Quick Grip Clamp - Repair


I was doing a bit of woodwork, I wanted to clamp my piece of wood to the work surface - nothing special so I reached out for a "quick grip" clamp. After a couple of squeezes it was tight, one more squeeze and "Snap!" the handle no longer worked and there was a small piece of plastic on the floor.
Sigh!
This is my first instructable and, what the heck, I'm going to put it in a contest too
I've been loitering in Instructables for years and years - its about time I give something back :-)
Supplies
A broken "quick grip" clamp
Eye protection (there are springs in the things!)
A suitable screwdriver
some sort of prising tool - I used the screwdriver on a Swiss Army knife
Some paper (though tape would be better in the long run I'm sure)
Investigation/Dismantling


This clamp is useless - it was cheap so I could have thrown it in the bin and replaced it or at least see what is wrong.
There are some springs involved so you might want eye protection
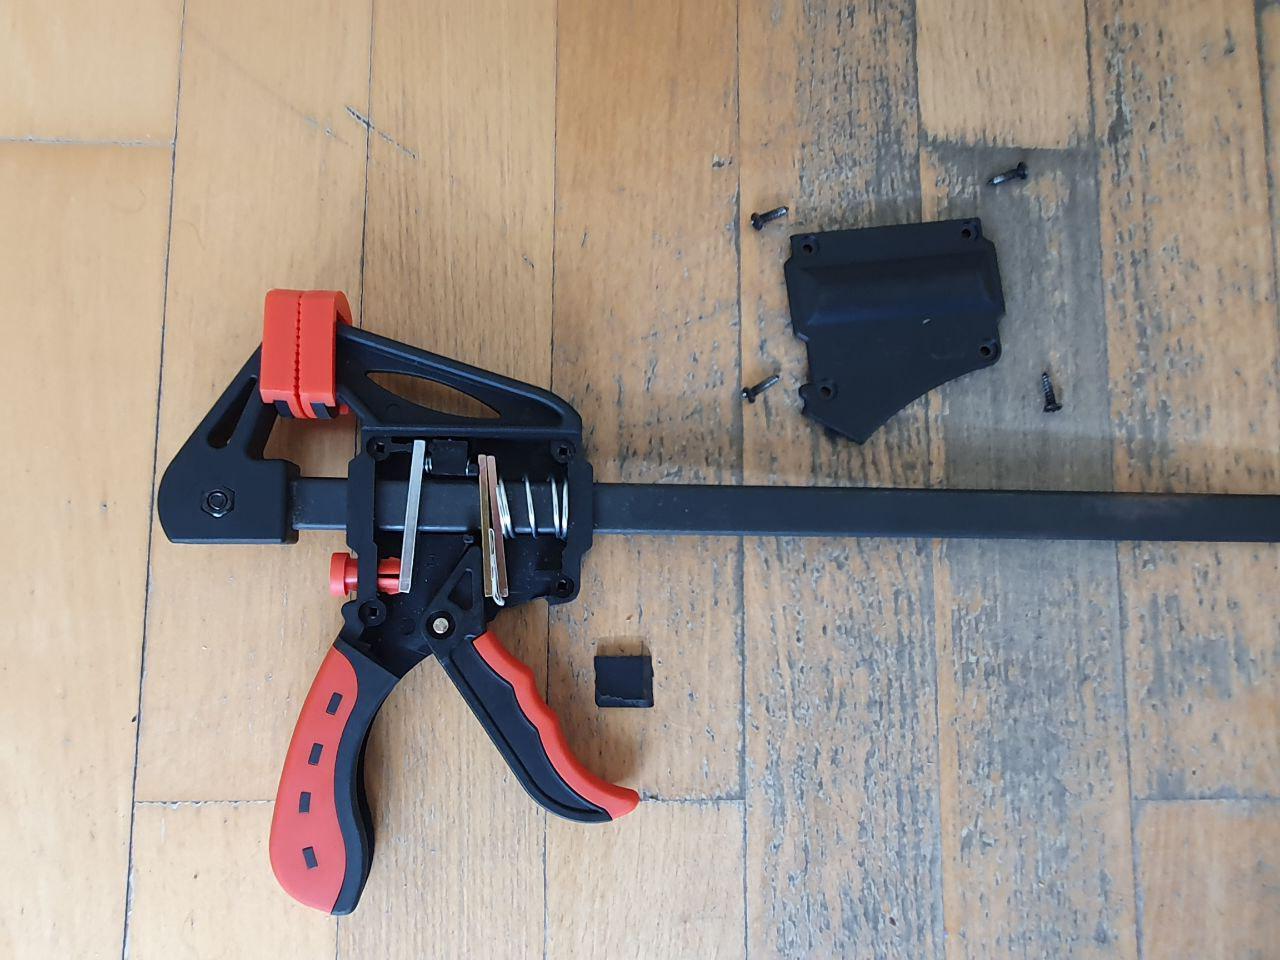
I unscrewed the back plate, laid all the pieces out for a nice photo and started identifying the problem
Identifying the Problem


I realised that the handle was not in the right place - so I put that right
The "working end" of the handle is meant to be "behind" the two silvery-metal plates
If you overly squeeze the handle the "working end" of the handle slides past the end of the metal plates
On my clamp, that meant it smashed into the cosmetic piece of plastic which snapped off.
So that small square of plastic can go in the bin
In the second picture you can see. the limit of the compression of the handle before. the "working end" slips off the back of the two metal plates.
So all the fix requires is to stop the handle from being squeezed too much!
There are a couple of ways to do this:
stop the metal bars from being pushed too far (maybe by sticking some spacer to them and having that butt up against the clamp frame)
Thicken the handle by sticking a spacer to the back of the moving handle - or inside the static part of the grip
I did not have any glue handy and because there are two plates I could place a wedge between them
I looked around for something I could fold into a variable thickness wedge and found a sheet of paper
I know that sellotape or any longer-lasting and ideally non-decomposing material would be better - but I stuck with paper
Making the Wedge


The wedge had to fit between the two metal plates - so they dictated the width of the final wedge - about 1cm in my case.
The wedge had to fit between the end of the two plates and the long metal bar running through the clamp (which ran through the two plates). It will be clearer in a later picture - for my clamp that was about 2cm
So I took a length of paper about 2cm wide and 20cm long, folded it in half (to get the 1cm) and then folded/rolled it into a 2cm length.
The last picture shows the paper folded - but it has sprung into a triangle - sticky tape - which I patently had would have stopped that from happening :-)
Fitting the Wedge


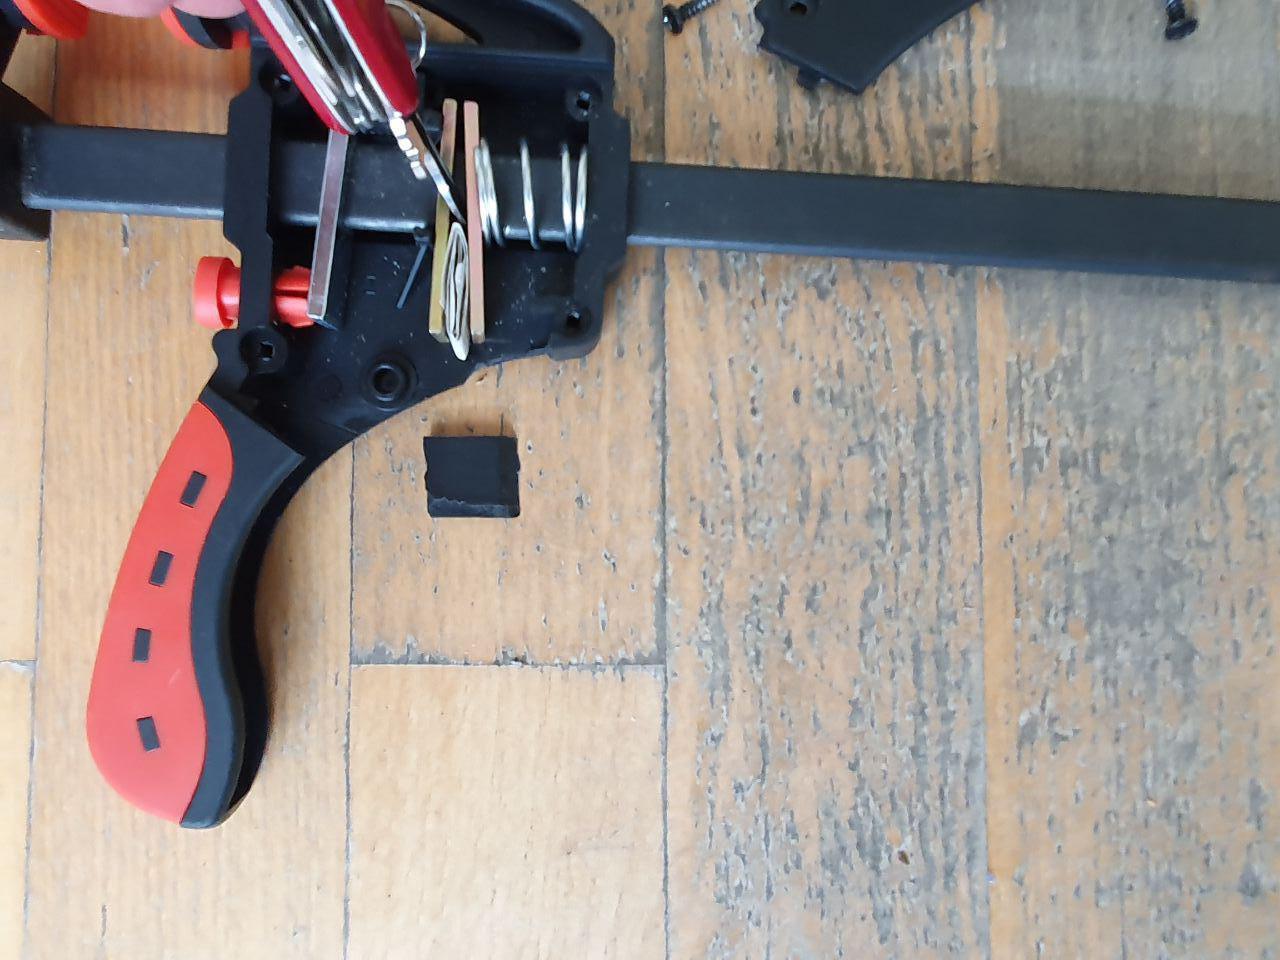
I pried the two plates apart with my trust Swiss Army knife and inserted the paper
This was not at all difficult - but made way trickier when having to photograph it - no assistant nearby!
Once the wedge was in place I took a final photo
I have no idea why I kept the small broken piece of plastic in these pictures - it is, now, in the bin I promise you!
Reassembly


I put the handle back into place. My clamp would let me do this and still hold itself together
I can imagine that other clamps - perhaps those with stronger springs - might need something to keep it all together - if this is the case please do remember your eye protection!
I had to jiggle the cover plate back into place because the handle pivot/axle had to fit into a recess in the plate
This was not tricky for me with this clamp - but a highly sprung one might need a bit more patience!
The End
There is no rocket engineering here and maybe my cheap clamp is not a perfect example but at least you get to see the inside of one of these and are encouraged to fix a broken clamp
Right I have done my first intractable - now to work out how to publish it and then enter it into a competition!
Thanks for reading!