Quick Color Change
by royalestel in Design > Digital Graphics
159269 Views, 31 Favorites, 0 Comments
Quick Color Change
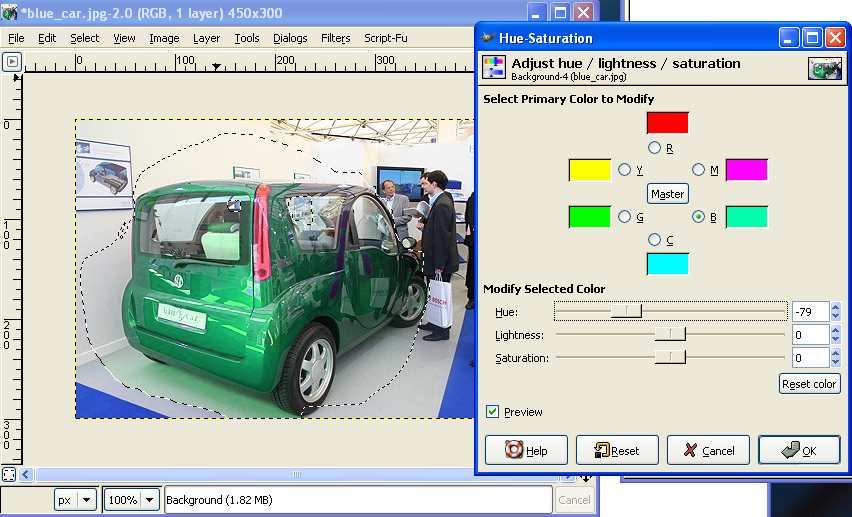

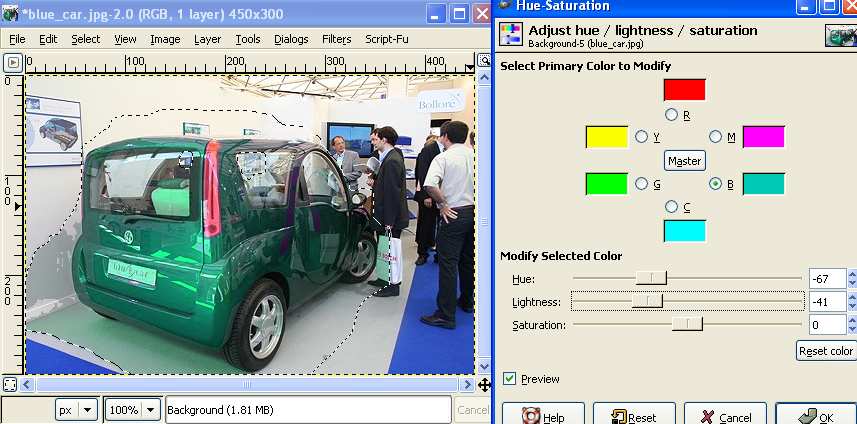
This is the fastest method I know for changing the color of something in a picture using GIMPPortable, or Photoshop. You make a hasty selection with the lasso tool, feather it, and then adjust the hue, using the option to adjust only the blues in the picture. This prevents unwanted color changes simply.
If you appreciate this instructible, please visit my blog for more ideas:
GoodCleanCrazy
If you appreciate this instructible, please visit my blog for more ideas:
GoodCleanCrazy
Make a Quick Selection

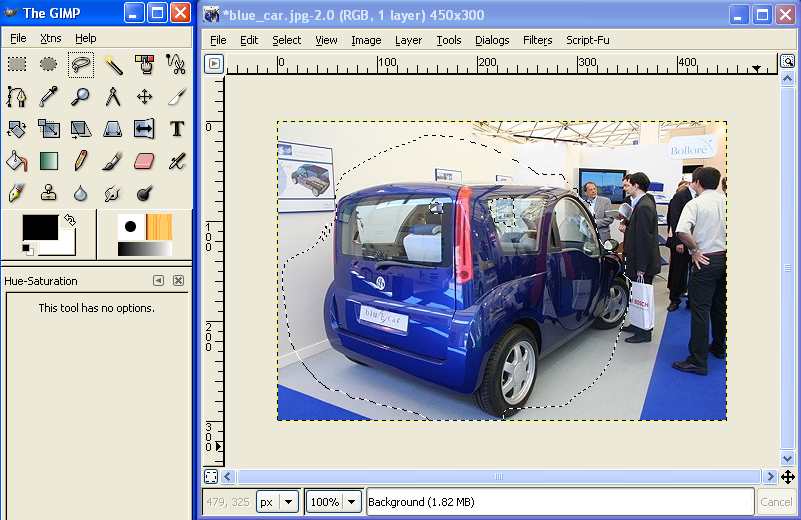
Open your picture in GIMP.
In my picture, I want the blue car to be green, but not the carpet, or anything in the background, so I need to roughly select the car.
Click on the lasso tool. Drag a quick selection around the car. Tweak the selection a bit using to add to the selection and to subtract from the selection. You do not have to be perfect with this. Not even close.
Great. Car selected.
In my picture, I want the blue car to be green, but not the carpet, or anything in the background, so I need to roughly select the car.
Click on the lasso tool. Drag a quick selection around the car. Tweak the selection a bit using
Great. Car selected.
Adjust the Hue
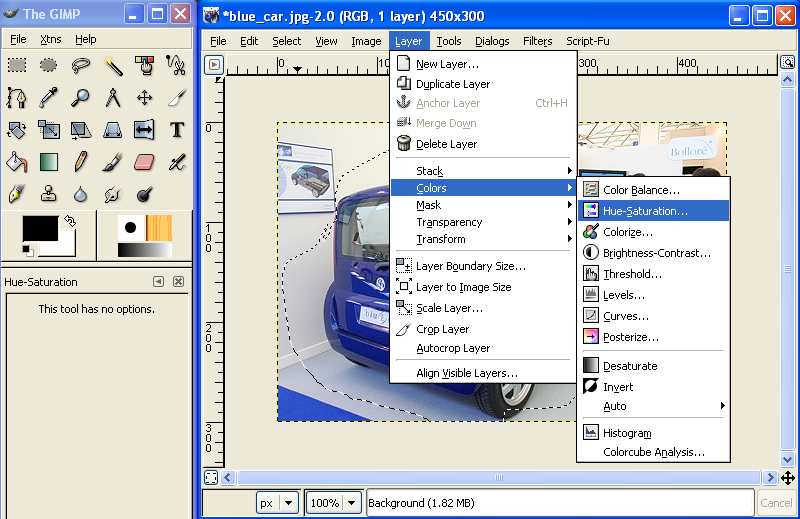

Go to Layer>Colors>Hue-Saturation
Select the blue swatch in the Hue Saturation window that pops up, and drag the hue slider around. Pretty good. Click OK.
Let us take a look at our picture without the crawling ants. Hit or go to Select>None.
Now I noticed a slight line on the floor near the selection edge. This is because there is a little blue light hitting the floor.
We can fix that by feathering the selection before adjusting the hue.
Select the blue swatch in the Hue Saturation window that pops up, and drag the hue slider around. Pretty good. Click OK.
Let us take a look at our picture without the crawling ants. Hit
Now I noticed a slight line on the floor near the selection edge. This is because there is a little blue light hitting the floor.
We can fix that by feathering the selection before adjusting the hue.
Feather the Selection
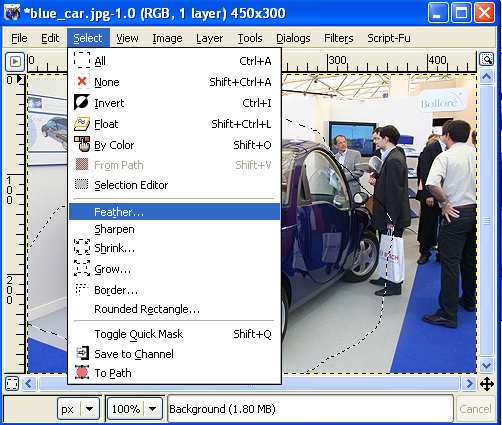
Go back a few steps with or by going to Edit>Undo a couple times until you see the original picture with a selection.
Now go to Selection>Feather and change the value to, say 10 pixels. Click OK.
Adjust the hue again and look at your final picture. No line near the floor. Great.
Save your new picture.
Now go to Selection>Feather and change the value to, say 10 pixels. Click OK.
Adjust the hue again and look at your final picture. No line near the floor. Great.
Save your new picture.
A Final Note


One final note on changing the hue of something in an image: In nature, some colors appear more saturated than others. So when you change a hue, tone down the saturation a bit to see if it looks more realistic.
So the steps again are:
1)Rough selection.
2)Feather the selection.
3)Adjust the Hue.
Happy shopping!
So the steps again are:
1)Rough selection.
2)Feather the selection.
3)Adjust the Hue.
Happy shopping!