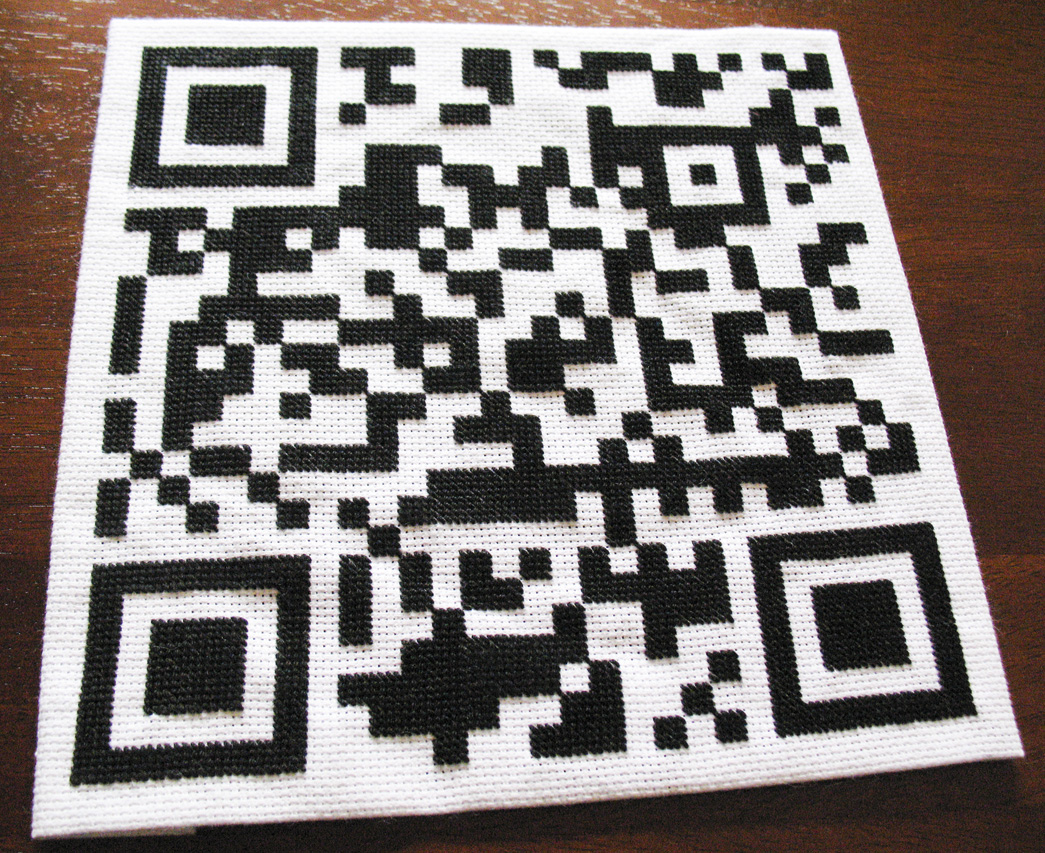
QR Code Love Note Needlepoint
by smith library in Craft > Embroidery
12289 Views, 214 Favorites, 0 Comments
QR Code Love Note Needlepoint
True Geek Love Valentine's Gift!!
Supplies
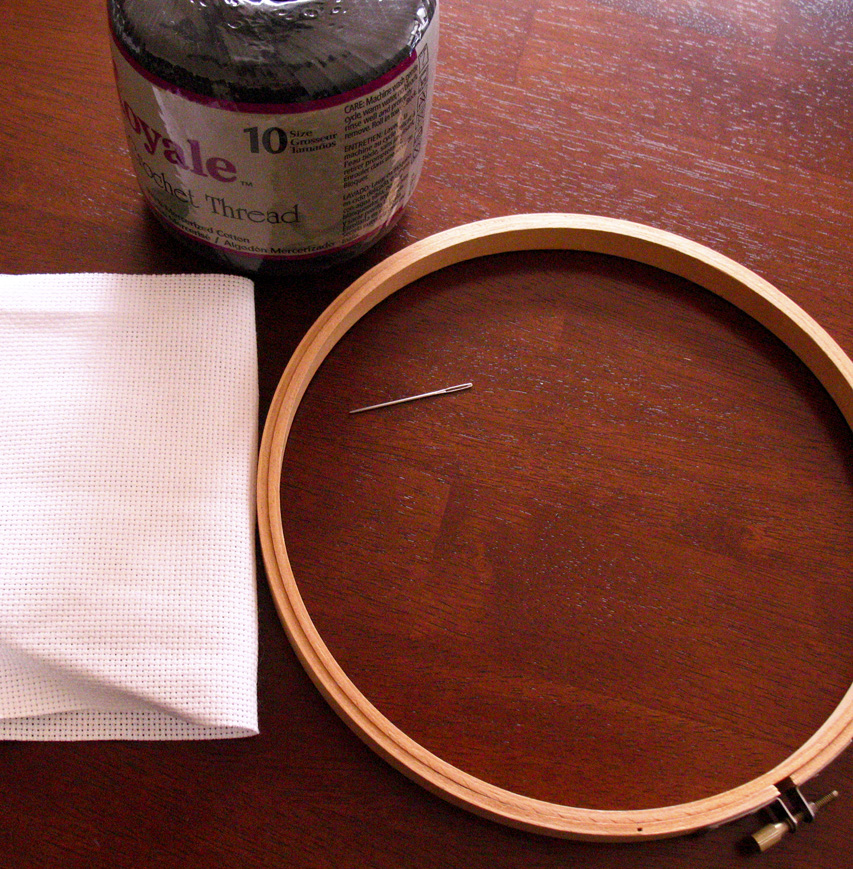
1 - Cross stitch material
2 - Crochet thread
3 - Large eye needle
4 - Embroidery hoop
5 - Square frame
All the stitch counts and size of material depends on the size of frame being used. I found a 10"x10" frame with 7.5"x7.5" opening.
The crochet thread is heavier than embroidery thread so it was faster to fill in the spaces and complete the project.
QR Code
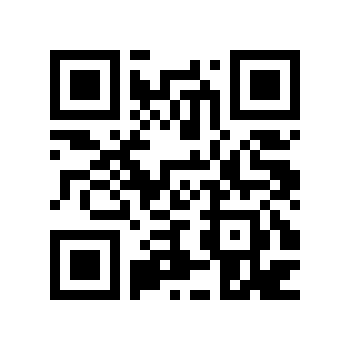
1 - install a scan app onto your smartphone that can scan QR codes and also try to sneak the app onto your Valentine's phone.
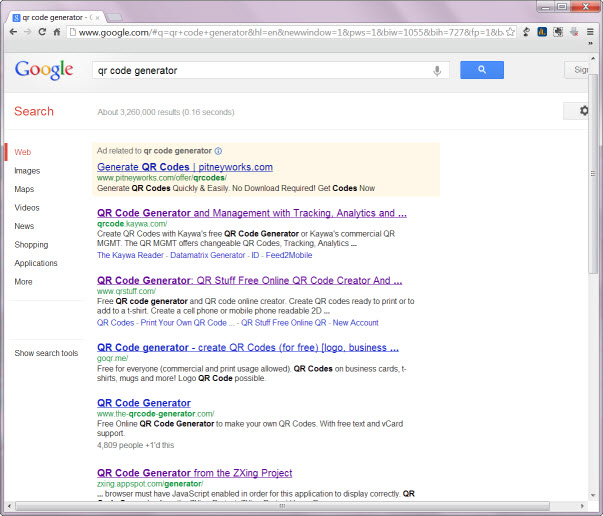
2 - Google search to find one of many free QR code generators
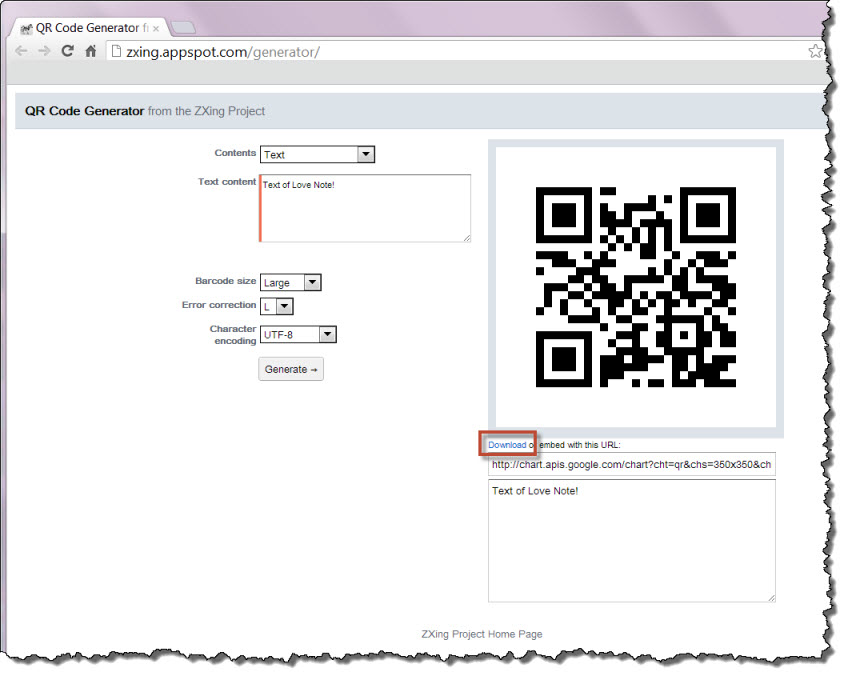
3 - generate your QR code love note and download it
The downloaded QR code has a white background and I planned on using Excel to help me visually keep track of my stitches. I suppose you could directly transfer/draw the QR code onto the fabric but I didn't want pencil markings to show.
Below I will show how to use either Photoshop or Powerpoint to quickly edit your QR code before placing it into Excel. Also, I suppose there may be software out there to quickly create needlepoint patterns but this is an easy work around for those who don't have it. And I never did needlepoint before this project. So I winged it!
2 - Google search to find one of many free QR code generators
3 - generate your QR code love note and download it
The downloaded QR code has a white background and I planned on using Excel to help me visually keep track of my stitches. I suppose you could directly transfer/draw the QR code onto the fabric but I didn't want pencil markings to show.
Below I will show how to use either Photoshop or Powerpoint to quickly edit your QR code before placing it into Excel. Also, I suppose there may be software out there to quickly create needlepoint patterns but this is an easy work around for those who don't have it. And I never did needlepoint before this project. So I winged it!
Photoshop Edit QR Code Background
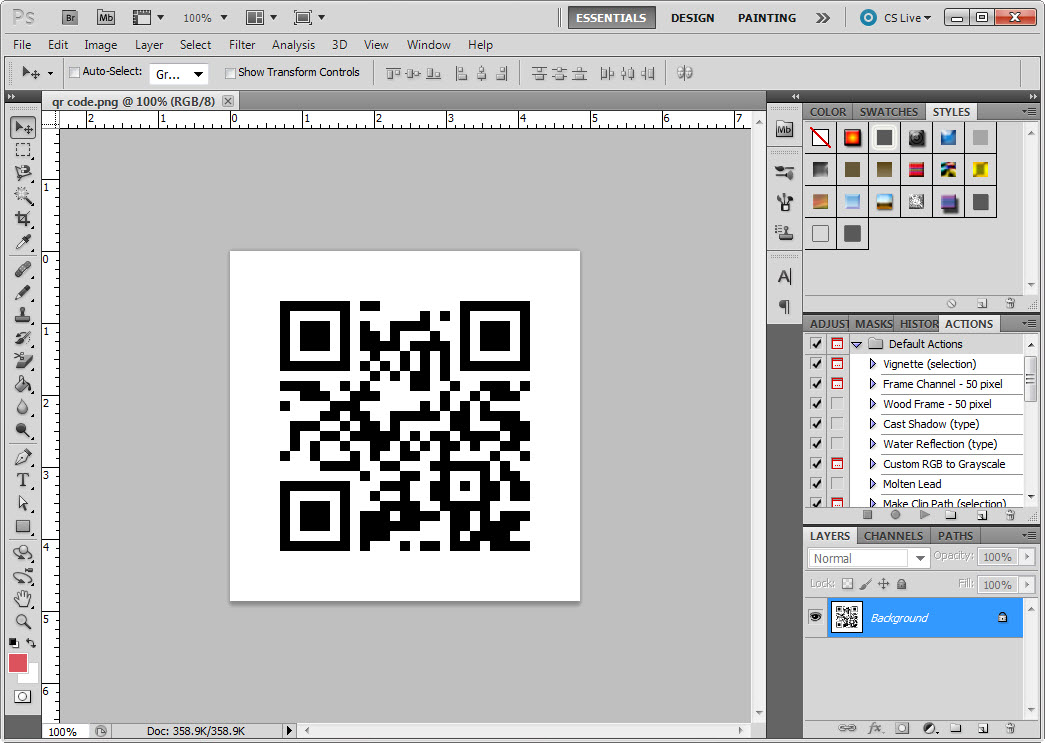
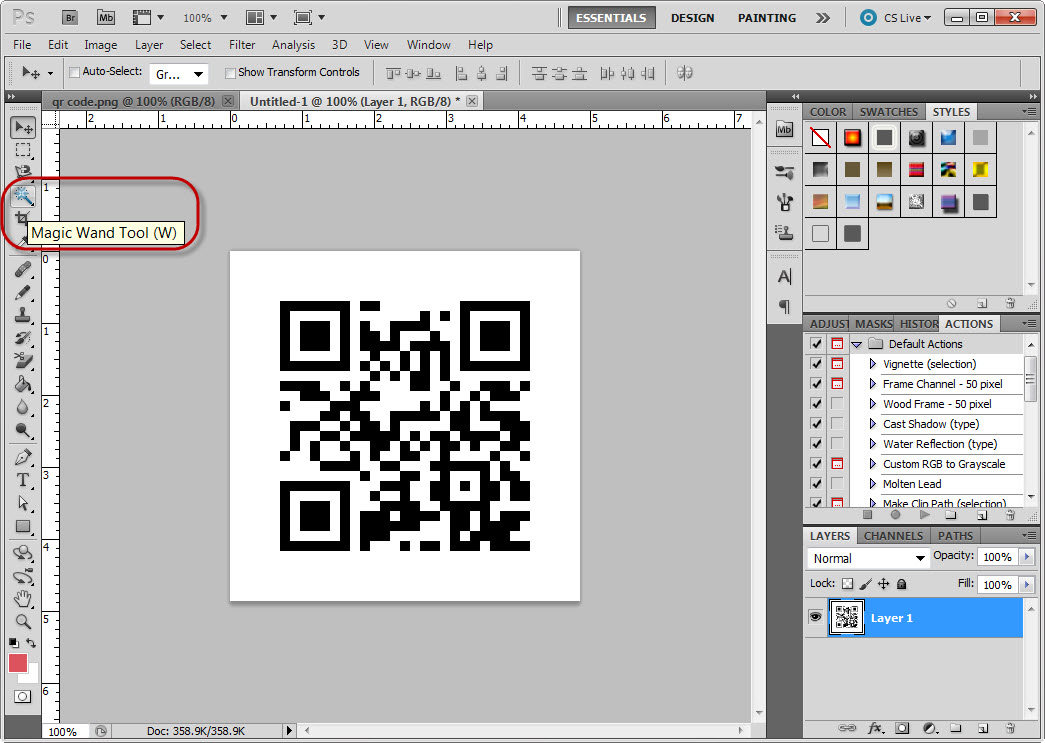

1 - open your QR code in Photoshop
2 - select it and copy into the clipboard
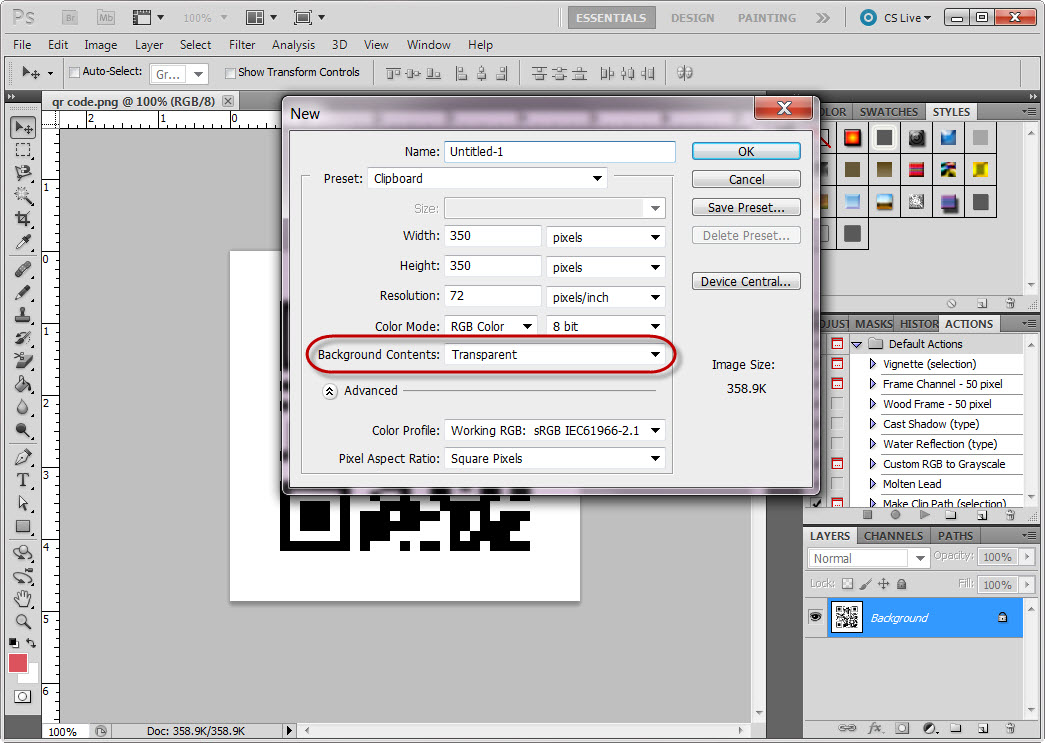
3 - open a new Photoshop canvas with the settings:
Preset: Clipboard
Background Contents: Transparent
4 - paste in the QR code
5 - use the magic wand to select and delete all the white areas
6 - save your now transparent background QR code as a png format
2 - select it and copy into the clipboard
3 - open a new Photoshop canvas with the settings:
Preset: Clipboard
Background Contents: Transparent
4 - paste in the QR code
5 - use the magic wand to select and delete all the white areas
6 - save your now transparent background QR code as a png format
Powerpoint Edit QR Code Background

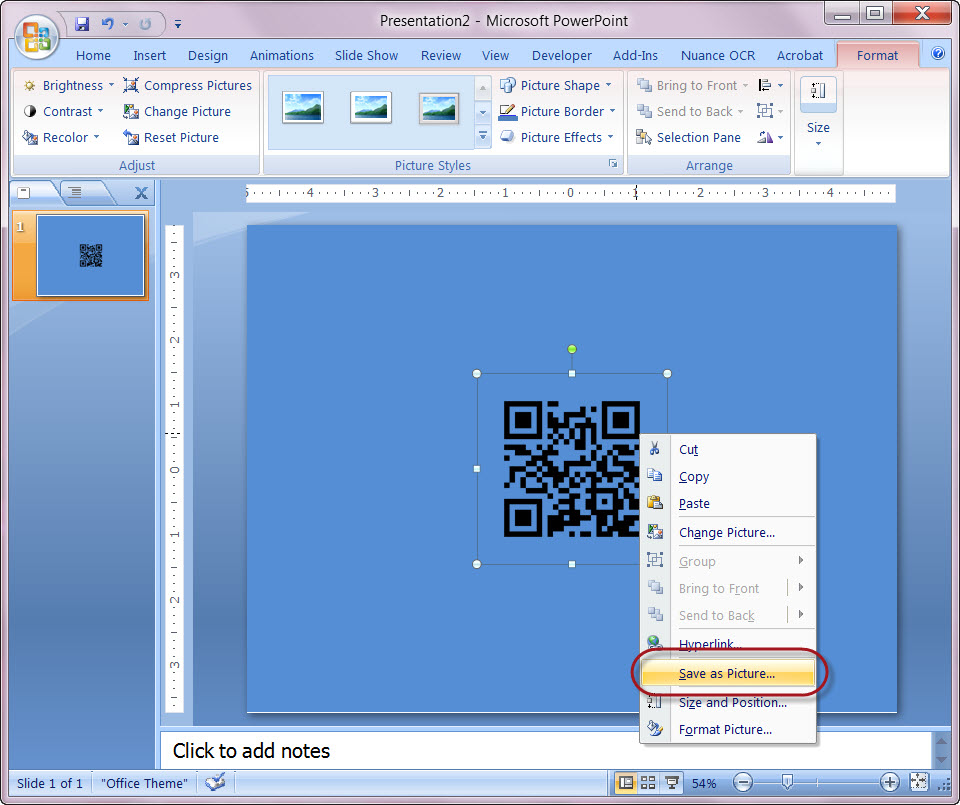
For people who don't have Photoshop but have access to PowerPoint either at home or at work.
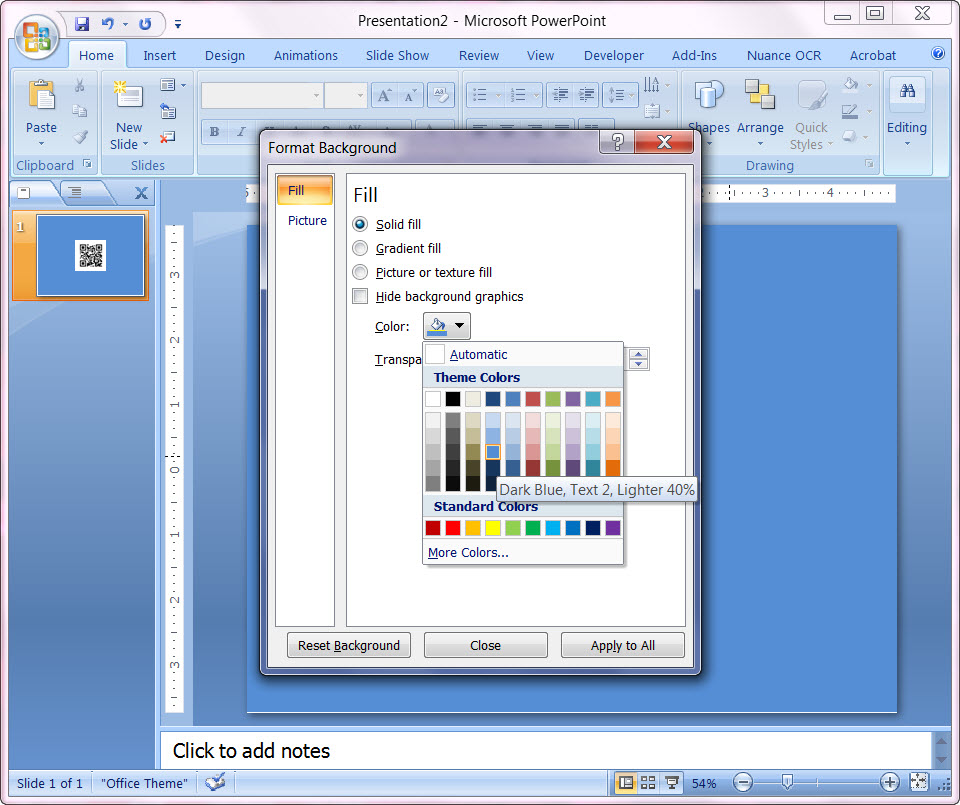
1 - open a new Powerpoint slide
2 - inert QR code
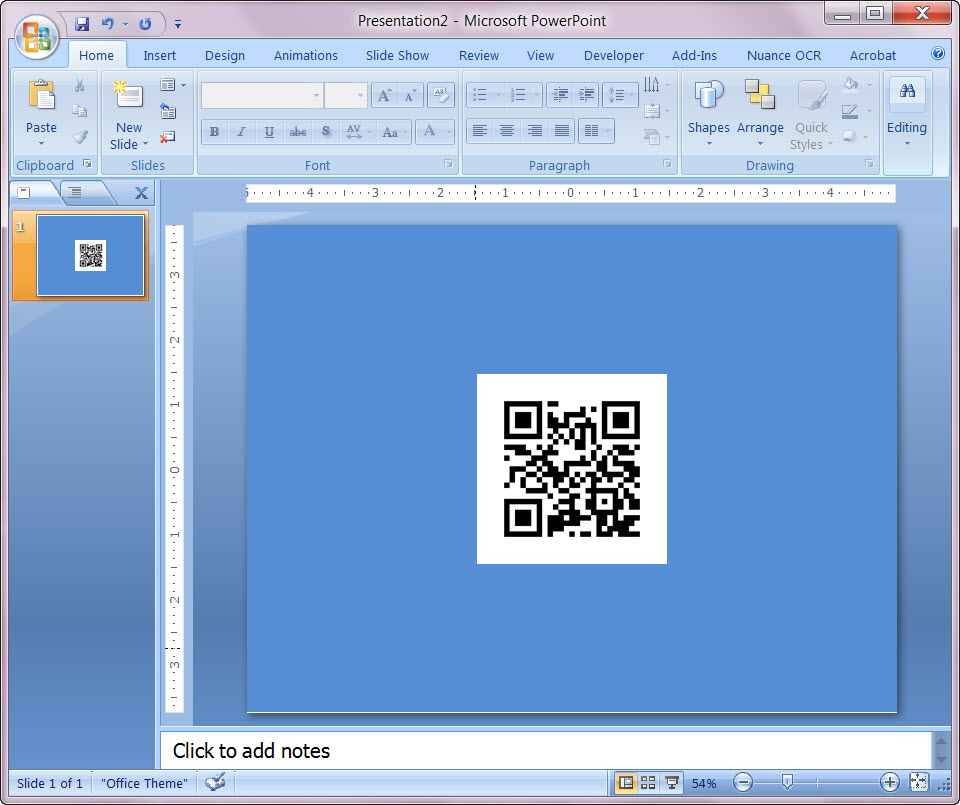
3 - format slide background to change the color to anything but white
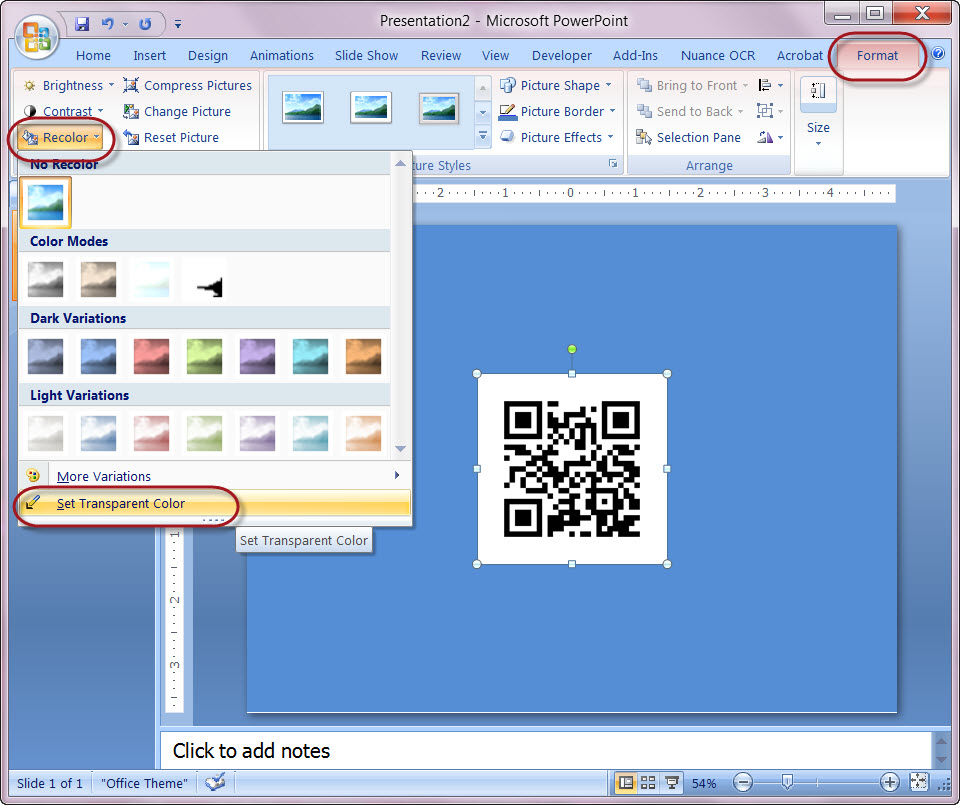
4 - select the QR code and go to the Format tab
5 - select Recolor and Set Transparent Color
6 - select the white background to remove it
7 - right-click on your altered QR code and save it as a png format
1 - open a new Powerpoint slide
2 - inert QR code
3 - format slide background to change the color to anything but white
4 - select the QR code and go to the Format tab
5 - select Recolor and Set Transparent Color
6 - select the white background to remove it
7 - right-click on your altered QR code and save it as a png format
Using Excel to Count the Stitches
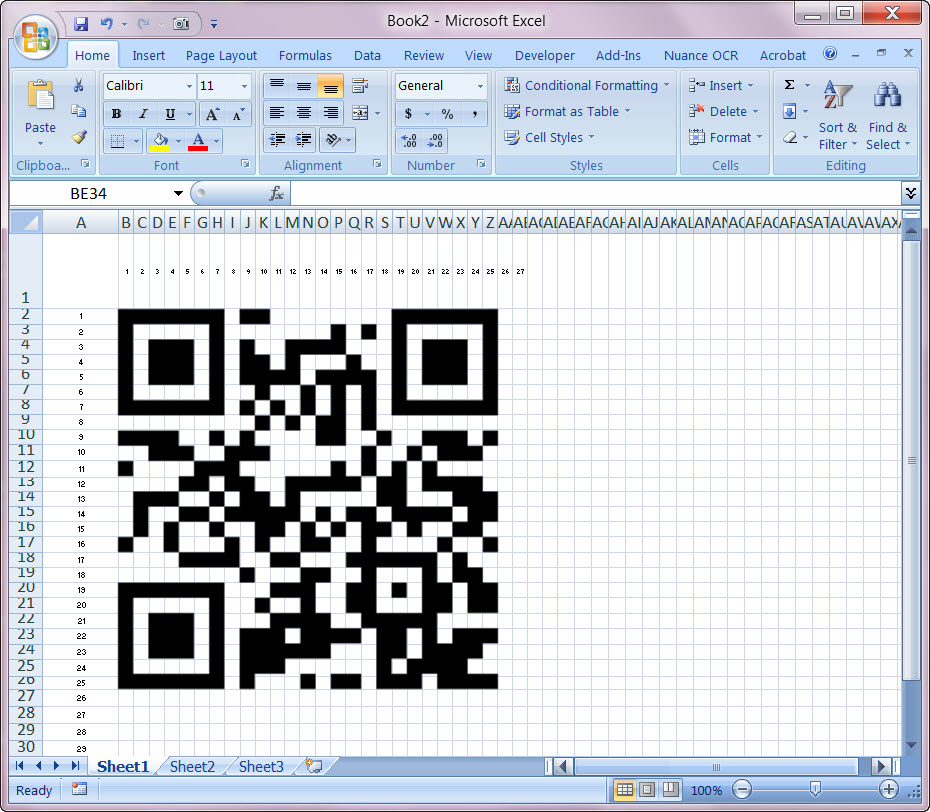

1 - Open a blank Excel sheet
2 - insert your QR code with the transparent background
3 - resize the QR code as big as you need it to be for you to see the excel cells as stitch markers
4 - resize the Excel rows and columns to line up to the QR code squares
I made a 4x4 stitch for every square of the QR code.
In the sample QR code shown here it will be 100 x100 stitches when complete.
So I also numbered the Excel Rows and Columns by 4s to see the total number of stitches.
Having this on the computer screen I could make it as large as I needed to see the stitch count and pattern so it was much easier to see than a small print out.
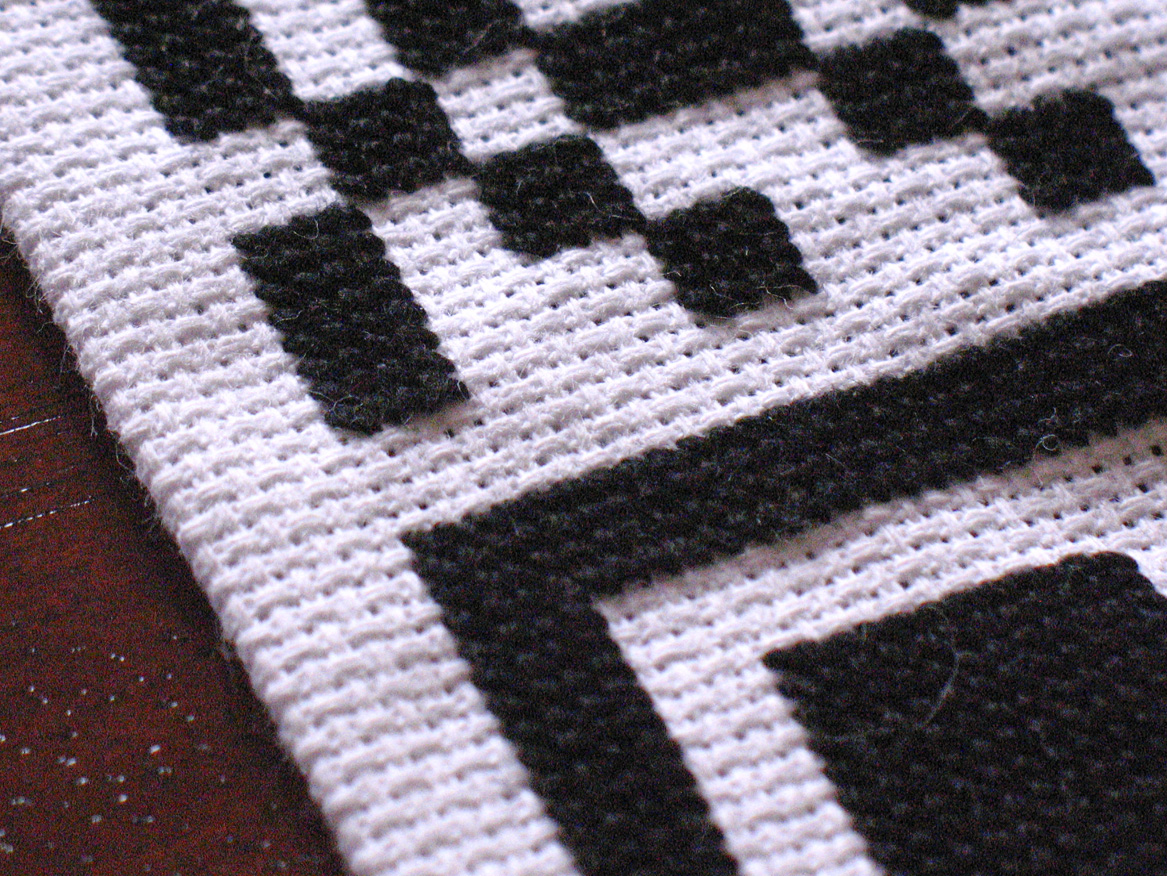
Start Stitching
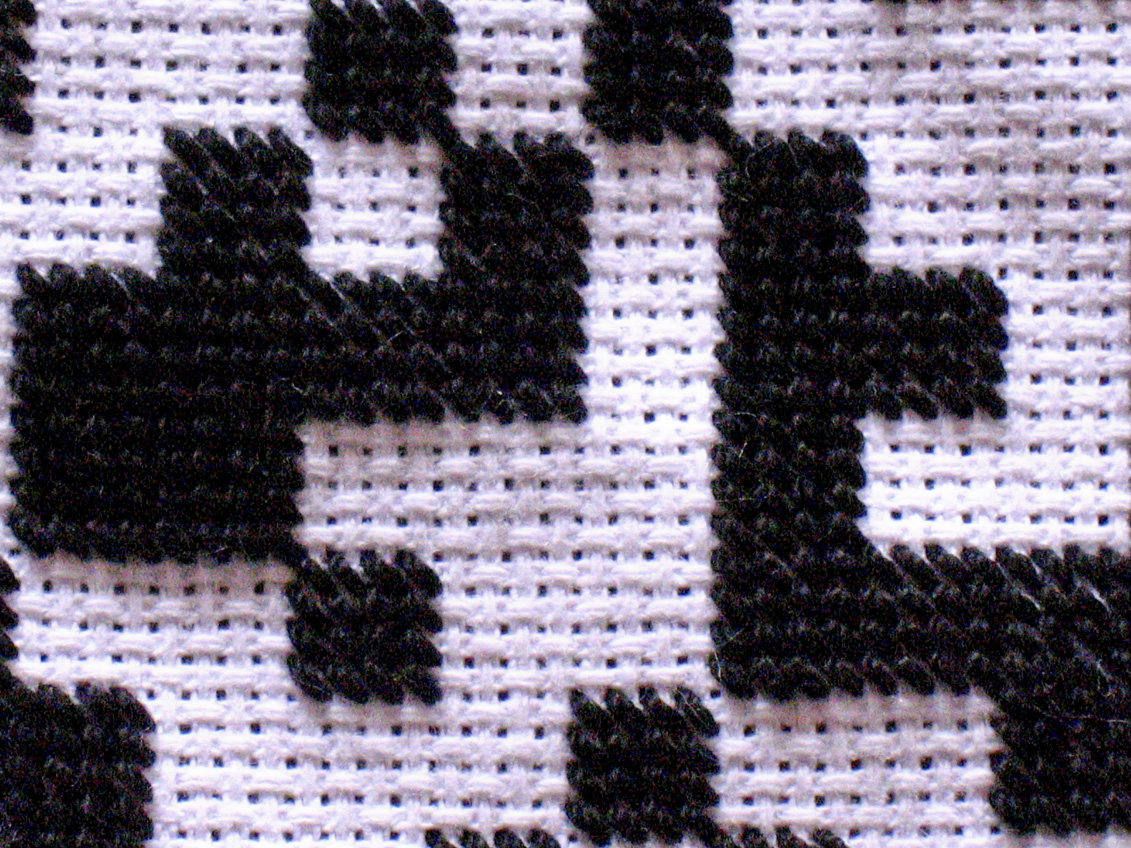
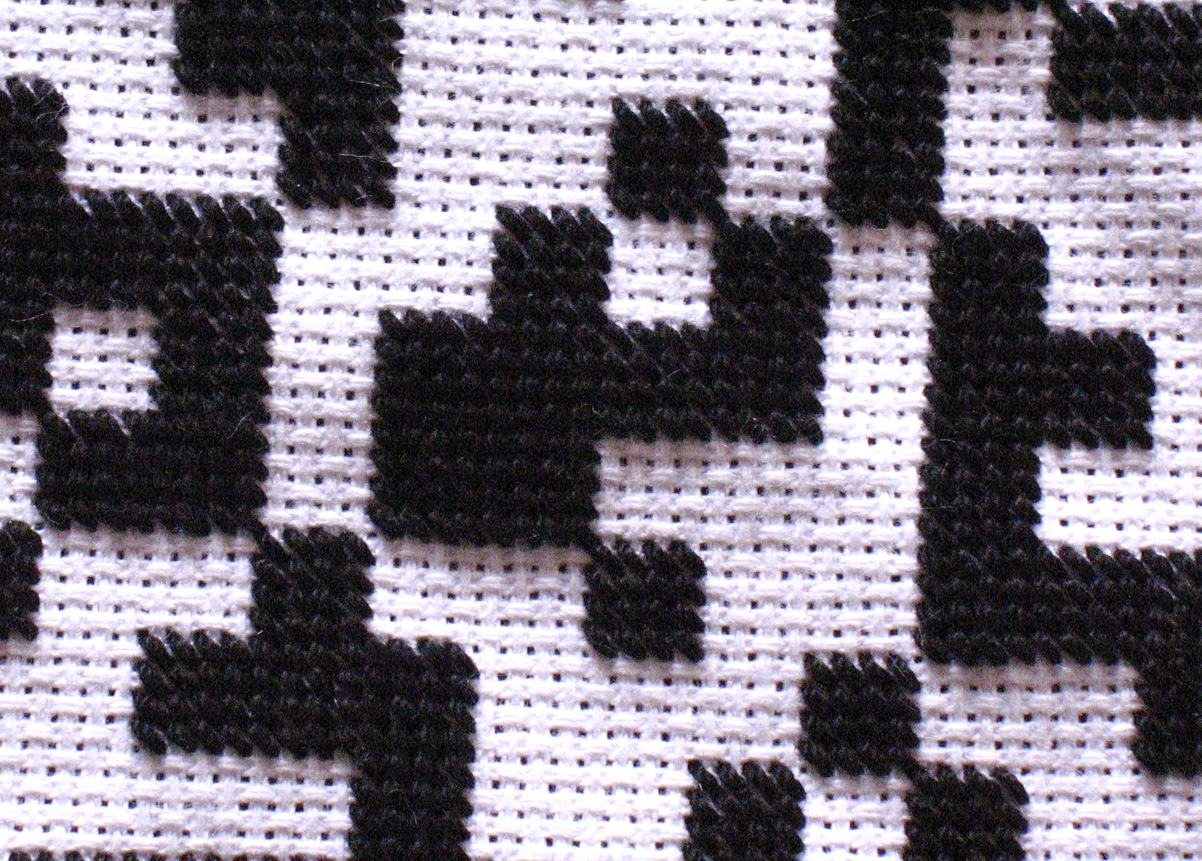
Using the thicker Crochet thread helped to fill in the areas quickly and I didn't need to use a cross stitch either.
I used a simple "half-cross" or diagonal stitch.
I used a simple "half-cross" or diagonal stitch.
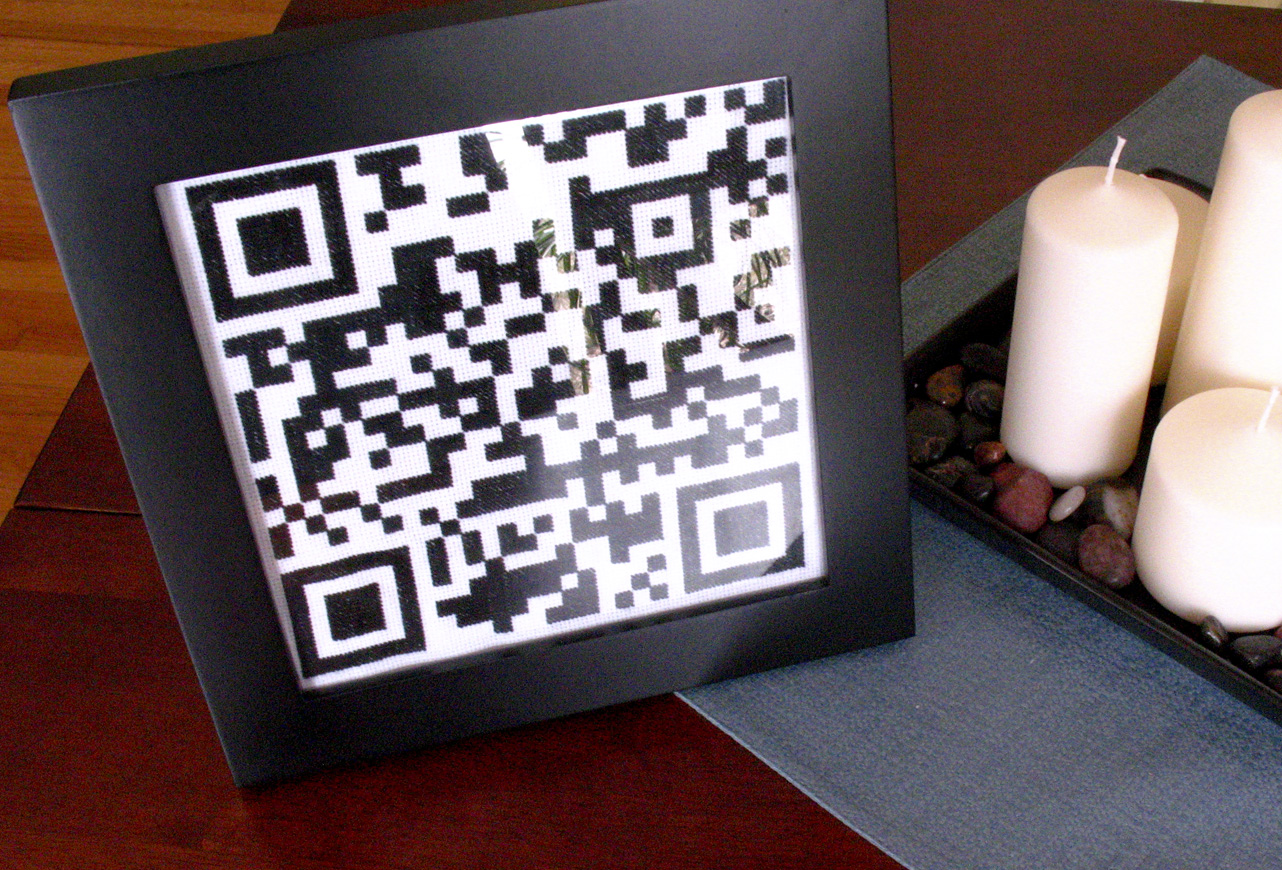
Fold Edges and Press
Fold the edges to fit within the frame being used and press flat.
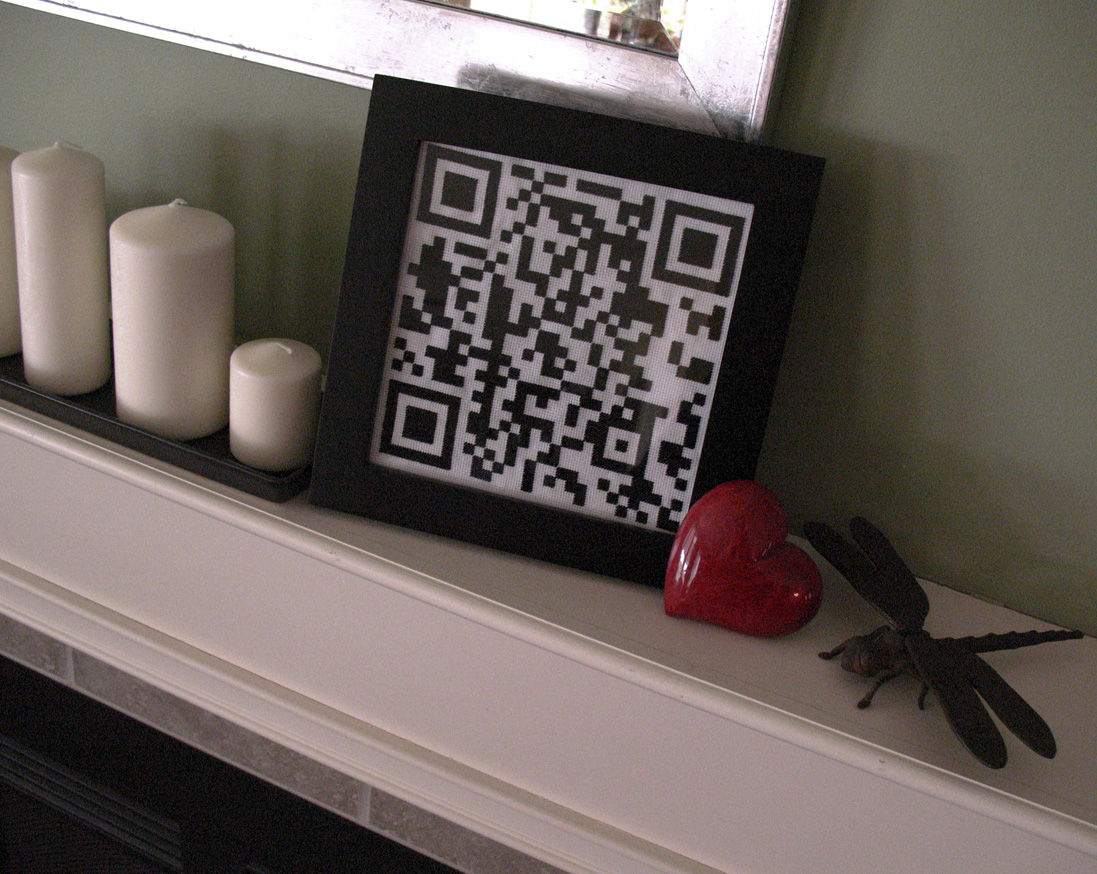
Frame It!
Frame it and place it somewhere for your Valentine to find.
My Valentine now keeps this on his desk to remind him of his Geek Love!
My Valentine now keeps this on his desk to remind him of his Geek Love!