Pushing 3D Printing by Making a Drone With Fusion360 Generative Design!
by Dia1Up in Workshop > 3D Printing
18534 Views, 161 Favorites, 0 Comments
Pushing 3D Printing by Making a Drone With Fusion360 Generative Design!
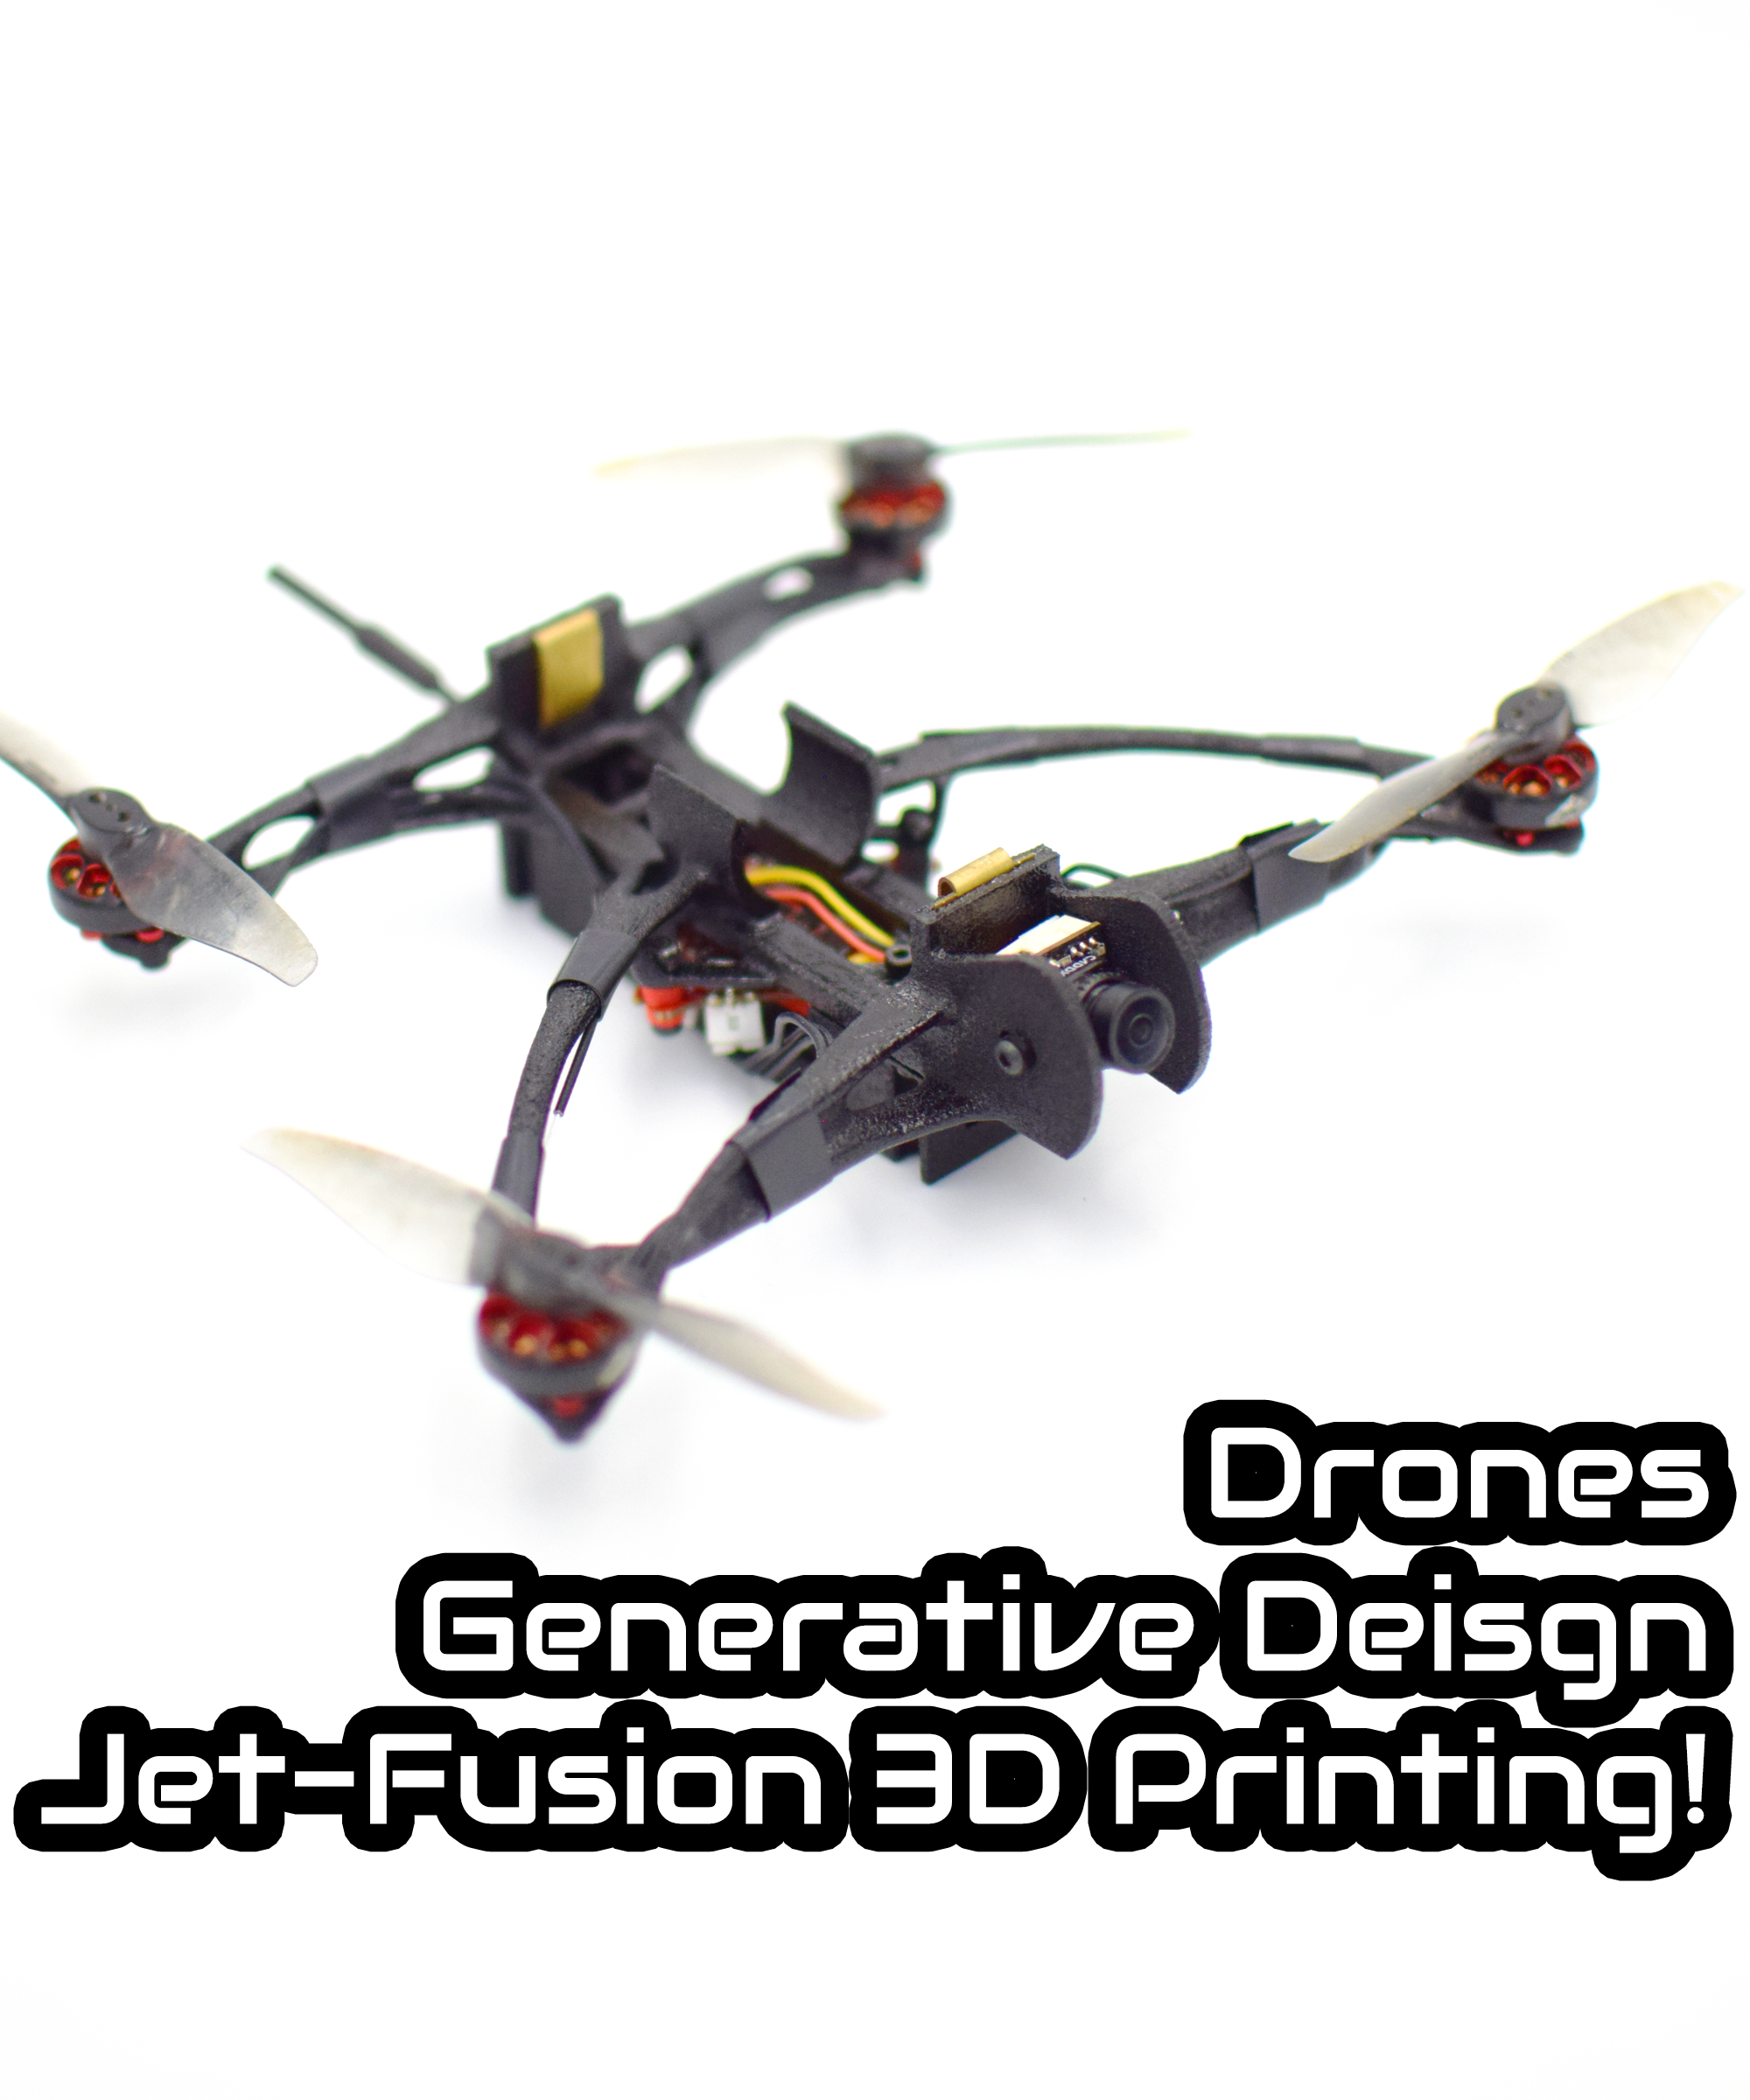
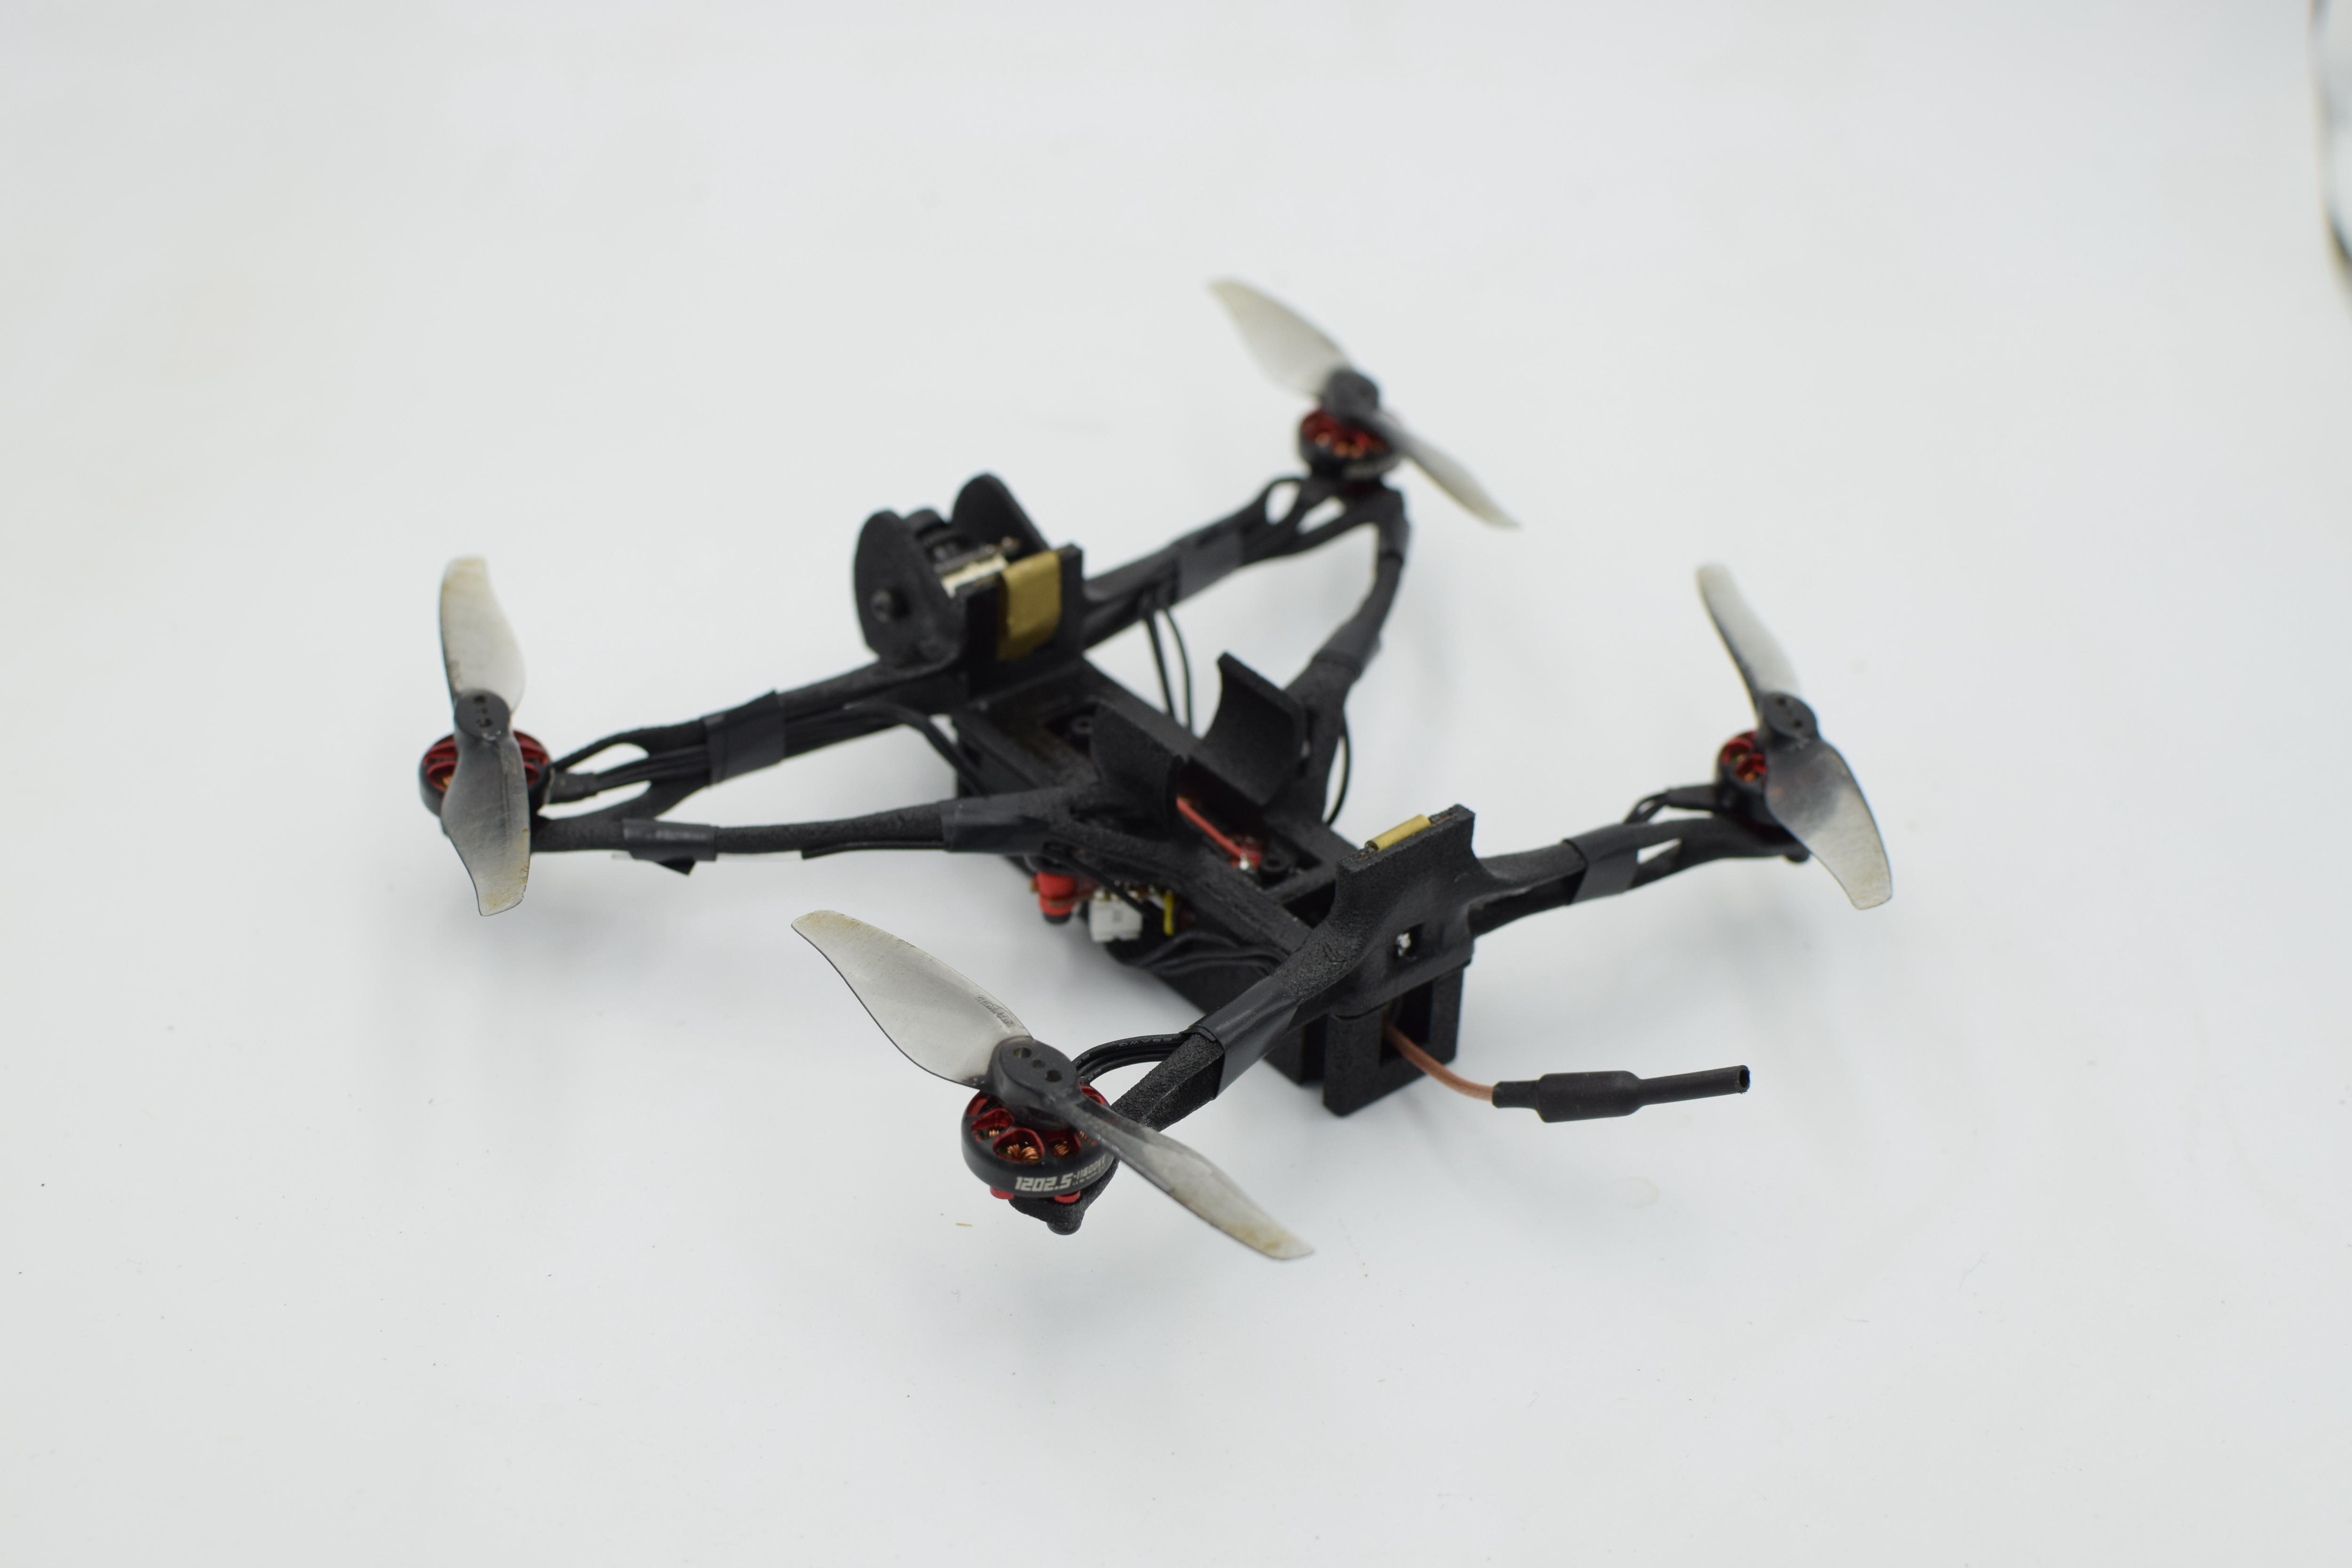
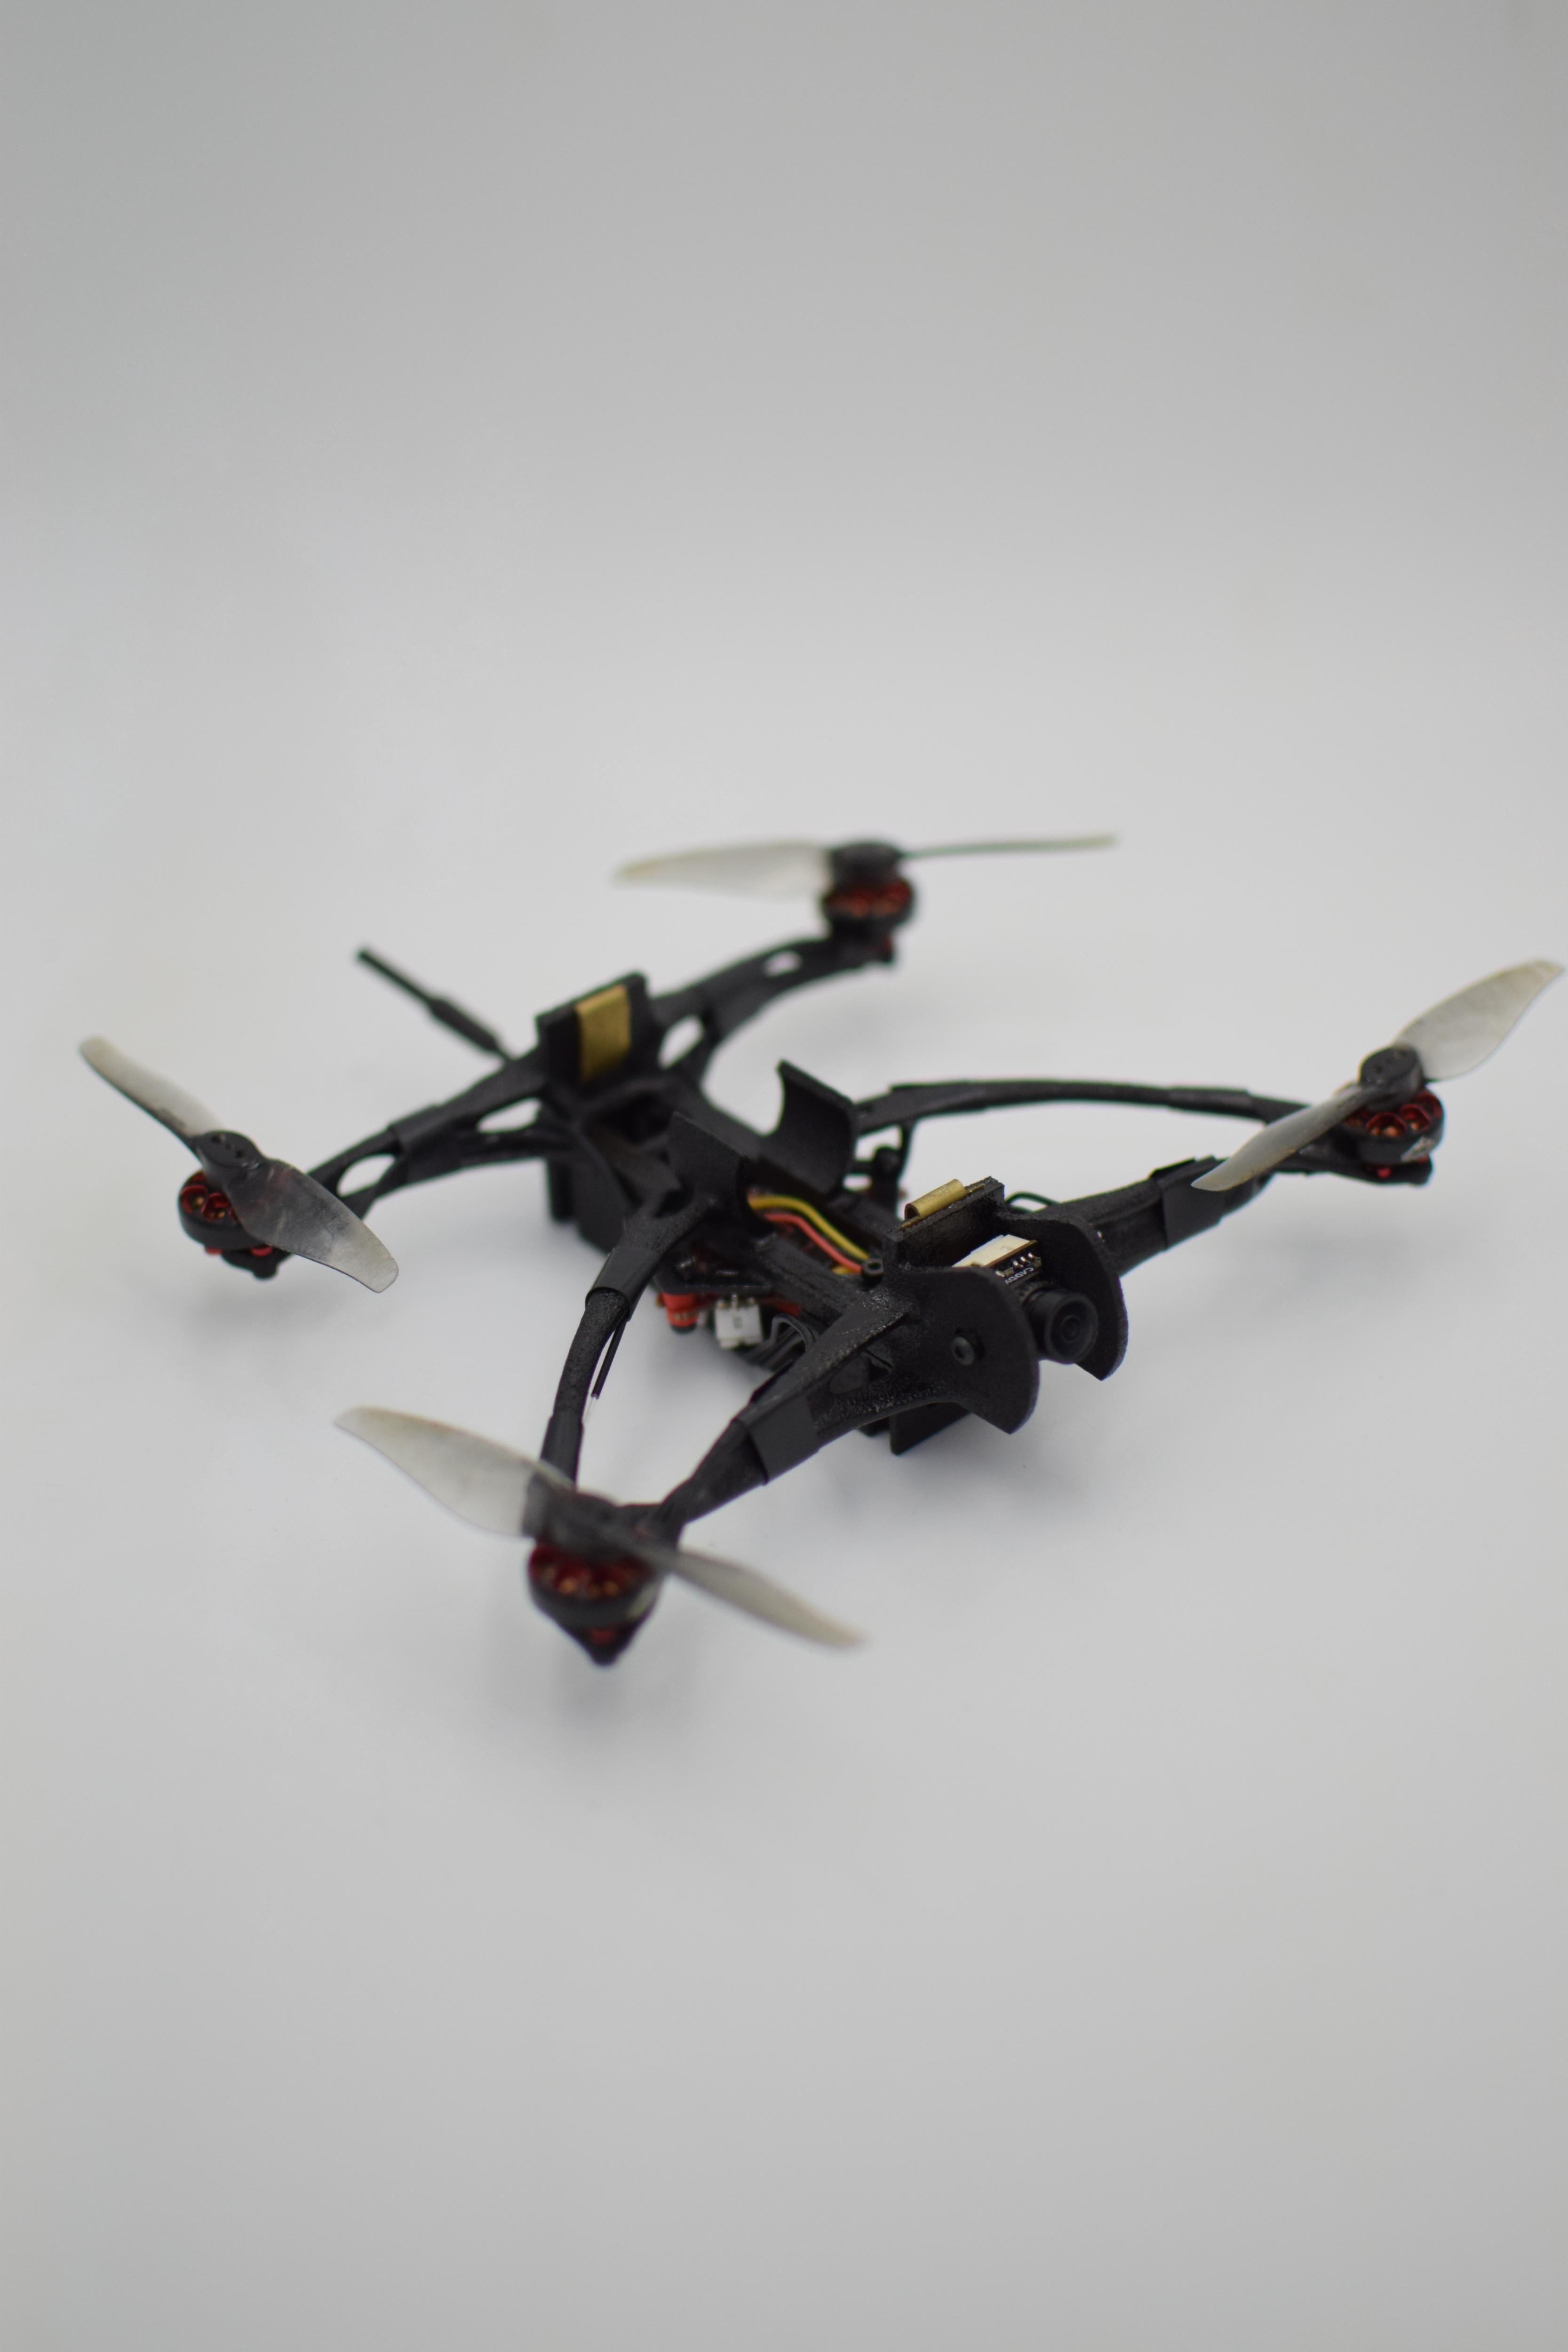
It's been a long time since I posted an Instructable, and lots has changed for me!
The big news is (at the time of writing of course, so years from now if you are reading this, hopefully I've graduated and done well!) I'm back in school. I'm currently attending Selkirk College here in BC Canada, in a program called Digital Fabrication and Design. We learn to design mainly using CAD, but also many other programs, and then learn to actually make the things we have designed. We use everything from traditional hand tools, all the way up the chain to Advanced Manufacturing. Of course 3D Printing is a large aspect of that.
I've completed my first year, and have been hired by the school for the summer to work as a Student Researcher at our technology access centre, called Selkirk Technology Access Center or "STAC" for short. This is a place owned by the school, but also does work for hire, and where we learn on the actual machines during our course. I have access to incredible machines here. Lasers, 3D printers, water jet, Hoss and Tormachs, Metal 3D printers, and the focus of this project, (with the help of Tempus3D) an HP JetFusion 5200.
I wanted to specifically come up with a project that only a multi-jetfusion printer could do. After a few days of racking my brain, I came up with the perfect project. Use the crazy awesome shapes of generative design to optimize my favourite drone
So the details? Well, it's 3 fold.
1: I have gotten into micro FPV drones. My favourite being the Nano Long Range by Dave_C. It uses eletronics normally found in "Whoop" style drones, but powers it using a single 18650 Li-ion Cell. For a micro drone, it has very impressive flight times, and it's pretty awesome to just land and click in a new battery. My goggles tend to die before I'm out of 18650s! As with most flying things, we need to make this as light as possble. The objective of this project besides learning is using generative design to optimize weight as best as we can.
2: My summer job here at the Selkirk Technology Access Centre for the summer is to help out on projects, but also self guided learning. I have access to machines and people to help me learn just about anything I want. It's an incredible opportunity that I'm pushing extra hard to get as much out of it as I can
3: And the cornerstone of this project: I wanted to leverage the power of a Multi-Jet Fusion printer. These printers have more or less no limits to geomtry. Sounds like a perfect match to the incredible shapes of generative design doesn't it?
Context:
The Nano Long Range (I will call NLR from now on) is fun, but is fairly heavy compared to the power that it has. My current pre-built Rekon 3 weighs around 120g (with battery) So you can't rely on throttle to get you out of situations, and as the battery runs down (18650 current limits aside for the moment) it only gets more difficult. The result being; the more weight you can save improves flight performance quite a bit, especially on the NLR
I'm very lucky to be in a place that I have access to a company called Tempus 3D right here in the same building. They run an HP Jet-Fusion 5200. One of the VERY few of these machines in Canada. The neat thing about a 3D printing machine like this, is that it's a powder based machine. No support material needed. Therefore, it can print more or less any shape without restrictions you can think of, and out of strong nylon to boot.
https://www.tempus3d.com/
(bolded so speed readers can skip the fluff)
I wanted to use Generative Design, to optimize the chassis/frame of the quad-copter, and leverage the geometry power of the the Multi-Jet Fusion 5200.
I've never touched generative design, we technically start learning that in year 2 of our program. But that's not going to stop me. So this was a great excuse to learn something new, work with a company, and get a neat object that I will actually use every day!
Handy enough, we are taught Fusion360 in the first year almost exclusivity, and even better, it has generative Design built in..... And even better better, I found the 3D Printing Student Design contest on Instructables yesterday (time of writing) as I was finishing the final iteration. Which seems like it was created for EXACTLY what I was doing. Things fell right into place!
So this Instructable is probably not the right way of designing something like this, but it is a record of the process I went through learning something new, and I hope it shows some other students or hobbyists/makers that it's not so bad to learn something on your own!
Of course since I found the contest after I started the project, some of the documentation might have holes, but I will try to be as through as possible.
Also I won't be going over the basics of Fusion, as this is going to be focused on Generative Design, learning Fusion from scratch is a whole different ball game of course. I will also be glossing over all of the very fine details of the design. If I didn't this Instructable would be a thousand pages long!
Supplies
Supplies, well. Depends on your project, but in this case, it's not a whole lot, given you have experience with Fusion360 and drones
1: FPV gear, this includes drone parts and transmitter, goggles ect
2: 3D printer (of course) I'll be using a VERY expensive super fancy multi-jet-fusion machine that the average person may not get to use, unless they go to a service for hire place. But even if you have an FDM at home, much of this Instructable can still be useful
3: Fusion 360
Design Objectives
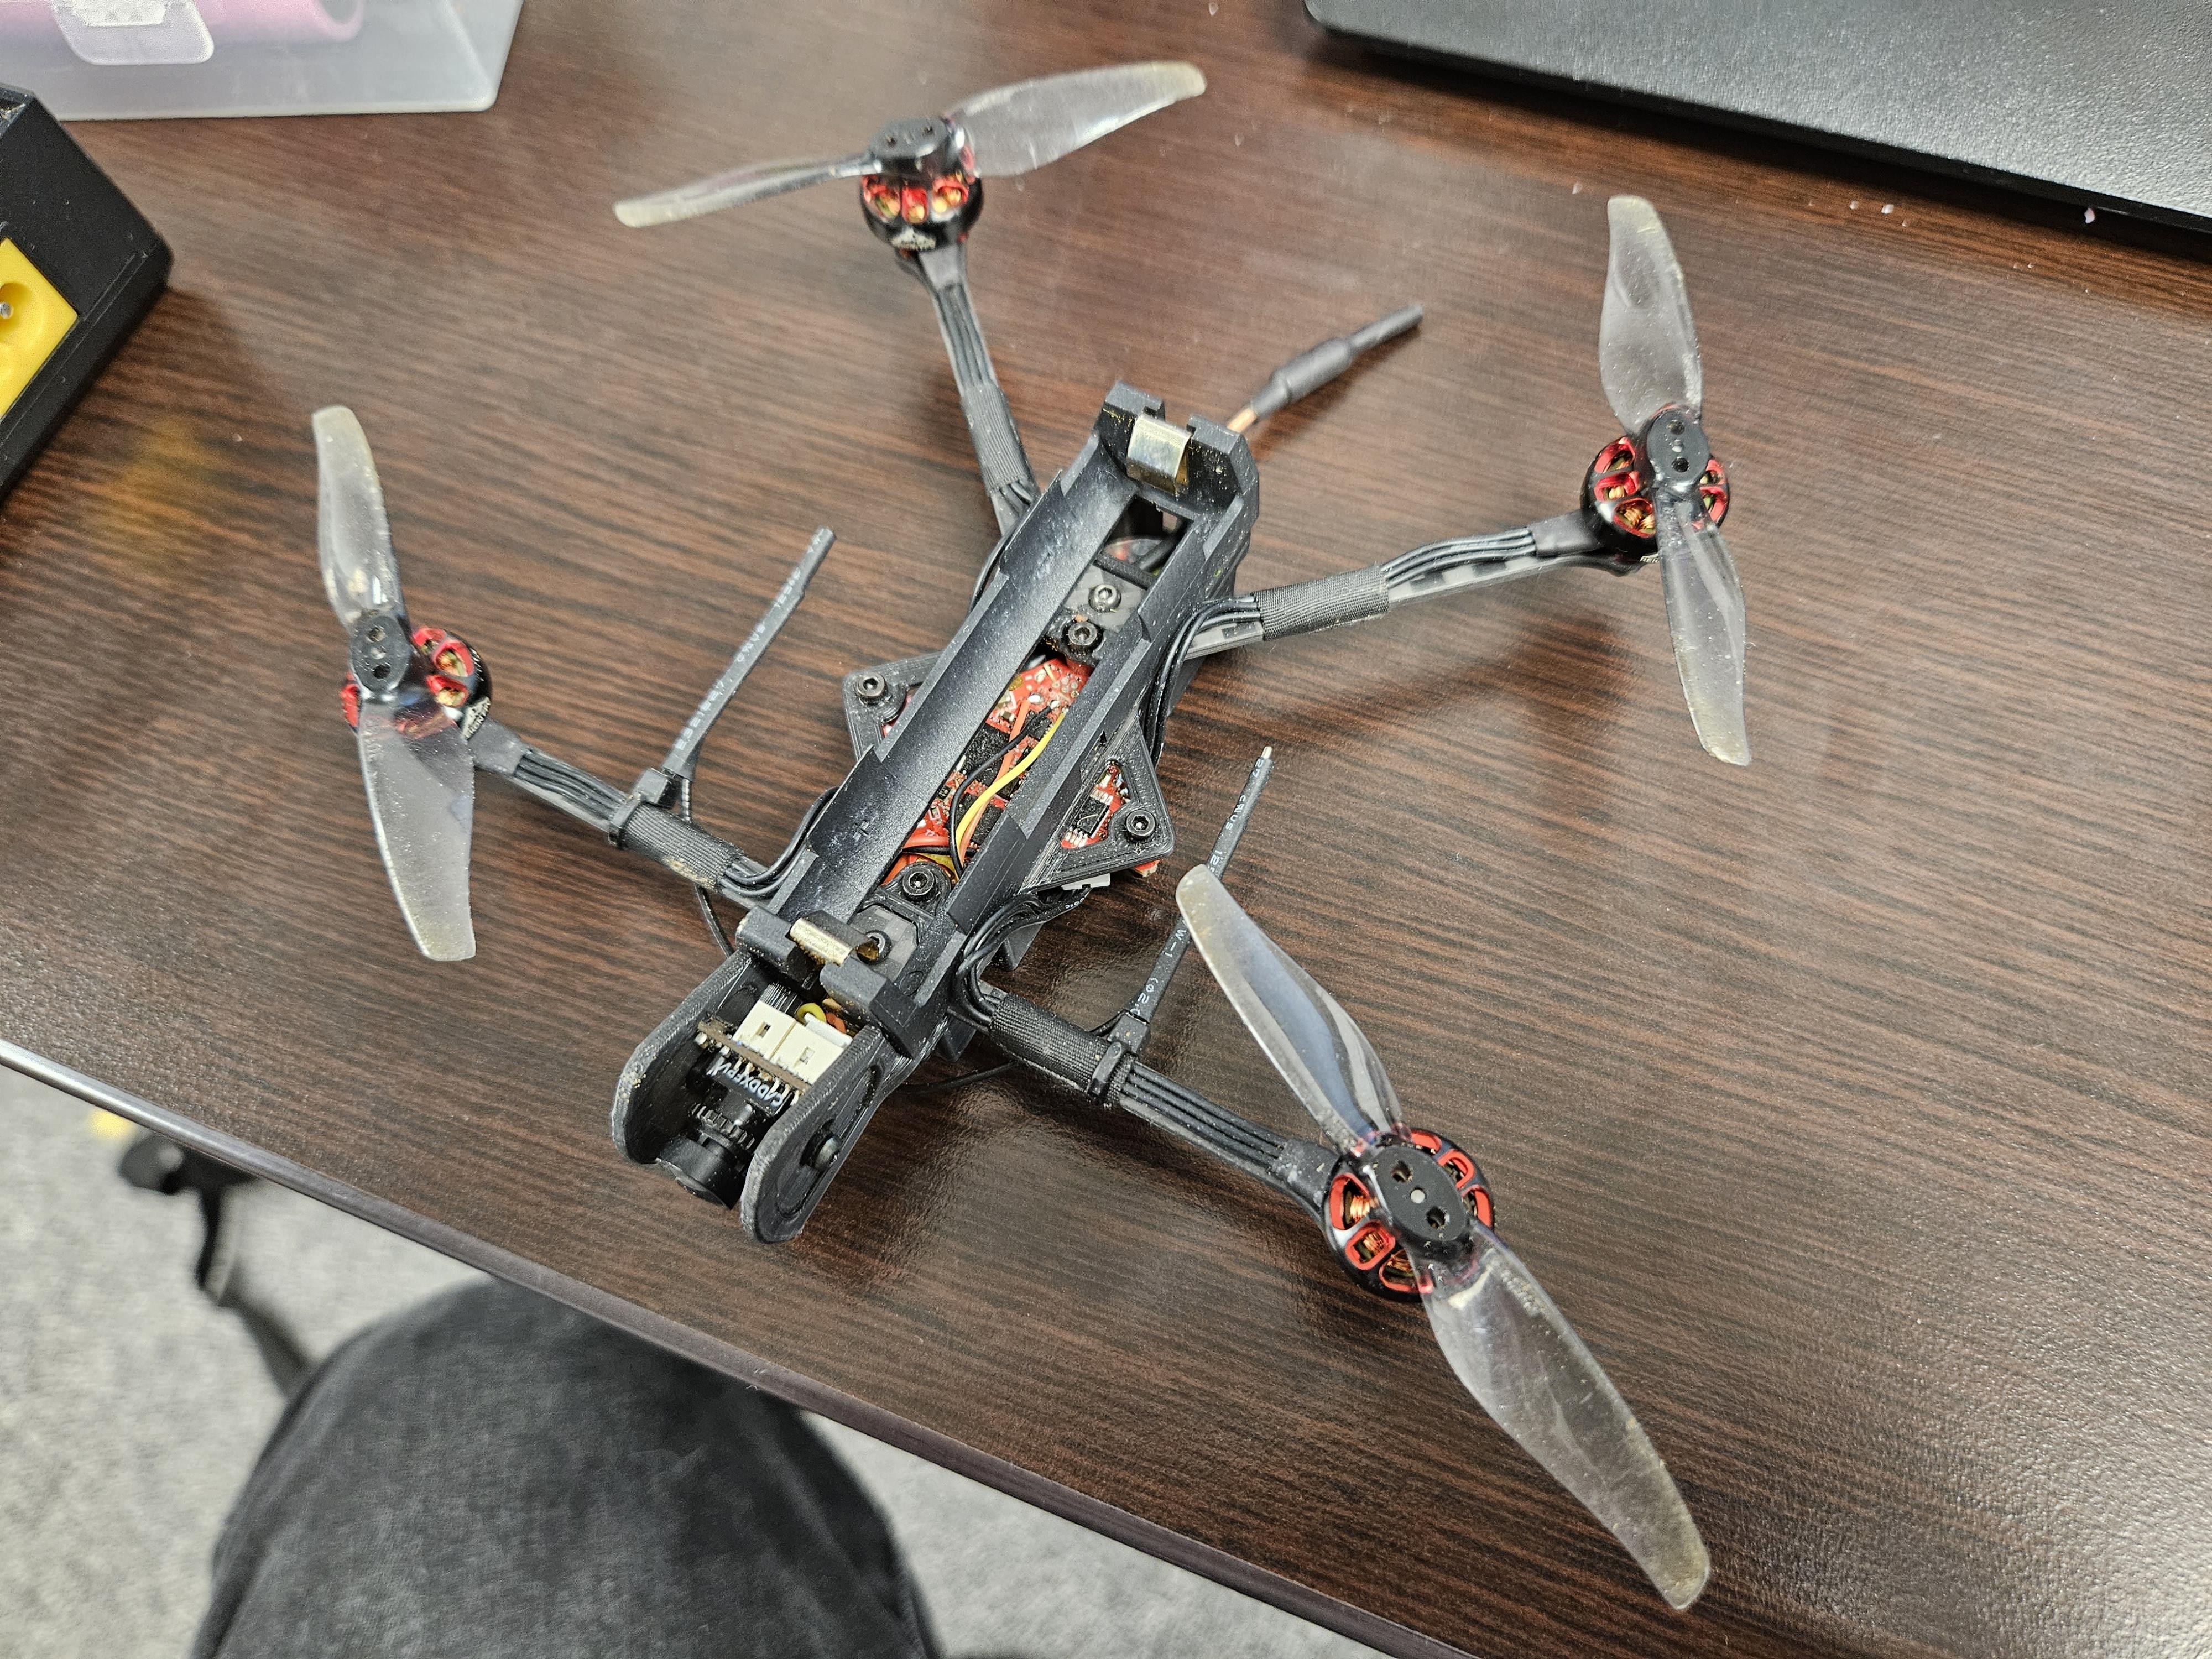
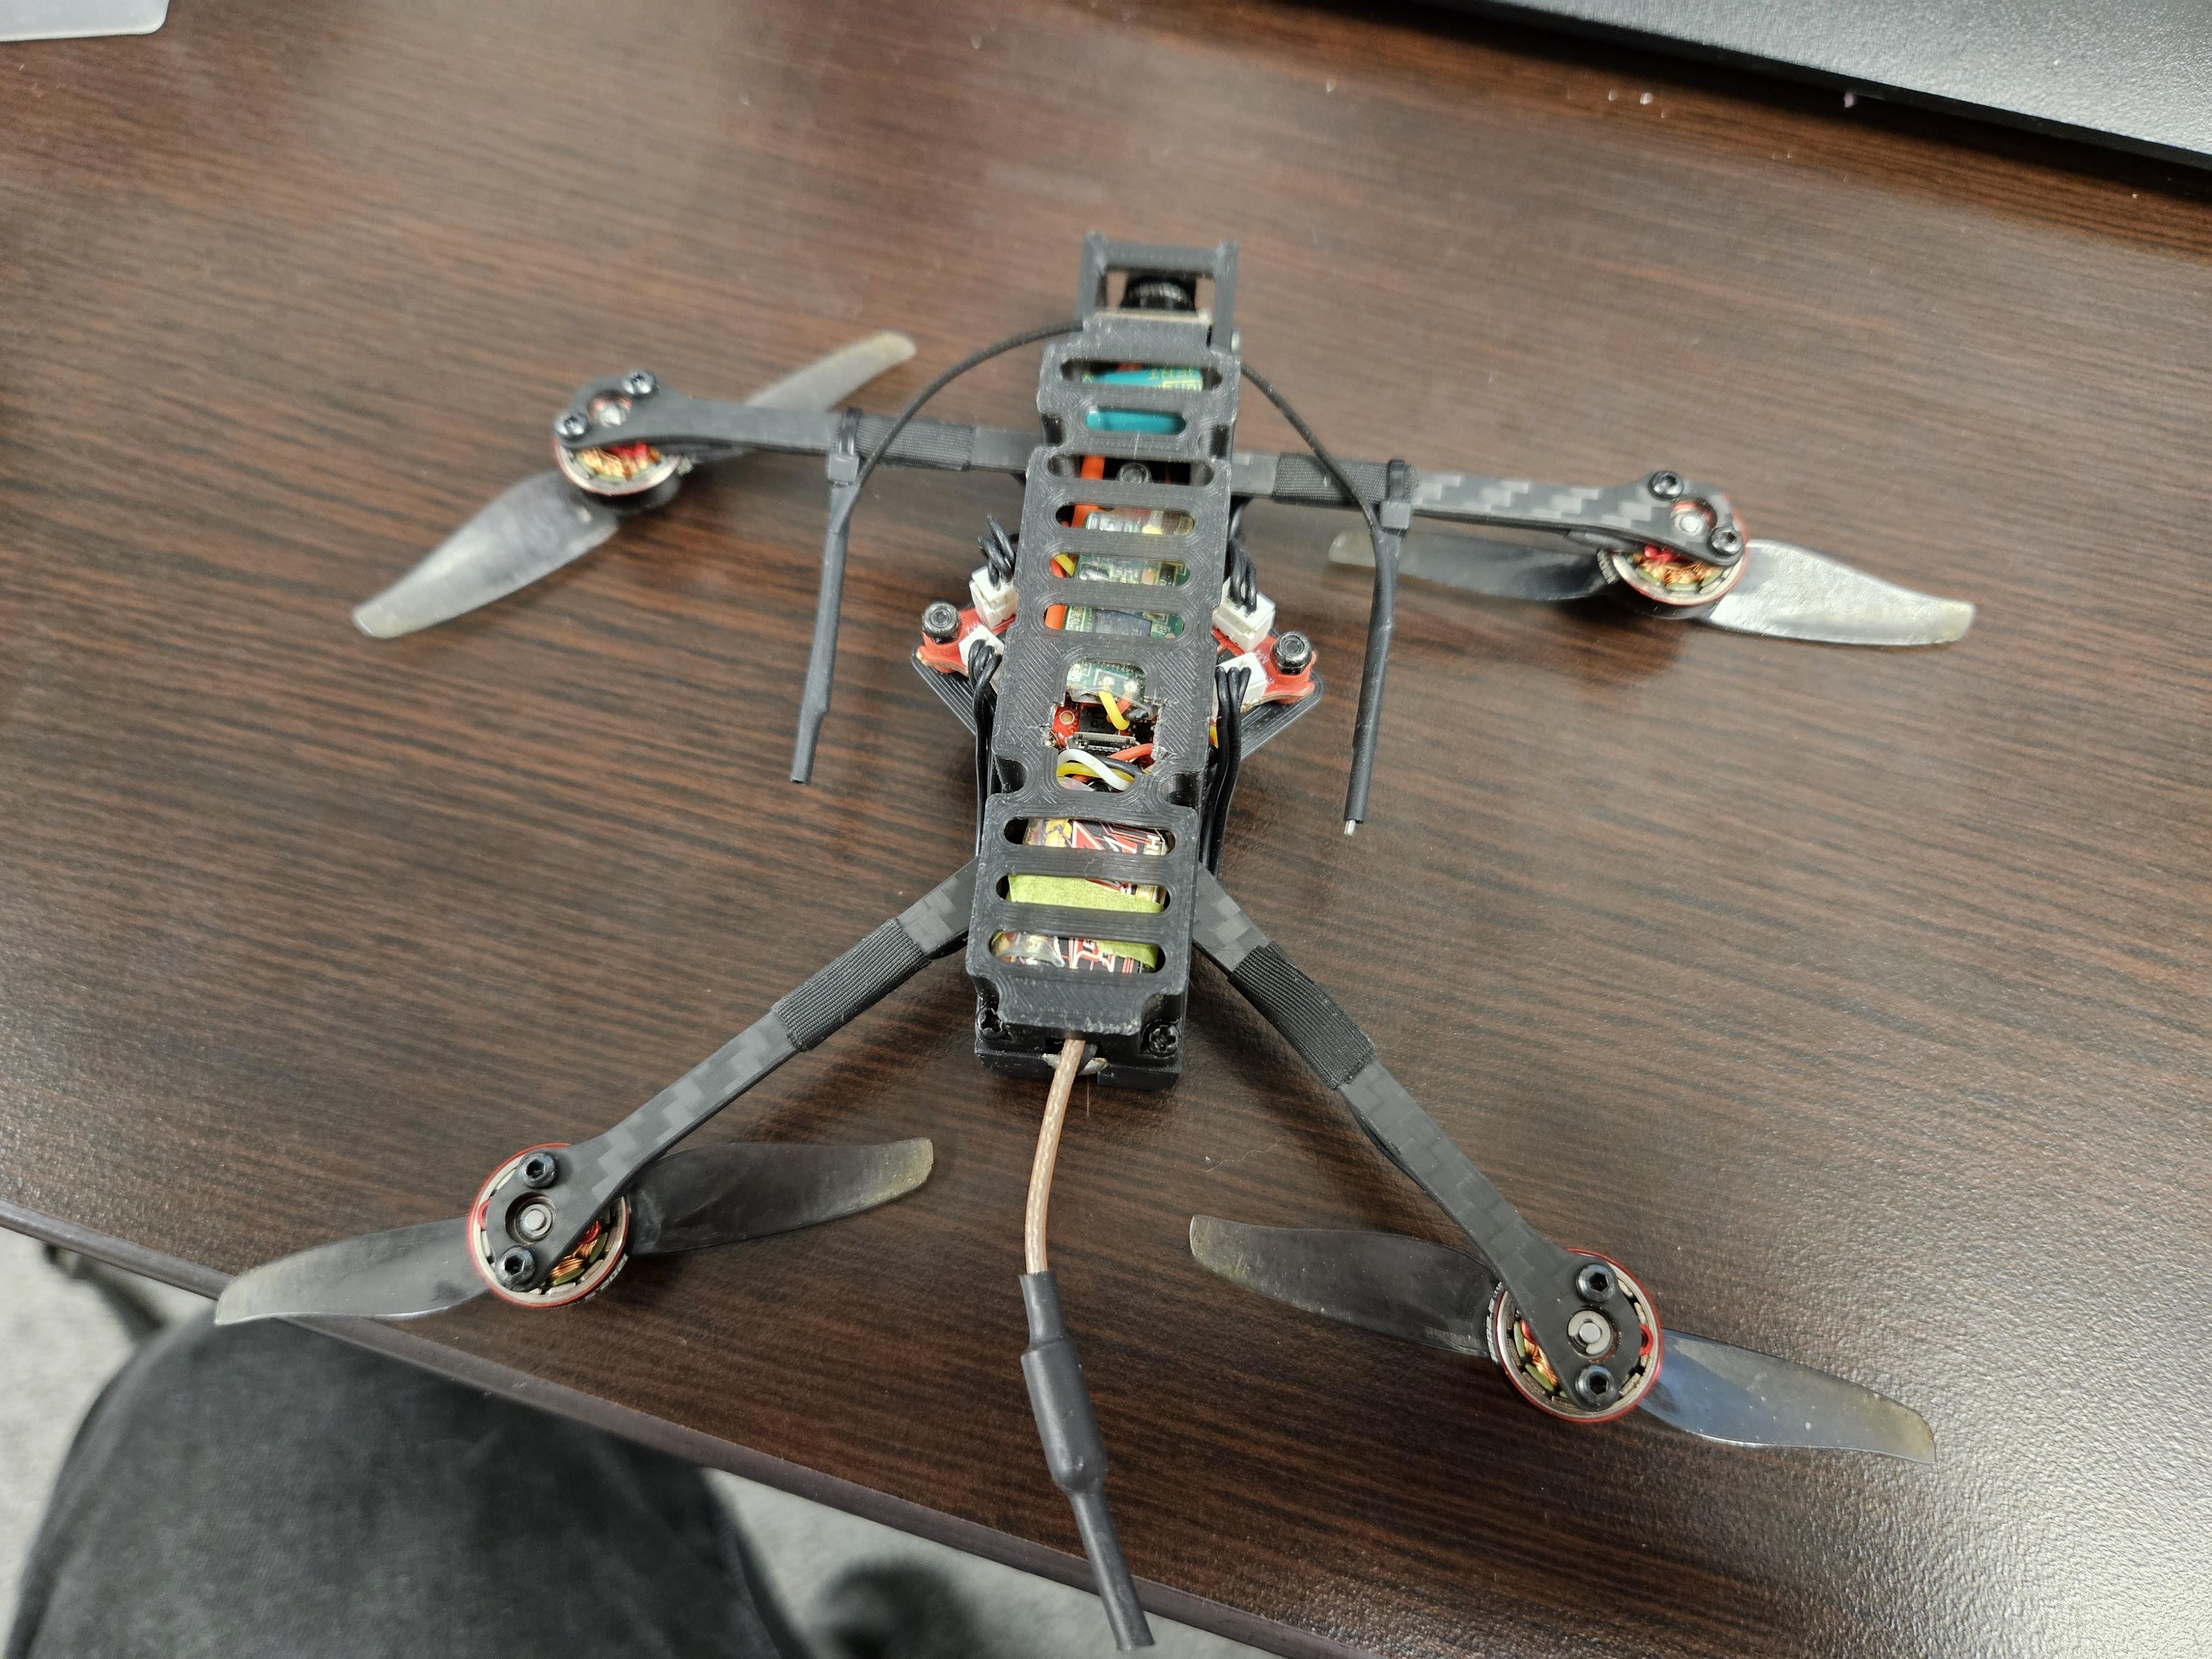
Before you can design anything, you of course need to know what you are designing, and more importantly; why.
The stock frame of the Rekon 3, pictured above, is actually fairly decent. It uses a 3D printed main air frame, and cut carbon for the arms. It's fairly sturdy, and pretty easy to fix if a piece breaks. The carbon is nice and stiff, but also decent vibration characteristics.
However it does come with a few draw backs
1: Every time you have a connection of different components of the frame, you need to attach it some how. In the case of this frame, that means screws. Screws add weight
2: Using CNC carbon fiber for the arms, although strong, light, easy to manufacture, you are limited to a 2D shape. This means you may have to spend weight in non-optimal ways.
What if we could remove all shape limitations?
This gets us to generative design.
Getting Your Base
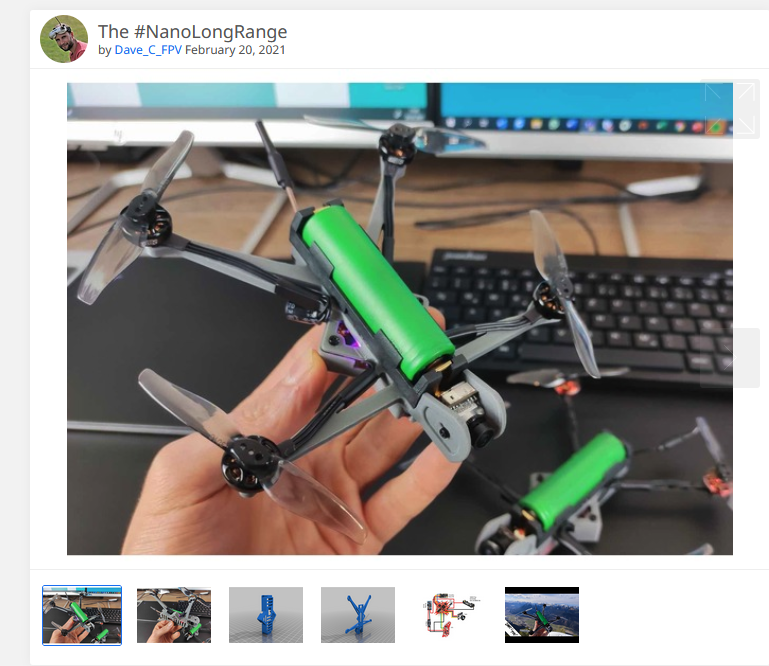
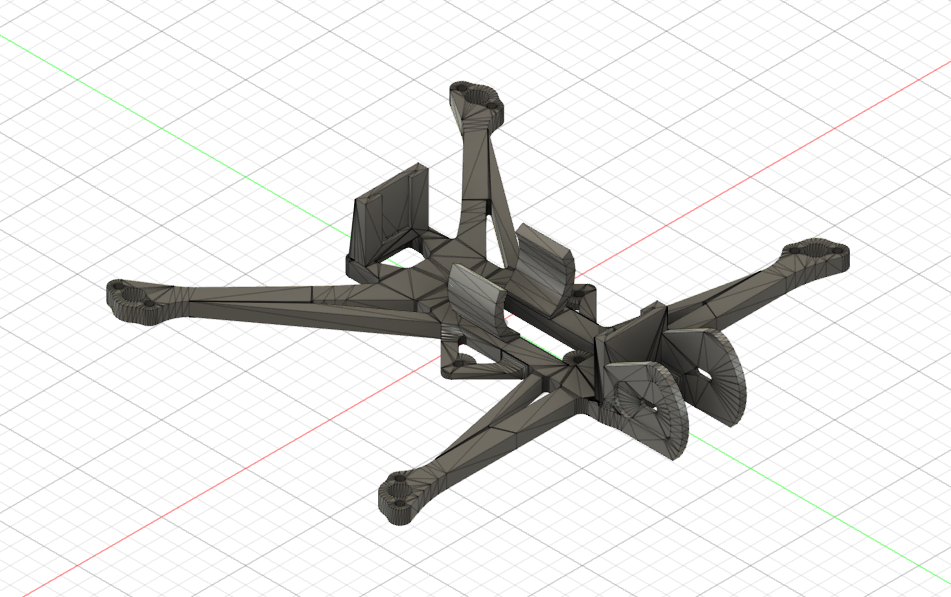
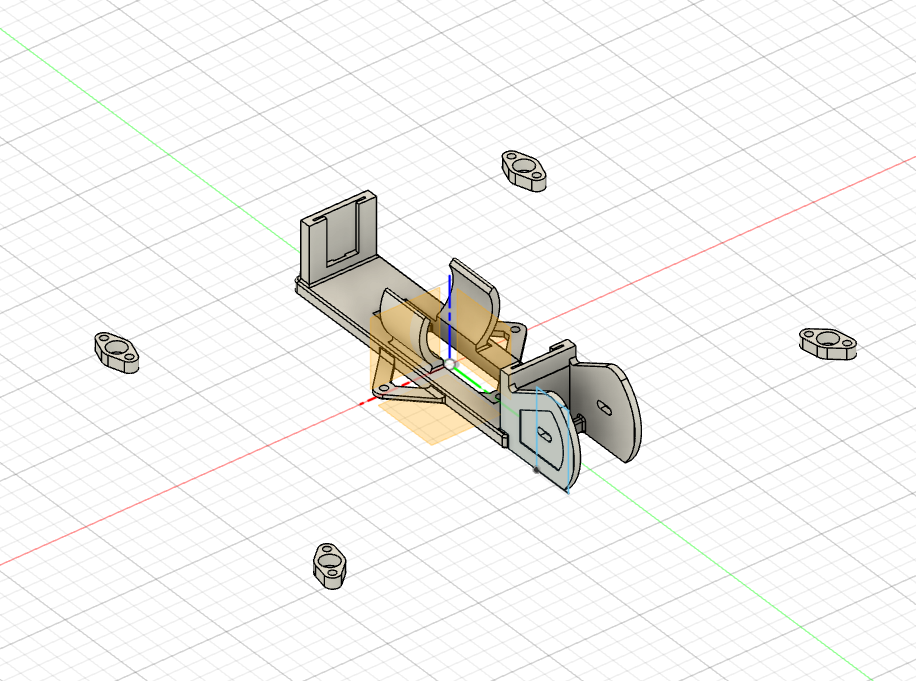
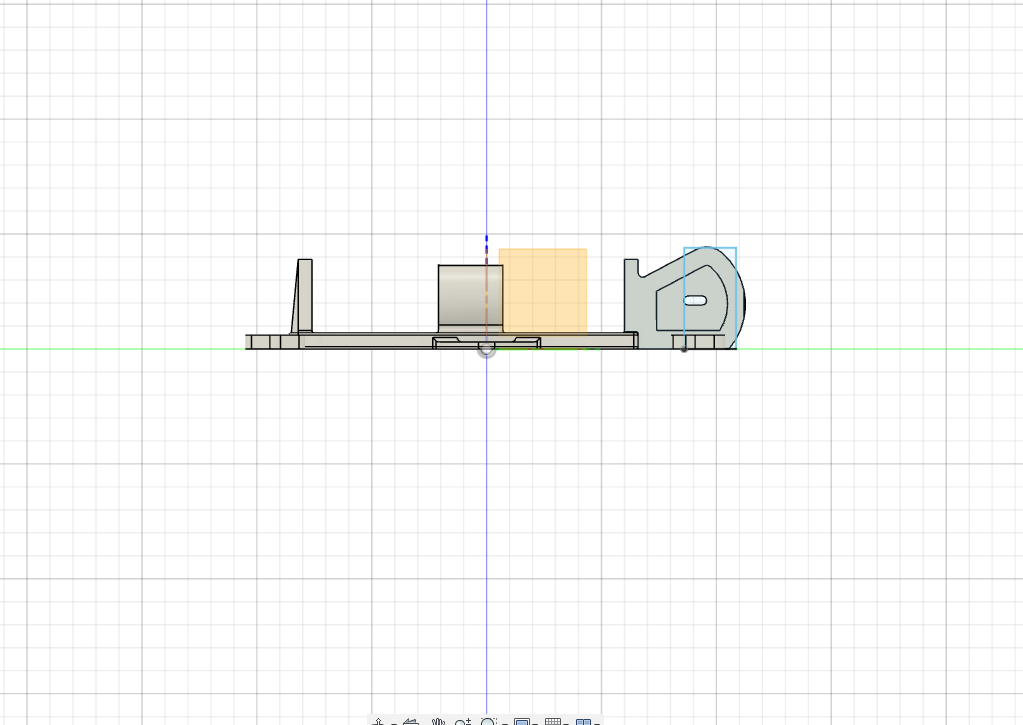
The fun part is coming, but we need a base to start from
For this, I used the original NLR from Dave_C, as well as a great remix by hulabaloo as a starting point
Dave_C: https://www.thingiverse.com/thing:4769576
hulabaloo: https://www.thingiverse.com/thing:4786123
I took the measurements from them, and made some changes as well.
Some key things to note is the hardware:
NLR uses:
A whoop board, which has a 25.5mm mounting hole pattern
1202.5 motors (although can be changed), mounting holes are motor dependent
3 inch props
15mm style camera
18650 battery
Now, these diamentions are set, and have to be considered when making the base.
I used the original design with hulabaloo's battery hold as a base line. I took the liberty of making a few changes of my own, that I think might help. Such as moving the battery to where I think a better center of gravity is. Other than that, as you can see by the pictures, the main airframe and motor mounts are the only peices we need to model
I modeled the motor mounds and place them where I think they are optimal, and then made the main part of the airframe. These are my set dimensions, and we will let Fusion360 do the magic from there.
Not the Base
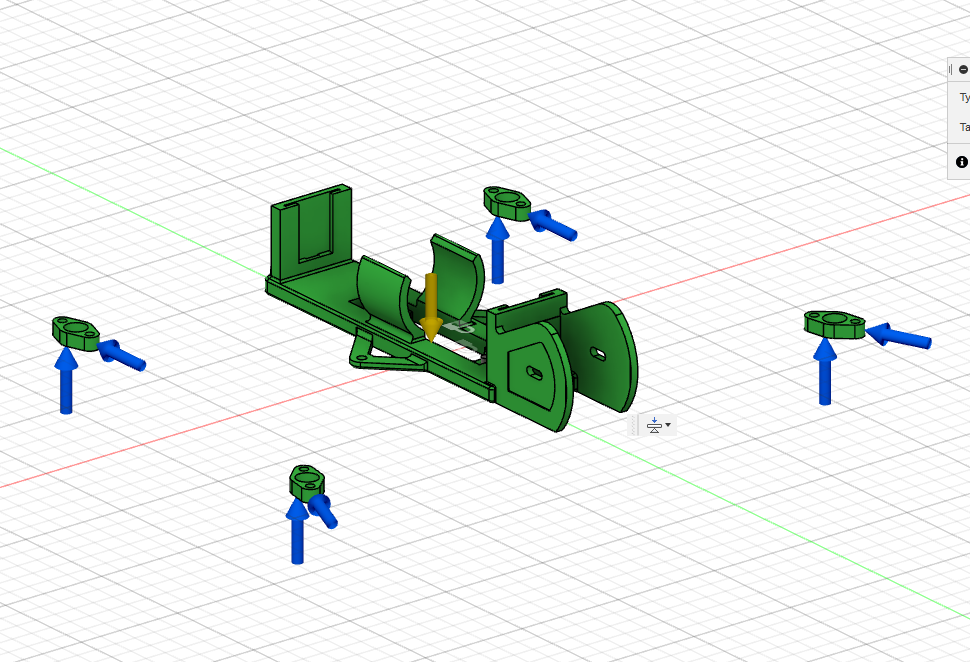
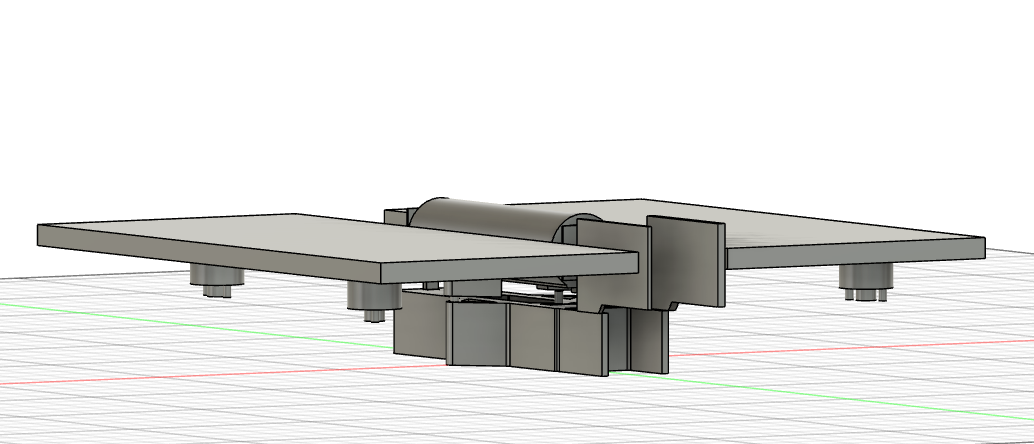
Now this is where the real work begins.
There's 2 ways (as far as I can tell, of course I'm still learning) you can use generative design. The first is slightly more common and is called Topology optimization. This takes your existing geometry, and uses the algorithm to optimize it for a given load. The second is what we will be doing, which is giving the algorithm full reign to make new geometry from basically nothing. The problem is with the second point, the computer has no concept of what it's actually making, so you have to give it as much guidance as nesessary, which sometimes is a lot. Esspecially in this case.
You have the geomtry you need, but with generative design, you also have to tell the algorithm where it's not ok to make new geometry. As with this project, we don't have any starting shape. We will be using solids to tell the computer to stay away from. As you can see by the picture, there's more obstacle geometry than starting geomtry.
There's 2 ways of making this Obstacle Geometry (as it's called). 1: In the Generative design space (we will get there), and 2: the way I'm doing it. In the normal design space.
As you can see in the picture I've made shapes in which the algorithm is to stay away from, such as the bottom of the frame, things that represent the motors, all the screw holes (I will still need SOME screws), props, battery tabs, ect. As it turns out, quite a lot. And as I've learned, things you might not have considered from the begining requiring you to go back and make changes
The Set Up Pt.1
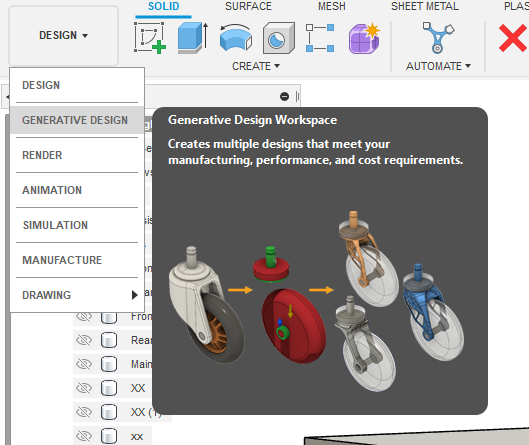

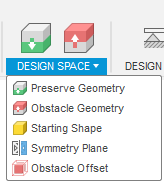
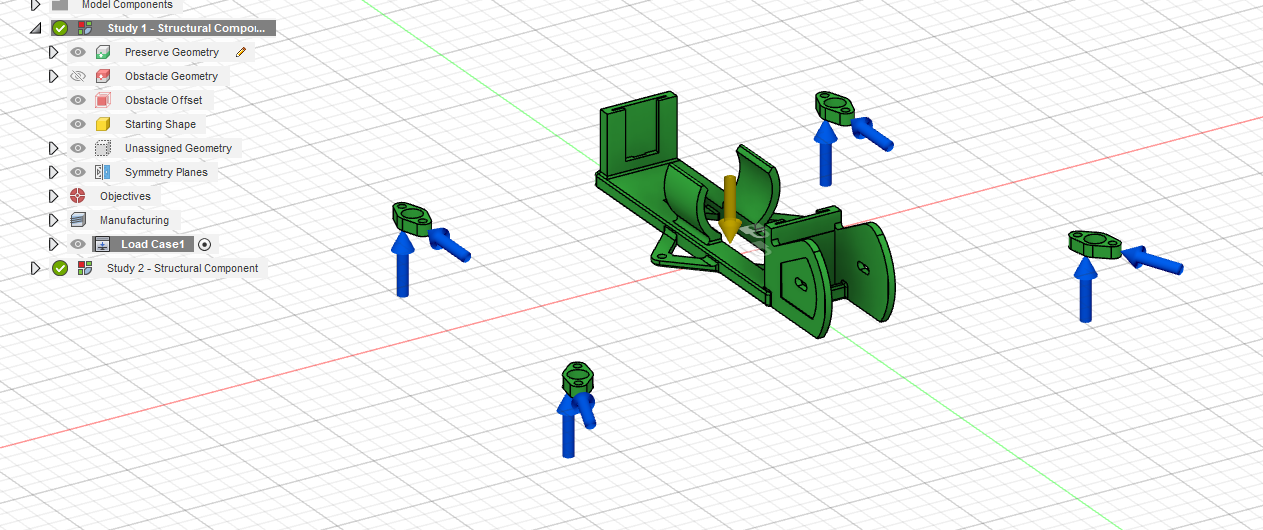
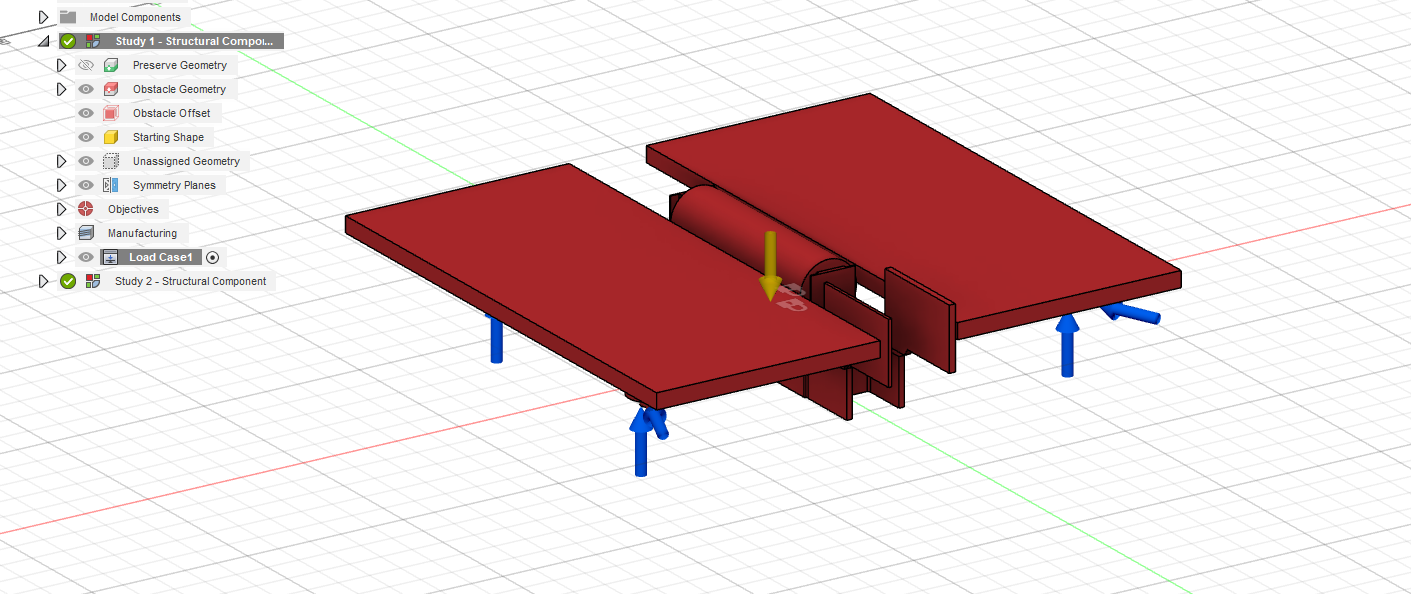
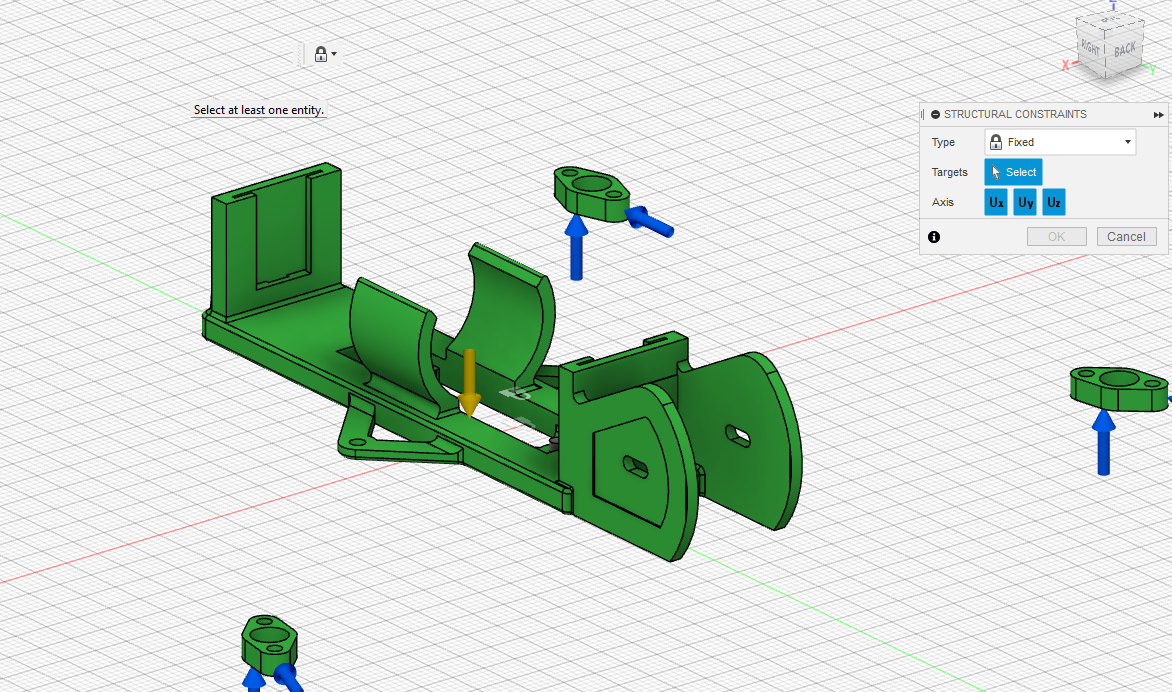
We are starting to get in to the potatoes of the project. It's time to click the Generative Design button!
First I looked at each menu above. Thankfully Fusion 360 is set up in a very logical order. The buttons at the top of the screen are layed out in such a way that it seems simply working left to right is the best order of operations
So First menu "Study". Things brings up "New Generative Study", which is what we would like to do. The second option is "Study Settings", which really is only for resolution. So this is a case where this one can be done later. For early revisions I kept resolution very low to make things a bit quicker, and then cranked it up on the final revisions.
Second menu is "Edit Model" this is where you can add geometry that will only apply to the Generative Design space, and NOT the original Design space. (This is where I meantioned you can make your obstacle geometry here instead).
The Third menu is where we really start the set up. You will see "Preserve, Obstacle, Starting Shape, Symmetry Plane, and Obstacle offset"
-1: Preserve: This is where you select the geomtry that you want to keep and not change, however, the algorithm may still add to it, even if the geometry underneath is "preserved". As you can see in the pictures, I selected by base. Once you have selected the geometry, it will be green, indicating it's roll
-2: Ostacle: Telling the algorithm what to avoid. Select where you want the algarithm NOT to make new geomtry, this would be the extra shapes you made earlier in Design, or the Edit mode. These will show as Red
-3: Starting Shape: This is used if you have made some geomtry that shows a rough idea of what you want the end result to be. Fusion will take that shape and optimize it. This is more akin to Topology optimization. In this particular case, we have none. I want the computer to do what ever the heck it wants. Part of the advantage of Fusion, it has full blown Generative Deisgn built in
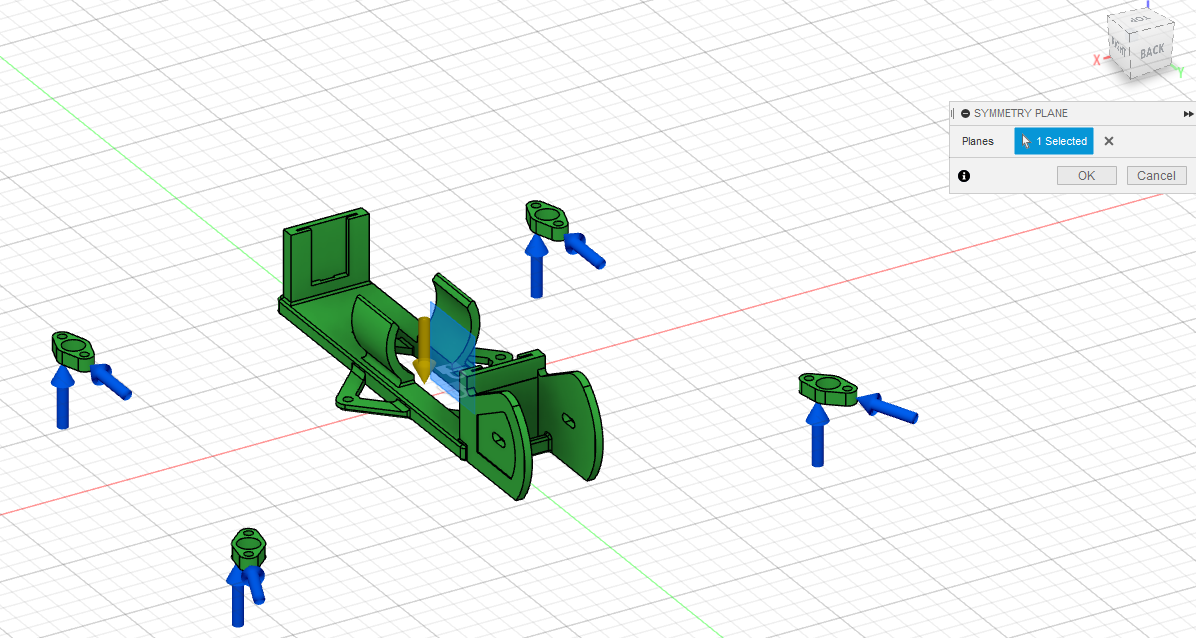
-4: Symmetry Plane: This is a tool to describe which axis you want the design to be symmetrical about. In our case, we want it symmetrical from left to right. I selected the plane accordingly
-5: Obstacle offset: not totally sure what it does, but it seems to add a space near obstacle geomtry that the computer can't go, for me I just made the geomtry itself the size I need, so I didn't use this option.
The Set Up Pt.2 (electric Boogaloo)
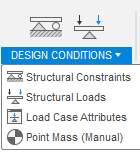
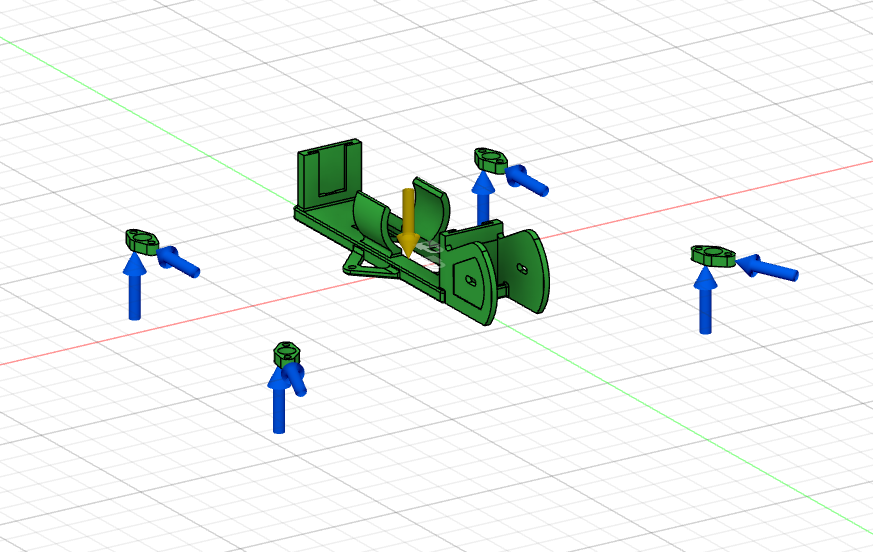
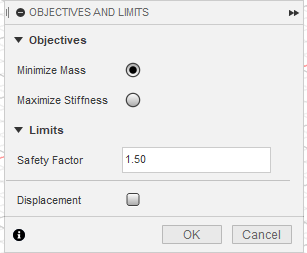
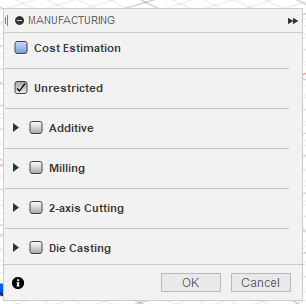

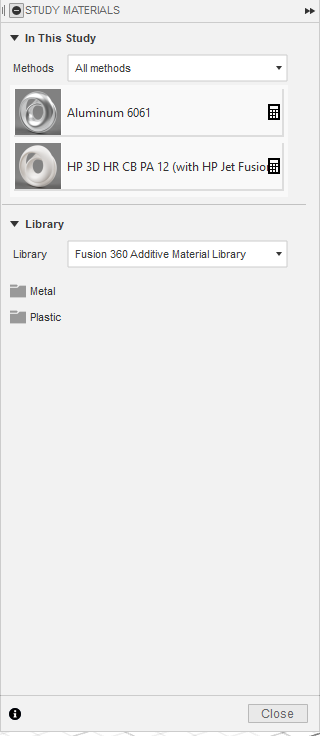
This brings us to our Fourth menu (we will only be using 2 options)
So now that we have our geometry defined in it's rolls, it's time to set our conditions.
Get an idea of what loads you think the object might see. For me, I put small vertical loads on all 4 arms, with relatively big frontal loads on the front arms. The idea is beefing them up for crashing. So later on, you'll see how beefing the front arms end up. (The rear motors are inset slightly to help protect them with the front arms)
First you will see "Structural Constraints". This will lock your chosen geomtry in place in different ways. The way I thought of this: You can't load anything up, if you have nothing pushing back (or in this case, keep it from moving). There's a few types you will see in the menu. For us I choose to lock the top and bottom of the main part of the frame in place. This means we will be solving for arm loads (which we are!)
Second you will see "Structural Loads". This is where we define what forces are going to be on what parts, and how much. For this project I assumed a AUW (all-up weight) of 120 grams (yes, NLR are heavy. Considering Whoops are 20-30 grams or less). From there I arbitrarily guessed on what forces the arms might get. I set a force of 2g (or 2x the weight of the drone) vertically upwards on all of the arms (so really over built vertically), and a small 1n force pushing the rear arms back. For the front arms, I had to account for crashes. Yes. All pilots crash. I assumed a 10g force back on each arm.
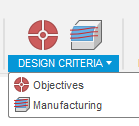
We then will move to the "Design Criteria" dropdown.
First you will see "Objectives". This menu is asking what you intentions are to be. We see 2 main options. You can choose between weight, or stiffness. Of course in this case we are trying to shave off as much weight as possible. Next is Safety Factor. More or less how over built the final product is realitive to the loads you set. (more on this later)
The second is a menu called "Manufacturing" menu, this is probably what I personally find as the coolest part. You can tell Fusion 360 which why you intend on actually building the part. Additive can set overhang limits so you can FDM print. You see different kinds of milling, and even just 2d cutting if you wish. In this case I chose "Unrestricted" given the amazing capabilities of a powder based 3D printer. I'm giving the computer full reign on what ever weird shape it wants to make.
Lastly is "Materials". This is where you can select what you are going to be making your thing out of. I was extremely excited about the fact Fusion 360 already had the exact material I will be using! Which is the HP High-reusability PA 12. If Fusion doesn't have what you are looking for, it's pretty easy to find a data sheet on your material and fill in the blanks!
I chose both the HP PA12 and Aluminum, as I wanted to see what differences the algorithm would make (again more on this later)
The Fun Part
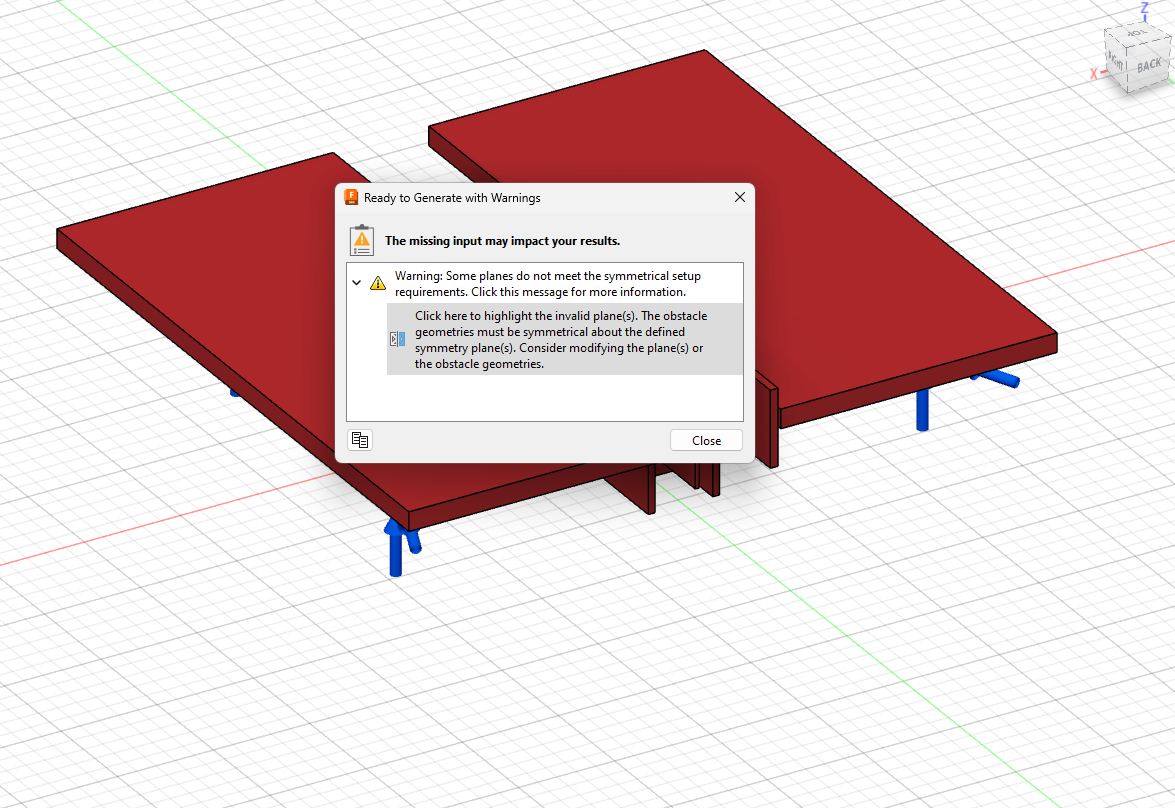
We get to push some buttons now!
Continuing our left to right, you can run a "Precheck". In my case you can see a warning come up, saying the obstacle geometry isn't symmetrical about our axis of symmatry that we set. In this case I'm going to ignore it, as it was probably just a small mistake I made while setting up the obstacle geometry, and shouldn't effect anything (Hopfully, spoiler, it didn't thankfully!)
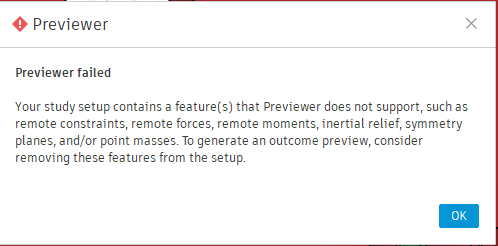
We then can choose to "Preview". The previewer runs locally instead of the cloud, and gives a really really handy quick reference to make sure the generated geometry looks like what you were intending. In this case since we have a symmetry line, it will not run however.
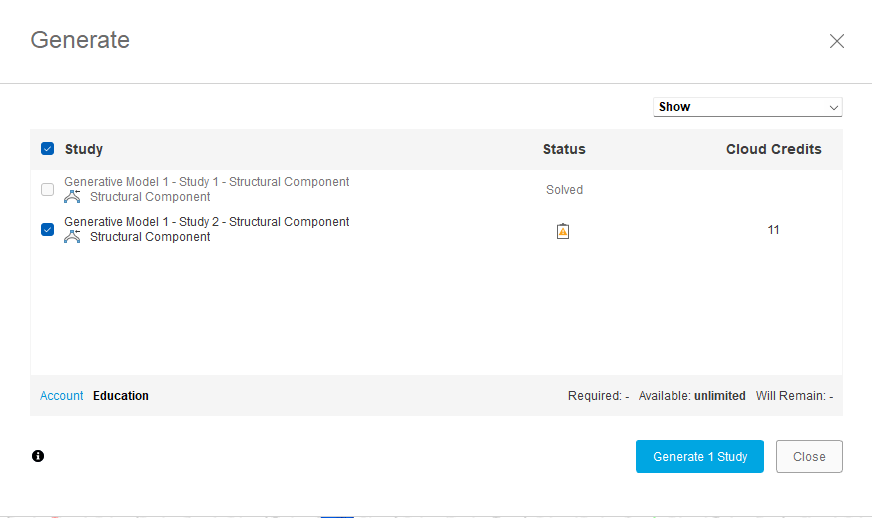
After we are done with the Preview, the time has come. It's time to hit "Generate"! You will see a dialog box pop up showing the required cloud credits, and from here you can hit go. Thankfully with a Student account you have unlimited, which for me, was a MASSIVE help. Learning this took me many itterations to get to this step, so I'm very thankful for Autodesk giving students free reign!
Results
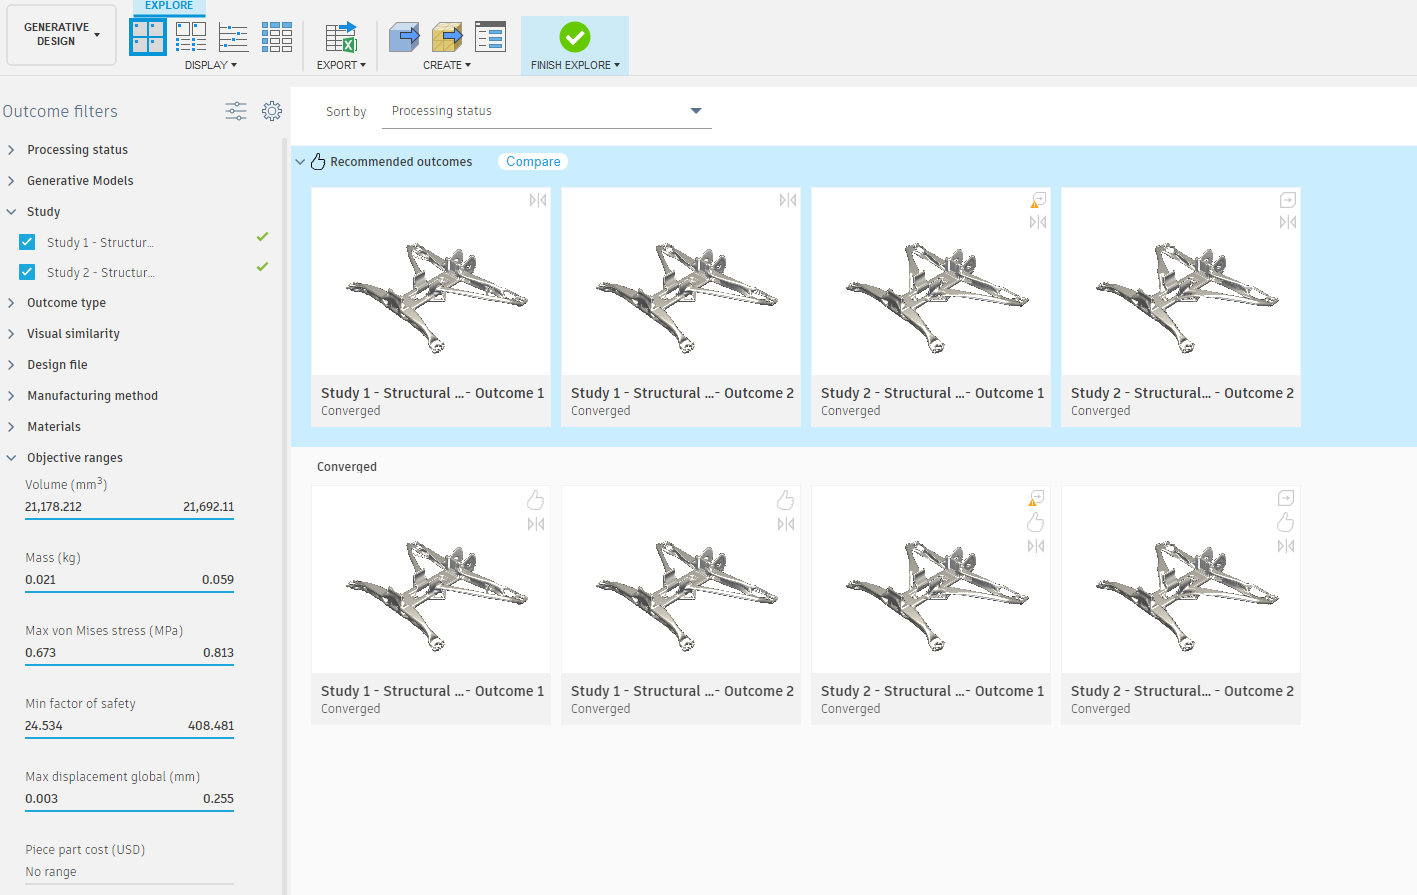

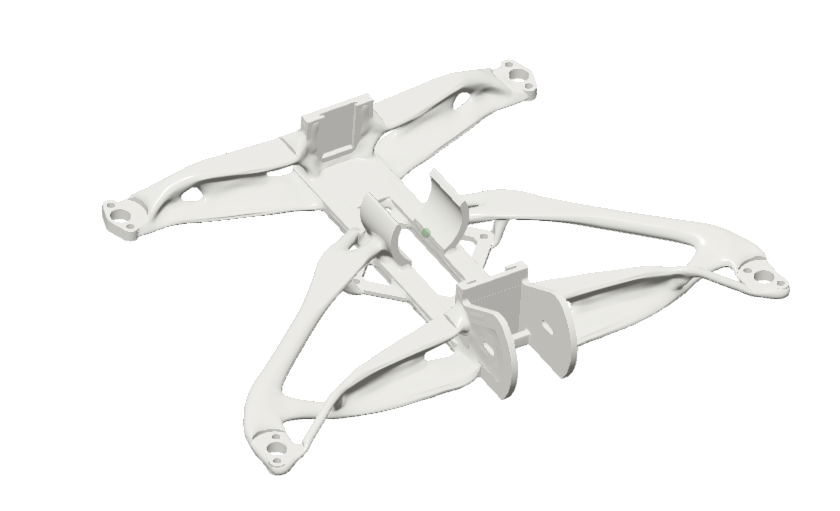
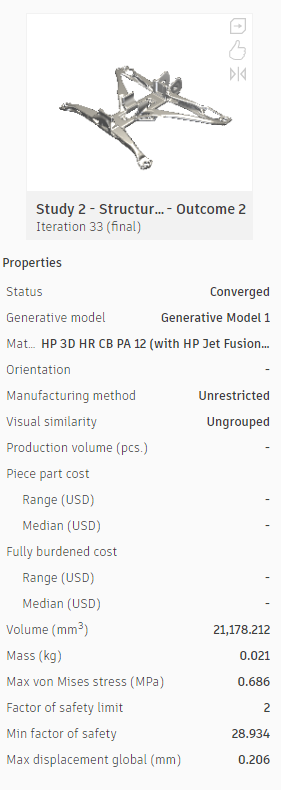

After some time, you will start seeing some results!
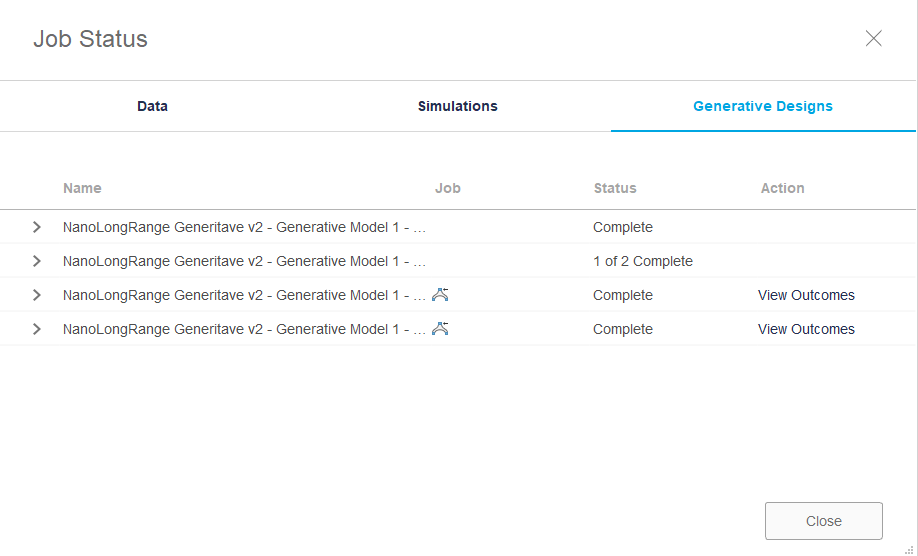
You will get 1 result for each material you set. As you can see in my picture of have many more than that. I had multiple studies running at the same time to save some time when I made small changes.
My first iterations weren't very good, this is where I learned I really have to set no go zones much tighter than I was. But eventually I got some results I really liked. From there I set resolution to max and ran it a final time.
This is several attempts in. Making small changes, adjusting loads, adding more obstacles ect. But the work is well worth it. Teaching myself all of this took much longer than I'm letting on, but it was a blast!
The one you see in the pictures is said result! Turned out amazing, however. The keen eye among you may notice that you can't really tell which one was almuminum and which was HP PA 12. This is where I ran into the only short coming of this process. Even though I set safety factor to only 1.5x, it seems to have still much over built, and in some regards was ignoring material choice. Attached is the screenshot of the technical details of my chosen result. To be clear this is probably more user error, given this was all self taught, but I wasn't worried in the least. As generative design is more of a tool to assist the designer, vs being the designer itself, so even the best generated designs, generally always need manual tweaking!
After I've chosen my piece, I then clicked both "Generate Design" and "Generate mesh" to use in different ways.
It was clear there was going to be a need for some changes, but I thought it would be better to touch and hold in person, to get a better idea of what changes I need to do.
Printing Time!
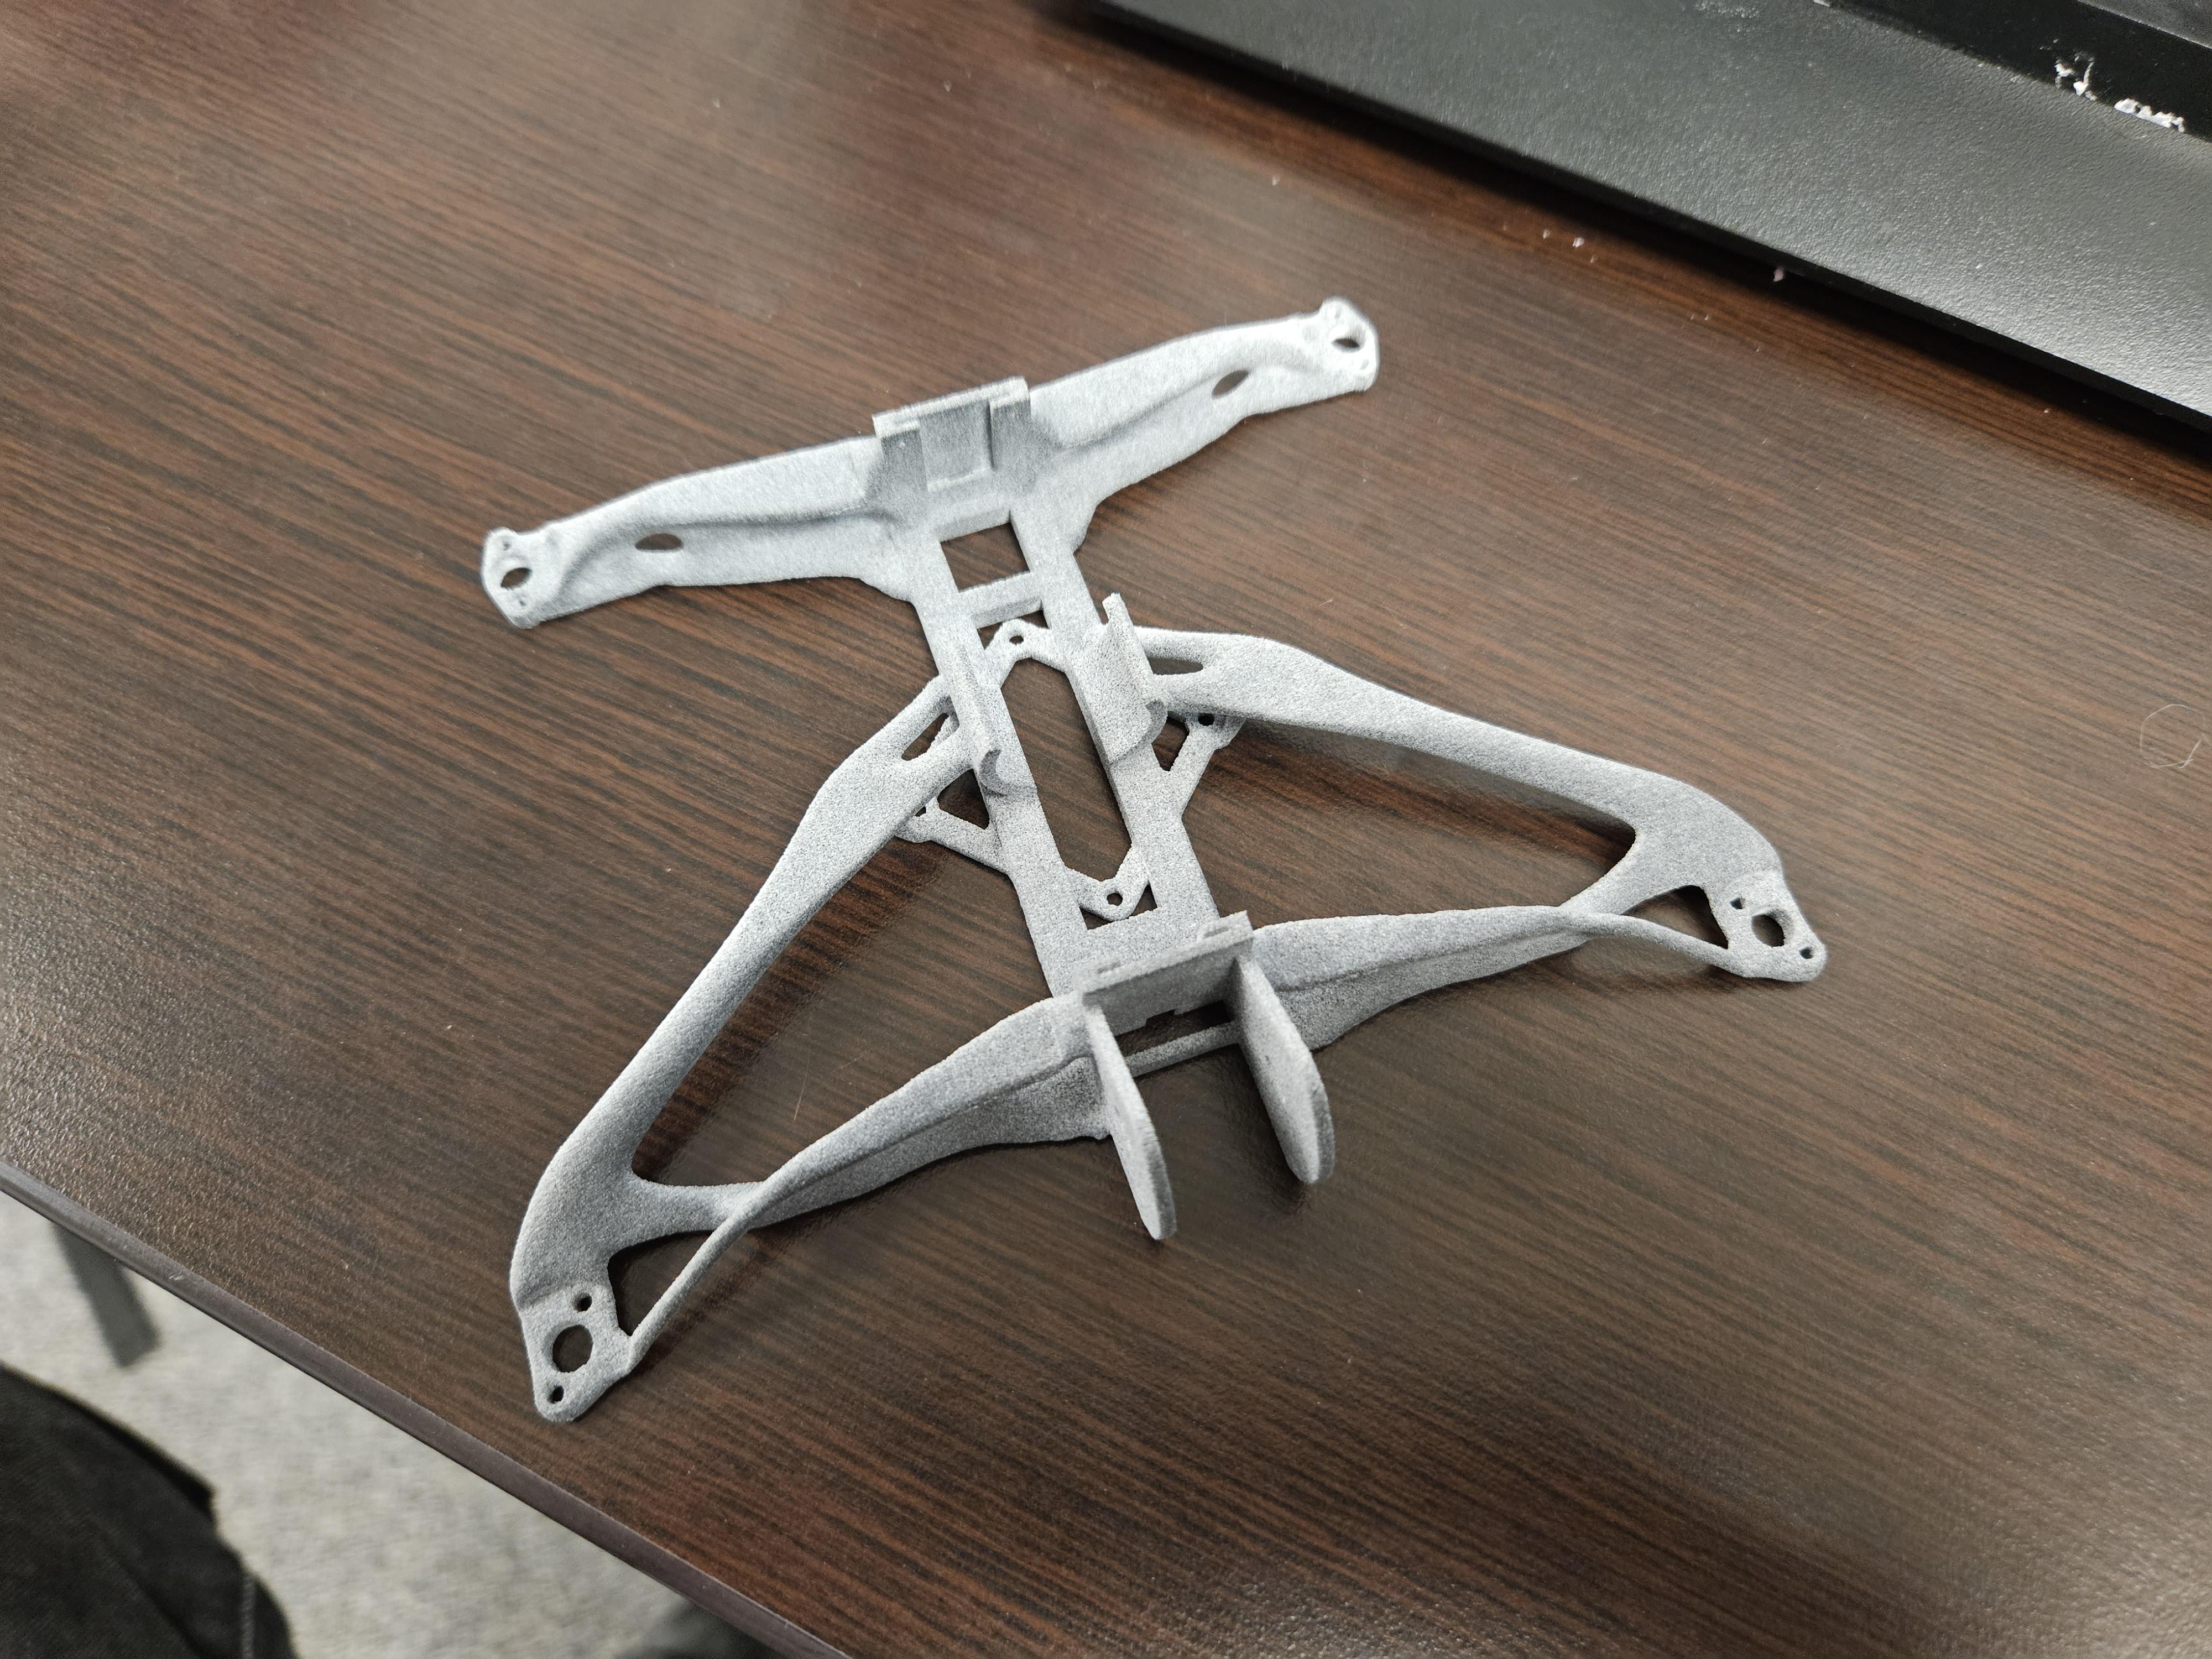
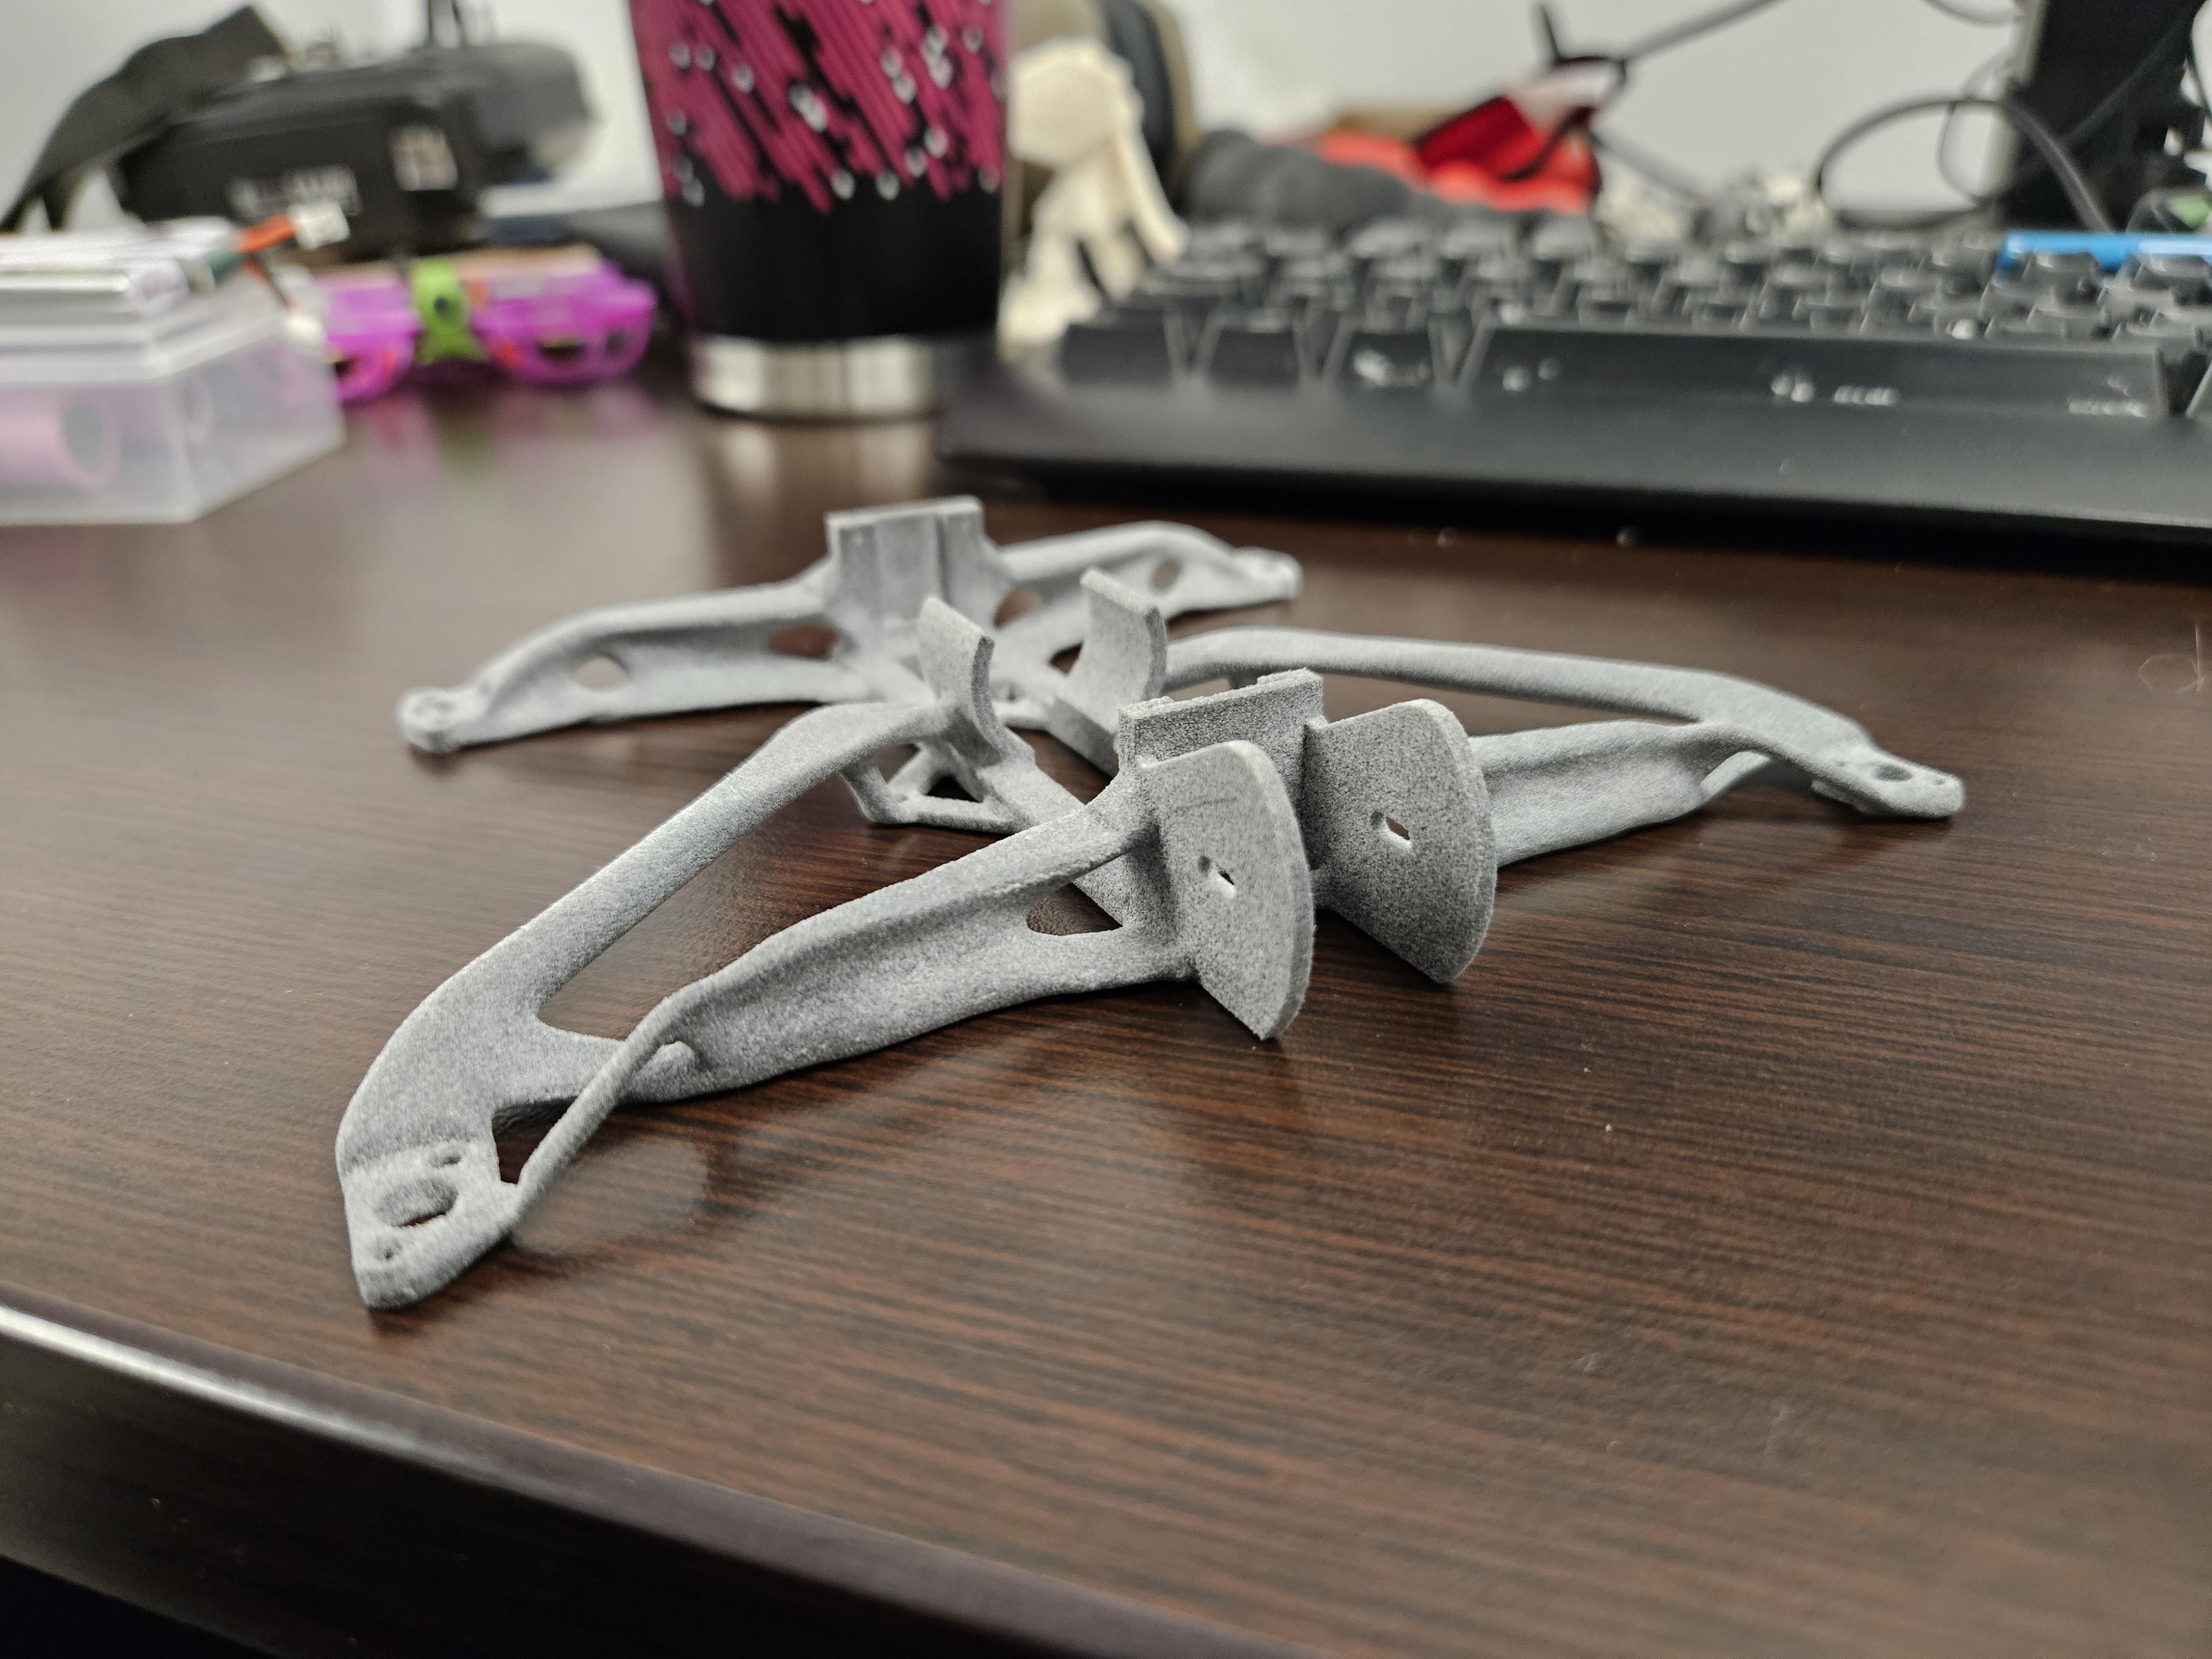
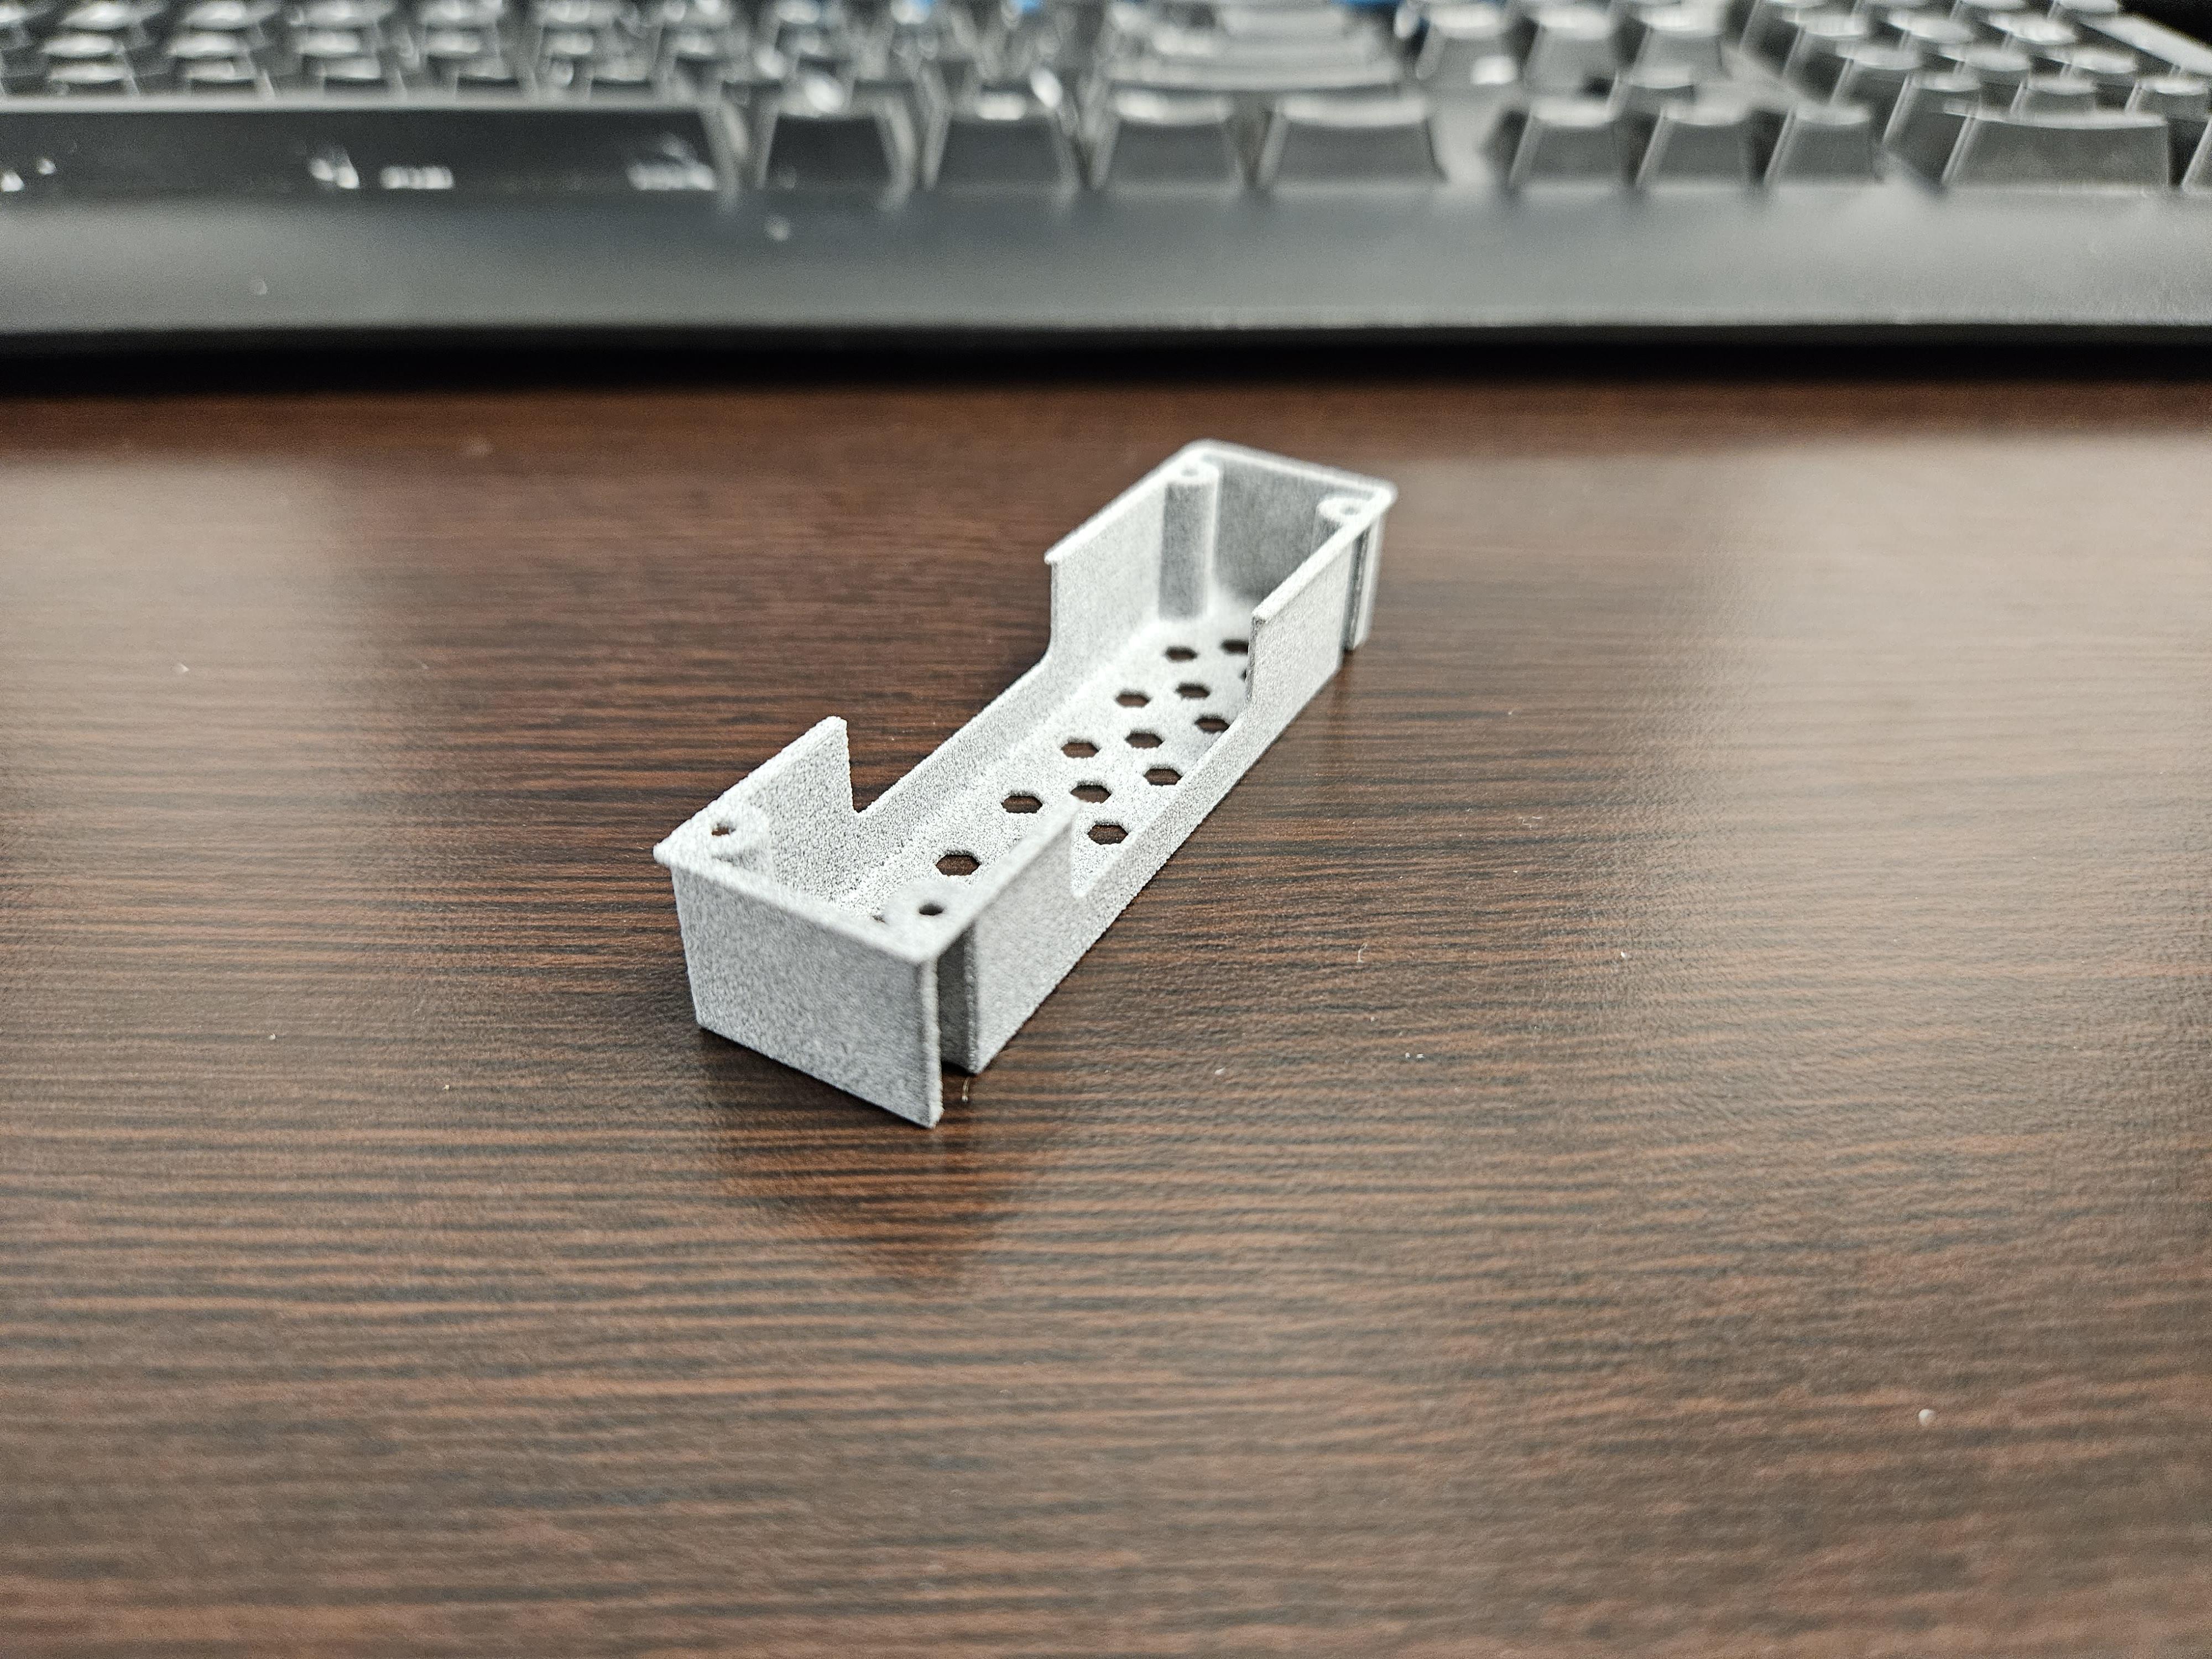
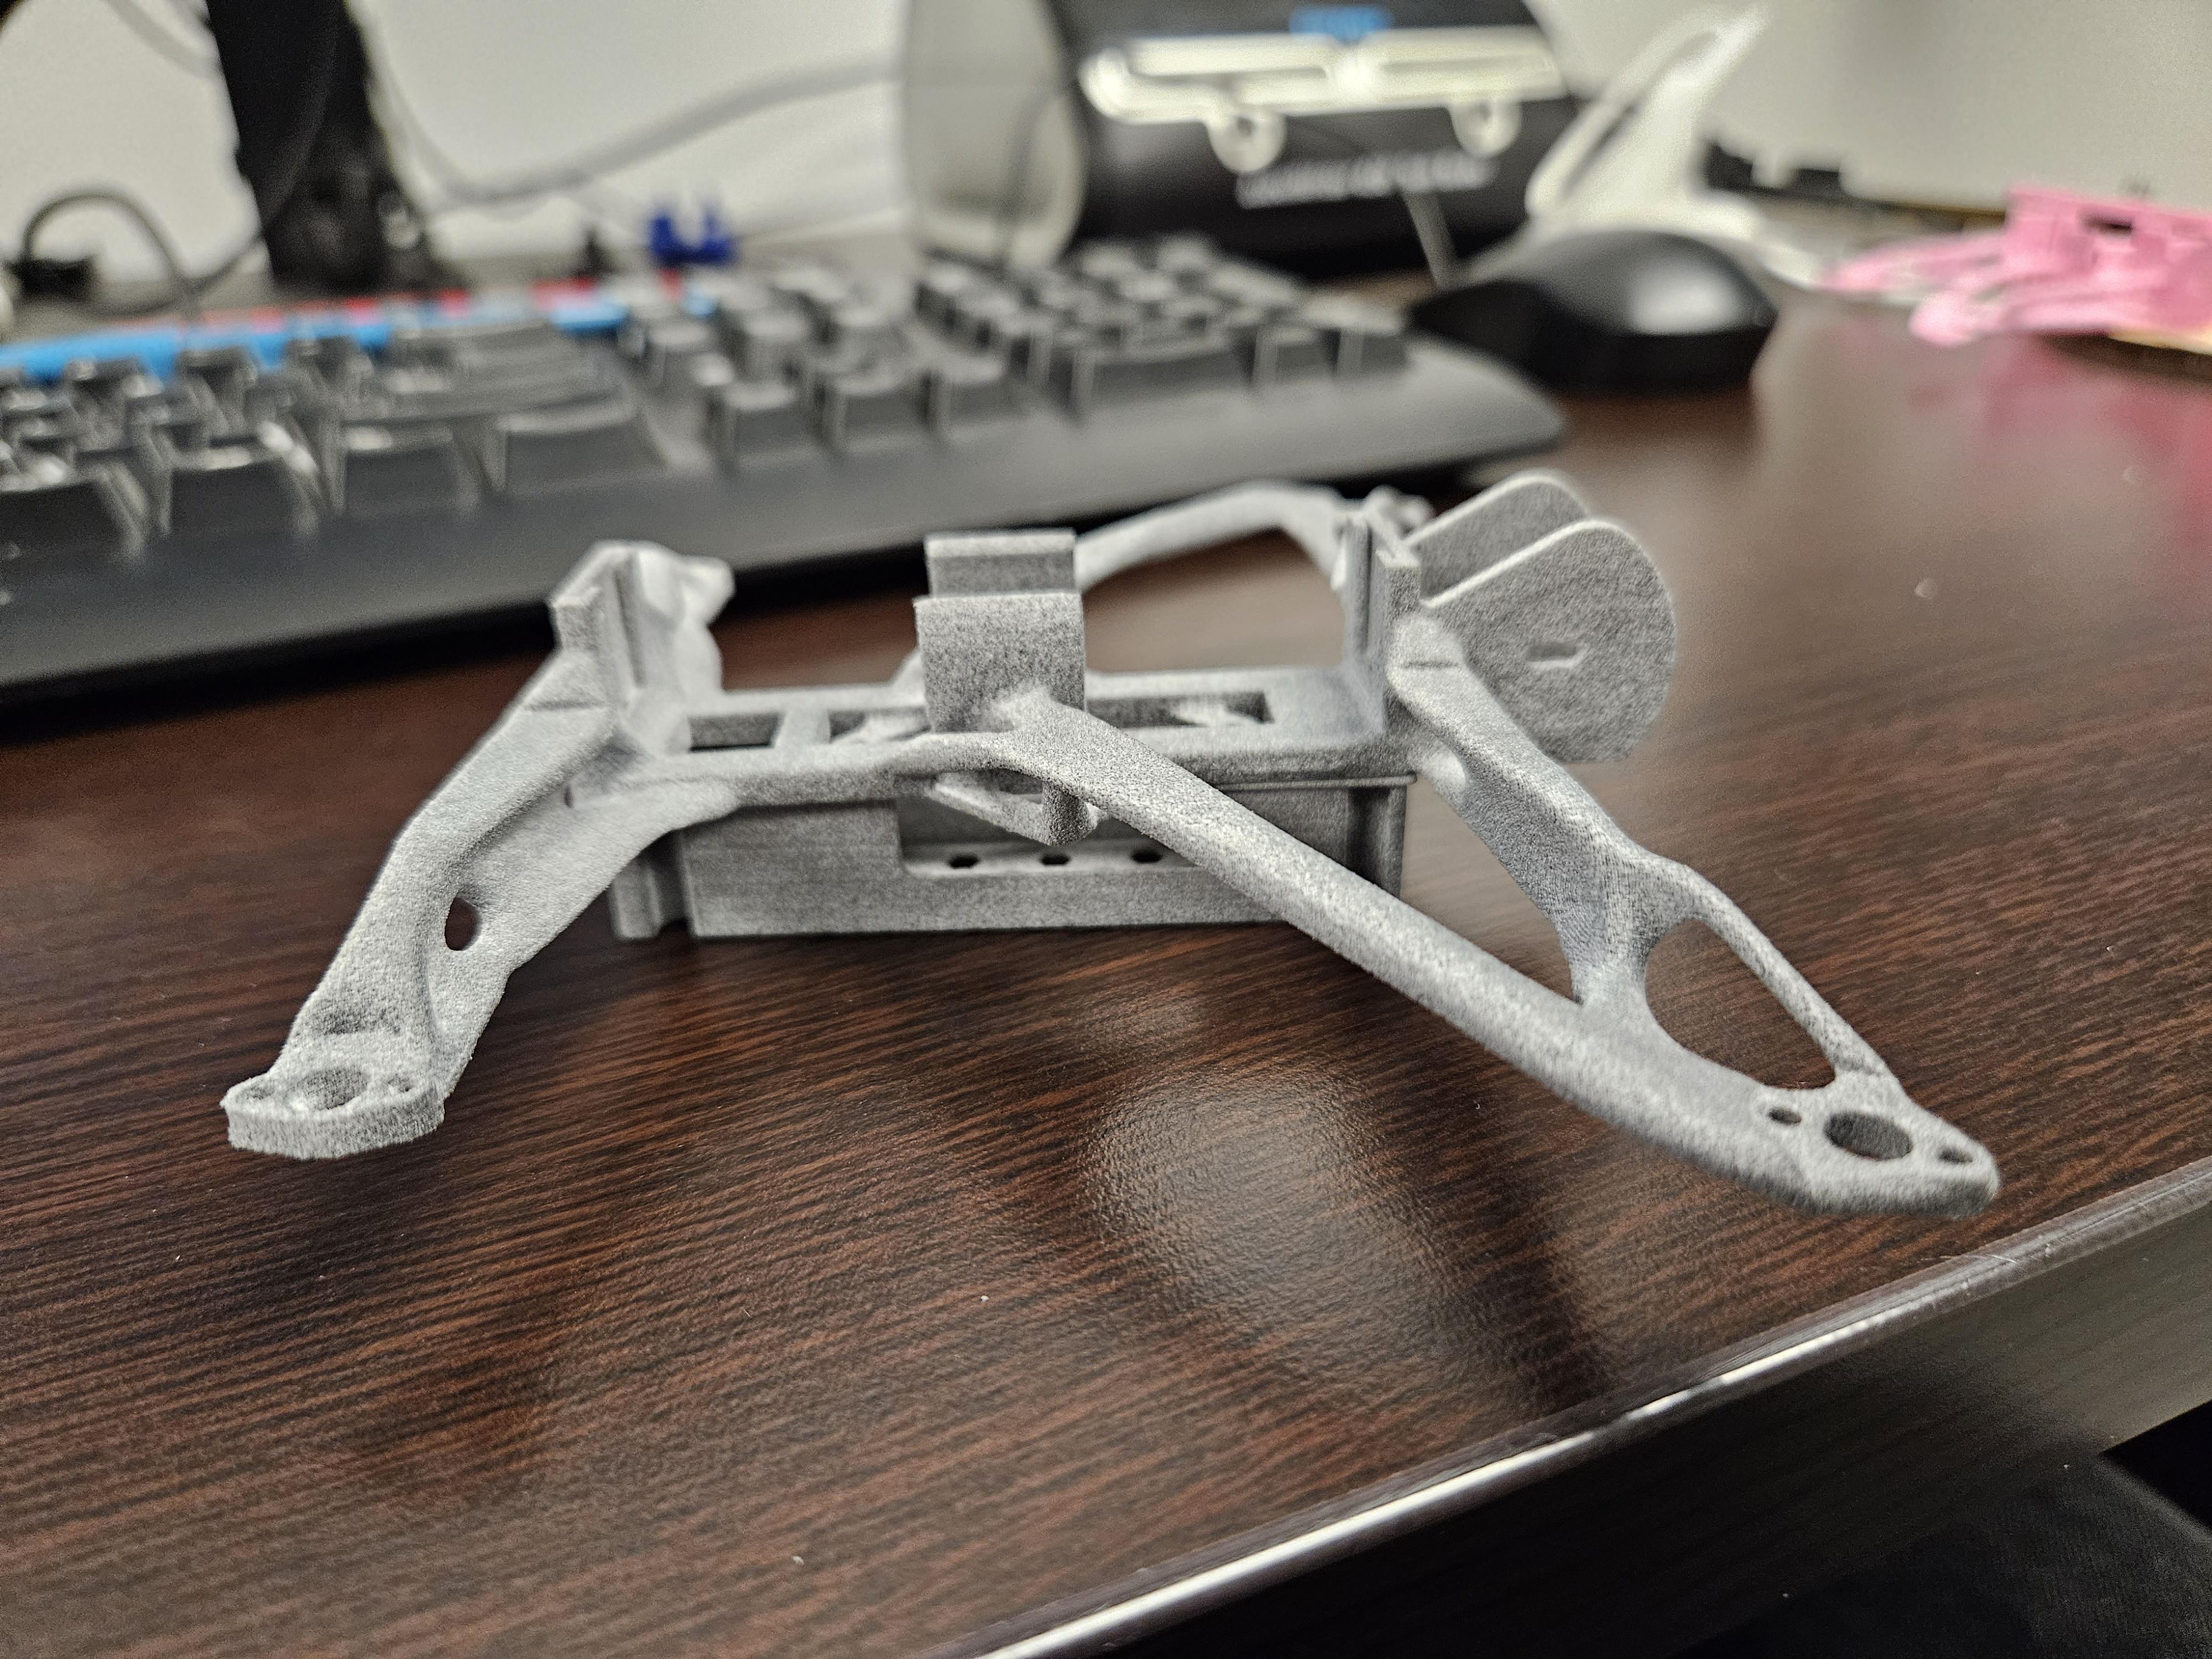
Again, I'm very lucky to have access to this HP Jet-Fusion 5200. It's run by a company out of the same building I'm in, called Tempus 3D.
https://www.tempus3d.com/
This machine is a mutli-jet fusion 3D printer. Which lays down a layer of powder, uses jets to spray a binding agent to bind it to the previous layer, and lays a layer down again (rather over simplified). The huge advantage of this is the unfused powder itself, acts as a support material which falls away after. Allowing for more or less completely limitless geometry, and stacking of multiple jobs in one volume. This is exactly what I want to use to my advantage
I gave them the file without changes, and we got to watch and wait!
After it finishes printing, there is still a bit of post processing. Some powder still sticks to the print and has to be manually removed. They have special equipment that can remove it, and reuse as much powder as possible.
Manual Tweaks

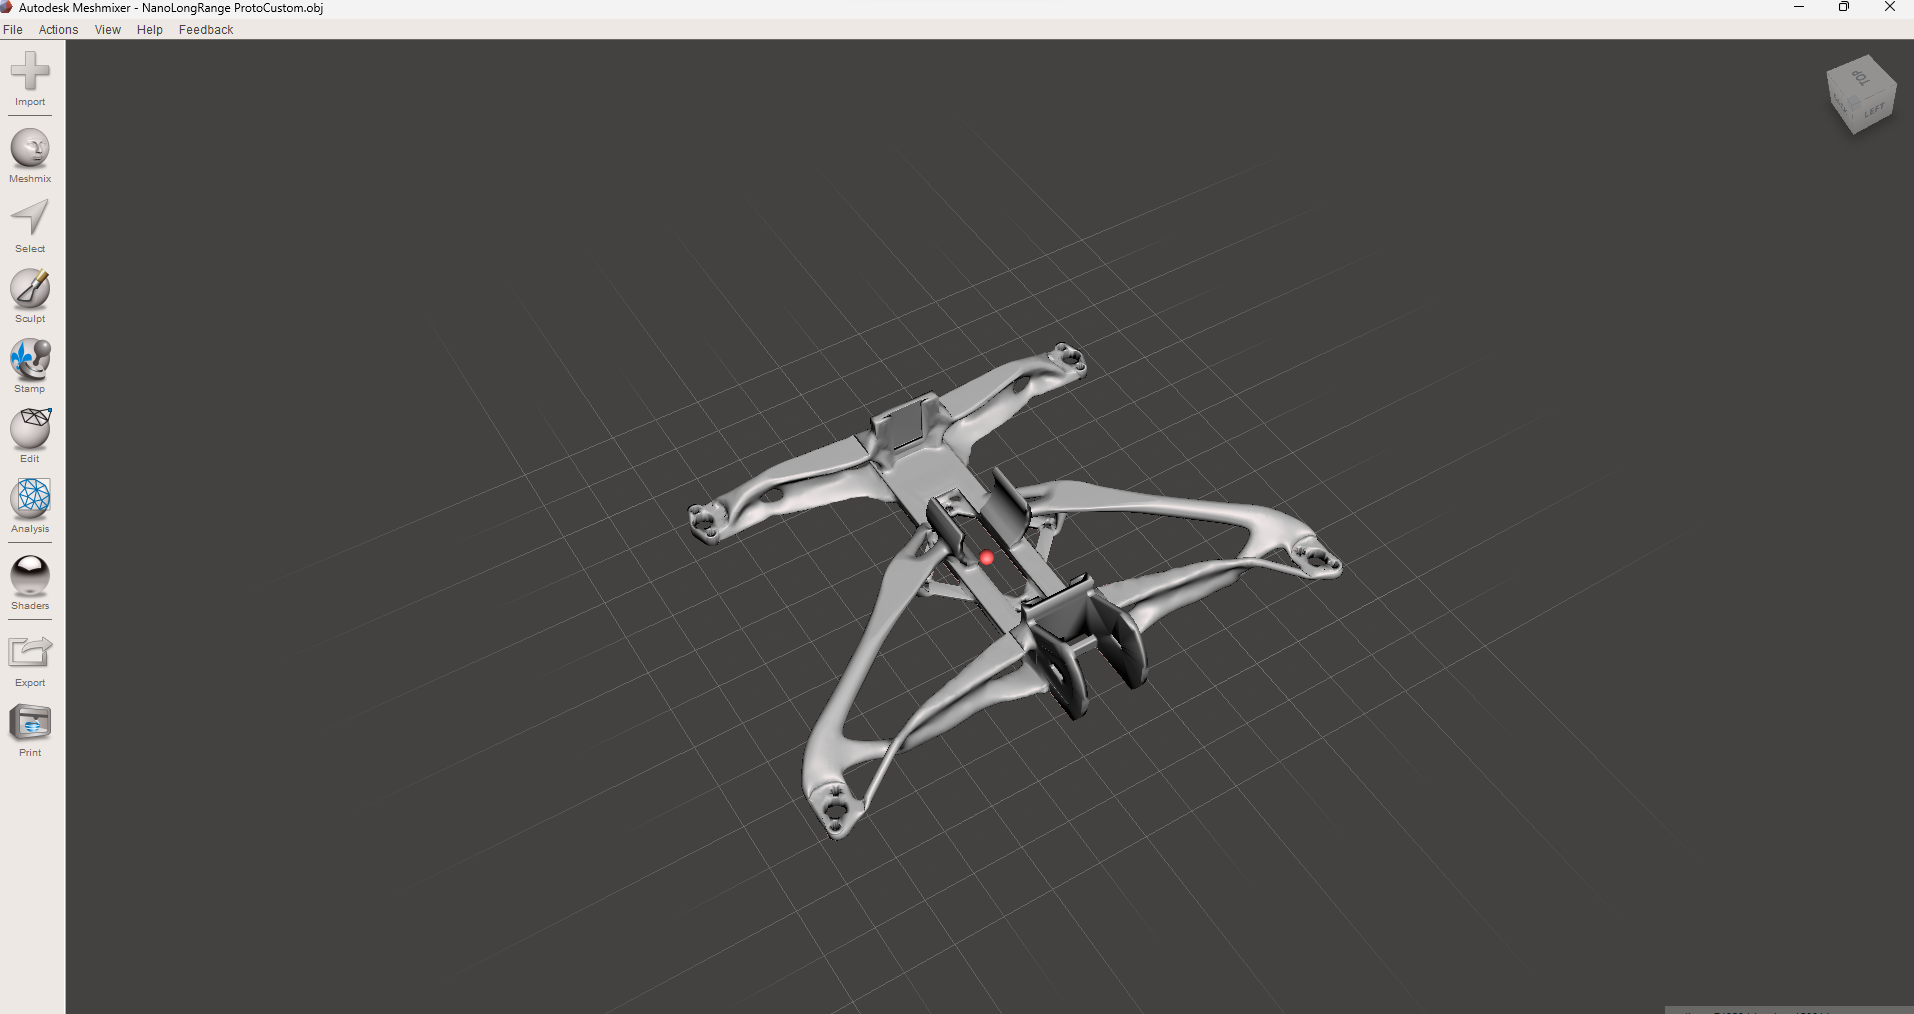
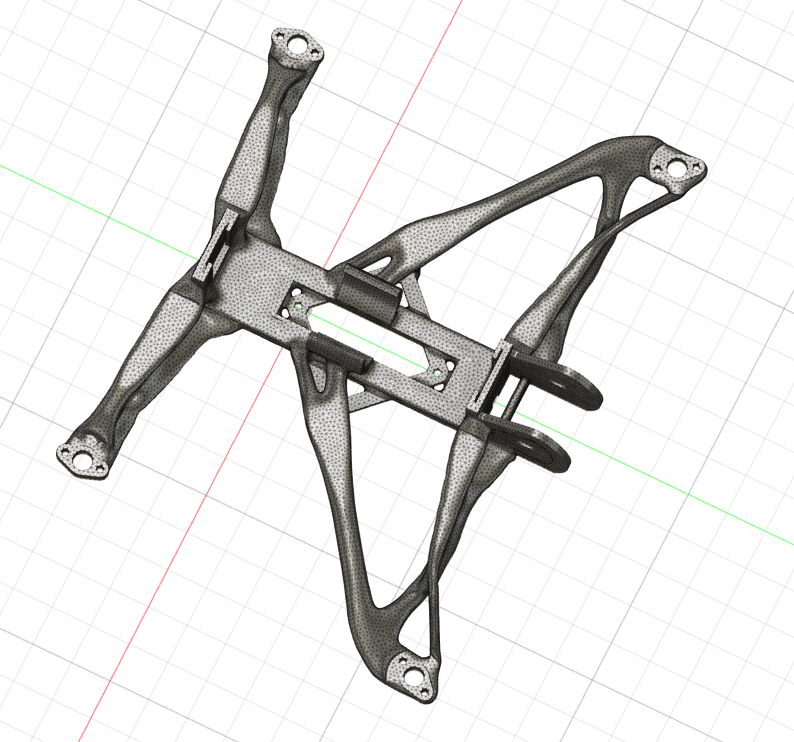
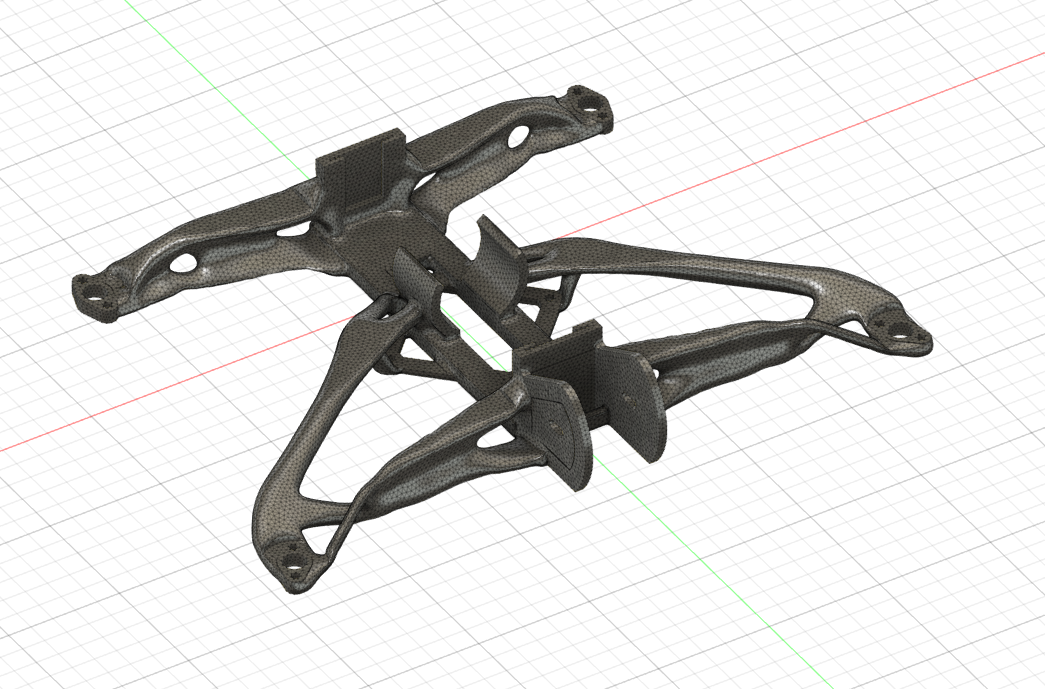
As stated above, no generative design is perfect. I think it would be unreasonable to think so!
Having the first prototype in hand physical is amazing. Very different from looking at it on screen. Plus, physically flexing it I can see exactly where I can strategically loose some weight.
That being said.... more or less everywhere could use some thinning. Even for P12, it's incredibly stiff and seemingly indestructable. Pushing and pulling in the ways I told Fusion the would be, shows how optimized the shape is. But..... it is unnecessarily strong.
Compairing to the modifed Dave_C 3D printed design from hulabaloo. This version is 19 grams, with Dave_C printed in PLA+, at 15% infill is showing 14 grams.
So now is time for some tweaking, and where a little design intent and knowledge might come in handy
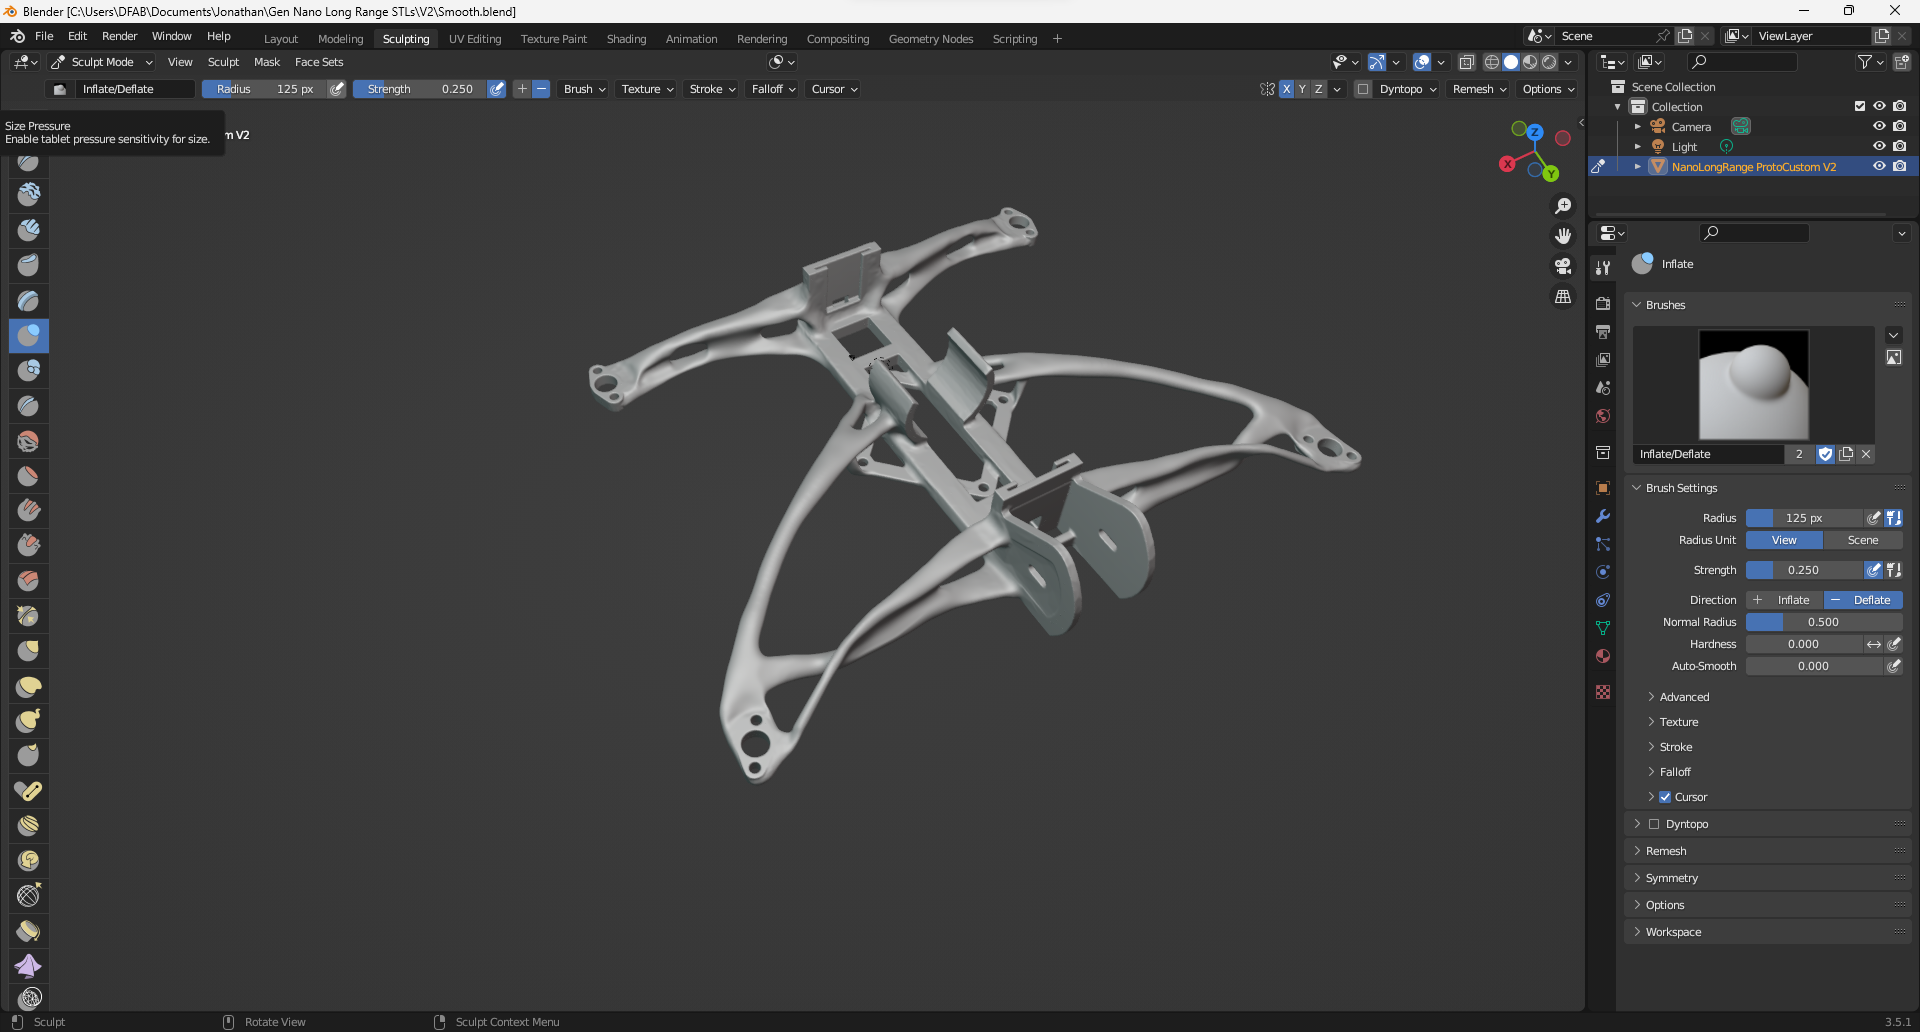
The very first thing I noticed (other than the Safety Factor thing and weight) was how wide the arms end up being when viewed from the top. This has a pretty big downside. More material in the way of the airflow from the propellers, the less useful work the propellers get to do.
So knowing absolutely nothing about mesh editing, I took to Blender. This is the first time I've ever used Blender, but I was excited to see how easy it was to use the molding tools. I started by doing a "Remesh" to give me more polygons/"resolution" to modify. I simply pushed and pulled to what I think looked good, while respecting the original generative design. I wanted to make the vertical cross section of the arms narrower, and this would also bring the weight down, while (hopefully) maintaining enough strength. (An FEA could always be run if you so choose) You can see the white original, and the grey edited!
(I also noticed I for got the holes for battery wires in the bottom tray)
Printing Time V2!
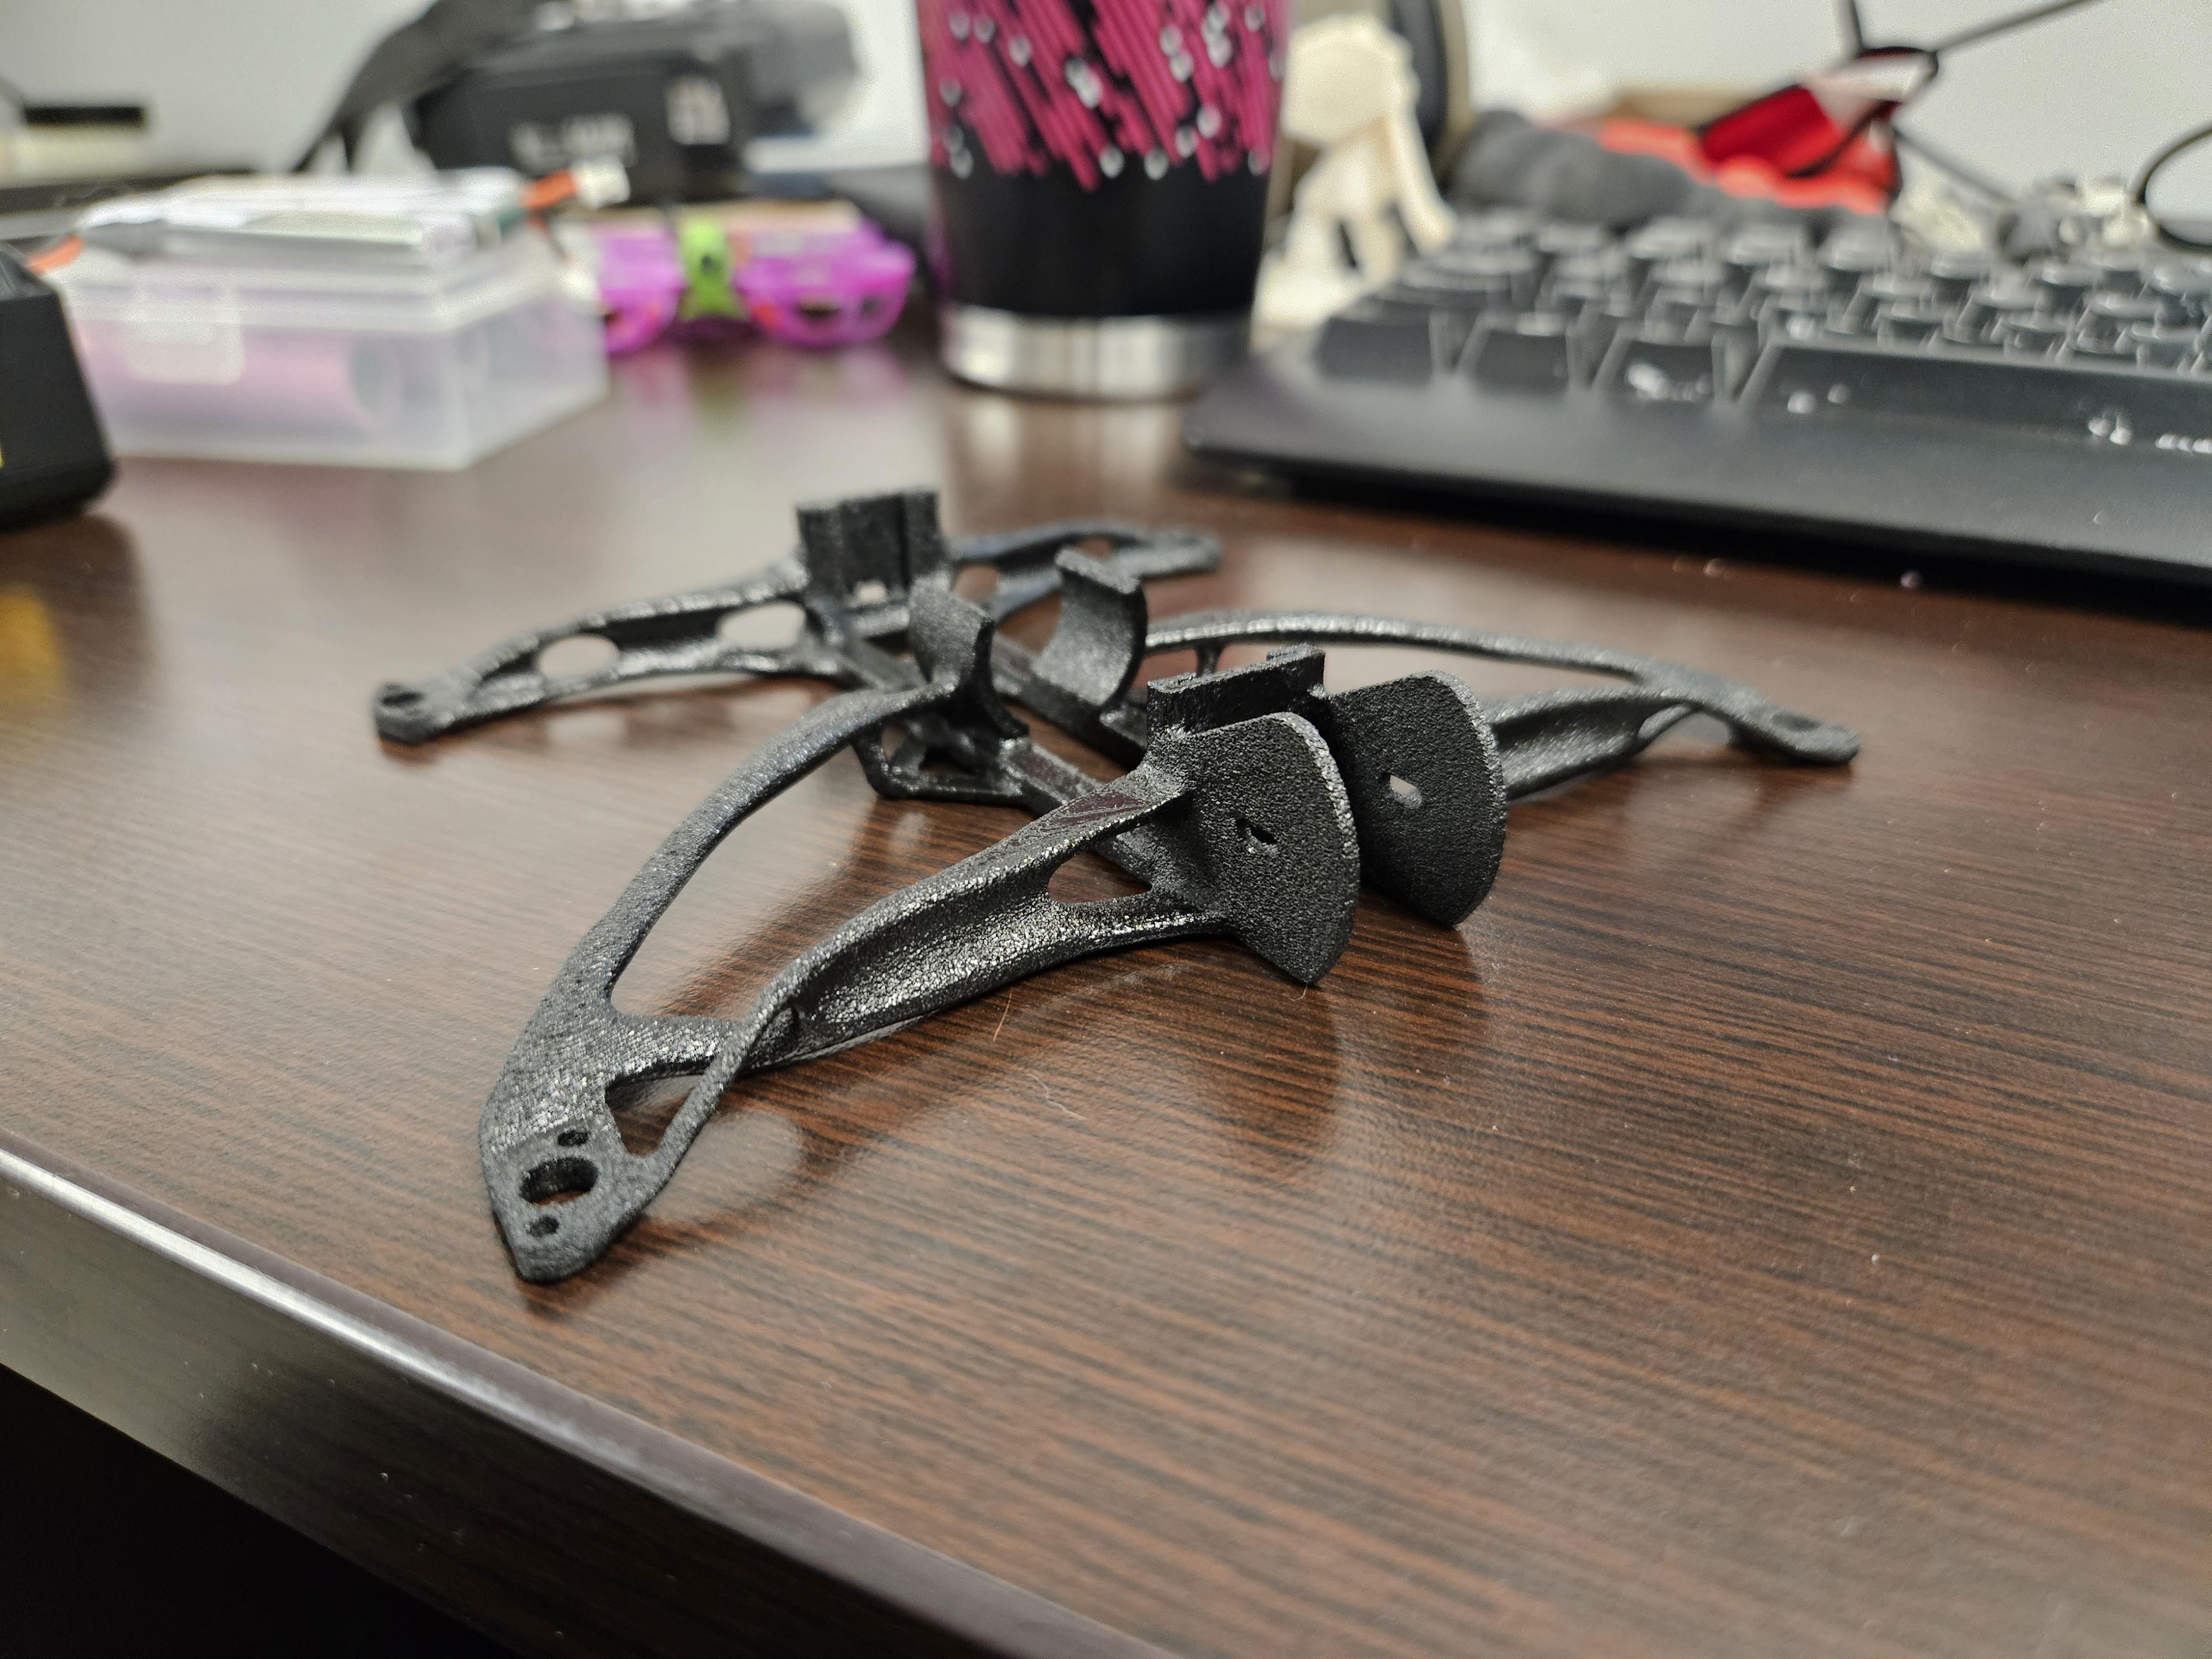
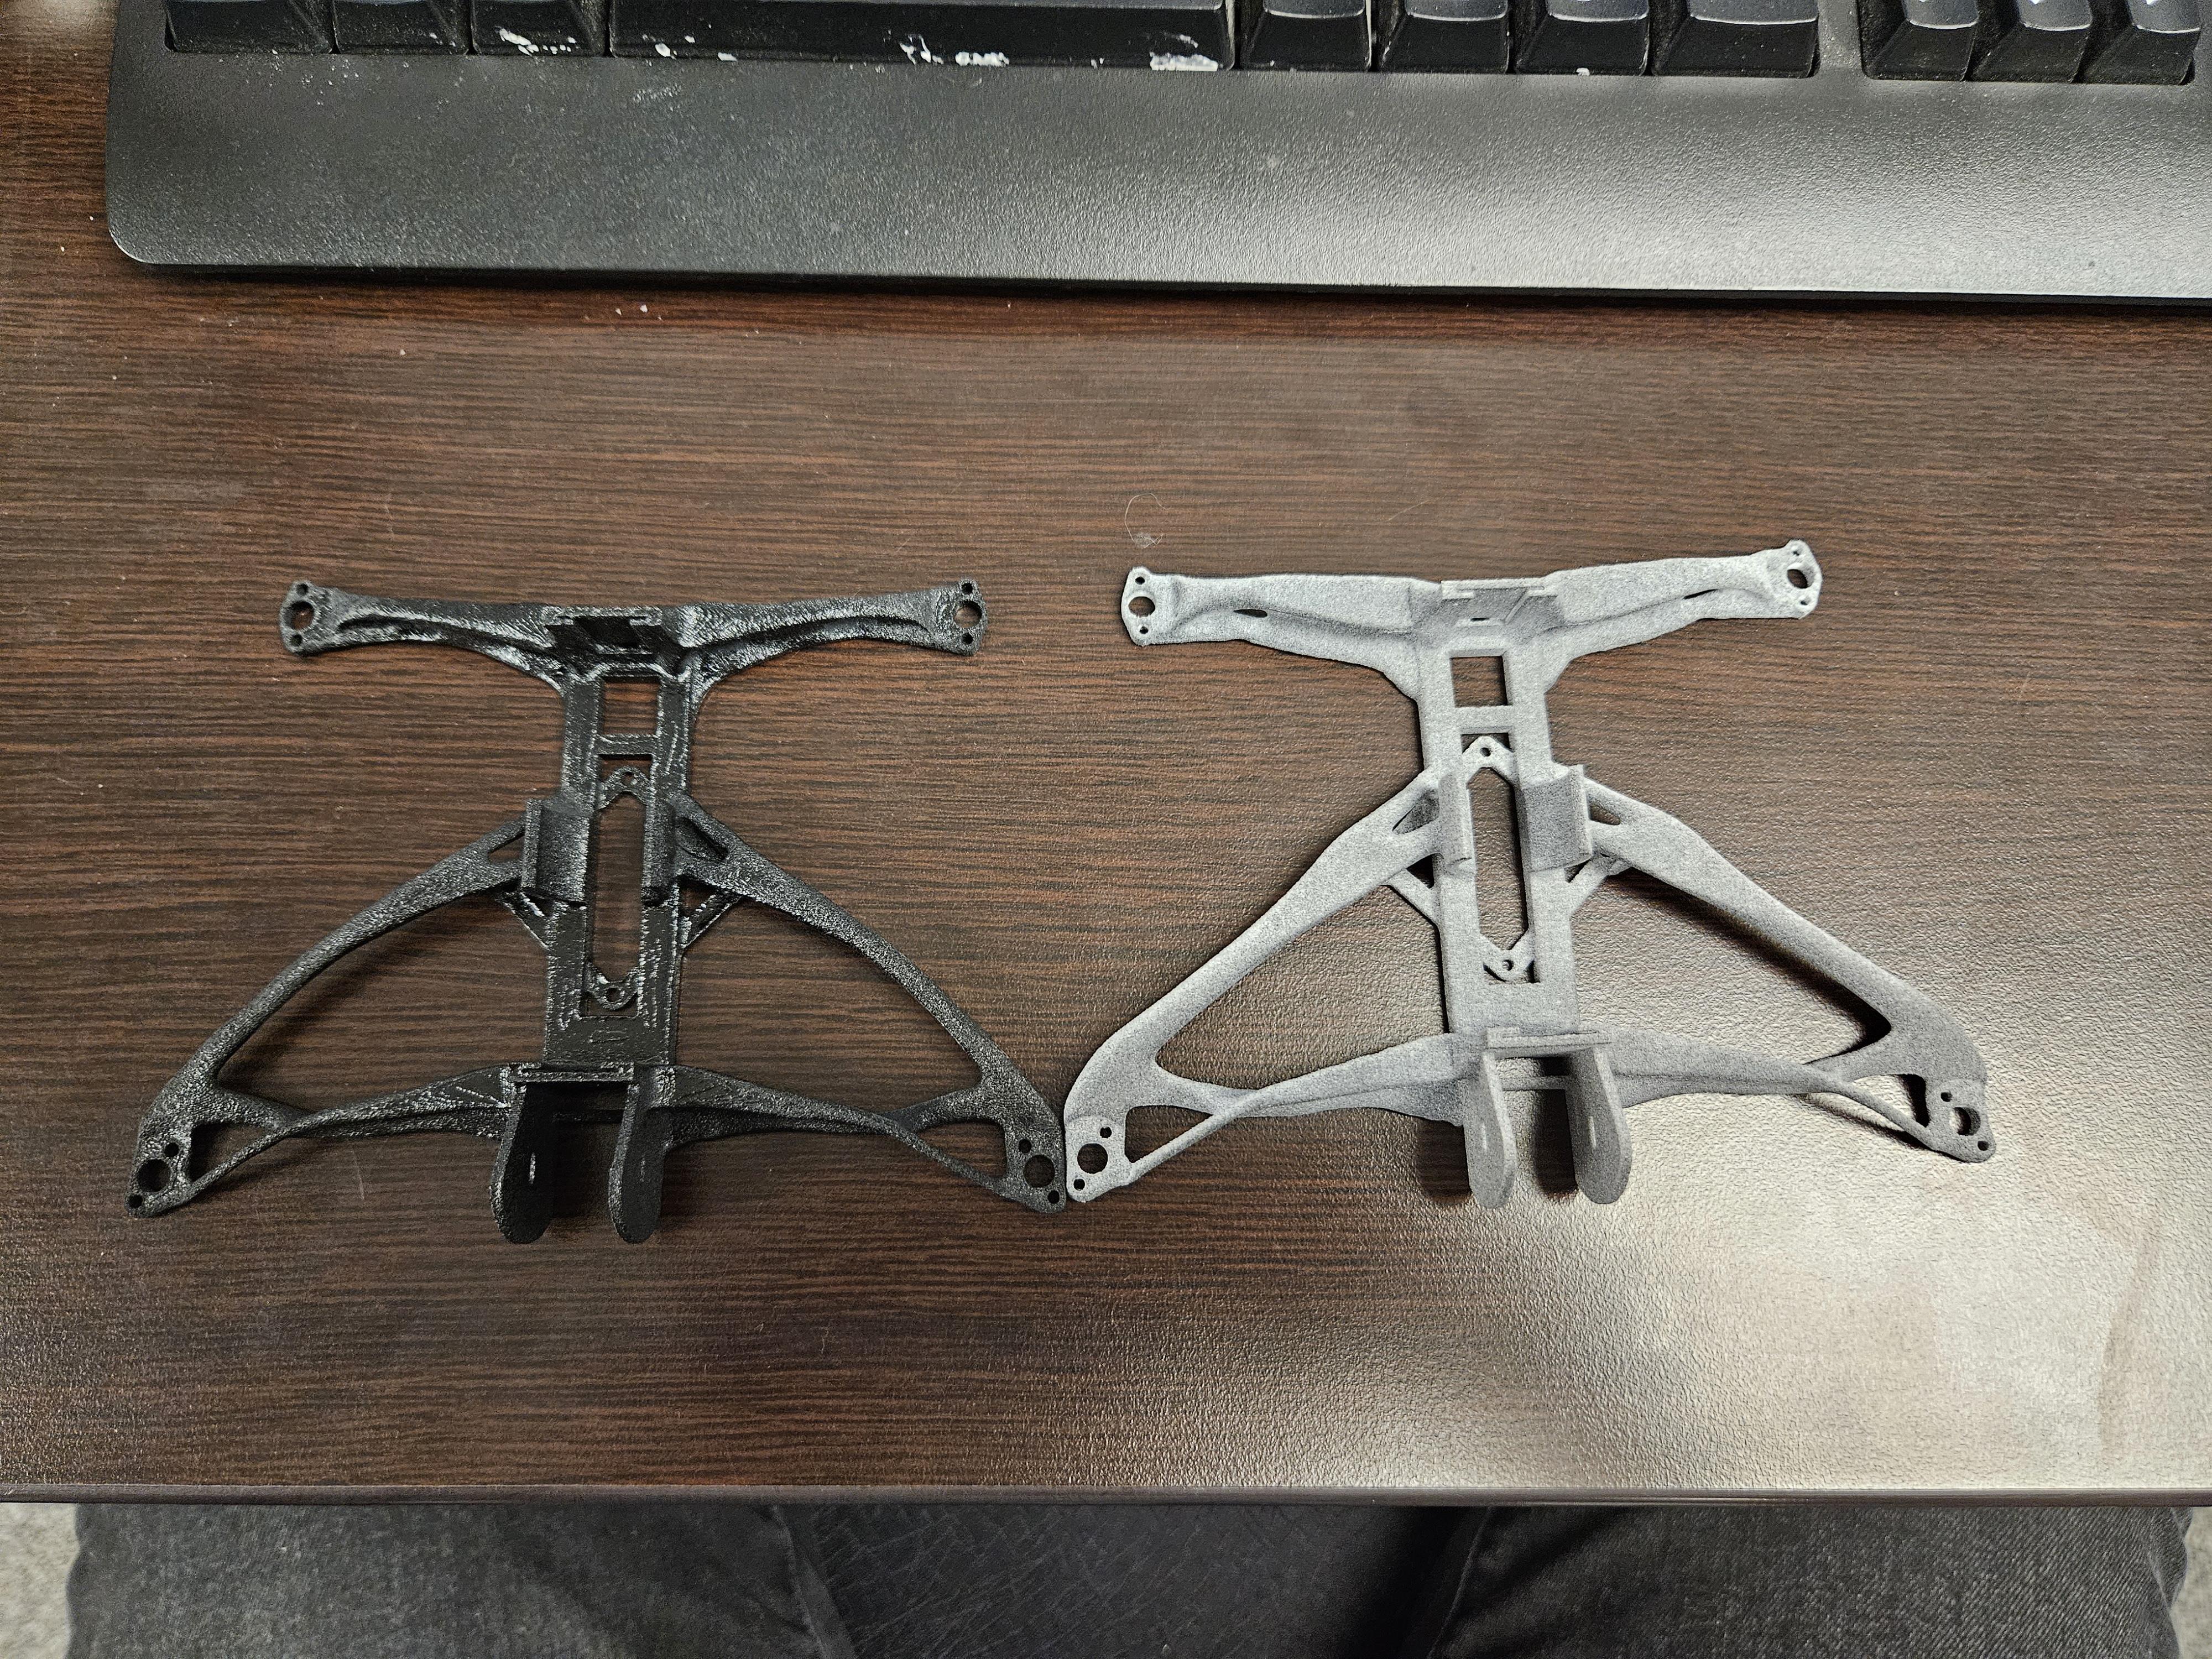
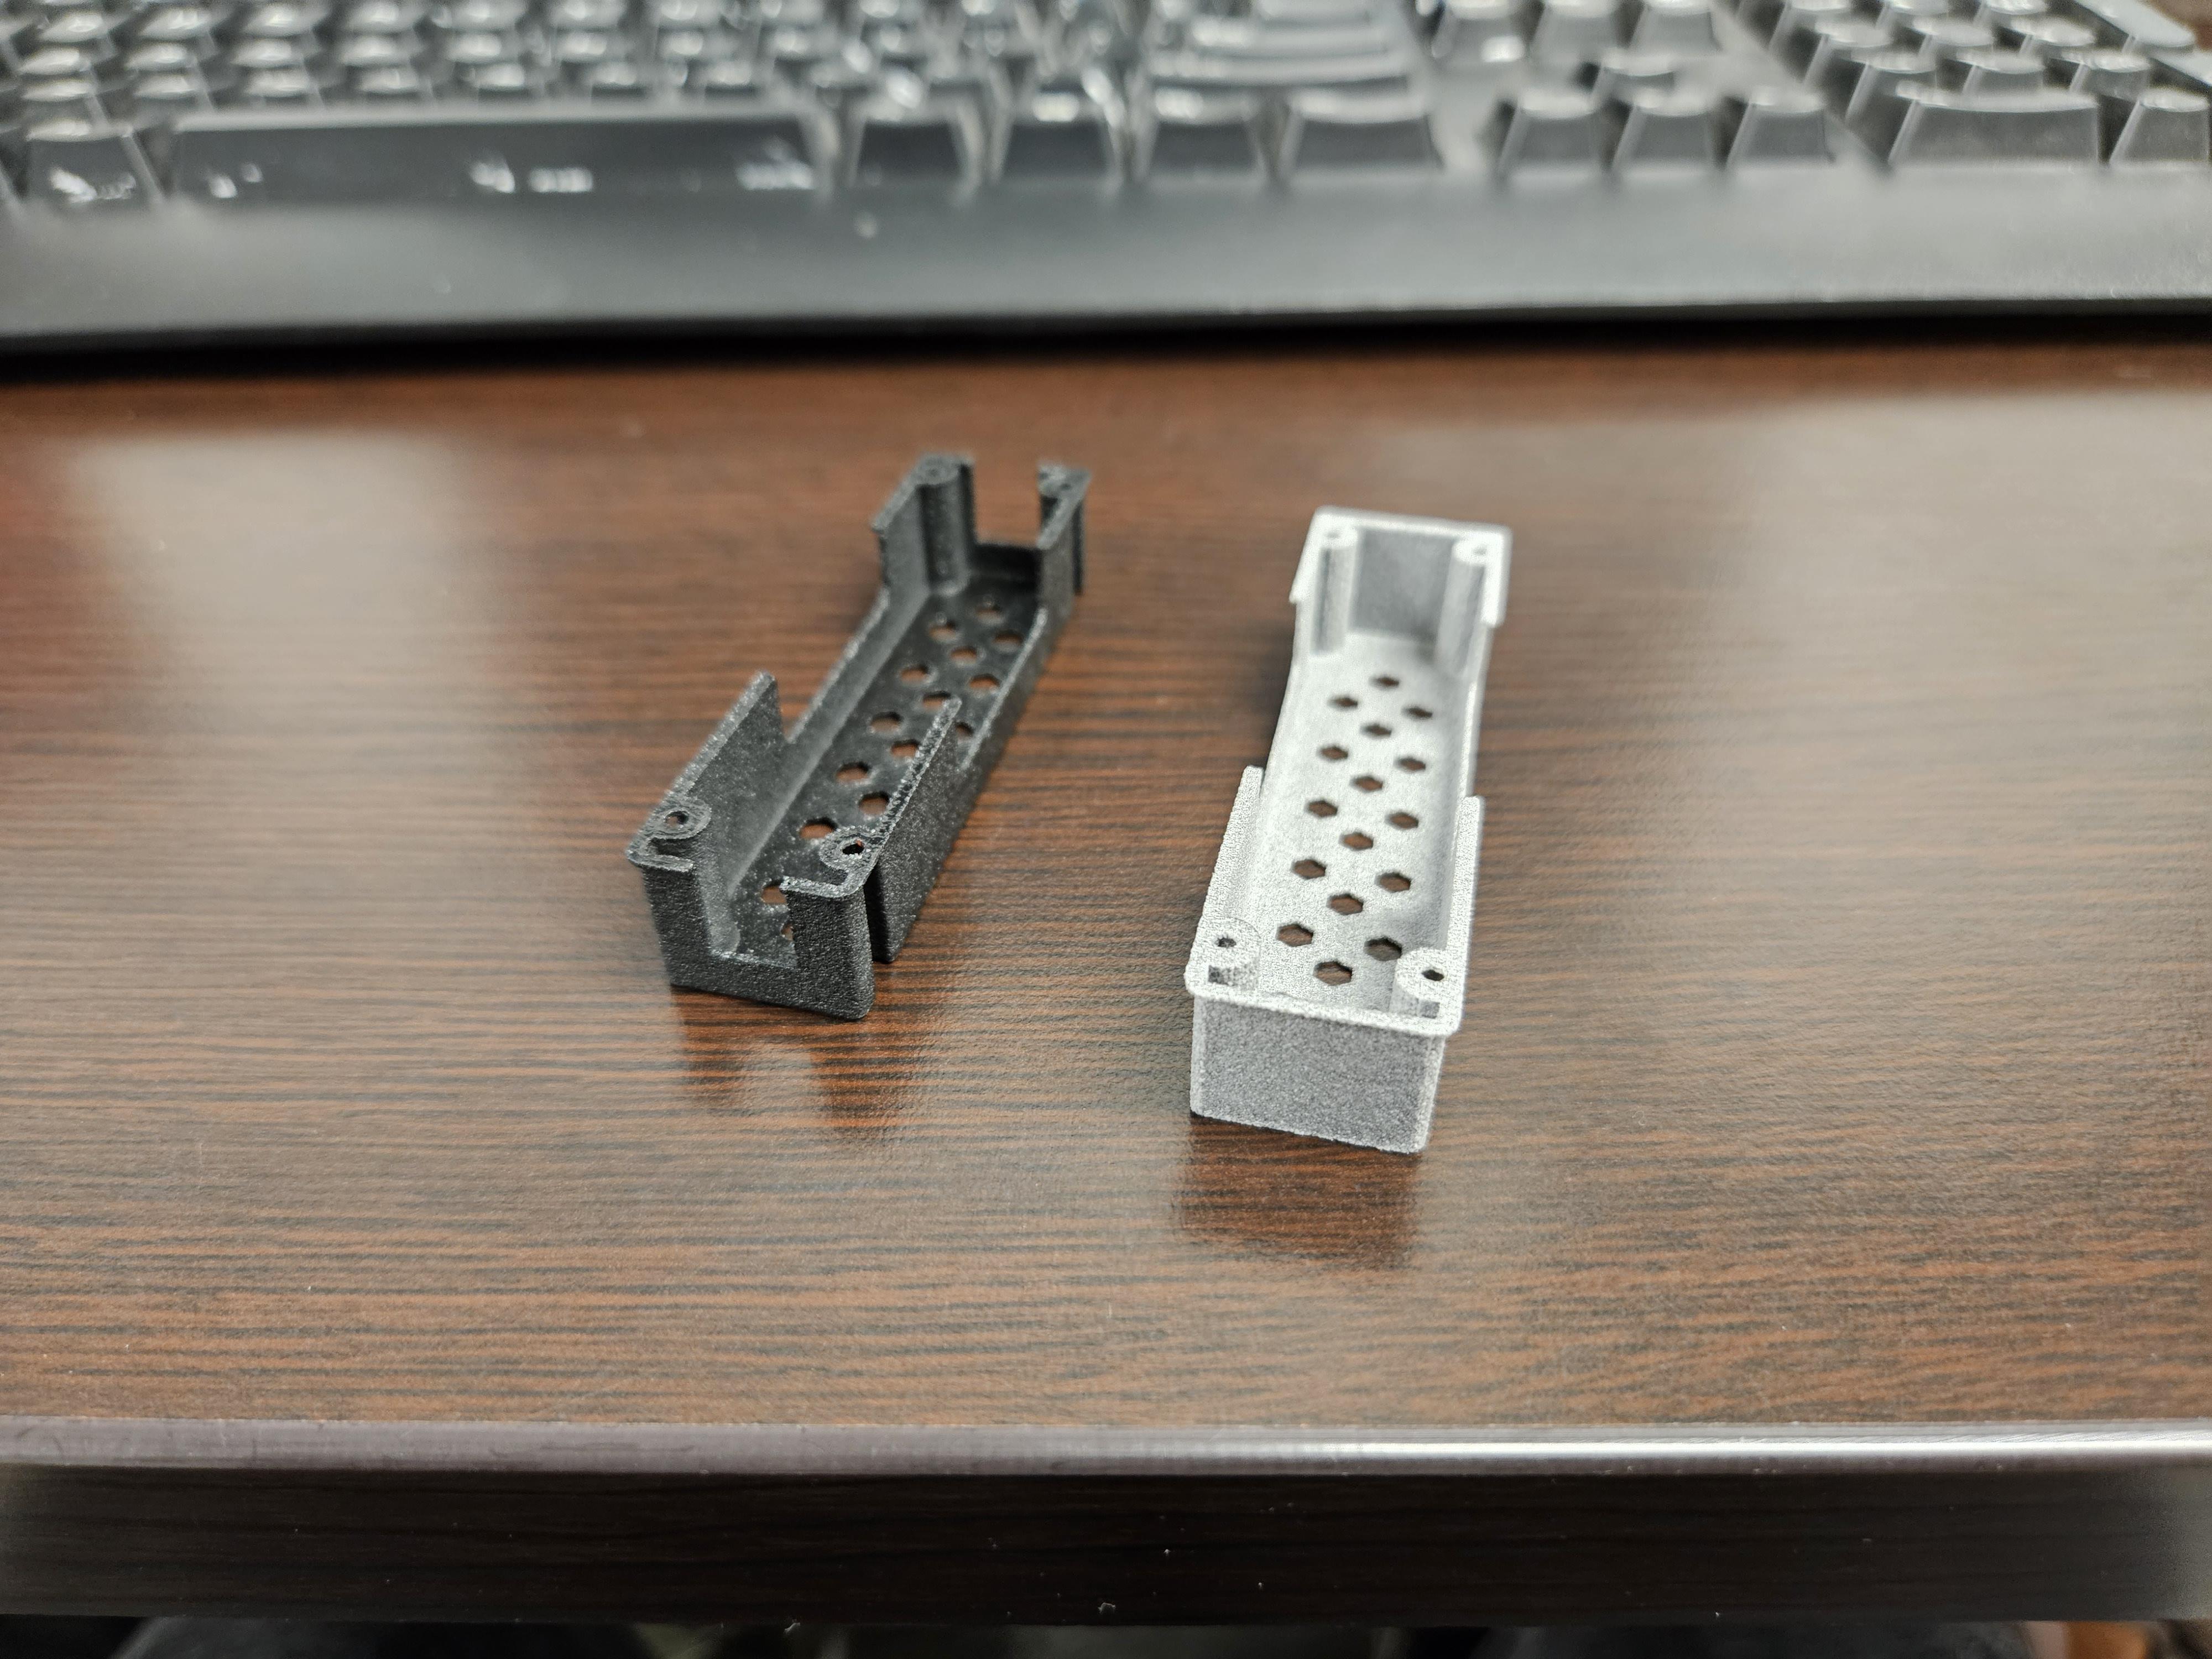
After making a bunch of tweaks, we are ready to print V2!
Here it is!
2 things I noticed with V2.
1: The front arms are MUCH thinner, but yet they still feel completely indestructible. This really shows the shape optimization that Fusion managed to do. It's extremely impressive
2: The rear arm have MUCH more flex in the front-to-back direction. Thankfully this actually shouldn't be a problem at all given the majority of the loading that these arms will see would be in the z-axis. Thankfully in the z-axis, they seem to be just as stiff as before, again showing that awesome shape optimization. The new flex in the x/y direction is probably from me trying to reduce the top cross section.
What are the results of the V2?
Frame Vs Frame Vs Frame Vs Frame
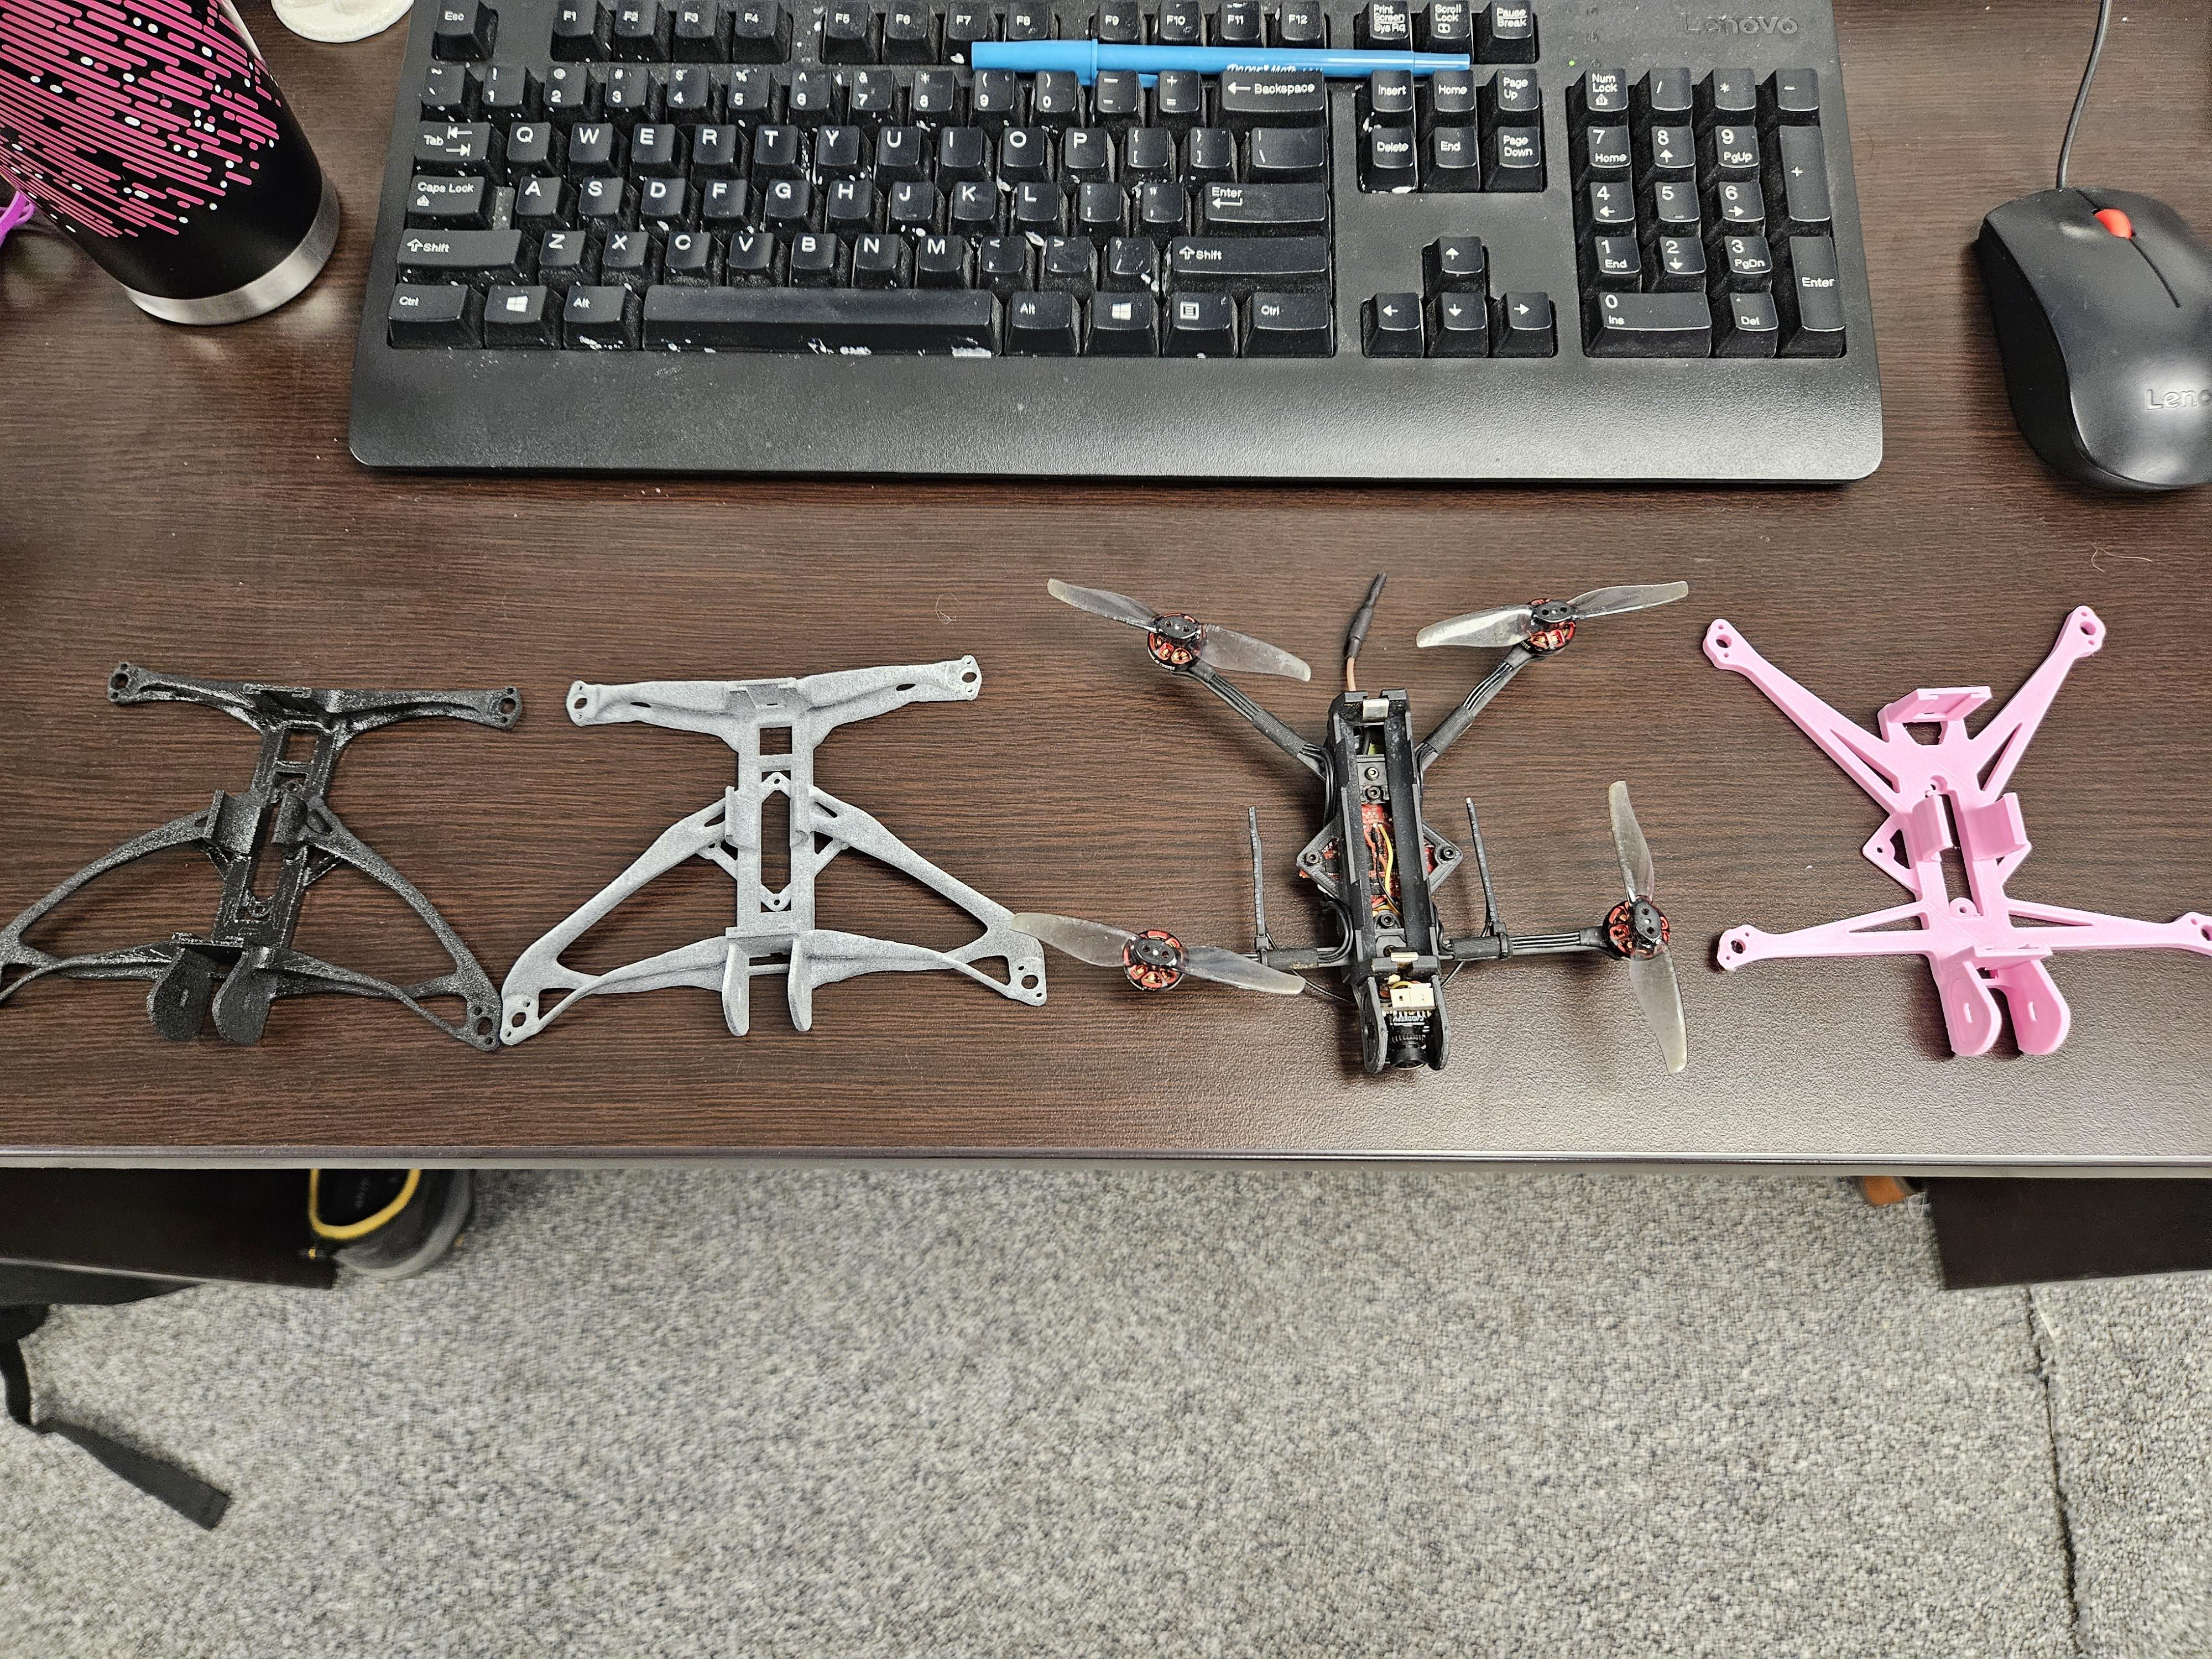
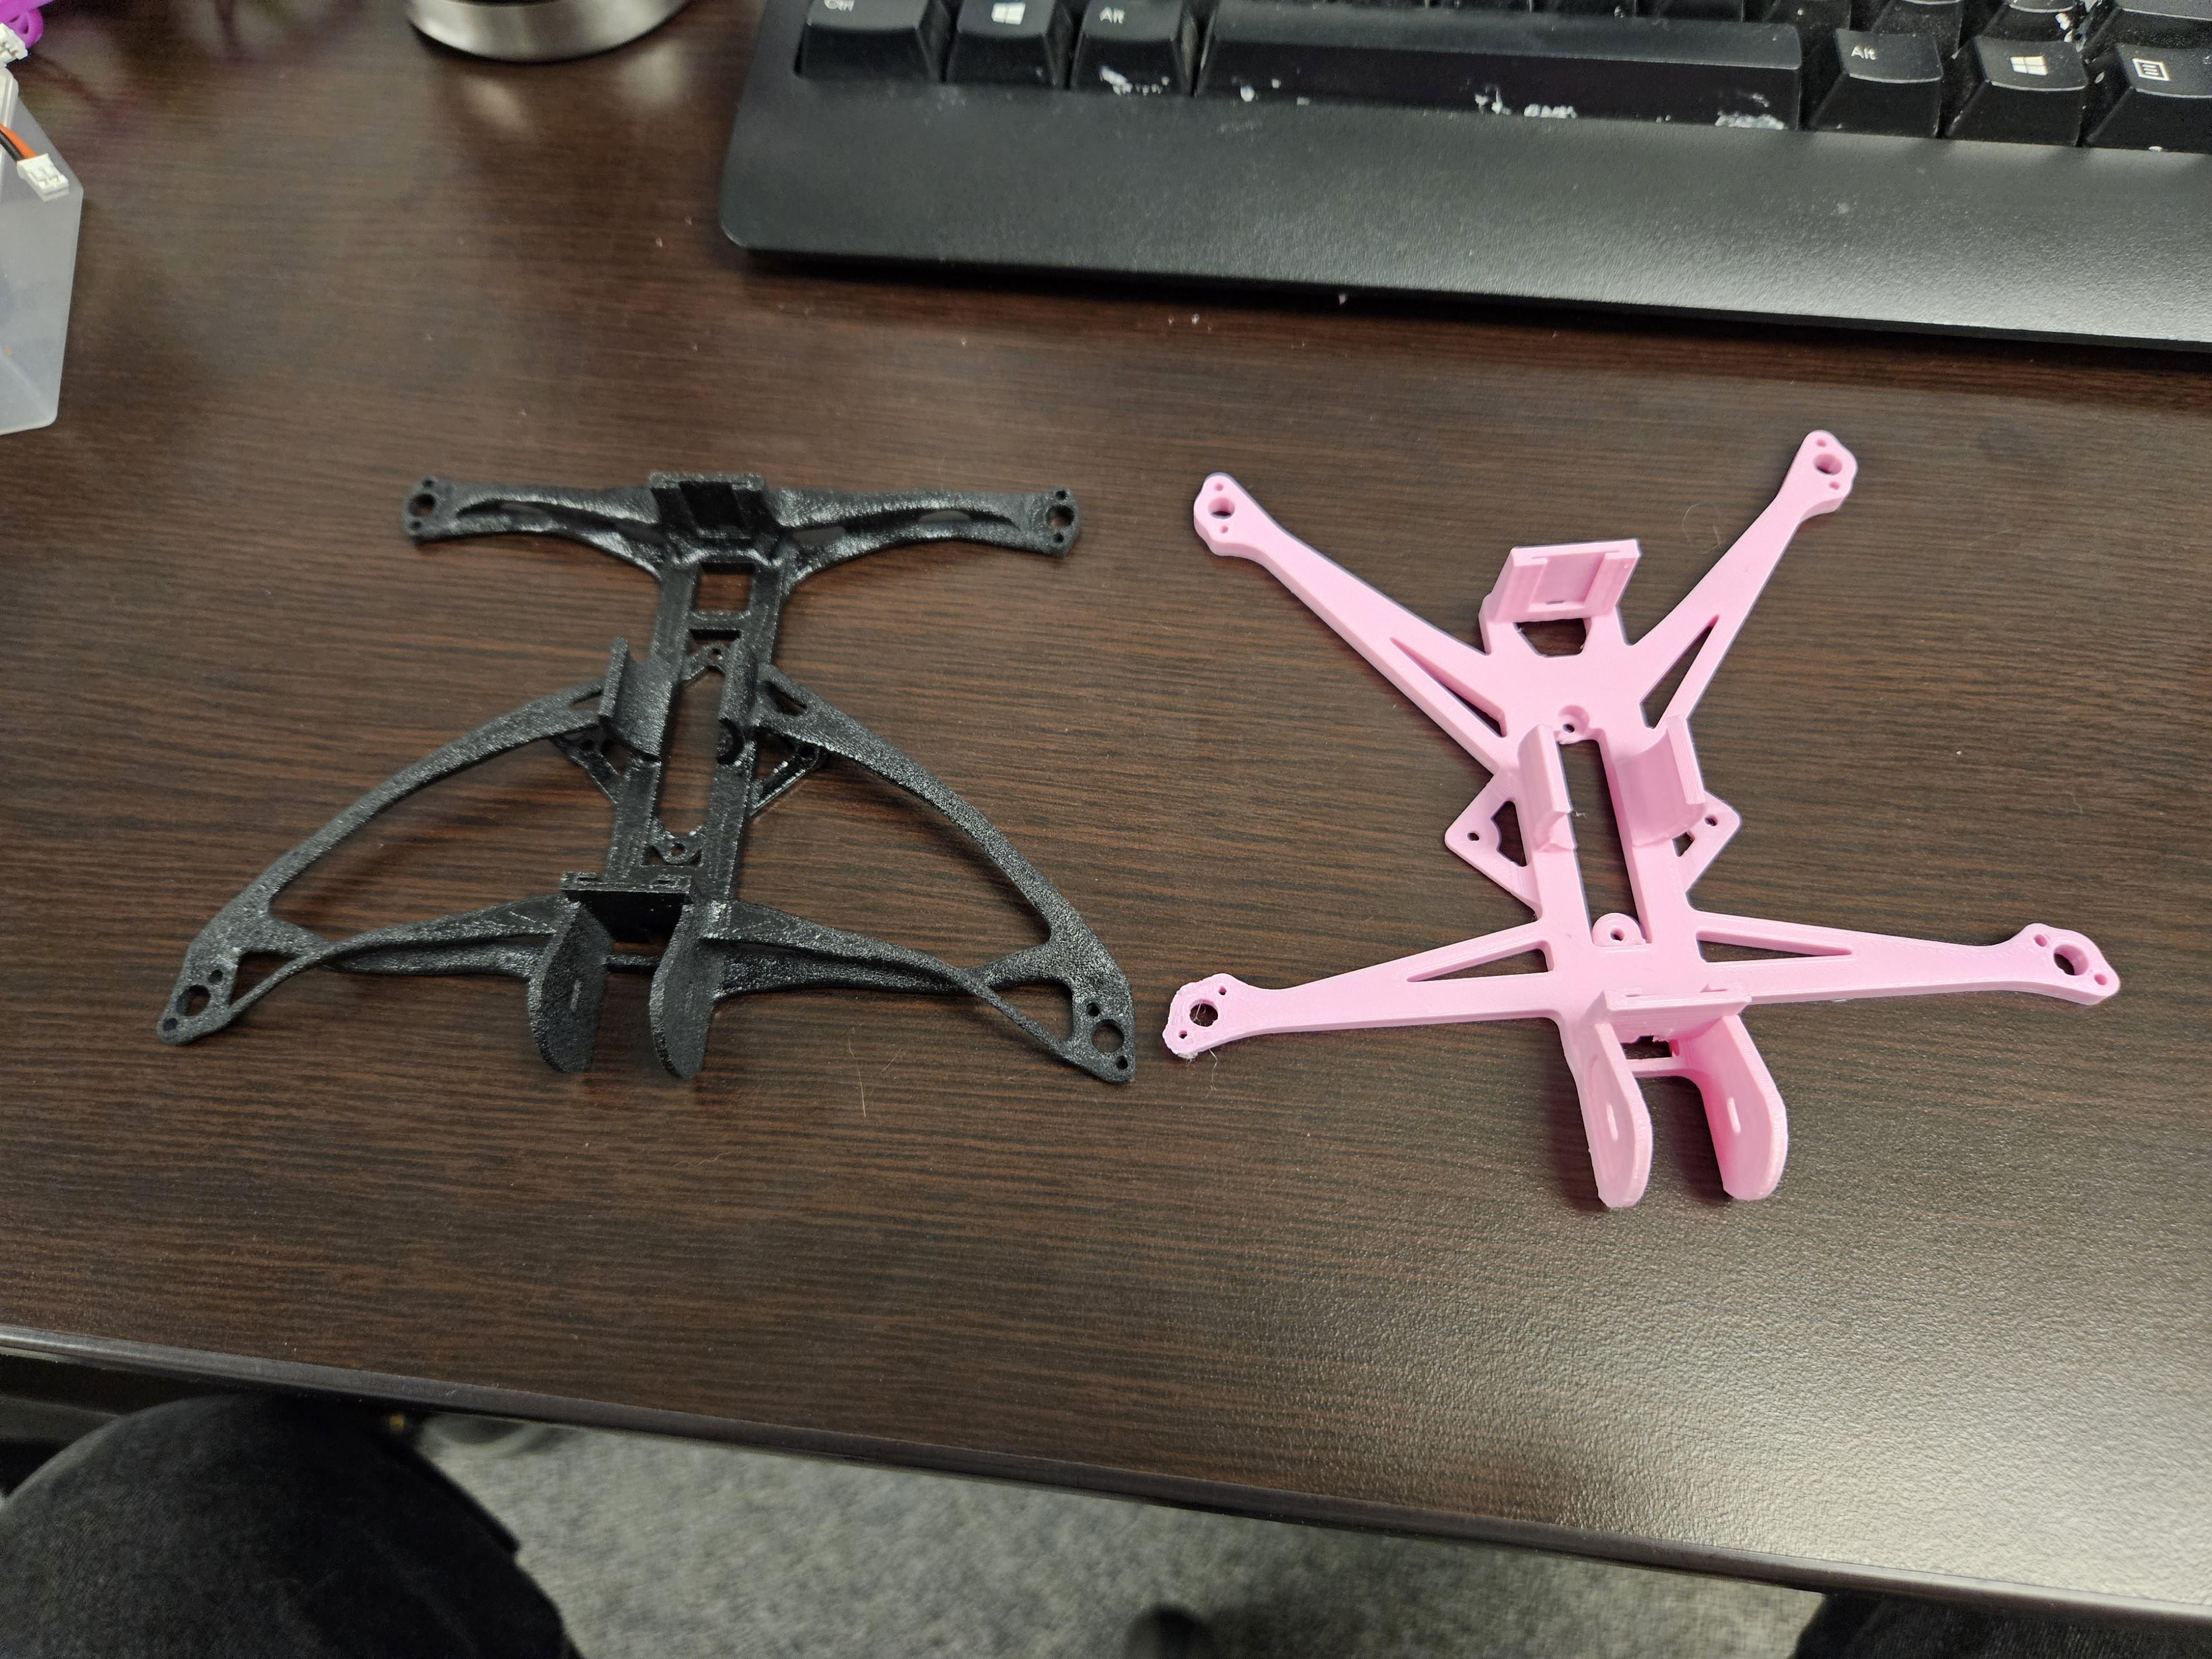
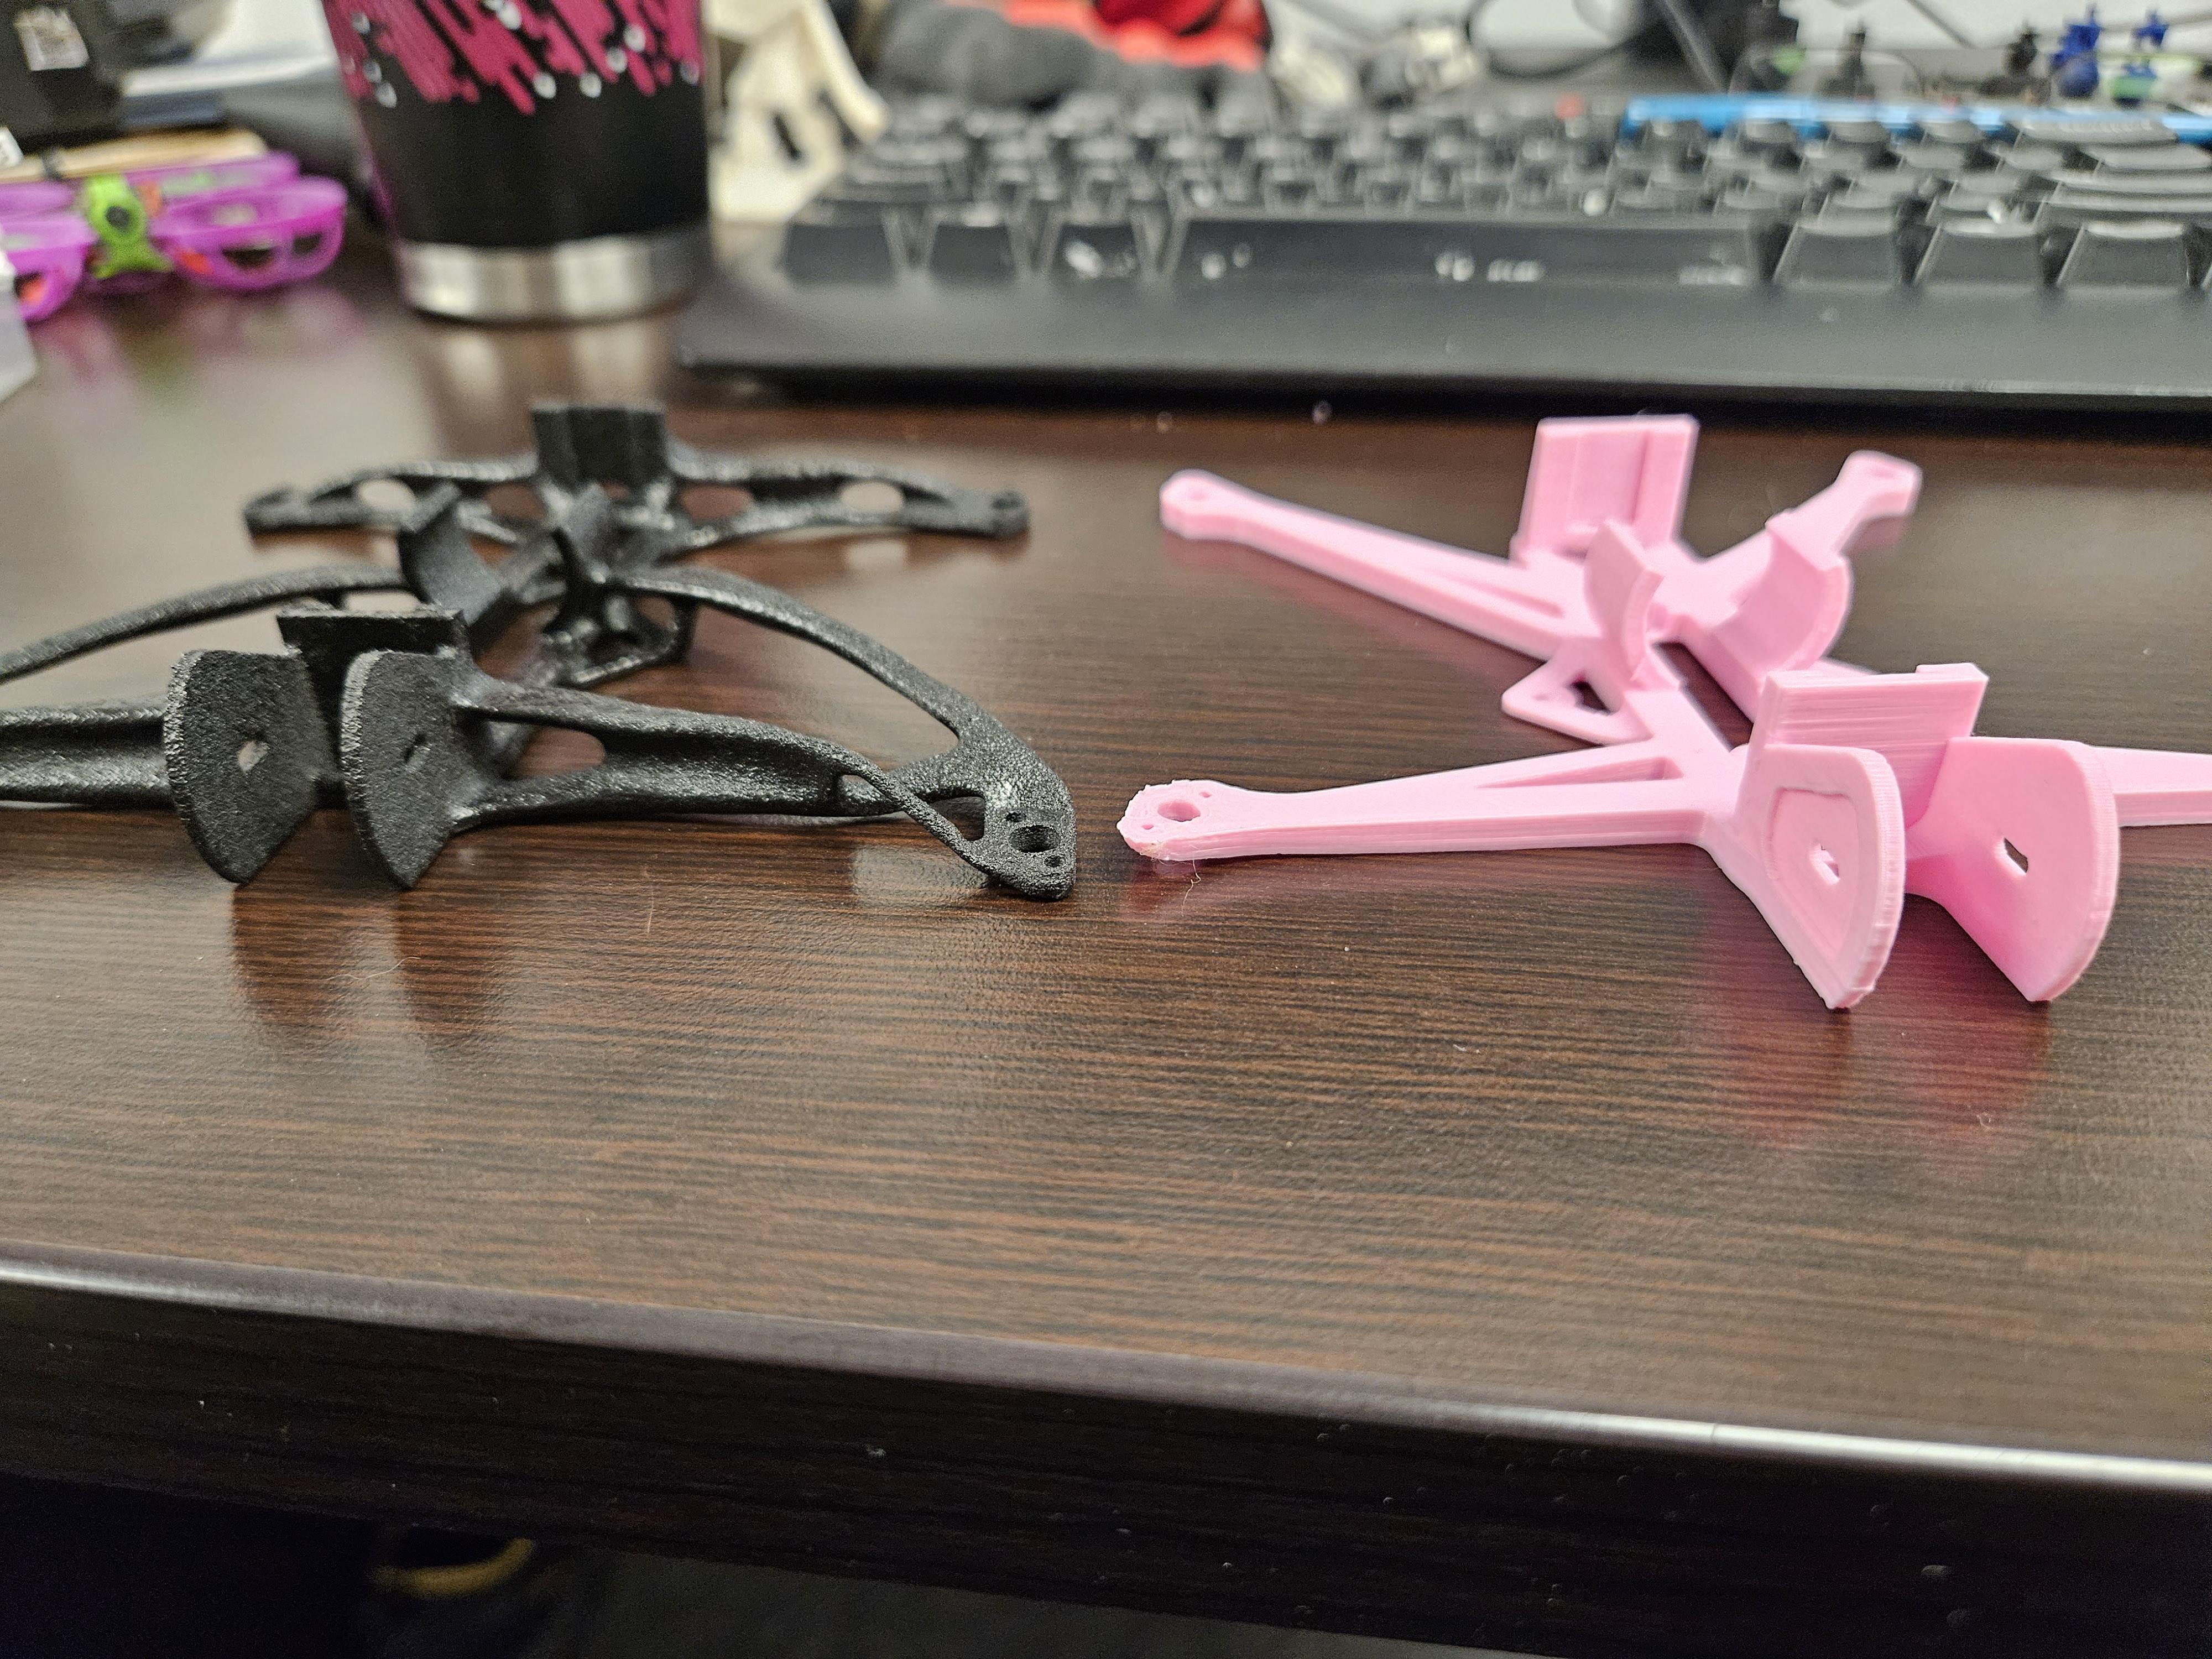
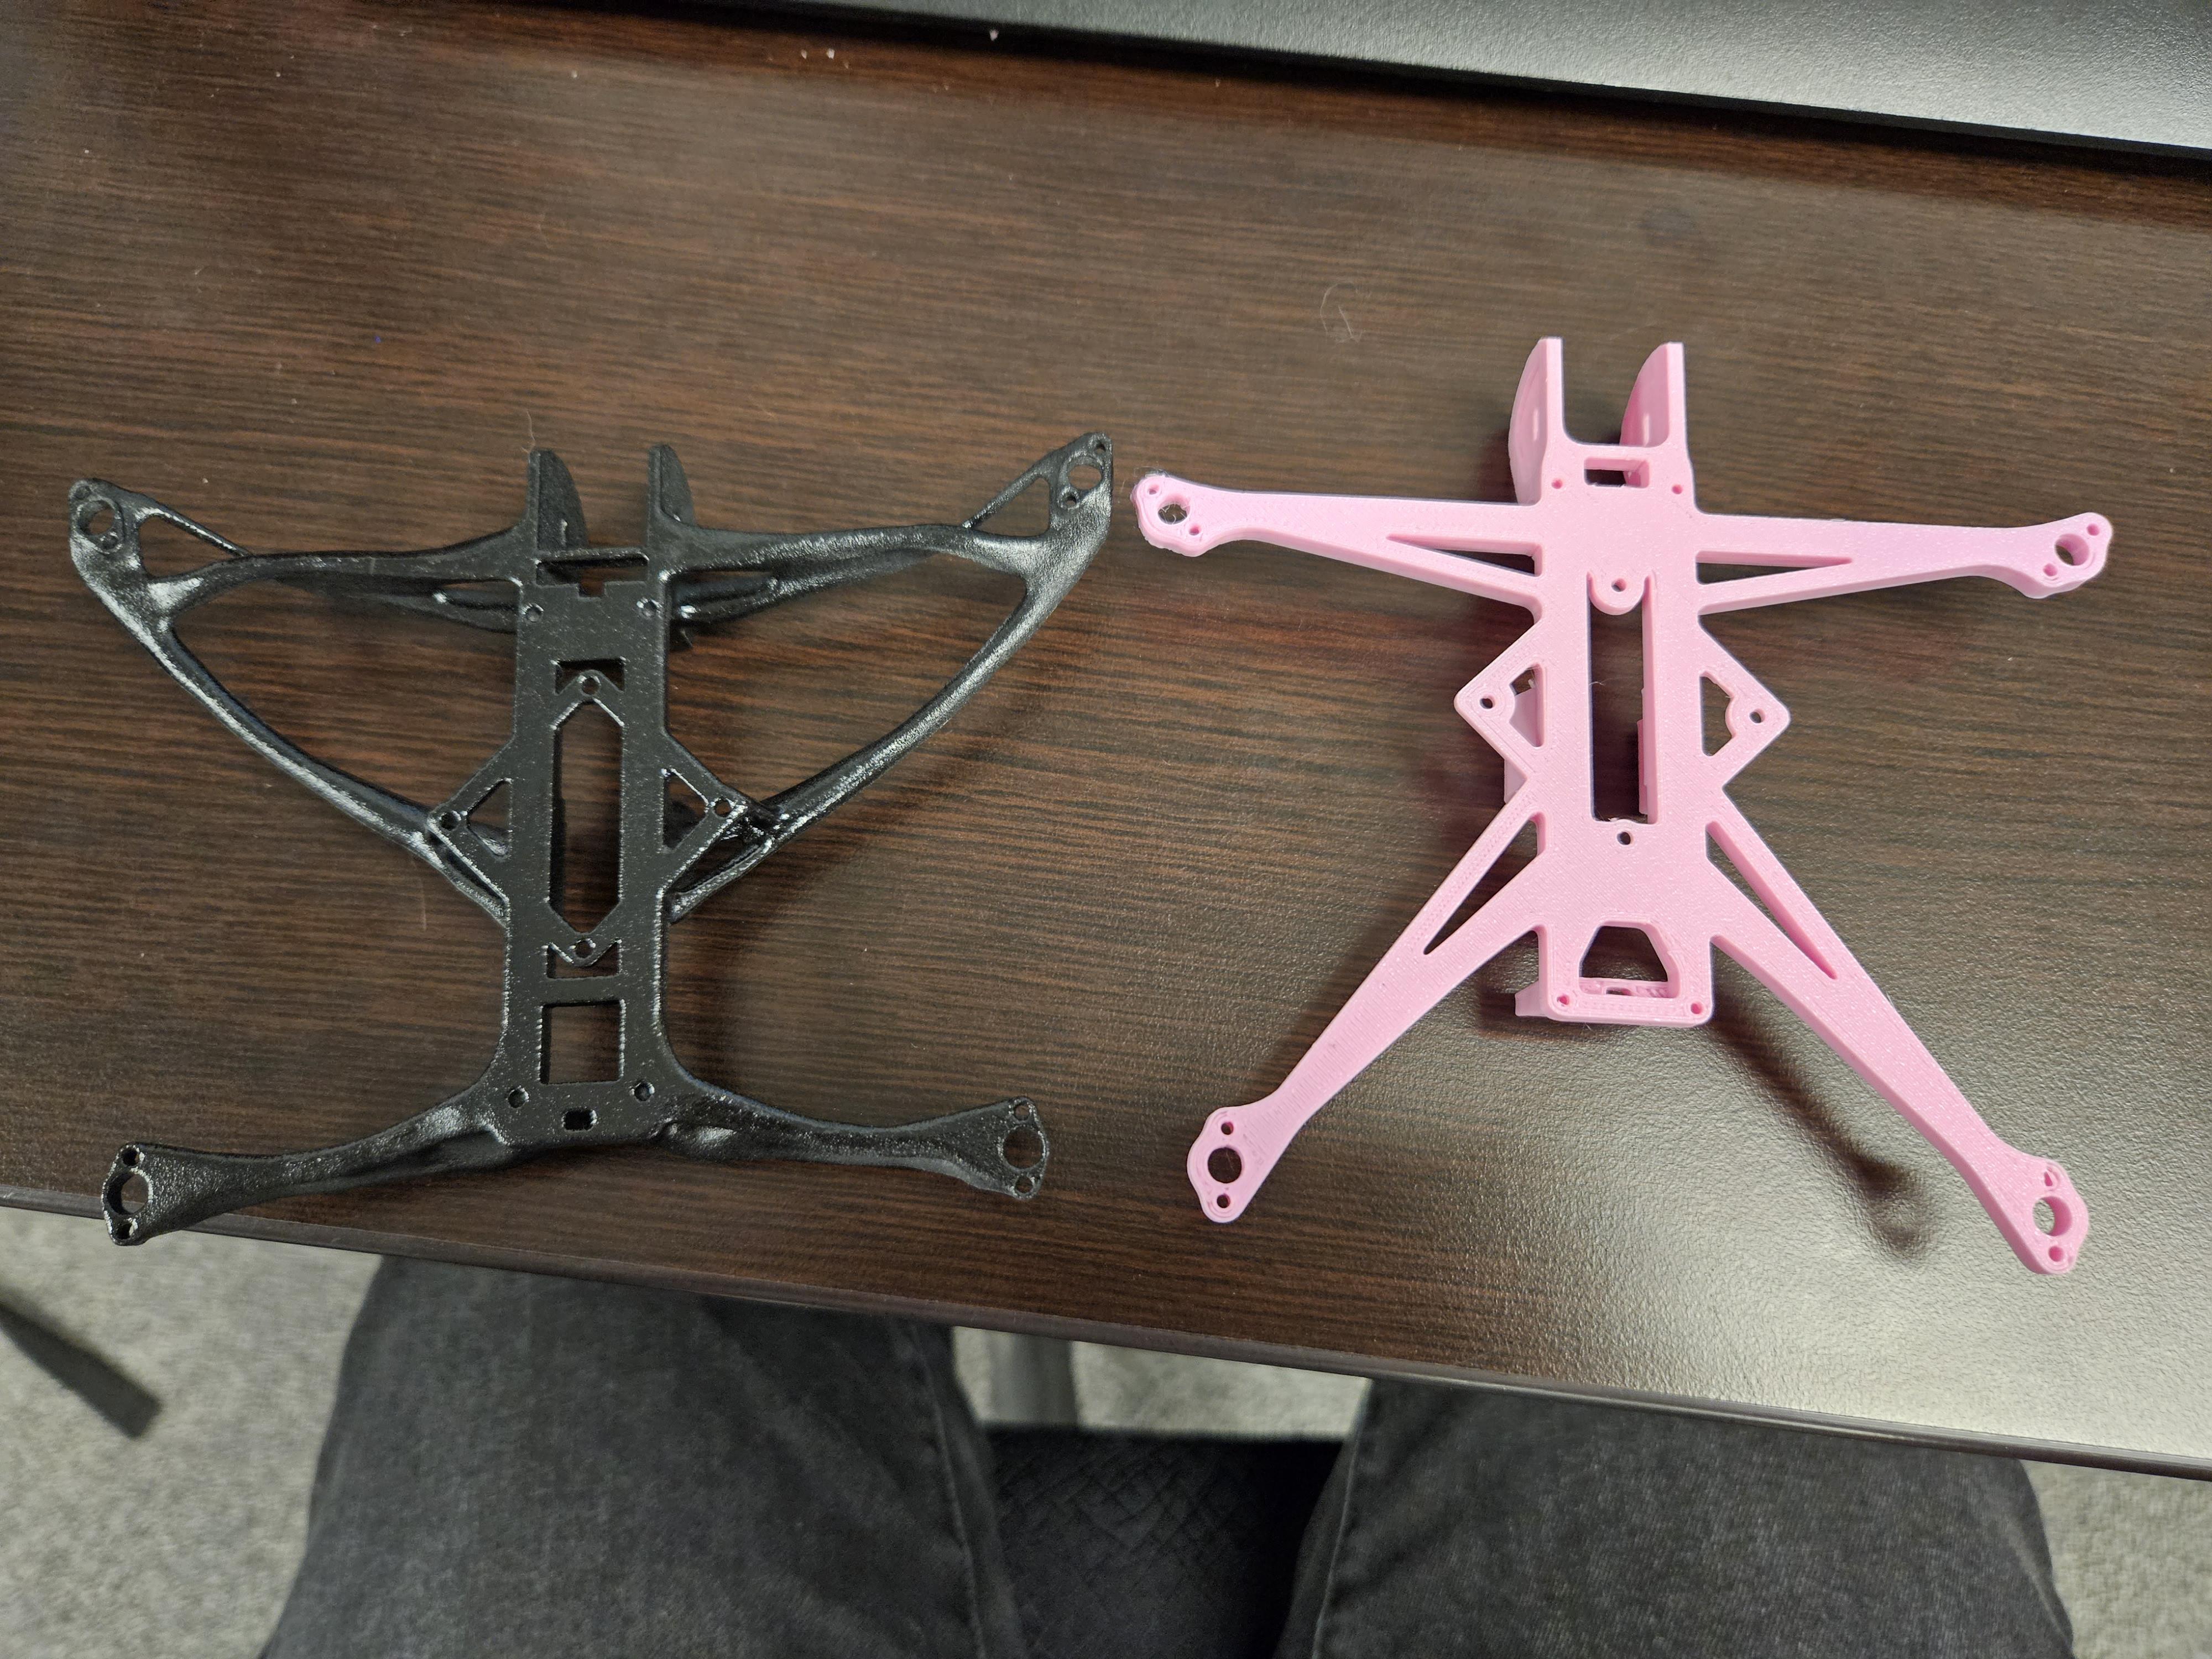
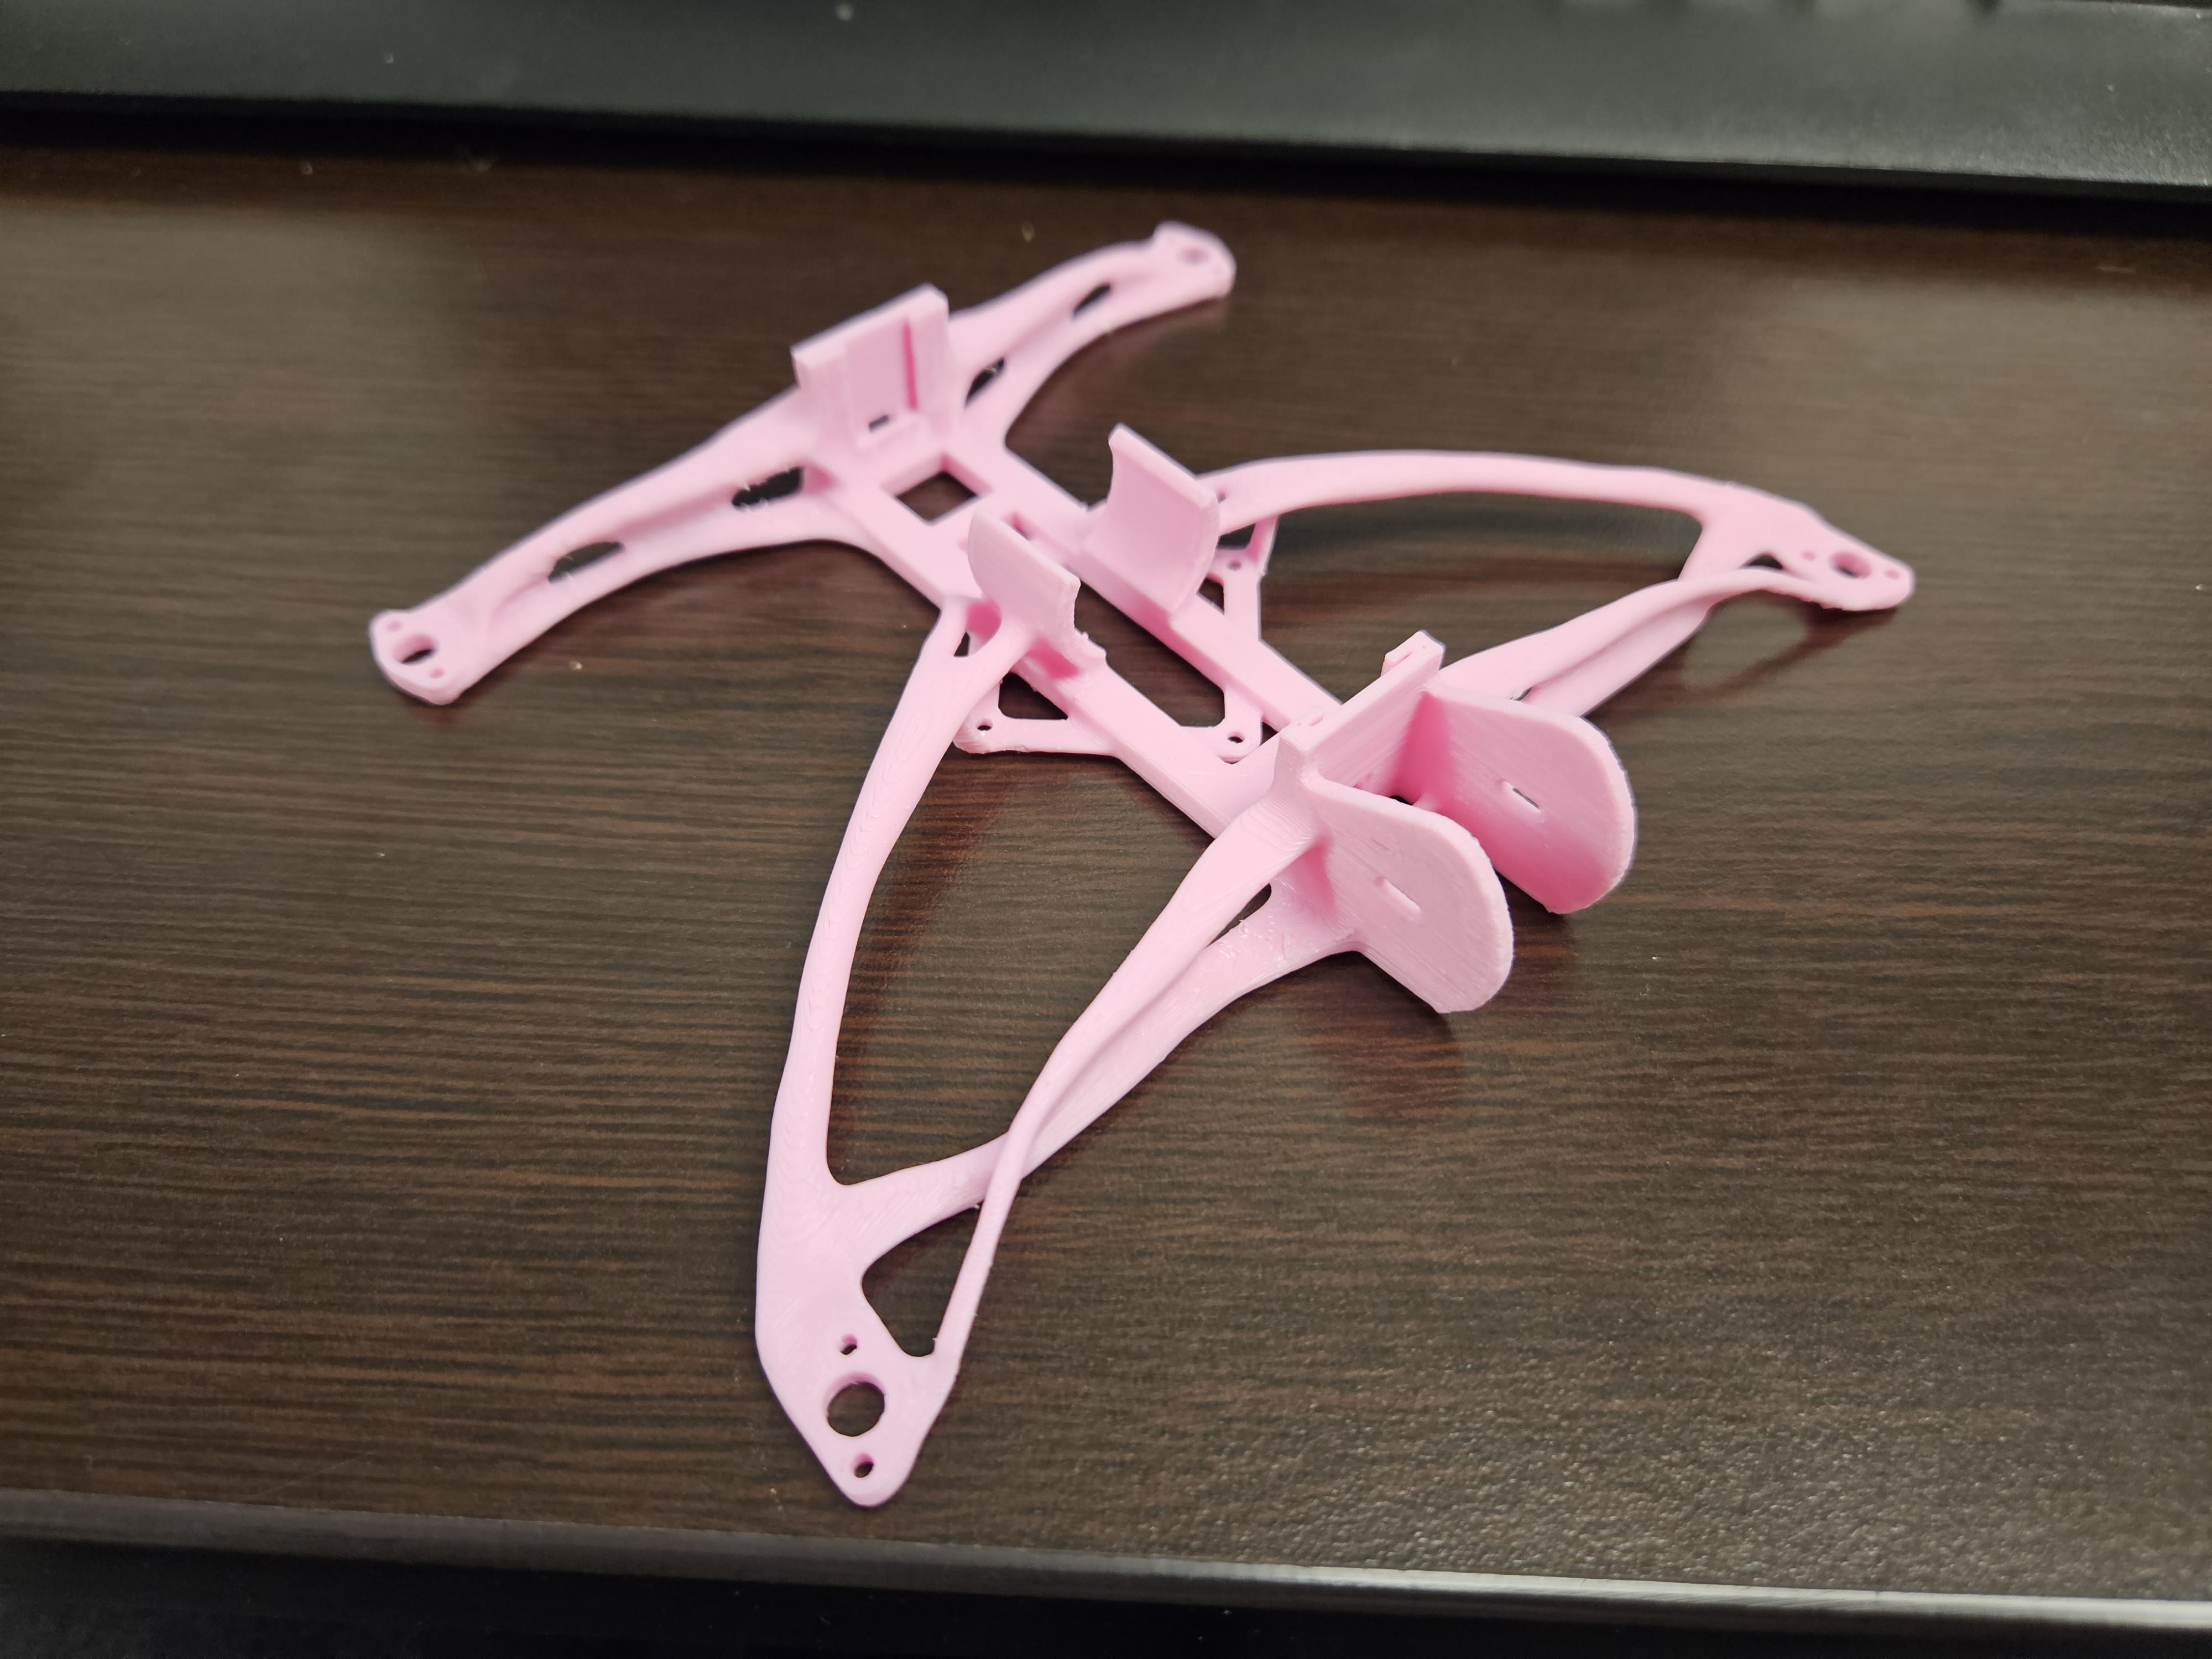
So we've gotten to the potatoes, but lets get to the meat (or applicable main entre of personal choice).
After all of this work (much more than the Instructable will convay of course), what were the fruits of my labor?
Well.... that depends.
First lets look at the Rekon 3 frame. The original frame weights 22 grams on my scale. (with battery tabs mind you). The carbon is really thin, extremely stiff on the X and Y axis, but flexible in the Z-axis. This frame also requires extra screws to hold the arms on, and screws to hold on the off the shelf battery tray.
Now let's look at modified Dave_C 3D printed version from hulabaloo. Again this was printed from PLA+ at 15% infill with standard layerheight for a 0.4mm nozzle (Printed on an S1 Pro). Putting it on scale (as meantioned above) we are seeing 14 grams. Arms show some flex in all diamentions, and are thicker in all aspects than the carbon. However due to the lack of nessesary hardware to hold just the airframe together, it's indeed much lighter than the Rekon 3. However, some pilots have shown breakage
The ultimate question:
My V2?........ 21 grams.
Yep, 7 grams heavier than the hulabaloo frame, and 1 gram lighter than the Rekon 3 frame. But thankfully that's not the whole story.
There's a few key points that I think justify this project as a complete success
1: The keen eye among you might notice V2 is black. Tempus wanted to ceramic (yes ceramic) coat the frame. This coating is crazy slippery, flexible, and completely seals the print form water. This should make the frame last for a long time. Sadly it does add weight, but I didn't get a measurement before hand to see how much
2: My arms are thinner, and round. I'm hoping this will allow more useful work from the airflow.
3: My frame is 100% solid infill due to jetfusion
4: Stiffer. My whole frame is stiffer. Front arms are a completely different level, rear arms are about the same forward to back, but MUCH stiffer vertically.
5: My frame is a little longer, and wider. This should offer a bit more control for the motors. However this does add a significant amount of weight
So the fact we are only 7 grams heavier (and about the same as the Rekon 3), is pretty darn encouraging given the above improvements.
But that's STILL not the whole story. I decided to print a version of V2 on my S1 Pro using the exact same settings as the original version. This one came out at 15 grams! So in this much more apples to apples comparision, we are seeing only a 1 gram increase. Pretty crazy.
Conclusion
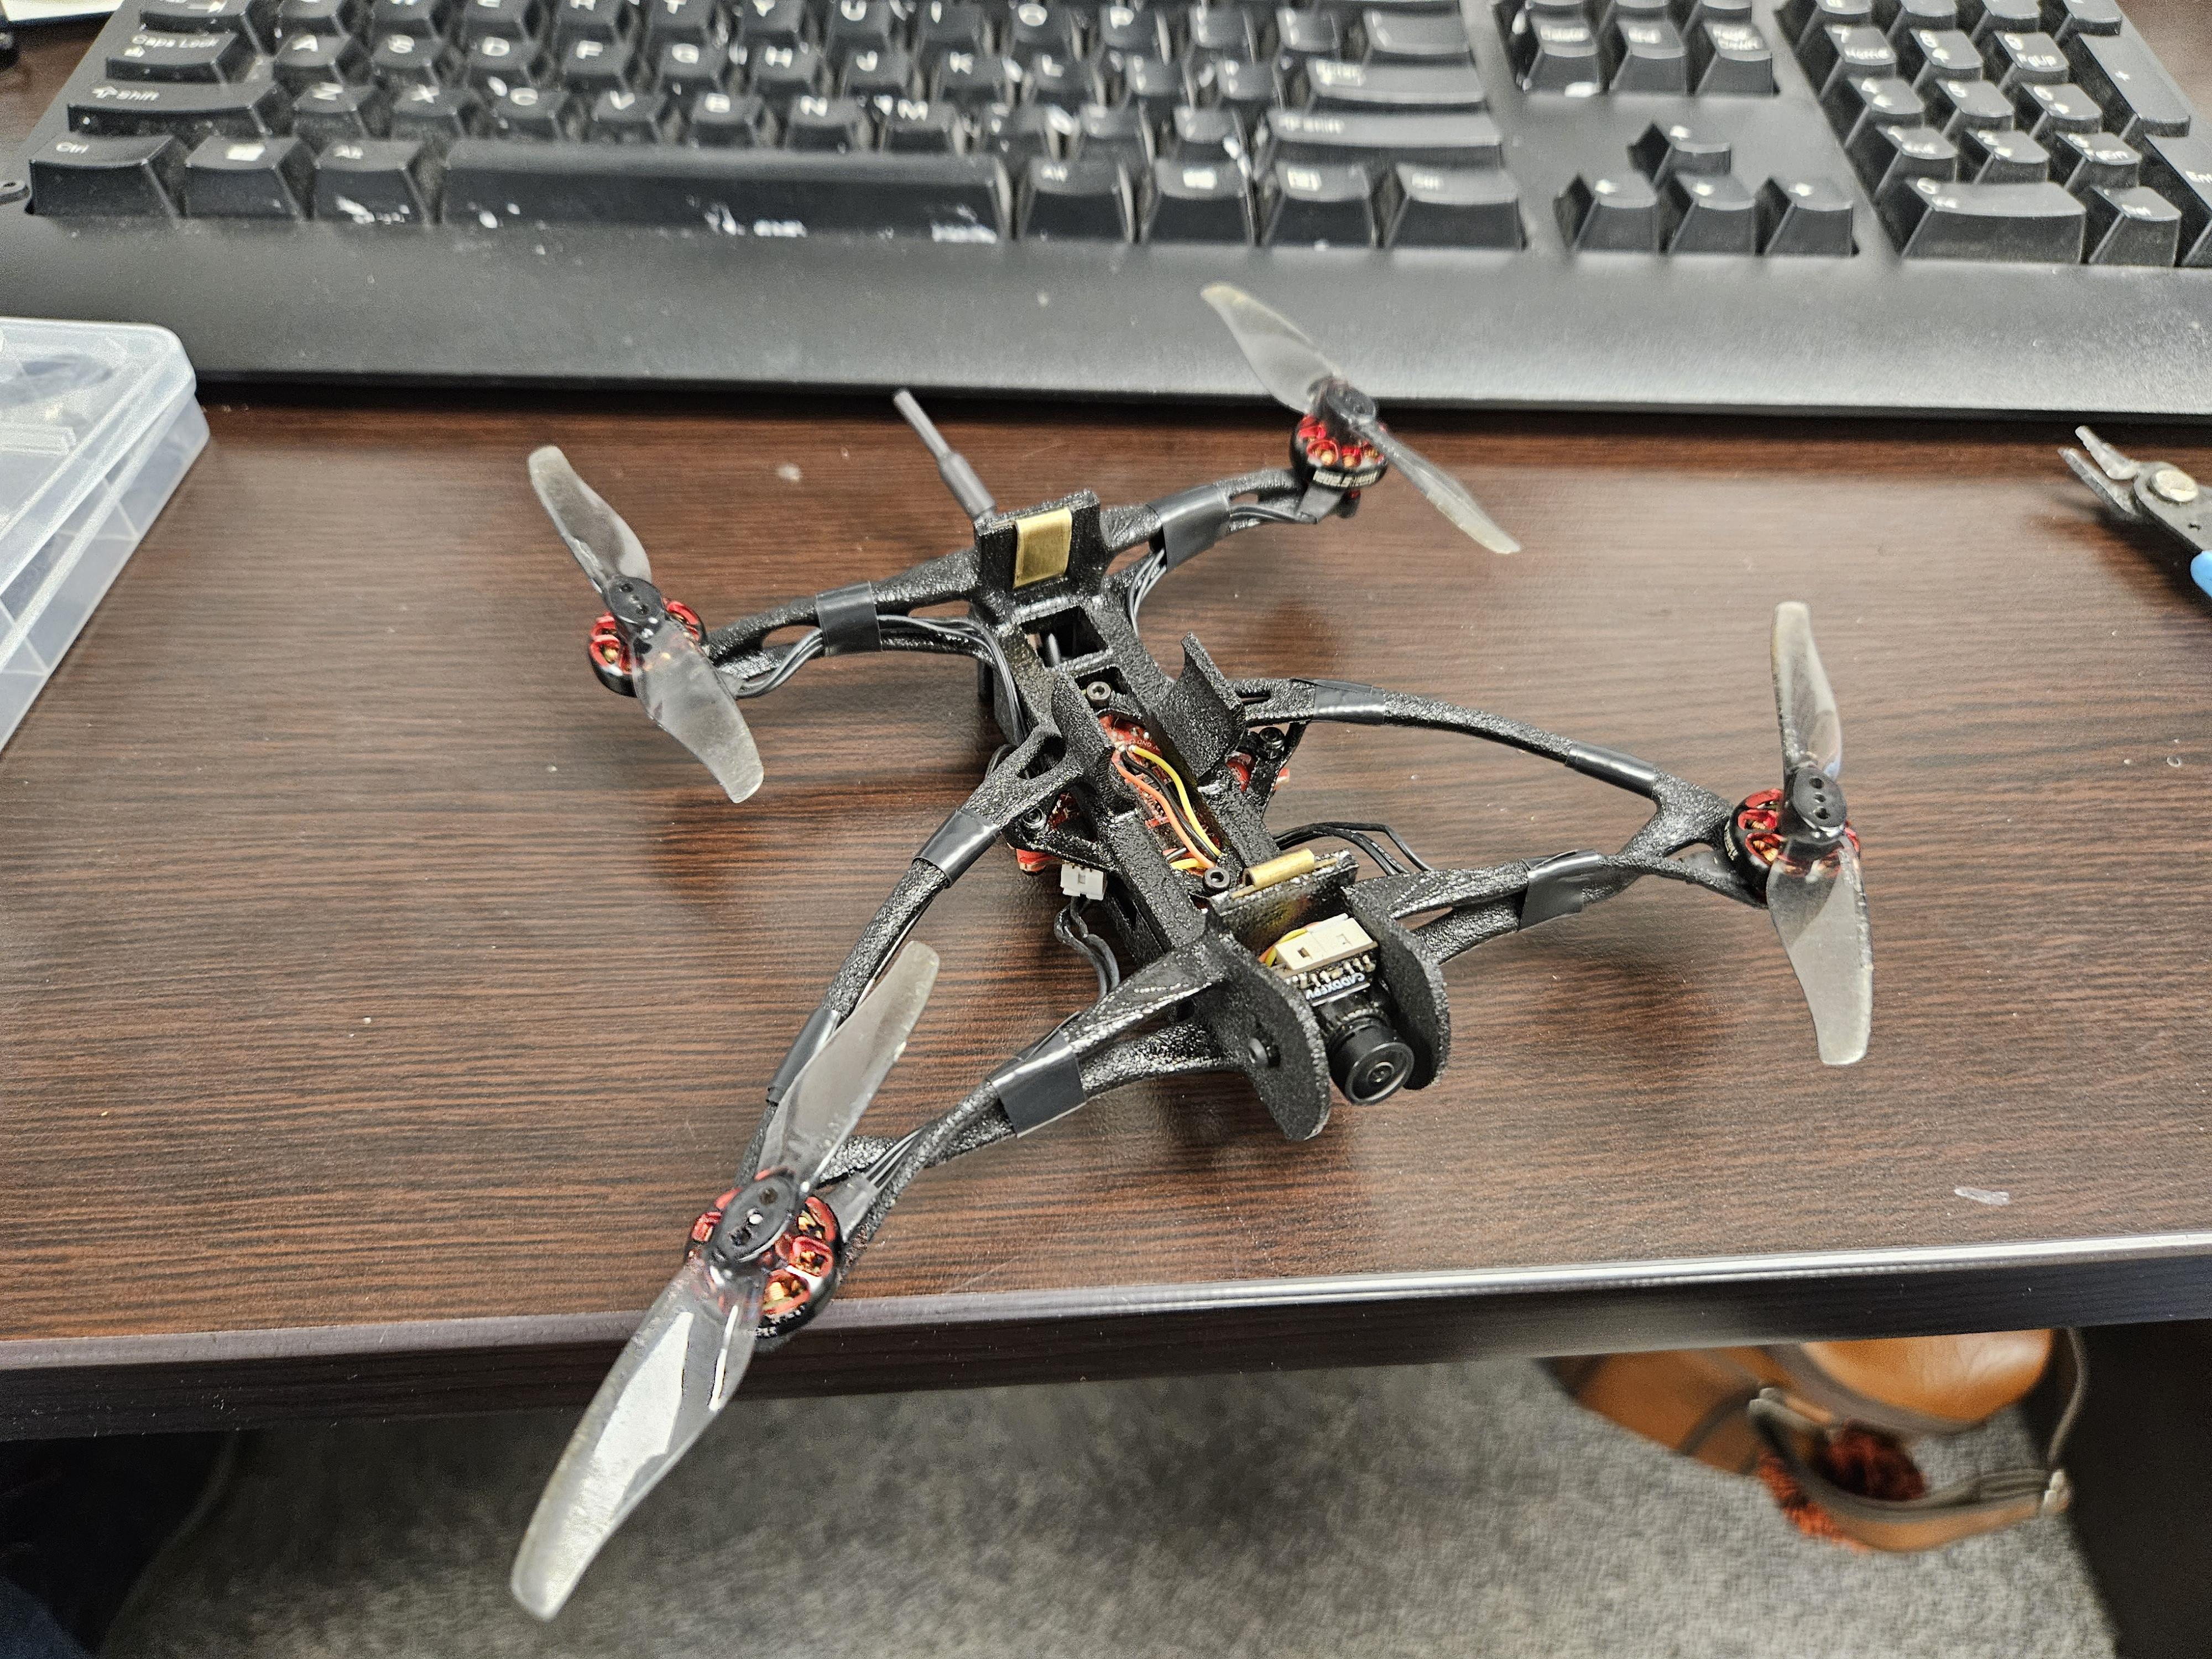
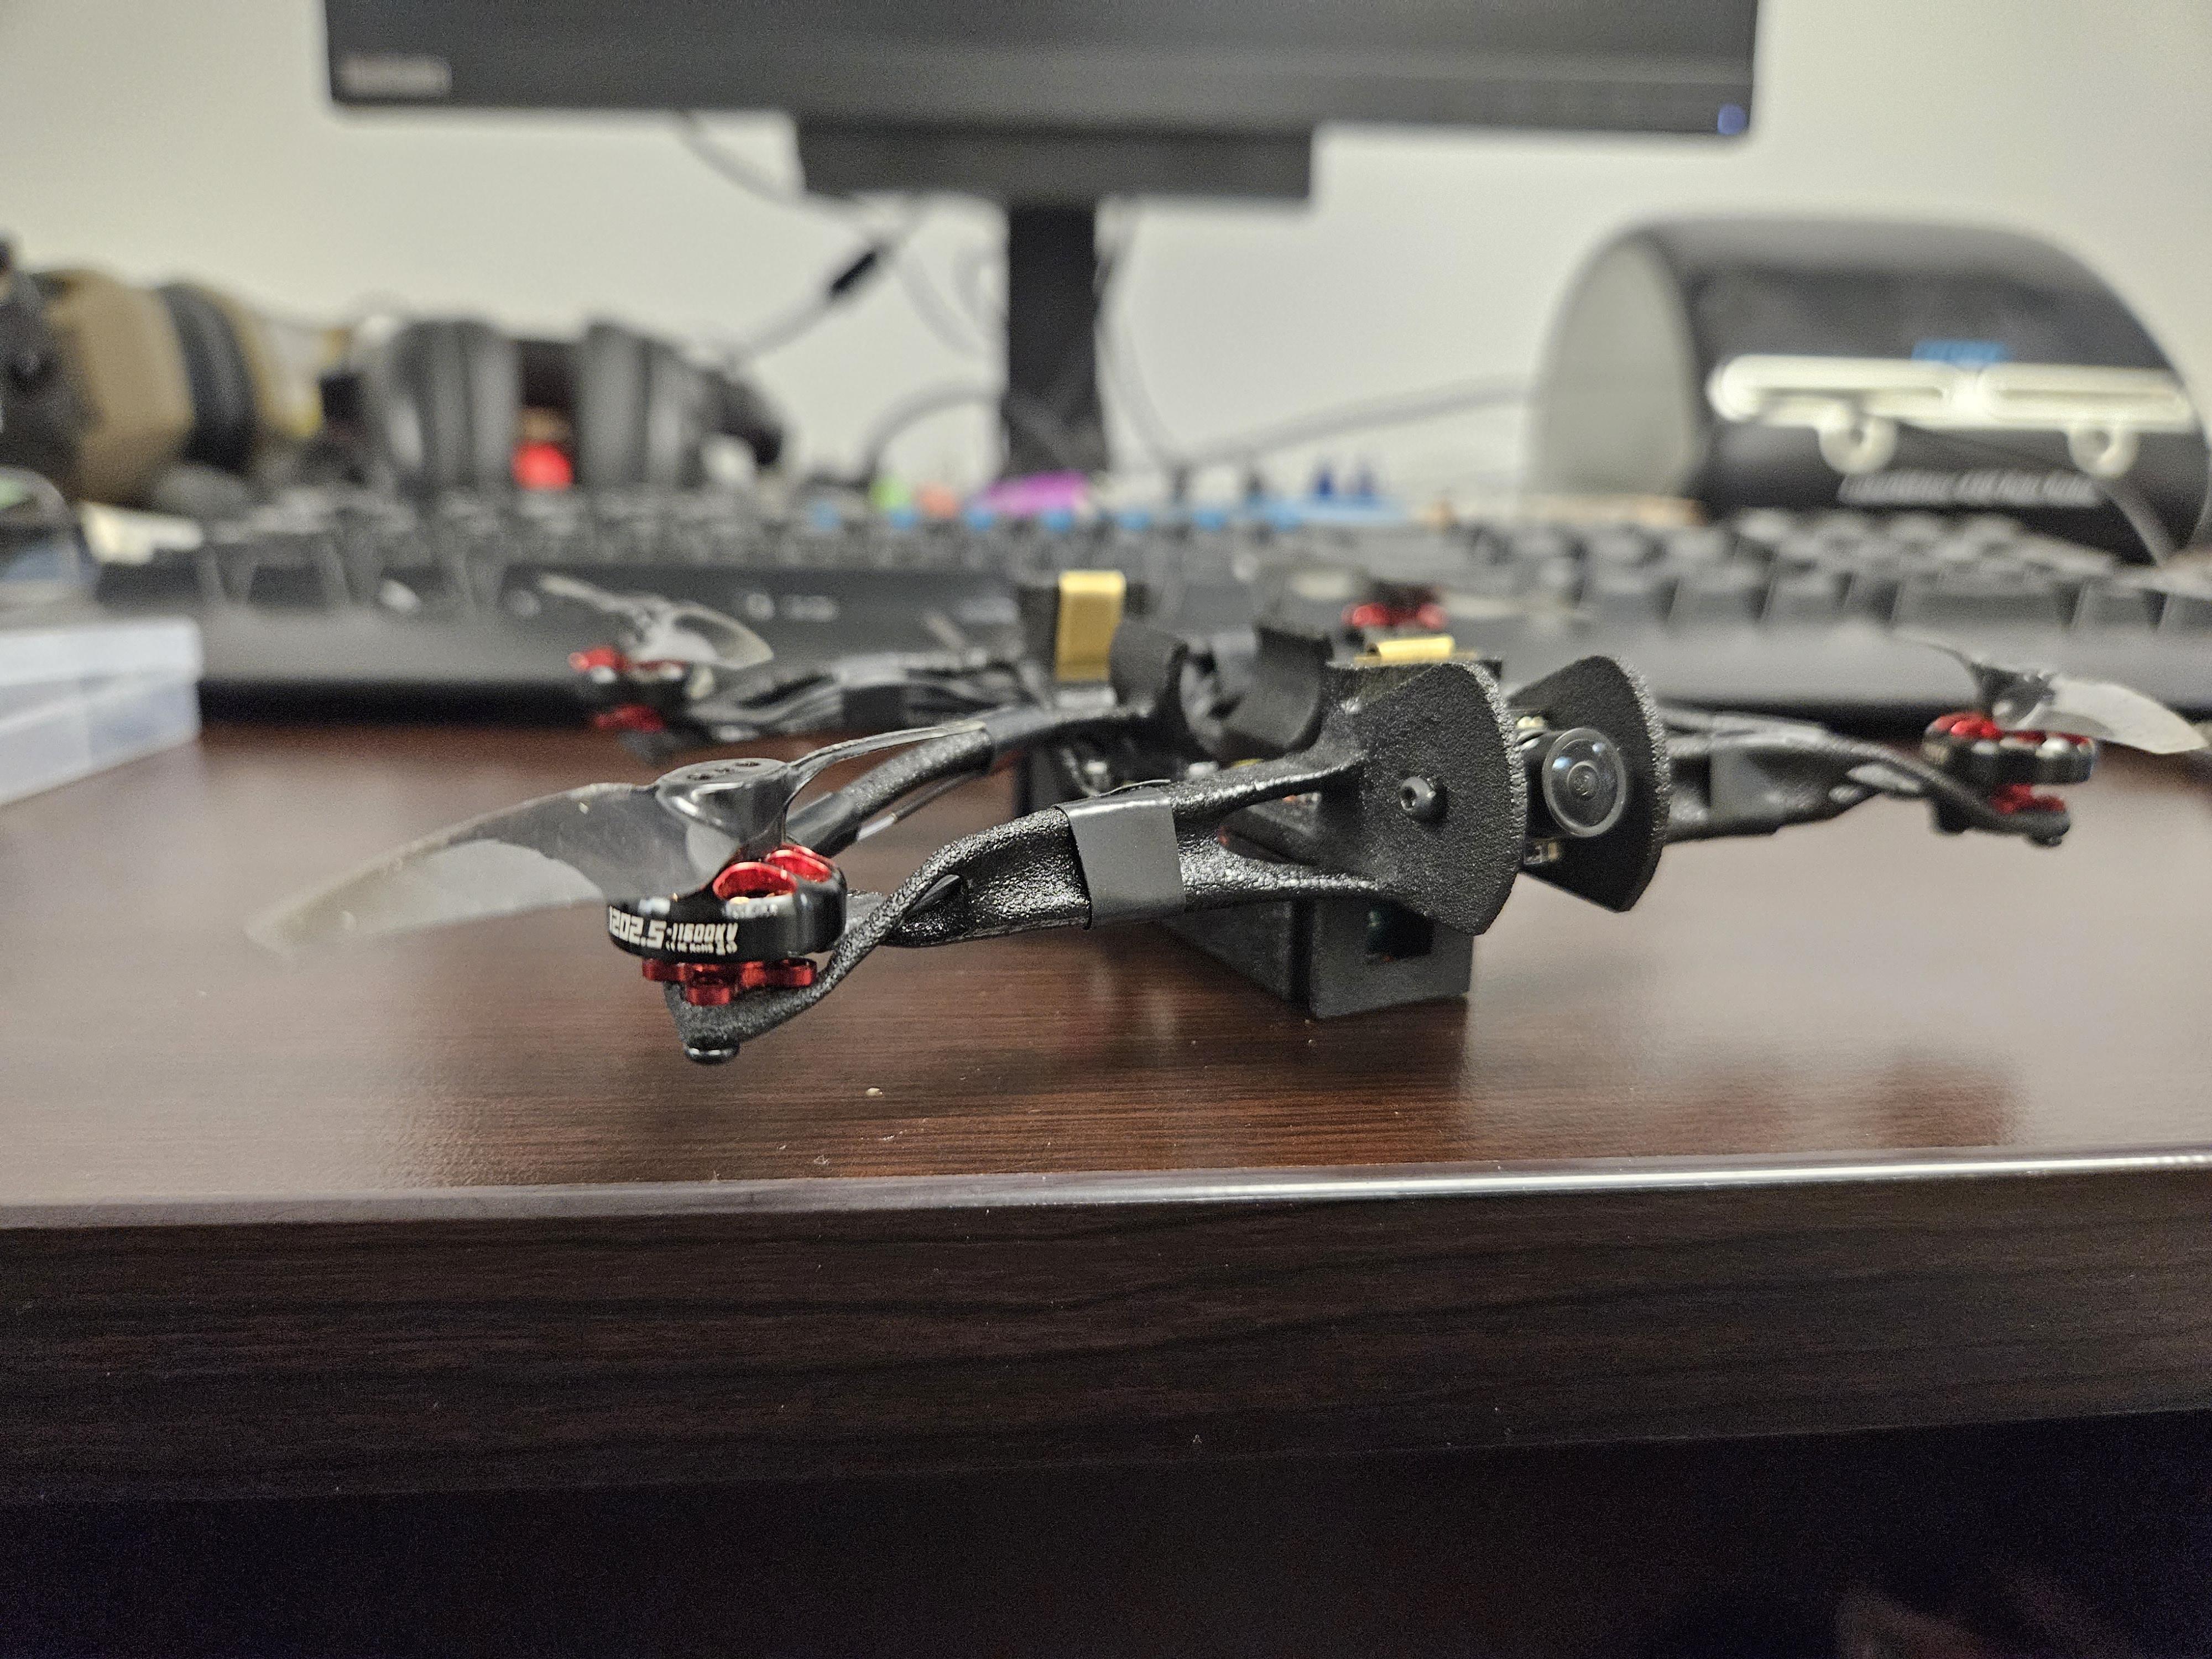
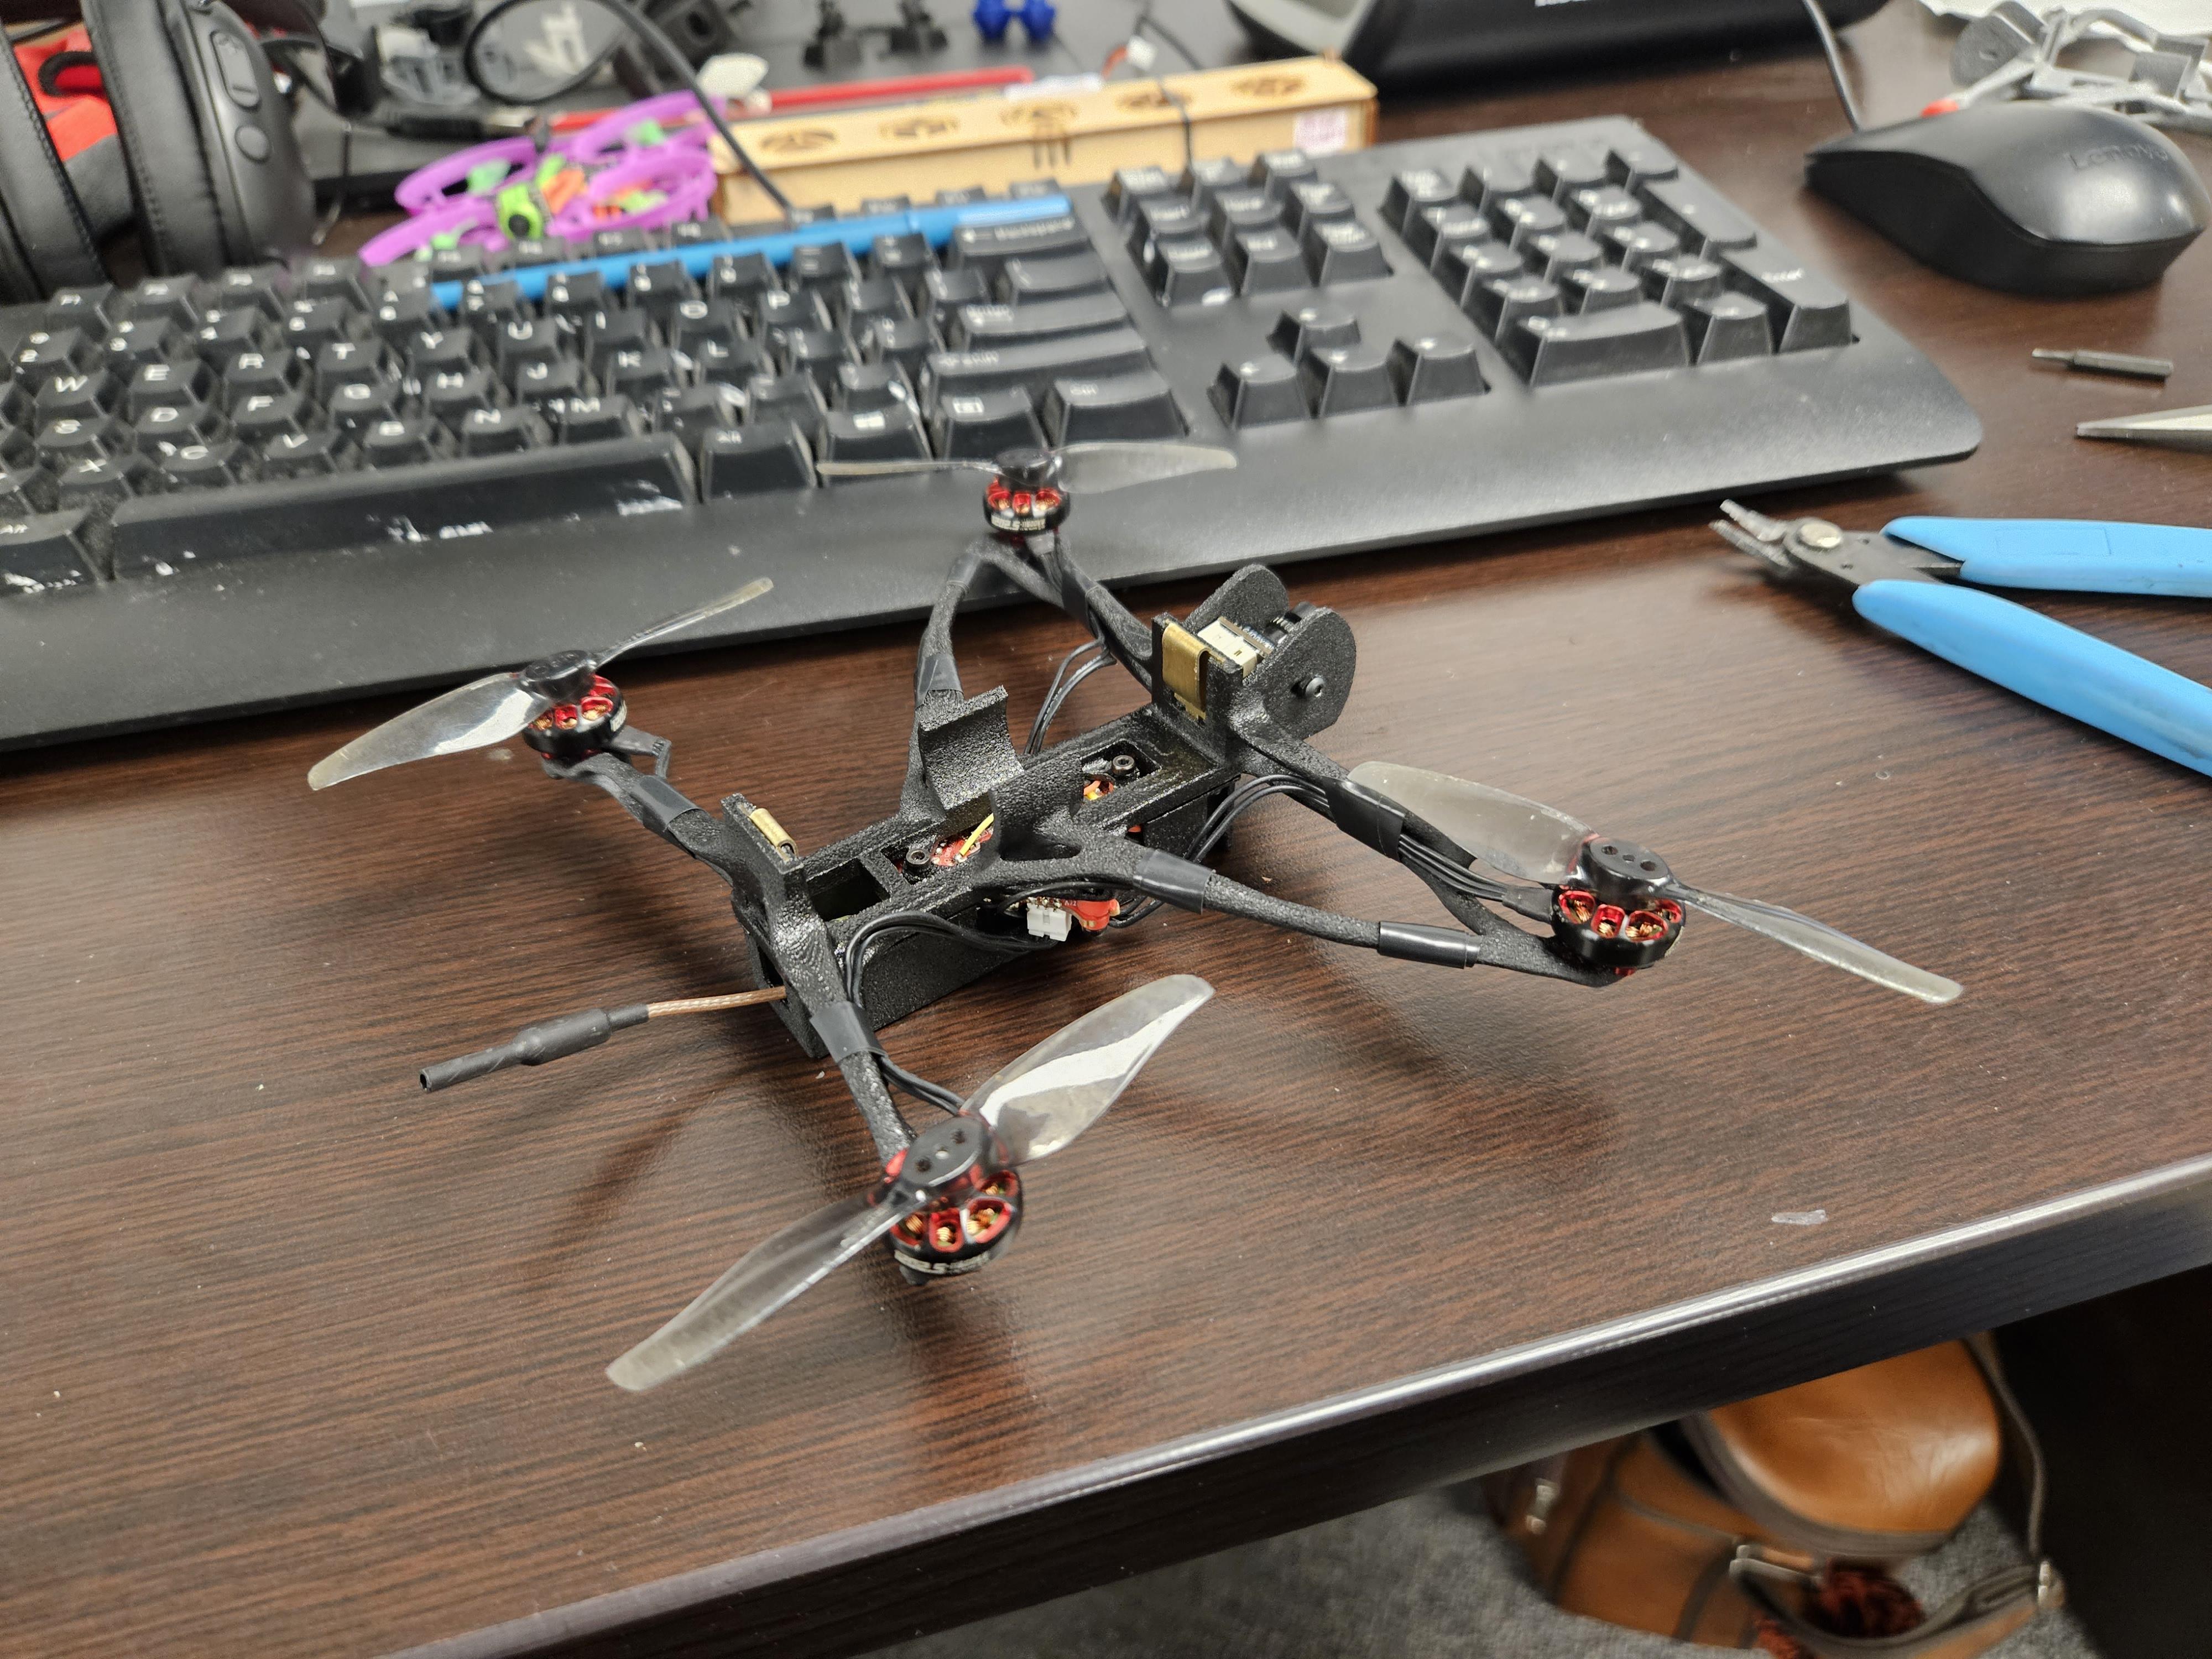
Let's go over my original goals again:
1: The objective of this project besides learning is using generative design to optimize weight as best as we can.
2: My job here at the Access Centre for the summer is to help out on projects, but also self guided learning. I have access to machines and people to help me learn just about anything I want. It's an incredible opportunity that I'm pushing extra hard to get as much out of it as I can
3: And the cornerstone of this project: I wanted to leverage the power of a Multi-Jet Fusion printer. These printers have more or less no limits to geomtry.
Well, I didn't achieve my goal of lightening the original frame. But ultimately, I don't think that's important at all!
But what did I acheive?
Although I didn't lighten the frame as intended, I still think the overall weight was heavily optimized. I'm seeing big improvements in stiffness and cross section in a package that is larger, while being extremely close to the original weight. If this was an actual professional project, of course this wouldn't pass. However for me, this was a learning exercise, and I still improved the original design in my opinion.
I think the only change to the frame I would want would be making the battery tabs smaller, they are currently big chunks of metal that add decent weight
What did I learn?
More than I could have imagined going into this project.
How to use Fusion generative design
Basic Blender
A little bit of mechanical engineering and FEA (with the help of the 1st year instructor)
How to print with the HP JetFusion 5200
Gained an awesome looking custom frame of my own design to show off
I couldn't be happier with how this project turned out! I think this show what is my favorite part of "science". Learning way more than the original goal was intended to do. I think this is excatly what we saw here. We optimized weight, leveraged the power of a multi-jet fusion printer as intended, but just not in the way that was expected. I hope some of you got something out of reading this adventure. I know I got so much out of it, and an awesome improved drone frame to boot.
Nevermind the Instructables contest that popped up at the exact right time