Pumpkin Scream

Each year, our library hosts a trunk and treat event. My role is to provide an interactive decoration. I use the Makey Makey, my favorite invention tool, for these decorations. The first year, I created the decoration described in this Instructable: Screaming Pumpkins.
The inspiration came from Makeshop at the Science Gallery Dublin. Jessica Stanley shared the Scratch code.
Supplies
- Plastic Pumpkins
- Carpet Tape
- Steel Wool
- Makey Makey board
- 6 alligator clips
- Paper clips
- Knife
- Aluminum Foil
- Device that can connect to the Makey Makey and run Scratch
- Bluetooth speaker
- Box to hold pumpkins, hide Makey Makey and speaker
- Table with tablecloth to hide device
- Display sign
- Halloween decorations
Plan the Display
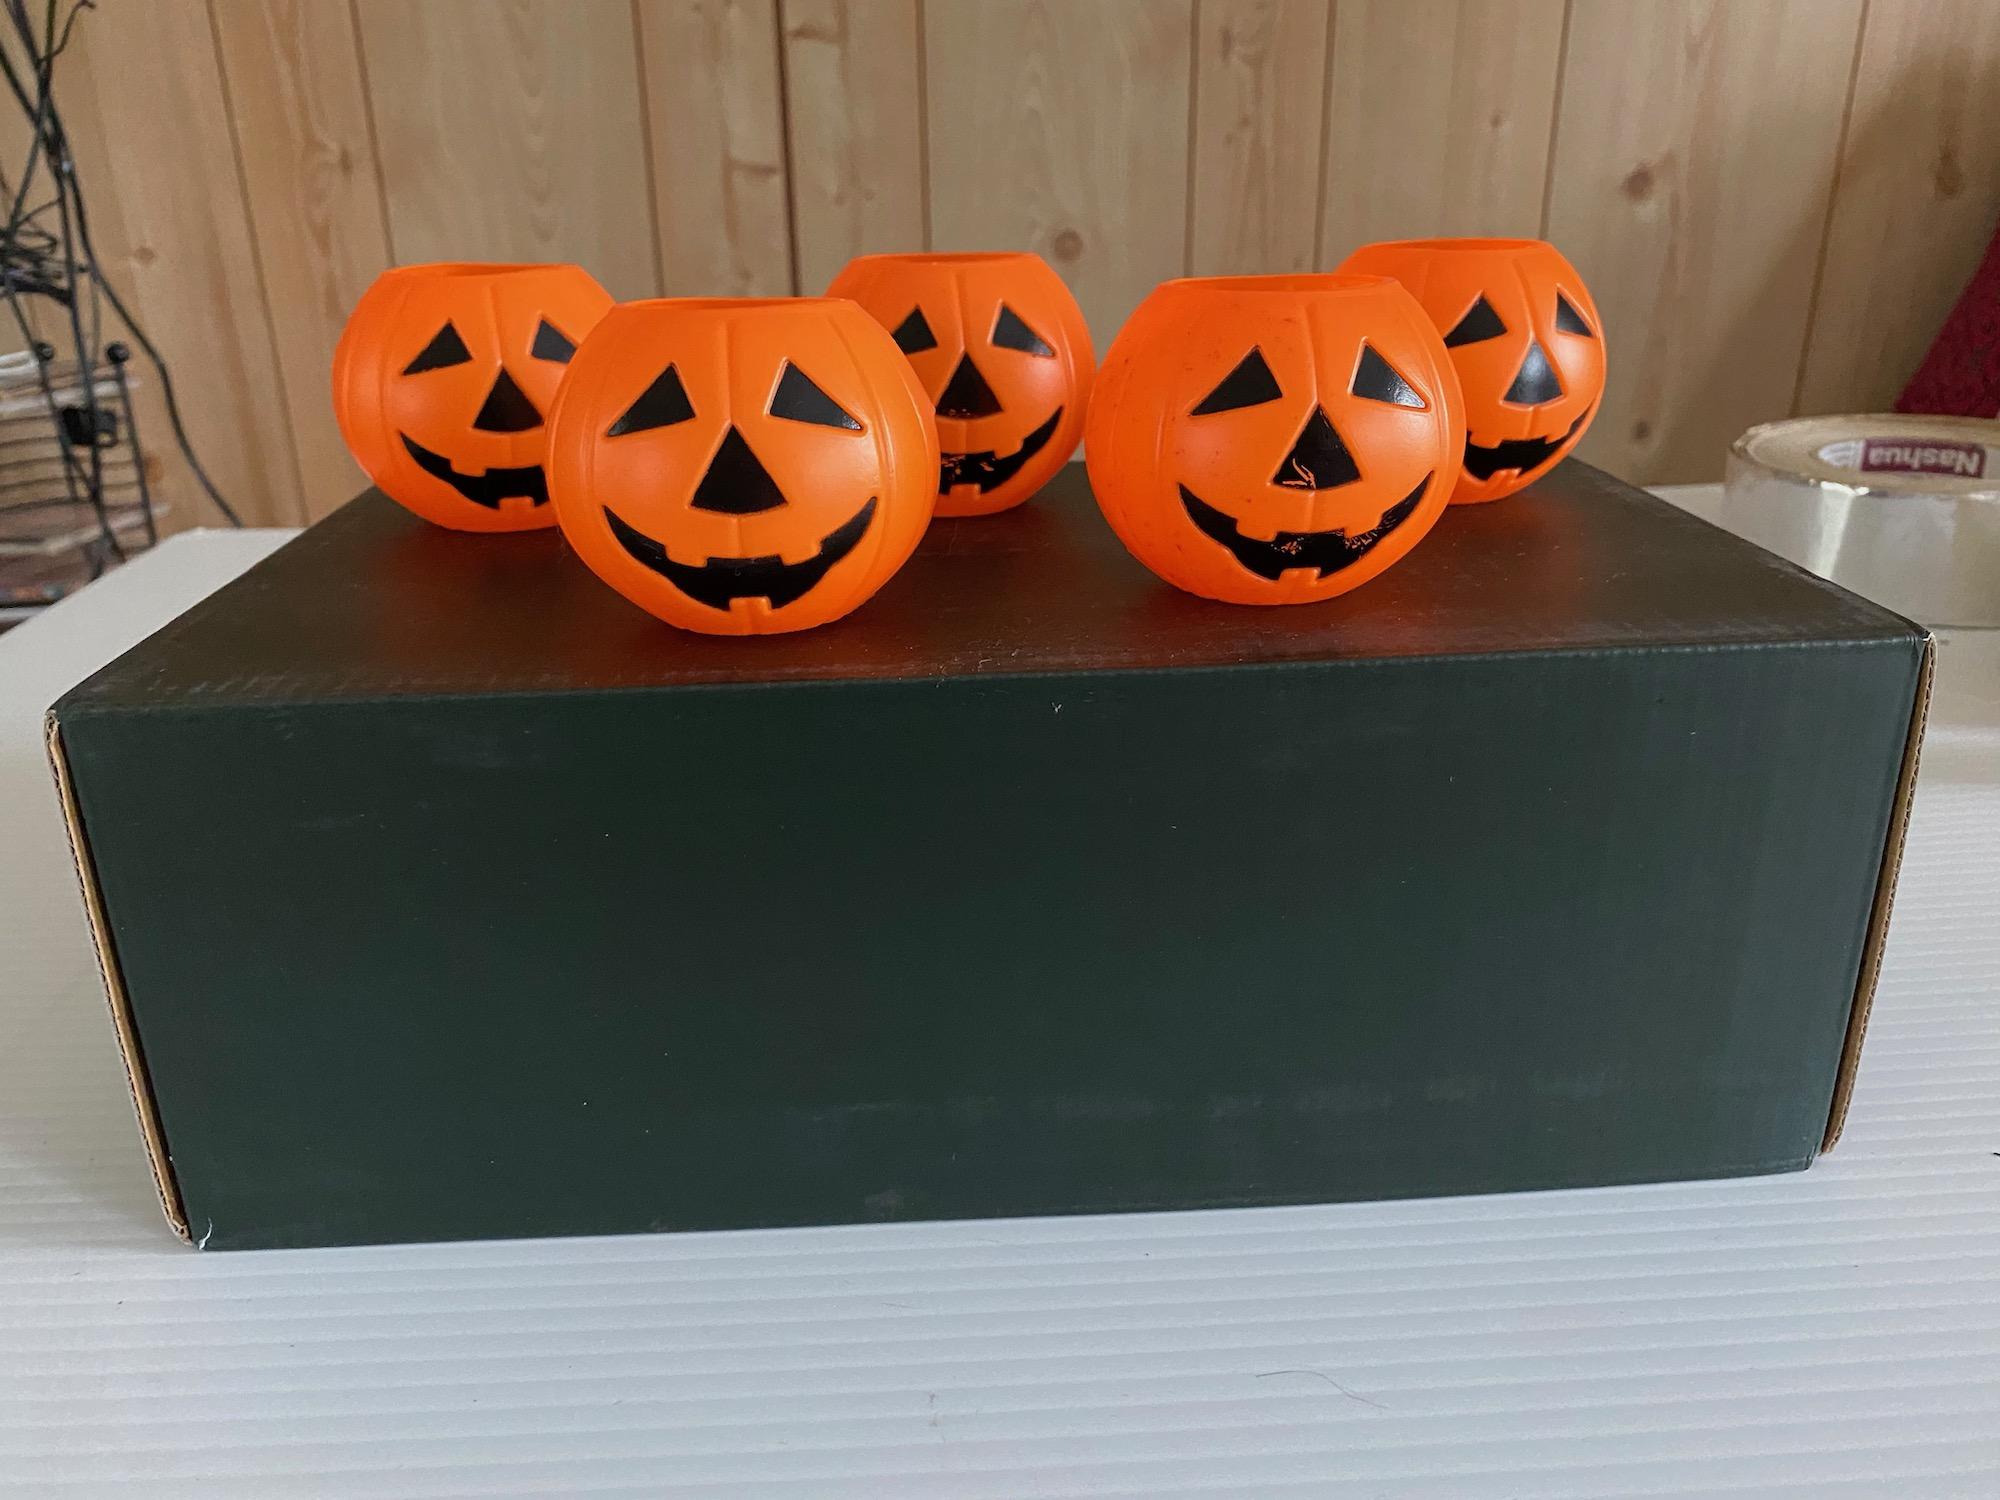
The plastic pumpkins sit on top of a box that will hide the Makey Makey. A shoebox is about the right size. I used the inside of a shoebox. It was black so was able to use as is. Your box may need painted or otherwise covered.
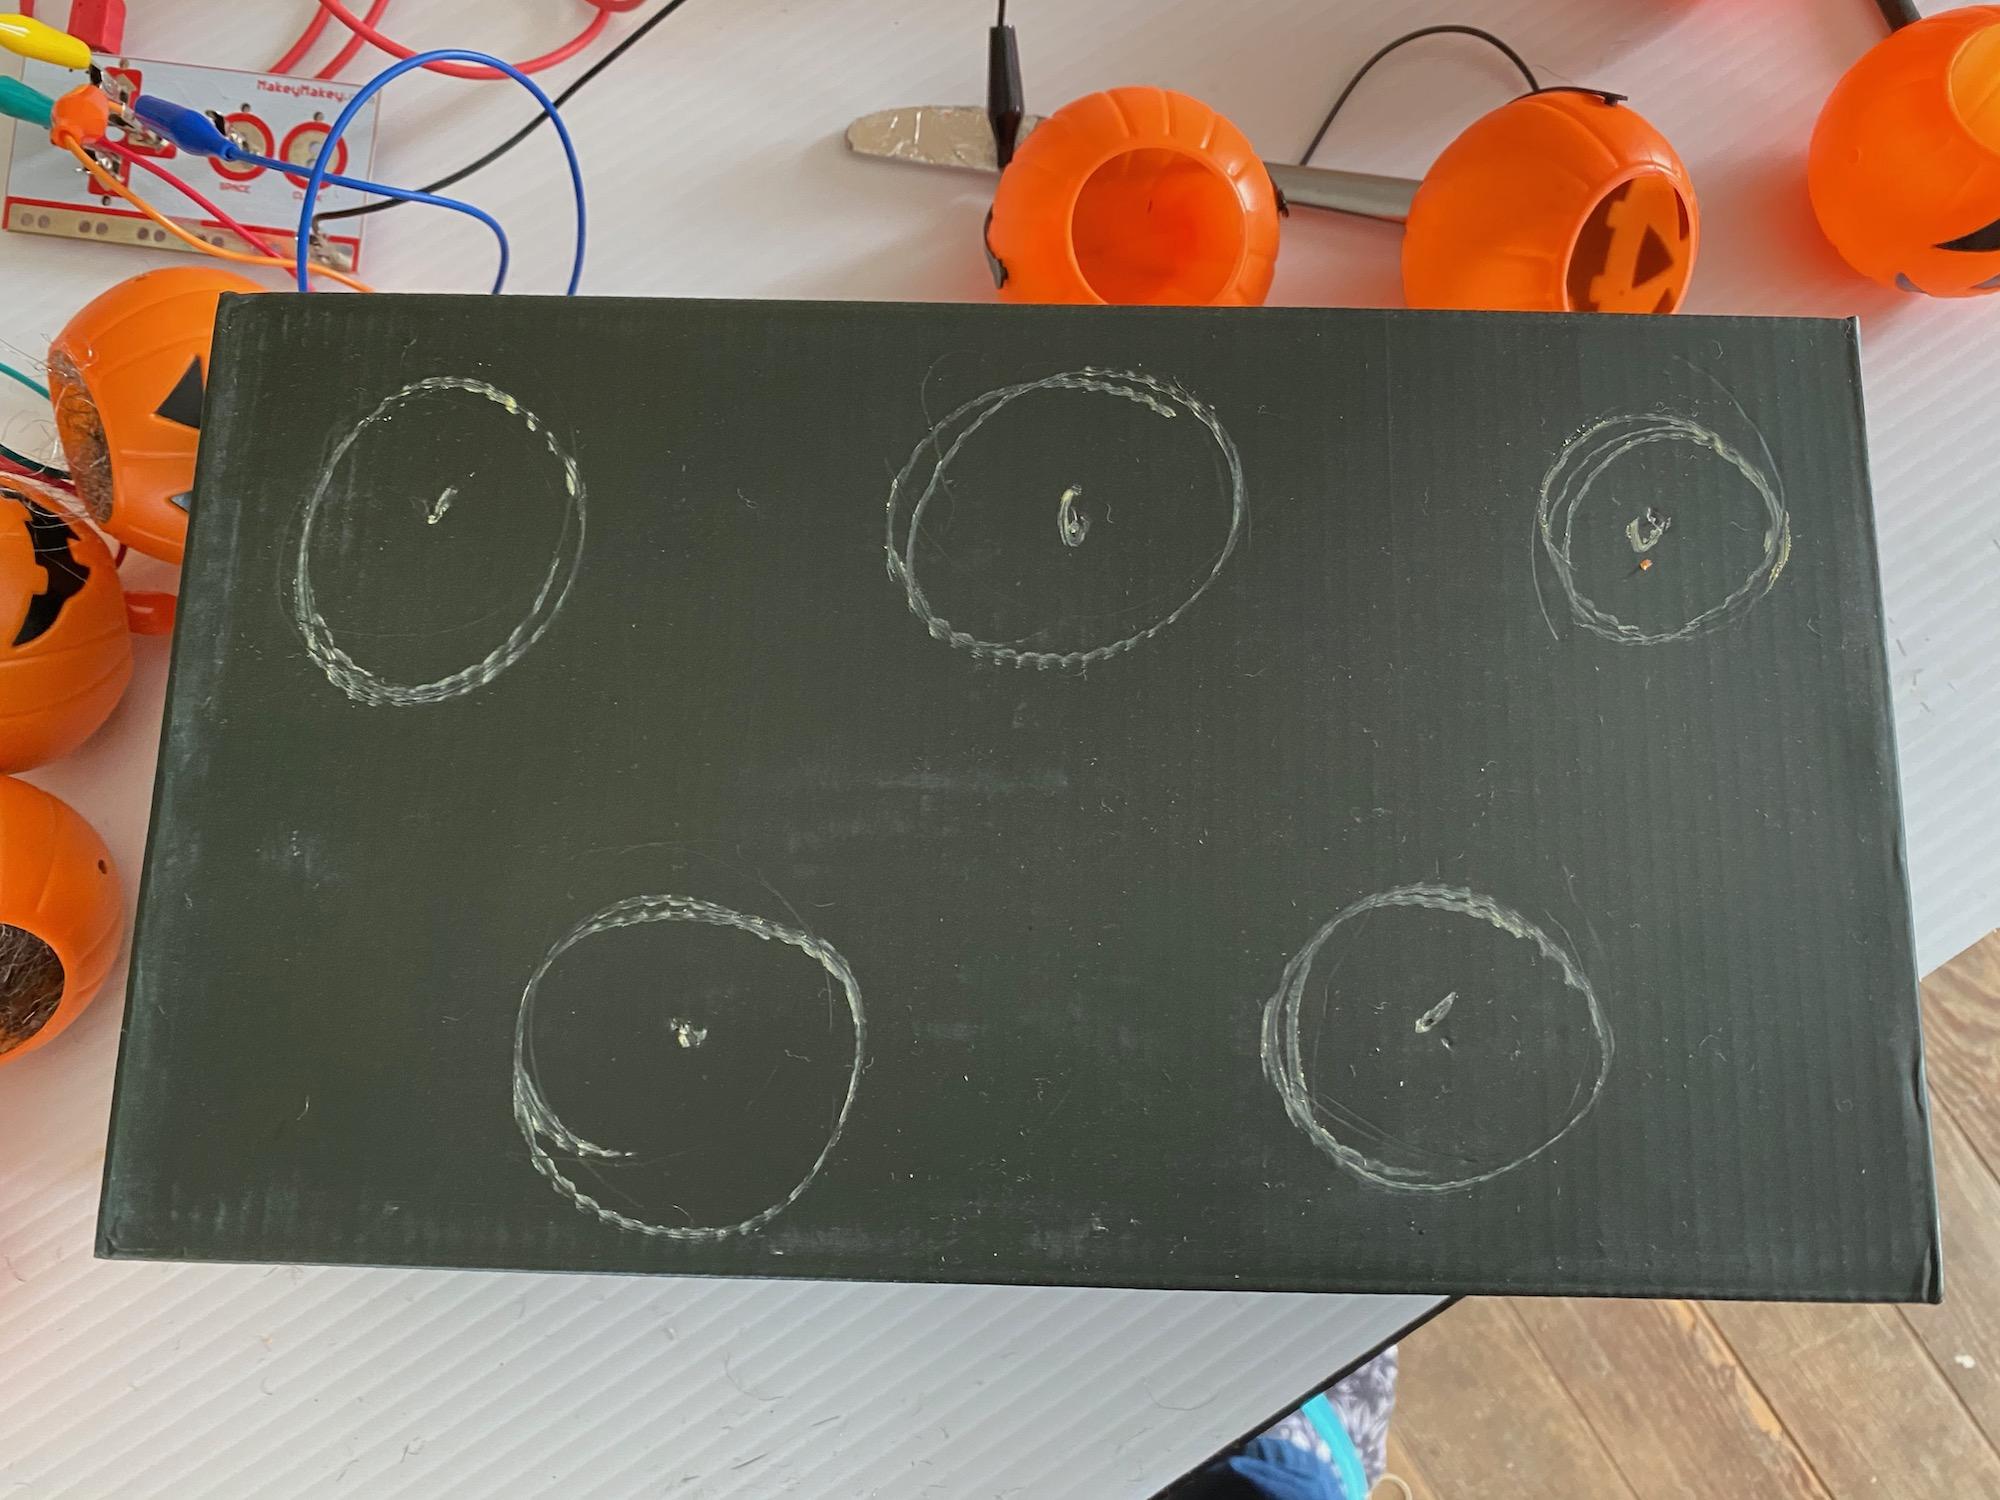
Once you find and decorate your box, place the pumpkins on top where you plan to attach them. Mark the spots with a pencil.
Prepare the Pumpkins
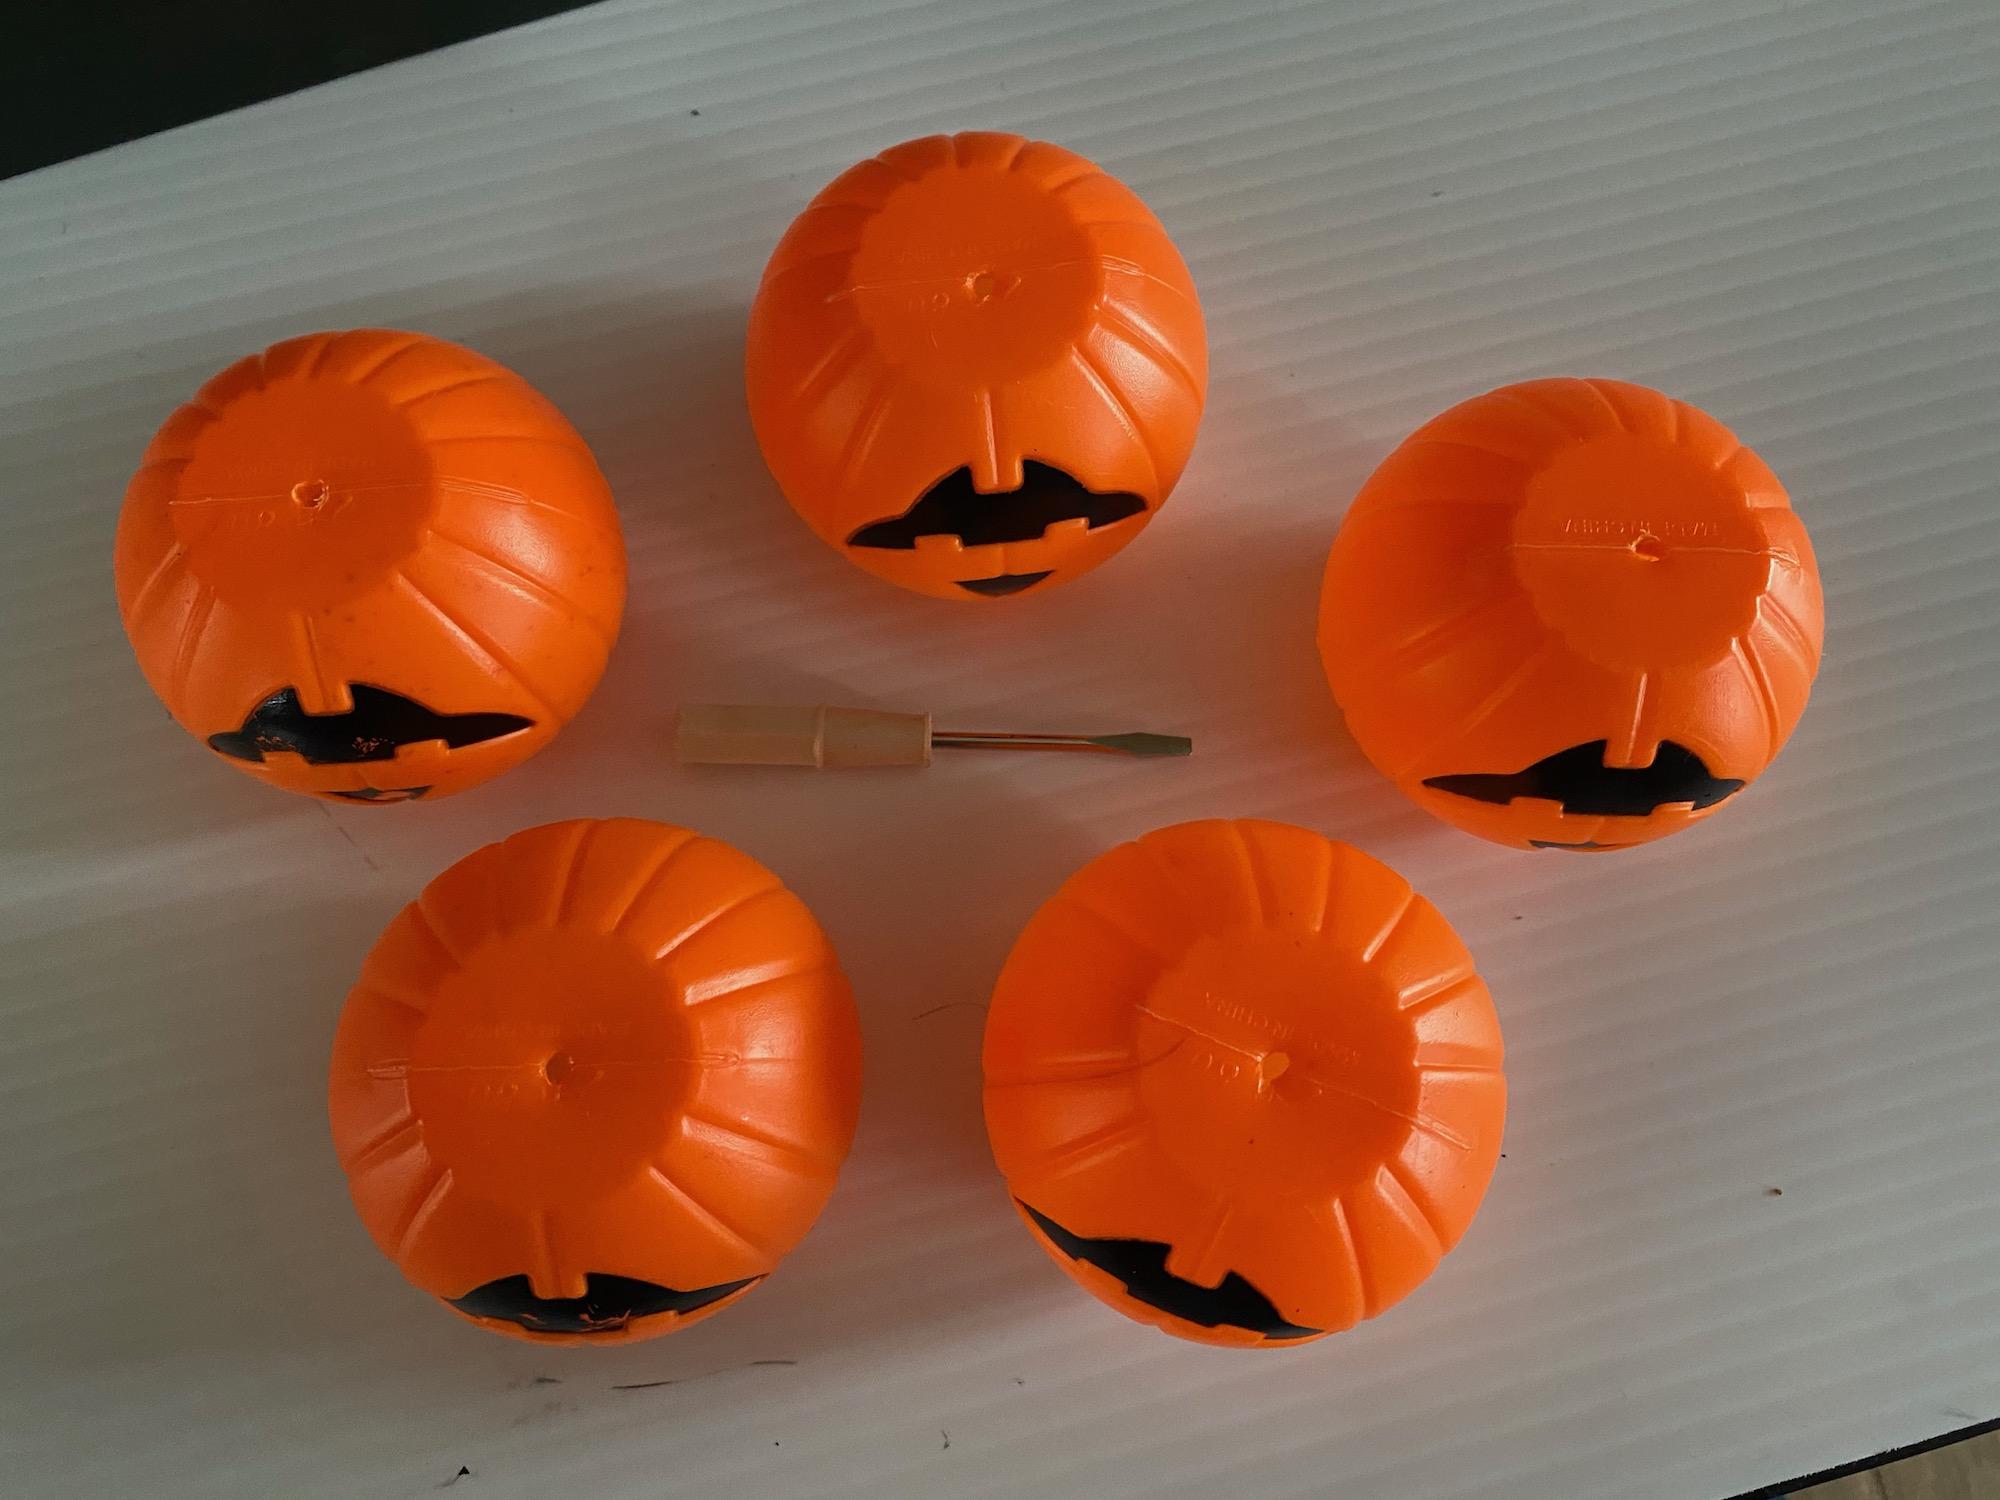
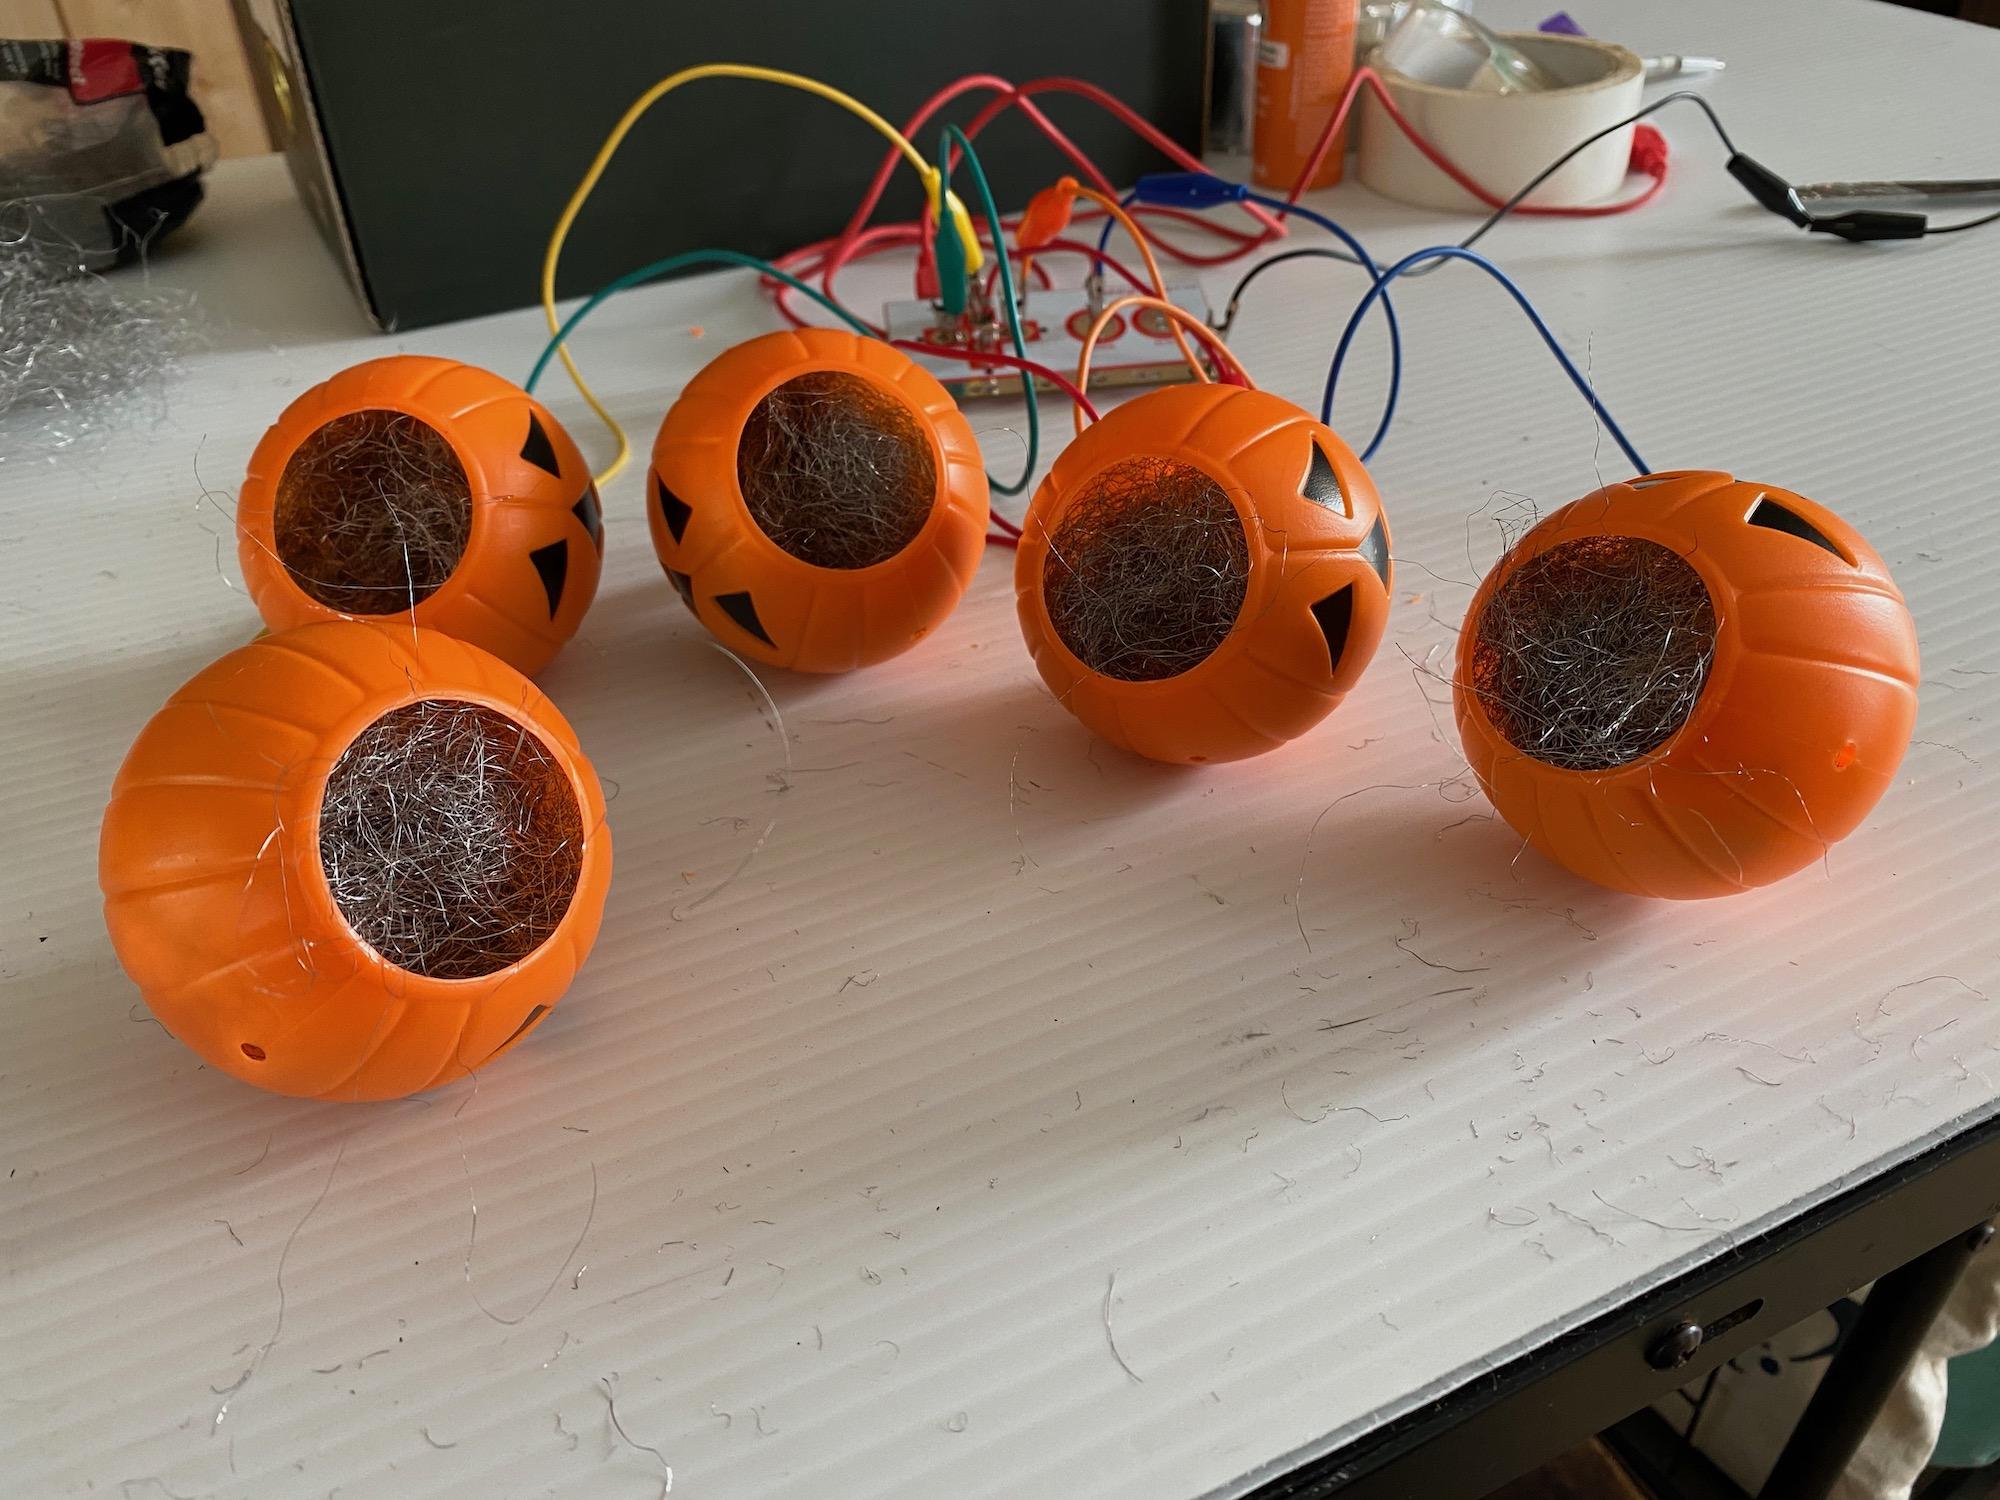
Remove the handles from your pumpkins if they have them. Use a tool--I used a small screwdriver--to make a hole in the bottom of each pumpkin. It should be about 1/4 inch wide, large enough for an alligator clip to slide inside the pumpkin.
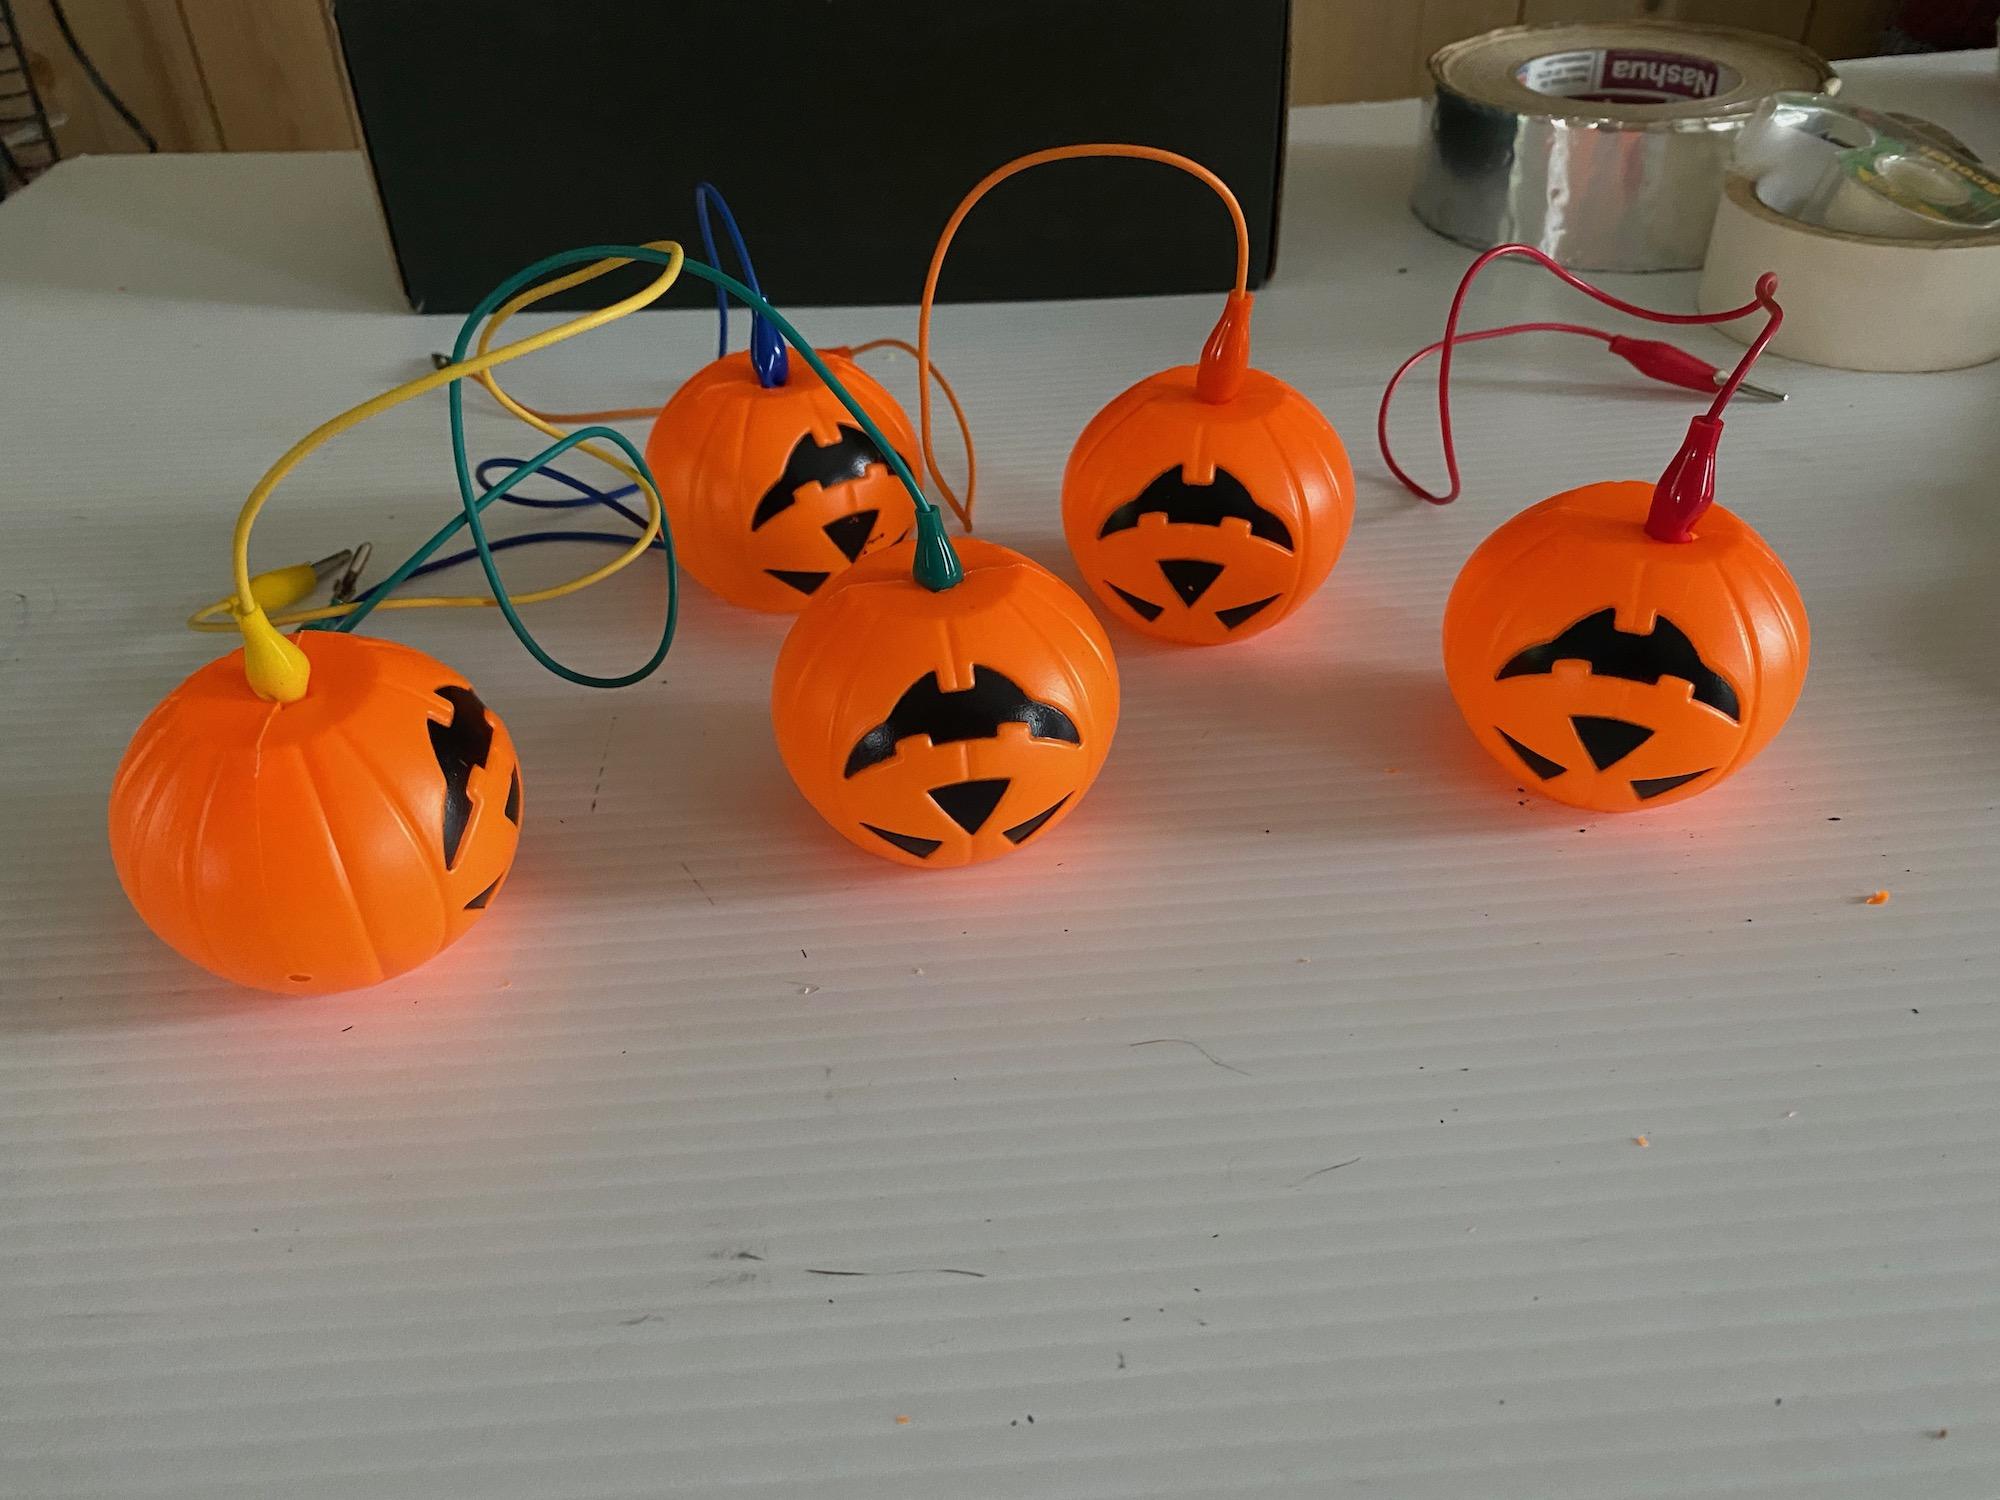
Slide one end of each alligator clip into the holes of the pumpkins and pull them tight against the bottom.
Stuff each pumpkin as full as possible with steel wool, pushing it down and around the clip.
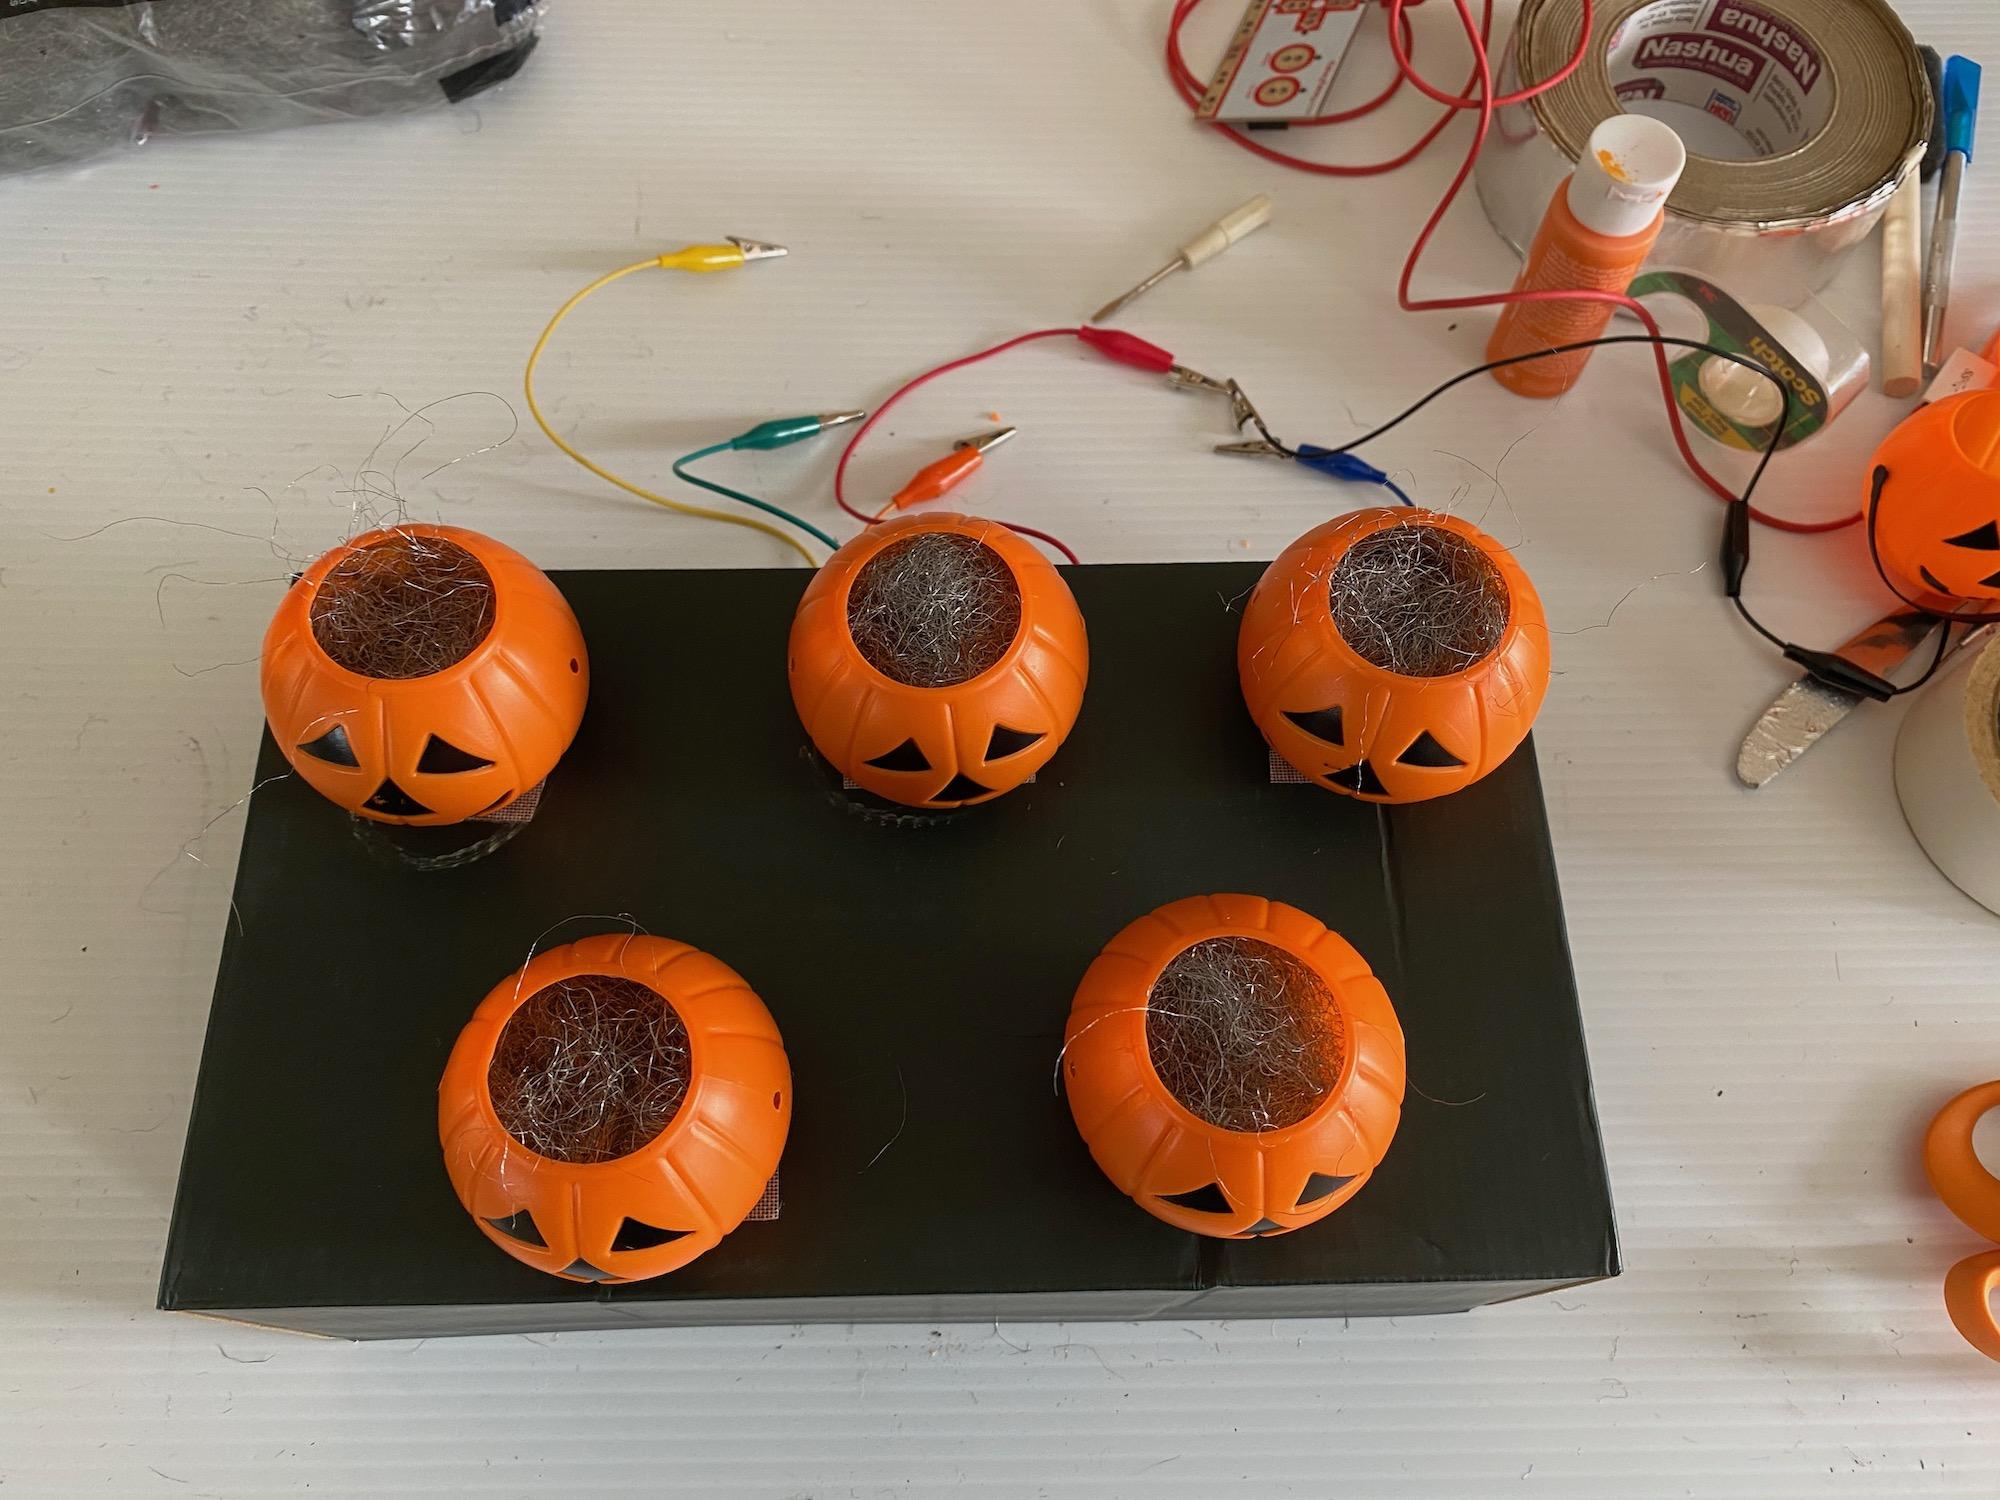
Attach Pumpkins to Box
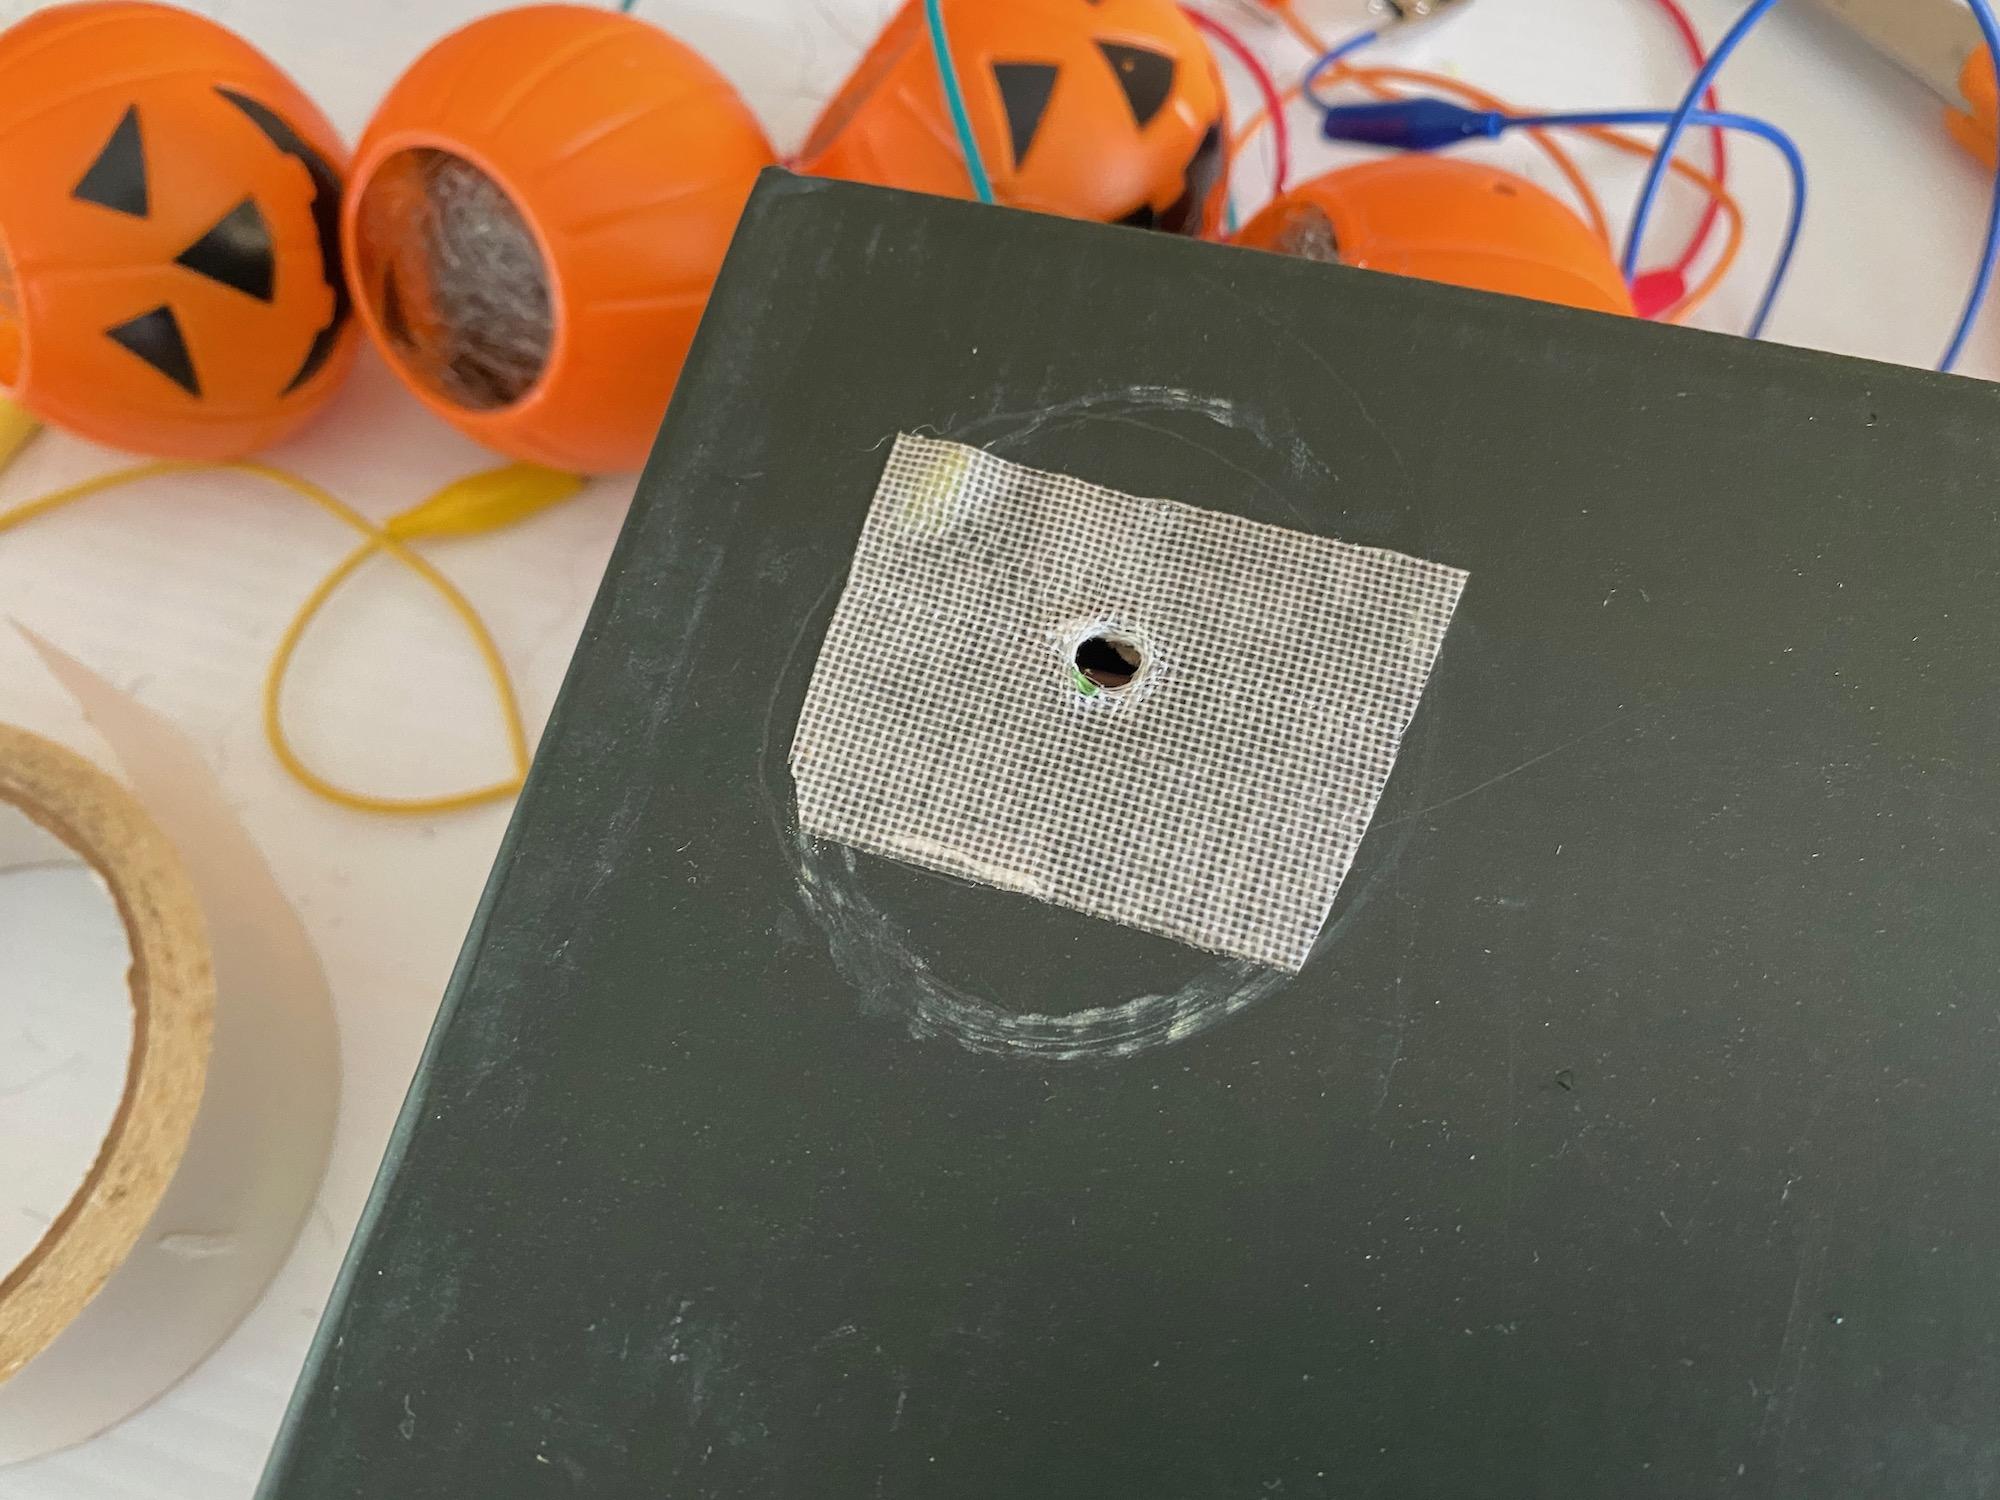

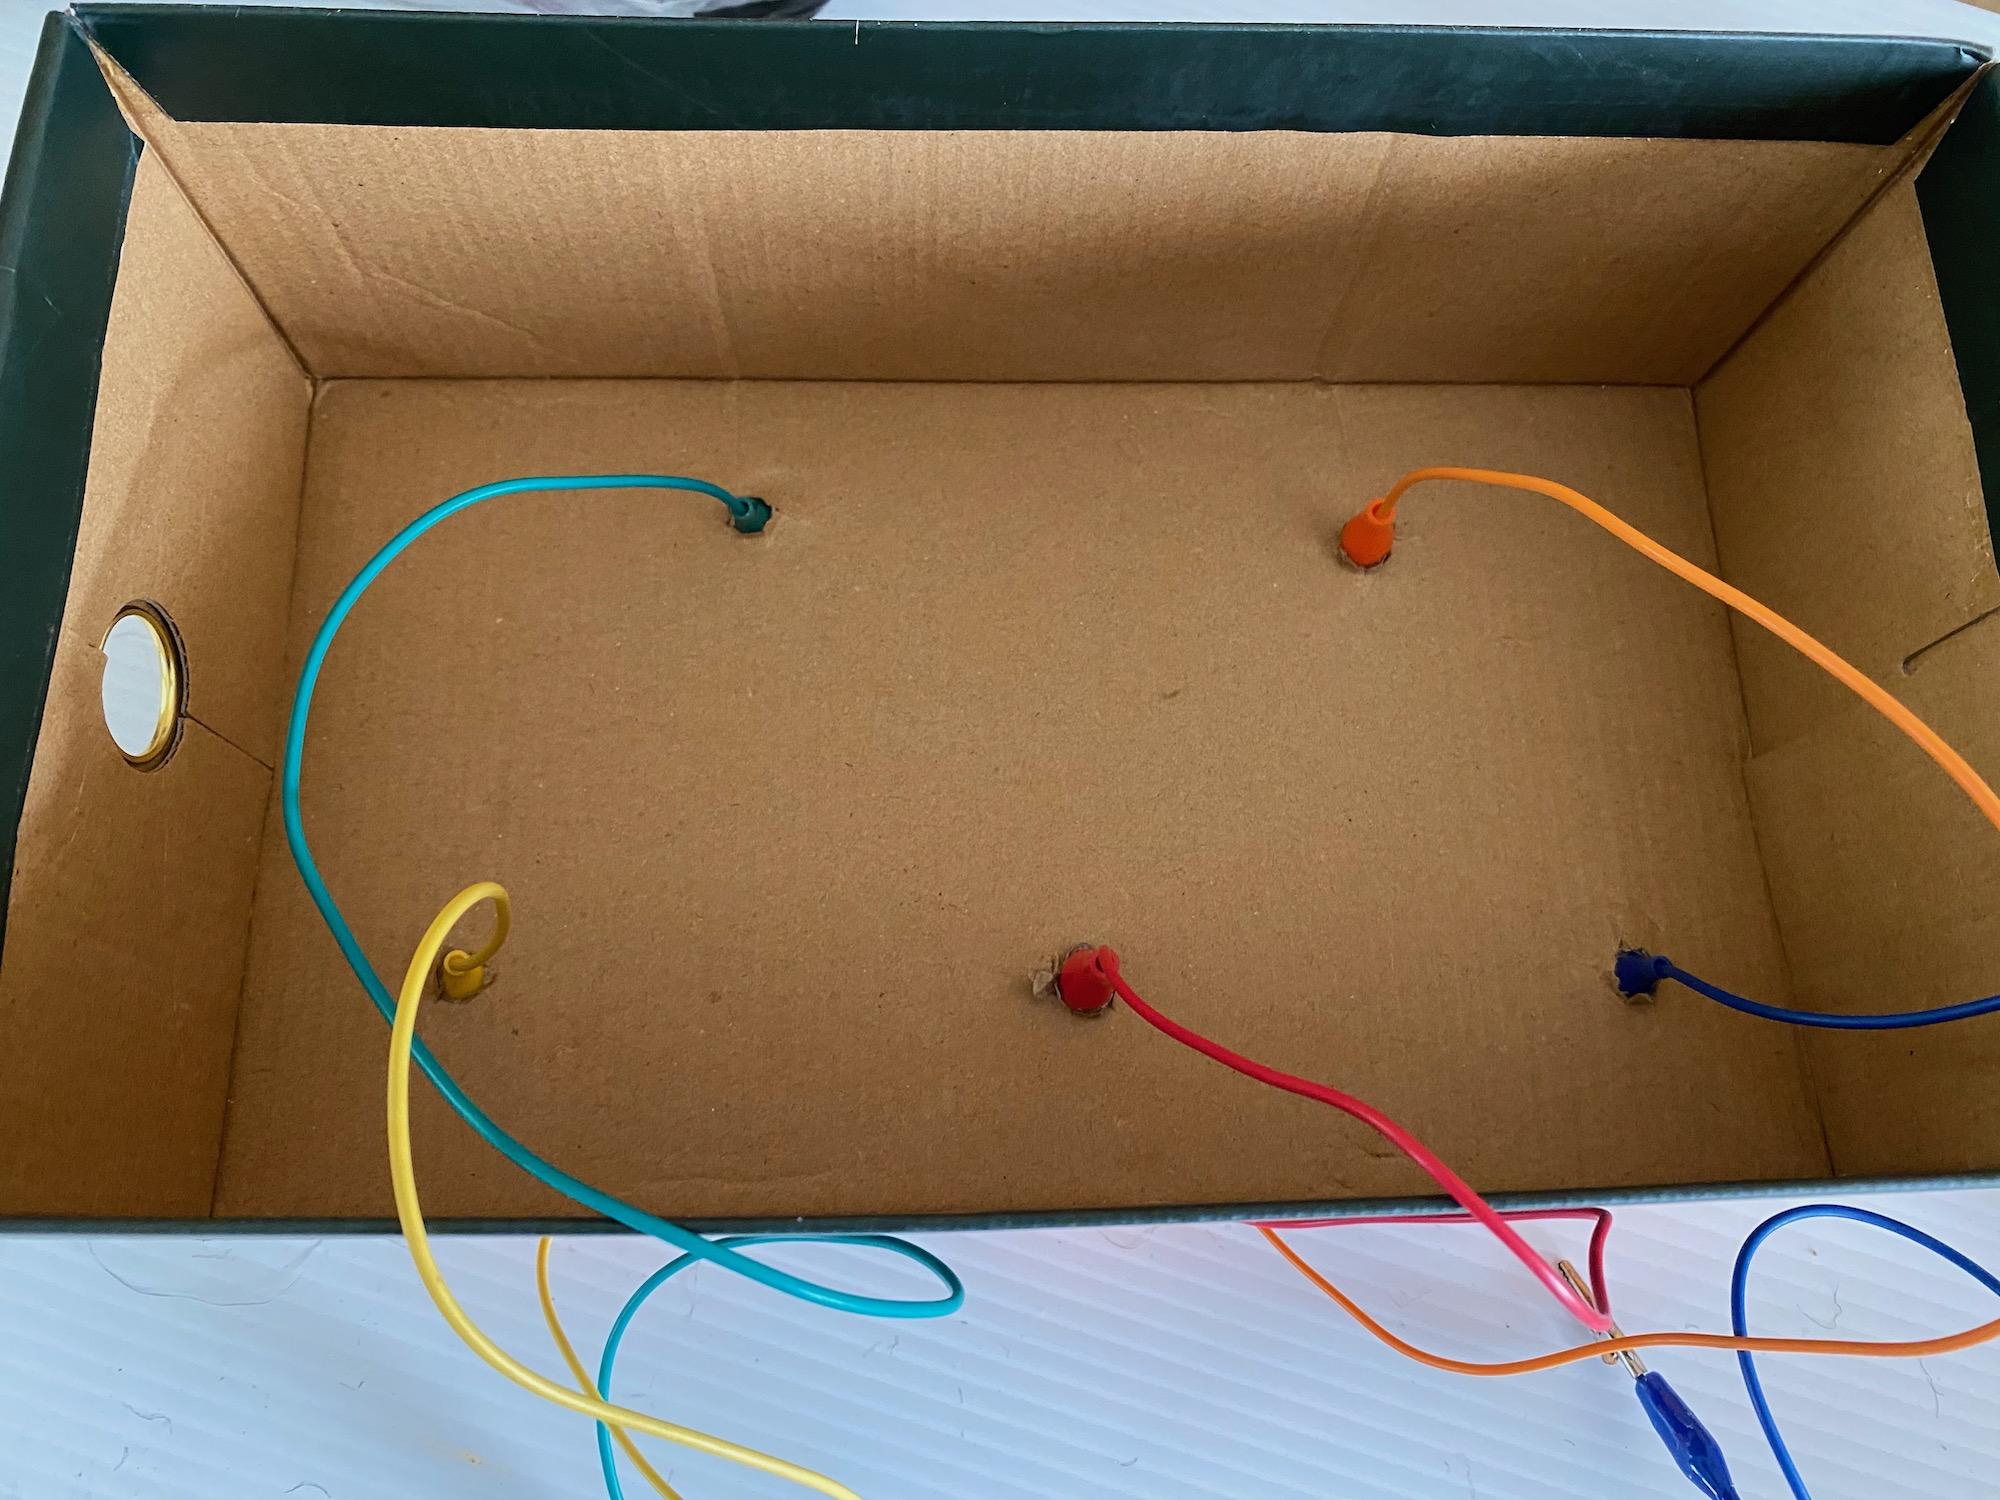
Cut pieces of double-sided carpet tape over each marked circle on the top of the box. Make a hole in the center of each circle, through the tape and the top of the box. It should be about 1/4 inch wide, wide enough for an alligator clip to fit through.
Thread an alligator clip from a pumpkin through the first hole.
Pull the top piece of the carpet tape off and push the pumpkin against it to attach.
Pull the alligator clip tight.
Repeat for each pumpkin until all five are situated.
Attach Makey Makey
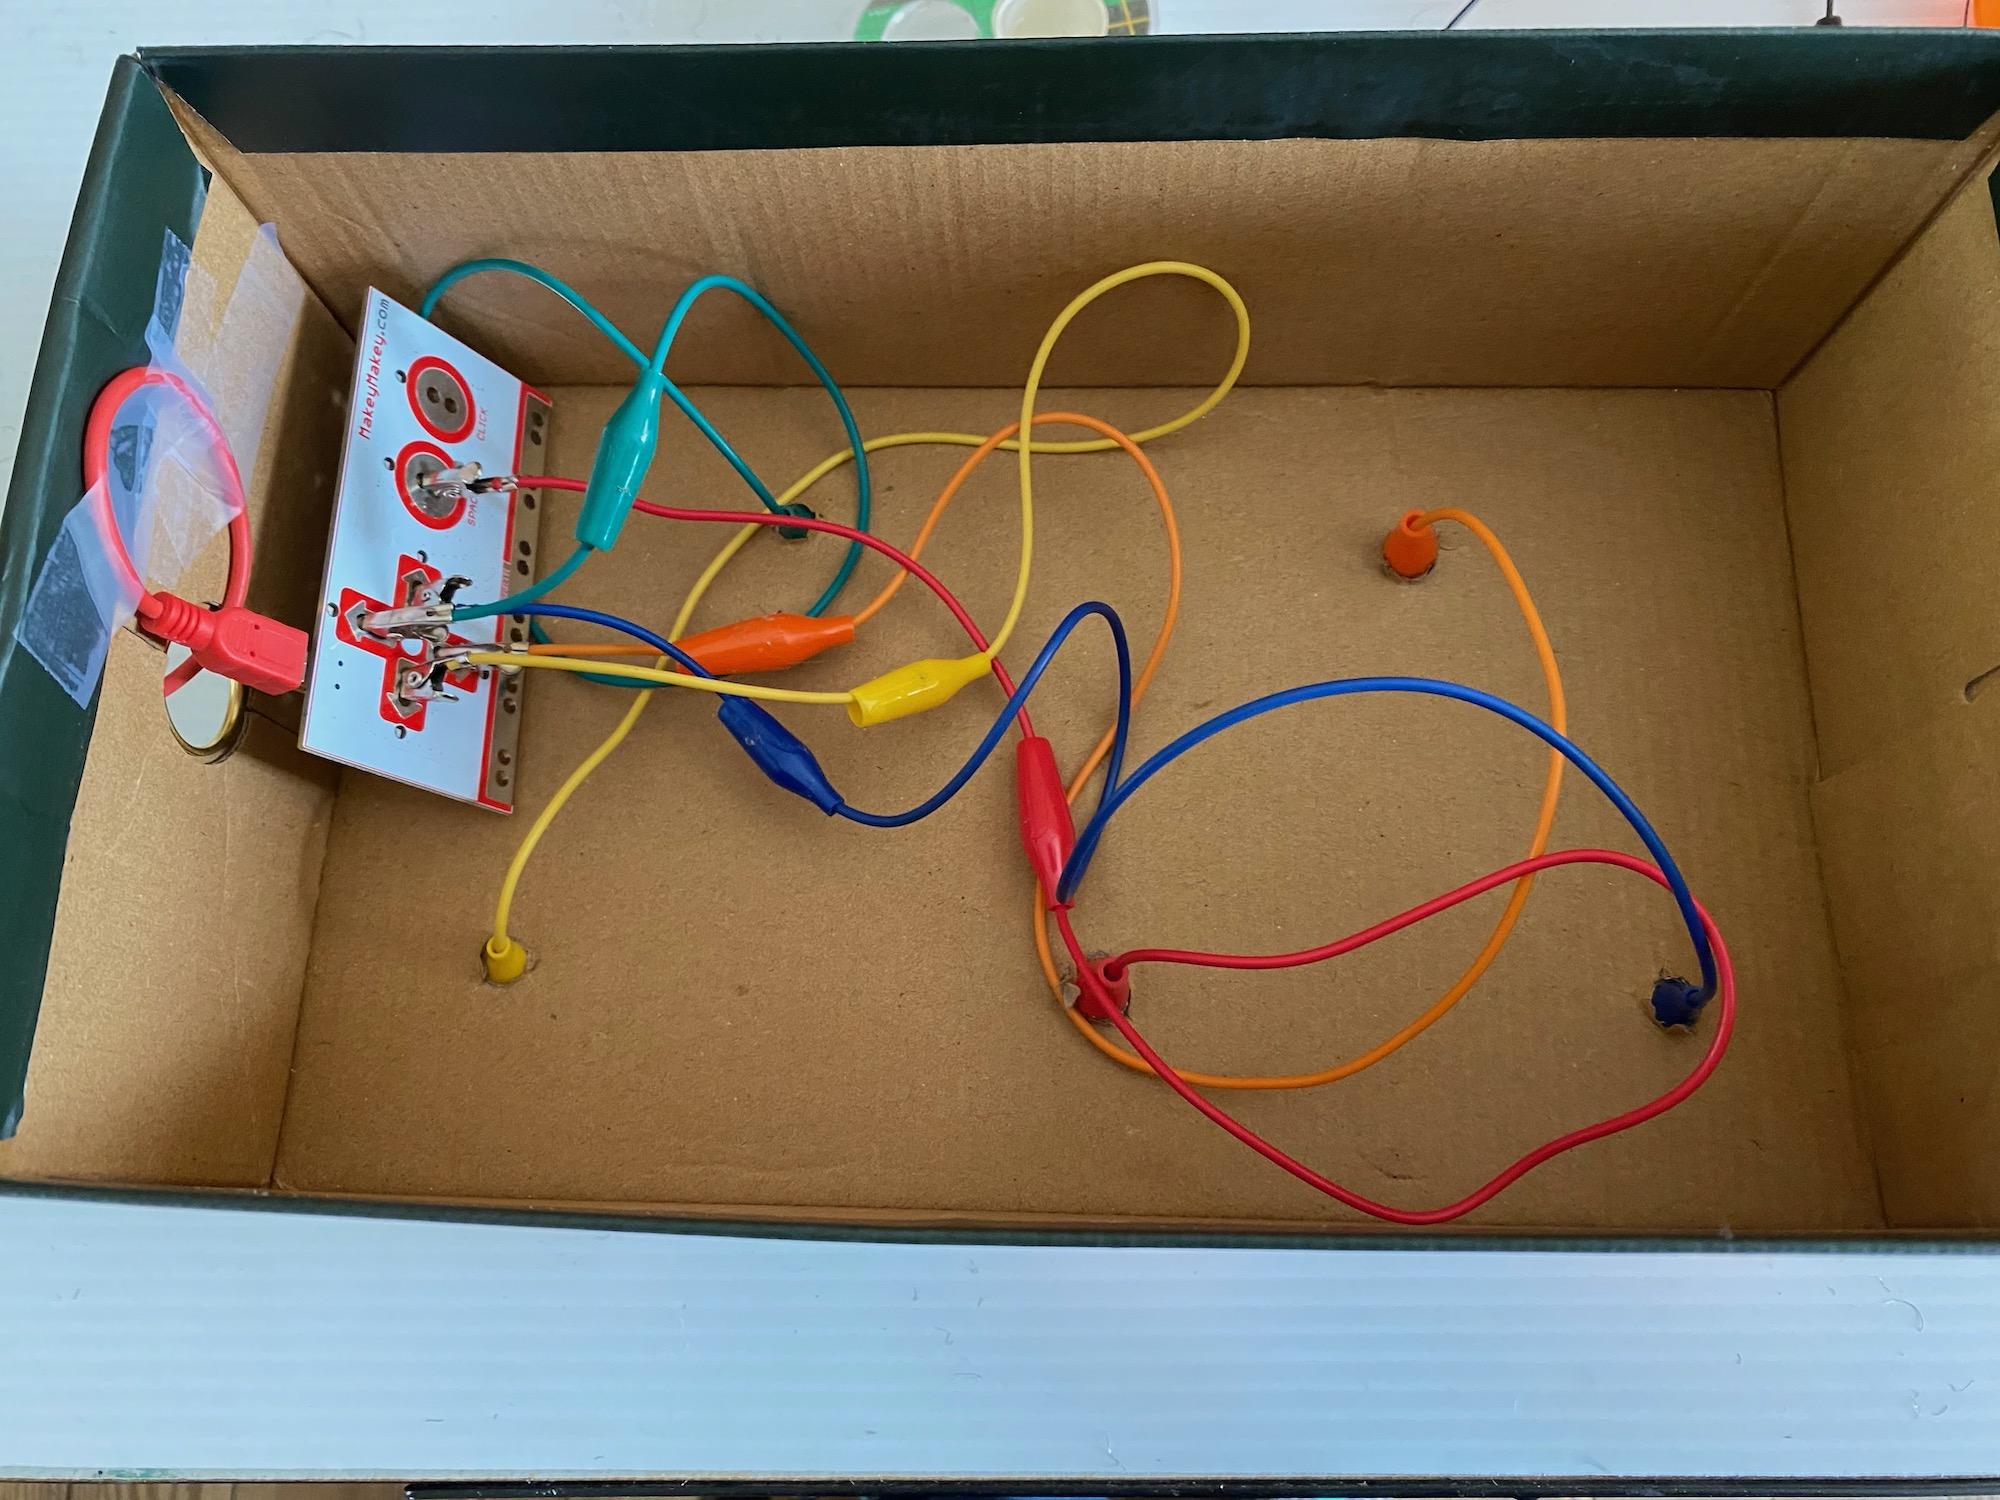
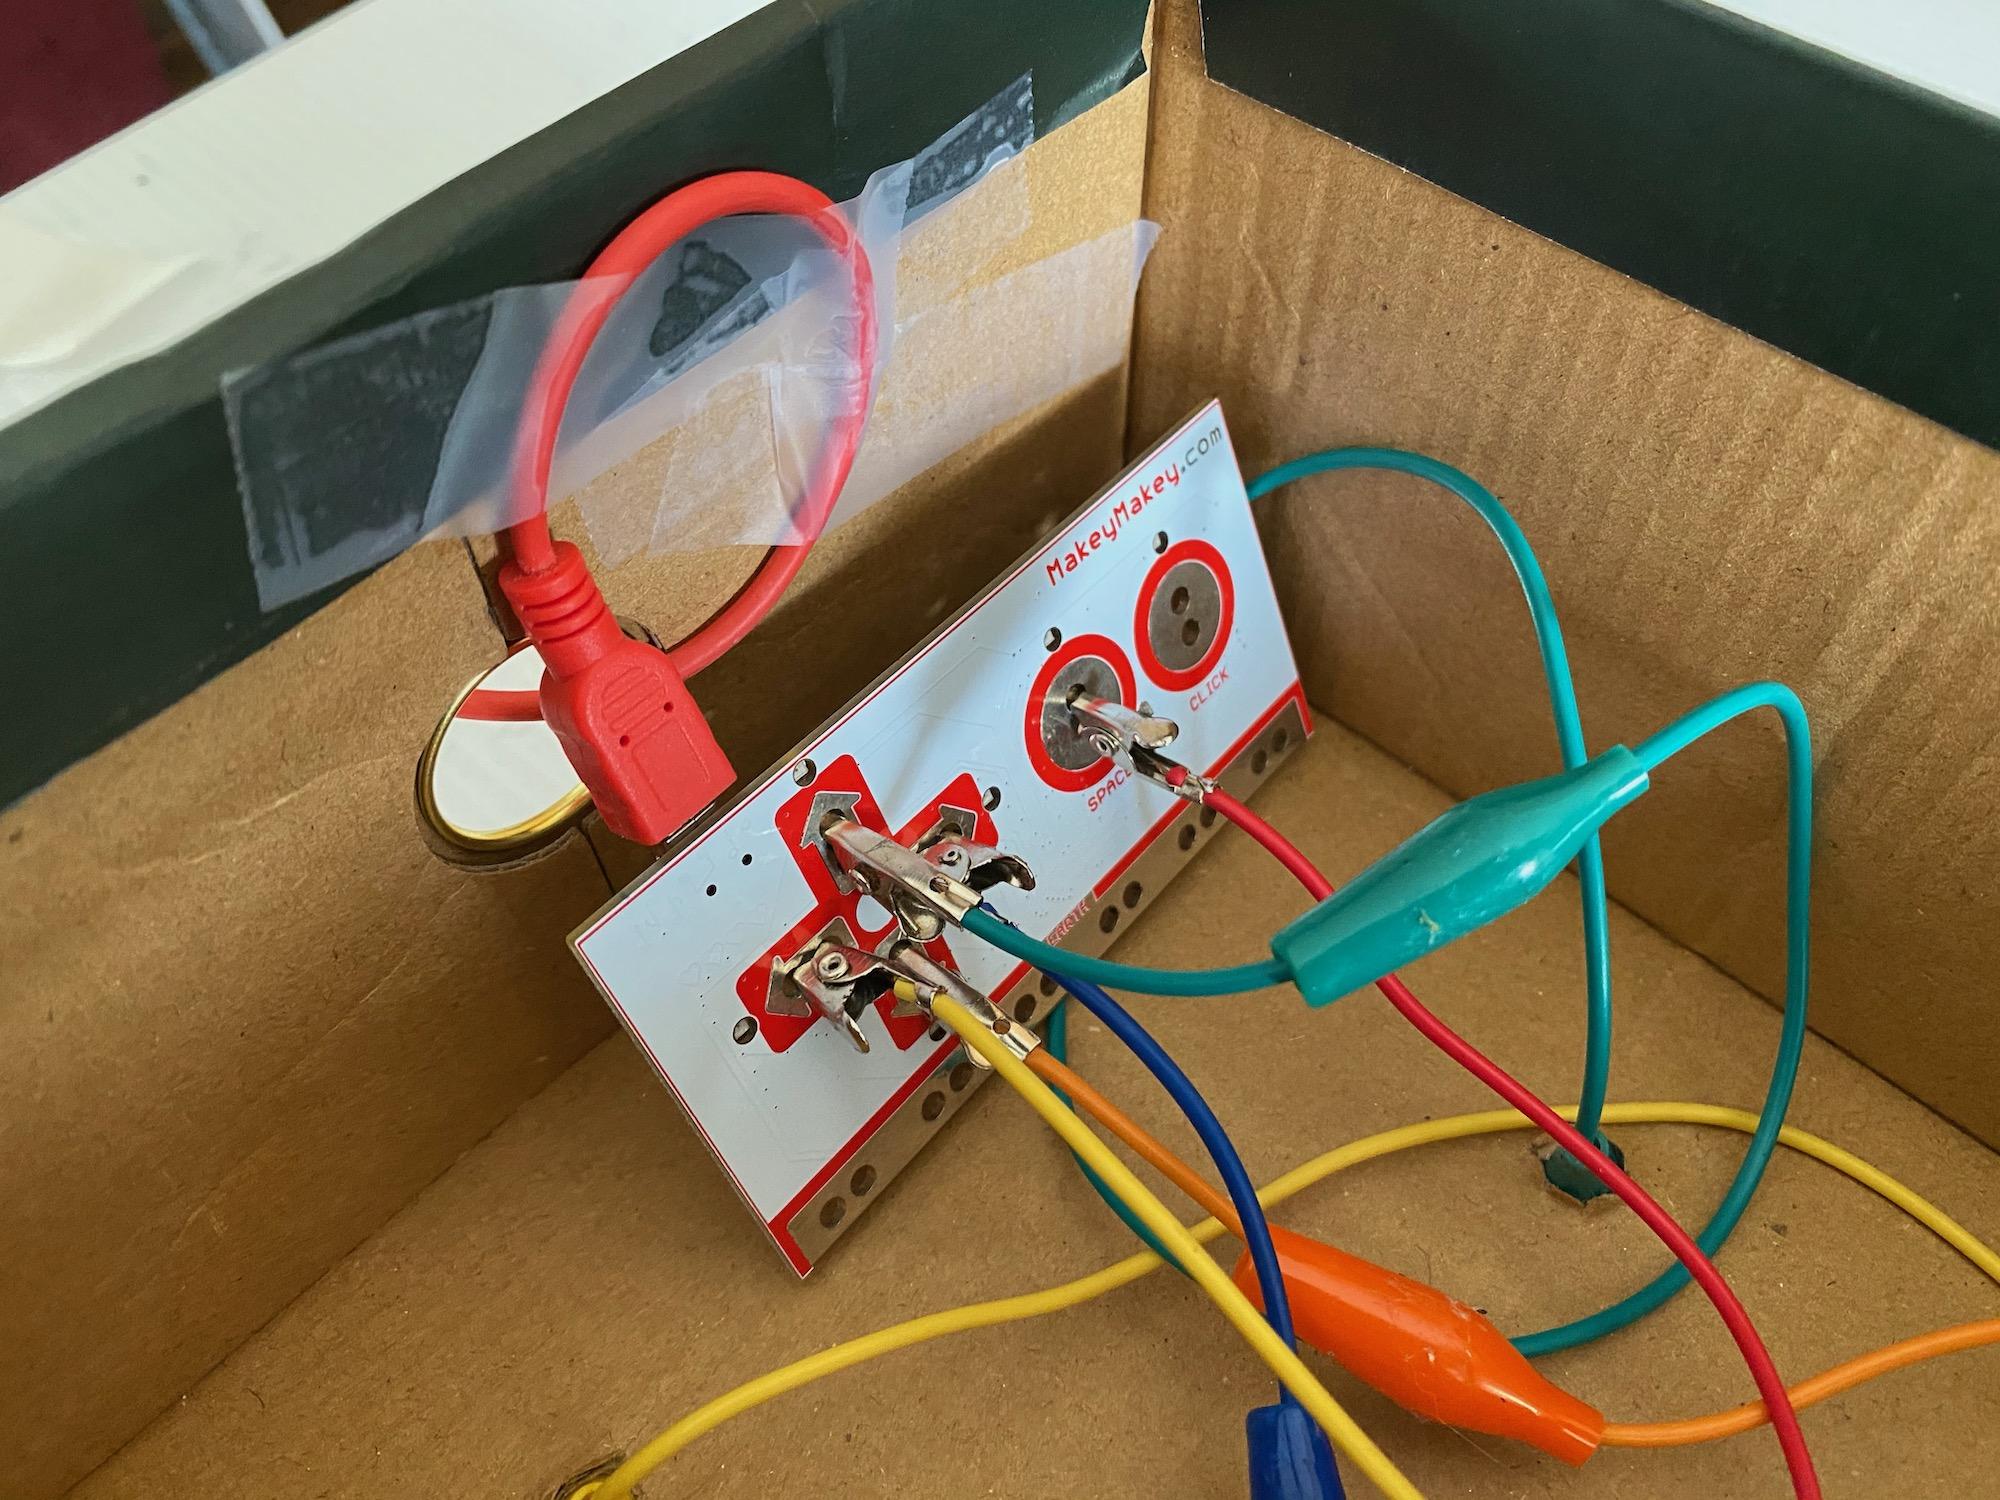
Carefully turn the box upside down.
Attach the loose ends of the alligator clips to the holes in the Makey Makey.
Attach an alligator clip to the ground on the Makey Makey.
Attach the USB cord to the Makey Makey.
Turn the box back over and pull the USB cord and the ground alligator from under the back of the box.
Prepare and Attach the Knife
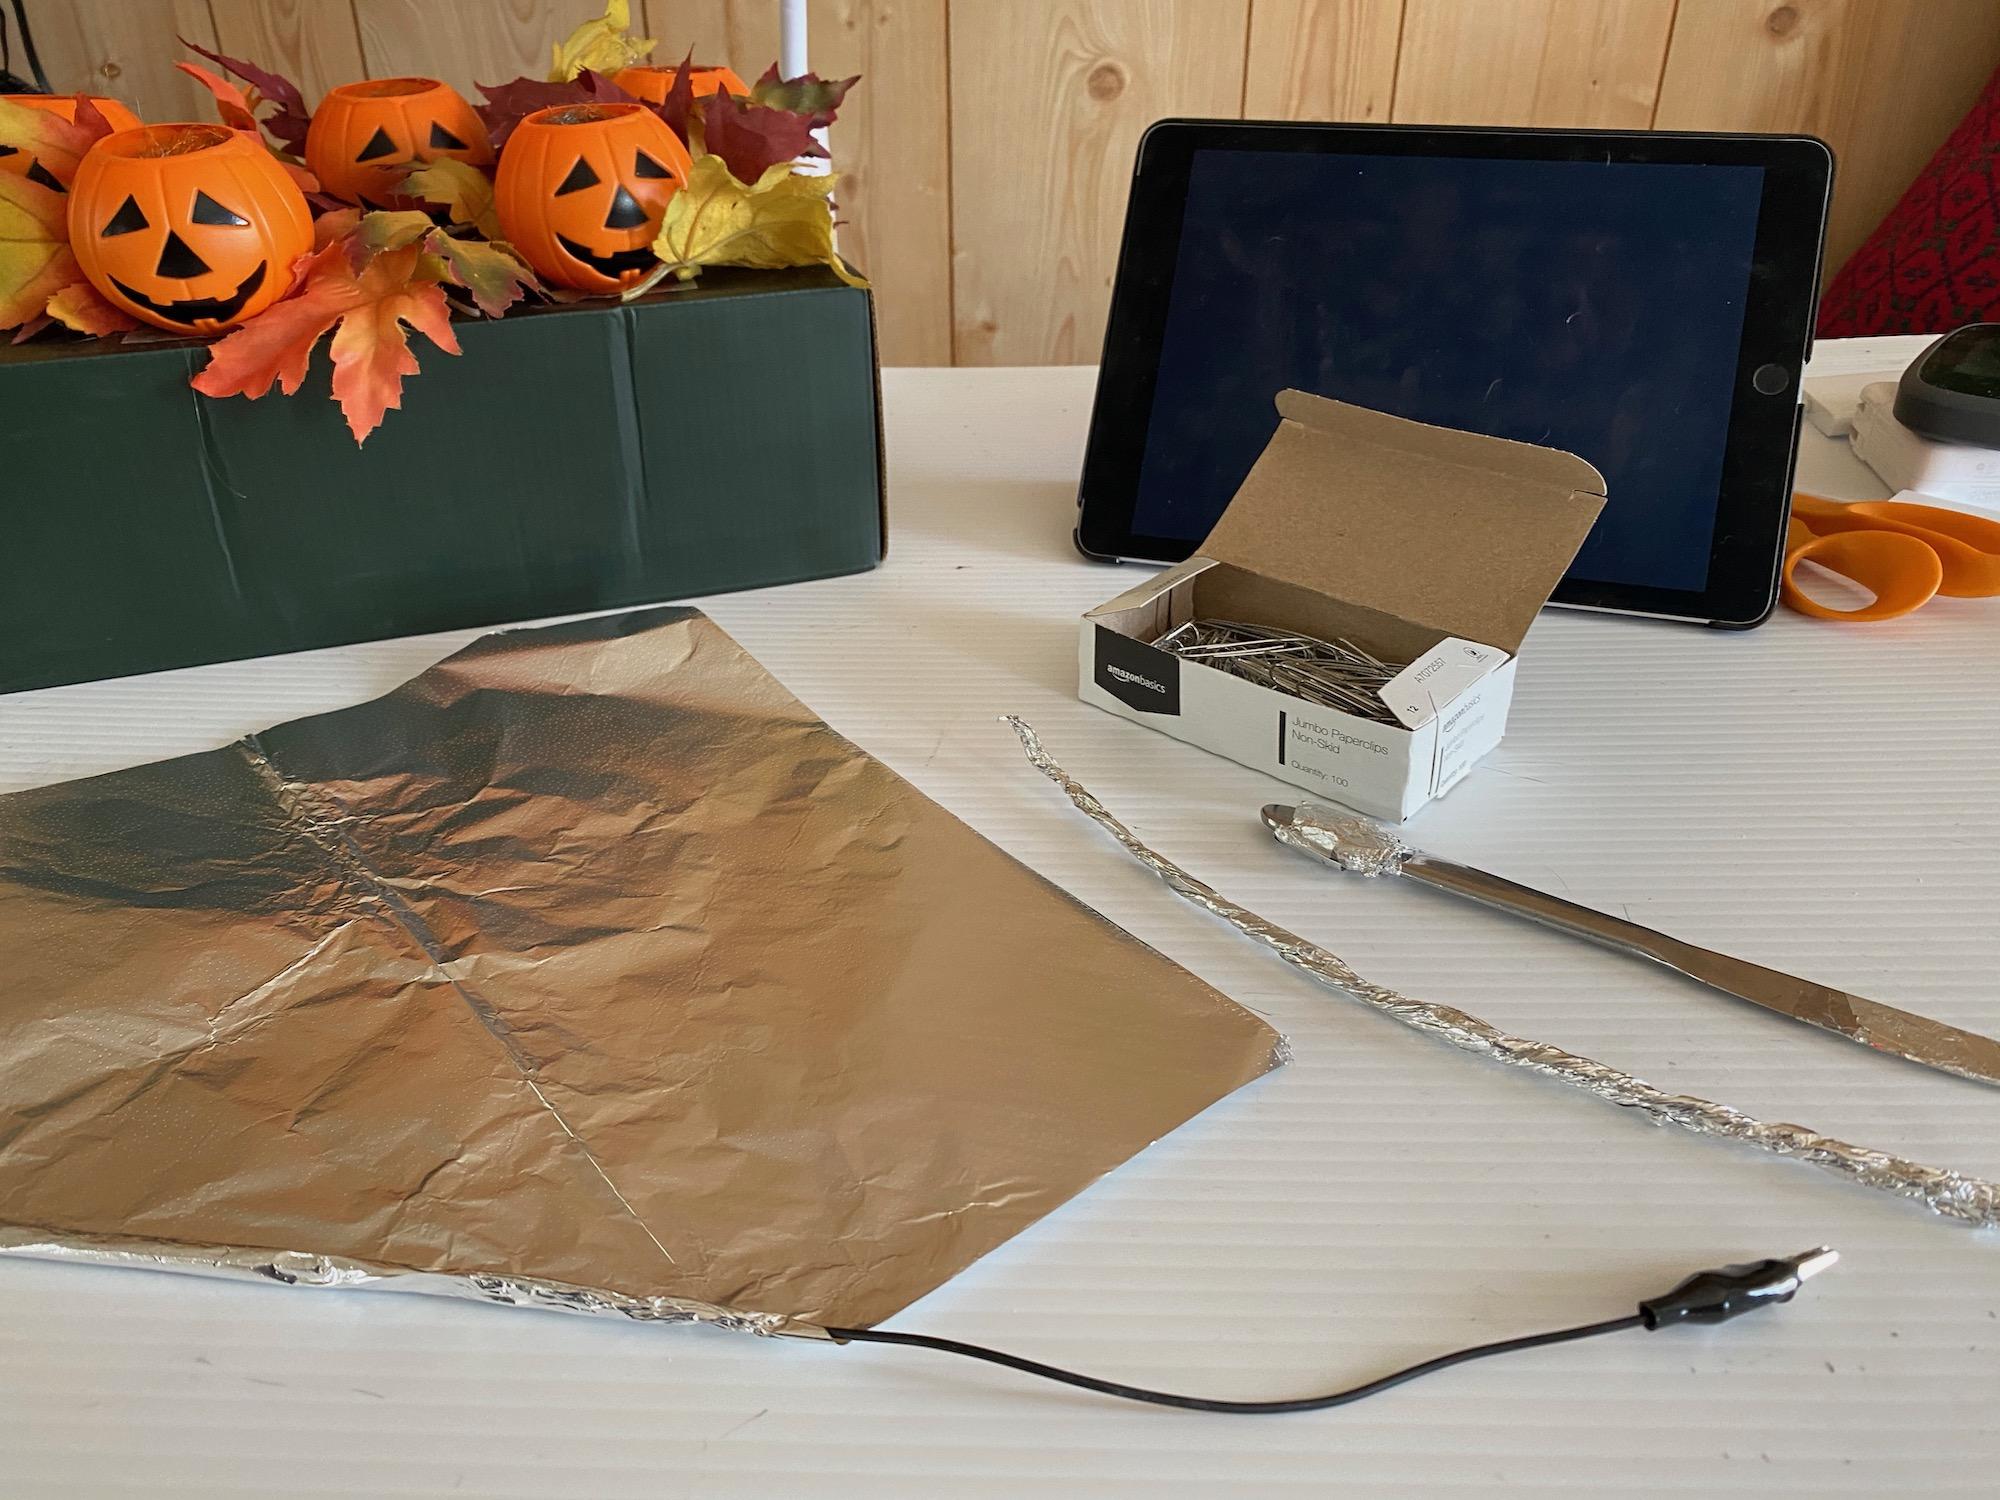
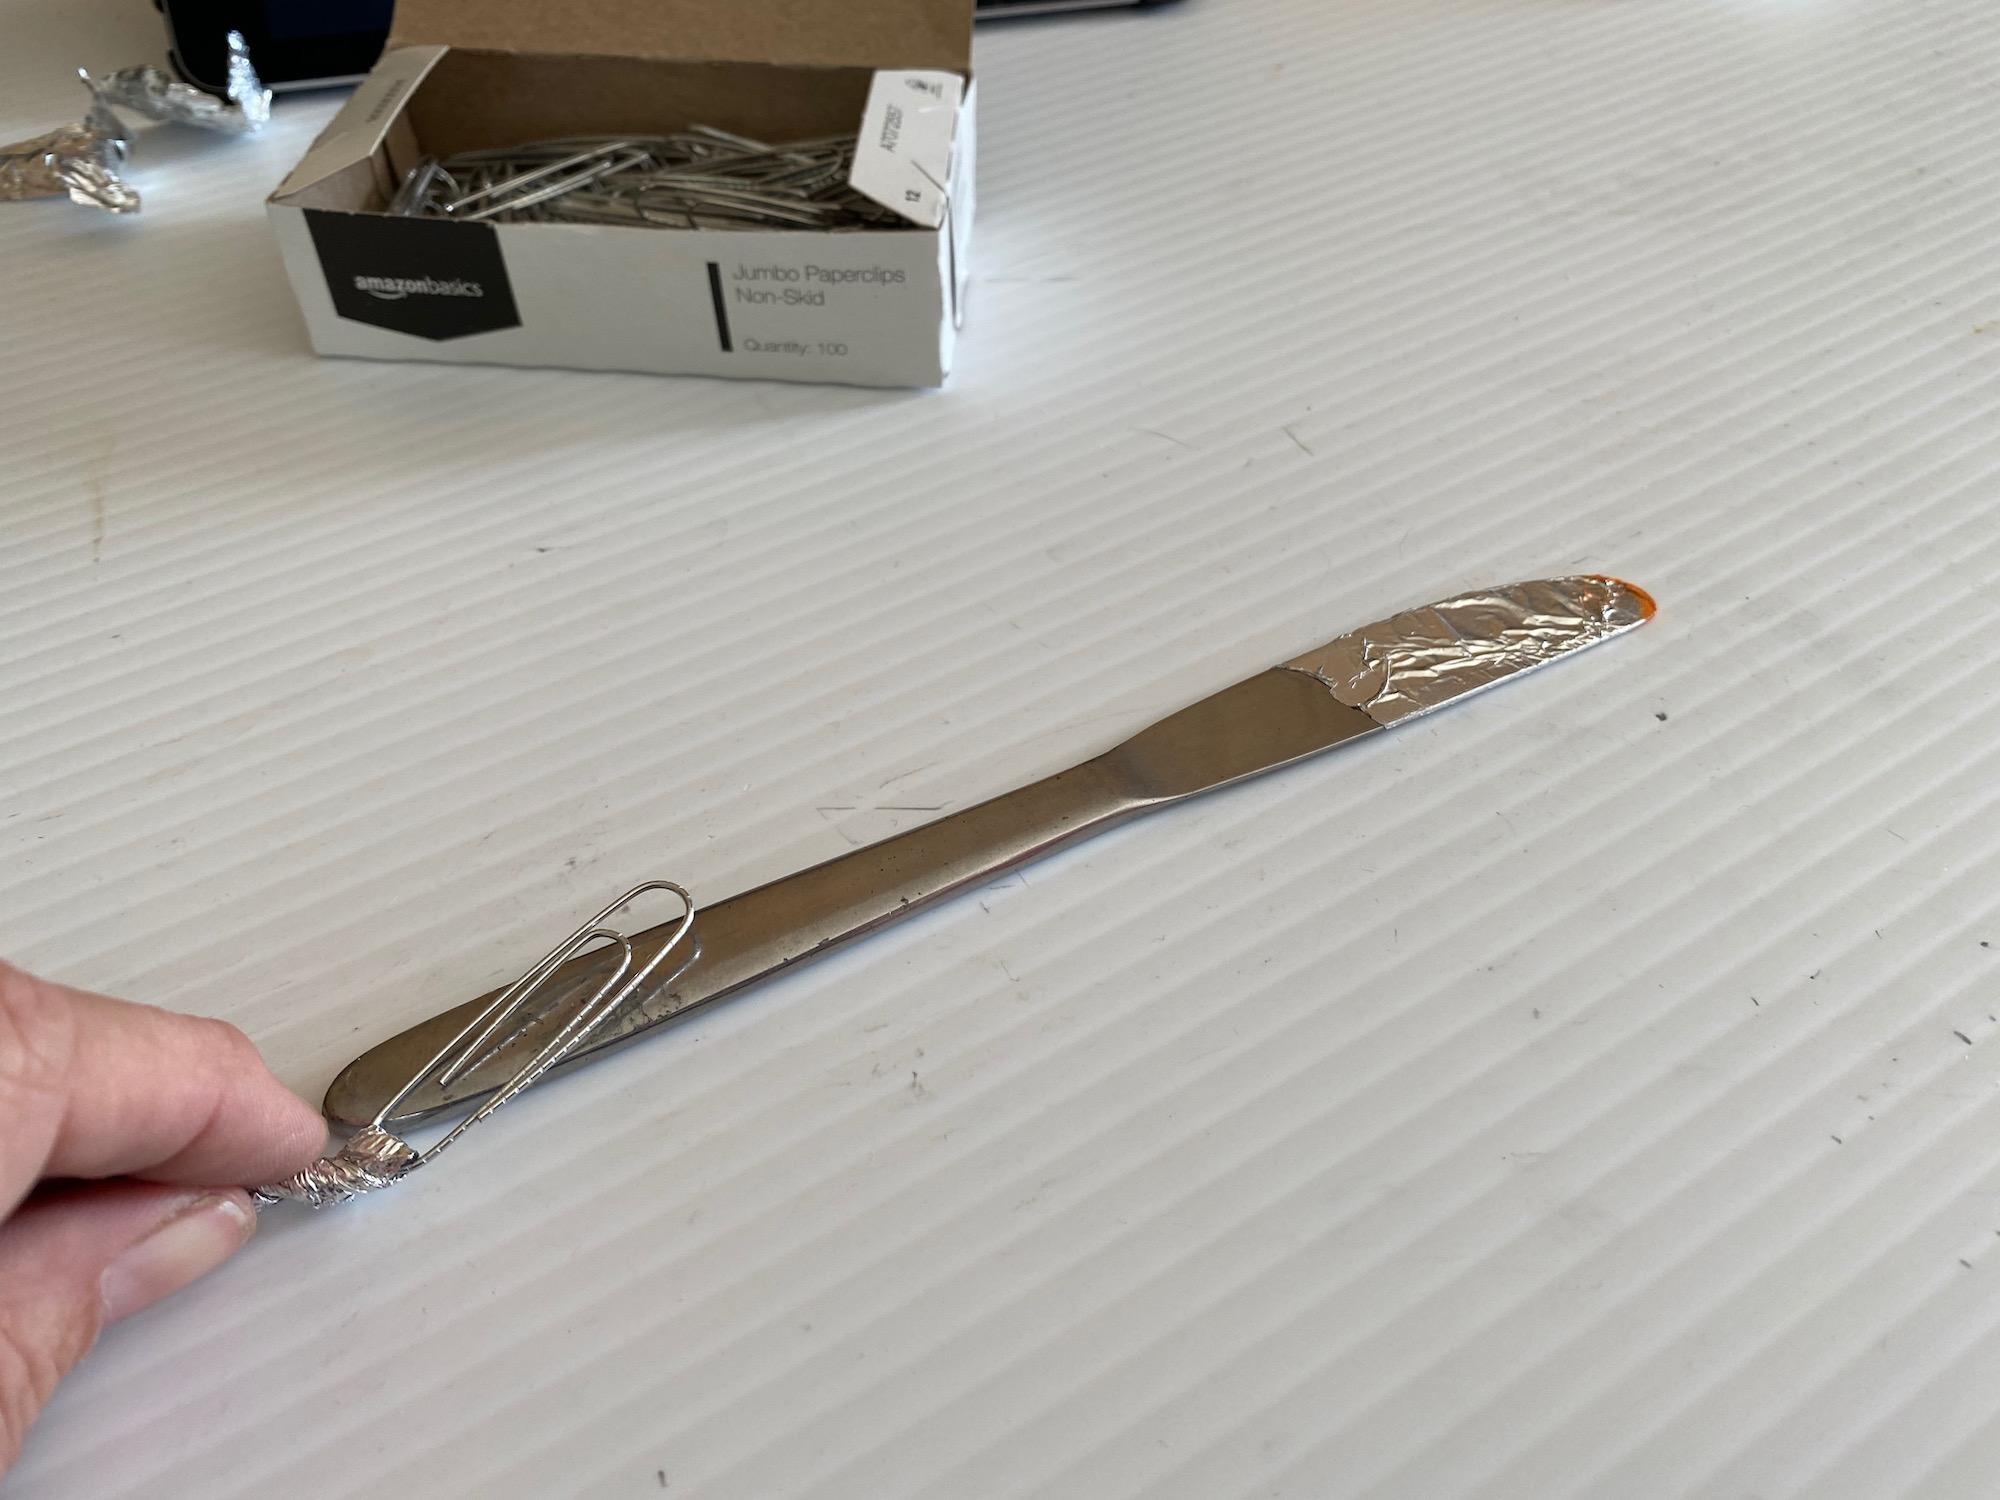
The knife completes the circuit so should be metal or wrapped in foil. My decoration was family friendly so I used a table knife.
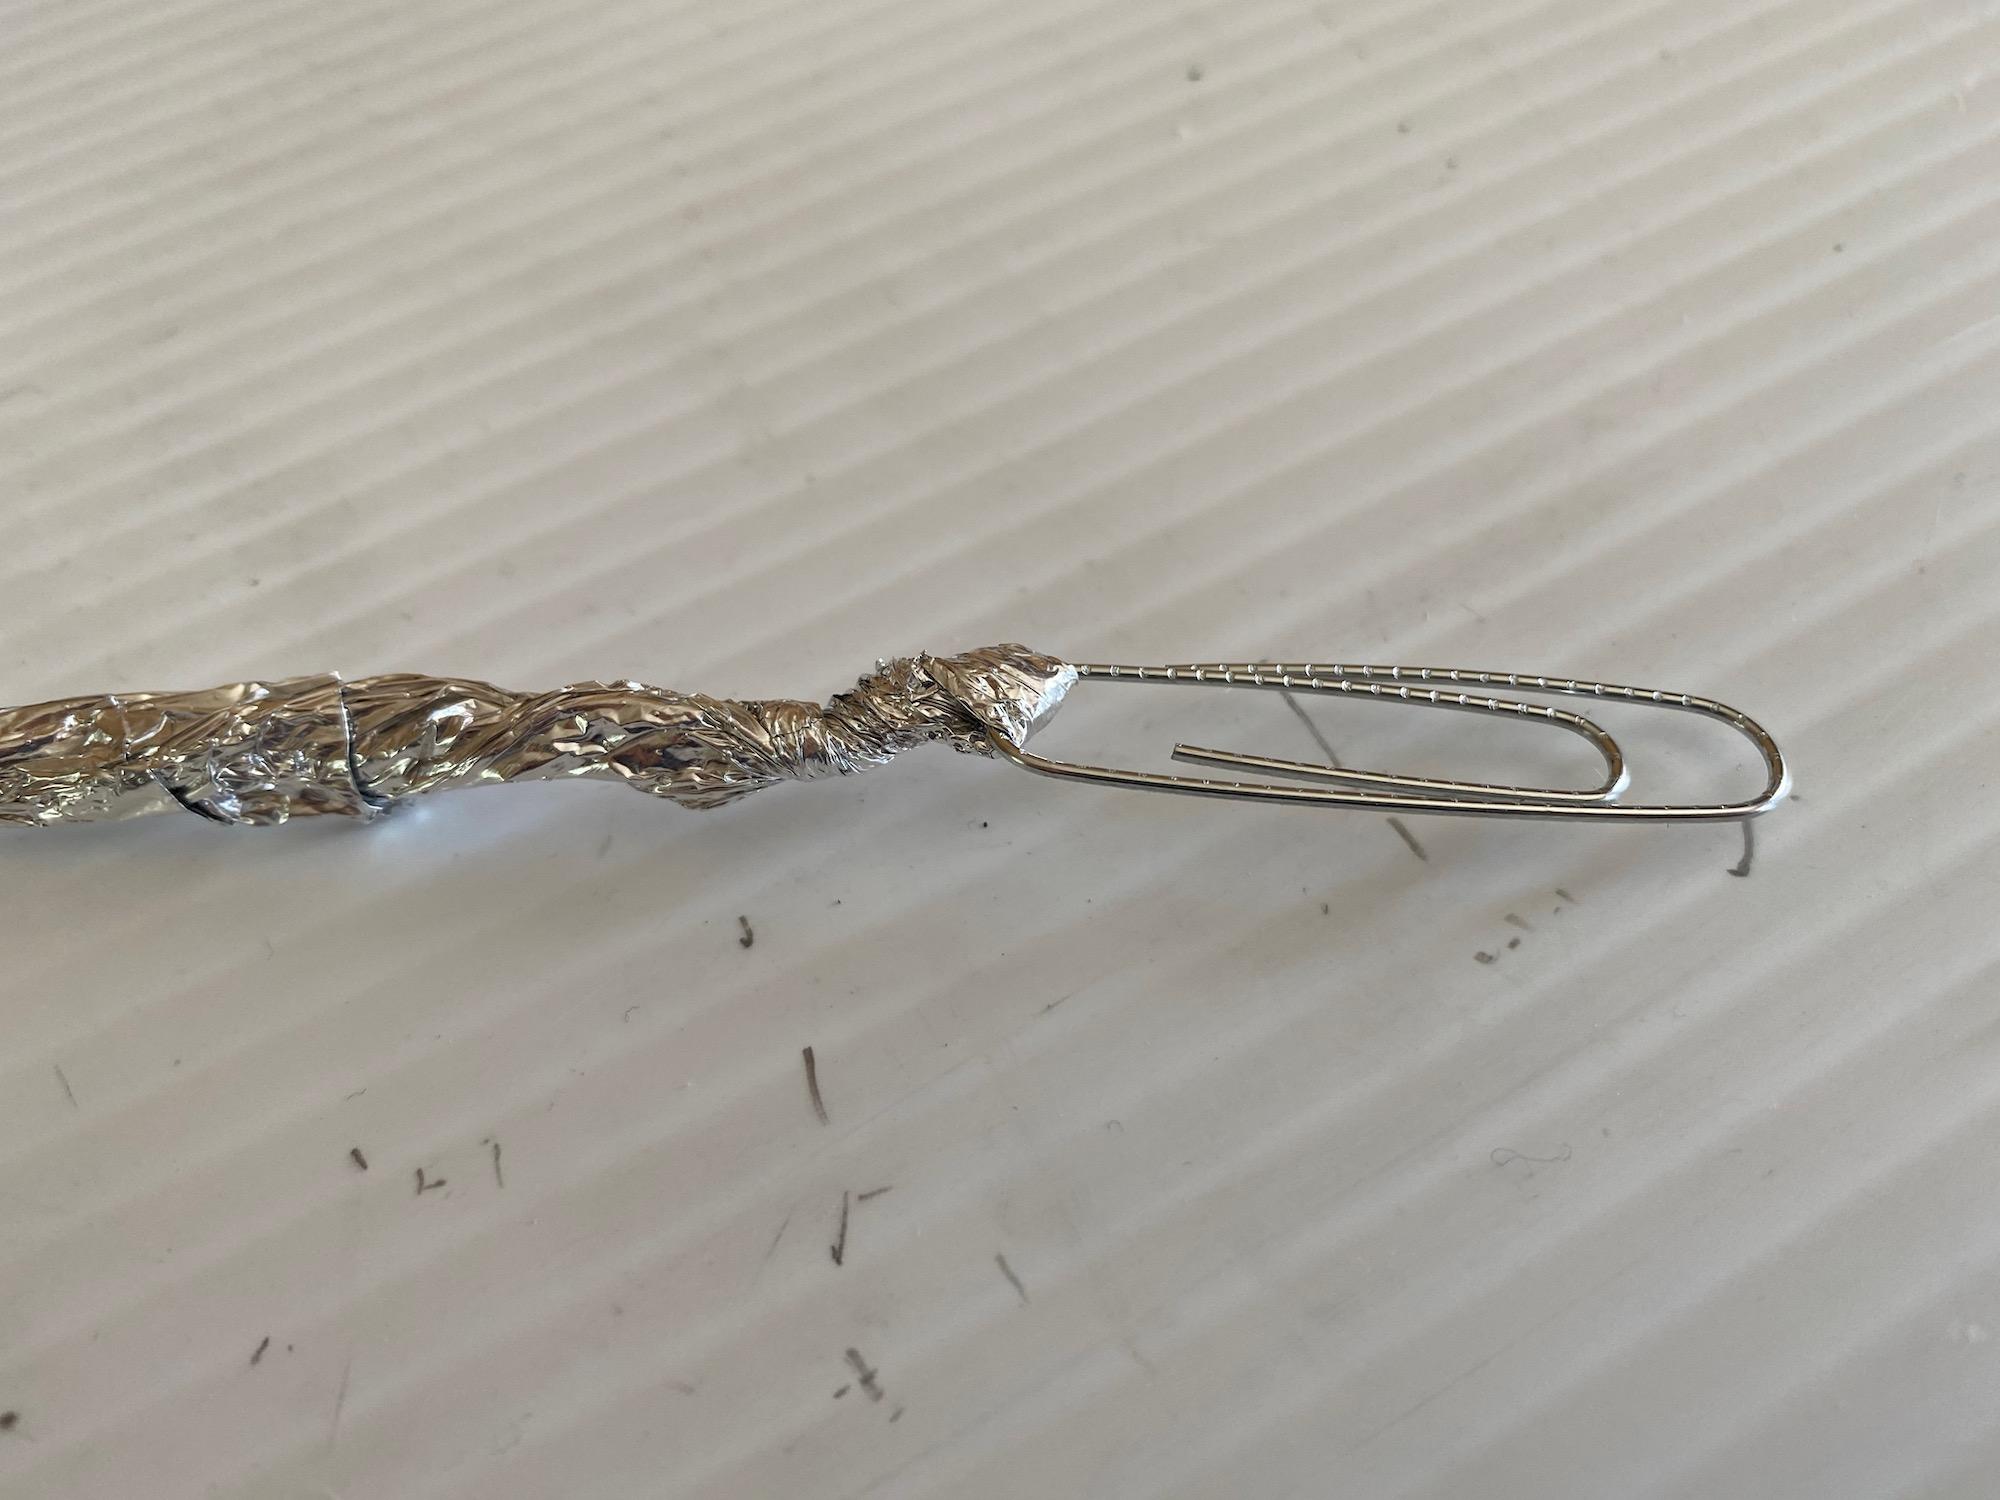
Connect the ground alligator clip to the end of the knife with aluminum foil. Wrap the alligator clip cord with aluminum foil to disguise it.
NOTE: My alligator clip wasn't long enough so I extended it with a paper clip alligator clip. (Two paper clips attach with a long strip of aluminum foil.)
Connect and Test
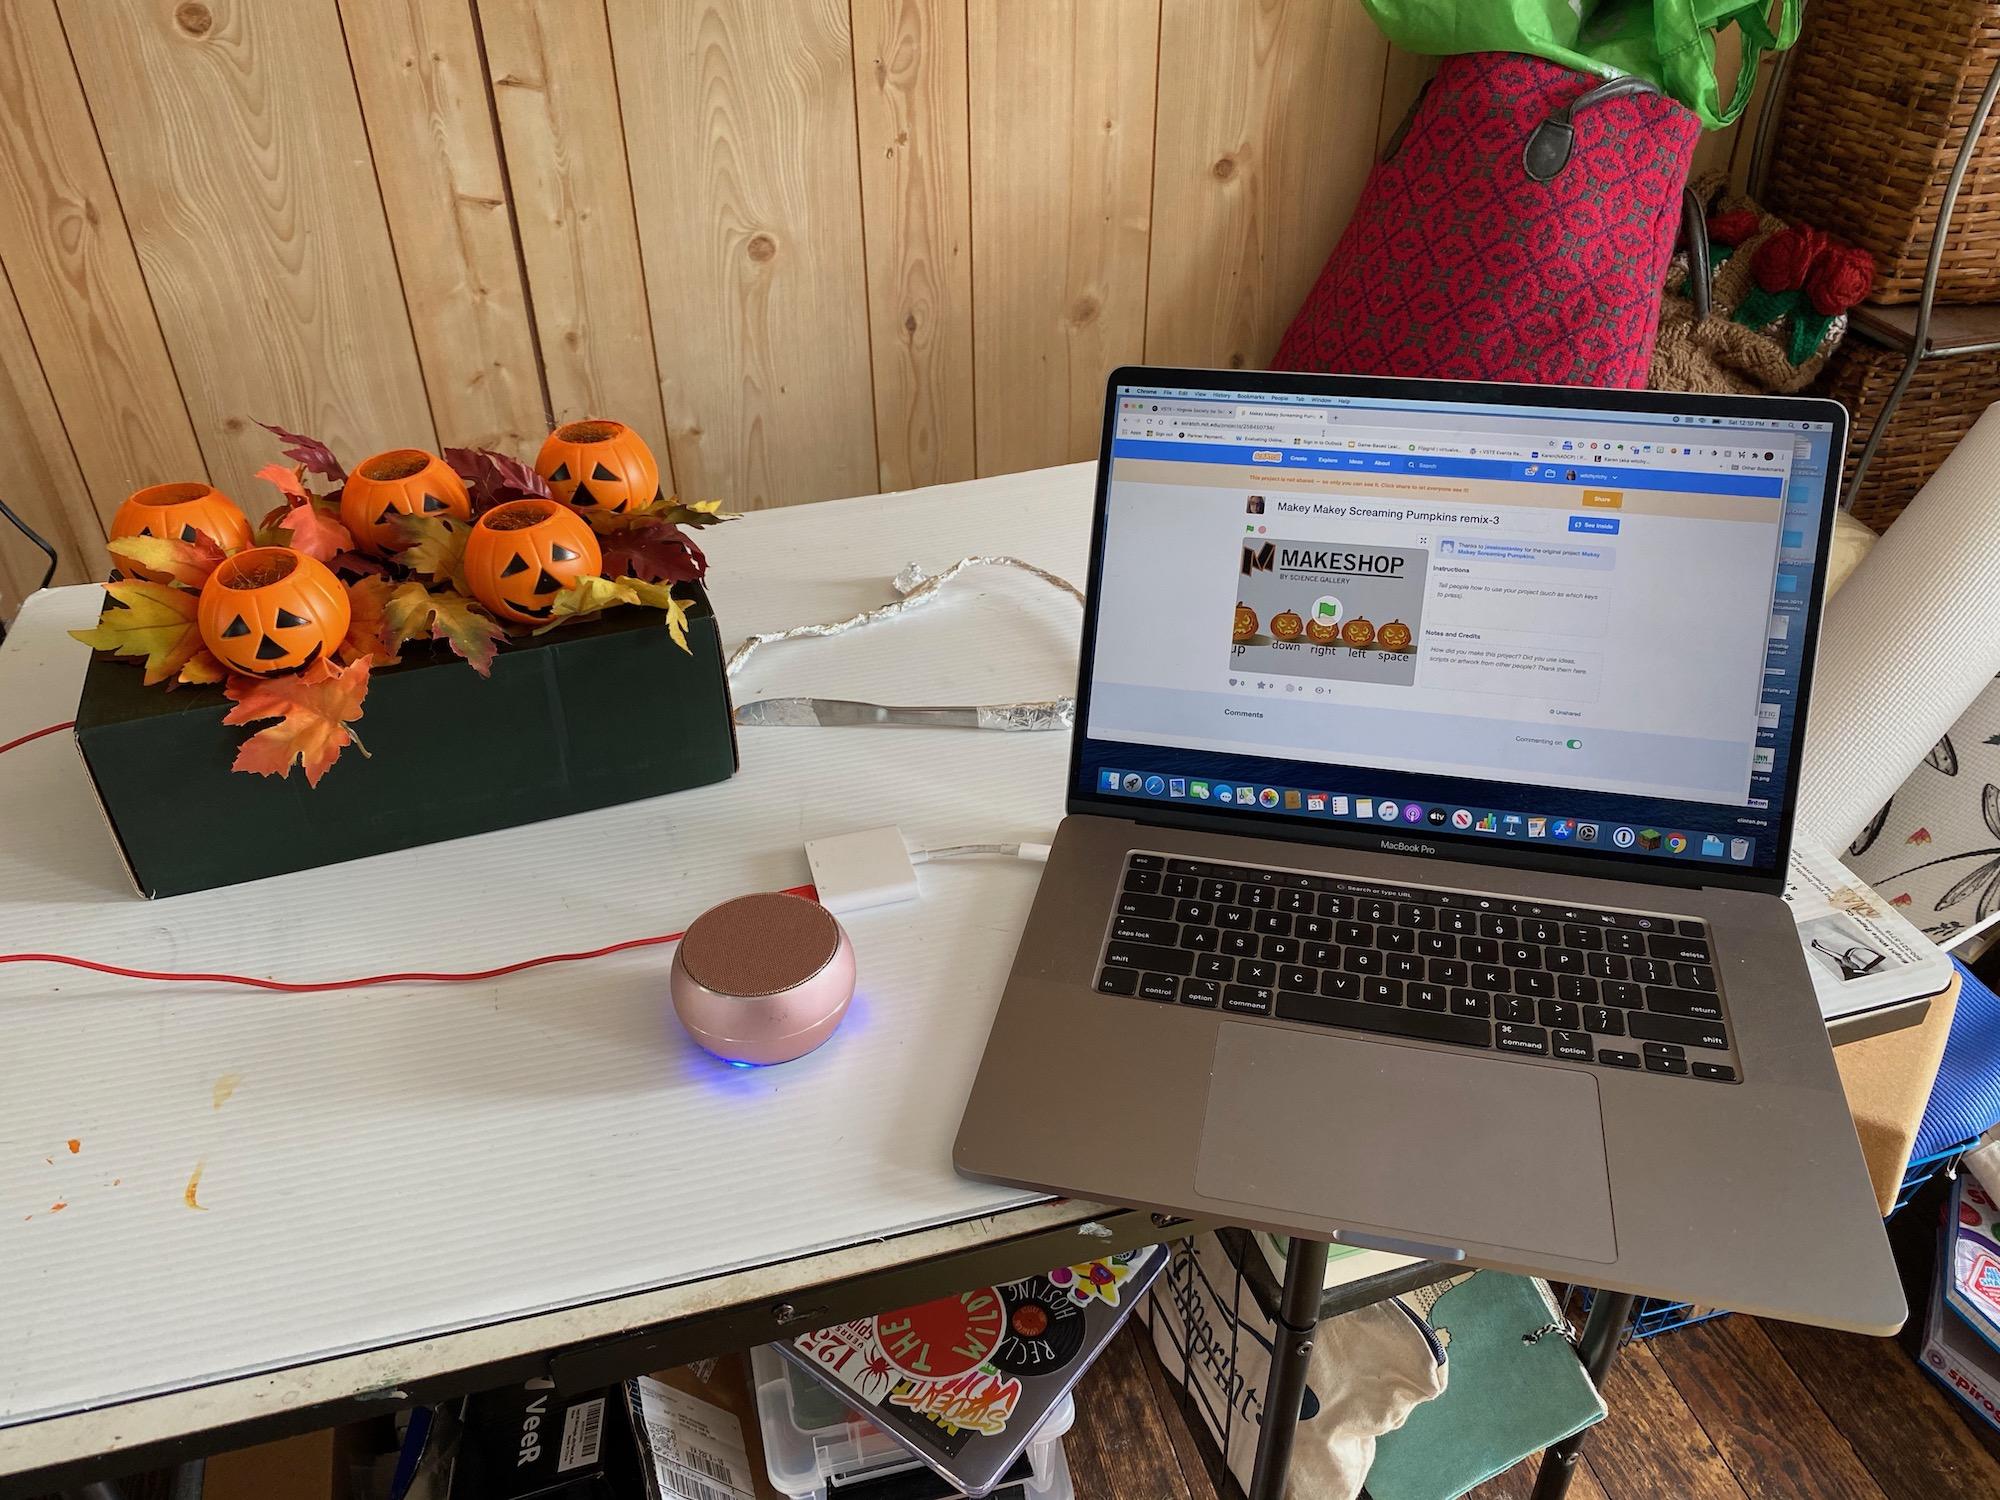
Connect the USB cord from the Makey Makey to whatever device you are using.
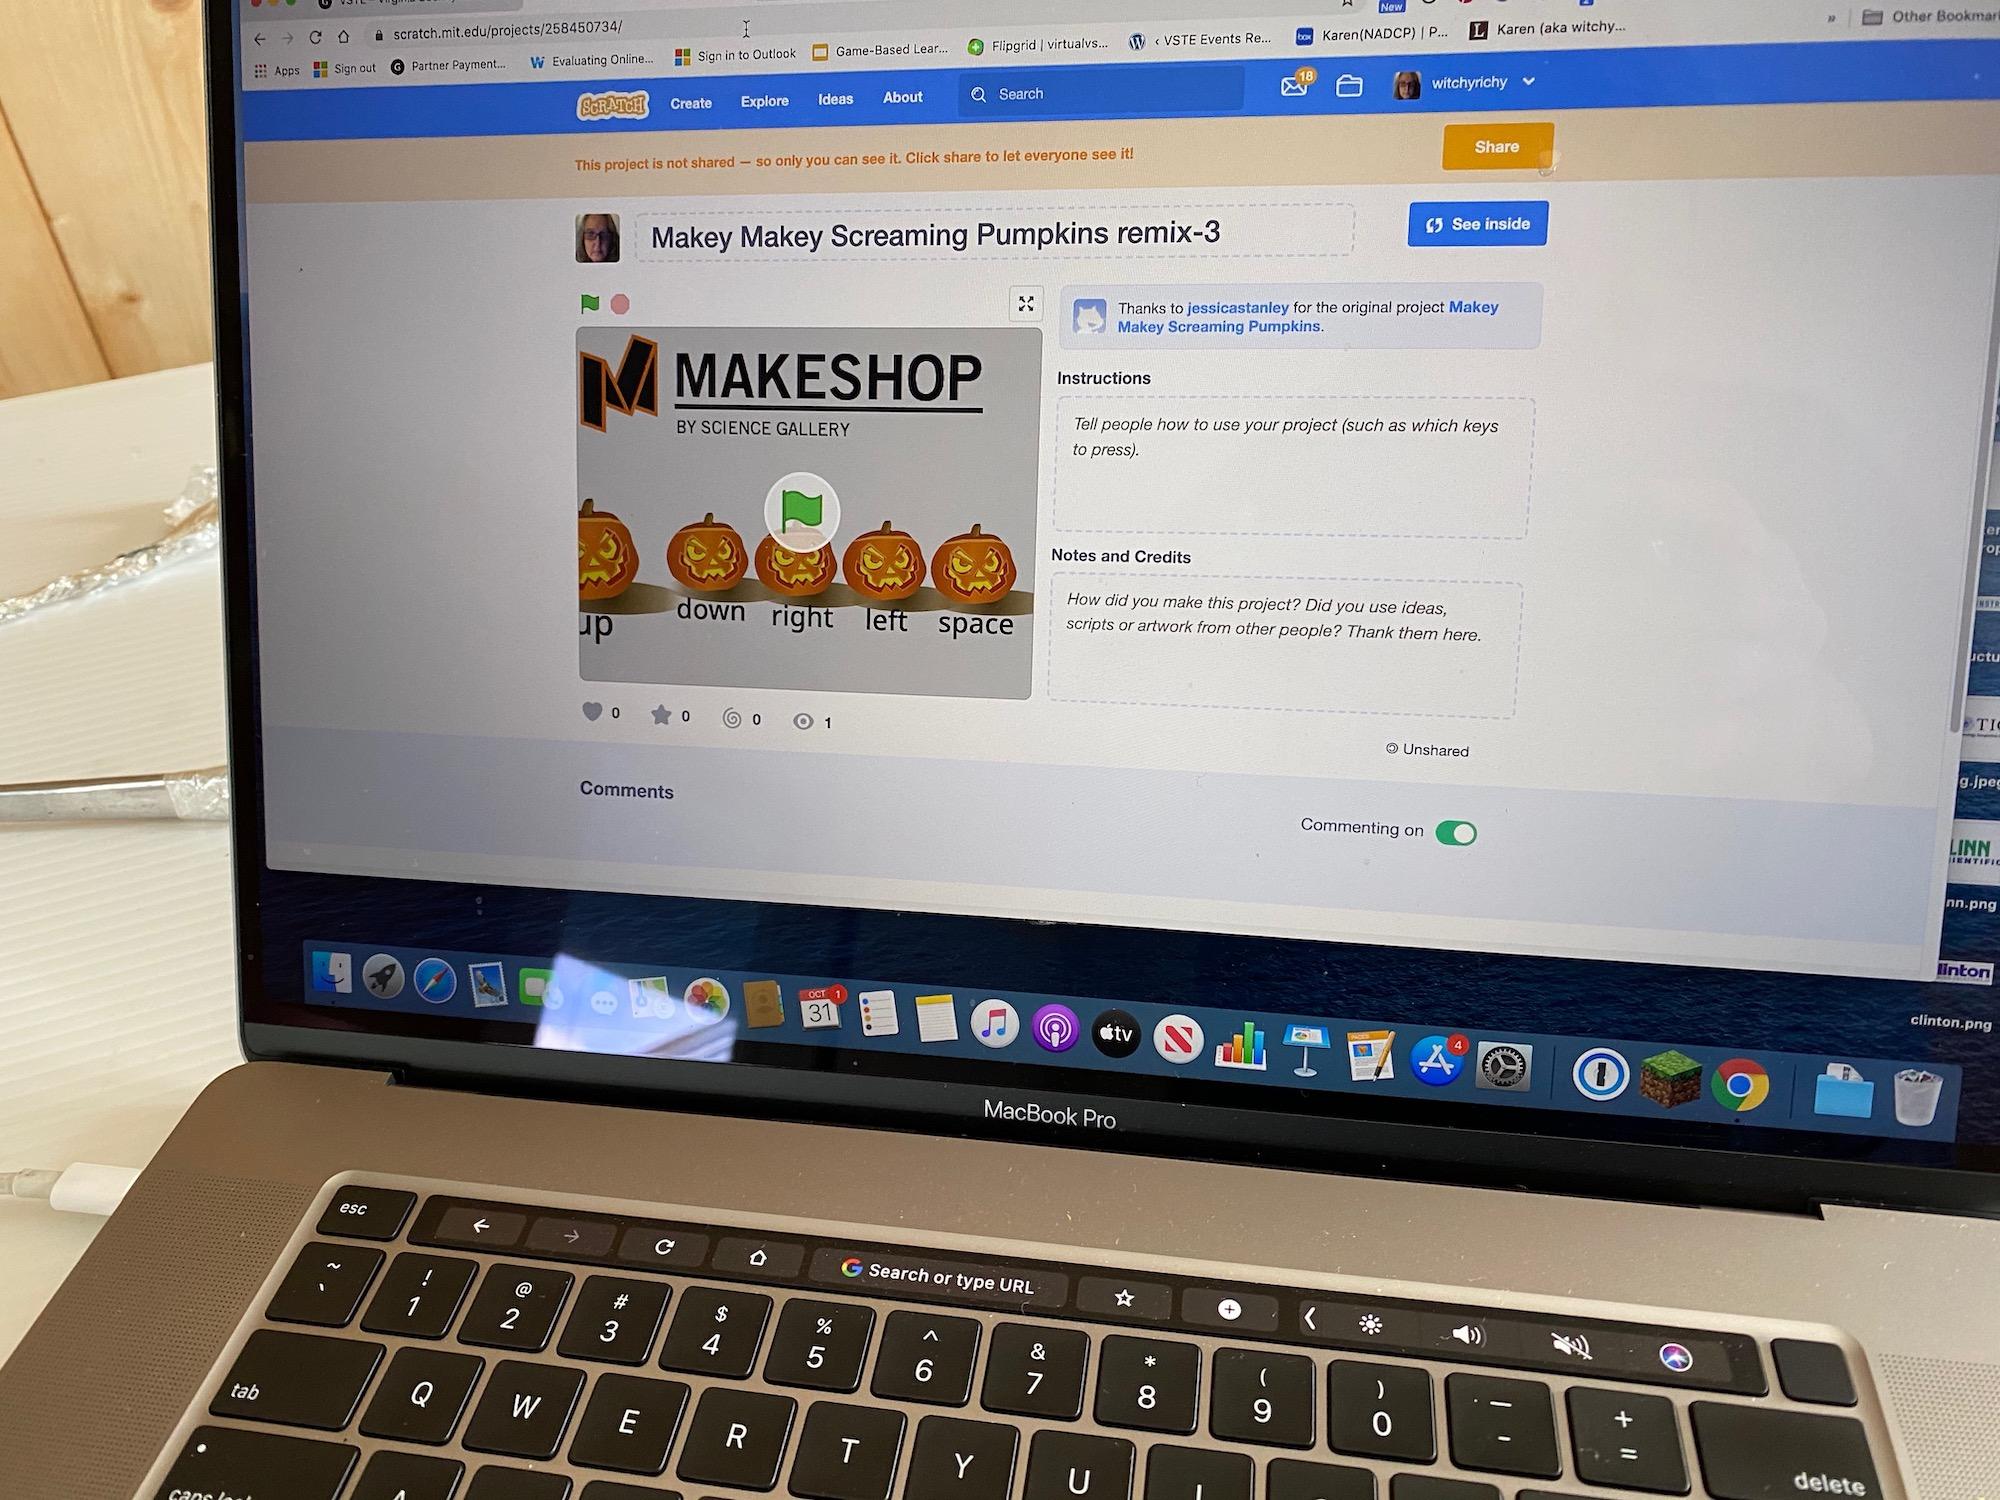
Connect to the Scratch Screaming Pumpkins project on whatever device you are using.
Click the green arrow to start Scratch.
Push the knife into one of the pumpkins. If all is working, it should scream. If it doesn't, check your connections and the volume on your device.
OPTIONAL: I use a bluetooth speaker under the box to make the sound more focused under the pumpkins.
Complete the Decoration
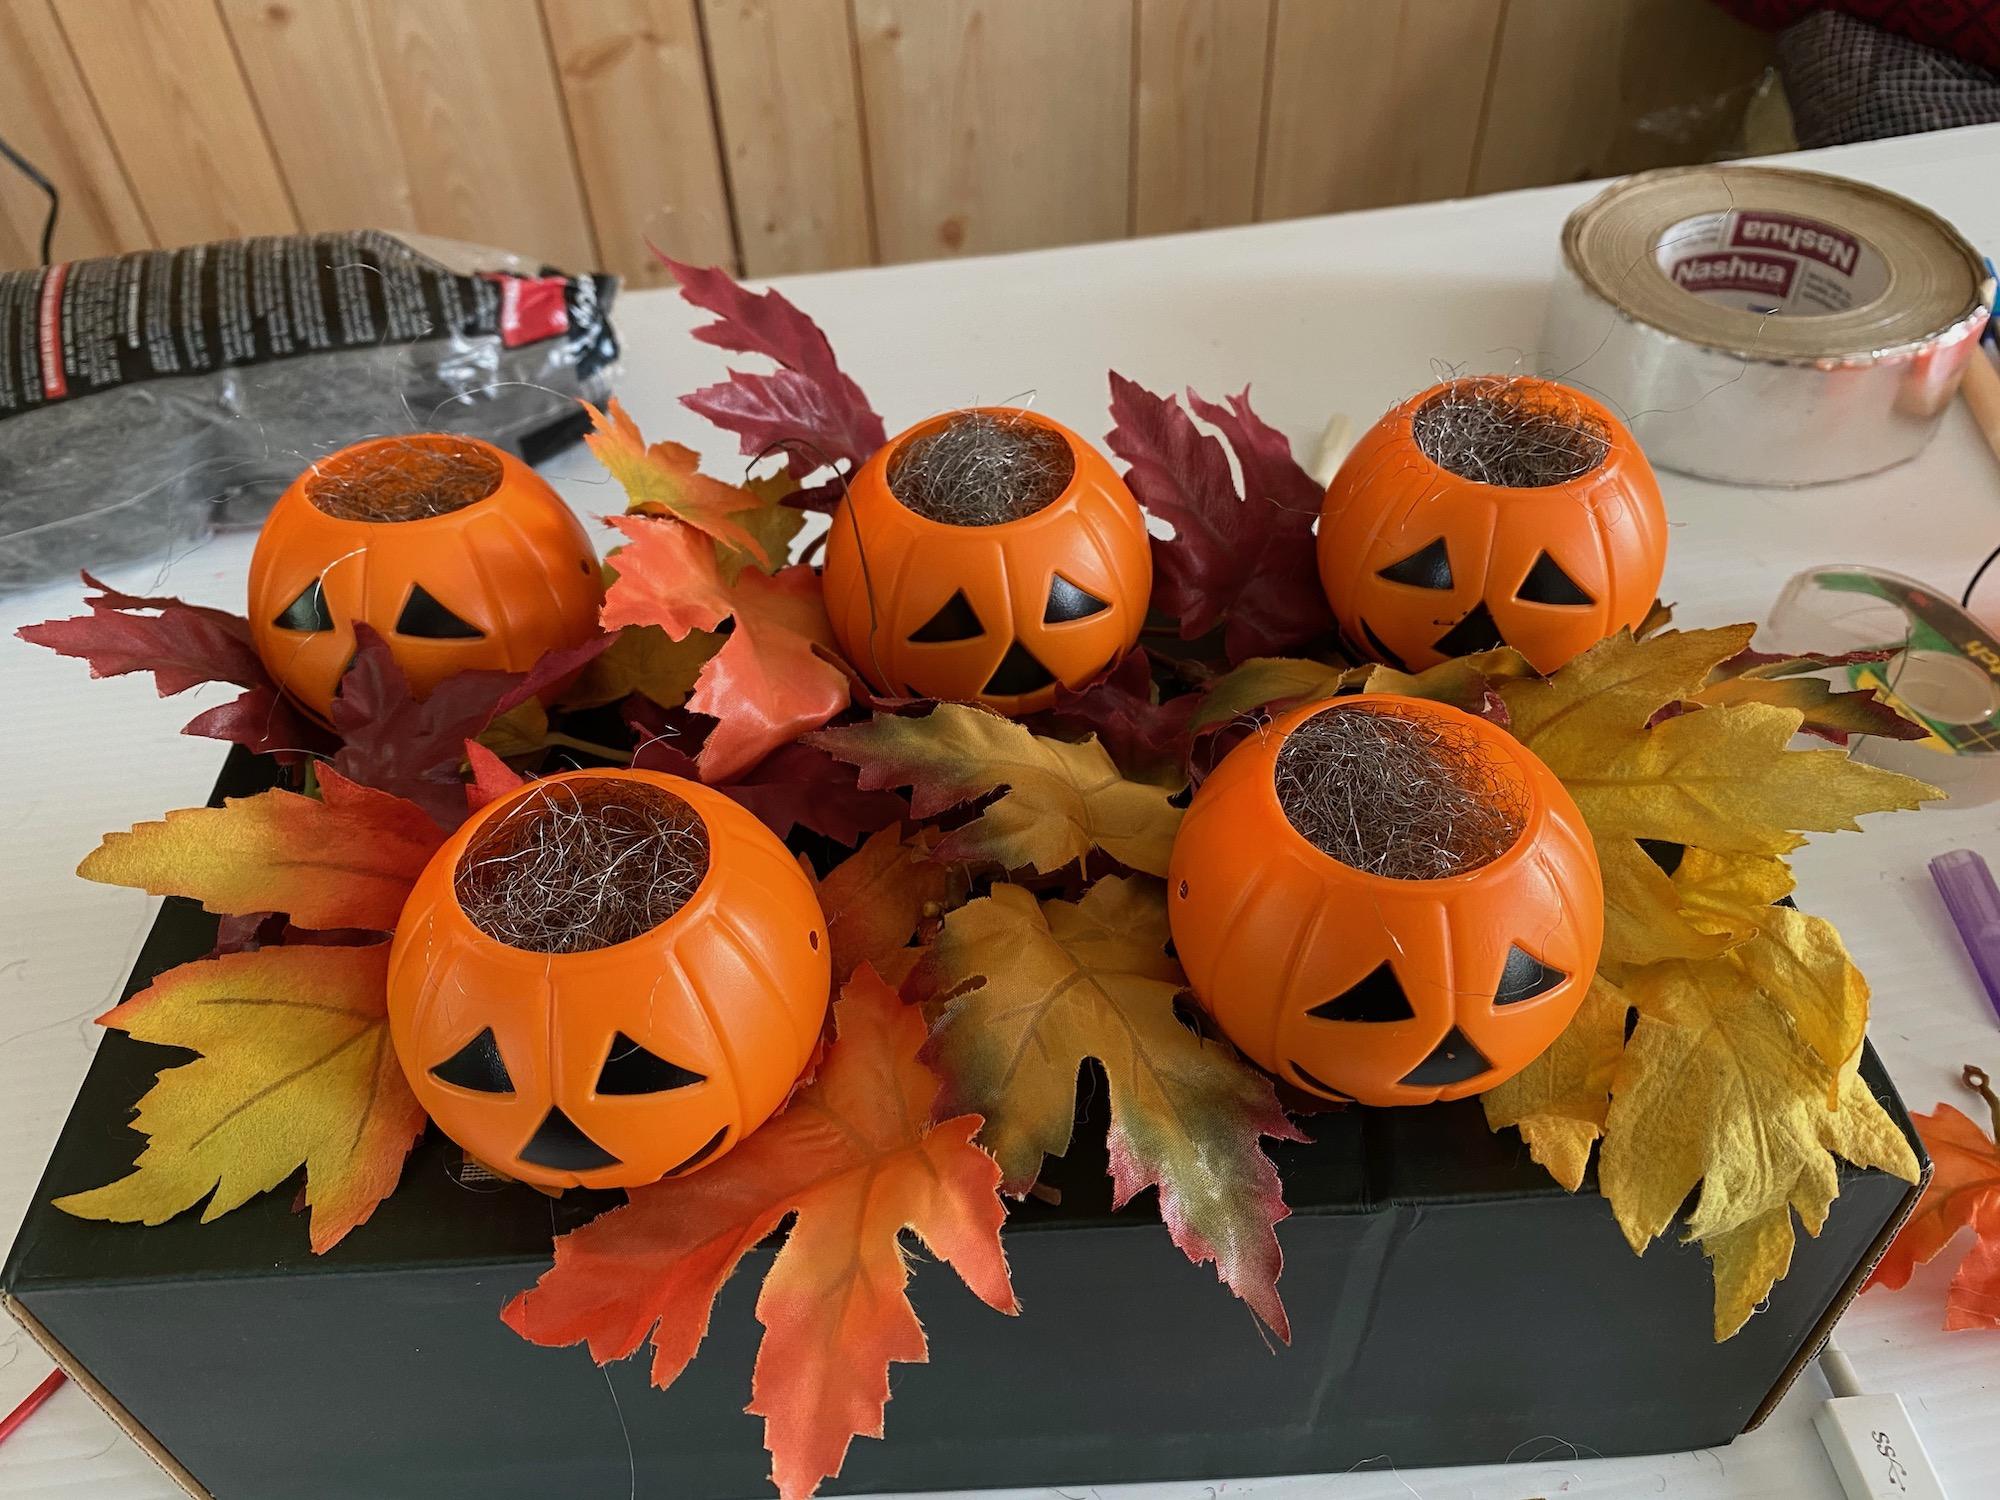
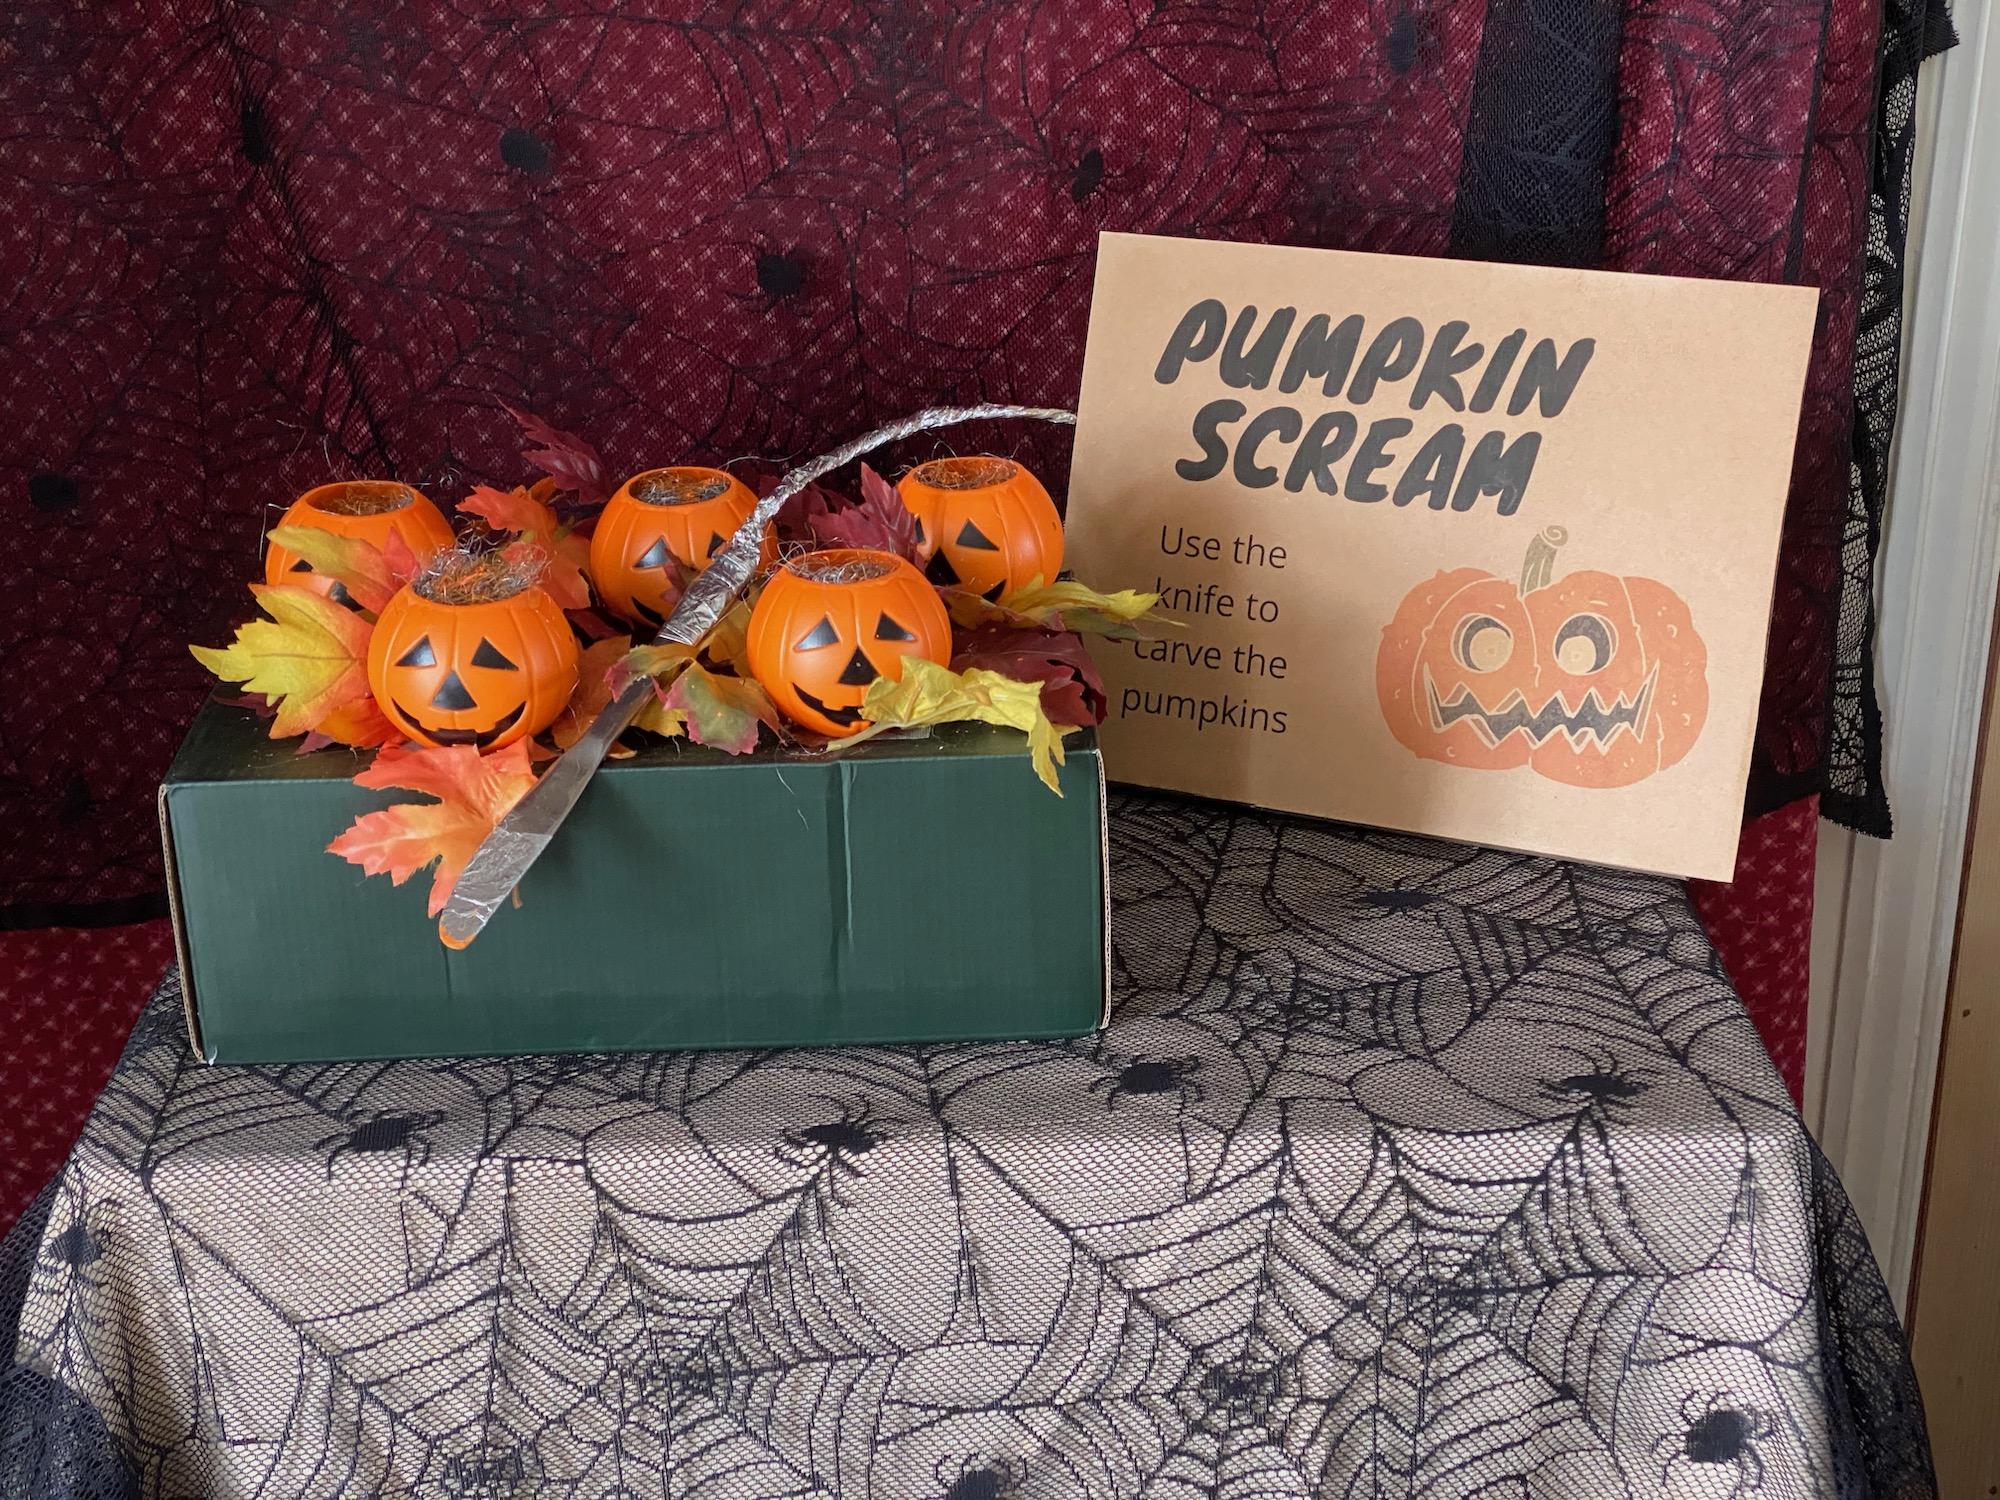
Decorate the box as needed. My box was black so did not need painted. I did add fall leaves to the top to hide the carpet tape.
The illusion works when you can't see the Makey Makey and the device. Place your box on a table covered by tablecloths. String the USB cord behind the box and under the table. Place the device under the tablecloth.
Set your laptop so it doesn't go to sleep. Load the Scratch site and get it running. Do one last test. You may need to reload the site occasionally.
Place the knife on the box. Place the sign next to the box.