Pull and Ambiently Display Data From Any Website Over Wifi (Northern Lights Indicator) With NodeMcu
by AlexanderK106 in Circuits > Arduino
4819 Views, 22 Favorites, 0 Comments
Pull and Ambiently Display Data From Any Website Over Wifi (Northern Lights Indicator) With NodeMcu
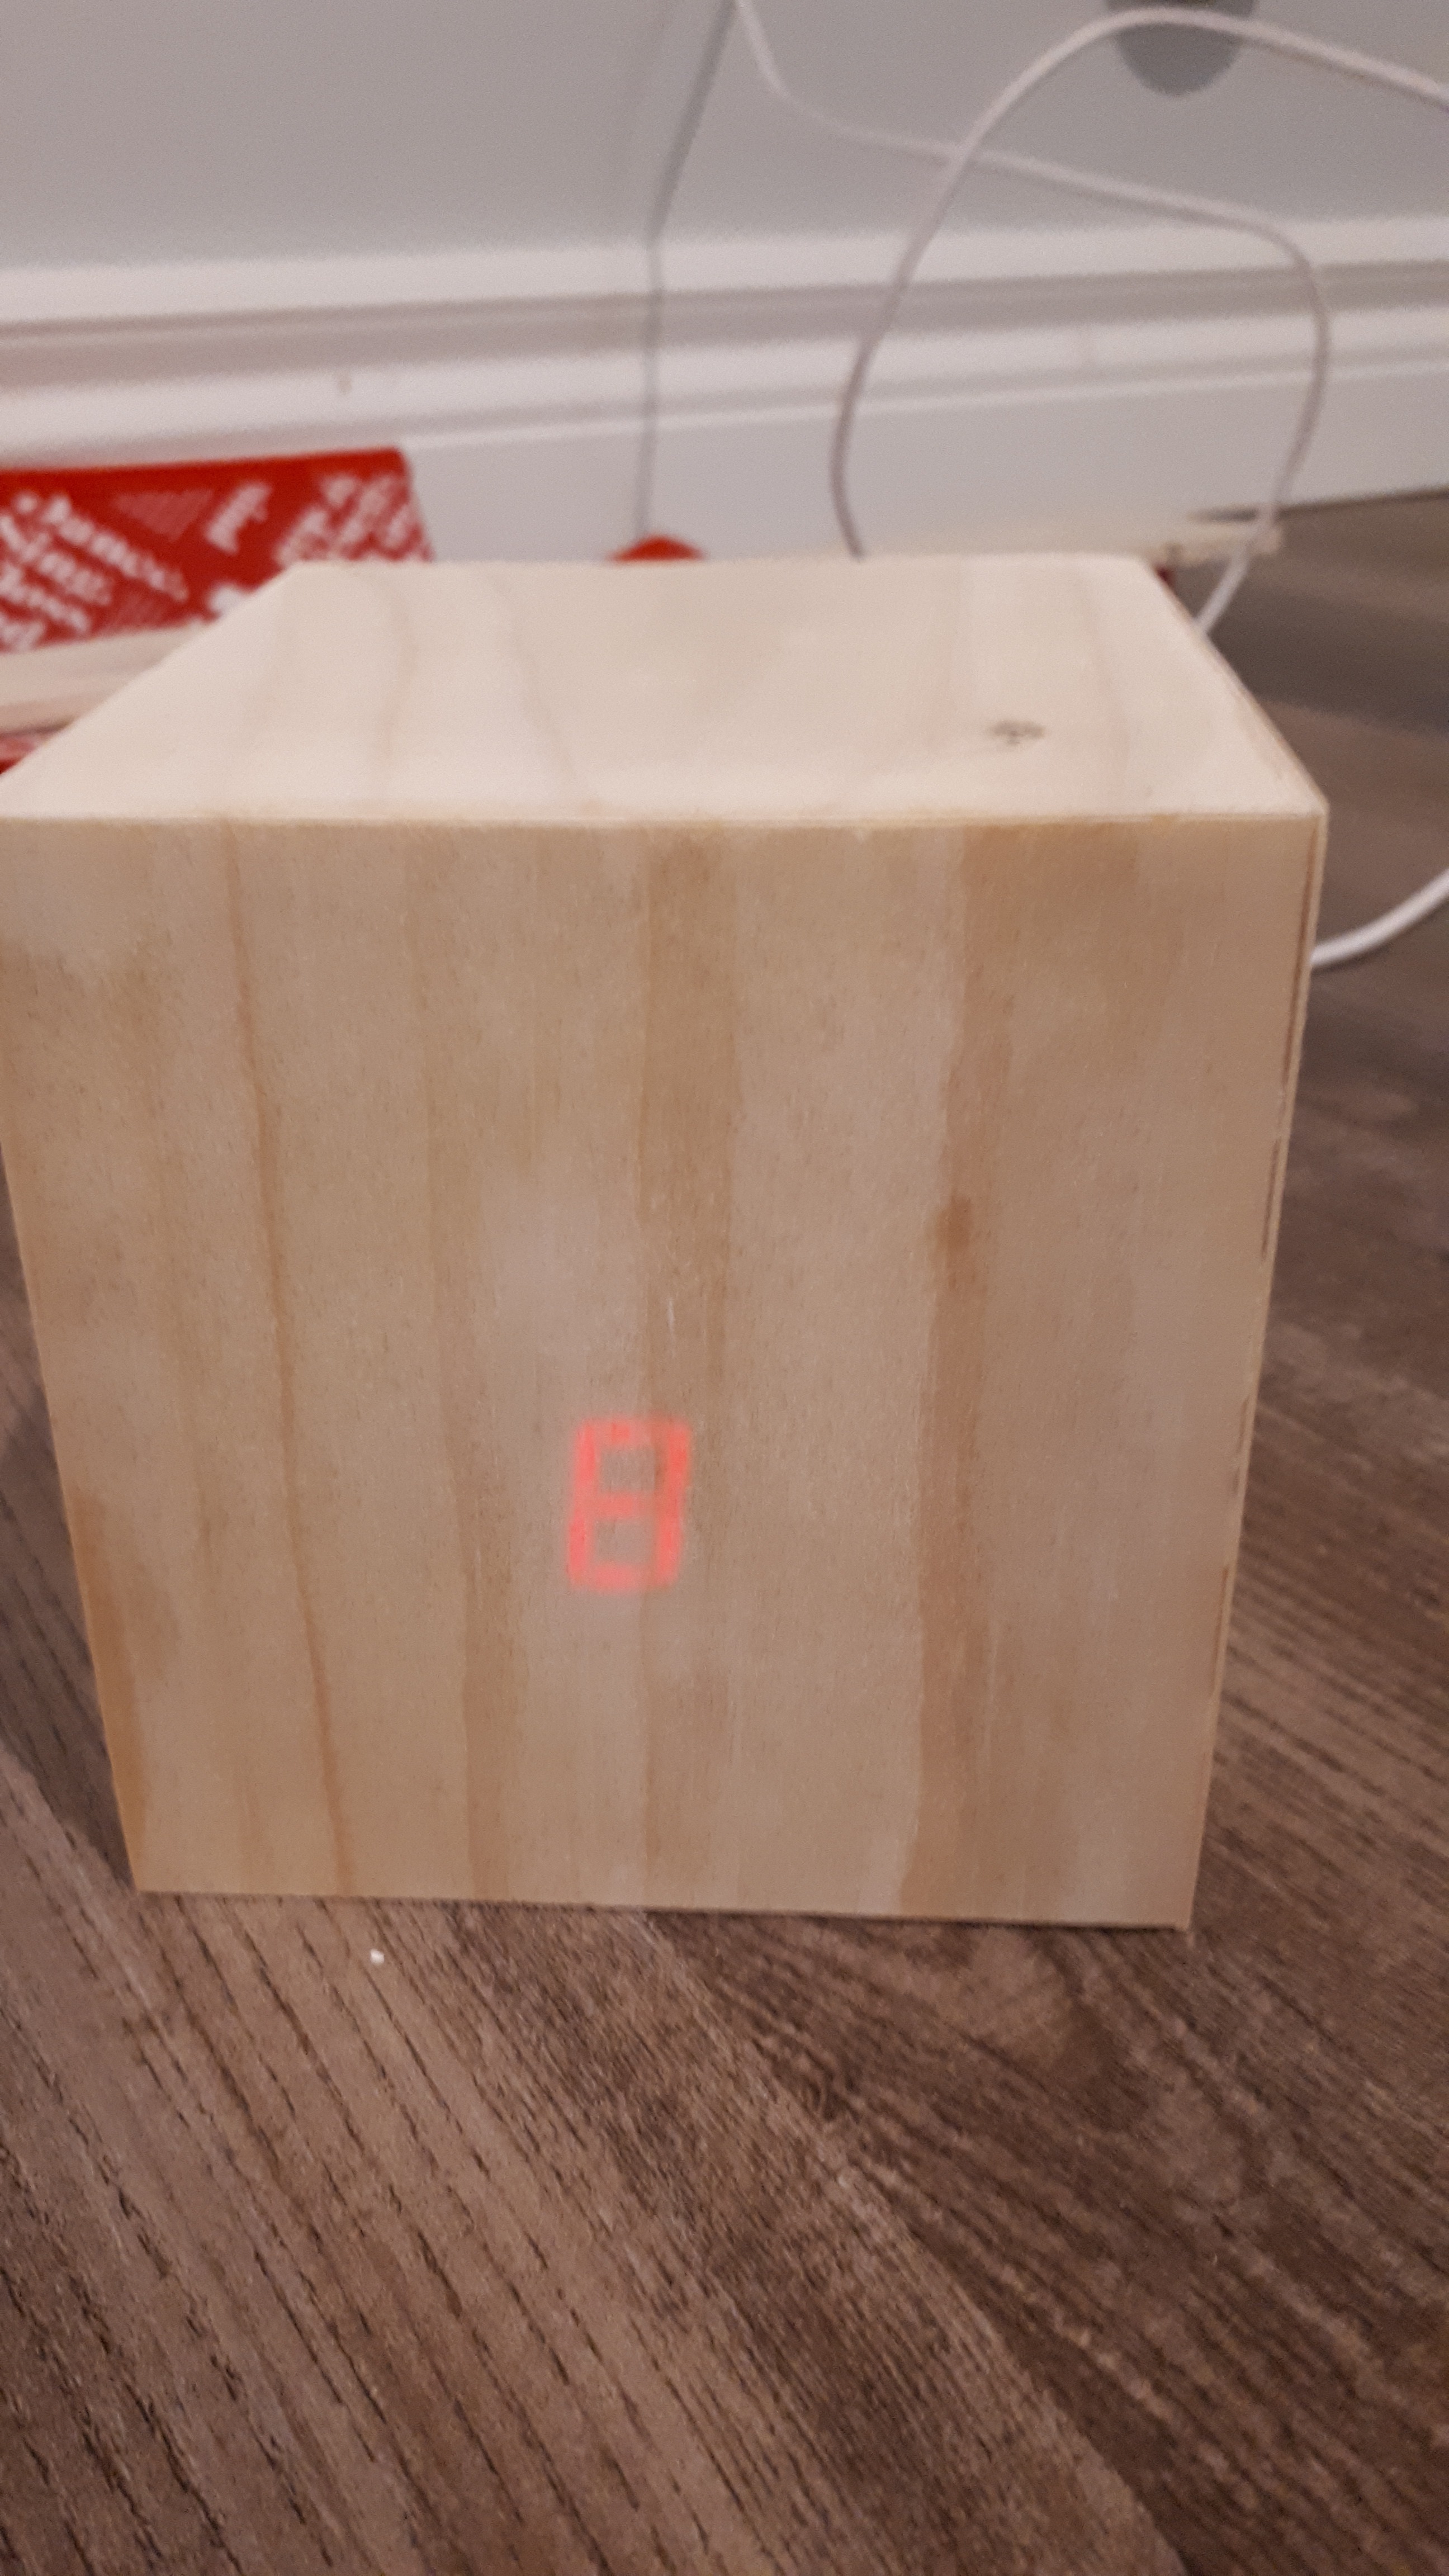
My Motivation: I have seen LOTS of instructables on setting up/ using a NodeMCU (built on the ESP8266 module) for making IoT (internet of things) projects. However, very few of these tutorials had all the details/ code/ diagrams for a very novice person to follow start to finish, and none of them did exactly what I wanted.
What will this cover?: This will cover everything you need to know (and that I didn't), including:
- Materials (what I used, specifically)
- Arduino, NodeMcu, ESP8266, what's the difference?
- Getting started with the NodeMcu
- Setting up the software (Arduino IDE)
- Making an LED blink
- Options for powering the NodeMcu
- Connecting to the internet
- How to pull data from a website
- "Pointing" to the info you want in the website
- Thingspeak/ ThingHTTP/ APIs (don't be scared, no coding necessary)
- Accessing this data from the NodeMCU
- Displaying the data
- What I used (how to wire a 7 segment display)
- Some ideas/ things I would have done with more time
- How to build a box I guess
DISCLAIMER: I watched LOTS of videos to learn how to make this, and almost all of the code is pieced together from other sources and I can't remember all of them. The main source of thinghttp inspiration was this guy who is essentially doing the same thing I'm describing, but I found sifting through what was touch screen stuff and what wasn't confusing. I consider this instructable more of an introduction to the NodeMcu and sorta kinda IoT projects rather than a specific object, but the inspiration for this specific (Northern Lights) indicator was this instructable from 2008. I loved the way it was described as a "poor man's ambient orb", displaying ambient information like stocks, youtube views, or weather without the use phones or other intrusive means.
Materials
You gonna NEED these:
1. A NodeMcu board
2. A micro USB cable for uploading the code to the board, and powering the final product if you so choose.
3. LEDs, jumper wires (male-male, male-female) and a breadboard for connecting things... this is sort of a given, but whatever you want to "output" (display or do dependent on the data) will require hardware. If you want to recreate the ambient orb, or make exactly what I did, a 7 segment display or some LEDs are just subtle enough. The breadboard is necessary for "prototyping" before you actually connect things 4 real, and I'll explain how they work/ how things are connected in the relevant section. If you're just a beginner, just get an arduino starter kit, since it has lots of little things in it (including everything I used), plus an arduino uno for another project.
Things you MAY need:
4. A breadboard power supply module (If you want to power the NodeMcu with a standard power adapter... I would not do this since you can just power it with a micro USB, which is way more convenient. If you want to make your project completely wireless, then of course you'll need a battery pack, but I'll address this in the power section.
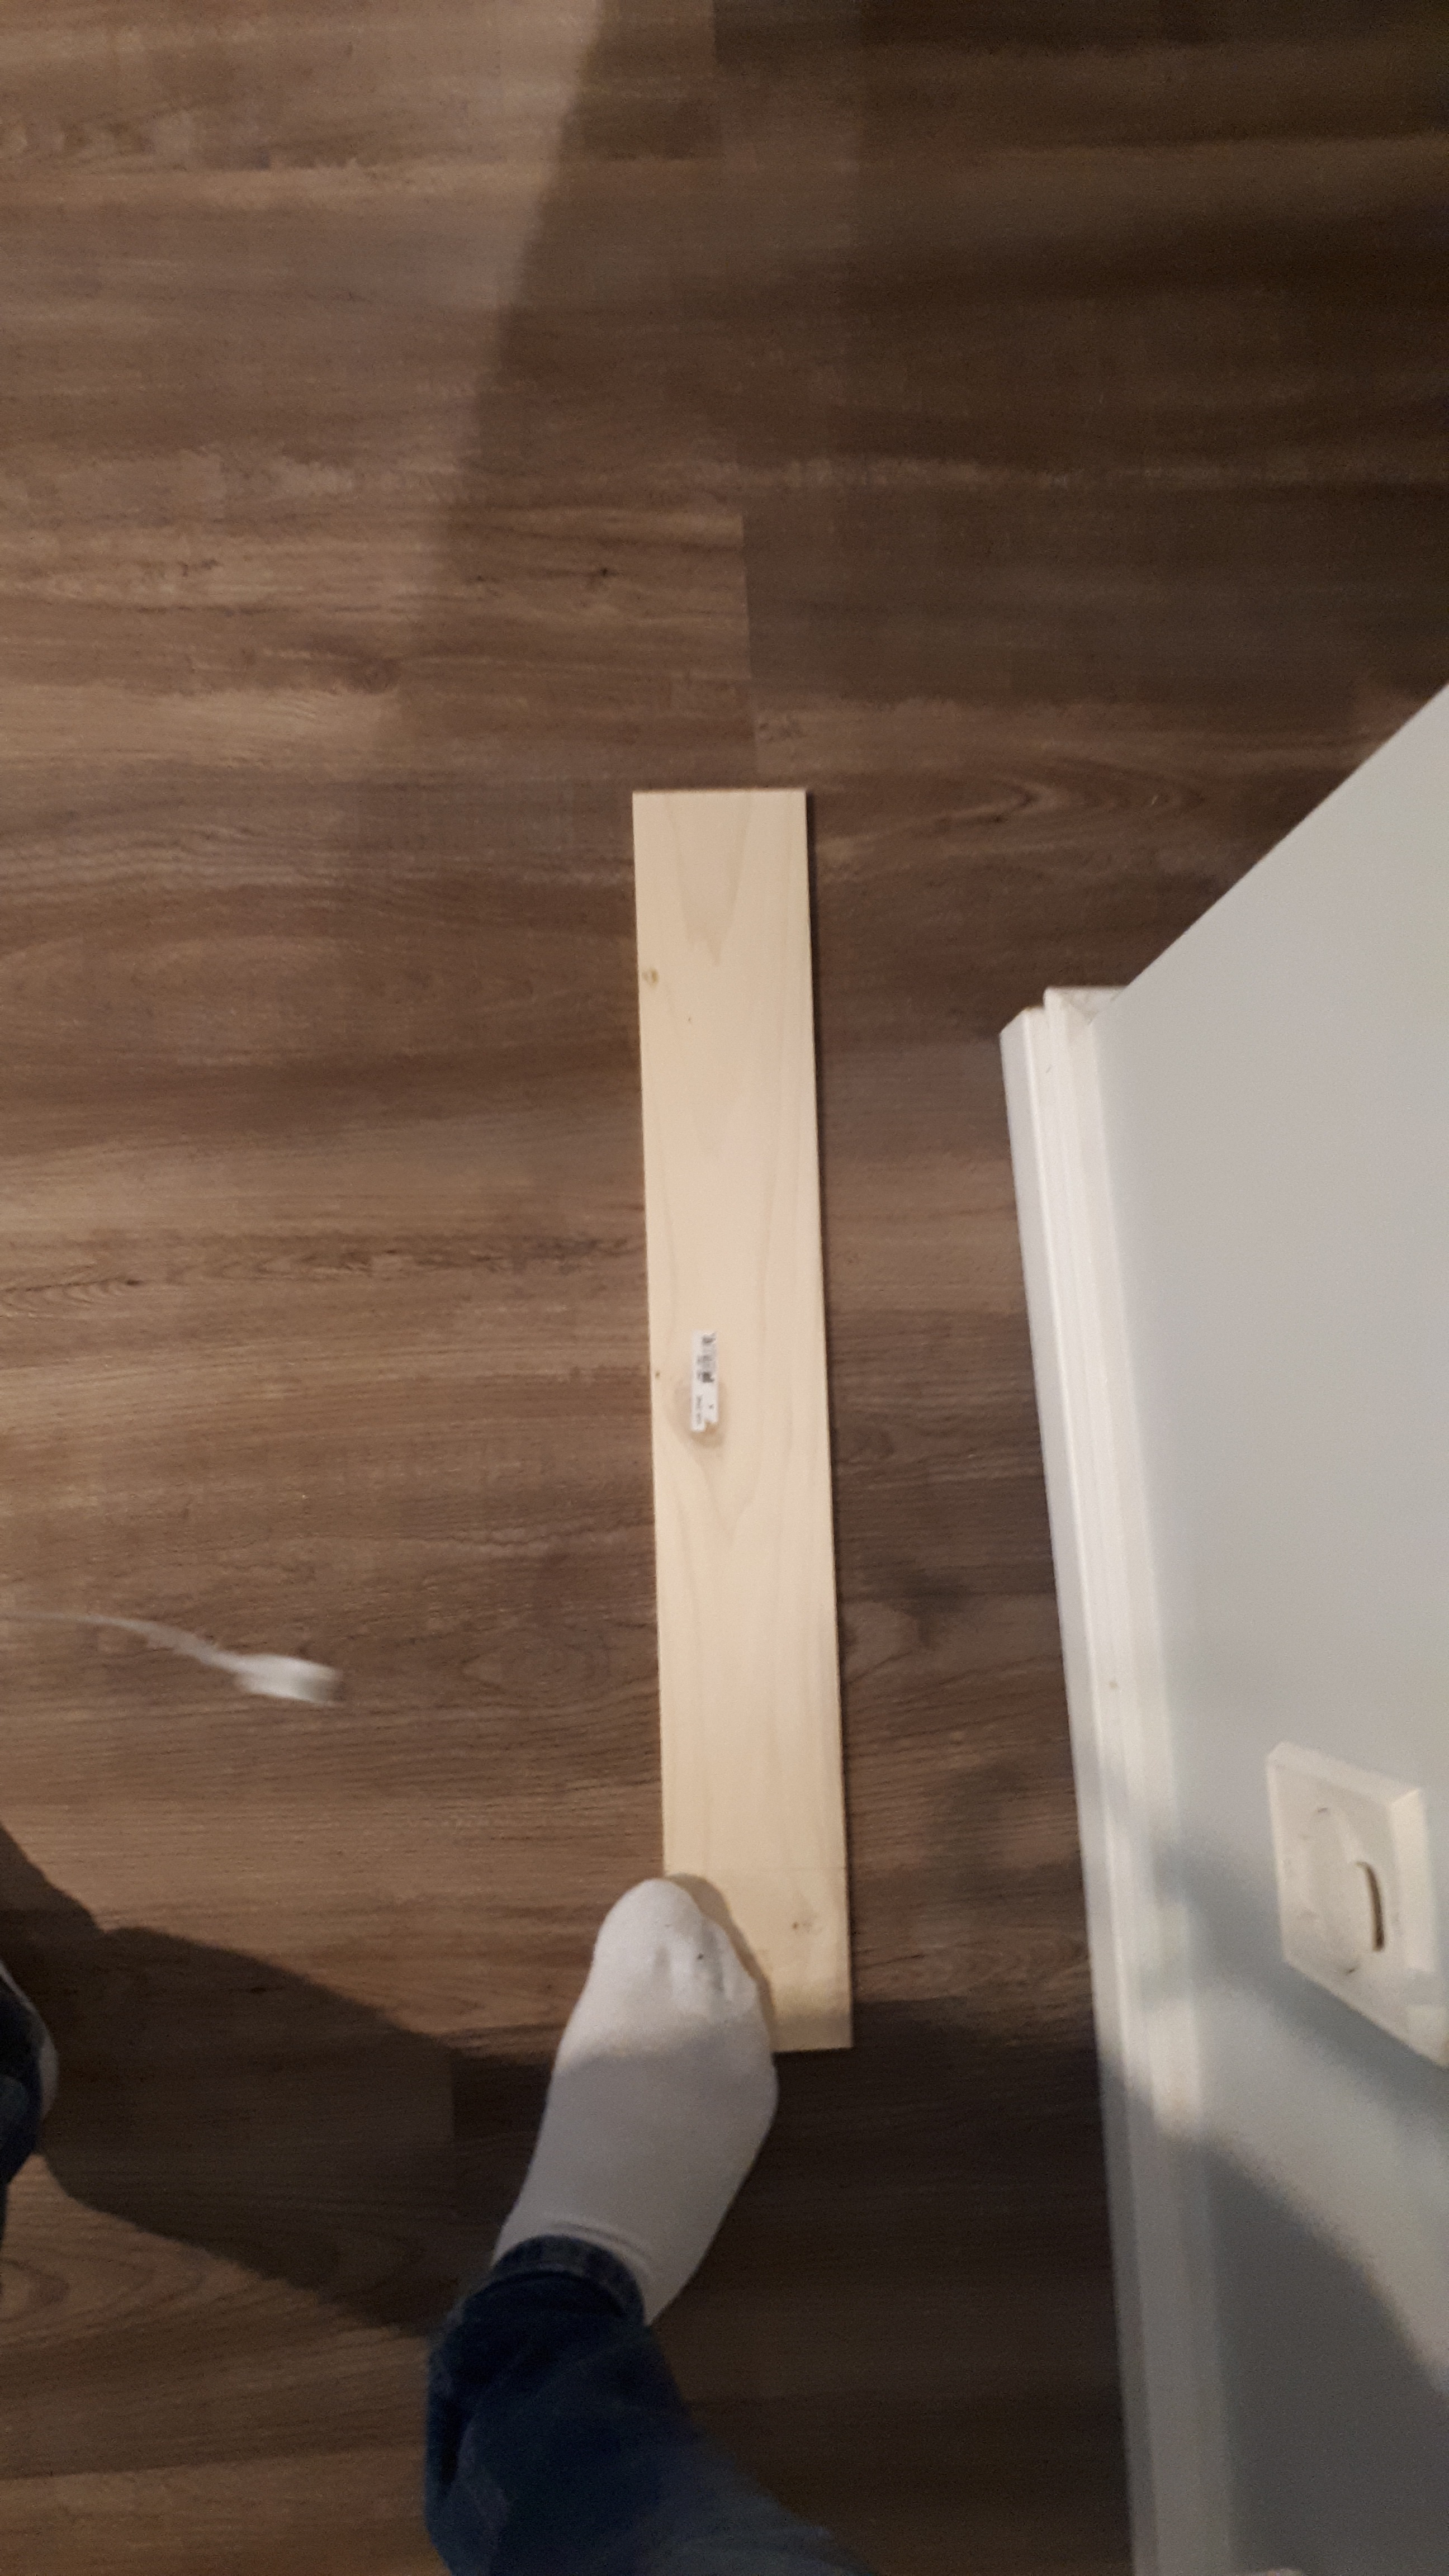
5. 1/4" pine for a lil' box (if you want)
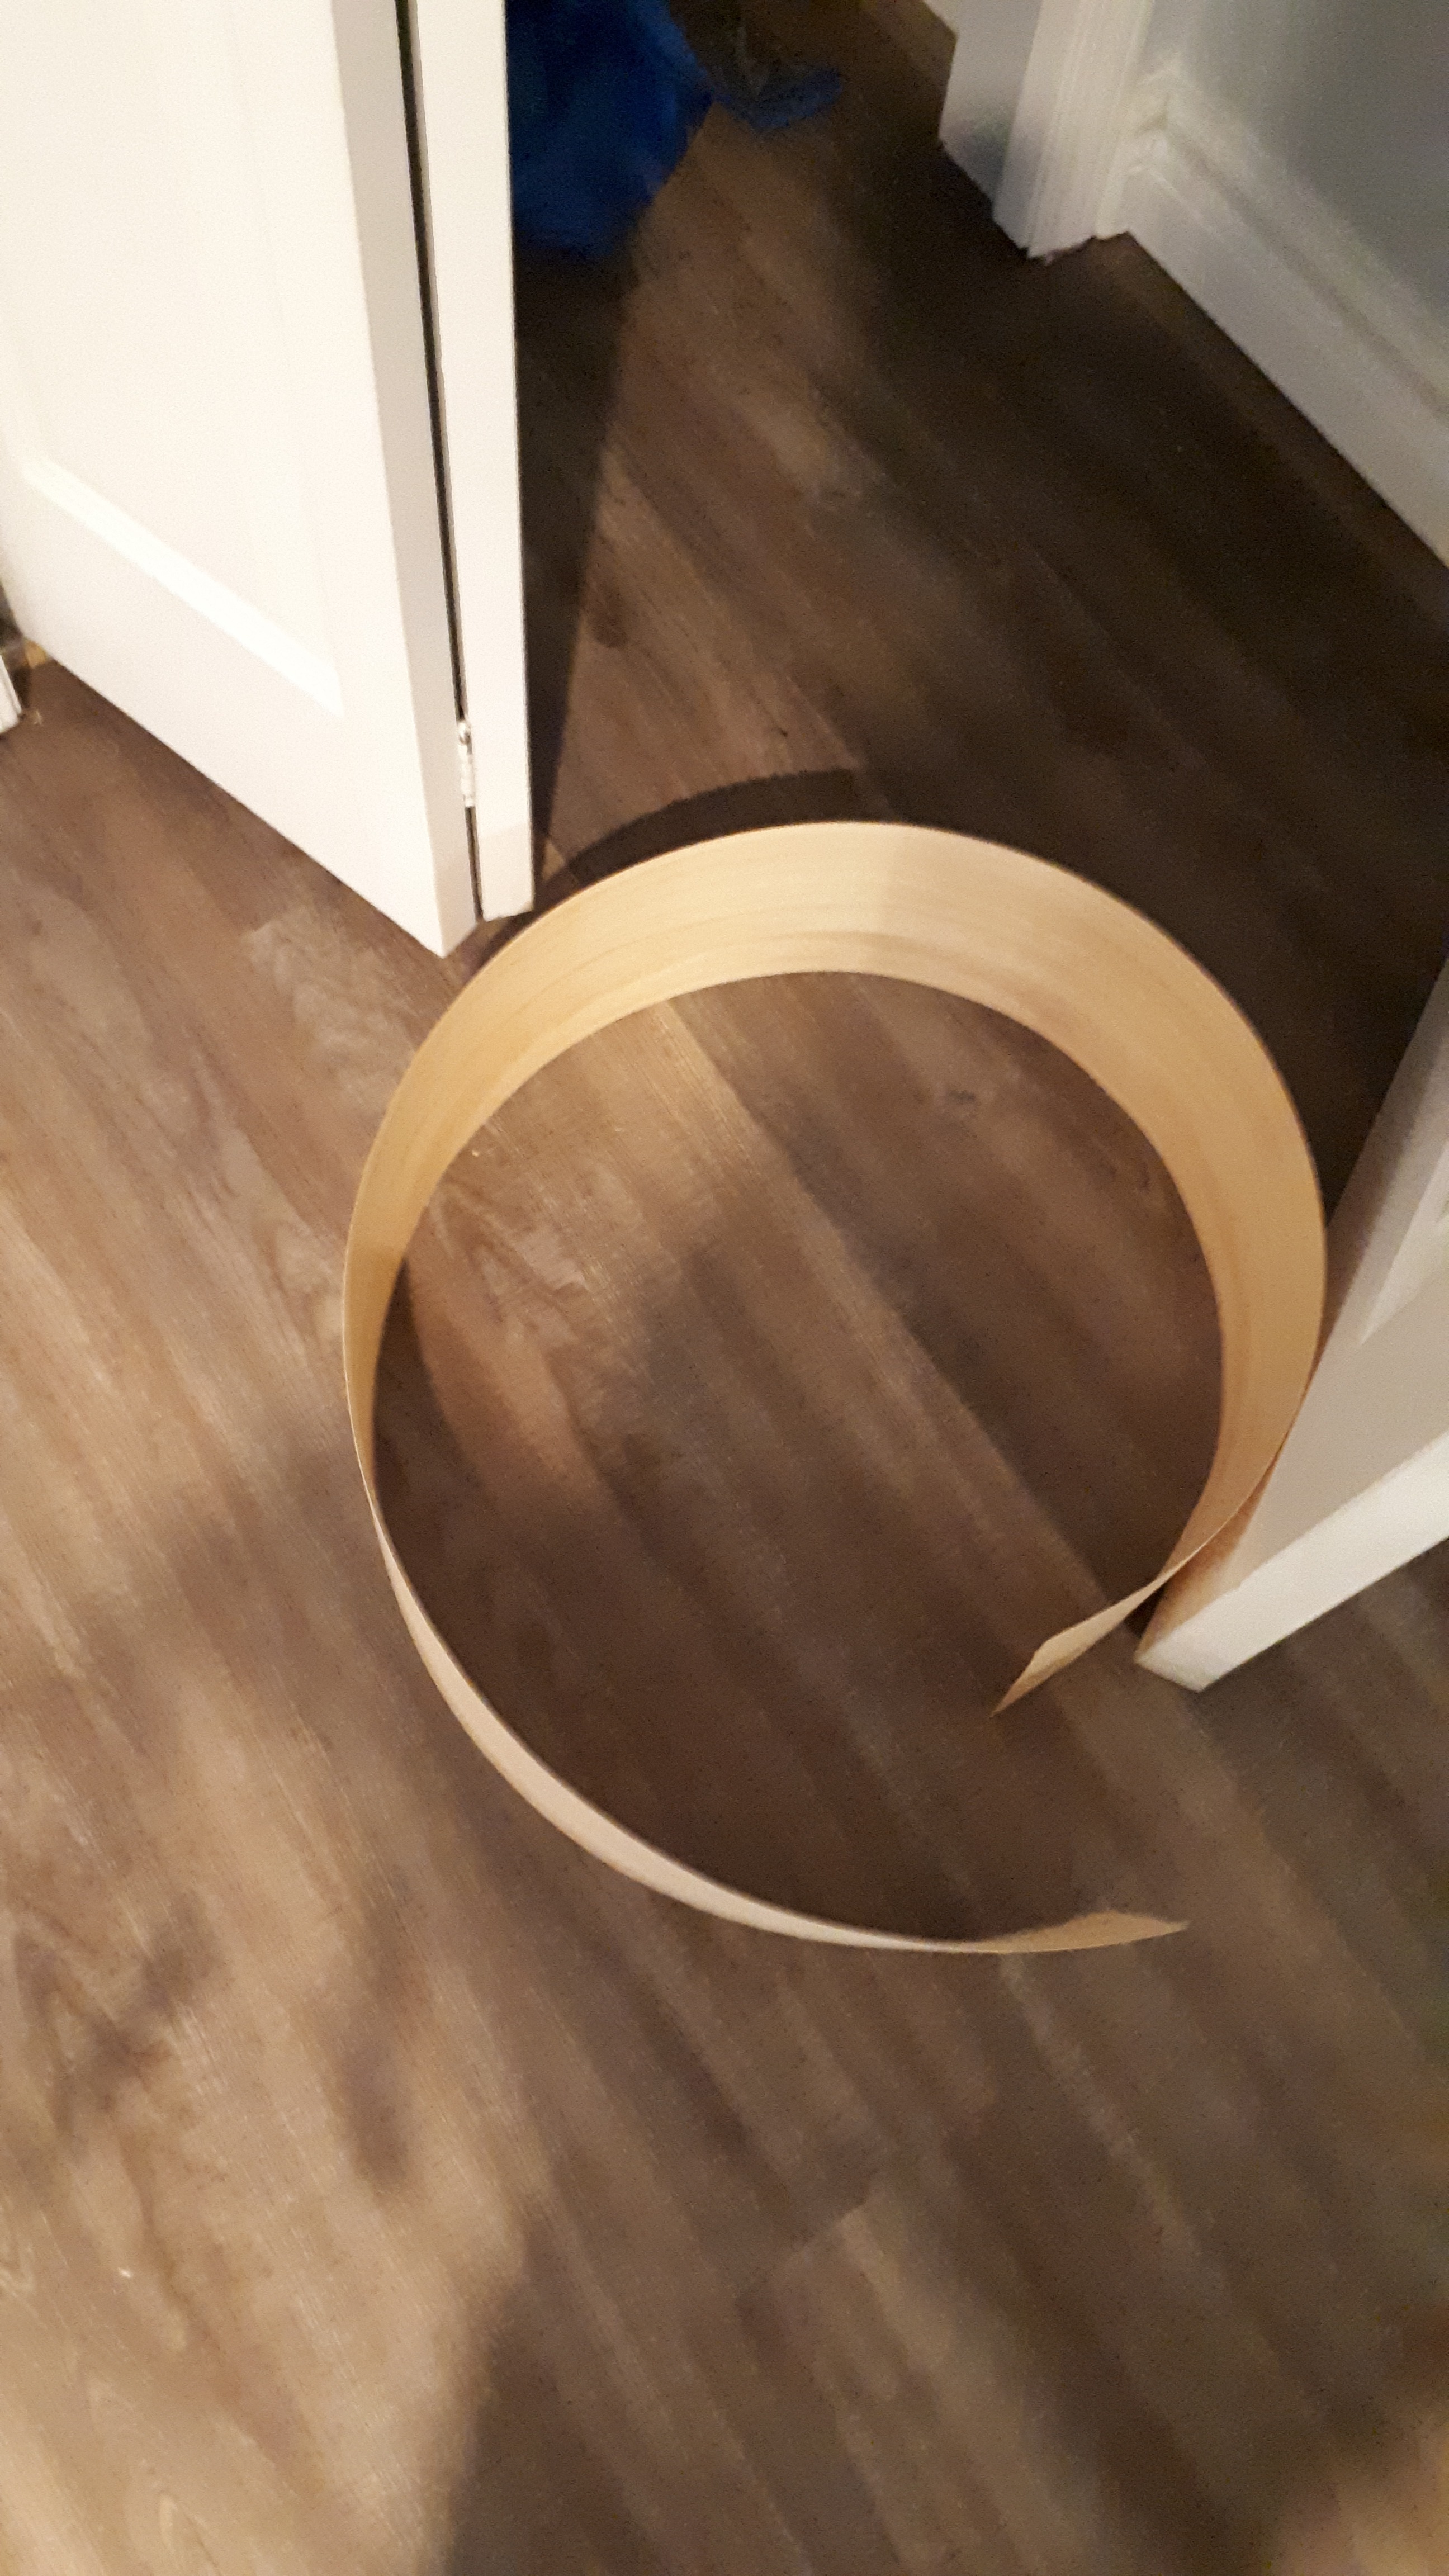
6. Some veneer to cover your box, and/or act as a diffuser for your LED or display
7. Super (CA) and/or wood glue to attach 5. and 6.
What's a Node MCU?
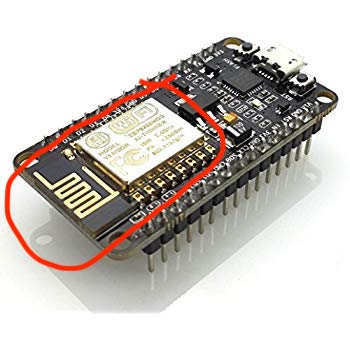
If you're a real beginner to electronics like I was, you may be wondering what the difference between an Arduino board and a NodeMcu board is, and maybe you've also heard about the ESP8266... what is the difference between these?!?
This is by no means technical, but this is what you need to know.
The Arduino has the ability to read inputs from a series of pins, "do things" using these inputs, and then output to a series of pins. It is essentially a small computer. Arduino makes LOTS of different boards, and lots of "shields" which plug in to the boards to do additional things. The products they currently sell which connect to the internet are very expensive and haven't got much of a community following them. Code is written and uploaded to the boards from the "Arduino IDE" software, which supports C and C++, with some other special formatting sprinkled in. You don't need to know how to program C or C++ to program, since there is such a crazy abundance of code available online, but some familiarity with programming (particularly things like while and for loops, variable declaration and scope etc) does help expedite understanding. The Arduino IDE also provides a single location for downloading the necessary libraries for different boards (more on that later, in setting up the NodeMcu).
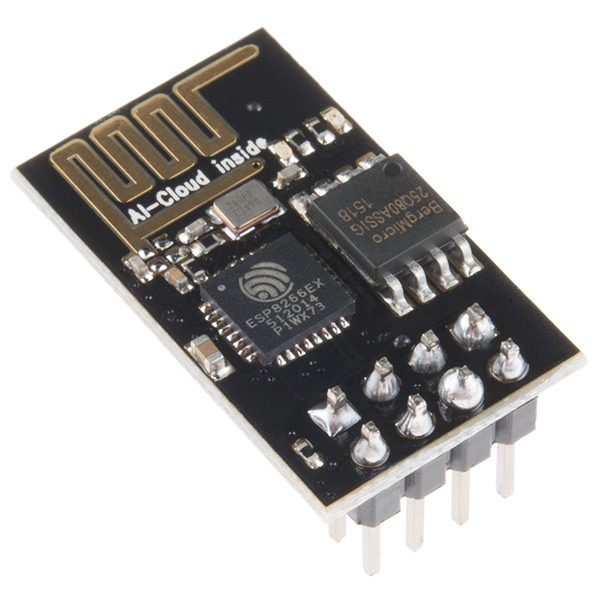
The ESP8266 is an extremely cheap WiFi module that basically made the internet-enabled arduino shields obsolete (although you still see arduino boards that have wifi built in). The DIY community surrounding the ESP8266 is so huge that it is almost the only logical choice for making internet-enabled devices. Often it is used in conjunction with an arduino board via the serial pins (Rx and Tx), although I guess some people use them "stand alone", but since the microchip is so tiny and difficult to interface with (it basically has 6 pins: 2 for serial (talking to things), 2 for power (ground and VCC), and 2 GPIO (general purpose input output), plus it operates on 3.3V and so 5V will destroy it) that it was rapidly superseded by...
The NodeMcu, which is an open source development board just like the Arduino, except with build on the ESP8266. You can actually see the ESP8266 built into the NodeMcu board circled in the pictures I attached. This board is perfectly friendly to program and interface with, and is basically comparable to an arduino nano. It has many more pins, and can be programmed via a USB directly from your computer, without having to go through another board. Also, although the board still technically works on 3.3V logic rather than 5V logic, it has built-in chips to manage this voltage, so it can be powered just like your arduino, whether by USB or by the VCC (voltage in) pins. Basically, for anything IoT, the NodeMcu is a good, simple, single board to use, and is WiFi enabled... although it's a fine choice for non-wifi projects too. Technically the NodeMcu's "out of the box" language is LUA, but after a 1-time setup within the Arduino IDE, you'll be able to program it just as you would any other Arduino.
Getting Started With the NodeMcu
I used the following video to do my first-time startup with the NodeMcu, and if you follow all his directions exactly, everything should work well.
1. Setting up the software (Arduino IDE)
- Download the Arduino IDE from the above link, and select "just download" if you can't make a donation
- Open the Arduino IDE software
- Under File -> Preferences, Additional Boards Manager URLs, paste the following link
"http://arduino.esp8266.com/versions/2.5.0-beta2/package_esp8266com_index.json" - Under Tools -> Board -> Boards Manager (at the top) scroll down to the bottom, or search for ESP8266, and click install
- You may need to restart the Arduino IDE for this to show up, but now click Tools->Board, and select the board you got, i.e. the NodeMcu 1.0 ESP12-E module
- You may not need to do this step, but connect the usb to your computer from your NodeMcu (lights will blink), and go to Control Panel->Device Manager -> Ports -> and then make NOTE of the COM port that is labelled "Silicone Labs..." this the COM port that the NodeMcu is using
- Go back to Arduino IDE and to Tools-> Port: and ensure that this port is selected
- Everything should be good, but ensure that under Tools, the flash size is 4 (don't worry about the SPIFFS, whatever is selected is good), and that the upload speed is 115200 I guess... The NodeMcu actually uses a baud rate of 9600 to relay info back to the serial monitor (if you don't know what this means don't worry, it'll show up in the example), but if in the code and then in the monitor, you've got 9600, it's good.
2. Making an LED blink
This is like the "Hello World" (i.e. baby $h1t) of programming, but it lets you know everything is good with the board, and will help you become familiar with the Arduino IDE. This does NOT demonstrate the WiFi capabilities of the board (we do that in the next example), just makes sure it's connected and can function etc.
- Open the arduino IDE, have your NodeMcu plugged in
- Before doing anything, notice that there is framework for the most basic code you can write to your arduino, with a setup() loop that runs once, and another loop() that will run continuously forever. Our final code will be structured just like this, with a few things added above, and a function defined at the bottom
- File->Examples-> (under the NodeMcu 1.0 section) ESP8266 ->Blink
- This will open up some code in the window. Feel free to save it somewhere.
- In this code, the setup() loop contains the definition of the builtin LED on the board as an output, and the loop outputs high and low to this LED. Note that for the LED built in to the board (only! this is not the typical case), "LOW" output (0 volts) will make it turn on, since it is on by default, and "HIGH" (3.3V in this case I guess), is off
- If everything is set up properly as outlined above, you should be able to click "Verify" (the checkmark in the circle at the top left hand corner) to ensure there are no errors (this one won't have any since you didn't write it, but yours will!), and when it's all good, the "Upload" right next to it
- Once you click upload, you'll see stuff reading out in the black region at the bottom, and dots/ % complete filling out
- Don't worry that it says it'll take up 33% of the memory... that's basically a "fixed" amount taken up by even the simplest code, what I wrote only took up an additional 1% of space
- You will see the LED on the board start to blink (which it may have been doing a bit of already), so feel free to change the amount of thousandths of a second (milliseconds) are in the delay part of the script. If this is your first-ever time programming, watching the LED blink at a slightly different frequency will probably be a real thrill ride
3. Options for powering the NodeMcu
I'm not sure why I didn't understand this at first, but the code that you upload to the board will stay there, and will run forever and ever as soon as/ as long as there is power supplied to it. For example, after completing step 2, if you were to unplug it from your computer, then power it elsewhere, it would begin blinking again. The easiest way to power the NodeMcu is to just plug a micro USB into it, and then into a charging block just like you use for your cellphone in the wall (a 5V 1A block or whatever it may be). Feel free to look at my other instructable for information on how to power things, polarity of DC jacks, etc. but the gist is that you can use whatever amperage you want, so long as it's sufficient to power all the stuff (1A is more than plenty for this board and any LED's you use, for example), but the voltage has to be within a very tight range for everything to work correctly. On the NodeMcu, you can use a power supply with any voltage from 3.3V to 20V safely, since there is a regulator on the board that throttles this voltage down (this is a nice feature). With amperage, going over is OK since the board will just draw what it needs, but with voltage, it's generally safer to use voltages as close to, without going under, the required #, so less work needs to be done/ power is wasted throttling the voltage down. If you DO want to use a battery pack, or want to use a DC power jack (maybe so you can have a nice long cable), the pins to use are the VIN adjacent Ground pins.
4. Connecting to the internet
I have attached as a file (for posterity's sake, in case the video goes away) the code from the youtube video above, but please go through the youtube link and give him a view for the code. It's actually worth your time, he explains the history of the board which is sorta fun.
Open the arduino code file called "Wifi_connect" and change the SSID and password to your own, then go
- Notice that above the loops there is a #include line, which is telling Arduino to include a library filled with WiFi stuff for the ESP8266. These are basically a bunch of utilities and things that are bundled together and let you do specific things relatively simply, using the pre-written stuff contained within the library. For example, if you bought a shield or addition to a board, it likely has libraries associated with it so you can more easily interface with it.
- Tools->Serial Monitor
- Ensure that the serial monitor is set to read at 9600. If it's not at the right speed, the serial monitor will spit out a garbled mess, so that's a good indicator that your serial monitor isn't at the same rate as the serial defined in the code
- Click verify and run, and watch the serial monitor as it completes... it will tell you a bunch of details about the connection if it worked, and demonstrates that the ESP8266 in the NodeMcu is capable of connecting to your WiFi! It isn't DOING anything, but if you went and plugged this board in to the wall somewhere, you could wait 30 seconds and be fairly confident that it established a connection with the internet which should also be thrilling.
- To test yourself, try mushing together the "bllink" code and the "wifi_connect" code to have the onboard LED turn on, or blink once it's connected to the internet. This is a great way to learn!
If you did all the above stuff, congratulations! You've shown that you can upload code to the NodeMCU, and that the NodeMcu can connect to your WiFi. We will actually be using a slightly different method of connecting to the WiFi, using the MultiWifi library rather than the regular old Wifi library, since it allows you to easily add a list of WiFis and just attempt to connect to whichever it can.
Downloads
How to Pull Data From a Website
Data in websites is stored in a very spooky way. Filtering this down into the stuff you want, or "parsing" for it is equally spooky, and attempting to do this without significant knowledge of HTML can be daunting... so the goal is to get the data you want out of the spooky place into a very pure and happy place. Functionally what this means is going from a URL that displays the entire website, to a URL that displays JUST the single piece of data you want.
1. "Pointing" to the info you want in the website
Go to the website you're interested in, for example here
https://www.timeanddate.com/worldclock/canada/edmonton
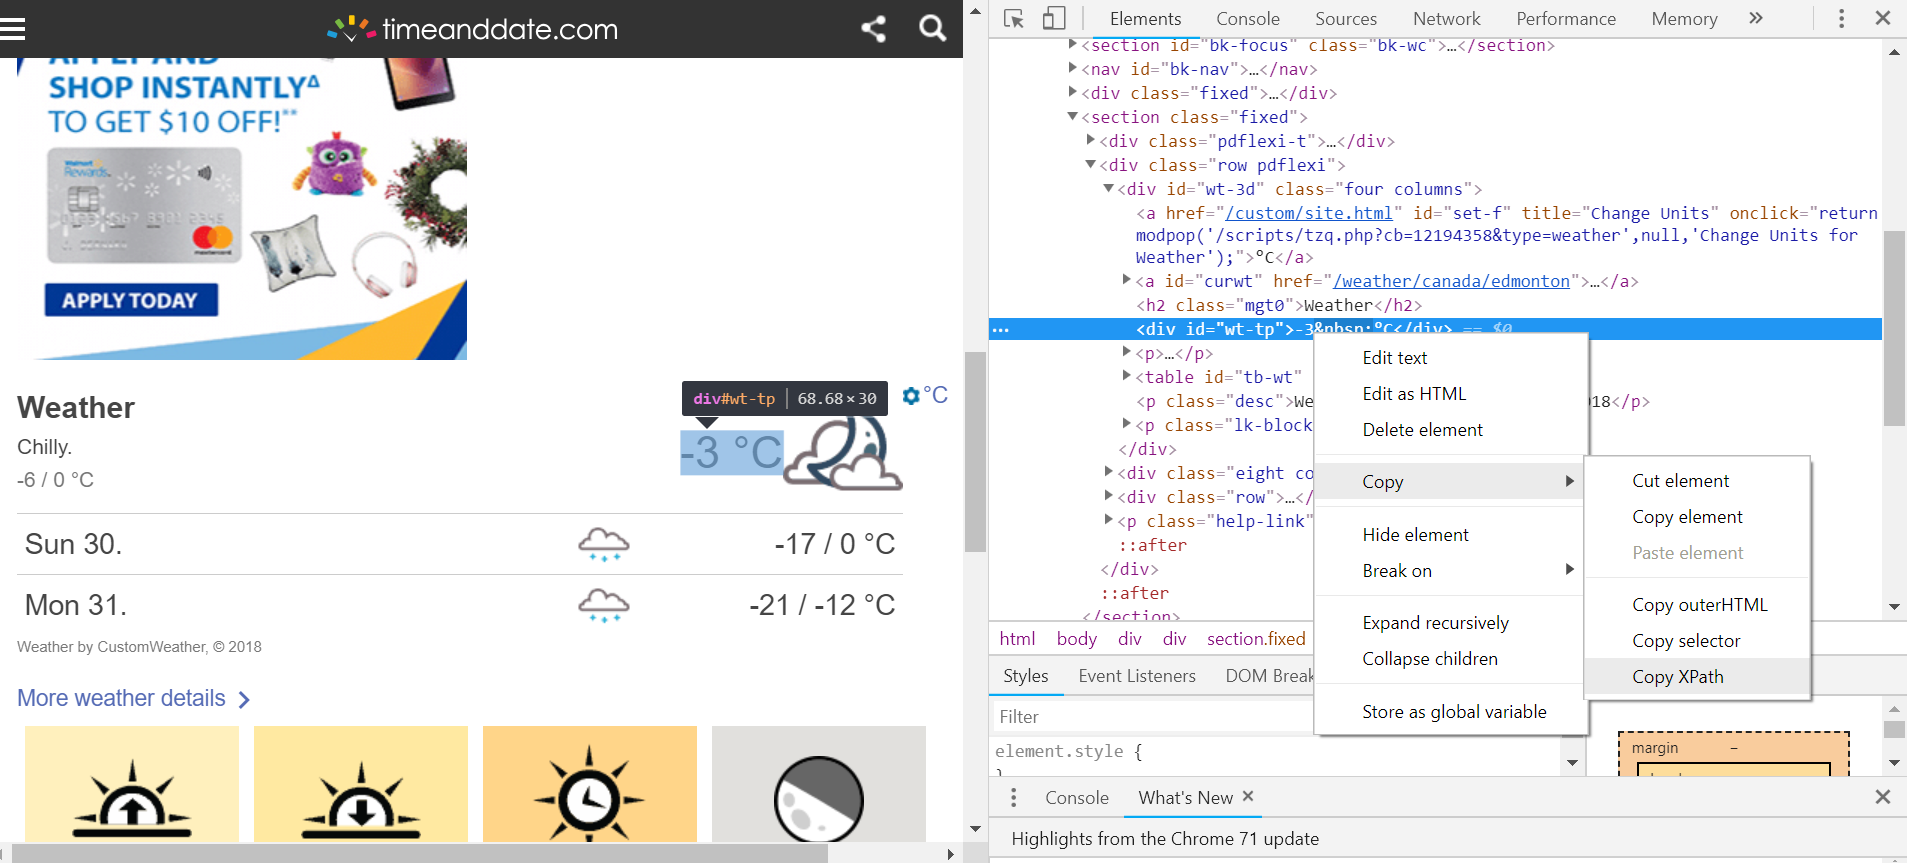
then go to the data you want, right click it, and select "inspect". It will open up the HTML viewer in your browser, and show you the final branch of the tree that your data is coming from. I find that the easiest browser to use for this is chrome, but apparently firefox has some extensions that make it better... but idk I feel like that's just a classic firefox-person sort of thing to say?
That's where the data lives. Sometimes it has an ID it's referenced by, sometimes it's just written right in. So how do we extract this?
2. Thingspeak/ ThingHTTP/ APIs (don't be scared, no coding necessary)
I'm not even going to talk about what API's are and how you make them, but you can imagine them as the actual connection or transmission between you (your requests) and where the things you're requesting about are. The classic analogy is a waiter at a restaurant. To carry this out without any coding, you will use a free service called "ThingSpeak", and specifically their application "ThingHTTP". Just make an account, and then go to apps, and way at the bottom , thinghttp, and create one.
The only thing you'll need to do is copy and paste the URL of the website, for example the date and time website above, and then scroll way down to the last field "Parse String". This is the path to the data you want.
I guess this path can be given in a few ways, but the simplest and only way that I know is by right clicking that piece of data as described above, inspecting it, and then right clicking the line that is highlighted corresponding to that data in the HTML viewer, and going Copy-> x path. This is shown in the attached picture.
Once you're done, try going to the URL generated for you and see if it contains the data you want in some way that can at least be worked with. For example, mine says the temperature as "XX F" instead of the number of degrees Celsius, but units and the F on the end can easily be changed within the code. IT IS EXTREMELY COMMON TO GET THE ERROR THAT IT CAN'T BE PARSED. If this is the case, try deleting some of the headers within the xpath, see if you can find the data elsewhere, or consult a forum where they may be able to identify the "corrupted" aspects of your parse string. This method will definitely NOT work on a website that doesn't load the desired data in with the website, but instead (itself) pulls from some external source, which requires a little while to load in. However, it should work well for things like youtube stuff, weather, etc.
3. Accessing this data from the NodeMCU
I have already typed a lot, so see the attached code, which has lots of comments, and is currently set up to read in aurora borealis likelihood for Edmonton AB, Canada (Only!). The first tweak you will have to make is just changing out the URL (in fact only the 16 digit api key part of the URL) to your own thinghttp.
The second thing you'll have to tweak is in the loop(), where the actual "value" is brought in and stored as the variable "yourvalue" , which is a string (text). It can be used in any fashion you want from there out. I removed the percent symbol, split the 2 digits of the % into 2 variables (for example 14% into 1,4), and had these each stored as integers, but with a few quick google searches or comments here, you should be able to extract exactly the numbers you want from the thinghttp generated string. You'll need numbers to be able to do things like decide if it's big or small or divisible-by-something enough to turn things on or off or display. The rest of the code from that point on, including the function at the bottom called sevenseg() are used for displaying the 2 numbers.
Feel free to ask questions about the code, or how you might extract or show the sorts of things you want, or how you might use these numbers, for example dividing up the spectrum of an rgb LED and mapping different values to different colours.
Downloads
Displaying the Data
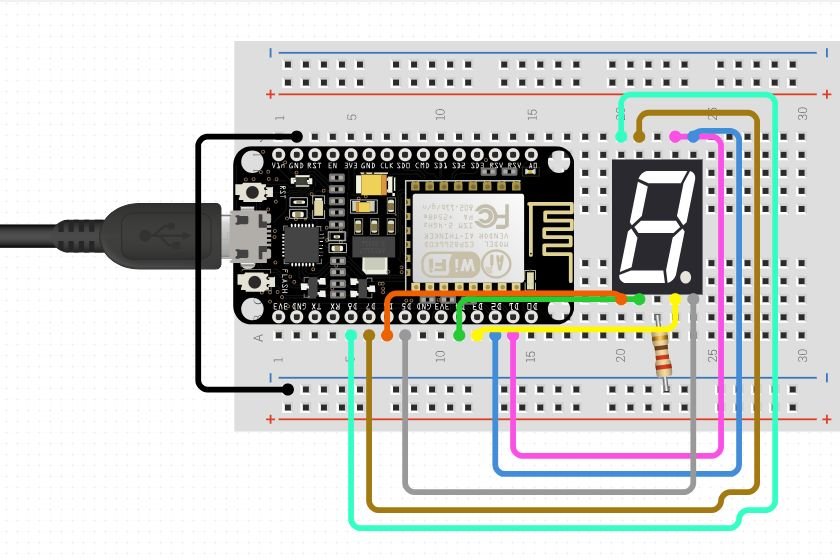
1. What I used (how to wire a 7 segment display)
I got the attached diagram/ followed the wiring described by this other instructable.
The wiring is fairly straightforward, but if you haven't ever used a breadboard, then it can be confusing what's going on. Essentially a breadboard is intended to make connections clear and temporary.
All of the following descriptions will be in relation to the attached diagram: A breadboard can be split horizontally into 2 repeated halves, each with 2 distinct segments: horizontal - and + rows extending the length of the breadboard (used for power) and vertical columns, which are numbered, and consist of 5 spots per column which are used for marking connections. There is then a little gap, and then these same features doubled on the other side of that imaginary dividing line. All of the spots in the horizontal + row are connected together, and all of the horizontal - row spots are connected together. This lets you plug power into one end of the breadboard and then be able to plug in things to any spot along the + to take power out, just like a long power bar for outlets. The same goes for the - row, which is used to ground things. For the numbered columns, each spot in a numbered column is connected to the other 4 spots. Note that the five spots in a column are NOT connected to the five opposite the imaginary half-way line. The breadboard could be cut lengthwise and no electrical connections would be severed.
The NodeMcu straddles the two halves of the breadboard perfectly, with each pin corresponding to power or inputs/outputs having a numbered column to itself, so you can plug wires in to the remaining accessible spot and connect it elsewhere on the breadboard. The same goes for the 7 segment display shown in the diagram. For example, follow the path of the ground from the board to the 7 segment display in the diagram.
- ground pin from NodeMcu is plugged into column 2
- wire from column 2 to the -ve horizontal power row (designated by convention ground)
- from the ground row (the column number is irrelevant, since the whole row is connected) to column 22 via a resistor
- into the "ground" pin on the 7 segment display which is also plugged in to column 22
The purpose of the resistor in the diagram is basically to "soak up" some of the excess power output to the LEDs, which functionally works to dim the display. You'll see that when a "1" is illuminated vs. an "8", the 1 is much brighter, since less LEDs are on. The less bright you run the LED, the longer it will last, so the resistor is necessary. Most diagrams for 7 segment displays actually show there being a resistor in series with each of the individual segments, but this seems to work fine. I used a 1K ohm resistor.
Be very very aware of which pins correspond to which pin on the display, since these are mapped in the code.
2. Some ideas/ things I would have done with more time
This is essentially where I stopped, but you could have chosen many other things to output based on the value of your data such as:
- an rgb LED that changes colour dependent on the value, or covers a gradient, from green to red for example
- a full LED display
- a logical on/off over/under true/false LED that just turns on or off to indicate something
- a motor that turns at a specific time of day, like for a valve on a watering system or to release a treat for your dog... I'm sure there's more efficient ways of doing this than interpreting the time via wifi but it's an option!
The next step (which there are surprisingly many more tutorials for) is posting data to your OWN server (which can also be done through thingspeak) and then using this data (like for an automated garden, or smart house stuff).
Building a Box
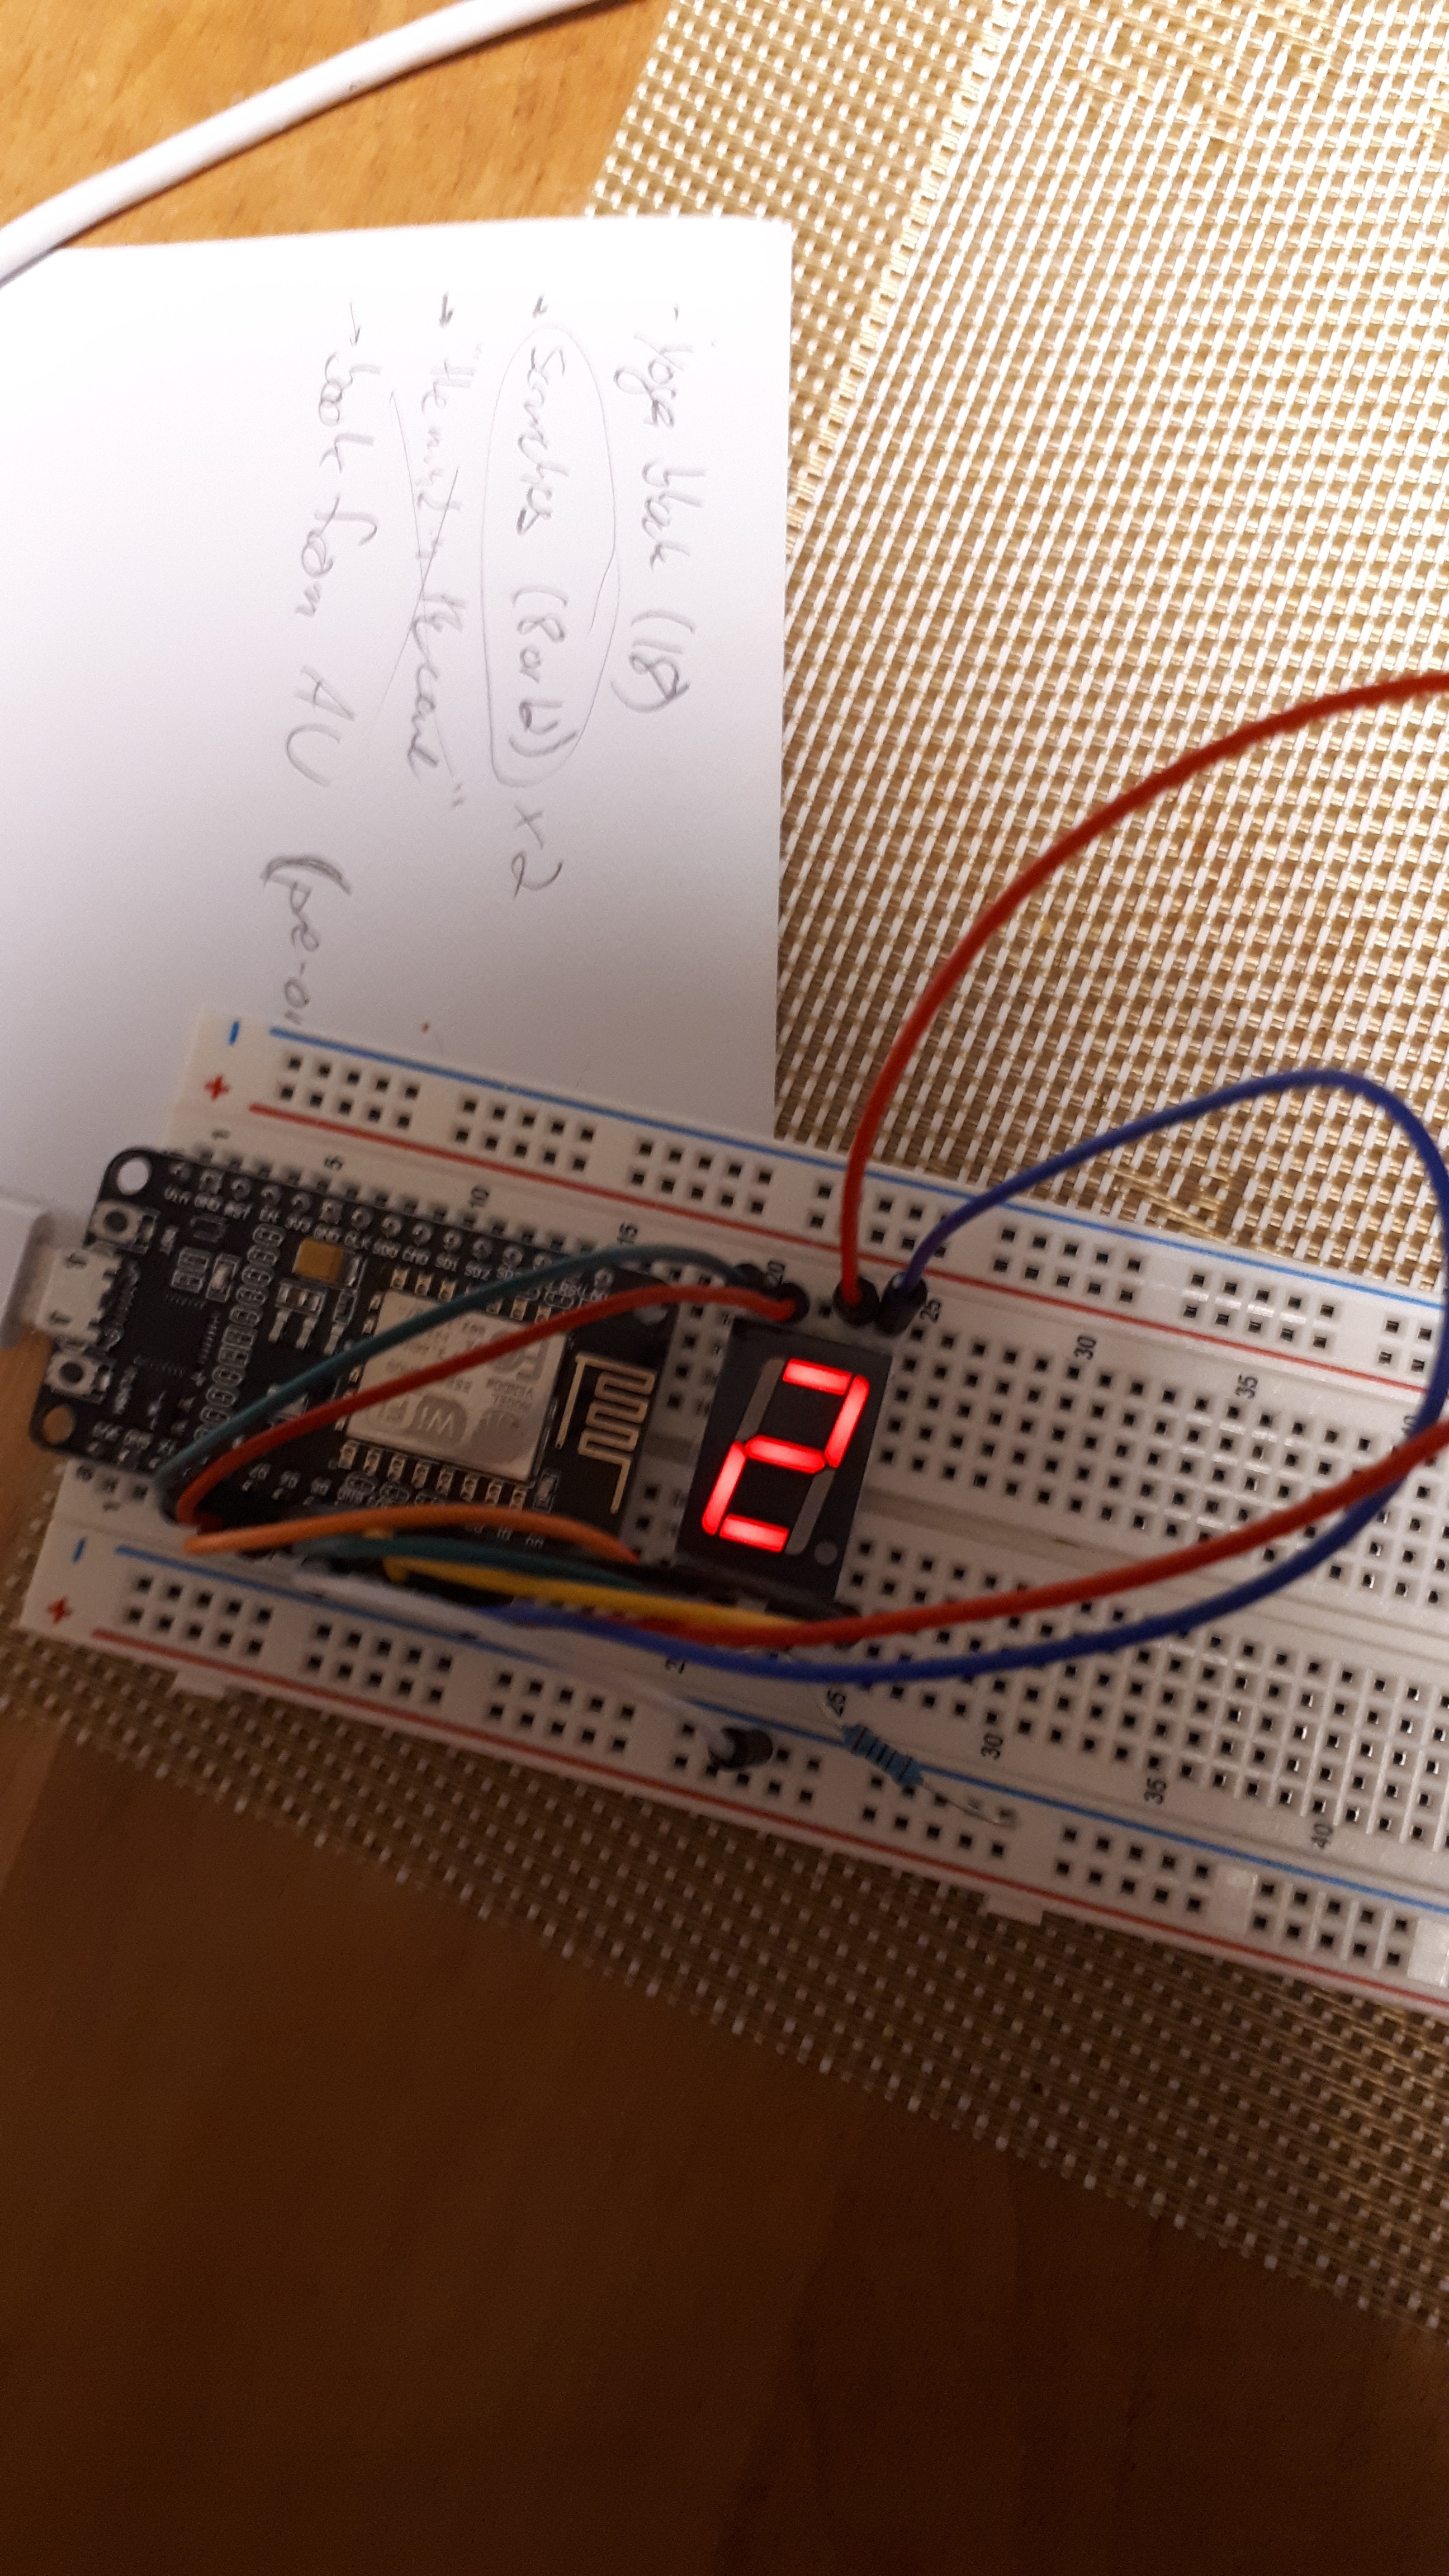
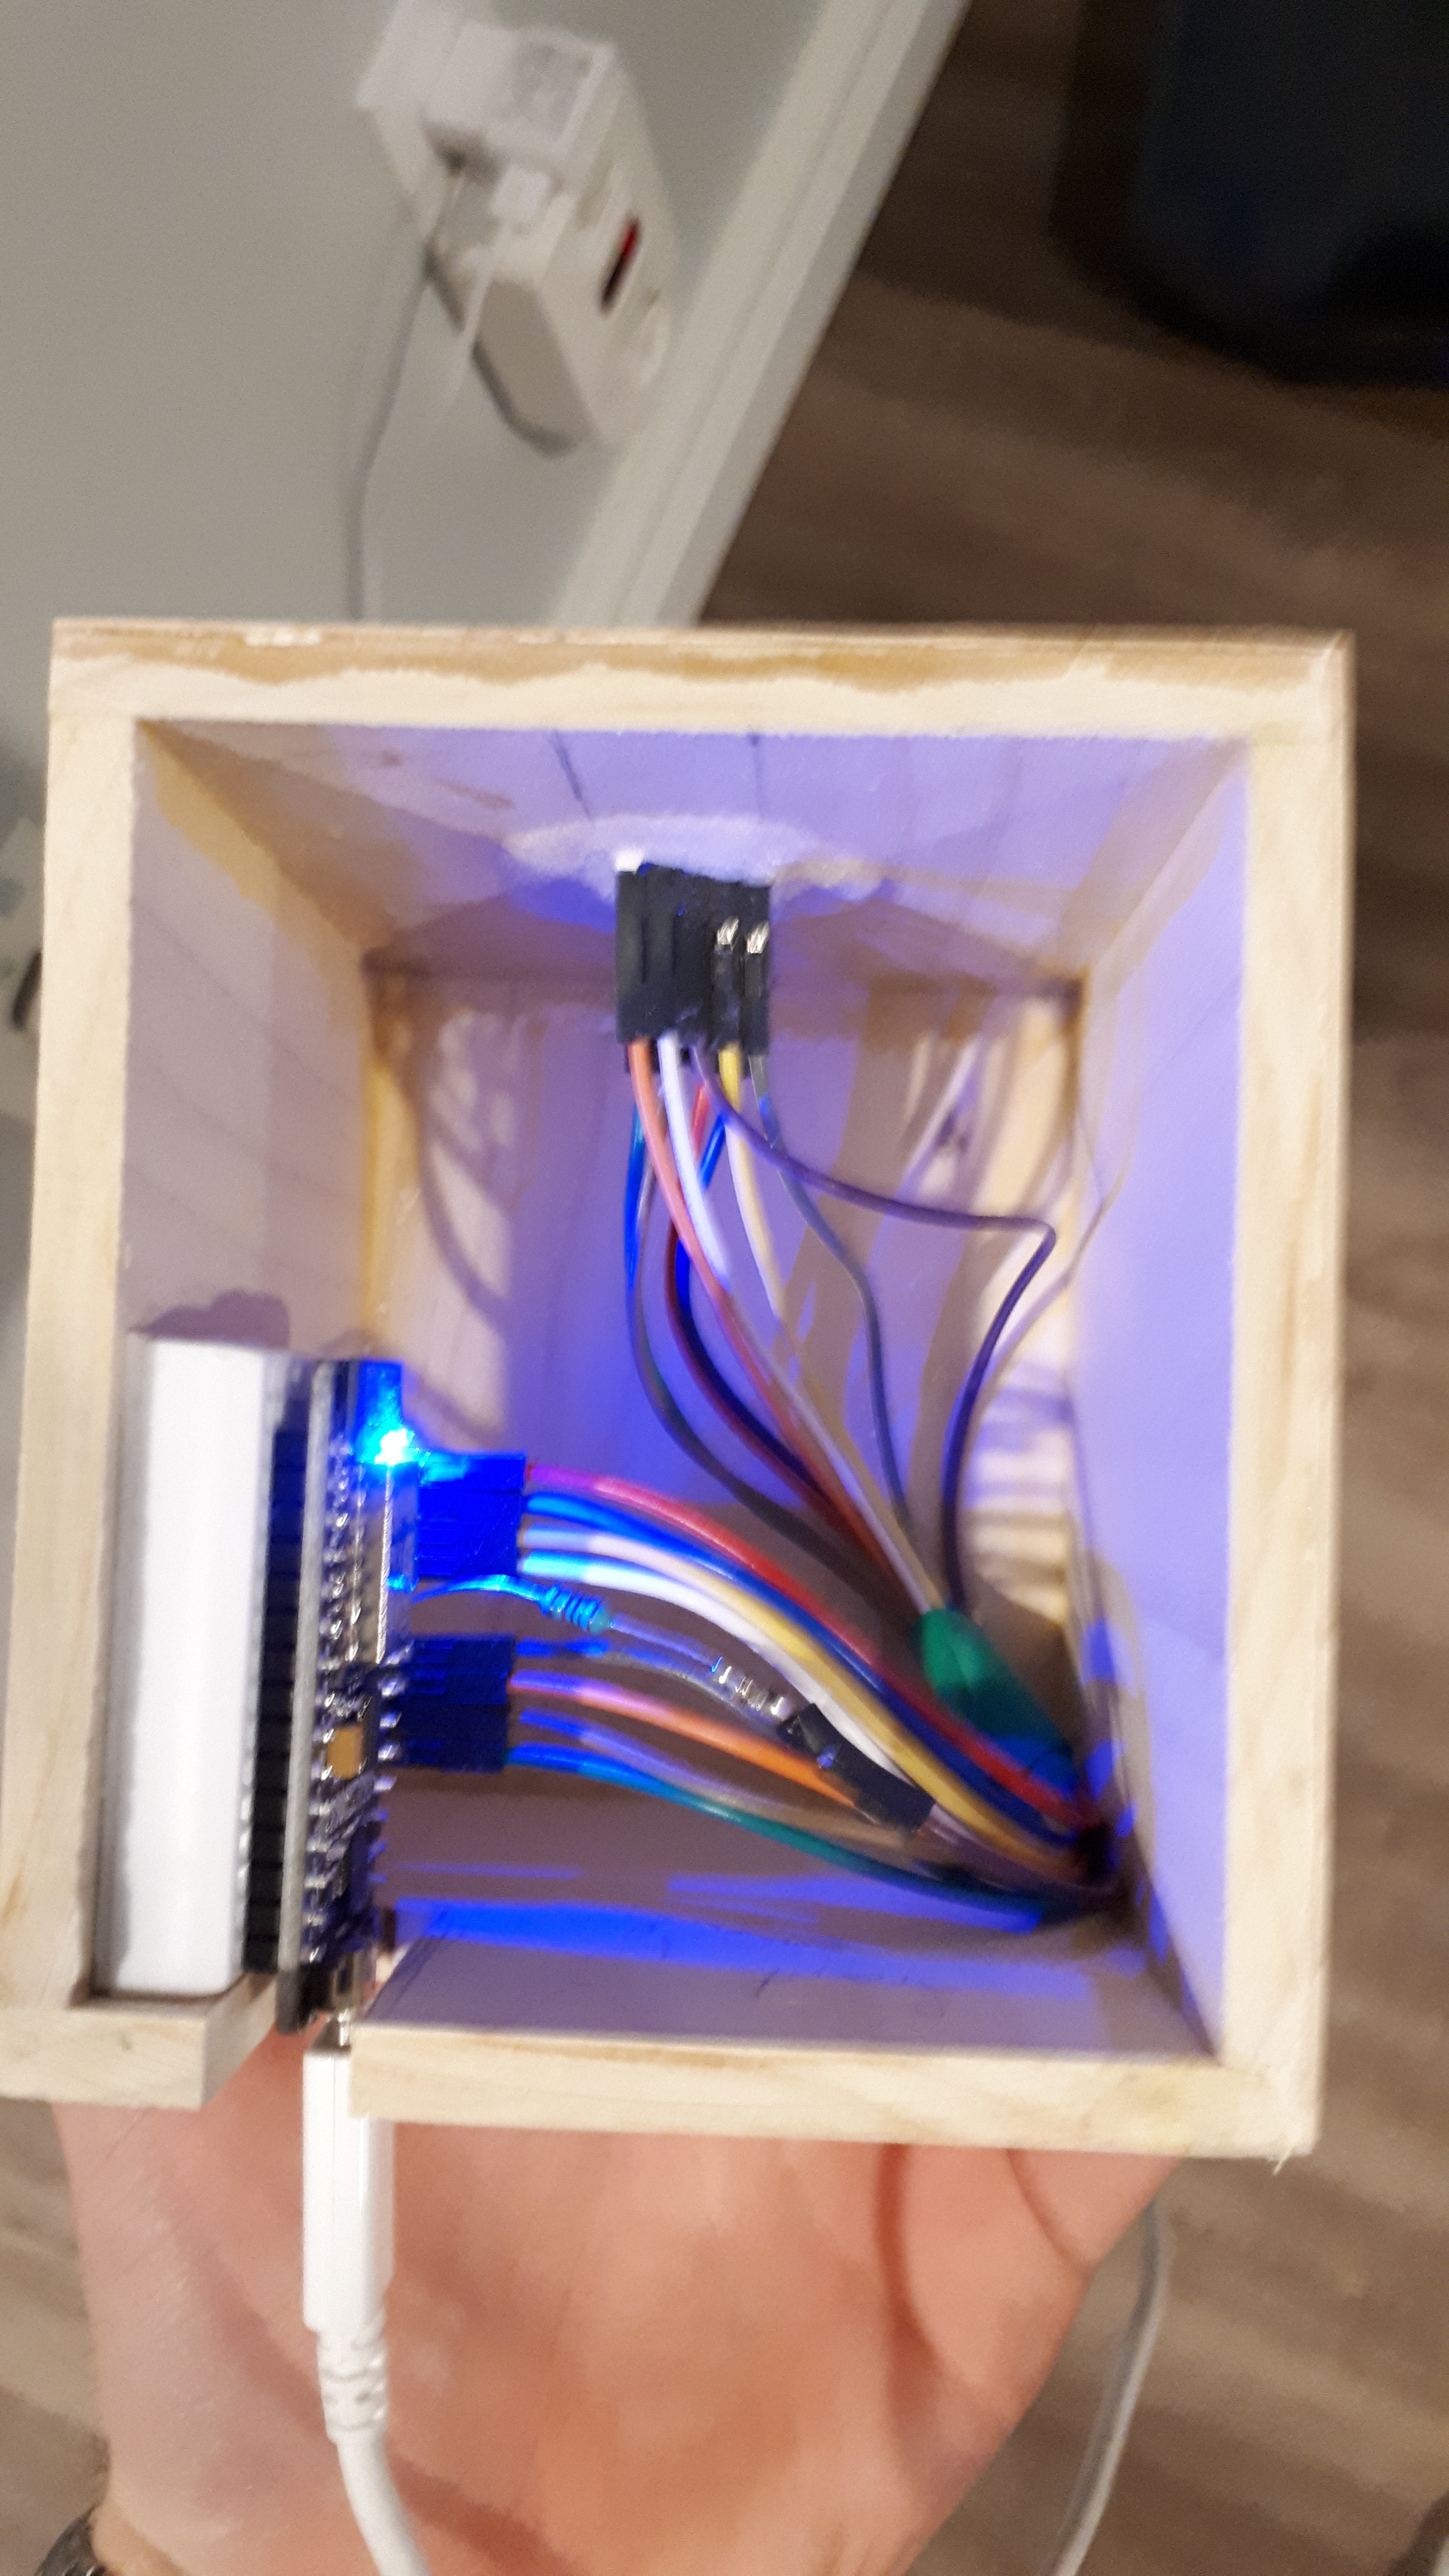
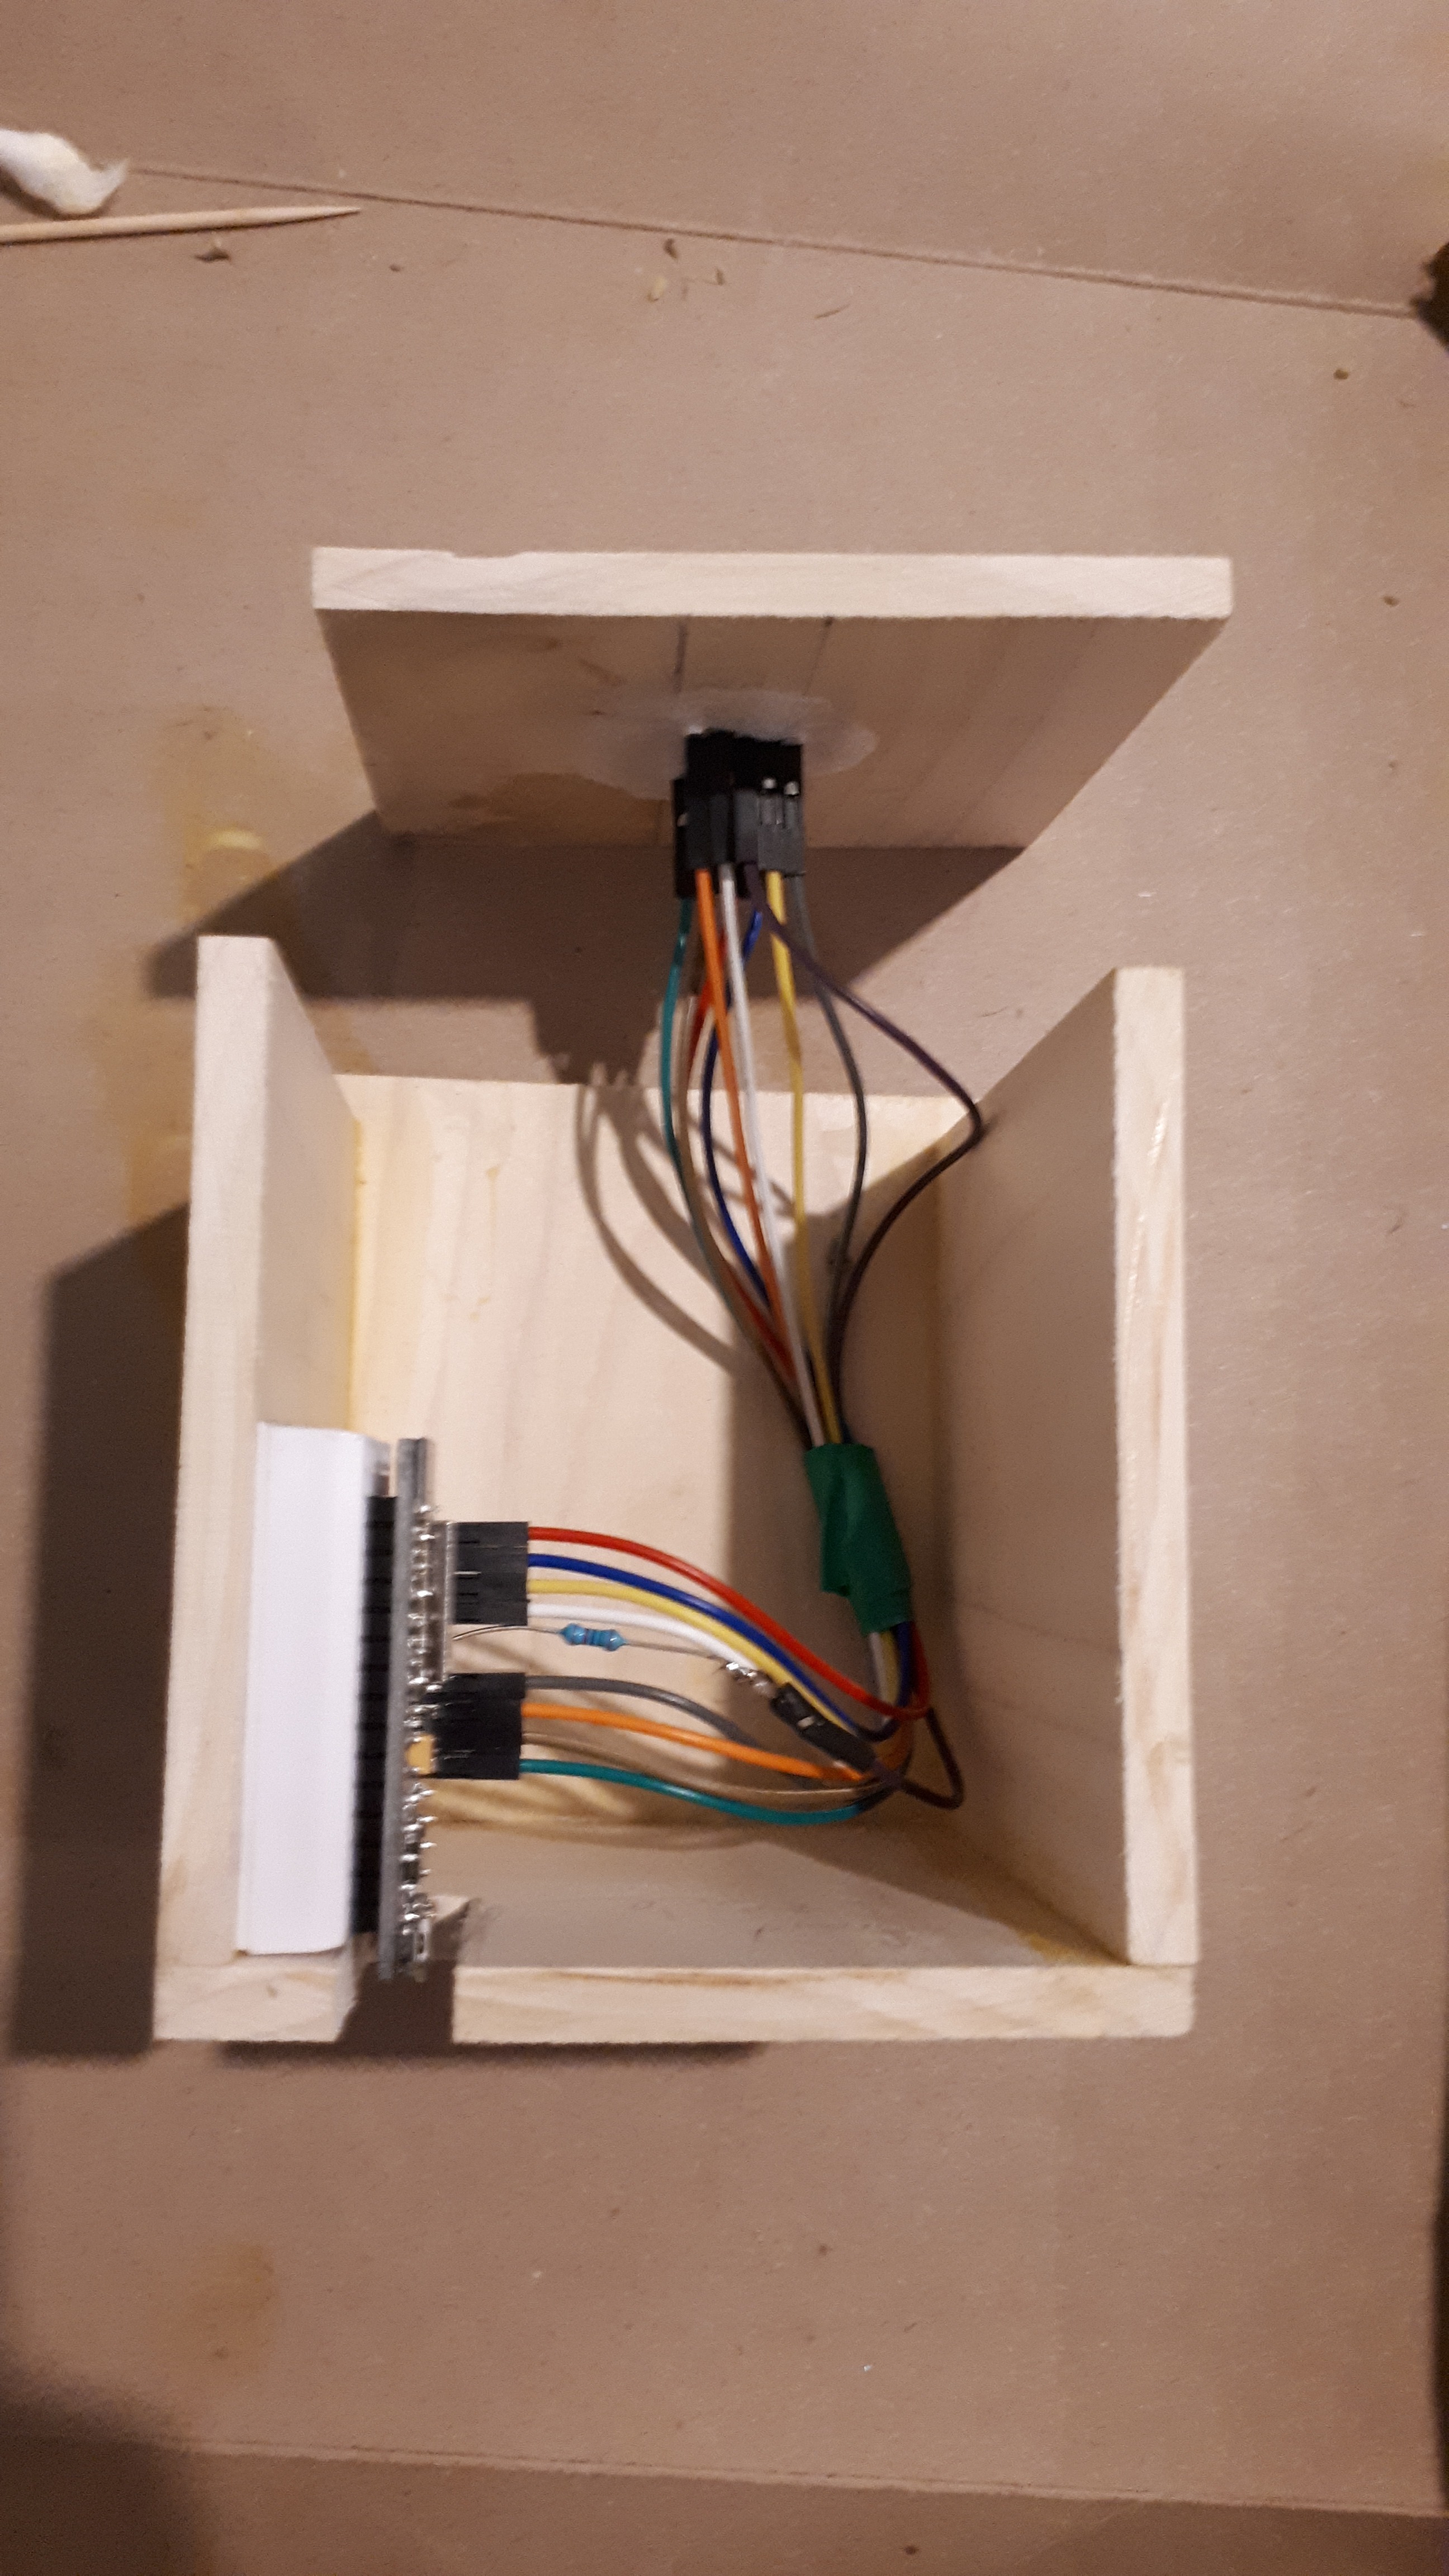
All of the connections made through the breadboard can be made permanent by either soldering the wires directly between the board and the output (like the LED), or by using a much smaller breadboard, or PCB to make connections on a scale that can fit into your project. I opted to use a tiny breadboard that came in the kit I linked, and only needed to solder a resistor onto the end of a wire... not very robust, but functional!
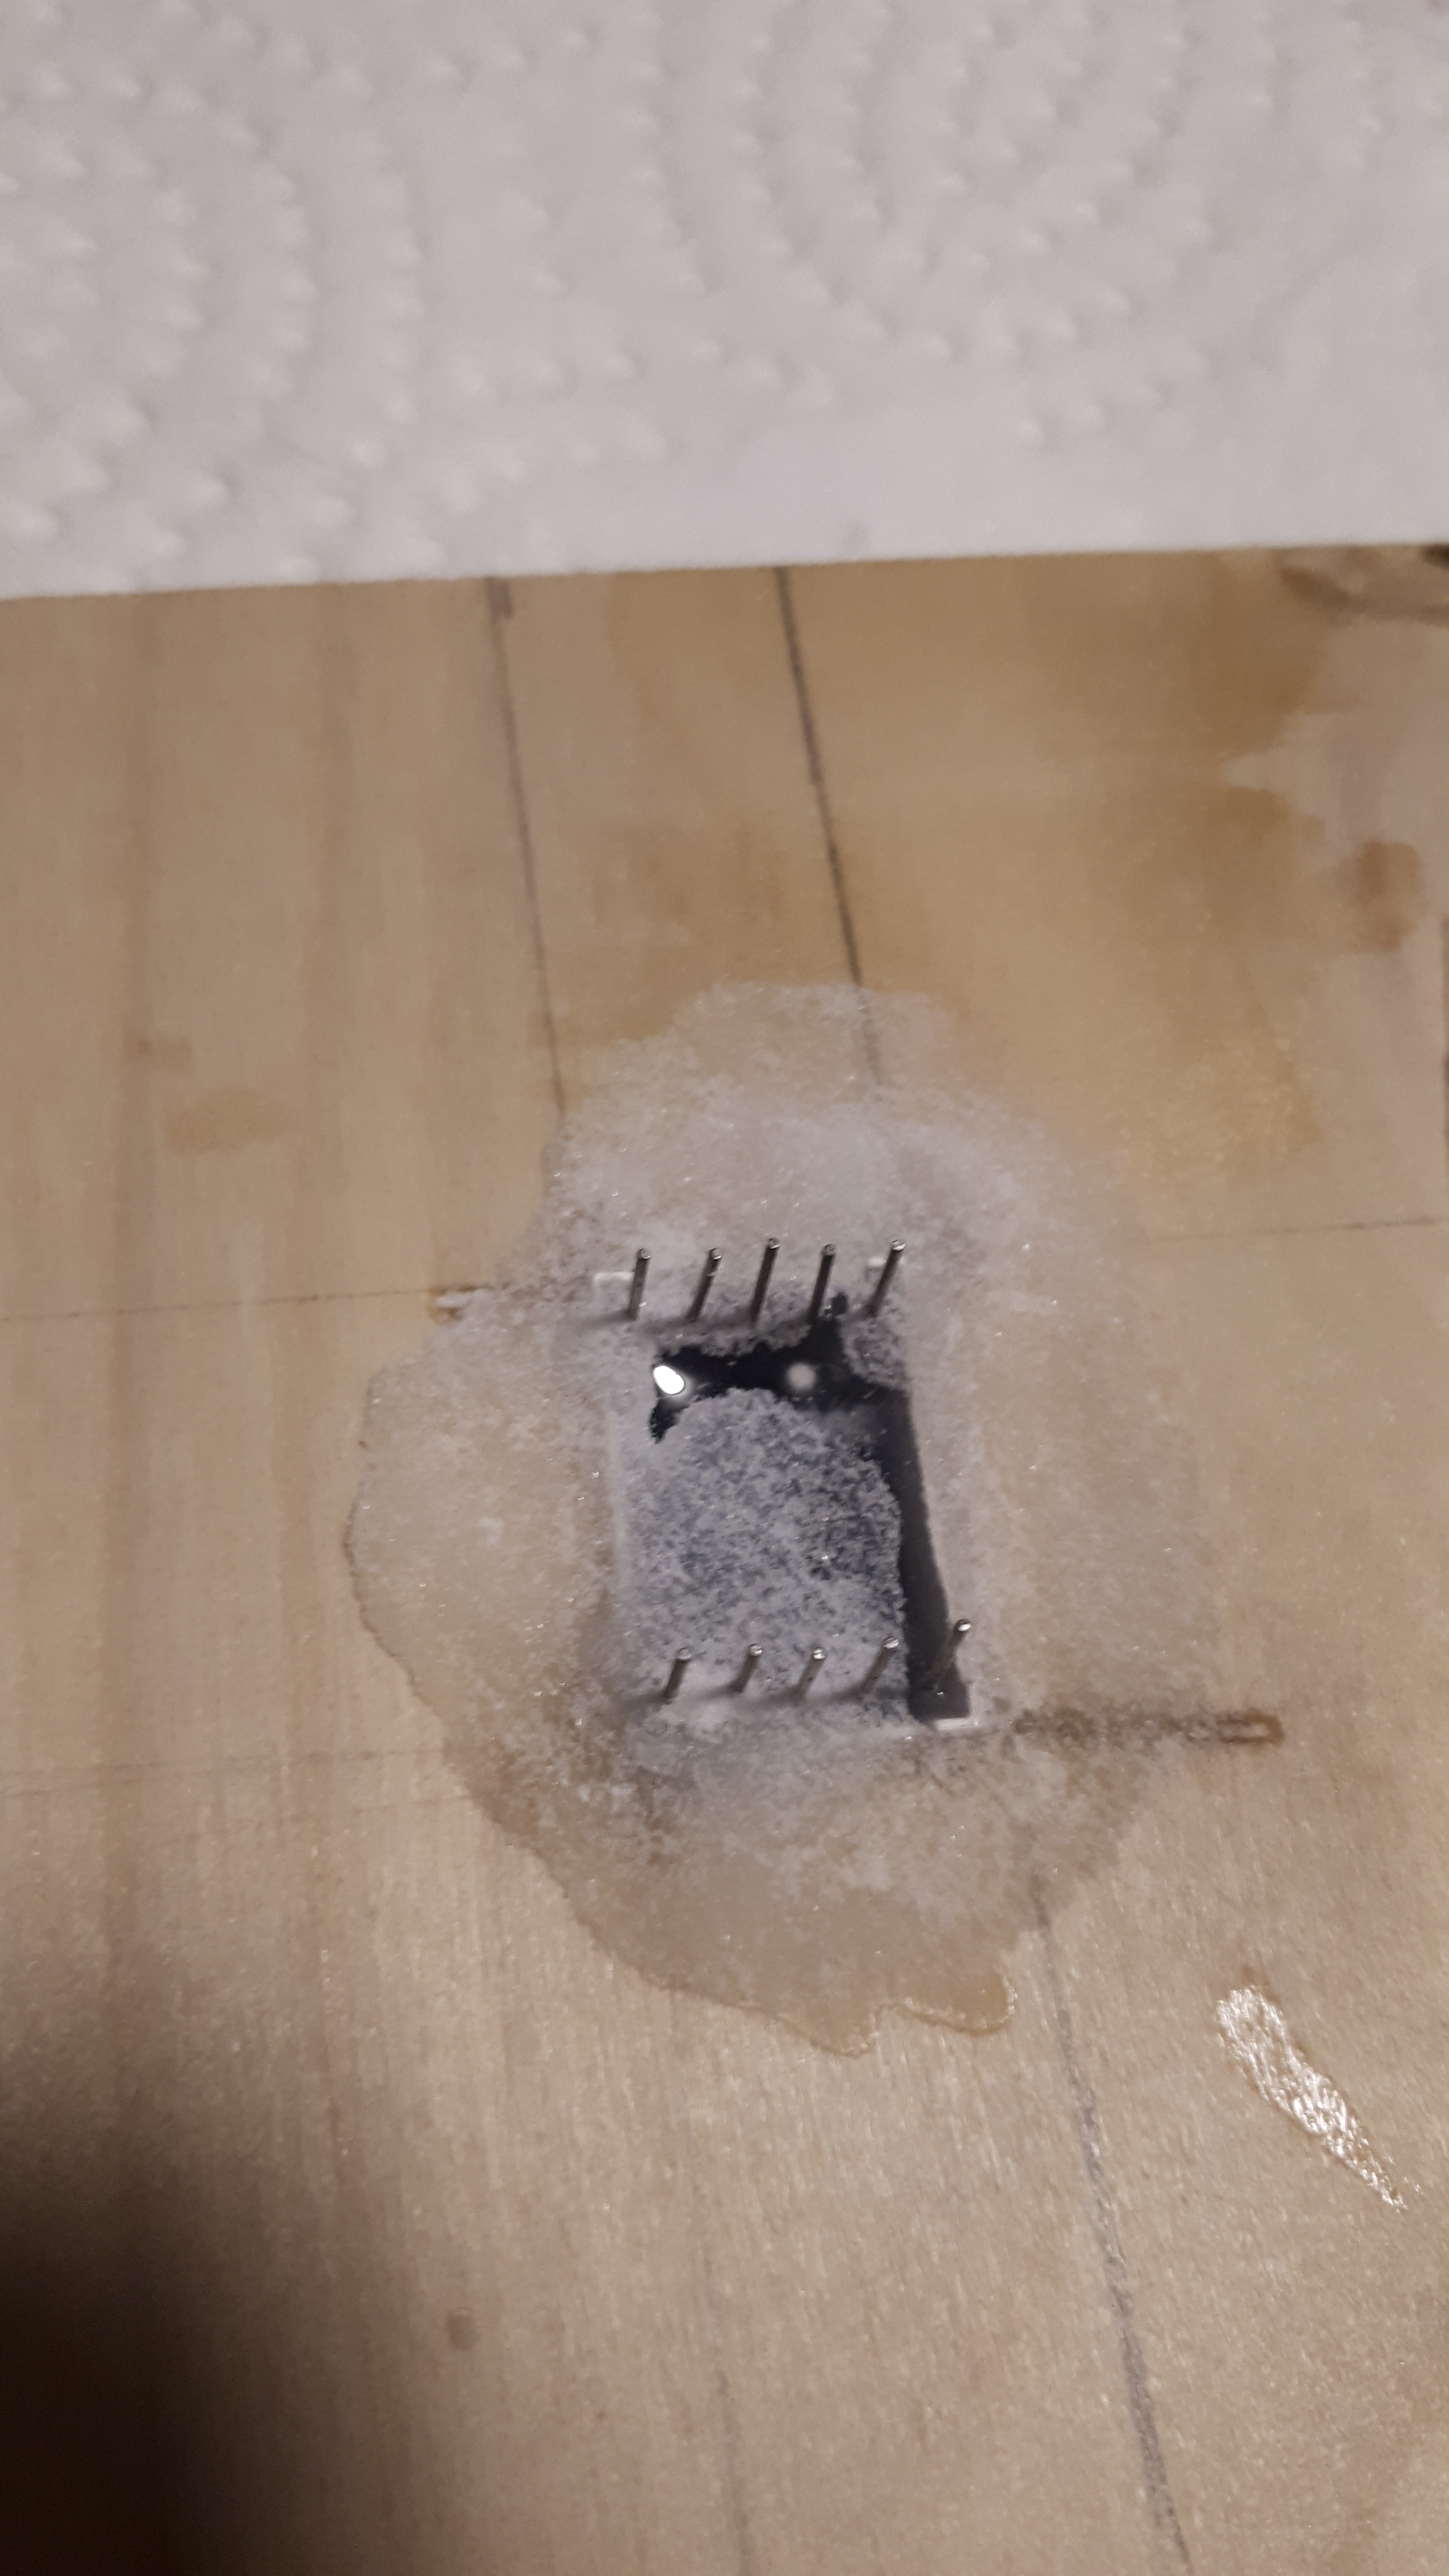
I cut 4 pieces of 1/4" x 3.5" pine at 3.5" (the sides) and one at 4" (the top), and just butted them up and glued them together, making sure to get all of the faces as square as possible so that each face was as flush as possible. Before gluing the front or back pieces I notched out areas for the display and the board to stick out enough to be seen/ plugged into respectively. The little breadboard I got had sticky tape on the back so it could be mounted to one of the side walls, and the 7 segment display could be held in place by first lying the piece down on packing tape, placing the display on this tape, and then sprinkling baking powder over/into all the gaps. Then I poured CA (super) glue into the gaps, which, upon contact with the baking soda, instantly hardened to hold the display in place, flush against the front of the front piece. The packing tape was to prevent any glue from seeping through between the display and the surface it's face down against and obscuring it once dry.
I glued pine veneer onto all the sides (using CA glue, which works better than wood glue in my opinion) and sanded the edges down with each piece applied, to make it look uniform/hide the butt joints/ act as a diffuser for the display like in this video.