Proximity Photo Sharing IOS App
by dataoversound in Circuits > Audio
770 Views, 0 Favorites, 0 Comments
Proximity Photo Sharing IOS App

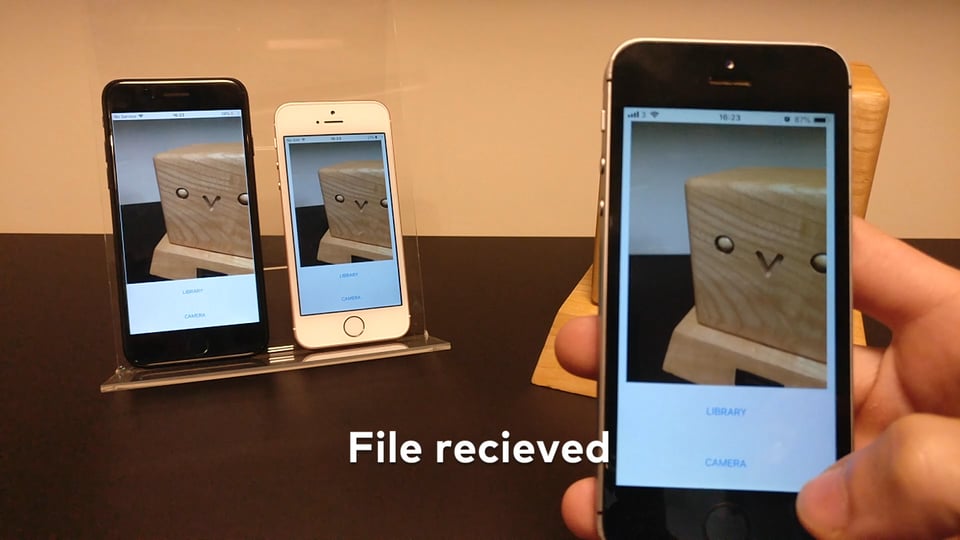
In this instructable we will be creating an iOS app with Swift that allows you to share photos with anyone nearby, with no device pairing necessary.
We will be using Chirp Connect to send data using sound, and Firebase to store the images in the cloud.
Sending data with sound creates a unique experience where data can be broadcast to anyone within hearing range.
Install Requirements
Xcode
Install from the App Store.
CocoaPods
sudo gem install cocoapods
Chirp Connect iOS SDK
Sign up at admin.chirp.io
Setup Project
1. Create an Xcode project.
2. Sign in to Firebase and create a new project.
Enable Firestore by clicking into the Database section and selecting Cloud Firestore. Click into Functions to also enable Cloud Functions.
3. Run through Set up your iOS app on the Project Overview page
You will need the Bundle Identifier from the General Tab in your Xcode Project Settings.
Once the Podfile is created you will need to add the following dependencies, before running pod install.
# Pods for project
pod 'Firebase/Core'
pod 'Firebase/Firestore'
pod 'Firebase/Storage'
4. Download the latest Chirp Connect iOS SDK from admin.chirp.io/downloads
5. Follow steps at developers.chirp.io to integrate Chirp Connect into Xcode.
Go to Getting Started / iOS. Then scroll down and follow the Swift set up instructions.
This will involve importing the framework and creating a bridging header.
Now the setup is complete, we can start writing some code! It is a good idea to check your project builds at each stage in the setup.
Write IOS Code
1. Import Firebase into your ViewController and extend NSData to include a hexString extension, so that we can convert Chirp Connect payloads to a hexadecimal string. (Chirp Connect will be available globally thanks to the bridging header).
import UIKit
import Firebase
extension Data {
    var hexString: String {
        return map { String(format: "%02x", UInt8($0)) }.joined()
    }
}
2. Add ImagePicker delegates to your ViewController, and declare a ChirpConnect variable called connect.
class ViewController: UIViewController, UIImagePickerControllerDelegate, UINavigationControllerDelegate {
    var connect: ChirpConnect?

    override func viewDidLoad() {
        super.viewDidLoad()

    ...
3. After super.viewDidLoad, initialise Chirp Connect, and set up the received callback. In the received callback we will retrieve the image from Firebase using the received payload and update the ImageView. You can get your APP_KEY and APP_SECRET from admin.chirp.io.
   ...

connect = ChirpConnect(appKey: APP_KEY, andSecret: APP_SECRET)
if let connect = connect {
    connect.getLicenceString {
    (licence: String?, error: Error?) in
    if error == nil {
        if let licence = licence {
            connect.setLicenceString(licence)
            connect.start()

            connect.receivedBlock = {
            (data: Data?) -> () in
            if let data = data {
                print(String(format: "Received data: %@", data.hexString))
                let file = Storage.storage().reference().child(data.hexString)
                file.getData(maxSize: 1 * 1024 * 2048) { imageData, error in
                    if let error = error {
                        print("Error: %@", error.localizedDescription)
                    } else {
                        self.imageView.image = UIImage(data: imageData!)
                    }
                }
            } else {
                print("Decode failed");
            }
        }
    }
}
4. Now add the code to send the image data once it has been selected in the UI.
func imagePickerController(_ picker: UIImagePickerController, didFinishPickingMediaWithInfo info: [String : Any])
{
    let imageData = info[UIImagePickerControllerOriginalImage] as? UIImage
    let data: Data = UIImageJPEGRepresentation(imageData!, 0.1)!
    self.imageView.image = imageData

    let metadata = StorageMetadata()
    metadata.contentType = "image/jpeg"

    if let connect = connect {
        let key: Data = connect.randomPayload(withLength: 8)
        Firestore.firestore().collection("uploads").addDocument(data: ["key": key.hexString, "timestamp": FieldValue.serverTimestamp()]) { error in
            if let error = error {
                print(error.localizedDescription)
            }
        }
        Storage.storage().reference().child(key.hexString).putData(data, metadata: metadata) {
            (metadata, error) in
            if let error = error {
                print(error.localizedDescription)
            } else {
                connect.send(key)
            }
        }
    }
    self.dismiss(animated: true, completion: nil)
}Note: You will need to add a Privacy - Photo Library Usage Description, Privacy - Photo Library Usage Description and Privacy - Microphone Usage Description statements to your Info.plist to grant permissions to use the Camera, Photo Library and Microphone.
----
Create a User Interface

Now go to the Main.storyboard file to create a UI.
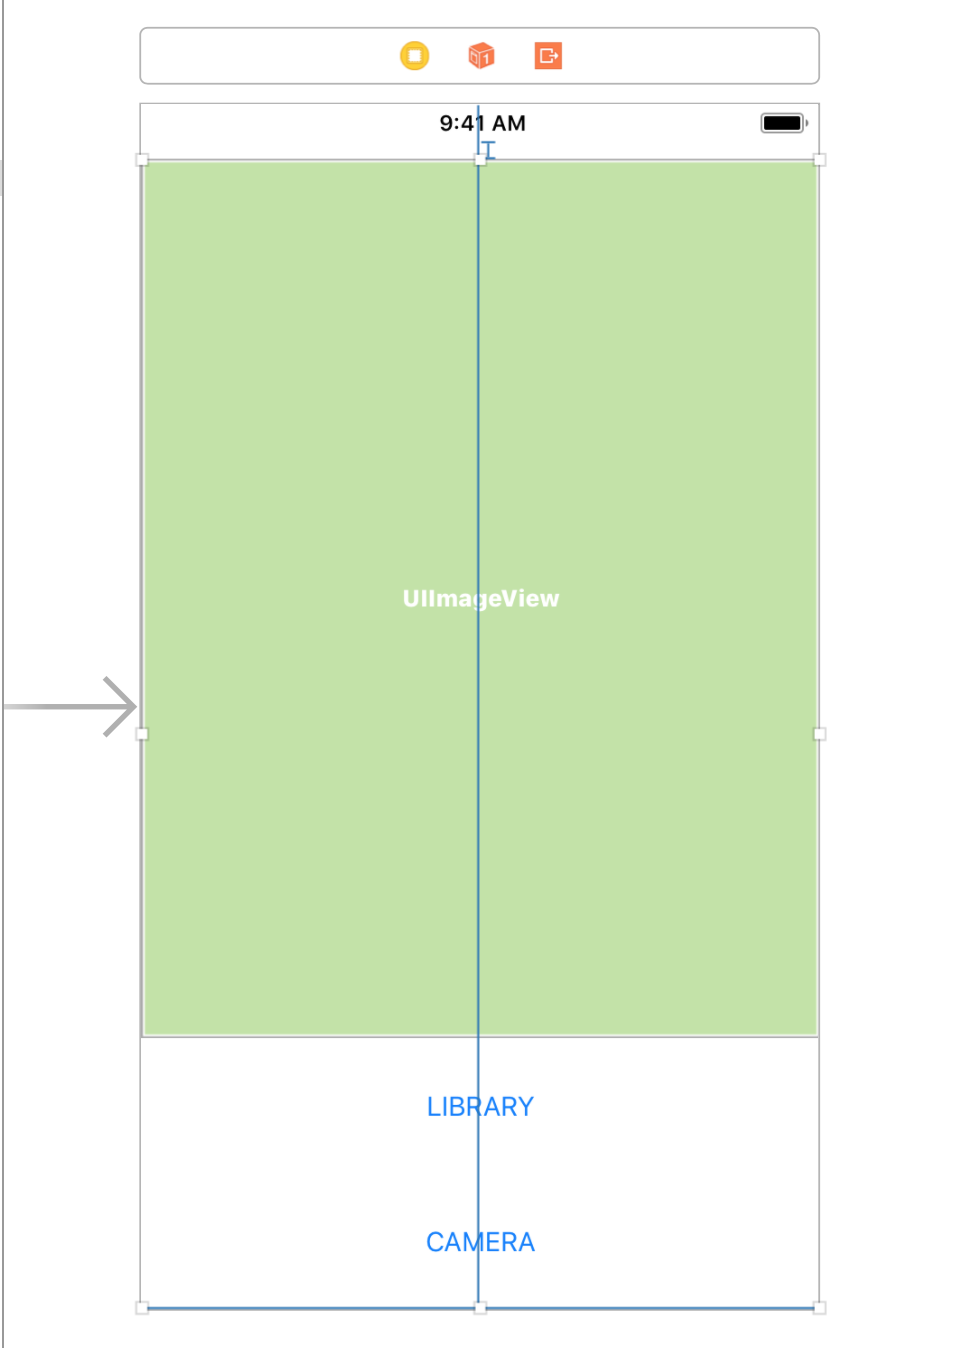
1. Drag across an ImageView and two Buttons to the Storyboard from the Object Library panel in the bottom right corner.
2. For each button add a height constraint of about 75px by selecting the component and clicking the Add New Constraints button (the one that looks like a Star Wars tie fighter), and then enter the height and press Enter.
3. Select all three components and put them in a stack view by clicking the Embed In Stack button.
4. Now open the Assistant Editor, and press CTRL and drag from each component to the ViewController code, to create Outlets for each component.
@IBOutlet var imageView: UIImageView!
@IBOutlet var openLibraryButton: UIButton!
@IBOutlet var openCameraButton: UIButton!
5. Now CTRL and drag from both buttons to create an Action to open the camera/library UI's.
6. In the Open Library action, add the following code
@IBAction func openLibrary(_ sender: Any) {
let imagePicker = UIImagePickerController()
    imagePicker.delegate = self;
    imagePicker.sourceType = .photoLibrary
    self.present(imagePicker, animated: true, completion: nil)
}
7. In the Open Camera action
@IBAction func openCamera(_ sender: Any) {
let imagePicker = UIImagePickerController()
    imagePicker.delegate = self
    imagePicker.sourceType = .camera;
    self.present(imagePicker, animated: true, completion: nil)
}
----
Write a Cloud Function
As the photos don't need to be stored in the cloud forever, we can write a Cloud Function to perform the cleanup. This can be triggered as an HTTP function every hour by a cron service such as cron-job.org.
First of all we need to install firebase-tools
npm install -g firebase-tools
Then from the project's root directory run
firebase init
Select functions from the command line to initialise cloud functions. You can also enable firestore if you want also want to configure Firestore.
Then open functions/index.js and add the following code. Remember to change
to your Firebase project id.const functions = require('firebase-functions');
const admin = require('firebase-admin');
admin.initializeApp()
exports.cleanup = functions.https.onRequest((request, response) => {
admin.firestore()
.collection('uploads')
.where('timestamp', '<', new Date(new Date() - 3600000)).get()
.then(snapshot => {
snapshot.forEach(doc => {
admin.storage().bucket('gs://<project_id>.appspot.com').file(doc.data().key).delete()
doc.ref.delete()
})
return response.status(200).send('OK')
})
.catch(err => response.status(500).send(err))
});Deploying cloud functions is as simple as running this command.
firebase deploy
Then at cron-job.org create a job to trigger this endpoint every hour. The endpoint will be something like
https://us-central1-project_id.cloudfunctions.net/cleanup
-----
Run the App
Run the app on a simulator or iOS device, and start sharing photos!