Proper Cropping and Resizing in Photoshop
by JonathanNielson in Circuits > Software
1467 Views, 2 Favorites, 0 Comments
Proper Cropping and Resizing in Photoshop

Images are everywhere. They dominate social media, webpages, printed works, advertising, etc. etc. So chances are, you've had to work with images at some point. Maybe you needed to make a PowerPoint or a flyer, or something else entirely, and you wanted to spruce it up with some supporting images. You probably realized that images come in all shapes and sizes, and that the vast majority of the time, the image you want is neither the shape nor the size that you want it in. But, with access to Adobe Photoshop, getting any image you want in the shape and size you want it, is very simple.
Finding the Right Image
If you've ever searched for specific images on the internet before, you probably used Google Images. The globe-dominating search engine has also dominated the image sourcing for most people on the internet for many many years. With that being the case, it's best to know how to properly source images using it that will avoid you getting in trouble with copyright law.
1) Using Google Images Properly
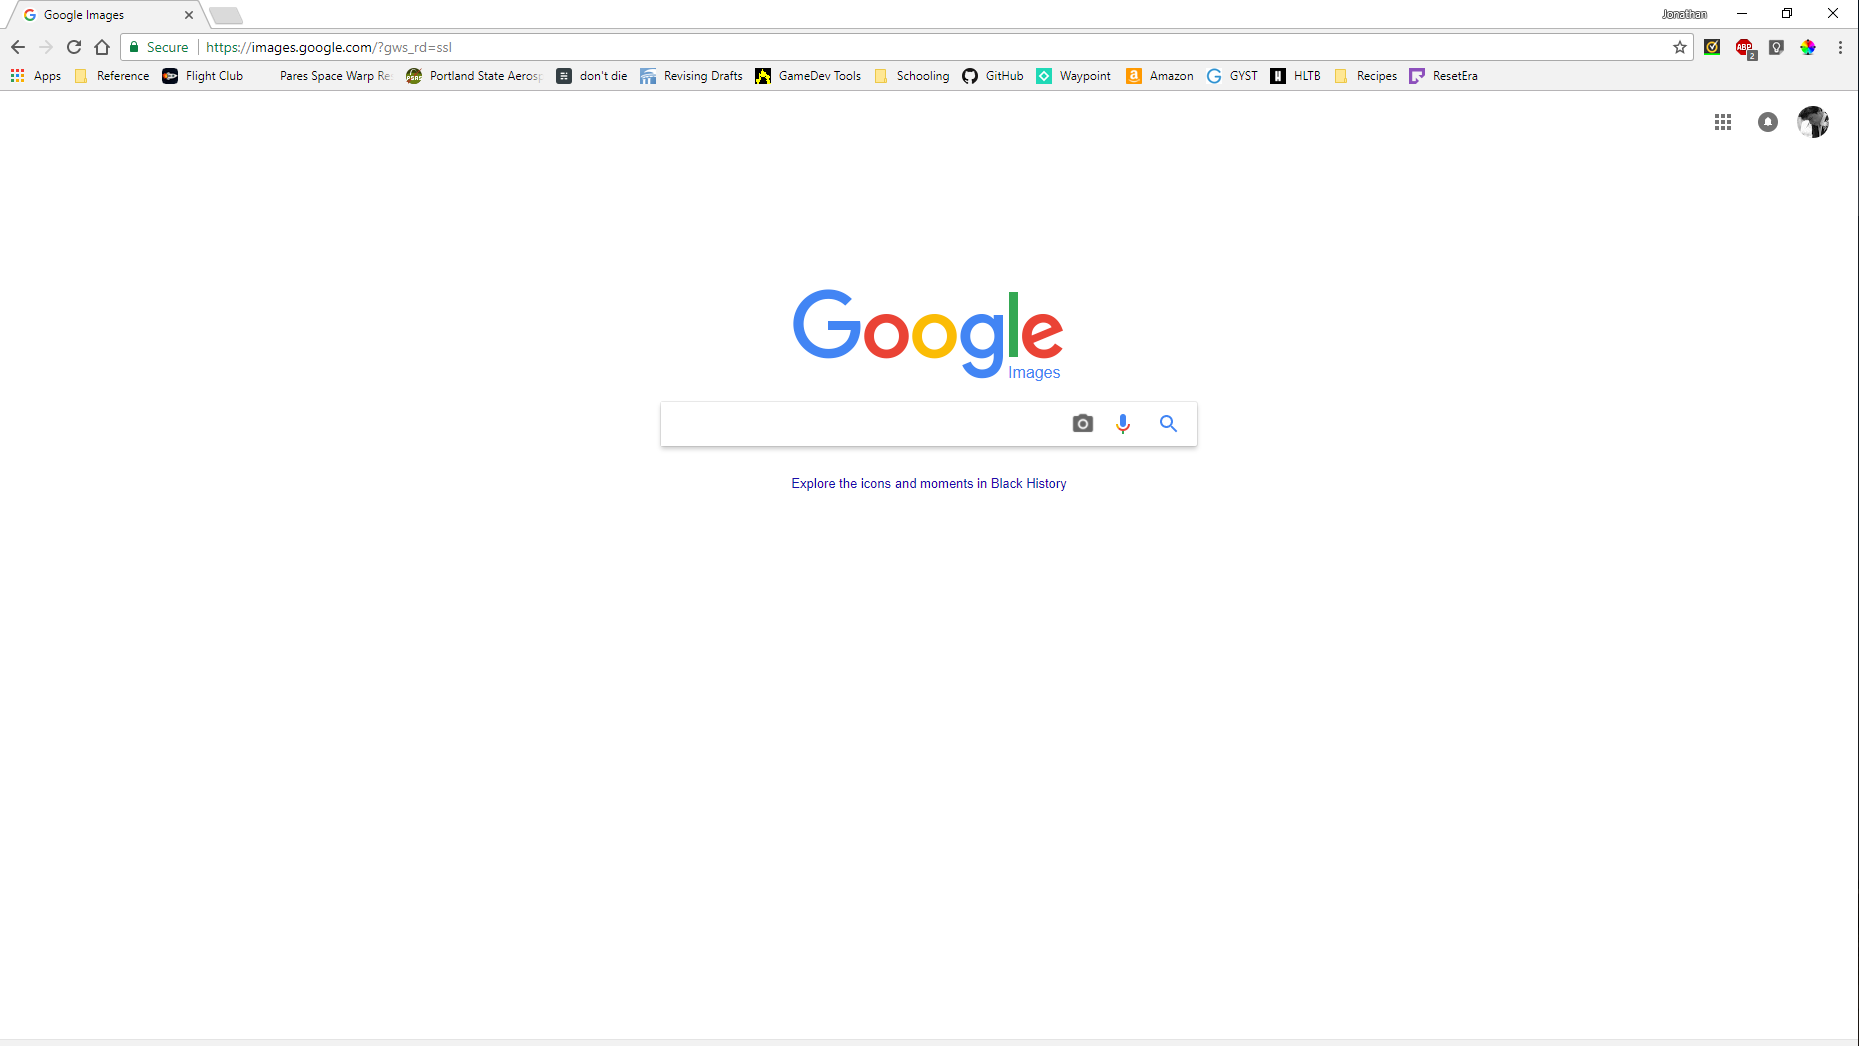
To begin, open a web browser of your choice and go to images.google.com. This will bring you to the homepage of the search engine and prompt you to enter some text. Enter a keyword or two related to the thing you wish to find an image of and hit enter.
**Important** By default, Google Images does not sort by license. Meaning that it will pull up any old image related to your search terms, whether or not that image is owned by somebody else. Just because an image shows up in the search results, does not give you the right to use it.
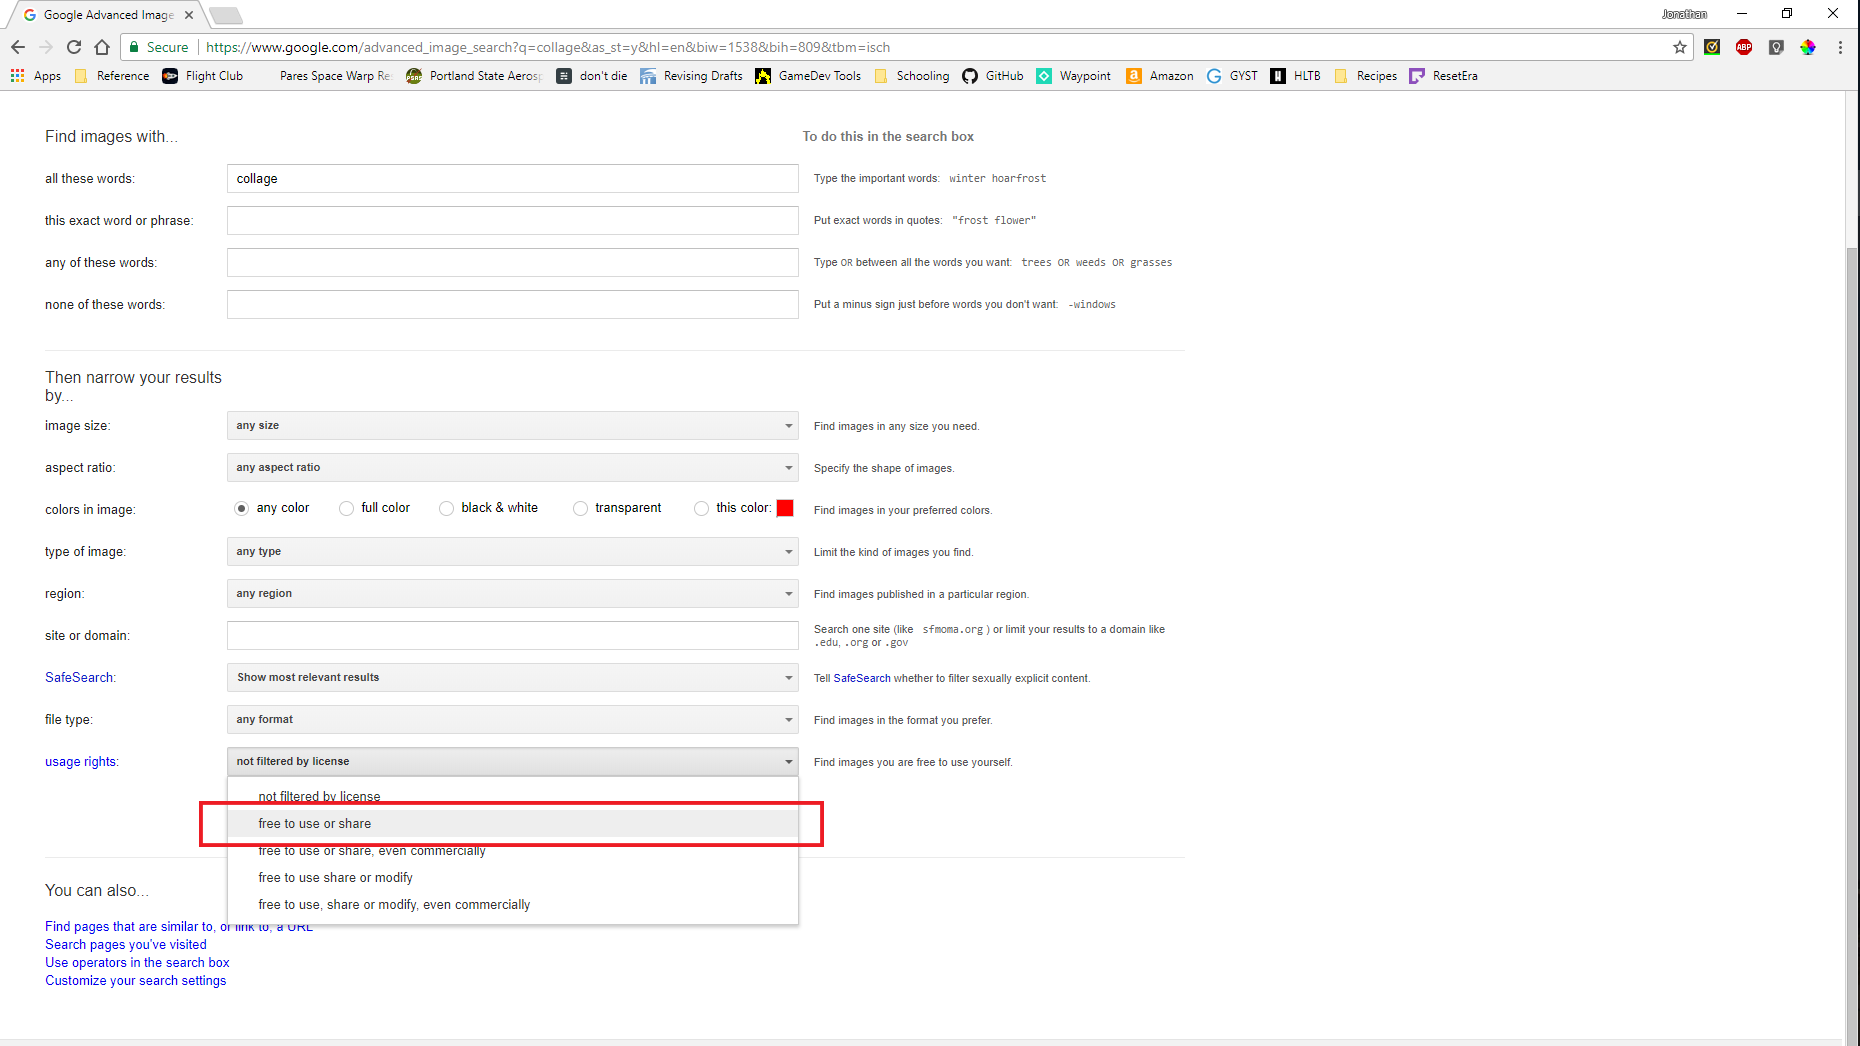
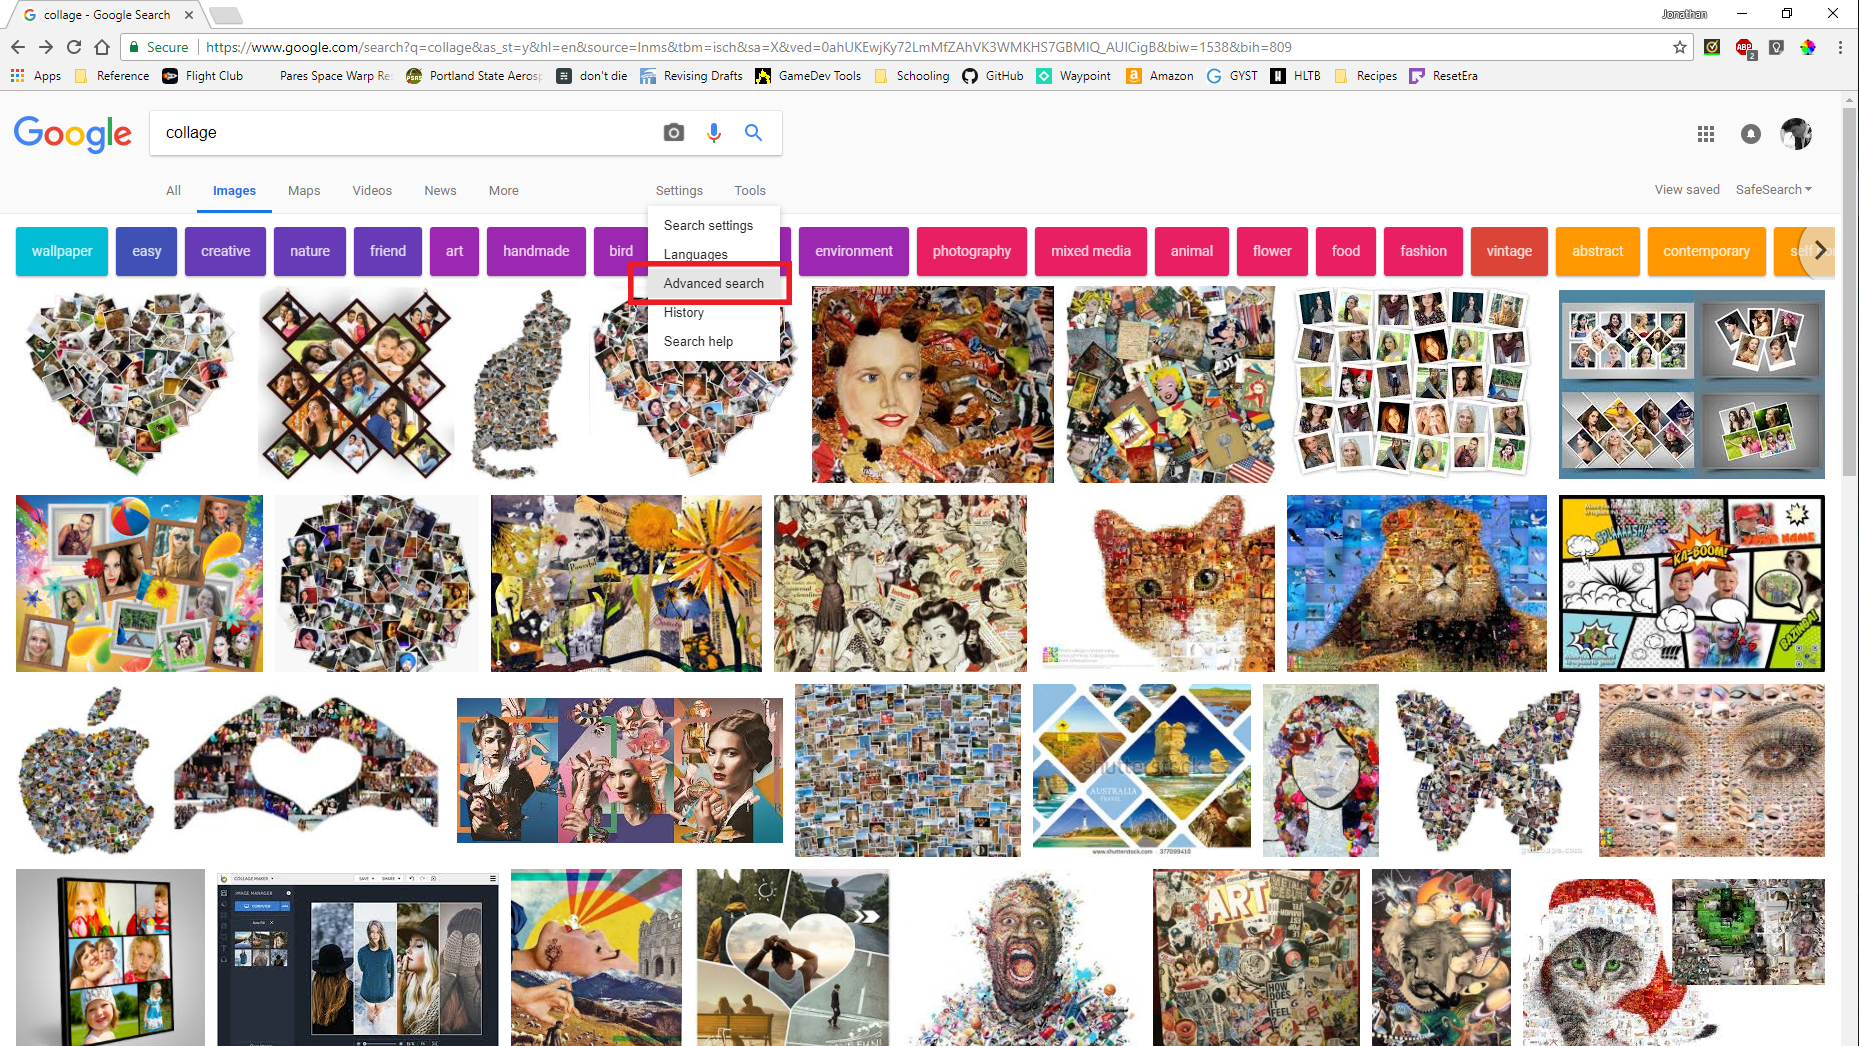
To find images that you are allowed to use for free, click on the "Settings" tab just under the search bar, then click on "Advanced search." Once on the Advanced Image Search page, scroll down and near the bottom you will see a drop down menu labeled "usage rights." Click on the menu and choose the option that best suits your purposes. In most cases, selecting "free to use or share," will be fine. Finally, hit the blue "Advanced Search" button right underneath and then choose from the results. All the pictures shown will be ones that the author has labeled as "Free to use."
It's important to note that this isn't an absolute guaranteed protection against improper usage, but it is a huge step up over random searching. If you want to be absolutely sure that you can use the image you want to use, contact the intellectual property holder and clear it with them.
2) Using Paid Services
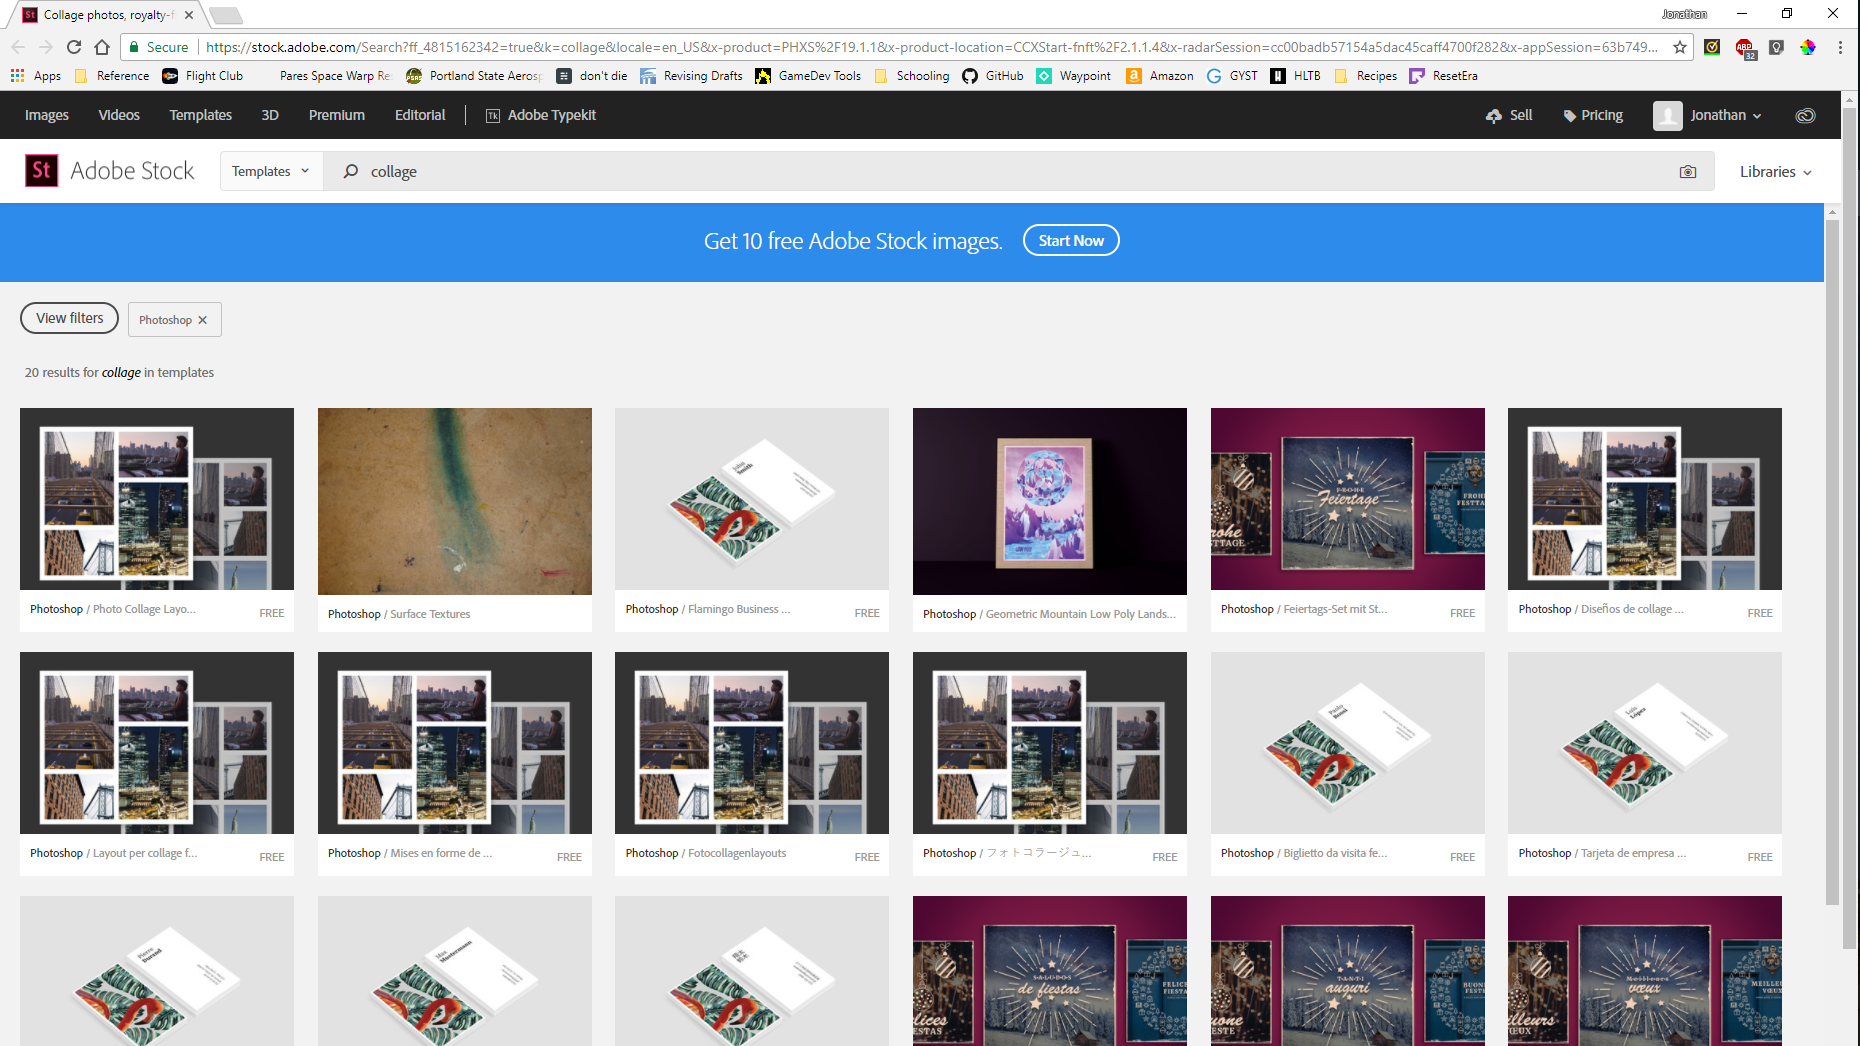
There are many websites that store huge databases full of images that they will sell you the rights to use, depending on what you are using it for. Some of these sights include: gettyimages.com, pexels.com, and Adobe's own database Adobe Stock (which can be accessed from inside Photoshop). These services typically provide very high quality, royalty-free (meaning you won't pay a recurring fee to continue to use the media) photos, videos, and soundbites. Whether or not you choose to go with a licensing company like one of these, will largely come down to price. For the purposes of a PowerPoint or a flyer, the price is likely a prohibitive and unnecessary factor. But for professional or commercial purposes, it's likely an avenue worth pursuing if you can't at all make the media from scratch yourself.
Storing Your Image
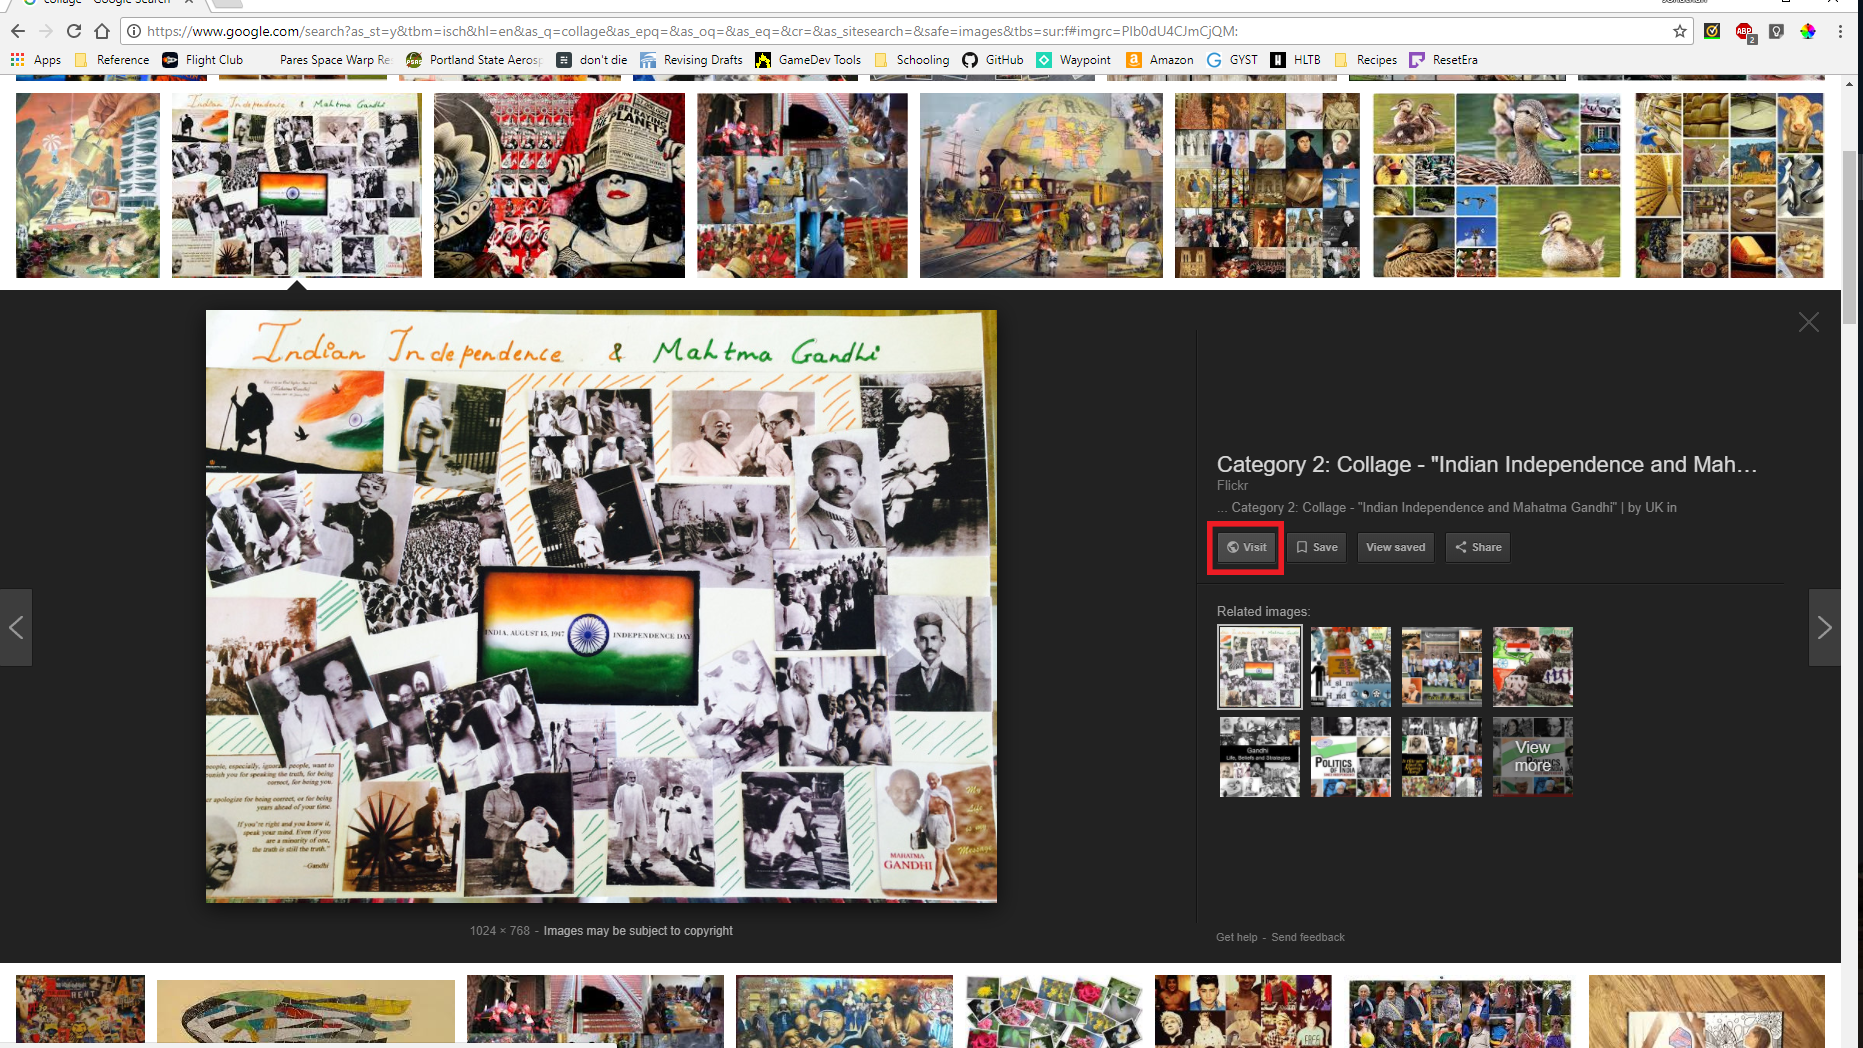
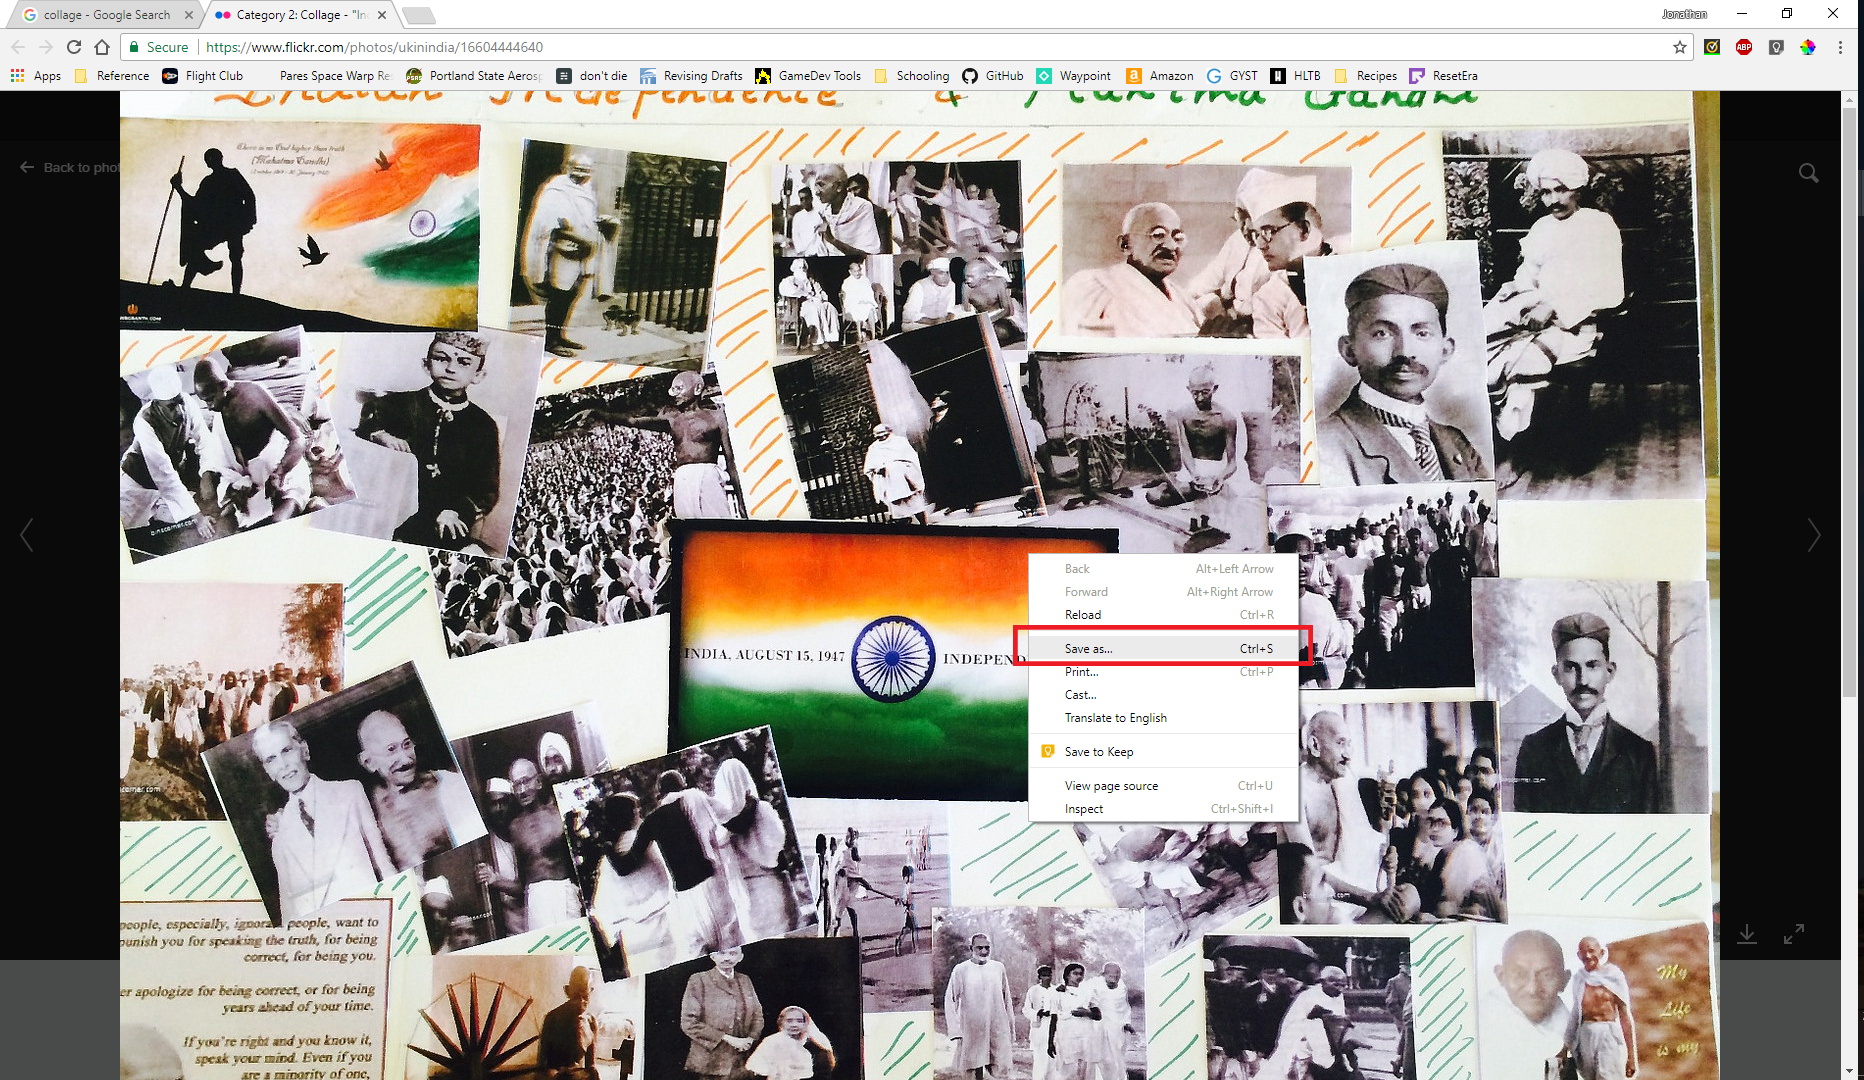
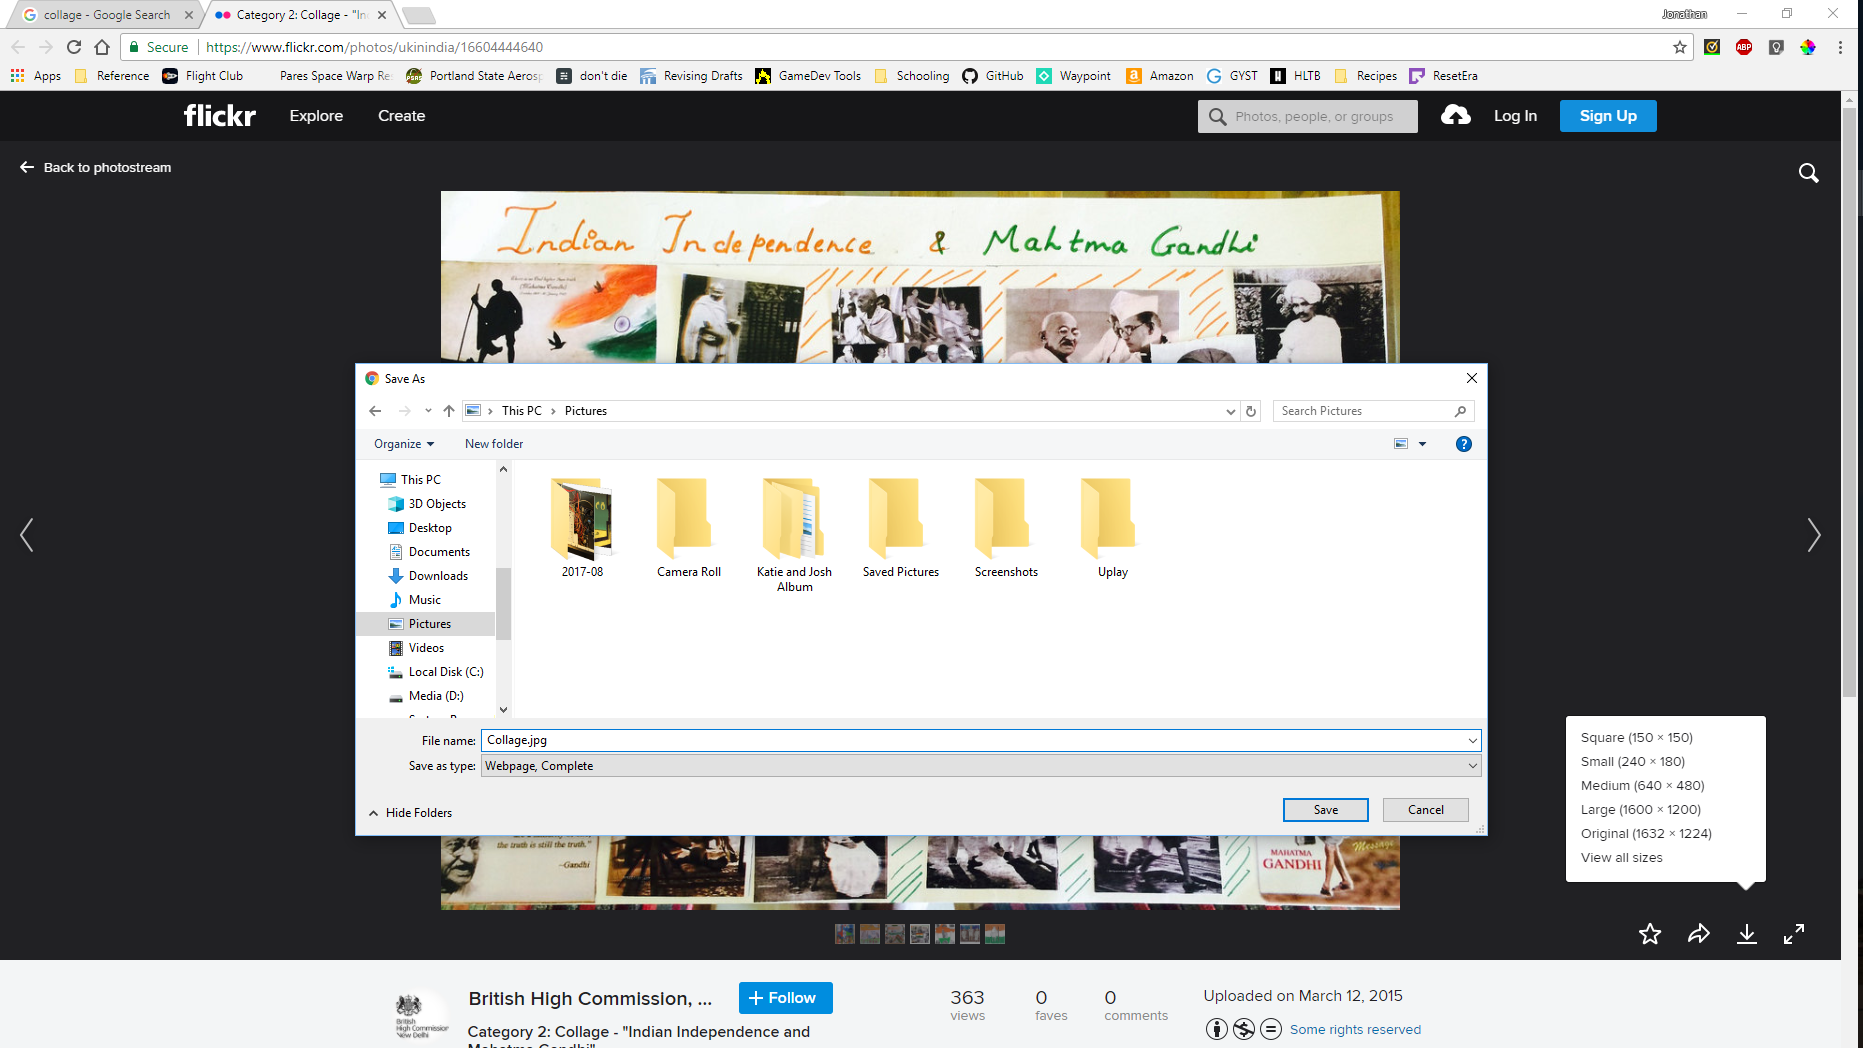
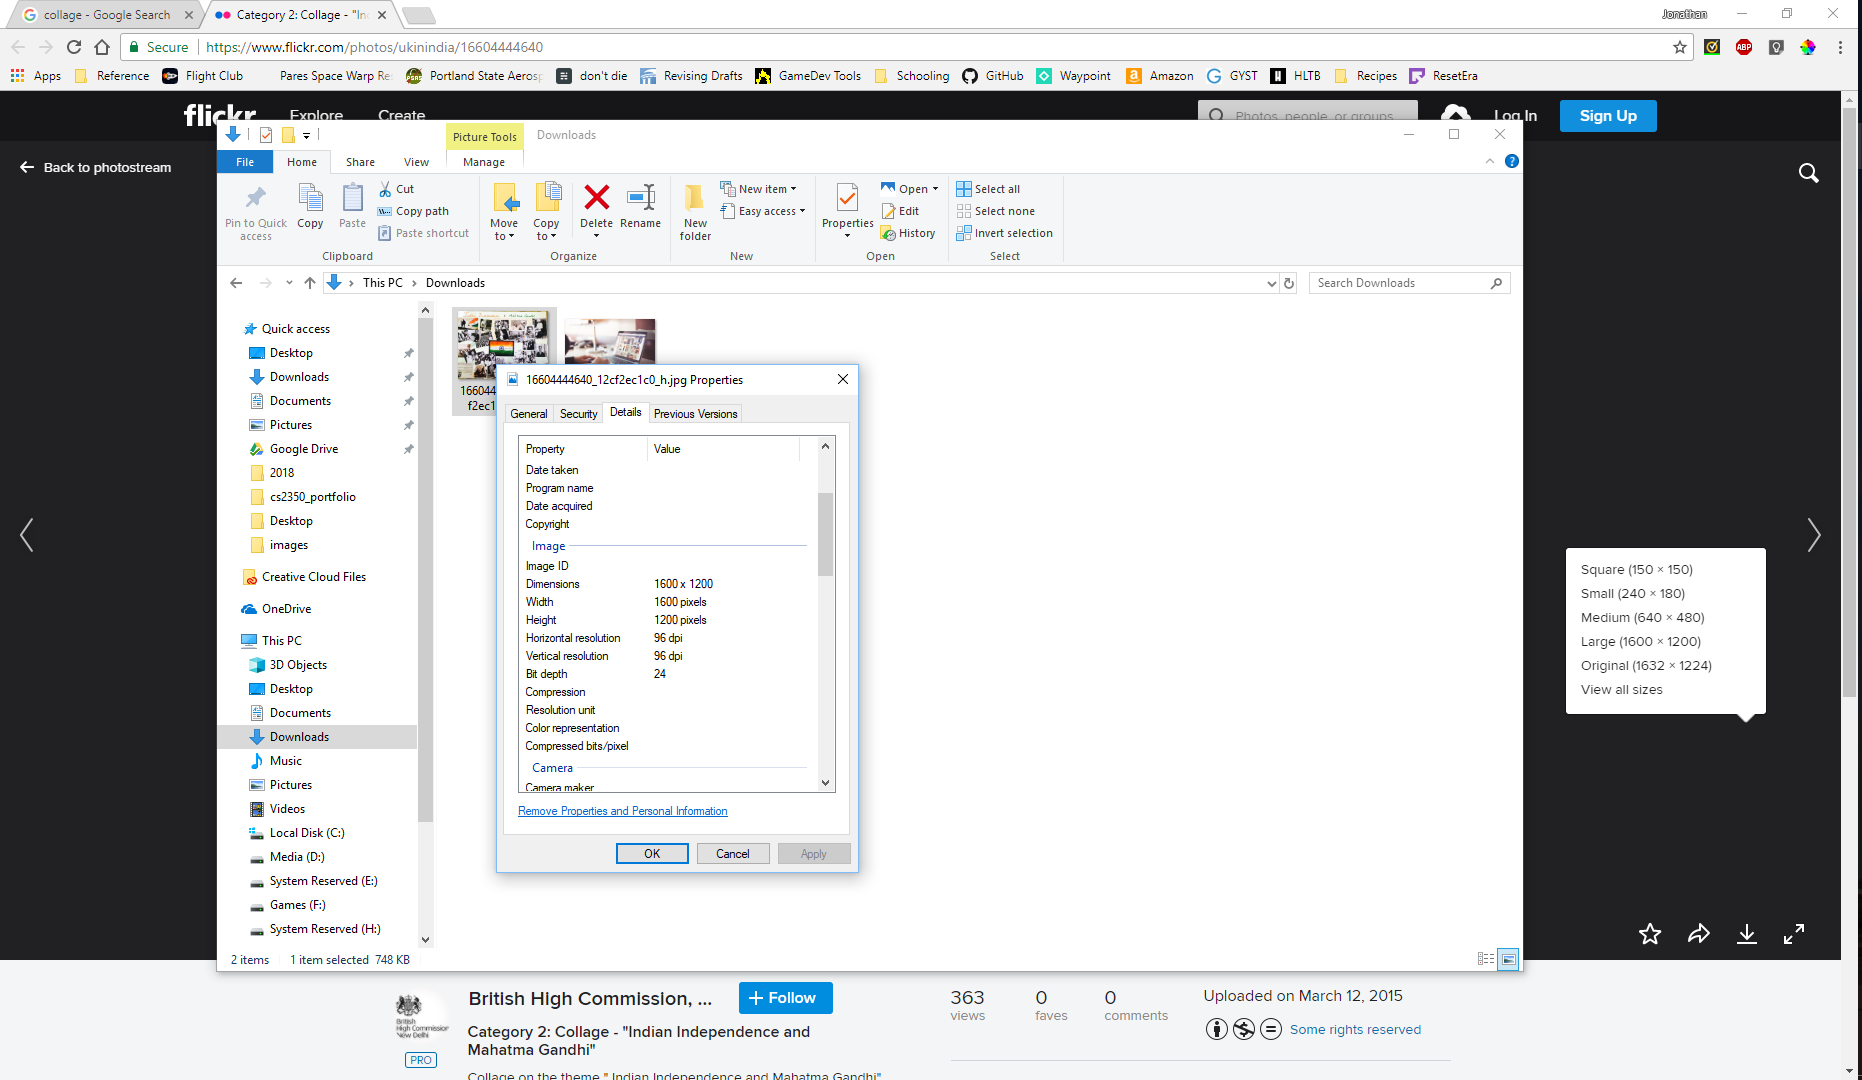
This is a simple, but often overlooked step that can easily cause you a headache if you rush past it. These instructions will be for Windows 10 users, though the process is very similar for Mac users as well as earlier versions of Windows. Once you've found the image you want to use in Google Images, click on the "Visit" button with a globe on it. This will take you to the web page that hosts the image. Once on that web page, locate the image and right-click on it. in the drop-down menu, select "Save as..." Click on it, and it will bring up Windows File Explorer. In the File Explorer window, navigate to the folder you want to save the image in.
Note that it's important that you save it someplace memorable, so that you don't lose the image when you go to use it and are forced to start the process all over again.
Once you have navigated to the folder that you want to save the image in (I recommend the desktop for most use cases, since it will be easy to retrieve, even if you do forget where you saved it), give the file a memorable name, and click "Save." The image is now stored locally on your computer, ready to be imported into Photoshop.
1) Identifying Key Image Characteristics
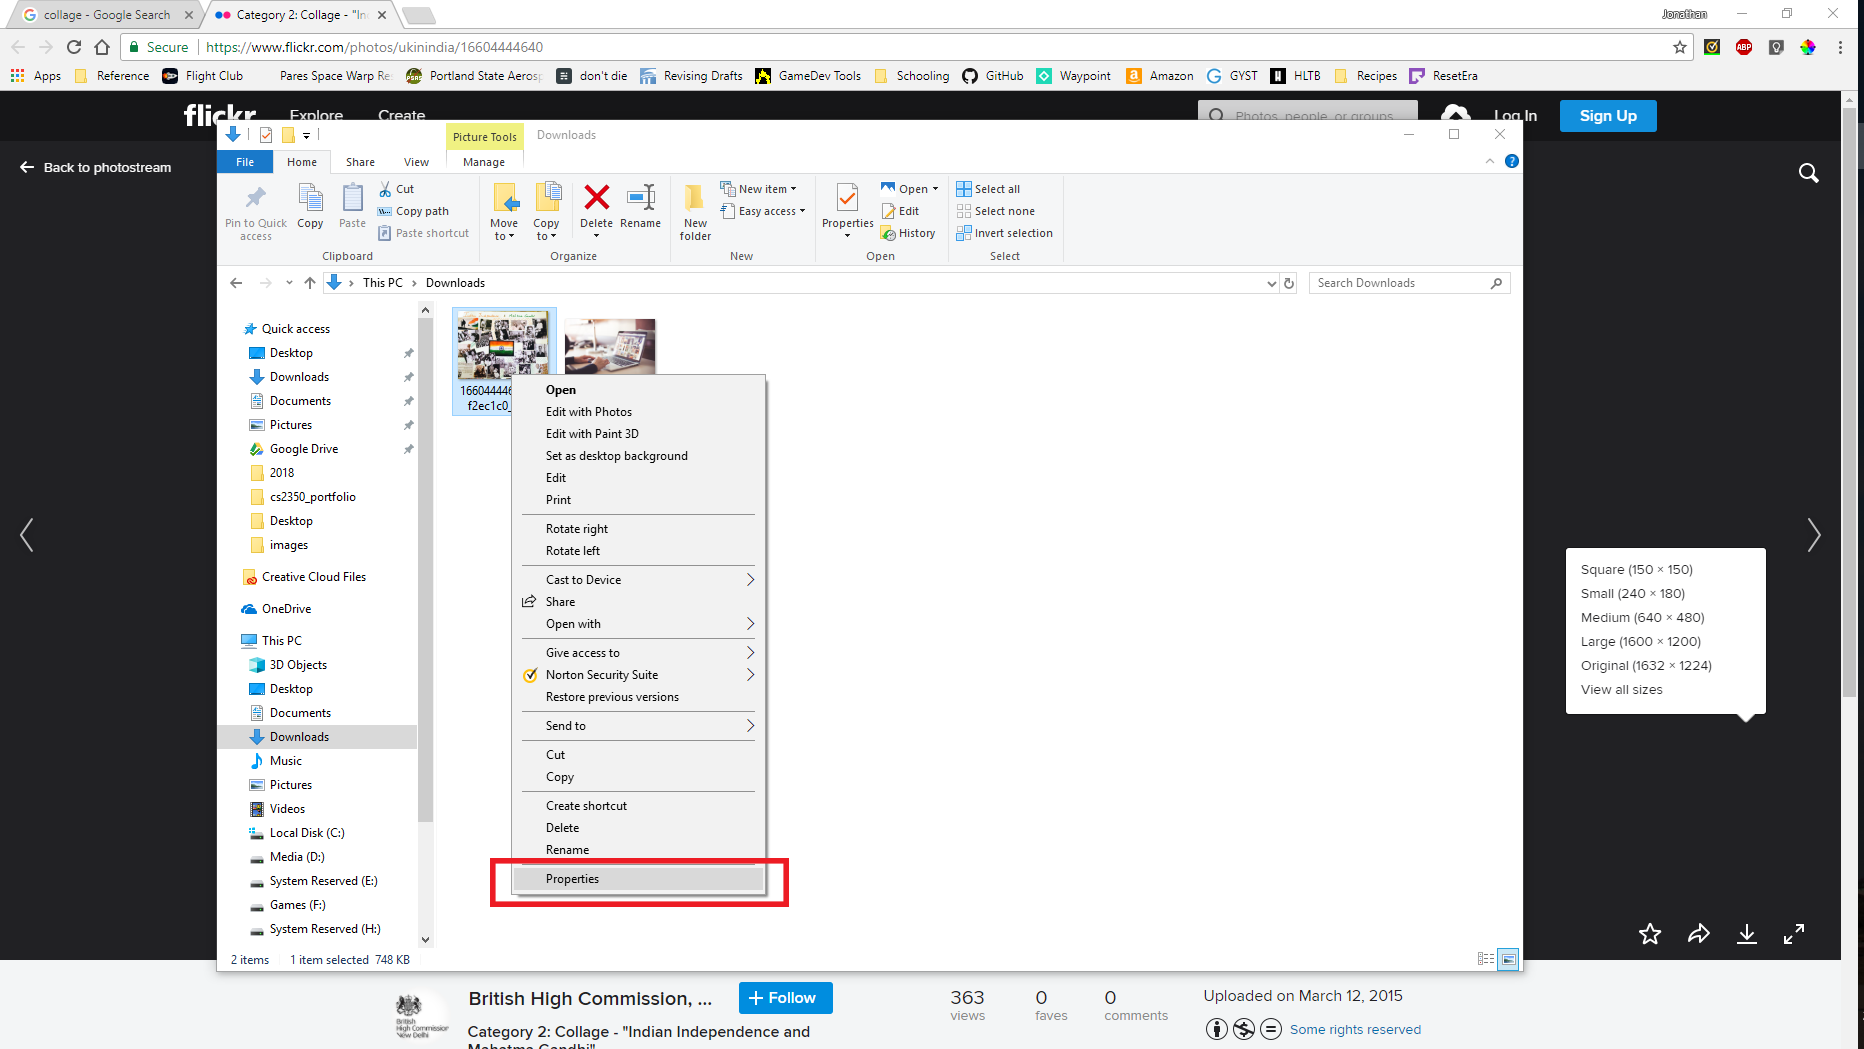
Depending on the final use case of the image you've chosen it might be worthwhile to know some important things about the image before you begin manipulating it. To learn about the image's file format, size, resolution, and dimensions. To find this information for your file, locate it again in the Windows File Explorer and right click on the file and select "Properties" at the bottom of the drop-down menu. In the pop-up Properties window, select the "Details" tab. Under this tab is all the information listed above. You might find it helpful to right these things down, or you can navigate to this window again when the information becomes important.
Importing Your Image Into Photoshop
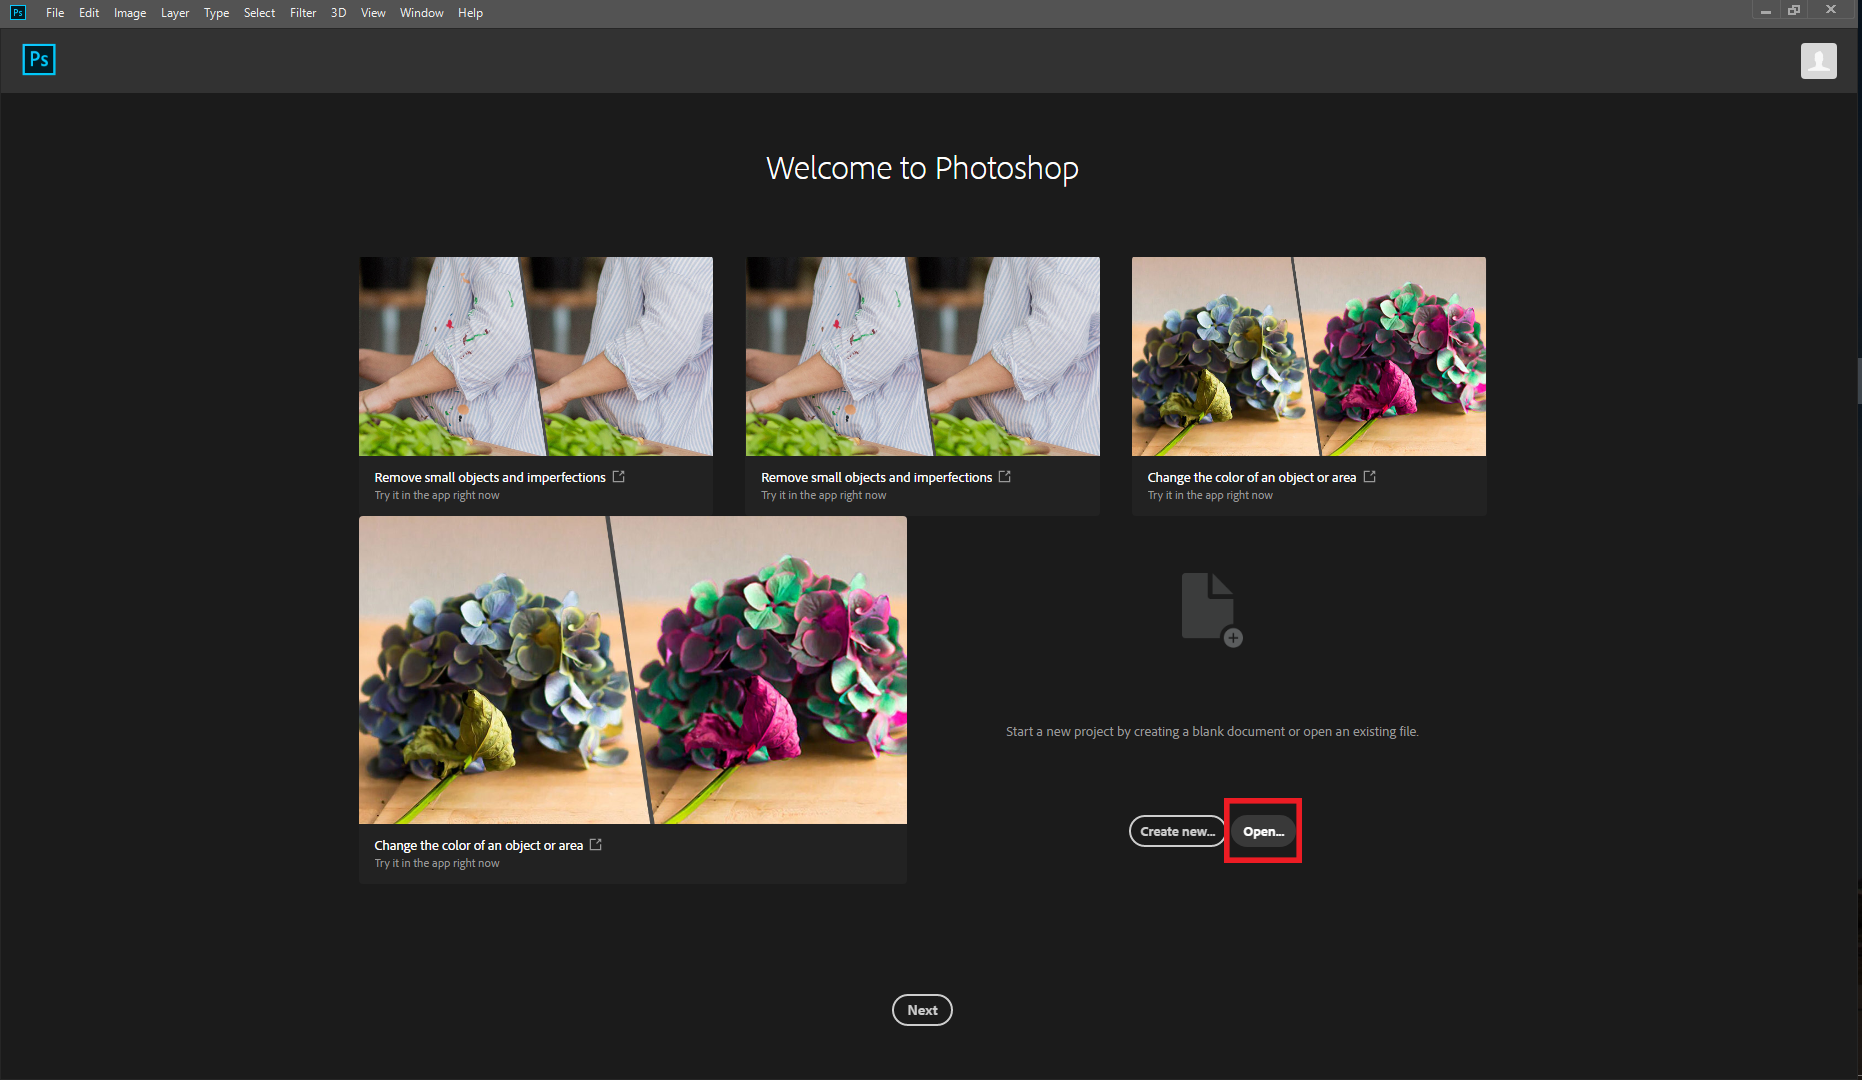
Here, we get at the heart of the tutorial: actually editing your image using Adobe Photoshop. Once you've completed the prior steps, find and open Adobe Photoshop on your computer. Once Photoshop is open, you should get a screen that looks something like this:
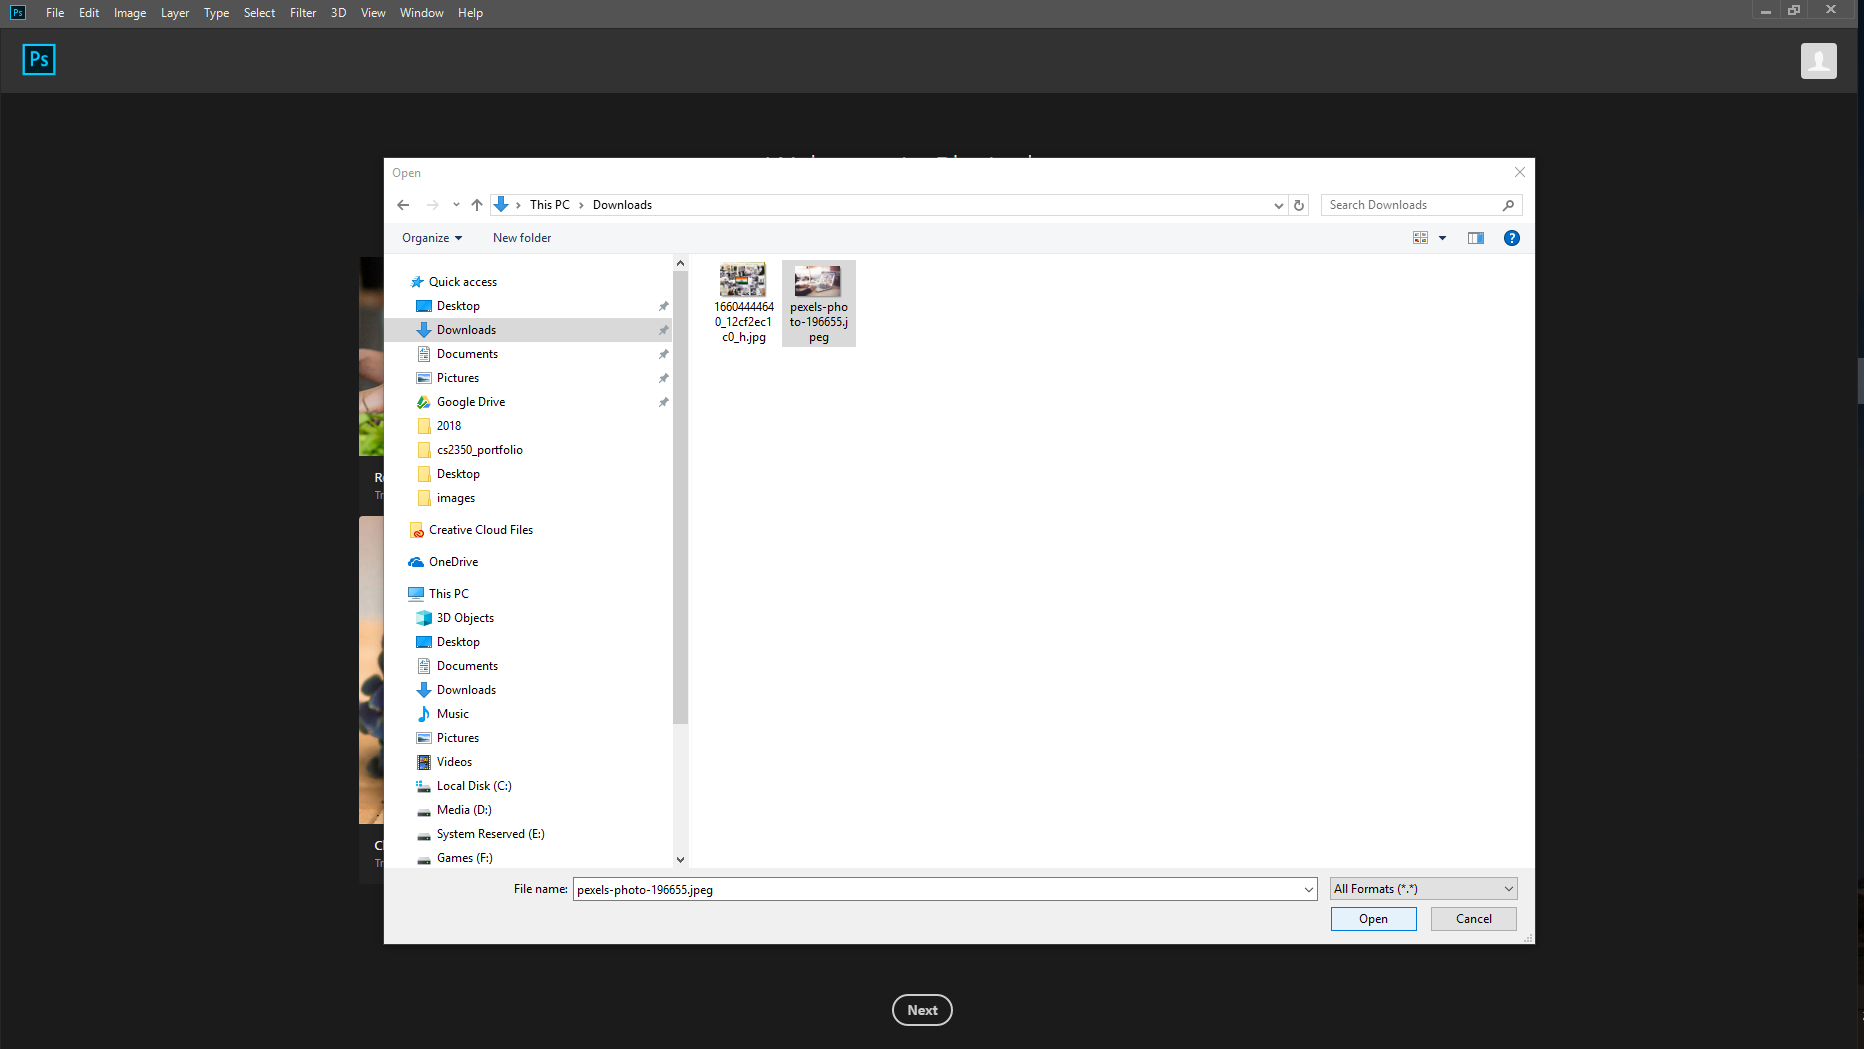
At the bottom of the screen is an "Open..." button. Click on it, and it will open a Windows File Explorer window. In this window, navigate to your saved image file and open it. Photoshop will now open its main window with your image in the center pane.
Cropping the Image
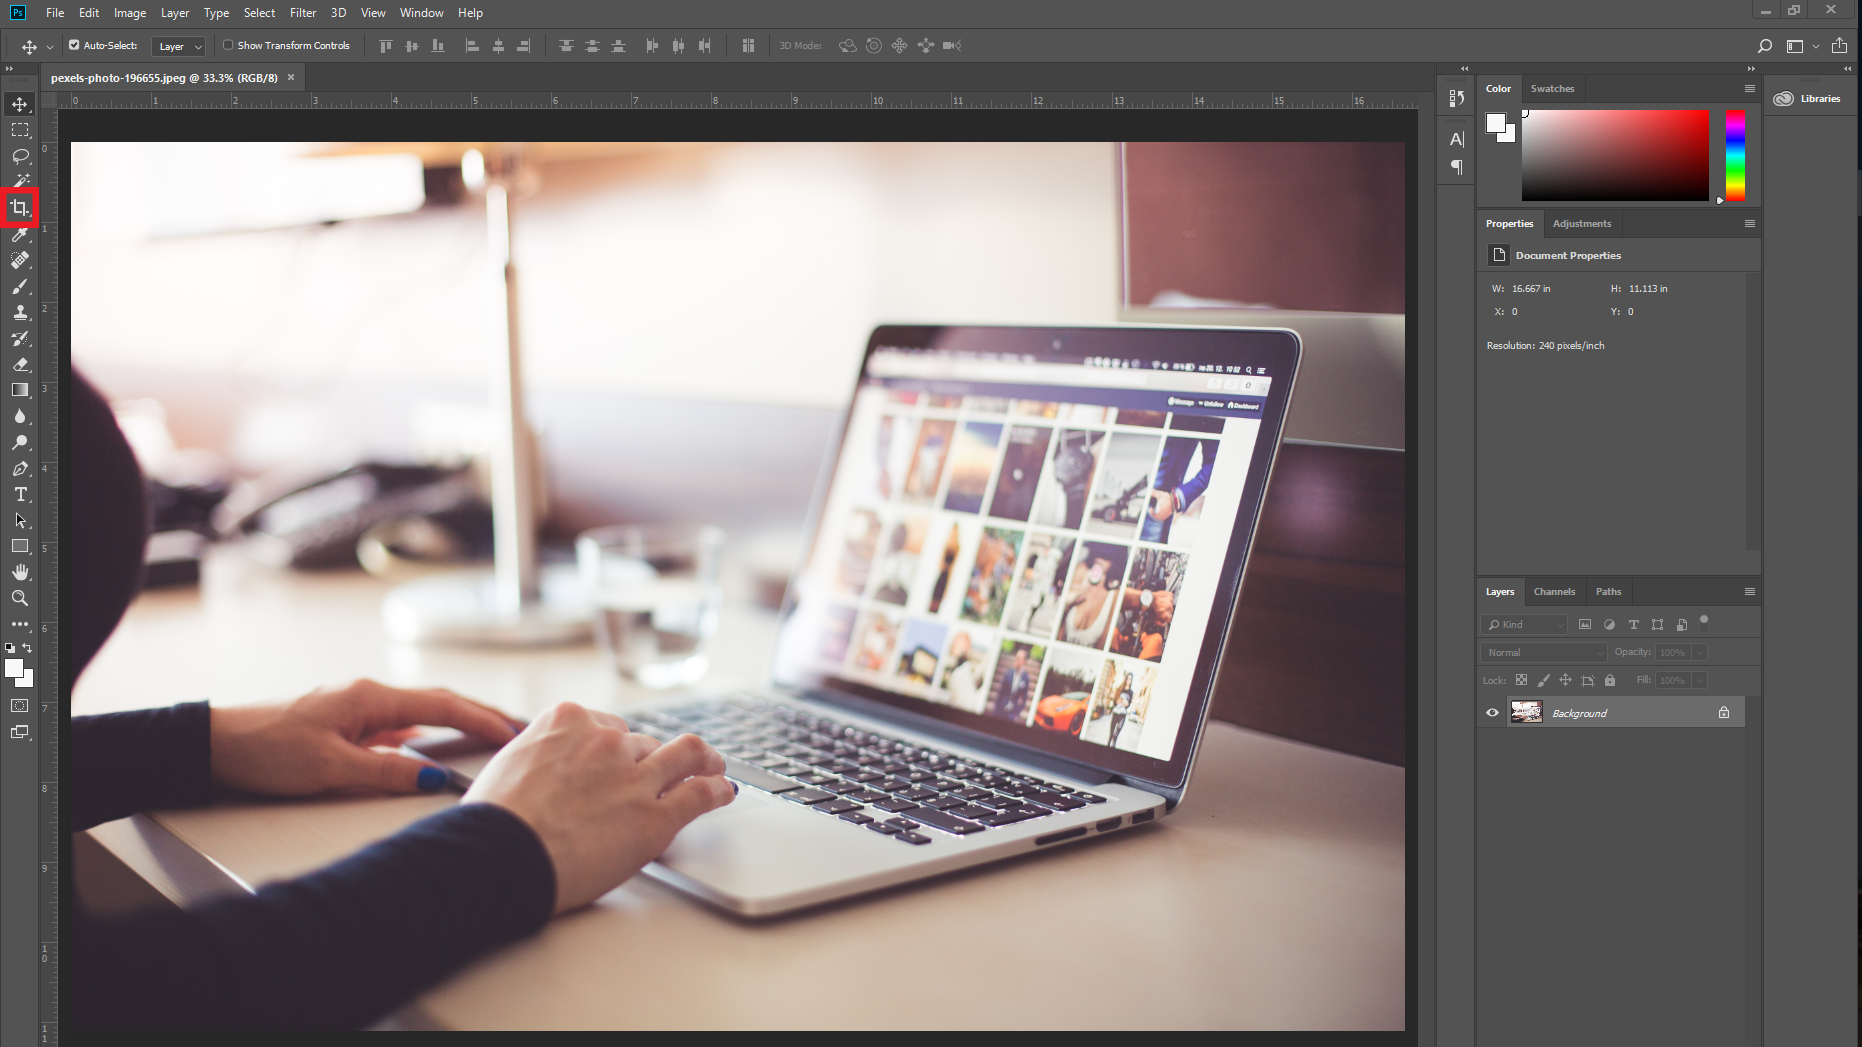
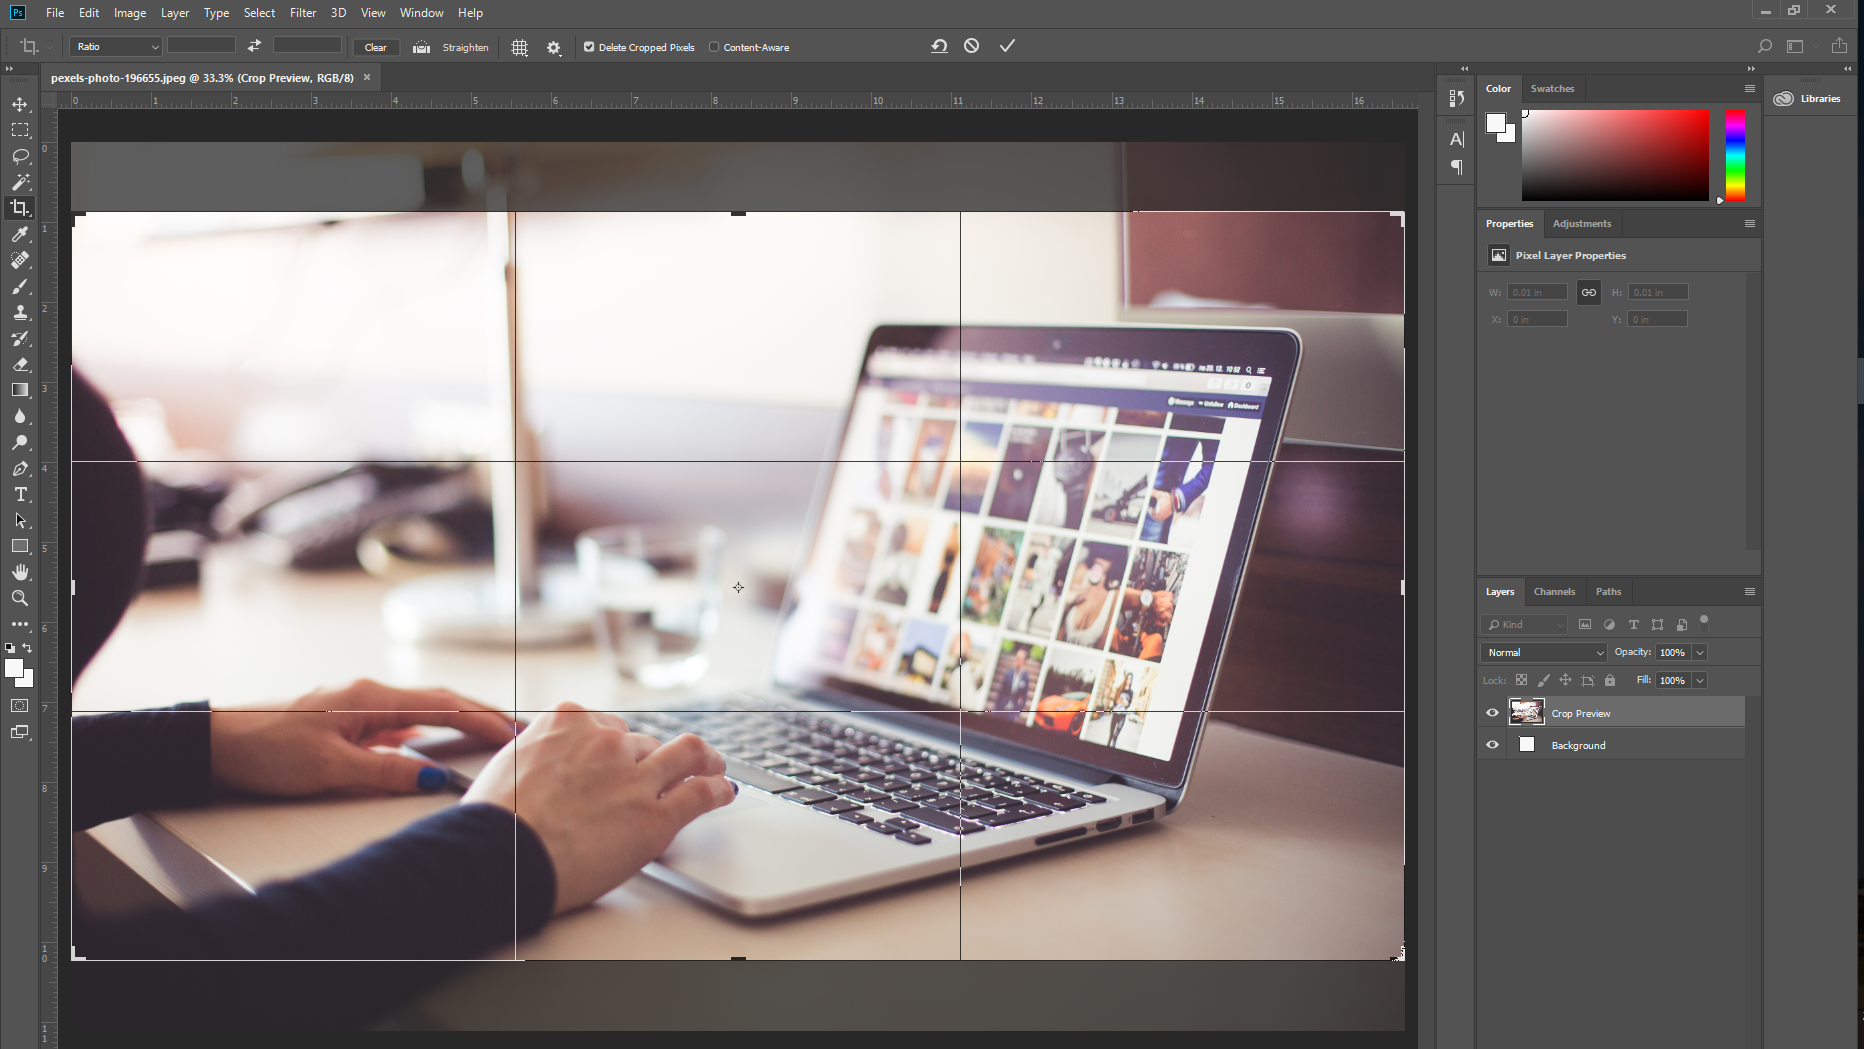
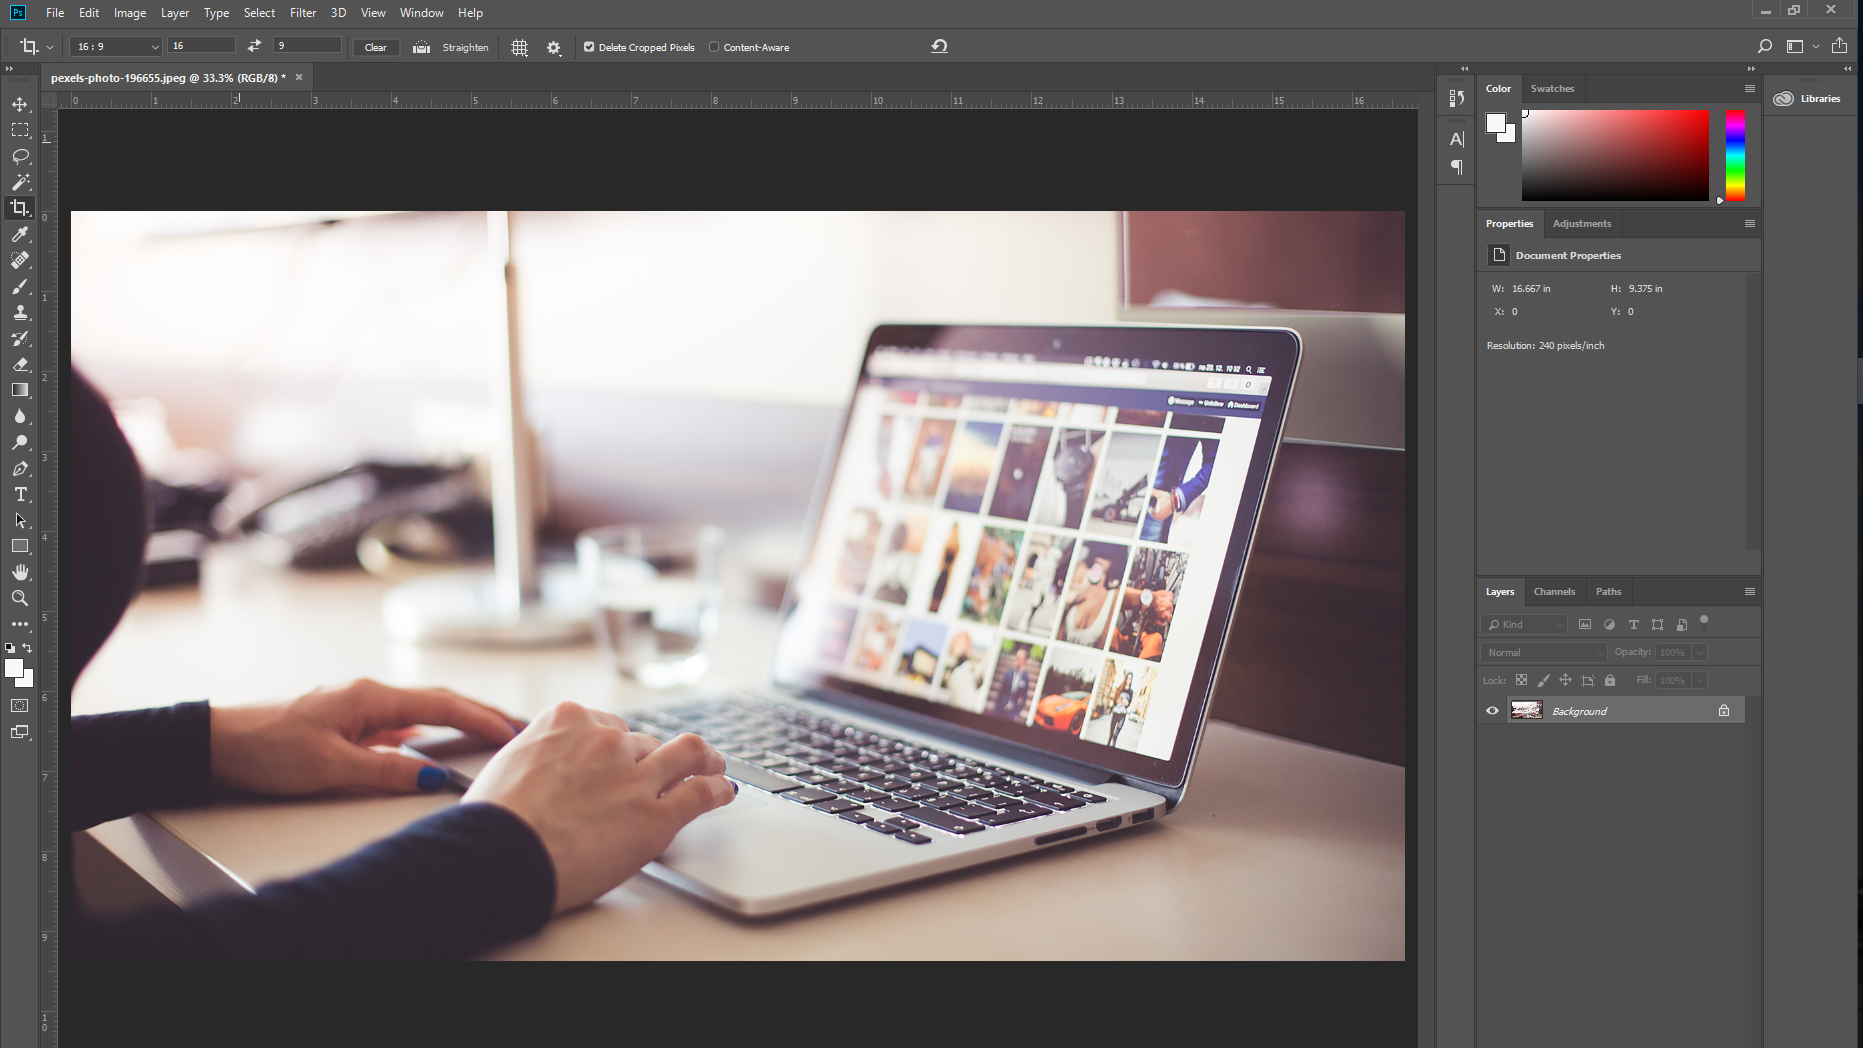
Before resizing the image, or making other adjustments, it's usually best to get the image into the shape you want it and/or removing unwanted areas of the image.. The vast majority of the time, the desired shape is a rectangle or a square, so this tutorial will focus on cropping to that form factor.
1) Finding the Crop Tool
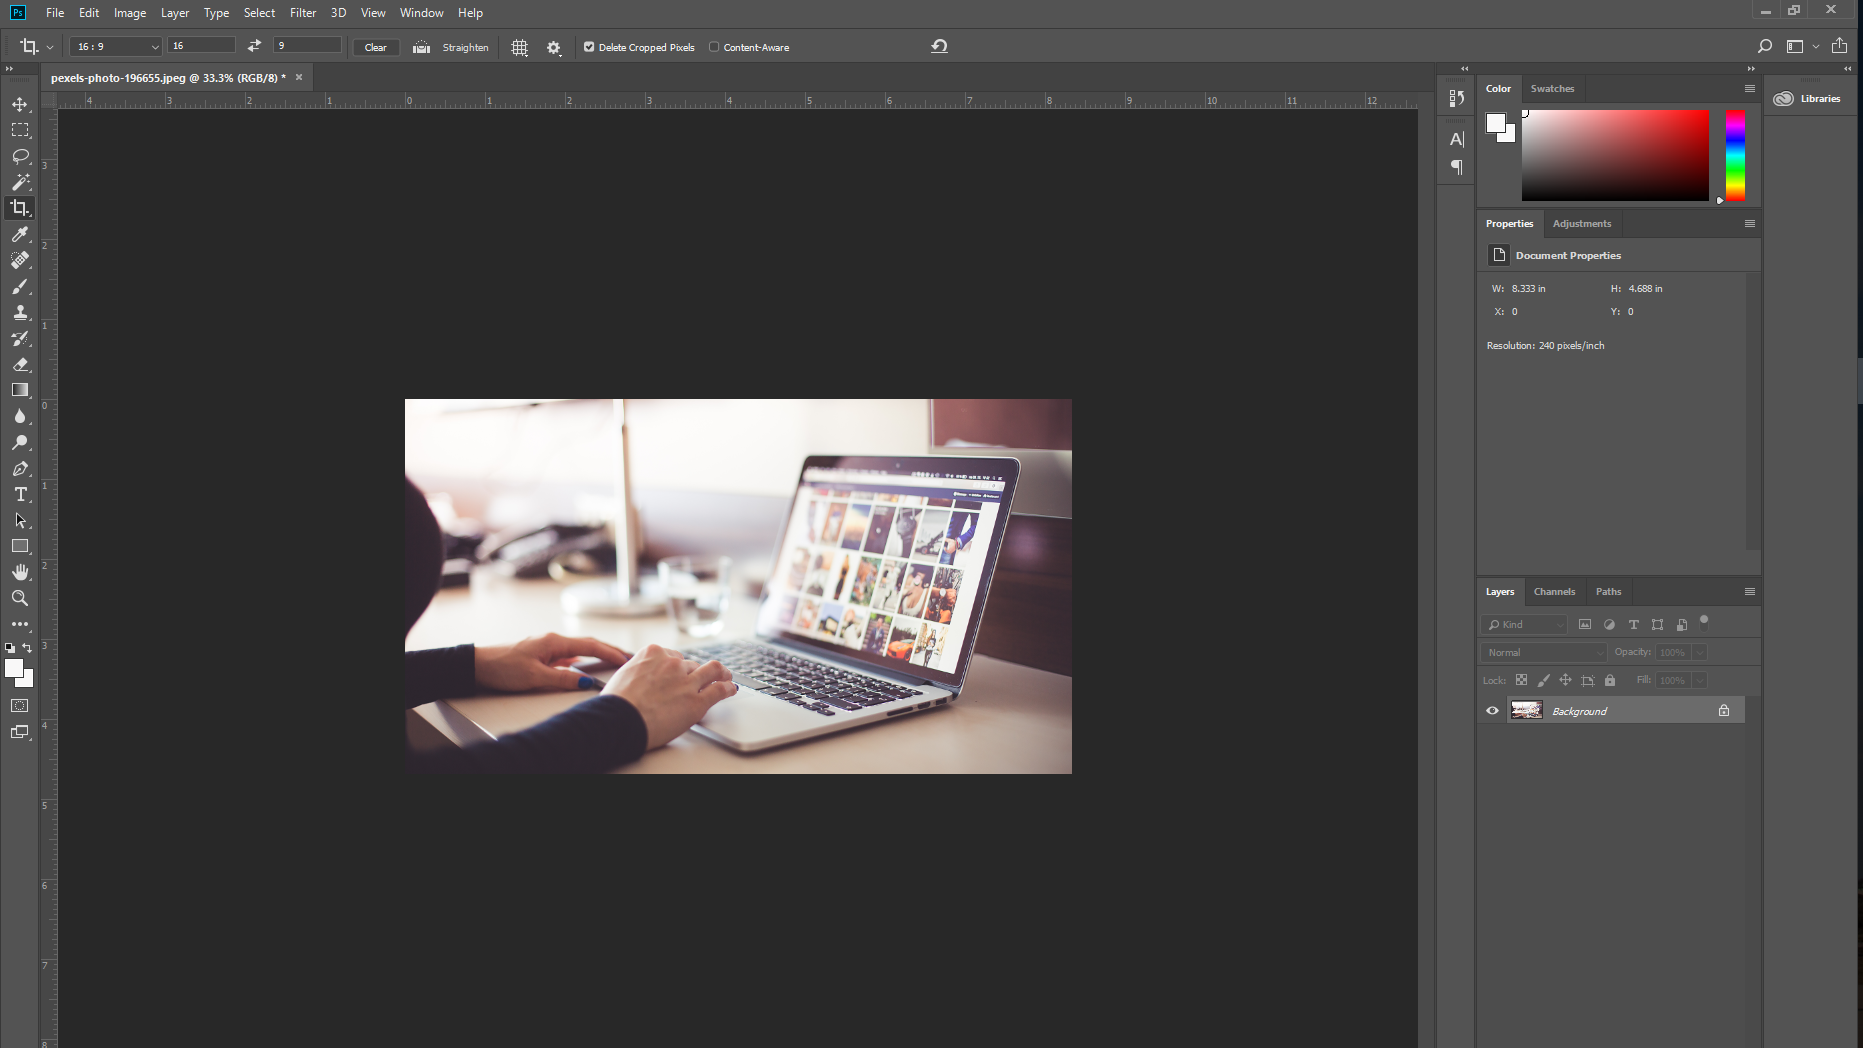
To begin cropping, locate the cropping tool in the toolbar on the left side of the window. The tool's icon resembles a square with overlapping corners, and looks like this:
Click on the tool and a box should overlay all, or part of your image. This box is the active area of the crop tool. Anything outside the dashed edges will be cut when all is said and done.
2) Cropping "Free Hand"
In most cases, you probably want to crop to remove something irrelevant or extraneous from the image. In that case, it's often best to manipulate the crop box manually--up/down as well as left/right. to do this, go up to the crop tool's toolbar at the top of the window and locate the button labeled "Clear." Clicking on this will remove any restrictions on how the crop box will resize.
Once that is complete, you can simply click and drag on the edges or corner of the crop box to give it whatever rectangular dimensions you need.
3) Cropping by Aspect Ration
The other main method for cropping is using the crop tool to shape the image to a certain aspect ratio. The three most common aspect ratios are 16:9, 4:3, and 1:1 (in the case of a square). For those unaware of what these numbers actually mean, it's quite simple. Using 16:9 as an example, it means that for every 16 units of measure (usually pixels) on the left/right axis, there are 9 units of measure on the up/down axis--hence the term "ratio."
To crop by aspect ratio in Photoshop, bring up the crop tool using the instructions above. Once the crop box has appeared over the image, locate the leftmost drop-down menu in the crop tool bar at the top of the screen. In the drop down menu, select the aspect ratio you want to crop the image to. Once selected, the crop box will be locked to that aspect ratio. Meaning that when you click and drag the corners of the box, the box will stay the same "shape" and maintain the ratio.
Once you've got the box to the size you want it using either crop method, you can click and drag inside the box to move around the entire image underneath. Clicking outside the crop box will allow you to rotate the main image, if you so choose. Once you've lined up the box the way you would like it, click the check mark button in the crop tool bar at the top of the window. Once that button is clicked, any part of the original image outside the crop box will be removed.
Resizing Your Image
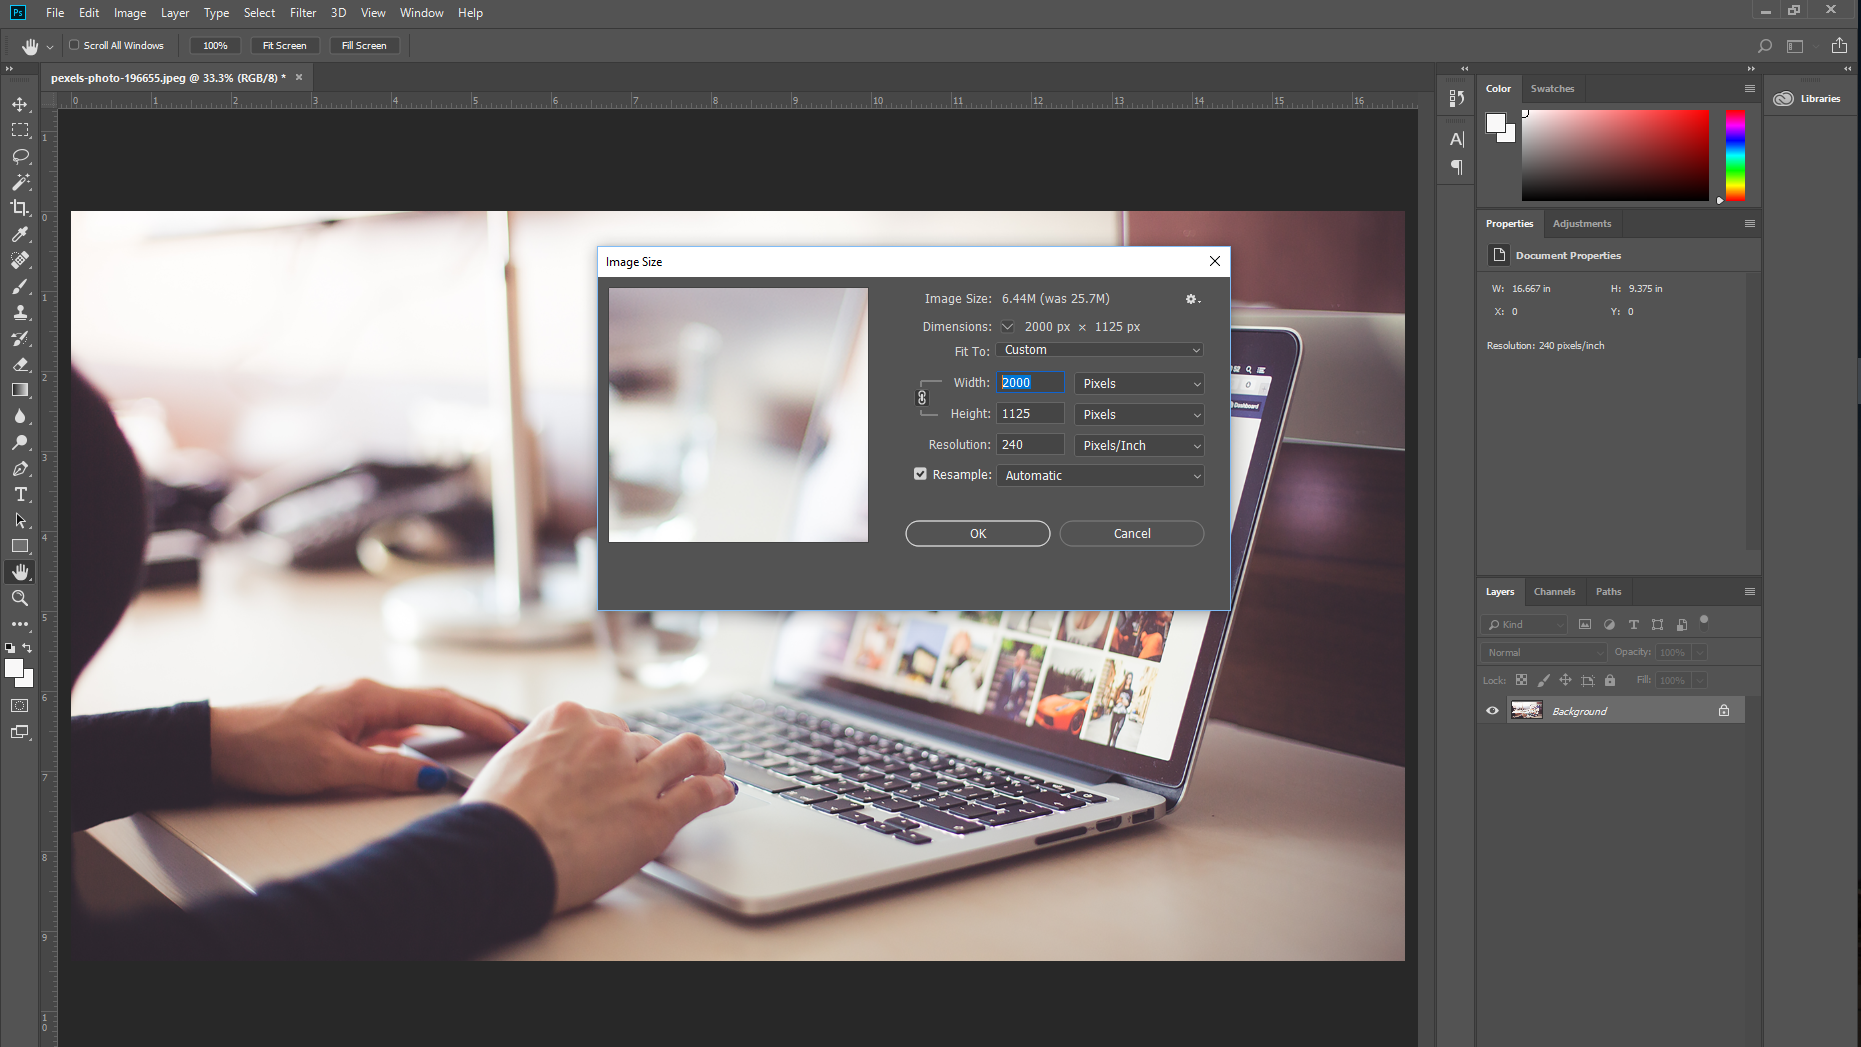
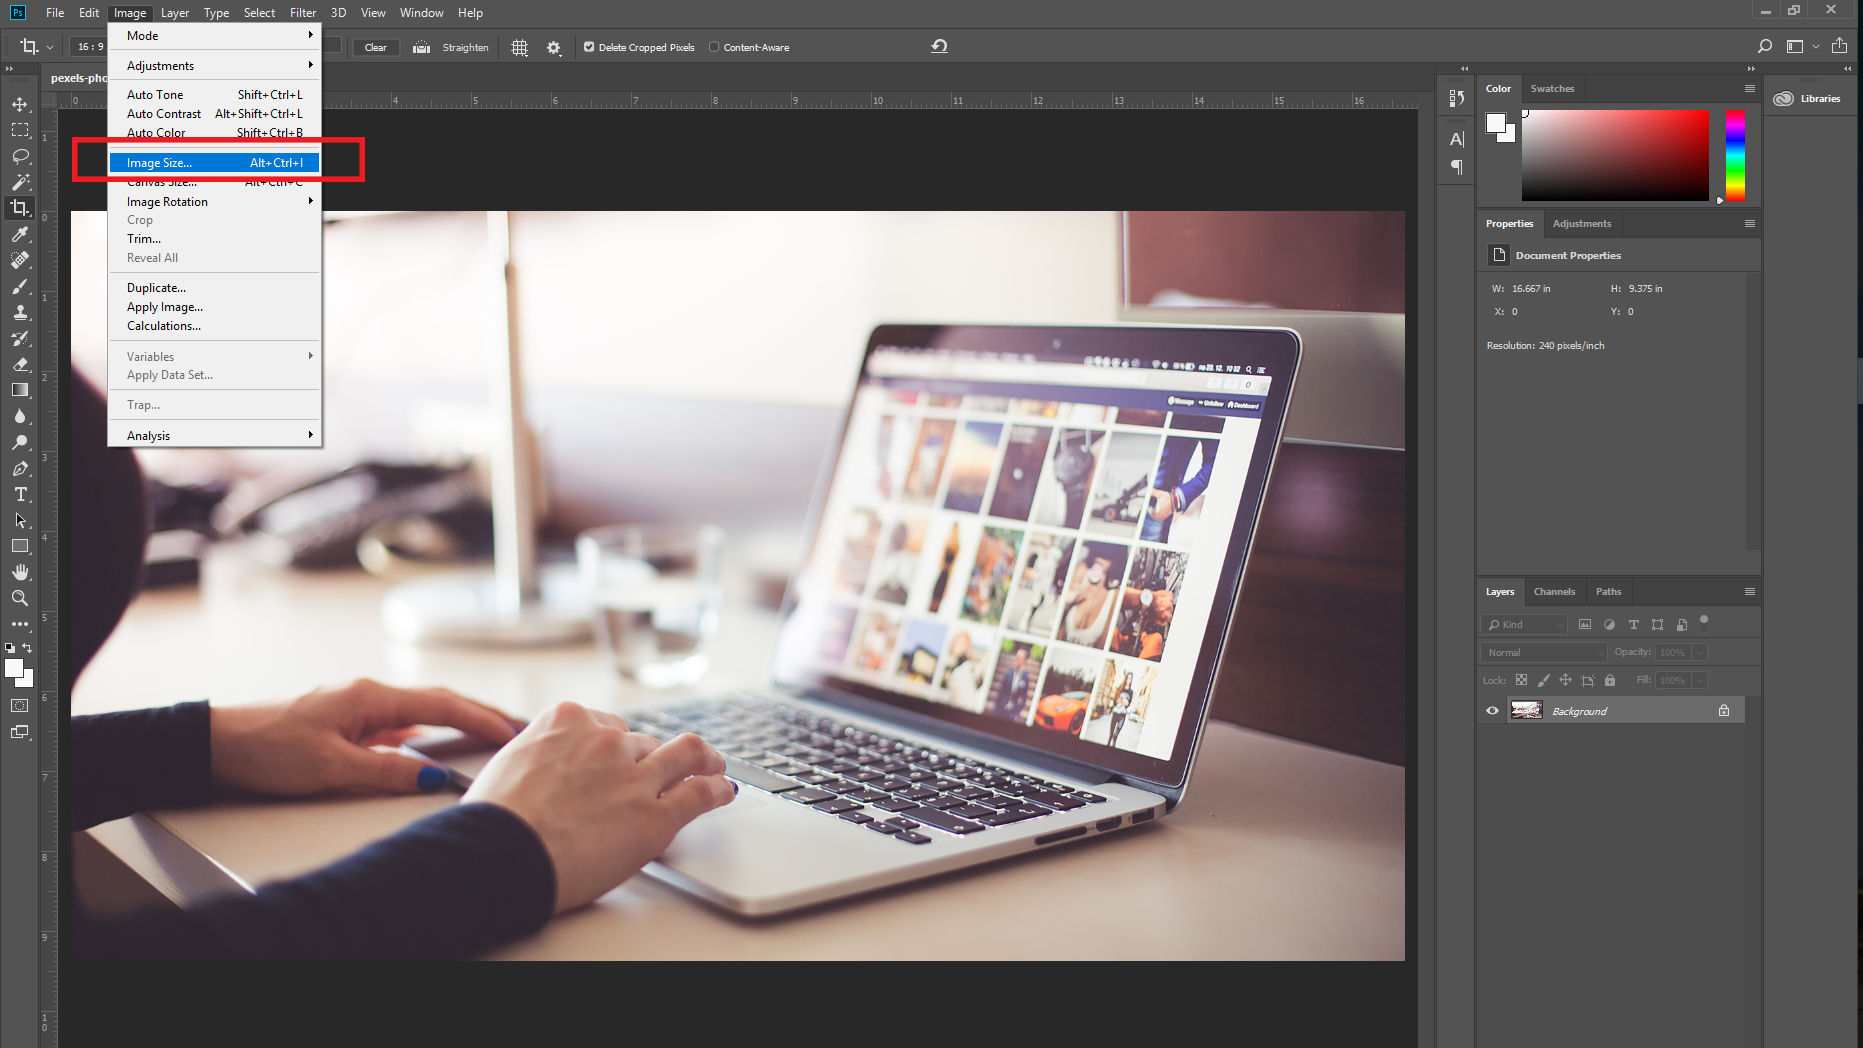
Now that you've got the exact image you want, it's time to make it the right size. This is not as simple as zooming an image and trying to save it that way. This is specifically about resizing the image at the fundamental file level. Thankfully, Adobe Photoshop provides a way to do this very quickly and easily. To begin, click on the "Image" tab at the very top of the window to bring up a drop-down menu. In that menu, select the "Image Size" option, which will bring up a window in the center of the screen. In this window is all the information we will need to resize the image.
In most cases, you will simply want to resize using the default pixel measurements. Other options include inches, centimeters, millimeters, etc. Those will typically only be used in printed mediums, since an inch has little meaning in digital formats that zoom and shrink images constantly. As such we'll focus on pixels, though the process is the same for all units.
It's important to first do one thing: click on the little chain icon next to the "Width" and "Height" menus. This will keep the aspect ratio locked, meaning that it won't have any stretching or warping by the time you're done. This is where it might be useful to have written down the image's original resolution so you can get a feel for how much you want to alter it by.
Once you've settle on a good number, simply highlight and overwrite the current pixel count in the "Width" box to whatever new width you want the image to have. If you have locked the two axis using that little chain icon, the "Height" value should change automatically to maintain the original aspect ratio of the image.
The change in size should now be reflected in the Photoshop main window.
Finalizing and Saving the Image
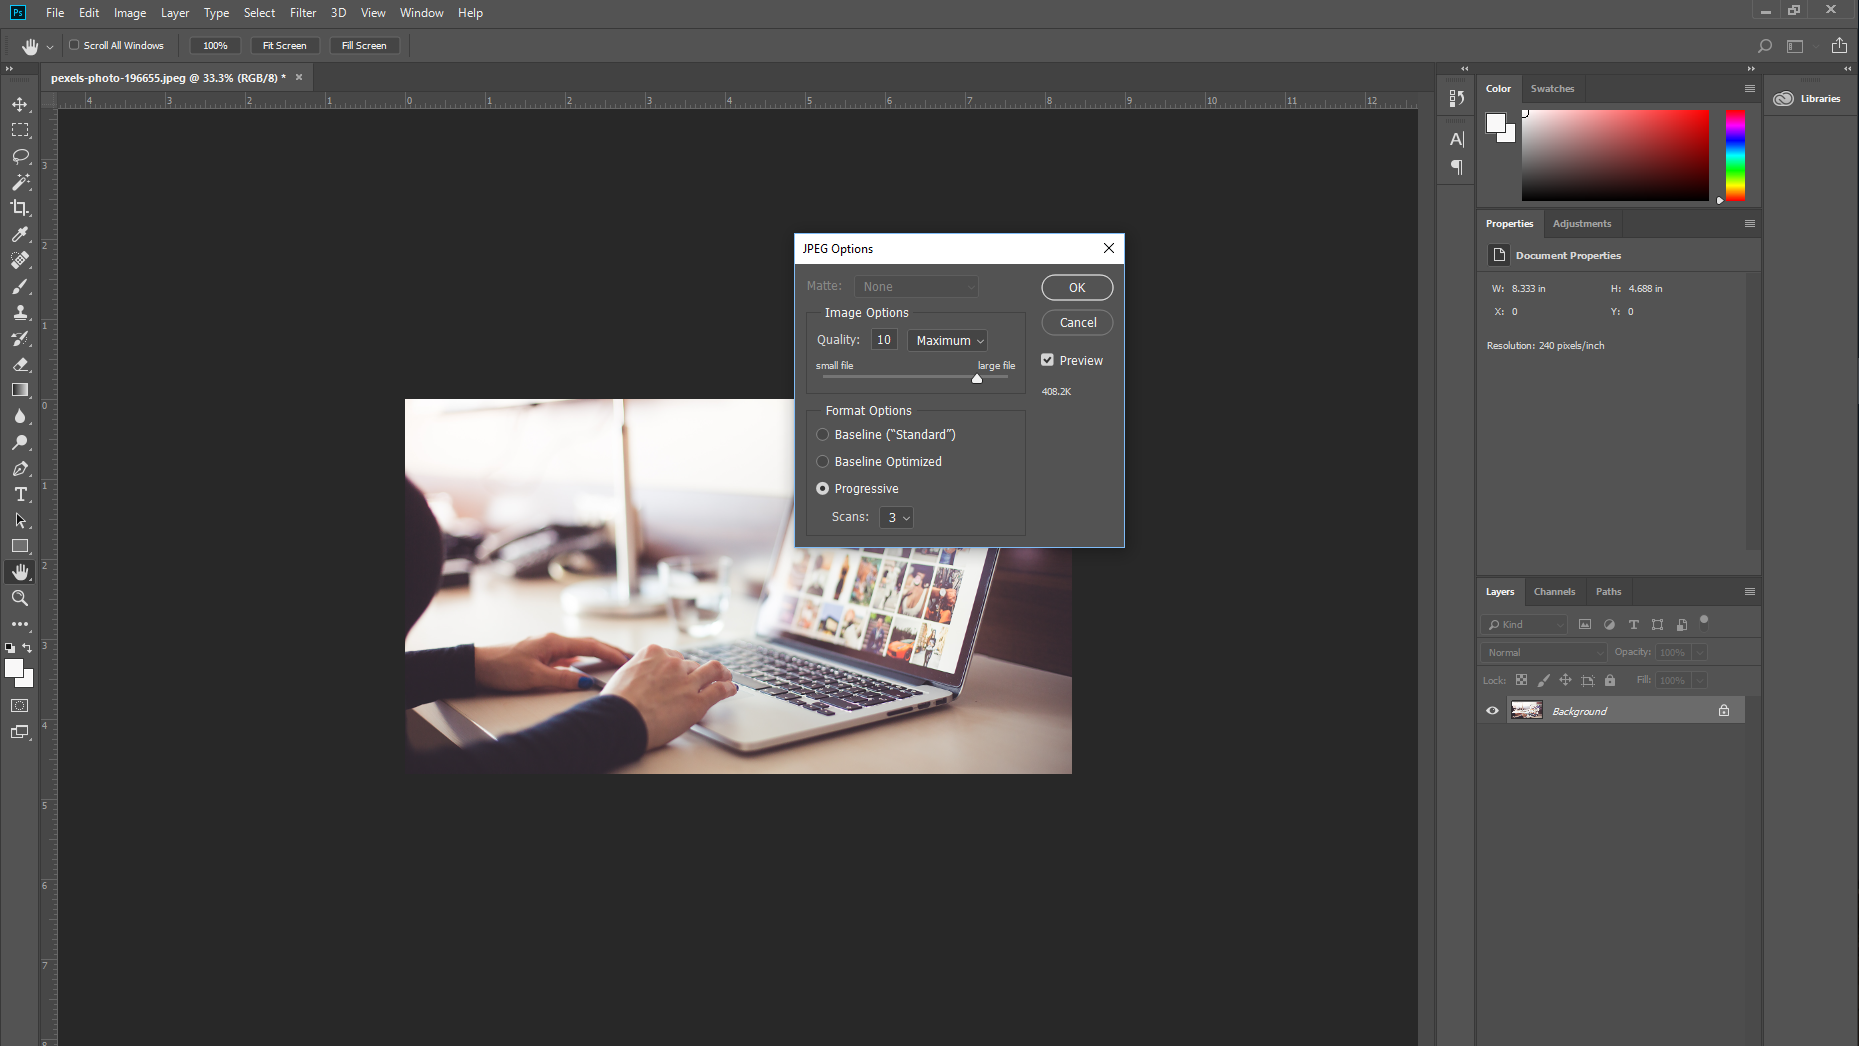

It's important to note that the image may be resized in Photoshop, but these changes have not yet been reflected on the actual file of the image saved on your computer. To finish the procedure, you need to save the changes by clicking on the "File" tab at the top of the window and selecting "Save." Since you have changed the image's size, the computer needs to do some final things to give you a finished image. For most file types, including the highly ubiquitous JPG format, the computer needs to go through a compression phase to get the photo to its new size.
You can think of it this way: If you had a row of 20 paint buckets, each with different colors, and you were tasked with shrinking the number of buckets to only 10 while still maintaining the same spectrum, you would have to make a few assumptions. For instance, if you originally had 3 shades of green, you can probably choose one or two of those shades in the final 10 to represent green overall.
A very similar process is going on with image compression in most file formats. Any time an image is resized, it needs to go through the process. Once you've clicked on "Save", a window will pop up, that allows you to tweak how that image compression works. At this stage, the most critical factor is how big you want the file size to be. This is very different from the image size, which is only partially connected. The file size is determined by how much information the file needs to display the image--in the case of our prior example, how many distinct buckets of paint it's decided to use for the spectrum of colors.
The window that pops up allows you to make that choice. In the top most box, you can choose a number between 1 and 12, 1 being very aggressive compression that will give you a very small file size and will lose a lot of the detail in the image. 12 is the mildest compression (keeps the highest number of "buckets") that will give you the most detailed image, but will also occupy the largest file size.
This is a choice that is entirely up to your individual preferences and constraints, so choose what will work best for your situation. Once you've decided on a file size and associated level of detail, click "OK" and all your changes to the image will be saved wherever you initially saved the file.
Congratulations! You've just customized an image in Photoshop, and can now use it wherever you need it!