Projects of Middle-earth: EP 1: Hobbit and LotR Titles
by Michael Ironstone in Craft > Digital Graphics
683 Views, 4 Favorites, 0 Comments
Projects of Middle-earth: EP 1: Hobbit and LotR Titles


Welcome to the Projects of Middle-earth series! This is the first episode of this new series. If you want to subscribe to this series, message me or comment bellow and I'll send a link to the newest instructable right to your Instructables Inbox. Let's get started!
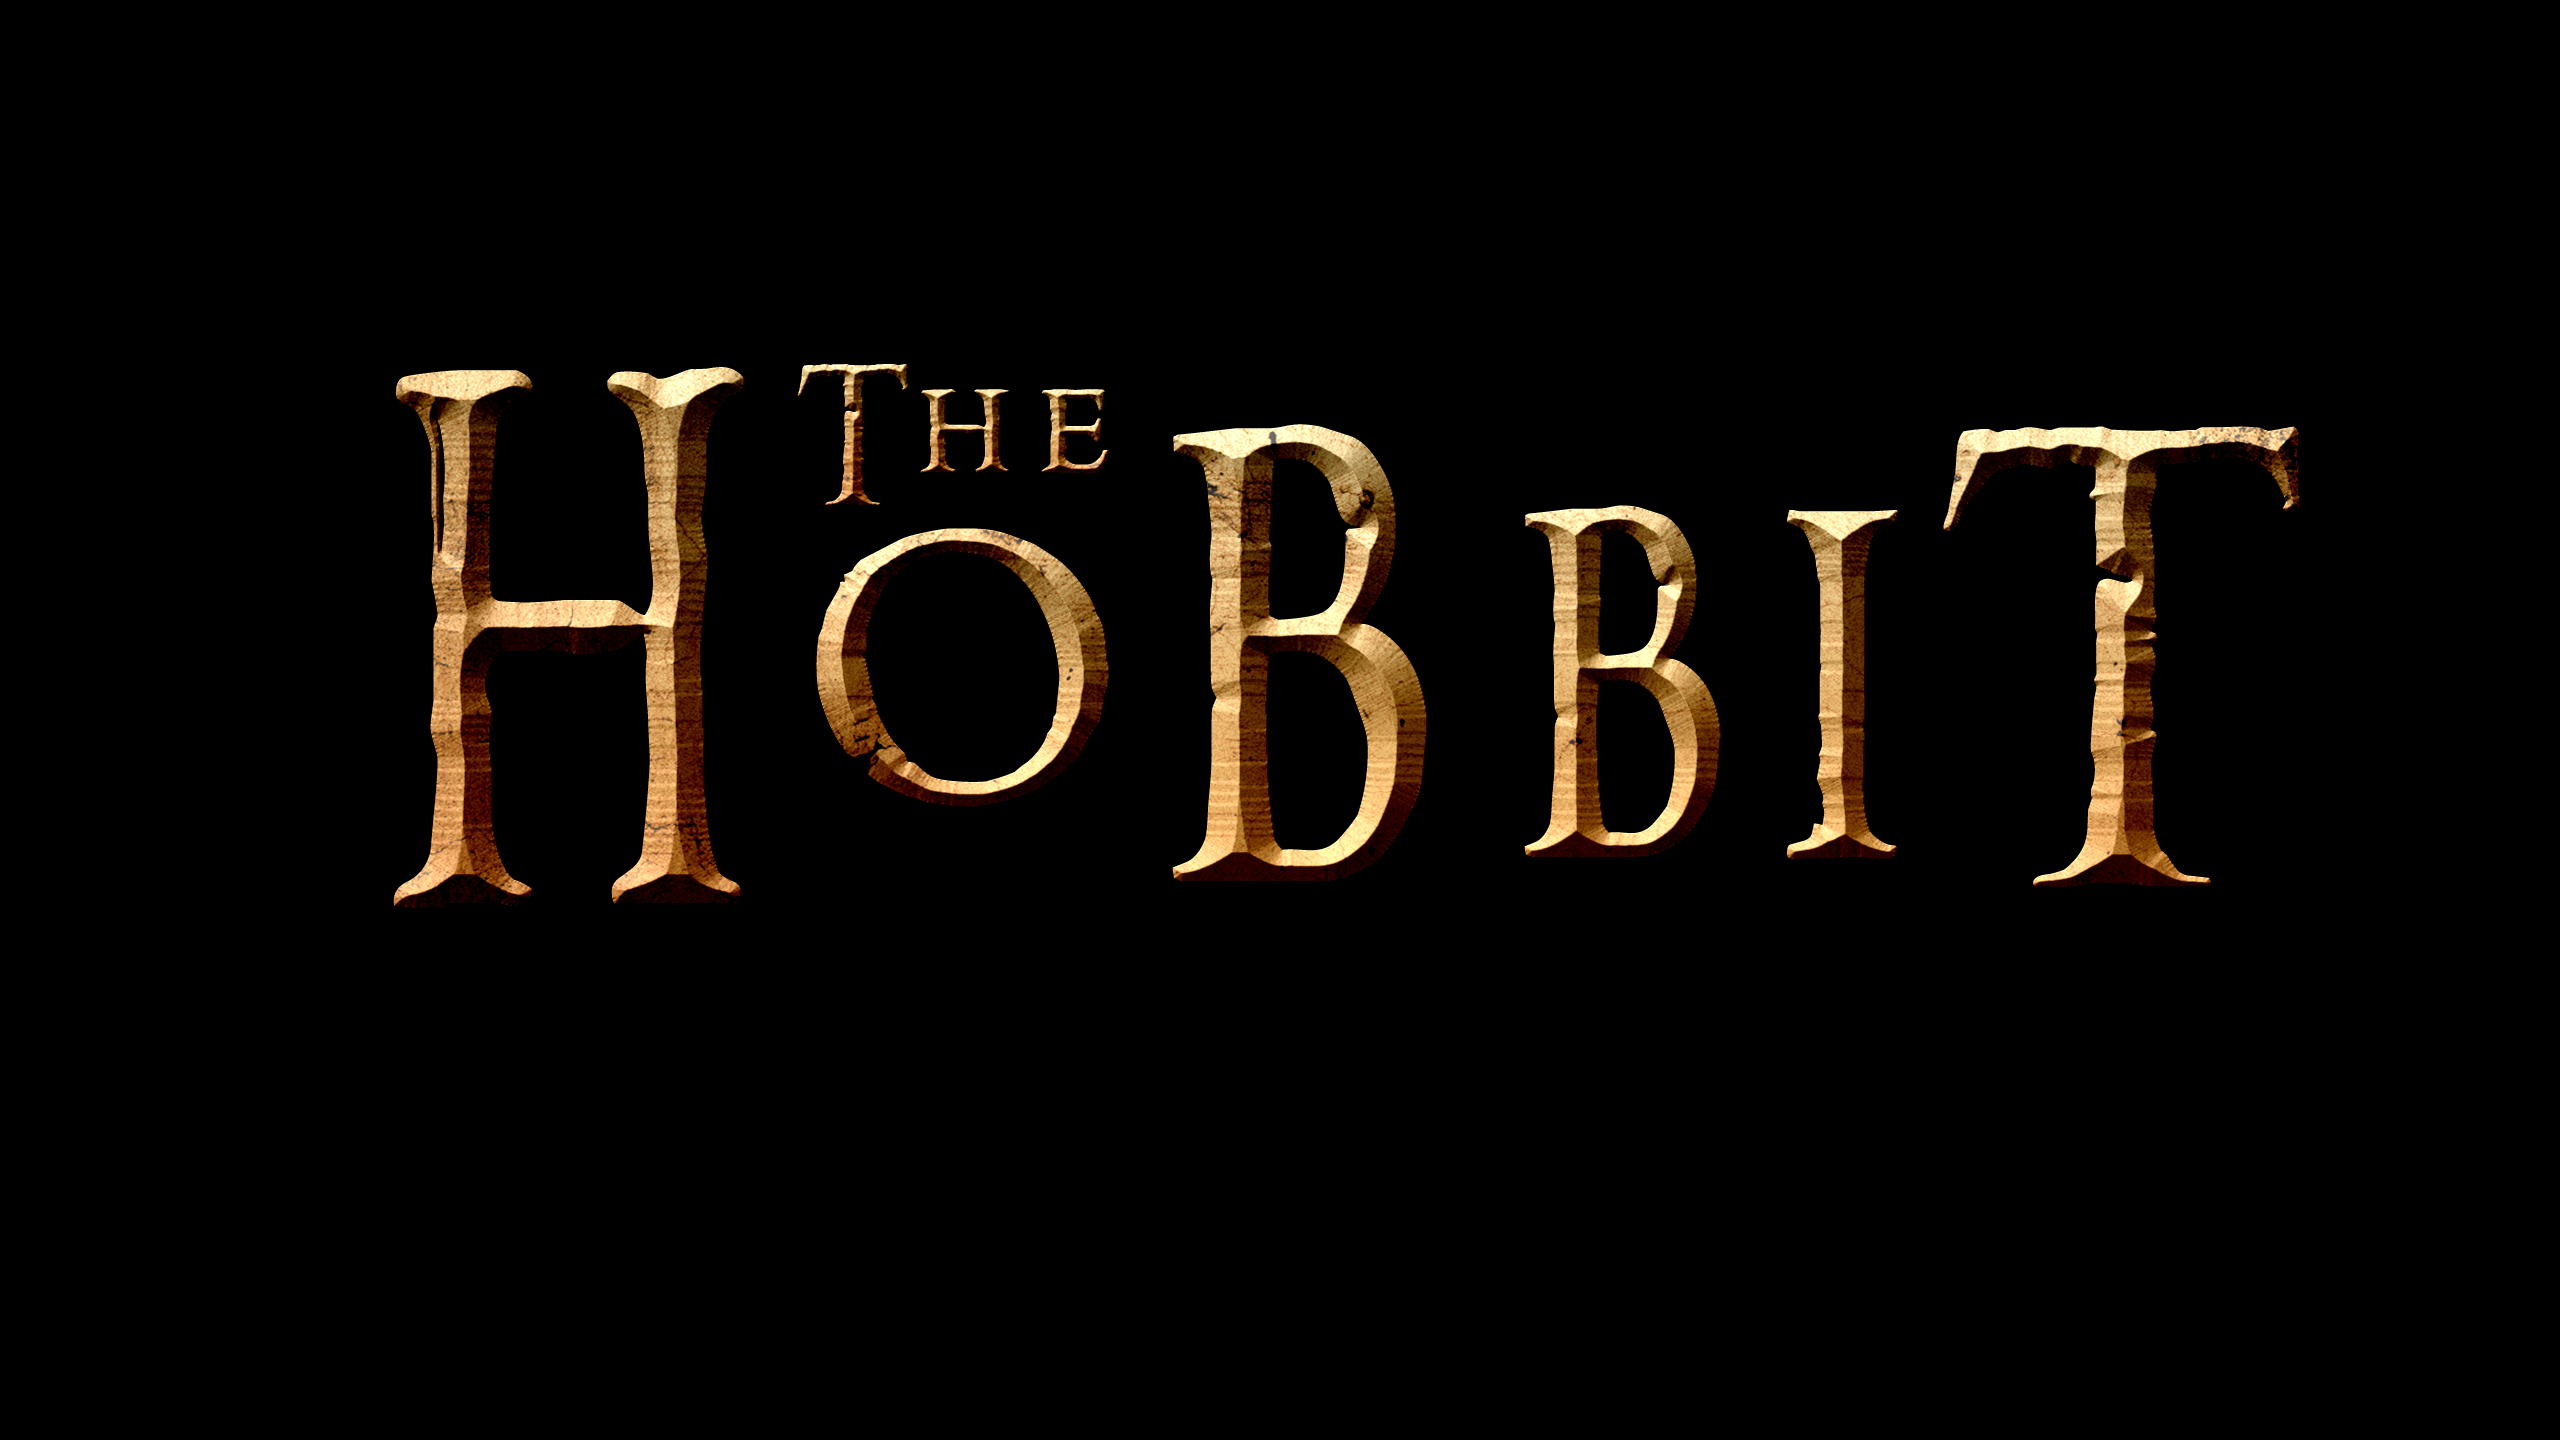
Today we will be creating movie titles inspired by The Hobbit and The LotR like this one.
You are going to need any version of Adobe Photoshop. I'm using CS4. You can download the texture file below. Let's get started!
- Michael Ironstone
Supplies
Computer
Adobe Photoshop CS4, later or earlier
Runes texture
Ringbearer font (http://www.councilofelrond.com/downloads/fonts/ringbearer.zip)
Step 1: Text Prep.
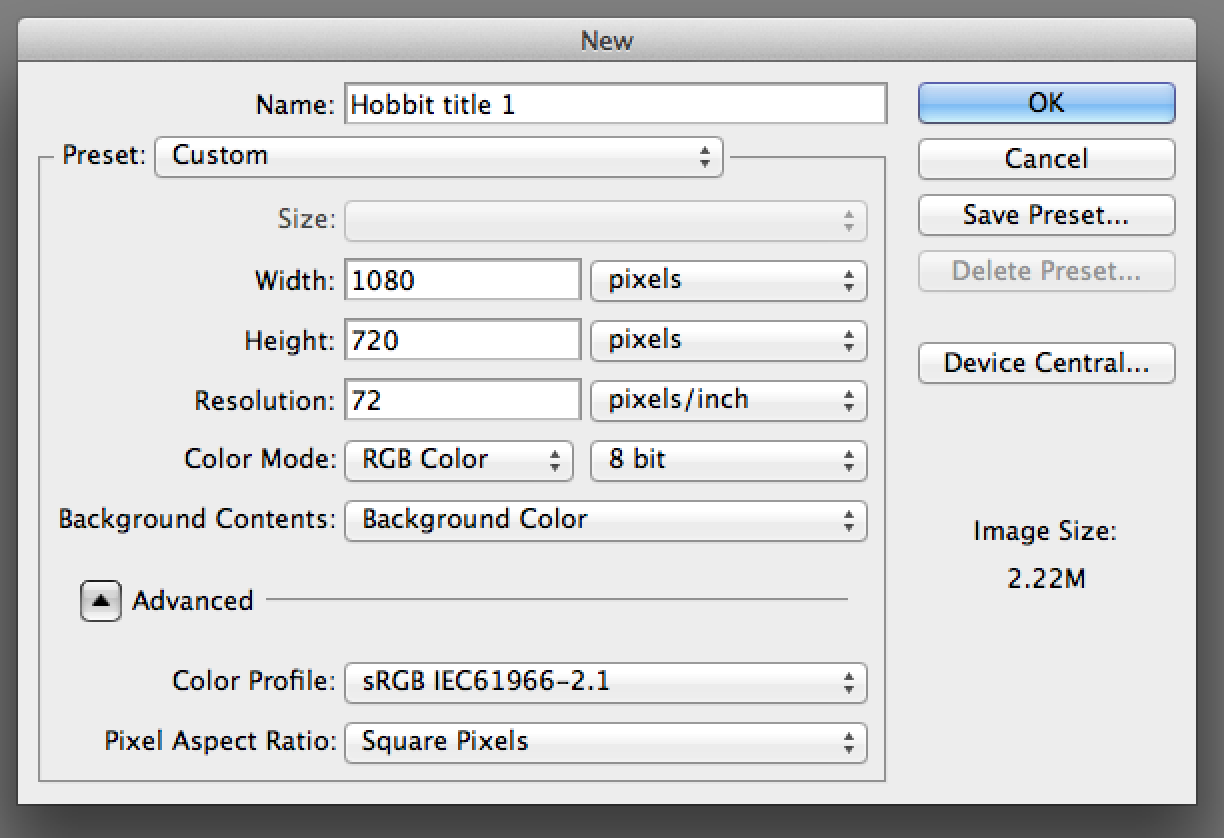
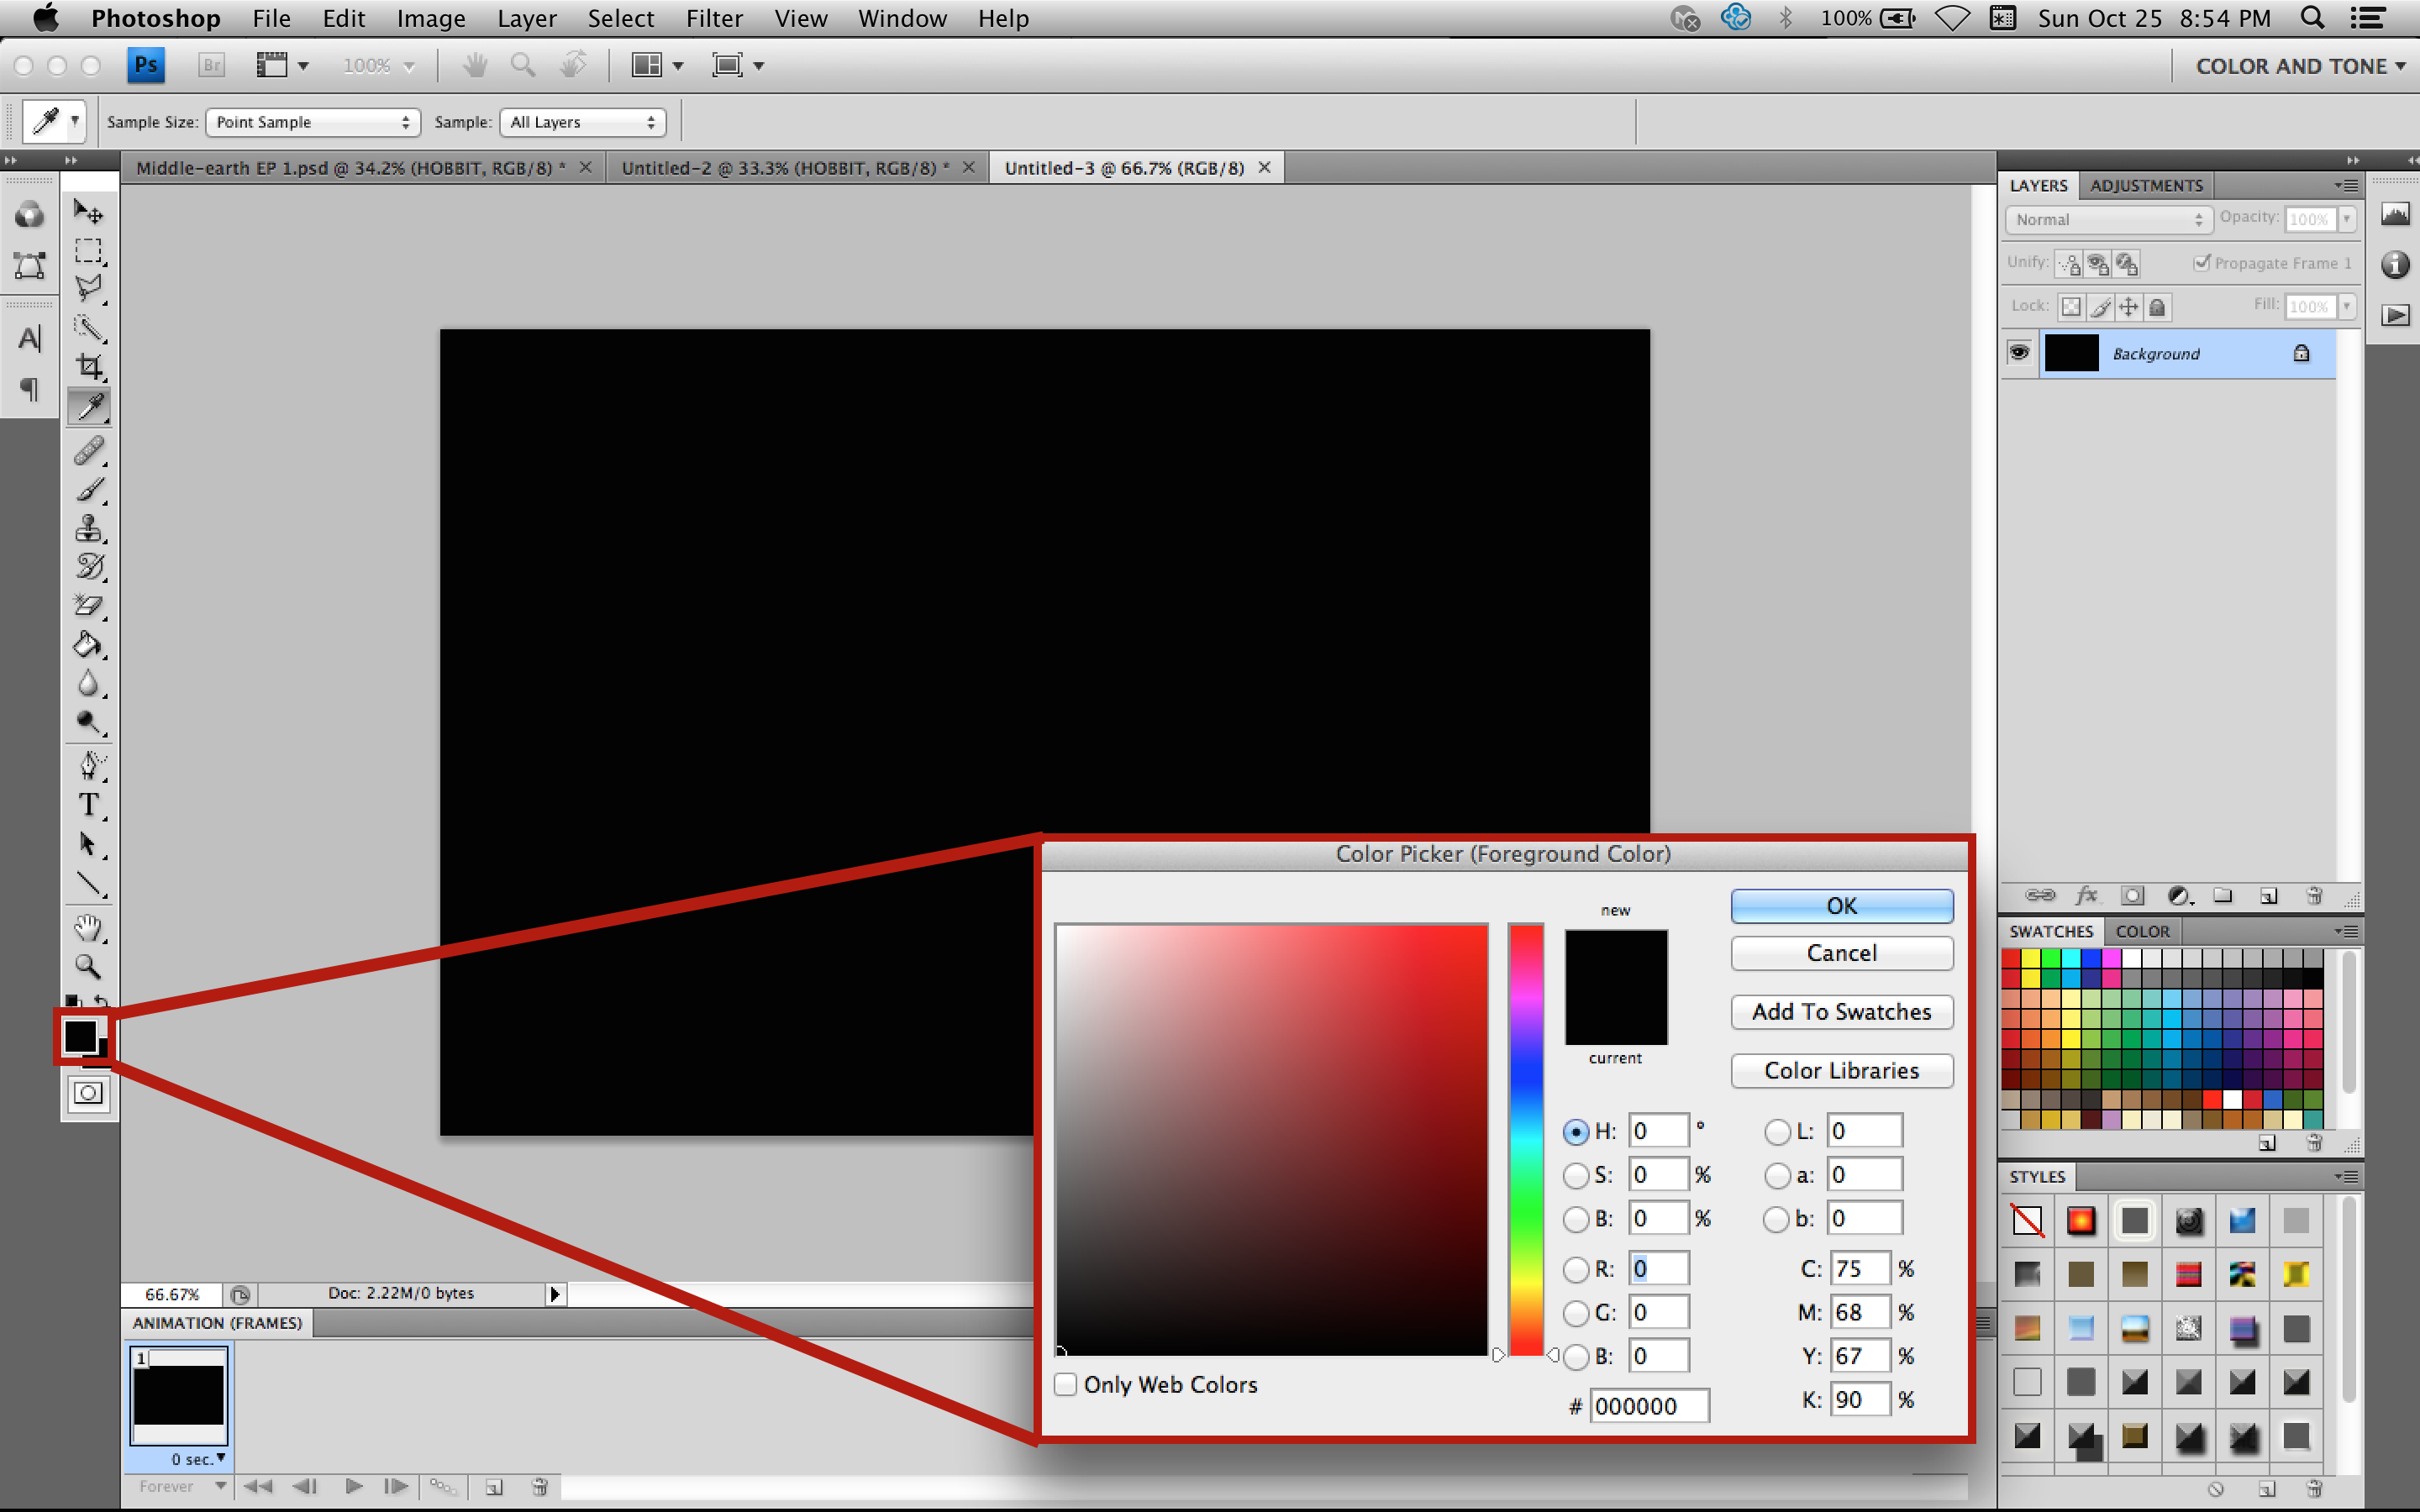
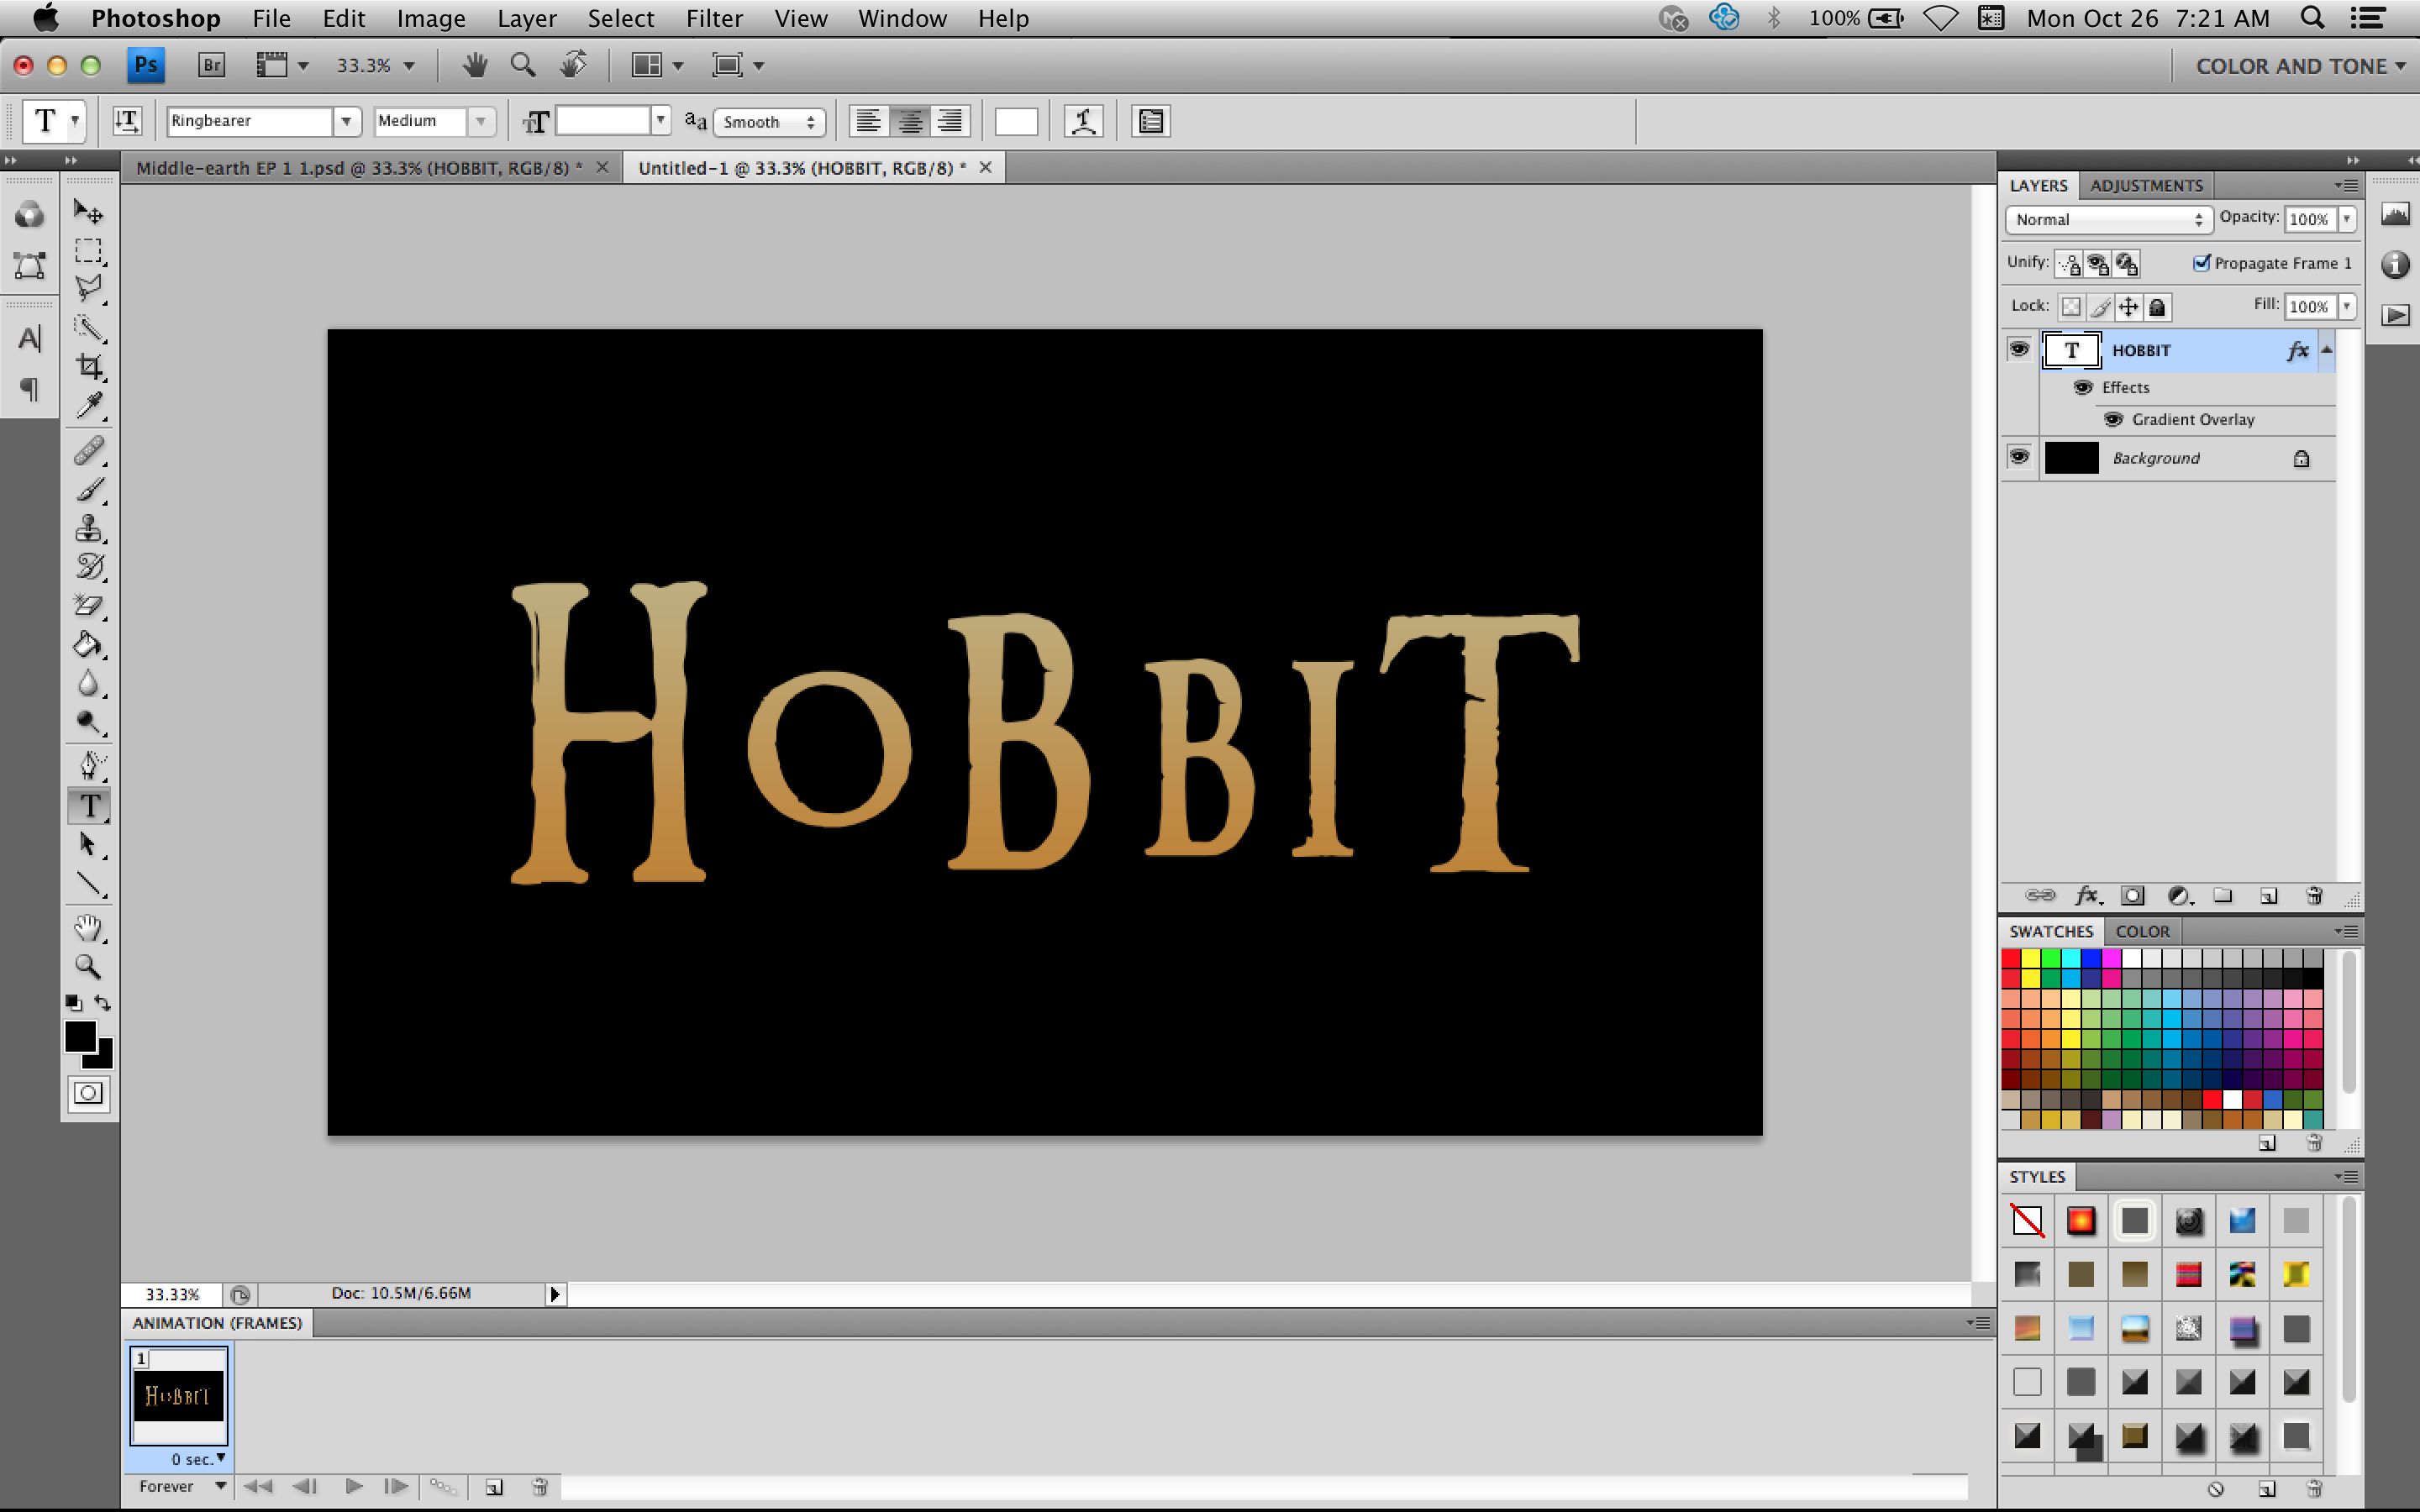
First, create a new image by striking command(control)+n, changing the width to 1080 pixels and the height to 720 pixels. Make sure the colour mode is set to RGB and the background contents is set to background colour. Make sure the background colour is black and the foreground colour is white.
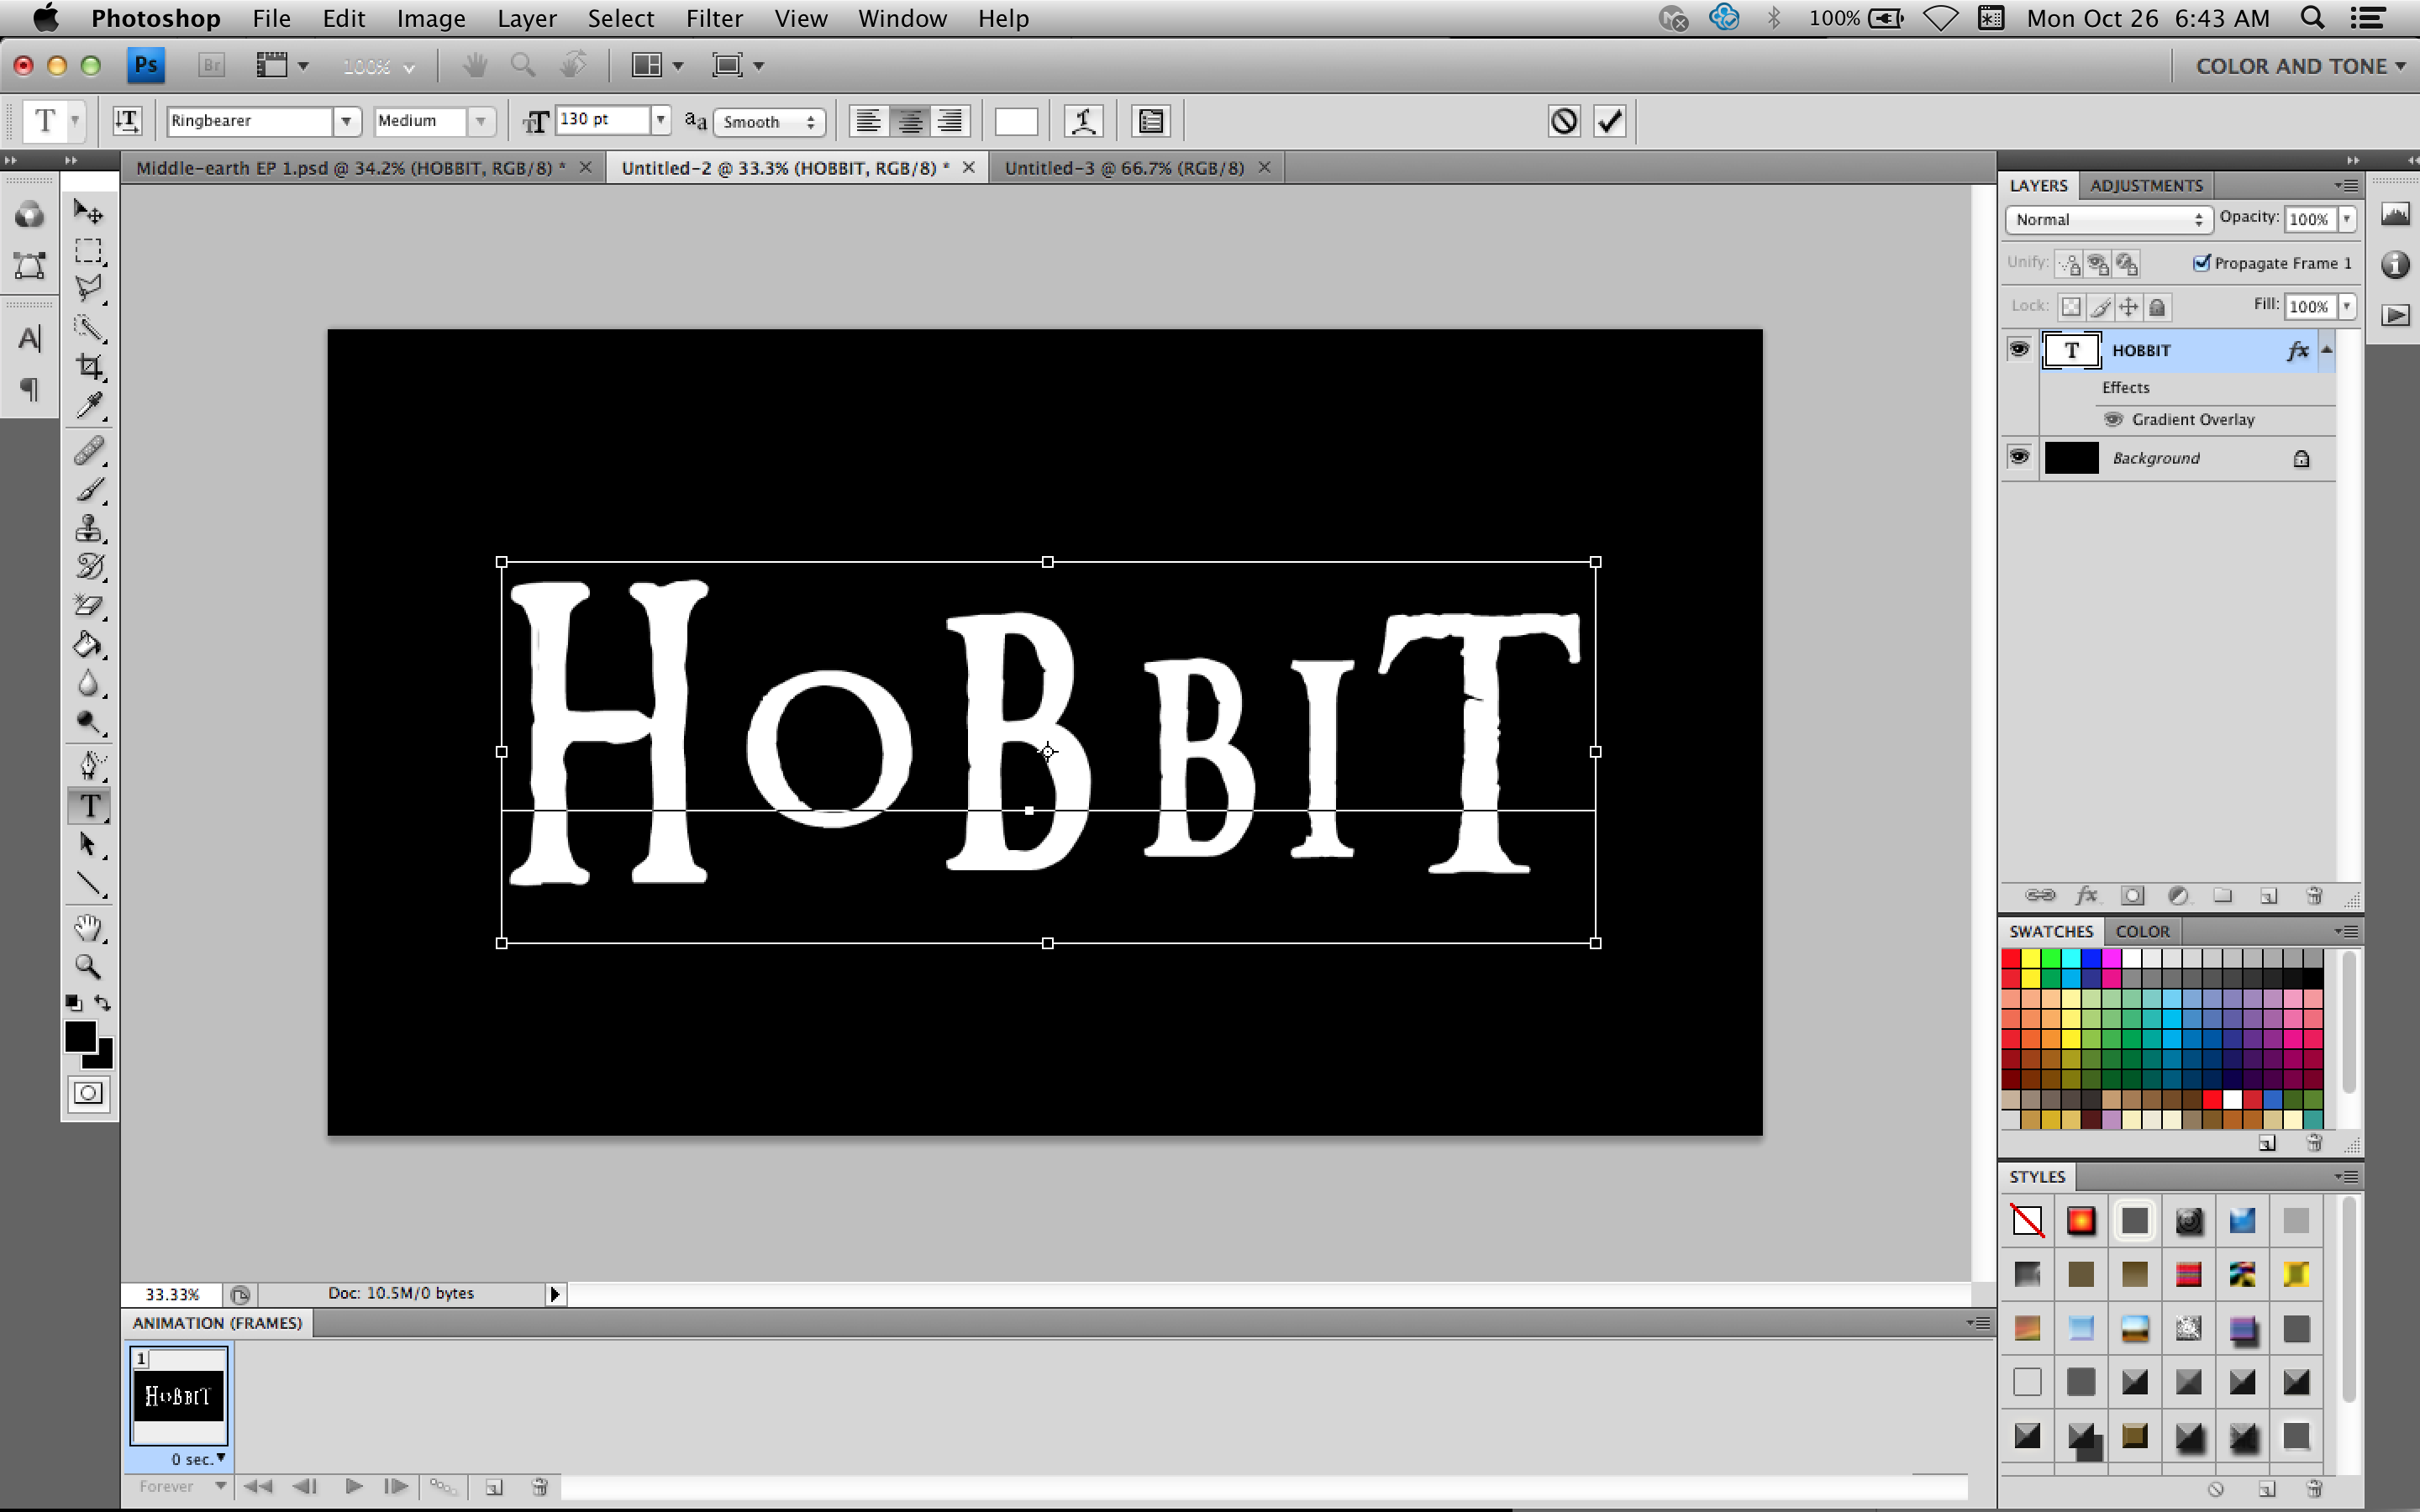
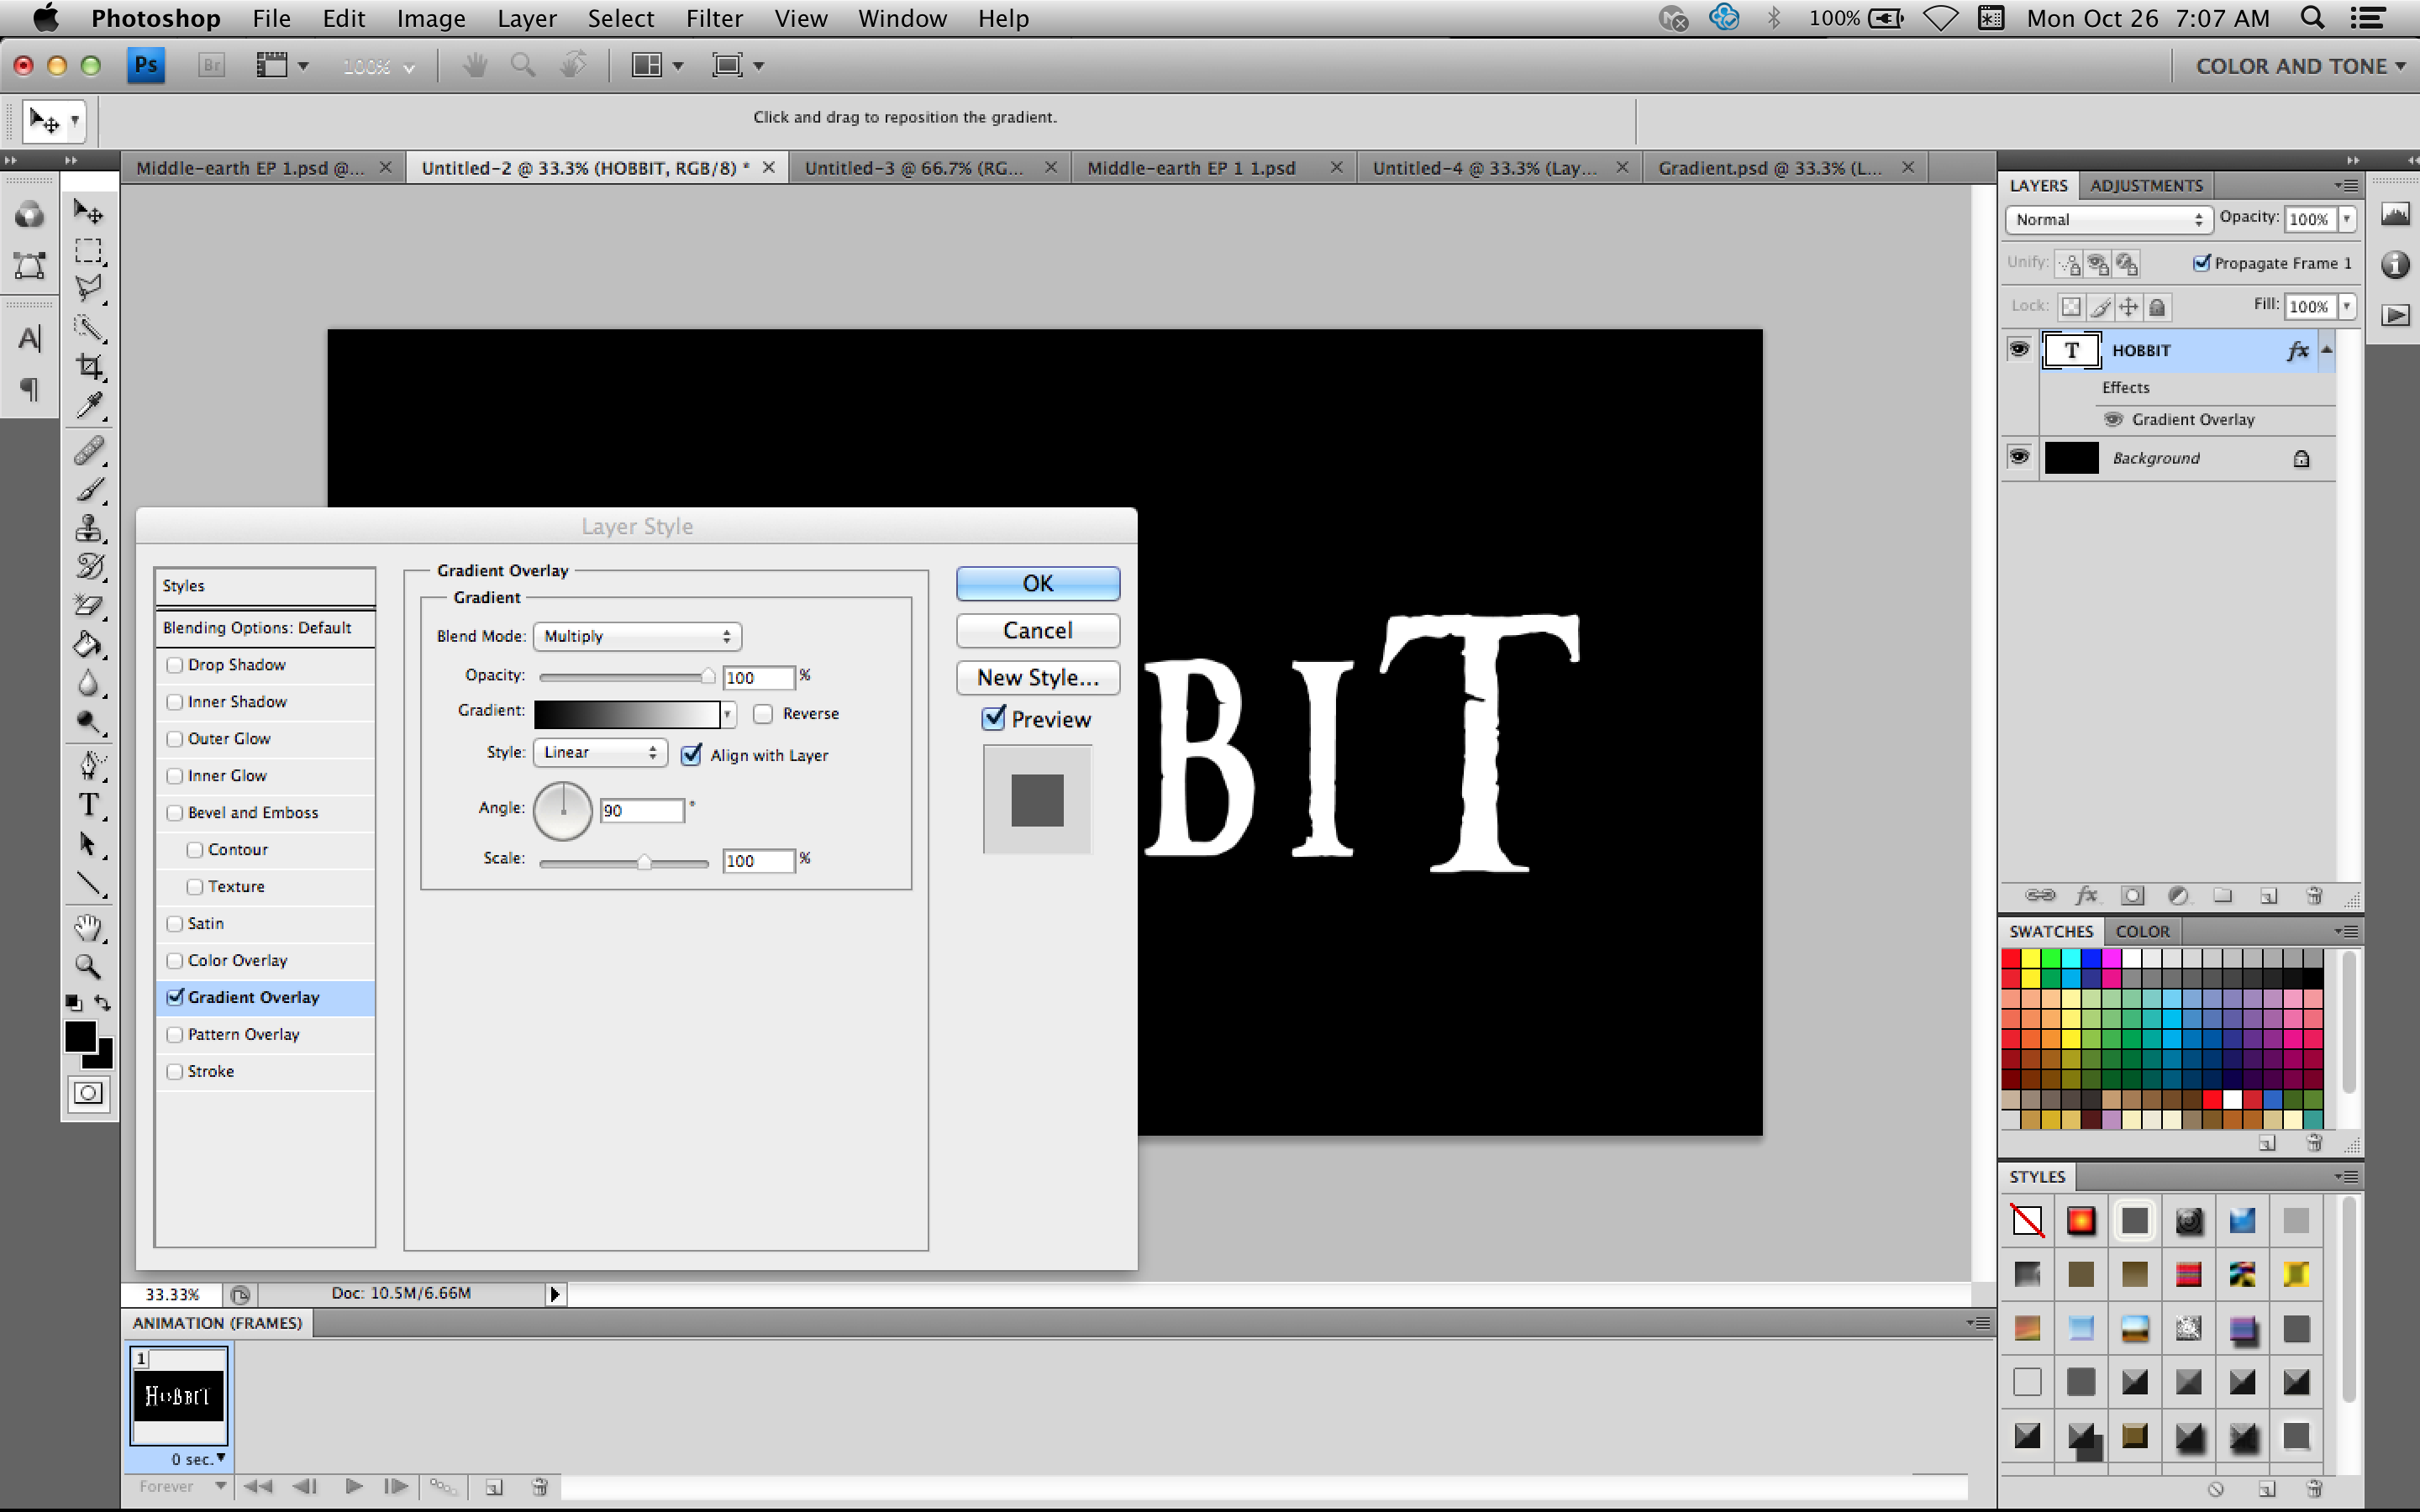
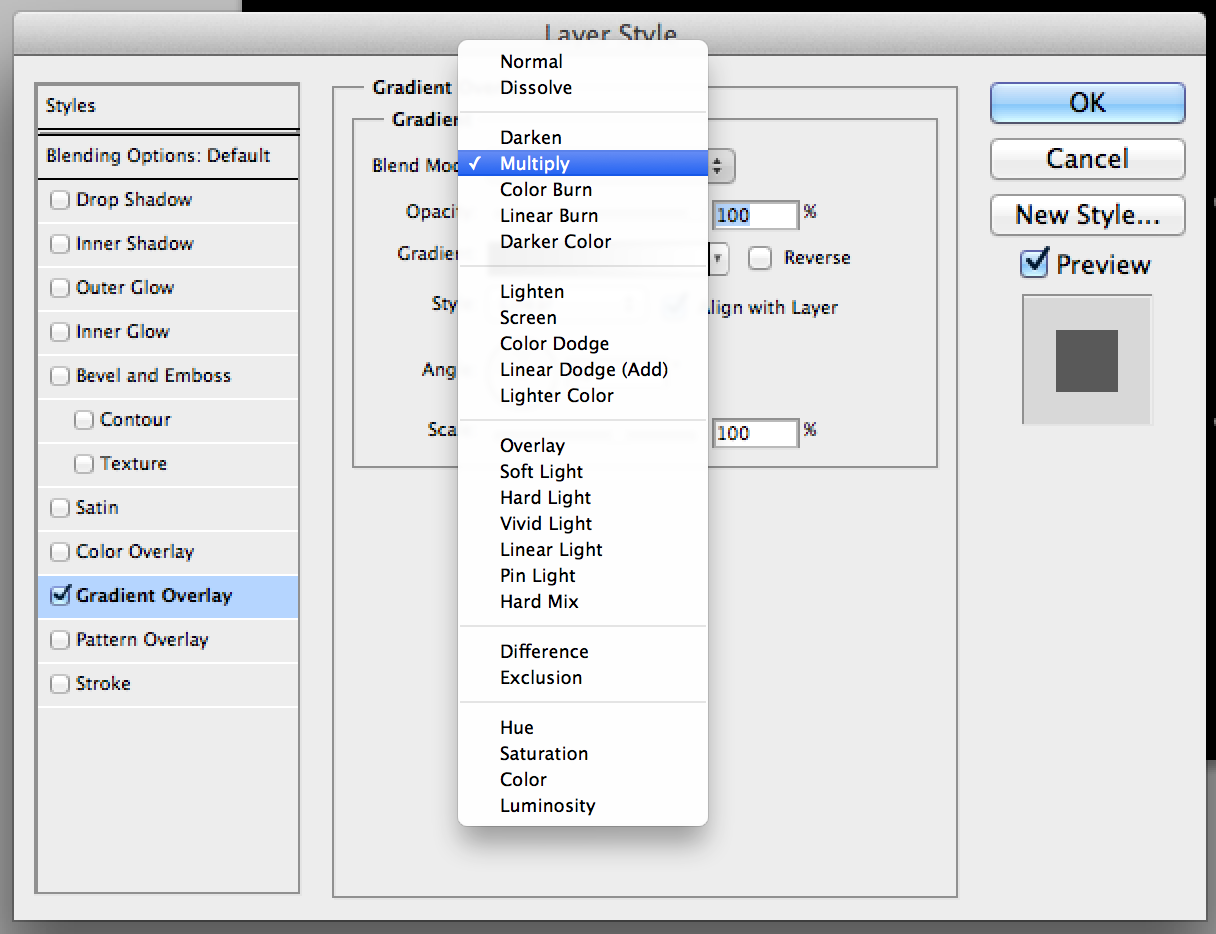
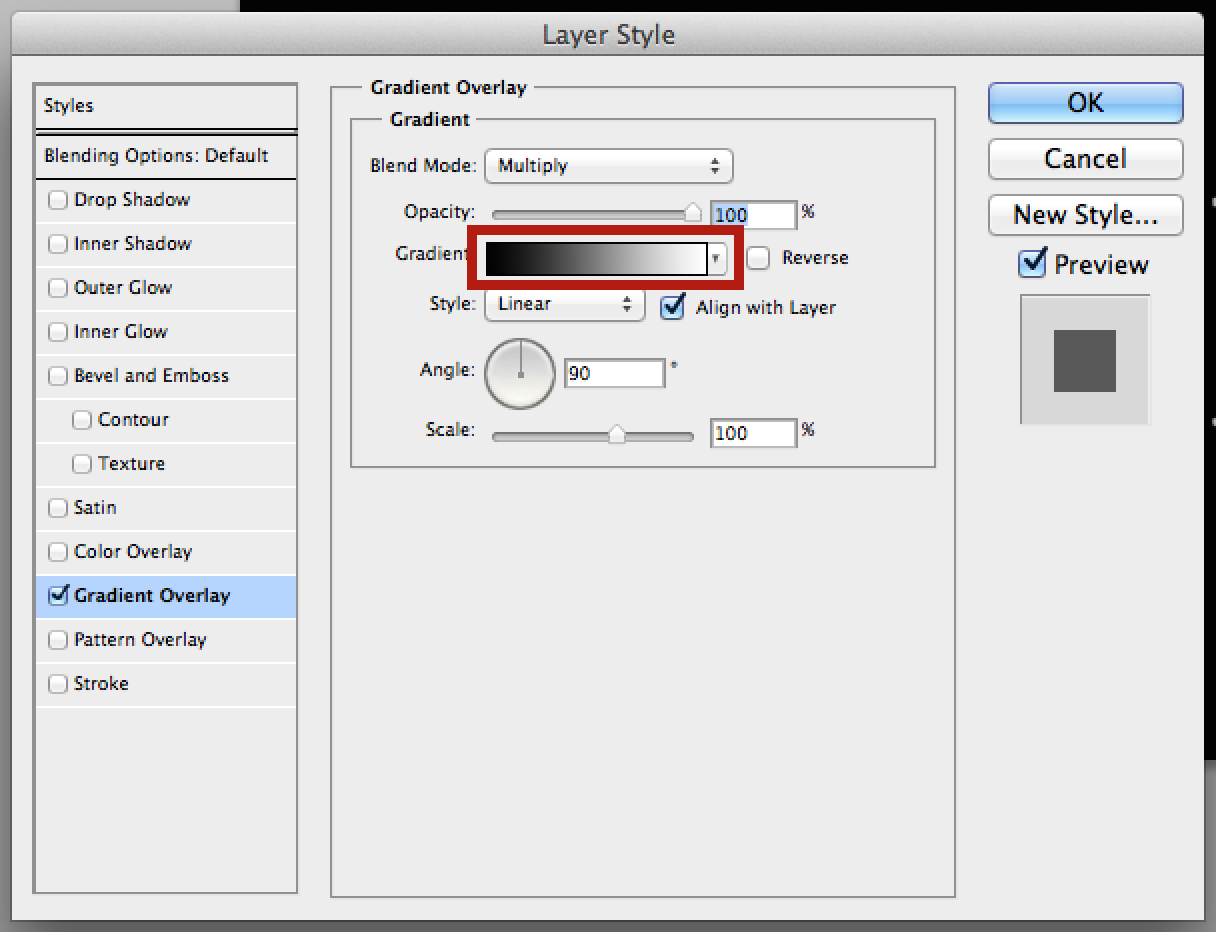
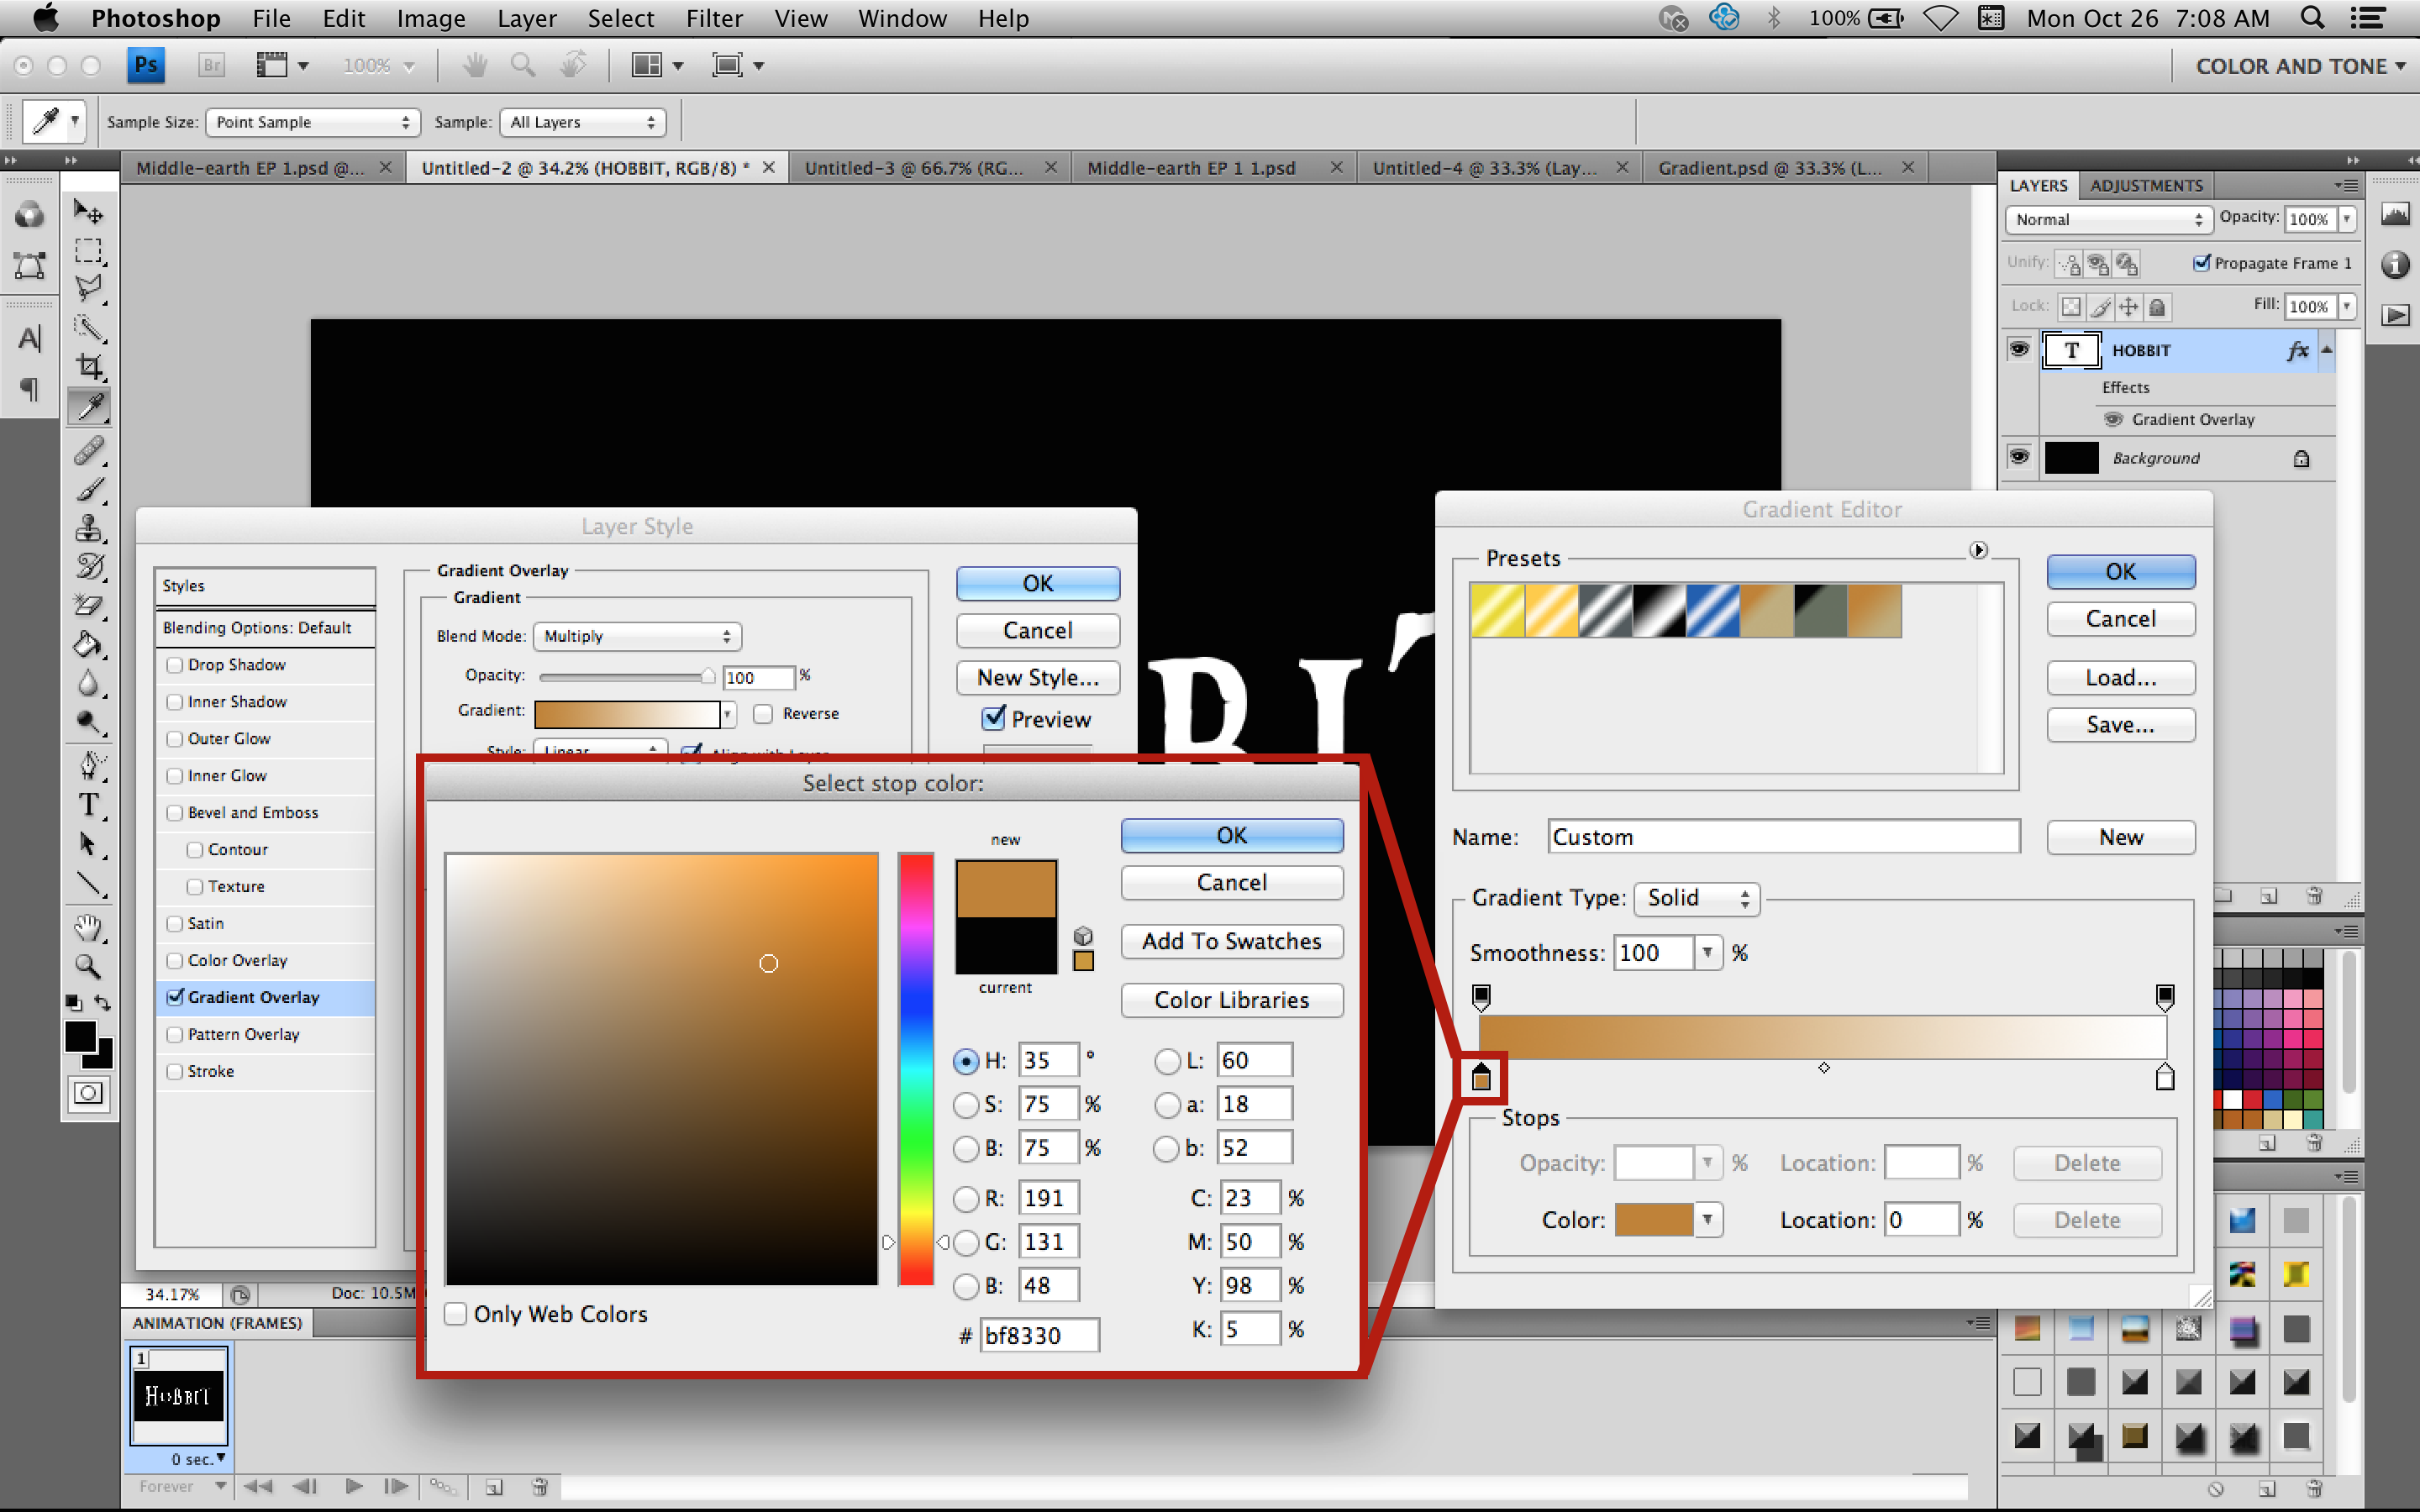
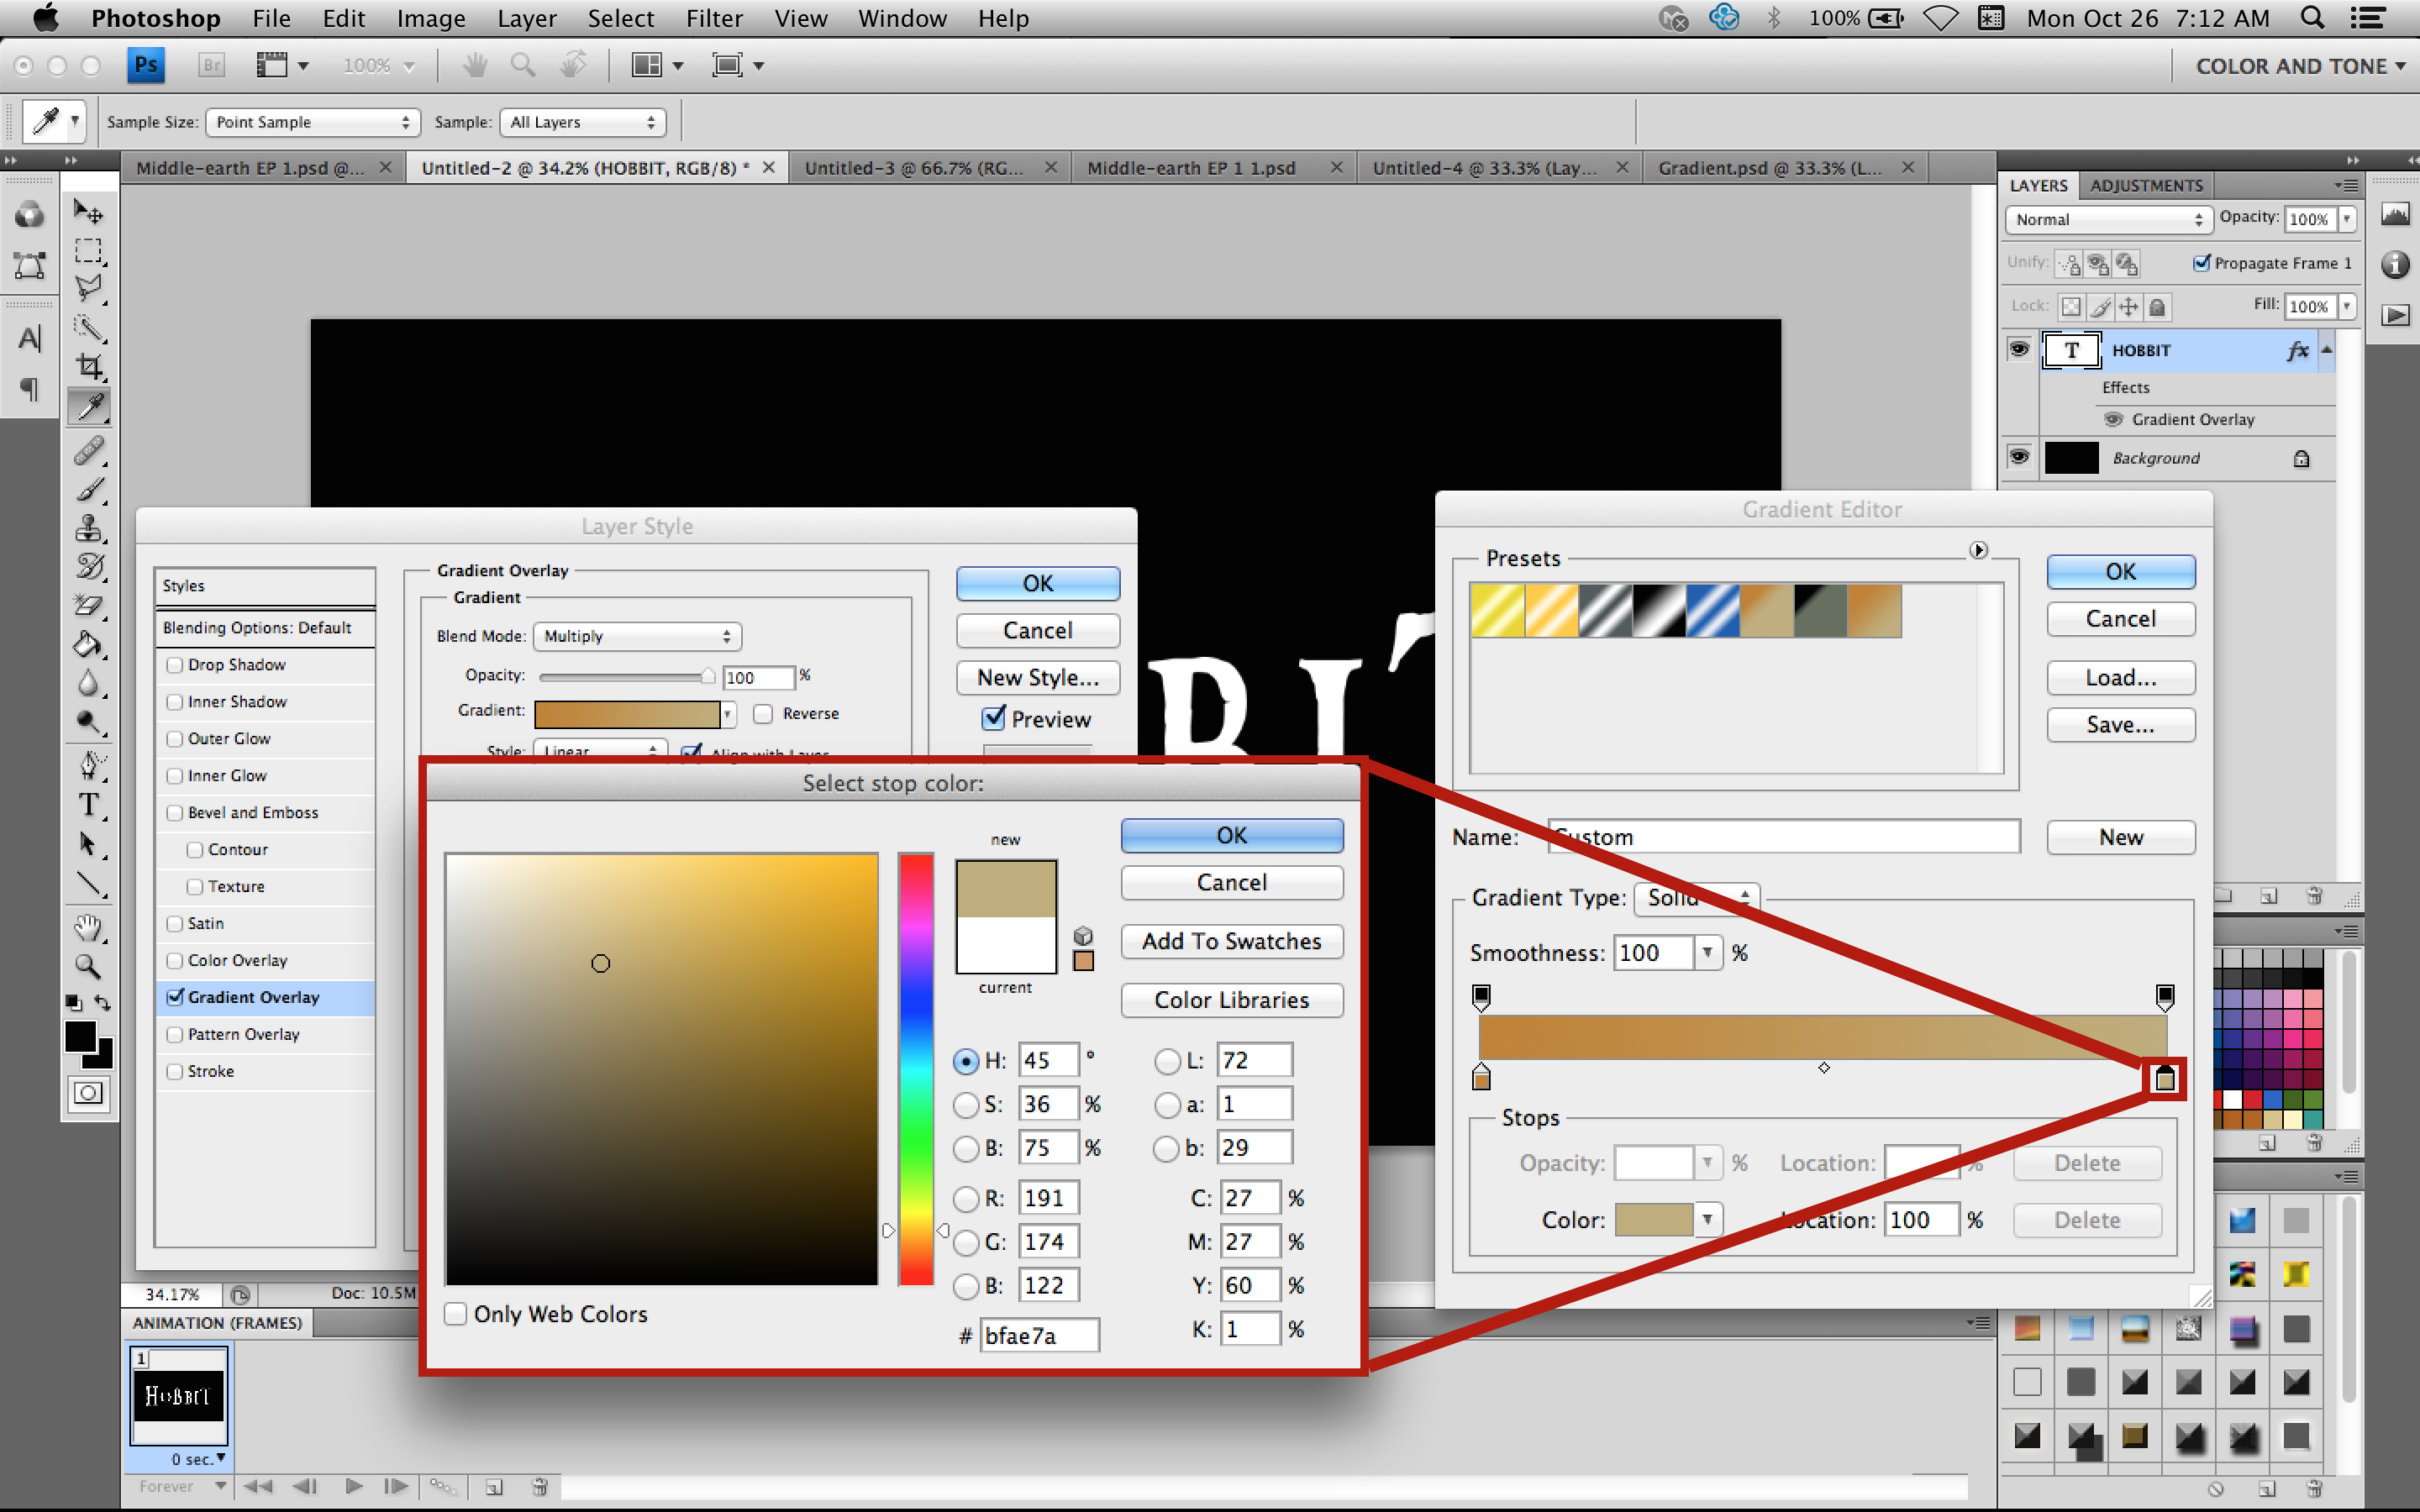
So start out by typing your text out. Then go ahead and double click on the layer located in the layers panel to bring up the Layer Style editing box. This will open up to "Blending Options" by default. Go down to "Gradient Overlay" in the left hand menu. Change the blending mode to Multiply. This allows our texture to mix with this gradient when we add it. Double click on the gradient icon located below the Opacity slider. Double click the left little colour box underneath the slider. Change the Hue (H) to 35 and the Saturation (S) and Brightness (B) to 75. Or just change the colour # code to bf8330. Click OK. Then double click the other little box. Change the Hue to 45, the saturation to 35, and the brightness to 75. (The image is wrong. It shows the saturation as 36. Typo.) Or you can simply just change the colour # code to bfae7a. Click OK to close this window and click OK to close the gradient editor. Let's move on to Step 2!
Step 2: Texturing
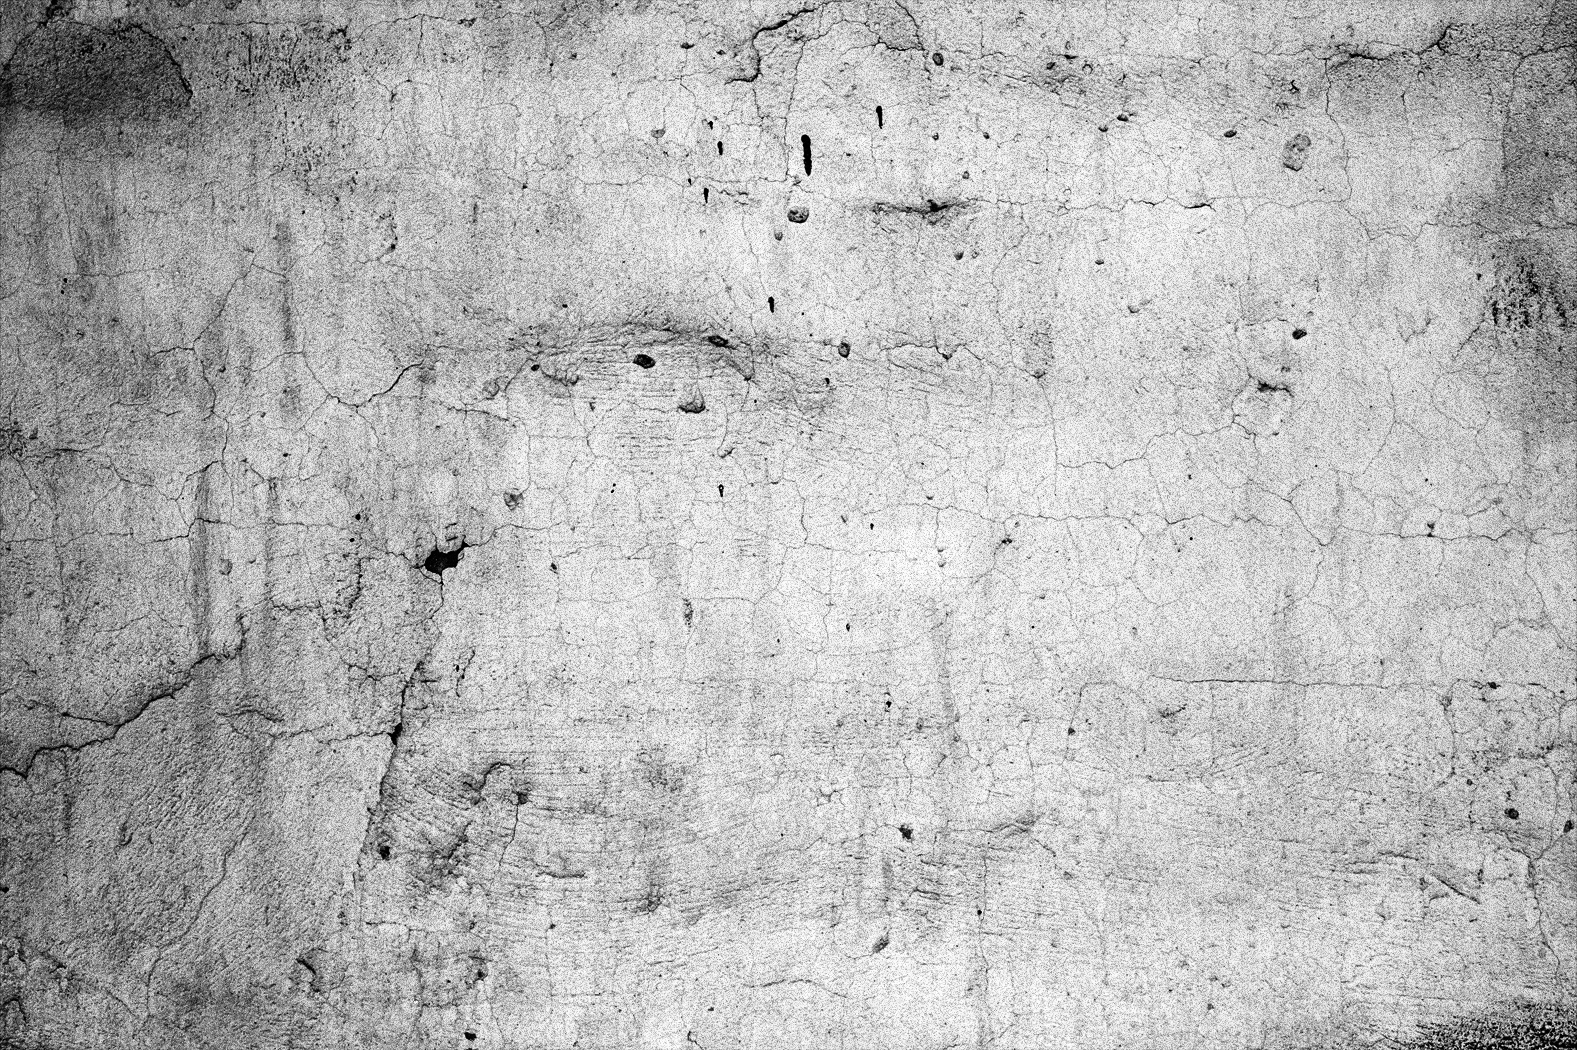
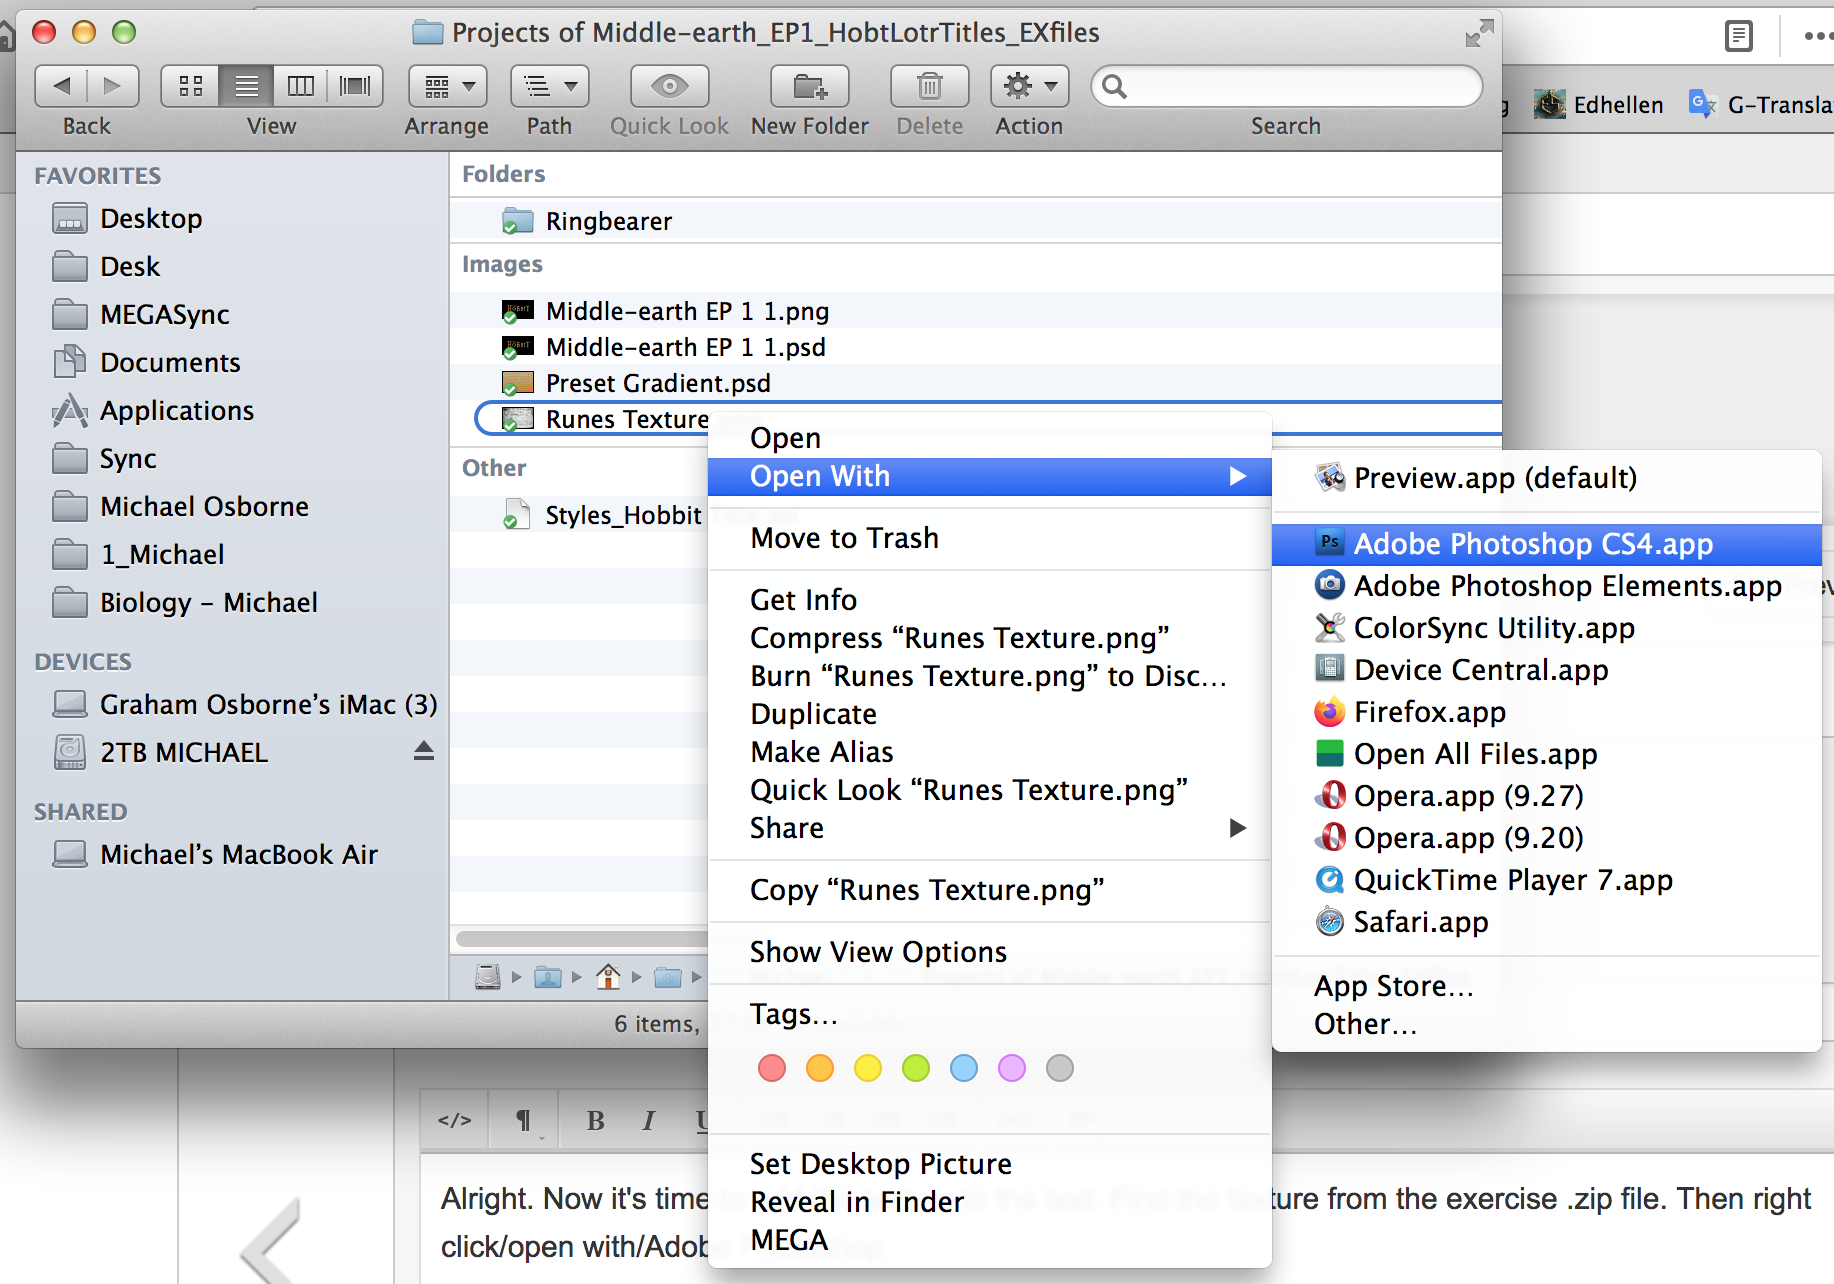
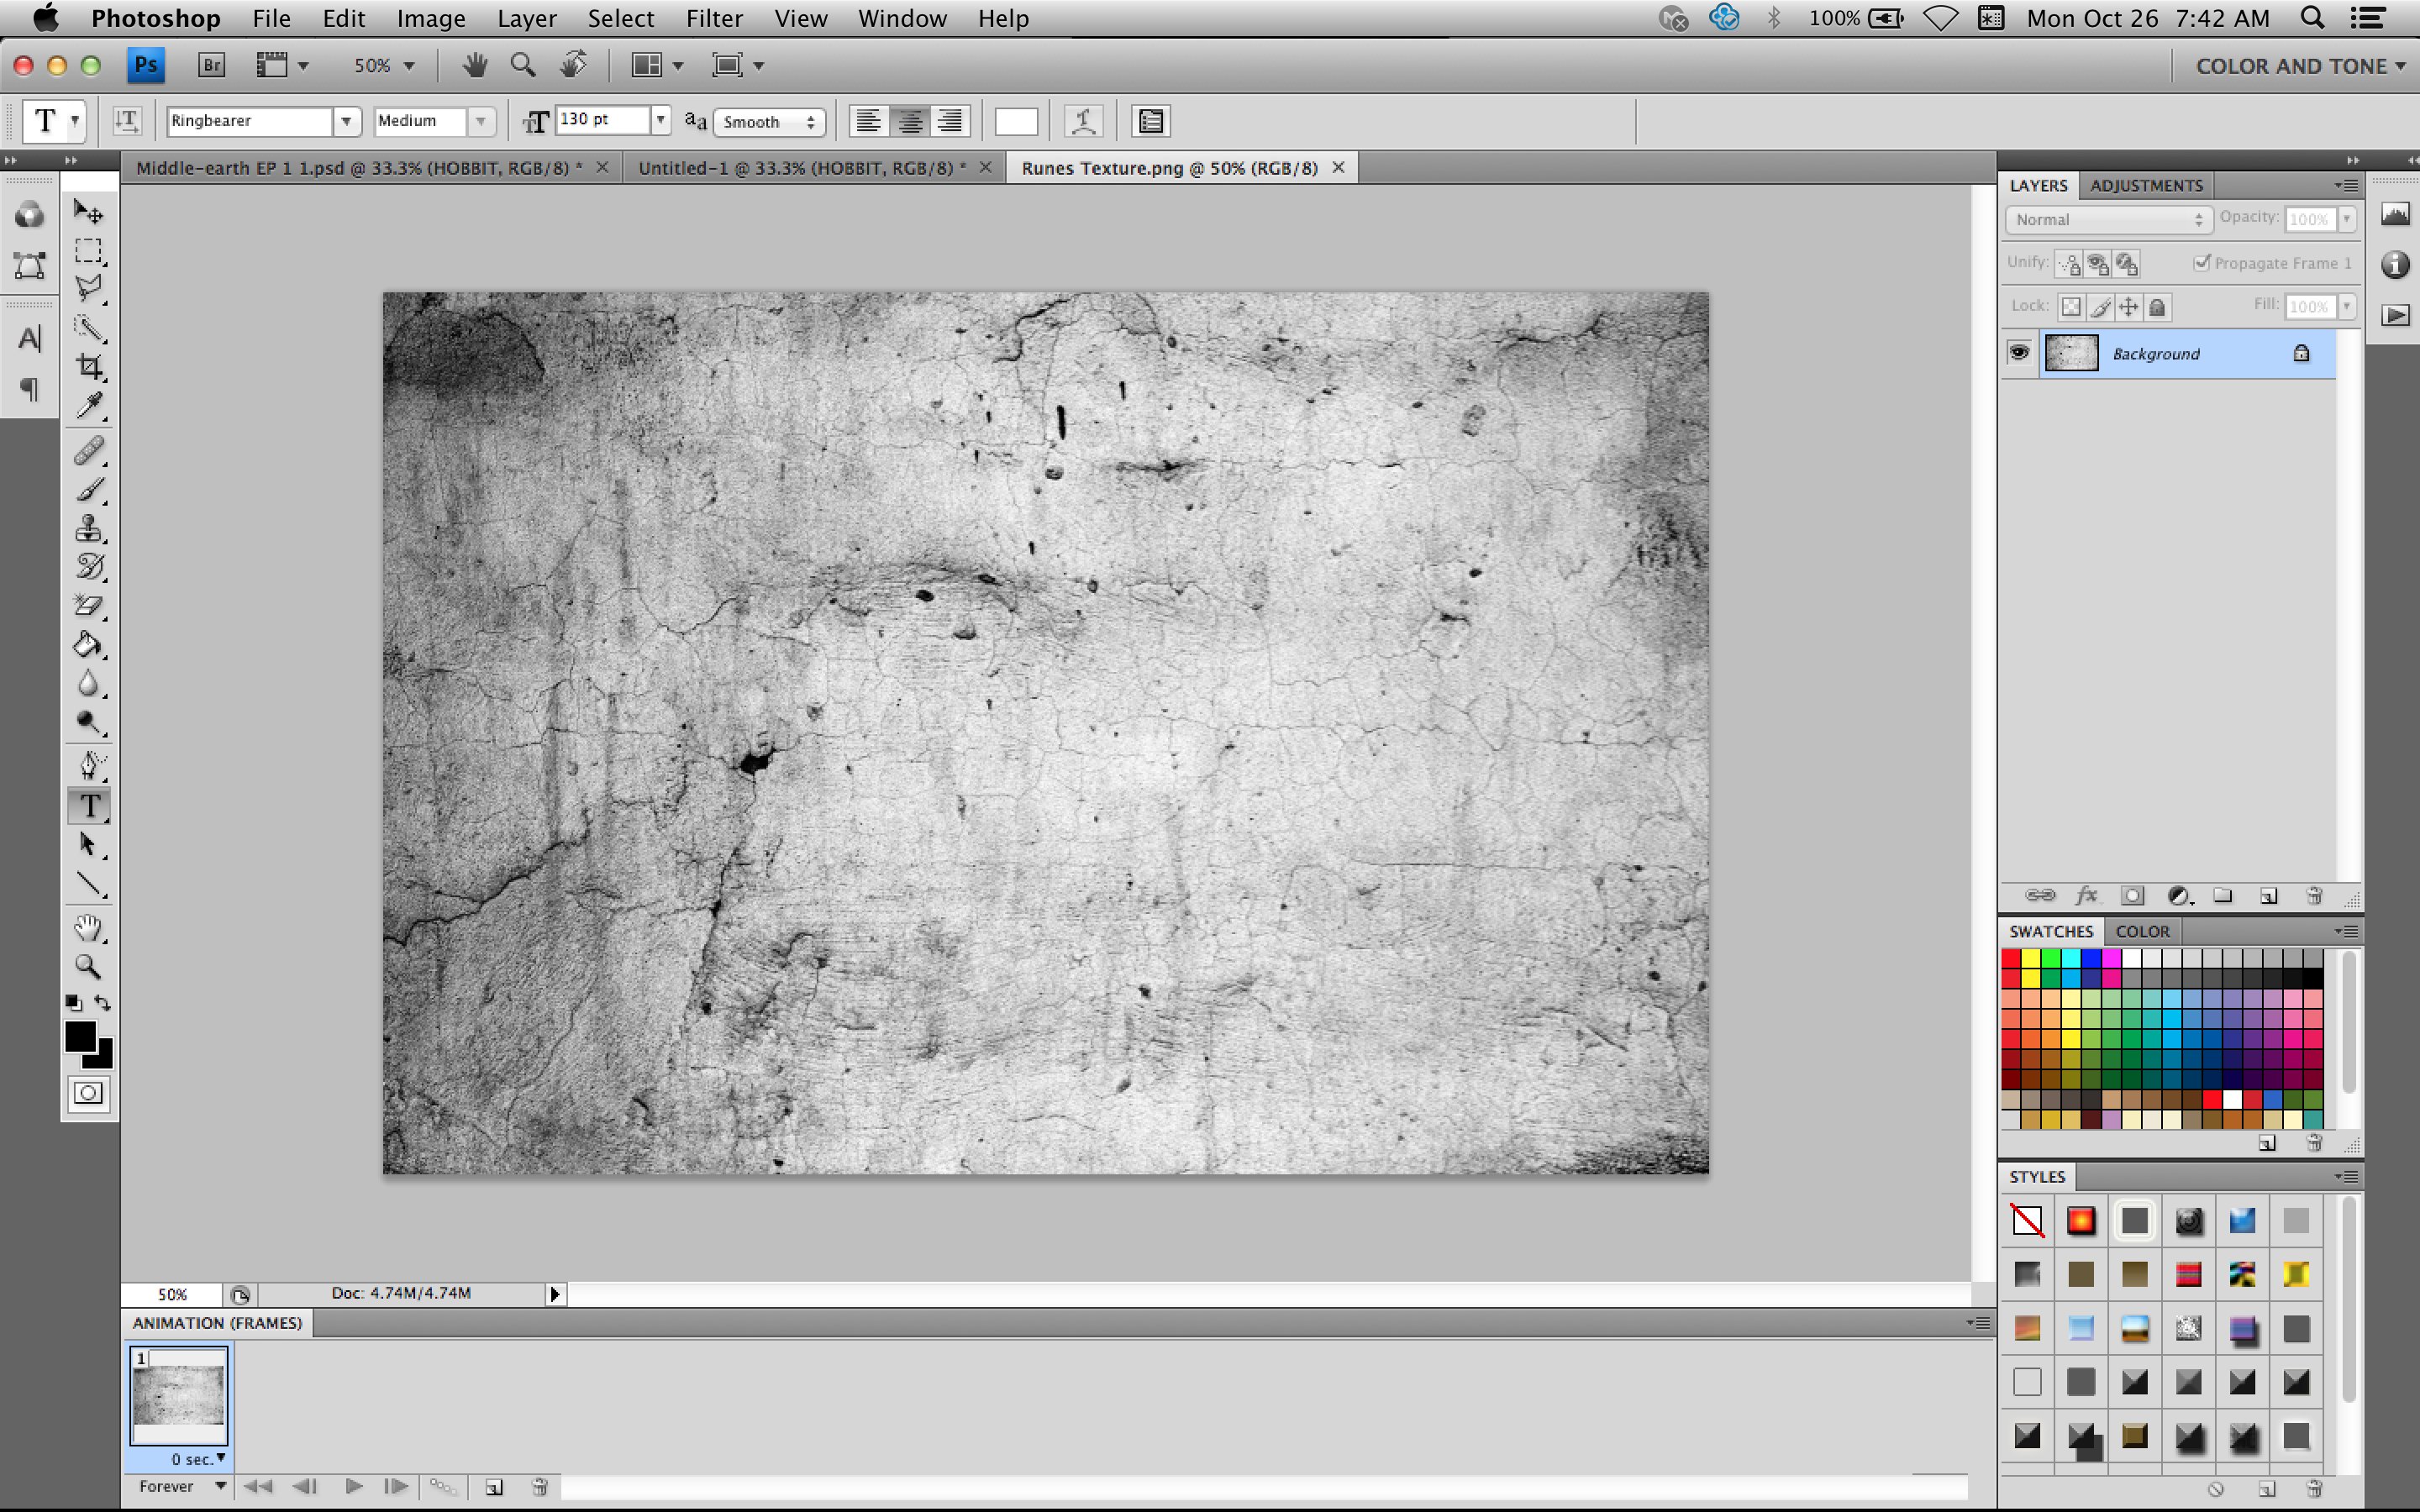
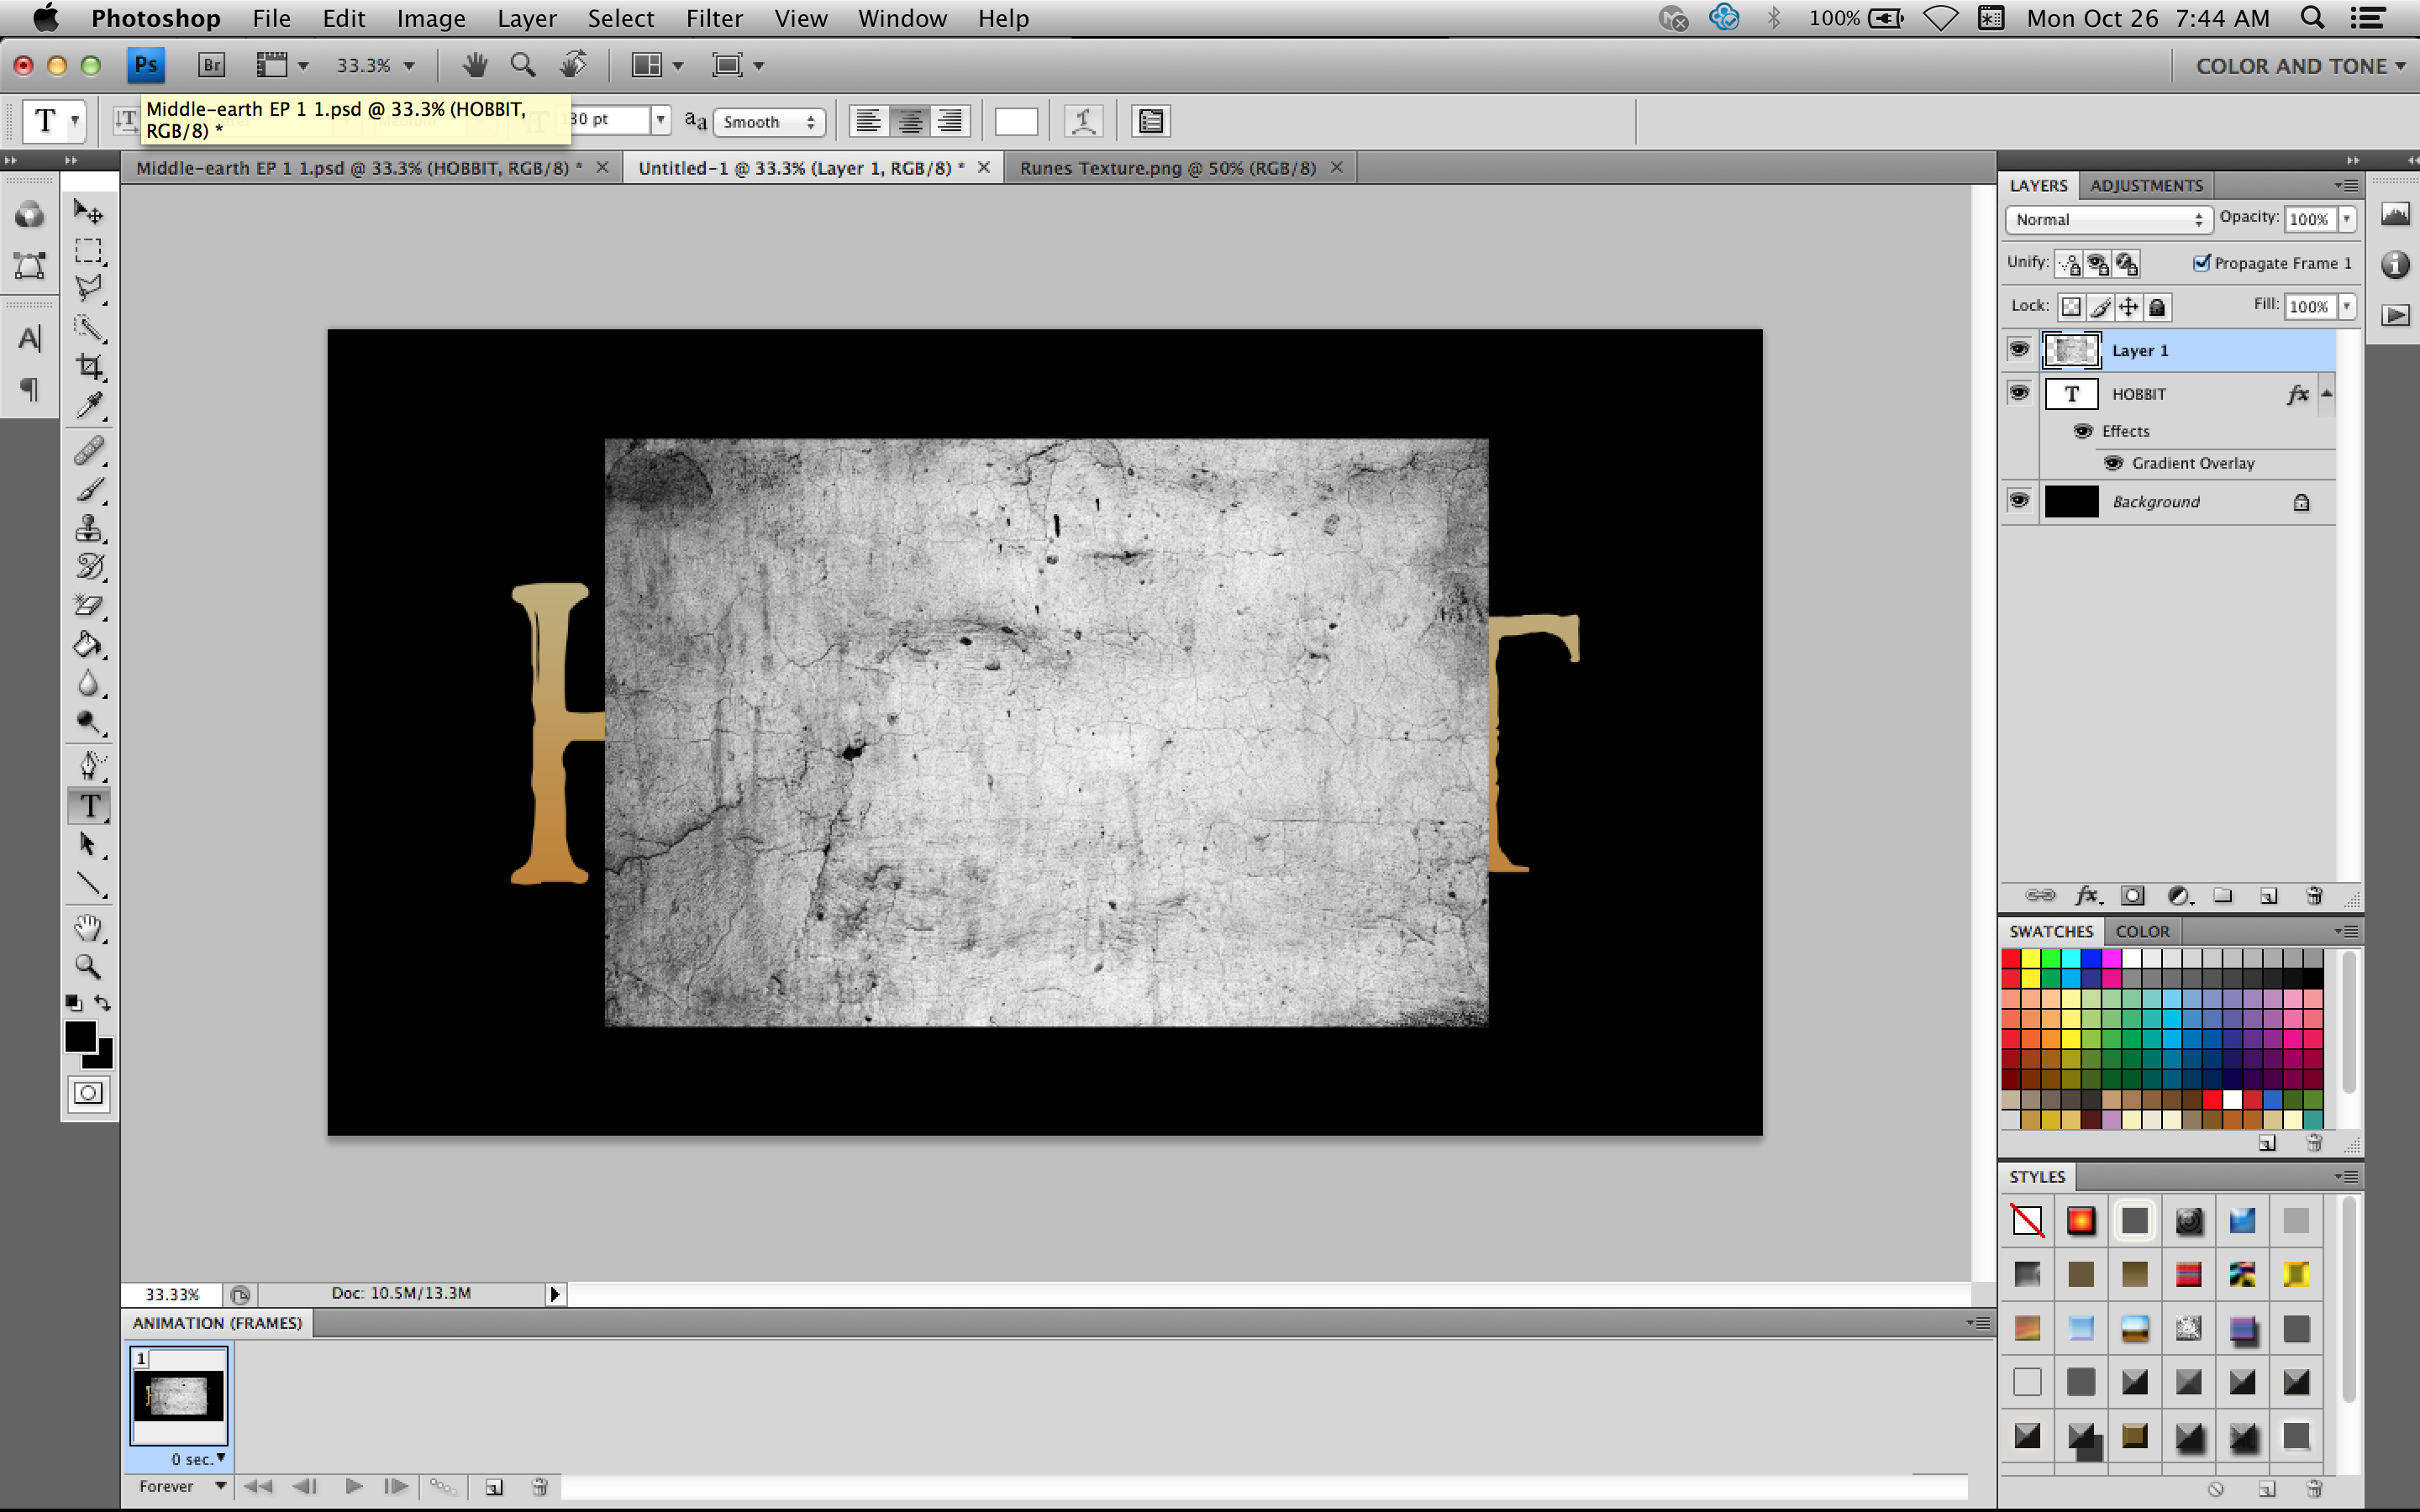
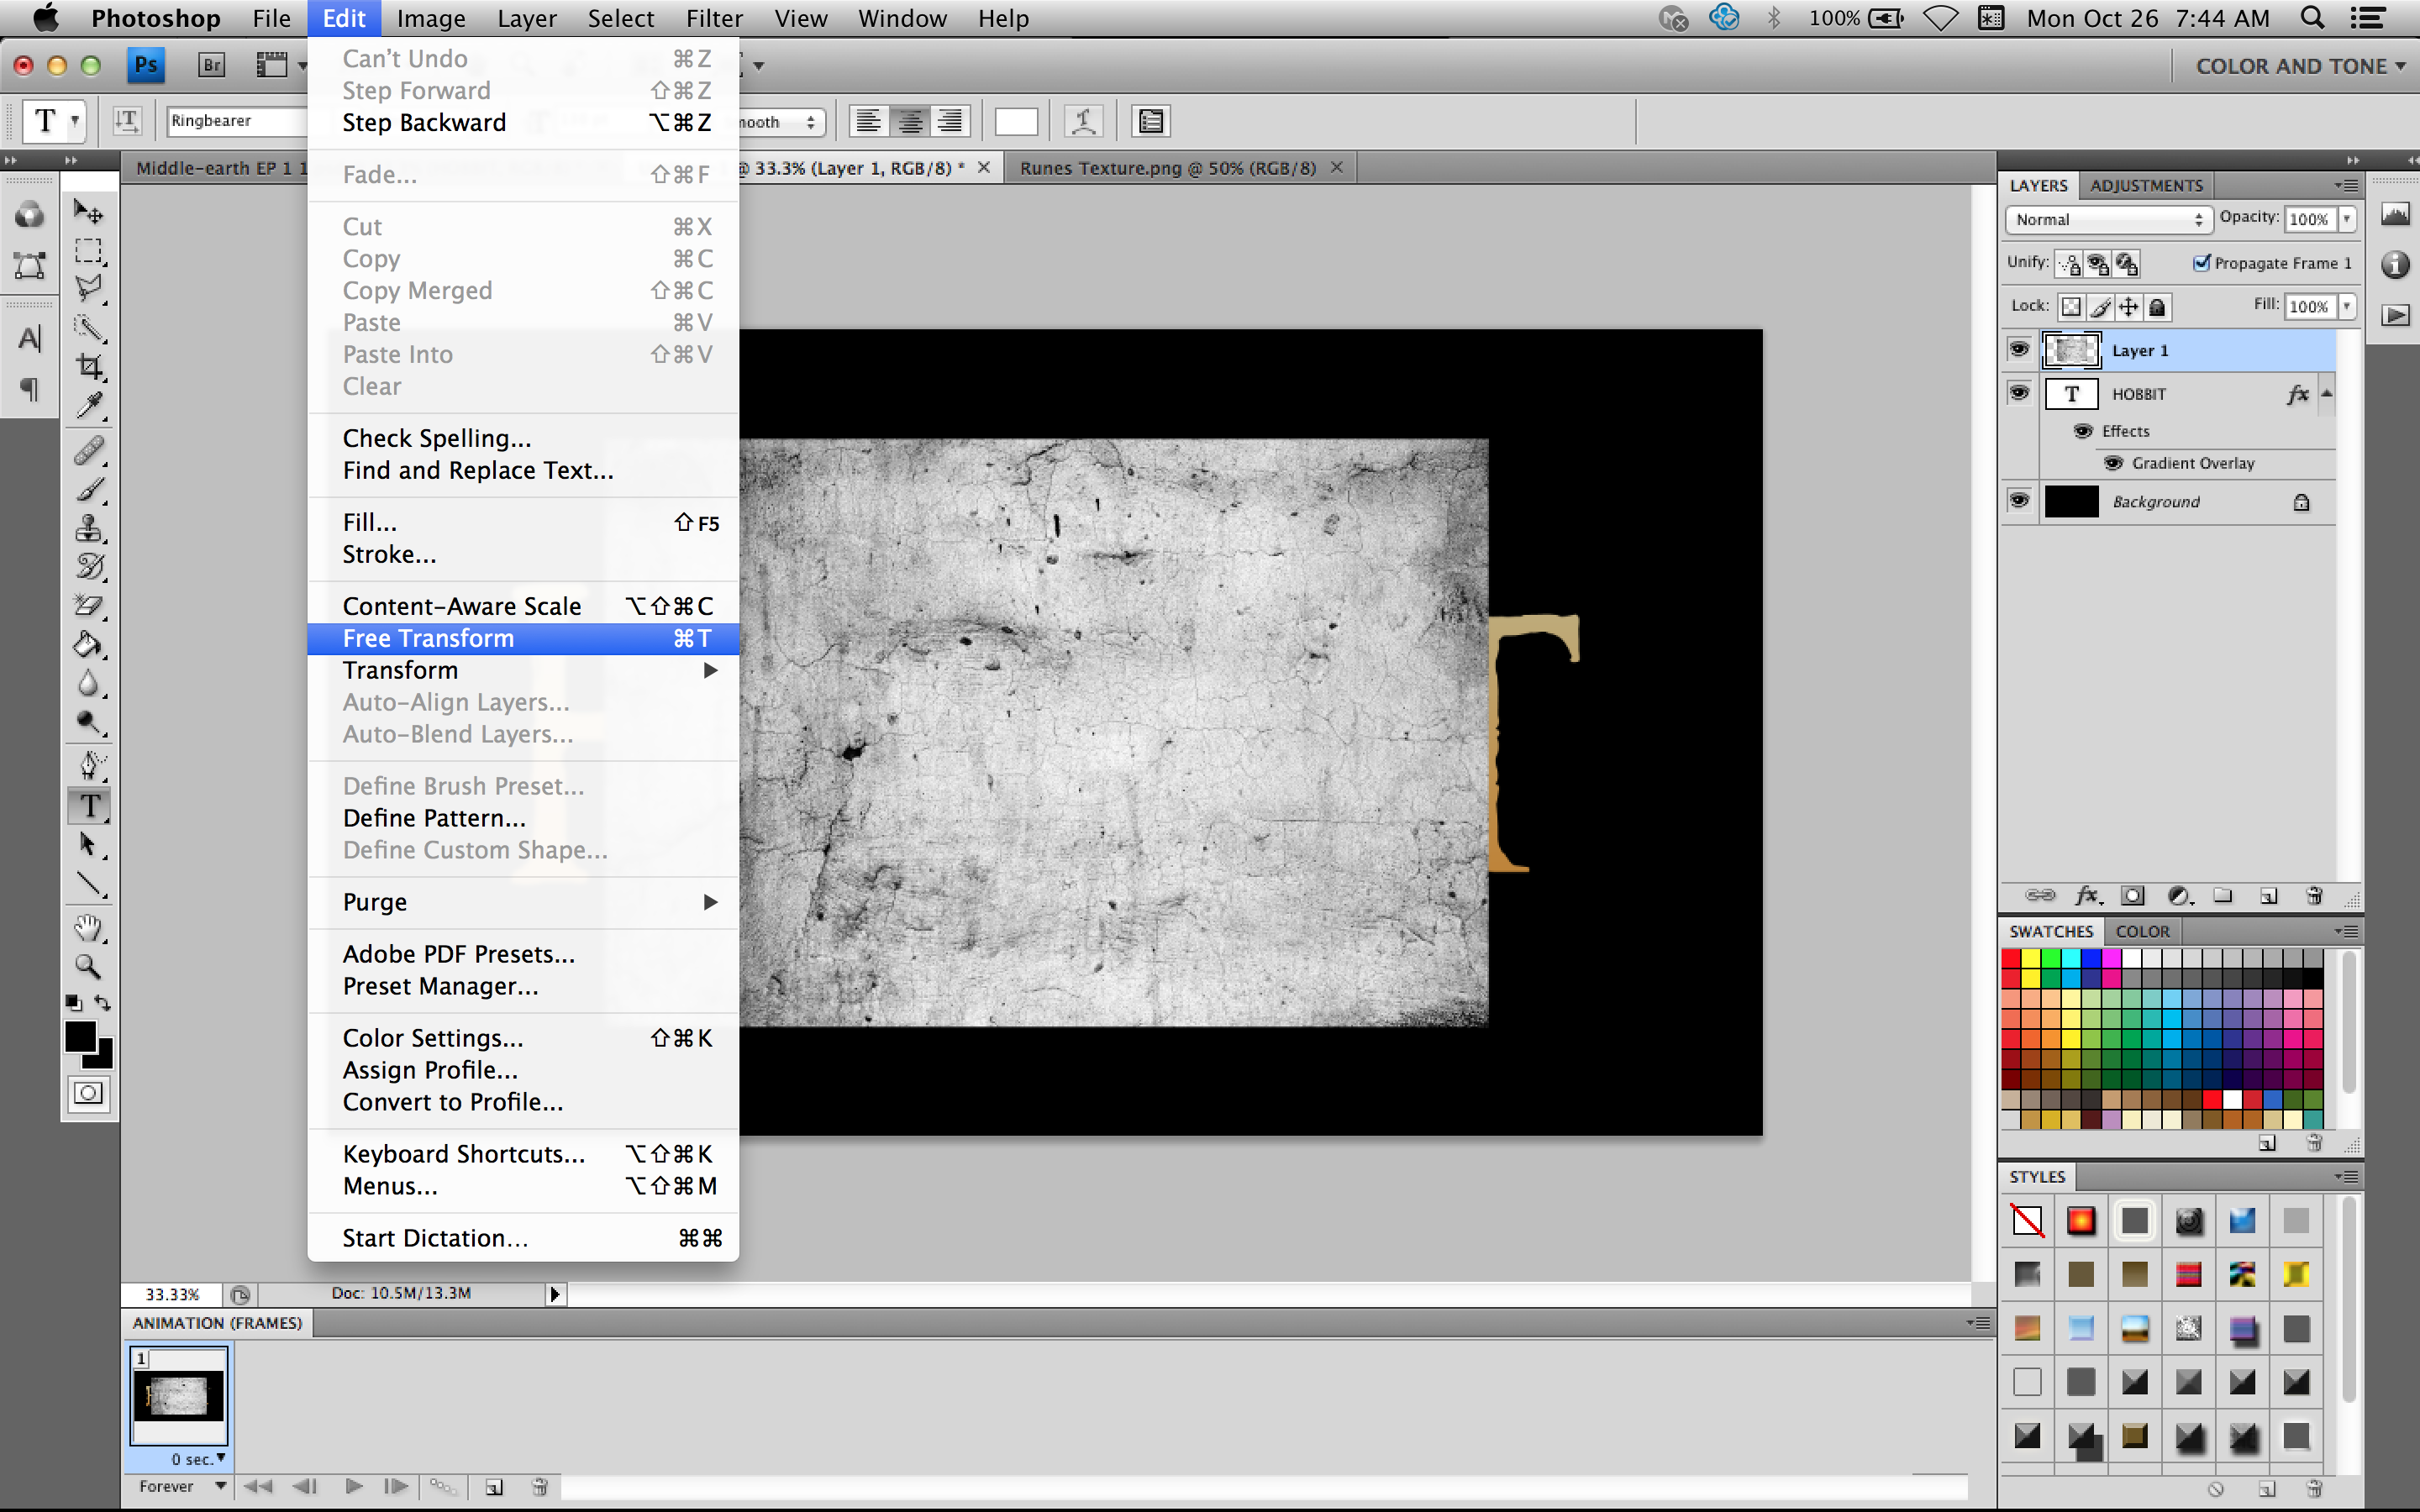
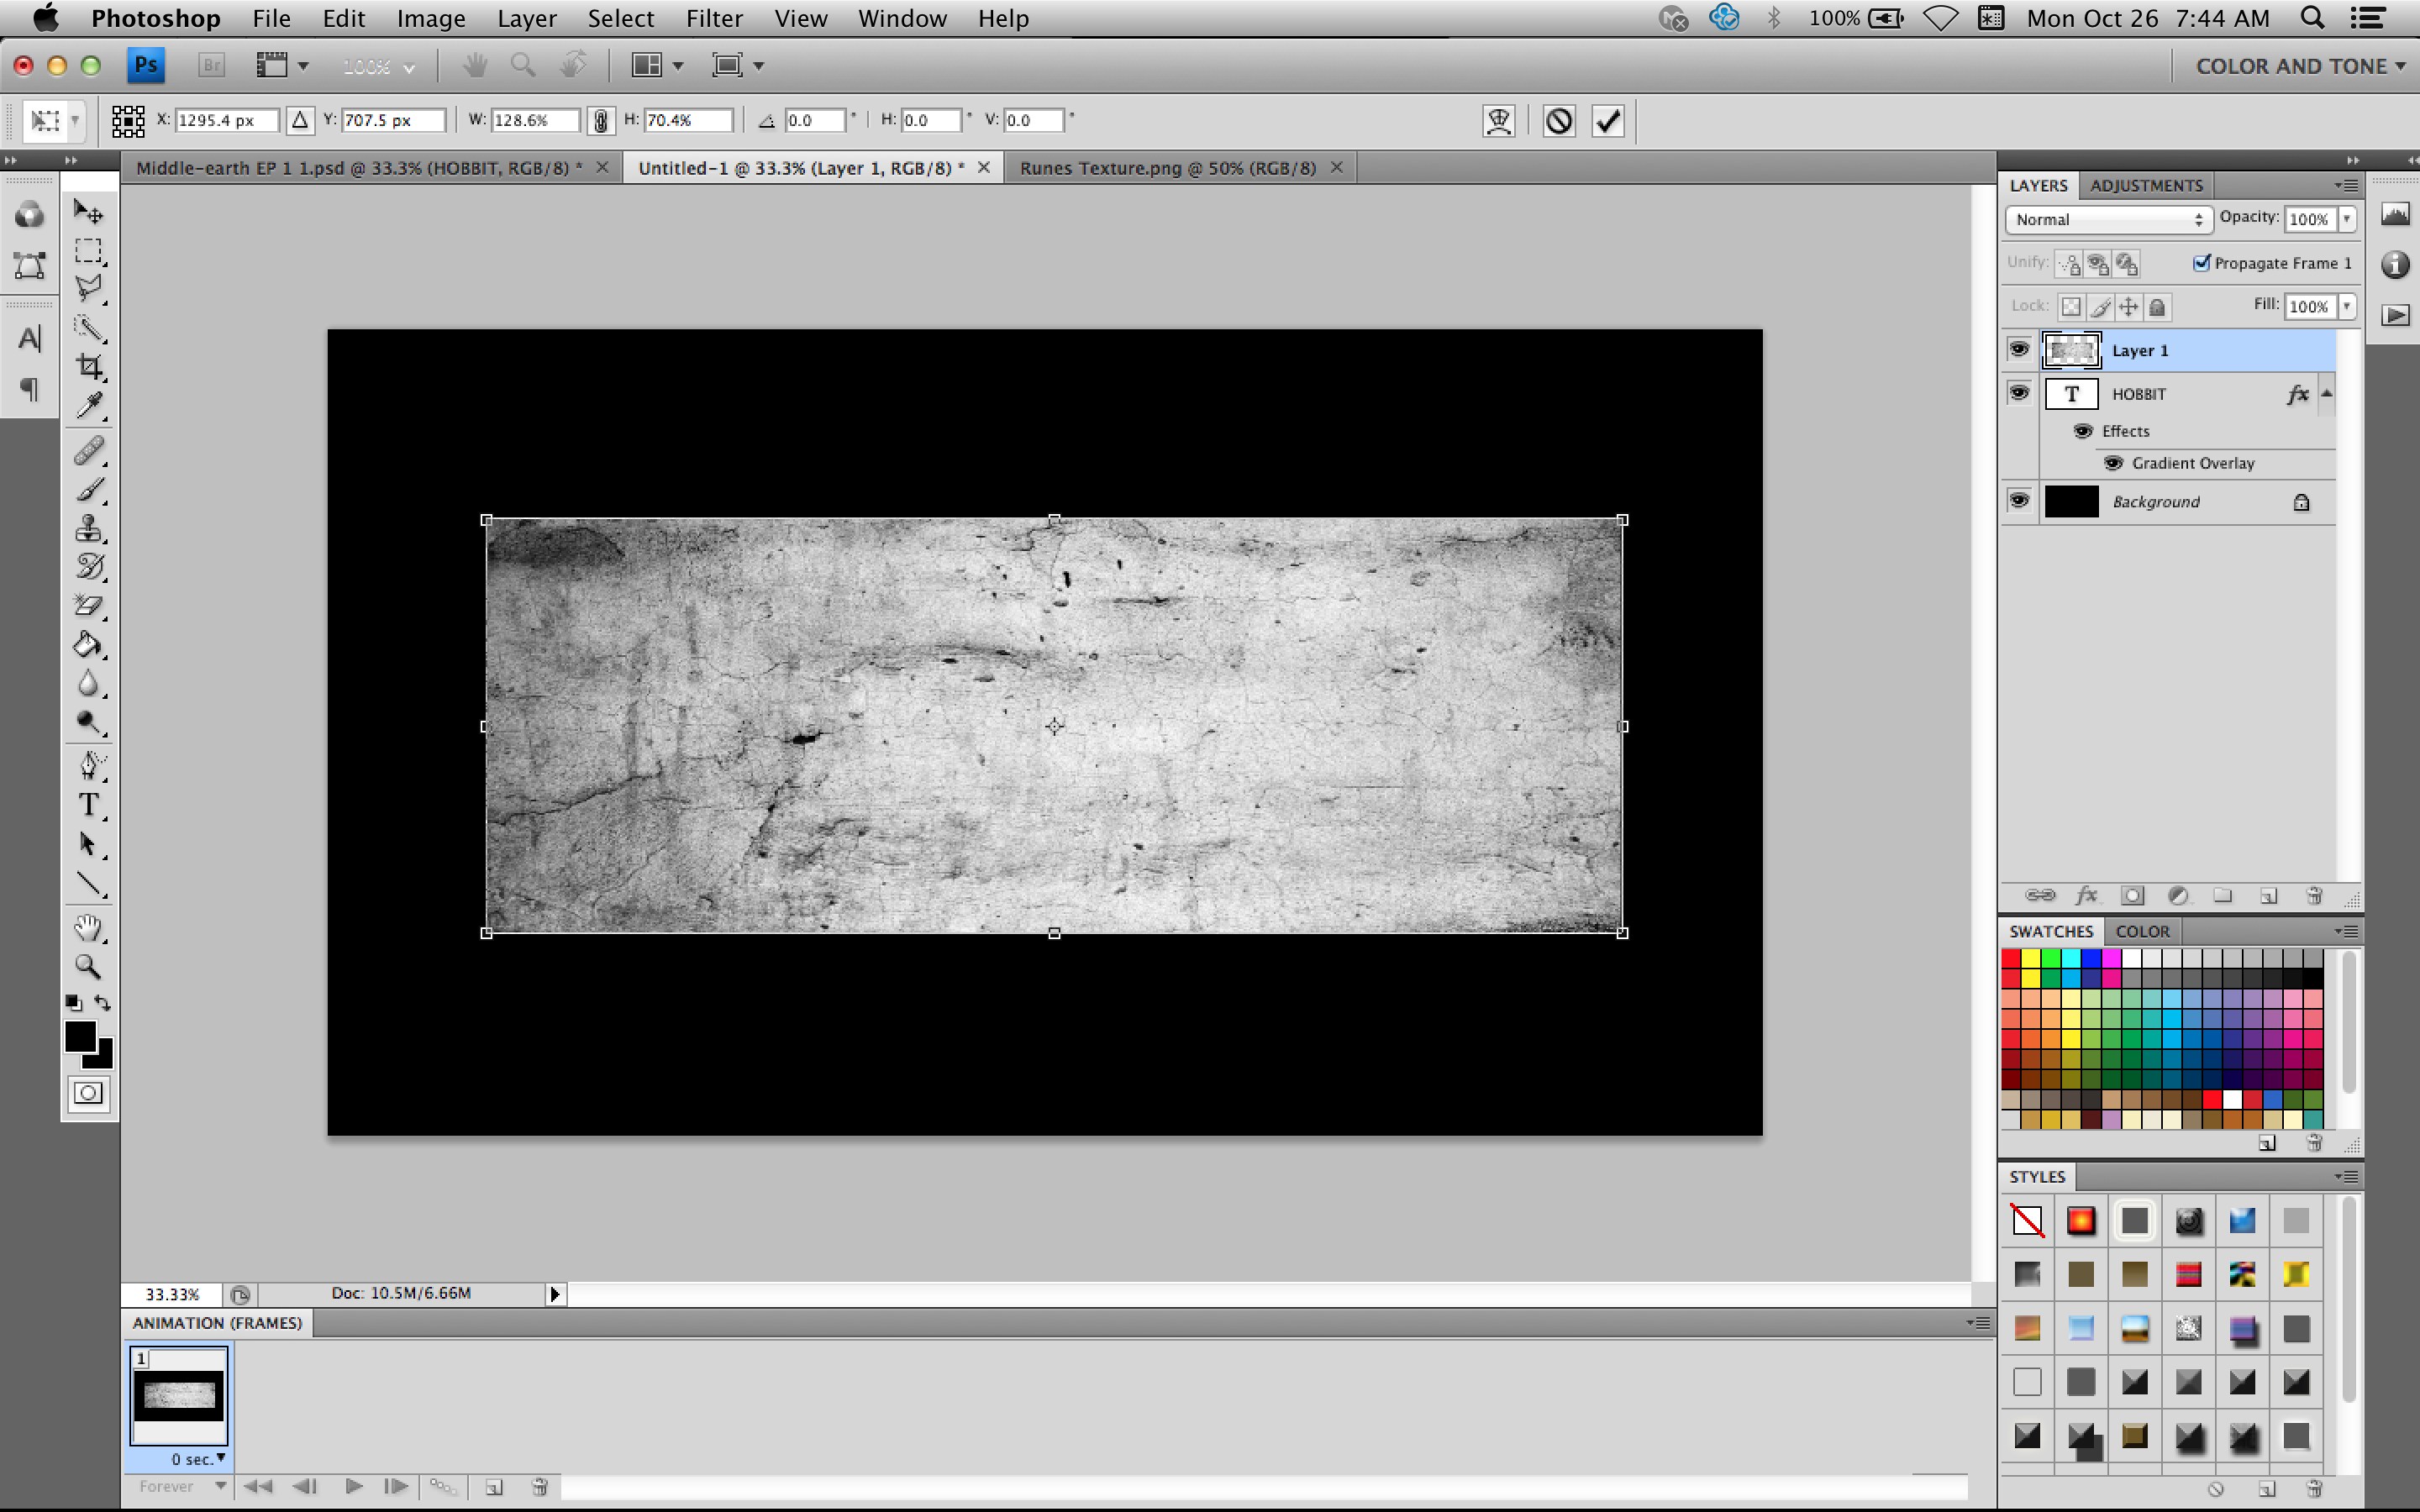
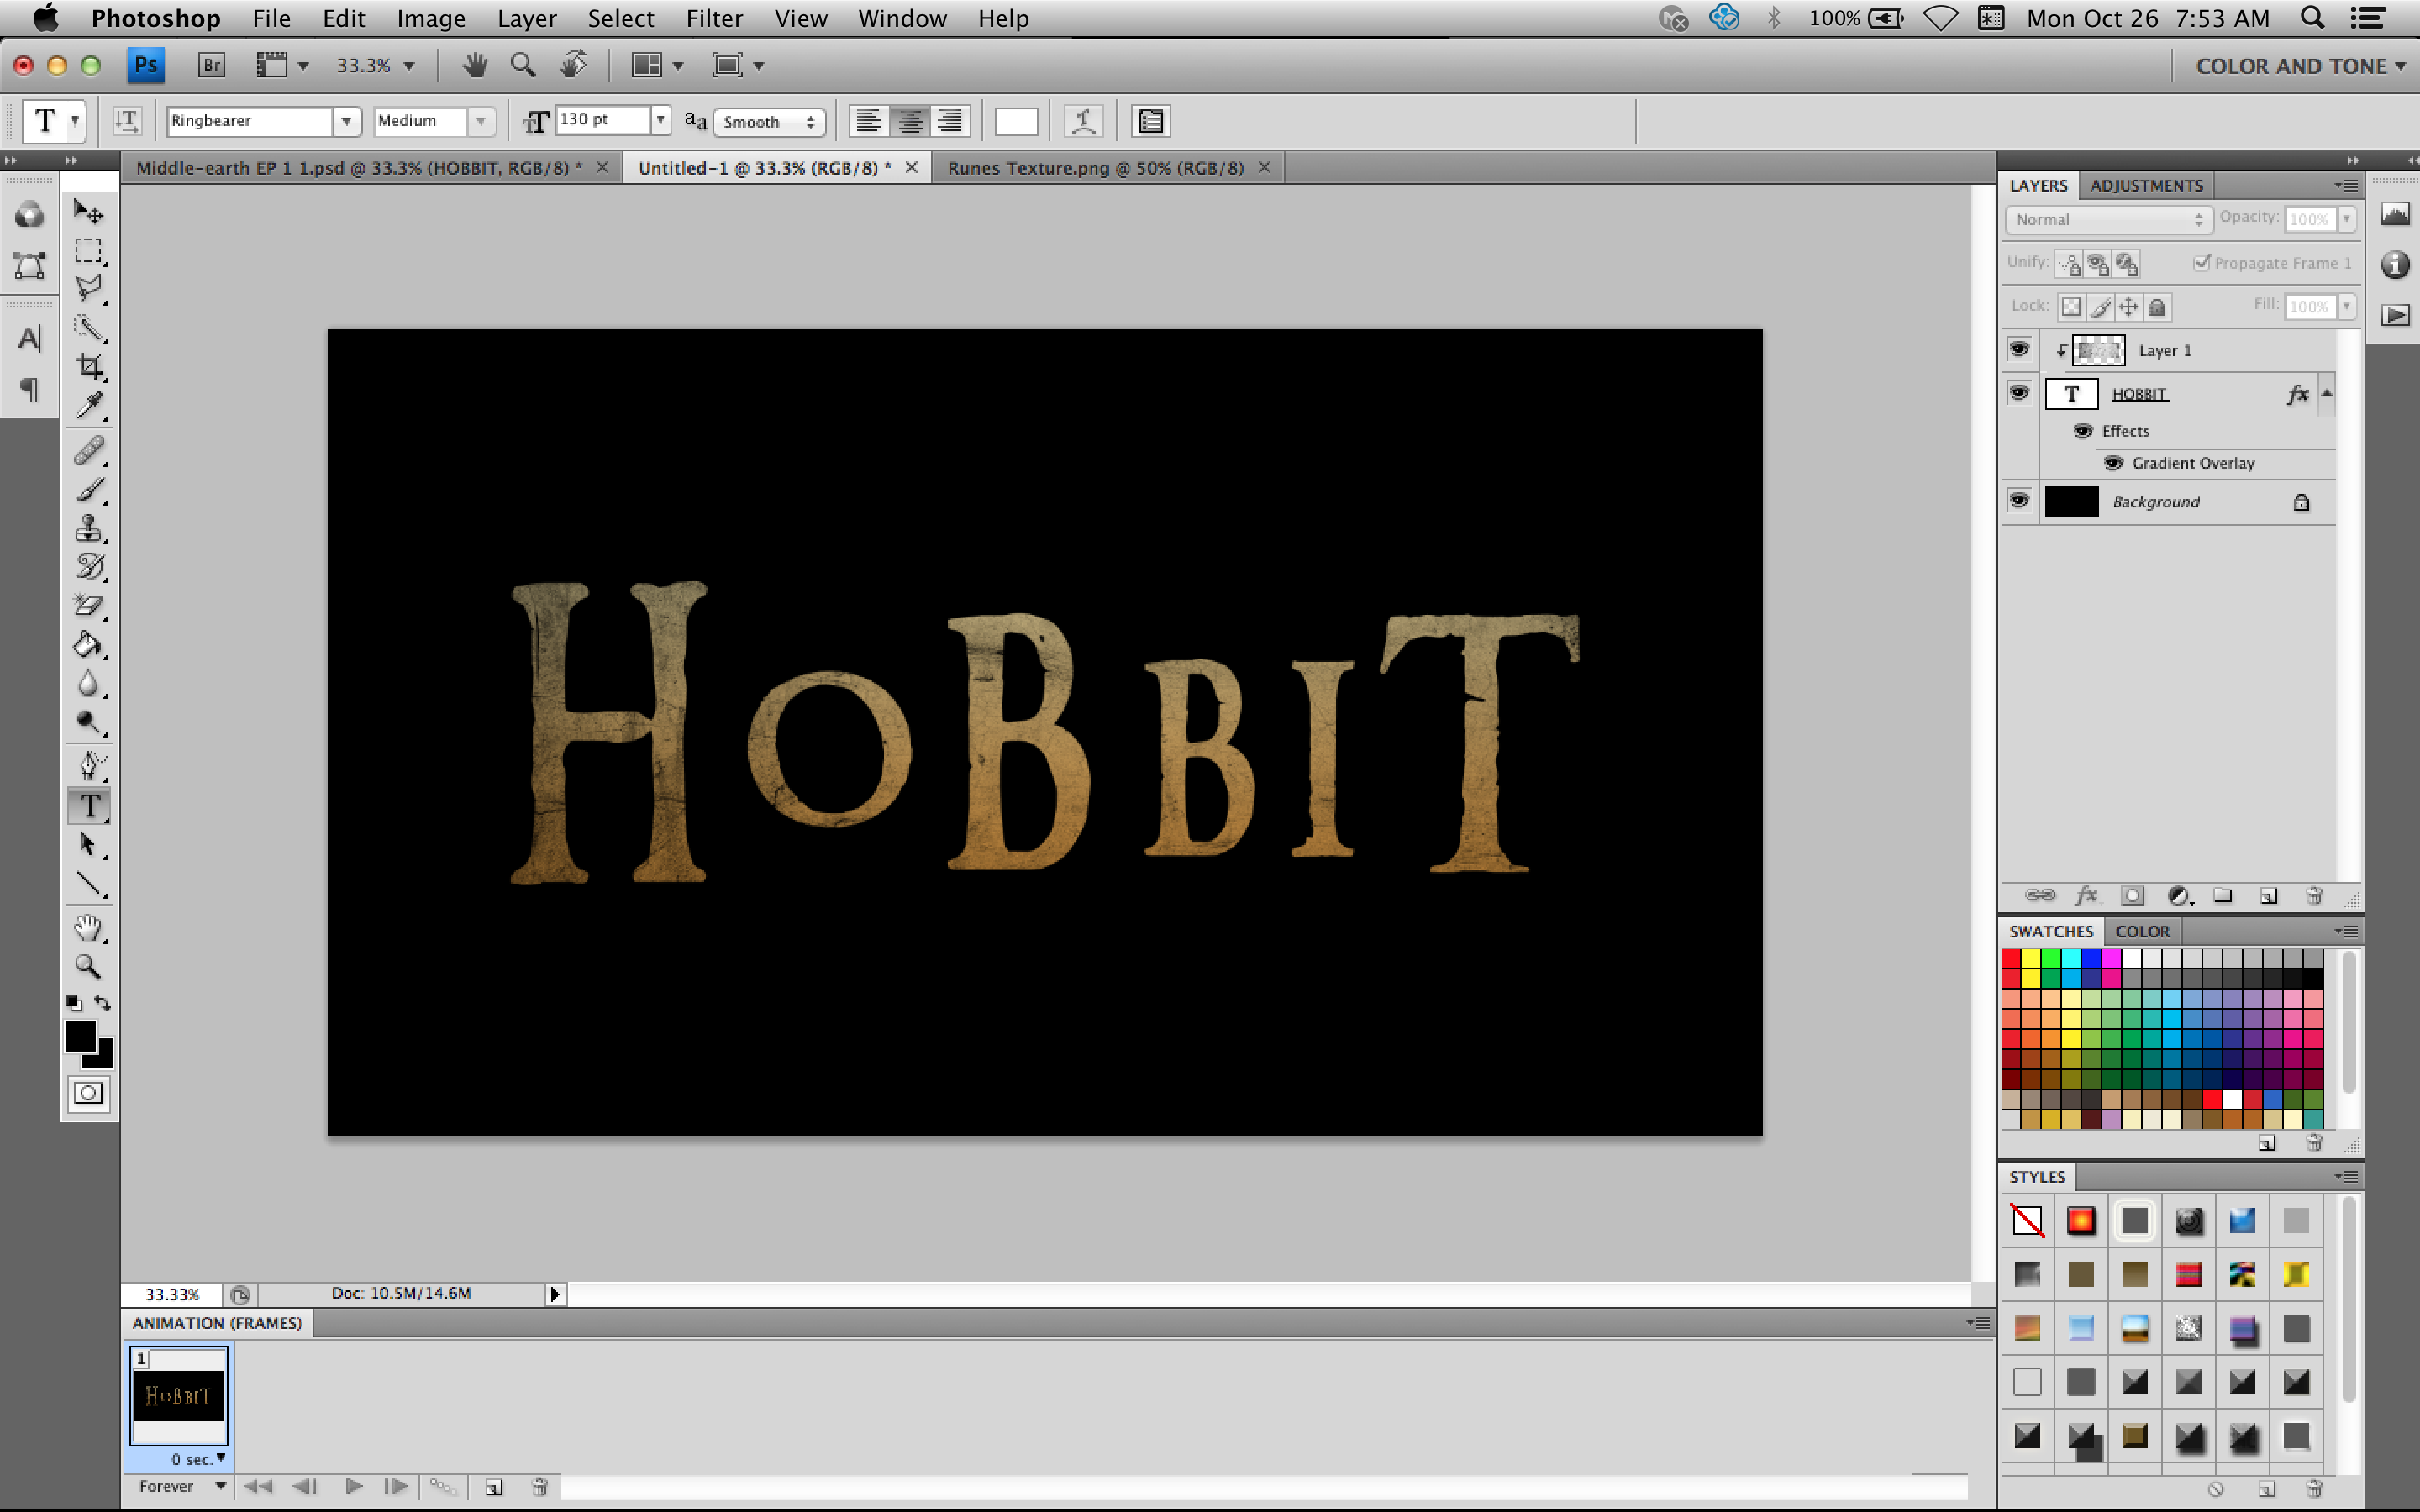
Alright. Now it's time to add the texture to the text. Find the texture above as an image. Right-click on the image and Save As. Then right click/open with/Adobe Photoshop. When that opens, strike command(control)+a and then switch tabs to return to your project. Then strike command(control)+v to past the image as a new layer. Using the free transform (Command[Control]+T), position the texture over your text. Then hit Enter or Return.
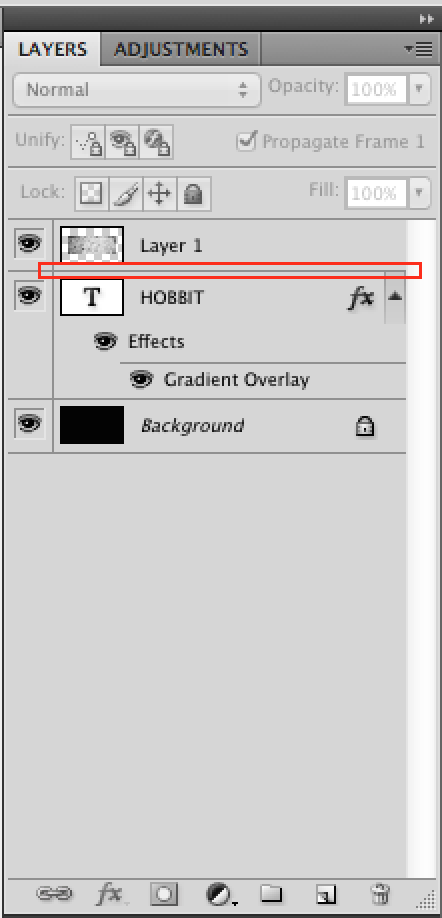
Go over to the layers panel. Hold down the Alt/Option key and click the line in between the texture and text. This will insert the layer into the other. You can now see the texture showing through the text. Notice you can still see the colour gradient we added in Step 1. This is because we set the blending options to Multiply.
Step 3: Chisel Effect
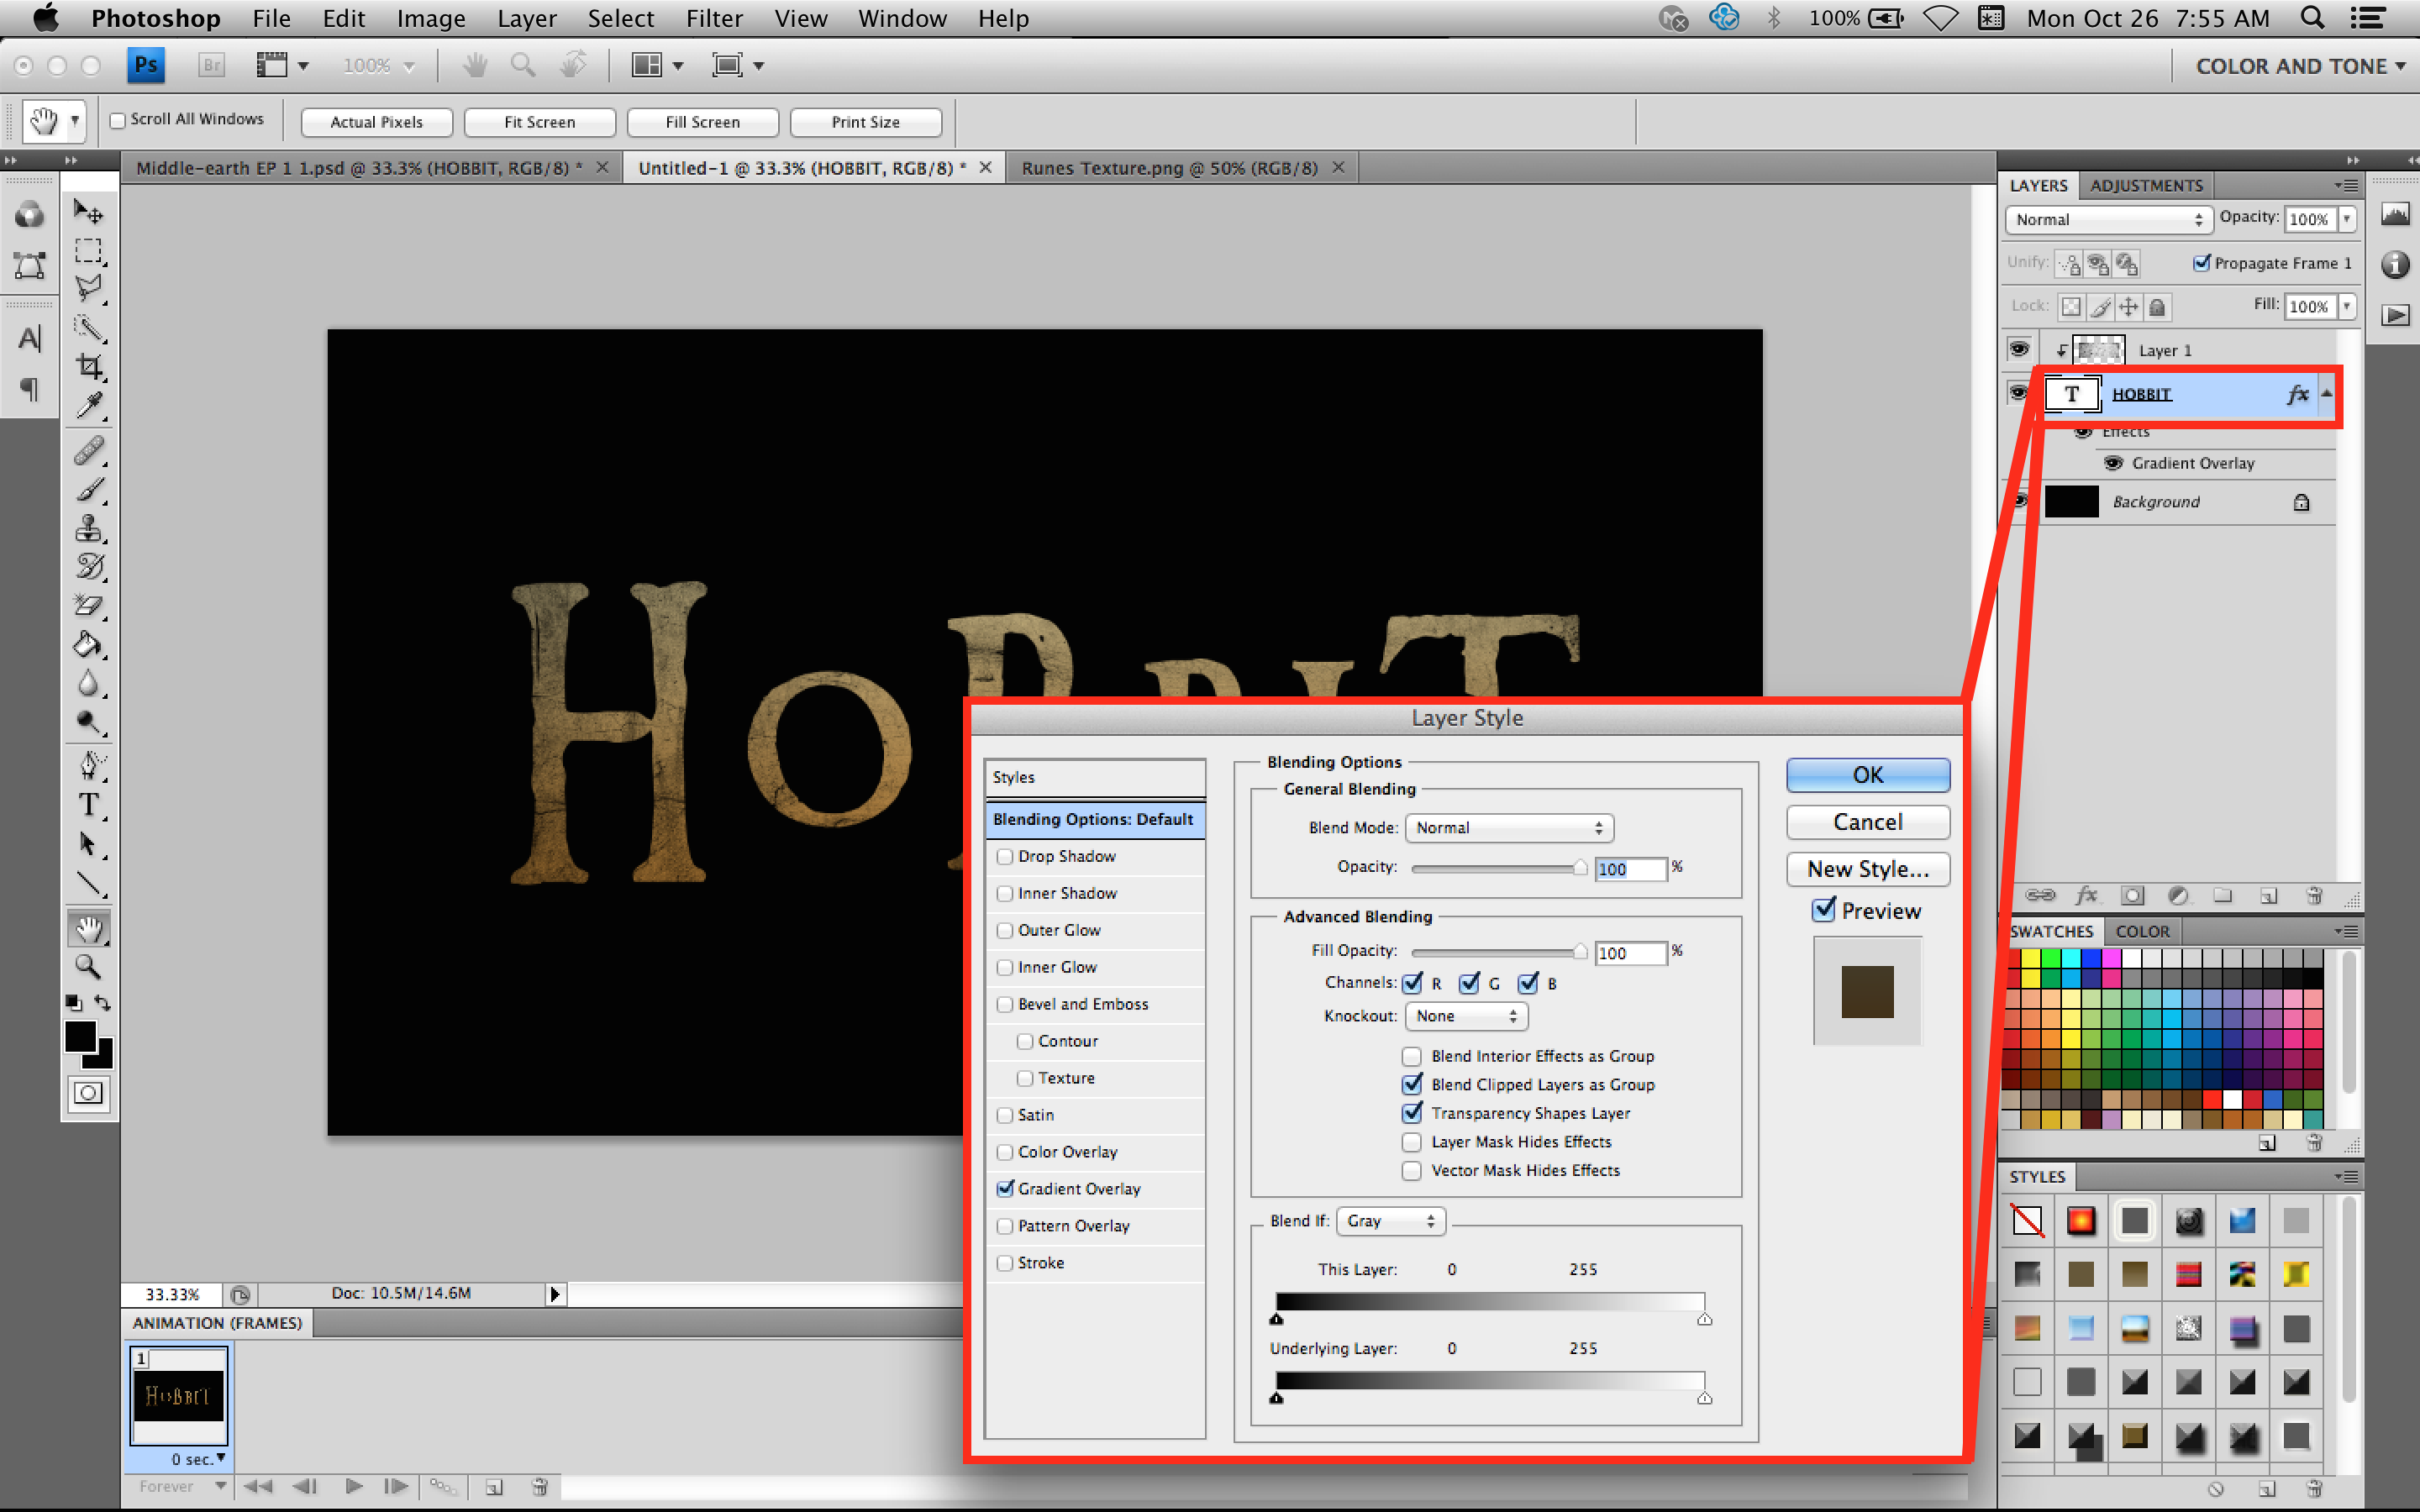
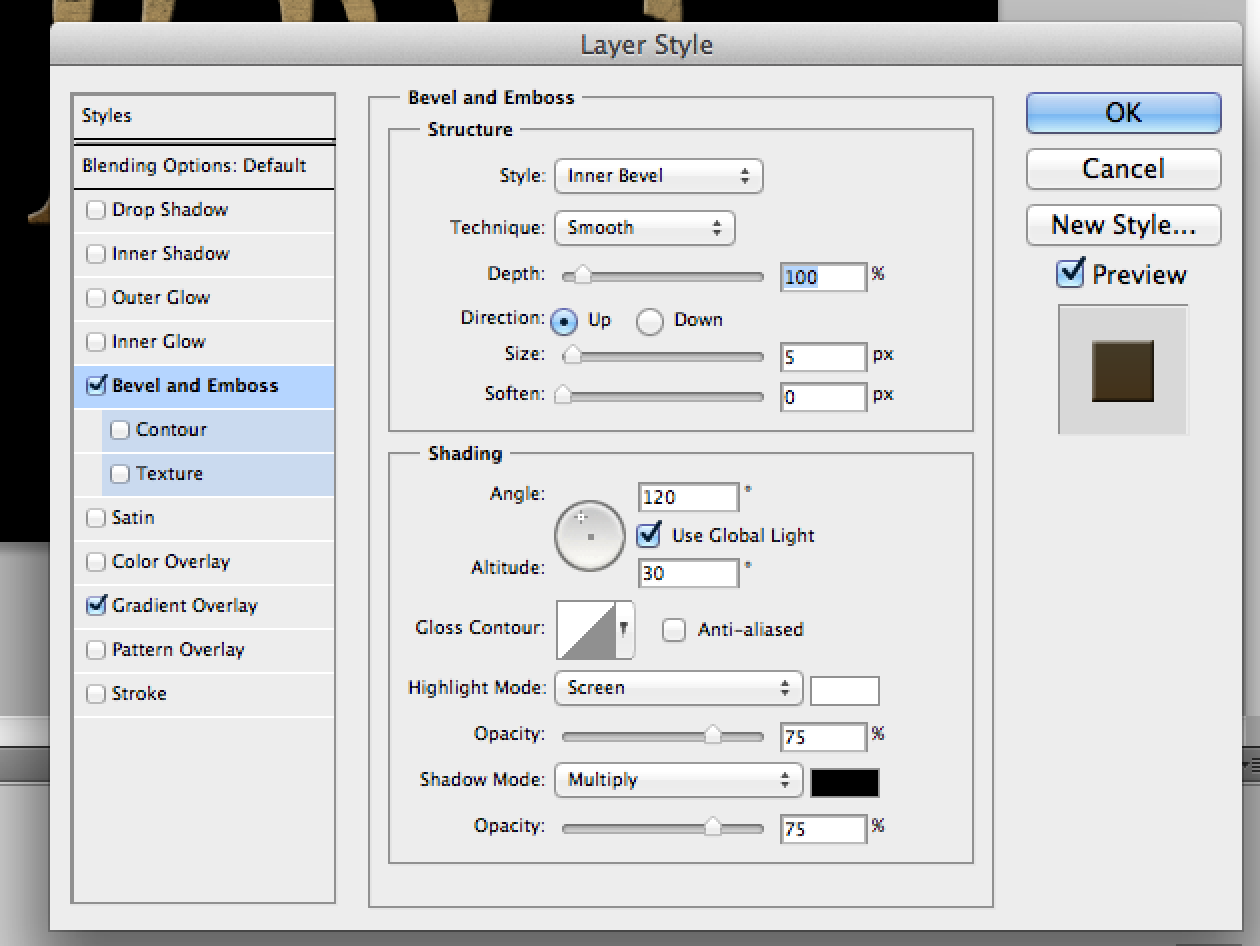
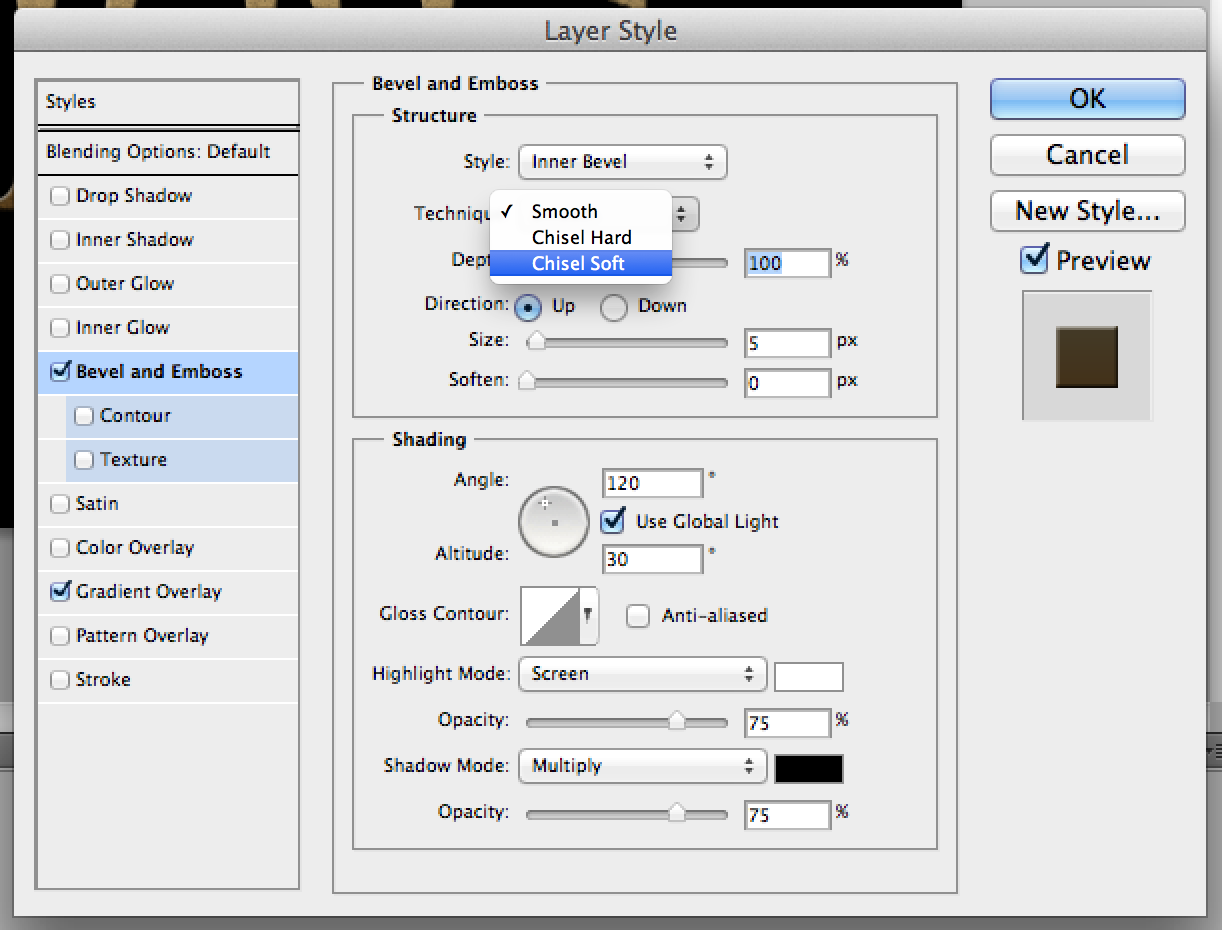
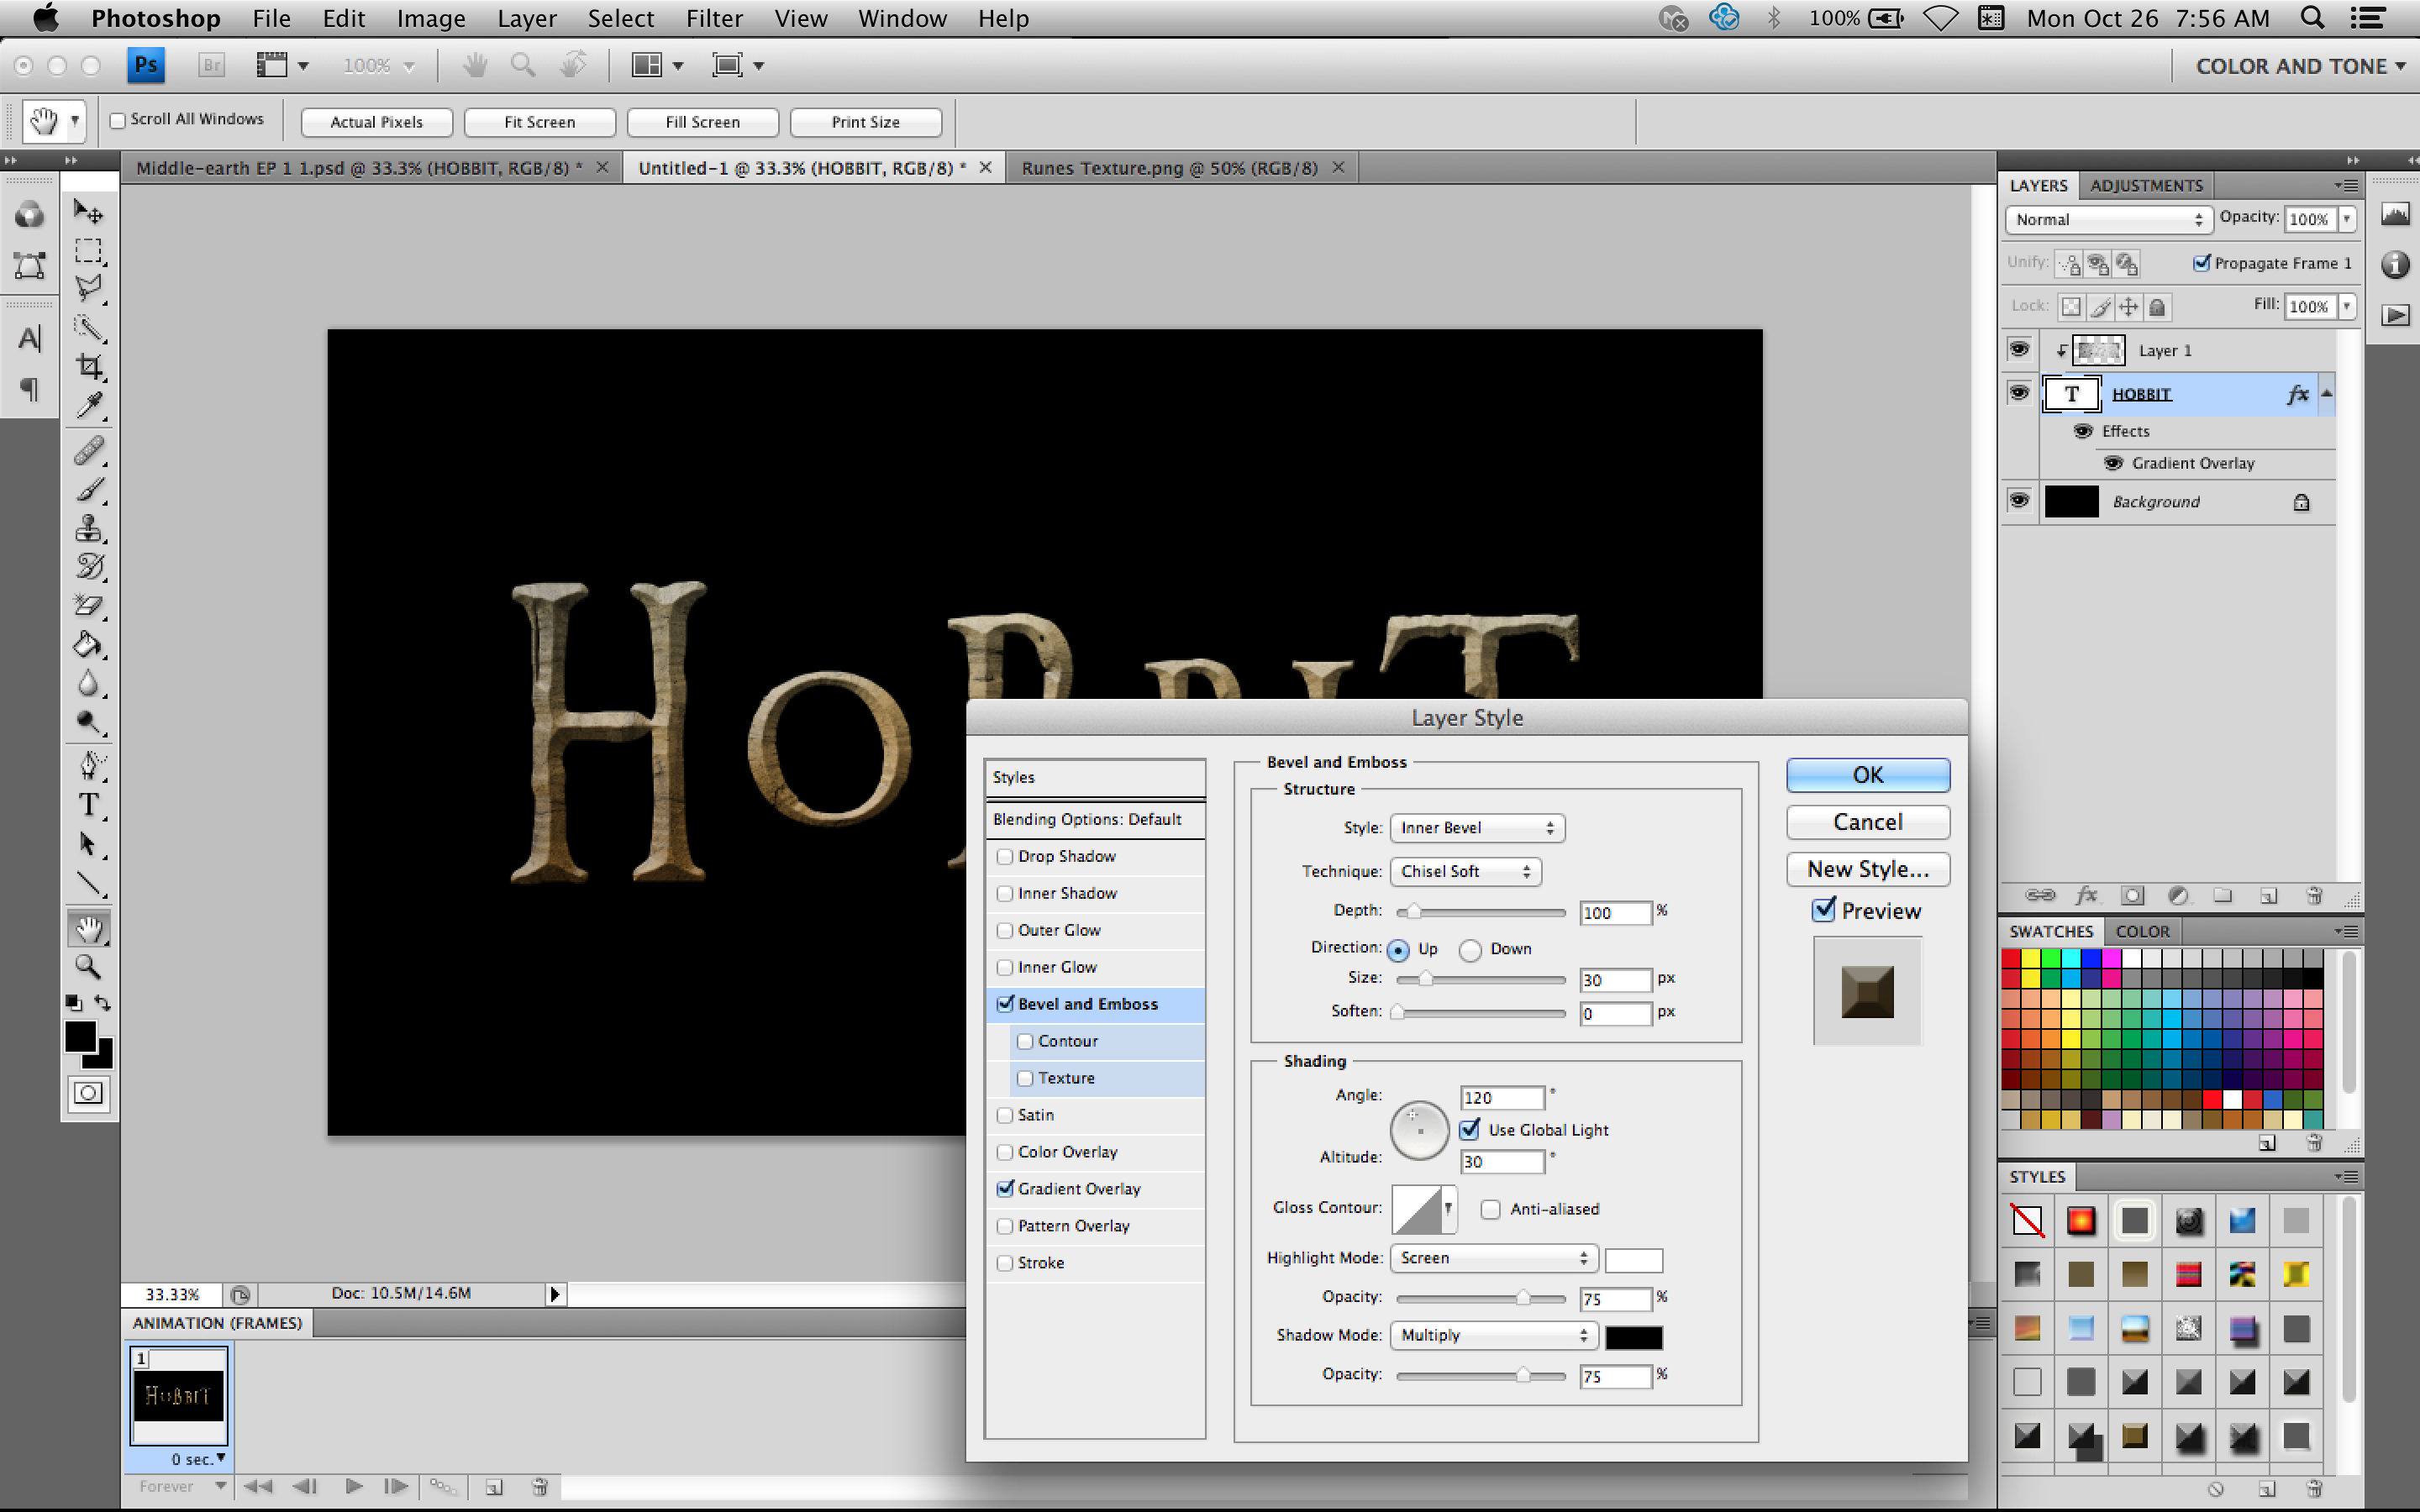
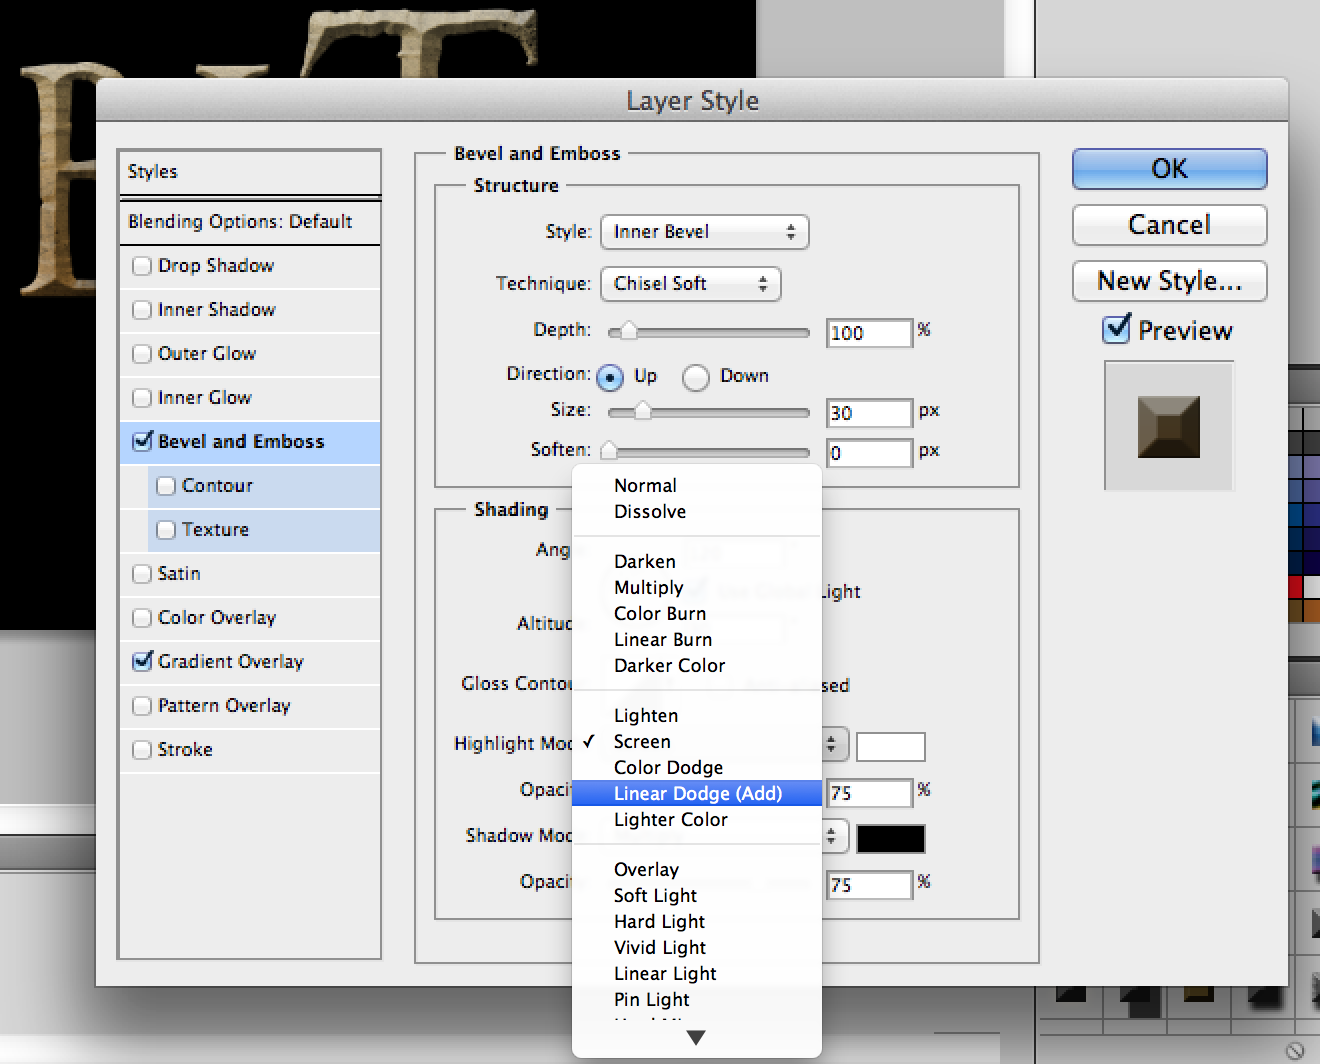
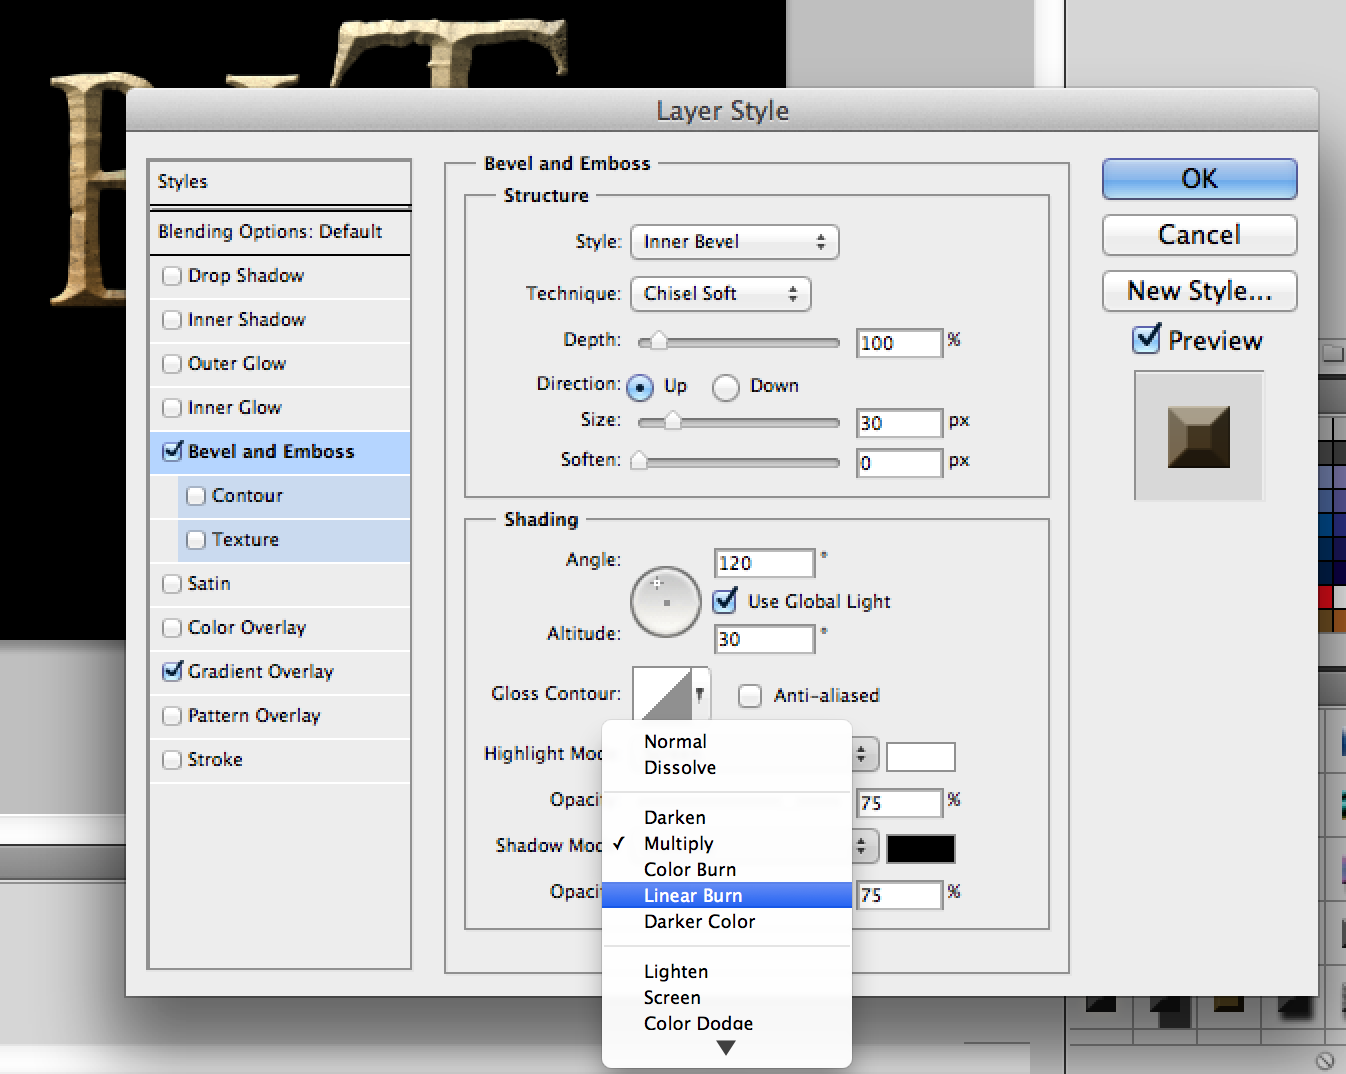
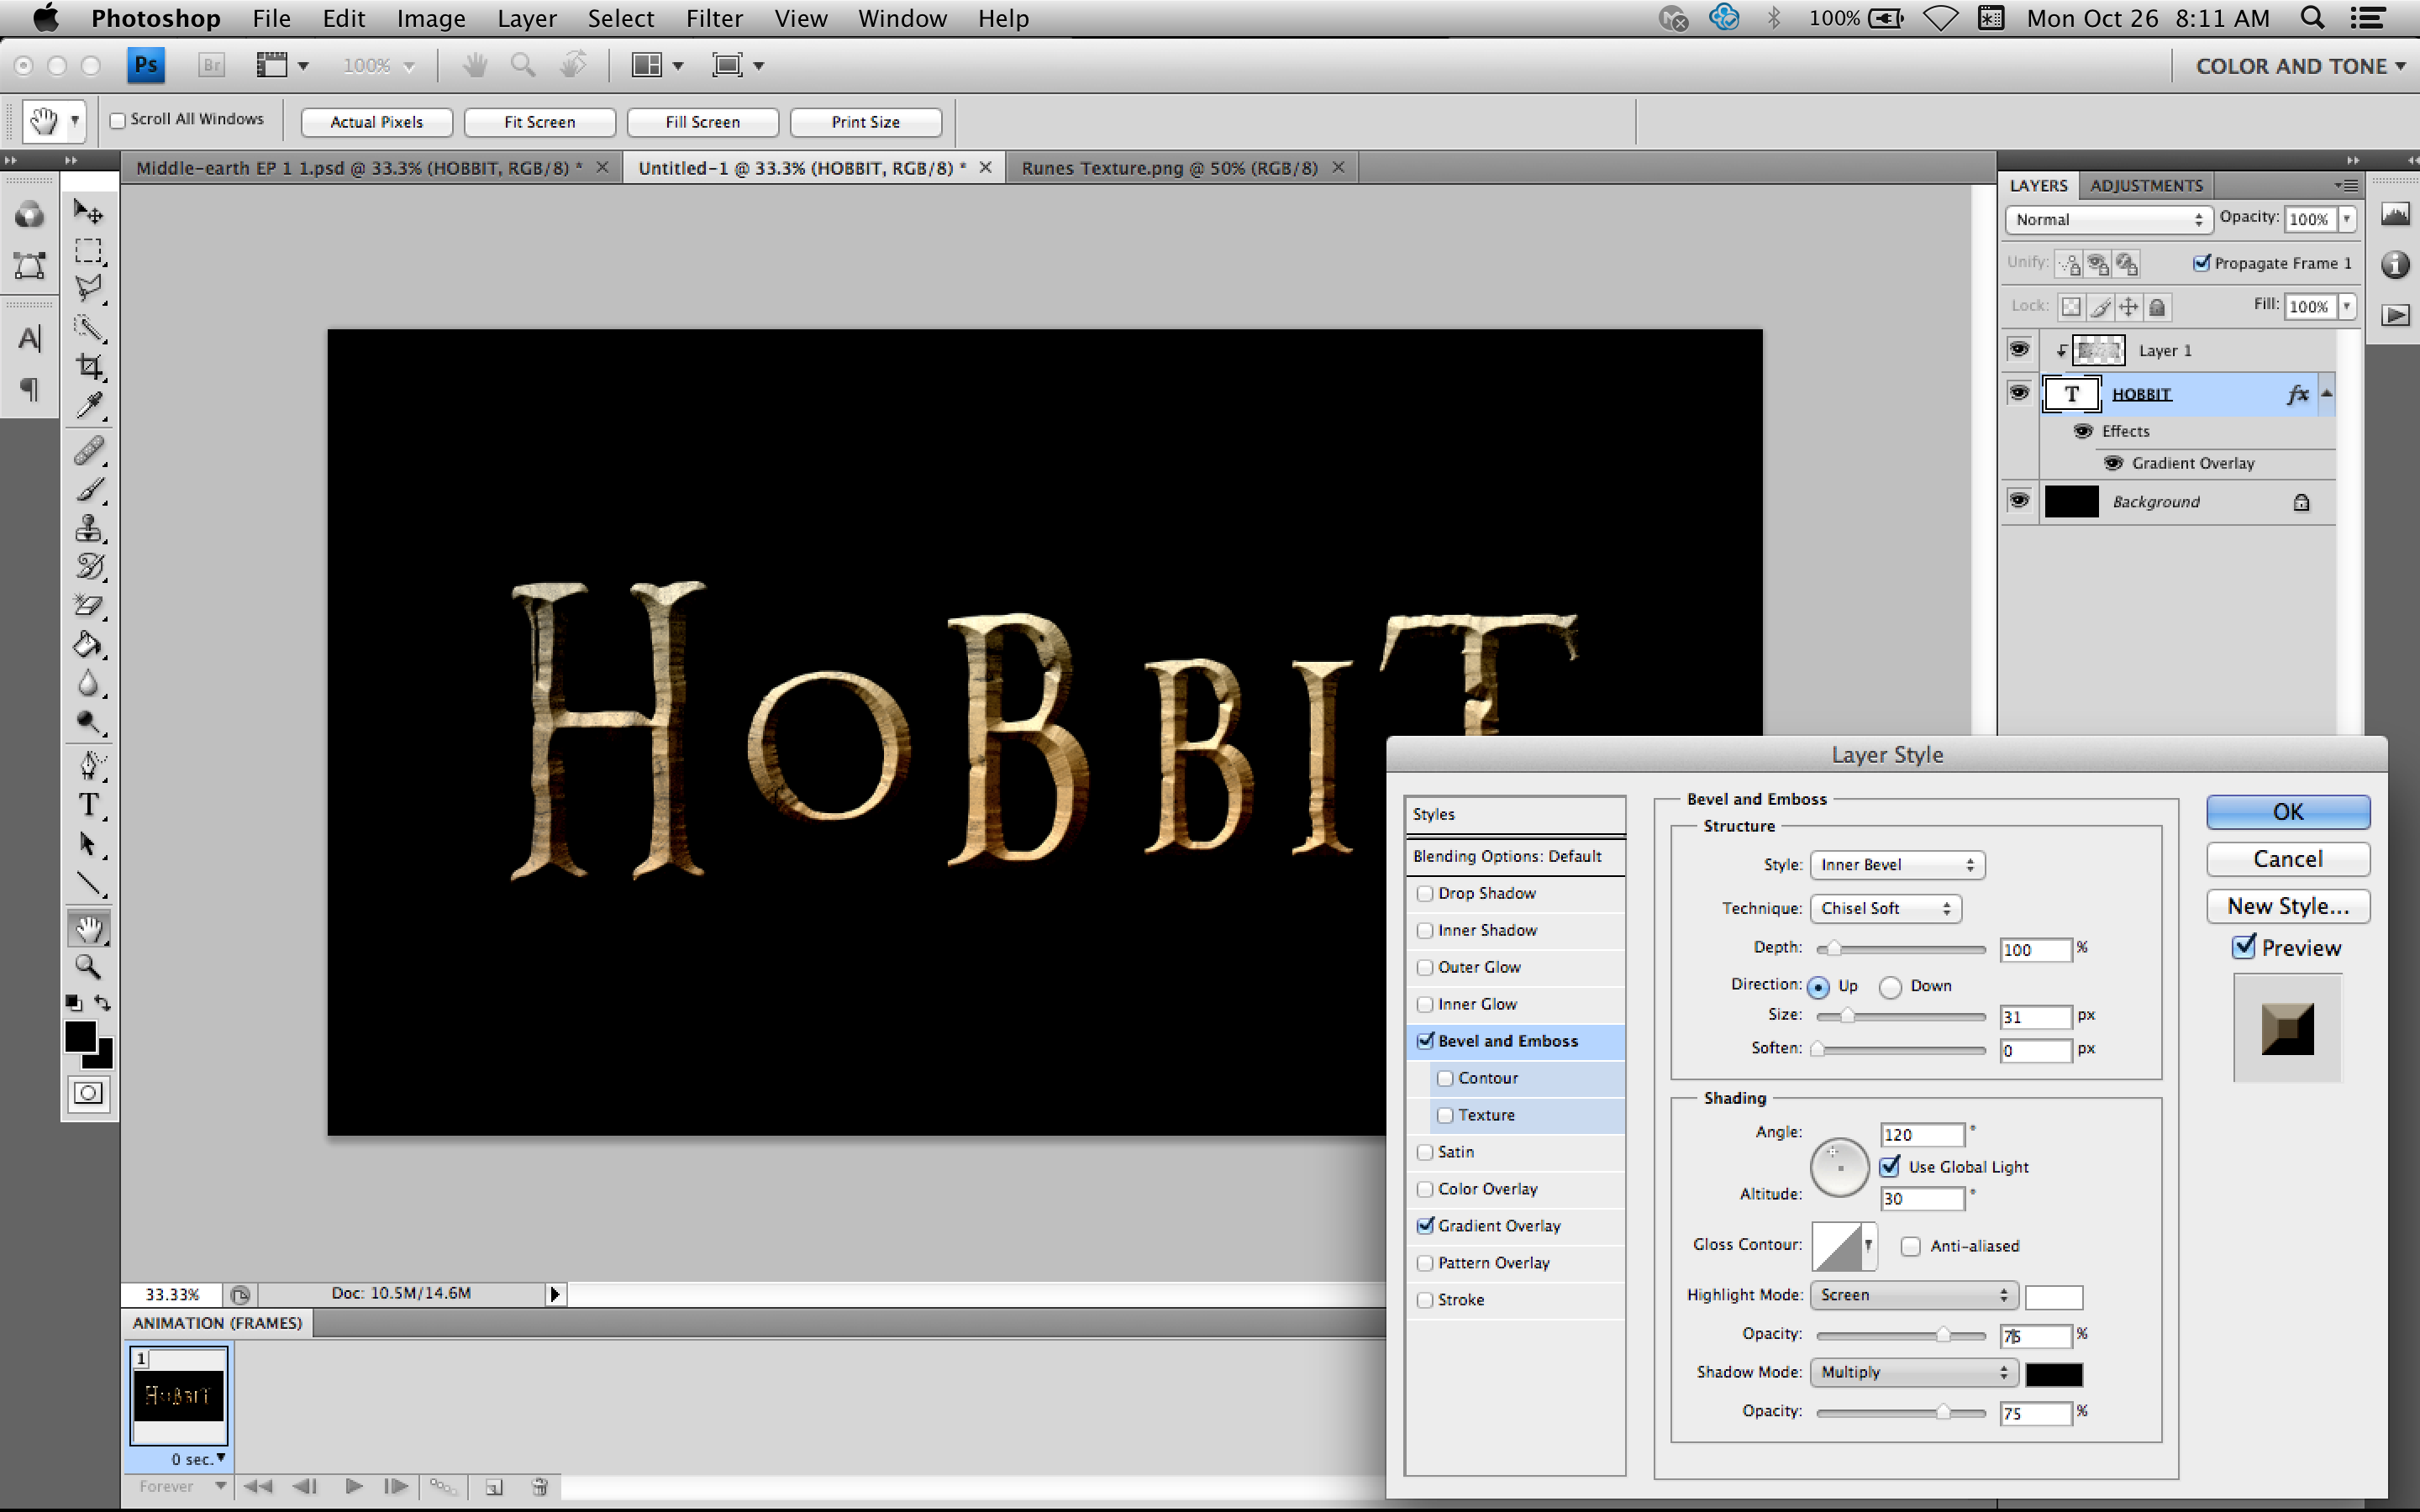
Double click on the text layer to bring up the Layer Style editor. Then click on "Bevel and Emboss". Change the technique to Chisel Soft, and the size to 30. Then change the Highlight Mode to Linear Dodge (Add). Change the Shadow Mode to Linear Burn. Now click OK to apply these changes. It's starting to look pretty good!
Step 4: Colouring the Texture
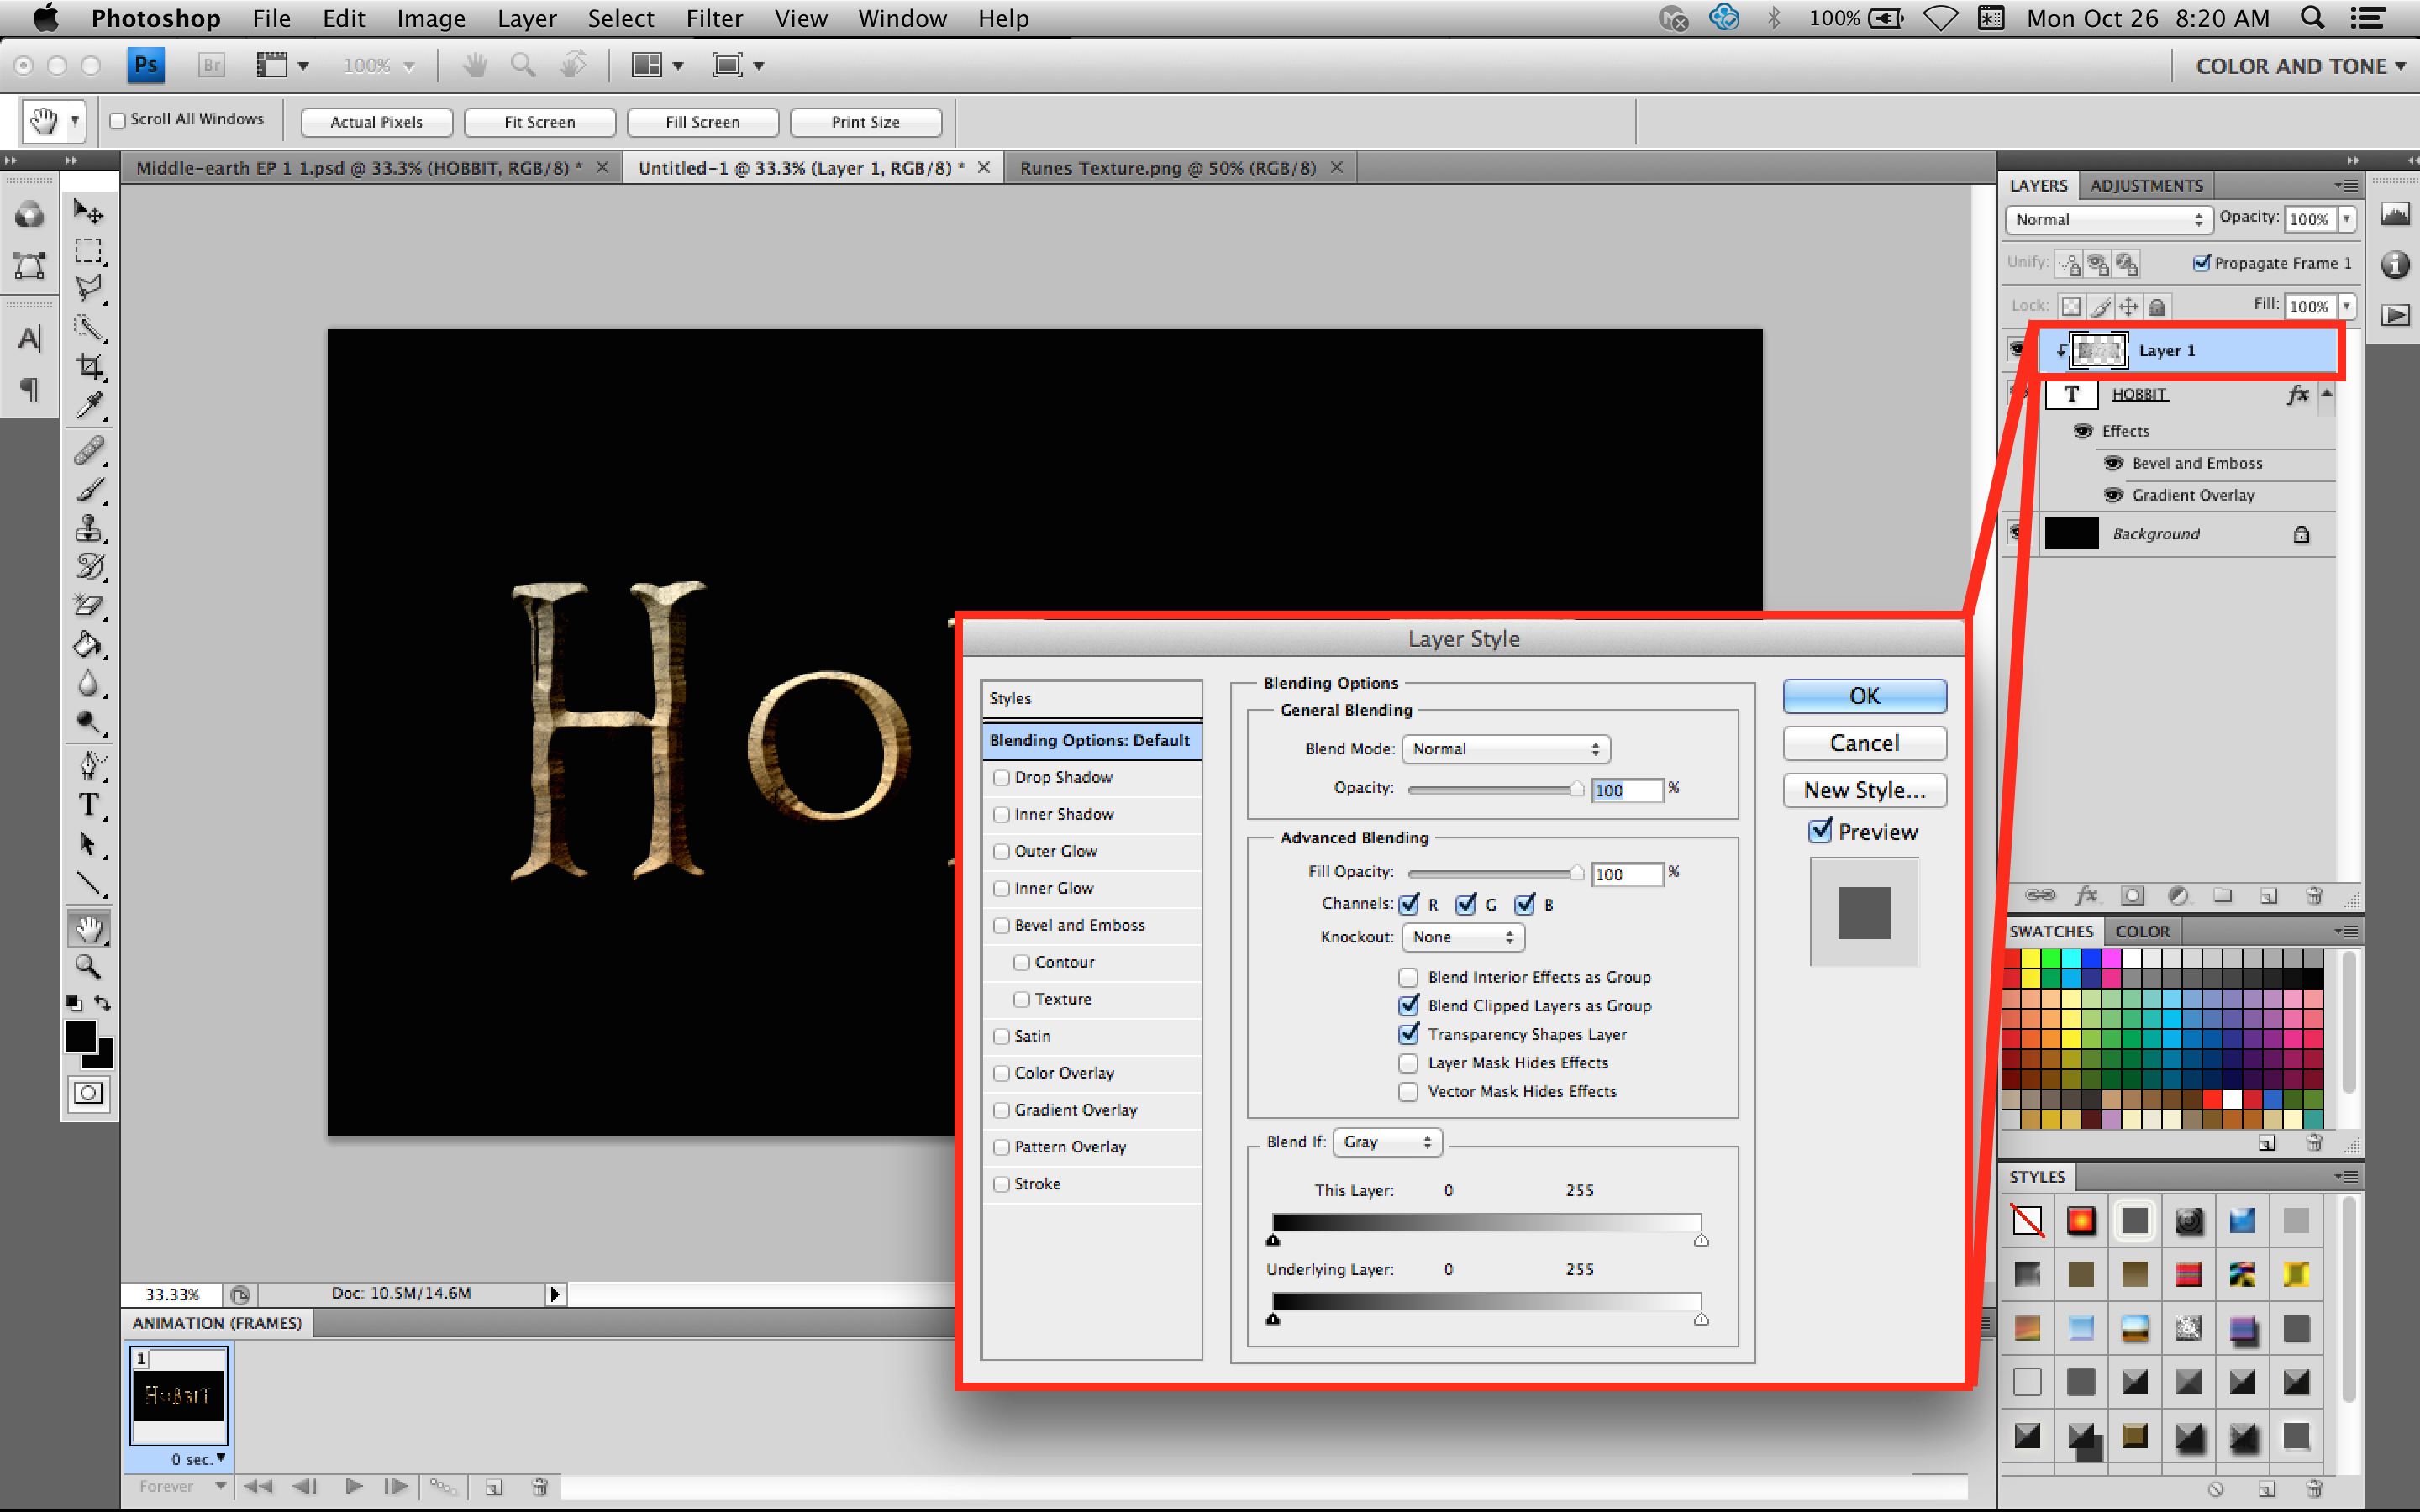
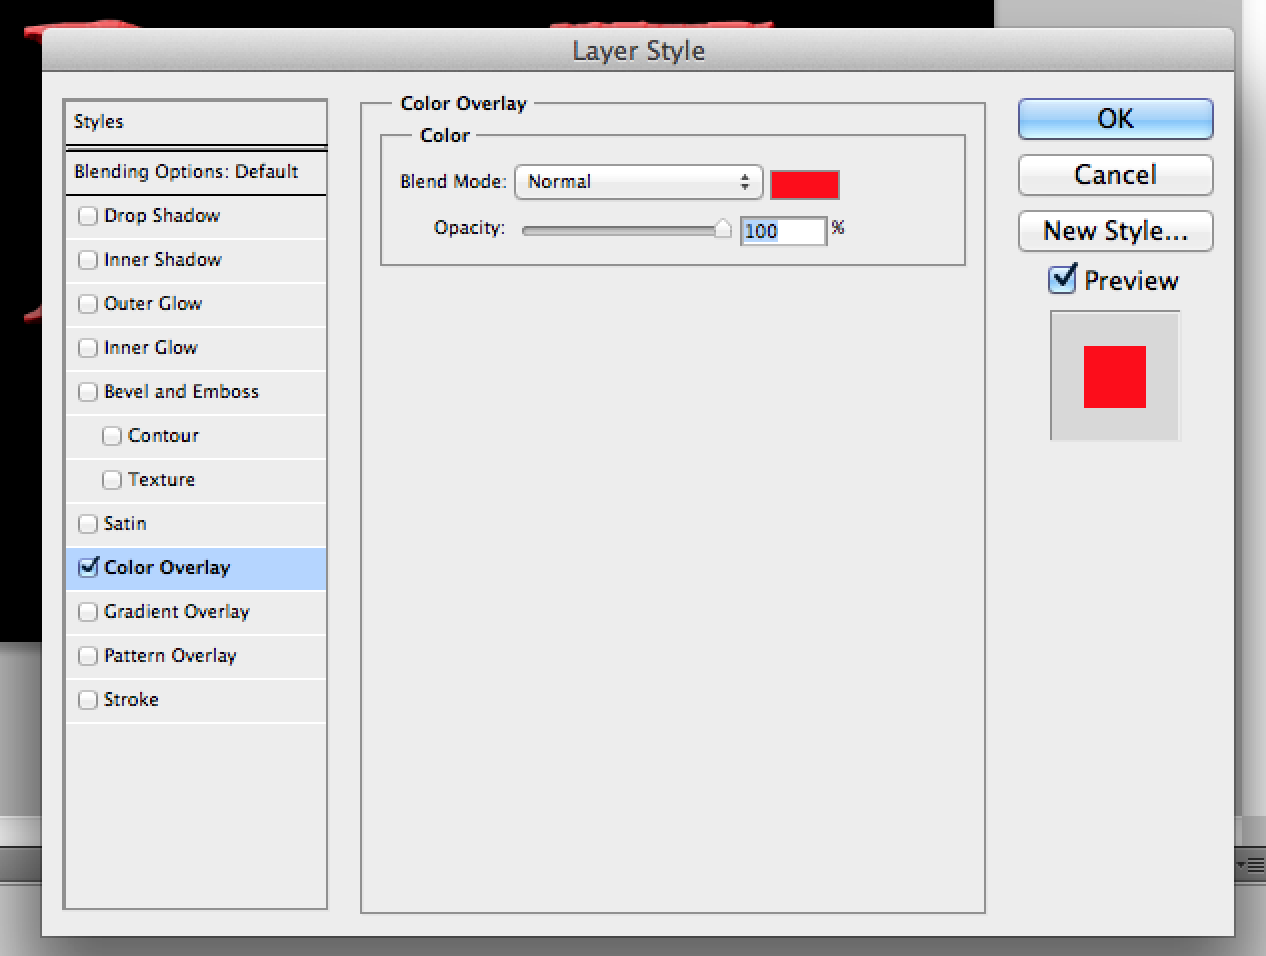
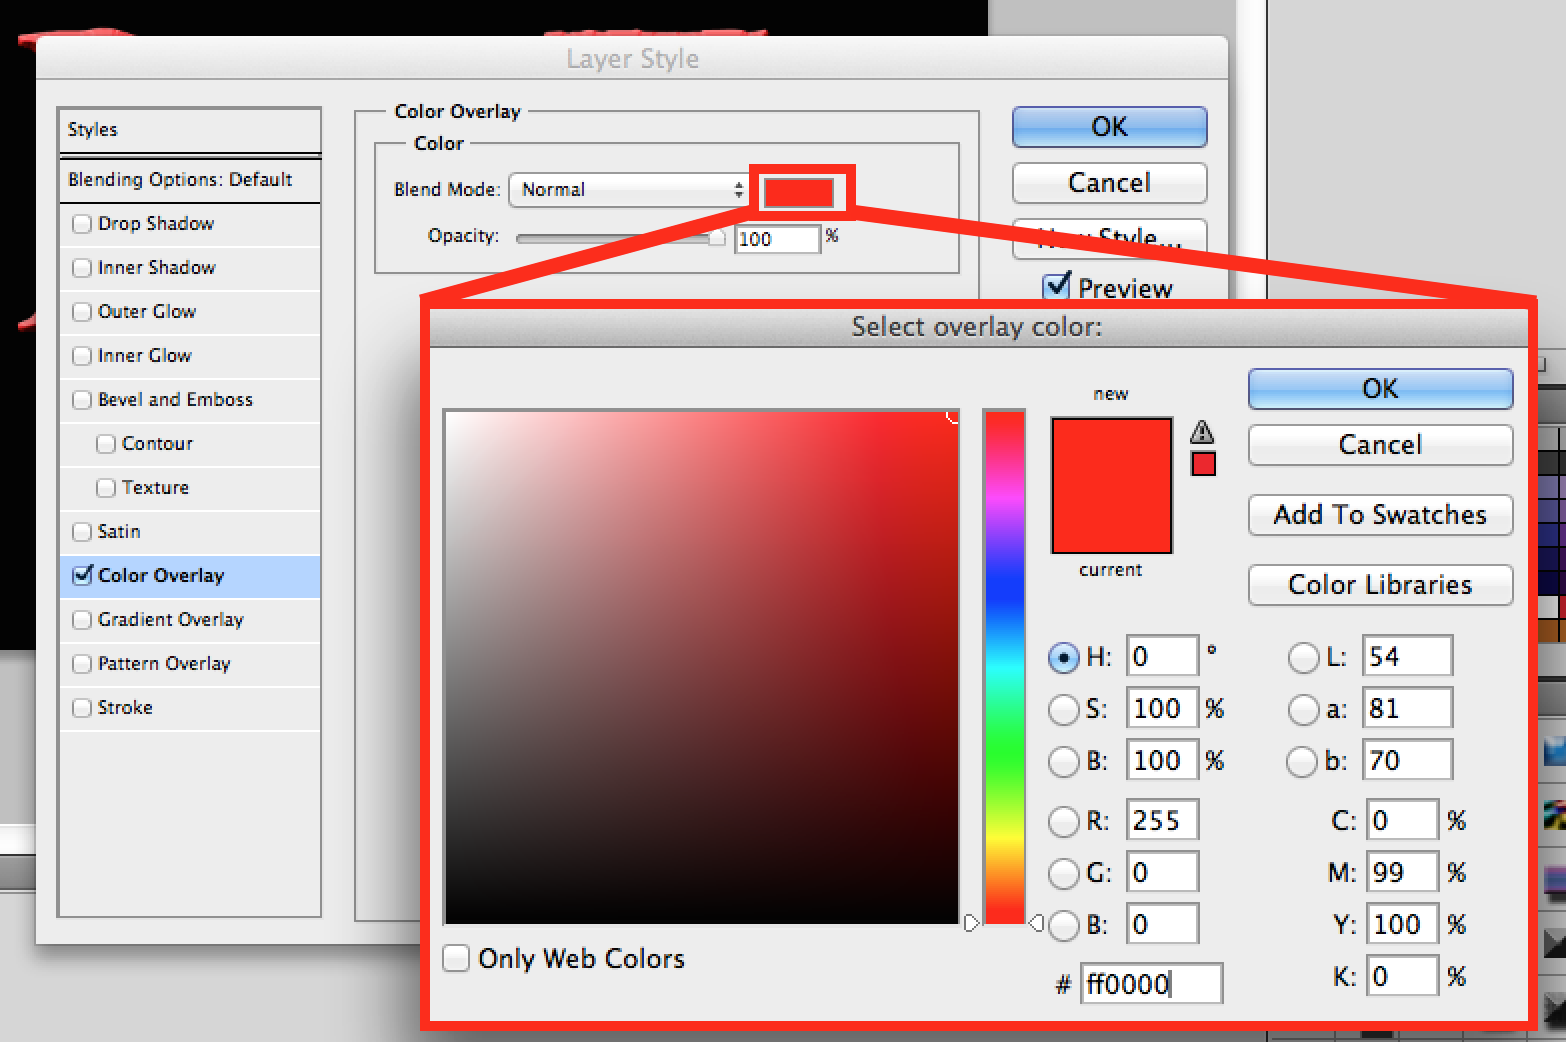
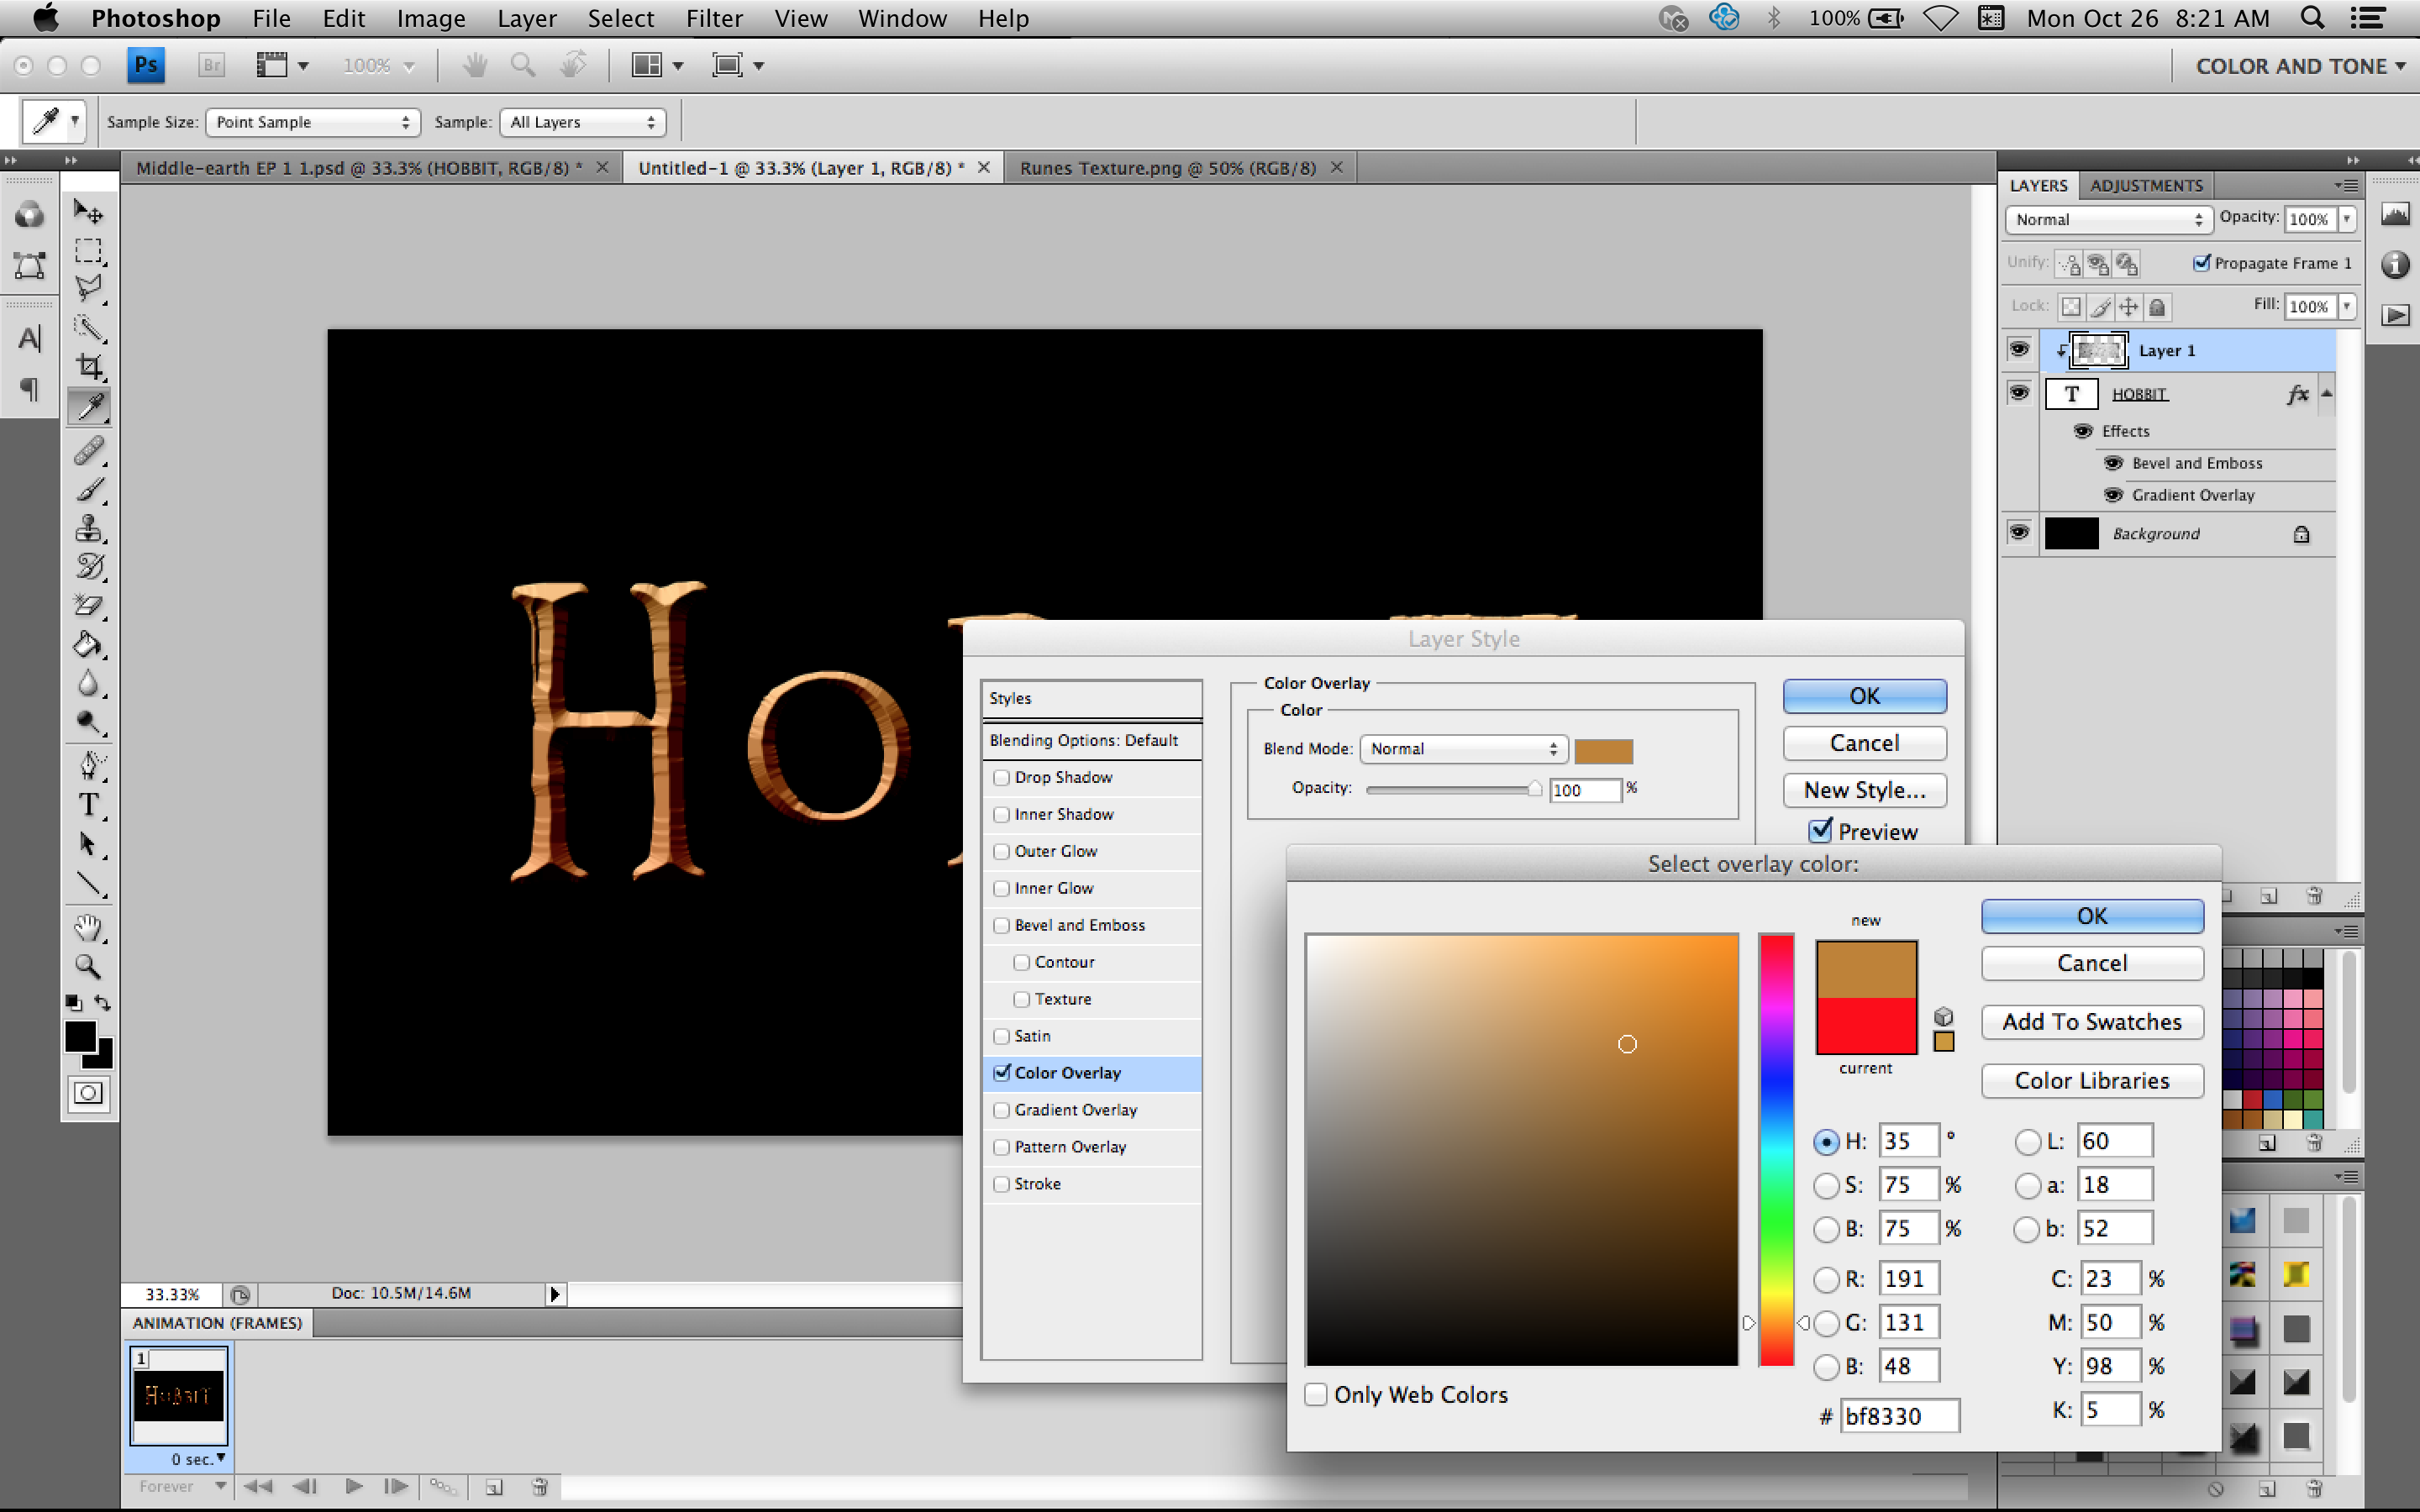

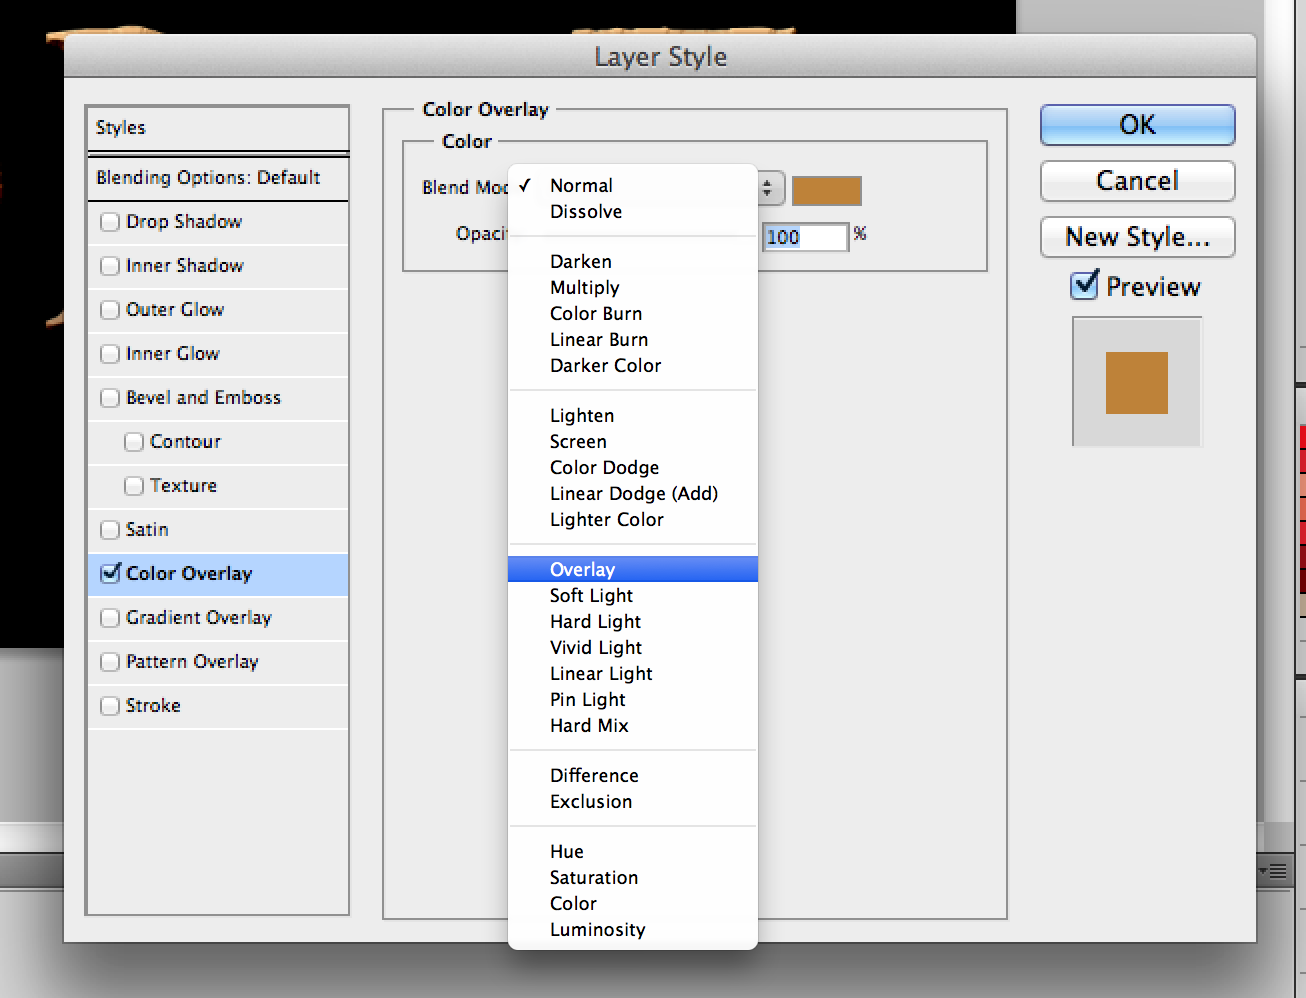
Now, double click on your texture layer to bring up the Layer Style editor. Activate the Colour Overlay. Now click the colour box to choose your colour. As before, change the Hue (H) to 35 and the Saturation (S) and Brightness (B) to 75. Or just change the colour # code to bf8330. Then click OK to apply these modifications and last of all, change the Blending Mode to Overlay.
Step 5: Export and Conclusion
To export the file, simply use the keyboard shortcut shift+command(control)+s. This will bring up a Save As window. Change the file type to PNG, JPEG, or other standard image types. Give it a name and you're done!!!
Thanks for reading this instructable! If you want to subscribe to this series, message me or leave a comment! If you have any questions, let me know. Feel free to suggest a tutorial of something based on Middle-earth, LotR, or any of the master Tolkiens epic works.
Thanks and God bless!
- Michael Ironstone