Programming the TinyBoard - ATTiny85 Development Board
by ankitdaf in Circuits > Arduino
10888 Views, 44 Favorites, 0 Comments
Programming the TinyBoard - ATTiny85 Development Board
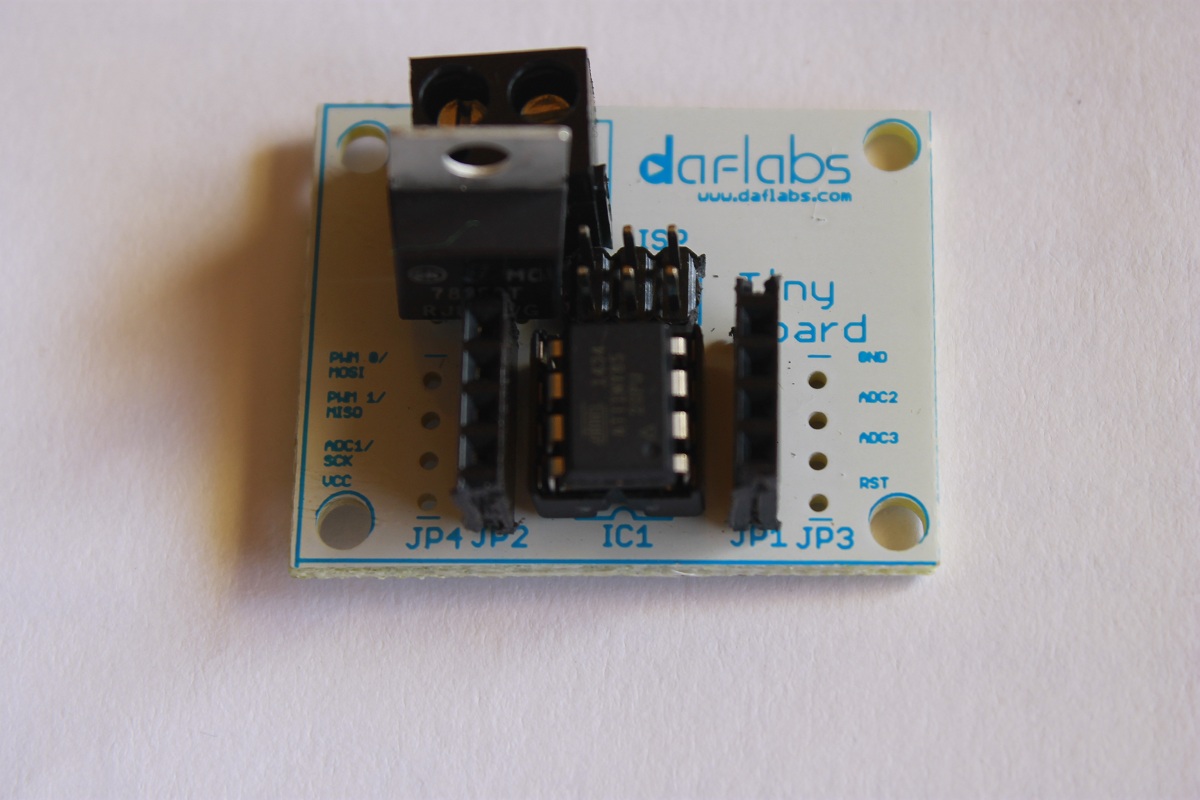
This instructable covers how to program the ATTiny85 based TinyBoard (from daflabs.com) using an Arduino Uno. This tutorial is covered using the Uno, but it can just as easily be used with any other Arduino.
For this tutorial, you'll need :
- An Arduino Uno with USB A-B Cable
- A TinyBoard
For the software, the MIT High-Low Tech group and David Mellis has done some great work in documenting and making core files available. Here is the link to the files : https://github.com/damellis/attiny/archive/master.zip
Make Arduino As ISP
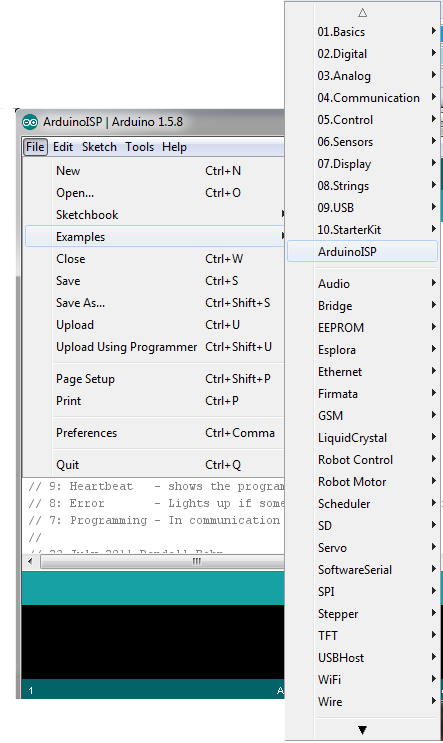
We will be using the Arduino Uno as the programmer to upload code from the computer to the TinyBoard since the TinyBoard does not have a USB interface.
For that, you will need to :
1. From Tools > Board select "Arduino Uno"
2. From Tools> Port select the port number where your Arduino appears
3. Open File > Examples > ArduinoISP, and upload that code onto the Uno. The Uno will now function as a programmer and relay all the code coming from the computer to the TinyBoard.
TinyBoard Core File Setup
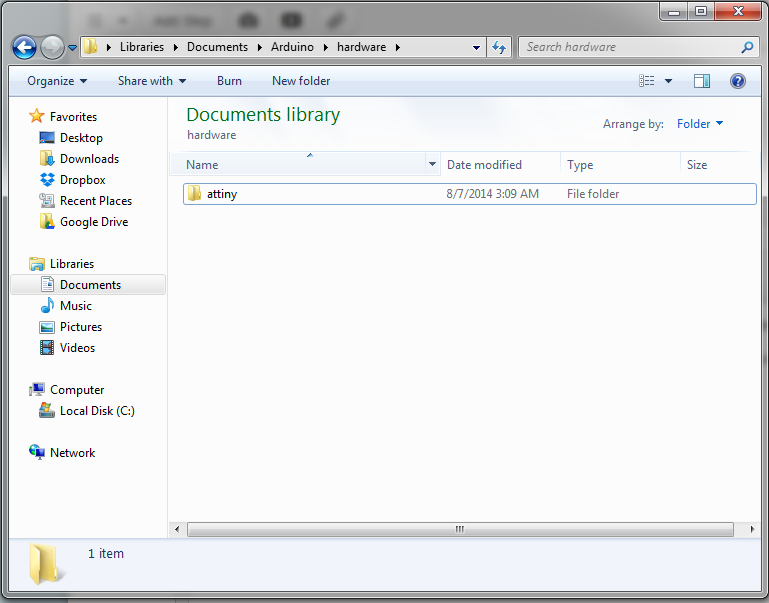
The zip file contains the "core" files that the Arduino IDE requires to translate user code written using Arduino style methods into standard C code. The "core" files create the mapping between the pin numbers you use in the software to the actual ATTiny85 pin numbers
You will need to extract the zip file from the previous step. After extraction, copy the folder called "attiny" into :
- Documents -> Arduino -> hardware for Windows users. Create the "hardware" folder inside Arduino folder if it does not exist.
OR
- C:\Program Files(x86)\ Arduino \ hardware on Windows
OR
- /home/your_username/Arduino/hardware folder in Linux
The folder location will look like the image.
Note : You will need to use Arduino v1.5.4 or above (BETA ONLY). The mainstream stable release does not, for some reason, support adding third party boards by adding core files in the location mentioned above.
Make the Physical Connections
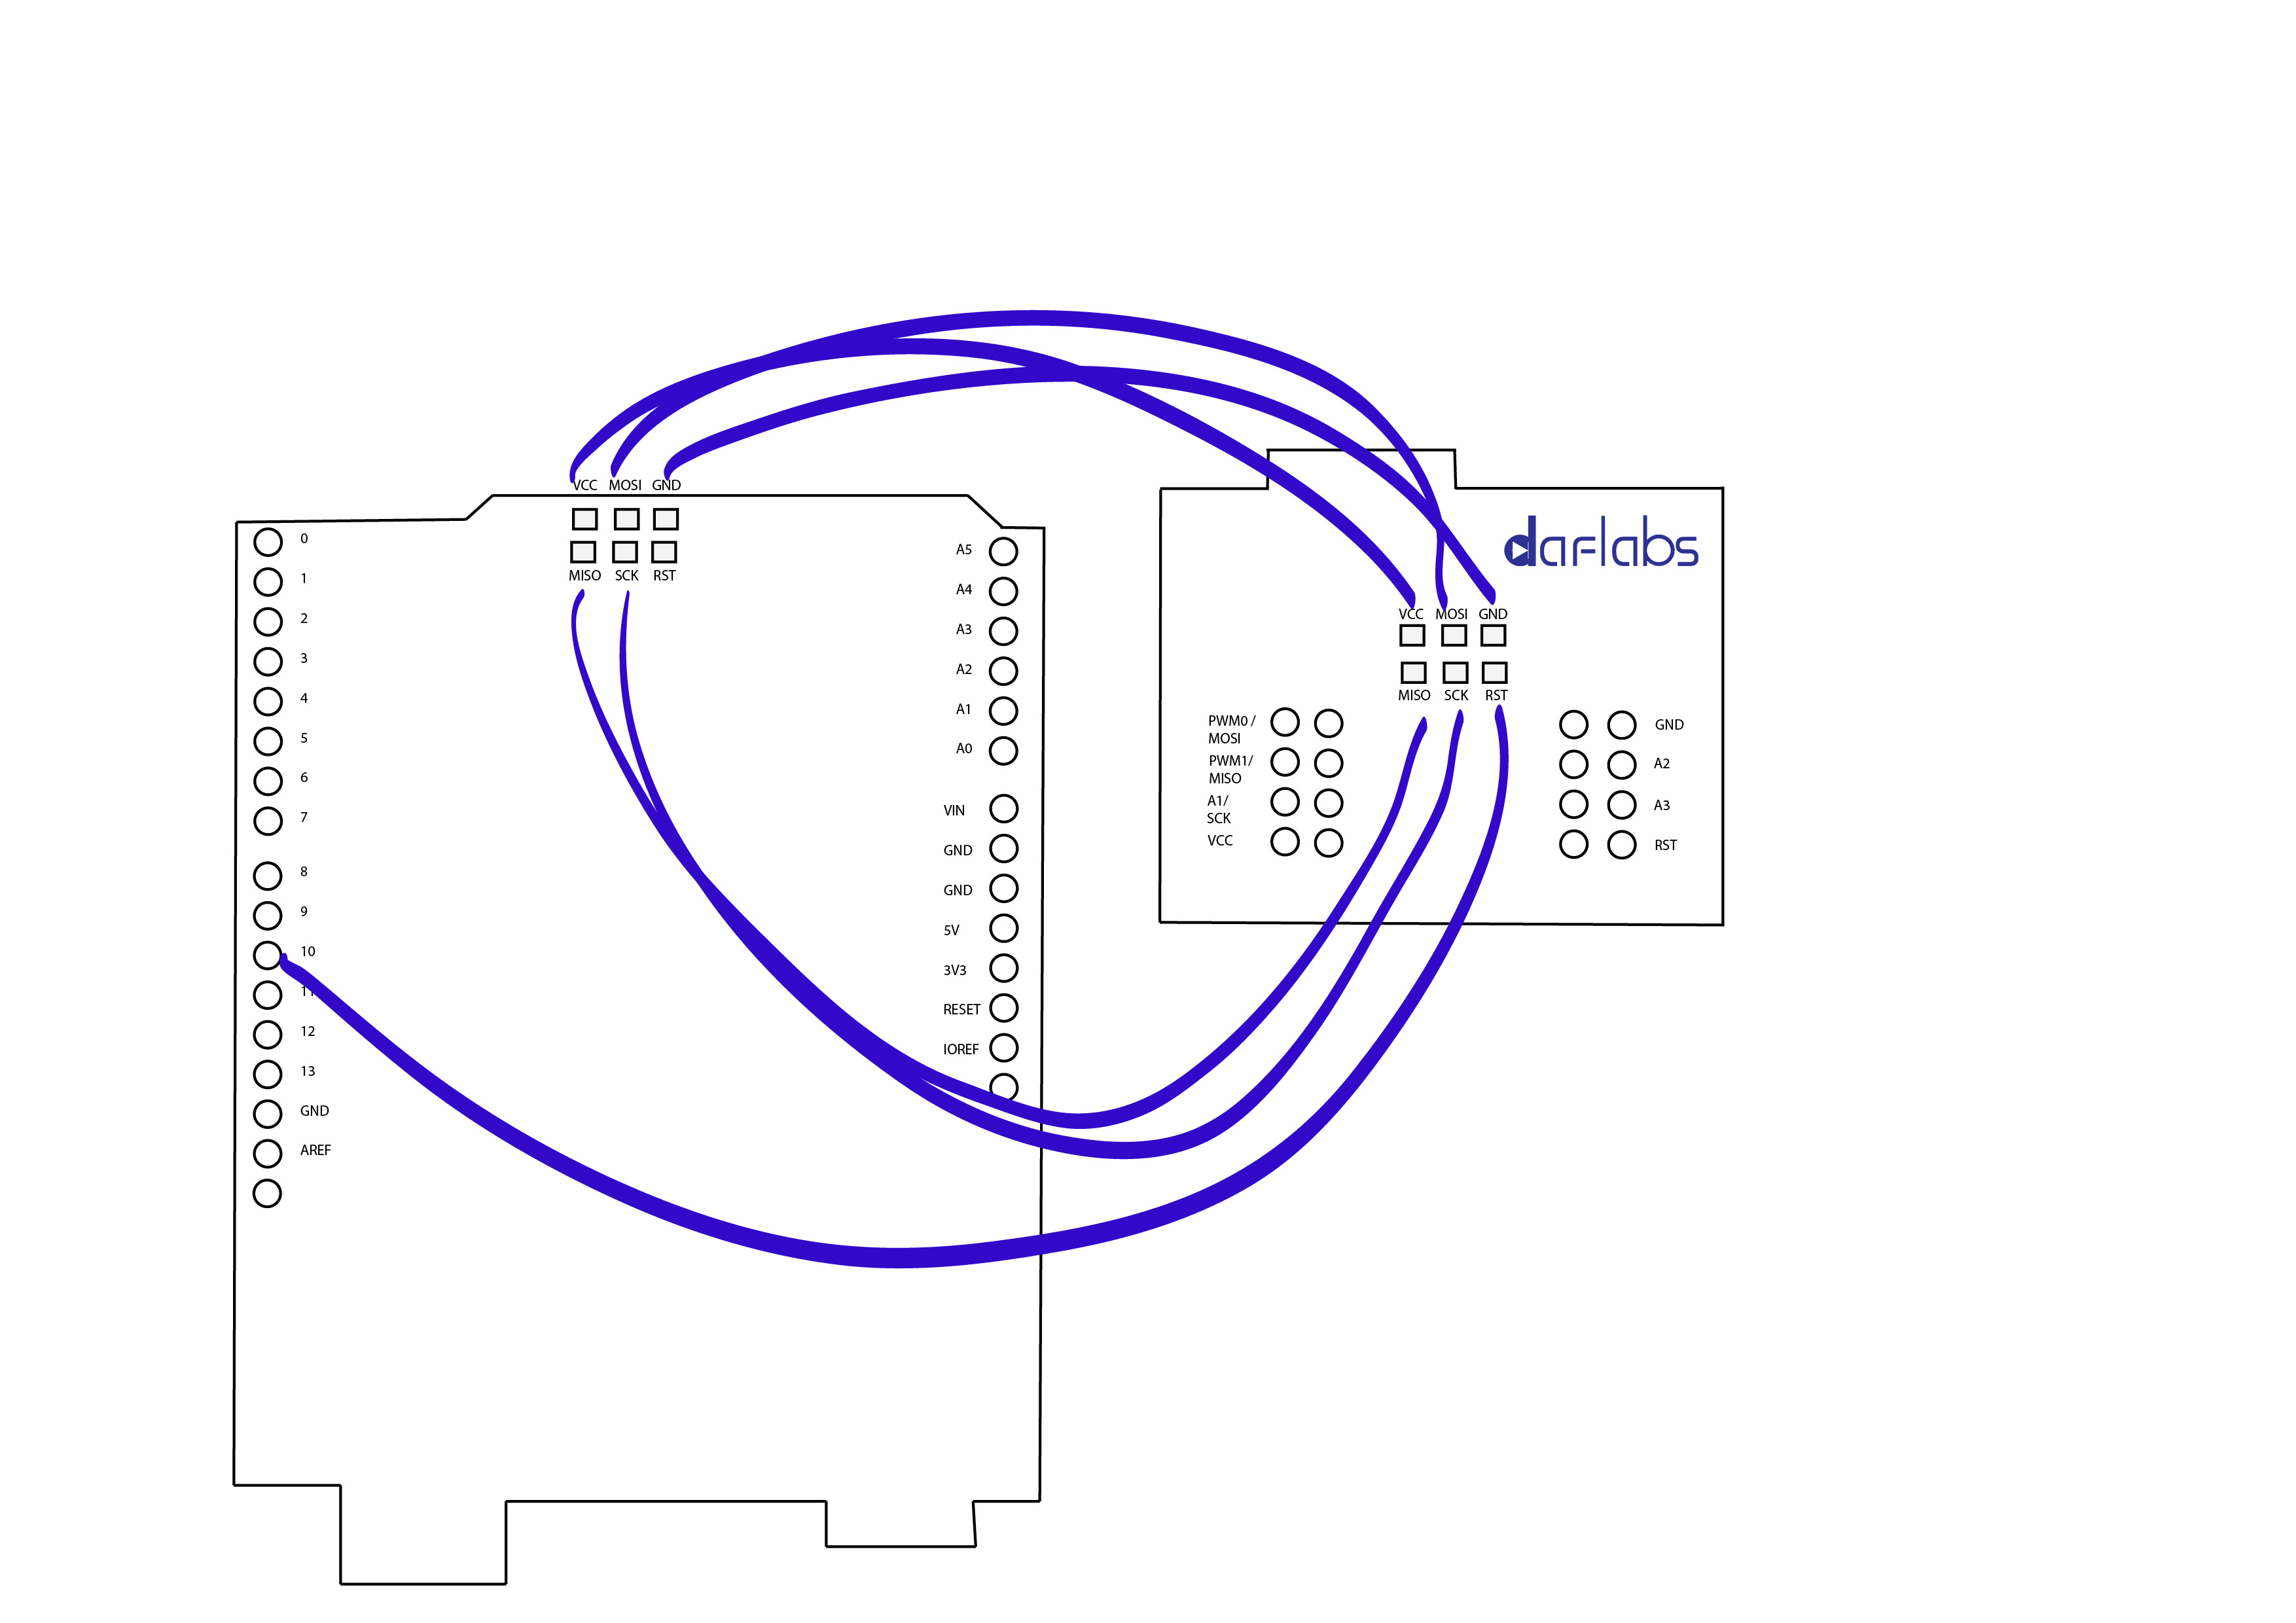
You first need to connect the Arduino Uno to the TinyBoard. The connections are shown in the image.
Arduino +5V ---> TinyBoard VCC
Arduino Ground ---> TinyBoard GND
Arduino Pin 10 ---> TinyBoard RST
Arduino Pin 11 ---> TinyBoard MOSI
Arduino Pin 12 ---> TinyBoard MISO
Arduino Pin 13 ---> TinyBoard SCK
Arduino IDE Setup
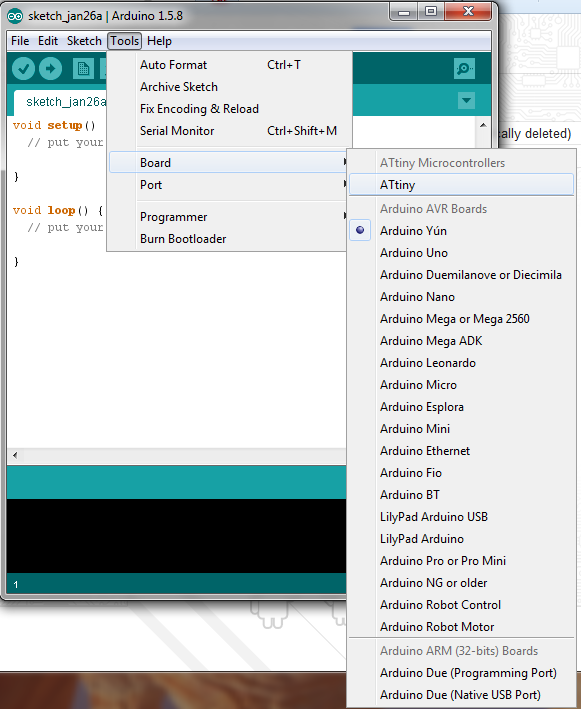
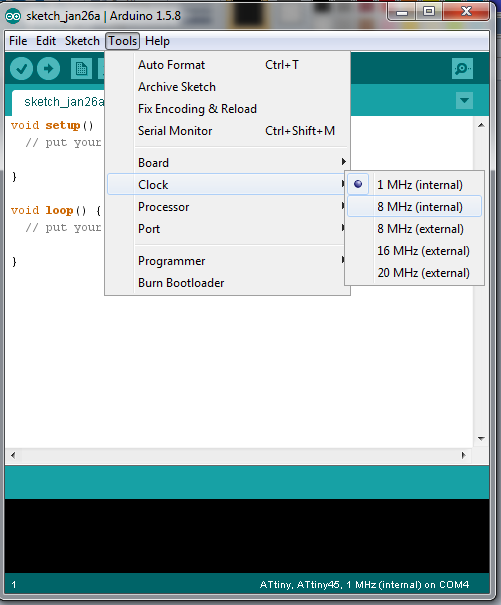
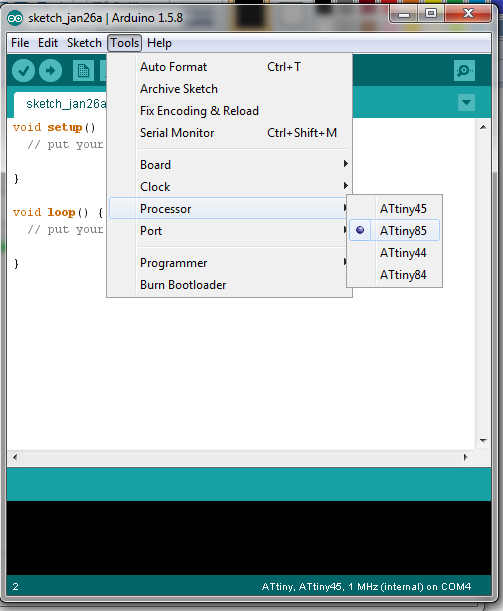
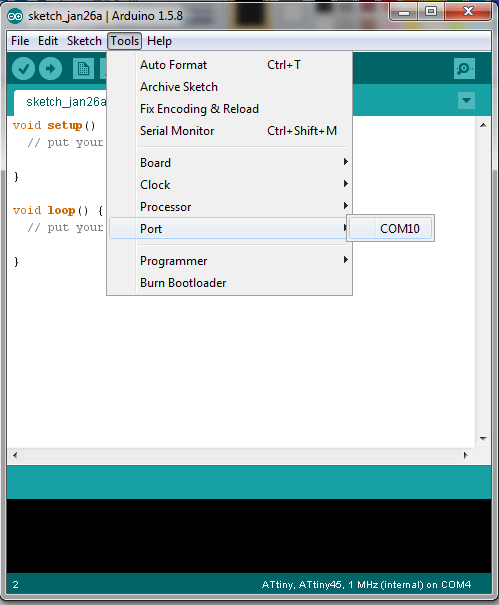
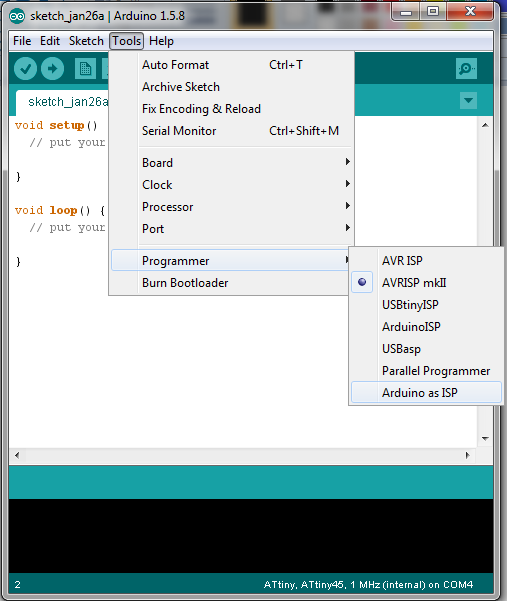
In the Arduino IDE, under the Tools menu, you need to make the following settings for Board, Clock, Processor, Port, and Programmer, as shown in the images.
a. Select "ATTiny" as the board from the top of the "Boards"
b. Select "8 MHz (internal)" from "Clock"
c. Select "ATTiny85" from "Processor"
d. Select the USB port number where your Arduino is connected in "Port"
e. Select "Arduino as ISP" in "Programmer"
Burn Bootloader
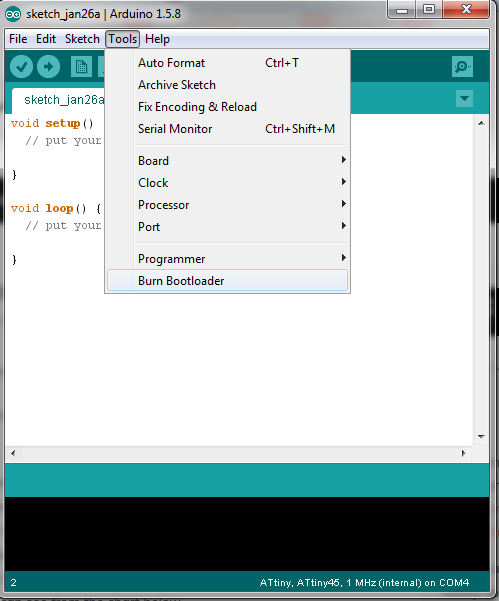
Next, burn the bootloader by clicking on Tools > Burn Bootloader. This does not actually burn a bootloader, but it sets some fuse bits including the clock frequency. This is important, because with an incorrect clock frequency the delays and timings for communications will be off, and some libraries (including the Adafruit Neopixel library) will not work with a clock frequency of 1MHz.
You should get a message saying "Done burning bootloader" at the bottom status bar.
Upload Your Code
Next, write your sketch like you would for any other Arduino Board, Verify, and Upload ! You are done !