Programming a Computer to Ask Questions
by Kelin Levine in Workshop > Tools
840 Views, 4 Favorites, 0 Comments
Programming a Computer to Ask Questions
Because it's really not as hard as it looks.
Computers are powerful. I don't need to tell you that, you're currently reading this through one. Harnessing that power however can be deceivingly difficult, or lack thereof. Coding and programming often gets marked off as one of those things so tricky that you just have to be the right kind of person to understand it, and while I don't disagree with that statement, I believe that most people are smart enough to learn the basics.
At the end of the day, programming is just telling a computer how to act, and how the computer should act is just logic. Chances are that you complete enough actions to fill up an entire computer script just asking people questions. So why not put that burden on a computer if they're so smart?
That's what this project is about. We'll be using a programming language called C# (pronounced C-sharp, like the musical note) to survey and impress (or bother) your friends.
Supplies
- A desktop/laptop computer with a keyboard + mouse
- An internet connection (to set up)
Installing Visual Studio
In order to program the computer, we'll need something that'll let us interact with the computer using code, as well as provide us with other luxuries that'll make our lives easier. This is called an IDE, also known as an integrated development environment (you technically don't need an IDE to write code, but that's not important for this guide). This is the most complicated step, but if you follow the instructions listed below, you'll barely have to think.
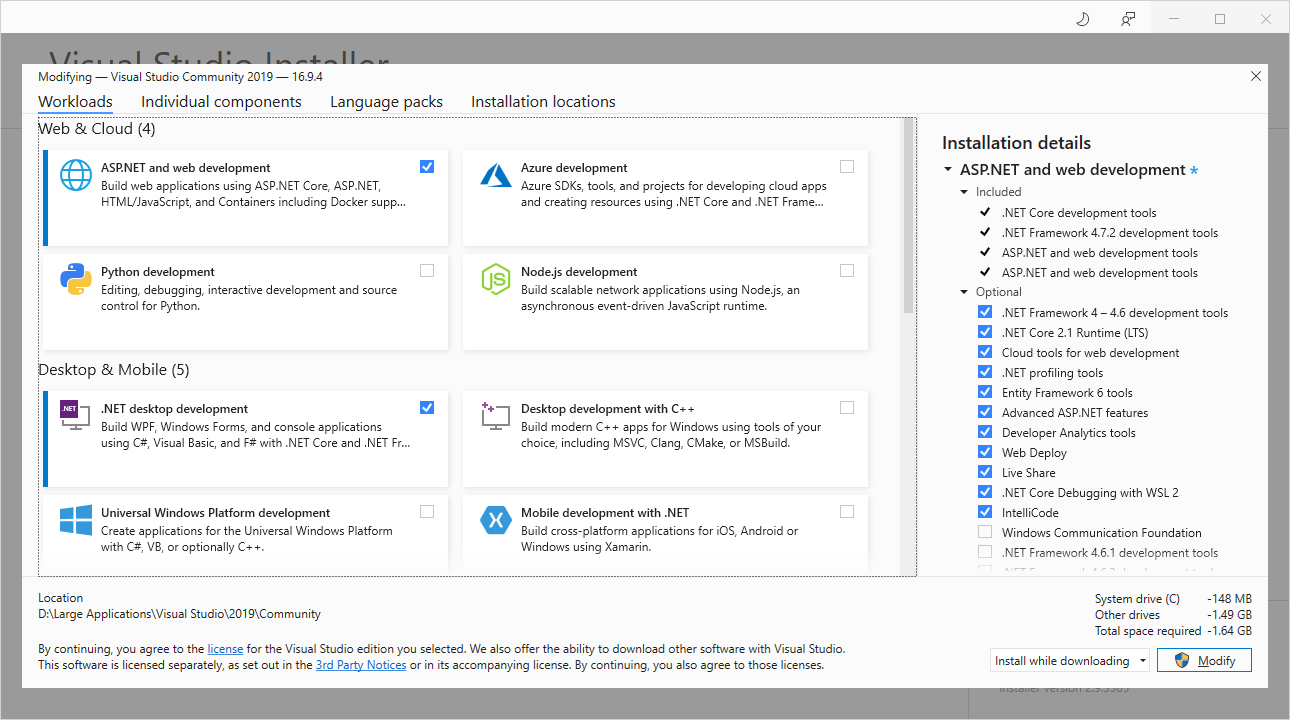
For this guide, we will use Visual Studio Community, a high-quality (though relatively heavy) IDE that is completely free for personal use. To get it, you'll first want to make sure you have a good amount of storage space on your device. You'll likely need about need about 800MB - 1GB of hard drive space, but you can uninstall it at any time if you need that space back. You can download the Visual Studio Installer from here. Once it finishes downloading, open up the application. Allow it to make changes, then simply follow the instructions provided to install Visual Studio Community 2019 or newer. Once you get to the Workloads page, make sure the check boxes at the top right corners of the rectangles labeled ".NET desktop development" and "ASP.NET and web development" by clicking on them. It should look similar to the image above on the left, but please ignore the installation details and hit the Install button on the bottom right corner, allowing it to make changes if it asks. You can do something else while it installs, but it may ask to restart your system when it's done. I've already installed Visual Studio 2019 before, so the window shown in the example above will appear slightly differently to your window.
Then, if everything went well and Visual Studio 2019 hasn't already opened itself, you can open it at any time by first pushing either the Windows key on Windows or cmd + space on Mac, then typing in "Visual Studio" and selecting Visual Studio 2019. If Visual Studio opens correctly, you will be greeted with a rather minimalistic start menu that looks like the image to the left at the start of the next step.
If you have any trouble installing or running Visual Studio 2019, you may follow the official instructions from this page. If you use that guide, skip all of the optional sections and install the workloads listed on this instructable.
Creating Your First Project
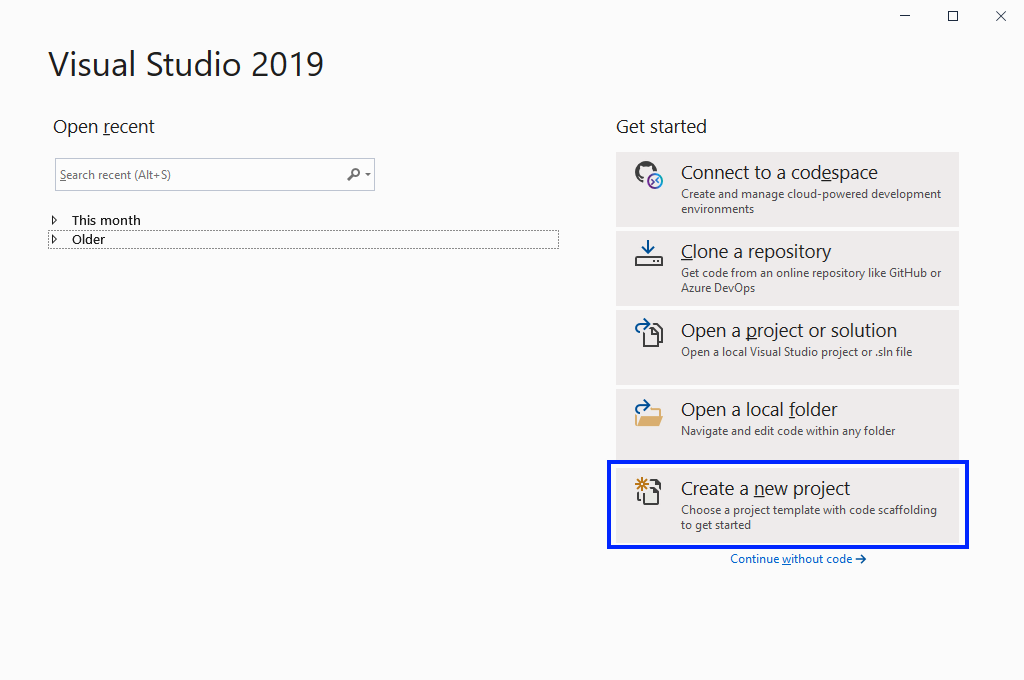
We're almost ready to start. Now that you have Visual Studio open and ready, simply select the button on the right that says "Create a new project", as highlighted in the image to the left above.
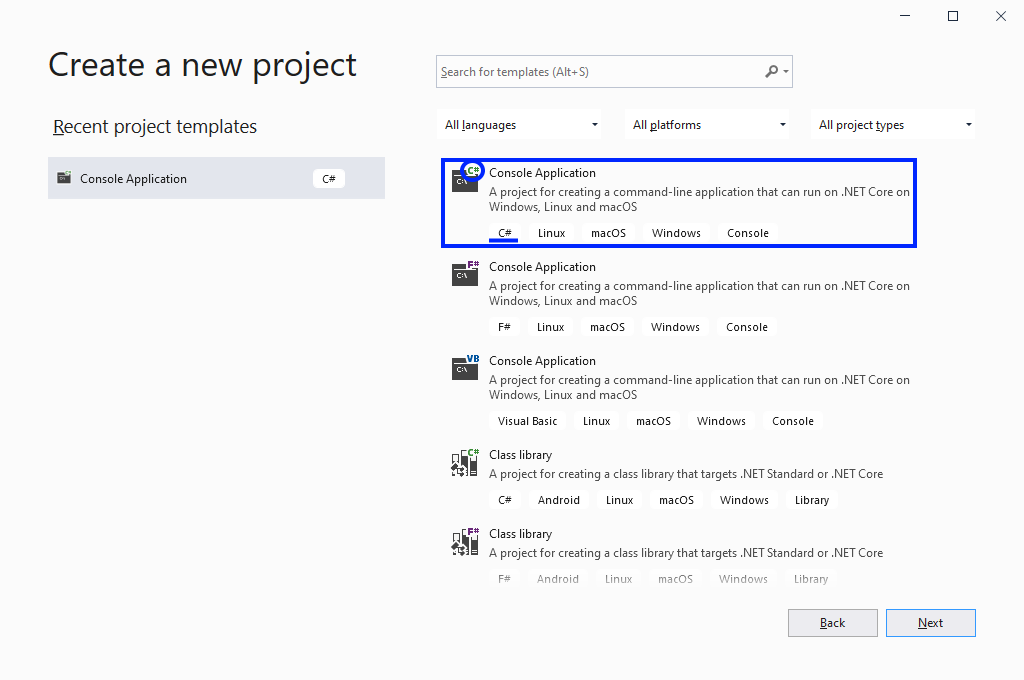
Once it's ready, click to select "Console Application" and make sure that "C#" is listed directly below it as well as in the thumbnail next to it, like the image to the right above. There are multiple different types of console applications built into Visual Studio for different programming languages, so make sure you pick the right one.
Now just push next, give it any name, choose your own location to keep it if you would like, and hit next again to create the project. If it asks, set the target framework to ".NET 5.0". Note that pushing enter at any point in this screen will skip to creating the project, so be careful when entering a name.
Running a Program
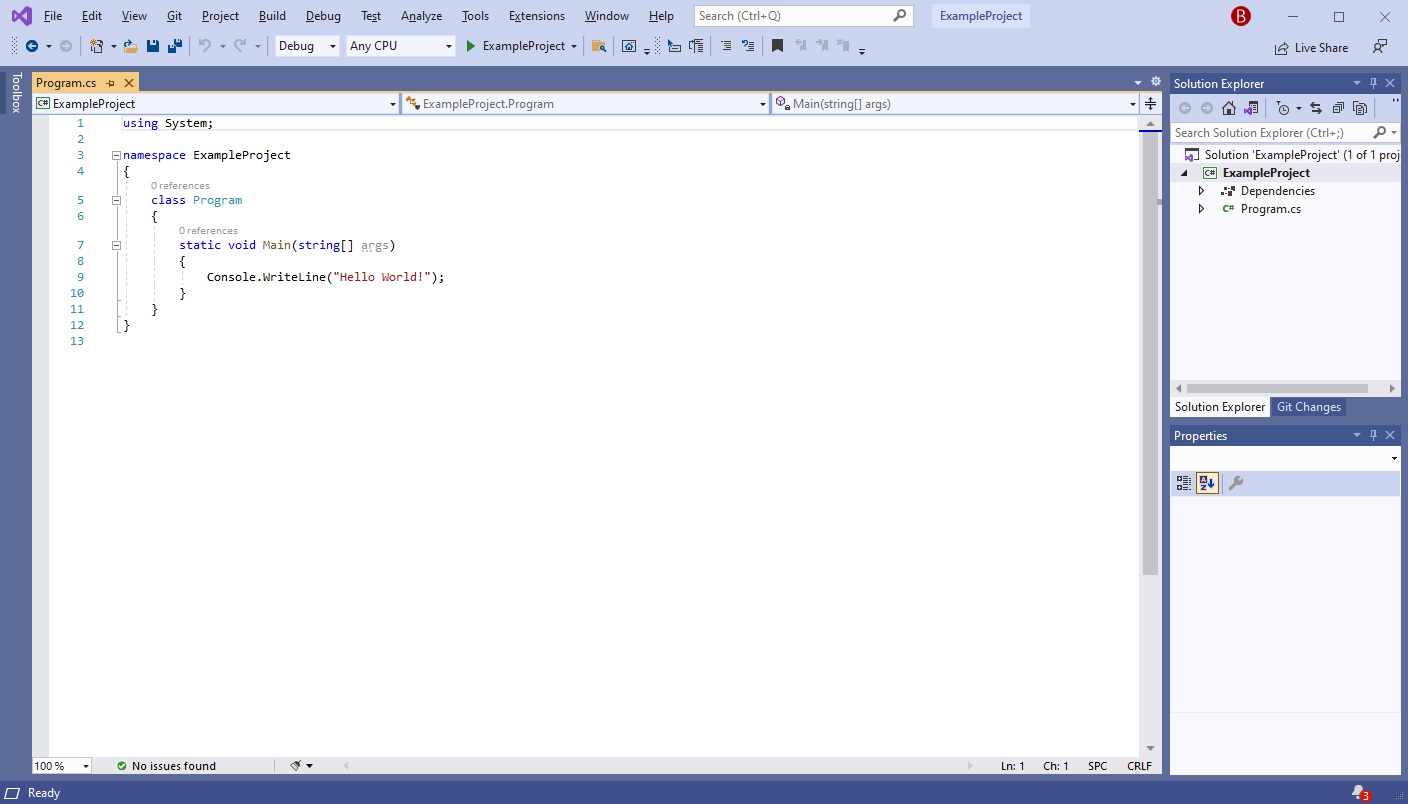
It should open a window that looks like the one above. If it doesn't, wait a minute. If it does, then congratulations! You've completed the most complicated part of this guide! Now we just have one last thing to get out of the way before we can finally get on with the programming.
This is usually the part where I'd tell you to make your first "Hello world!" program, but Visual Studio has already taken the liberty of doing that for us. Instead I'll explain how to run it.
Go to the top of the window (Windows) or the top of your desktop (Mac). Click on "Debug" then click on "Start Without Debugging". It will then compile your program and run it once it's done. The program should say "Hello World!" at the top followed by a line of text telling you to push any button to close the window. Go ahead and close the test window then go back to your Visual Studio window.
Computers have to process code before it can understand it. The process of a computer turning code into the instructions that tell it exactly how to process data is called compilation, and it can take a little while. This is why the computer needs several seconds between you telling it to start the program here and it actually opening the window.
Remember how to do this. You will compile and run your program constantly while writing it to make sure everything new that you add works as intended. You can come back to this step later if you ever forget.
Customizing What It Says
Now, for the moment you've been waiting for: actually writing the program I've been hyping up this whole time! Most of the stuff you see in the Visual Studio window isn't important for this guide, and you can learn more about it later using either Google or by searching on Microsoft's own website. What you do need to know however is by far the largest part of the window: the code.
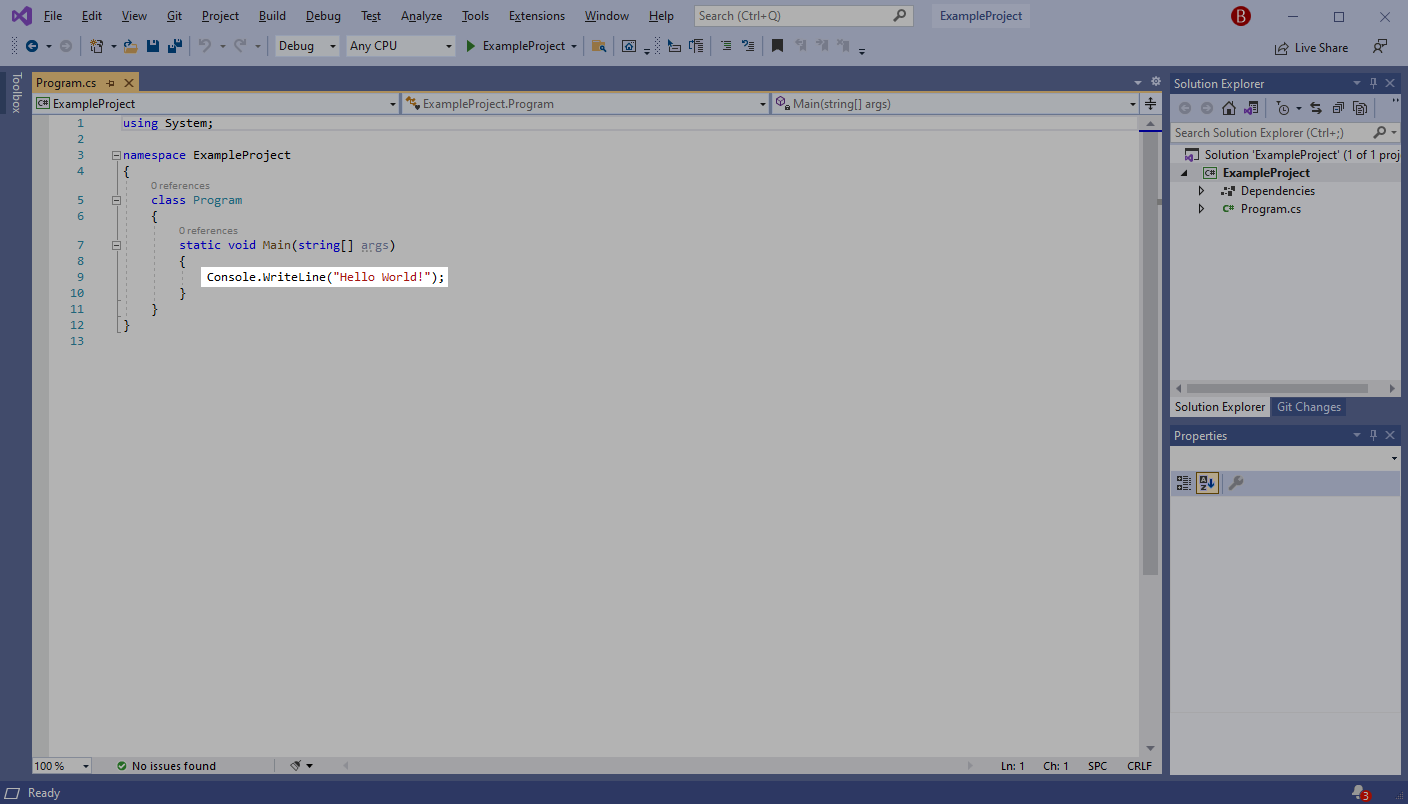
Out of all of what you see, only the bit that isn't blacked out above is what makes your program interact with the user. Everything else you see have varying degrees of importance, but this is all a lot to take in at once, so again, you can search this all up later on the web if you have questions.
The one line that isn't blacked out in the image above tells the program "Hey, write this in the console:" followed by what it should write. What it should write is between the parenthesis. You can change that bit to whatever you want it to say. Try it out! Change the text there a few times and test the program.
Then once you're happy with the result, press Ctrl+S (Windows) or Cmd+S (Mac) to save your program. You should do this every time you make a change, otherwise you'll lose it if something happens.
Getting a Response From the User

Now that you know how to make the program say something, we can have it ask the user something. We do this by writing the following:
string response = Console.ReadLine();
Let's break this down. The first word tells the program what kind of response to expect. We want the user to give us some text. This is called a string, as it is a bunch of letters strung together.
Then, we give the program a name. This is simply what we'll refer to what we're getting here as when we write the program, so it can be anything. The only rules on what it cannot be is that is can't have spaces or special characters.
Once we tell the program what that first part is and what to call it, we tell the program what it contains. We do this with an equals sign followed by a value. The value here isn't text itself; rather, we ask the program to read the next line of text inputted into the test window. Console.ReadLine(); tells it to remember what it gets in that line using the name that we gave it.
Finally, we use a semicolon. All lines of code in C# must end in a semicolon to tell the computer to move on to the next line of code.
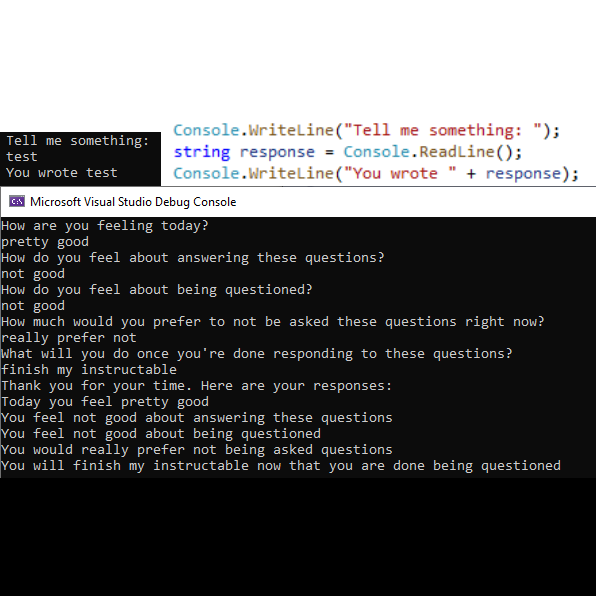
If you put the line in, then your script should look something like the image above. Go ahead and test the program, it'll let you write text, but as soon as you hit enter, it ends.
Repeating the User's Response
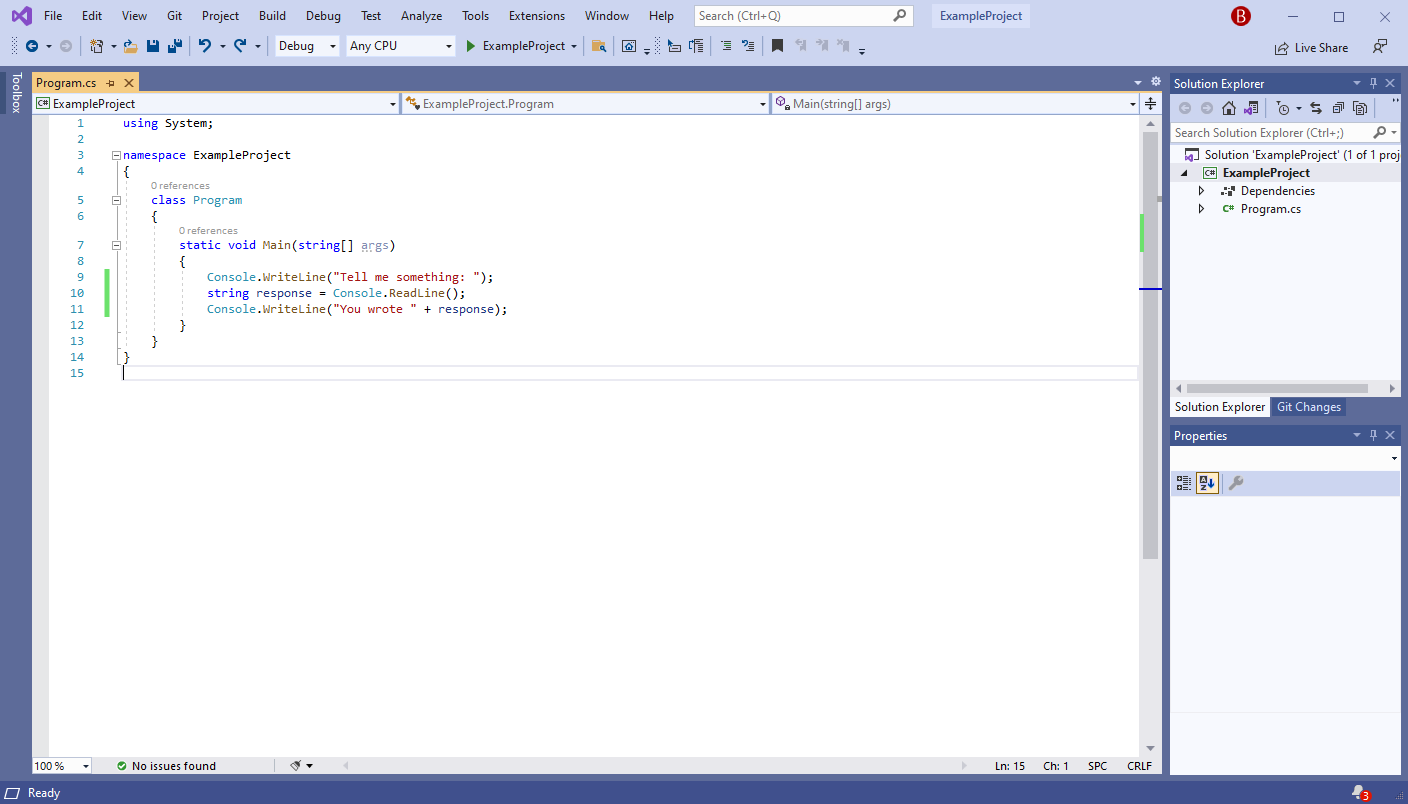
At last, the final piece to our program: using what the user inputs. We'll do this with a line of code that resembles a combination of the last two steps:
Console.WriteLine("You wrote " + response);
If you've been following along to this point, what you see here should make some semblance of sense. For one, it starts with Console.WriteLine, which is the same thing that our first command does. Just like before, that tells the program to type some kind of text. The difference now is that in addition to just a pair of parenthesis, we have our name from the last step.
The parenthesis were explained in step 4, so I won't spend any more time on them. Immediately following the parenthesis however is a plus symbol. This tells the program that we have another thing that we would like to add to the text. That other thing we would like to add is the text we collected previously in the last step, so we put the name we assigned it to after the plus symbol. Note that we do not put the name in parenthesis. This is because we want the program to write what the name represents rather than the name itself.
If you did everything correct, then you should have all the basics done! You can check the images above for what the script should look like, though feel free to customize the text it writes. Just save it then test it! Always remember to save.
Getting Creative
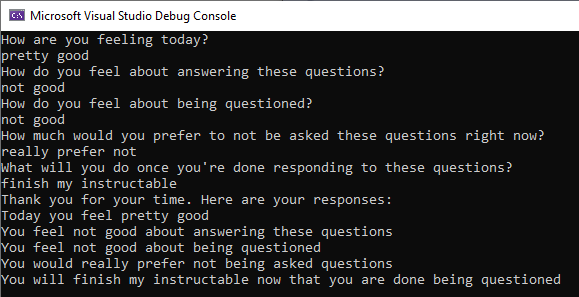
Finally, you're ready to go off on your own. You've learned everything that you'll need, so now it's time to make something yourself. I like to copy and paste commands around when I'm first learning what to do, then I change up the text later. Remember how each line we've done so far works, and use that knowledge to make something new.
Above is an example of something I made. I won't be providing the code. I challenge you to recreate it yourself as a final test to prove your understanding of this instructable. It might be hard, but make sure everything lines up correctly, as human error when writing code is almost inevitable. If you do it, then you can say so below, but please don't post the code so that others can be challenged too.