Programming Microcontrollers With a USBasp Programmer in Atmel Studio
by VB96 in Circuits > Microcontrollers
27032 Views, 9 Favorites, 0 Comments
Programming Microcontrollers With a USBasp Programmer in Atmel Studio
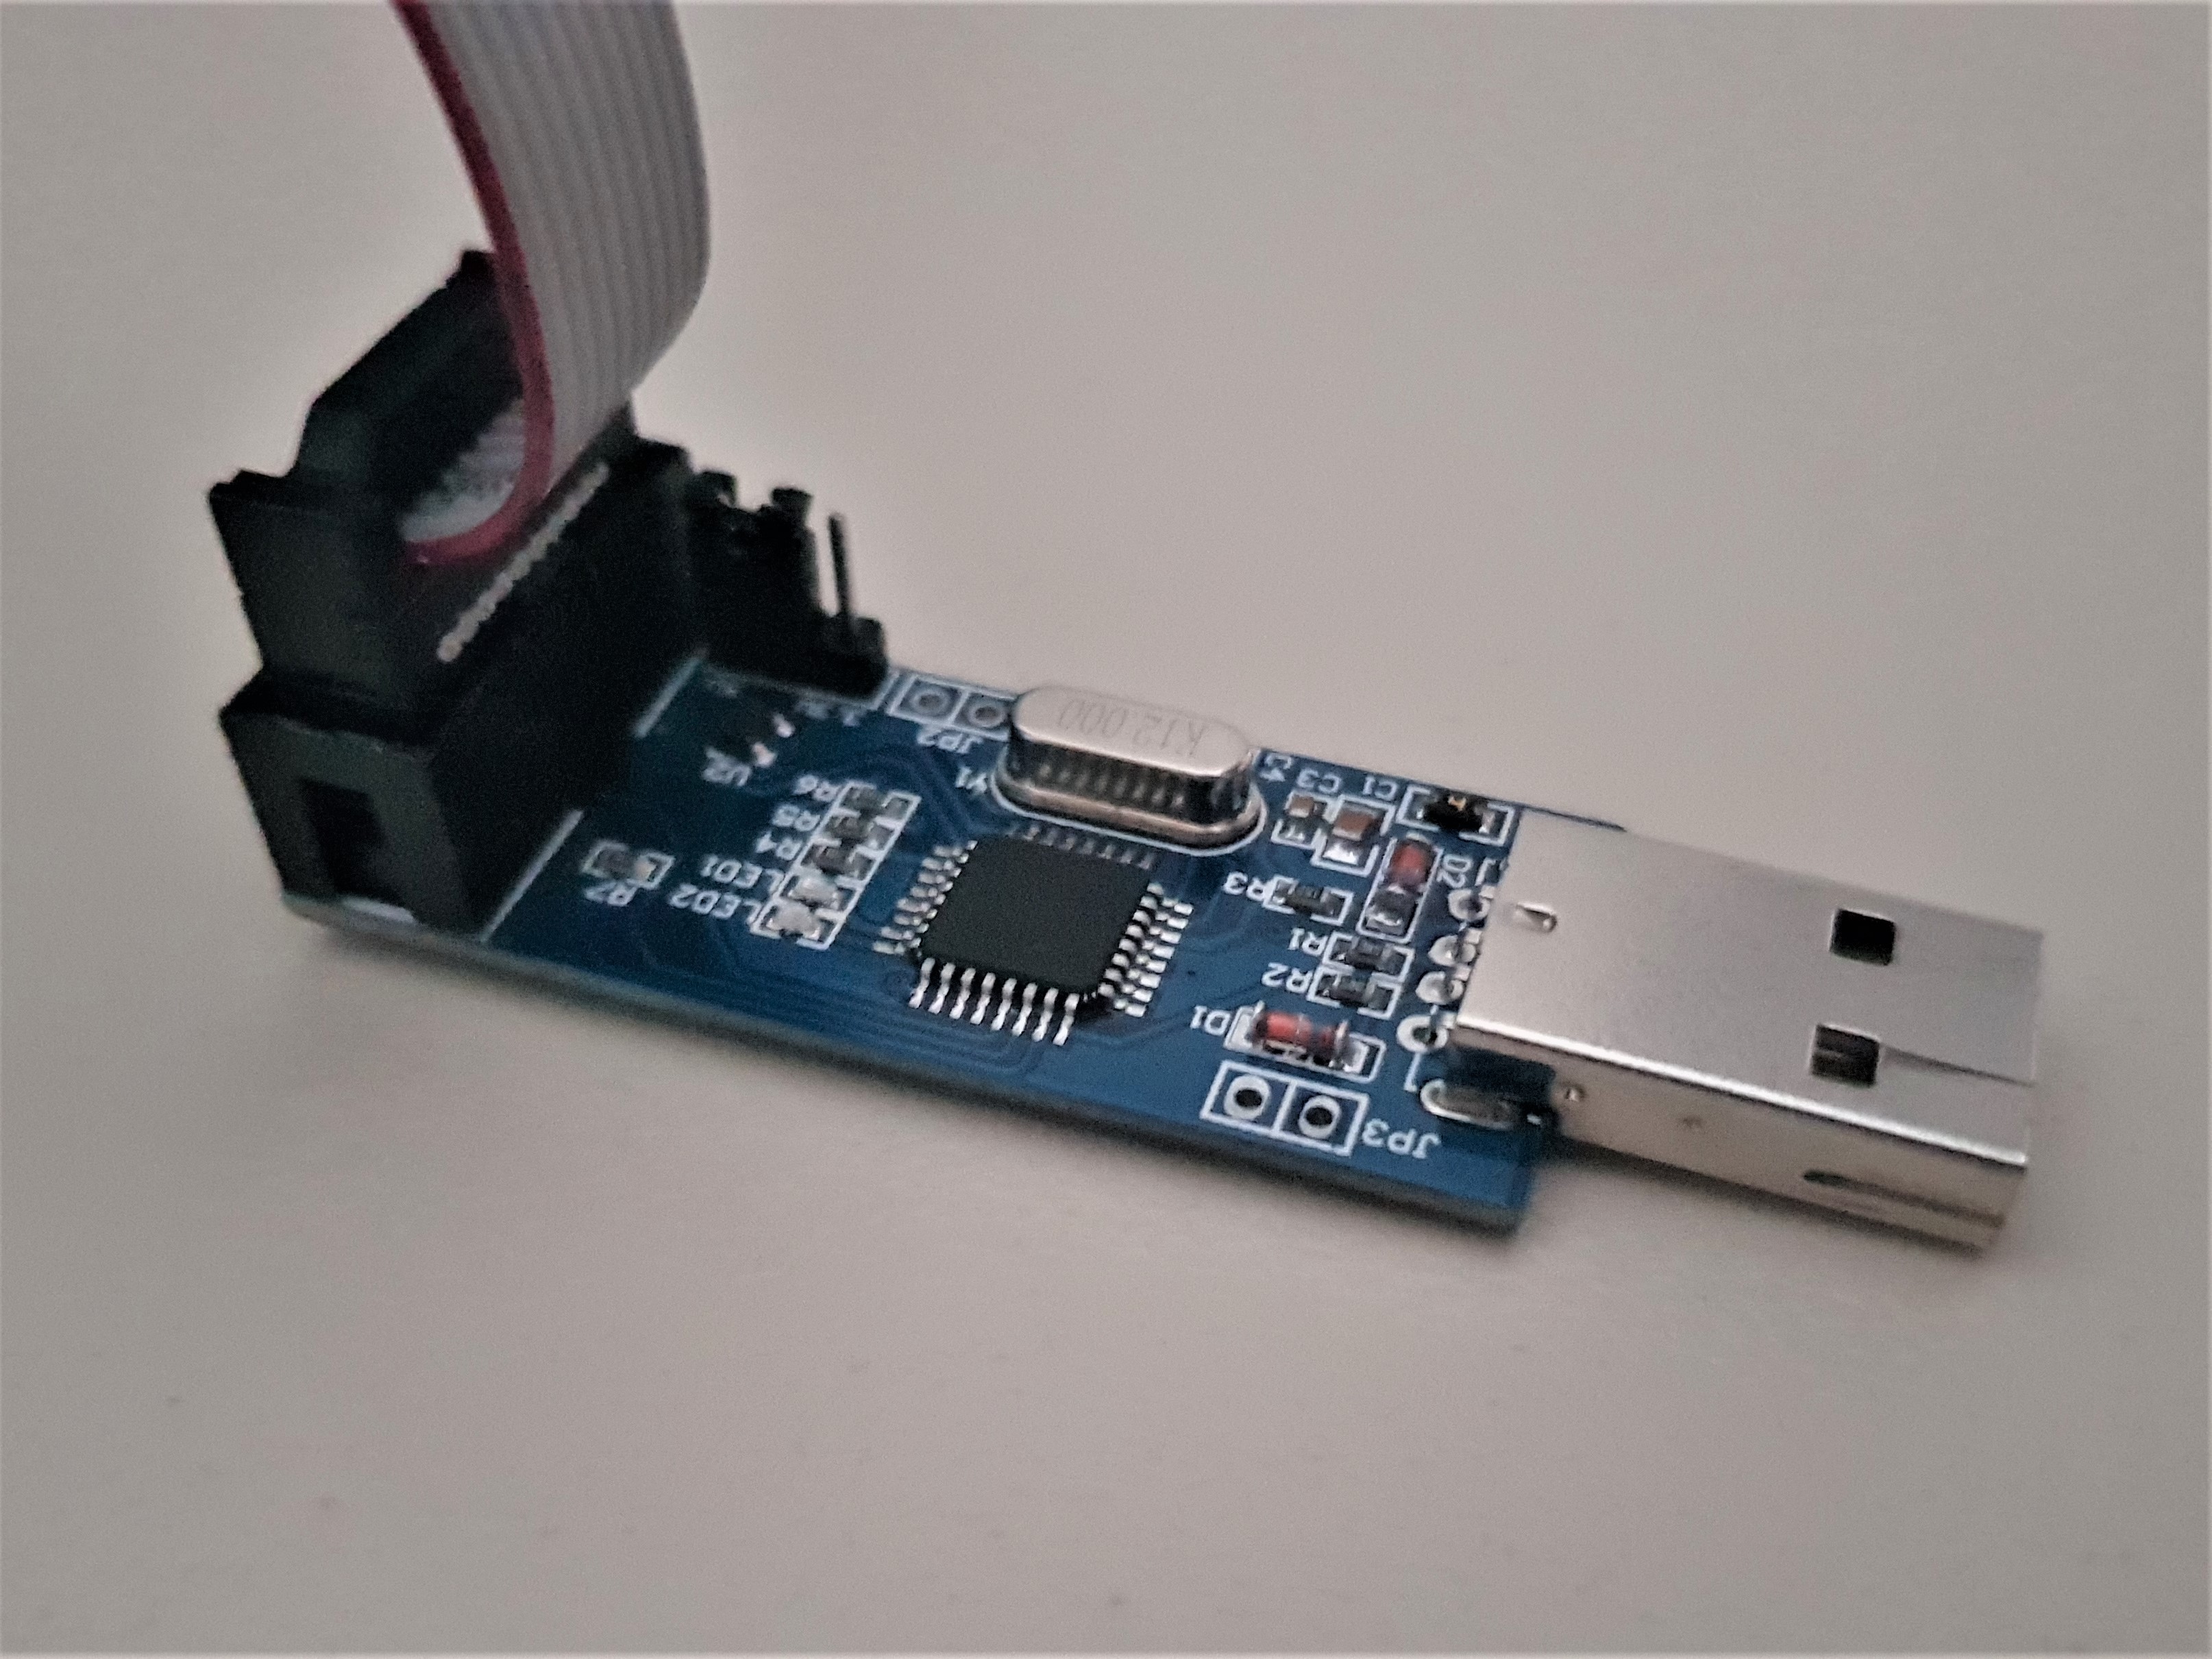
Hi
I've read and learned through many tutorials teaching how to use the USBasp programmer with the Arduino IDE, but I needed to use Atmel Studio for a University assignment and couldn't find any tutorials. After researching and reading through many resources, I've constructed this tutorial for anyone wanting to use Atmel Studio with a USBasp programmer.
The USBasp is a cheaper solution to AVR programming and supports multiple microcontrollers. The full list can be found at https://www.nongnu.org/avrdude/user-manual/avrdude...
This tutorial uses the ATtiny85 as an example but can be extended for programming any supported microcontroller using the USBasp programmer.
Let's get onto it!
Supplies
USBasp AVR Programmer
Installing the USBasp Driver Using Zadig
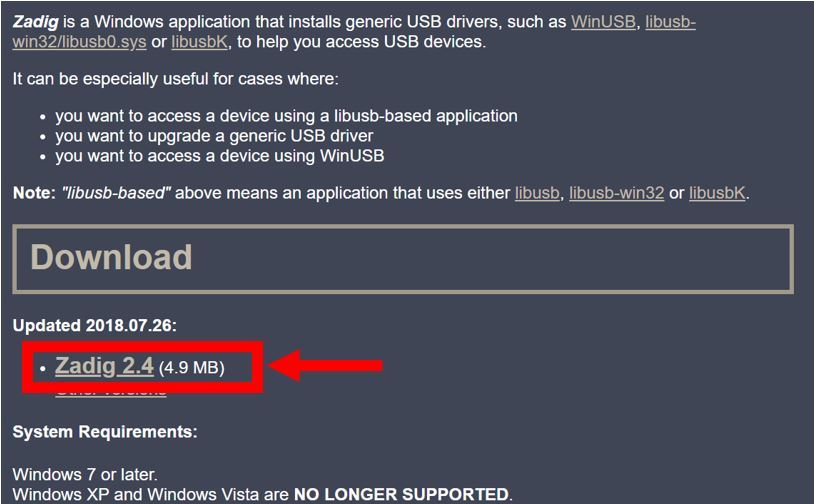
Open your web browser and head to https://zadig.akeo.ie/
Using this tool, we first install the correct driver onto the USBasp.
- Hit the download button and install the application.
- Open Zadig
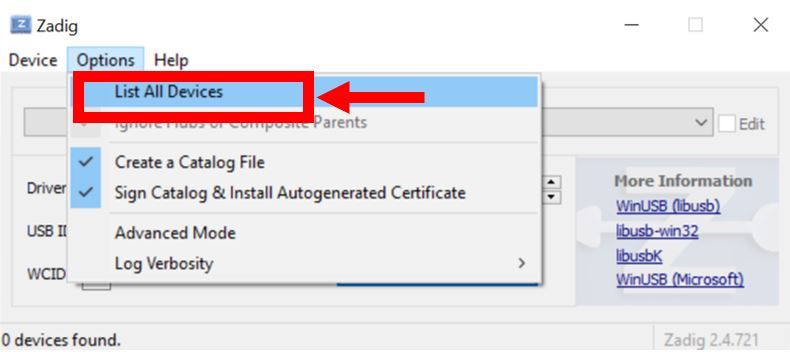
- Click on options and press on List All Devices
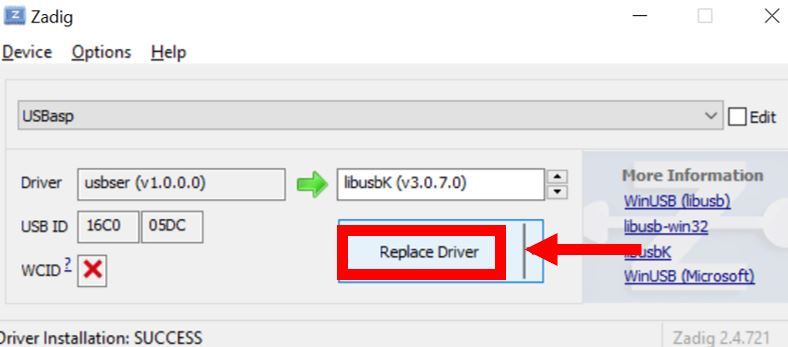
- Select USBasp and install the libusbK (v3.0.7.0) driver
Please note, installing the driver may take up to five minutes.
Downloading AVRDUDE

The next step is to download AVRDUDE.
Click on the link below to download the ZIP file directly, or feel free to download it externally by searching for download AVRDUDE.
https://mirror.freedif.org/GNU-Sa/avrdude/avrdude-...
Once downloaded, extract the files into your documents or into the Atmel Studio Program files. It is important to know where these are being extracted as you will be requiring their file path in the following steps.
Open Atmel Studio
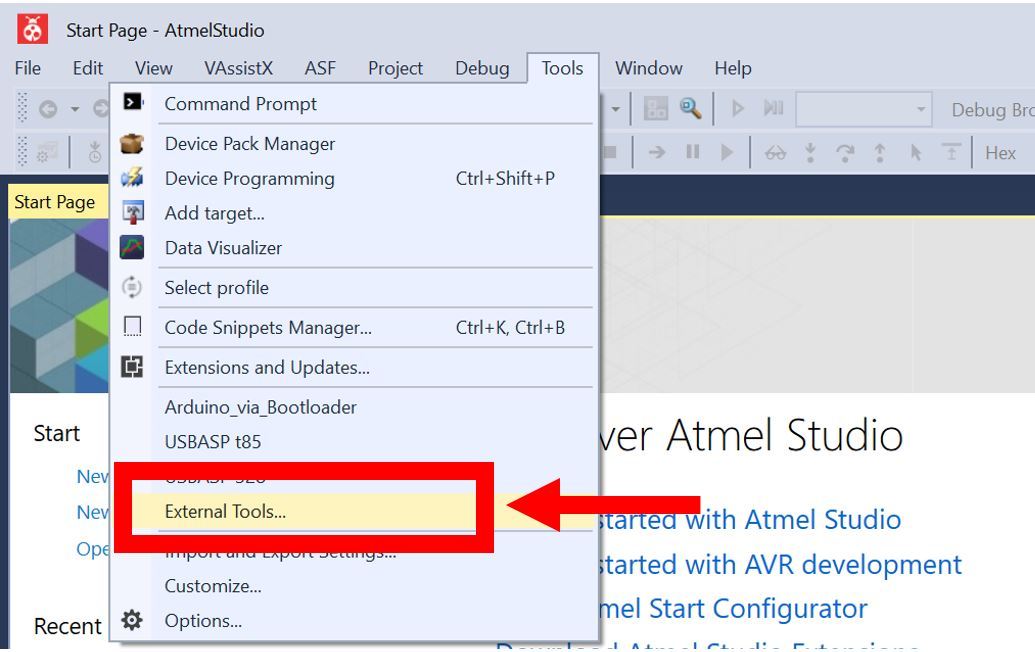
Open Atmel Studio and in the main navigation bar, head to tools, and then click on external tools.
Click "Add"
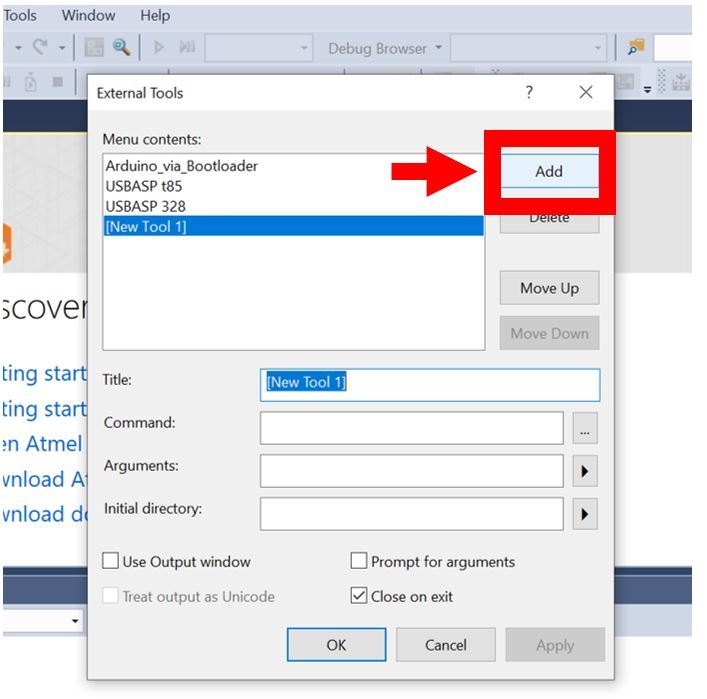
Click "Add" to add settings for a new tool.
Entering Details for the USBasp Programmer
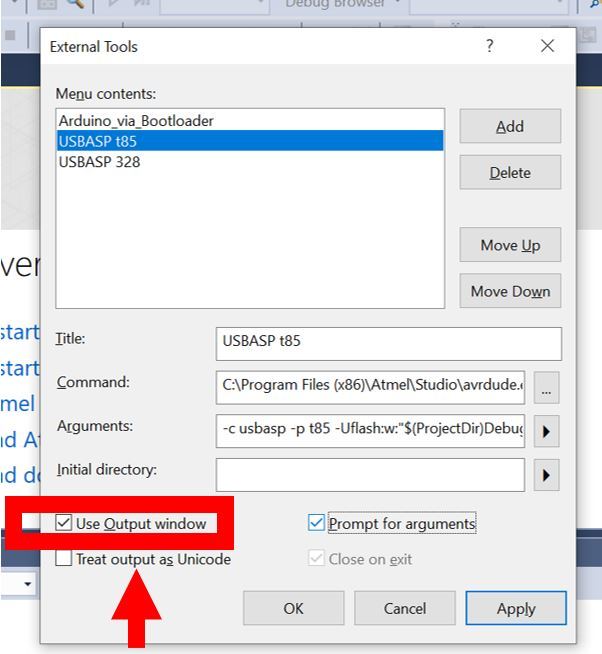
For the command, enter the file address to the AVRDUDE .exe file we downloaded and extracted earlier.
For example, my command input would be:
C:\Program Files (x86)\Atmel\Studio\avrdude.exe
Note, this is an example only!! Your file address will probably be different. Feel free to use the browse feature (the three dots at the end of the command input) to find the avrdude.exe file.
For Arguments, copy and paste the line below into your Arguments input:
-c usbasp -p t85 -Uflash:w:"$(ProjectDir)Debug\$(TargetName).hex":i
Breaking down the arguments above:
- The argument after -c identifies the programmer id. In our case, the usbasp
- The argument after -p identifies the microcontroller. In our case, the ATtiny85, known as the t85
- The argument after -U identifies the memory type
- Change the t85 to your microcontroller by looking up the associated keyword in the documentation links provided at the beginning
Note, the arguments are taken from the avrdude documentation. This can be obtained from the links provided at the beginning.
Hit Apply when all done!
Using the Programmer
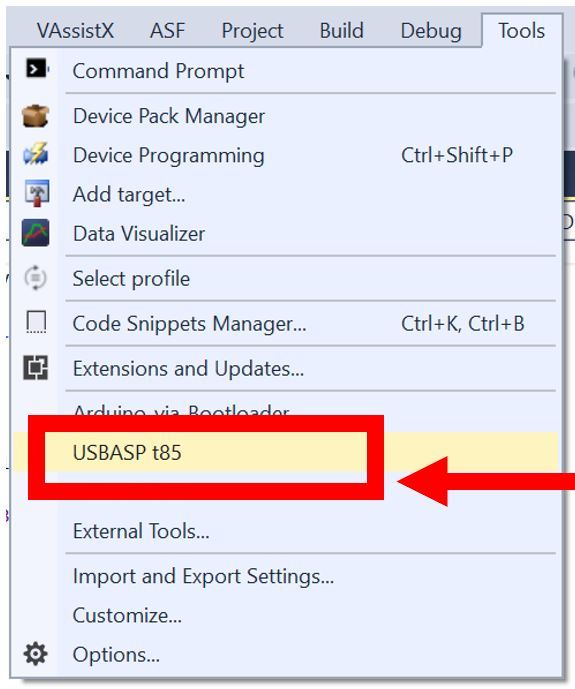
To program the AVR, ensure it's connected to the USBasp, go to external tools and click on the tool you just created.
Don't forget to build your solution before your program.
It should be all programmed!
Troubleshooting
If problems occur:
- Try using different USB ports to plug in the USBasp programmer into
- Ensure the AVR is connected to the programmer
- Read through every step carefully again and ensure the command and arguments in the external tools setup are correct
Otherwise, you're all good to go!