Program a "Startup Dashboard"
by yehyarocks in Circuits > Microsoft
5227 Views, 47 Favorites, 0 Comments
Program a "Startup Dashboard"
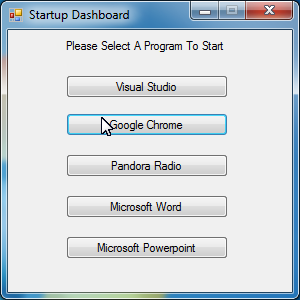
Every time I power up my PC I always look around my cluttered desktop for programs that I want to open. This led me to designing and programming the "Startup Dashboard", which in theory would help me open up programs much faster and efficiently upon startup. In this Instcrutable I will show you how to program your very own Startup Dashboard in Visual Studio 2013. No programming knowledge required!
Starting a New Form Project
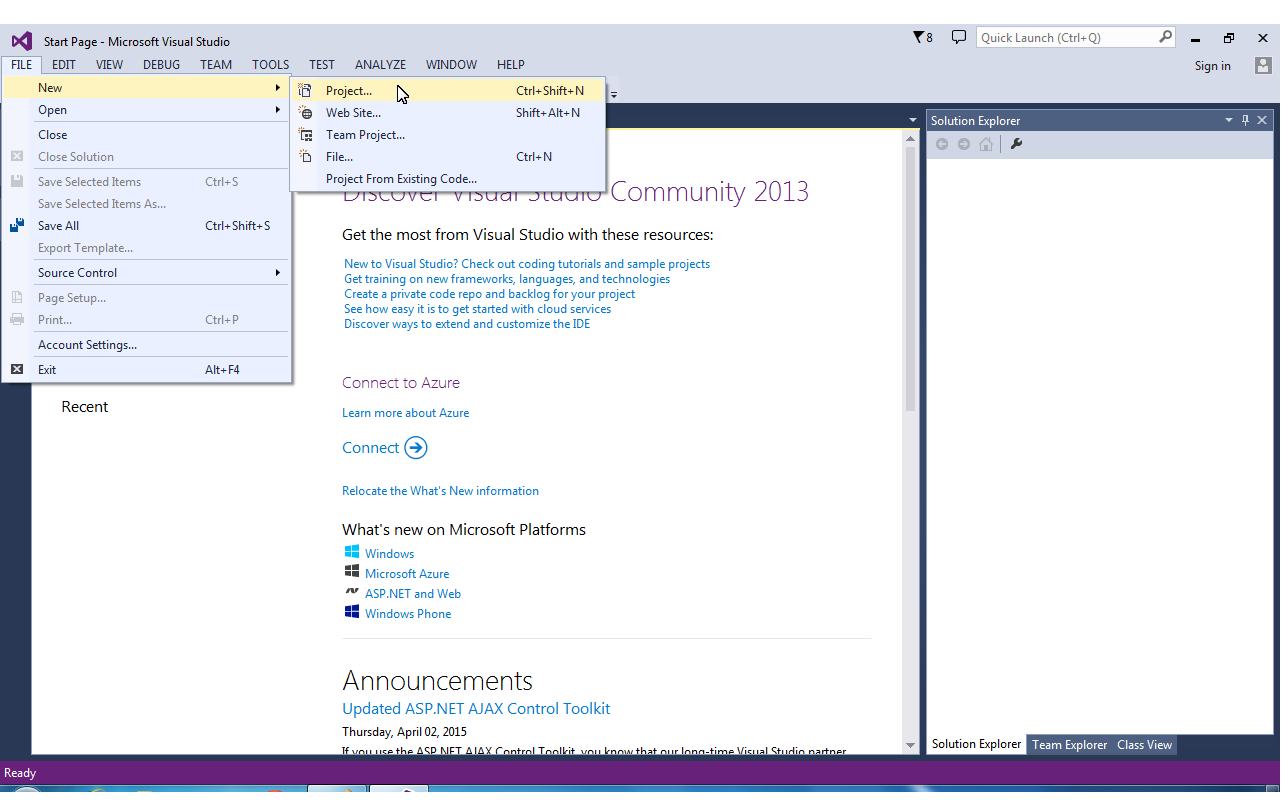
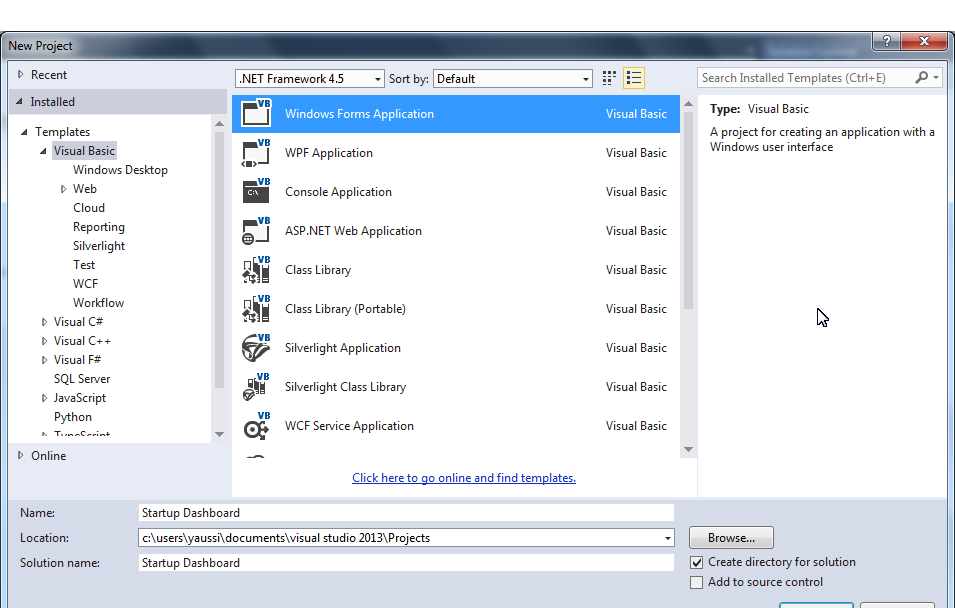
Open Visual Studio and select File>New>New Project. After you click on New Project a Dialog Box will appear. On the Left Side Toolbar, select Visual Basic then from the Right Side, Select Windows Form Application. Rename the Project to "Startup Dashboard", then press "OK".
Setting Up Form Interface
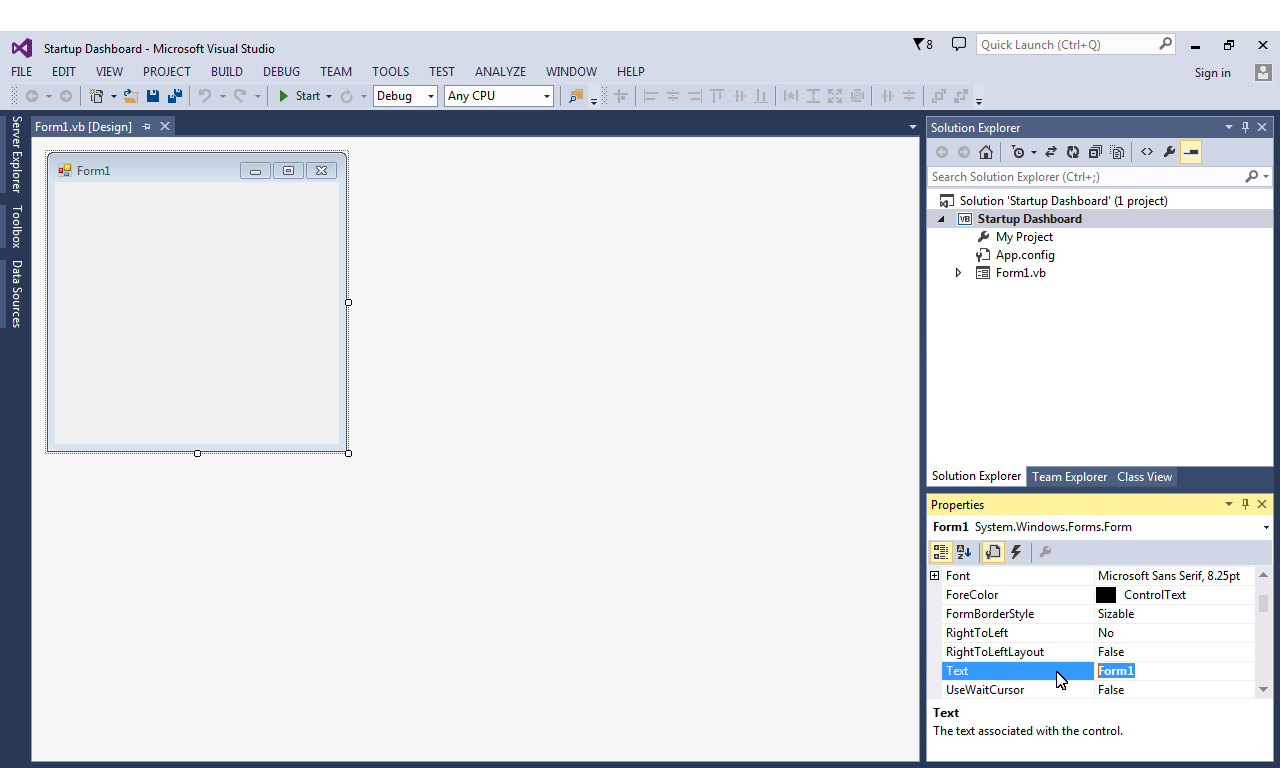
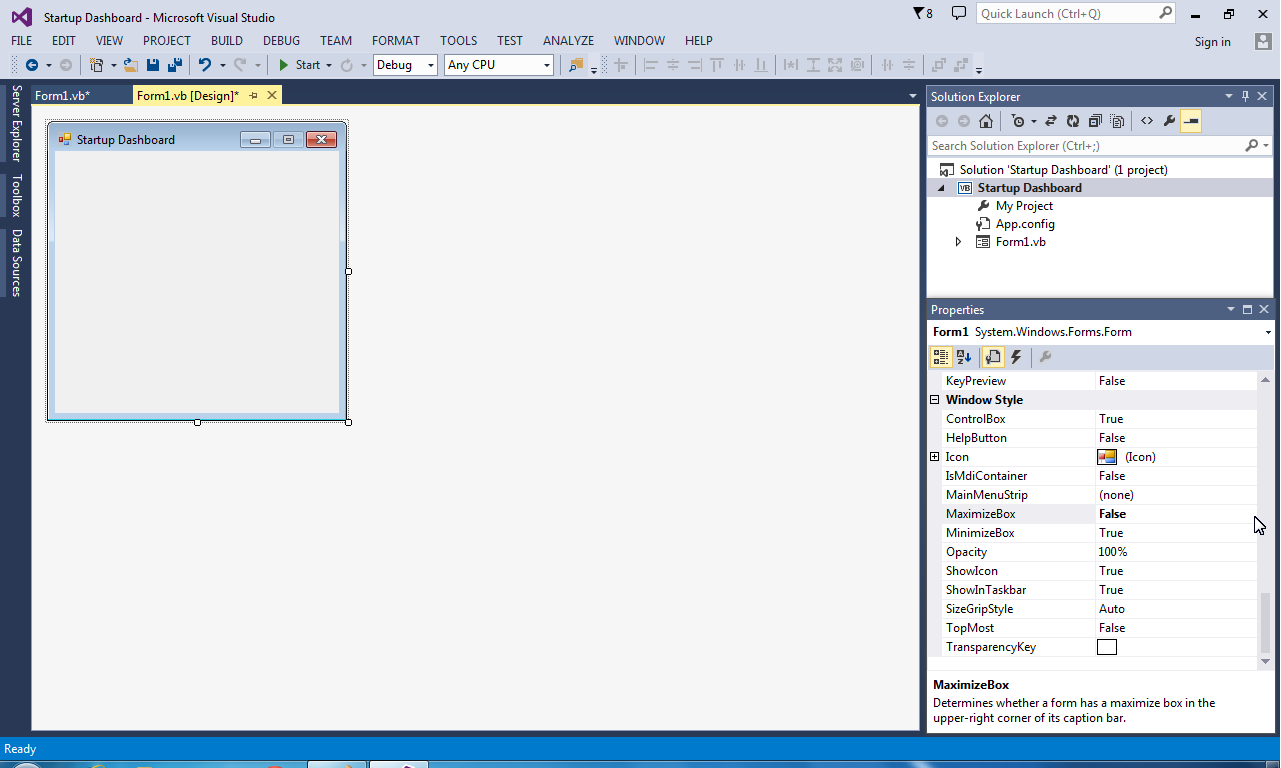
Before we do any coding, we have to setup the GUI or Graphic User Interface so it will look nice and User Friendly. First, we must change the text in the "Text" Field shown in the bottom right corner to "Startup Dashboard". Next scroll down to the option of "Maximize Box" in the category "Window Style". Change the option from True to False.
Setting Up Form Interface 2
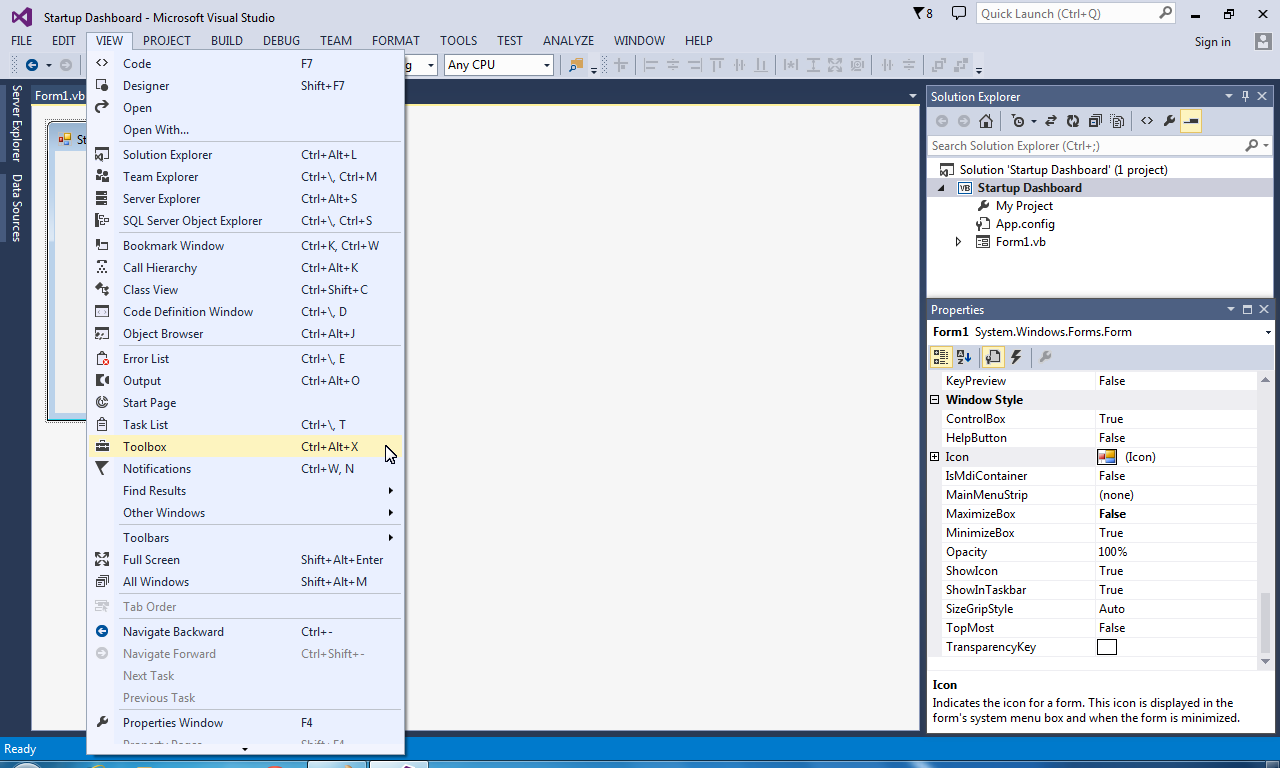
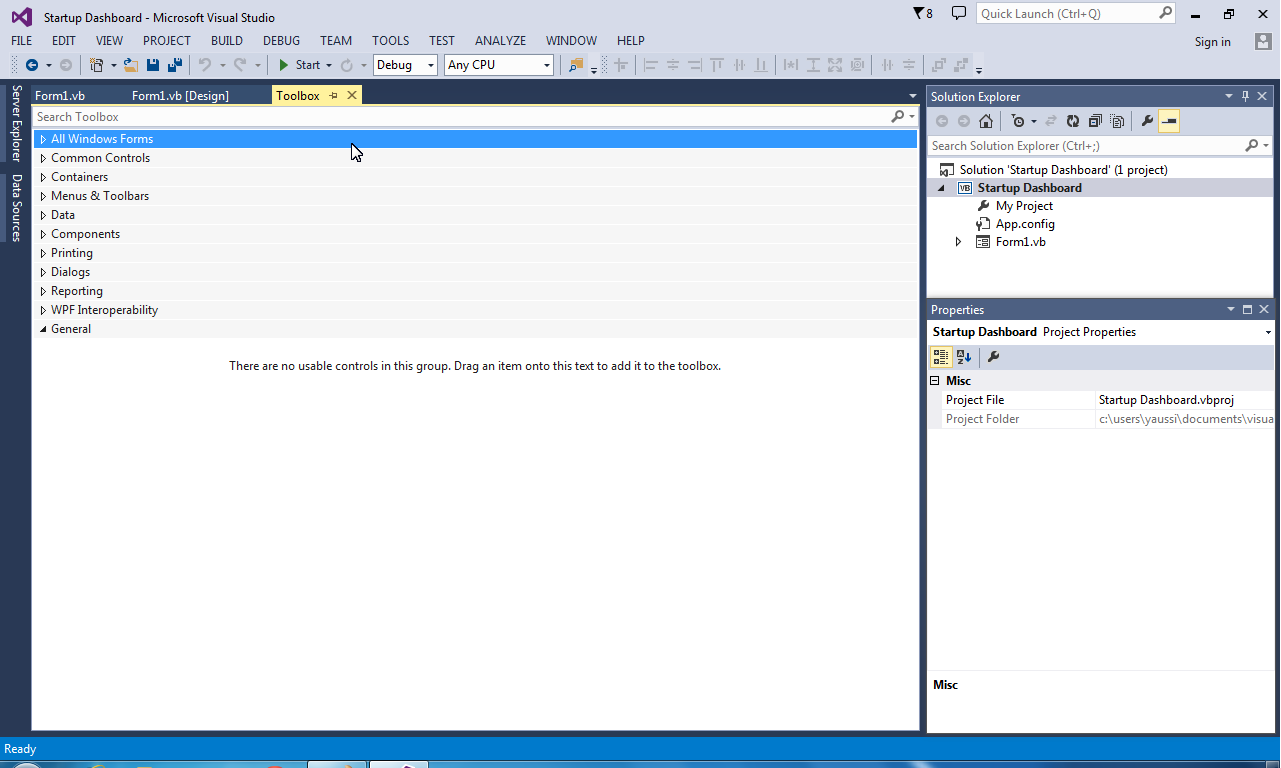
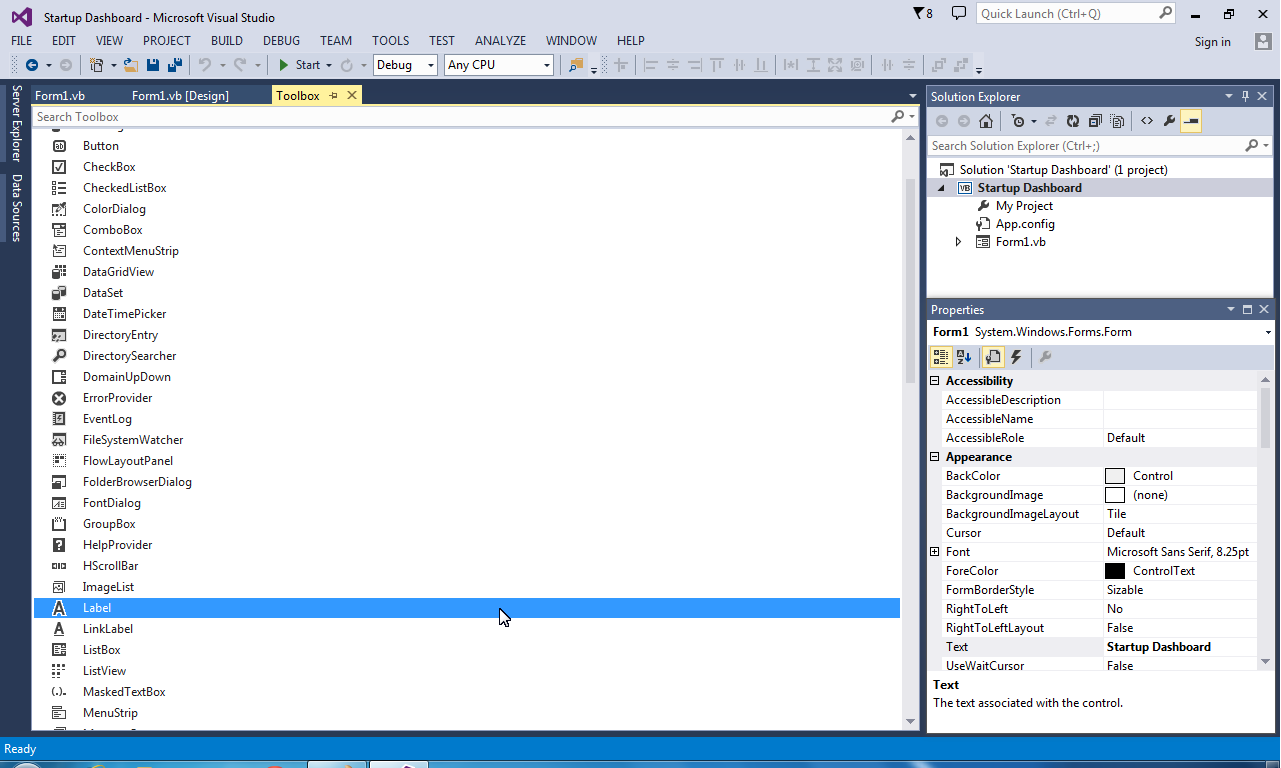
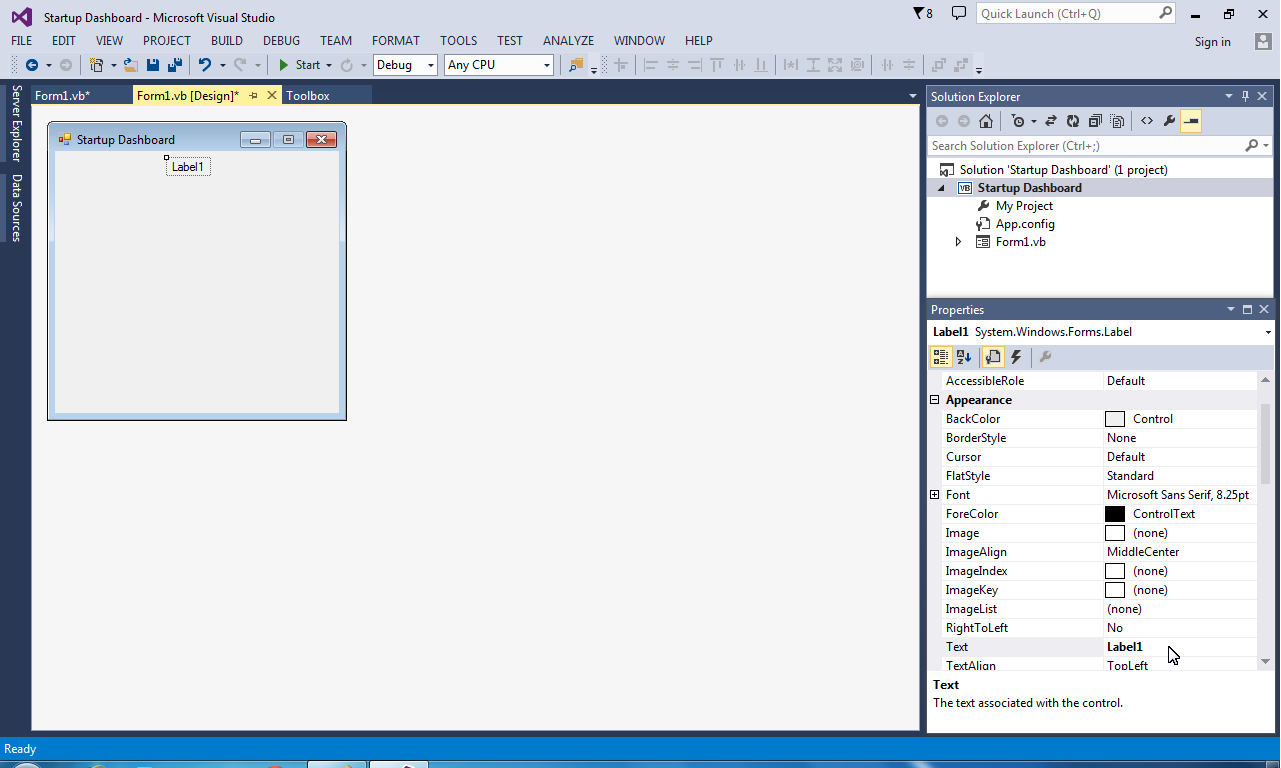
Next, access your toolbox by going to the View Tab on the top of your screen, then scroll down to 'Tool Box' and click it. This should open up a new window with all the Form Tools. Now that you are in the Tool Box, select the first Category (All Windows Forms) and scroll down until you can see the object "Label". Double click on that, this should add a label to your Form. Now you drag it and center it with the Form. Next step is to change what the Label says. To do this, you go to the bottom right corner and scroll down to where you see "Text" and enter "Please Select A Program To Start".
Setting Up Form Interface 3
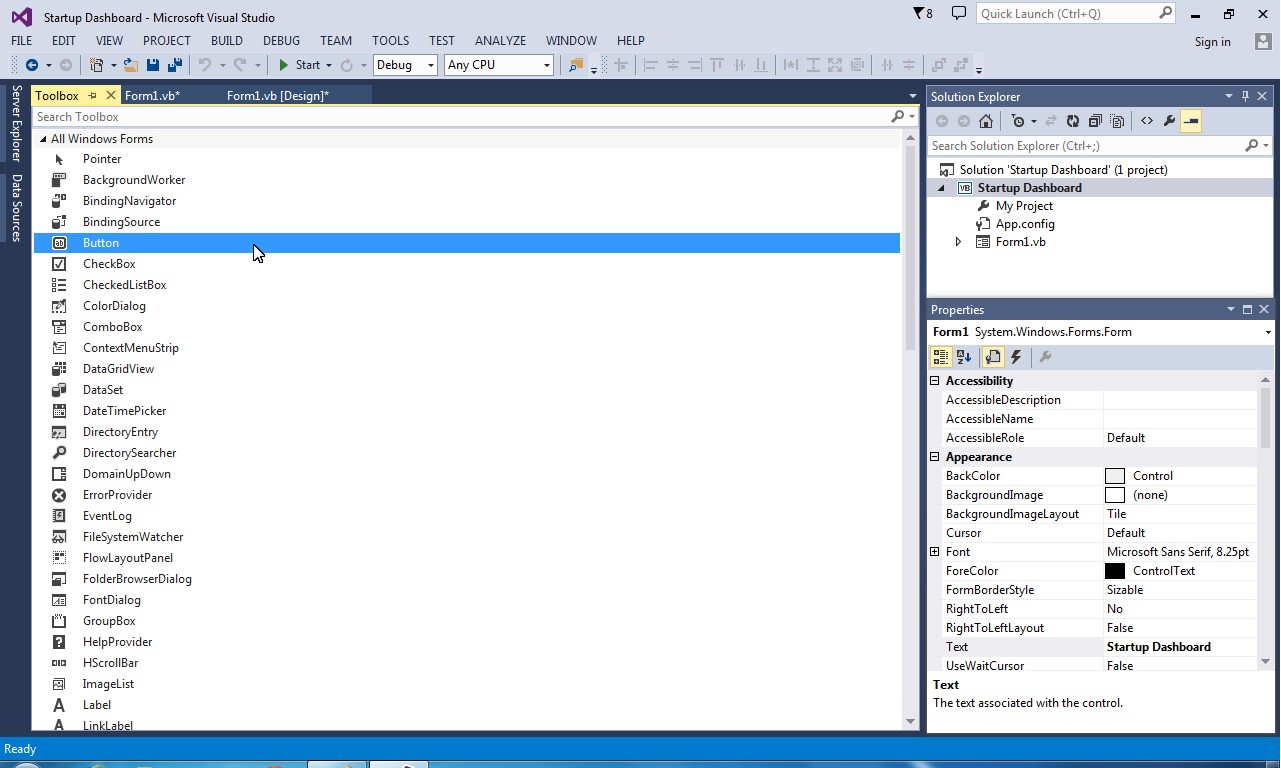
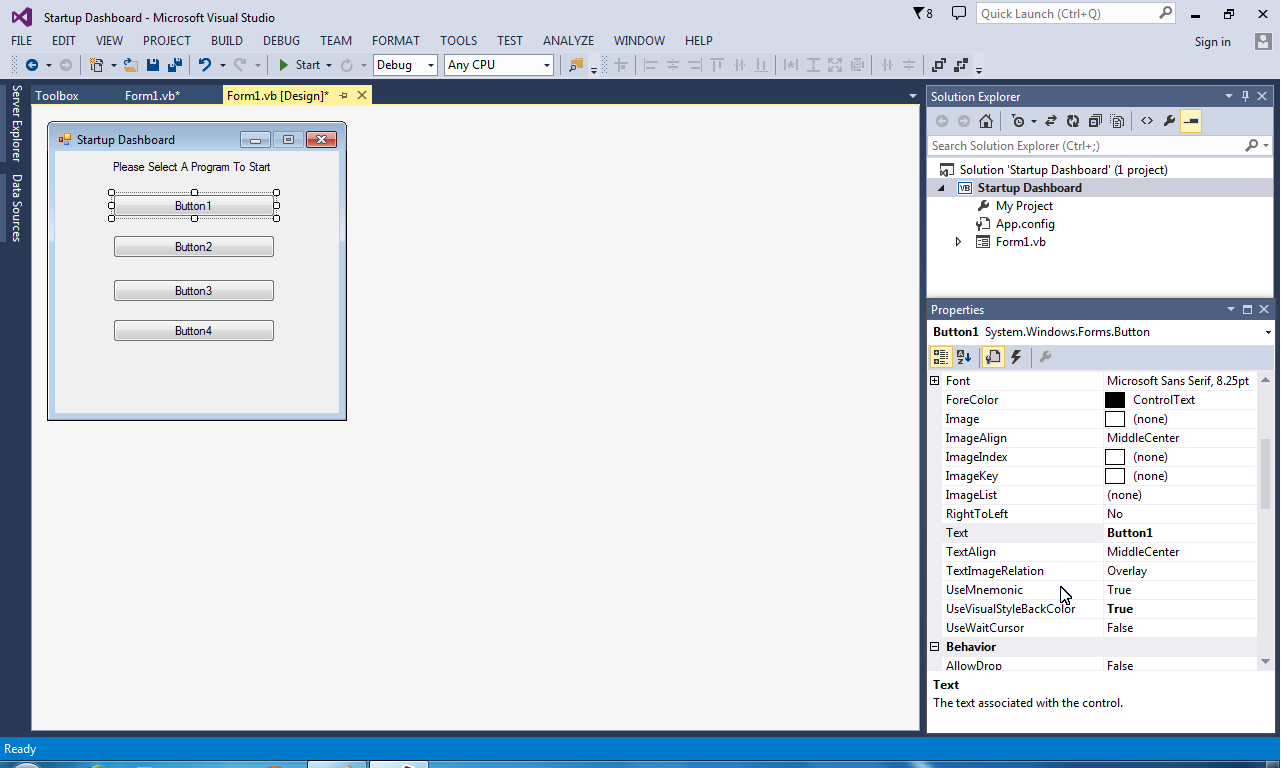
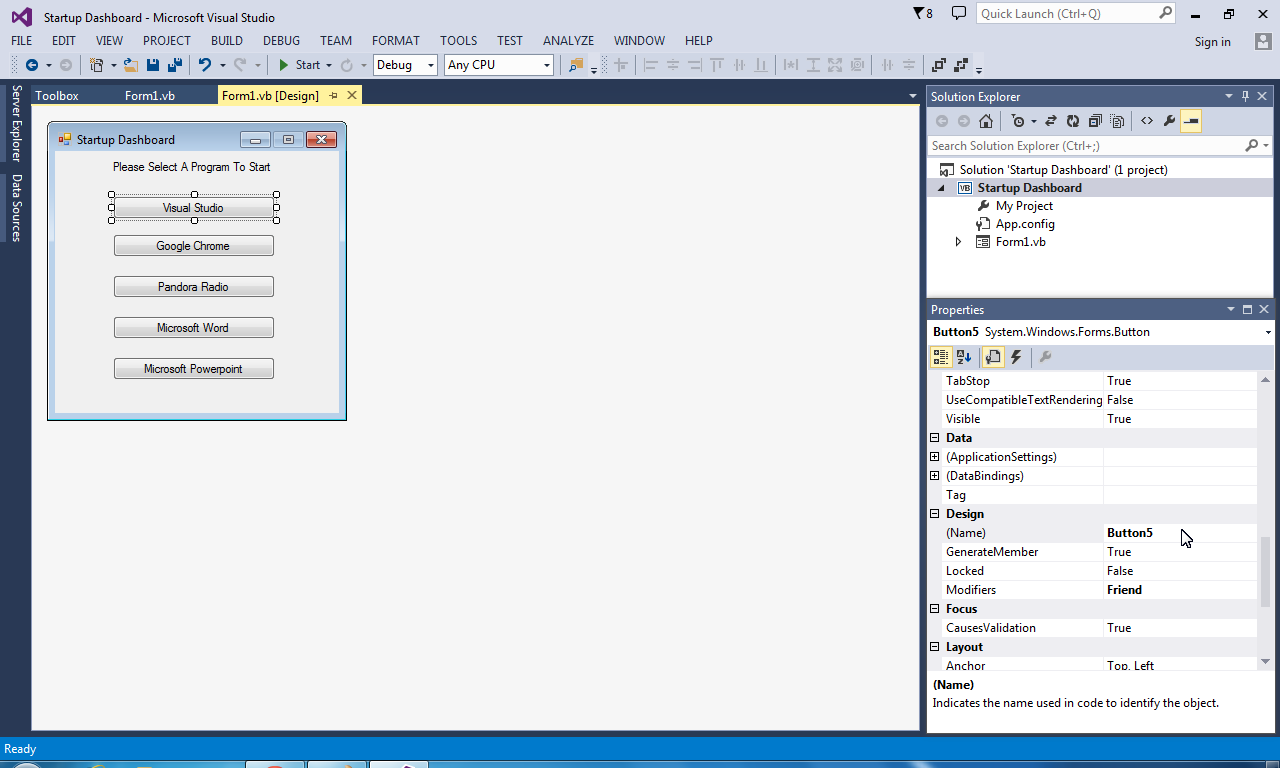
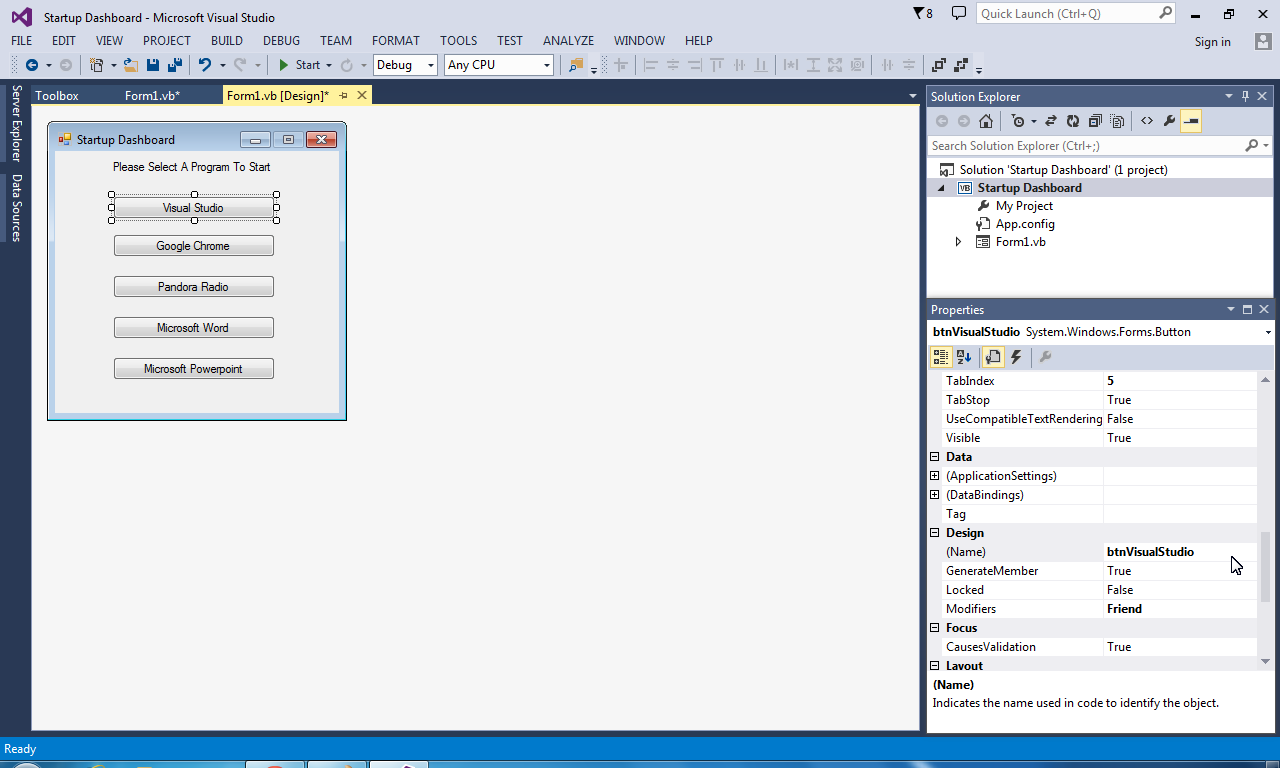
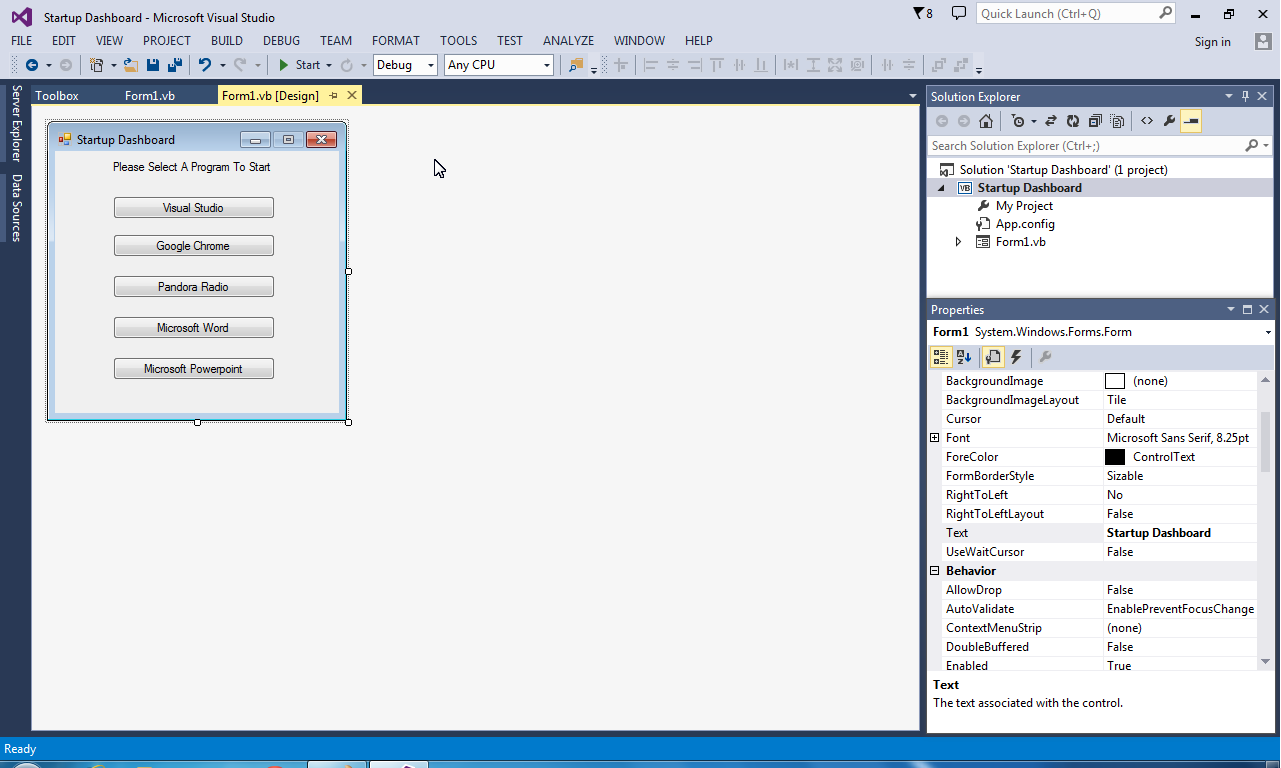
Now that your Label is done, it is time to add buttons. Go into your Tool Box and scroll until you see the object "Button". Double click on that and make it as wide as your Label. You can accomplish this the same way you size a picture in Microsoft Word. It also auto aligns to help you out as well. After sizing it, right click and select "Copy" from the drop down menu. Paste this button four more times for a total of five buttons. Space them to your liking. To change the text of the button , simply click on the button once, then go to the bottom right corner and scroll down to "Text". I named my buttons "Visual Studio", "Google Chrome", "Pandora Radio", "Microsoft Word", and "Microsoft PowerPoint". After you changed the text, go through the same process but in the "Name" section below "Text". All you need to do is change it from "Button*" to "btnYourProgram". The end result should look like the last picture in this step's slide show. You can change them to any program on your computer, you just need to change the code I had made. If you need any help with that just shoot me a comment.
Coding the Buttons
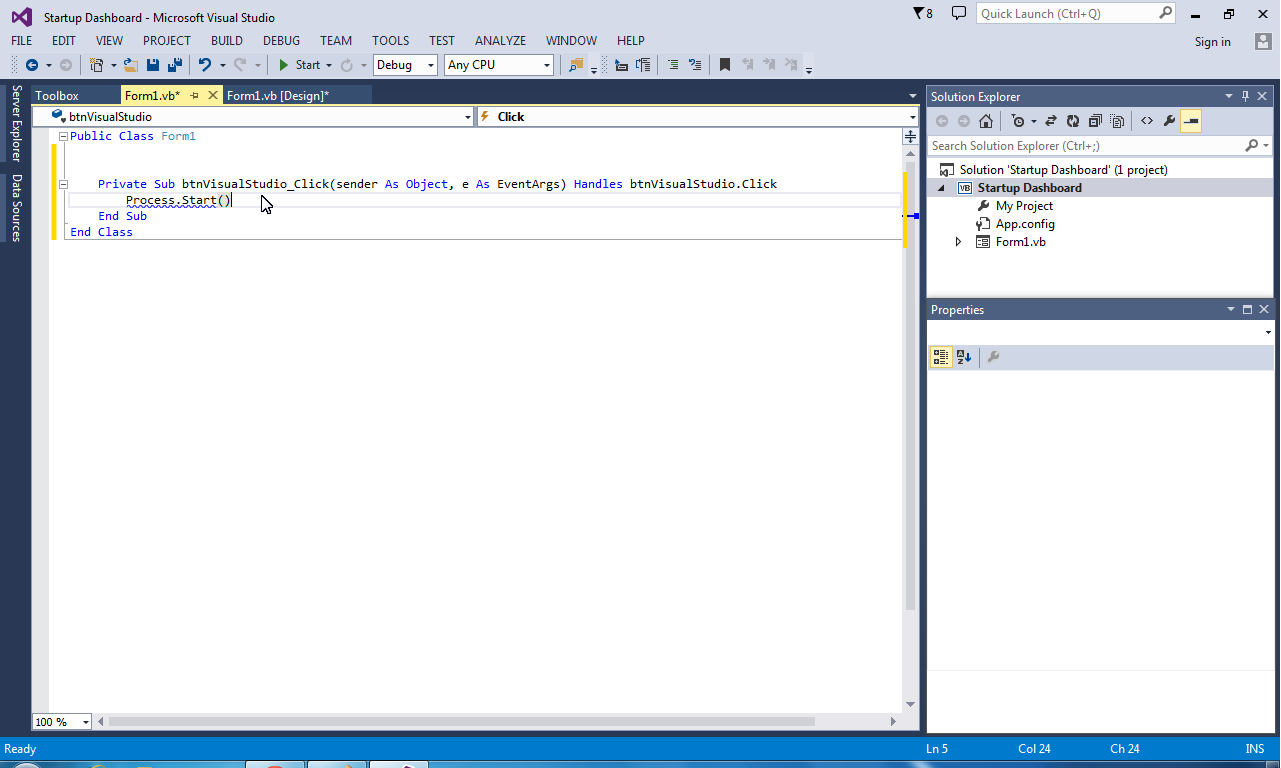
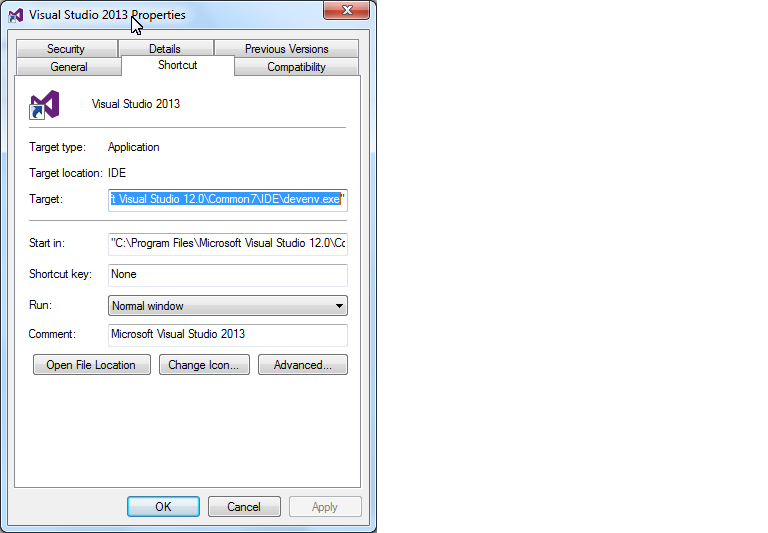
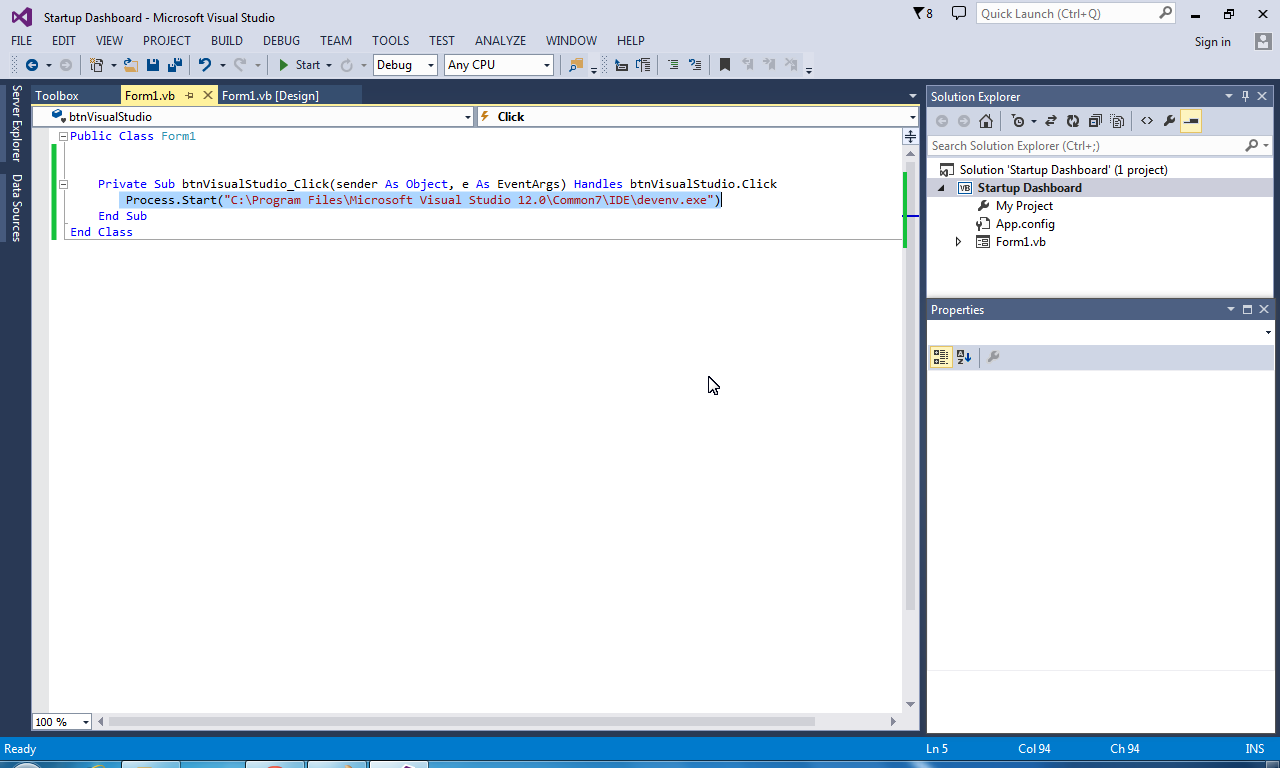
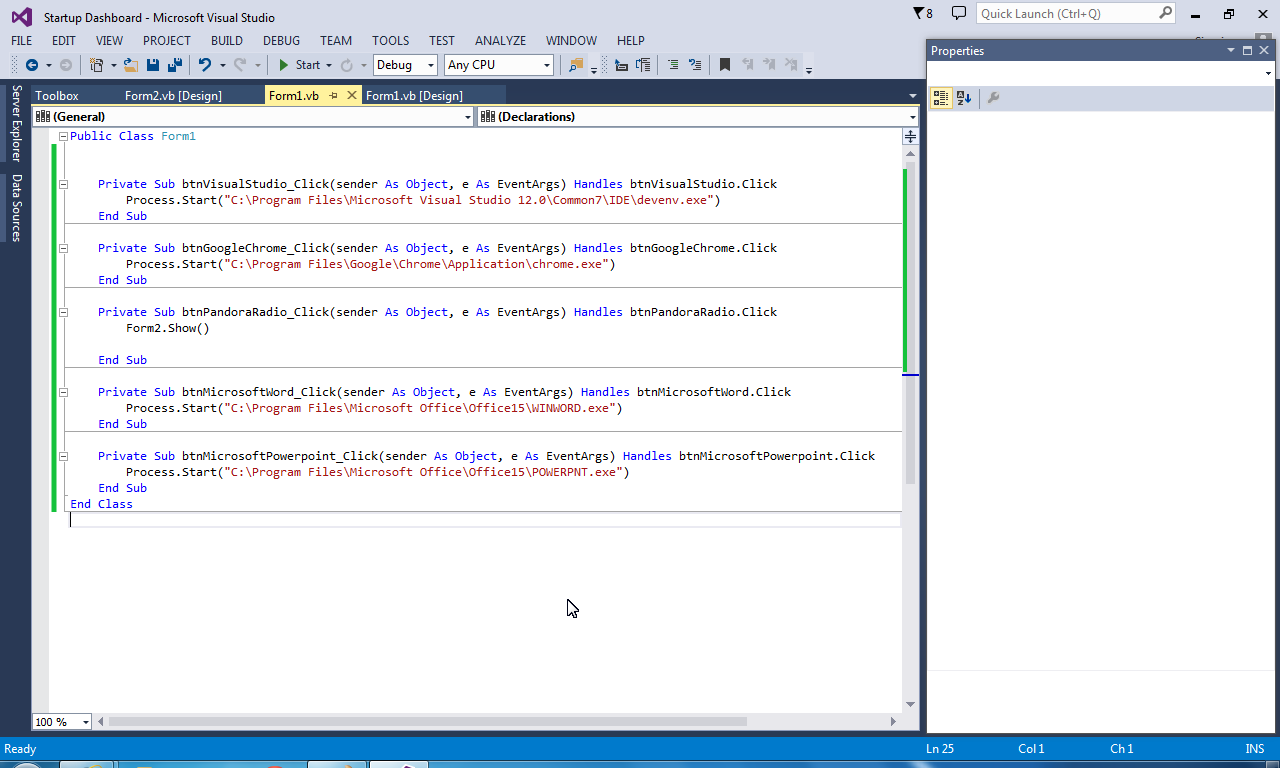
Here comes the fun part! Don't be intimidated by the word coding, when you get the hang of it, It becomes pretty fun! Double click on your first button and it should take you to a code screen like the one showed in the first picture. The first thing you should type is Process.Start(""). Then go to the shortcut of the program you want to open with the button and find its "Target Location". Highlight that without the quotation marks and copy and paste it into the Quotations of Process.Start(""). Do that for every button EXCEPT Pandora Radio. All you need to do for Pandora is type Form2.Show(). If you need a visual, the last picture in this step's slide show is of the completed code.
Setting Up Pandora Radio
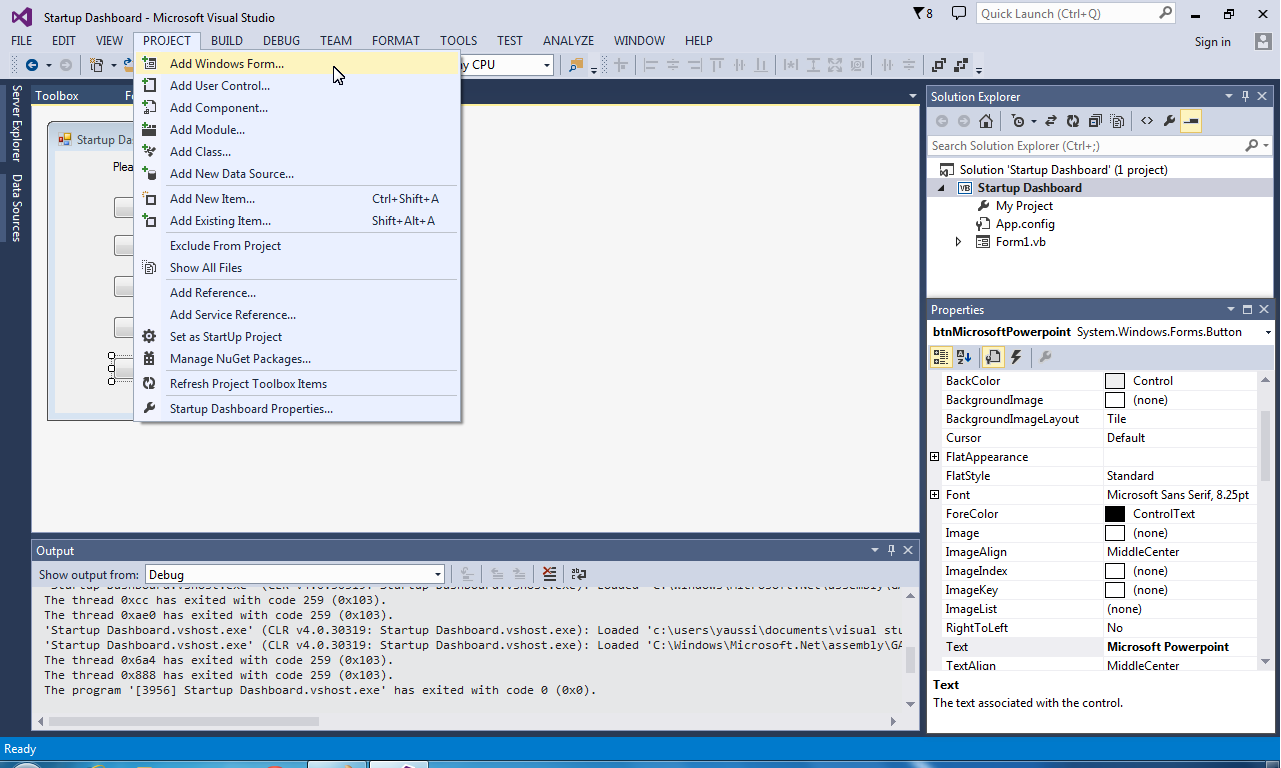
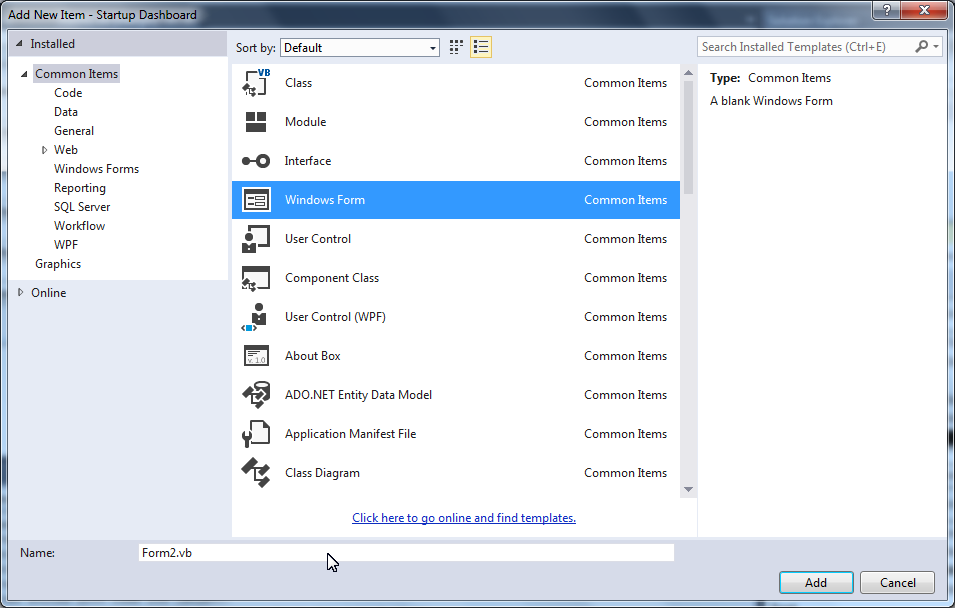
After you finished coding the buttons, move your cursor to the "Project" Tab and select "Add Windows Form...". This will open up a new dialog box. By default you should be in the "Common" Menu. All you need to do is Select "Windows Form" and press OK. DO NOT CHANGE THE NAME! This will mess with our code we created in the earlier step.
Setting Up Pandora Radio 2
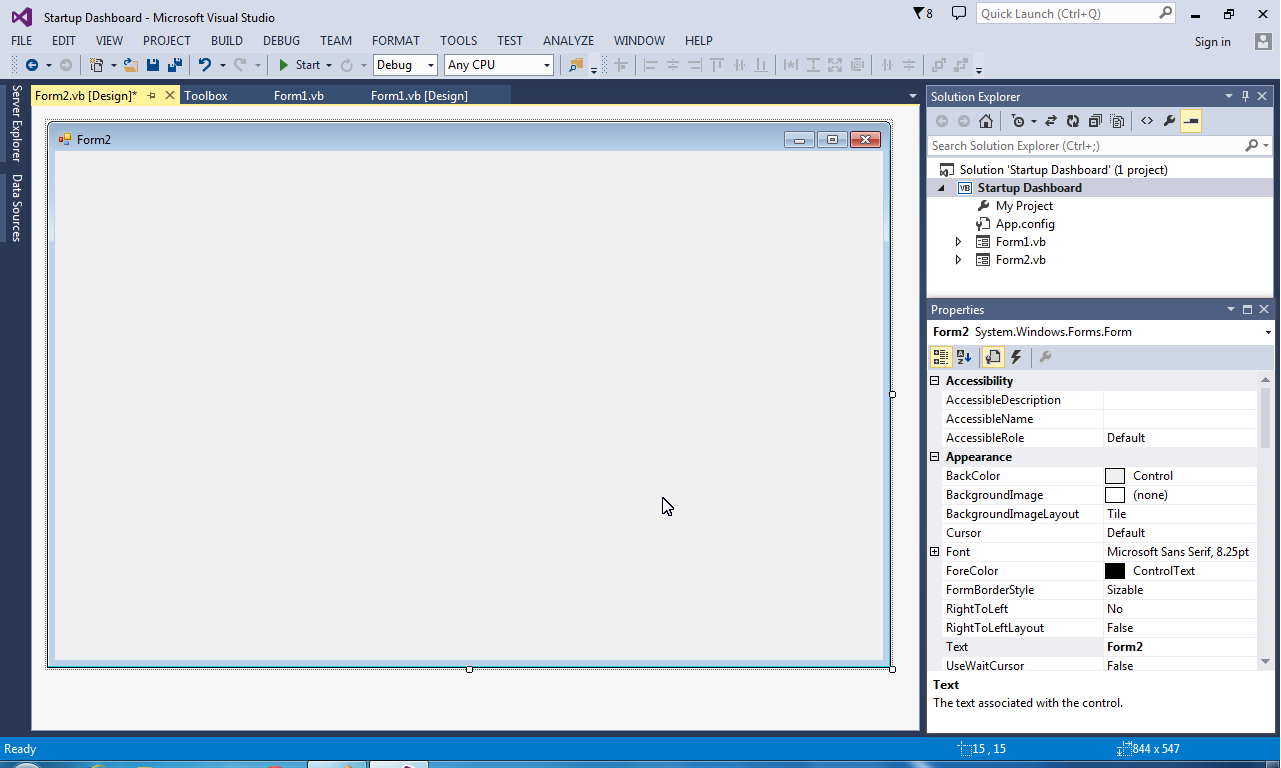
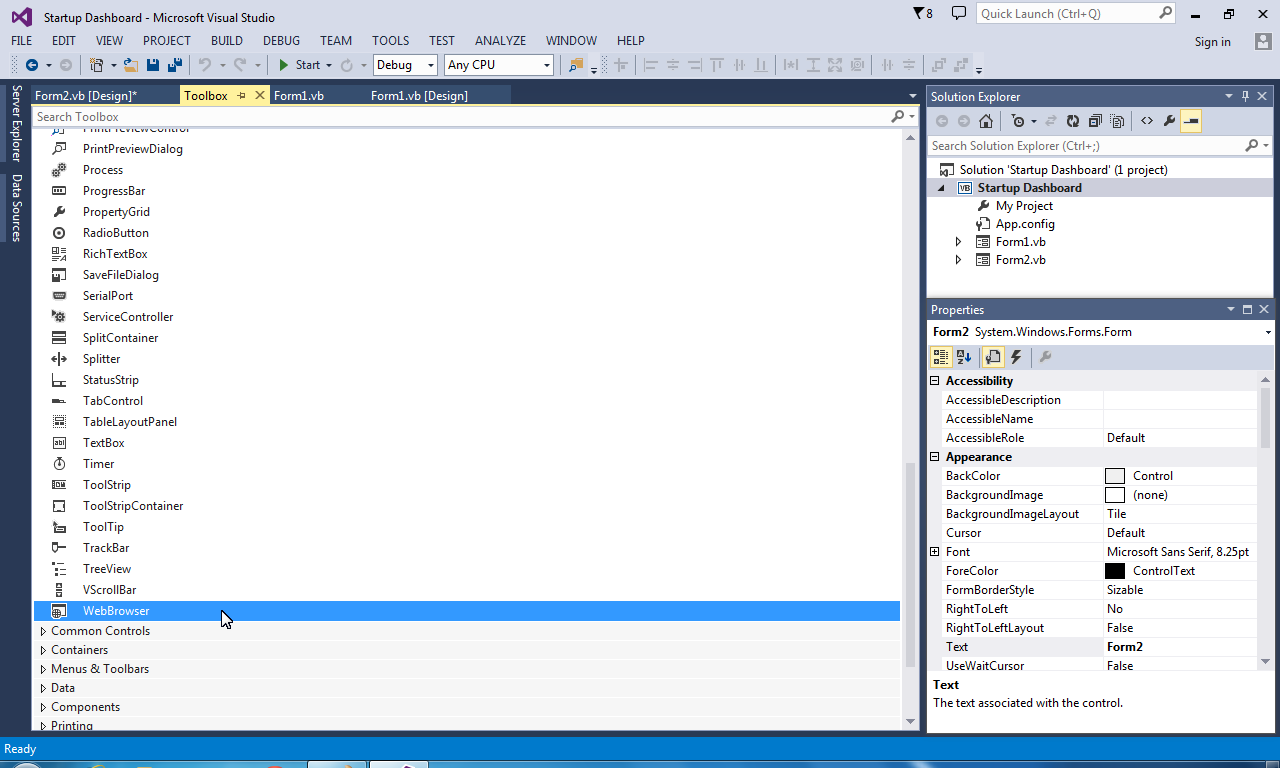
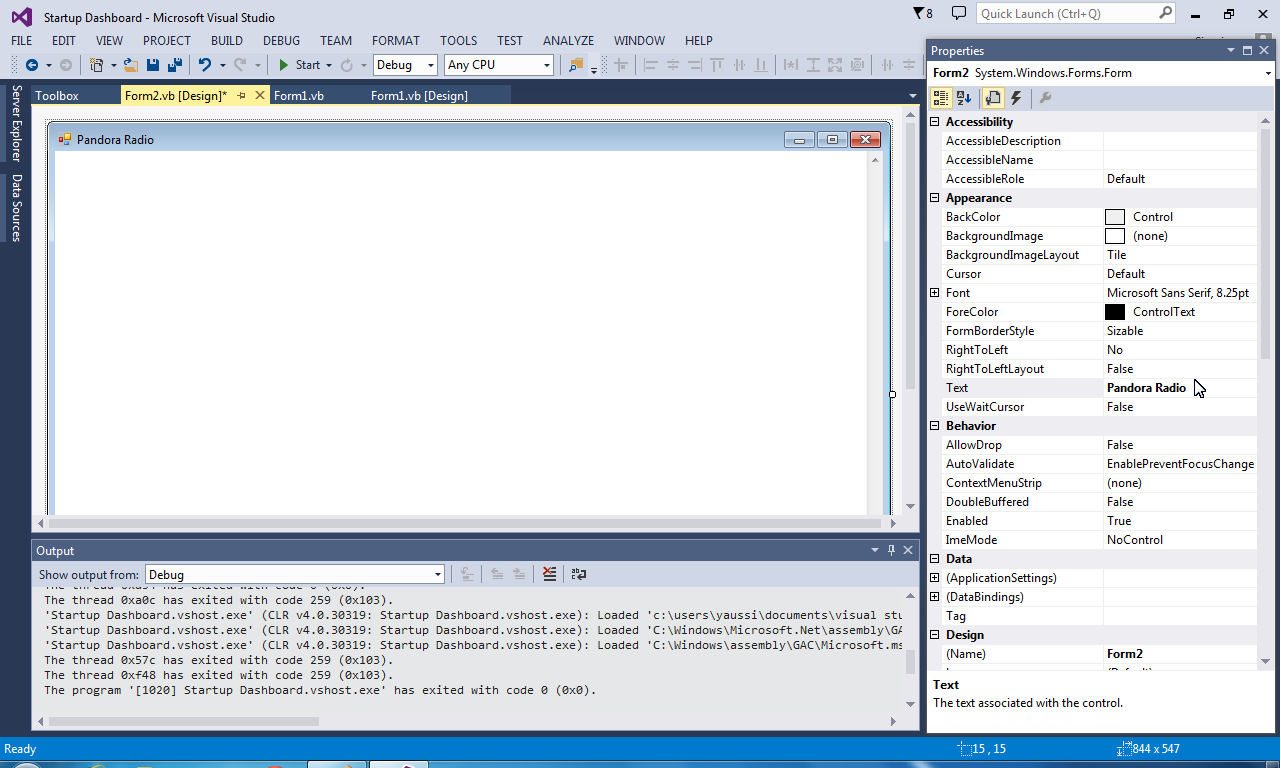
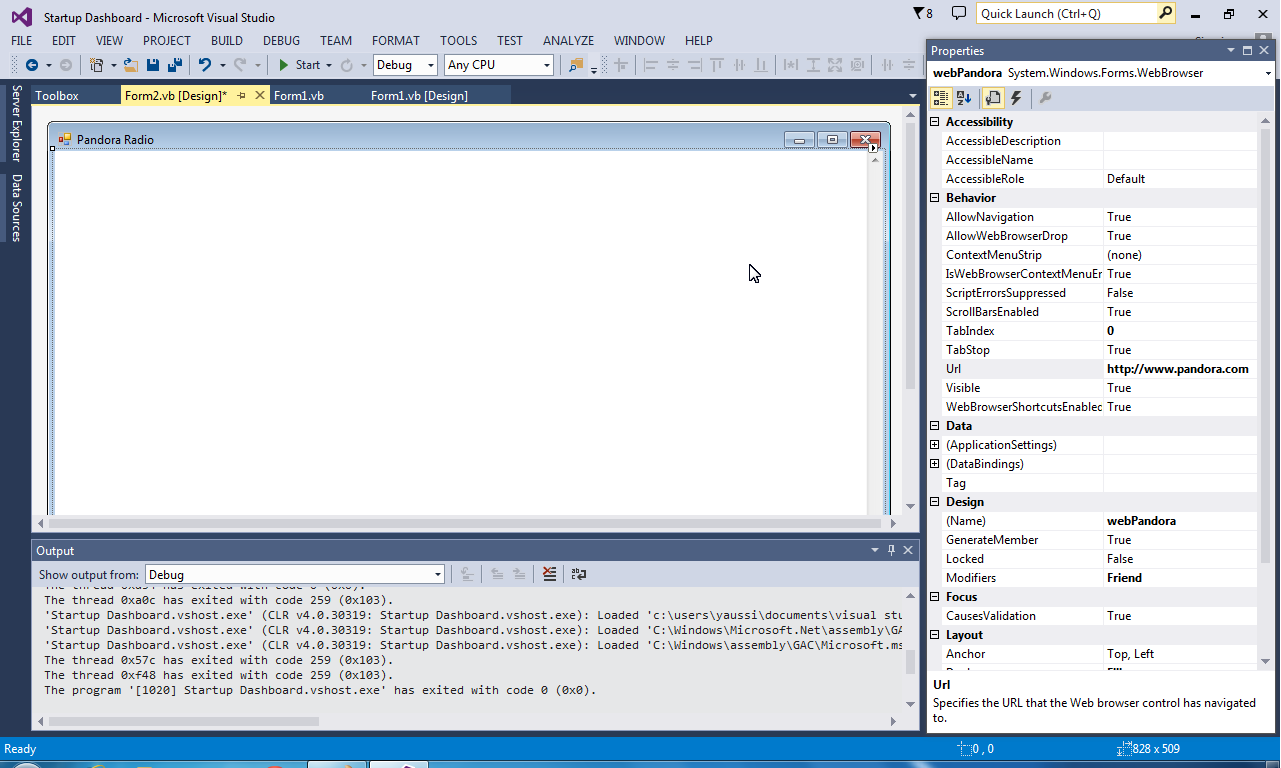
Now that you have your New Form, resize it to a slightly large window. After that is done, go into your Tool Box and scroll down to the object 'Web Browser". Double click that and the inside of your form should turn white. After that, we need to change the text of Form 2 to say "Pandora Radio". To do this, click on the top of the Form, go to the bottom right corner, and scroll to "Text". Just change that to "Pandora Radio". After changing the name of the form, we have to set up the "Browser" to open up Pandora when active. To do this, click on the white part of your Form, go to the bottom right corner and type "http://www.pandora.com" and change the name to "webPandora".
Debug and Test
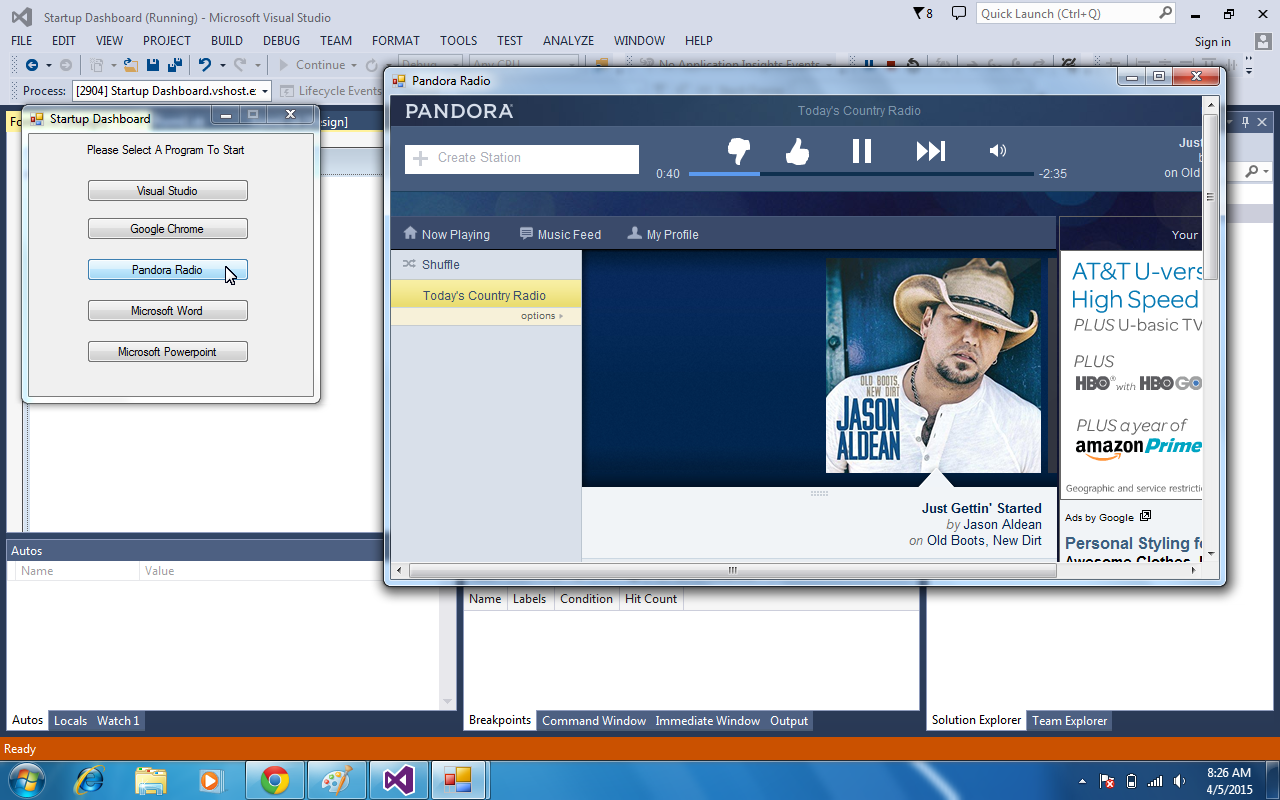
To test the program you had just created, go to the "Debug" tab on the top toolbar and select "Start" or "Run". Your Startup Dashboard should start up with no errors or problems!
Adding to Startup Processes
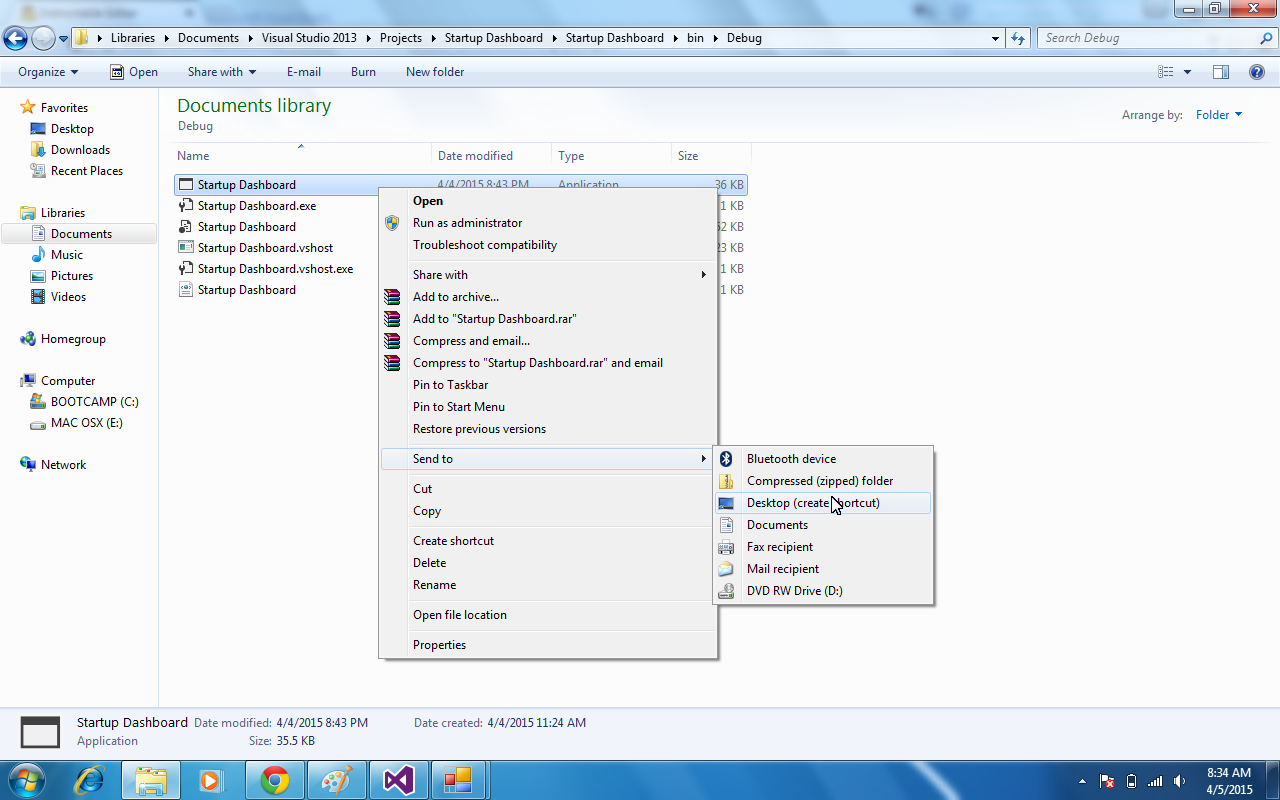
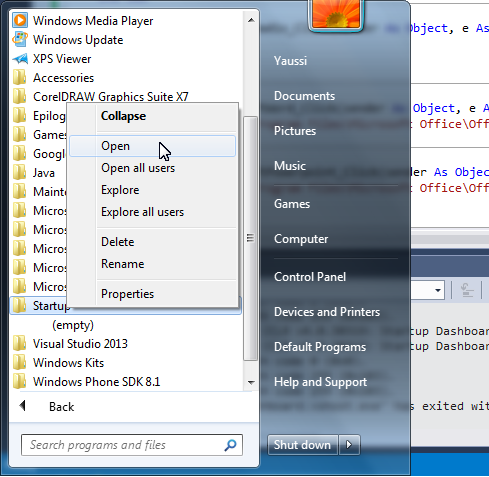
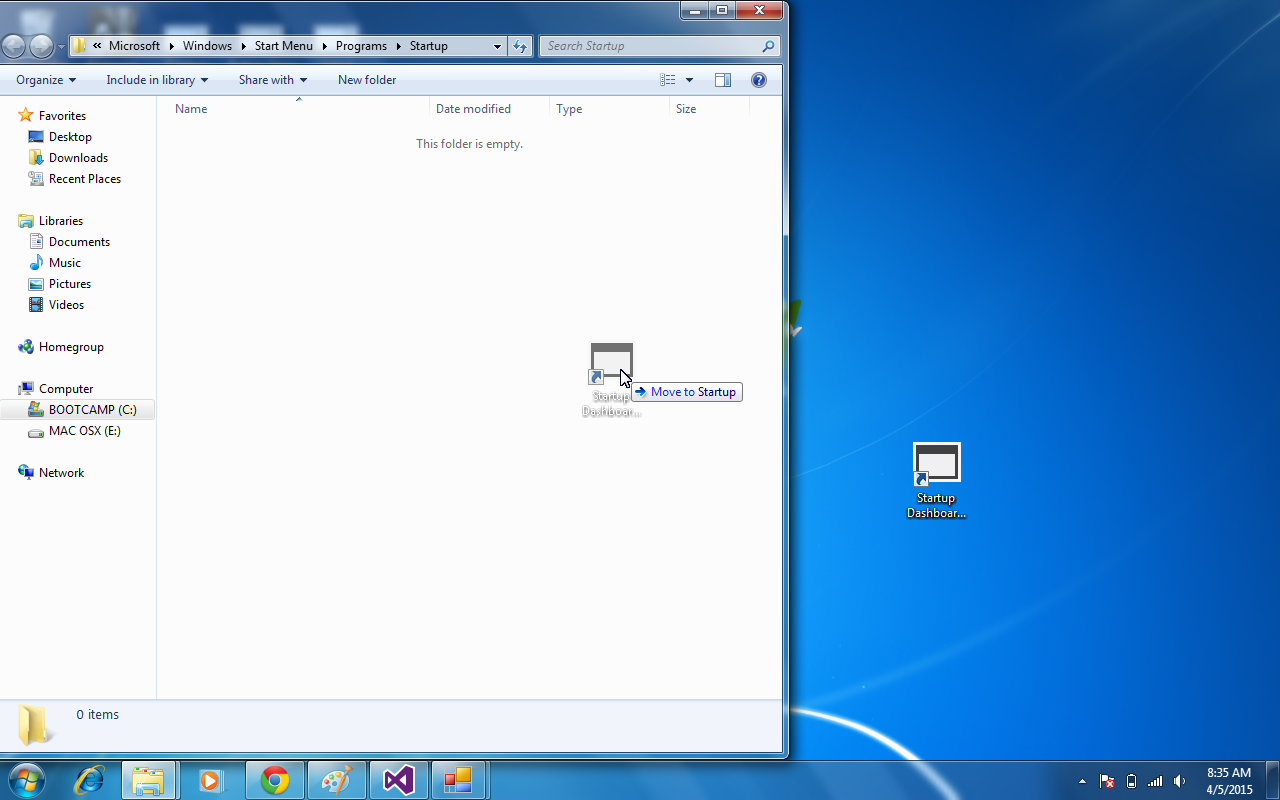
Now you need to locate your Program. It should be in Libraries>Documents>Visual Studio 2013>Projects>Startup Dashboard>Startup Dashboard>bin>Debug. In the Debug folder, your application should be the first one shown. Right click on it and "Send It" to the desktop. This creates a shortcut on the Desktop. Now go to the Start Button>All Programs>Startup. Right click on the Startup folder and drag the shortcut into the folder.
Done and Contest
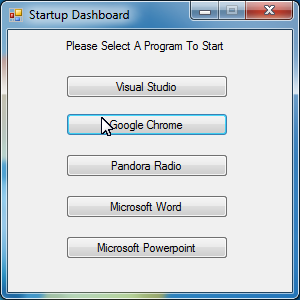
Now you have a fully functional Startup Dashboard! Every time you turn your computer on after a shutdown, this will pop up after all the essential Windows Processes are loaded during Startup! I entered this Instcrutable into the Coded Creations Contest. I would love for you to help me out with a vote! Thanks For Viewing!