Procreate Illustration
by Taylor_Moir in Design > Digital Graphics
352 Views, 0 Favorites, 0 Comments
Procreate Illustration
Hi. My name is Taylor Moir. I help people find creative ways to spend their free time. I cangive you a way to use your creativity to make something you are proud of and want to show to your friends and family. I am going to show you how to use the basics of Procreate in 12 steps; with these steps you can make illustrations of pictures. My friends and family are proud of my work and yours will be too. Studies have shown that seeing completed art work releases dopamine; which is the feel good hormone, and will increase your feeling of confidence.
Supplies


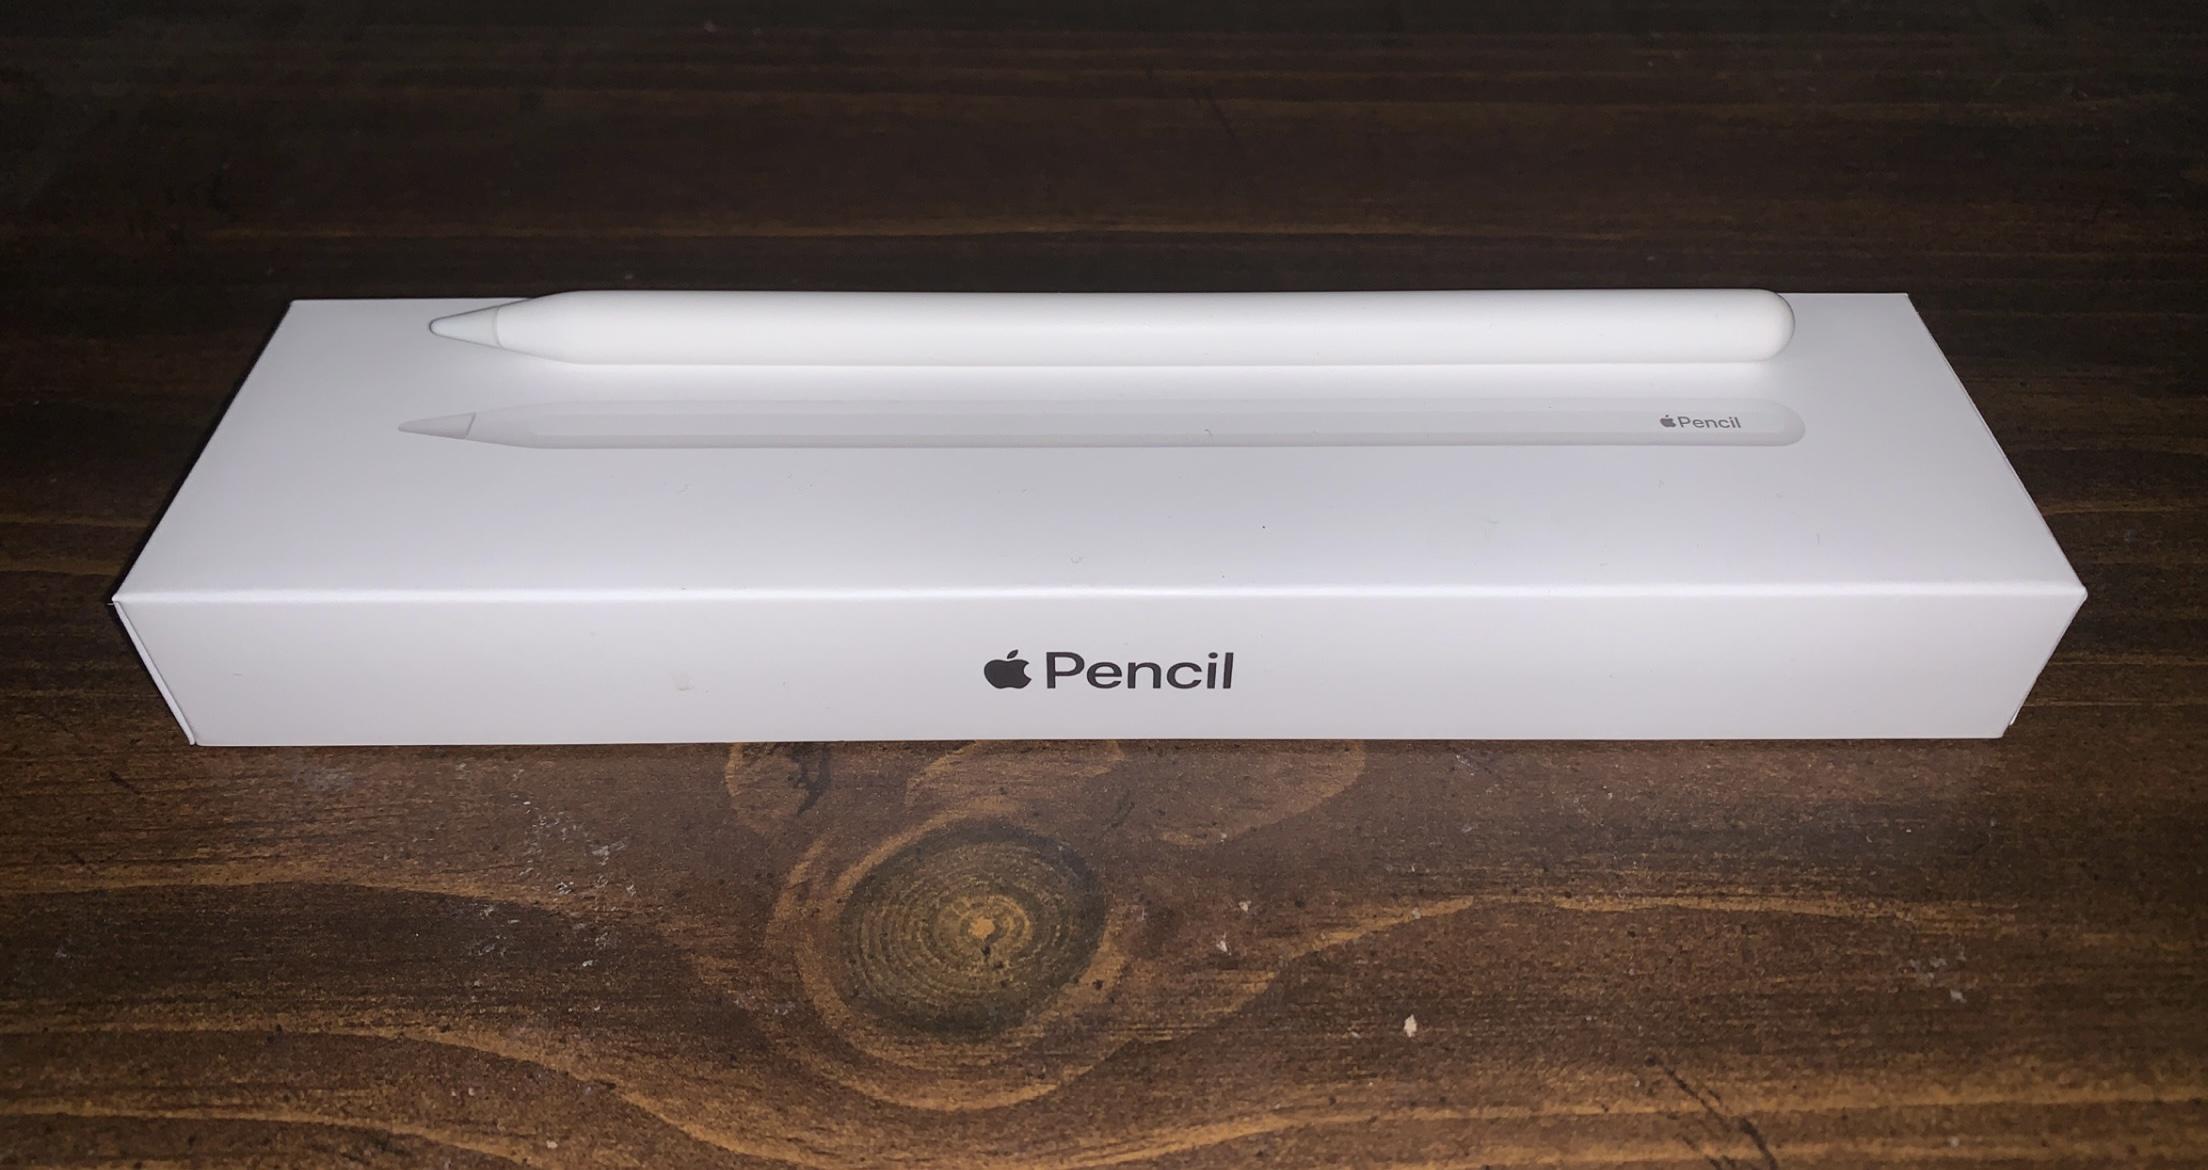
The supplies you will need to make a Procreate illustration are an iPad Pro, Apple Pencil and the Procreate app. I got my IPad Pro and Apple Pencil from Apple, but you can get them from Walmart, Target, Best Buy, and Amazon; and many more places. Procreate can be downloaded off of the Apple App Store. With these supplies, you can begin to create!
Upload a Picture
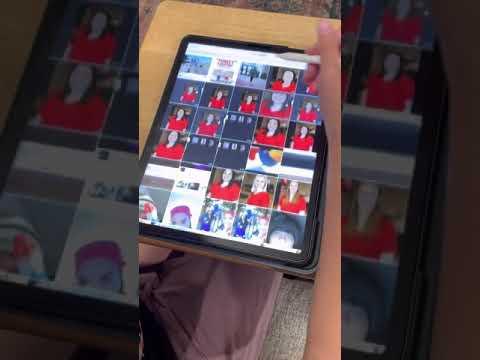
The first step is to uploaded a picture. To begin the project, upload a photo prepared from camera roll on the device being used. If one isn’t prepared, please take a moment to upload one for the project. To upload a picture to begin the project, start in the gallery; this will be the first page that pops up when you open your app. On the top right of the screen, there are three words select, import, photo and +. Click on the photo option. Now choose the photo being used for the illustration. It will automatically open. The picture being illustrated should be ready to be worked on in this step.
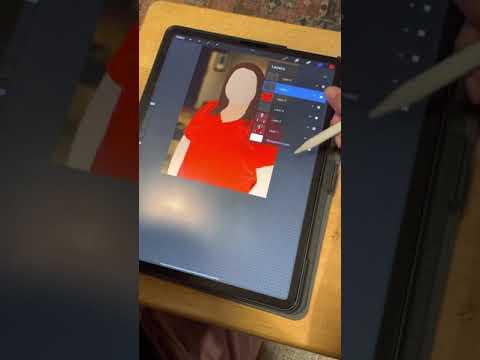
Adding Layers

The next step is to start adding layers; first add a layer so the art isn’t directly on top of the photo. Add a layer by clicking the button with two squares on it. It is on the right side second from the end. Once selecting this button, it will open a drop down menu. On the drop down menu click the + to add a layer. Make a new layer every time, working on a new area of the project.Review this step multiple times.
Color Matching
Step Three is how to select a color. Start by color matching the skin color to do the arms, neck, and maybe legs. Using the color match tool use one finger to touch and hold until the eye dropper appears. This is my go to way to use the color matching tool. Select the preferred color by matching the upper right hand corner to the skin color preferred.
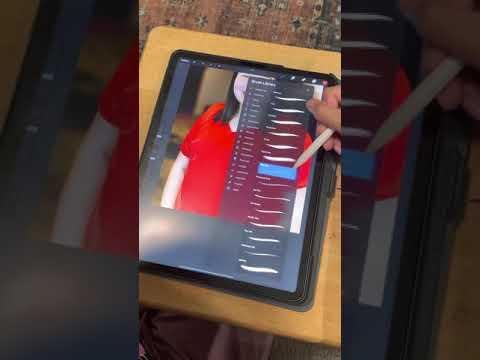
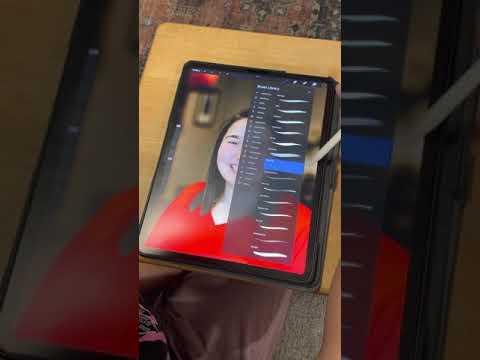
Selecting a Brush
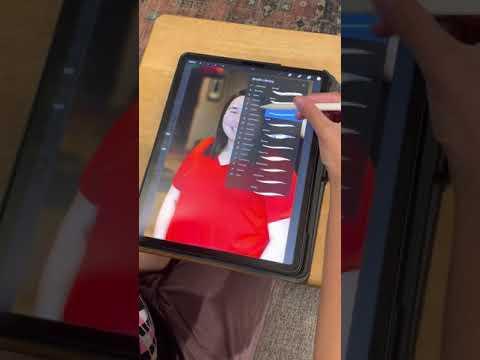
Before starting select a brush. To start outlining the arms, face, and legs use the Calligraphy Monoline brush. To get here go into the brush library by clicking on the paintbrush, on the first button on the right hand side. After clicking this button, it will open a drop down menu and find the calligraphy tab on the right hand side and it will show the brushes in that category. Then on the right hand side the monoline brush is the third one down. When selected the correct brush it will be colored blue instead of grey.
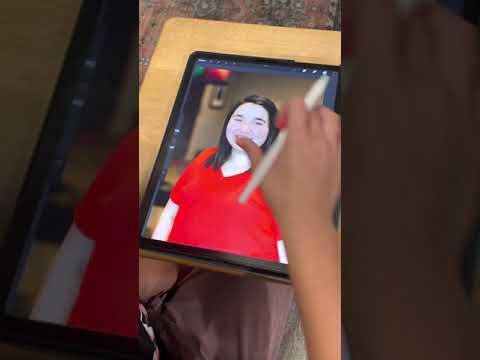
Outlining the Project
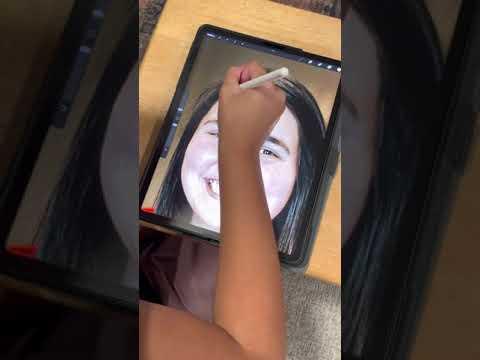
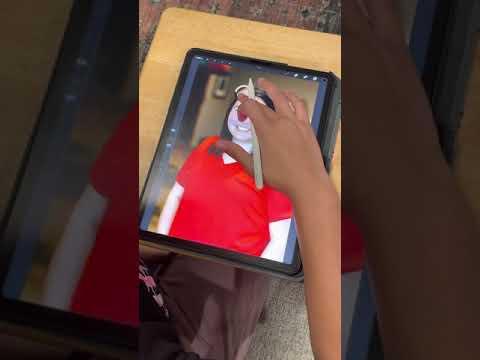
Finally start outlining. After selecting the color and brush selected start outlining. To start outlining it will be the most beneficial to use an Apple Pencil. I find it very helpful to zoom in on the picture and manipulate it to get an accurate outline. Only trace on the outside of the area; fill it in using the color drop. After tracing around the whole object or limb use the color drop tool.
Color Dropping
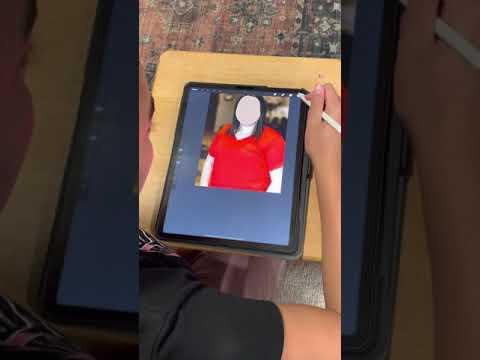
Using Colordrop is the next step. To use color drop use Apple Pencil and click and hold on the color circle in the top right corner. This will allow a color droplet to appear; continue to hold the Apple Pencil to the screen to the area where the color drop is to be applied. This should fill in the area seamlessly without any small areas uncolored. If the whole page turns the color drop color, there is an unconnected line somewhere. To undo this error there is a tool bar on the left hand side with two arrows, one pointing left one pointing right. Select the arrow pointing to the left.
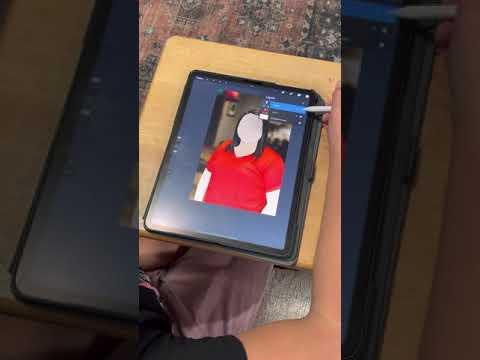
Adding Layers and Reminders
Repeat the following setups to finish the base of the project. Use the calligraphy monoline brush for all of the main areas like the clothing, arms, legs, head including hair. Add a layer every time a new part of the project is start. There are around three layers at this time. They should be 1. Skin/limbs 2. Hair and 3. Clothes. Remember to go slowly and follow the outside area for accurate precision.
Etc.
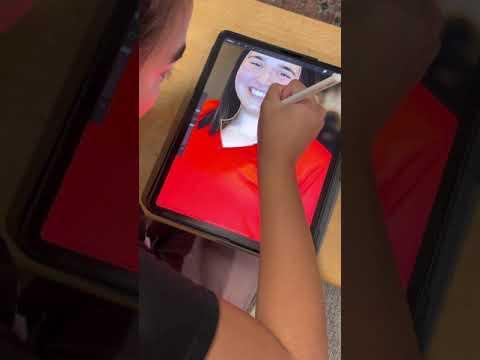
Once the arms, legs, and face are finished, the hair will be next. With the hair follow all of the steps above with color matching and color drop; continue using the monoline brush on drawing the hair. Before starting to outline the hair add another layer. Follow the steps listed in the third paragraph . After finishing the base layer, go onto adding smaller details.
Hiding Layers
If smaller details are desired in the illustration, add another layer above the base layer. The brush I recommend for adding hair details is the Inking, fine tip brush. Click on the brush button on the top right. On the drop down menu select inking then find the fine tip brush; it’s the seventh brush down. Some of the hair details can be traced on the actual picture by hiding the layer below. Hide the layer by selecting the layer drop down bar, clicking the check mark on the layer being working on. This will hide the layer and not delete it. To make the layer reappear click the box where the check mark was, and it will reappear.
Smaller Details
For adding details on the shirt and pants I recommend using the inking, fine tip brush or using the drawing, eaglehawk brush. It is the creators’ choice on what brush to want to use; it is about how the creator want the details on the shirt to look. Feel free to explore other brushes options for different design looks.
Merging the Layers
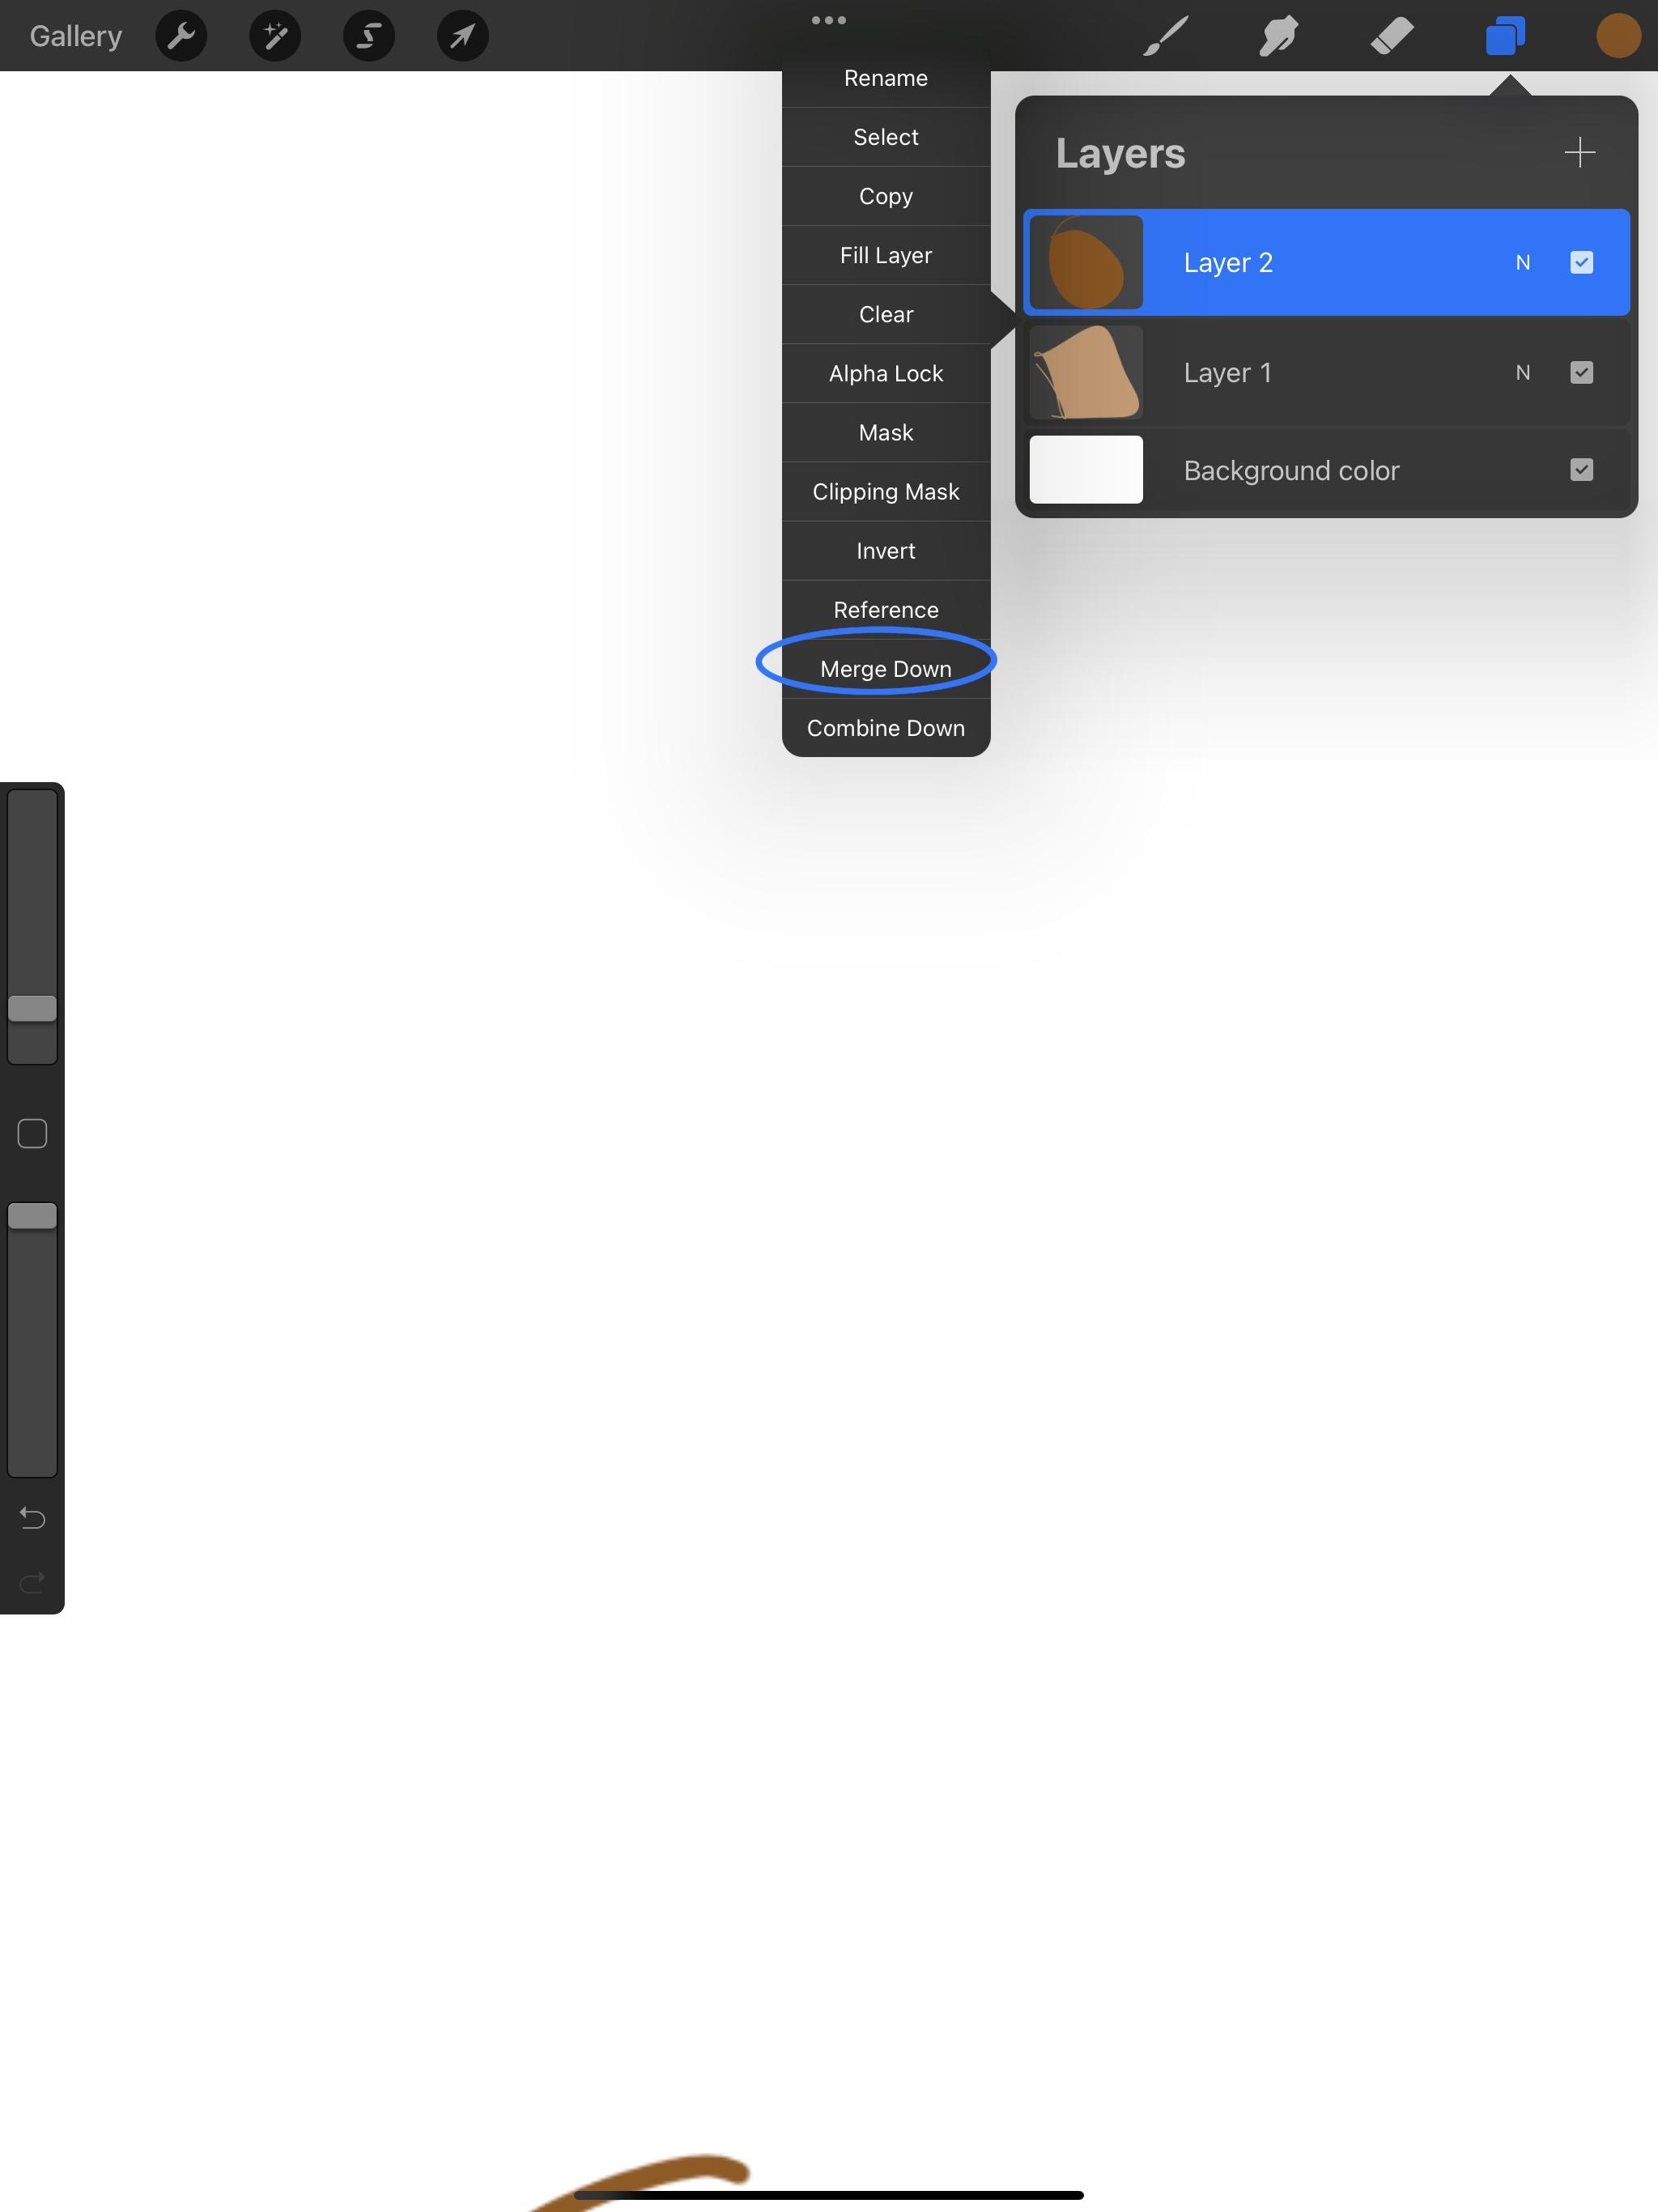
The project is now complete with the exception of jewelry and shoes. For jewelry I recommend using the monoline or fine tip brushes and the same for shoes. There may be a safe that isn’t colored in add a layer to fill any colorless areas with the monoline brush. To finish the project merge all the layers together. Be sure all layers are complete before merging; it will become difficult to change small details once merged all together. Start at the highest layer and merge down; to merge down finger click. This will pop up a drop down menu. There will be an option to merge down; it is the second from the bottom. Continue to merge down the layers, until it has become one layer. Now the illustration is complete in the designing process.
Finishing and Background
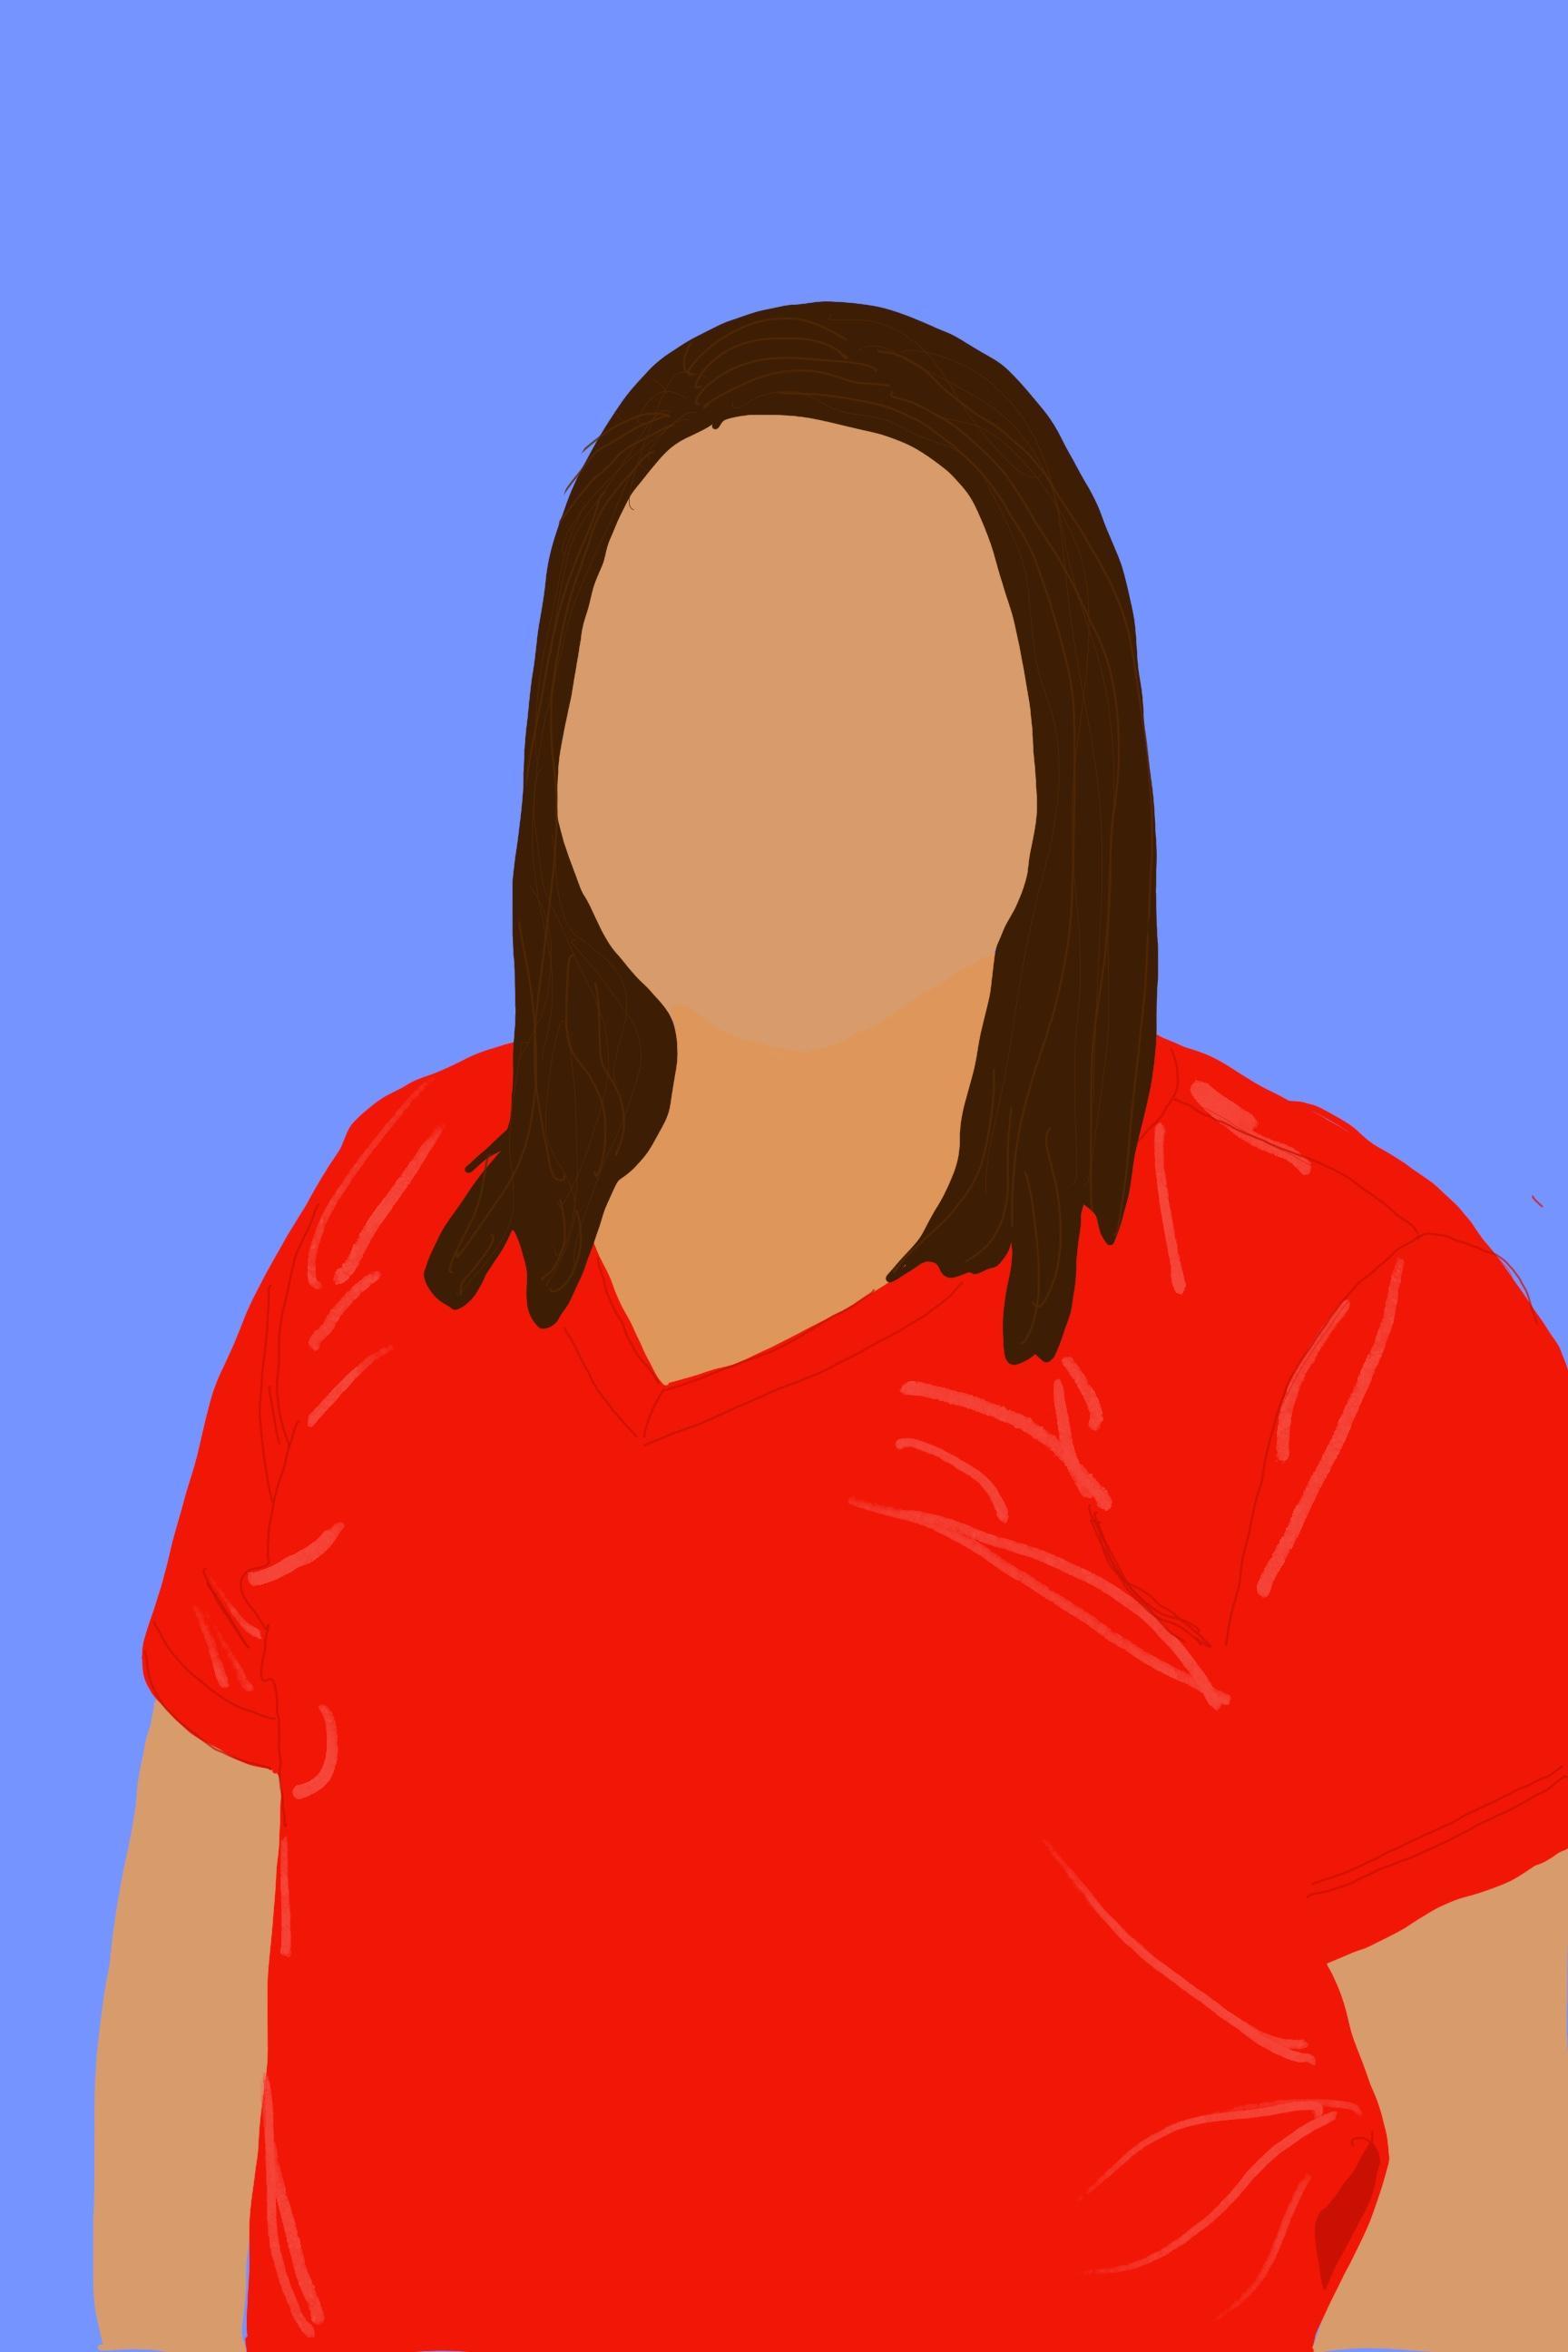
With a completed project now remove the picture you were working on top of. Now the background can be deleted by selecting the layer and swiping to the right. Now select delete; the background will be white. Finish by selecting a background color that matches the finished illustration on.
This project is a way to use your creative skills so you can feel confident in yourself. It may also be use this as a stress reliever and as a time to clear your mind. Using these 12 step to create an illustration you can show off in a home or workplace.