PowerPoint Stop Motion Animation
by Ham-made in Teachers > Resources
10047 Views, 9 Favorites, 0 Comments
PowerPoint Stop Motion Animation


As a teacher, it can be frustrating to integrate technological tools in the classroom due to bureaucratic limitations such as restricted download access (which includes common software updates ), software licensing costs, inadequate computer and network performance, etc. Due to these sorts of restrictions, I often opt for browser or cloud-based software when possible.
Having experimented extensively with animation in a post-secondary setting, with unfettered access to overpriced specialty software and equipment, I quickly became frustrated with the resources available to me in the context of a secondary school setting. Young and naïve as I was early in my career, I proposed an animation assignment to my media arts class. Having outdated entry level software and low-resolution point and shoot cameras, I invited the students to create their storyboards and start by building their sets and characters to buy myself some time. During that first week, I searched for outside funding, donations, rental equipment, and different software licensing options, all to no avail. Long story short…they ended up making flip books.
Frustrated by this first experience I re-evaluated my available resources. When introducing my class to basic animation, I like to start with the brilliant Canadian filmmaker and animator Norman McLaren. I often show multiple examples of his work and let the students discover the rest through the National Film Board’s website. After re-watching works such as Le Merle with my students, I wondered if there was a way to use existing software already installed on the school’s computers to create simple animated shorts. Honestly, I don’t know how I didn’t come to this conclusion earlier, but I realized that any presentation software such as, Microsoft PowerPoint, Google Slides, and Apple’s Keynote, could be used to easily make animation shorts!
So that’s what I started doing and the results were akin to McLaren’s early hand-painted animations, brilliant in their simplicity. With a few basic geometric shapes and TRANSFORMATION as the assignment’s theme, the students were able to create interesting animated shorts using the school’s outdated hardware. If you prefer to use cloud-based software, the Office 365 version of PowerPoint and other browser-based software, such as Google Slides, can be used to create these types of animated shorts.
Also, because this method shares many of the basic principles of stop motion animation, students can apply what they’ve learnt to real equipment and in specialty software when they gain access to it.
I've used this technique in the context of a media arts class, but this technique can be applied to nearly every teachable subject to illustrate various concepts and processes!
Planning
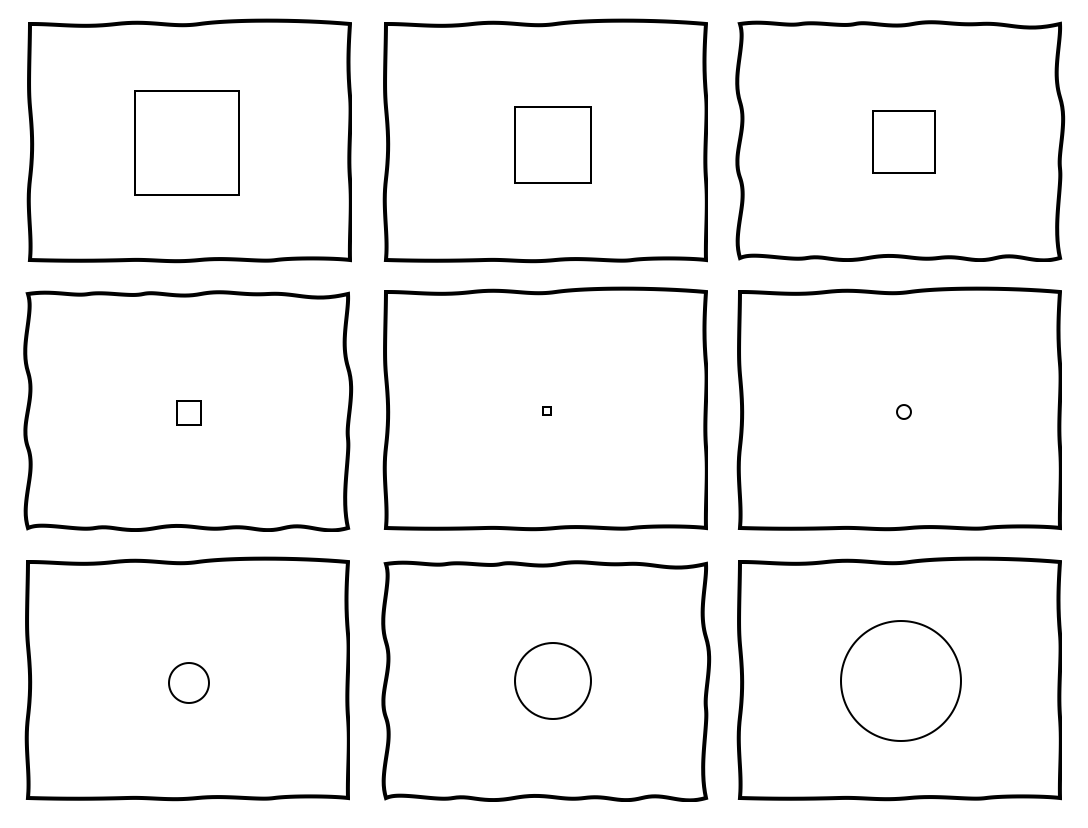
To begin, students start by choosing which geometric forms they would like to use in their animation. Then, they create storyboards of the concepts they would like to exploit and illustrate the major points of transformation. Once their storyboards have been approved, they create a short flip book that illustrates the lead up to every major point of transformation. That way, they can visually plan their concepts before stringing them together and recreating them within the software. (I discovered that the students achieved better results by planning out their animation by hand in this way instead of diving directly into the software. )
After they have received feedback on their flip books, they can begin to work on their animations in the software of their choice. Setup progress meetings throughout the creative process to offer continuous feedback.
Inserting and Modifying a Shape
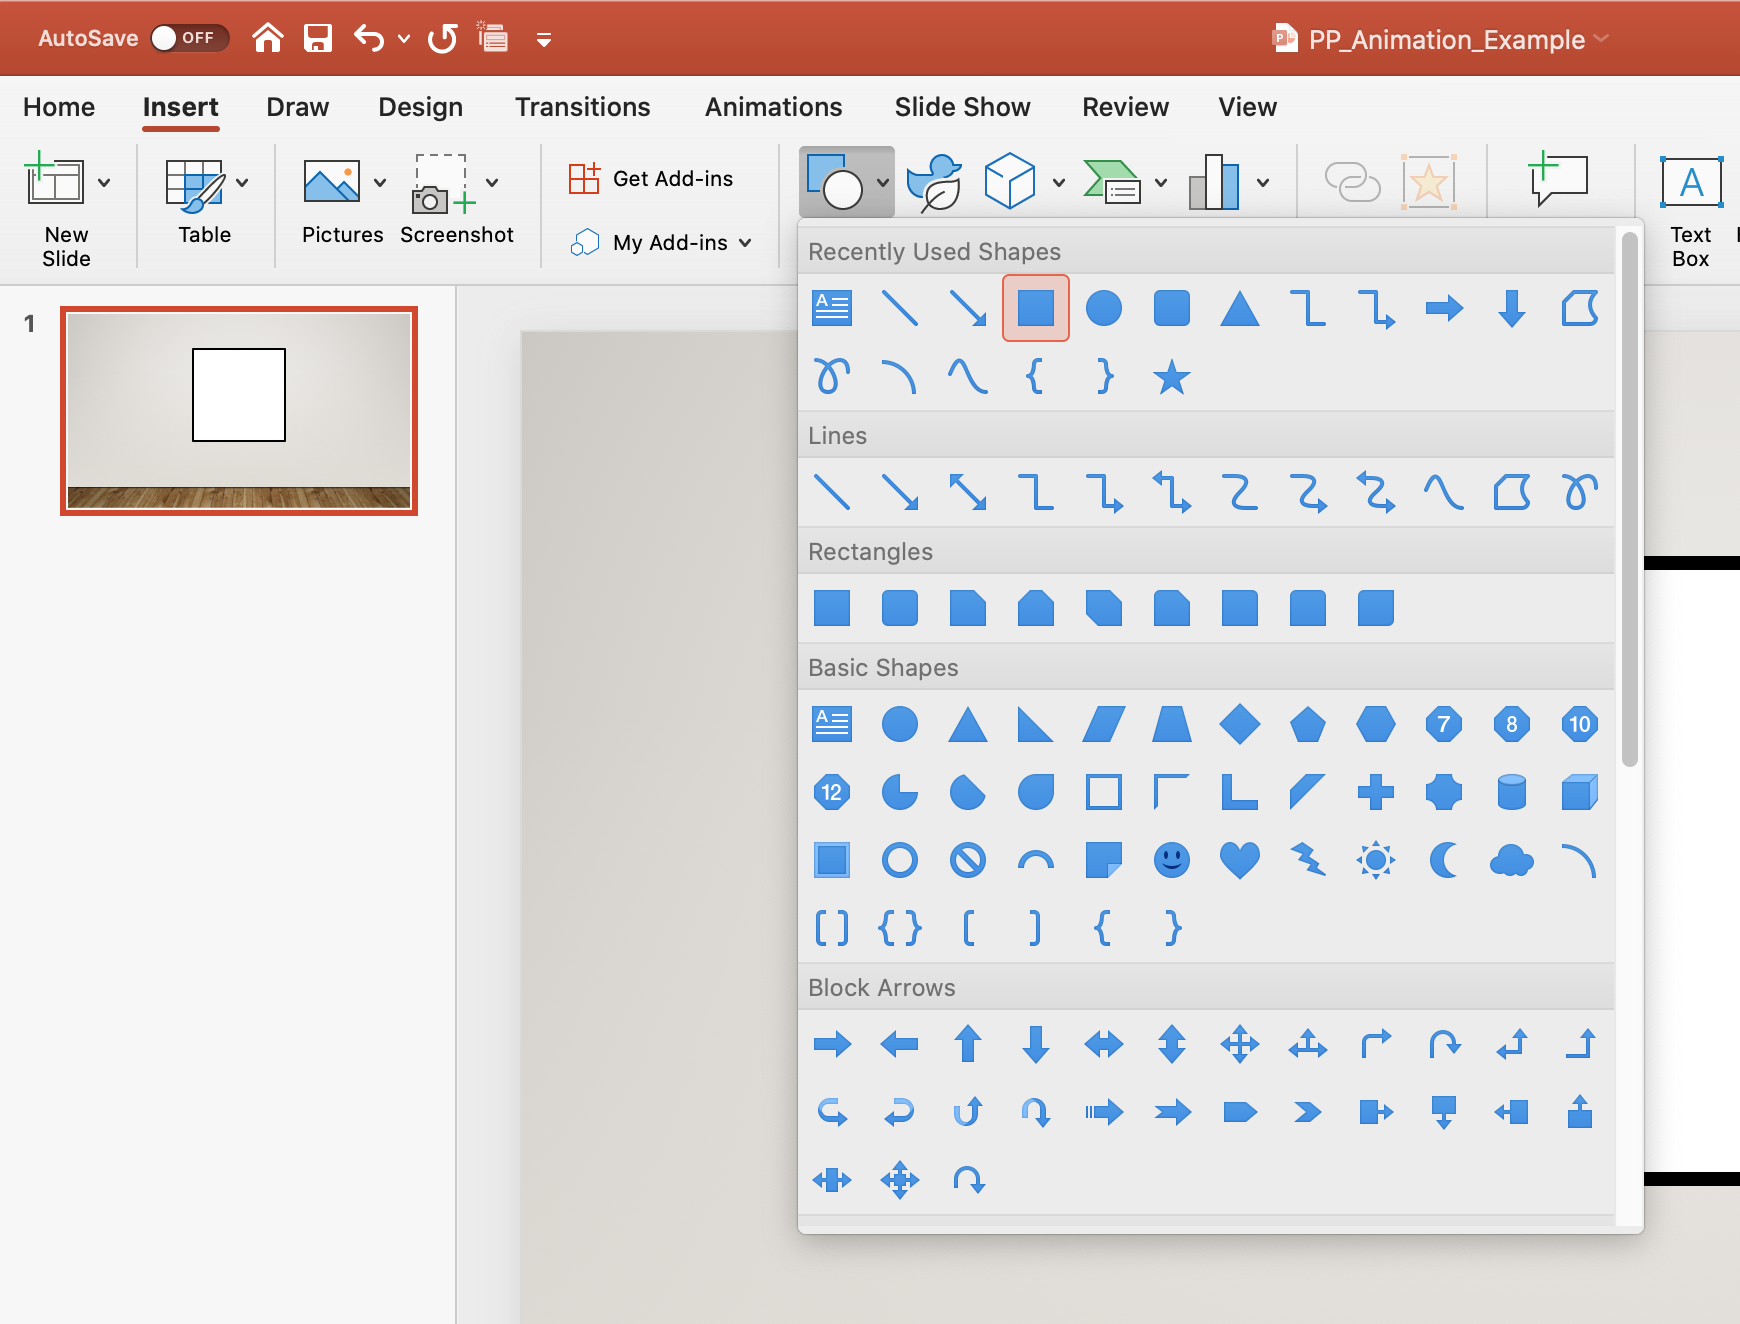
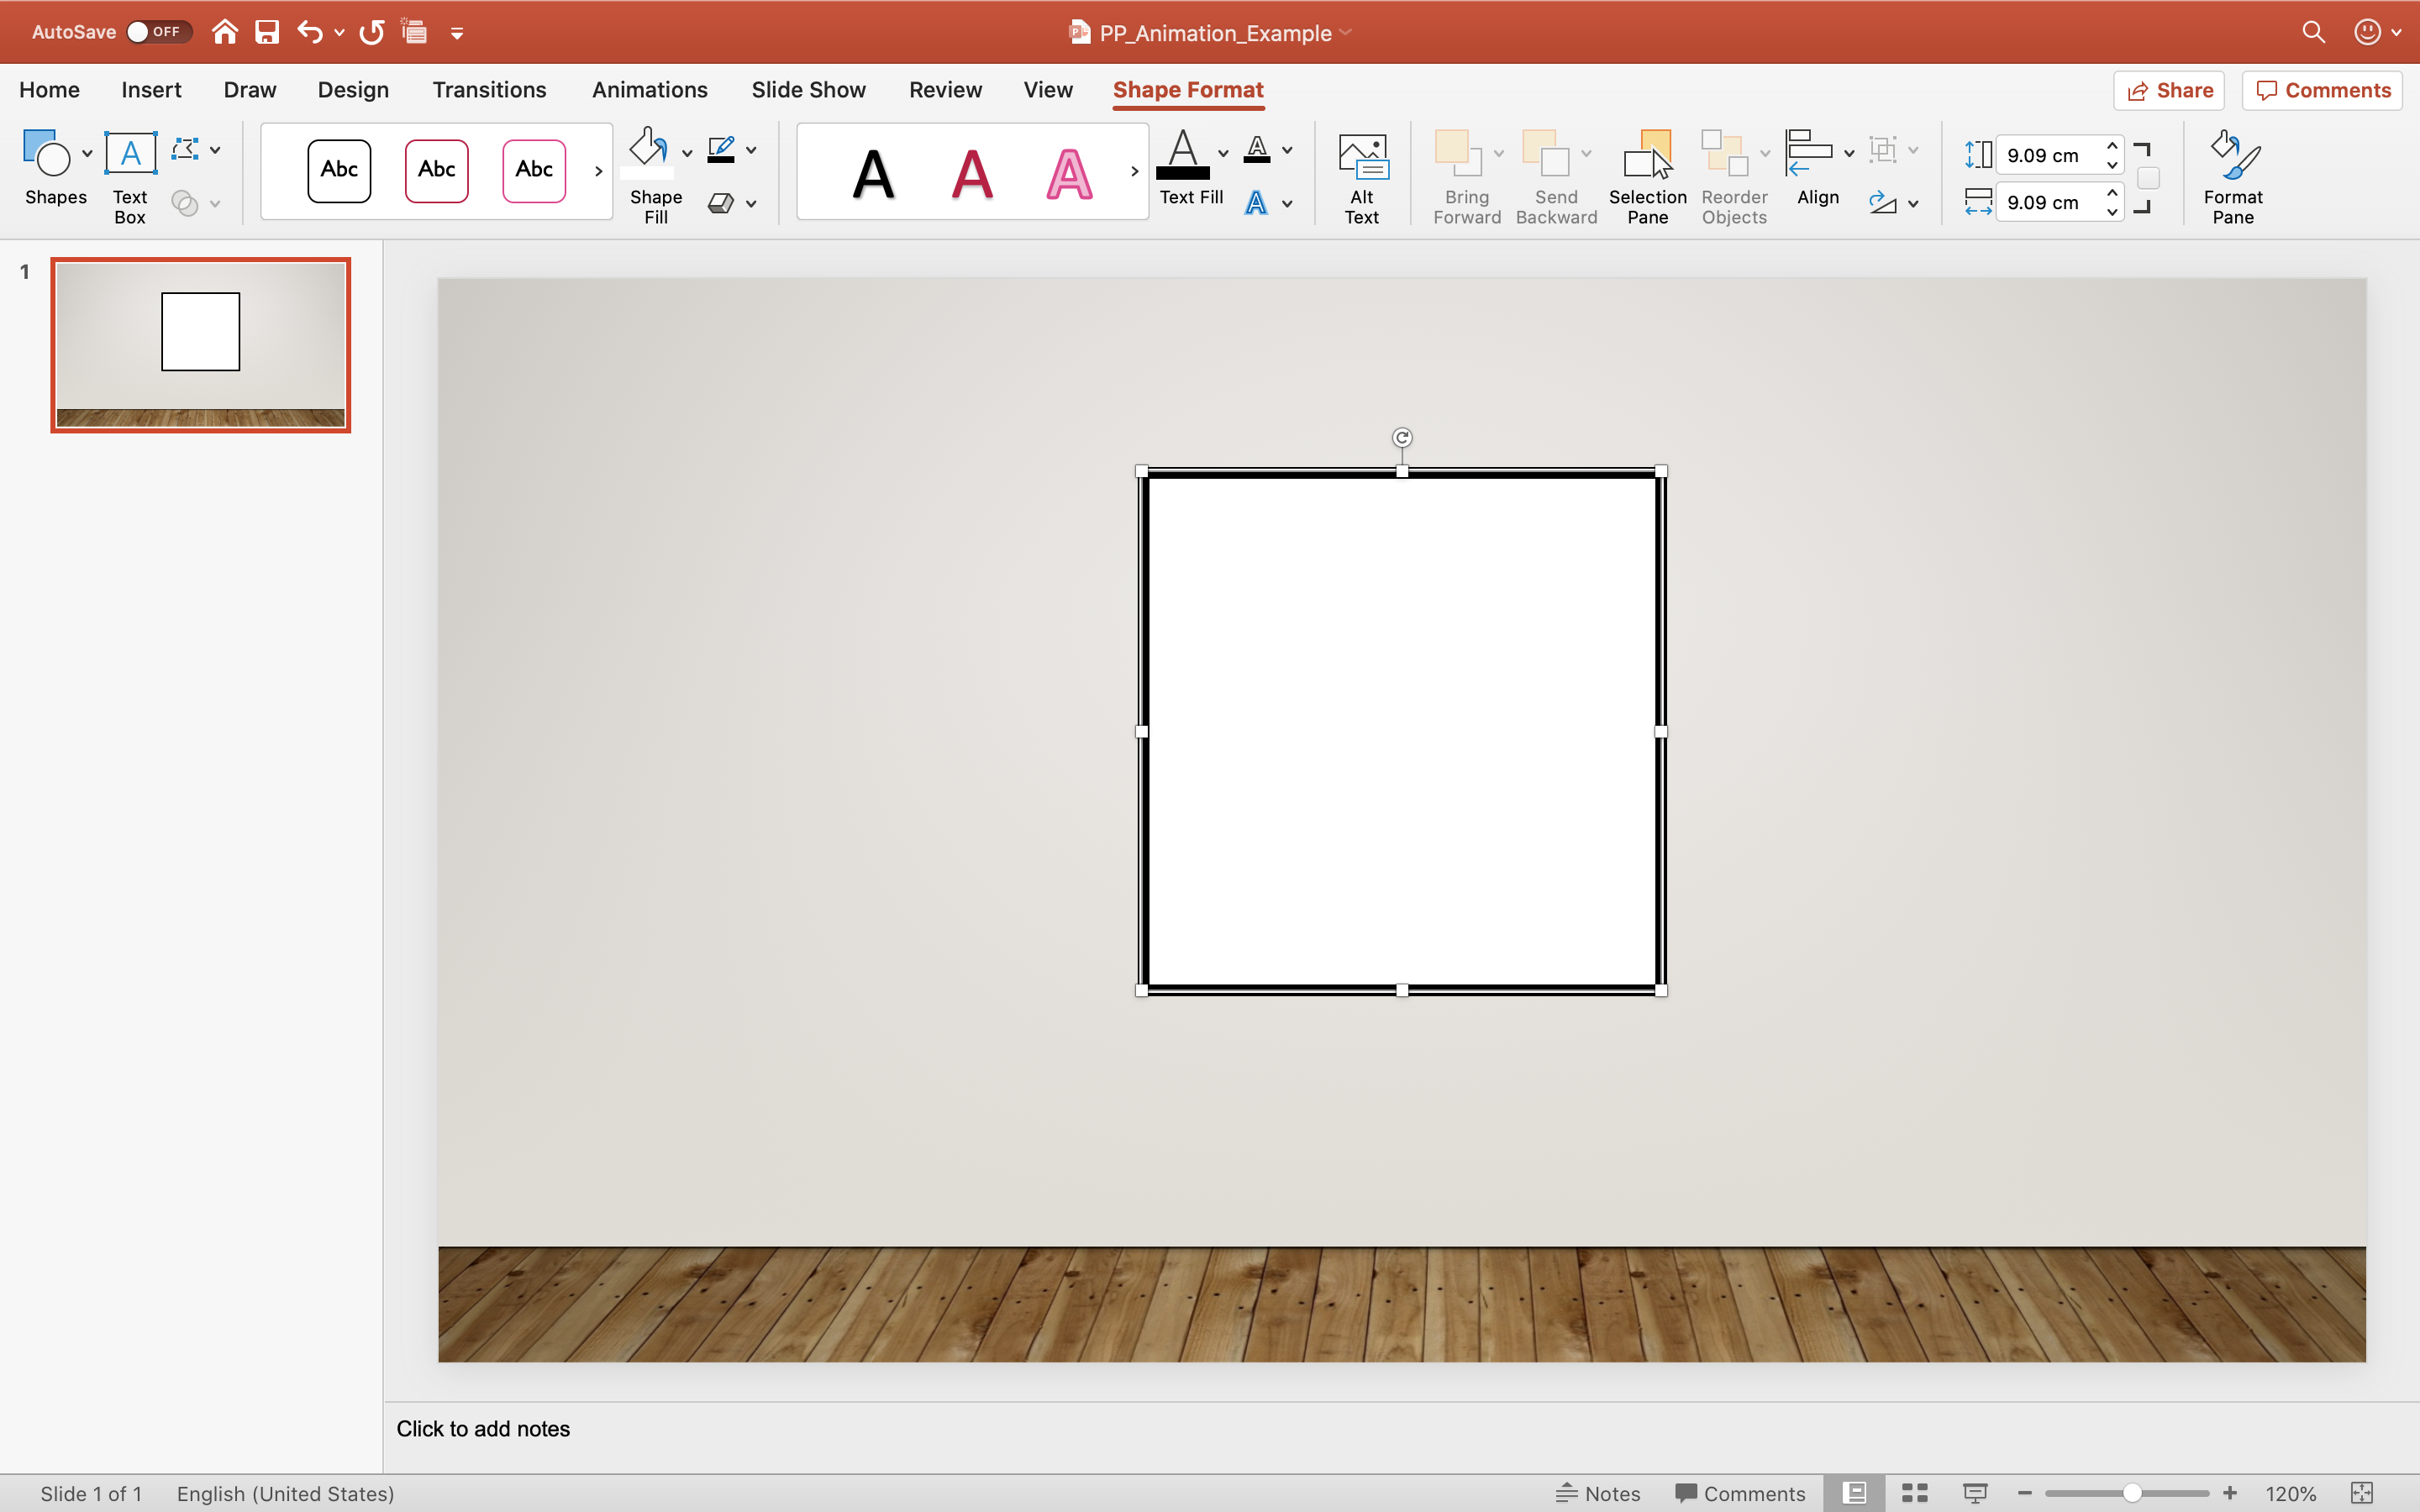
Under the "Insert" tab, select "Shapes" then select the shapes you would like to insert into the sequence. To modify the shape, double-click on the shape to activate the "Shape Format" tab, this will allow you to change all aspects of the shape.
Basic Technique
For the sake of simplicity, I’ll be demonstrating the technique using Microsoft PowerPoint as it is the software available to the vast majority of educators. Nevertheless, the concepts learned in this software can be applied to nearly any other presentation software.
For the purpose of this demonstration, I’ll be transforming a square into a circle. Start by establishing your background “set” and choosing the initial placement of your original shape (square in this example ). Any modifications which include, but aren’t limited to, colour, size, shape, background colour, etc. must be done at this first stage. I chose a simple gallery wall as the background for my animation and chose to add a black outline around a white square for my initial shape.
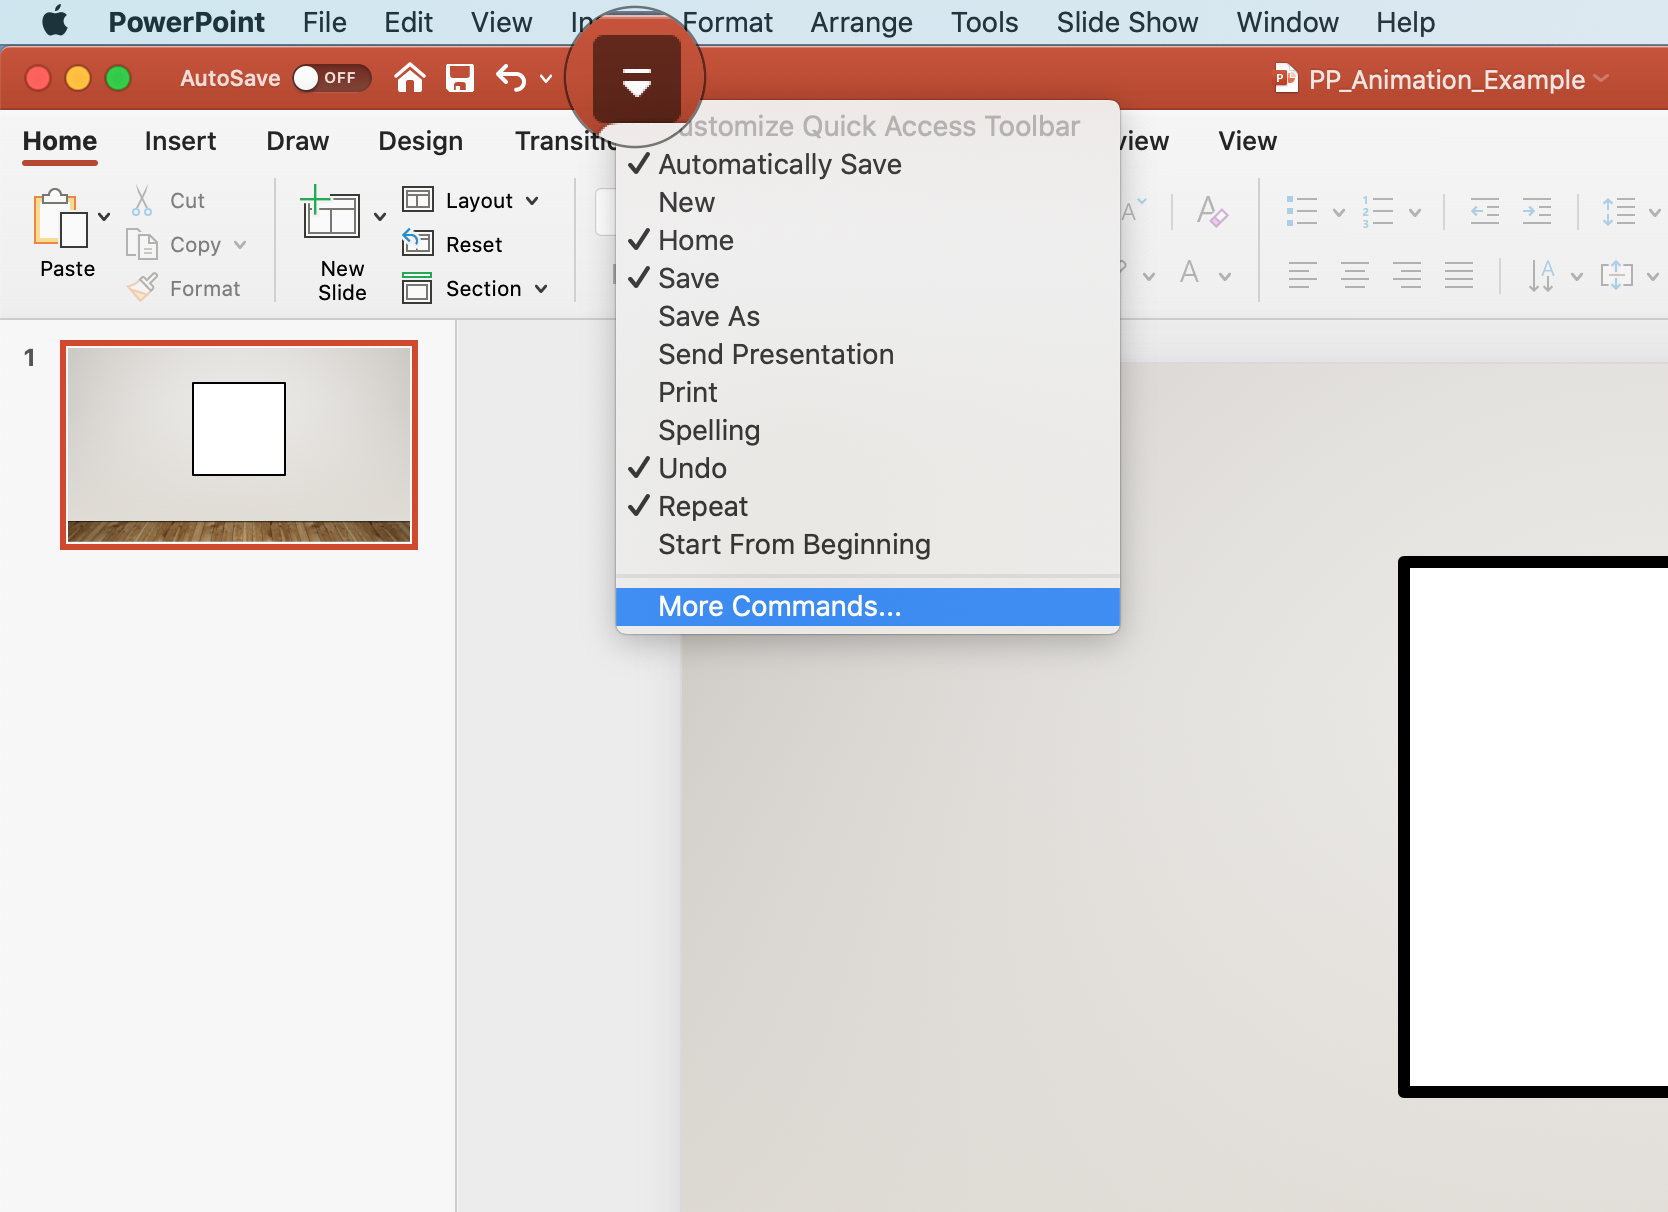
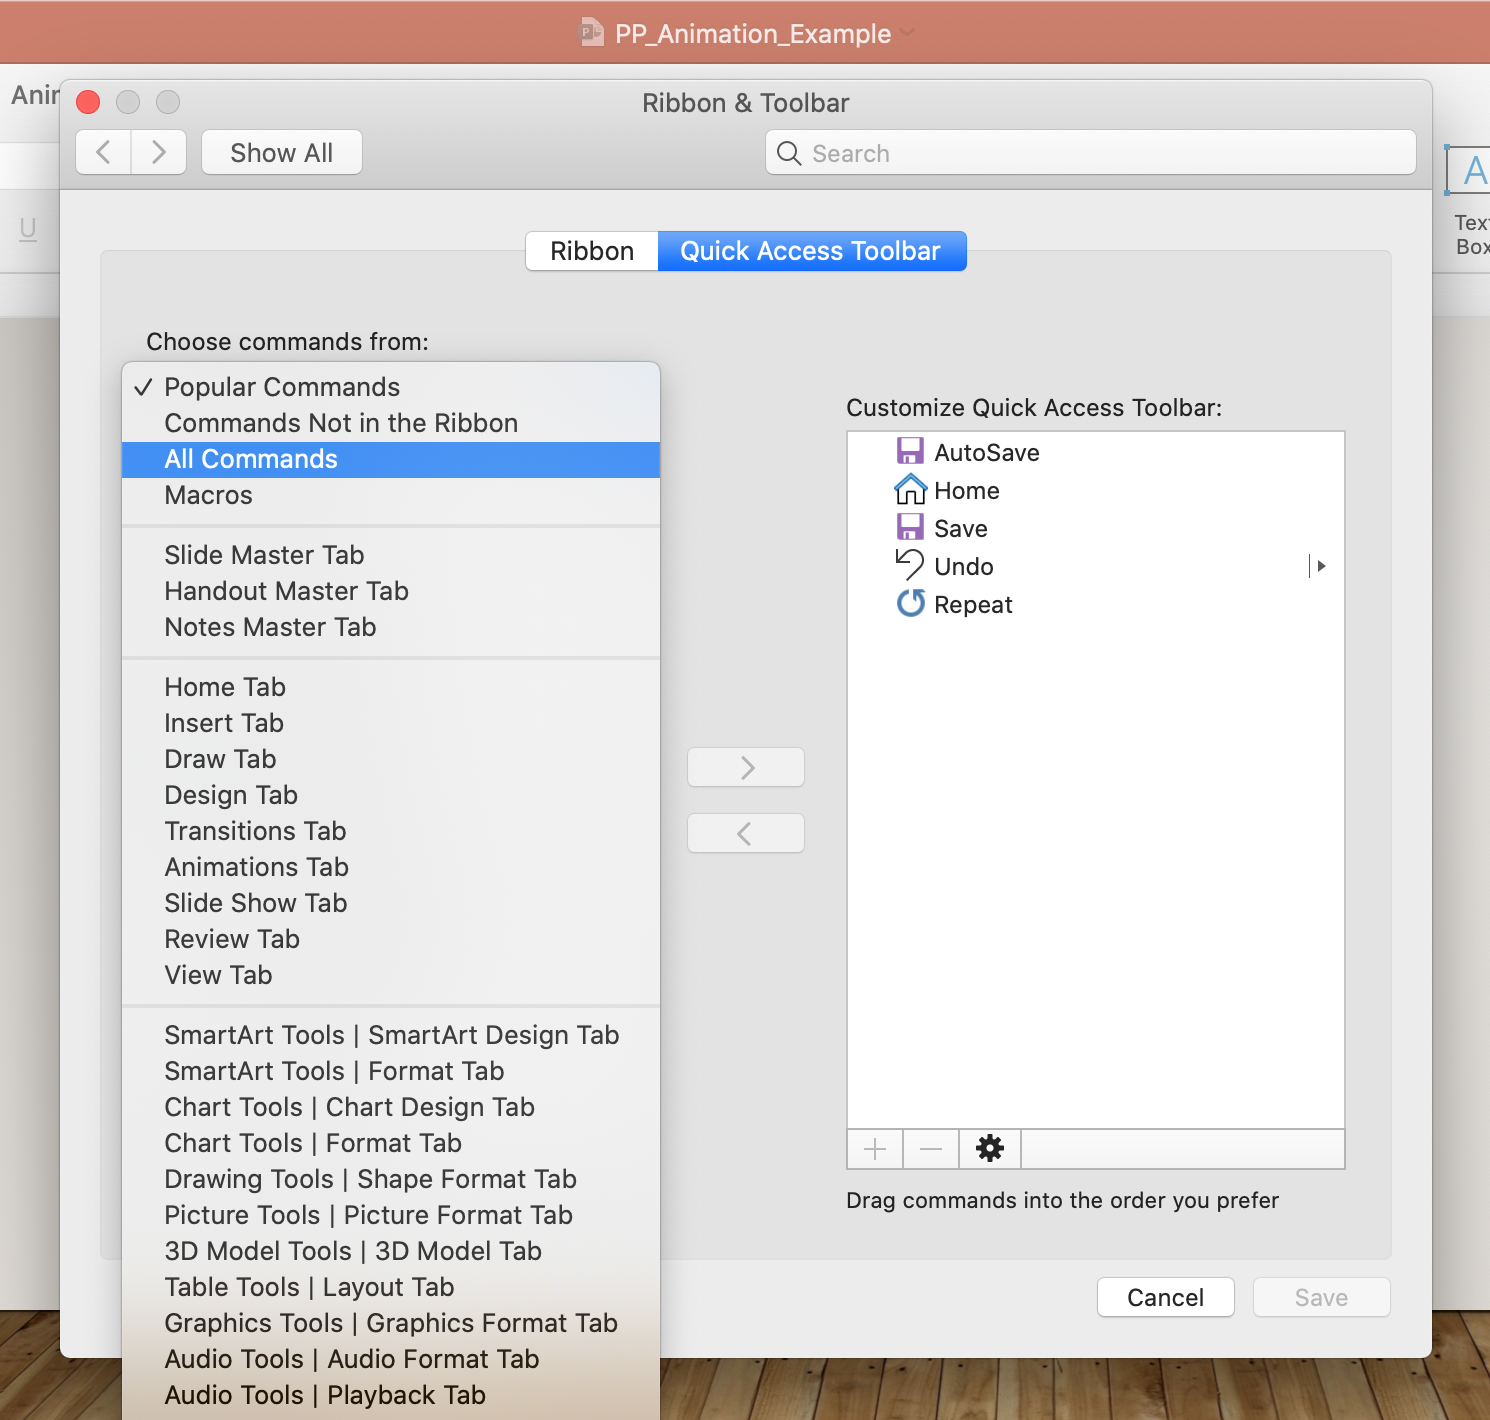
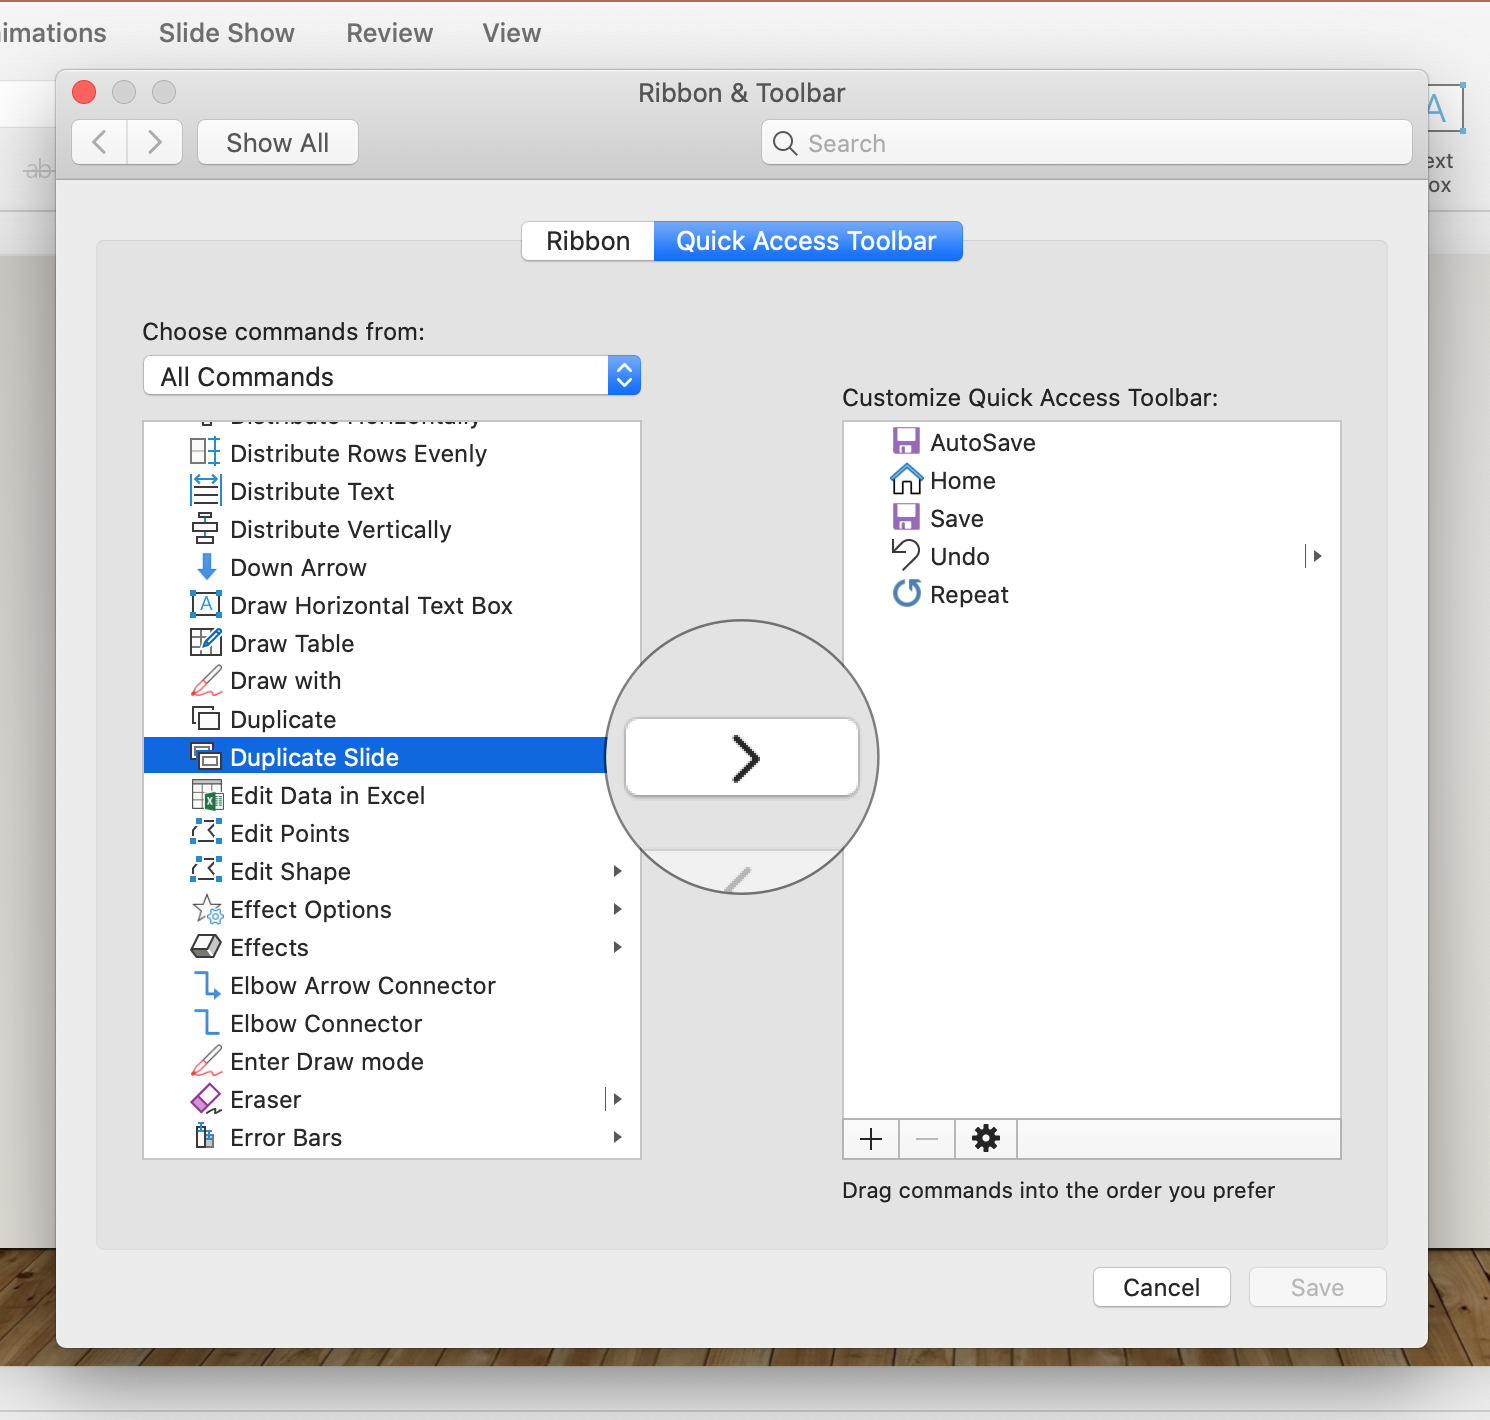
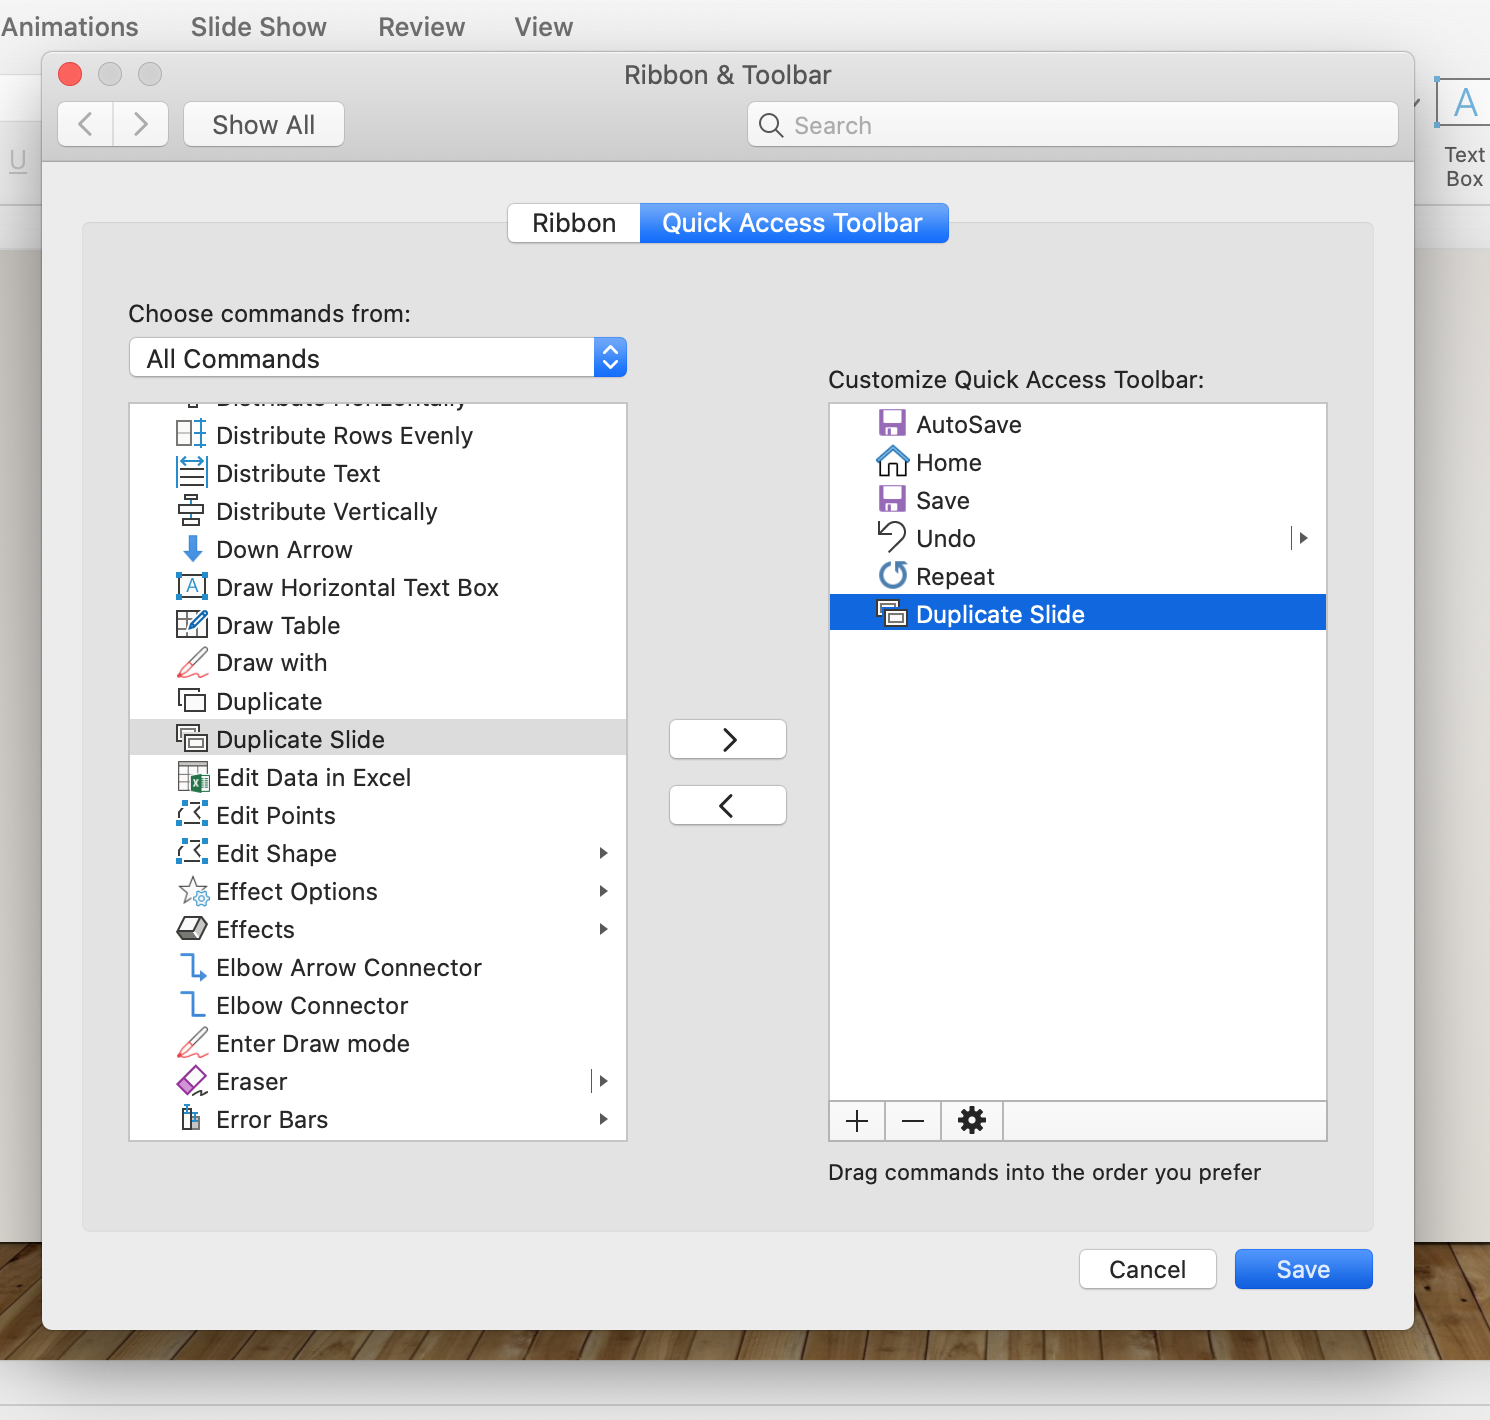
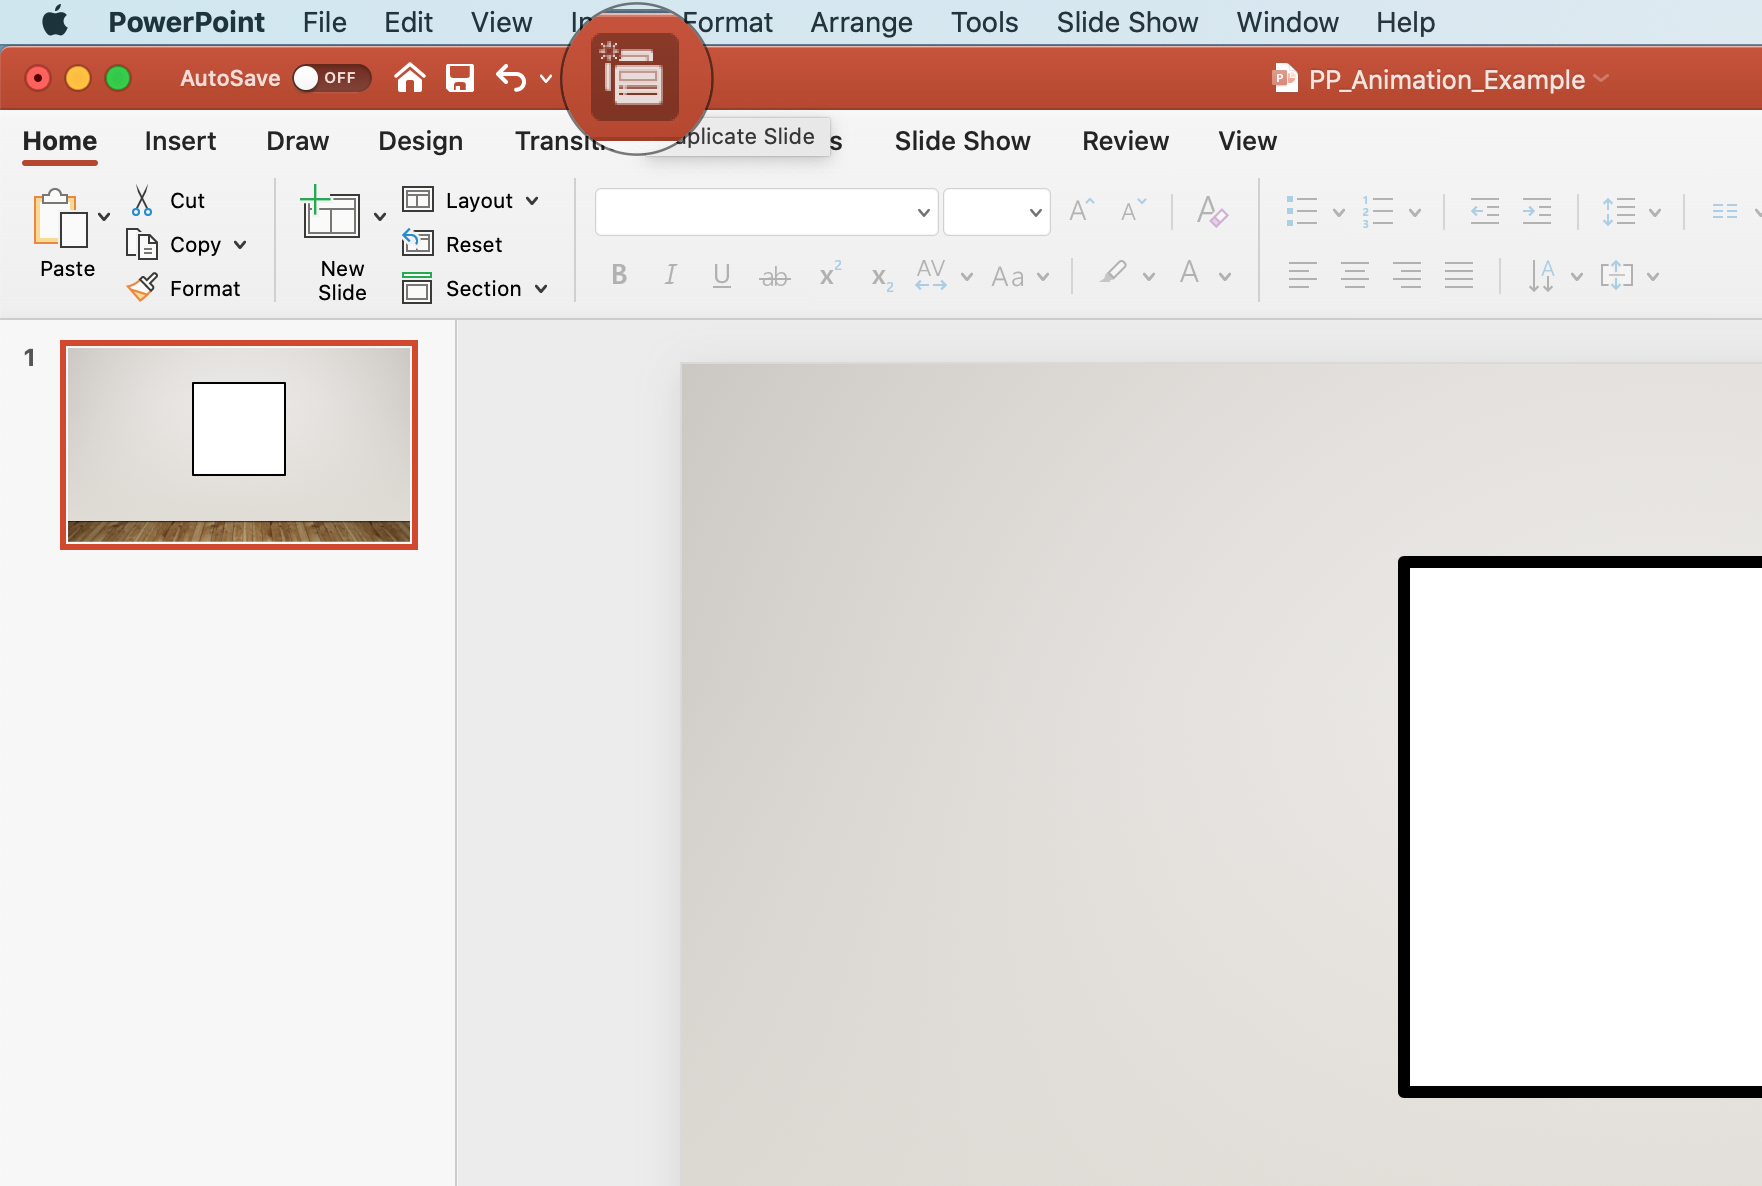
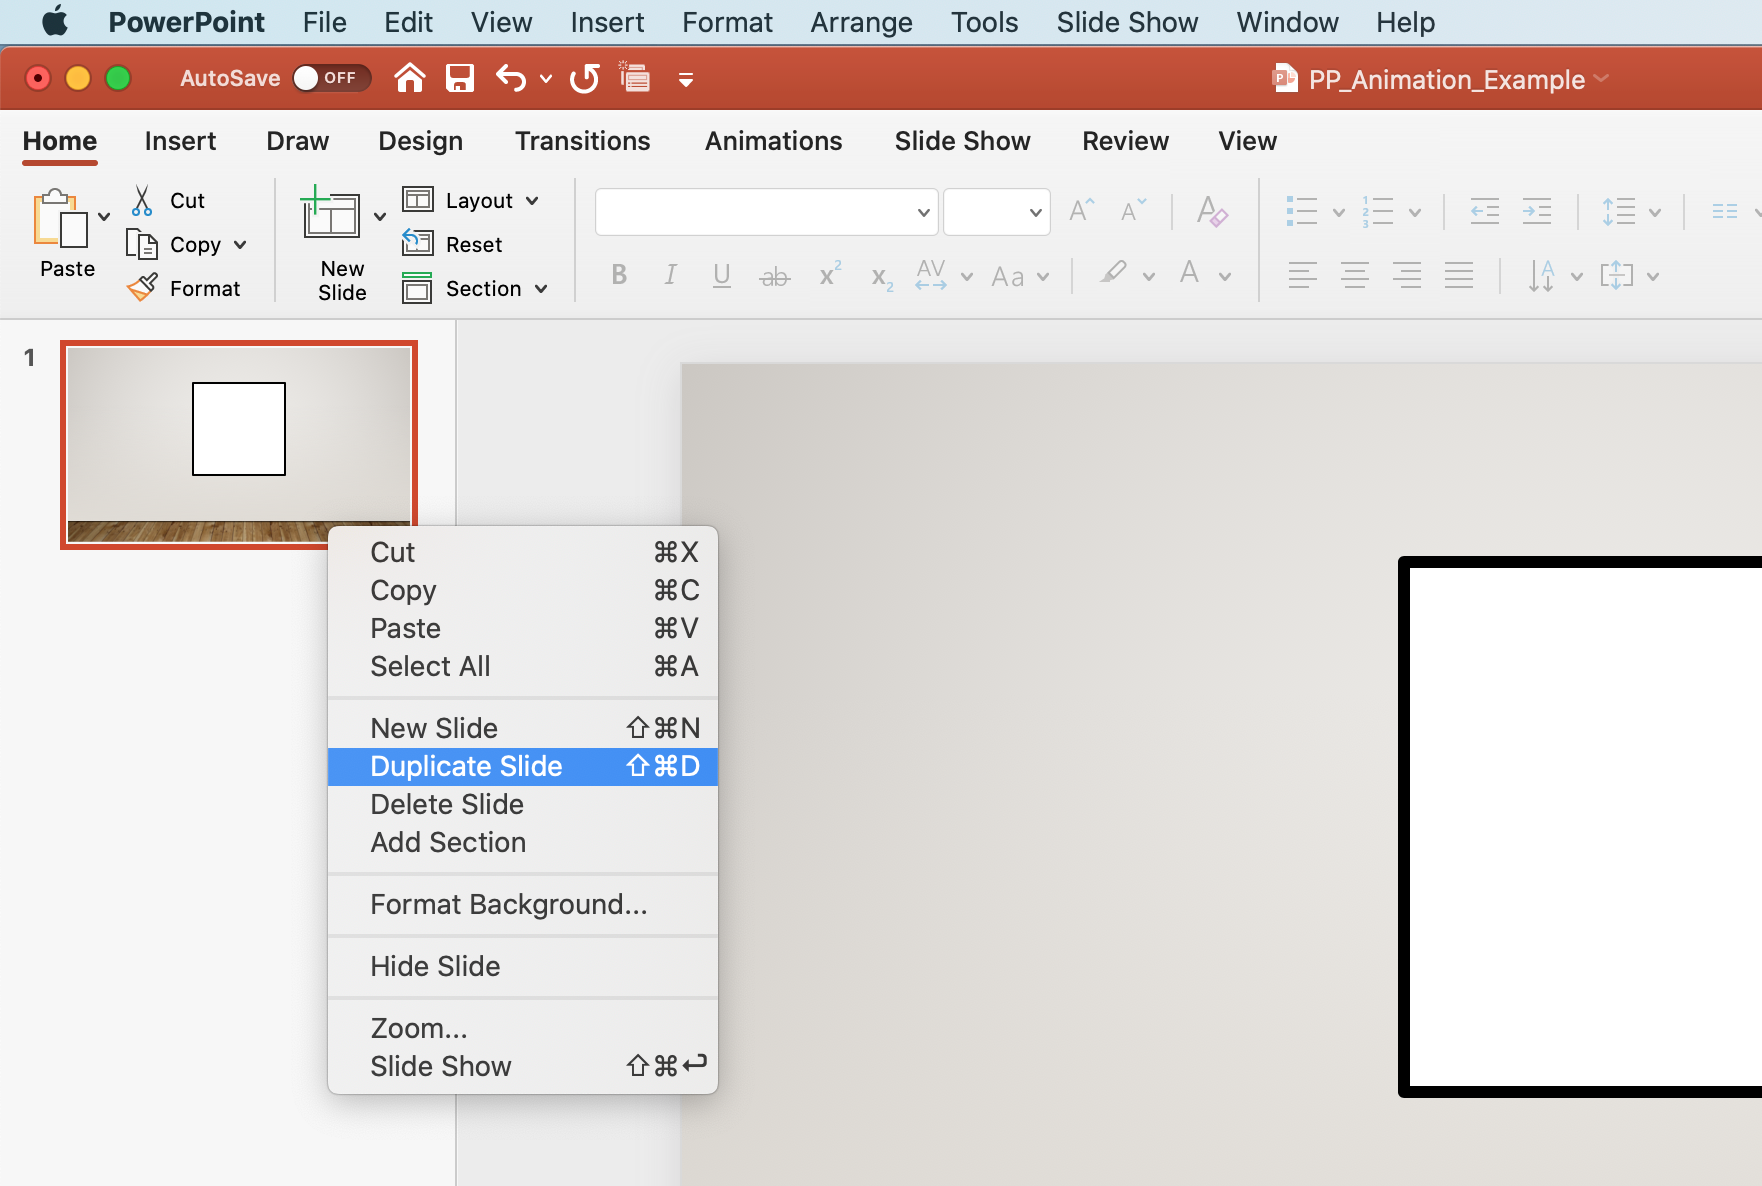
To streamline the animation process, I suggest adding this function to the “Quick Access Toolbar”, Duplicate Slide. To do this, click on the Drop-Down Menu button and select “More Commands…” which should be the last selectable menu item. Next, in the Ribbon and Toolbar menu pane, select “Quick Access Toolbar” then select “All Commands” from the “Choose Commands From:” drop-down list. Once the list of “All Commands” has populated, scroll down to find the “Duplicate Slide” command. Select it in the left column and press on the right facing arrow to add it to the “Quick Access Toolbar” column on the right. Click on the “Save” button in the bottom right hand corner of the Ribbon and Toolbar menu pane to make this change permanent. You should now see that the “Duplicate Slide” shortcut has been added to the “Quick Access Toolbar”.
The second option for quickly accessing the “Duplicate Slide” function is to use the keyboard shortcut: Shift + Command (or Control) + D.
To begin animating a sequence, start with an initial frame (slide ) and duplicate it. On the duplicated slide, move everything in the frame you would like to animate in nearly imperceptible increments. The idea is to move everything in the frame you would like to animate incrementally, duplicate the slide, and repeat the process. During this process, students learn to manipulate the shapes in interesting ways to transform them into other shapes.
*Here’s a tip, if you want to cease movement momentarily, simply duplicate slides without altering them.
Animating a Sequence
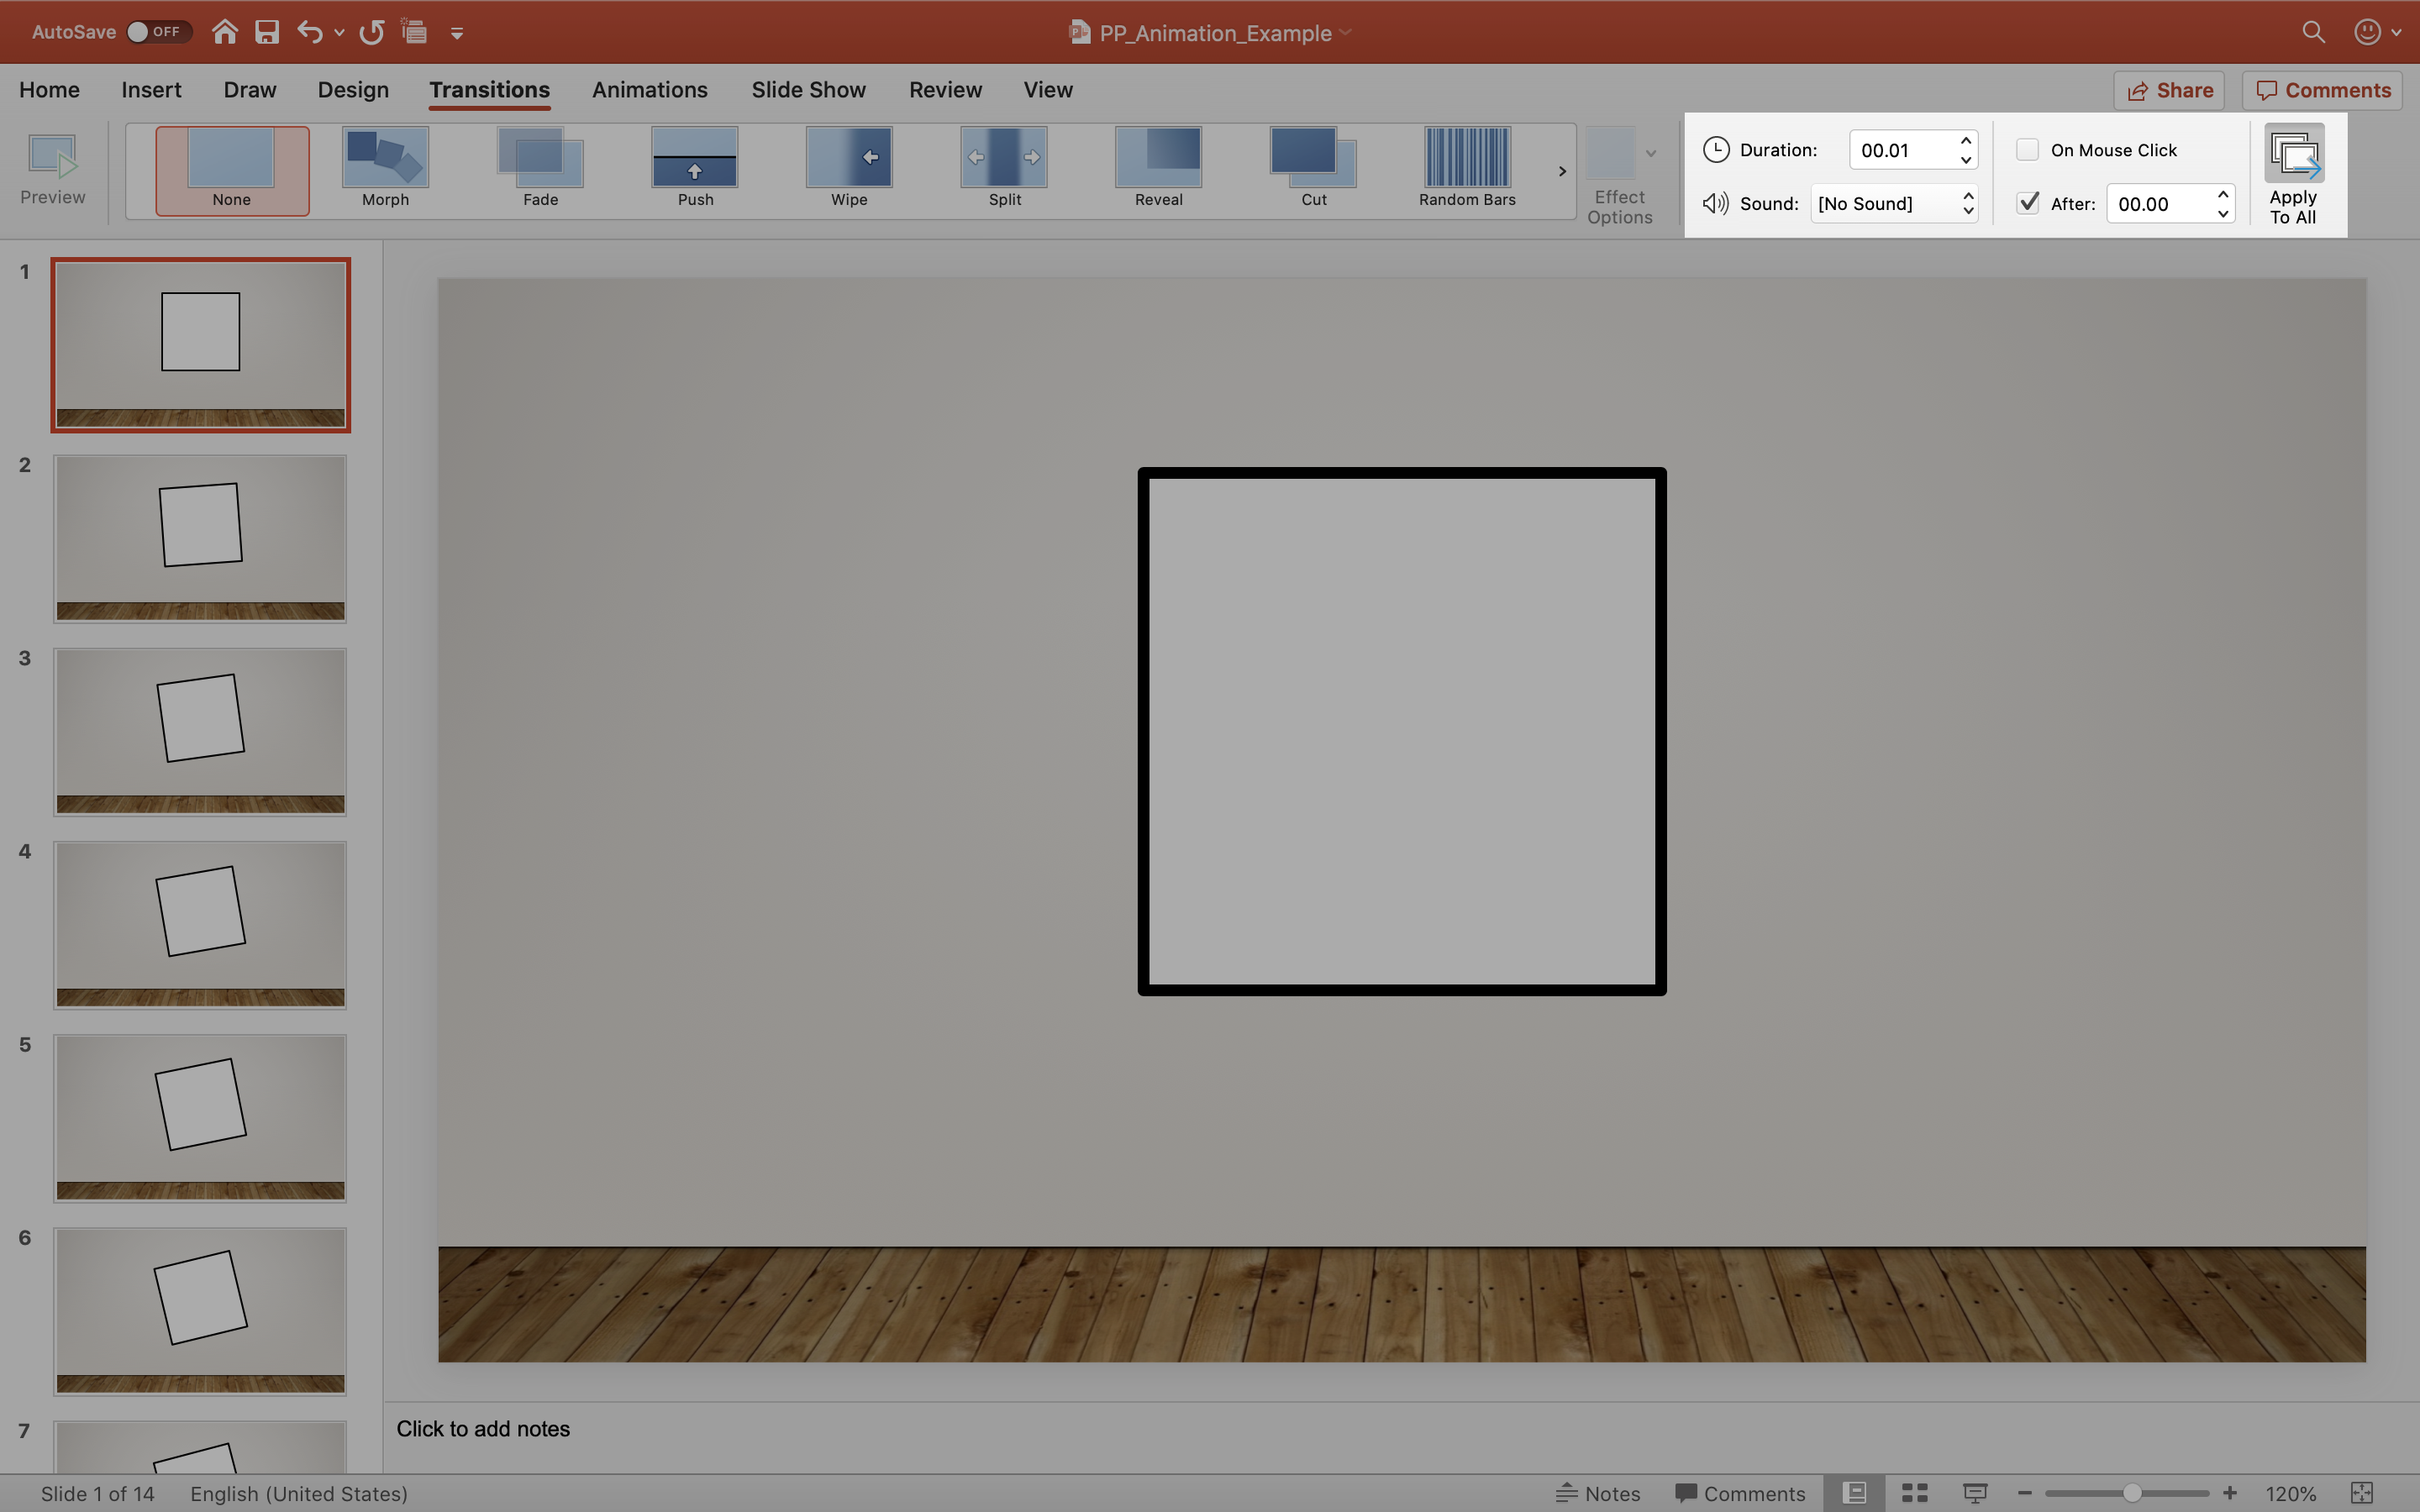
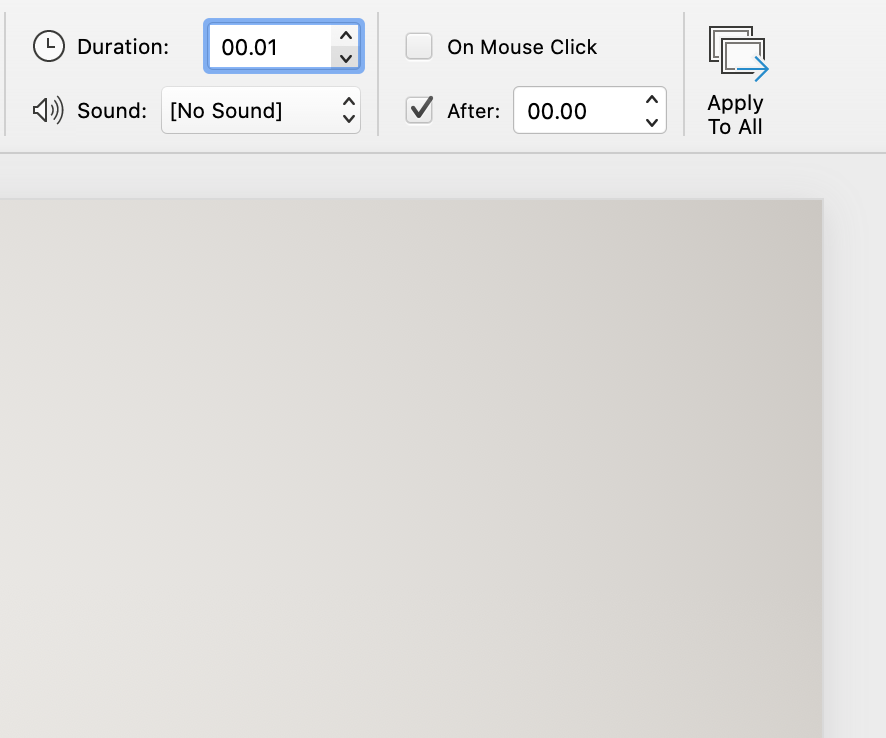
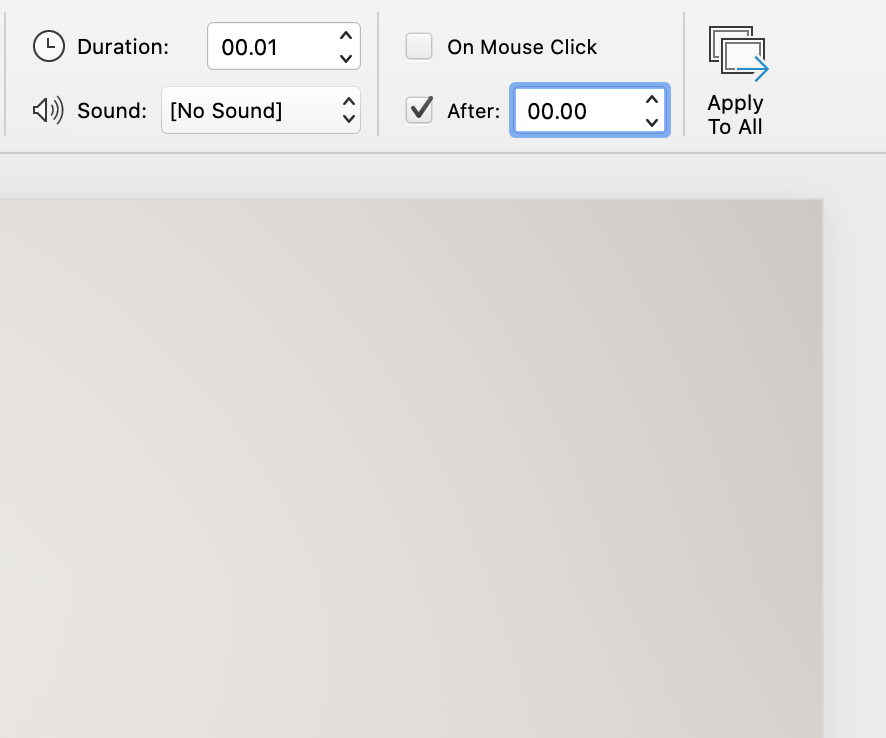
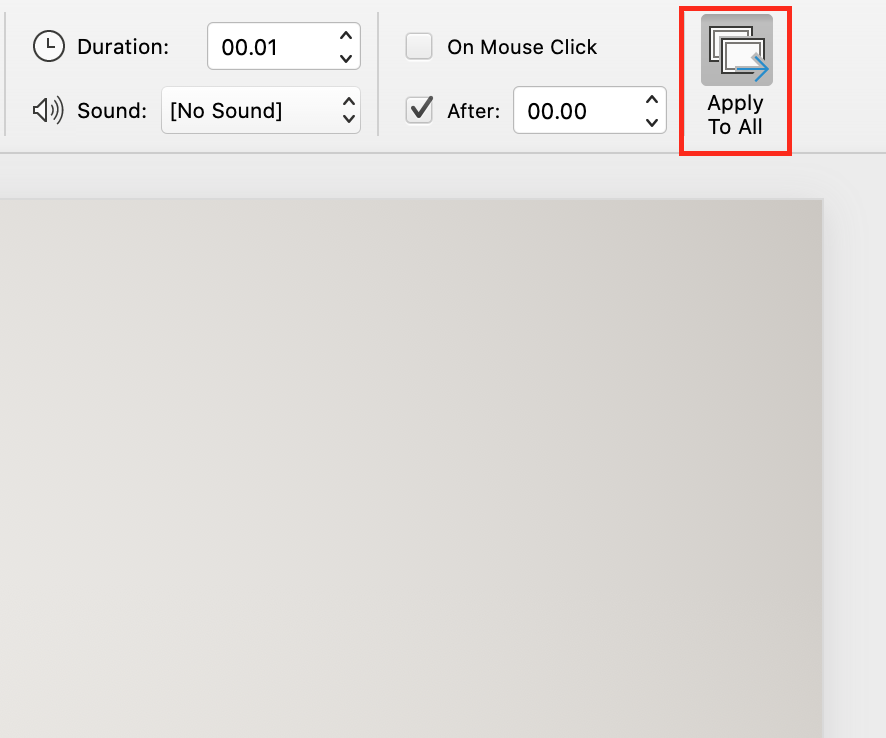
Once you have a sequence of images you would like to animate, navigate to the “Transitions” tab. Here, changes to a few key settings will automatically animate your sequence. First, change the option to move to the next slide not “On Mouse Click” but instead “After” a certain number of seconds. The number of seconds should be set to 00.00. Another setting that should be altered is the “Duration” spent on each slide. Set the “Duration” to 00.01 (the smallest possible denomination ). The last step (which can’t be overlooked ) is to select “Apply To All”. This will apply the changes to the entire sequence of slides, animating it. The “After” and “Duration” values can be altered to adjust the animation sequence.
Exporting the Animation As a Video File
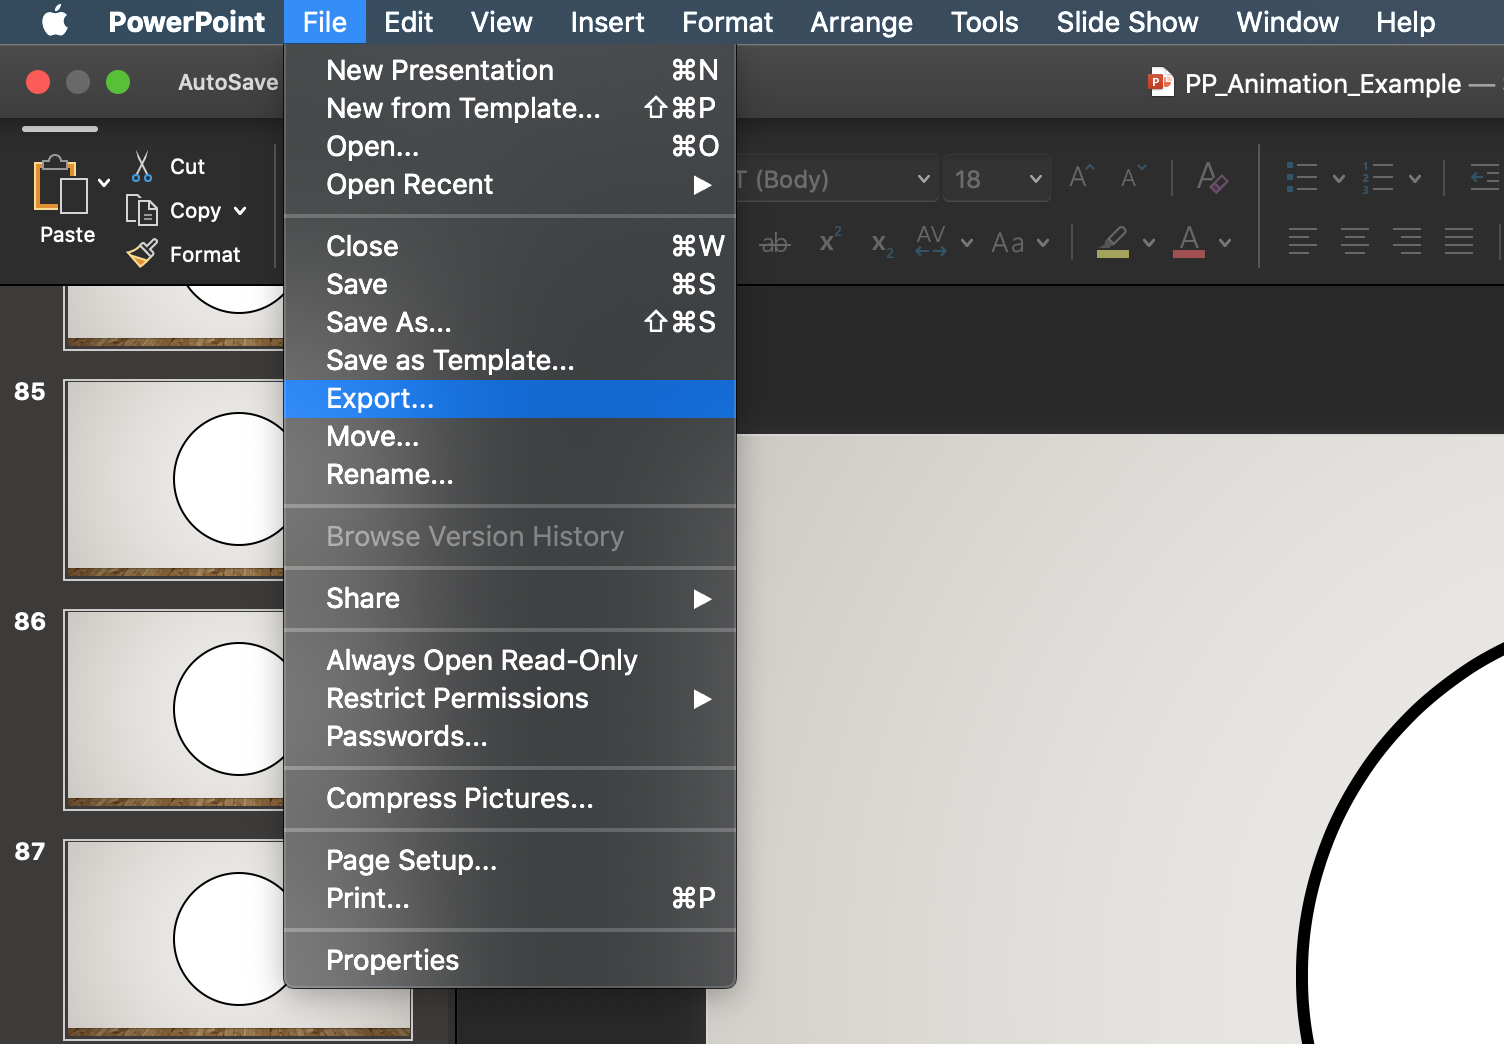
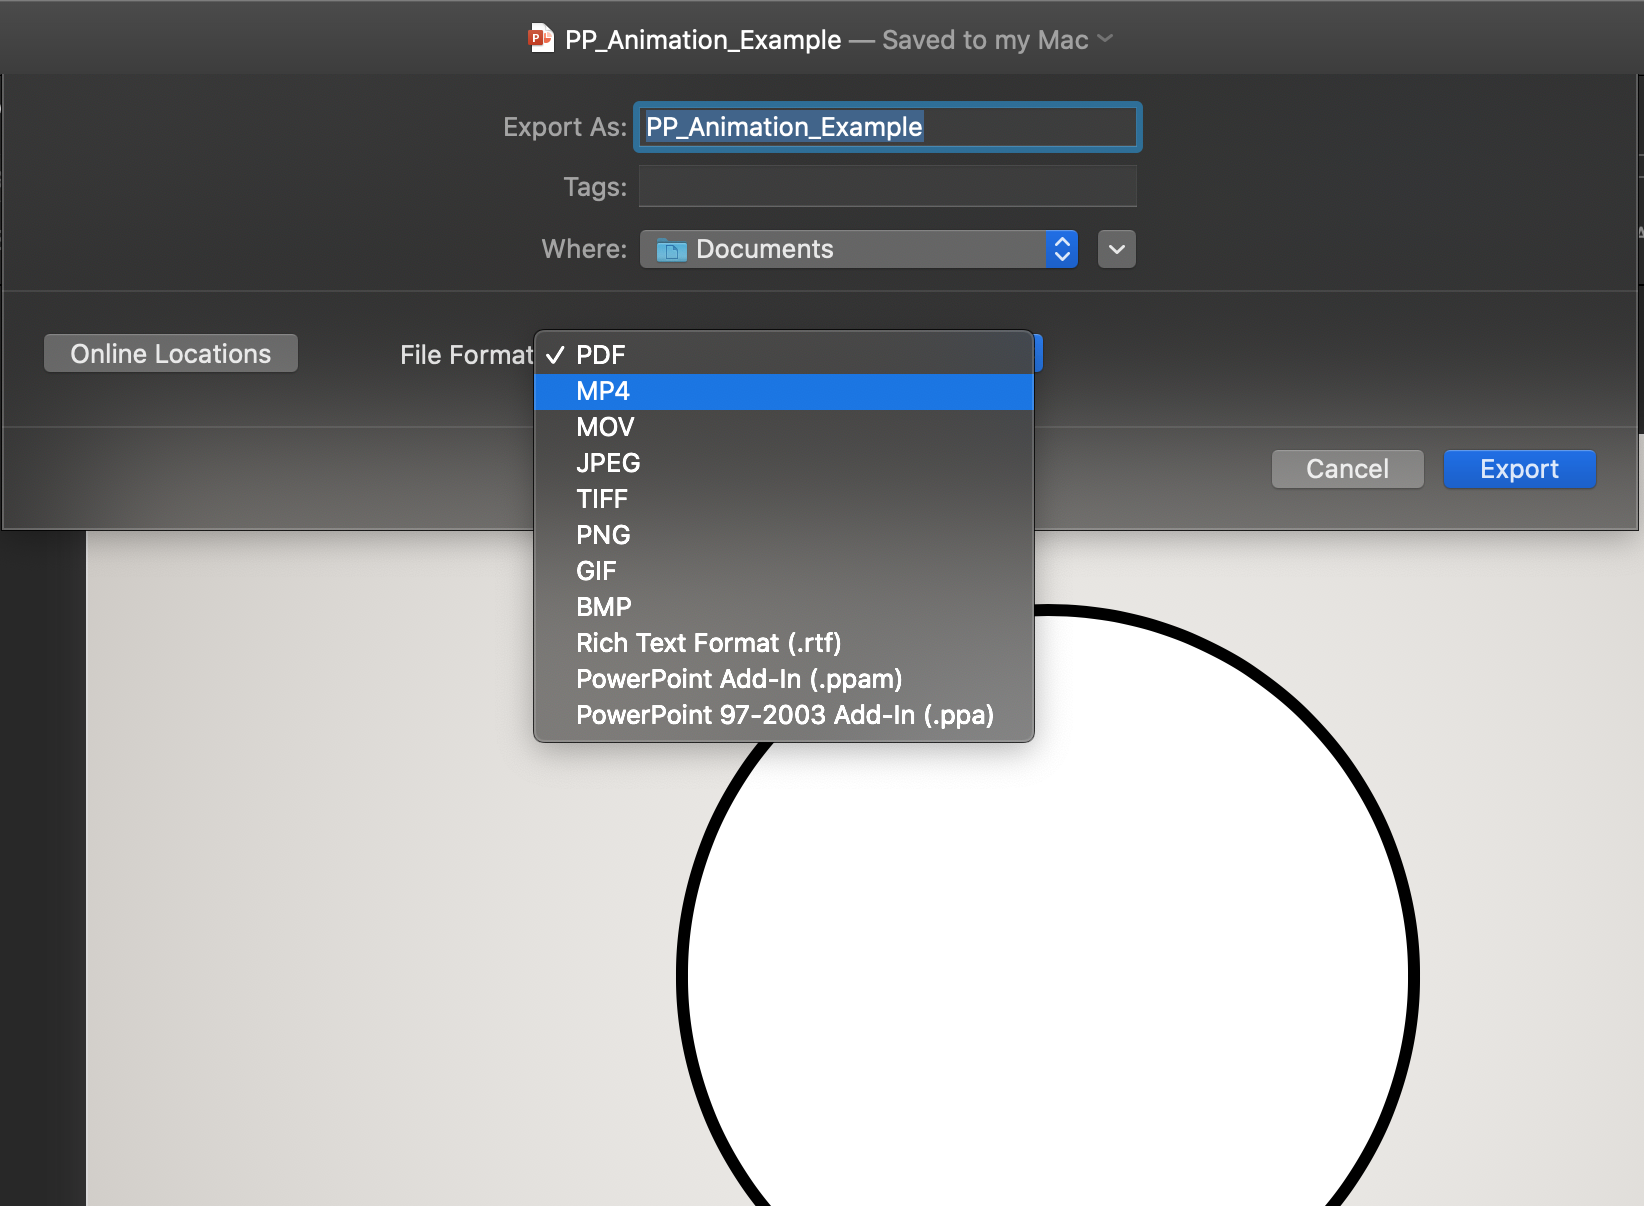
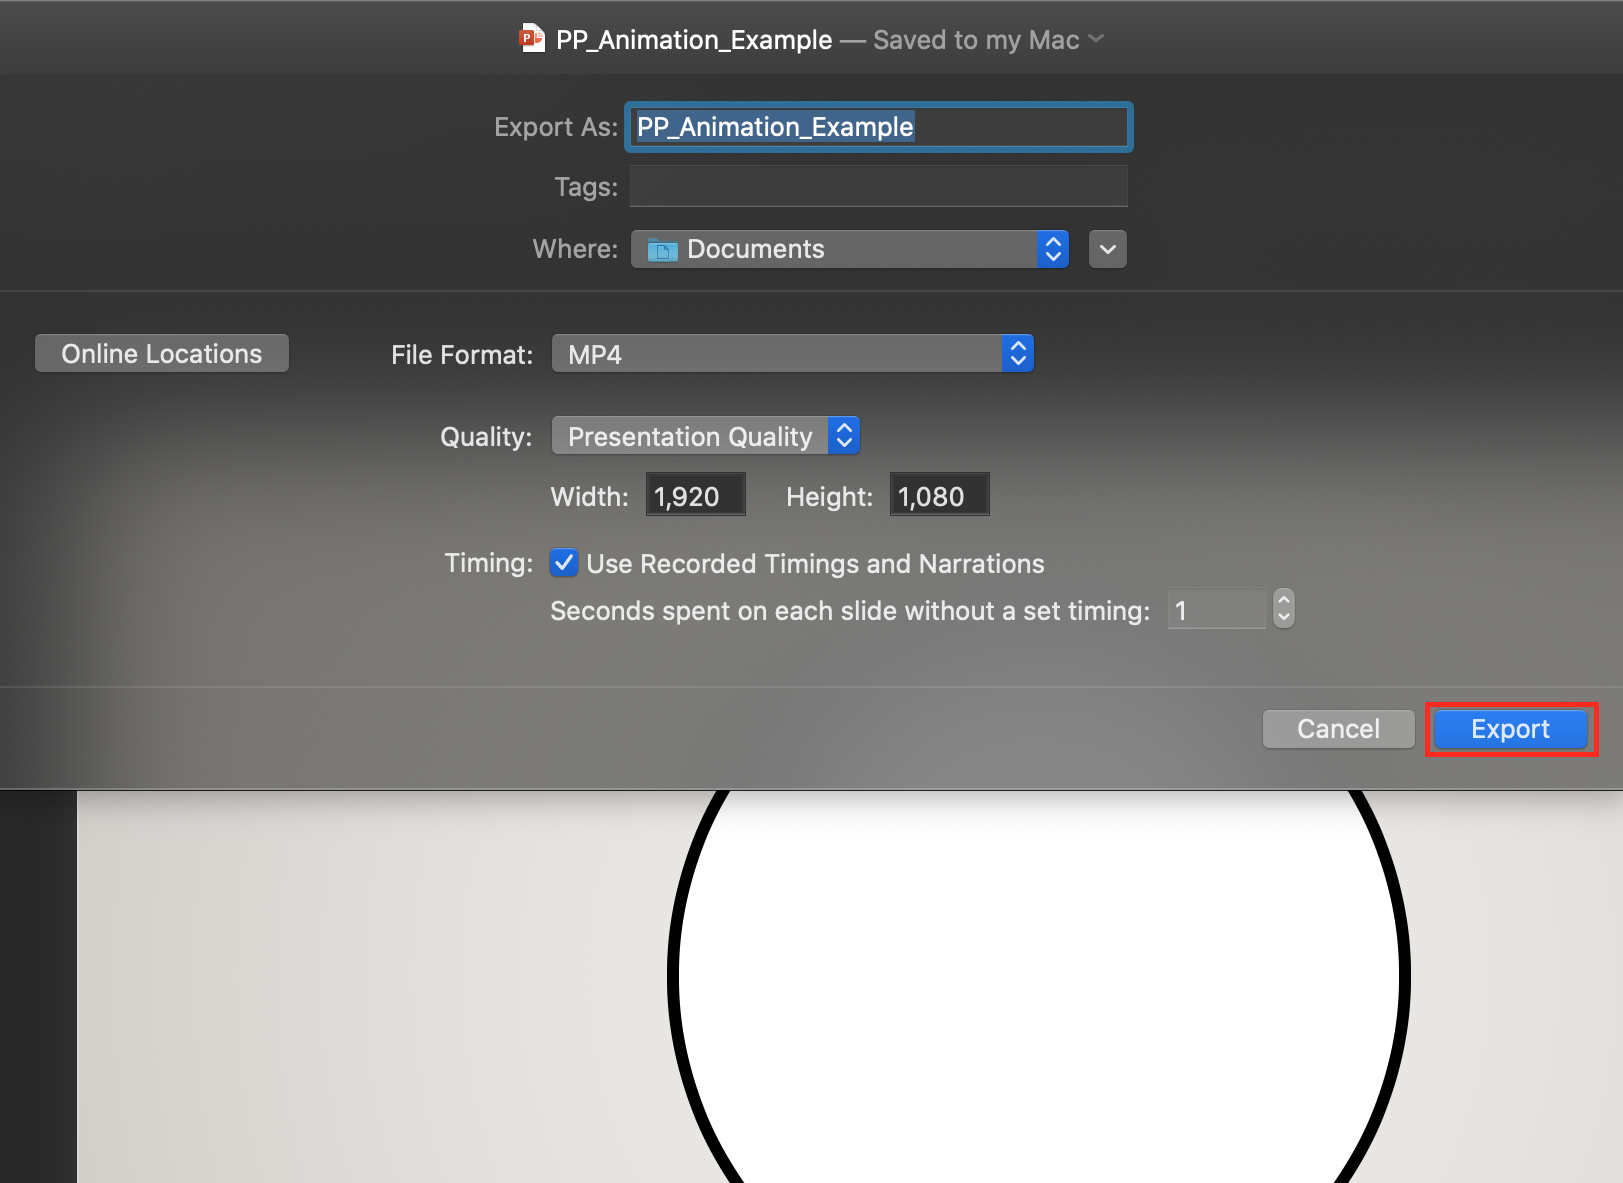
Now that the animation has been realized, you can choose to have the students submit their finished animations as either a PowerPoint (.pptx) file or as a video file (.MP4 or .MOV). My preference is for them to submit both a .pptx file and a video file, either a .MP4 or .MOV.
To export the presentation as a video file, navigate to the "File" menu and select "Export ". Once in the "Export " menu pane, select either "MP4" or "MOV". I selected "MP4", and left the preset settings as is. Select "Export " at the bottom right of the menu pane and a video will be created.
Animation Example and Next Step

I've provided an extremely simple example for demonstration purposes of a square transforming into a circle. This technique would truly excel as a visual storytelling tool for concepts in a variety of subjects, such as Science. For example, this technique could be used by students to illustrate processes in Biology such as the Stages of Mitosis. The possibilities of this technique in the classroom, in any subject, are truly endless! Try it out in your teaching subject and share your results with the community by using the Teacher Notes section!
Cheers!
Mr. Ham