Precise Temperature Control on the Raspberry Pi 4
by the2ndTierney in Circuits > Raspberry Pi
2007 Views, 3 Favorites, 0 Comments
Precise Temperature Control on the Raspberry Pi 4

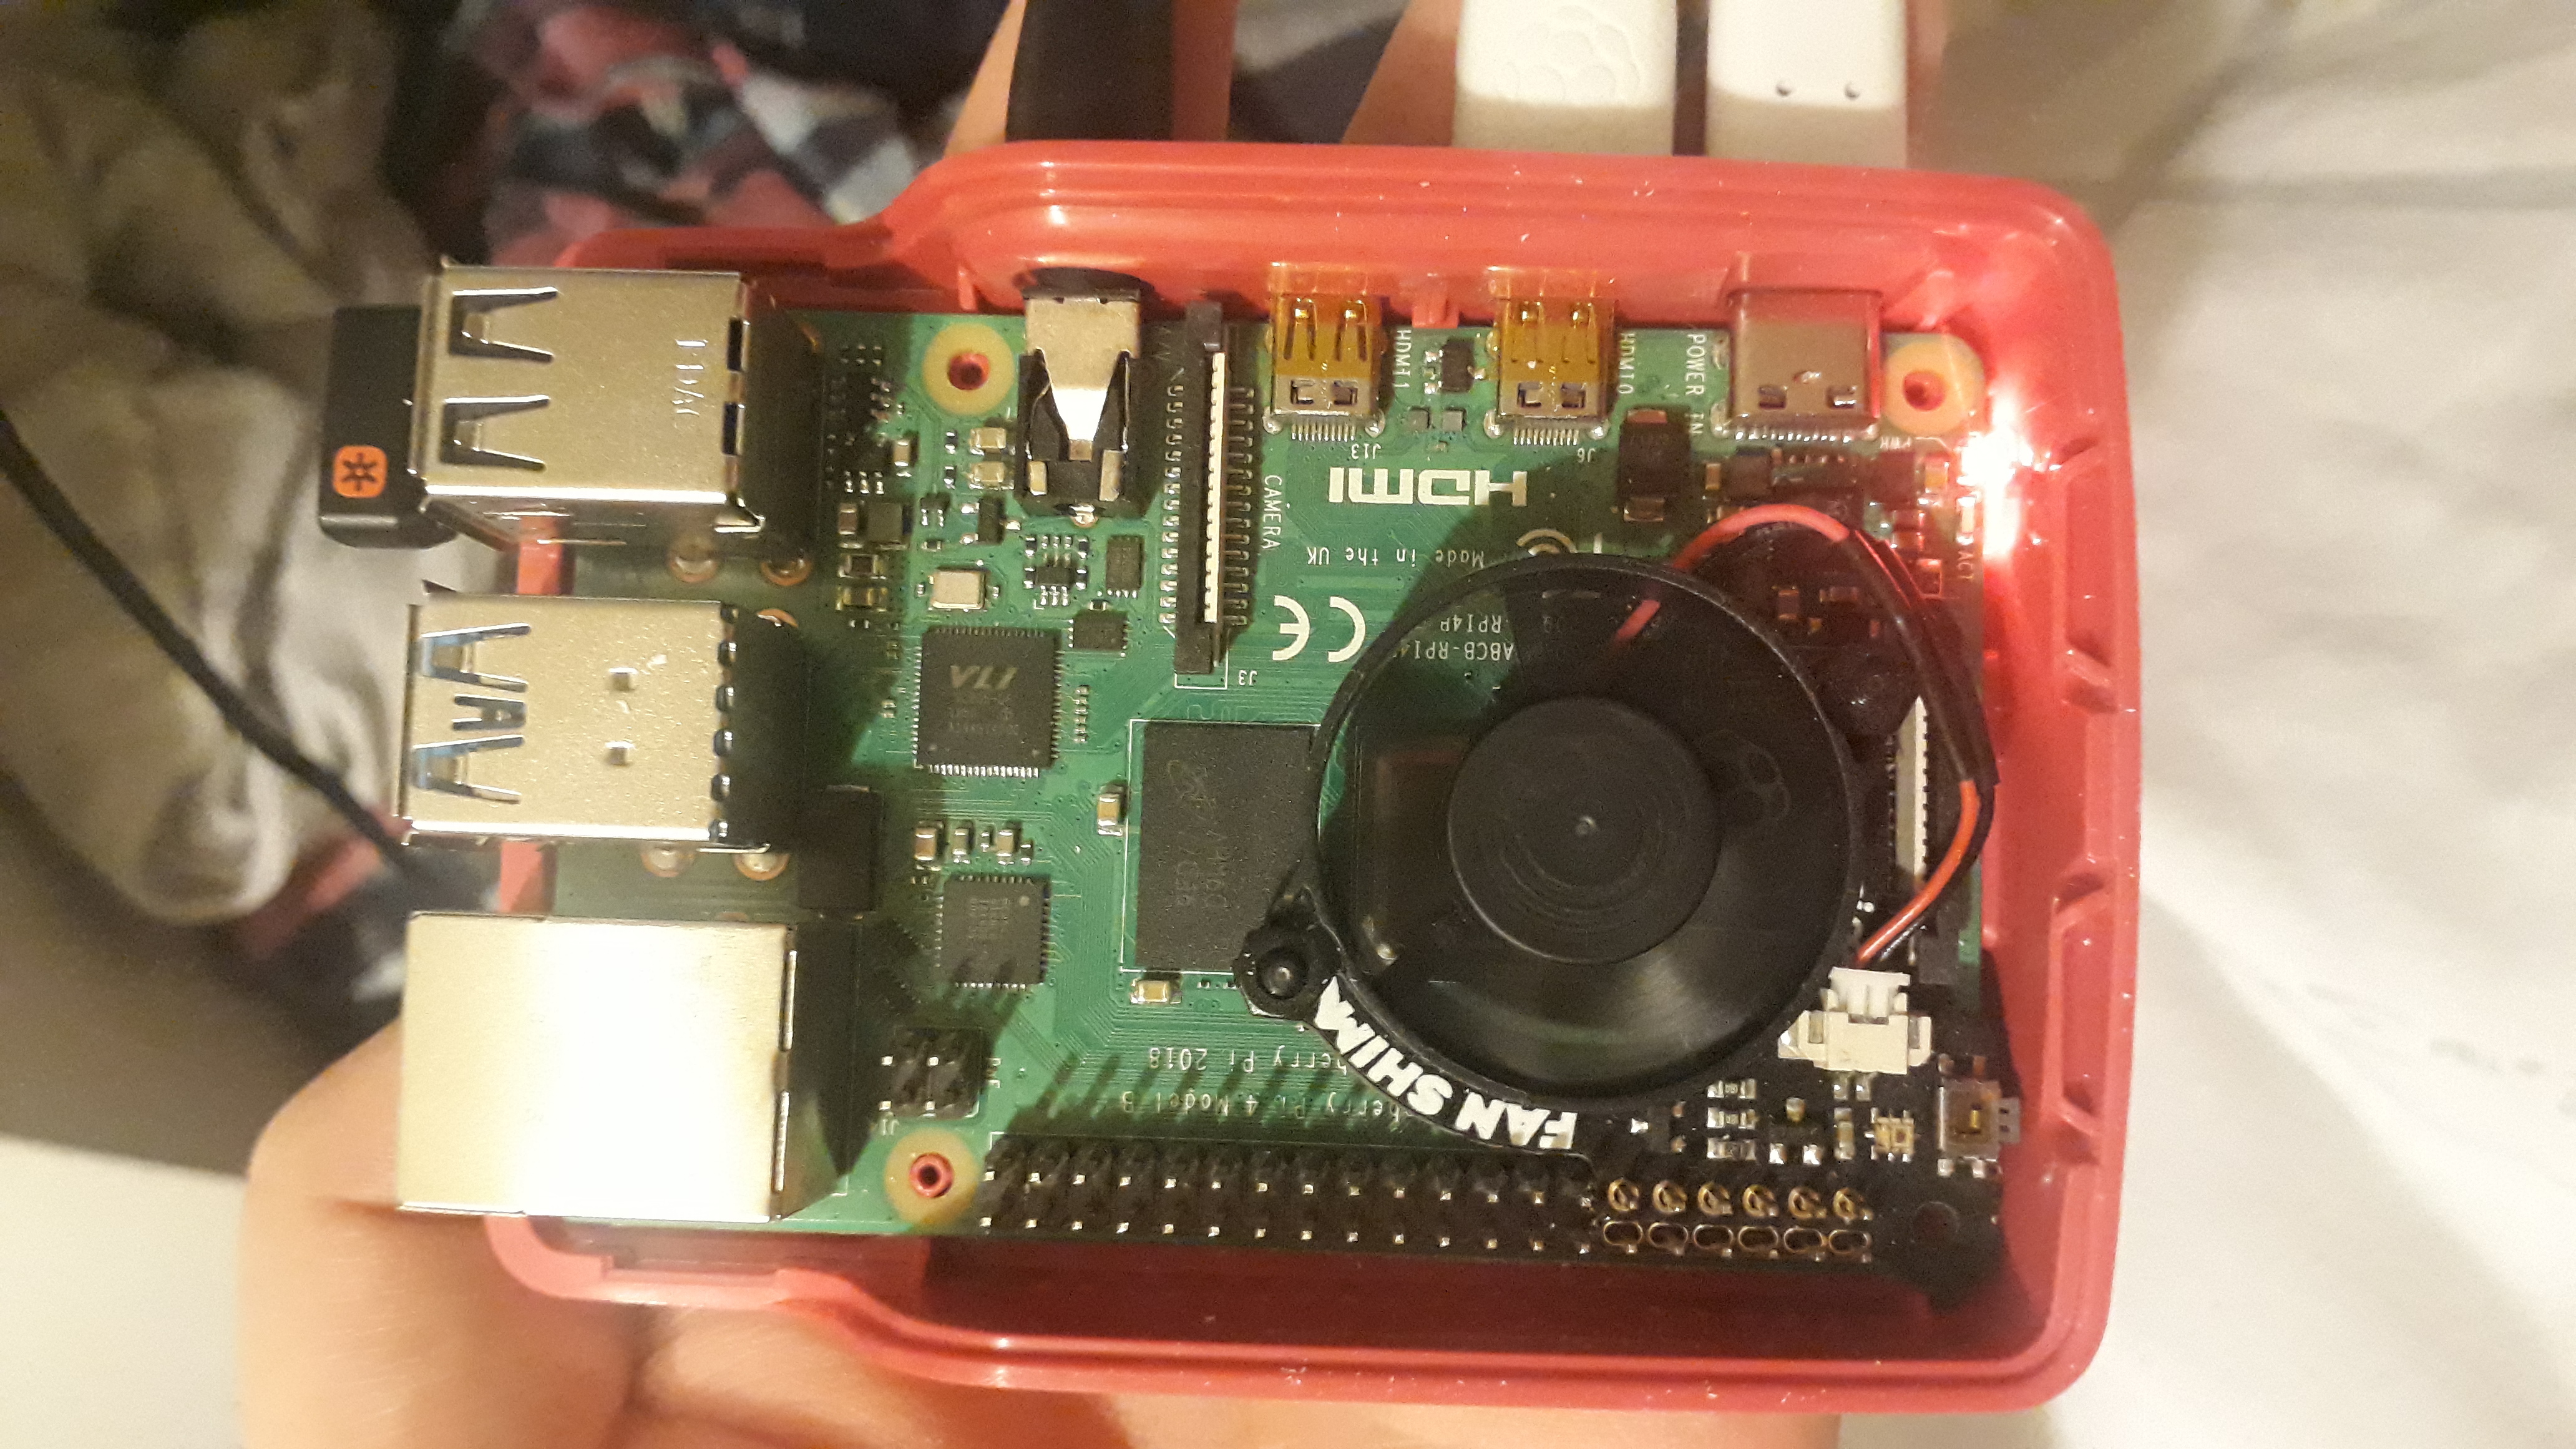
The Pimoroni Fan Shim is a great solution for reducing the temperature of your Pi when it runs hot. The makers even provide software that triggers the fan when the CPU temperature rises above a certain threshold (e.g. 65 degrees). The temperature quickly reduces below a lower threshold and turns off the fan. This is great but causes the temperature to rise and fall under moderate loads and creates audible fan noise. This instructable will reduce the noise of the fan while fixing the CPU temperature to a specific value using something called a PID controller. Higher thresholds (e.g. 65 degrees) will result in a much quieter fan while lower thresholds (e.g. 50 degrees) will result in a louder fan but better temperature control.
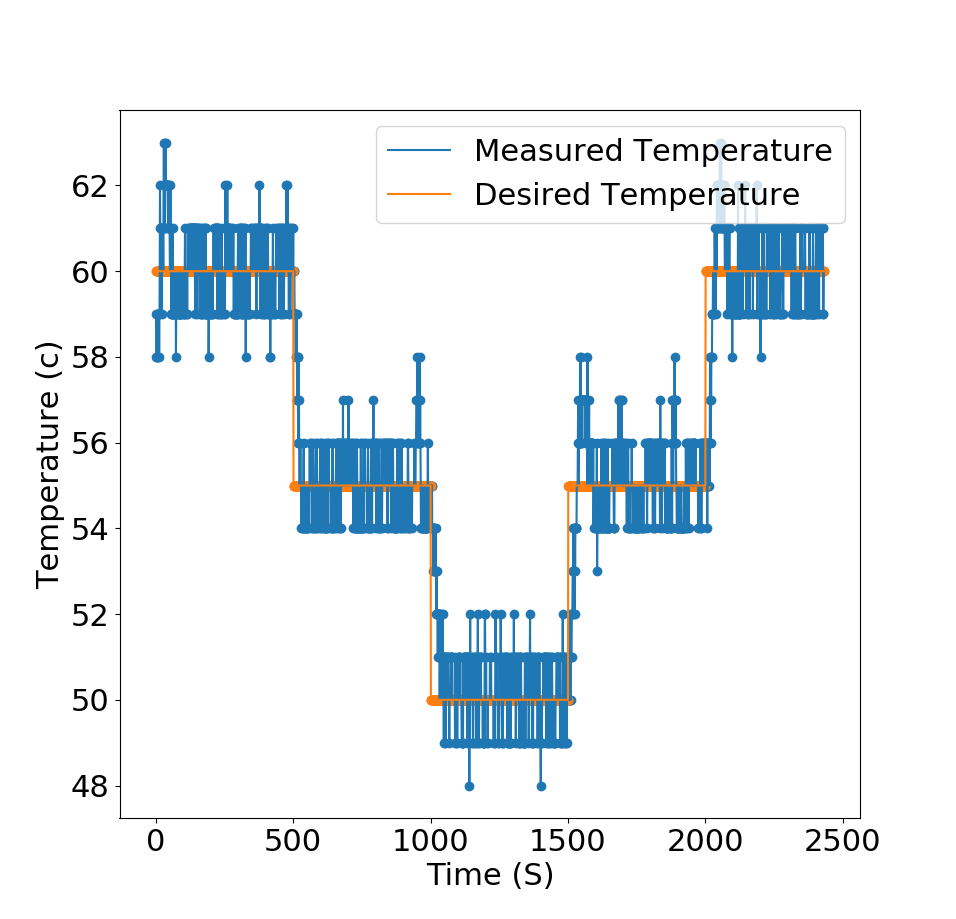
The example above shows my results from running the PID controller and changing the target termperature every 500 seconds. The accuracy is +/- 1 degree with some overshoot on sudden changes in termperature.
Importantly, this test was perfromed under the same load for the total test time (watching BBC iPlayer).
Supplies
Set Up Your Fan

The first step is to set up your fan. The Pimorini tutorial is great!
Then open up the terminal on your Pi (ctrl alt t)
And install the code provided by Pimoroni
git clone <a href="https://github.com/pimoroni/fanshim-python" rel="nofollow"> https://github.com/pimoroni/fanshim-python</a><br>cd fanshim-python
sudo ./install.sh
Create a PI(D) Controller

A Proportional Integral Derivative (PID) controller is a system used to control the value of a certain process (CPU temperature) by manipulating some physical device (Fan Speed). We can manipulate the 'speed' and noise of the fan by turning it on and off periodically (Pulse Wave Modulation). The length of time it is on for in a given period (e.g. 1 second) determines how fast and how loud the fan is (900ms = loud and fast, 100ms = quiet and slow). We will use the PID to manipulate the speed of the fan and thus control the temperature.
We can divide the use of a PID into number of steps.
- Decide on the value of the process variable you want to achieve (e.g. CPU temperature = 55 ). This is called your setpoint.
- Calculate the PID error. If your setpoint is 55 degrees and the actual temperature is 60 degrees your error is 5 degrees (Temperature - setpoint)
- Change the on-time of the fan in proportion to the error (Big errors result in big changes in fan speed, small errors cause small changes in fan speed).
- Adjust the fan in proprtion to past values (Integral/sum of all previous errors)
- Optionally you adjust the fan speed based on the rate of change of the error (derivative) but we won't do that here
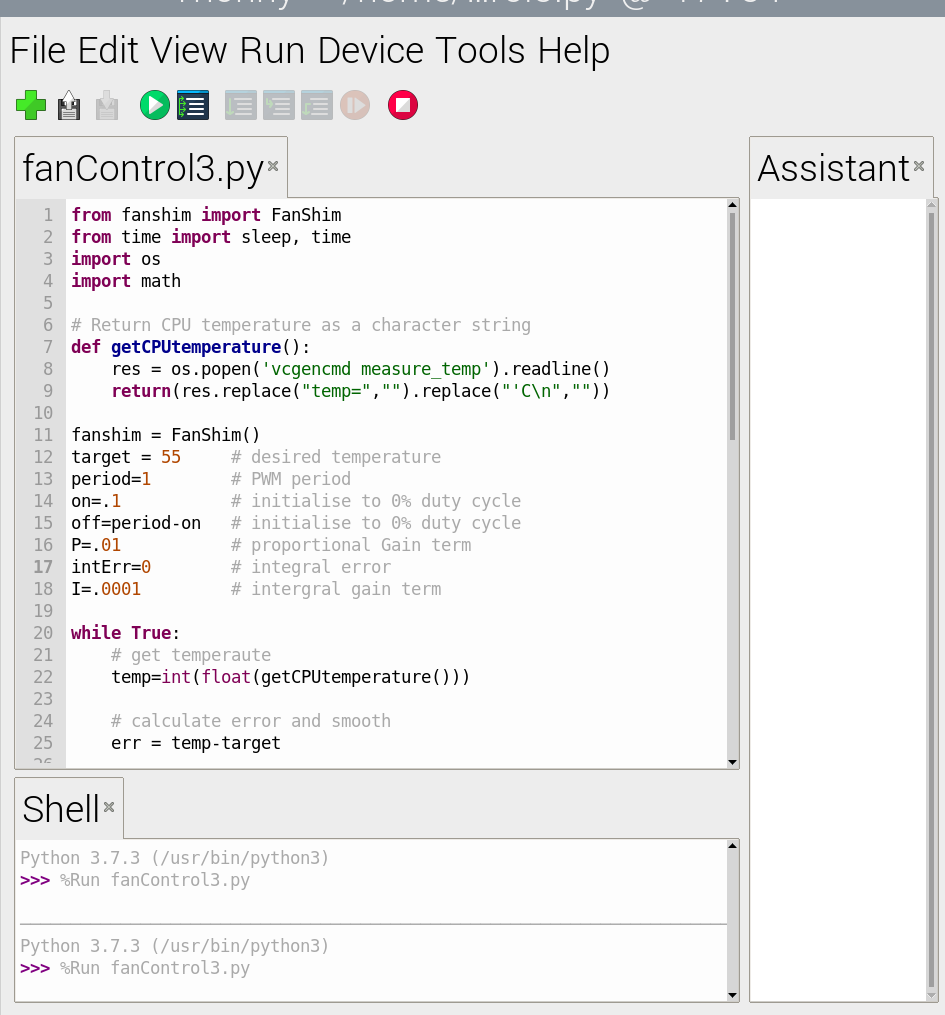
Now that you have the theory run the code below in the Thonny IDE (or some other python IDE). Change the value of 'target' in the code below to change what terperature you want to maintain your Pi at. I've set the 'P' and 'I' terms at somewhat arbitrary values. Feel free to adjust these if they don't work for you. making 'P' bigger means the controller will respond rapidly to new errors (but may not be stable). Changing 'I' will cause the controller to weight it's response more to past values. I wouldn't try to make these terms too big as rapidly chaning the fan speed won't rapidly change termperature. Also, if you're doing incredibly heavy work on your Pi you may not achieve your desired termperature (the limits of the fan still apply).
from fanshim import FanShim
from time import sleep, time
import os
import math

# Return CPU temperature as a character string
def getCPUtemperature():
    res = os.popen('vcgencmd measure_temp').readline()
    return(res.replace("temp=","").replace("'C\n",""))

fanshim = FanShim()
target = 55     # desired temperature (play with this and see what happens)
period=1        # PWM period
on=.1           # initialise to 0% duty cycle
off=period-on   # initialise to 0% duty cycle
P=.01           # proportional Gain term  (play with this and see what happens)
intErr=0        # integral error
I=.0001         # intergral gain term (play with this and see what happens)

while True:
    # get temperaute
    temp=int(float(getCPUtemperature()))

    # calculate error and smooth
    err = temp-target

    # compute integra lerror and constrain it
    intErr=intErr+err
    if intErr>10:
        intErr=10
    if intErr<-10:
        intErr=-10

    # Cacluate new duty cycle
    G= P*err +I*intErr
    on=on+G

    # Set maximum duty cycle
    if on>=period:
        on=period
        off=0
    else:
        on=on
        off = period-on

    # set minimum duty cycle
    if on<.09:
        on=.09
    else:
        on=on

    # PWM on the fanshim pin
    if on ==period:
        fanshim.set_fan(True)
        sleep(on)
    else:
        fanshim.set_fan(True)
        sleep(on)
        fanshim.set_fan(False)
        sleep(off)
Run Control Script at Startup

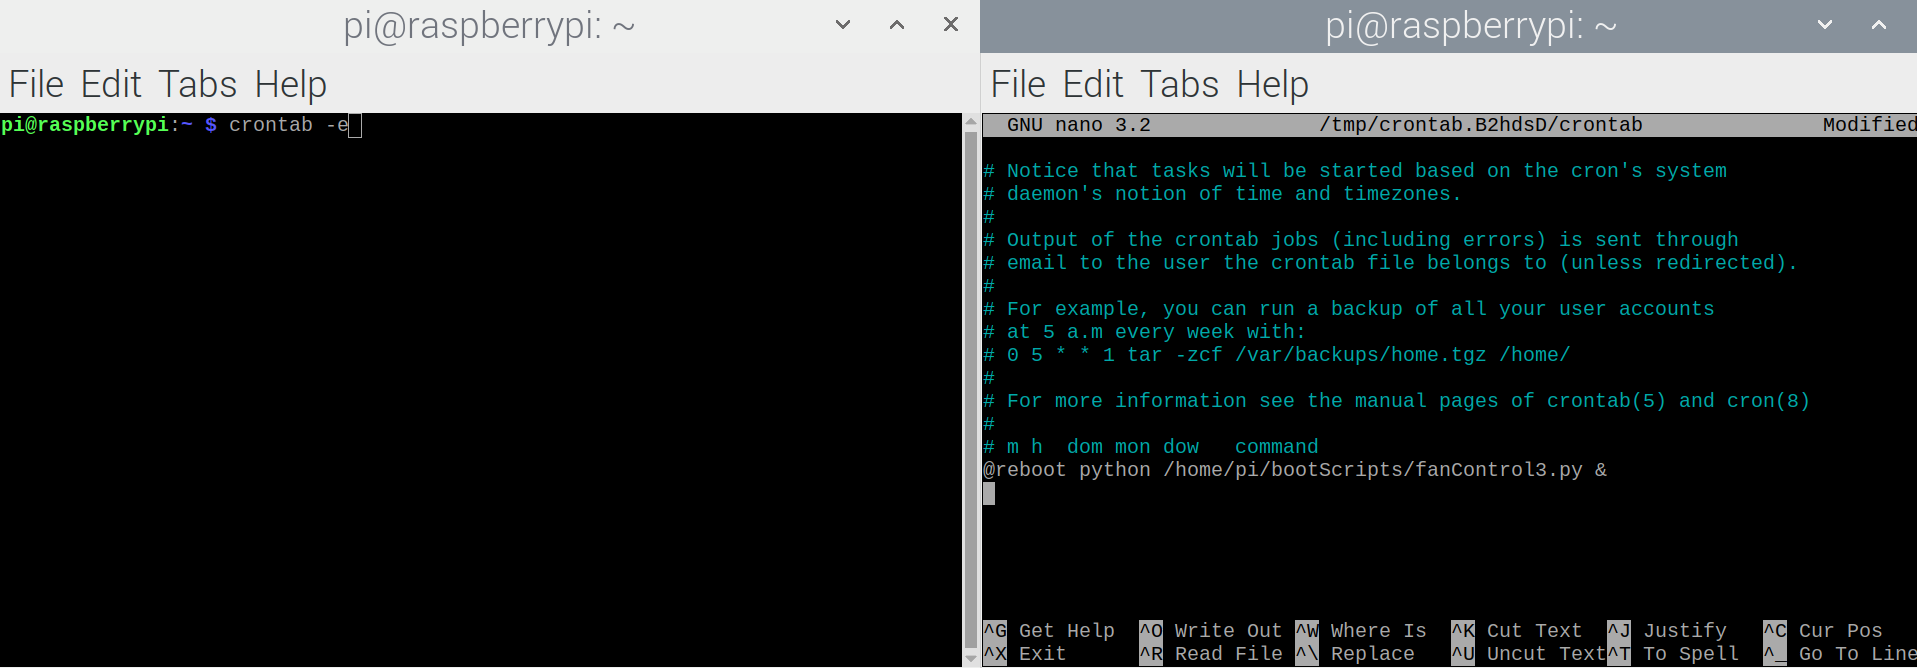
You could run this script everytime you start your pi or you could have it automatilcally trigger on reboot. This is super simple to do with crontab.
- open the terminal
- type crontab-e into the terminal
- add the follwing line of code to the file '@reboot python /home/pi/bootScripts/fanControl.py &'
- exit and reboot
I put the script (fanControl.py) in a floder called bootScripts but you could put it anywhere just make sure you specify the correct path in crontab.
All done! Now your fan will control the temperature of your CPU to a specific value, while minimizing the audible noise it produces.