Power-off Button for Raspberry Pi
by AlxChr in Circuits > Raspberry Pi
1463 Views, 2 Favorites, 0 Comments
Power-off Button for Raspberry Pi
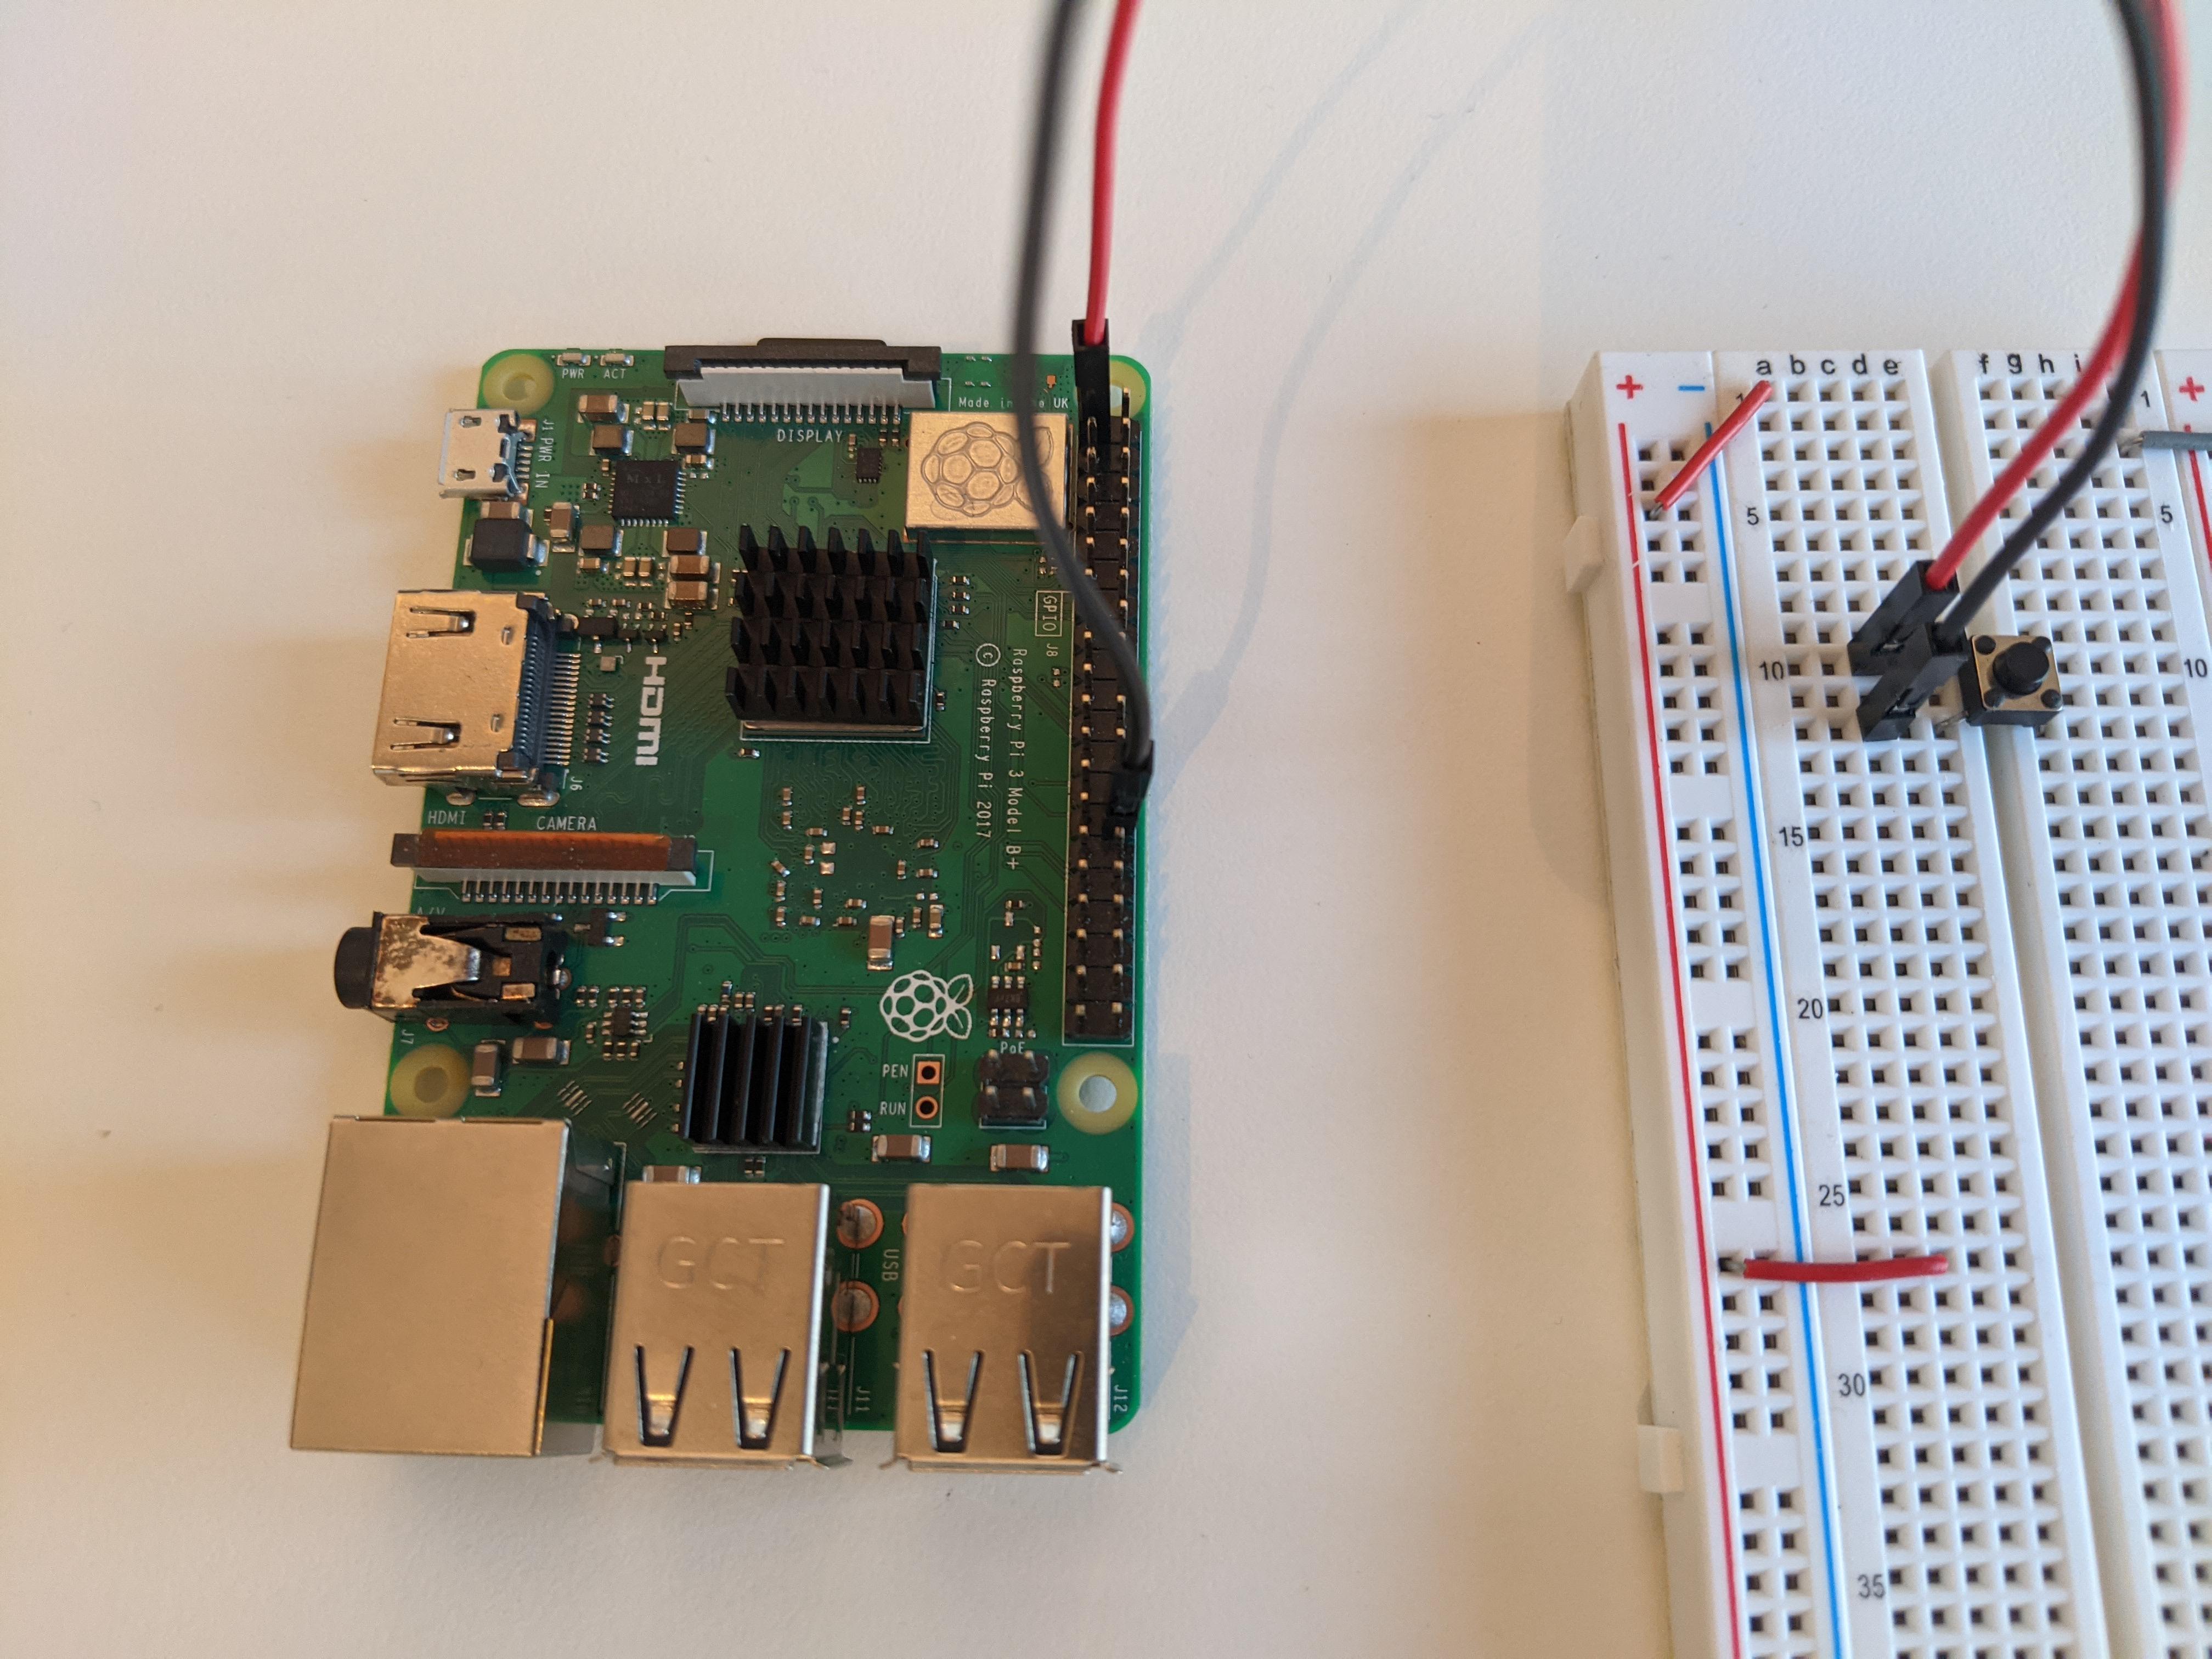
The Raspberry Pi is a very useful computing platform that allows creating various IoT/robotics/smart-home/... project applications. The one thing it doesn't have though, compare to a normal computer, is a shutdown power-off button. So how can we create one ourselves? Alright, let's do it together!
For this tutorial, you'll need the following:
- 1 Raspberry Pi already configured and ready to use
- 1 breadboard or something that will allow you to create the electronic circuit
- 1 push-button
- 2 jumper wires
If you've never used a Raspberry Pi, you can check out my tutorial on how and what to do to configure it:
https://www.instructables.com/How-to-Setup-a-Raspberry-Pi-and-Start-Using-It/
Electronic Circuit
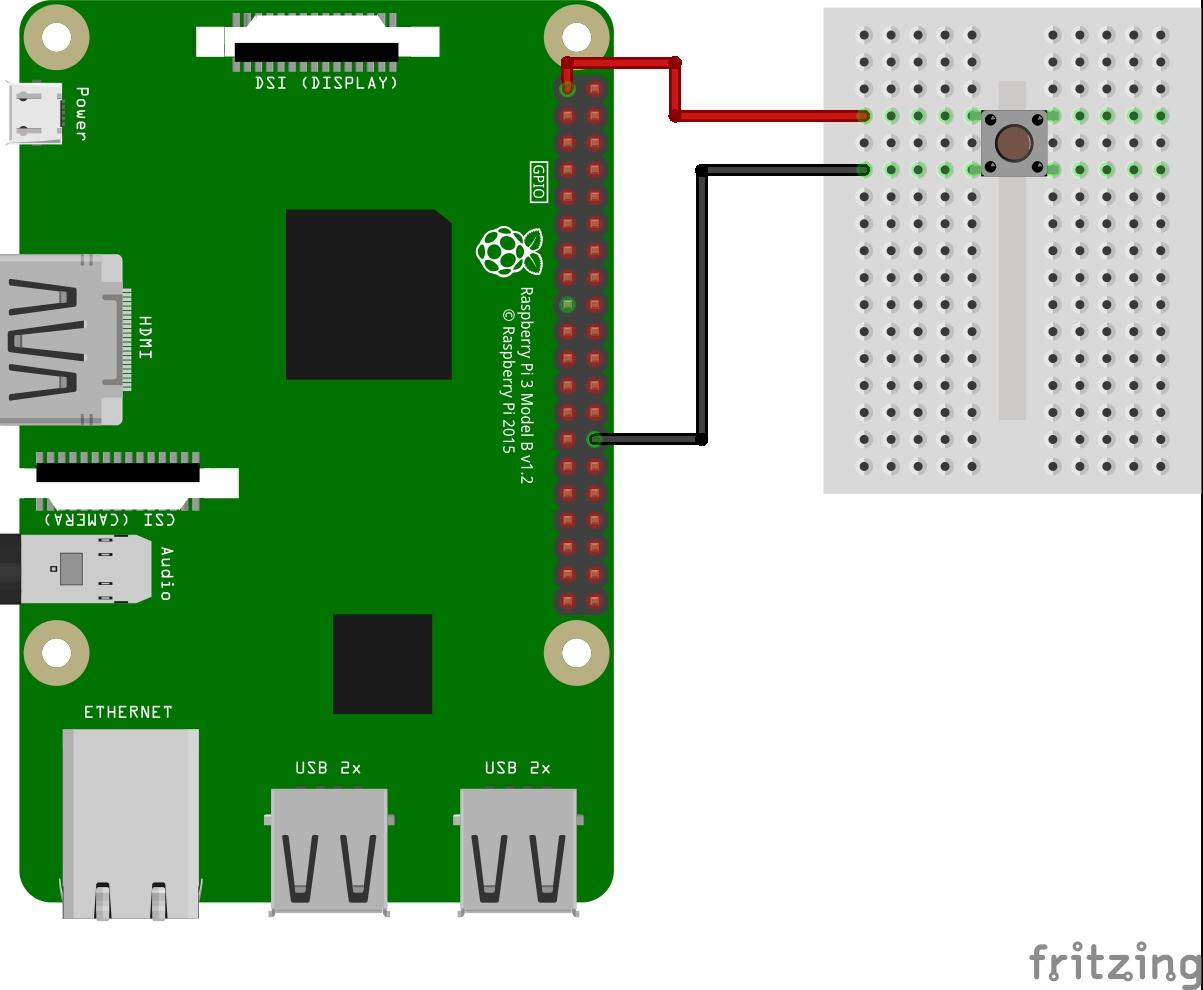
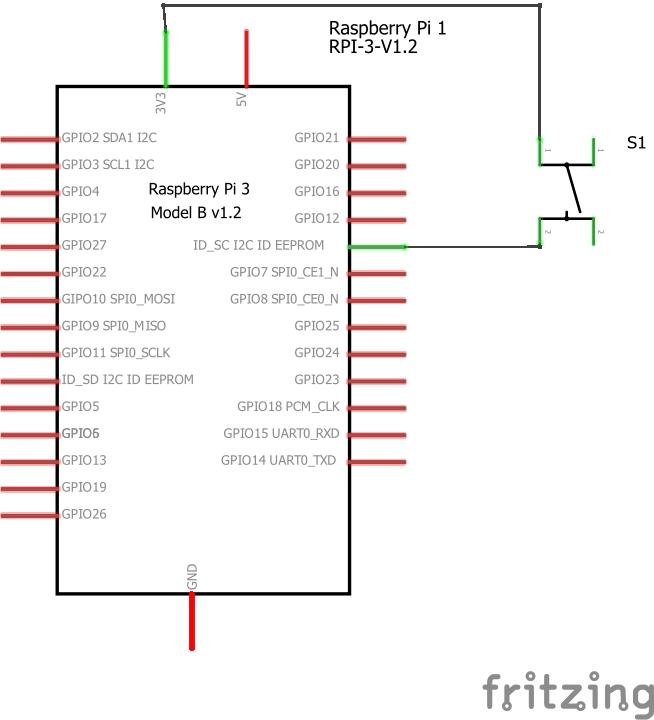
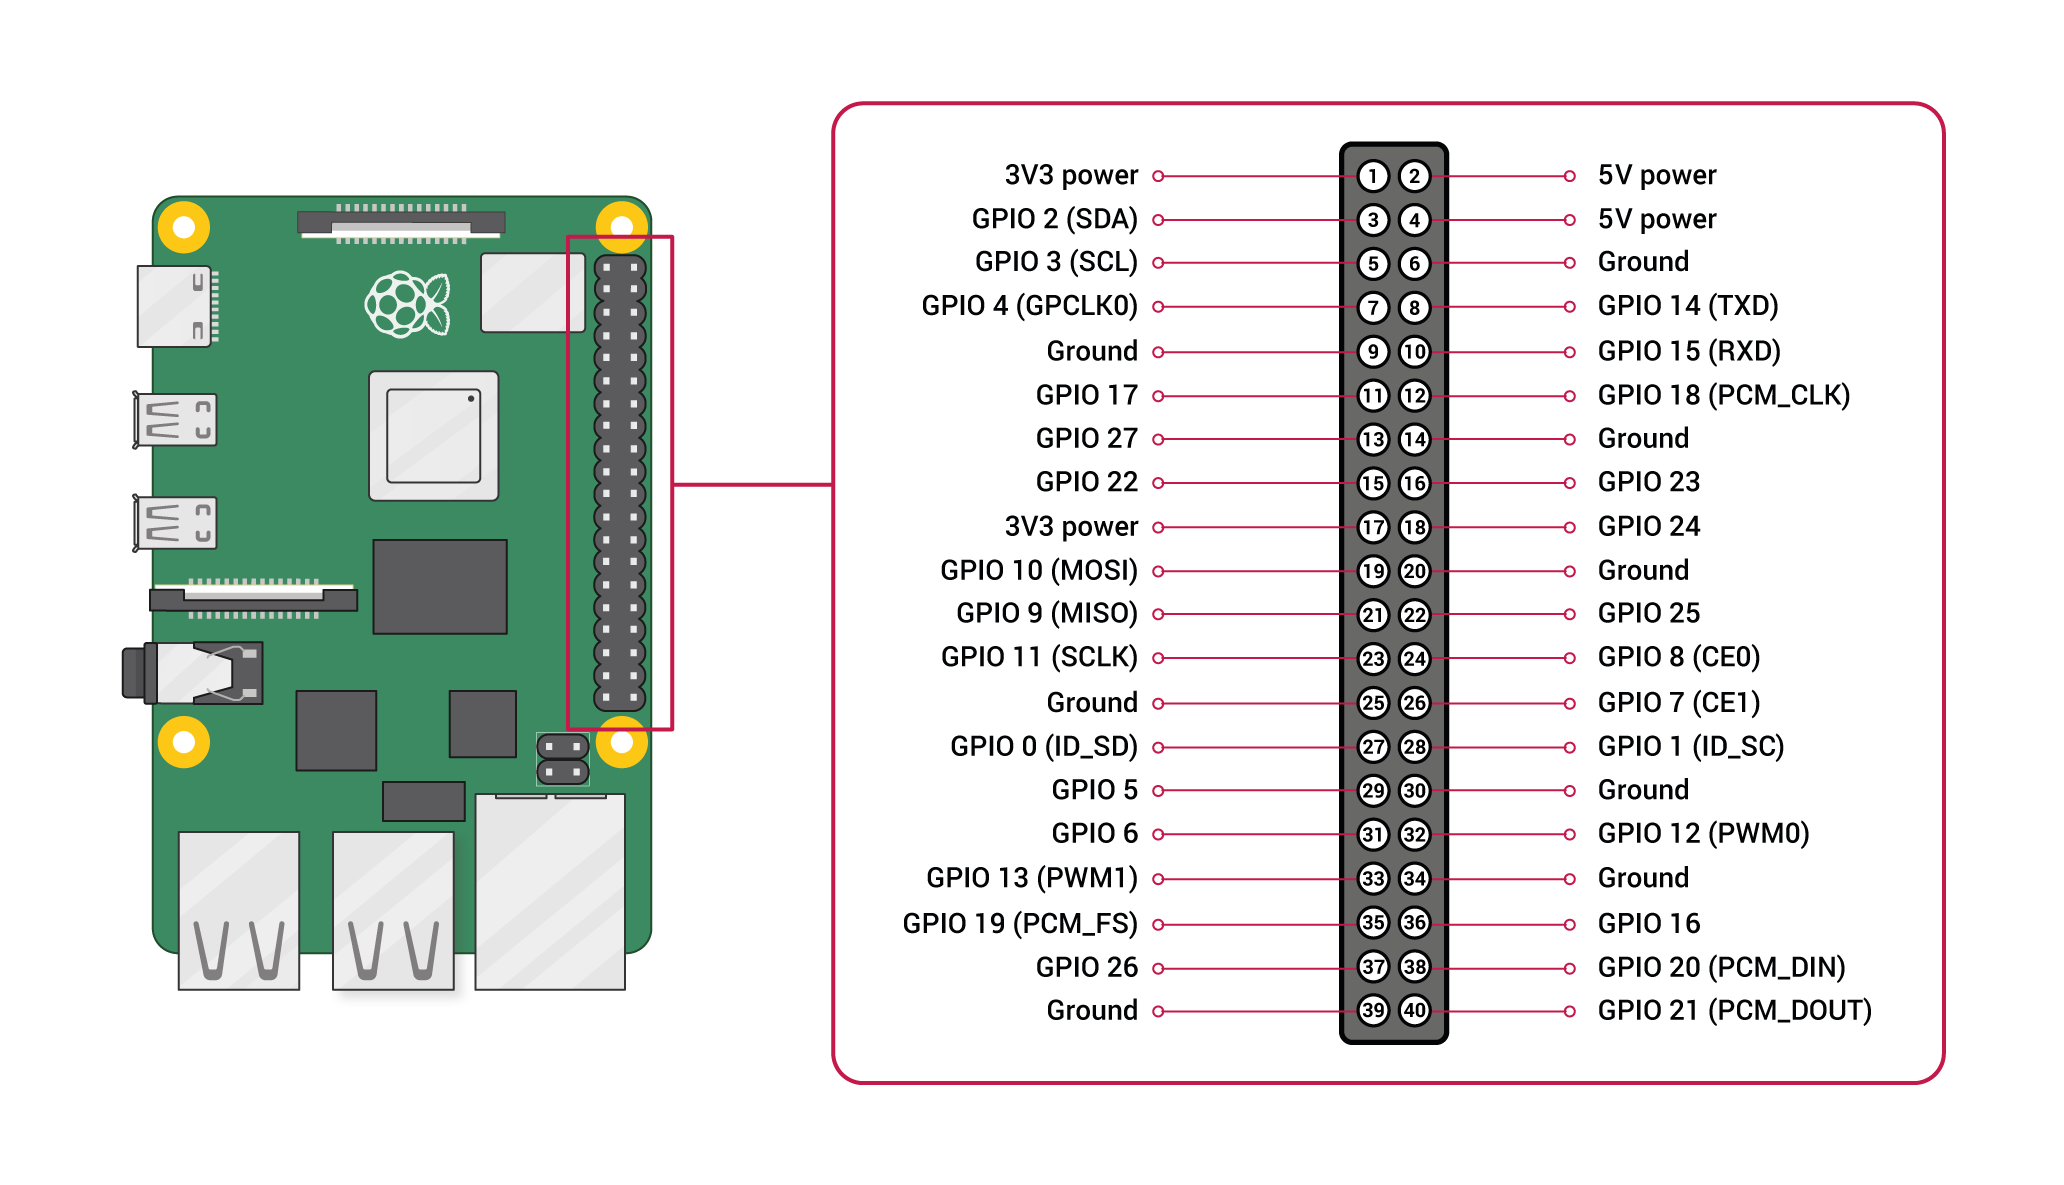
Nothing super complicated here, it's quite a straightforward circuit. The 2 pictures above are explaining the circuit build. You can use whichever GPIO pin you want for the button input, you'll just need to make sure to update the code to reflect that.
Let's explain quickly how this is going to work:
- the RED wire is taking the 3.3V to one end of the push button.
- the BLACK cable is connecting the other end of the push button to a Pi GPIO which will be used as input.
- by default the button is open, so there is no voltage going through it. So the BLACK cable is at 0V when the button is not pressed. This means that the logical state of the Pi GPIO input is 0.
- when the button will be pressed, the voltage will go through it and the BLACK cable will be linked to the 3.3V. The Raspberry Pi will then see a voltage of 3.3V at its input, corresponding to a logical state of 1.
Python Code
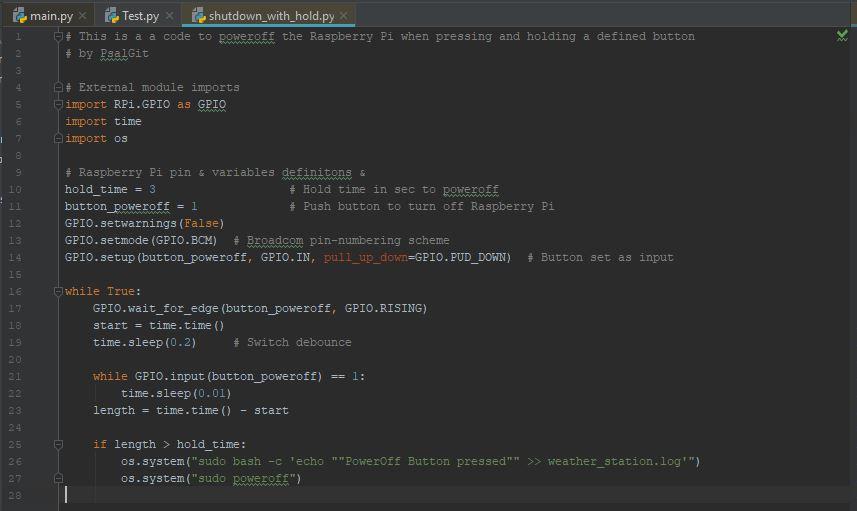
Now that the circuit is ready to be used, we need to write the code that will run it, and I'm using Python in a PyCharm environment here. I configured the button to power-off the Raspberry Pi only when it is pressed more than 3 seconds consequently. The reason why I'm doing so is that it is very easy to have it pressed accidentally, and you don't want to shut down your Pi by accident.
The printscreen above is from my PyCharm environment, and the code is the following (with a minor difference on line 26 which is linked to another project but not required here):
# This is a a code to poweroff the Raspberry Pi when pressing and holding a defined button

# External module imports
import RPi.GPIO as GPIO
import time
import os

# Raspberry Pi pin & variables definitons &
hold_time = 3                   # Hold time in sec to poweroff
button_poweroff = 1             # Push button to turn off Raspberry Pi
GPIO.setwarnings(False)
GPIO.setmode(GPIO.BCM)  # Broadcom pin-numbering scheme
GPIO.setup(button_poweroff, GPIO.IN, pull_up_down=GPIO.PUD_DOWN)  # Button set as input

while True:
    GPIO.wait_for_edge(button_poweroff, GPIO.RISING)
    start = time.time()
    time.sleep(0.2)     # Switch debounce

    while GPIO.input(button_poweroff) == 1:
        time.sleep(0.01)
    length = time.time() - start

    if length > hold_time:
        os.system("sudo poweroff")
The first thing, if you have connected the push button to a different GPIO, is to update the line 11 on the above printscreen with the relevant GPIO input:
button_poweroff = GPIO_X # Update with the correct GPIO used on your circuit
Also, the hold_time variable allows you to modify the waiting time that triggers the Pi to shut down.
How to Launch the Script Automatically After the Boot Procedure

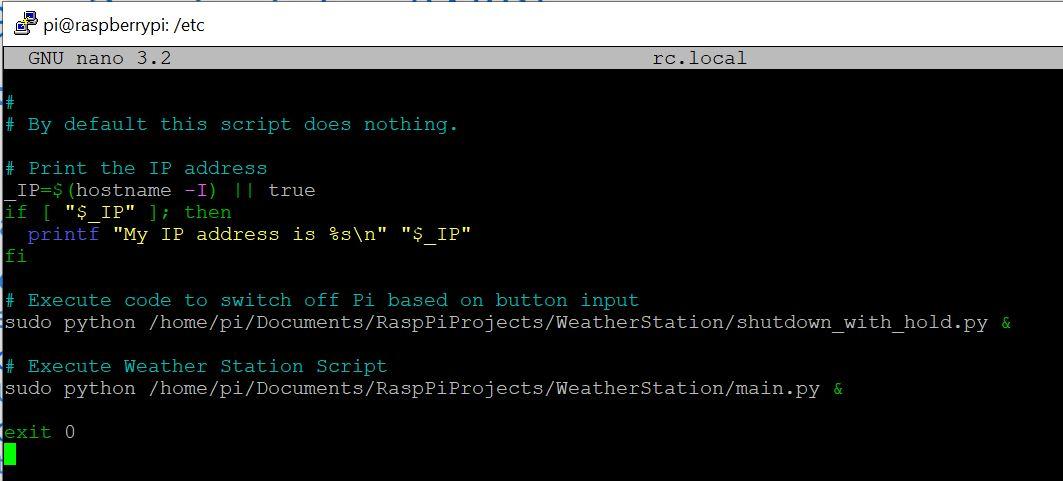
Now that we have the code ready, we just need to execute it. But, it would be convenient if we can have this script executed every time the Pi is booting, in an automatic way, so the button would work without us to run the script each time. There are many ways to do so. I've added here one line into the rc.local file which is located in the /etc/ folder of your Pi. It is executed as part of the boot sequence.
You need to open a command line and type the following commands (1st printscreen above):
cd /
cd etc
sudo nano rc.local
The first command will take you from your /home/pi directory to the root one, which is /.
The second command will then take you to the /etc/ directory.
Finally, the third one will open the rc.local file as a superuser, with full edit rights, which you need to modify the file.
Once in the file, you just need to add a line at the end of it, but before the exit 0 statement (2nd printscreen above):
# Add this line to rc.local file to launch the script
sudo python /home/pi/Documents/shutdown_with_hold.py &
There are a few things you'll need to pay attention to, here:
- the name of your file: in the line above, I'm assuming that the file is shutdown_with_hold.py. But it could be whatever you want, just update the name with yours.
- where you have saved your file: in the line above, I'm assuming that it is saved in your /home/pi/Documents directory. But again, it can be anywhere. You just need to make sure to put the absolute path to your file here.
- the "&" character at the end of it: this is important, and it allows this command to run in the background