Postshirt: Realtime Wearable Posture Detection
by jakers96 in Circuits > Wearables
1940 Views, 4 Favorites, 0 Comments
Postshirt: Realtime Wearable Posture Detection
Postshirt is a realtime wireless posture detection system that transmits and classifies accelerometer data from an Adafruit Feather to an Android application via Bluetooth. The complete system can detect in realtime if the user has bad posture and creates a push notification when the user starts to slouch, the detection also works while walking.
Supplies
Electronics
1 x Android Smartphone
1 x Adafruit Feather
1 x Lithium Ion Polymer Battery - 3.7v 100mAh (optional for wireless usage)
2 x ADXL335 triple-axis accelerometer
Materials
Hookup wire
Roll of tape
Install Necessary IDEs and Libraries
Adafruit Feather
First install the Arduino IDE and then follow the steps to install Adafruit nRF51 BLE Library
Jupyter Notebook
First install Jupyter Notebook and then the following required libraries
Android
Install Android Studio
Project Code
Download all the project code from GitHub
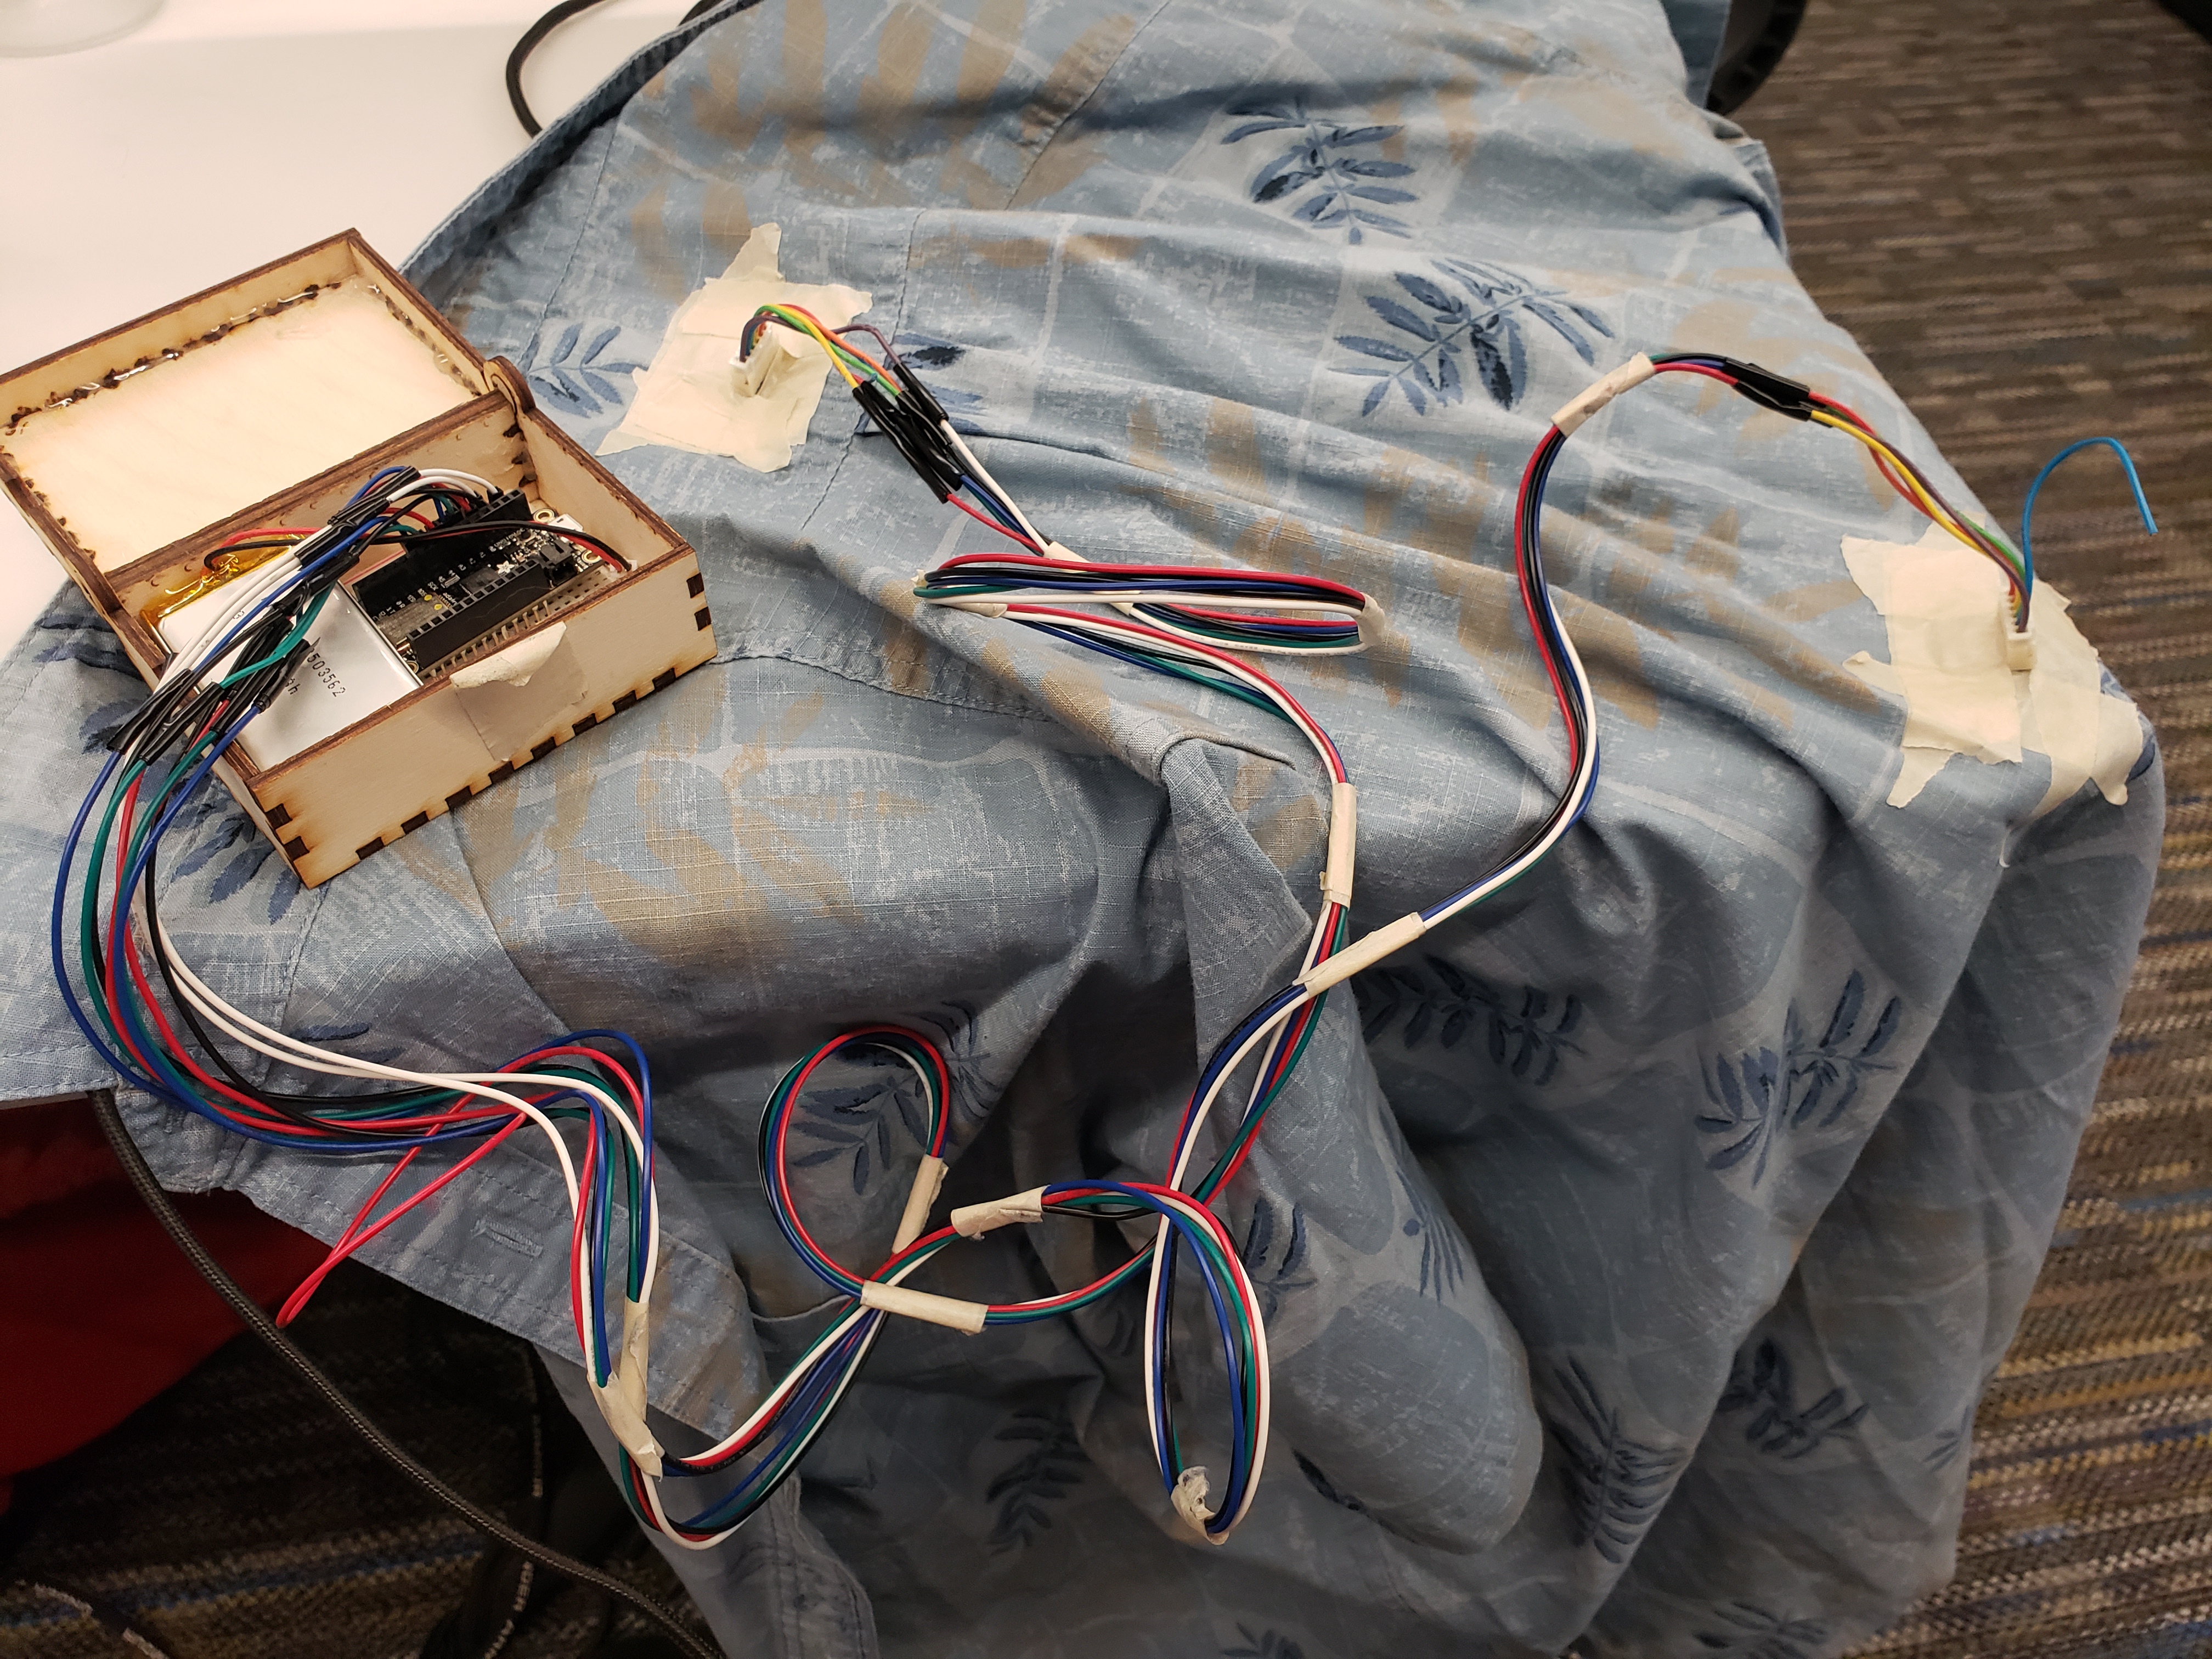
Wire the Accelerometers to the Feather
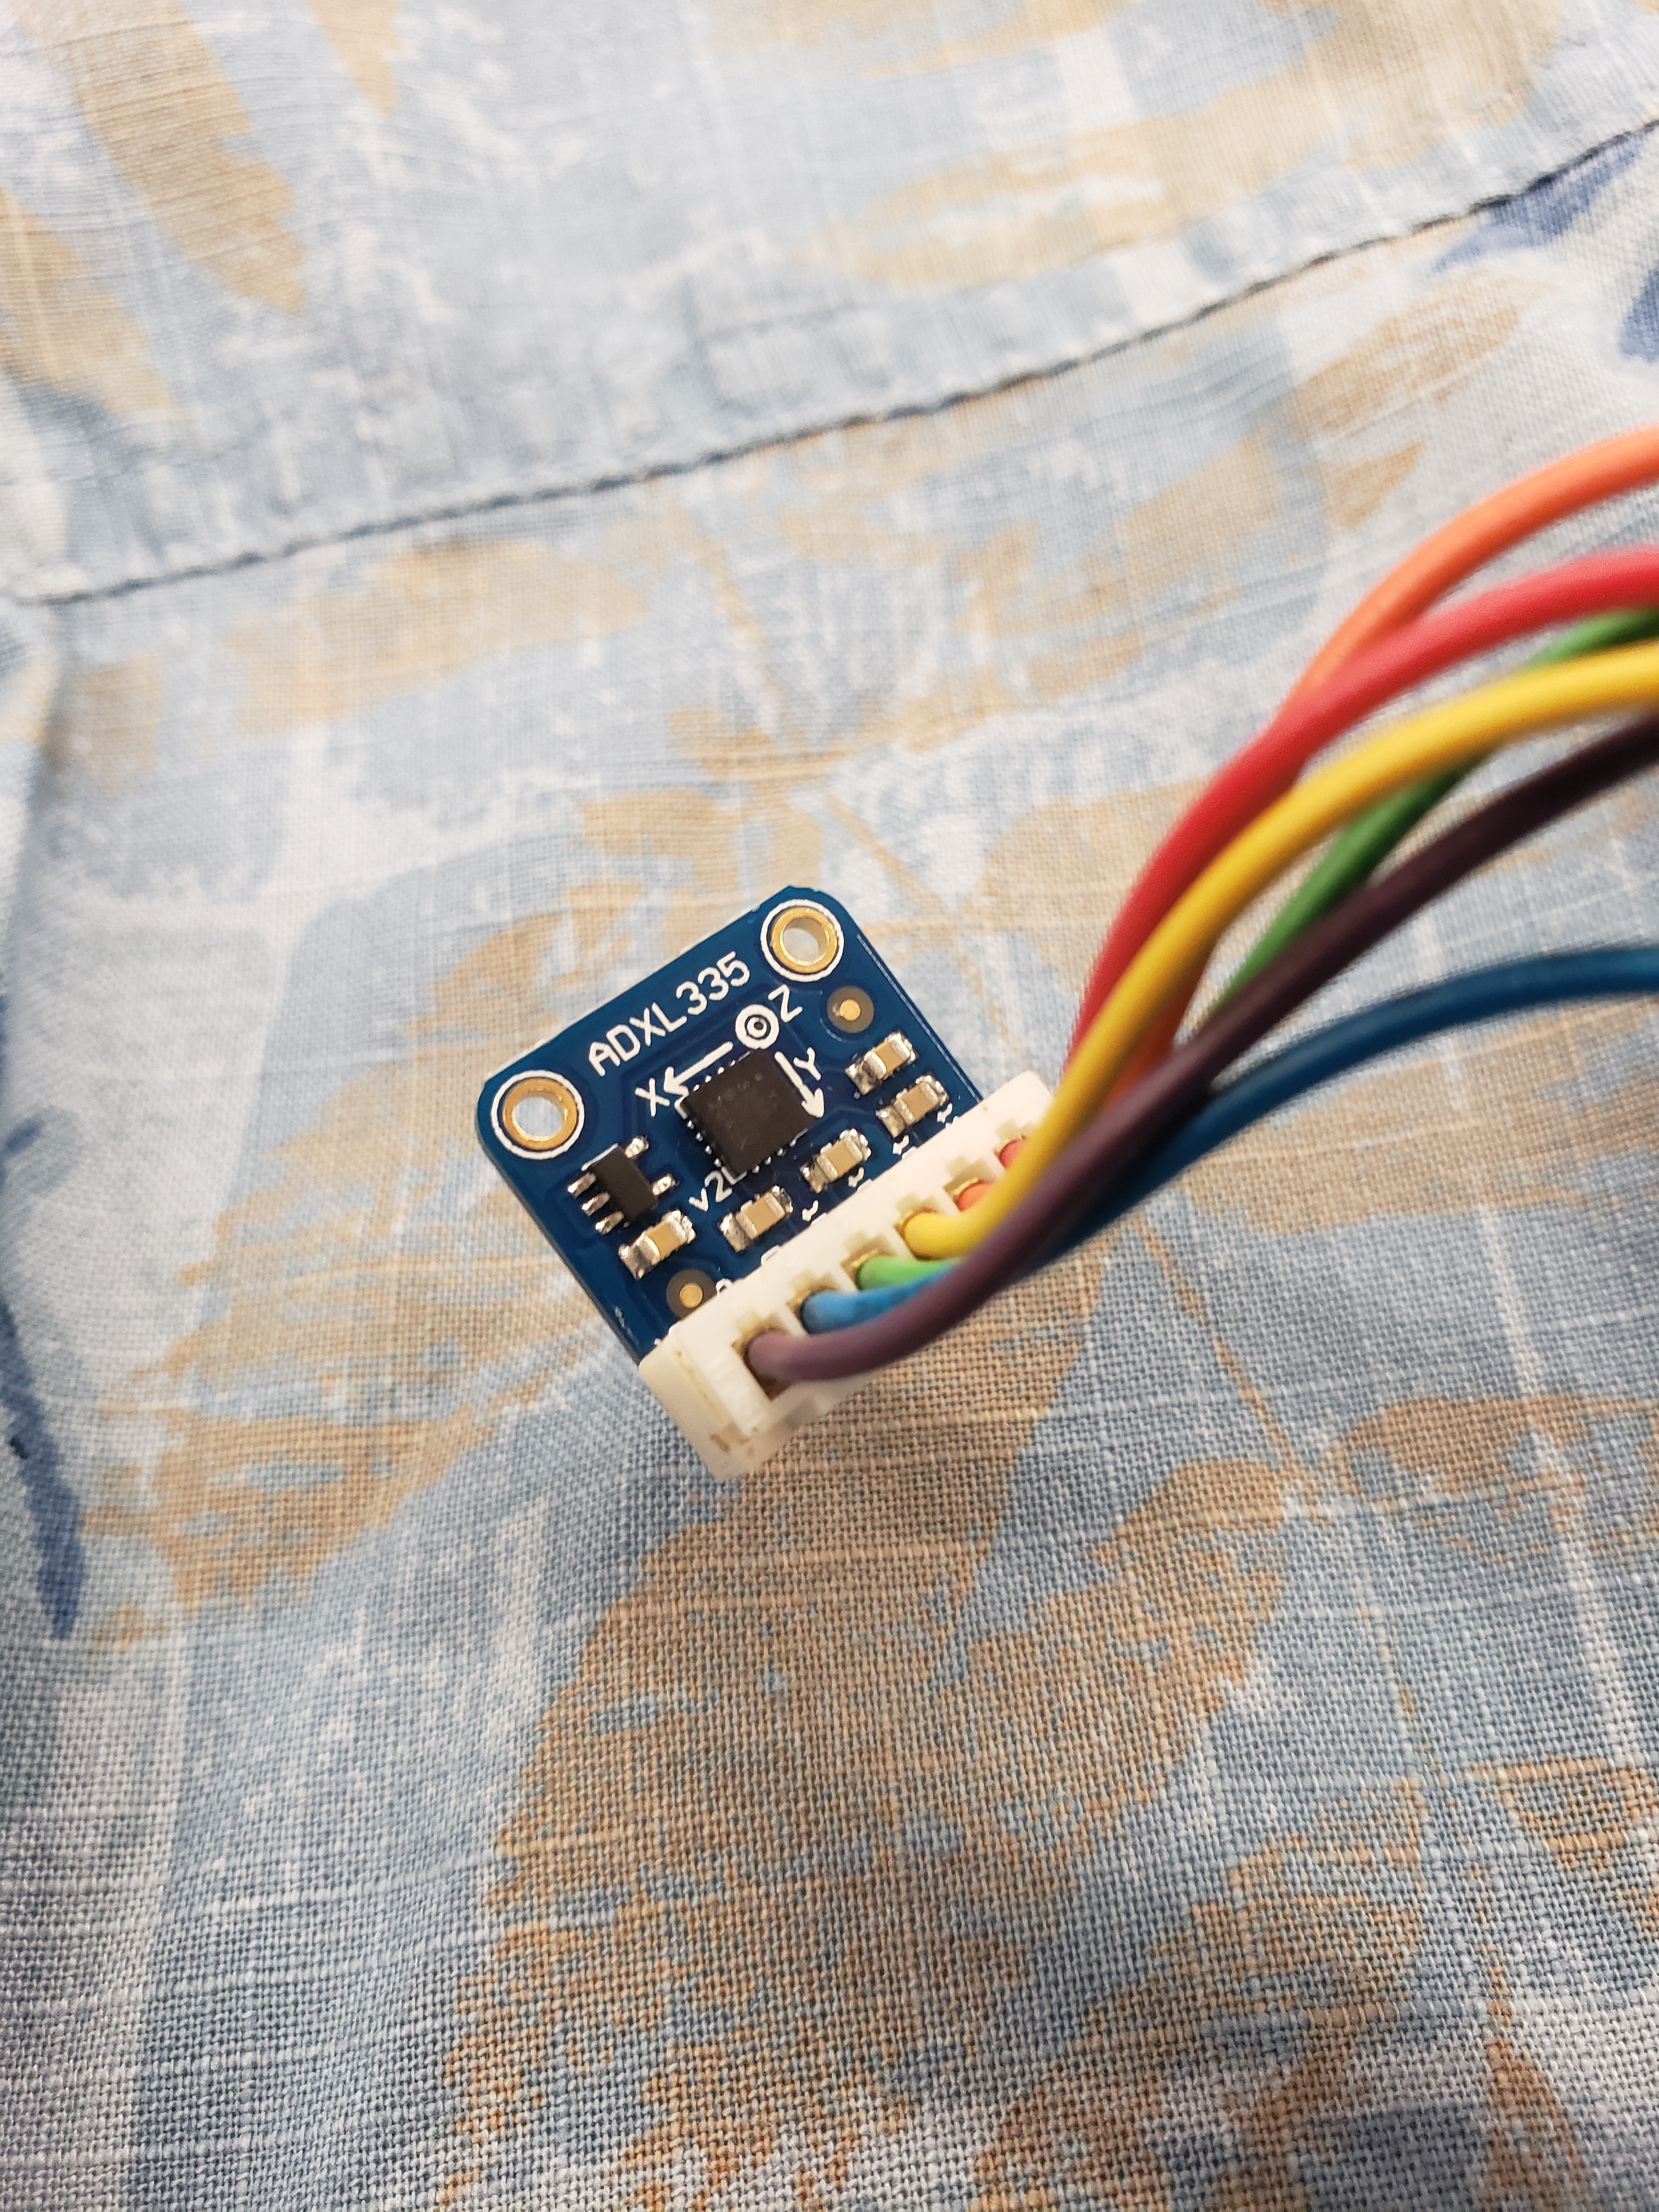
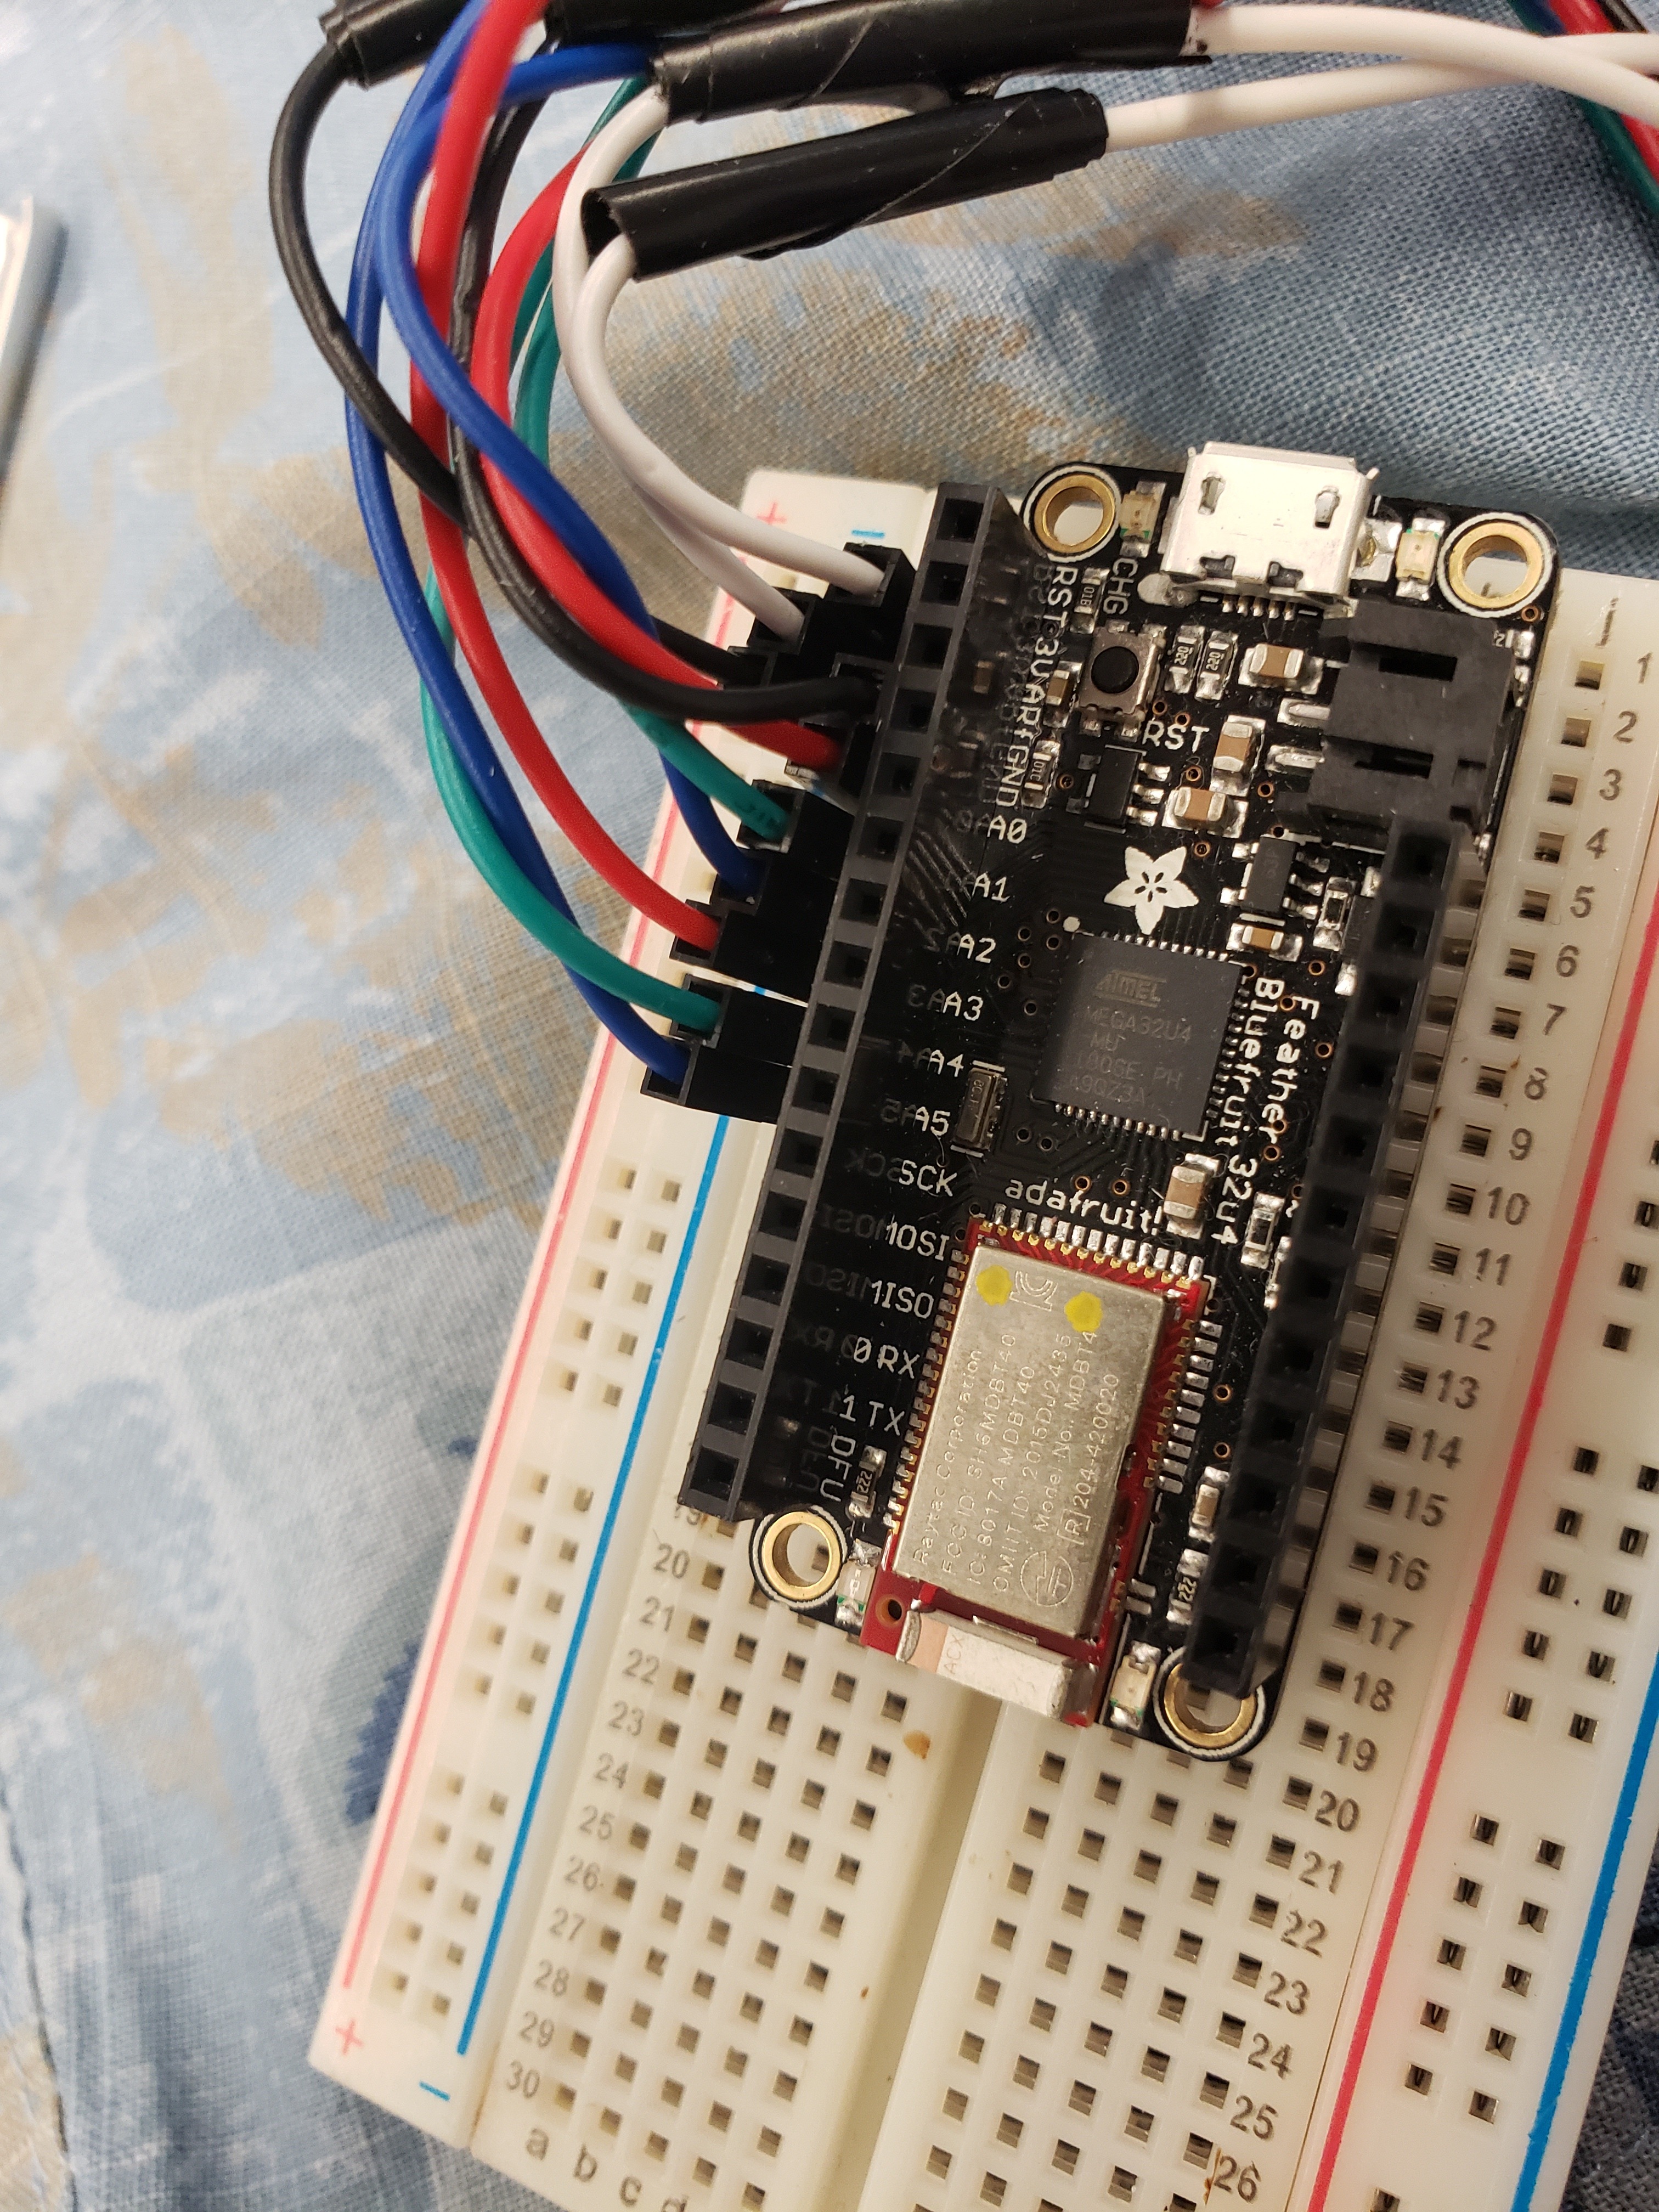
To read data off the ADXL335s connect the hookup wire to the Vin, ground, Xout, Yout, and Zout pins. For both accelerometers connect the other ends of the Vin wires to the 3V pin on the Feather and the other ends of the ground pins to the ground pin on the Feather. Connect the Xout, Yout, and Zout wires of the first accelerometer to the A0, A1, and A2 pins on the Feather. Connect the Xout, Yout, and Zout wires of the second accelerometer to the A3, A4, and A5 pins on the Feather.
The accelerometers can be connected in any way but soldering the wires and heatshrinking or wrapping electrical tape around the connection points is suggested for preventing exposed sections from contacting each other.
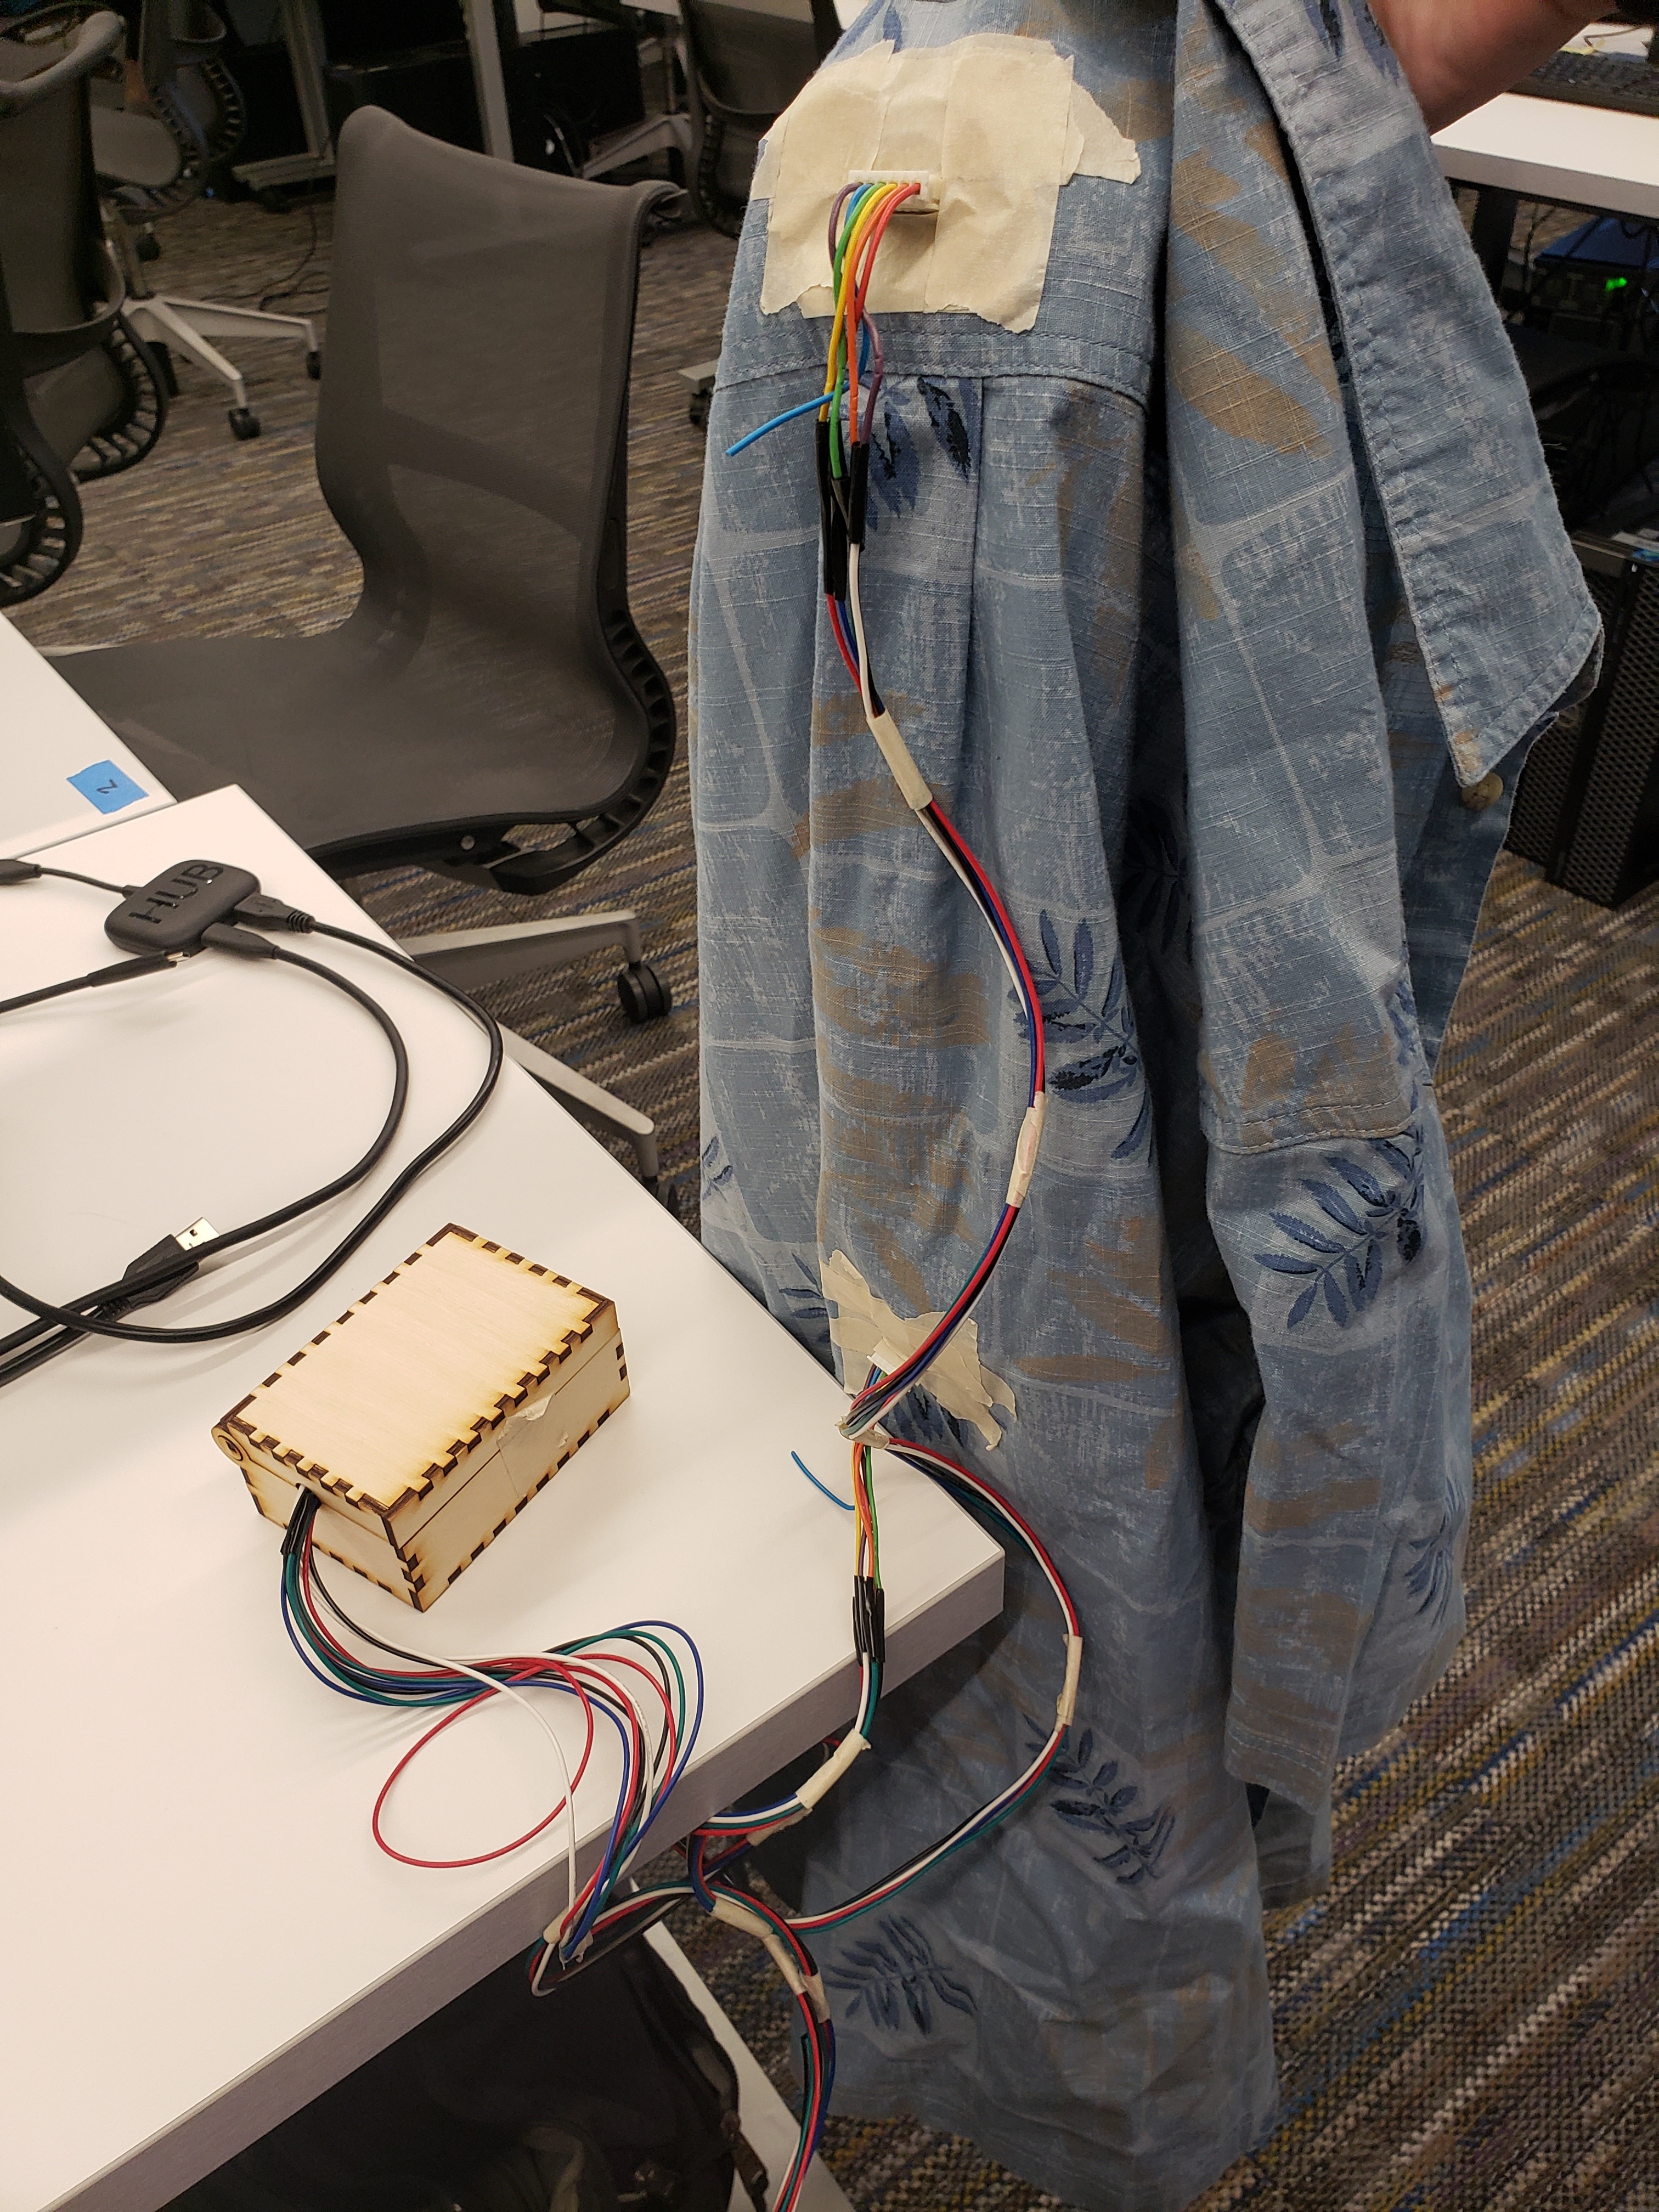
Attach Accelerometers to Shirt
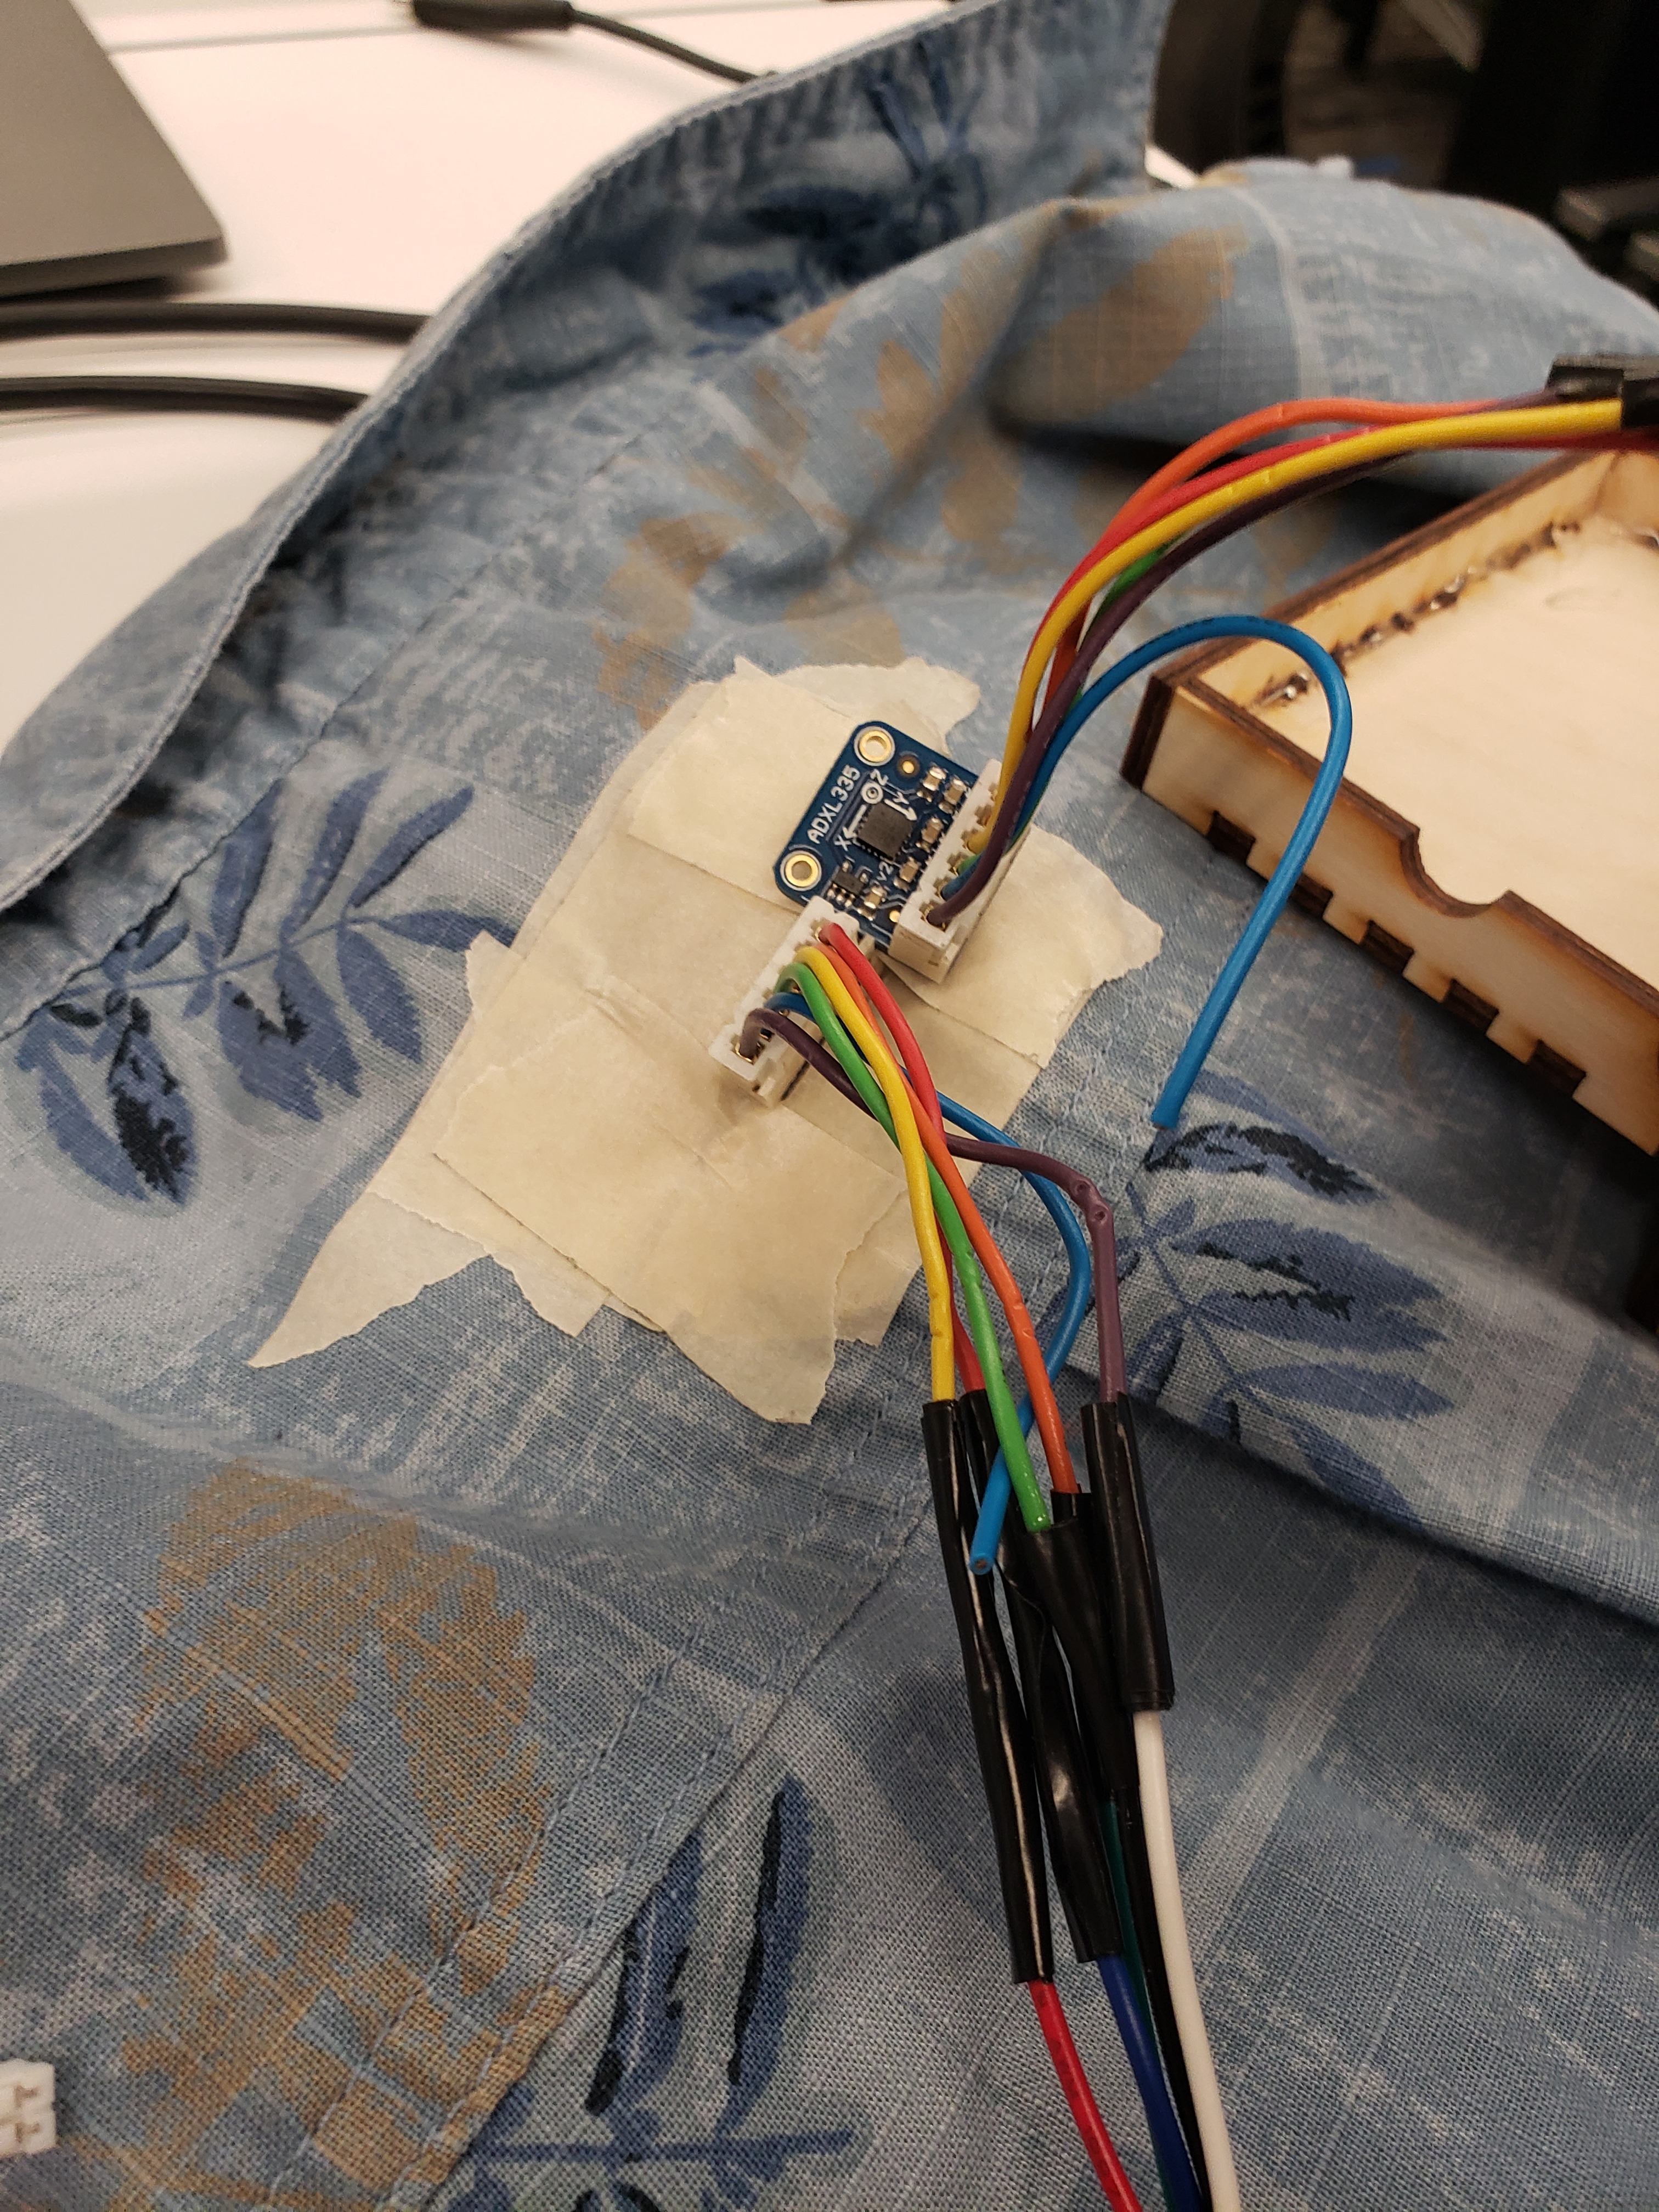
Using tape attach the accelerometers to the back of the shirt. The accelerometer wired to pins A0-2 should be placed horizontally center at the mid-lower back. The accelerometer wired to pins A3-5 should be place horizontally center at the back of the neck. Both accelerometers should be aligned such that the pins are along the bottom side and the sensors should be taped flat and secure against the shirt.
Note: For a more permanent wearable the sensors can be sewn onto the clothing but they should be taped and tested first to ensure the sensor placements are effectively positioned.
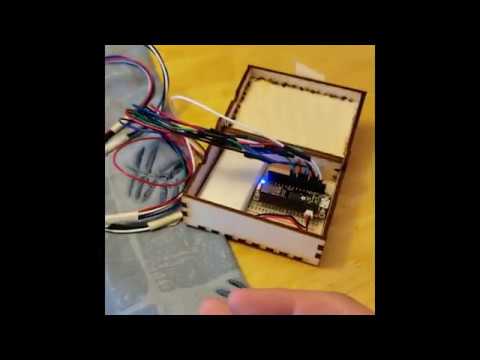
Running Code on Arduino
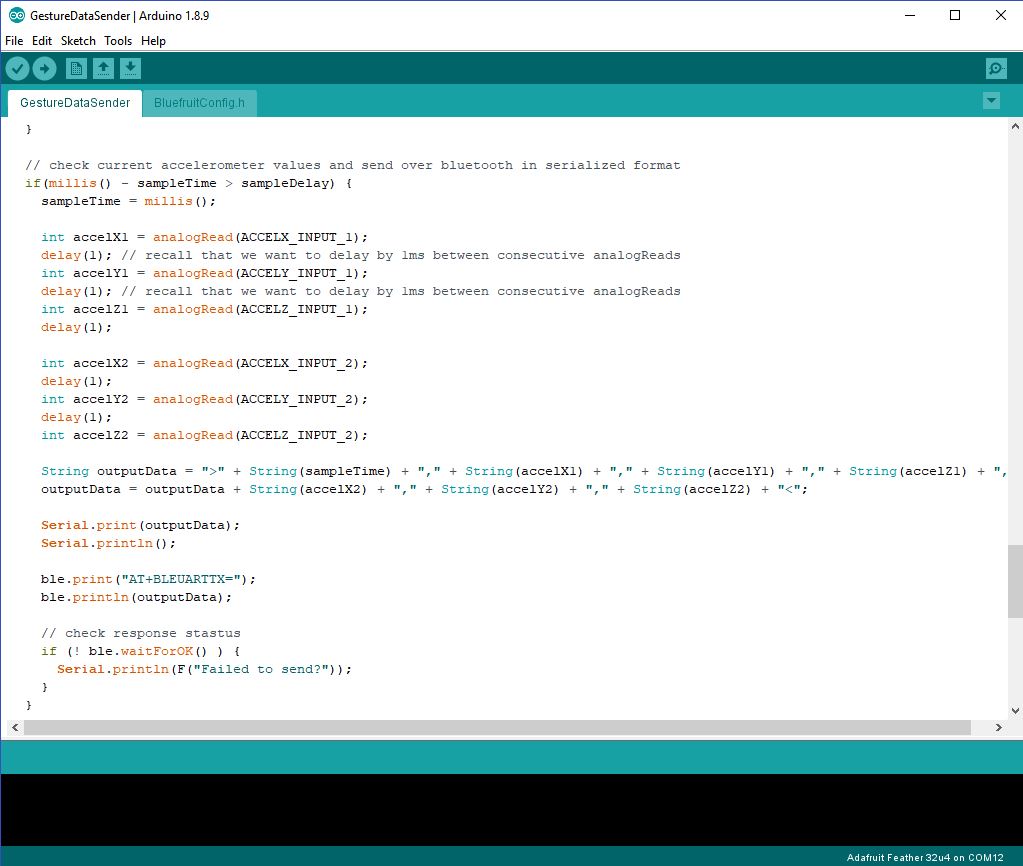
To start collecting data on the Feather start the Arduino IDE and open the file GestureDataSender under the Arduino section of the project code. With this file open set the board and the port being used and then select "Verify" and "Upload" to upload the code to the Feather.
Running Code on Android
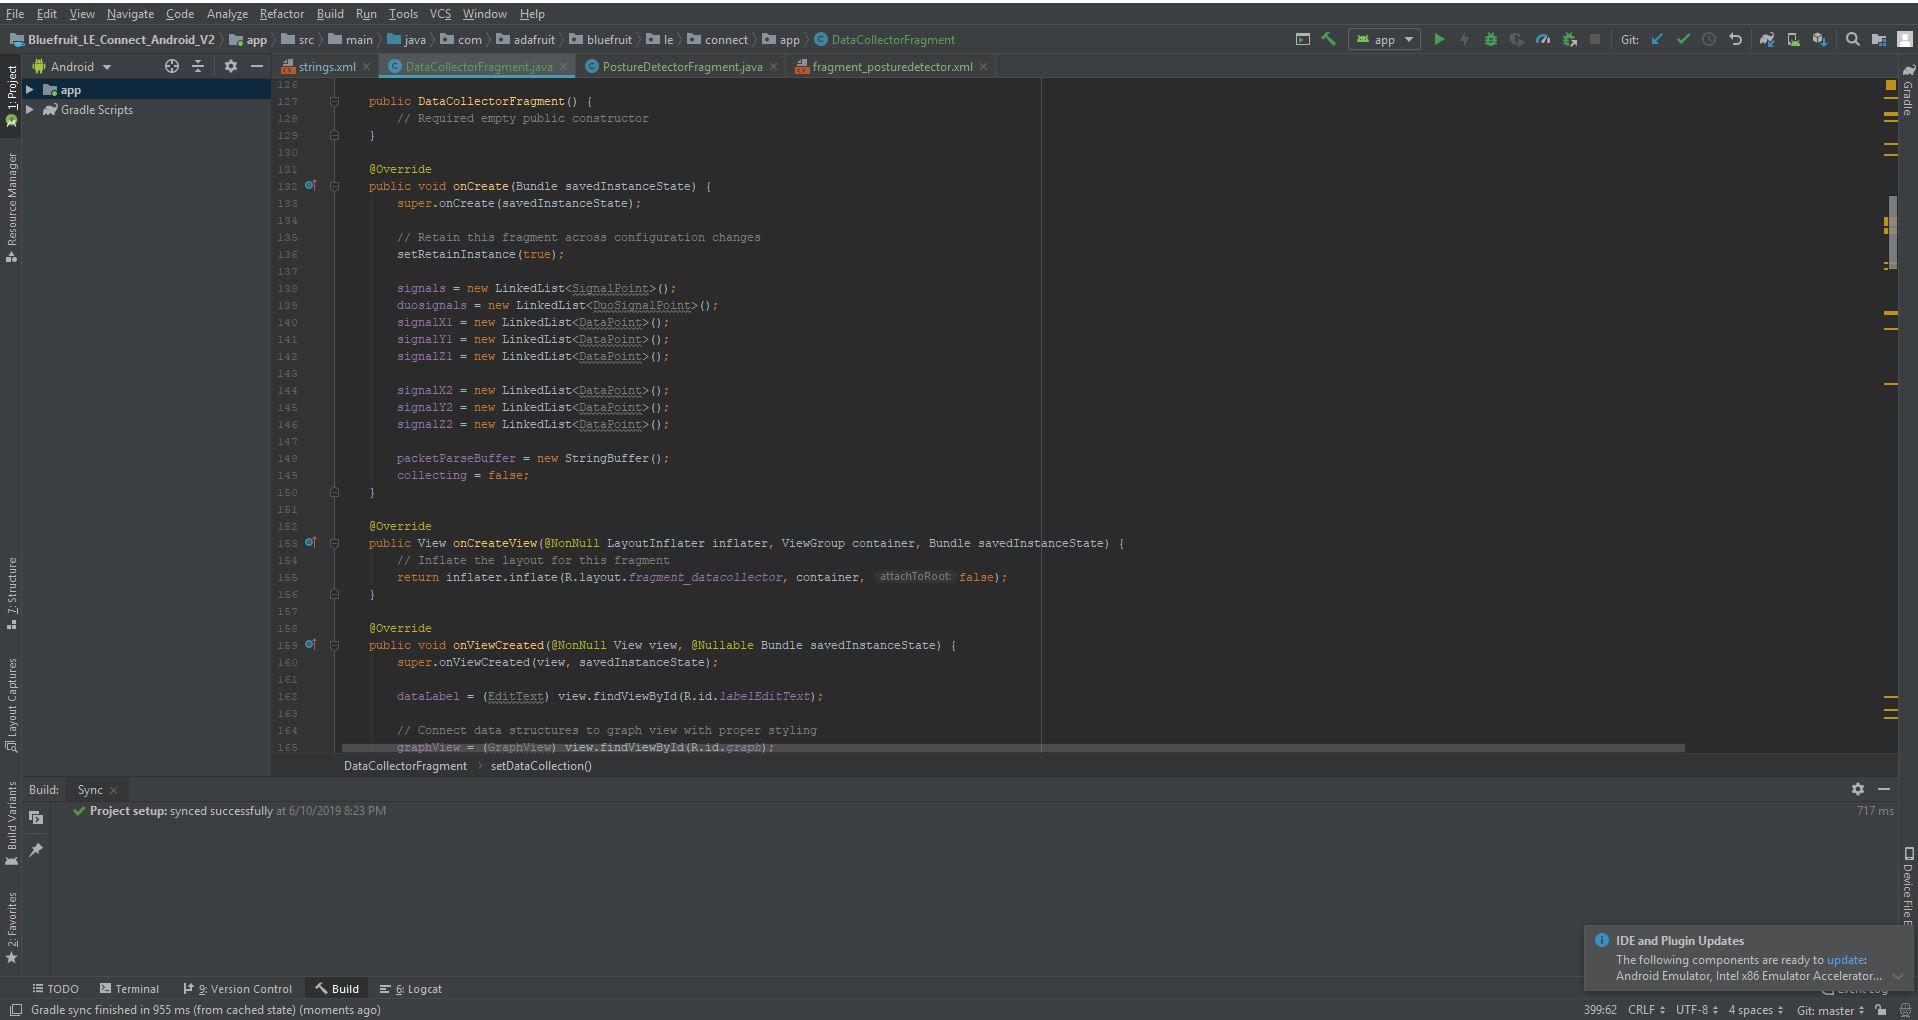
To run the application on android first start Android Studio and then select the option to open an existing Android project. Navigate to the project code and select the "Android" folder. Android Studio will take a while to sync the project files and may request to install some required libraries, accept these options. Once the project is ready plug the Android device into the computer and select the run option at the top of the window. Select the device from the prompt that displays and then let the application build to the device.
Testing Bluetooth Signal Connection
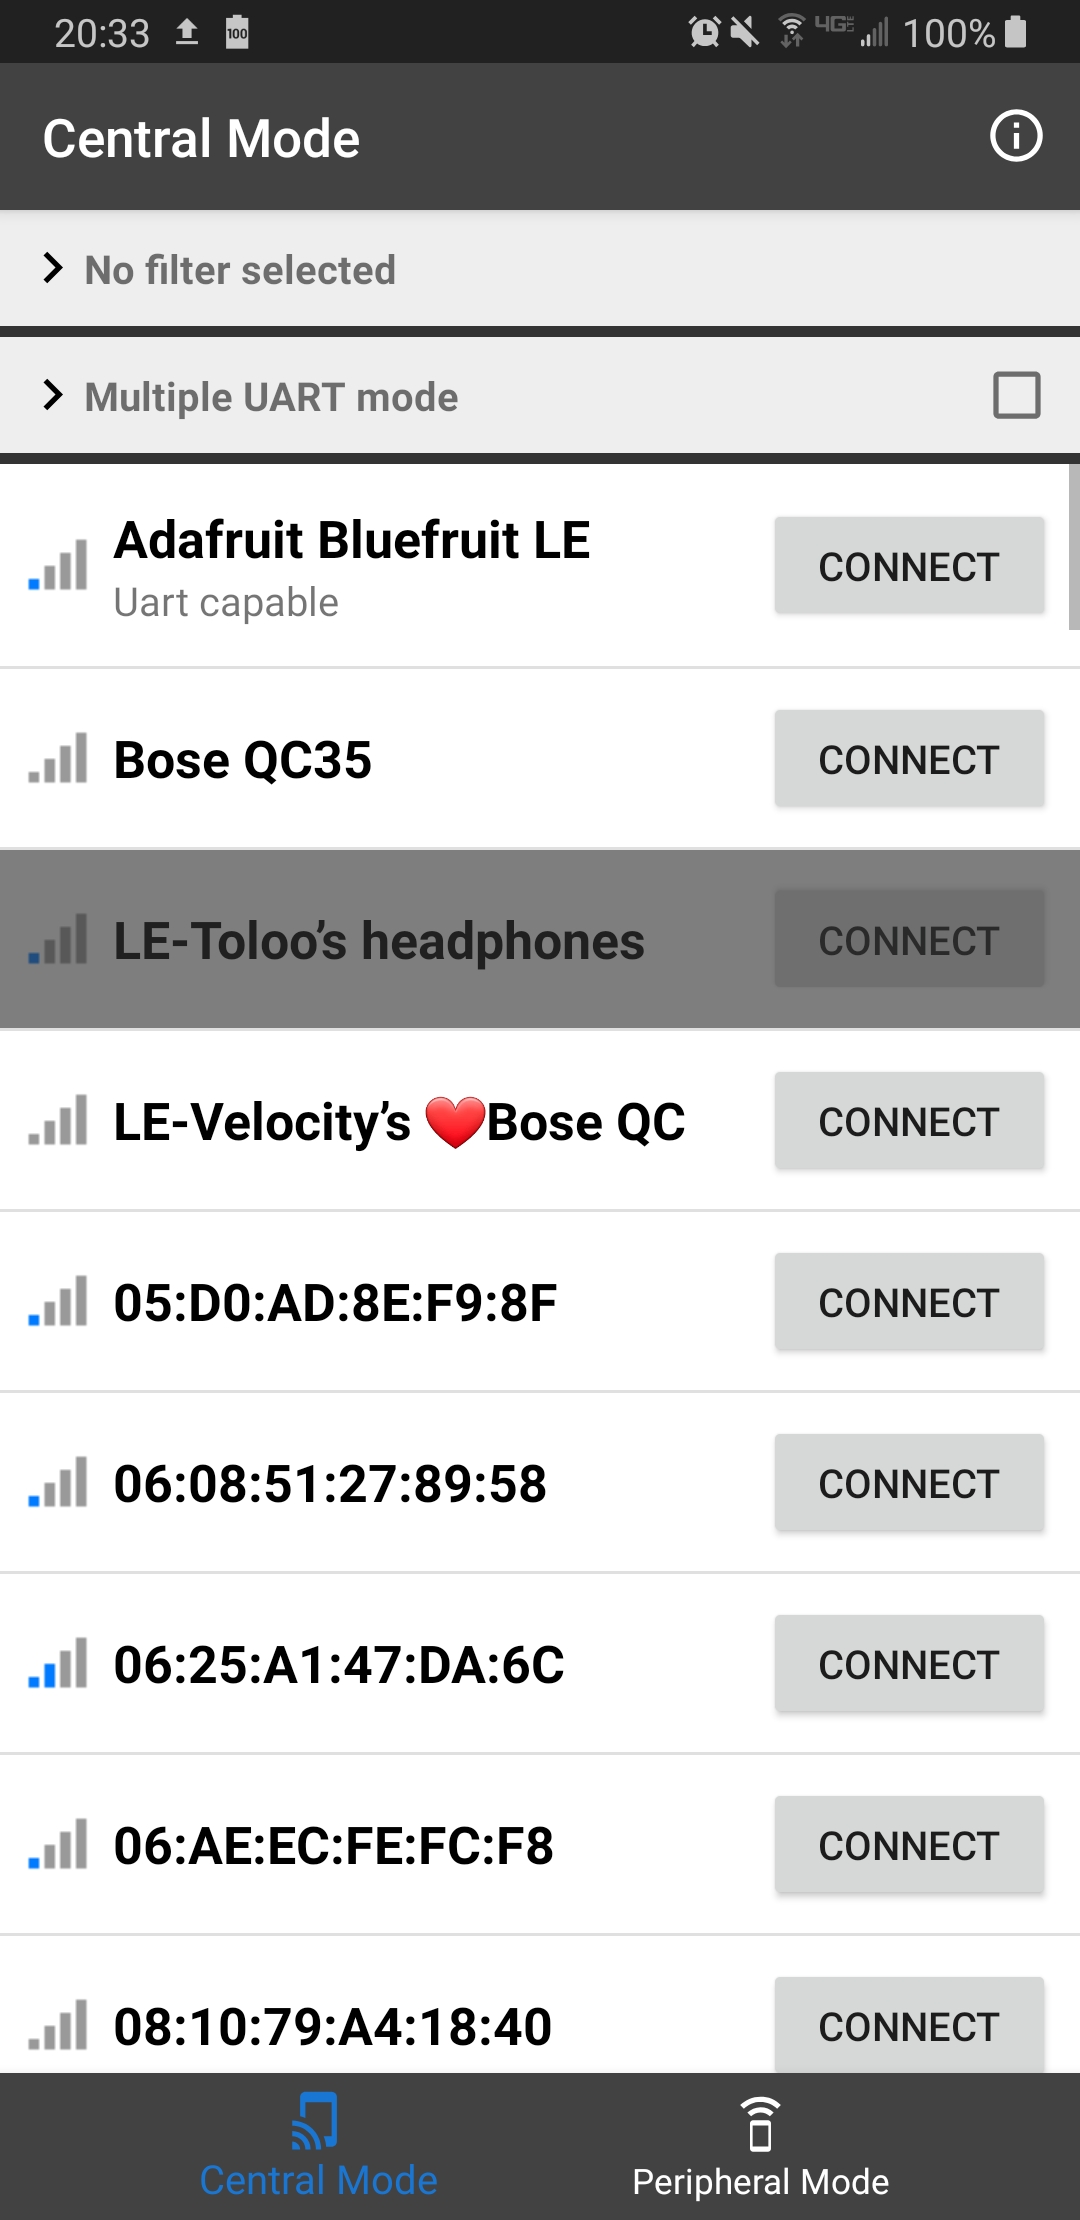
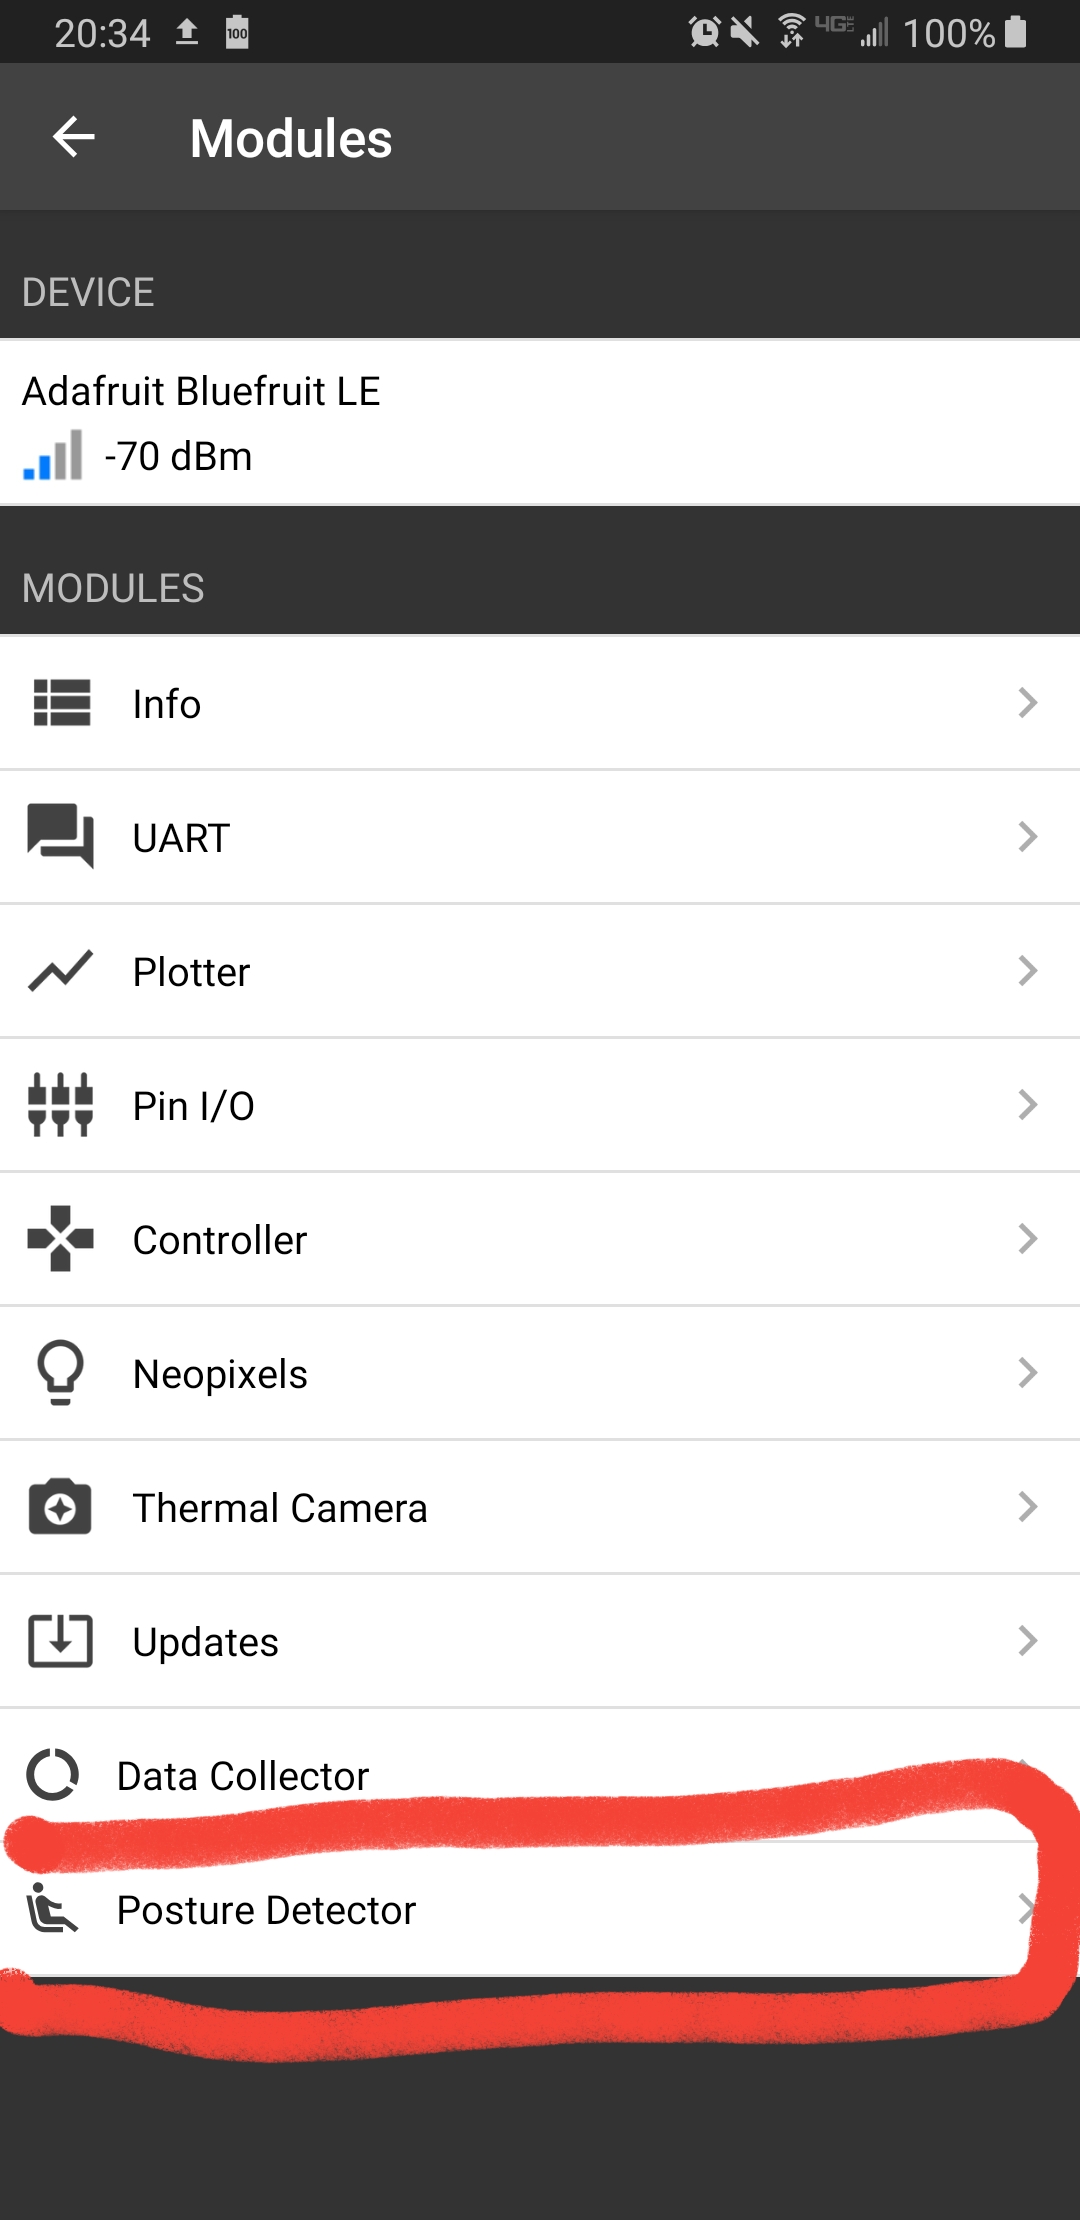
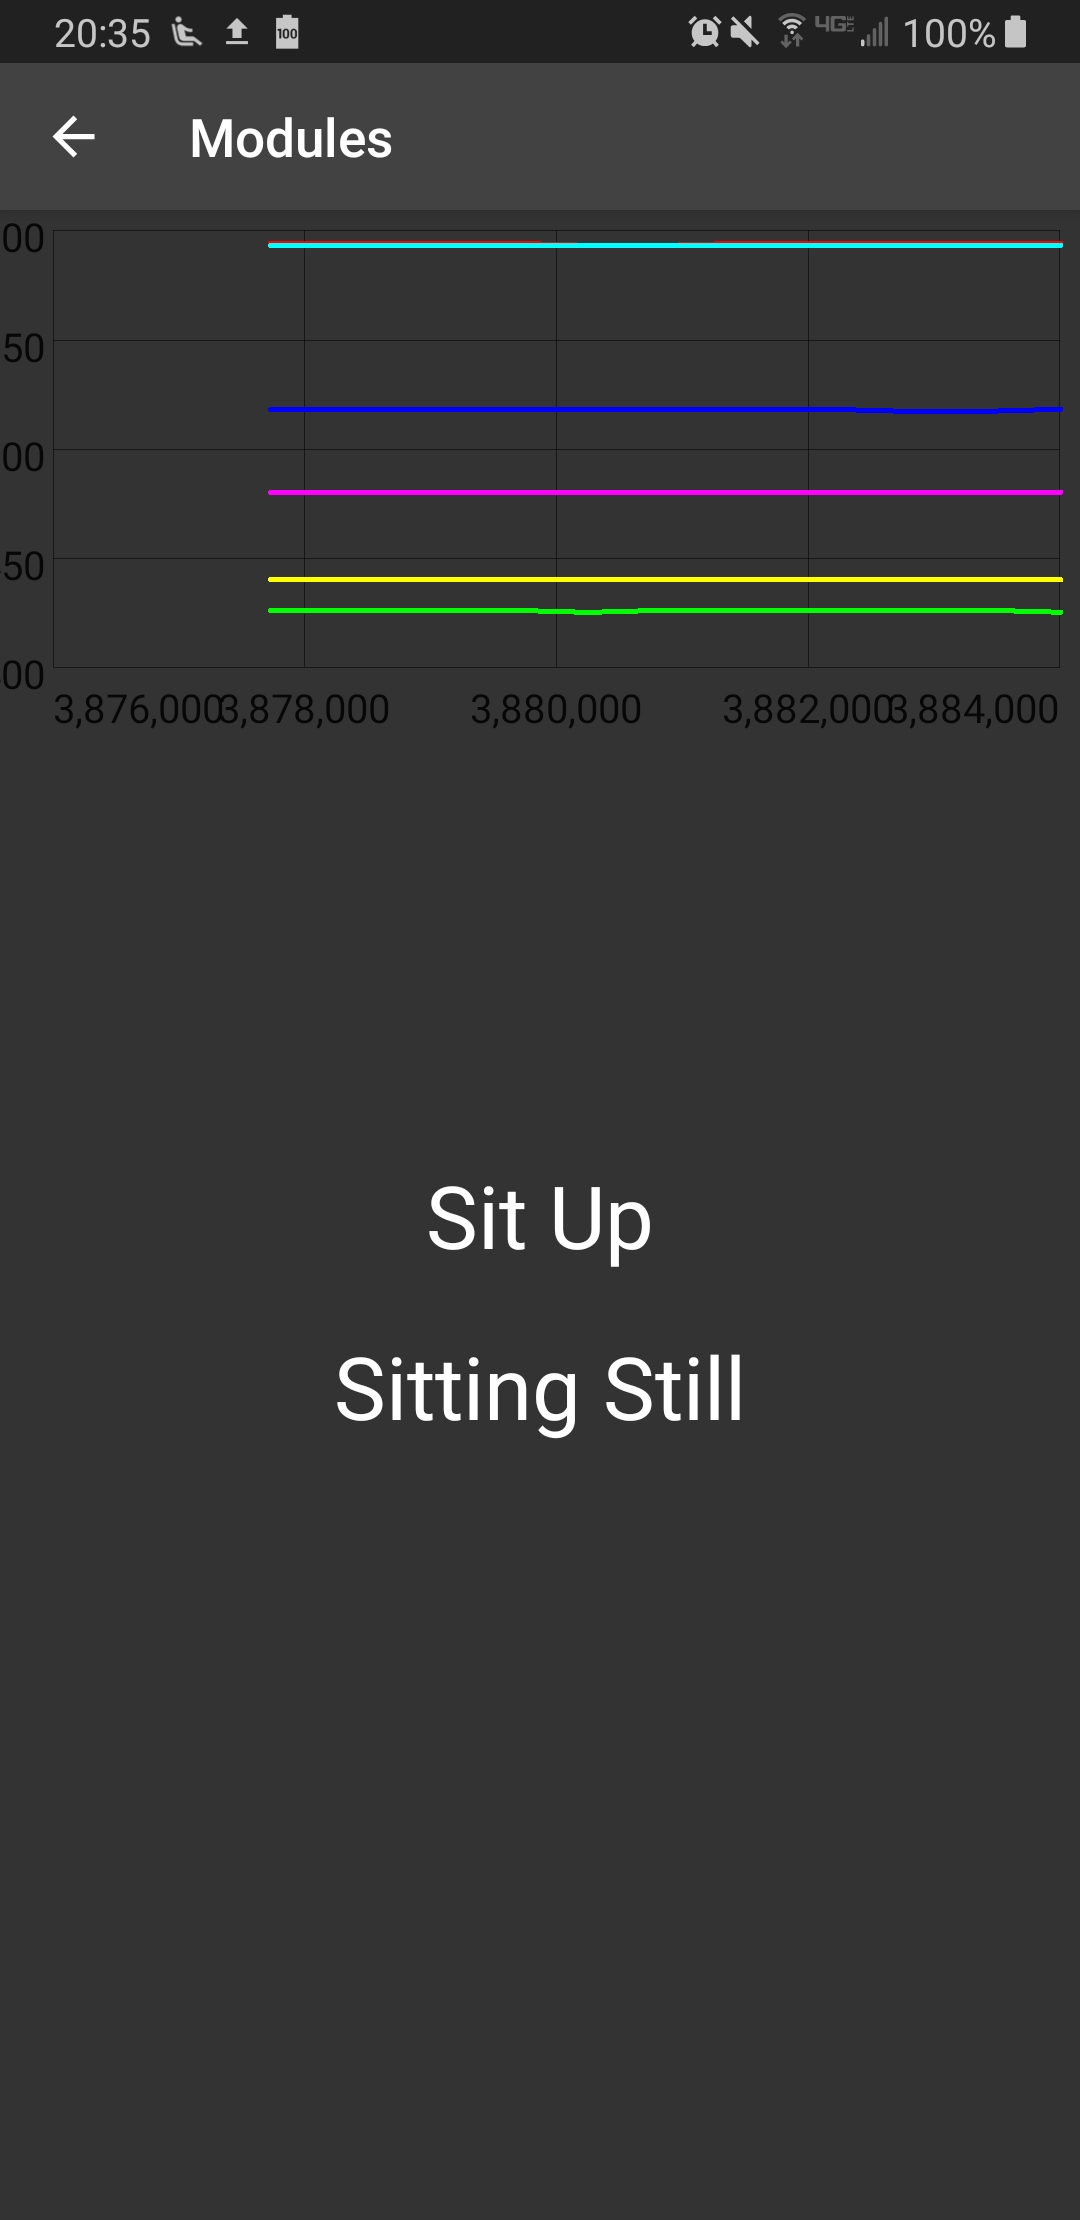
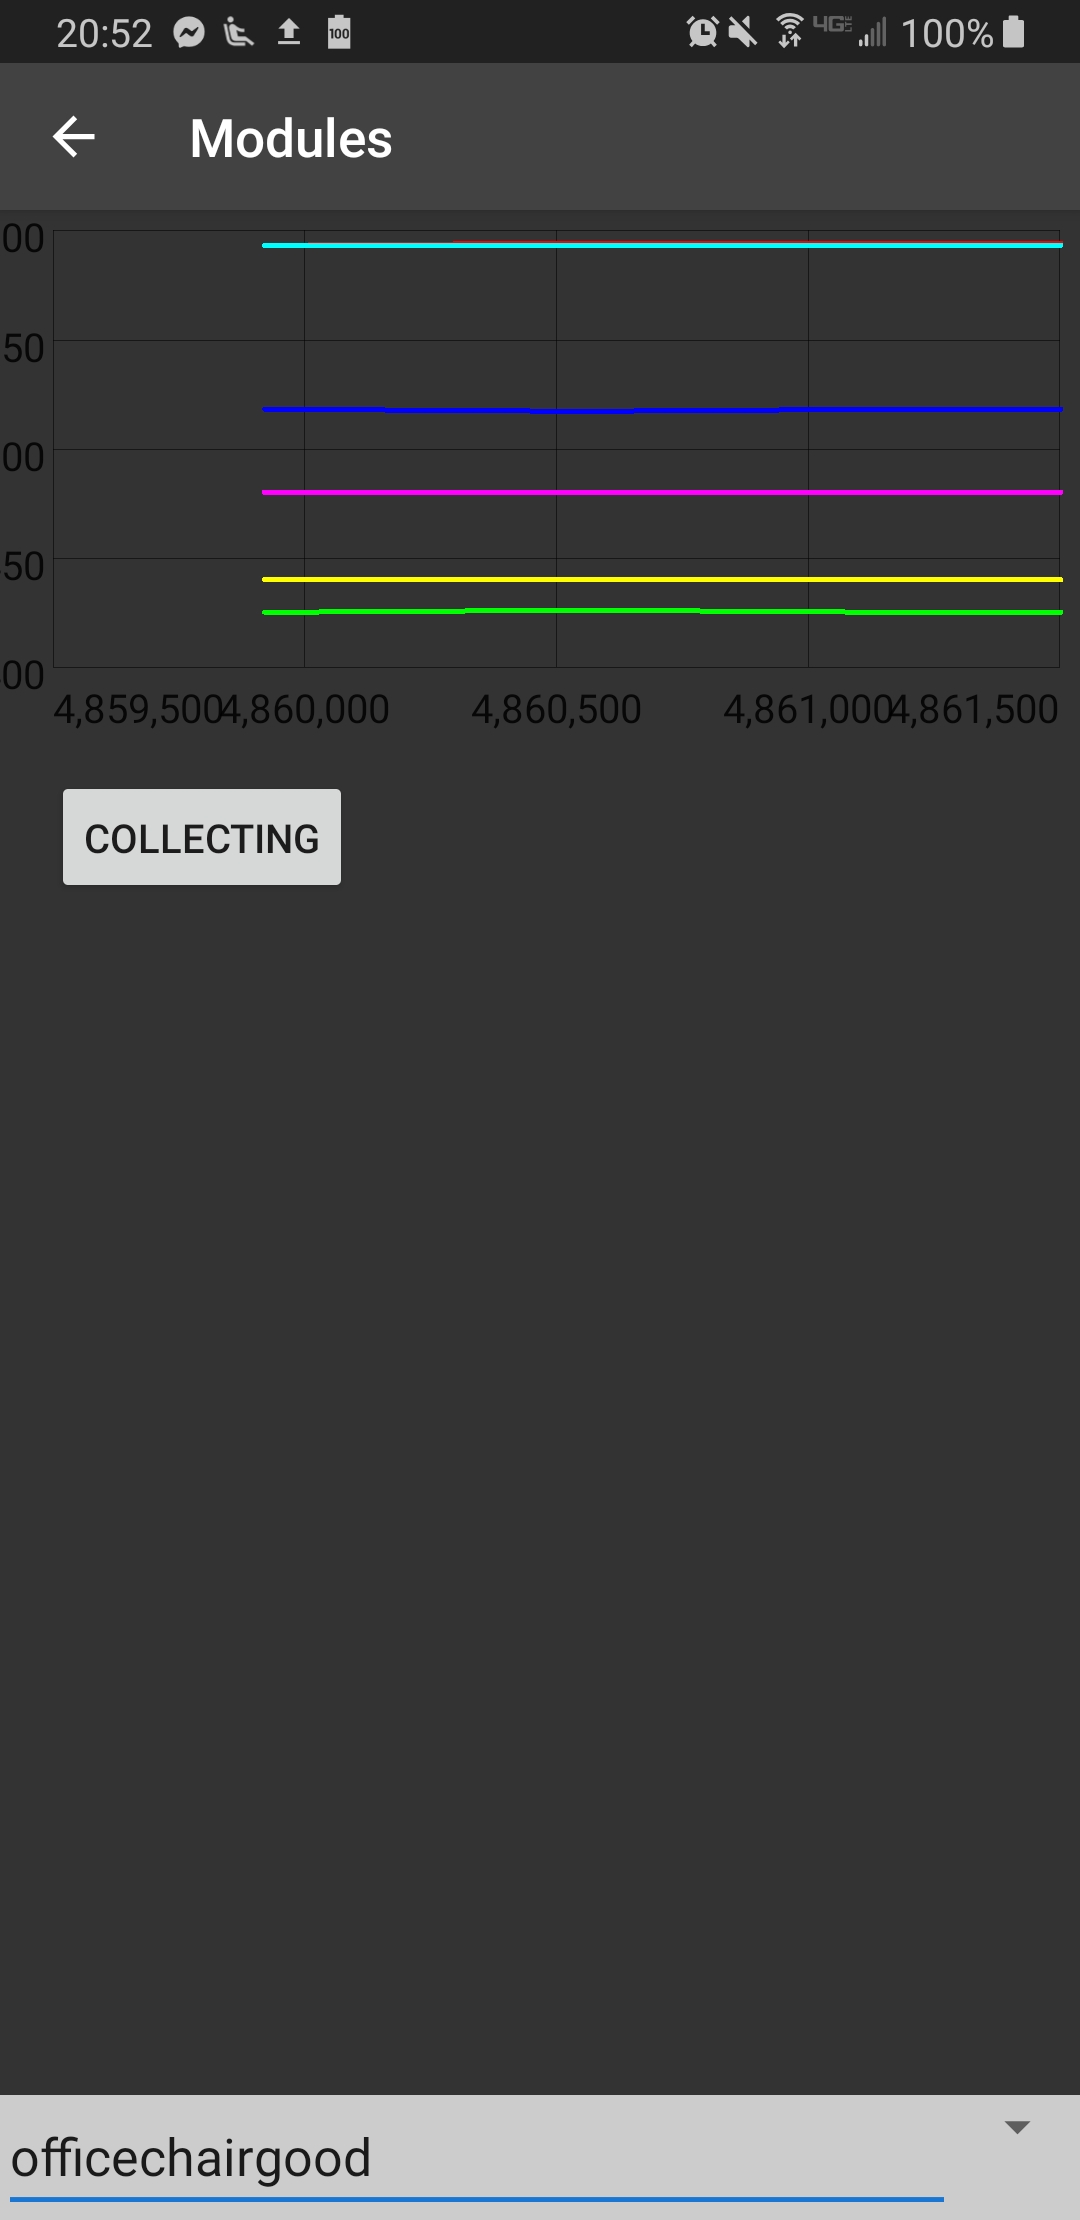
Once the app is open make sure the Feather is powered on and then select the Adafruit Bluefruit LE from the device list that appears on the phone. Wait for the device to connect, if the connection fails the first time retry connecting before taking other debugging steps. After the device has been connected select the module "Posture Detector" which if working properly will display a live updating graph as well as the current predictions of posture and movement. To test that the arduino is communicating sensor data correctly move the two accelerometers in random directions and check if all the lines on the graph change. If some lines remain constantly flat make sure that the accelerometers are properly connected to the Feather. If everything is working put on the shirt and test that the posture detection is correctly predicting your posture. Congratulations! You have successfully setup a posture detection wearable. Continue through this instructable to learn how to create your own dataset and customize your own posture detection.
Collecting Your Own Data
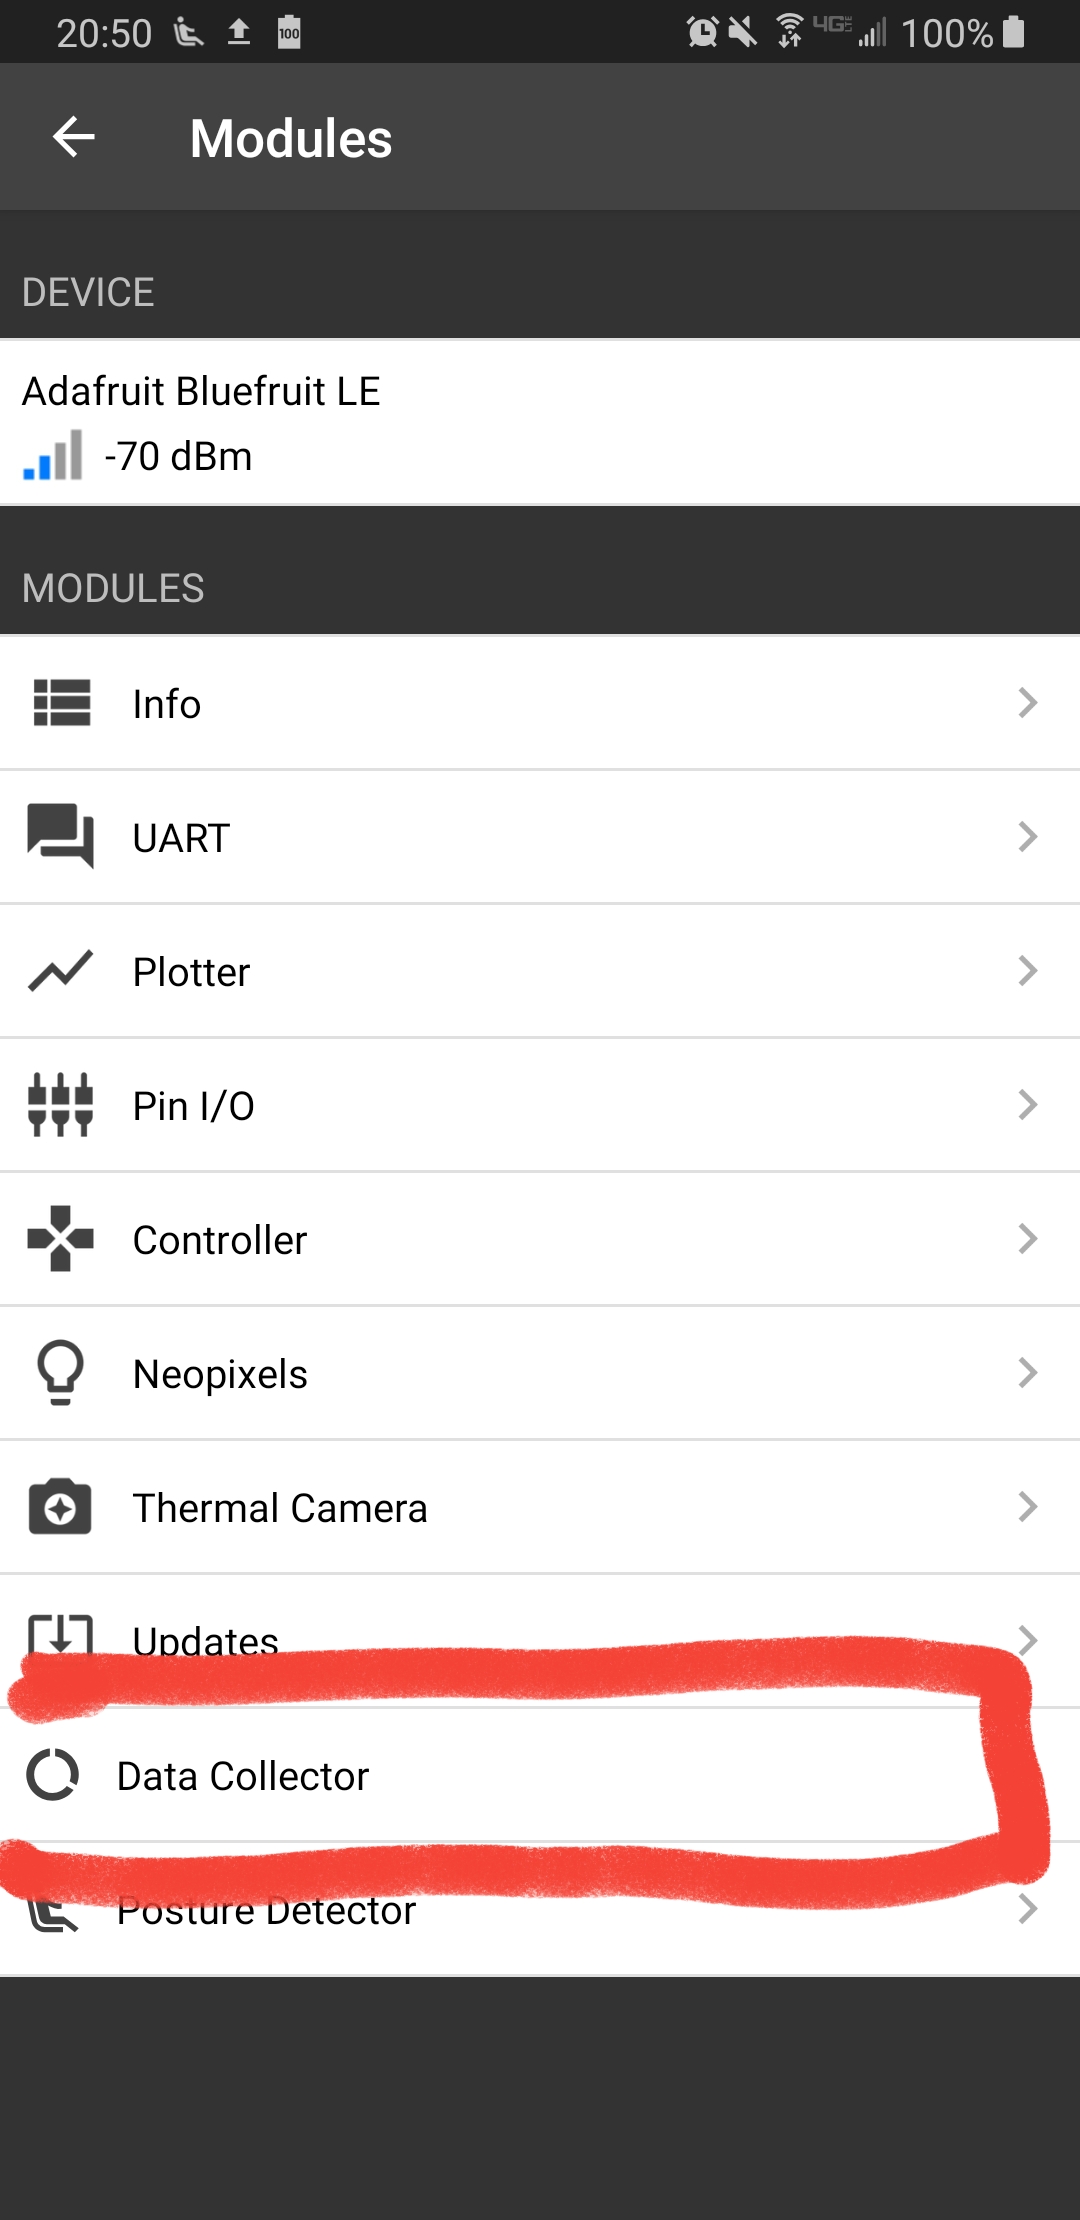
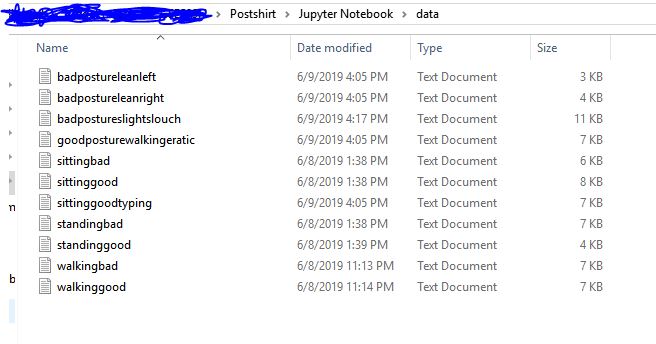
To collect your own data return to the module selection screen and open the Data Recorder module. Once this screen has opened fill in the label for the data you will collect; in order to easily train on your data you should include the word "good" in the name of any recordings with good posture and "bad" in any recordings with posture. To start collecting tap the "Collect Data" button and perform your intended action, when you are finished tap the button again to finish and save the data. All of the recorded data will be stored in a folder named "GestureData" under the documents folder of your file system. When you are finished recording all your data copy the files over to your computer for model training.
Training Your Data on Jupyter Notebook

The initial project code contains the original data used for training in the folder "data" under the Jupyter Notebook section, for training your own data delete all the files in this folder and then copy your own data into the folder. Then run Jupyter Notebook and open "PostureDetectorTrainer.ipynb". This notebook is designed to automatically separate any files in the data folder by good and bad posture and then train a linear SVM for classification to train the model simply select the "Cell" drop down and select "Run All". The notebook may take a moment to run but once complete scroll to the point that provides the posture prediction accuracy for the model, if the accuracy is low you may want to ensure your previous recordings are accurate and consistent ground truths. If the results look good then scroll to the next cell where a Java class will have been generated. Scroll to the bottom of this cell until you see a portion commented as parameters. Copy these values as you will need them in the next step.
Modifying Android Application With New Model
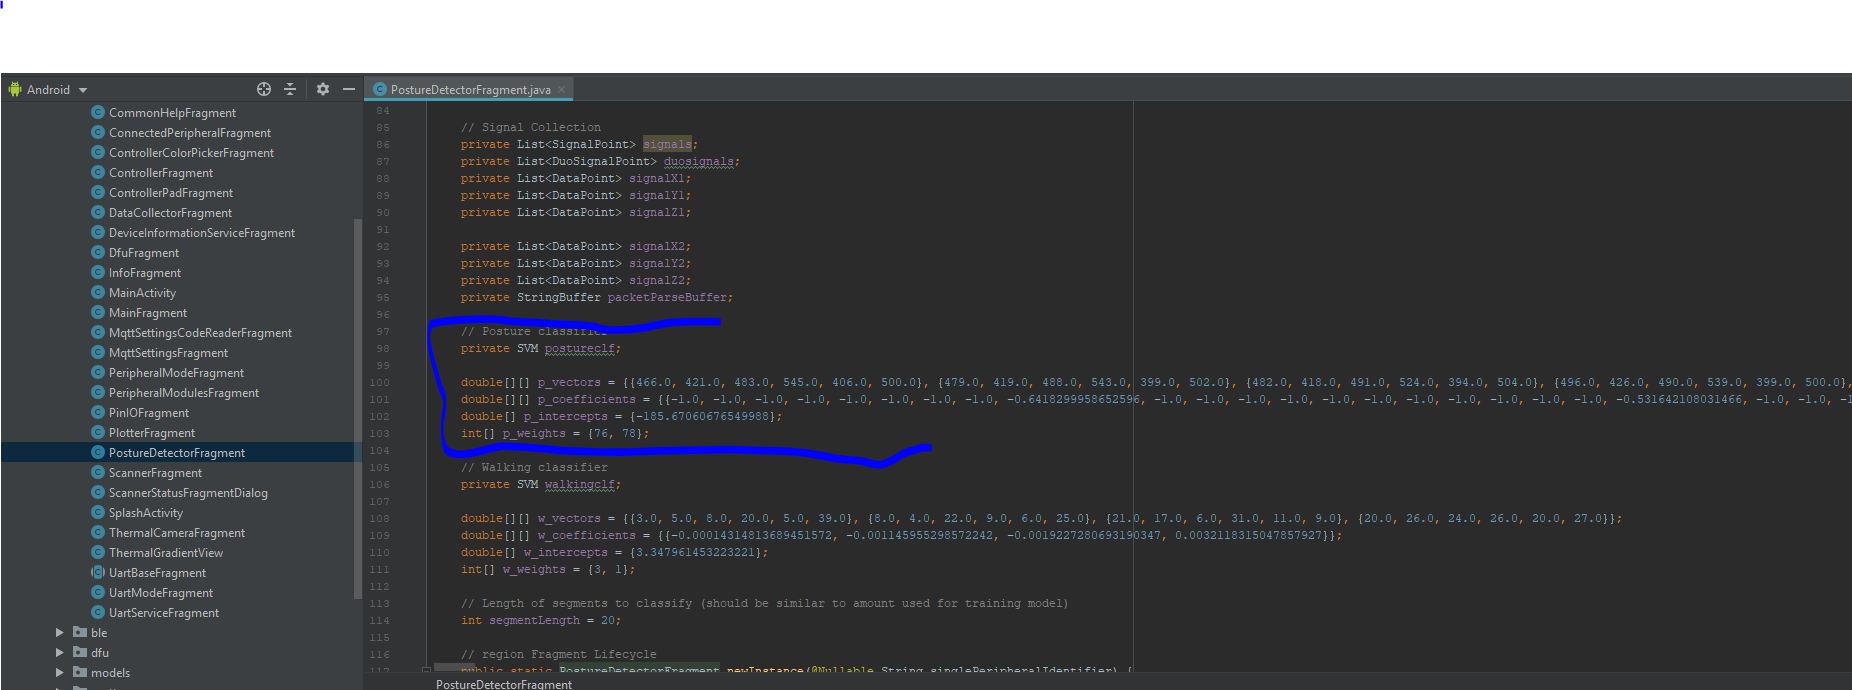
To change the model in the Android application use Android Studio to navigate to the file "PostureDetectorFragment.java" under the java section of the project structure. In this file scroll down to the section commented as "Posture classifier" which will have the same 4 corresponding variables as the 4 generated in Jupyter Notebook. Replace these 4 variables' values with the values copied from the Jupyter Notebook, being sure that the variable names are not changed from p_vectors, p_coefficients, etc. Once this is done save the file and select the Run option again to build the application to your device. Now follow the same steps as before to open the Posture Detector module and you should see the classifier now working with your newly trained model. If it still does not seem to perform well you should consider recording further data and recreating the model. Otherwise congratulations! You have now imported your own personally trained classifier into the Postshirt!