Portable Tabletop Backdrop
by Needleroozer in Design > Photography
169 Views, 3 Favorites, 0 Comments
Portable Tabletop Backdrop

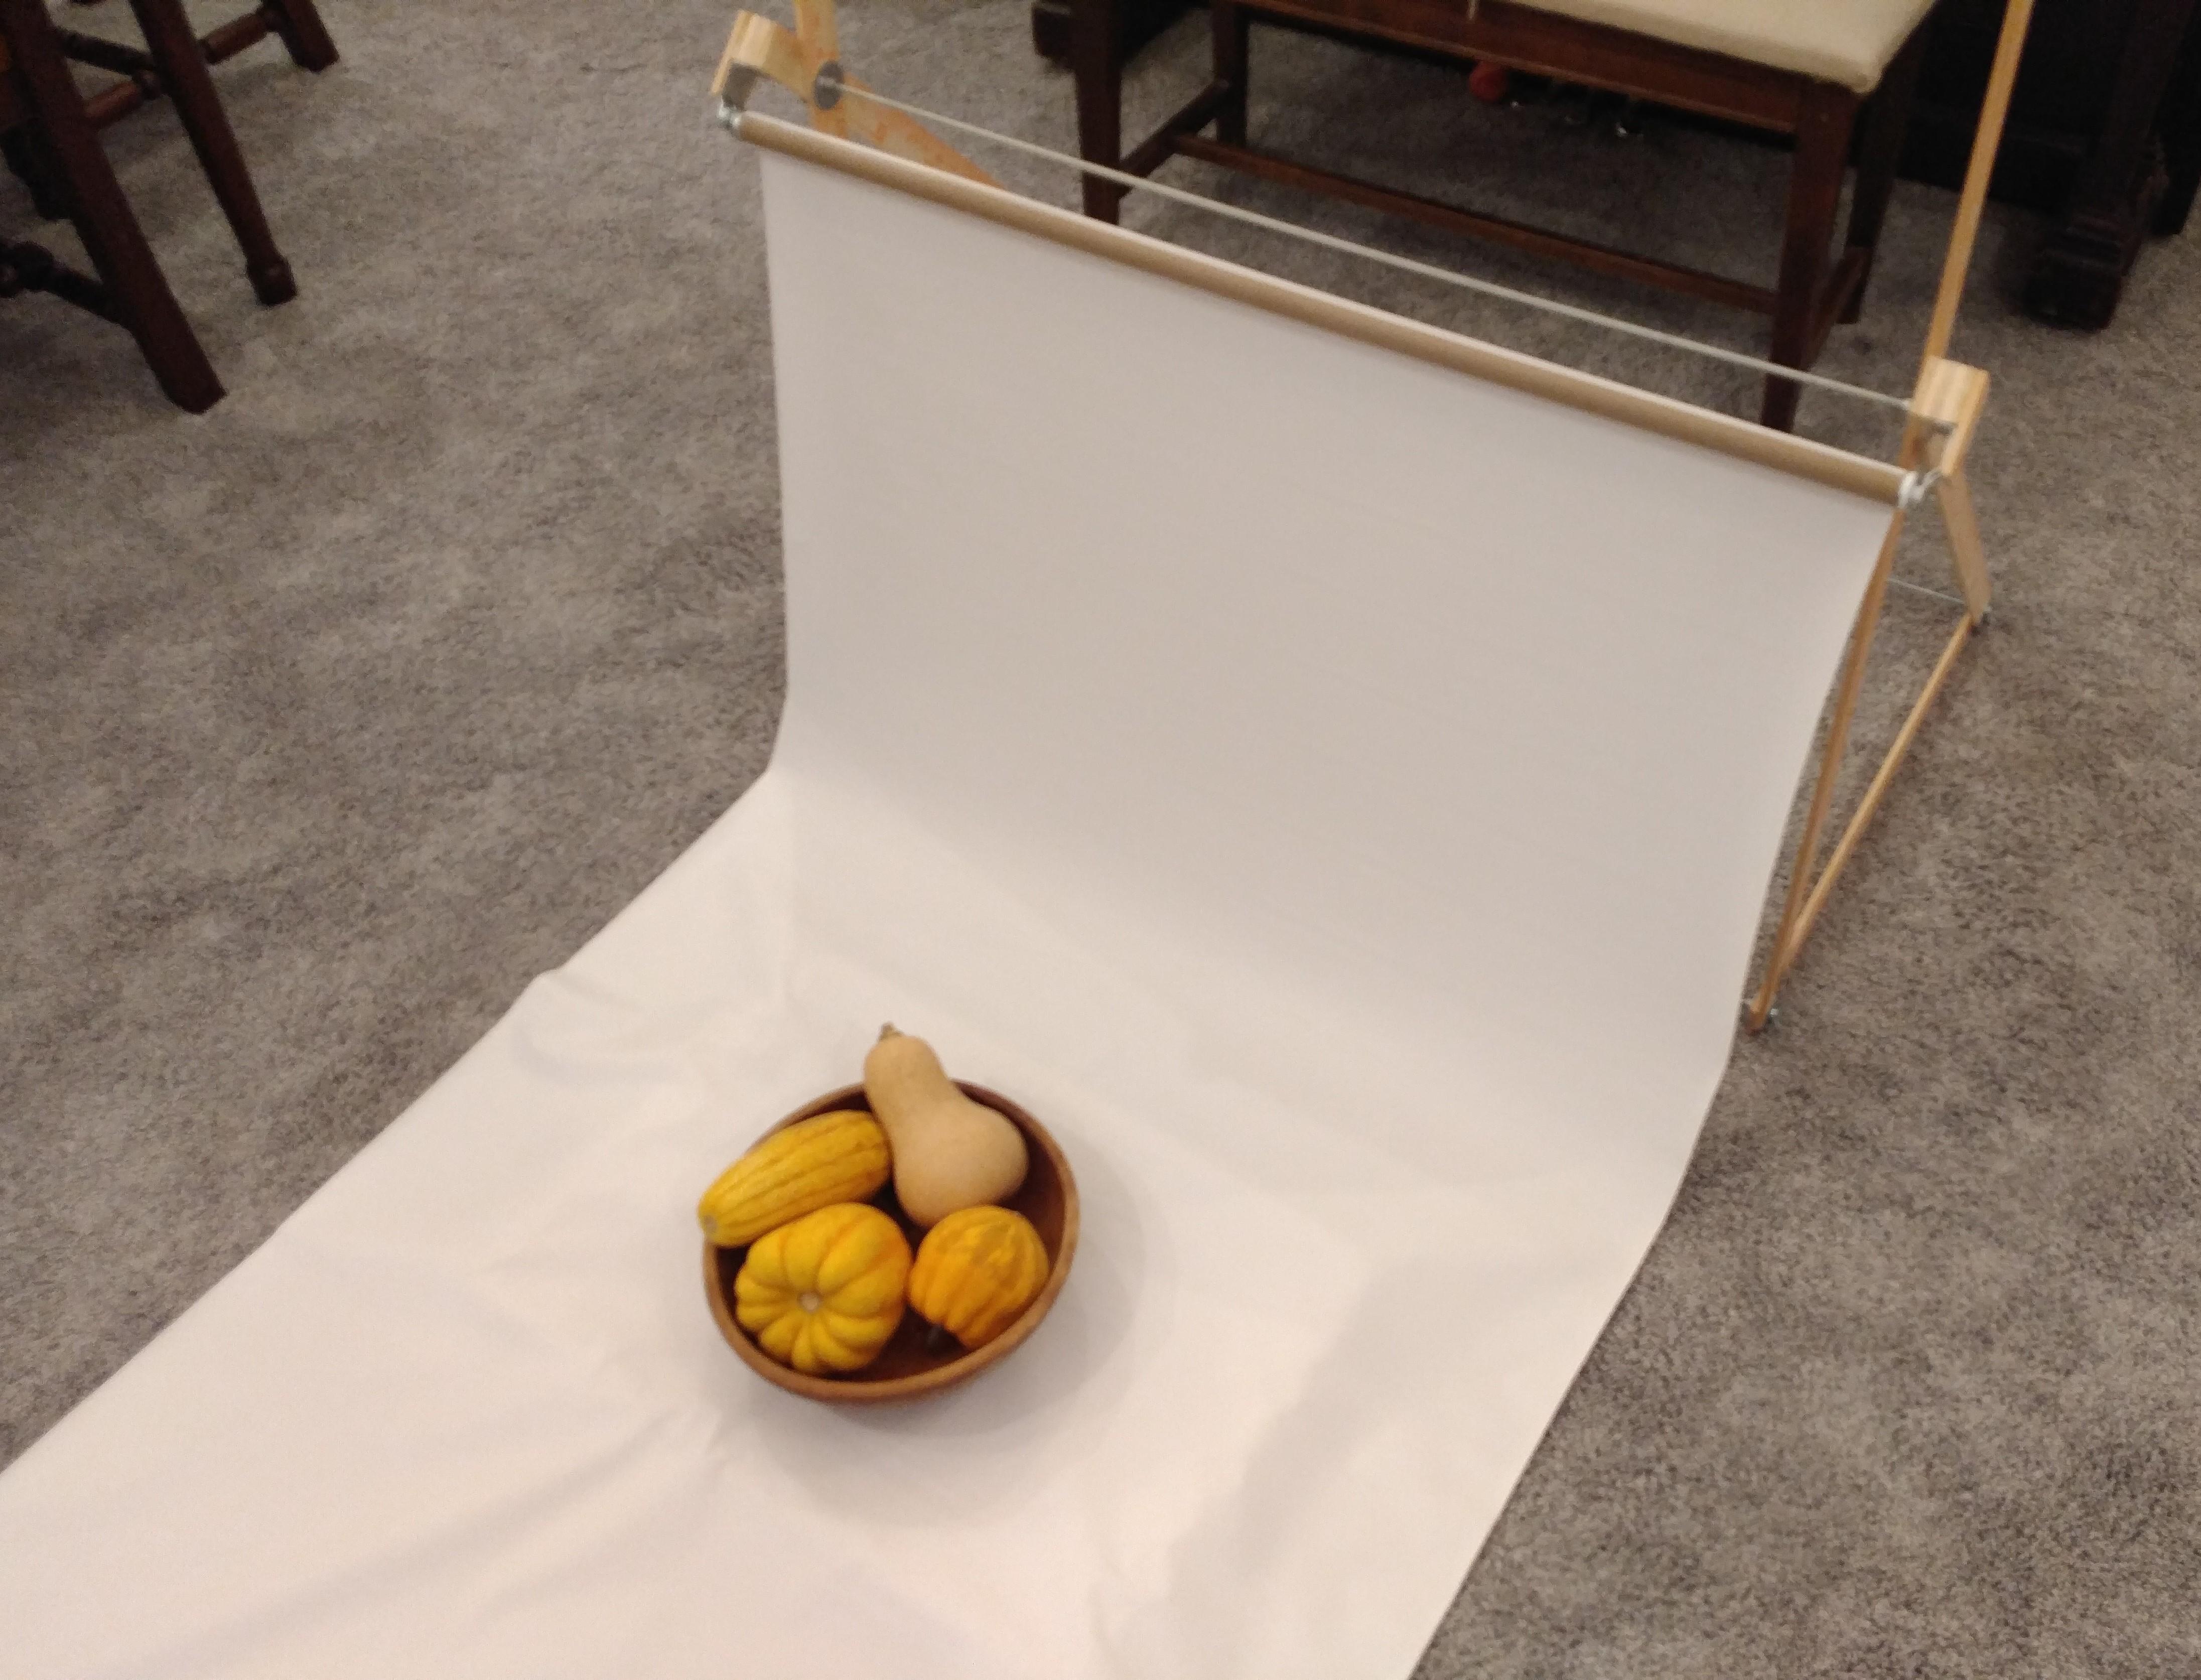
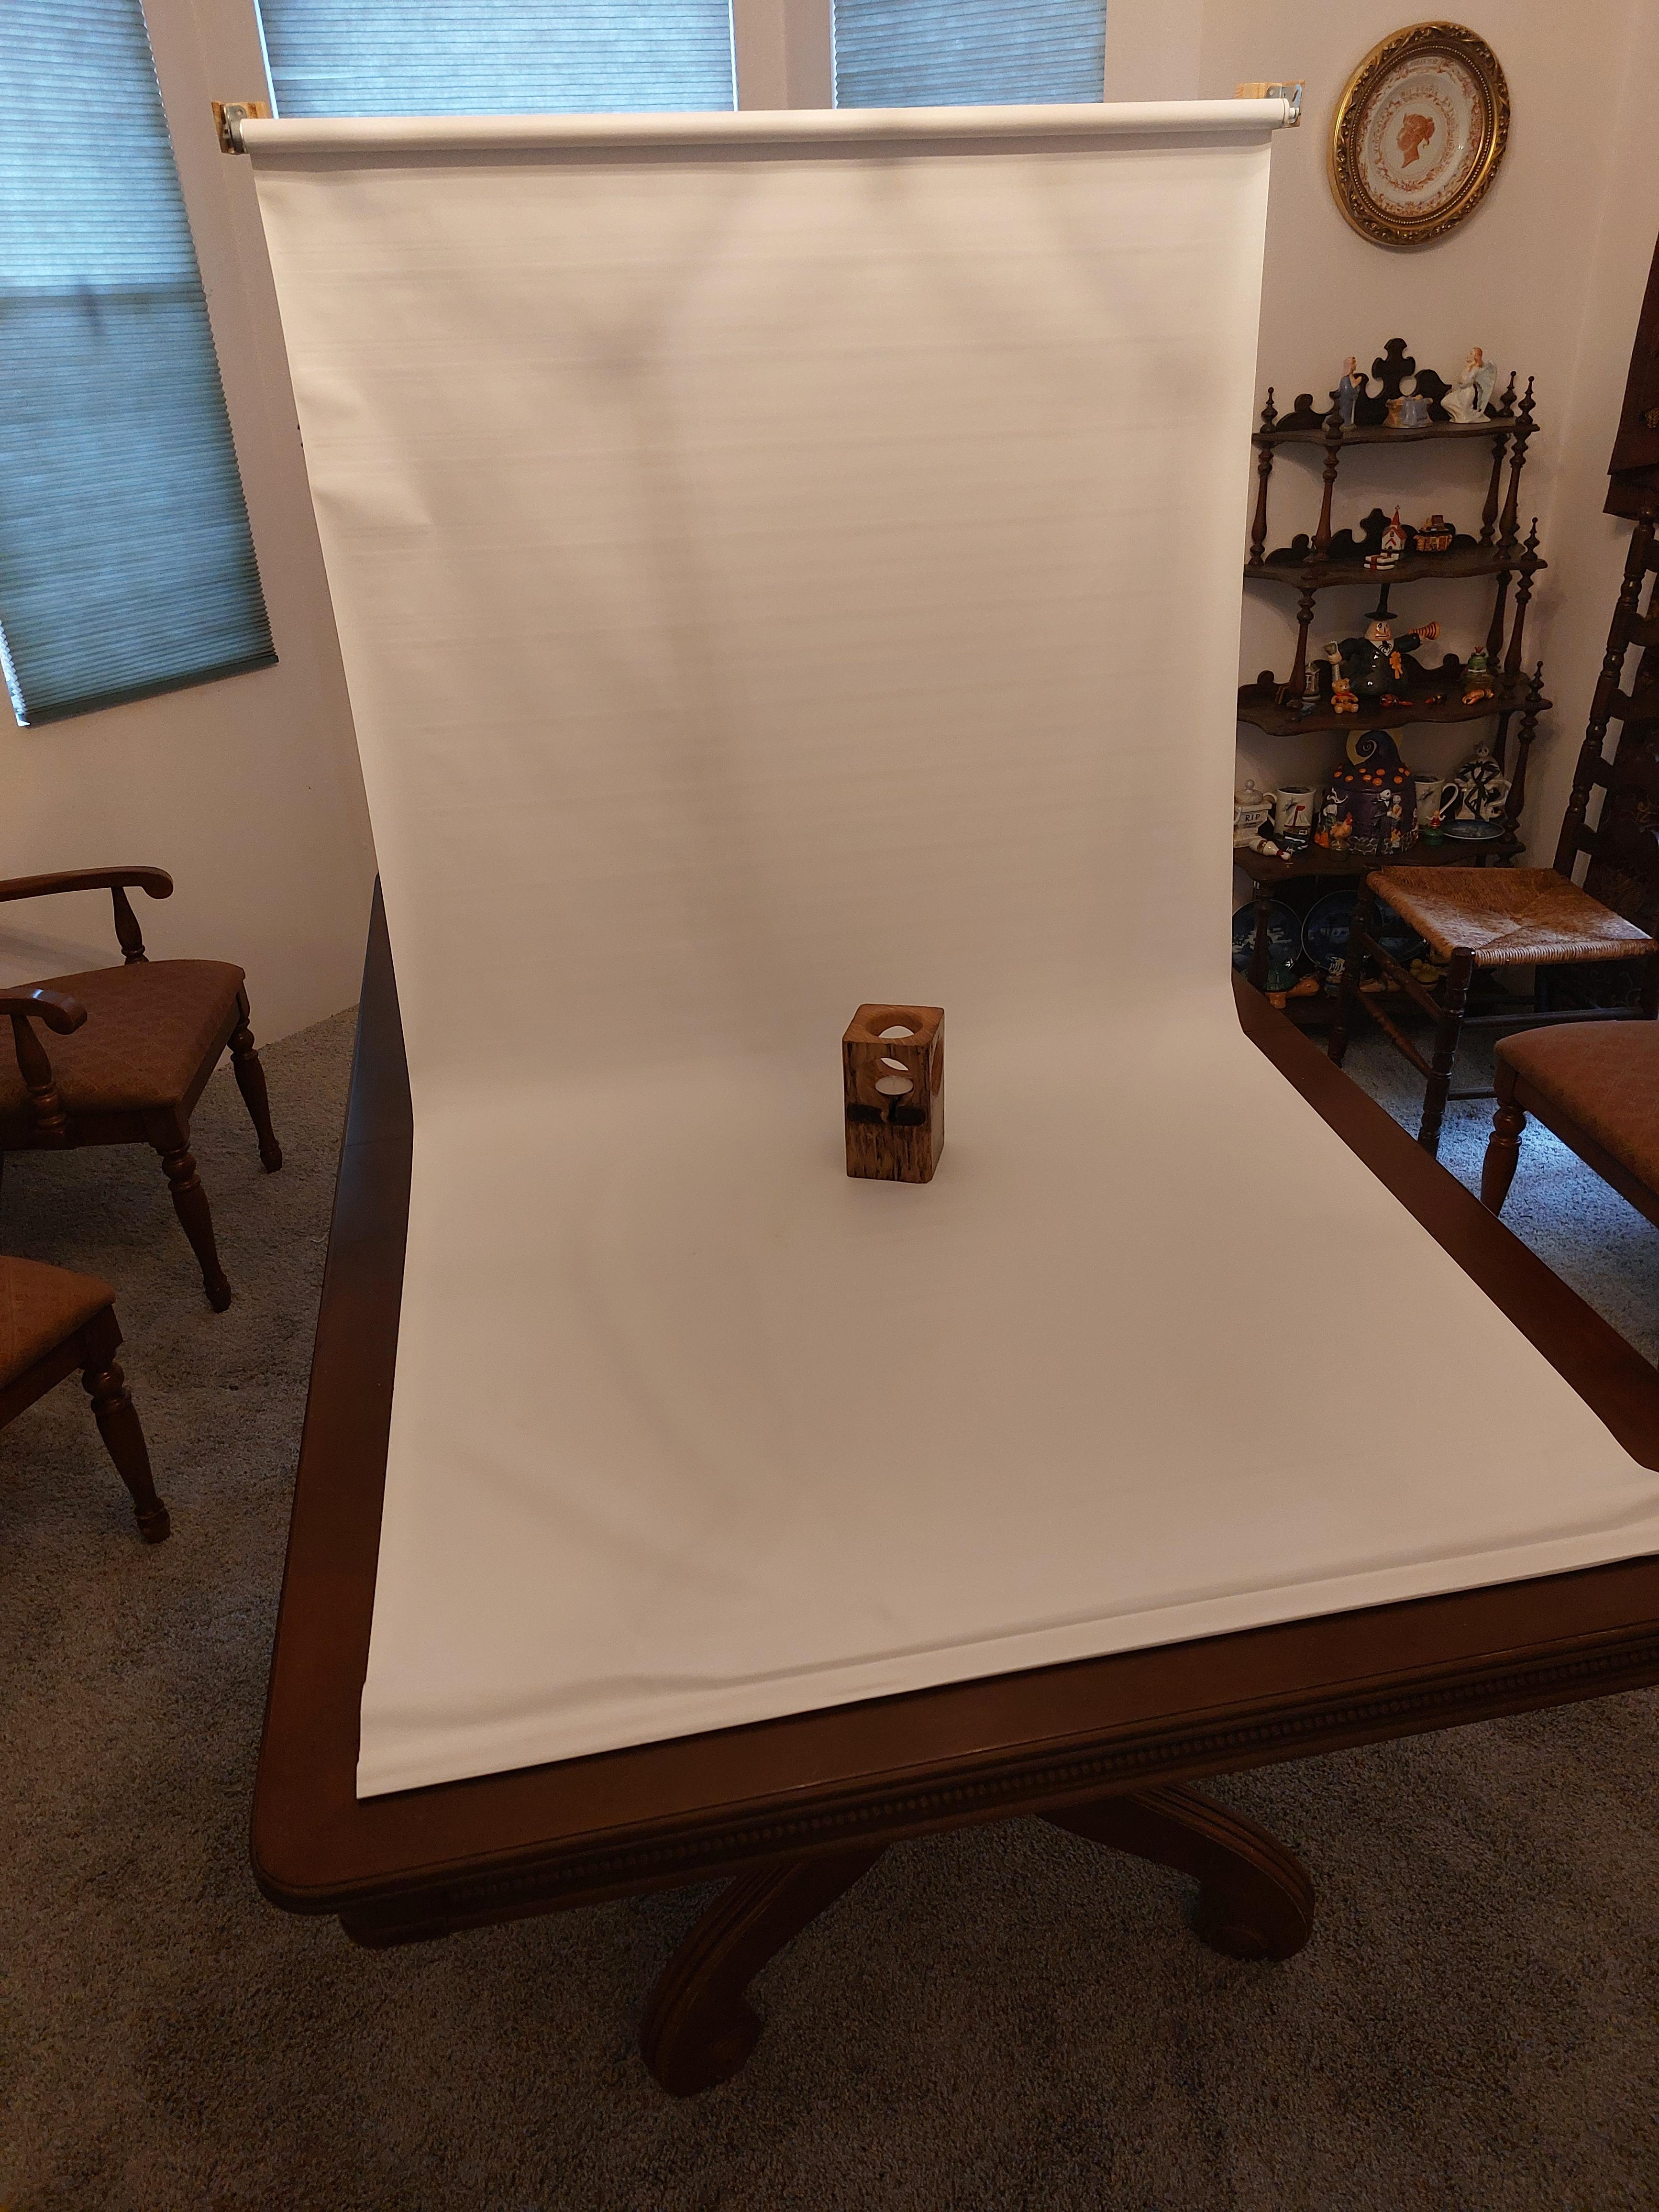
As you can see from the pictures of this project, I didn't have a suitable backdrop for photographing things like eBay sales or Instructables - so I made one! Photography studios have entire rooms where the floor curves up to meet the wall to reduce shadows, and I wanted something like that only practical. I don't even have a place to keep a backdrop set up, so it had to be something I could easily put up and take down. This tutorial will walk you through the steps I took to make one!
Supplies

Tools:
- pencil
- drill
- 1/4" drill bit
- saw
- sandpaper
- clamp
- adjustable wrench or pliers
Optional:
- scroll or coping saw
- Stanley Surform plane
- square
- hot glue gun
- rubber bands
Parts:
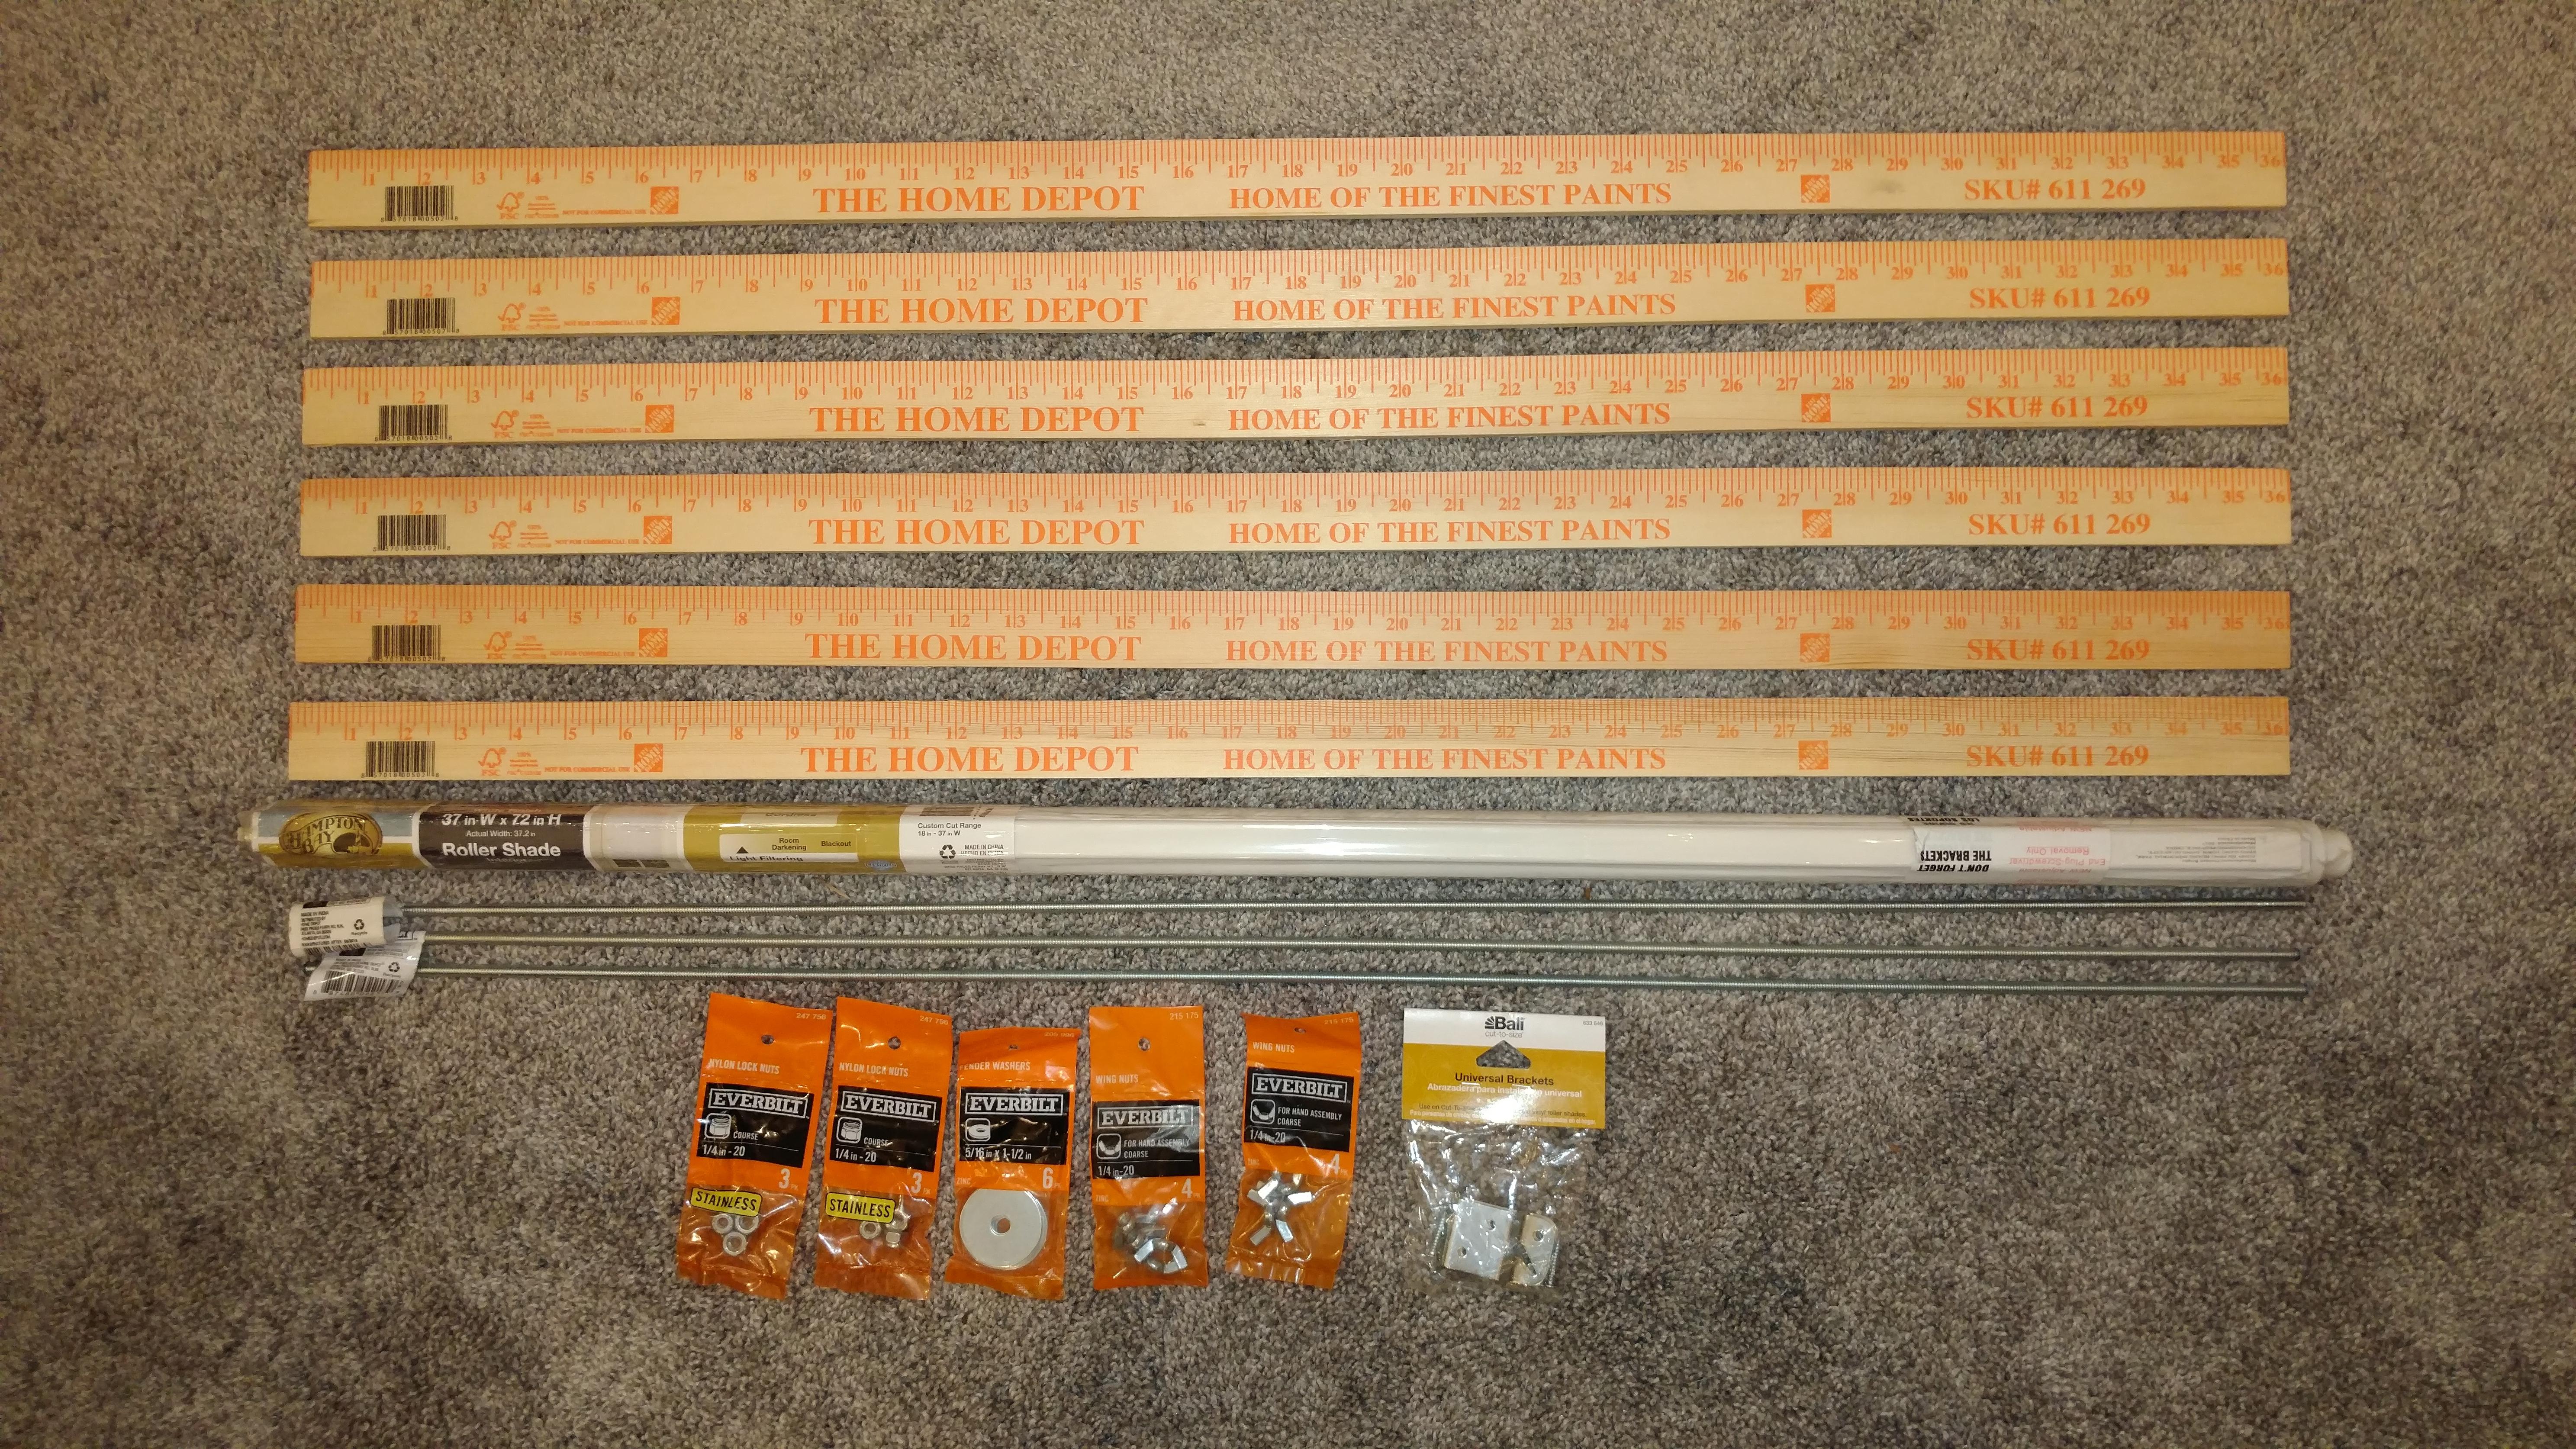
- 6) Wood Yard Sticks (Home Depot #611-269, $1.48 each)
- 3) 1/4 in. x 3 ft. Zinc Plated Steel (Coarse) Threaded Rod (HD #671-207, $2.47 each)
- 6) 1/4 in.-20 Stainless Steel Nylon Lock Nuts (HD #1006-539-957, $1.38 pack of three)
- 12) 1/4 in. x 1-1/4 in. Zinc-Plated Fender Washers (HD #590-605, $0.20 each)
- 6) 1/4 in.-20 Zinc Plated Wing Nuts (HD #1006-539-997, $1.38 pack of four)
- 1) White Cordless Blackout Vinyl Roller Shade 37.25 in. W x 78 in. L (HD #1007-478-359, $29.98)
- hot melt glue
- or -
- wood glue and epoxy
Total cost:
$54.19 (plus glue)
Basic Design

My thought was to use an ordinary roll up window shade for the backdrop, and a simple frame to hold it. I decided to use yardsticks because a bundle of 5/16 in. x 1-1/2 in. wood lath was $29.98, and they weren't nearly as straight as the yardsticks. I sourced everything at Home Depot, but you can get the parts at most any hardware store.
The design is pretty simple. Two triangles made from three yardsticks each, held together and spaced about three feet apart by three threaded rods. Mount the brackets for the window shade on the ends of two of the yardsticks and you're done.
The only tools needed are a drill with a 1/4 in. bit and a saw. You do have to round the ends of some pieces, so a coping saw or Surform plane are helpful, but with persistence you can do it with a regular saw if you're careful. Smooth your jagged curve with the sandpaper. You should mark your cuts, so a pencil is a requirement and a square is helpful. If you don't have a square you can use another yardstick held perpendicular to the one you're marking - the design is forgiving and exact marks aren't required. A clamp to hold the pieces while you glue them is helpful, but you can use rubber bands - again, if you're careful. If you don't have a glue gun for attaching the metal brackets you can use epoxy.
Cutting


We'll start with the two yardsticks that form the base. Using yardsticks makes measuring the cuts super easy. Take two yardsticks and cut them at the 25 inch mark. Done.
Now we have to do some math. Don't worry, I've done it for you. The thing is, the all thread is 36 inches long, but the shade is 37 inches long. Home Depot will cut it to size for free, but why waste it? We want all the backdrop we can get. The all thread holds the yardsticks together, so there's a half inch, then the thickness of the washers, and finally you need to leave some threads for the wing nuts, so we give up 3/4 inch off each end of the all thread. To make up for this loss, plus the extra inch of the blind, we add spacers to the window shade mount.
Like I said, I did the math and we need four spacers on each side. The spacers are square, as long as the yardsticks are wide. So take the two 11 inch leftovers from the first cuts and use one to mark a yardstick width from the end of the other. Start where you already cut, around the 25 inch mark. Cut it, then mark it again and cut again. Repeat until you have four spacers. We do this because each cut takes a saw's width of wood, so we can't mark them all at once or they'll be too short.
Now do the same with the other ruler, until you've made four spacers off of it.
Finally, we need the supports. They're 2-1/2 inches long, so start at the 36 inch end and draw a line at the 33-1/2 inch mark. Cut those and we're done with the cutting.
Drilling


To mark the holes we're going to use one of the fender washers. We'll start with the two 26 inch sticks. Put the edge of the washer on the very end of the stick - it should be about as wide as the yard stick, making it easy to center. Use the inner hole to mark a circle on the yardstick. Do that on the other three ends.
Next take two full yard sticks and do the same, only this time also draw a half circle on the outside of the washer, rounding the ends. Finally, use the washer as a guide and draw an inner circle at the 12 inch mark on each stick.
Moving to the the final two full yard sticks, do the half circle rounded end thing at the 36 inch end of each, then draw the inner circles like you did at 12 inches on the others, only these go at 2-3/4 inches and 10-1/4 inches.
Now get out your drill and drill the 1/4 inch holes, 16 in total. Next take your coping saw, regular saw, scroll saw, Surform plane, sandpaper - whatever you have, rub it on the sidewalk if you must - and round off the six ends you marked earlier. Your yard sticks should almost look like the second picture, just the gluing up to do.
Gluing


Take the two 36 inch yard sticks with one square end and glue four spacers on each, as shown. You probably noticed by now that the 36 inch end on one side is the zero inch end on the other side, so it really doesn't matter which side you glue the spacers on, as long as they're on the square end. I changed the grain direction of each layer, like plywood, but the stresses are minimal and that wasn't necessary. If you're using wood glue, glue them all up at once and clamp them, or wrap them with rubber bands. Just make sure they're all square then leave them for the glue to dry. If you're using a hot glue gun, glue them one at a time, again making sure they're all square.
After the glue dries we're ready to move on to the supports. Up until now the two pieces have been identical, but now you must make mirror images. The simple way is to put the yard sticks flat back-to-back with the spacers at the same end but on opposite sides. Now glue the supports to the spacers, perpendicular to the yard sticks, pointed up. In the second picture it's as if the left hand yard stick was rotated up, flat against the one on the right. Again, wood glue or hot melt will do.
Finally, as in the pictures, glue the roller blind brackets to the supports and spacers. If you don't have a hot glue gun use epoxy.
Assembly


Screw a nylon lock nut 3/4 inch in from the each end of each threaded rod. This is where the wrench or pliers come in. Once they're on you'll never need tools for this again.
To assemble it, start with the base. Take two rods, four washers, and the two 25 inch sticks. Put a washer on each end of the rods, then put the sticks on the ends of the rods, as shown in picture three. Next take the two long sticks with two rounded ends and slip them over the ends of one of the rods. These are the braces. Add washers and wing nuts and tighten snugly. Now take the last two sticks and slip the rounded ends over the ends of the other rod, as shown in picture four. These are the uprights. Add washers and wing nuts. Now put washers on the ends of the last rod and stick the ends through the holes on the rounded ends of the braces. Finally, put the 10-1/4 inch (or 25-3/4 inch) holes in the uprights over the ends of the rod and add the last washers and wing nuts.
The frame is done! All that's left is the window shade, and that's pretty straightforward. One end has a pin which goes in the hole in one bracket, the other end has a tab which goes in the slot in the other bracket. Each bracket has a hole and a slot, so it will go either way. It should now look like picture five. Pull down the shade and you have picture six. If you want more foreground and less background, rearrange the pieces as in picture seven (that's what the extra holes are for). This really is a lightweight, flimsy structure, so it helps to hold the frame while you're pulling the shade open.
Take Pictures!


One thing I learned while taking the pictures for this instructable is that it doesn't work well on carpet. The shade deforms and you see the wrinkles. I put a book under the bowl in the first two pictures but it didn't work as well as setting it on a table, which I did in the next pictures.
If you've read all the way to the end, thank you, and I hope it was enjoyable. If you make one yourself I'd really like to know, and if you have any suggested improvements be sure to comment. Thanks!