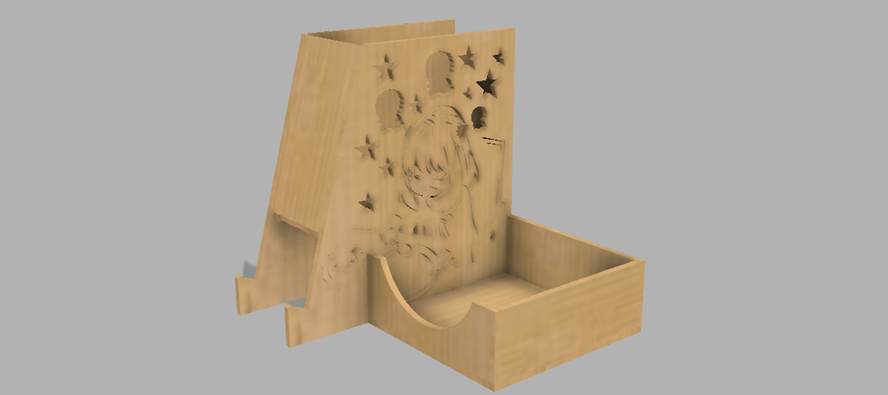
Porta Celular - Proyecto Pc1
by veronica_chuquicaja in Workshop > Laser Cutting
259 Views, 1 Favorites, 0 Comments
Porta Celular - Proyecto Pc1


Hey! Como están? Hoy vamos a hacer un trabajo muy interesante que es un porta celular espero que les guste y les llame mucho la atención hacerlo bueno empecemos
Hey! How are they? Today we are going to do a very interesting job that is a cell phone holder I hope you like it and it calls your attention to do it well let's start
Supplies
Primero necesitamos los materiales que son tener una cuenta autodesk y tambien tener el fusión 360 que te ayudara mucho para el desarrollo de este hermoso trabajo
First we need the materials that are to have an autodesk account and also to have fusion 360 that will help you a lot for the development of this beautiful work
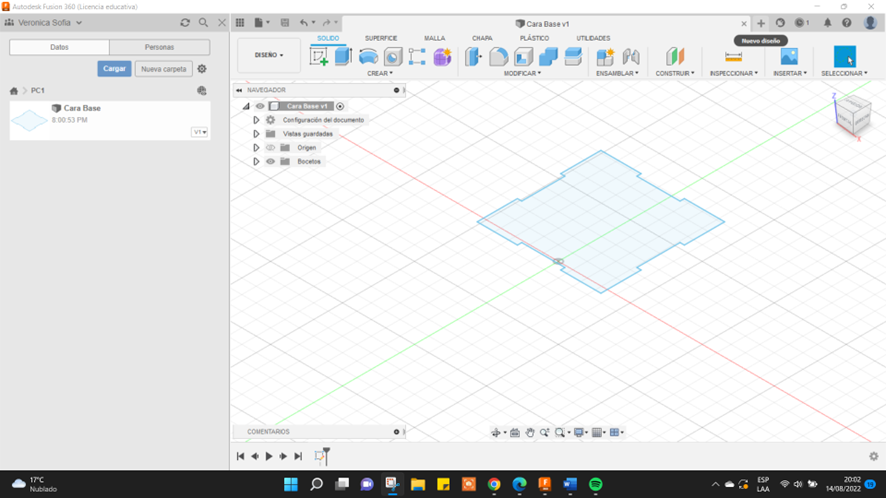
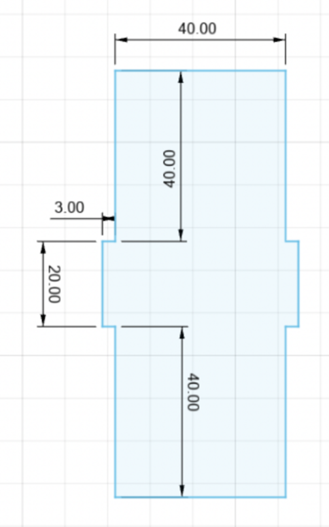
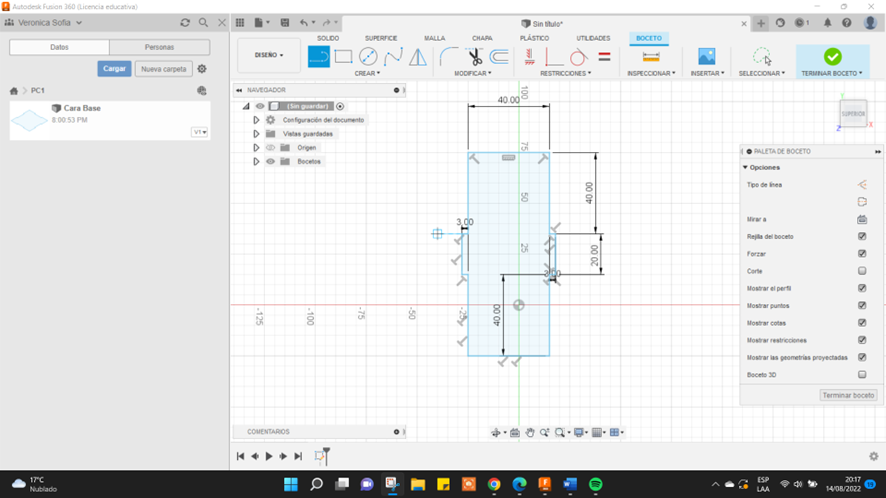
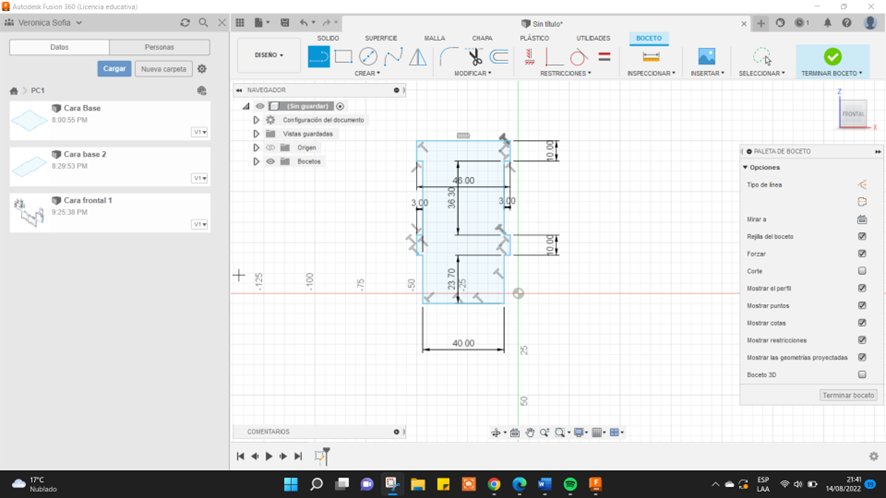
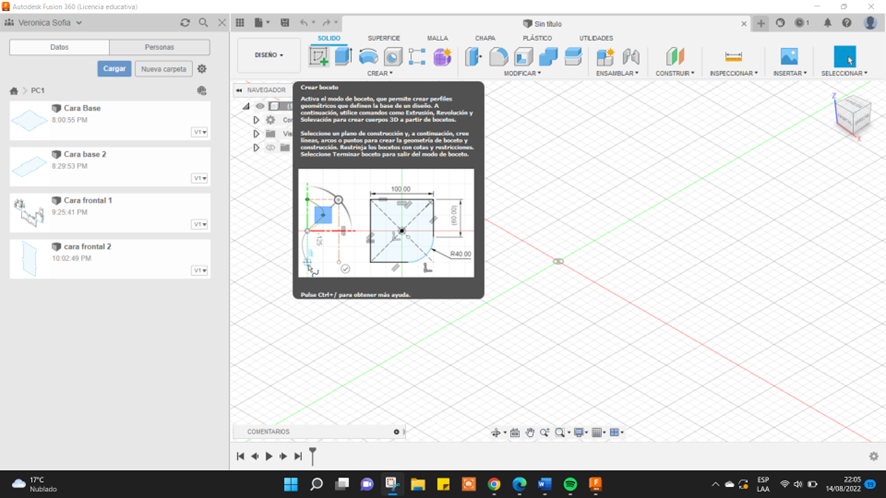
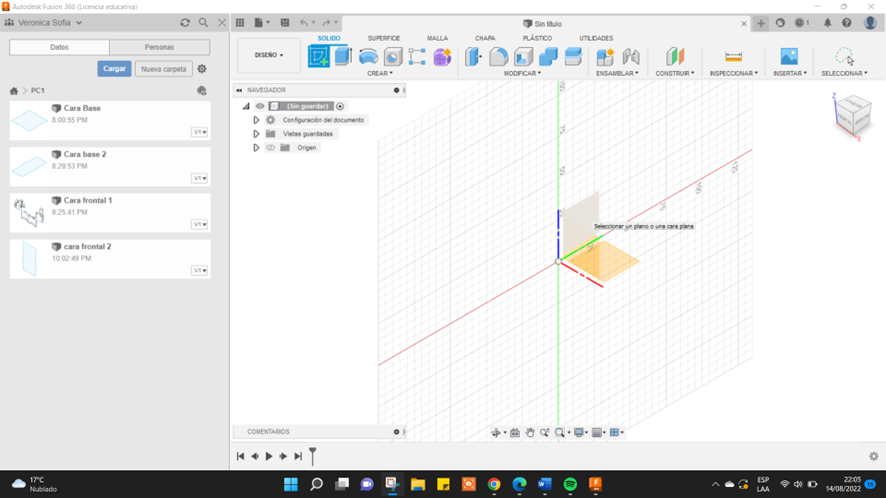
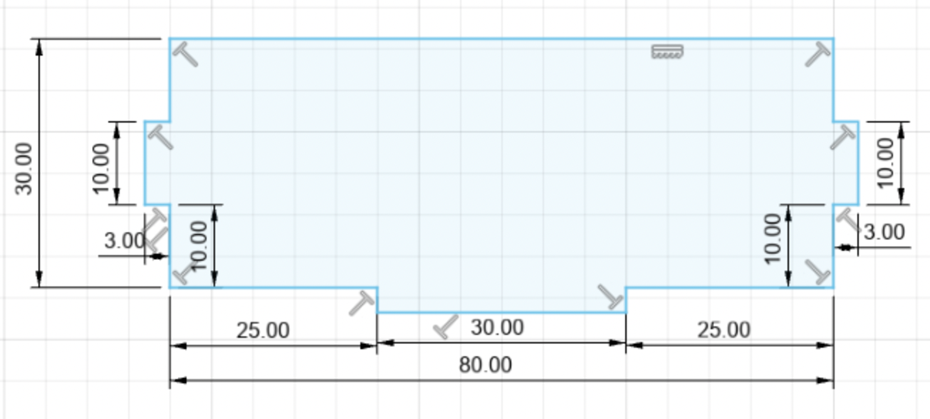
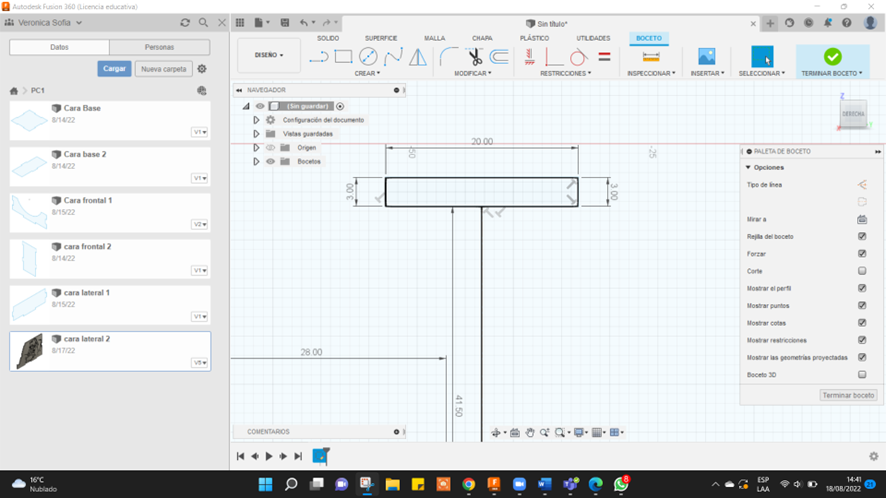
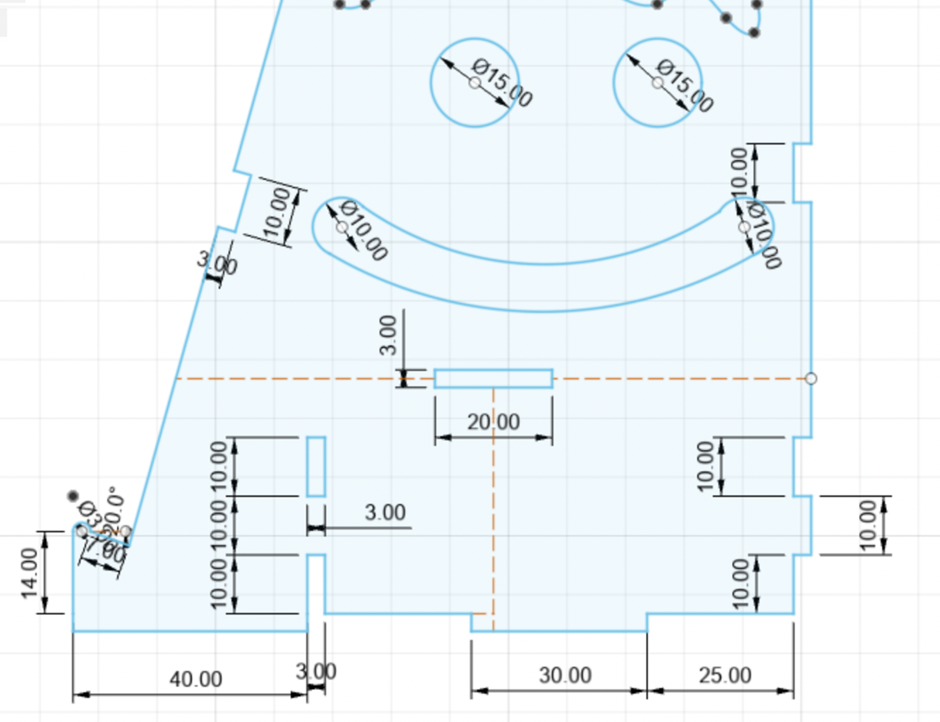
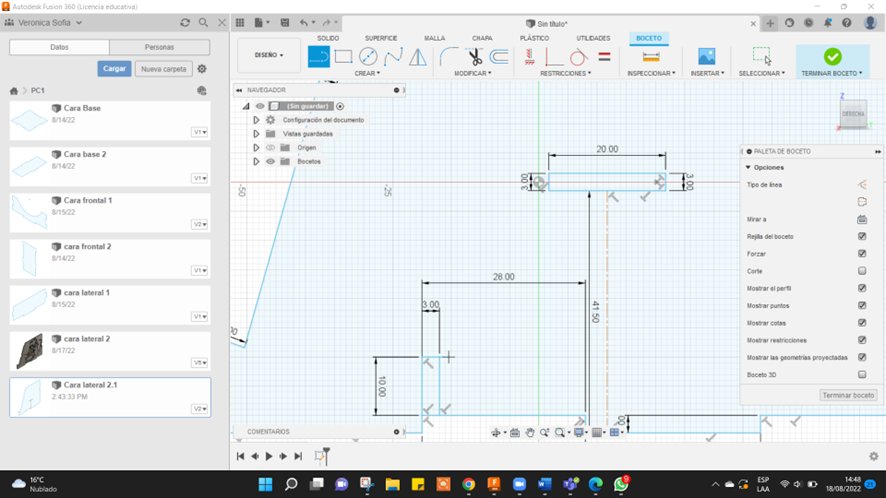
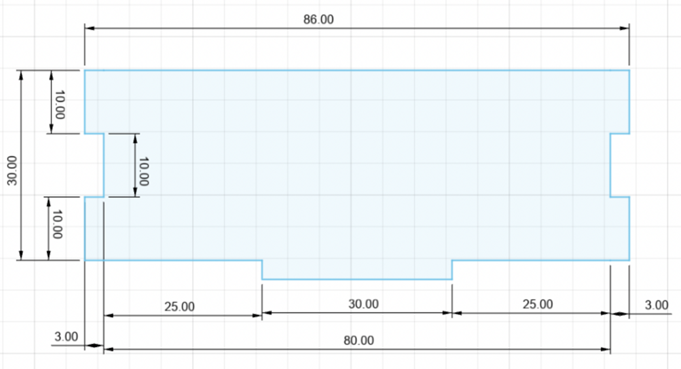
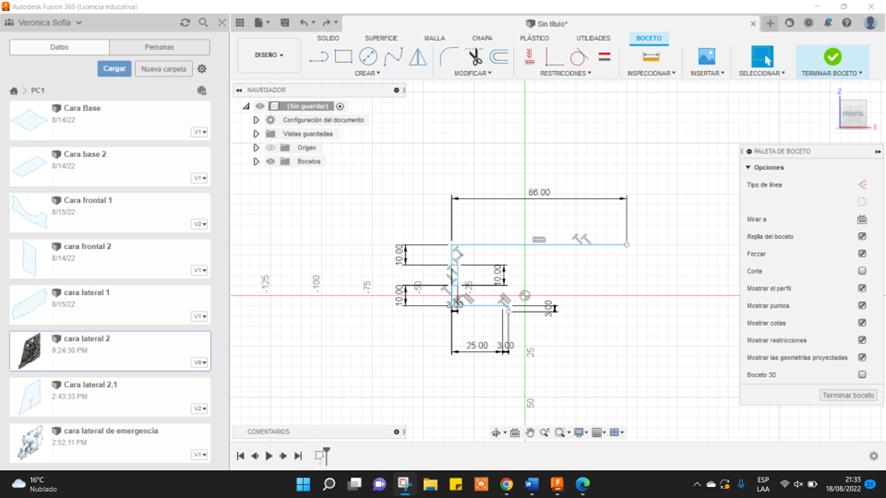
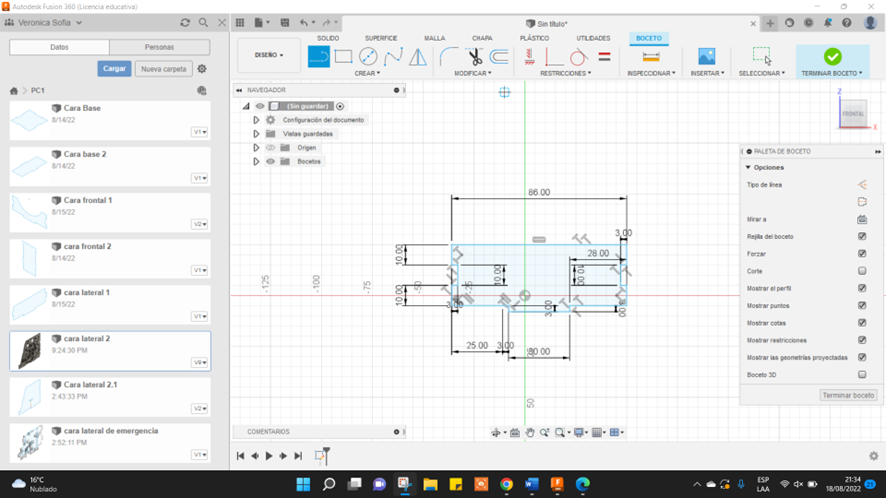
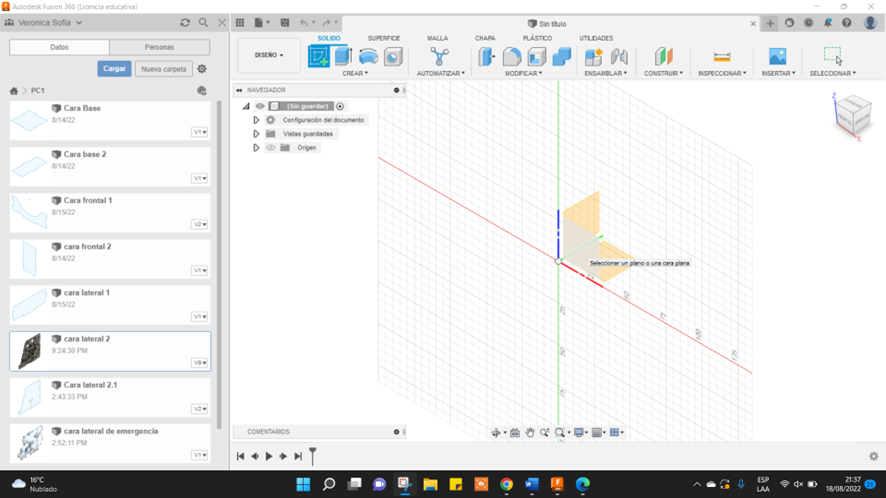
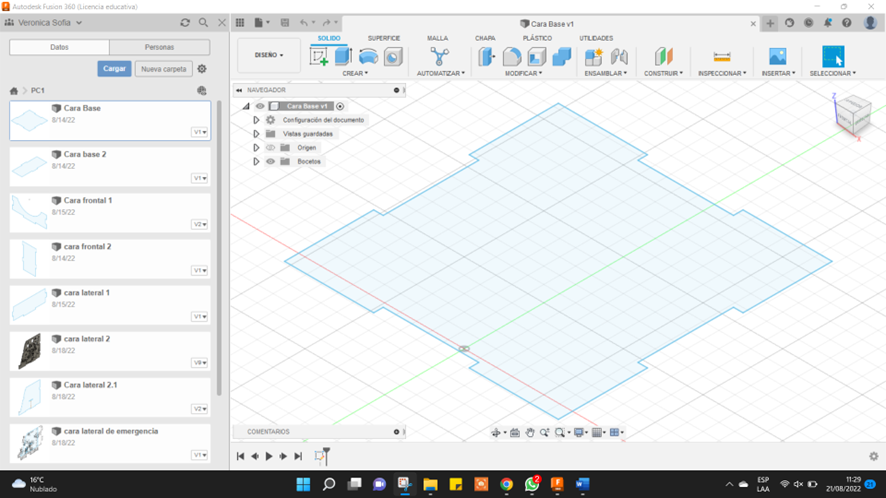
Plano De Cara Base

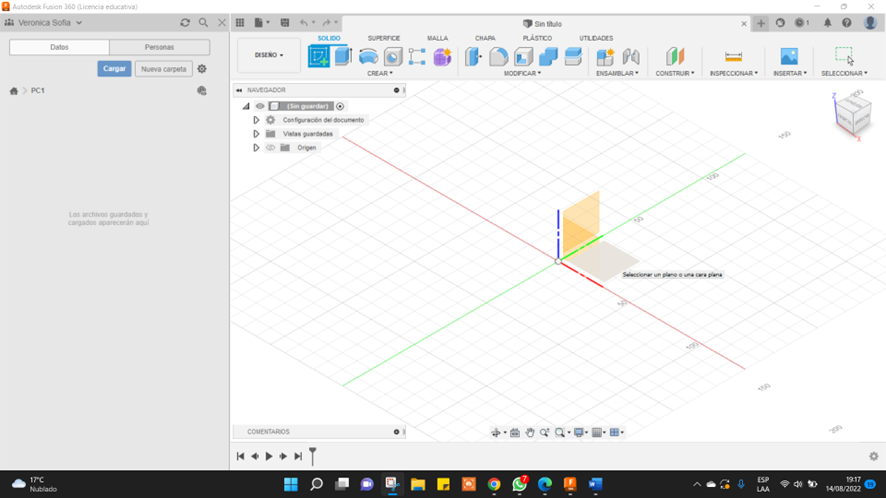
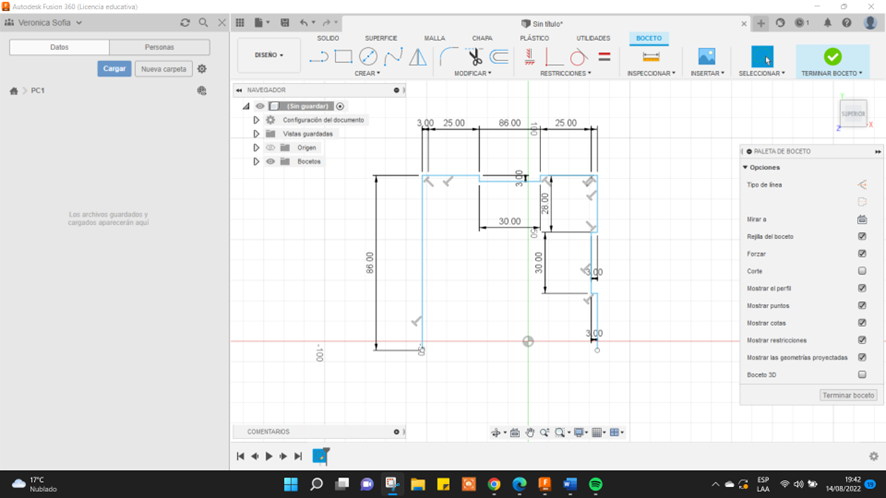
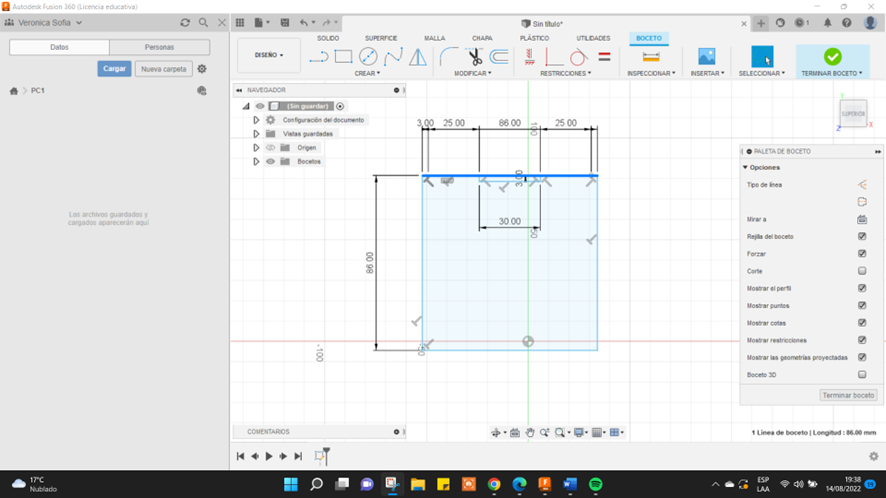
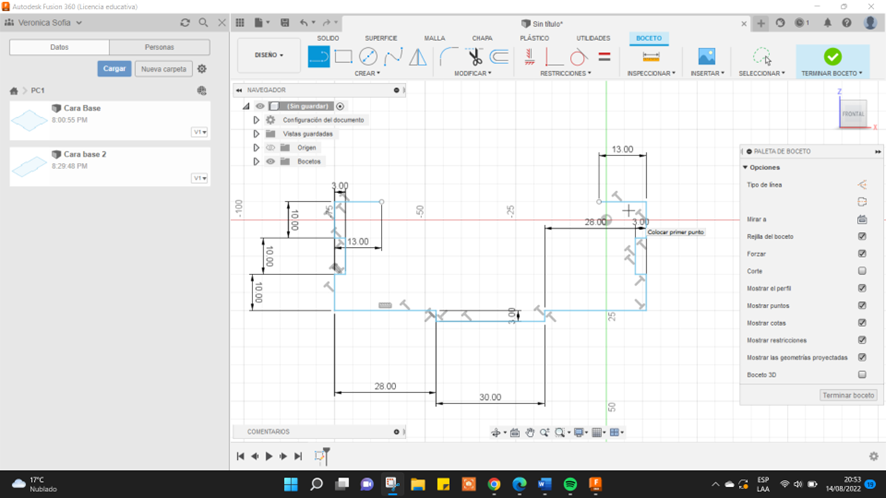
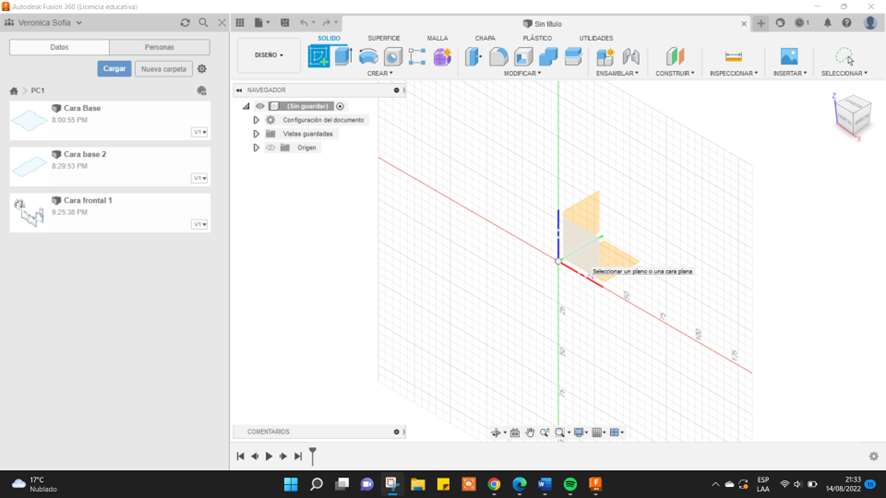
El primer paso de este trabajo es desarrollar la cara base dar un clic a “crear boceto” seleccione el plano o la cara plana mirando para abajo presioné la primera opción que se llama “línea” luego inicia por el lado que más te agrade ten en cuenta los milímetros de cada pieza en mi caso para desarrollar este plano sin complicaciones realice un cuadro de los milímetros completos y voy a diseñar sobre ello para hacerlo más sencillo (según mi opinión) luego presionas la barra del medio y lo borras y así sigues con lo demás si sigues mi paso luego al cumplir todo lo requerido en las siguientes medidas y verificando con la opción inspeccionar da un clic a “terminar boceto” te aparecerá de la siguiente forma para que este plano quede guardado presiona “ ctrl” + “5” para que de opción de guardar o presionas ese pequeño icono de la parte de arriba y listo
The first step in this job is to develop the base face click on “create sketch” select the plane or planar face facing down press the first option called “line” then start with the side you like the best keep in mind count the millimeters of each piece in my case to develop this plane without complications take a photo of the complete millimeters and I will design on it to make it easier (in my opinion) then press the middle bar and delete it and so on the rest, If you follow my steps, after complying with everything required in the following measures and verifying with the inspect option, click on “finish sketch” it will appear as follows so that this plan is saved, press “Ctrl” + “5 ” for the save option or hit that little icon at the top and that's it
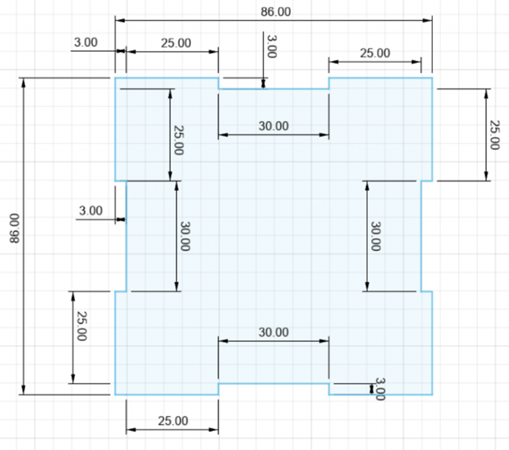
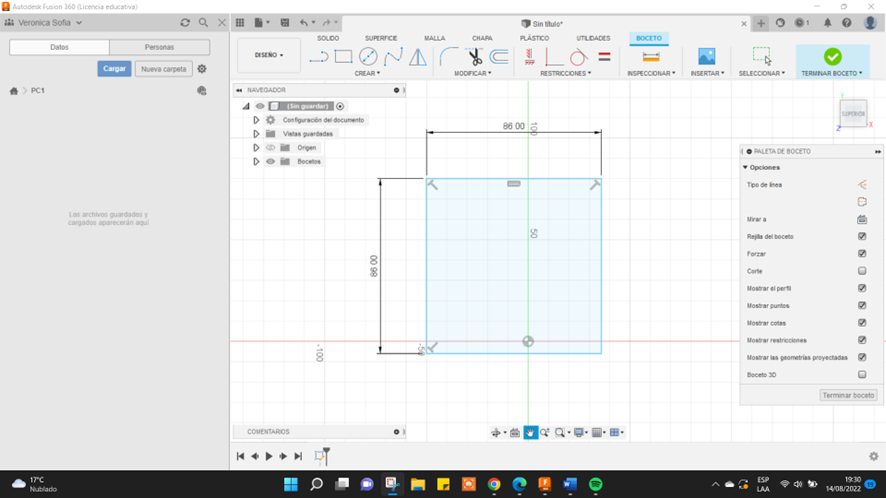
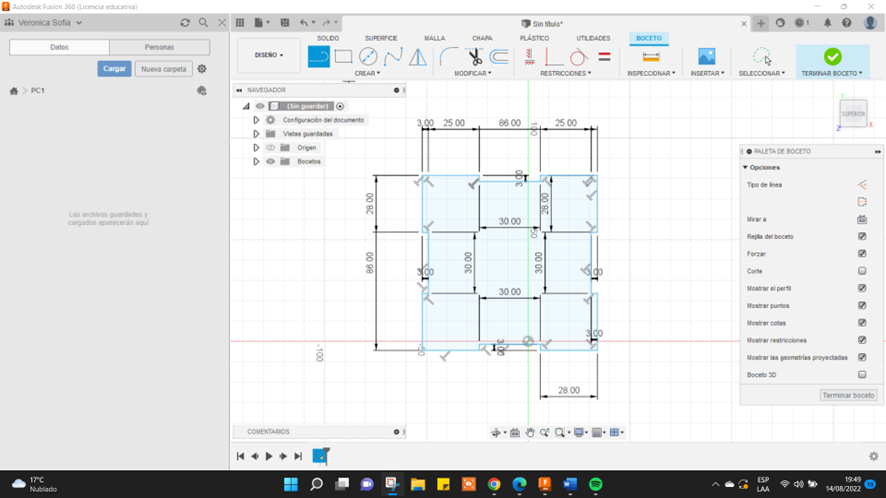
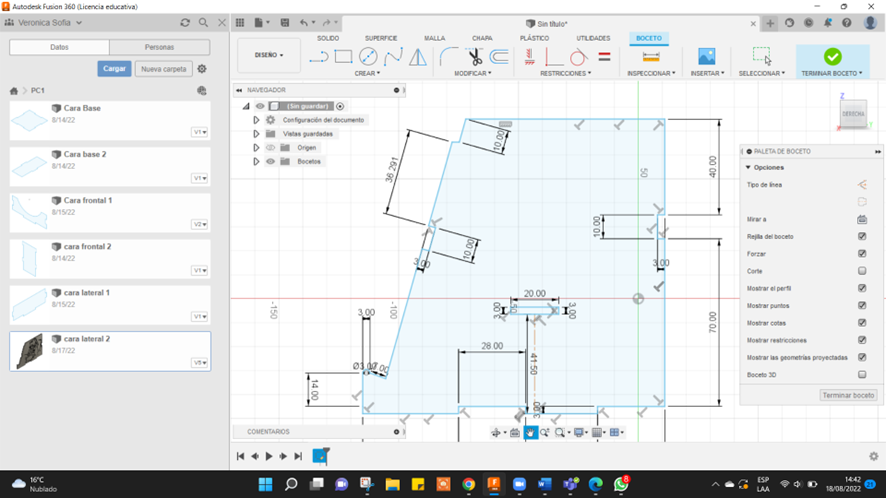
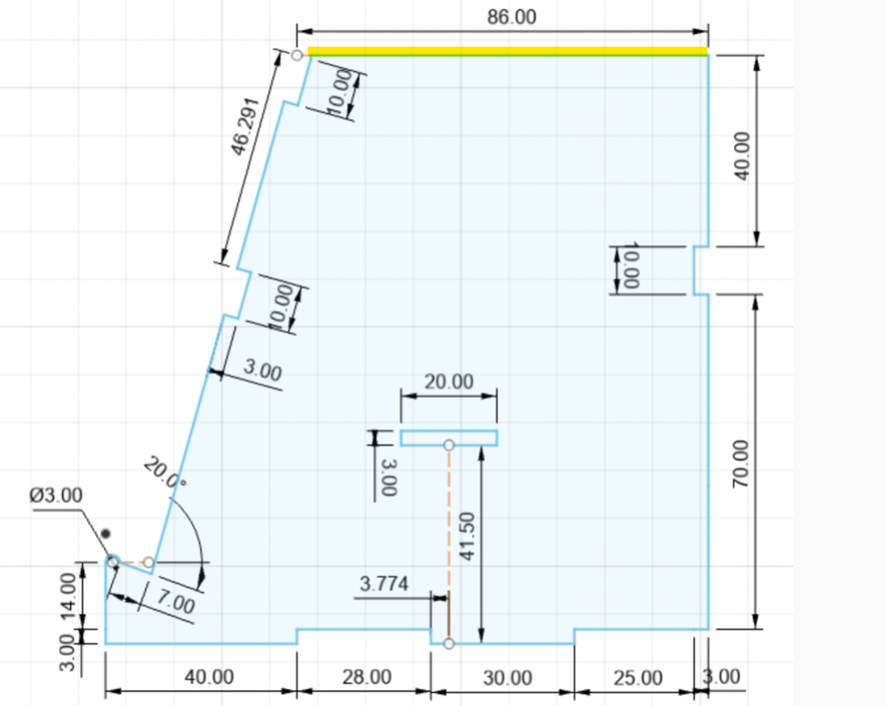
Plano De La Cara Base 2

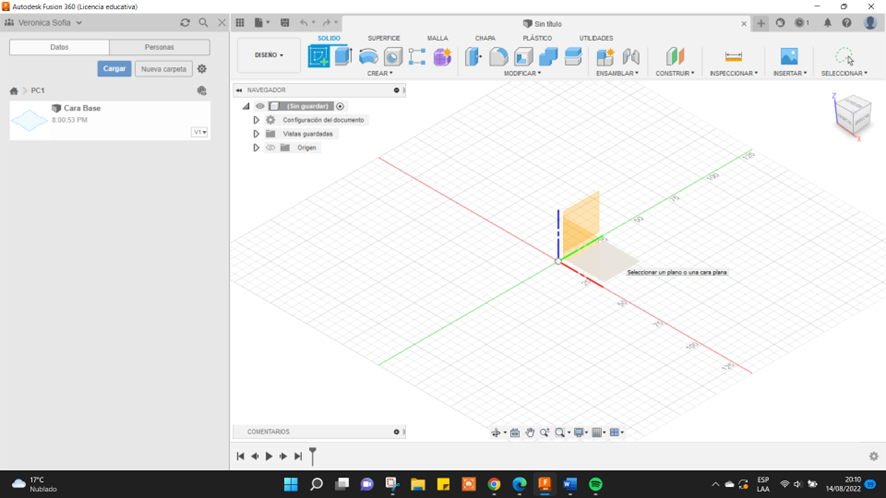

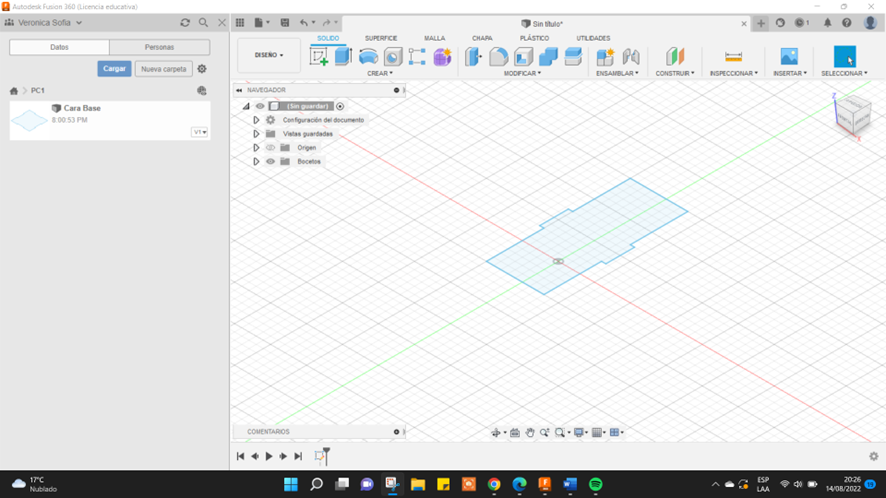
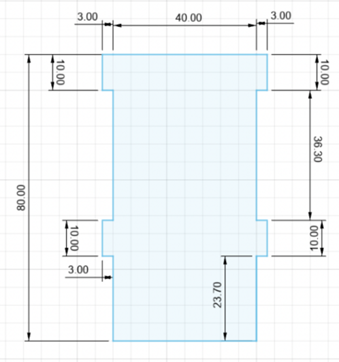
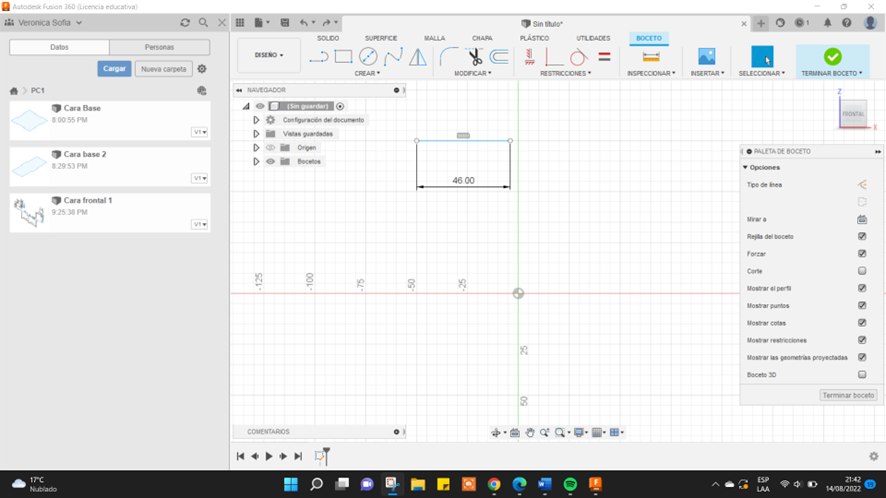
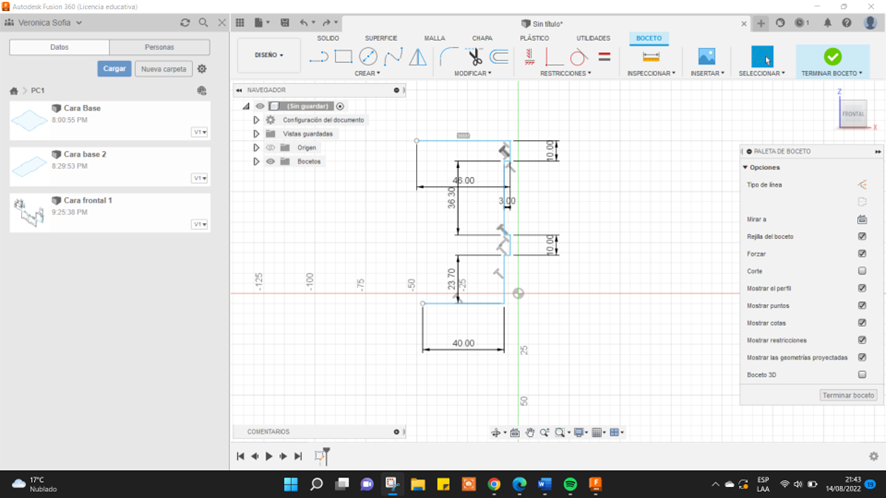
Dale un clic al más que esta al costado de tu primer plano te aparecerá un plano en blanco como la primera vez ahora tienes que señalar en que cara ira, pero como dice su nombre es una base ay que va mirando para abajo presionas el más con un cuadrito de ahí arriba las medidas del plano son las siguientes inicia en la parte donde más te guste, pero recuerda que cada lado tiene sus milímetros y debes respetarlos cuando termines todo presionar la opción “terminar boceto” y opción de “guardar”
Click on the plus sign next to your first plane, a blank plane will appear like the first time, now you have to point to which side it will go on, but as its name says, it is a base and it is facing down. , you press the plus with a small square up there, the measurements of the plan are the following, start with the part that you like the most, but remember that each side has its millimeters and you must respect them when you finish everything, press the "finish sketch" option and the "save" option
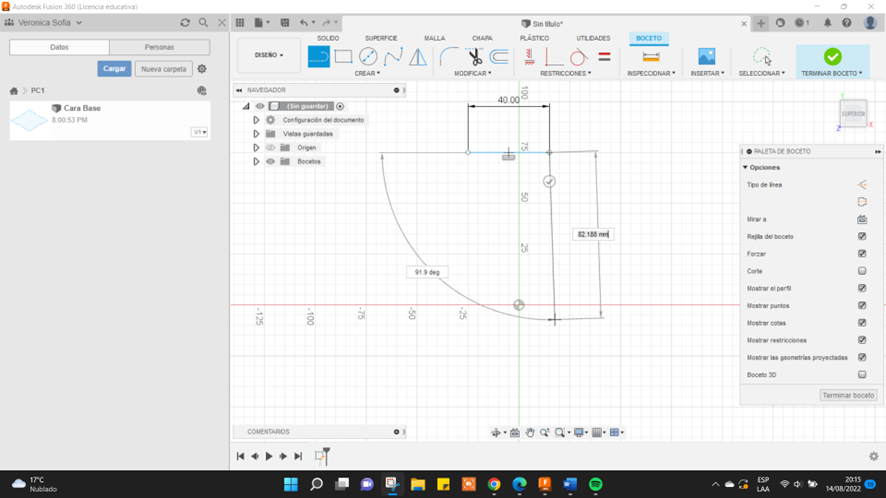
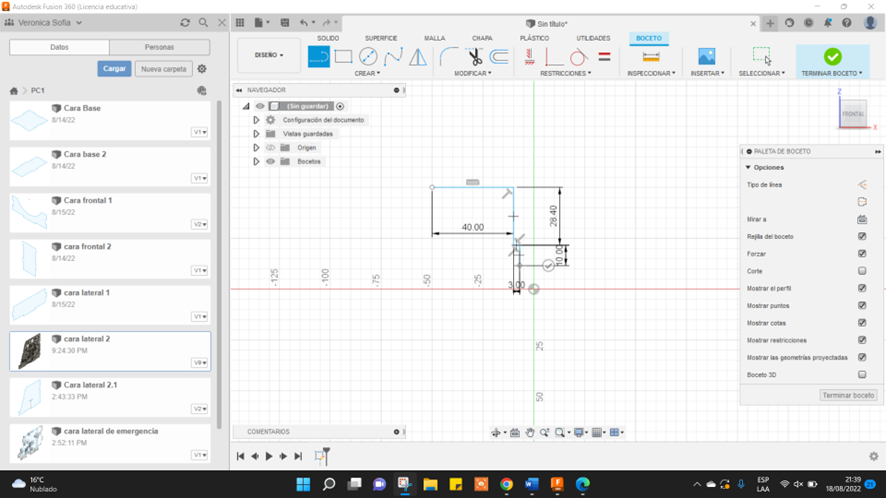
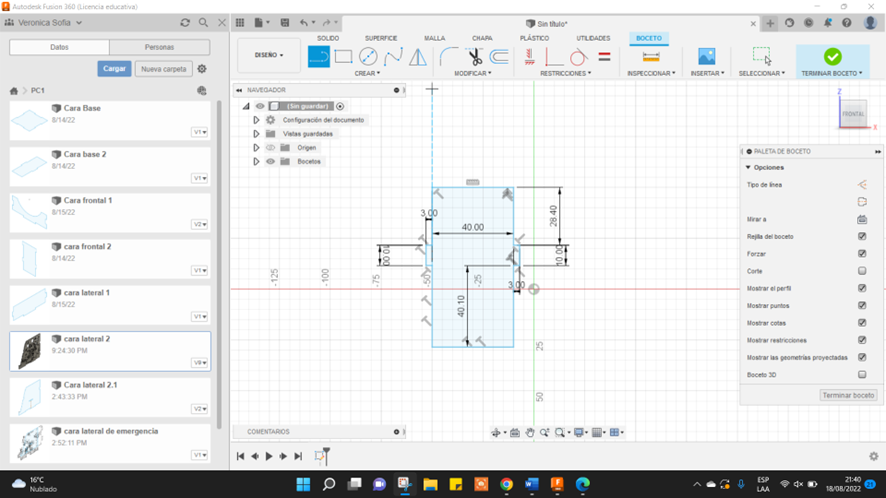
Plano De La Cara Frontal 1

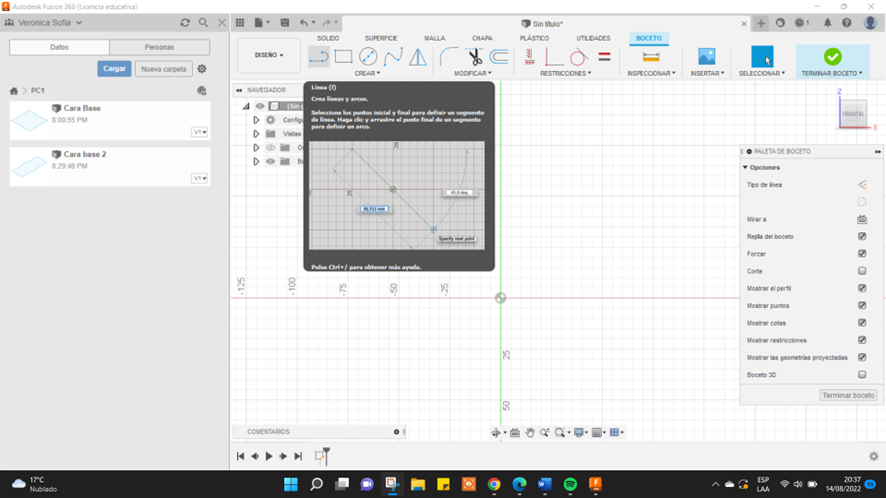
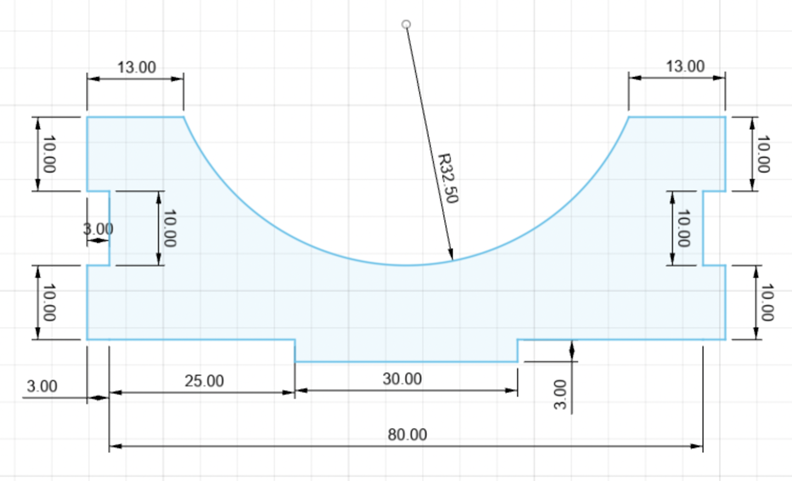
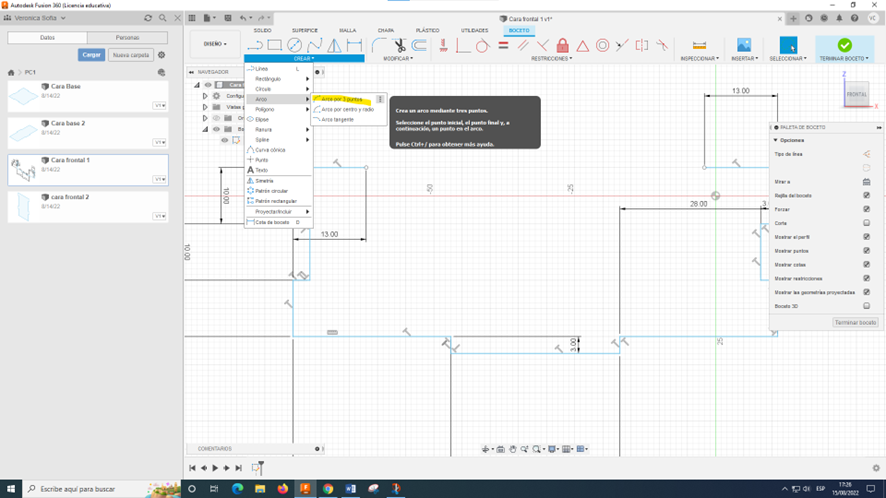
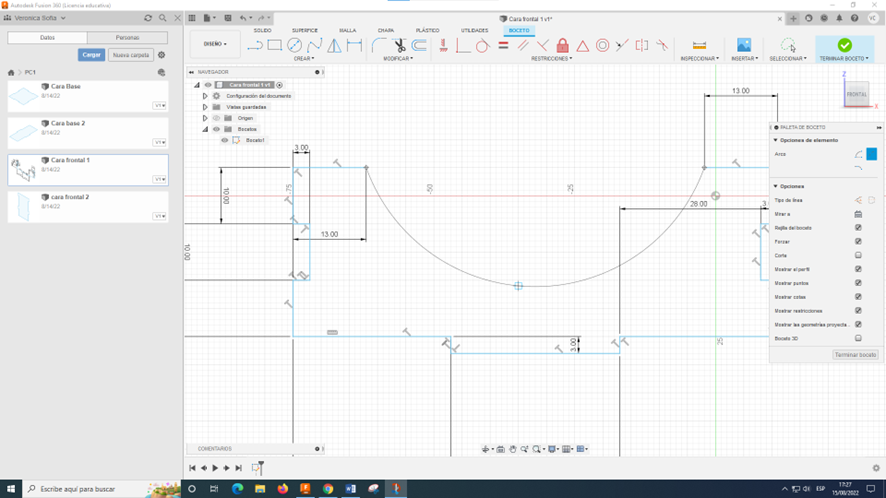

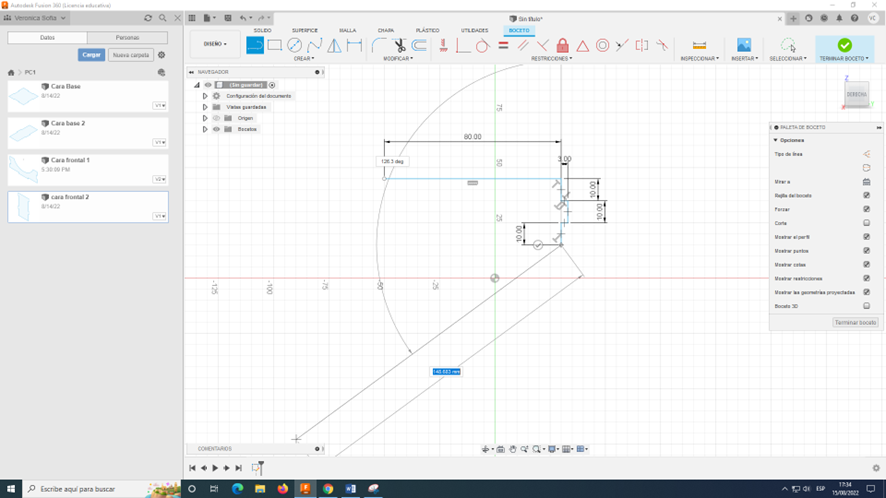
Empecemos como todas las veces dando clic a “crear boceto” luego selecciona la cara frontal luego da clic a la opción de “línea” y empieza por el lugar que más te guste siguiendo las medidas del plano ahora para llegar a la parte de la media luna presionar da un clic en la opción crear y seleccionar la opción “arco” la primera que es de 3 puntos
Let's start like every time by clicking on "create sketch" then select the front face then click on the "line" option and start from the place that you like the most following the measurements of the plane now to reach the middle part Moon pressing clicks on the create option and select the "arc" option, the first one that is 3 points
Cara Frontal 2


Primero da un clic en “crear boceto” presiona cara frontal ahora te mostramos los siguientes planos que seguirás recuerda hacer clic en “línea” e iniciar por donde más te guste recuerda seguir las medidas y los milímetros de separación para que el plano te quede bien ahora al terminar da clic en “finalizar boceto” y listo presionas “guardar” y colocas el nombre
First click on “create sketch” press front face now we show you the following planes that you will follow remember to click on “line” and start where you like the most remember to follow the measurements and the millimeters of separation so that the plane fits you well now when you finish click on "finish sketch" and that's it you press "save" and put the name
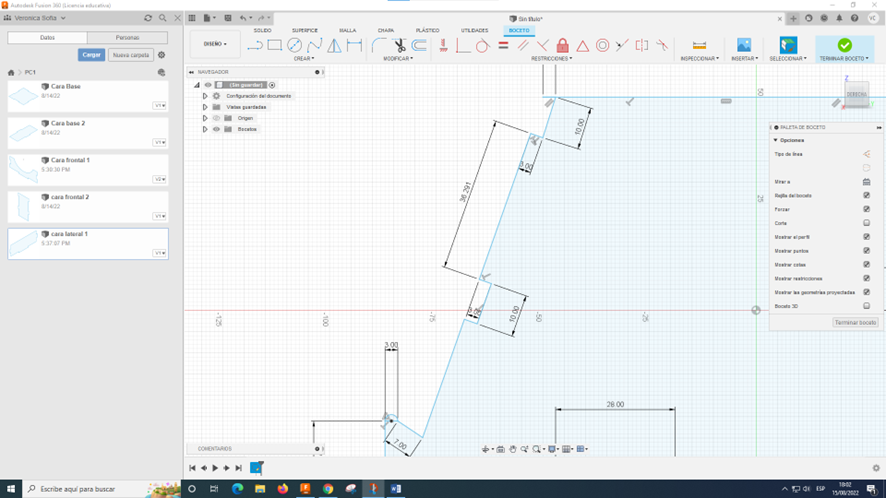
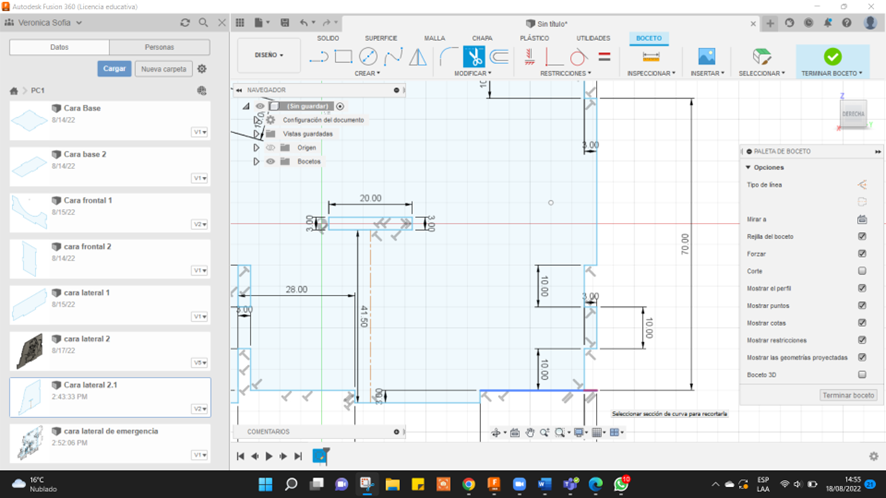
Cara Lateral 1
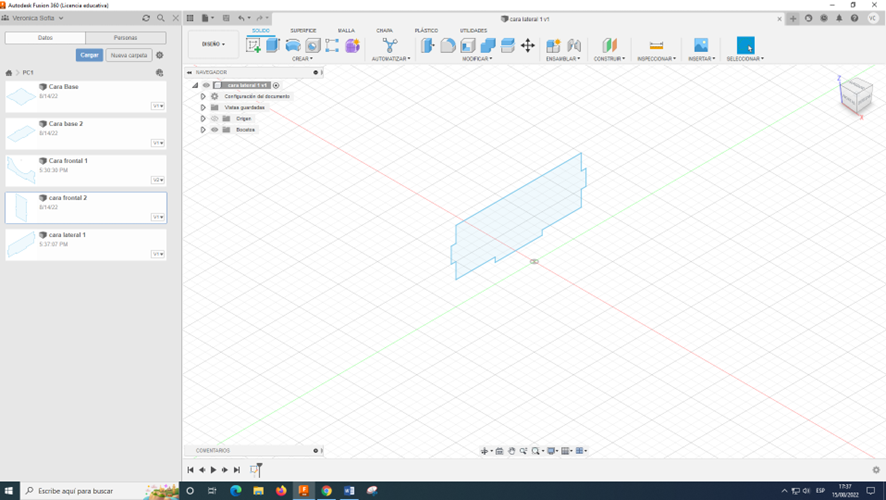
Volvamos a repetir el paso anterior de crear nuevo boceto, pero ahora seleccionaremos una nueva cara ahora escogemos el lado lateral inicia por el punto que más te guste y siempre recordando los milímetros de distancia
Let's repeat the previous step of creating a new sketch, but now we will select a new face now we choose the lateral side start with the point that you like the most and always remembering the distance millimeters
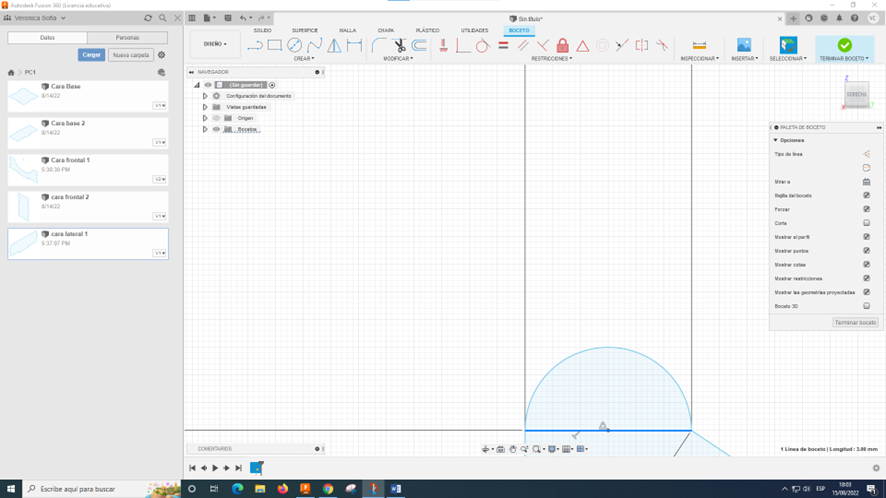
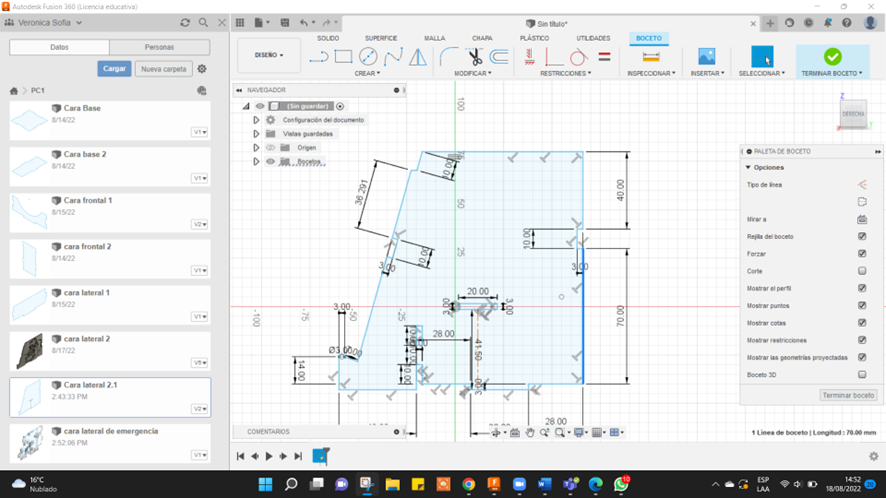
Cara Lateral 2.1
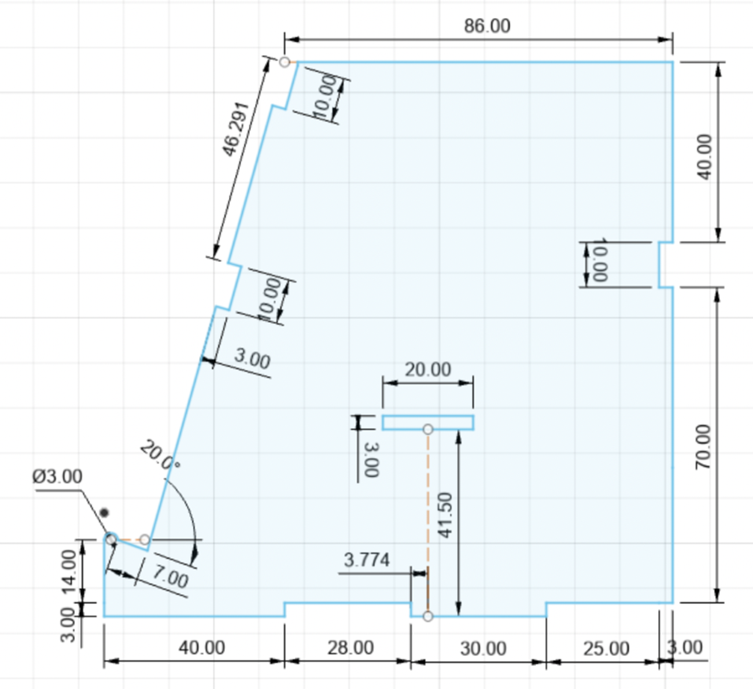


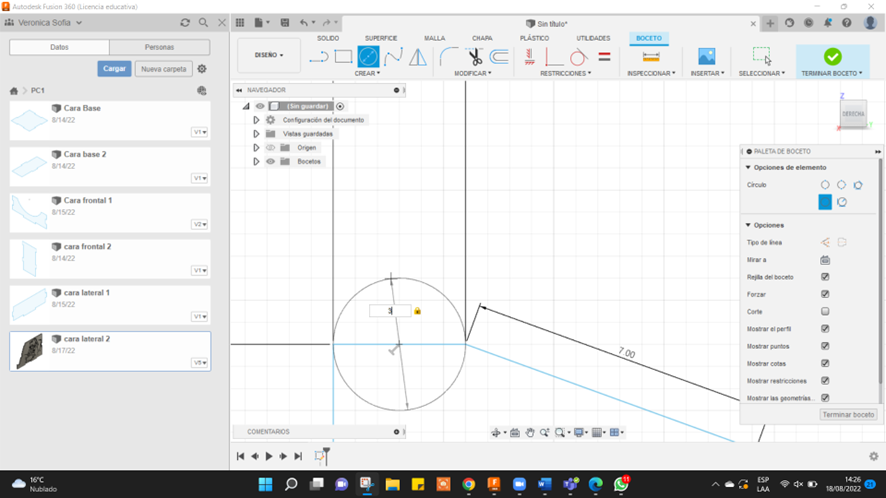
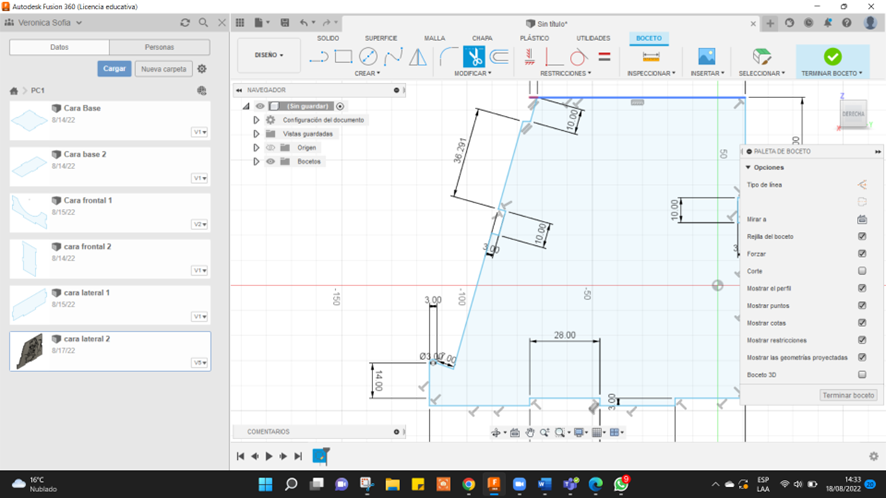
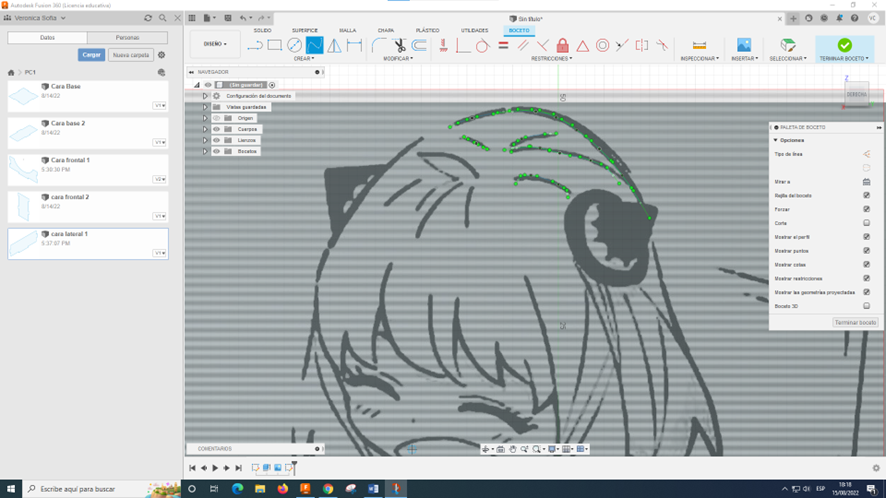
Iniciemos dando clic a “crear boceto” y escoge la cara lateral da un clic a la opción “línea” y empieza desde el lugar que más prefieras es recomendable el que tiene una medida clara para que puedas guiarte mejor y recuerda seguir los planos a detalle cuando llegues al medio círculo has una línea de 3 milímetro y agarra la opción circulas de la circunferencia y conecta esos 2 puntos de separación al hacer eso tú con la opción de recorte y eliminación tú borras la parte media y baja y la eliminas y sigues desarrollando el plano con las medidas necesarias hasta terminar recuerda que la cara lateral 2.1 debe ser casi similar que la siguiente pieza que es la 2.2
Let's start by clicking on "create sketch" and choosing the side face, click on the "line" option and start from the place that you prefer the most, it is recommended the one that has a clear measurement so that you can guide yourself better and remember to follow the plans in detail when you get to the half circle make a 3-millimeter line and grab the circle option of the circumference and connect those 2 separation points by doing that you with the cut and delete option you erase the middle and lower part and delete it and continue developing the plan with the necessary measurements to finish remember that the side face 2.1 must be almost similar to the next piece that is 2.2
Cara Lateral 2.2


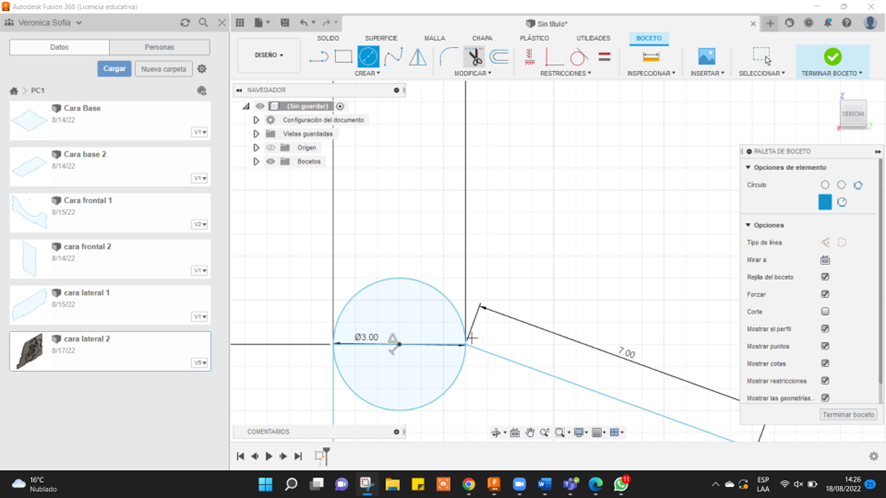
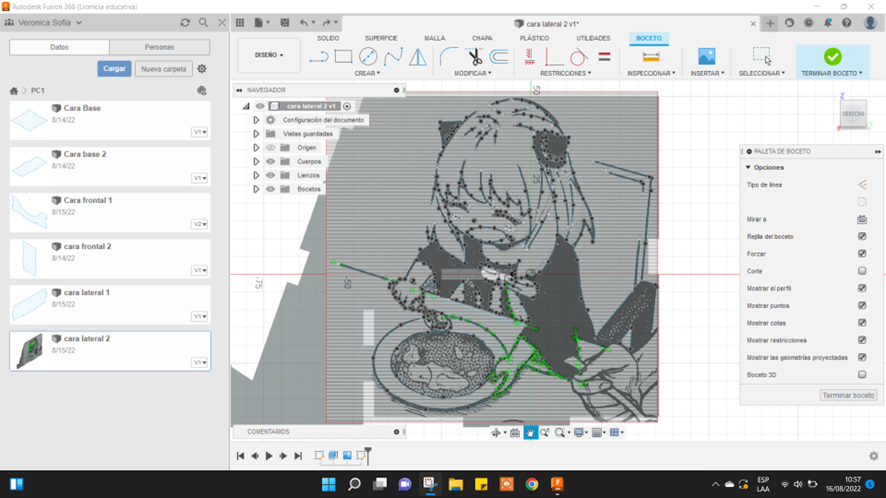
Hagamos un nuevo plano y dale clic a la opción “crear boceto” selecciona el mismo plano y cara de la anterior vez ahora seguiremos las siguientes medidas es más recomendable empezar por la parte superior del plano iniciamos desde el punto de la parte superior hasta el punto de la parte inferior luego haces una pequeña subida de 17 mm y luego una línea de 3 mm y en el punto centro le haces un círculo que luego borras las partes innecesarias y vas siguiendo el plano y en la parte del lado derecho del plano debes cambiarlo porque no es igual al otro plano
Let's make a new plane and click on the option "create sketch" select the same plane and face from the previous time now we will follow the following measurements it is more advisable to start at the top of the plane we start from the point of the top to the point from the lower part then you make a small elevation of 17mm and then a 3mm line and in the center point you make a circle which then erases the unnecessary parts and you follow the plane and in the part on the right side of the plane you have to change it because it is not the same as the other plane
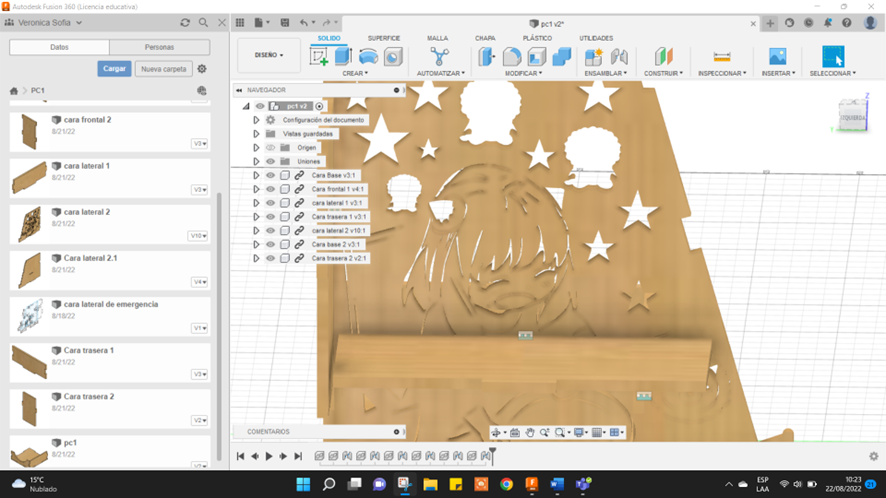
Dibujo De La Cara Lateral 2.2
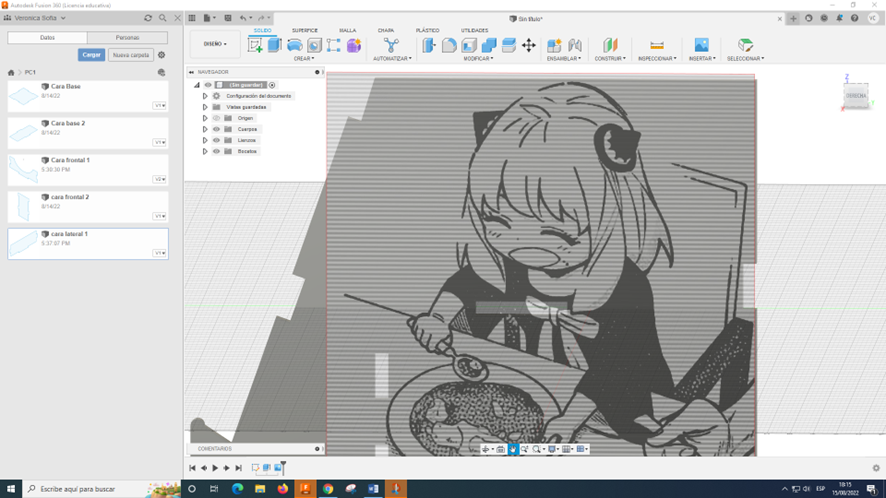
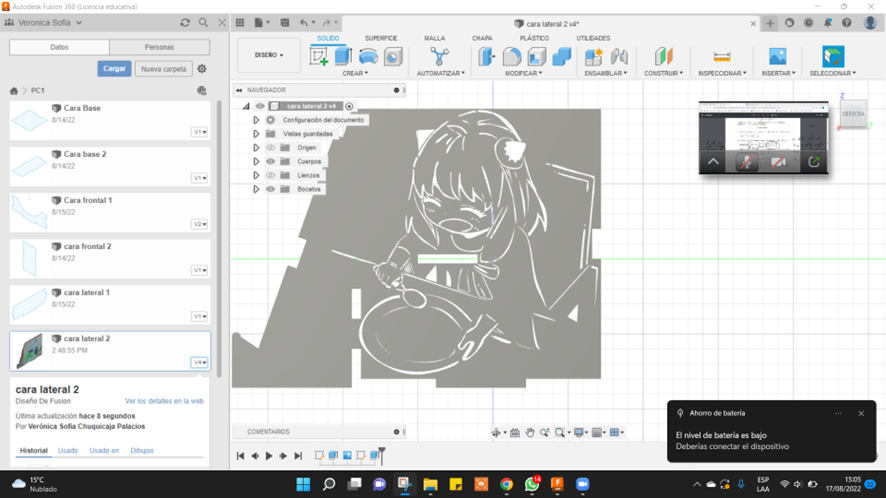
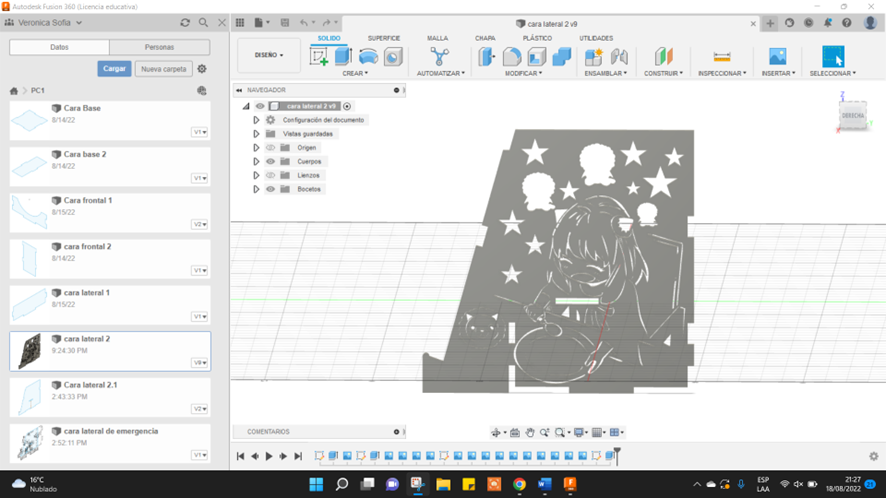
primero escoge una imagen que mas te guste descárgalo en formato png luego con la opción que esta ahí de lienzo inicia colocándolo en el plano correspondiente al que mira tu pieza al colocar la imagen con la opción del costado de linea que esta al cotado de un circulo presionas y vas bordeando el dibujo suavemente dándole forma al finalizar presionas las piezas que quieres eliminar y pones extruir y la opciones -3 y aceptar
first, choose an image that you like the most and download it in png format then with the option that is there of canvas start placing it in the plane corresponding to the one that your piece looks at when placing the image with the option of the side of the line that is next to a circle you press and go around the drawing gently shaping it at the end you press the pieces that you want to eliminate and put extrude and the options -3 and accept
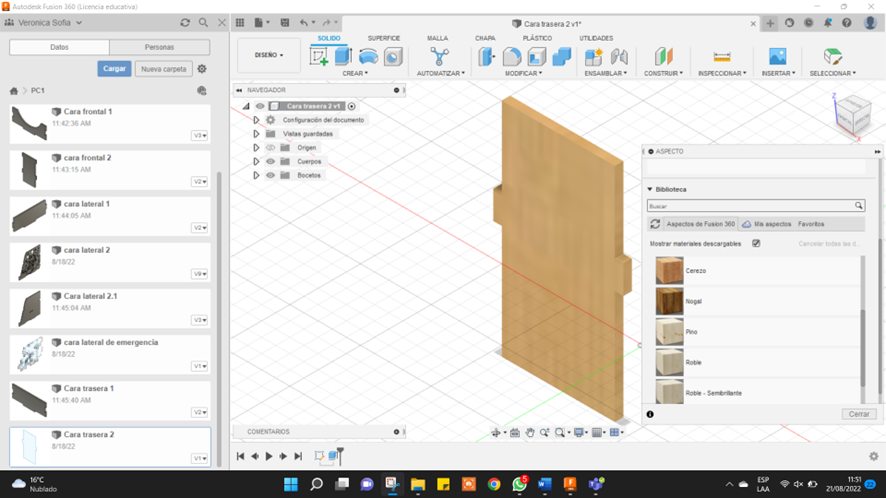
Cara Trasera 1
Iniciamos dando clic a “crear boceto” escogemos el lado correspondiente para hacer el plano de la cara trasera ahora damos una revisión al plano y comenzamos dando un clic a “linea” luego empieza por el lado que mas te guste
We start by clicking on "create sketch" we choose the corresponding side to make the plane of the back face now we review the plane and we start by clicking on "line" then start with the side that you like the most
Cara Trasera 2
Iniciemos escogemos el lado donde van a hacer el plano luego inicien con “linea” en el lugar que mas le guste siguiendo los planos a medida y detalle
Let's start, we choose the side where the plan is going to be made, then start with "line" in the place that you like the most, following the custom plans and detail
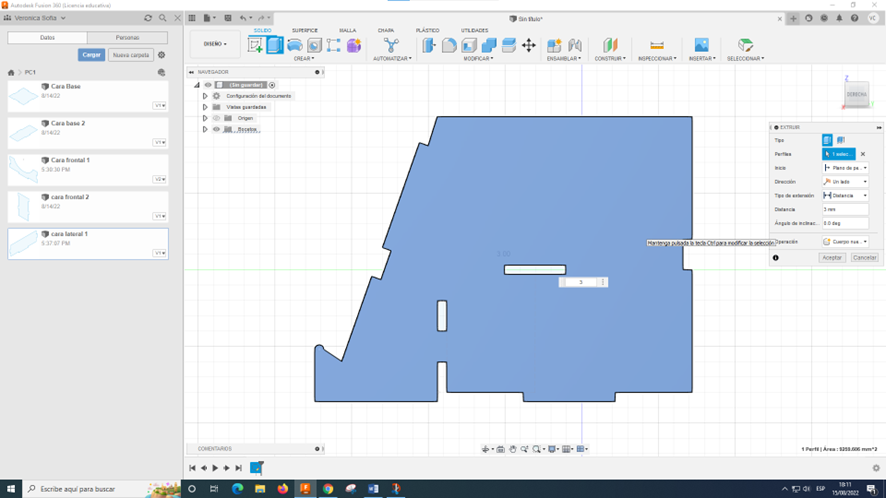
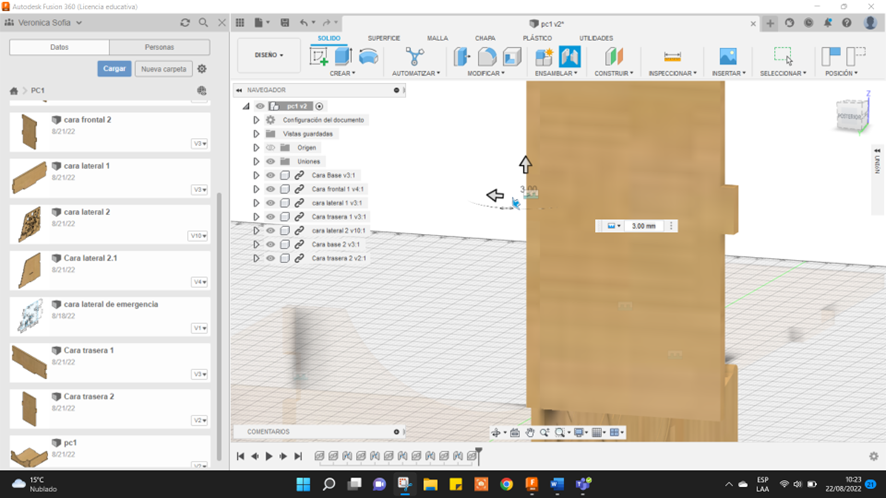
Grosor De Cada Pieza Con 3 Mm
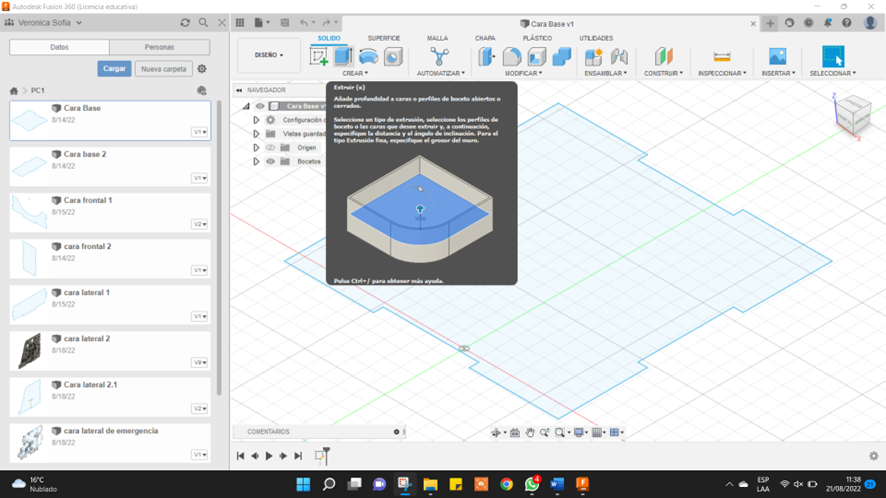

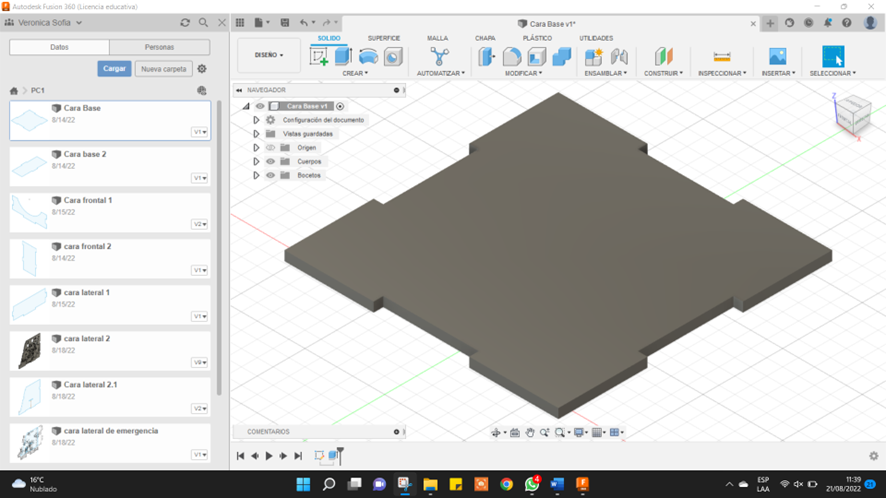
Iniciamos escogiendo un plano y luego le damos un clic a “extruir” le damos 3mm de grosor y luego le damos un clic a “aceptar” y así sigue con los demás
We start by choosing a plane and then we click on “extrude” we give it 3mm thickness and then we click on “accept” and so on with the others
Darle Color a Las Piezas

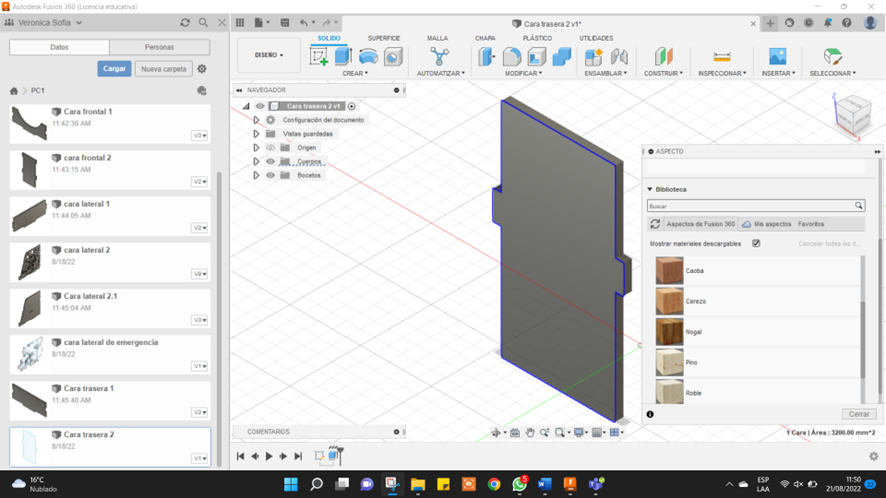
Iniciamos seleccionando una pieza y presionando clic izquierdo nos aparece las opciones y damos un clic a la opción “aspecto” ahí te va a aparecer muchas opciones escoge el tono que mas te guste y lo arrastras hacia la pieza
We start by selecting a piece and pressing the left mouse button, the options appear and we click on the “aspect” option, many options will appear there, choose the tone that you like the most and drag it towards the piece
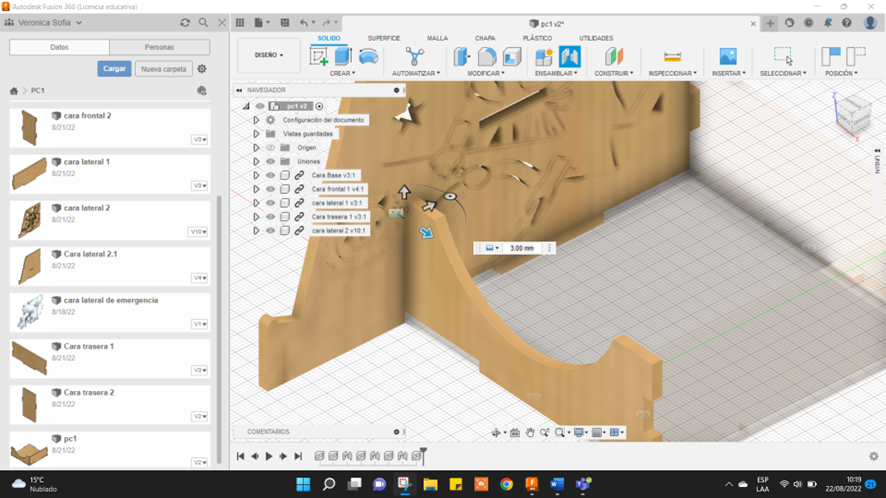
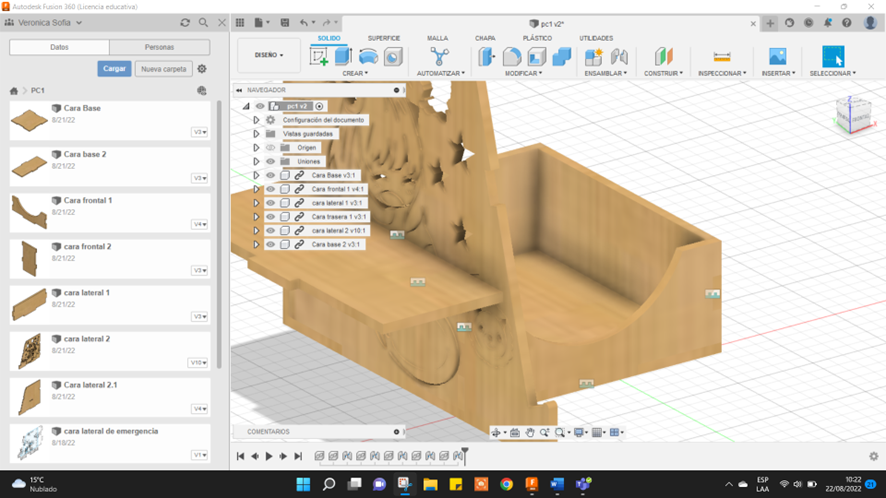
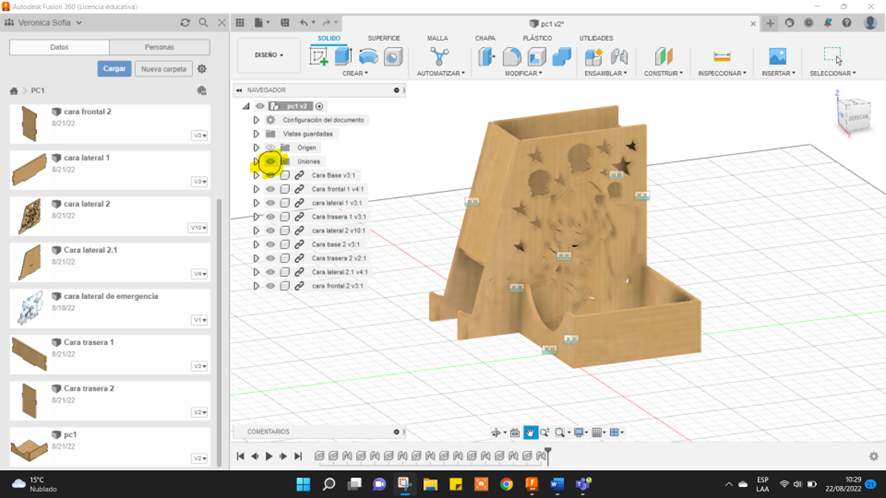
Se Debe Tener 9 Piezas Para El Ensamble
Recuerda que todas las piezas deben tener el mismo color y mismo grosor es muy importante para este trabajo
Remember that all the pieces must have the same color and the same thickness is important for this work
Ensamble En Video
https://drive.google.com/file/d/1kNC74g-stoYi_r2KlKRxokxnNmXtginb/view?usp=sharing
Ensamble
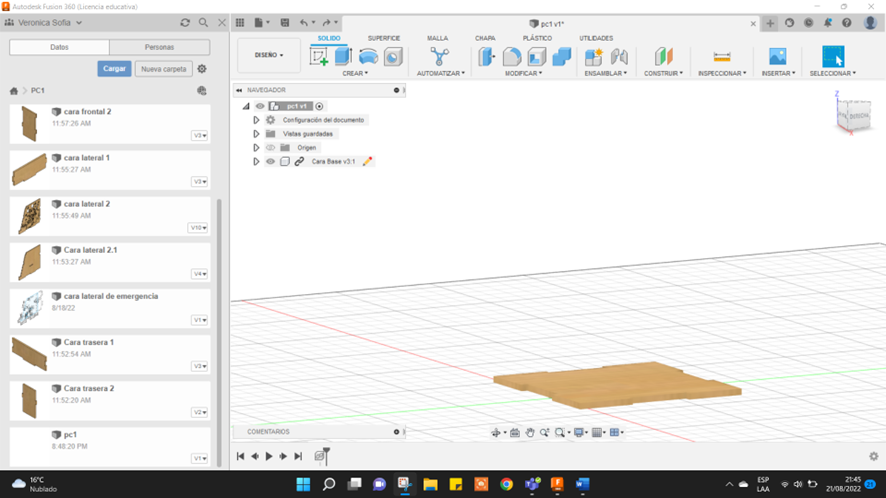
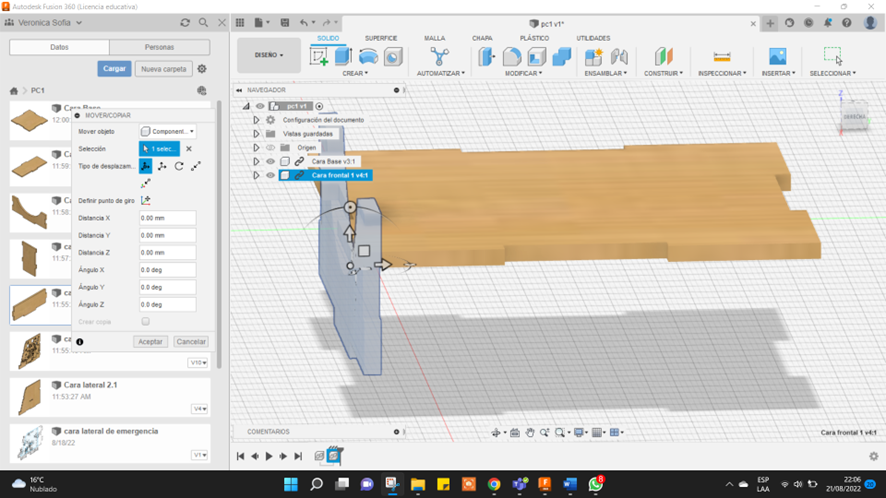
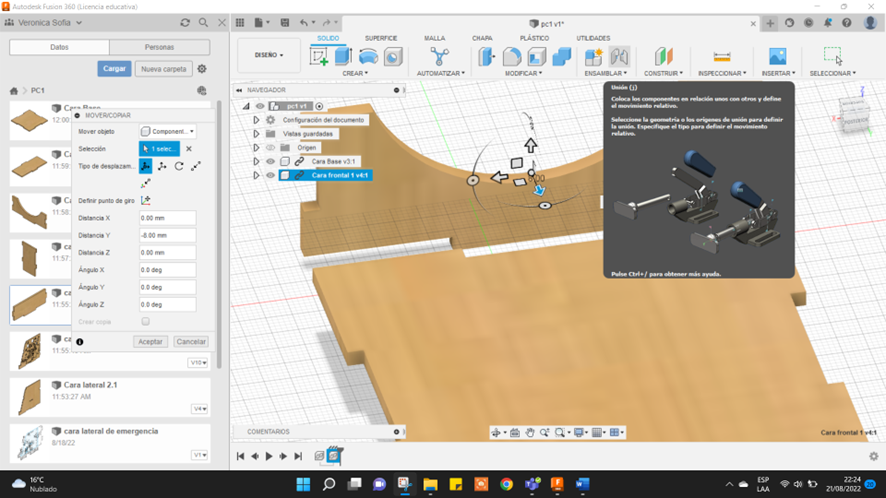
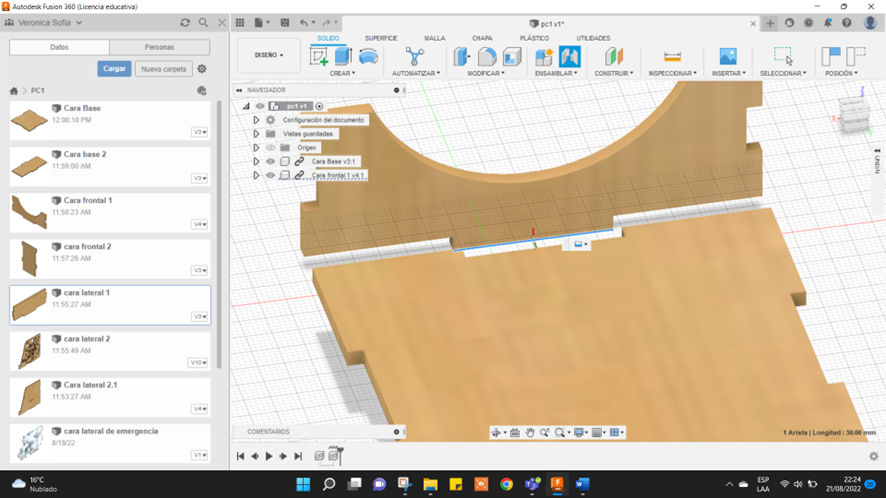
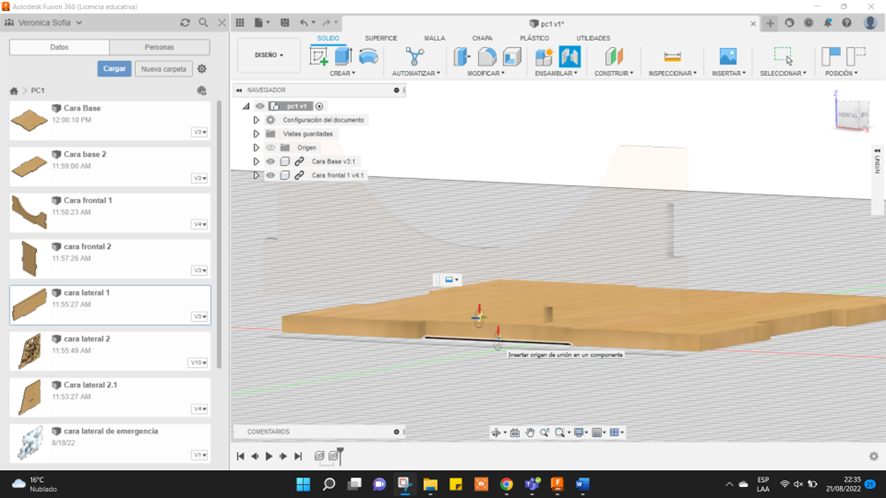
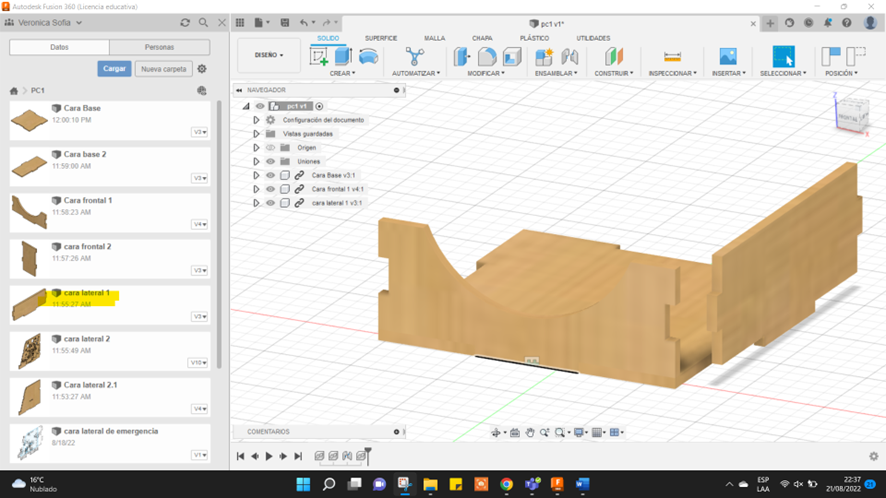
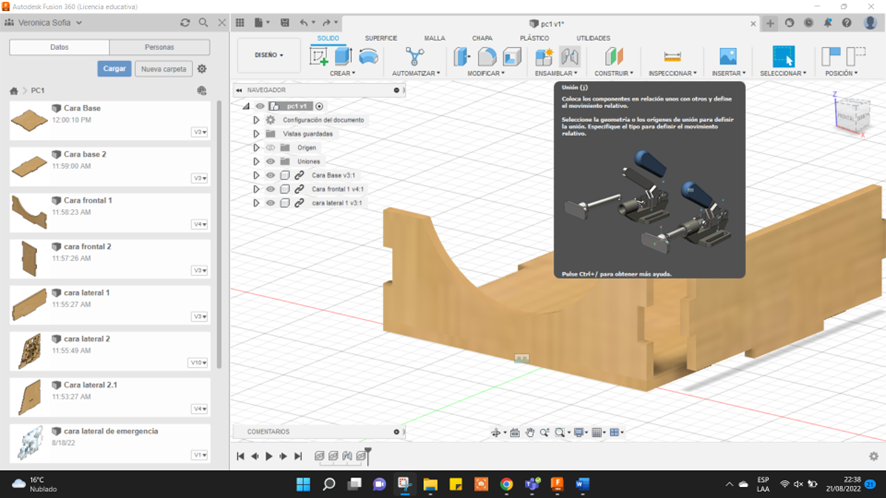
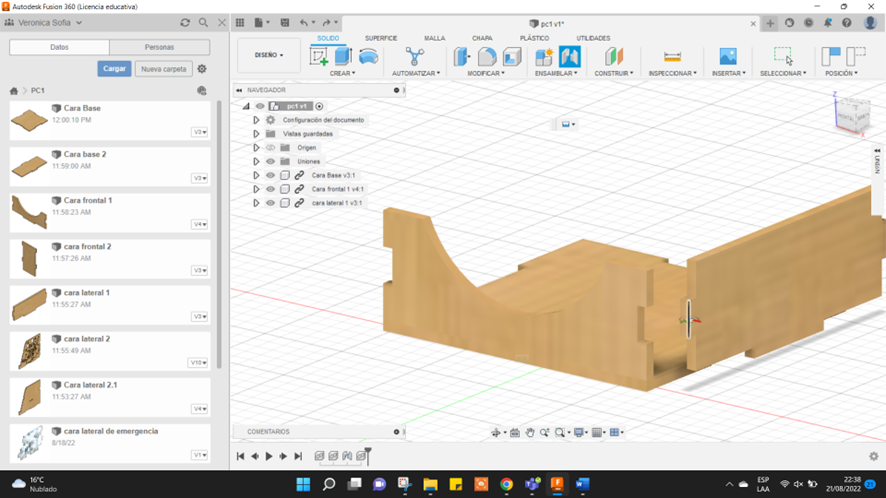
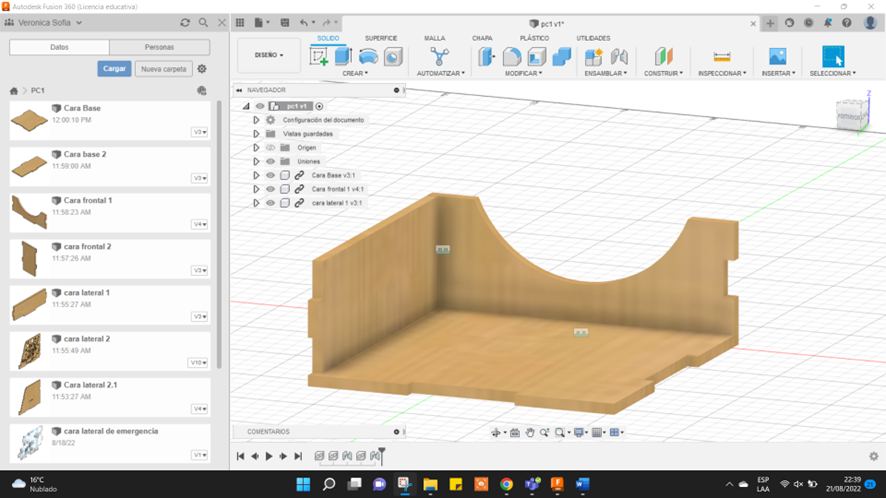
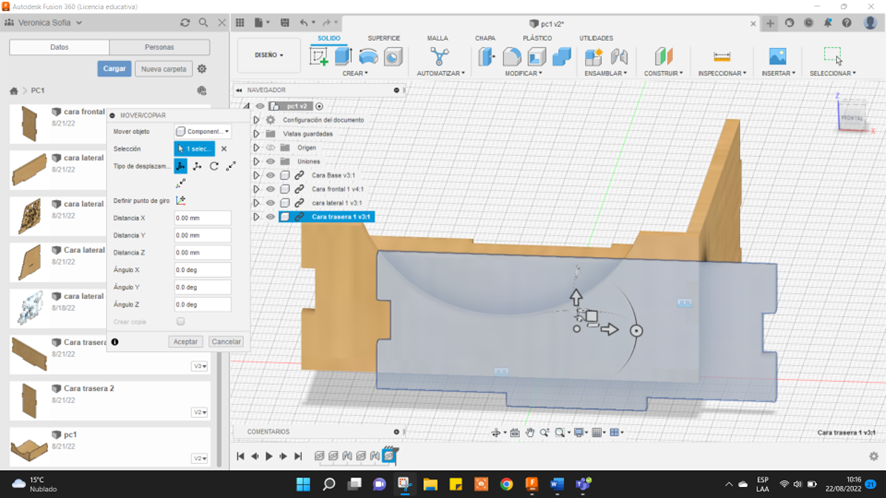
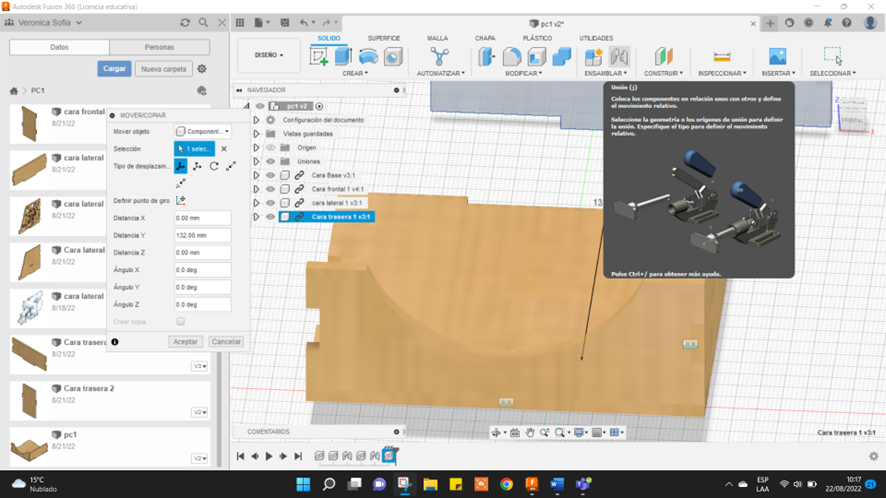
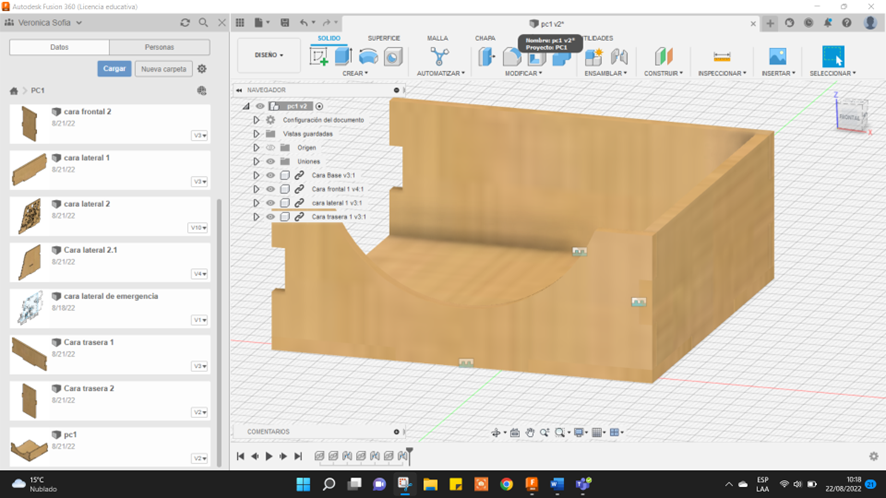
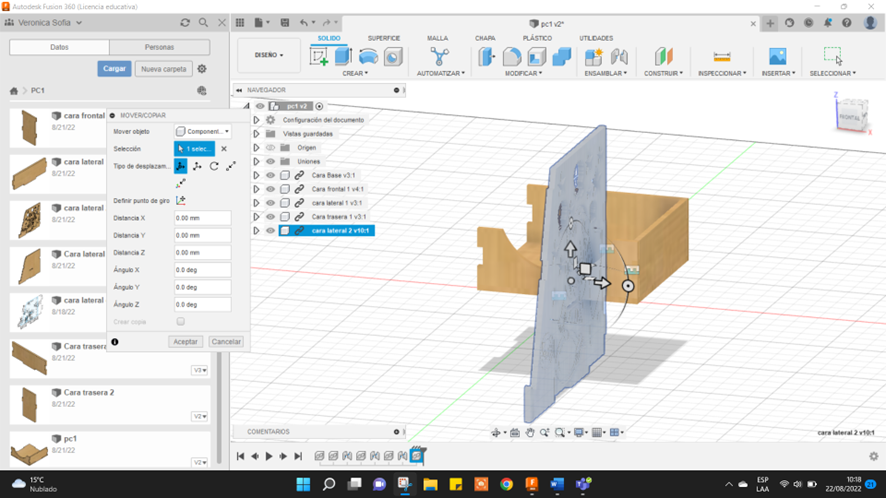

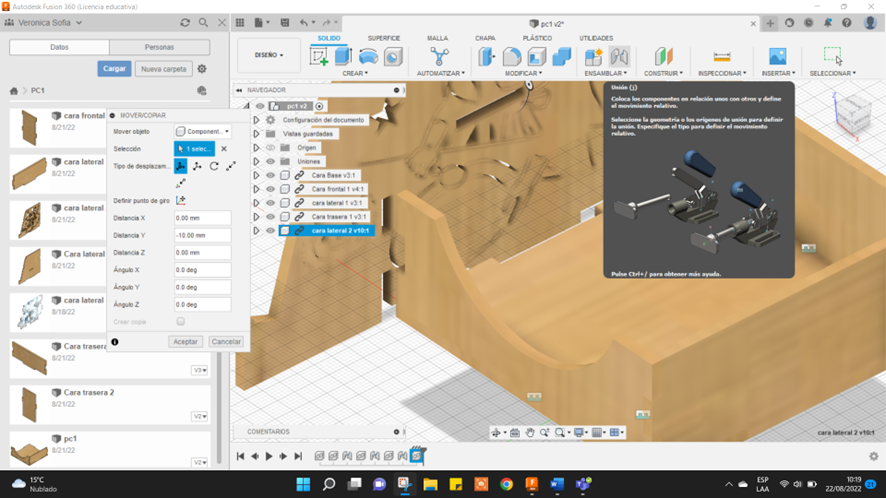
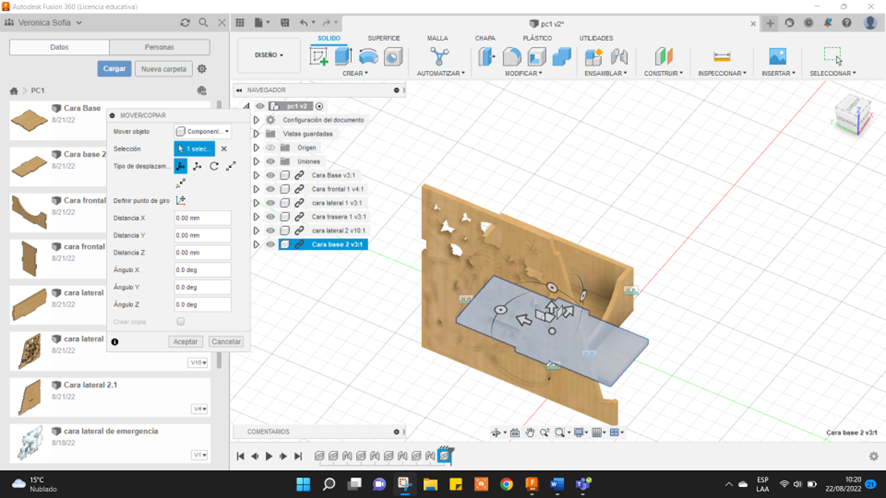
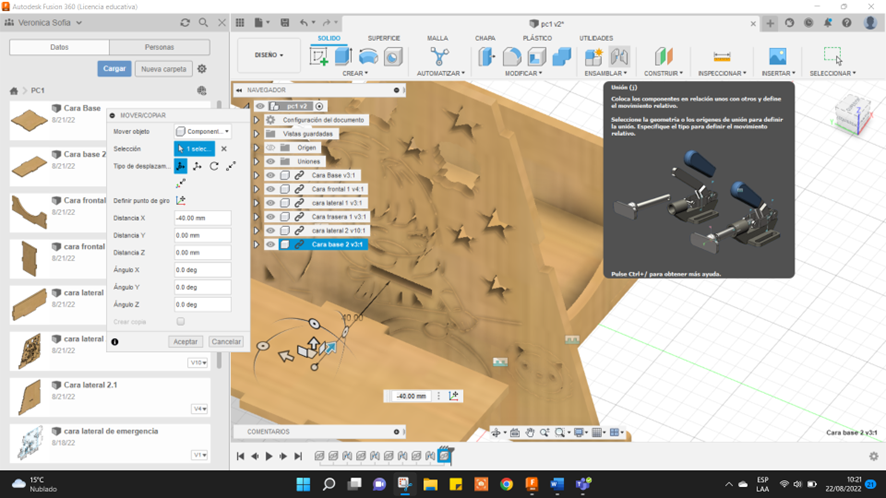
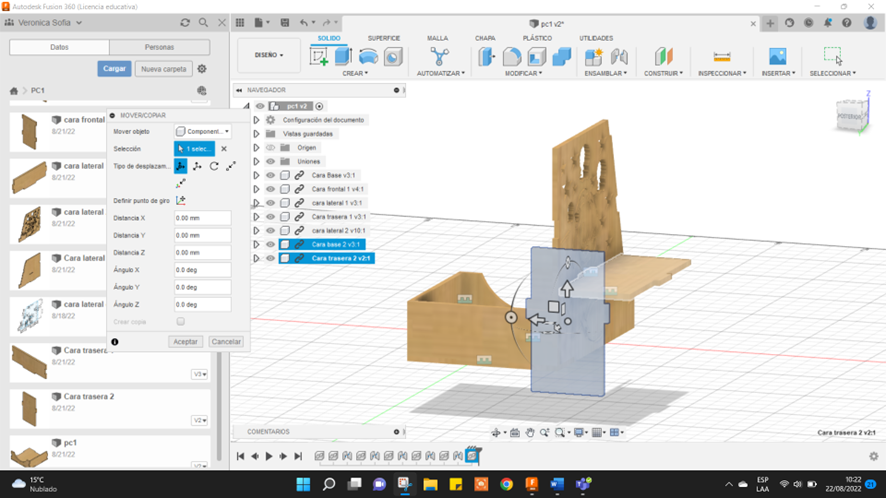
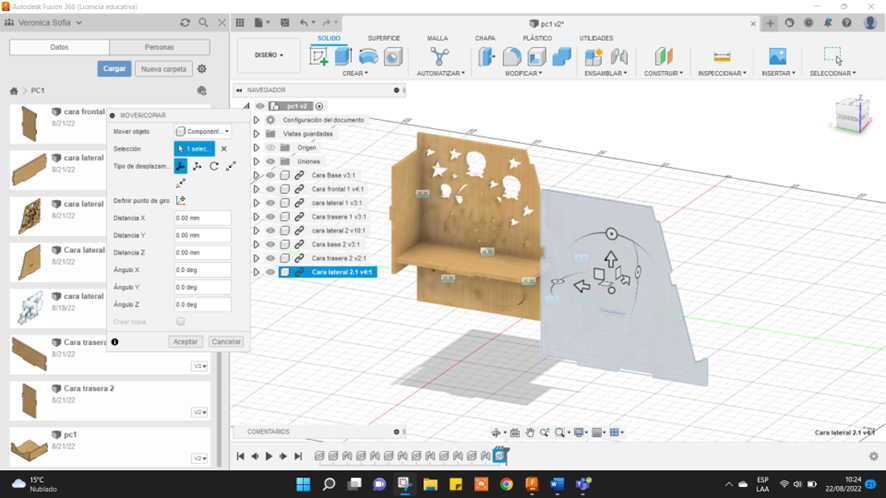
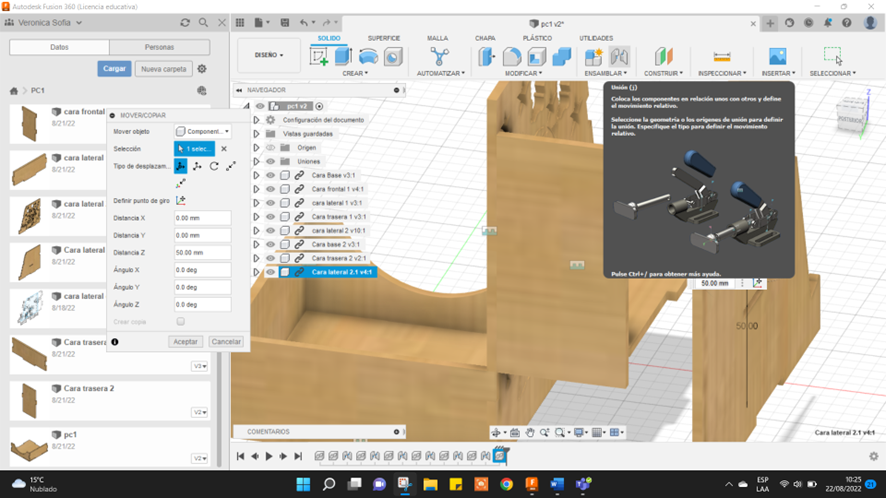

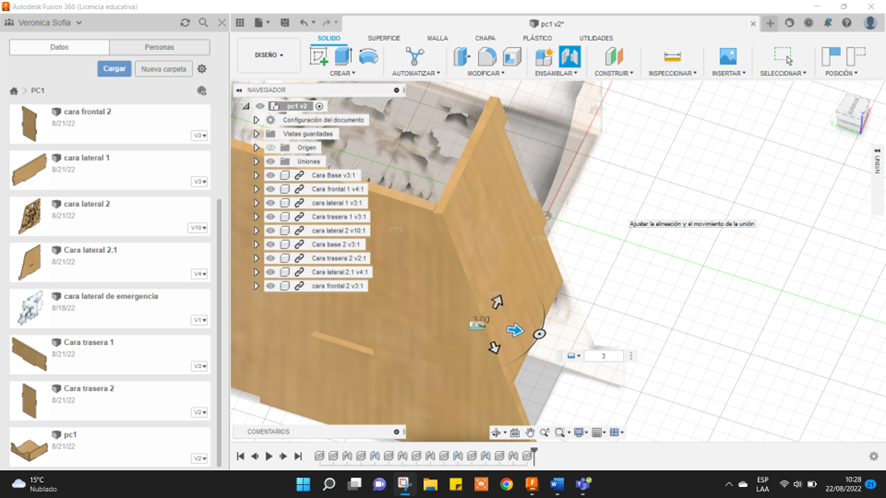
Primero hacemos una carpeta con el nombre de como decidiste llamar a este trabajo y luego colocas la primera pieza base arrastrando luego colocamos la cara frontal 1 en la parte izquierda de nuestra base para poder ordenarlo correctamente en parte de la barra inicial hay una opción de unión con eso puedes unir las aristas de las piezas recuerda que tiene que encajar bien ubica la pieza en el lugar correspondiente y con un clic en “unión” unes todas las piezas
First, we make a folder with the name of what you decided to call this work and then you place the first base piece by dragging then we place the front face 1 on the left side of our base to be able to order it correctly in part of in the initial bar there is an option of union with which you can join the edges of the pieces remember that it has to fit well place the piece in the corresponding place and with a click on “union” you join all the pieces
Como Quitar Las Uniones Del Ensamble

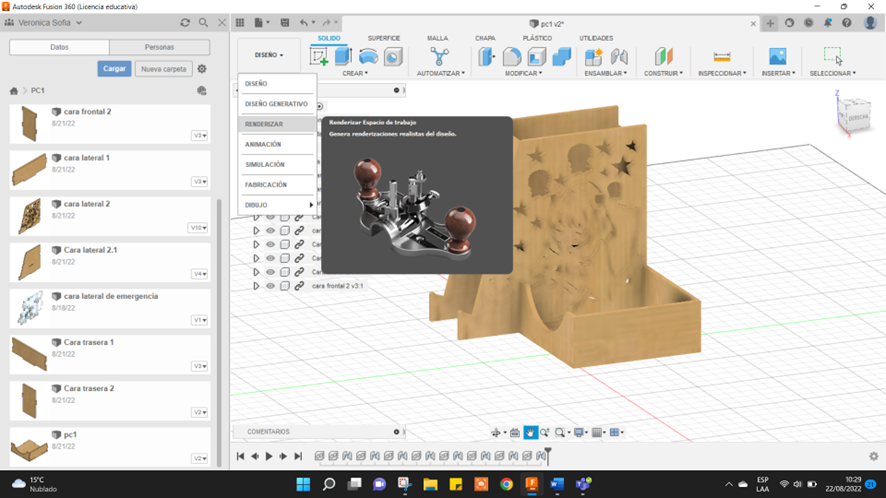
Renderizado

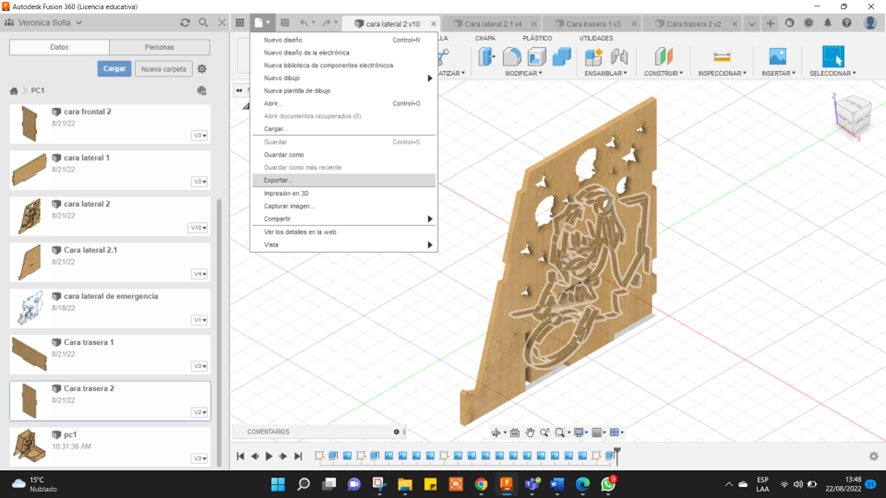
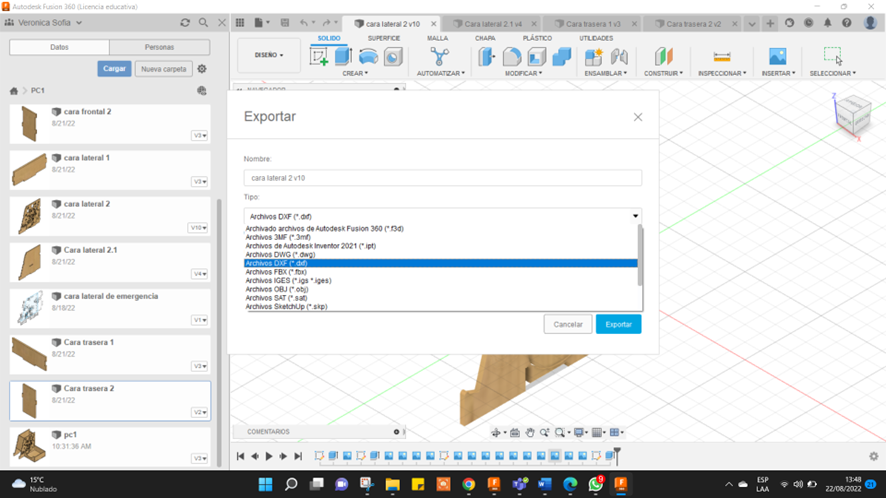
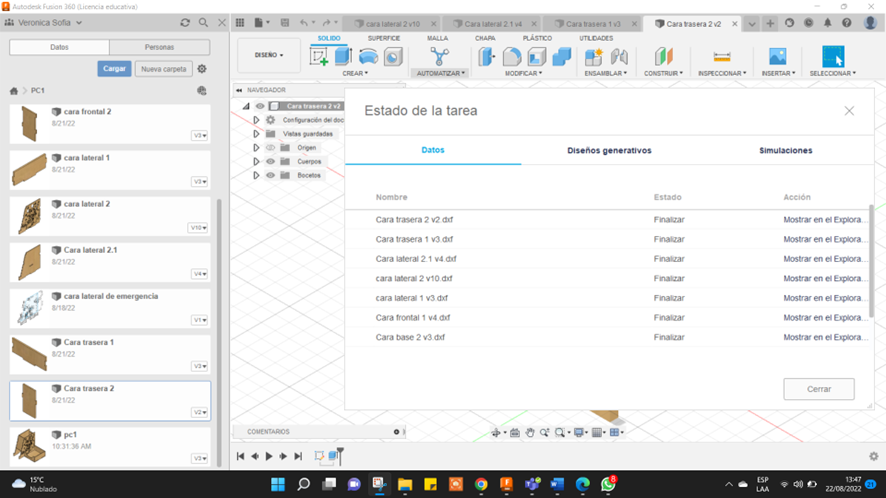
Como Convertir Archivo DXF
Final