Pop Art Negatives for Lumi Inkofilm
7527 Views, 90 Favorites, 0 Comments
Pop Art Negatives for Lumi Inkofilm

At our recent Lumi Build Day, we decided to make a pop art themed piece as a tribute to the founders of our makerspace. The important part was getting the negatives just right so we could get more of a painted on look than an actual photo and the right features were visible.
Things you'll need
Inkofilm
A computer running GIMP
An inkjet printer
A nice digital photo
Things you'll need
Inkofilm
A computer running GIMP
An inkjet printer
A nice digital photo
Open the Picture in GIMP
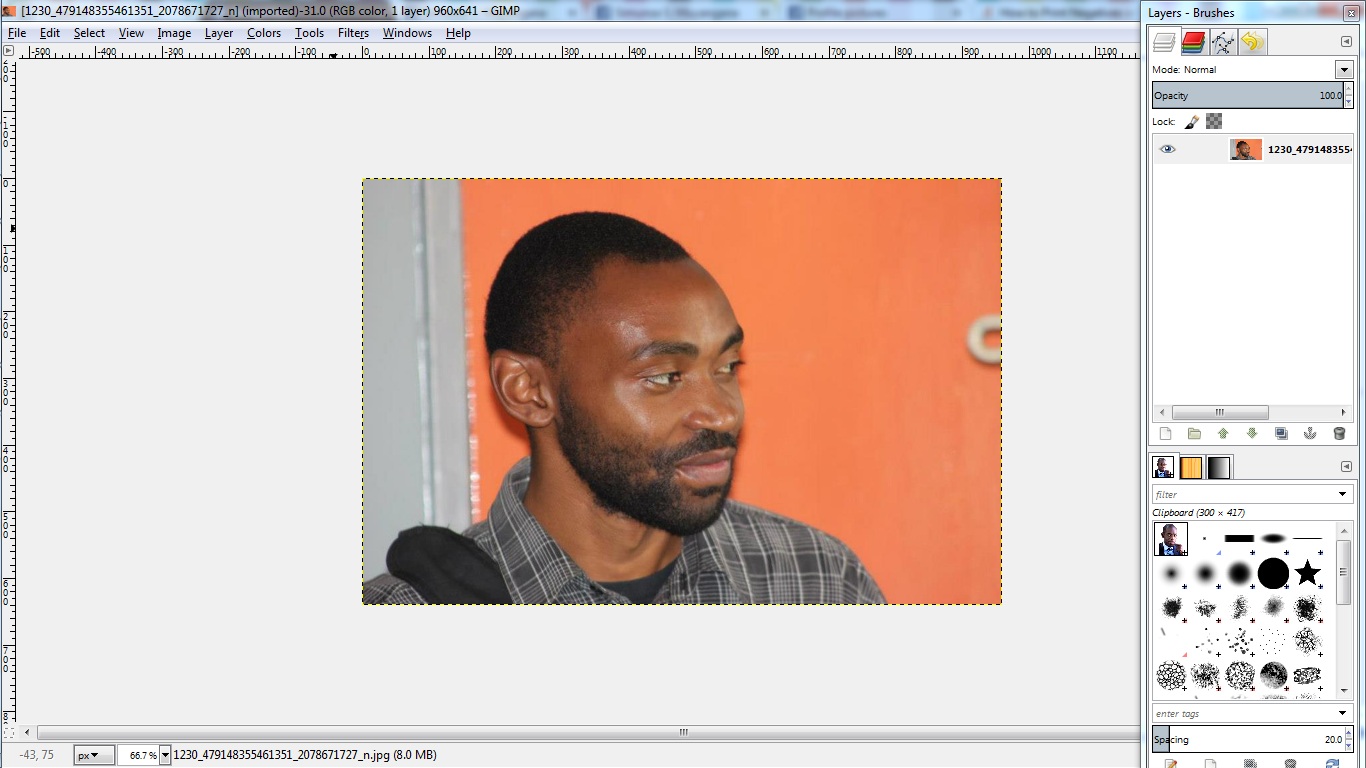
I'm choosing GIMP because it's free and available on all operating systems so there's no reason for you not to have it :)
You can download it from www.gimp.org
To make things easier, make sure you choose a picture that has a lighter background and you have a clear shot of the persons facial features. The best pics are casual portraits where the subject is unaware
You can download it from www.gimp.org
To make things easier, make sure you choose a picture that has a lighter background and you have a clear shot of the persons facial features. The best pics are casual portraits where the subject is unaware
Desaturate the Image
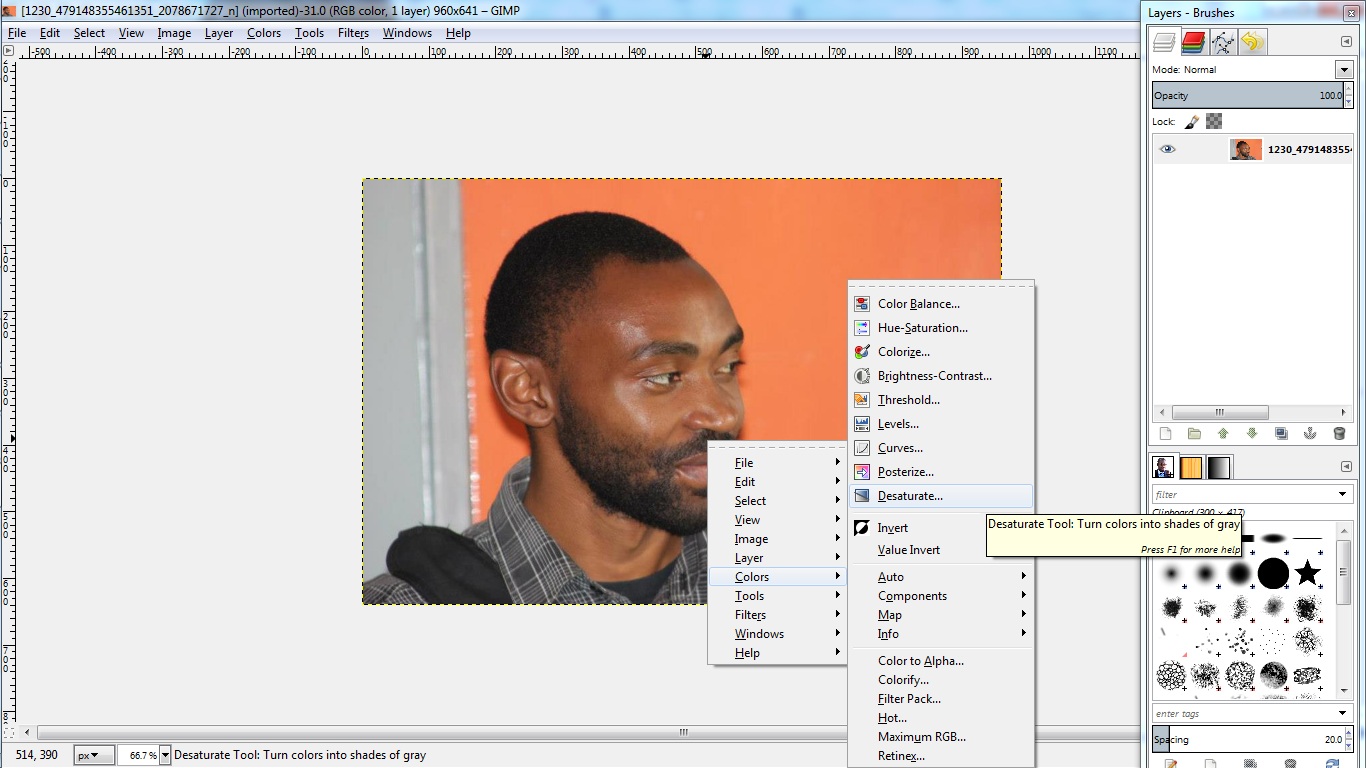
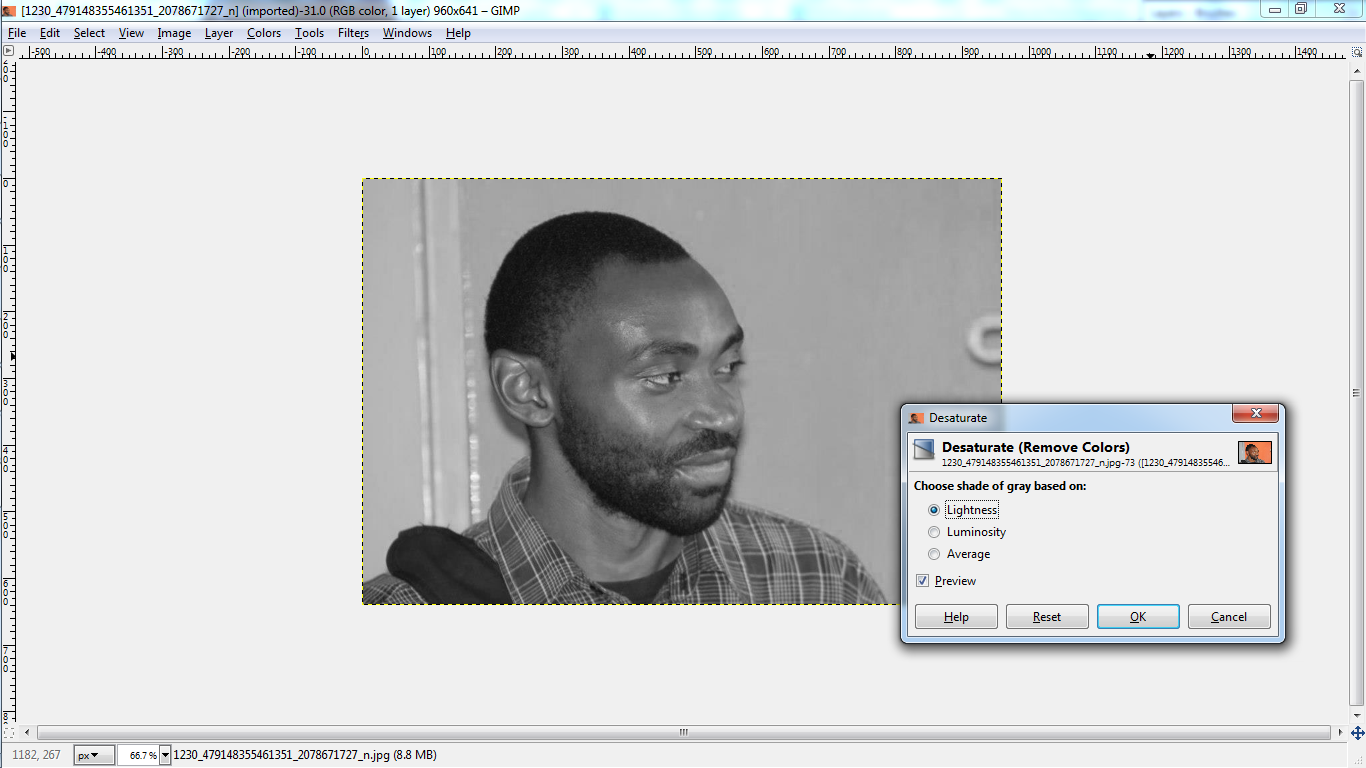
Inkofilm works best in grayscale or black and white so no need for color here.
Right click image > 'Desaturate...'
Right click image > 'Desaturate...'
Adjust Brightness/Contrast
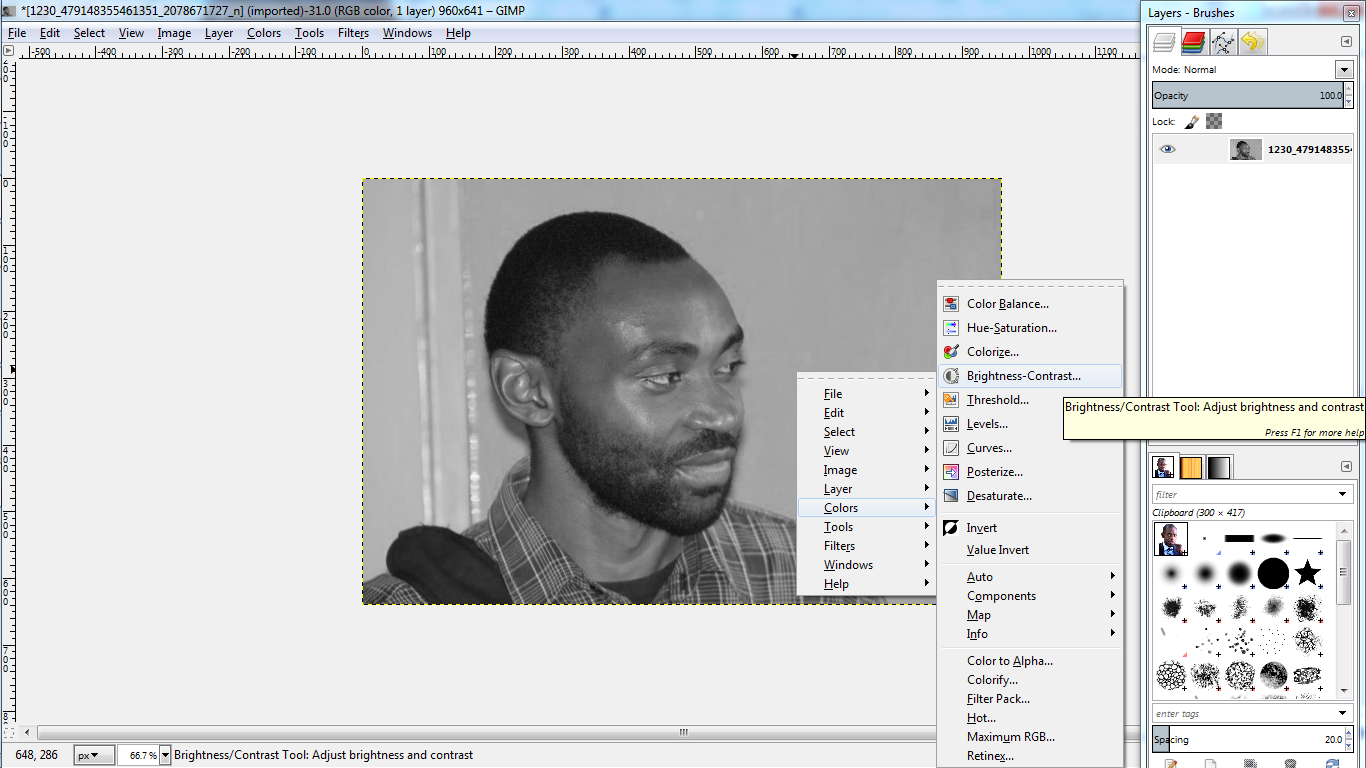
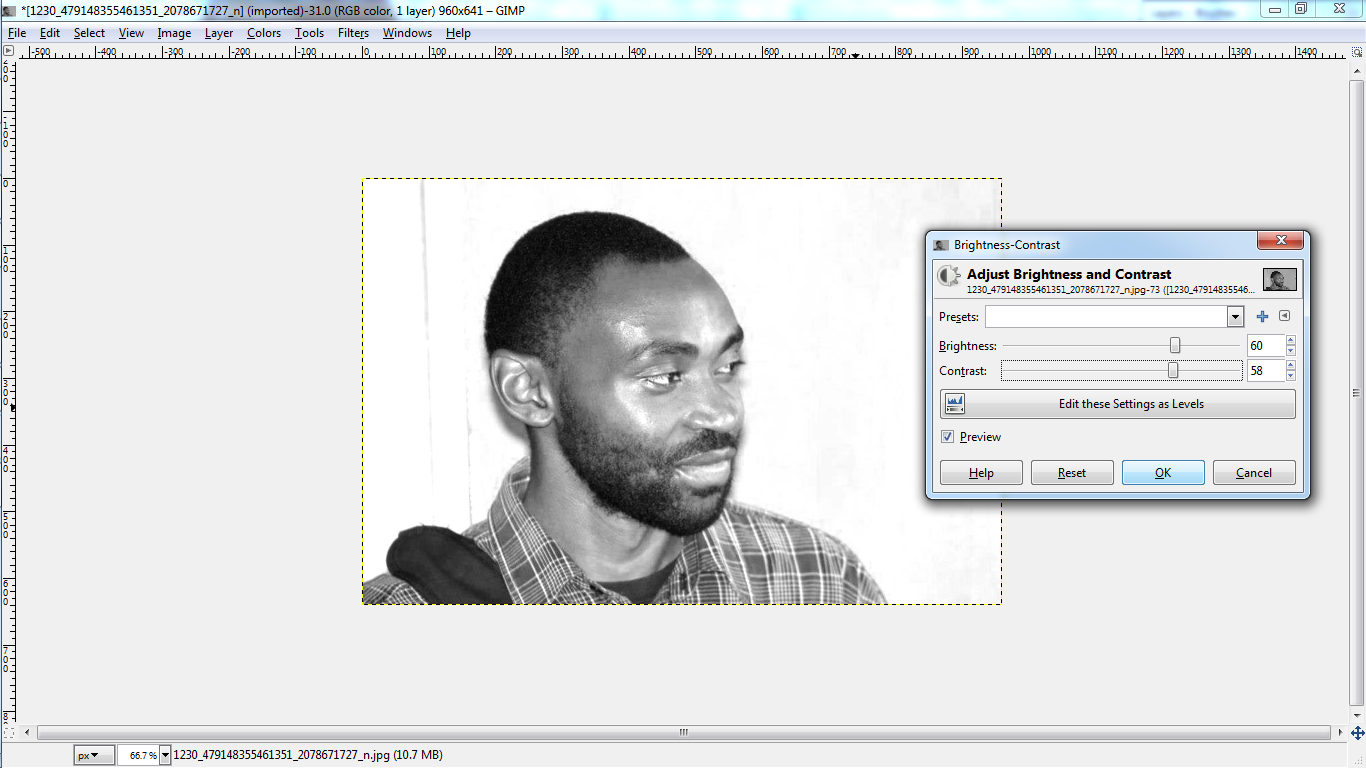
Next, adjust the Brightness/Contrast levels so you have clearly distinguished whites, grays and blacks
Duplicate Layer
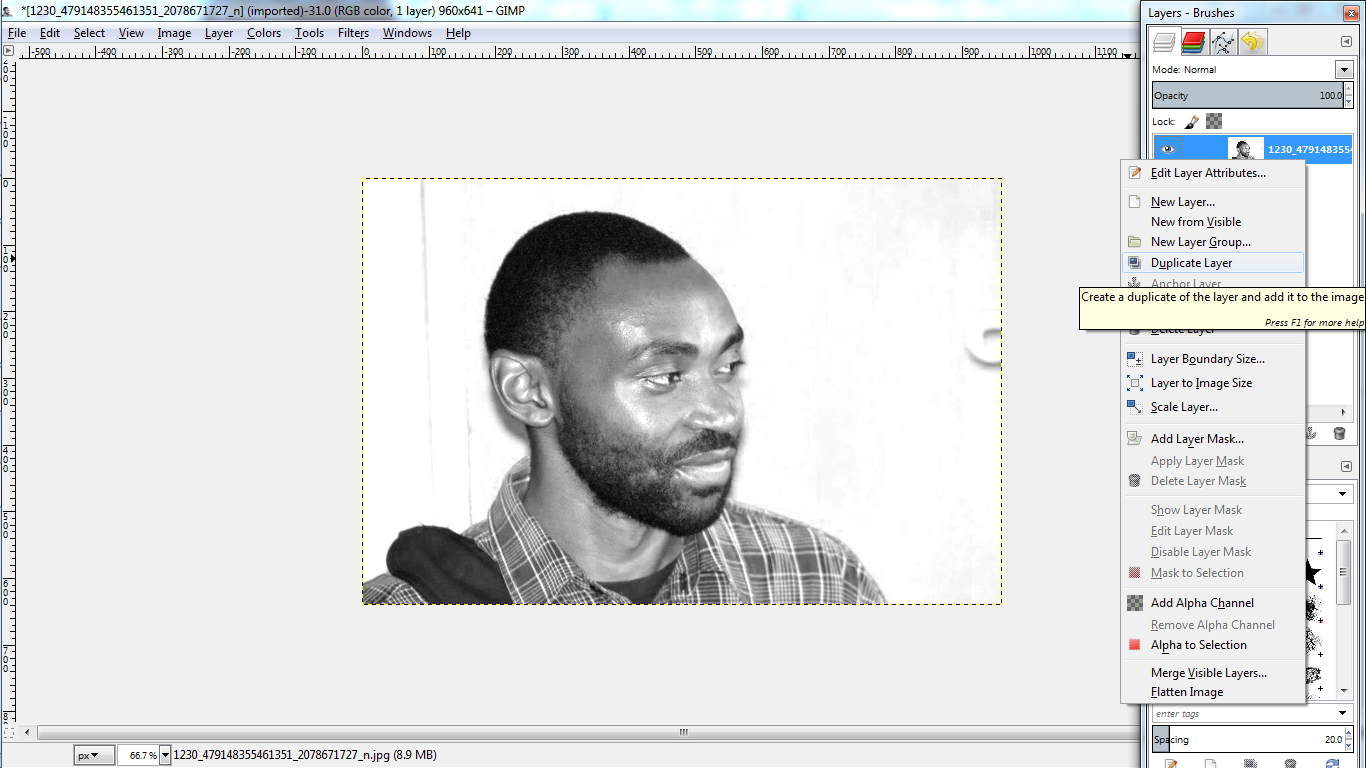
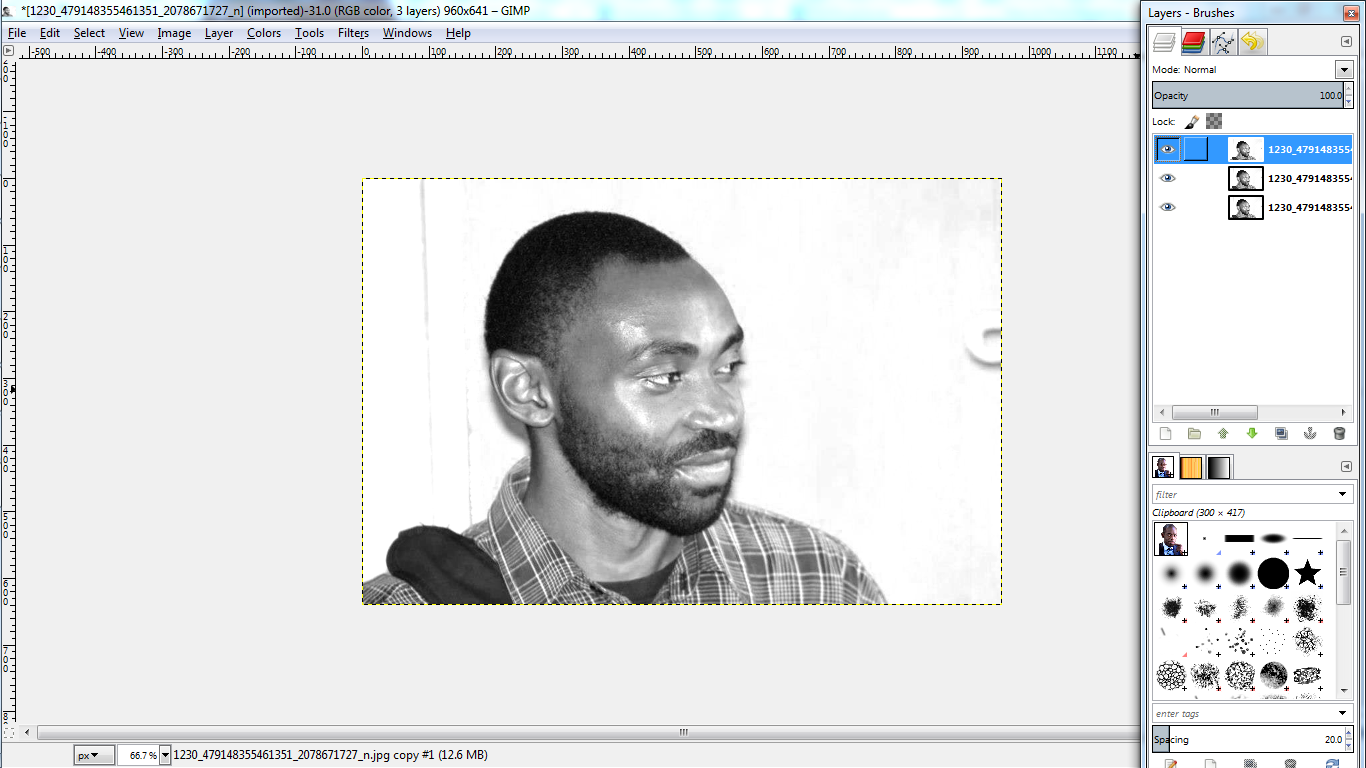
Then duplicate the layer at least 3 times by right clicking and selecting duplicate layer. These layers will each take one shade of gray. The more variations you want the more layers you should have.
Right click image in Layer toolbox > Duplicate Layer
Right click image in Layer toolbox > Duplicate Layer
Apply Threshold
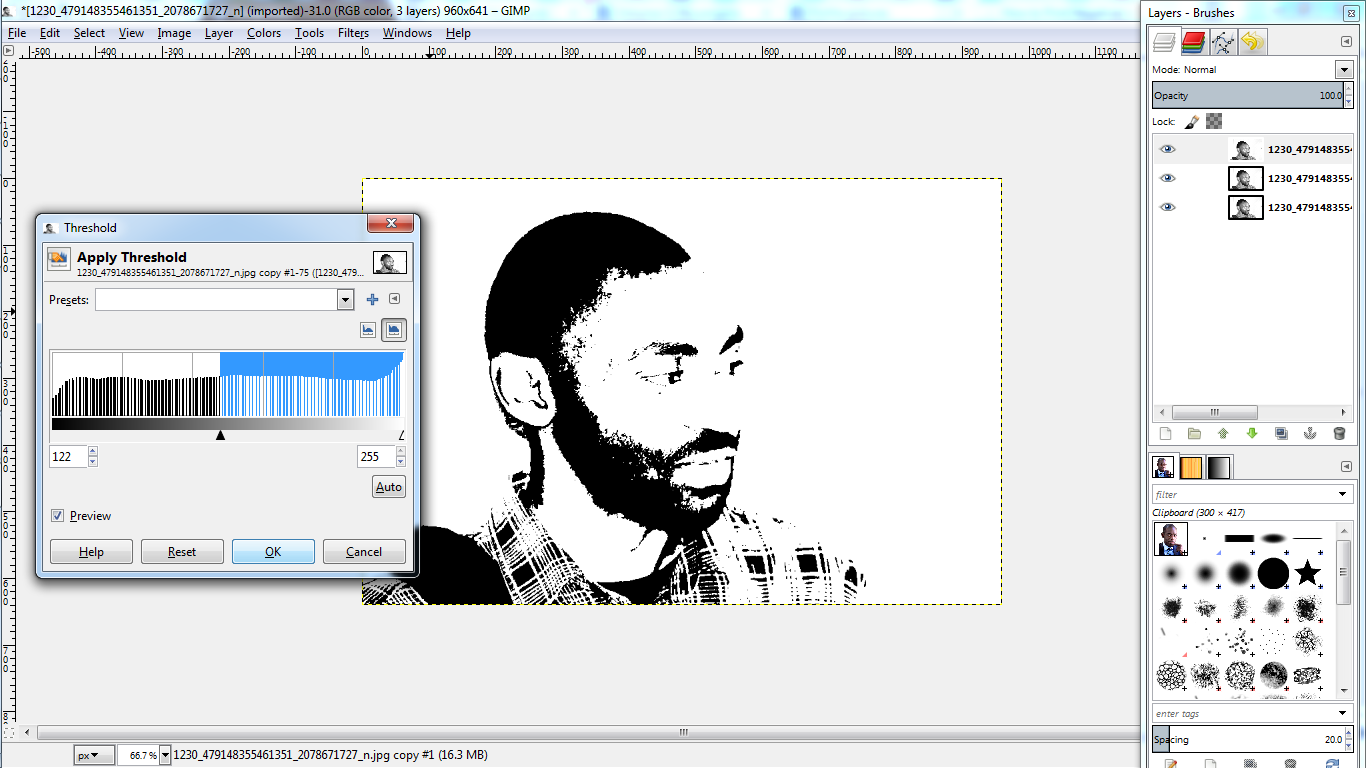
Next, select the top layer and make it a two tone image by using threshold. This is going to be your darkest layer so make suer you the features you want to be darkest are clear. With this layer I made sure that his pupils, eye brows and beard were clearly defined.
Right click image > 'Threshold...'
Slide the marker from side to side to get the right balance
Right click image > 'Threshold...'
Slide the marker from side to side to get the right balance
Reduce Opacity of Layer
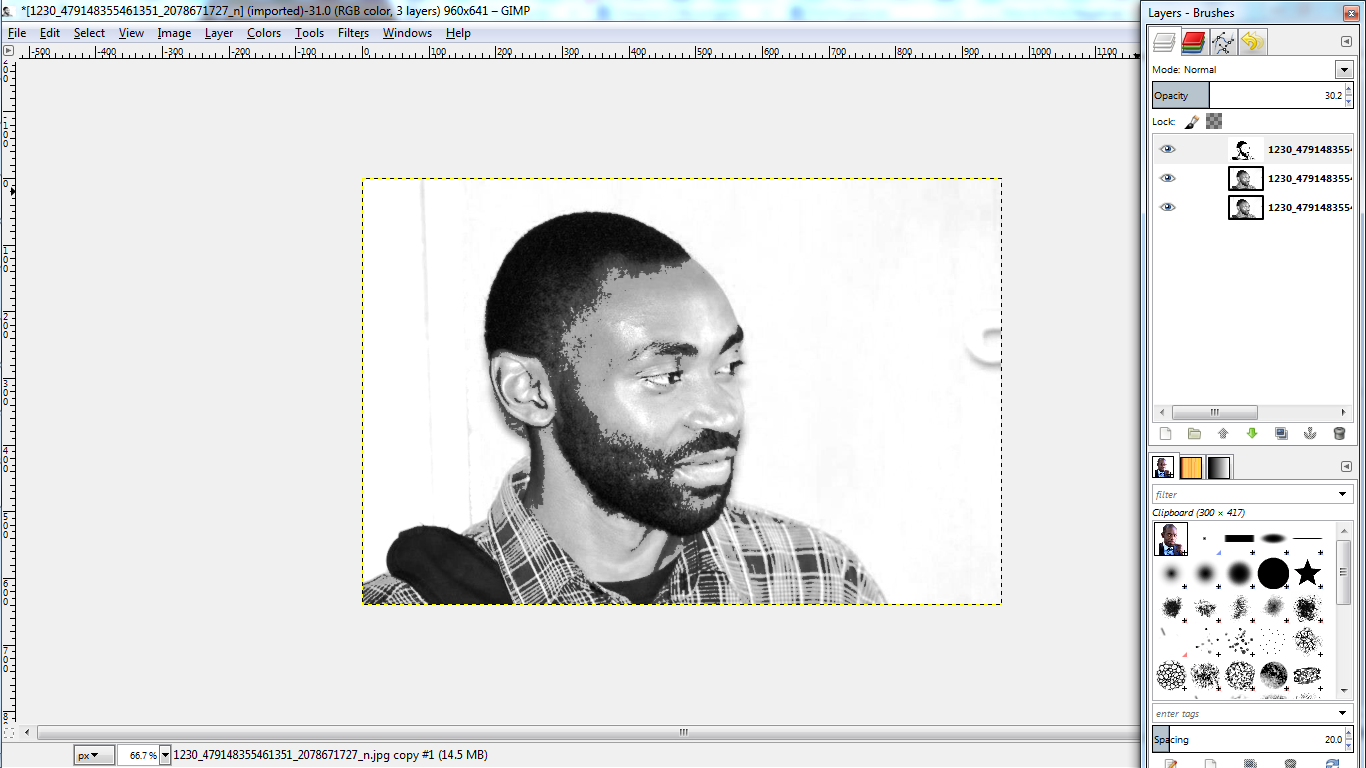
When you're satisfied with the threshold level, reduce the layers opacity to about 30%. This will let you work on the other layers while still being able to see the foreground.
In Layer toolbox on the right side of the screen, slide opacity down to 30%
In Layer toolbox on the right side of the screen, slide opacity down to 30%
Apply Threshold to Next Layer
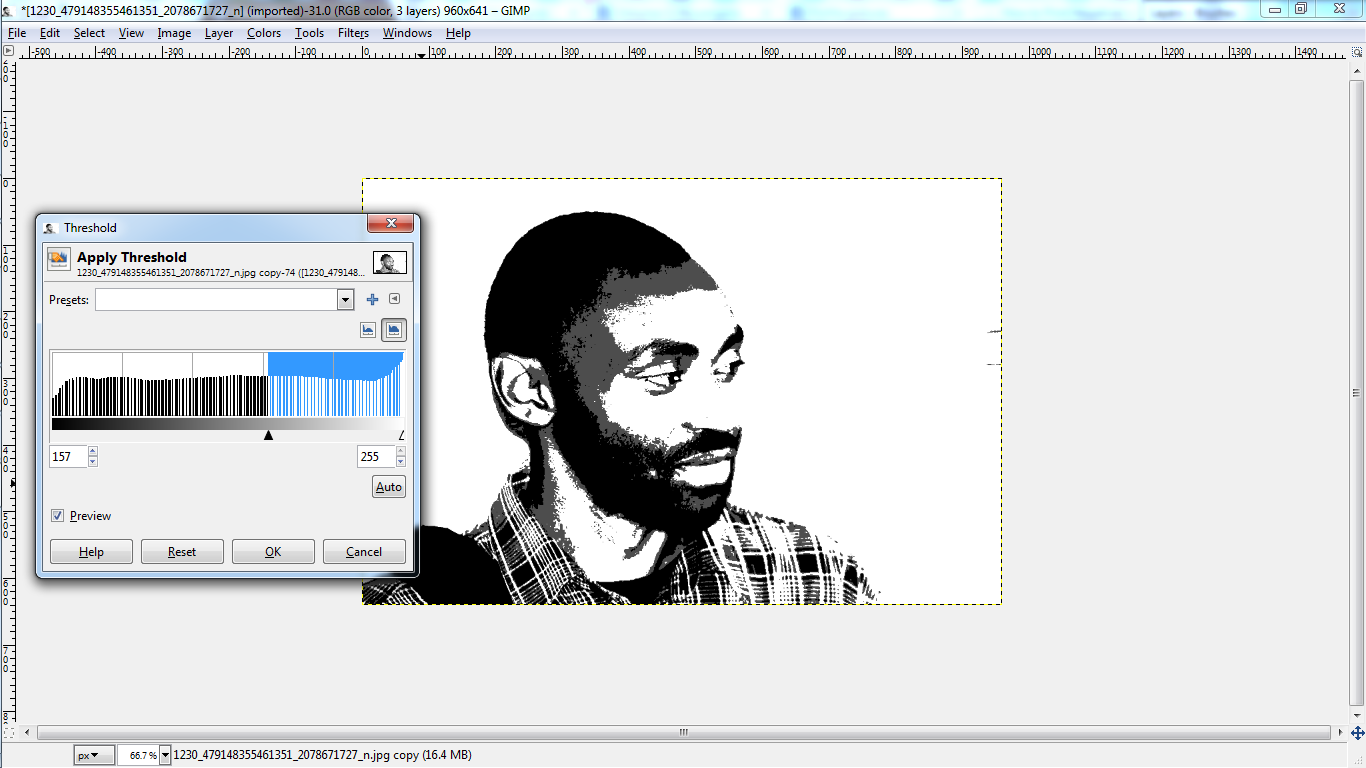
Next, repeat the 'Apply Threshold' process with your second layer. This time you're defining the midtones. These will give the image depth while maintaining it's painted on look. On this layer, I made sure I caught the shadows around his face.
Reduce Opacity...again
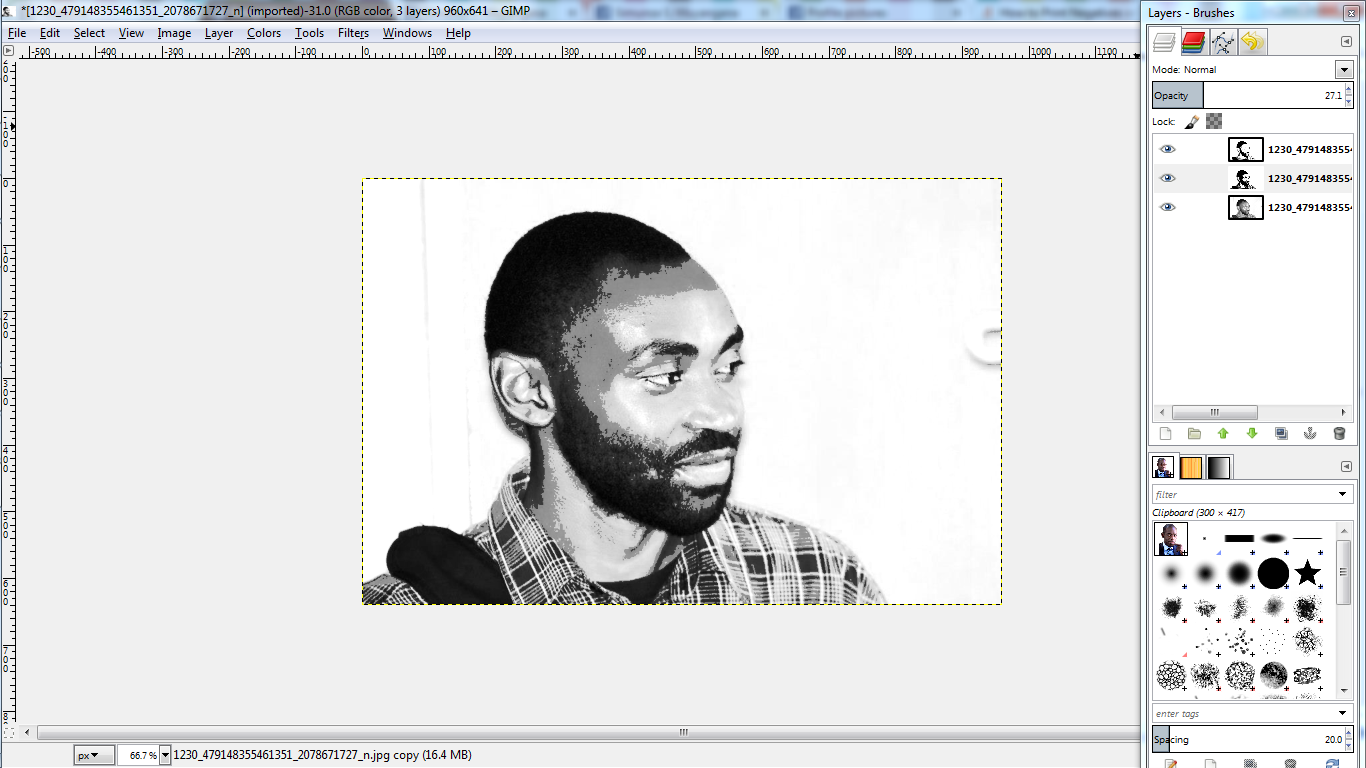
Now reduce this layers opacity too. 30% should do fine.
Repeat Process Until Last Layer
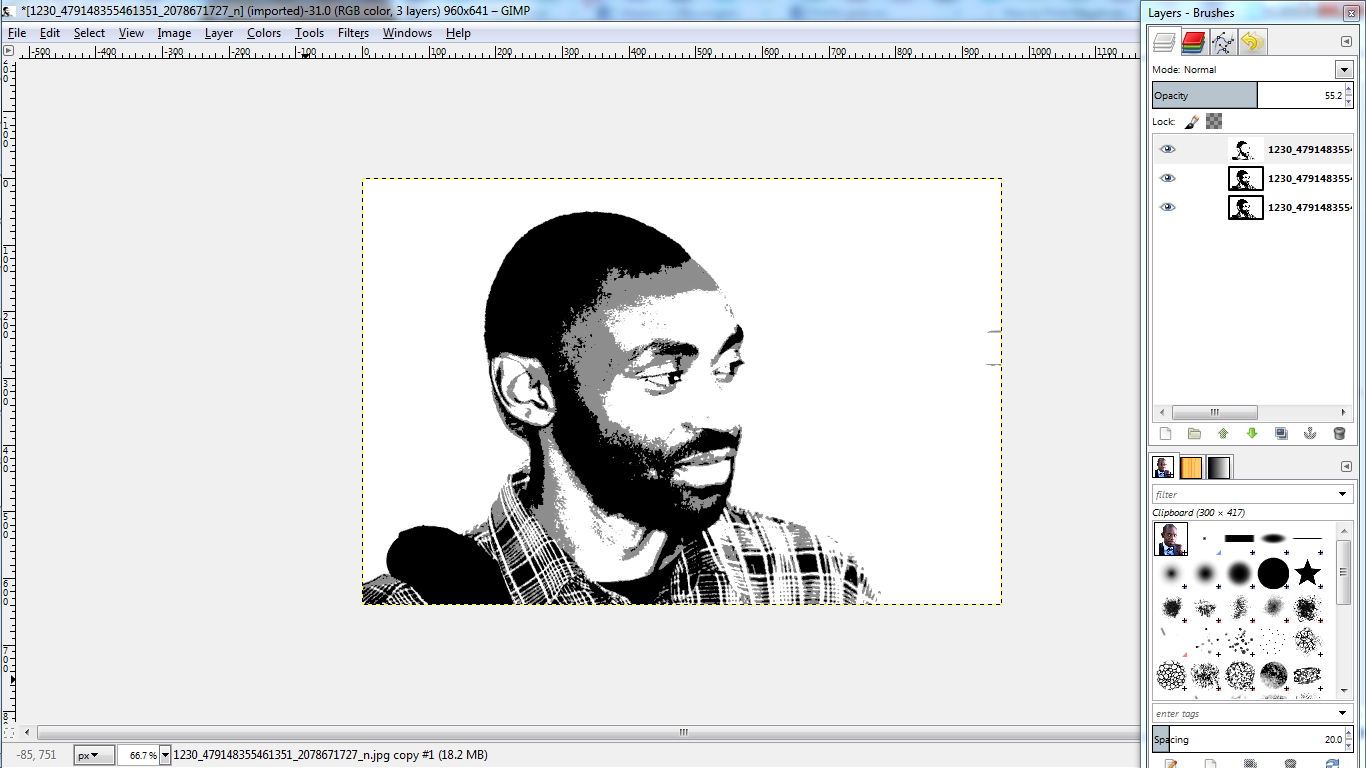
Depending on how much detail and depth you want your image to have, you may have more layers. Your final layer is going to be your lightest one. Make sure the threshold is applied just enough for you to see the outlines of the face and perhaps a little more shadow for depth
Merge Layers
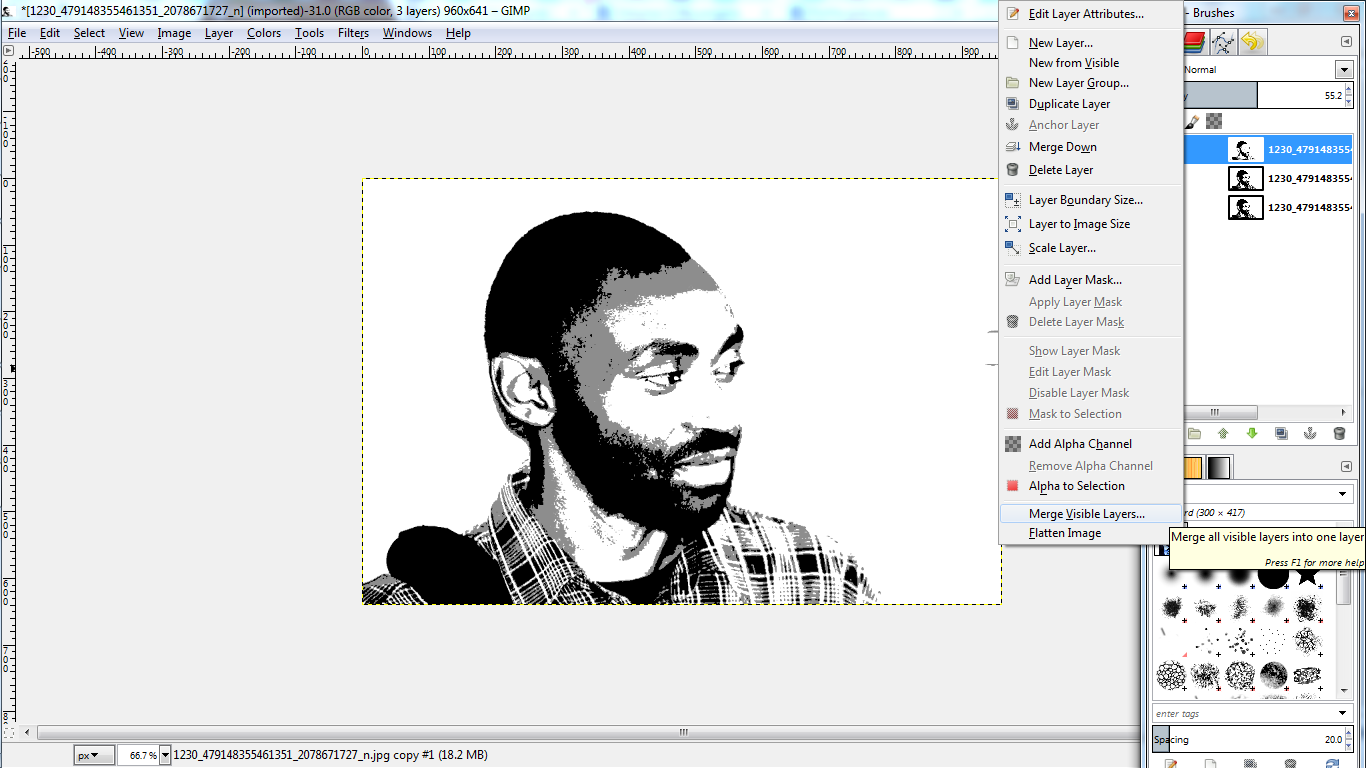
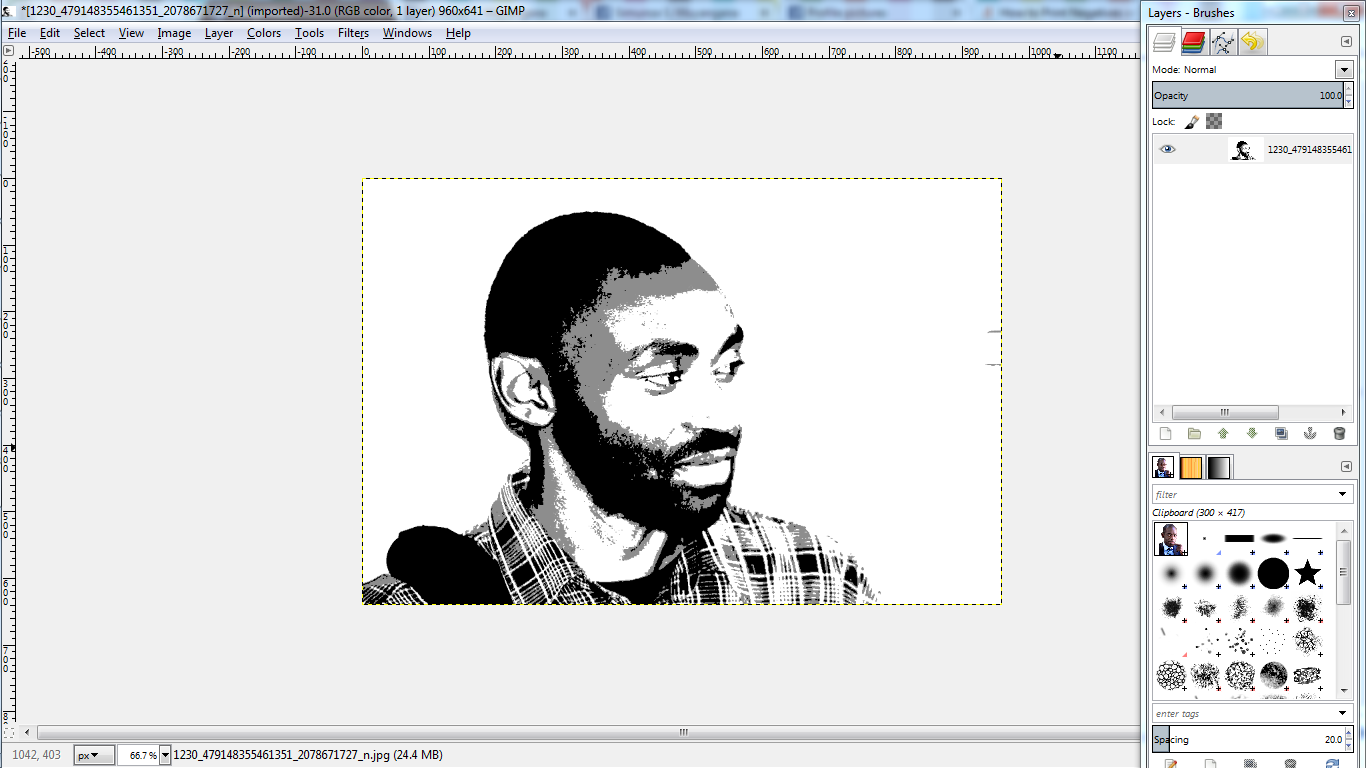
When you're done, merge the layers. Right click the top layer in the layer toolbox and 'Merge down' twice. Or if you have many, select all the layers and merge all.
Invert Image

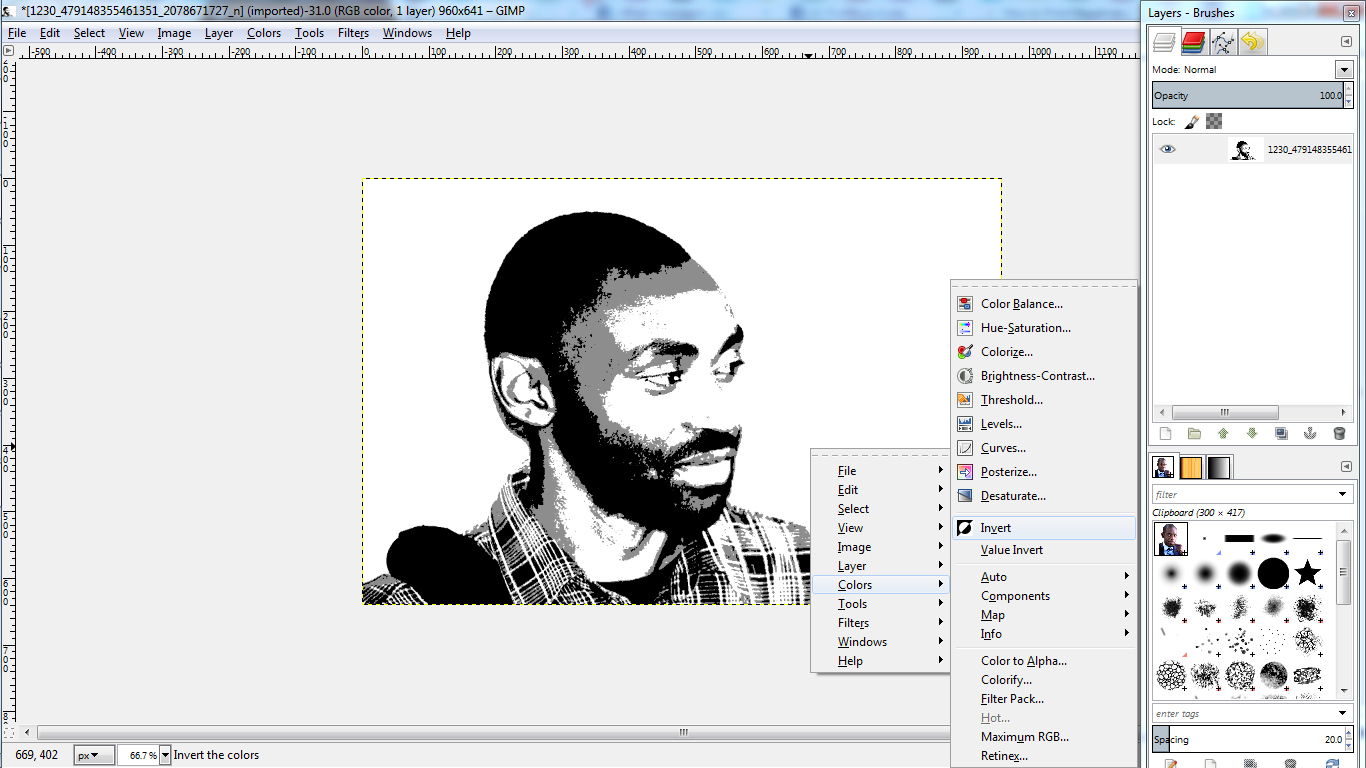
Your image looks great so far. But in order for it to be printable with the Lumi Inkodye, we need to turn it into a negative. This is pretty easy to do. Simply
Right click image > Invert
Right click image > Invert
Square Image
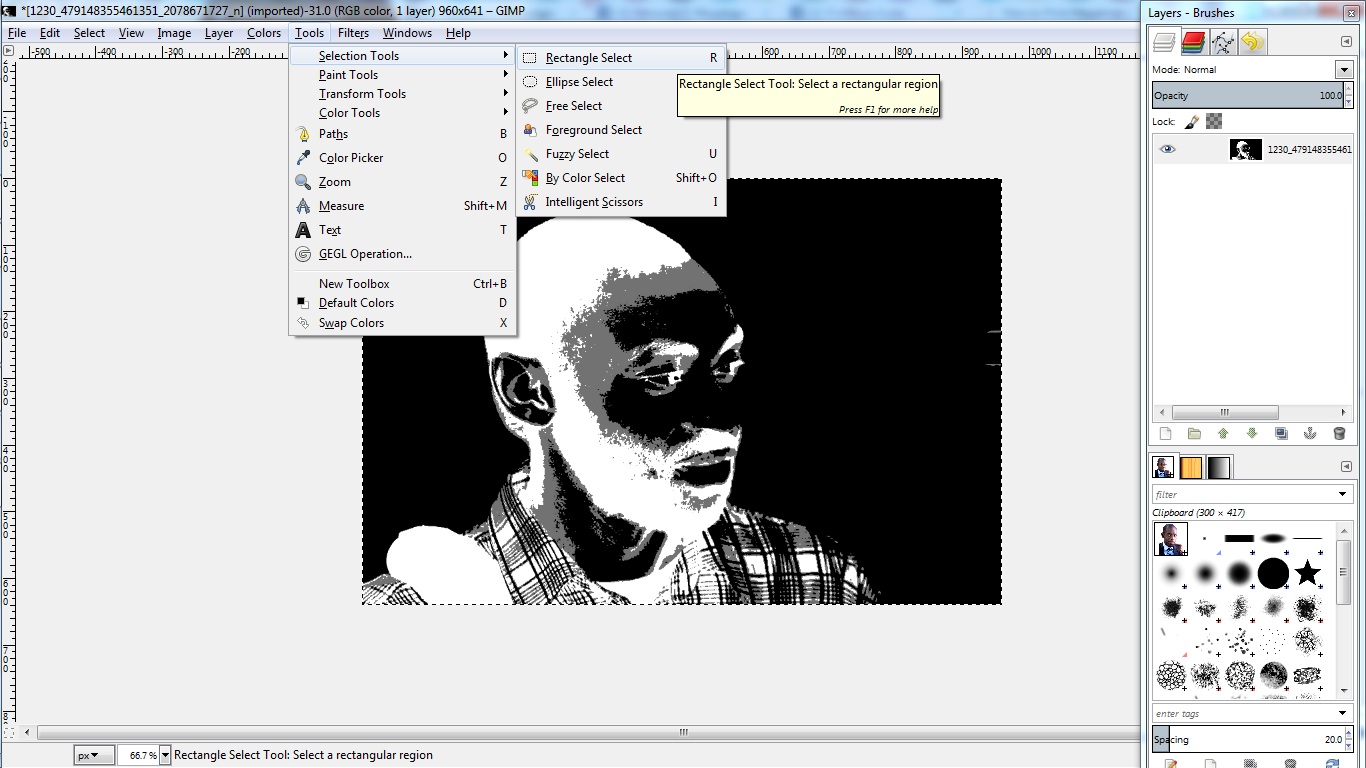
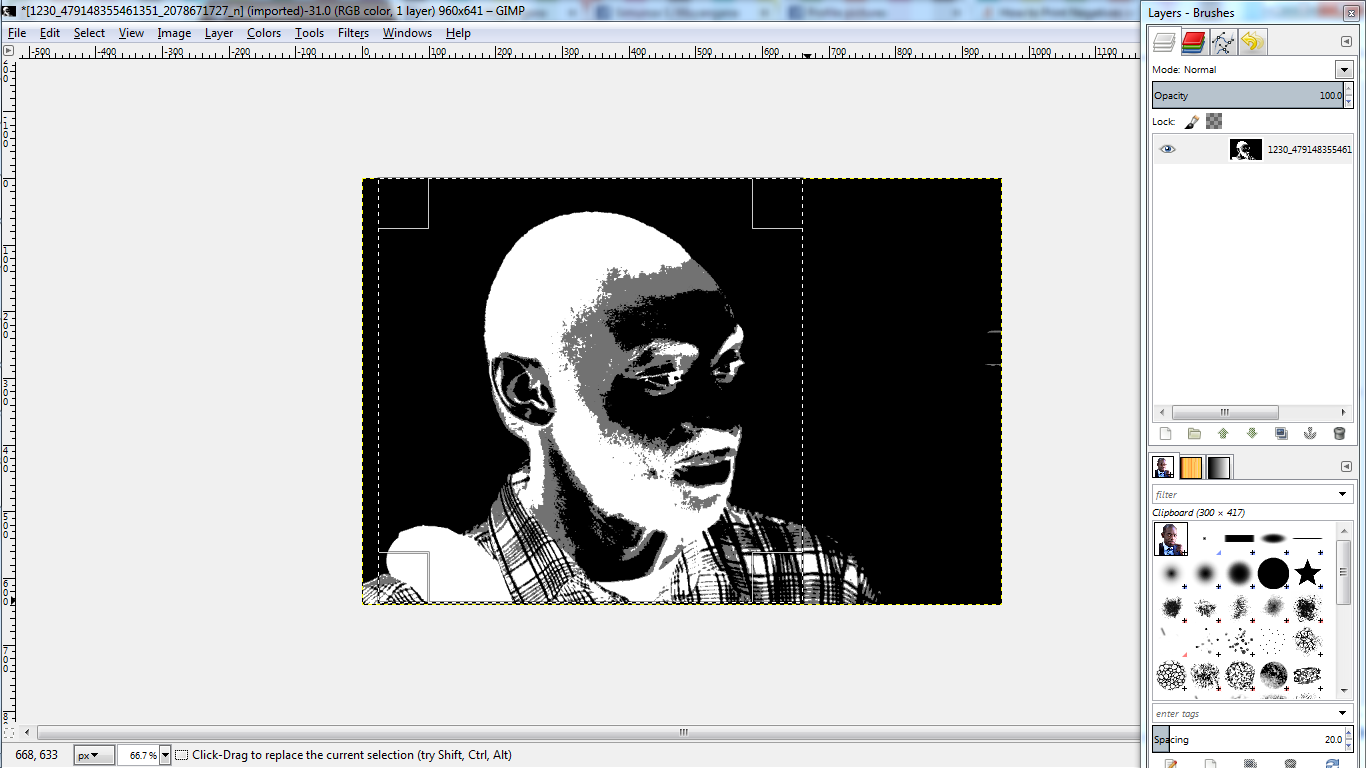
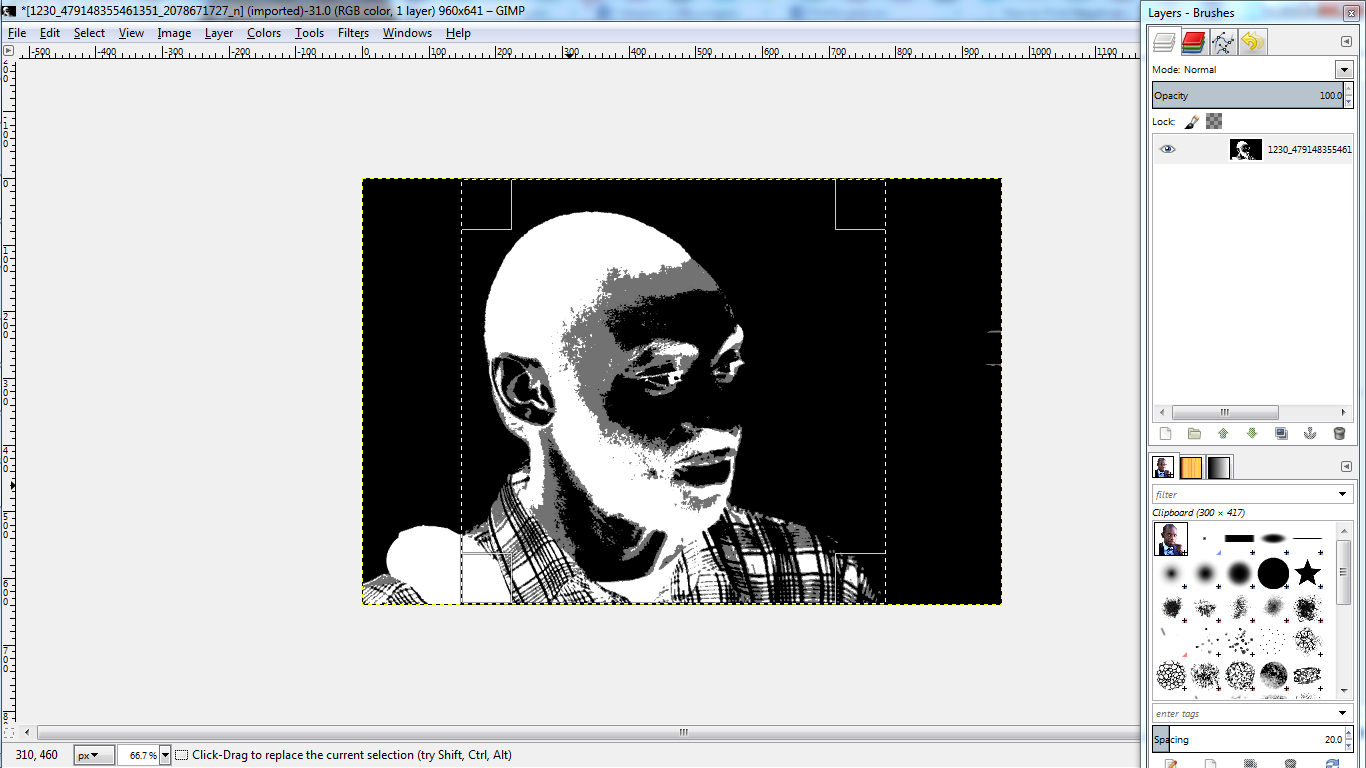
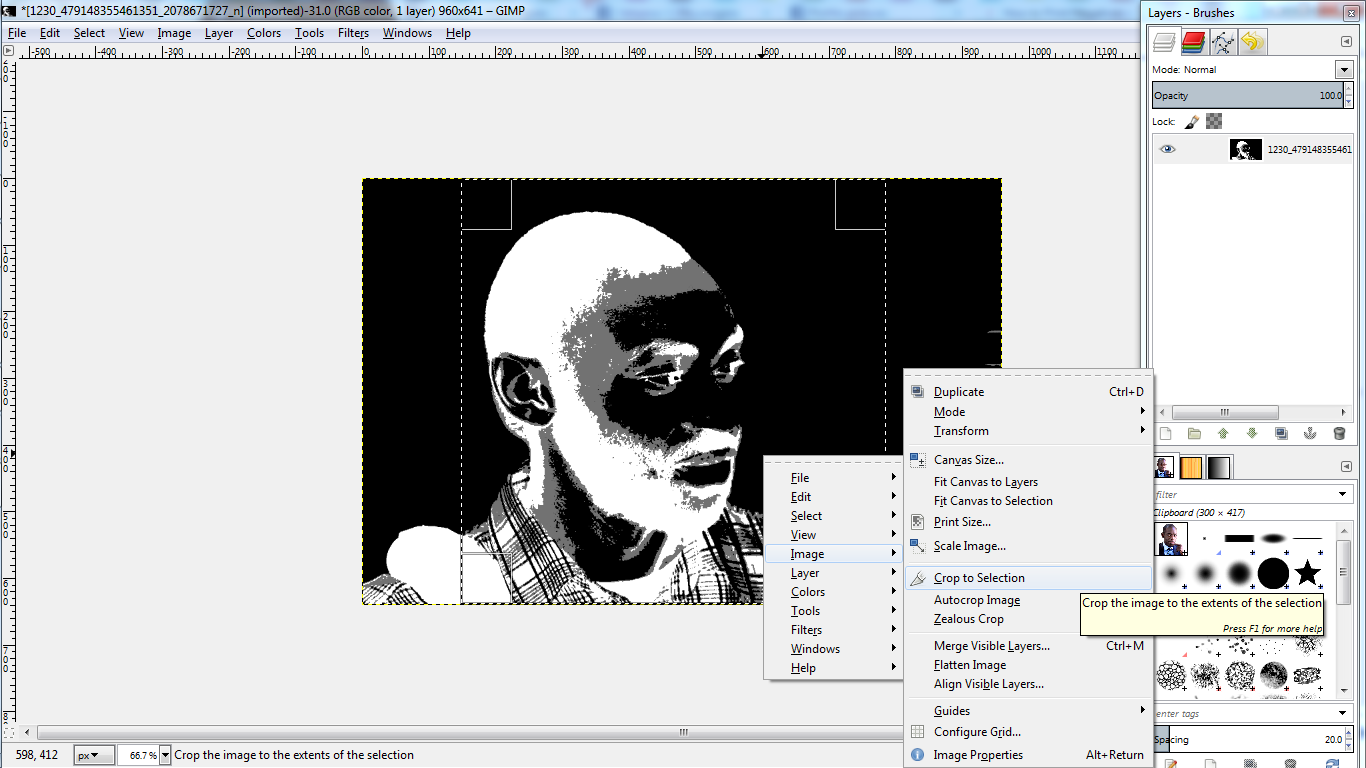
Inkofilm comes in square shapes, so in order to make sure you use space more effectively, it's best to have square images. To make you image a square go to
Tools > Selection tools > Rectangle select
Then hold shift while you click and drag from any corner to get a perfect square. Move the square to select the part of the image you want to keep then
Right click image > Image > Crop to selection
If you don't get it right you could always undo and try again
Resize Image
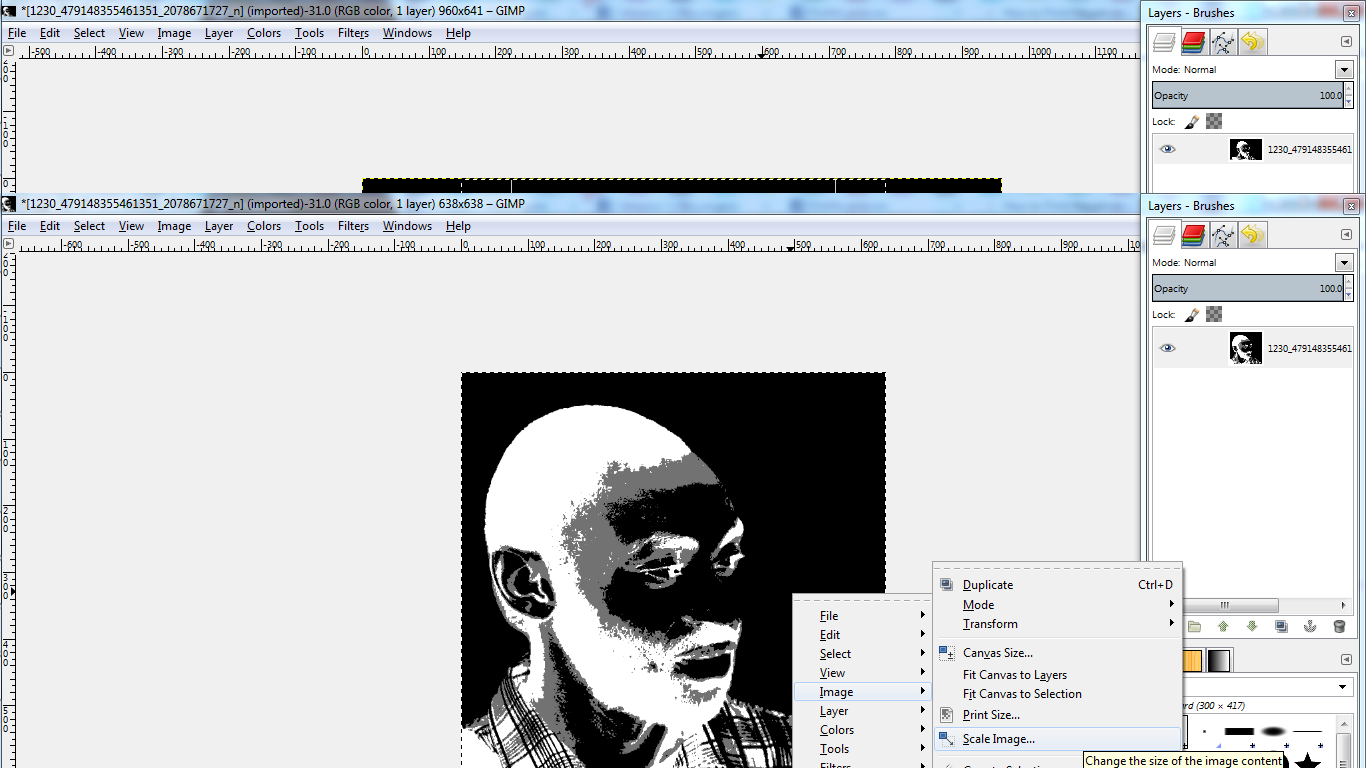
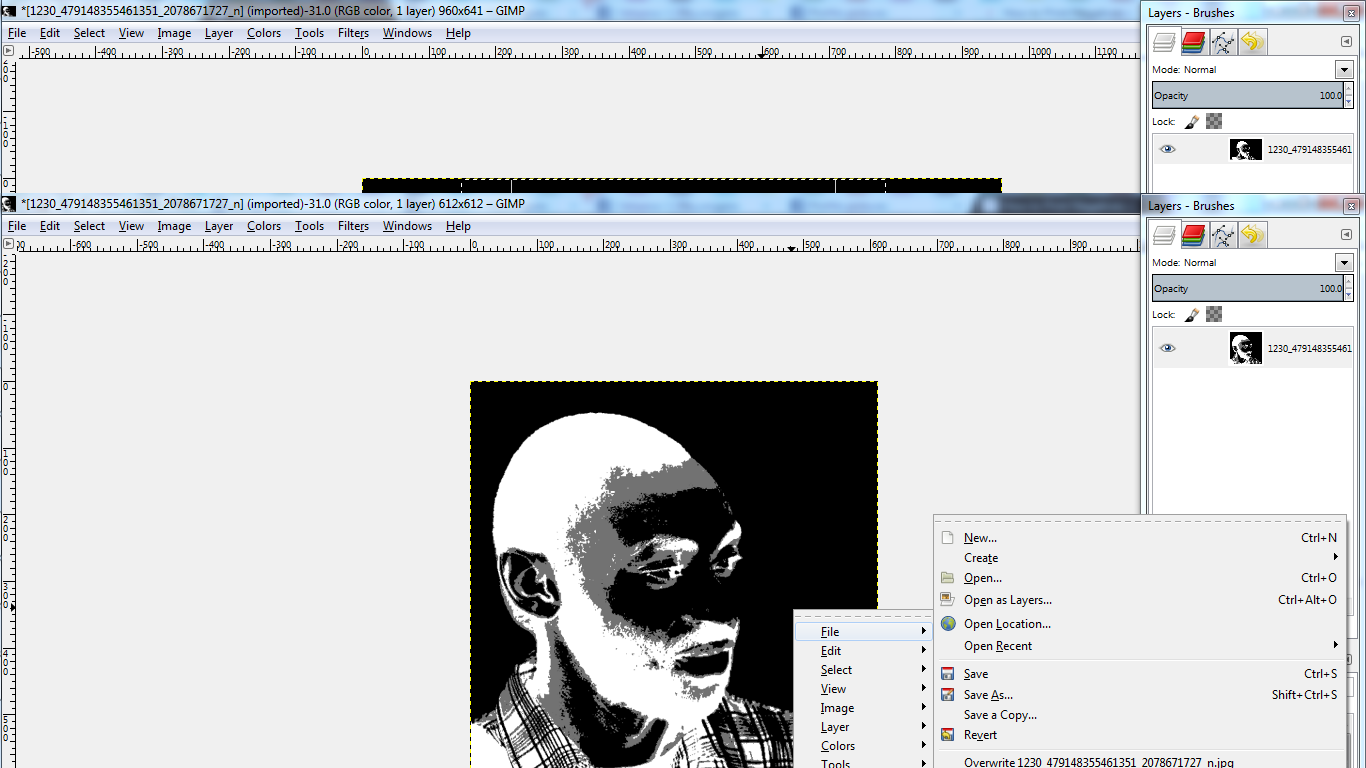
The inkofilm dimensions are 8.5" x 8.5"
To resize your image to that proportion
Right click image > Image > Scale Image
Make sure the dimensions are in inches and scale it to 8.5" by 8.5"
To resize your image to that proportion
Right click image > Image > Scale Image
Make sure the dimensions are in inches and scale it to 8.5" by 8.5"
Save and Print
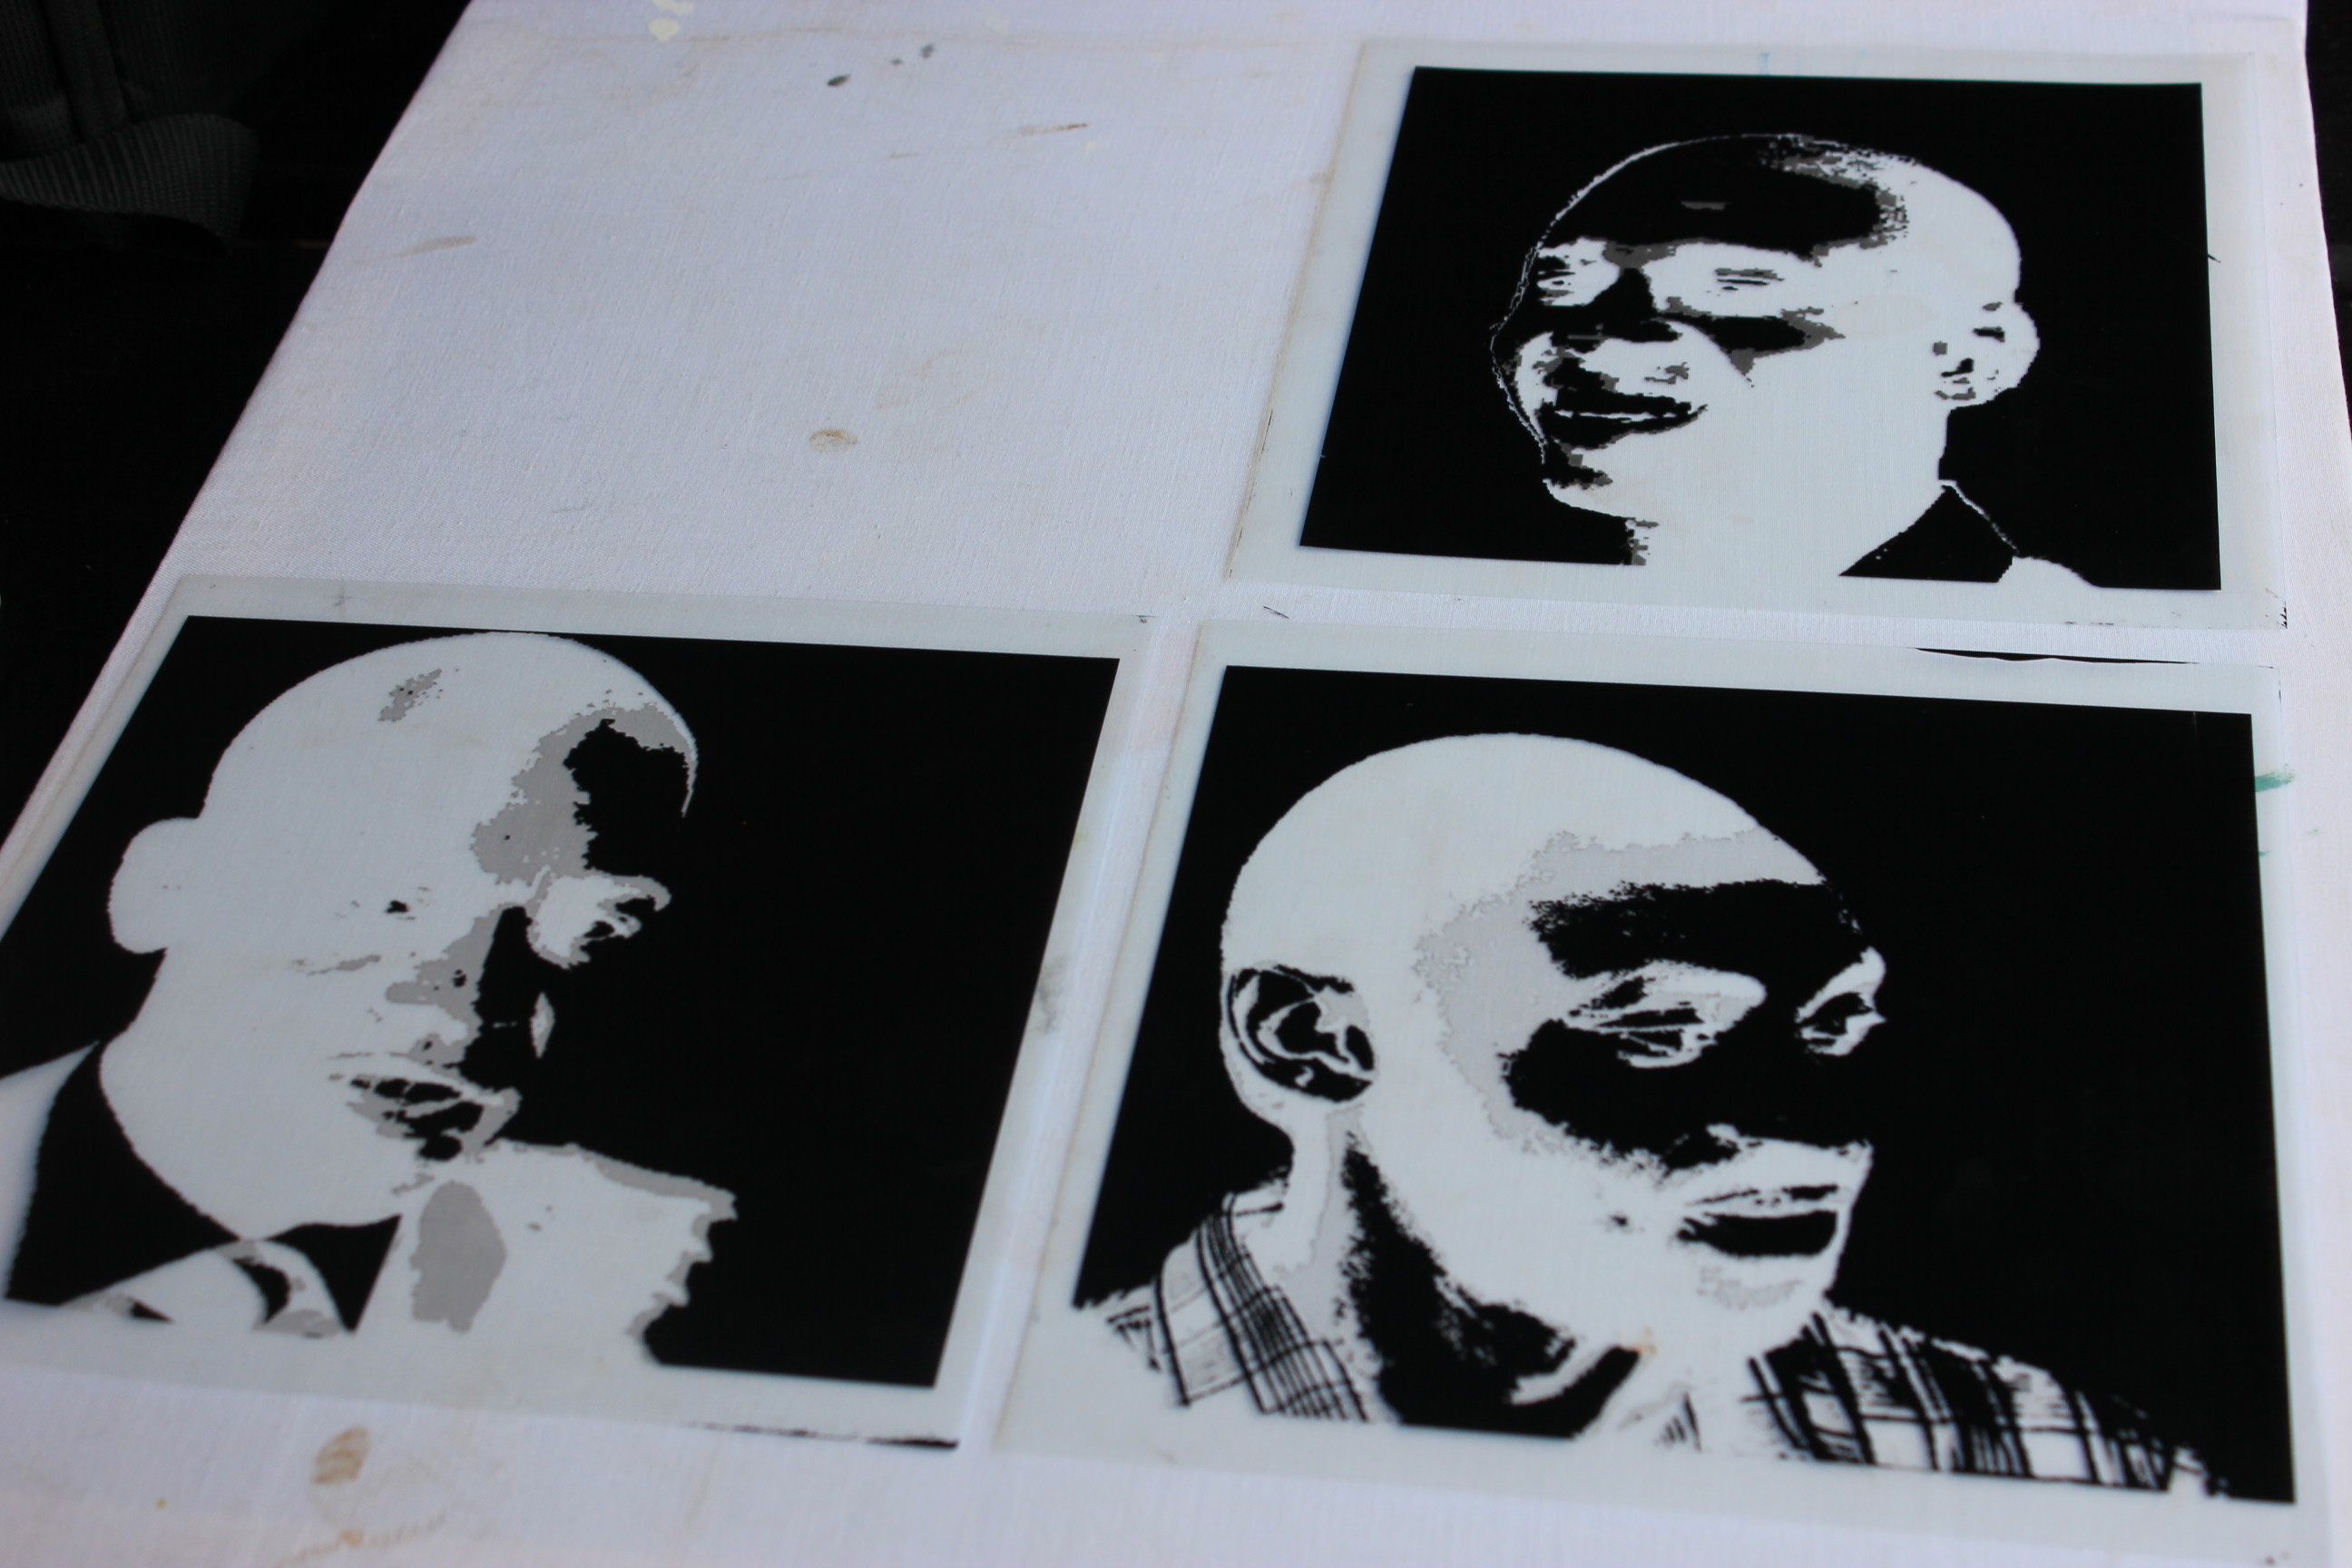
Next save your project and export it as a png. You can do that by going to file and save(to save the project). If you want to save it as an image you're going to have to export it by going to file and 'Export...'
Place your Inkofilm in your inkjet printer. (Remember to make sure it's an inkjet!)
Go to File and Print. Set it to print in Grayscale only or Black and White.
Click print and voila! Your very own reusable pop art negative for inkofilm
Place your Inkofilm in your inkjet printer. (Remember to make sure it's an inkjet!)
Go to File and Print. Set it to print in Grayscale only or Black and White.
Click print and voila! Your very own reusable pop art negative for inkofilm