Pong
This instructable will serve as an introduction to Godot as well as a tutorial on how to make a simple Pong game.
Supplies
A computer or laptop, Godot Engine, and the assets linked below.
https://github.com/russs123/Pong_tut/blob/main/assets/Bg.png
https://github.com/russs123/Pong_tut/blob/main/assets/pixel_font.ttf
Making Our Scene
After opening Godot:
- Select "Other Node"
- Next select Sprite2d and rename this node to "Main"
- This will act as our background and parent node
- On the right hand side under texture the Bg.png should be selected
- Finally, in the texture drop down under the CanvasItem section, the Filter should be set to Nearest in order to sharpen the background image.
Player and CPU Nodes
For the player controlled paddle:
- Create a child node "Color Rect"
- Under "Layout" change "Anchors" to Center Left
- Under "Transform"
- Size: change x to 20 and y to 120
- Position: change y to -60
- Create a second child node "CollisionShape2D"
- Change Shape to Rectangle and drag the points around until it matches the Color Rect that was created before.
- Select the Player node and under Transform
- Position: change x to 50 and y to 324
For the CPU controlled paddle:
- Select the Player node and all child nodes inside of it, and hit Ctrl + D to duplicate
- Under Transform
- Position: change x to 1080 and y to 324
Ball Node
After selecting the Main node
- Create a "CharacterBody2D" node and rename it "Ball"
- While selecting the Ball node, create a ColorRect node
- Under Layout change Anchors to Center
- Under Transform
- Size: Change x to 10 and y to 10
- Position: Change x to -5 and y to -5
- Under the Ball node, create a CollisionShape2D
- Change the Shape to Rectangle and make sure that the shape is mirroring the Ball ColorRect node
Border Node
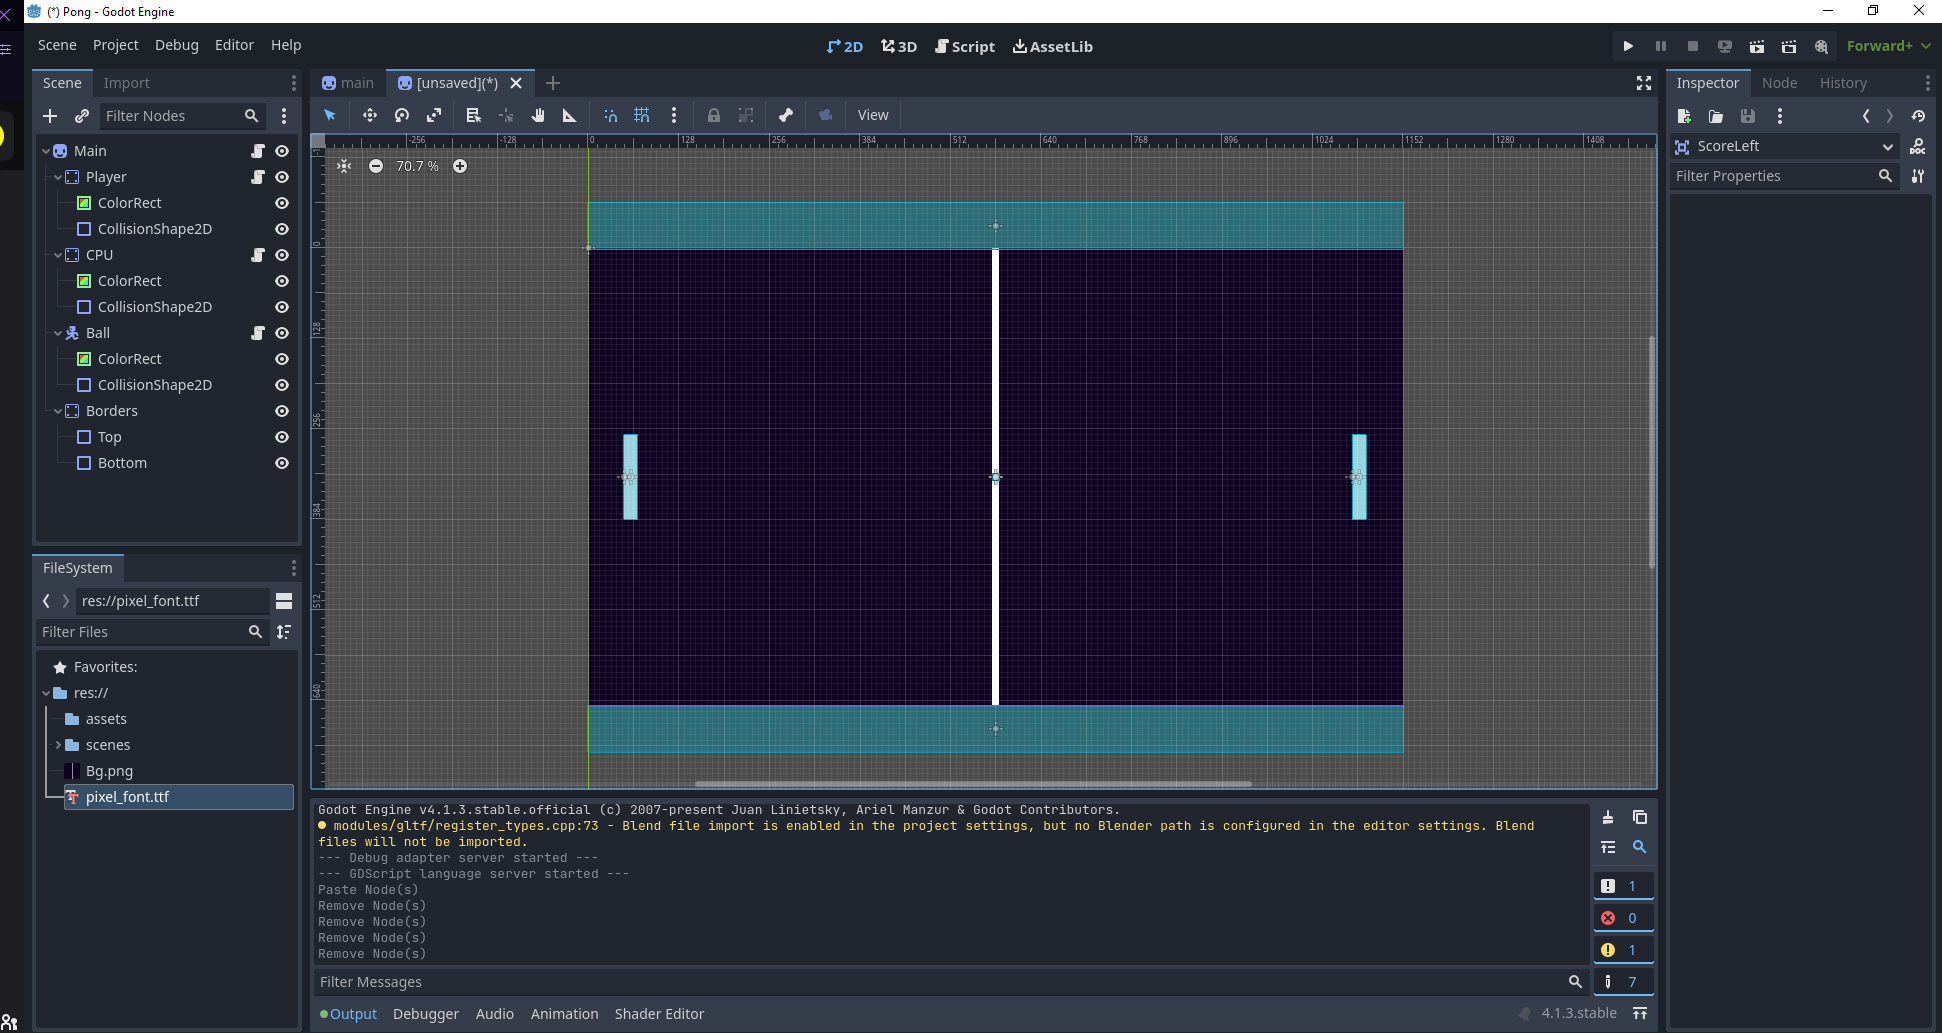
After selecting the Main node
- Create a StaticBody2D and rename it "Borders"
- Select the Borders node and create a CollisionShape2D and rename it Top
- Under "Collision" change Layer to 2 and make sure that 1 is deselected
- Then drag the corners until it matches the top box in the picture attached
- Select the Top node and duplicate it using Ctrl + D and move it down until it matched the bottom box in the picture attached
Score Nodes
After selecting the Main node
- Create a "Area2D" child node and rename it "ScoreLeft"
- Adjust the corners until it matches the box on the left side of the image attached
- Next duplicate the ScoreLeft node and rename it "ScoreRight"
- Adjust the corners of ScoreRight until it matched the box on the right side of the image attached
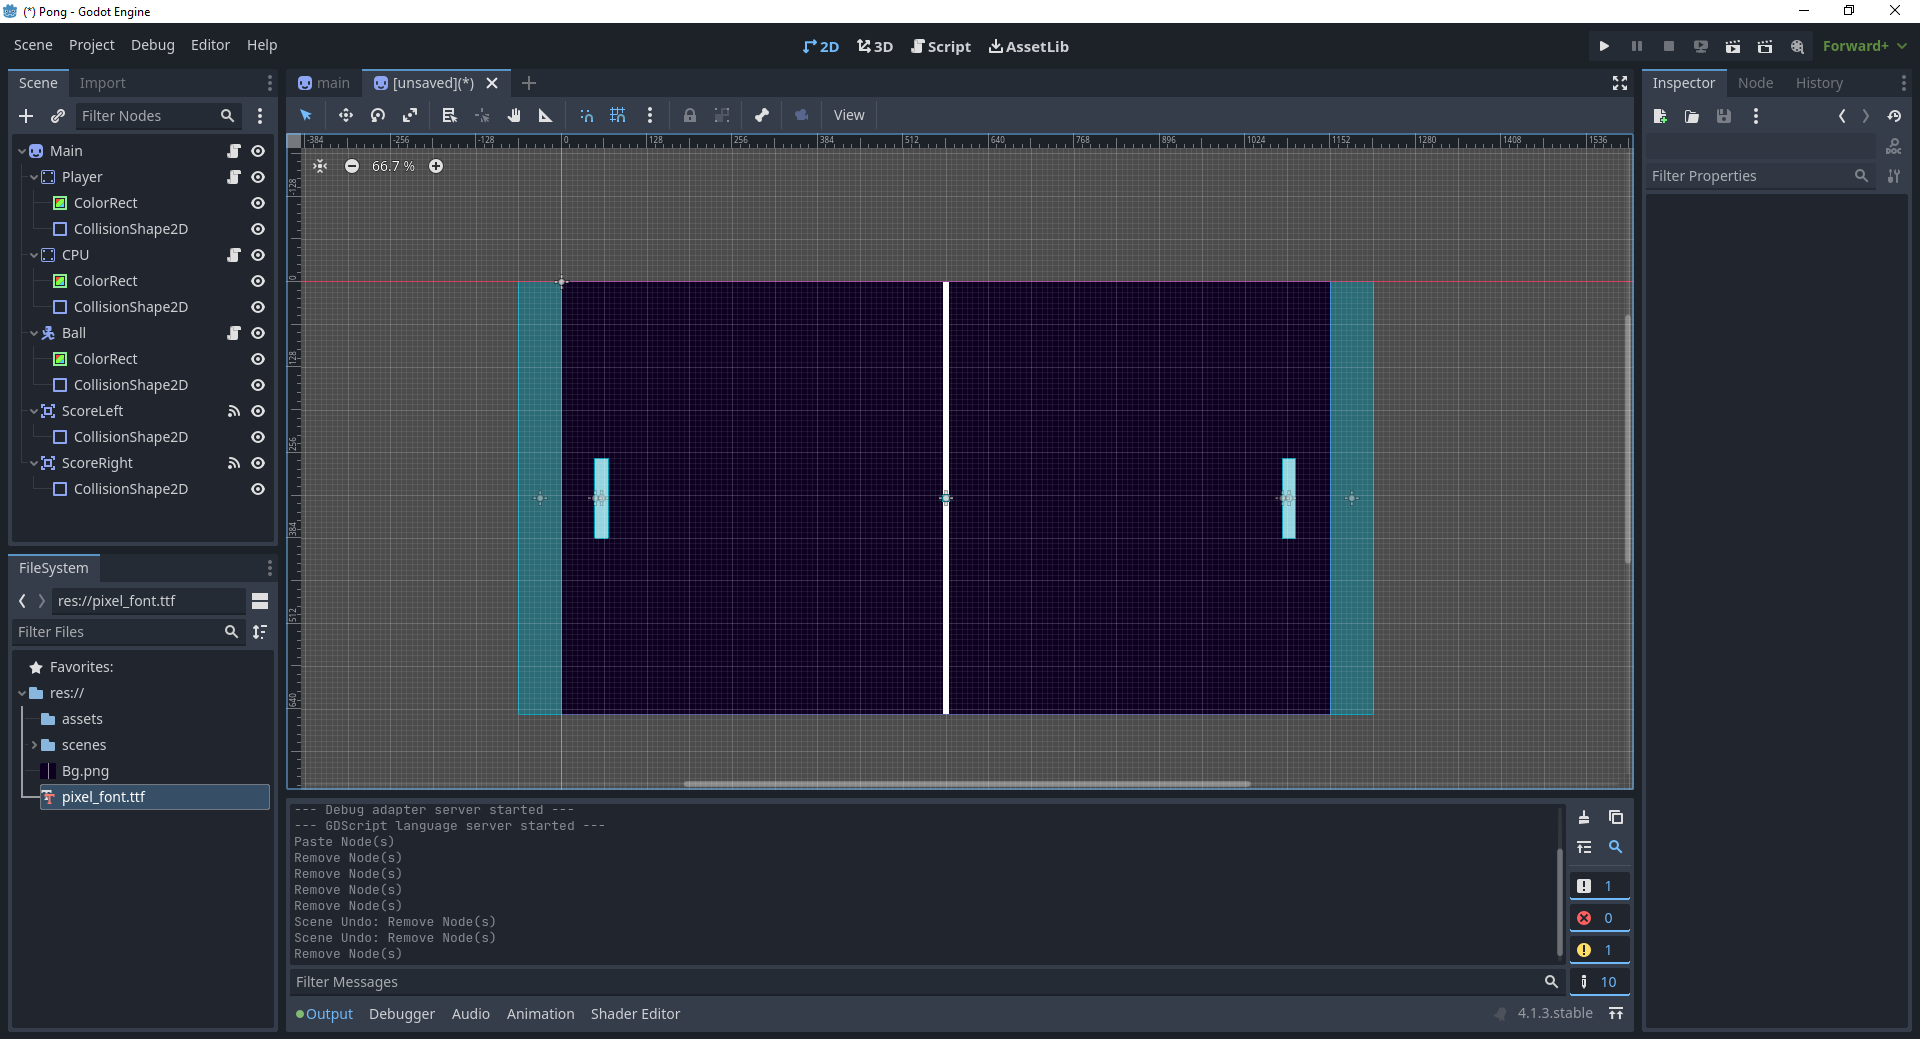
HUD Nodes
After selecting the Main node
- Create a "CanvasLayer" child node and rename it "HUD"
- Within the HUD node:
- Create a "Label" child node and rename it "Player Score"
- Within the "Player Score" child node:
- Set Text to 0
- Transform:
- Size: x to 50 and y to 53
- Position: x to 456 and y to 5
- Theme Overrides: Insert the font file attached under the materials section
- Next using Ctrl + D duplicate the Player Score child node and rename it "CPU Score"
- Within the CPU Score child node
- Transform:
- Position: x to 648 and y to 5
Your scene should now look like the image attached.
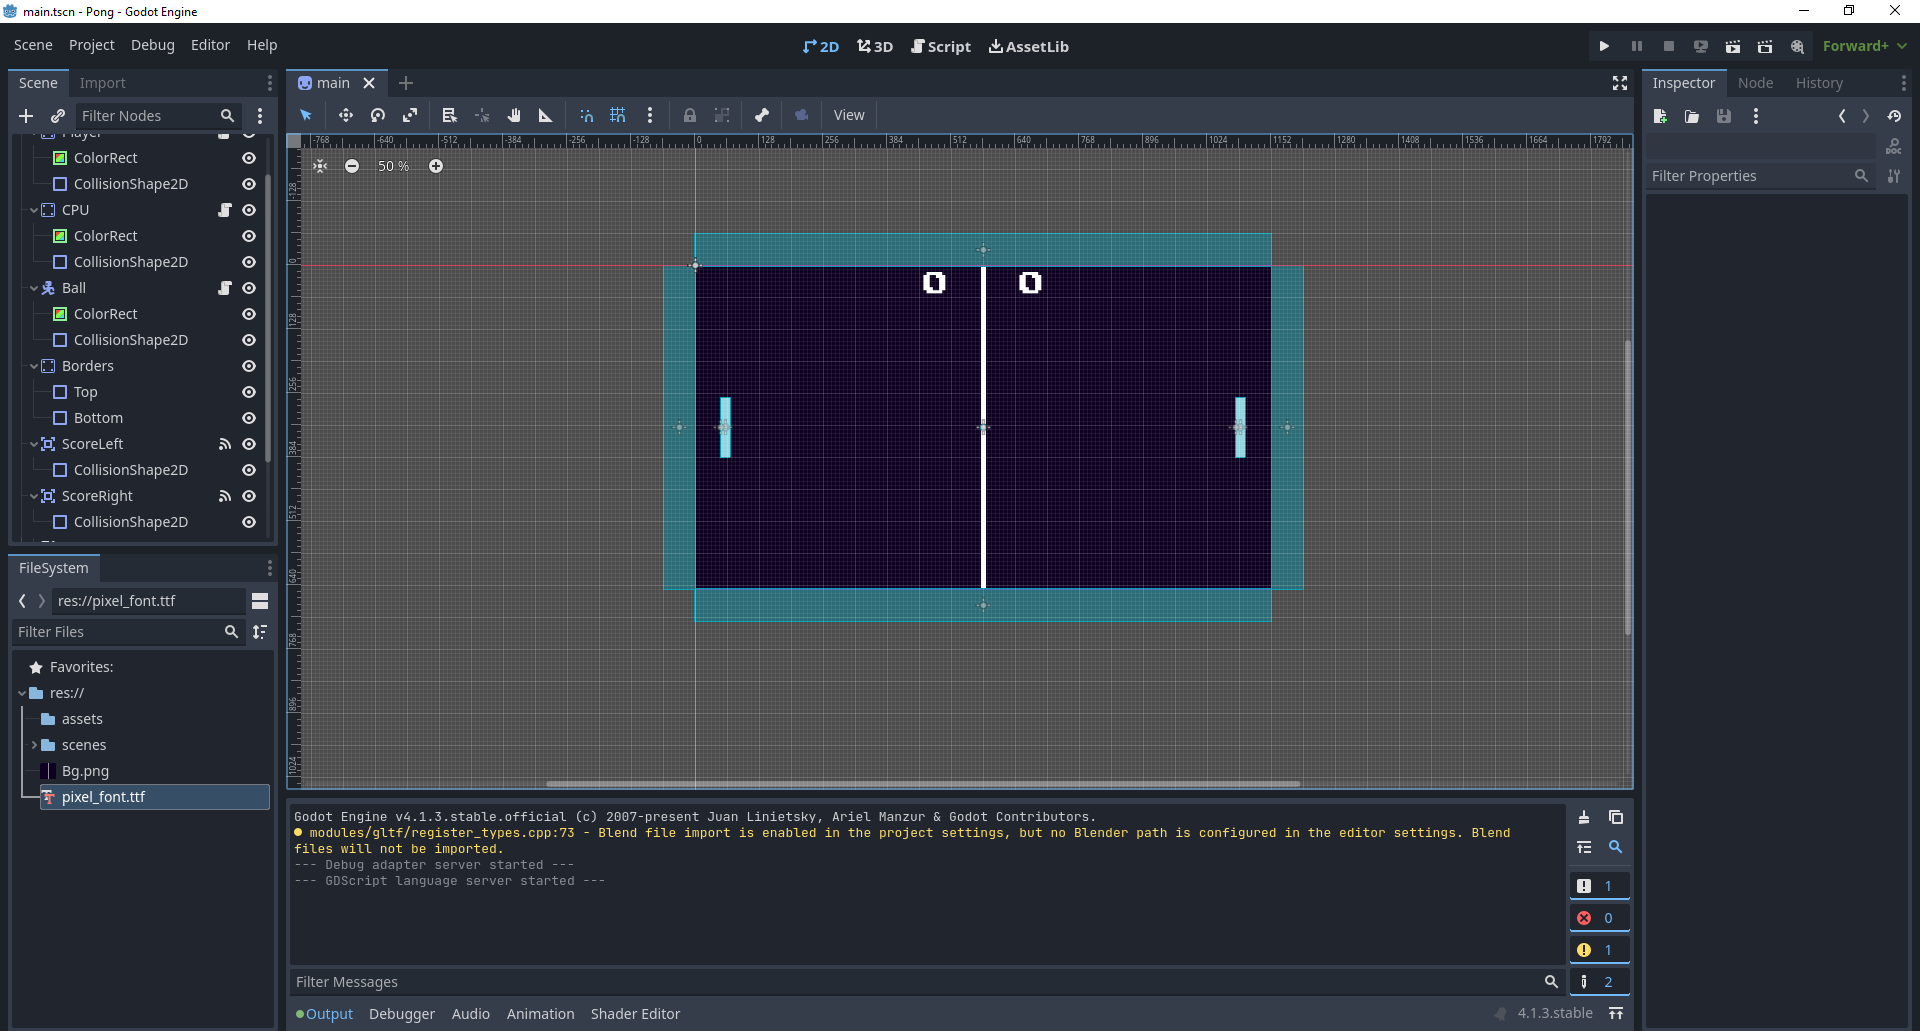
BallTimer Node
After selecting the Main node
- Create a "Timer" child node and rename it BallTimer
- Next set "Wait Time" to 1 s and insure:
- Process Callback = Idle
- One Shot = On
- Autostart = On
Main Script
- On the top of the Godot workspace, select the Script tool
- Select the main parent node and in the top left corner select the icon that looks like a scroll, when you hover over it, it should say "Attach or select an existing script to the selected node." From now on, I will refer to this as the new script button and it is used to add scripts to nodes.
- After clicking on the new script button, delete what is existing in the window and copy and paste what has been copied below.
extends Sprite2D
var score :=[0, 0]# 0:Player, 1: CPU
const PADDLE_SPEED : int = 500
func _on_ball_timer_timeout():
$Ball.new_ball()
func _on_score_left_body_shape_entered(body_rid, body, body_shape_index, local_shape_index):
score[1] += 1
$"HUD/CPU Score".text = str(score[1])
$BallTimer.start()
func _on_score_right_body_shape_entered(body_rid, body, body_shape_index, local_shape_index):
score[0] =+ 1
$"HUD/Player Score".text = str(score[0])
$BallTimer.start()
Although these scripts will not look very pretty due to how they transfer between documents, they should function just the same.
Player Script
- Select the Player node and copy and paste the script attached
extends StaticBody2D
var win_height : int
var p_height : int
# Called when the node enters the scene tree for the first time.
func _ready():
win_height = get_viewport_rect().size.y
p_height = $ColorRect.get_size().y
# Called every frame. 'delta' is the elapsed time since the previous frame.
func _process(delta):
if Input.is_action_pressed("ui_up"):
position.y -= get_parent().PADDLE_SPEED * delta
elif Input.is_action_pressed("ui_down"):
position.y += get_parent().PADDLE_SPEED * delta
#limit paddle movement to window
position.y = clamp(position.y, p_height / 2, win_height - p_height / 2)
CPU Script
- Select the CPU node and copy and paste the script attached below
extends StaticBody2D
var ball_pos : Vector2
var dist : int
var move_by : int
var win_height : int
var p_height : int
# Called when the node enters the scene tree for the first time.
func _ready():
win_height = get_viewport_rect().size.y
p_height = $ColorRect.get_size().y
# Called every frame. 'delta' is the elapsed time since the previous frame.
func _process(delta):
#move paddle towards ball
ball_pos = $"../Ball".position
dist = position.y - ball_pos.y
if abs(dist) > get_parent().PADDLE_SPEED * delta:
move_by = get_parent().PADDLE_SPEED * delta * (dist / abs(dist))
else:
move_by = dist
position.y -= move_by
#limit paddle movement to window
position.y = clamp(position.y, p_height / 2, win_height - p_height / 2)
Ball Script
- Select the Ball node and copy and paste the script attached below
extends CharacterBody2D
var win_size : Vector2
const START_SPEED : int = 500
const ACCEl : int = 50
var speed : int
var dir : Vector2
const MAX_Y_VECTOR : float = 0.6
# Called when the node enters the scenetree for the first time.
func _ready():
win_size = get_viewport_rect().size
func new_ball():
#randomize start position and direction
position.x = win_size.x / 2
position.y = randi_range(200, win_size.y -200)
speed = START_SPEED
dir = random_direction()
func _physics_process(delta):
var collision = move_and_collide(dir * speed * delta)
var collider
if collision:
collider = collision.get_collider()
#if ball hits paddle
if collider == $"../Player" or collider == $"../CPU":
speed += ACCEl
dir = dir.bounce(collision.get_normal())
#if it hits a wall
else:
dir = dir.bounce(collision.get_normal())
func random_direction():
var new_dir := Vector2()
new_dir.x = [1, -1].pick_random()
new_dir.y = randf_range(-1, 1)
return new_dir.normalized()
func new_direction(collider):
var ball_y = collider.position.y
var pad_y = collider.position.y
var dist = ball_y - pad_y
var new_dir :=Vector2()
#flip the horizontal direction
if dir.x > 0:
new_dir.x = -1
else:
new_dir.x = 1
new_dir.y = (dist / (collider.p_height / 2)) * MAX_Y_VECTOR
return new_dir.normalized()
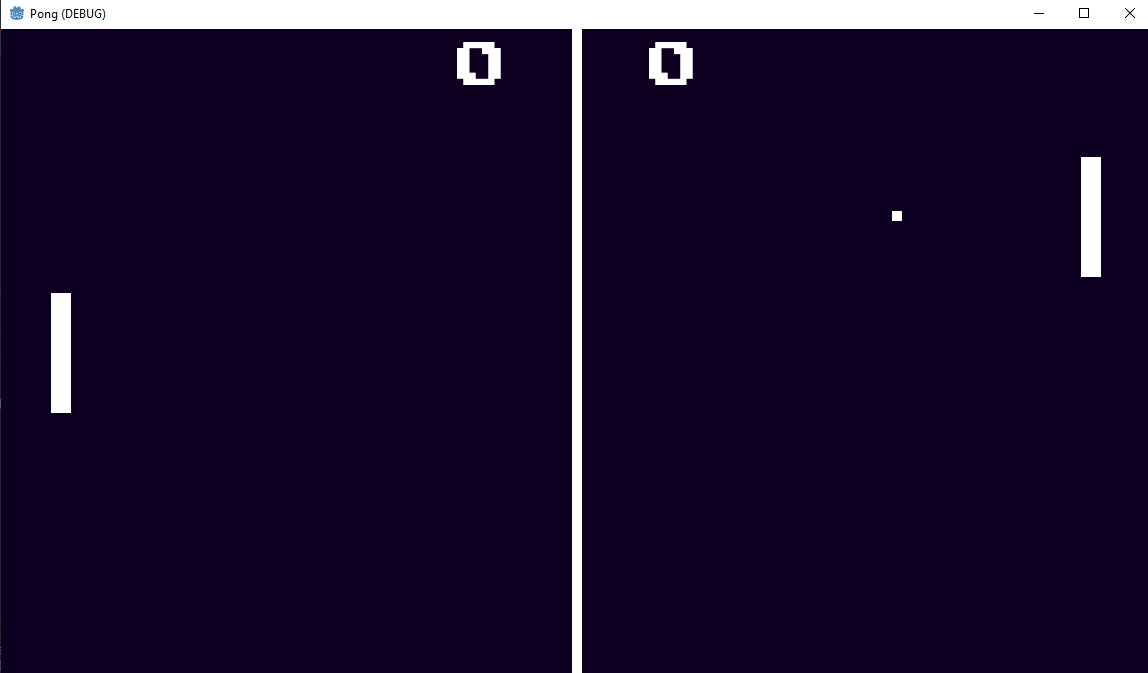
Testing
Press F5 and enjoy pong!