Poem Spiral Vase
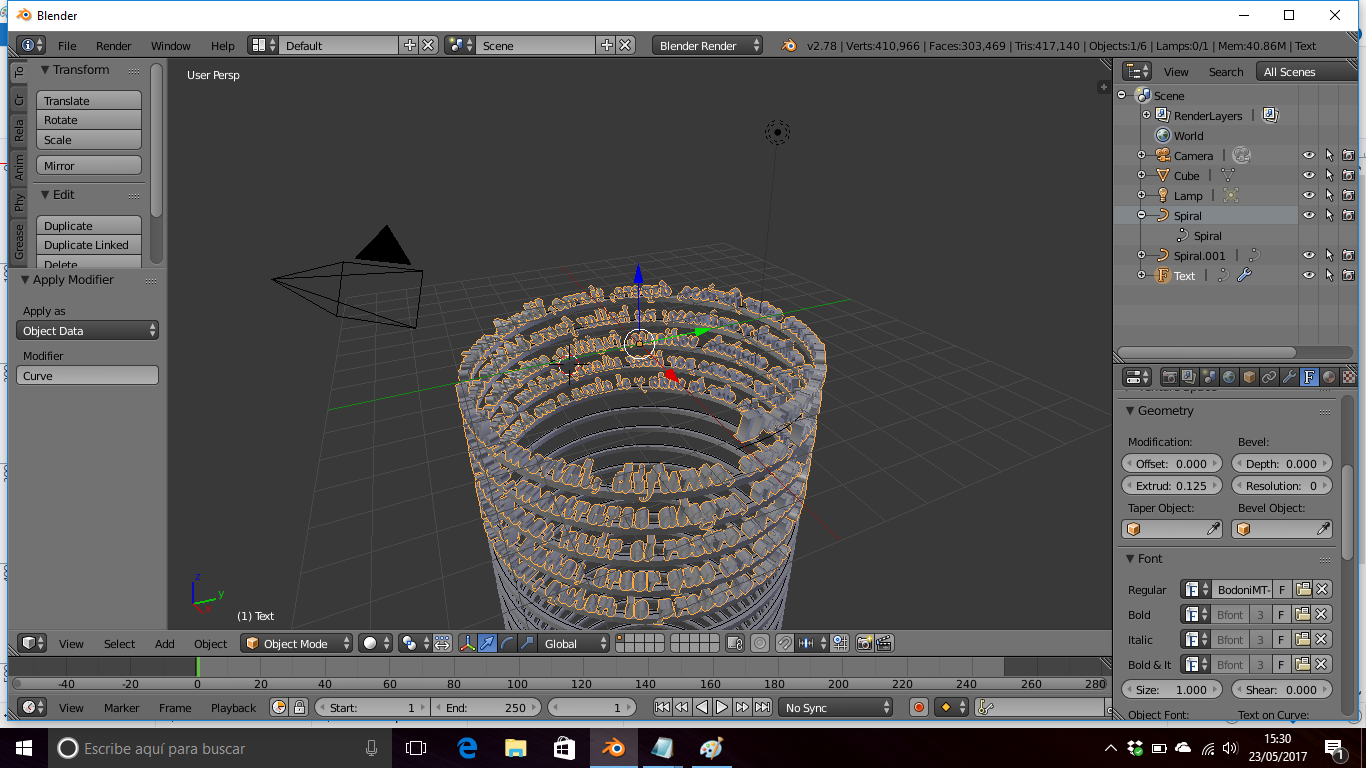
I'm sure many of you have seen the "tower of pi" (https://www.thingiverse.com/thing:271769) and wanted to do something similar. In my case, I wanted to create a pencil holder with a poem around it.
There is a minimal tutorial at blenderartists (https://blenderartists.org/forum/showthread.php?350150-Creating-a-cylindrical-spiral-text-object), but it does not ask some questions, like how to keep all text around the spiral in the same plane (because default behaviour is doing a double twist, see picture 6b) and how to make the line that connects all the text. I guess these are simple questions to blender experts, but they are big questions for we newbies, and in fact I was exploring the first problem for around two weeks.
Creating a Spiral Curve
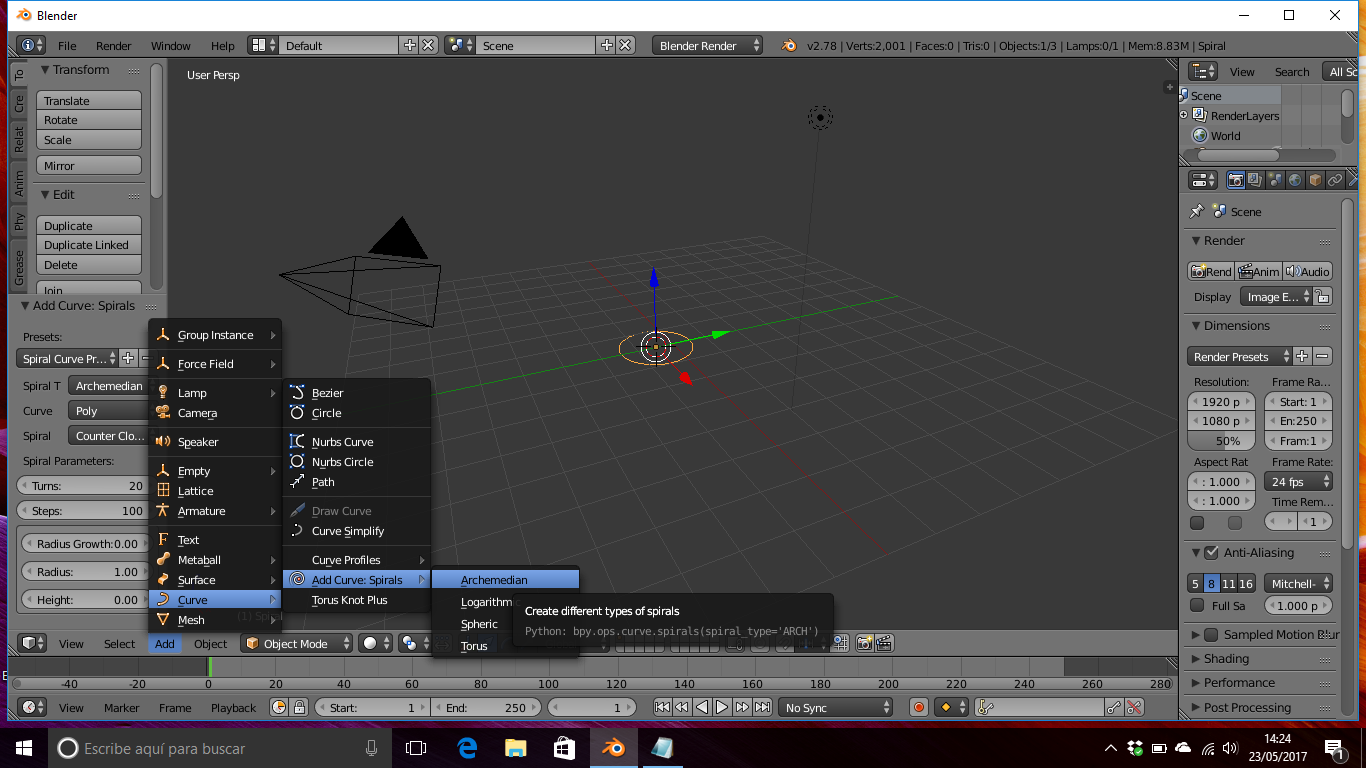
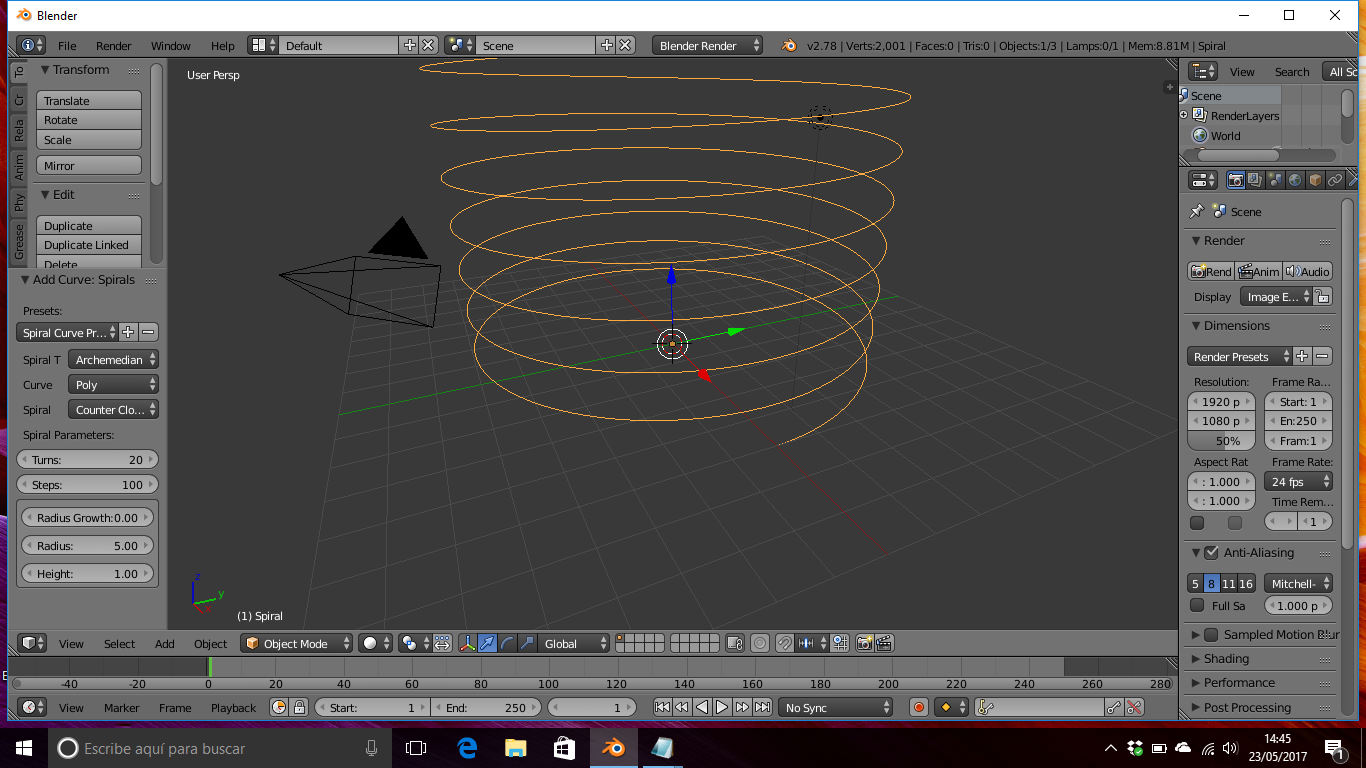
Open Blender (if you didn't). Blender is a free, opensource application used for 3d drawing.
We should first activate the spiral addon. It is included with blender 1.6-1.7, but we have to activate it:
Look for the addon at "File => user preferences => Add Curve => Add Curve extra objects" and check it.
Add a curve.
On object mode, click Add =>Curve =>Add curve spirals => Archemedian Select the following parameters in the "Add curve spirals"
panel: Spiral: Archemedian Curve:
Poly Spiral: Counterclockwise (or clockwise, as you prefer).
Turns: Big number (i.e. 20) to make room for all our text.
Steps: Big number (i.e. 100), to make a precise twist.
RadiusGro: 0 Radius: radius of our cylinder (5)
Height: 1
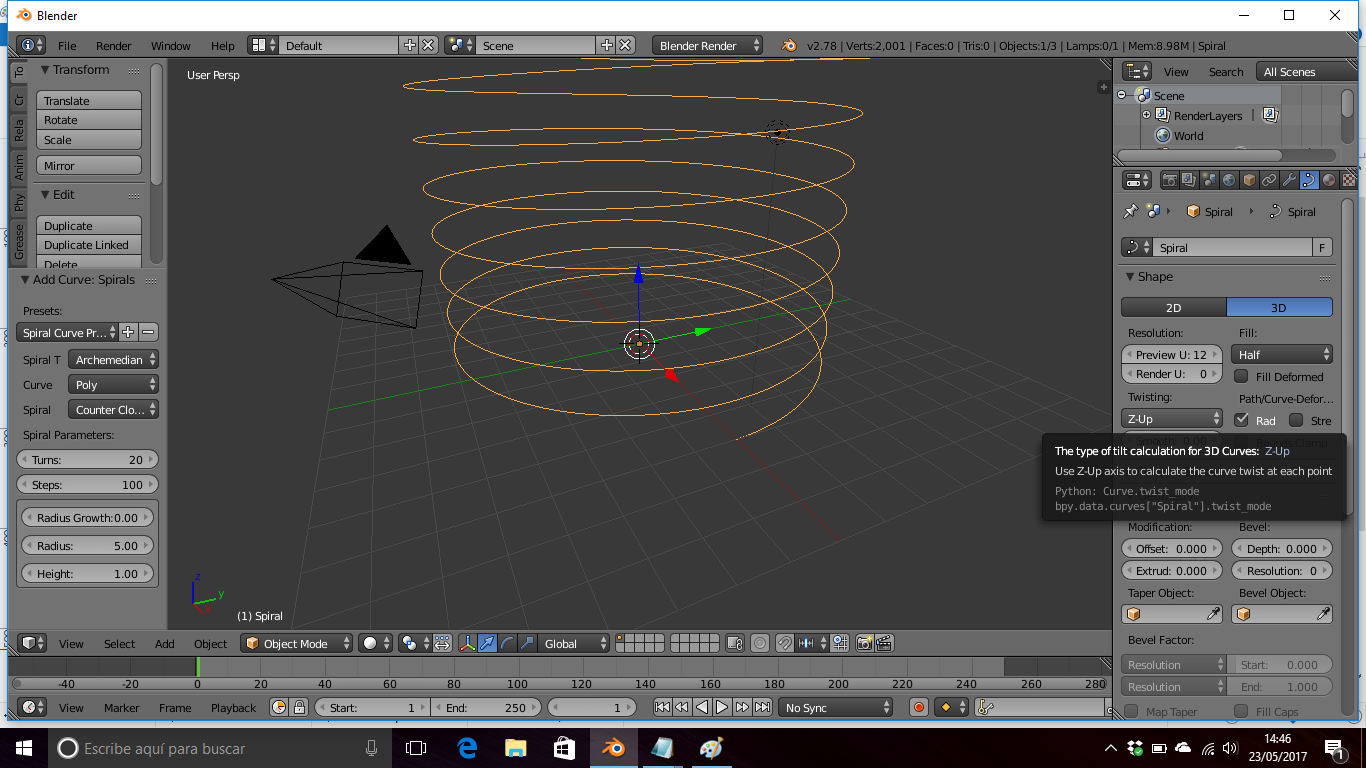
Now, the trickiest thing. To avoid a double twist effect (see step 3), you have to go to the Properties panel (at the right), and select "Object data" tab (the one with a curve icon), then locate an option called "Twisting". Select "Z-UP"
Properties panel => Object Data (Curve icon) =>Twisting: Z-up
Add Some Text
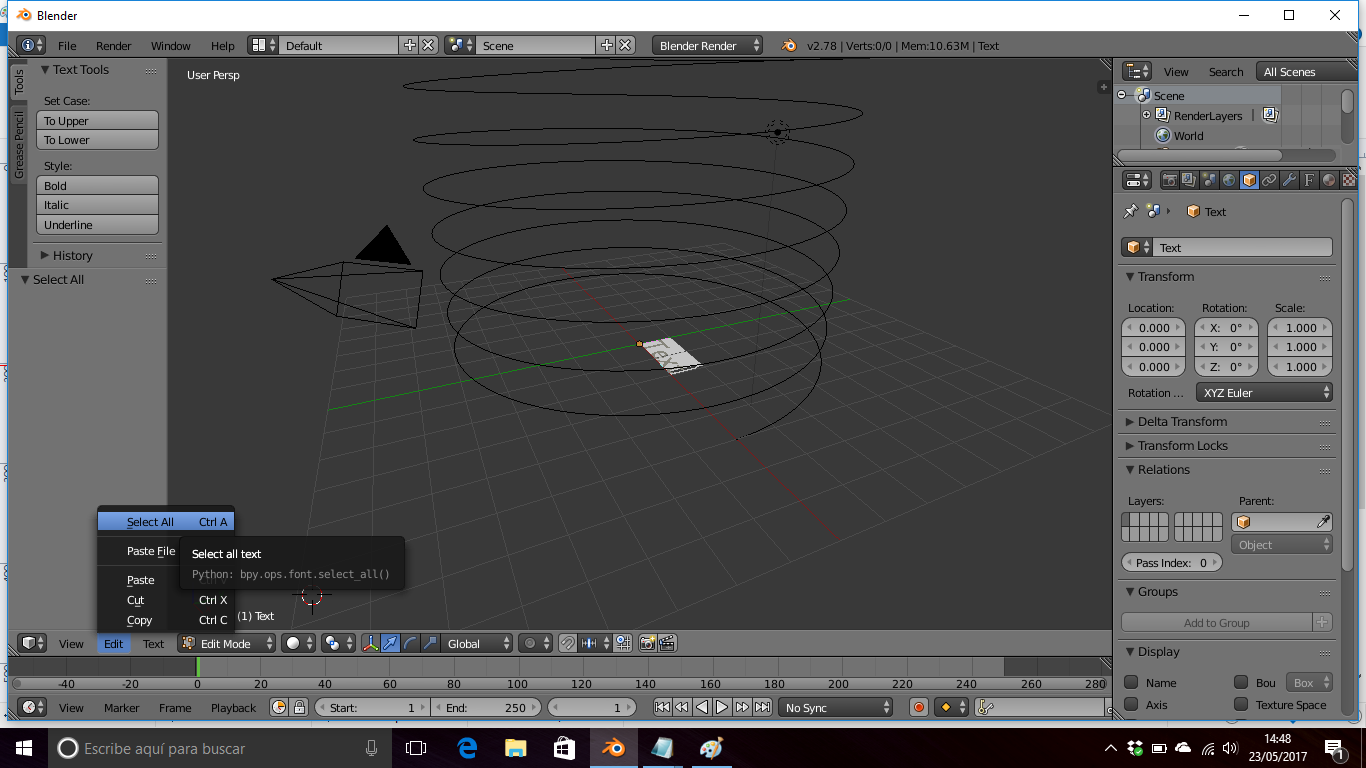
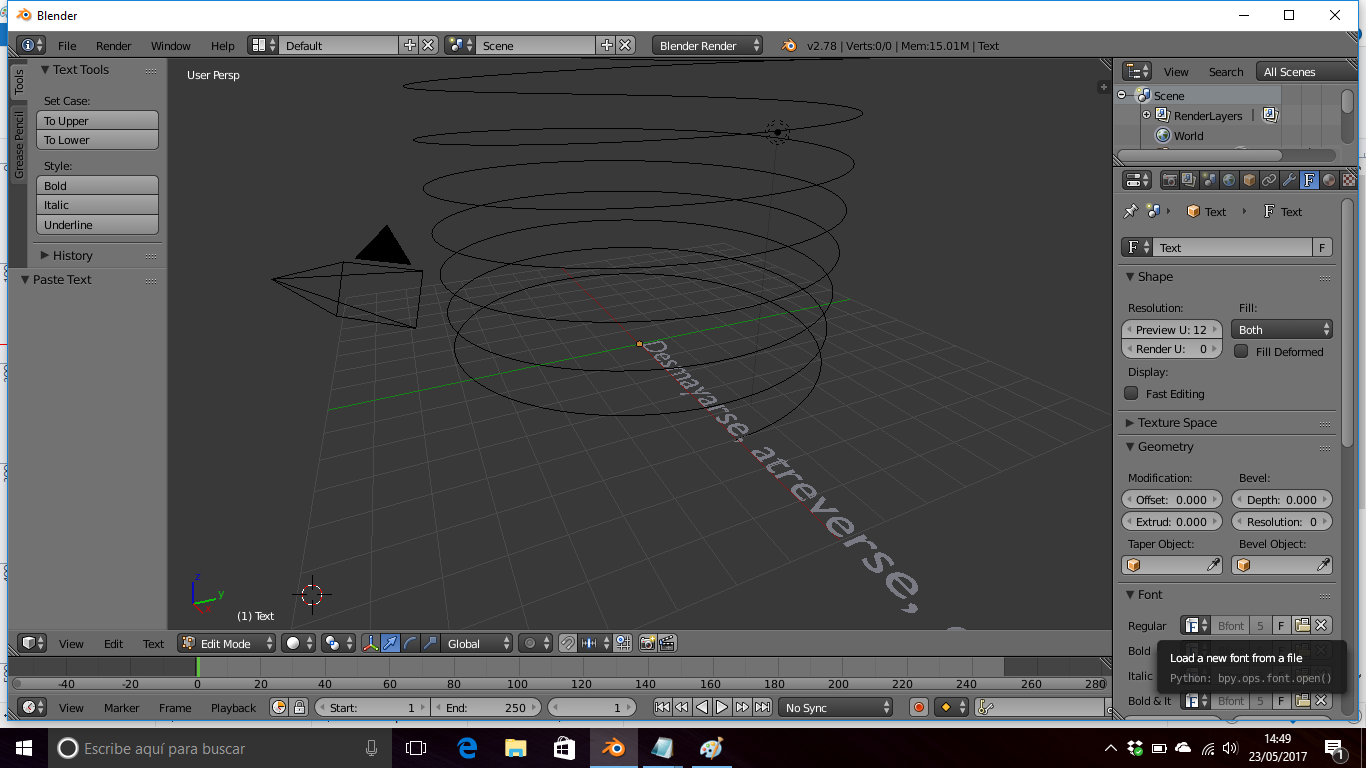
On object mode, click: Add=> Text.
Go to Edit mode (press TAB or click on the "Mode" menu).
Write your desired text on a text editor (notepad, etc.) and copy into clipboard (you can paste text straight from a file, but it does not work for non-english text, only for pure 7 bit ascii characters. So you'd better manually copy and paste your text unless it's an english text without special characters).
Delete the placeholder text:
Edit => Select all => press "DEL"
Paste your desired text:
Edit => Paste
You can also write in-place or in the text editor panel.
If you use the text editor panel you have to cut and paste too.
If you want to change your font, you can do it in the object data tab in the properties panel. If you don't see it (in the standard config I don't see it), you can expand the properties panel by dragging it.
Properties panel => Object Data (F icon) => Font => Regular => Load new font from a file (folder icon).
In case you don't know it, a good place to find fonts when inside windows is the C:\windows\fonts folder.
Twist Text
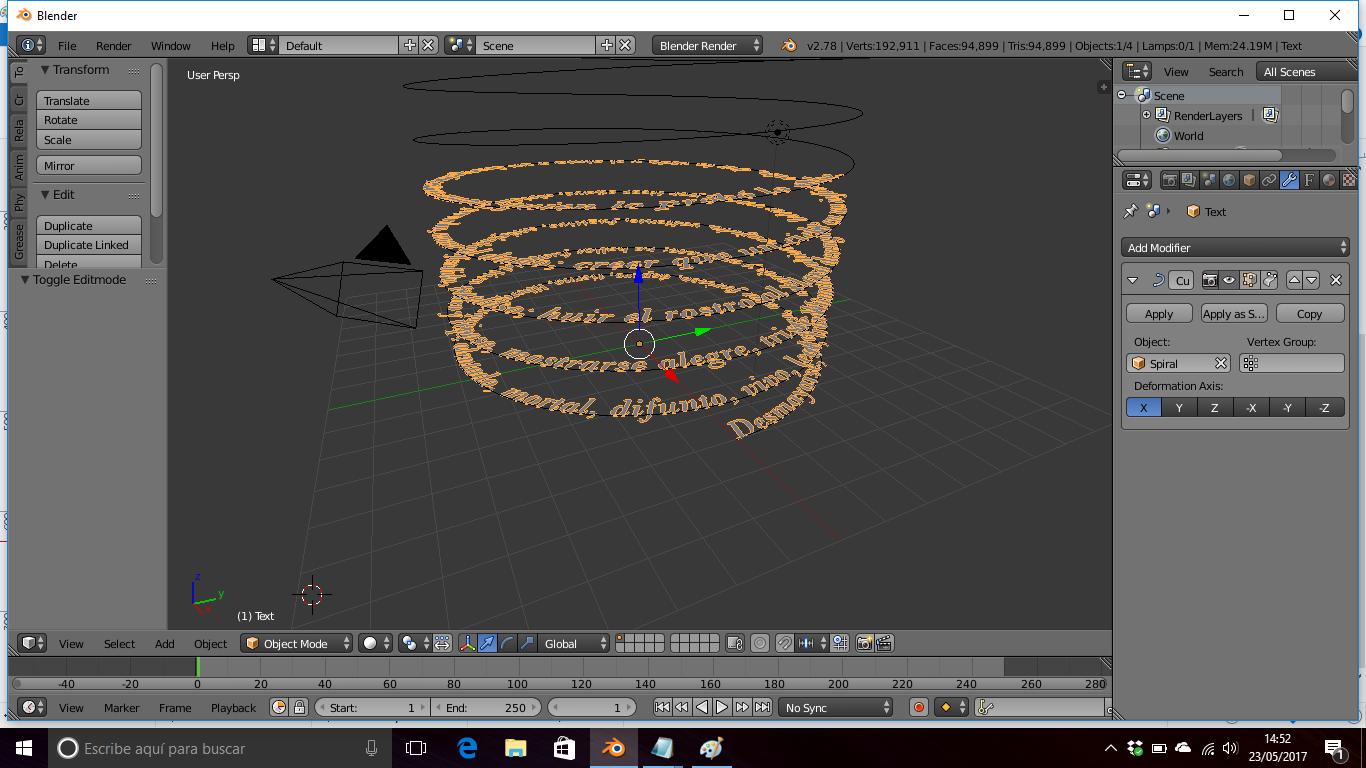
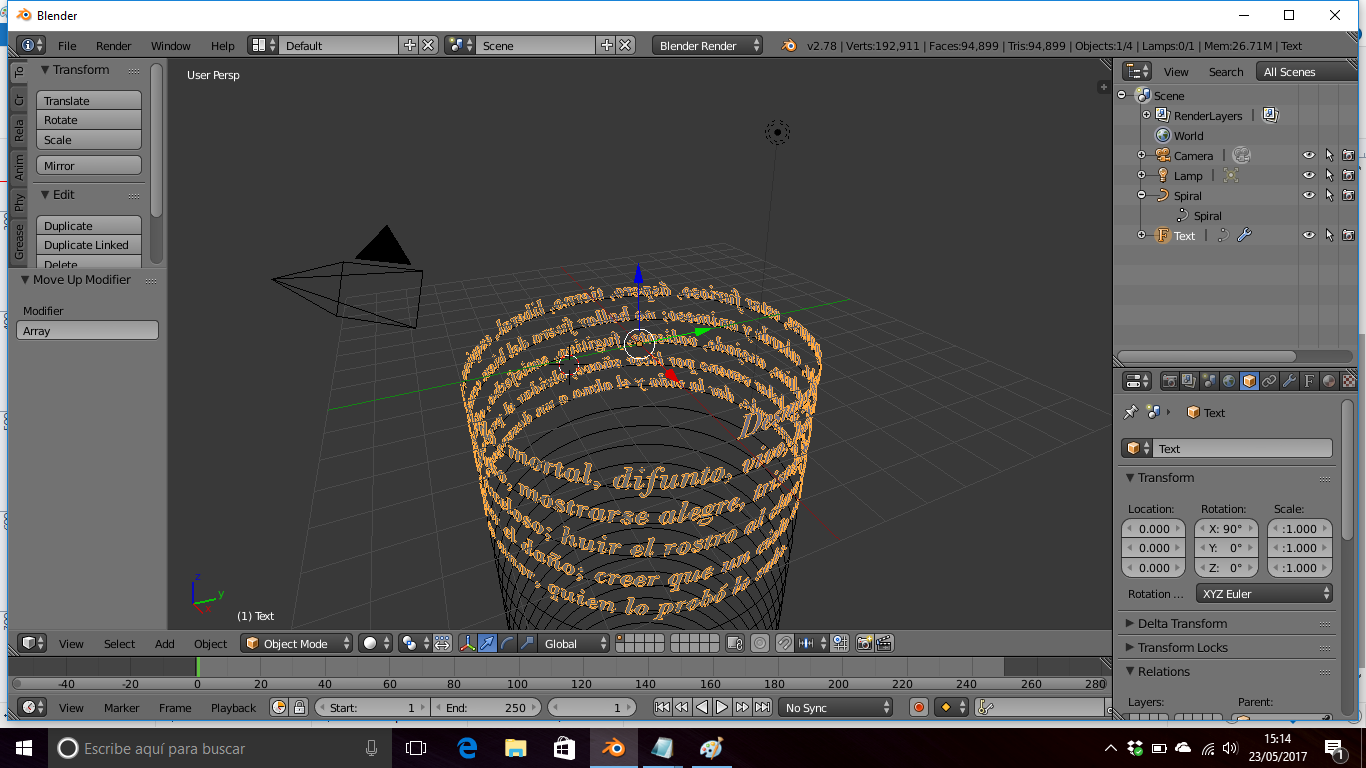
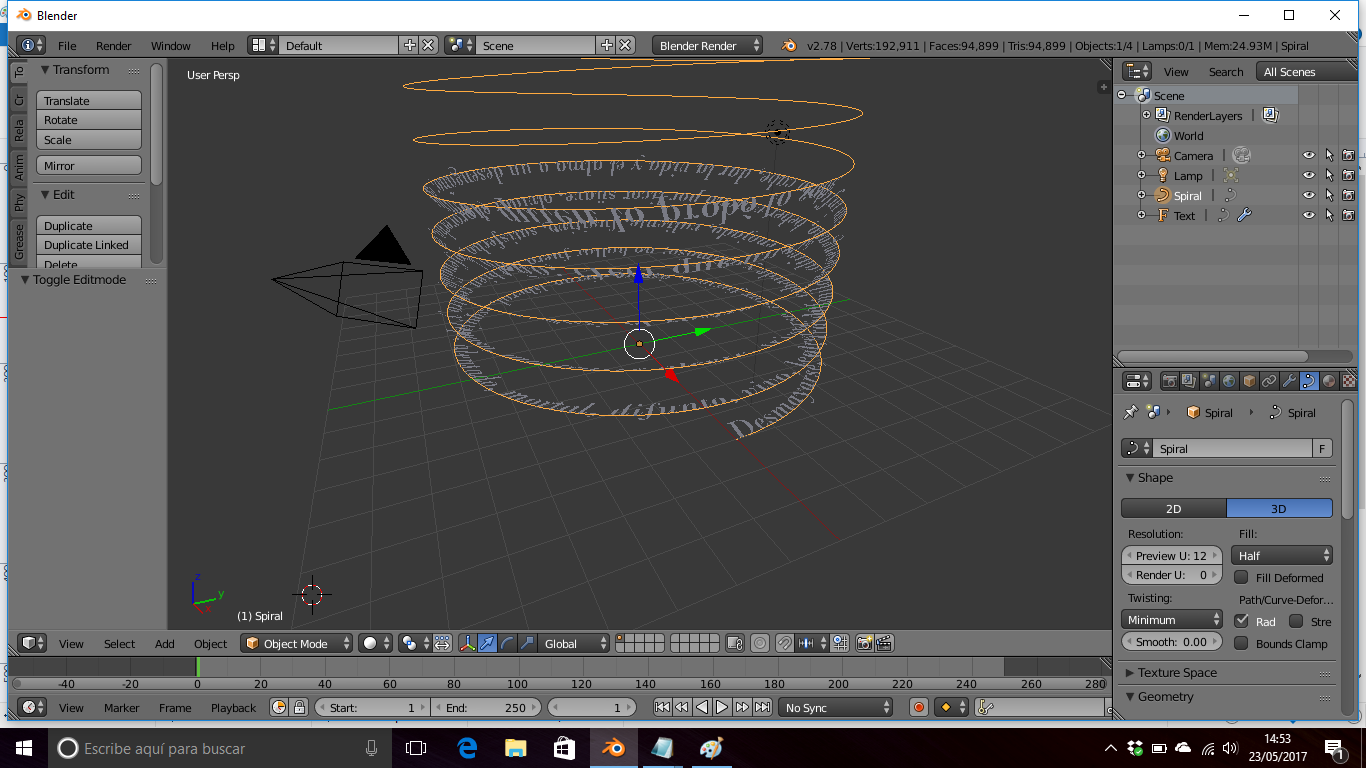
Return to Object mode (press TAB or click the mode menu). You need to be in object mode to be able to see modifiers in action.
Select the text in case it is not selected. Go to the modifiers tab in the properties panel. It's the one with a wrench icon.
Properties panel => Modifiers tab => Add modifier => Curve In the "Object" option, select the Spiral.
In "Deformation Axis" option, select X.
We have the text turning around the spiral, but it is laying flat. We want to make it vertical. To do it, we must rotate the text object.
Return to the Object tab in the properties panel. It's the one with a cube icon.
Properties panel => Object tab => Rotation X: 90
In case you see the text both turning and twisting (some lines flat, some standing, see picture 6b), this means you forgot to stablish the "Twisting Z up" option in step 1.
The text starts on the bottom of the spiral, wich is a bit weird. To make it start on top of the spiral, you have to turn the spiral upside down, by resizing its Z scale to -1: Select the Spiral Properties panel => Object => Scale Z: -1 This makes the text start on top of the spiral, and then go down.
Supporting Guideline
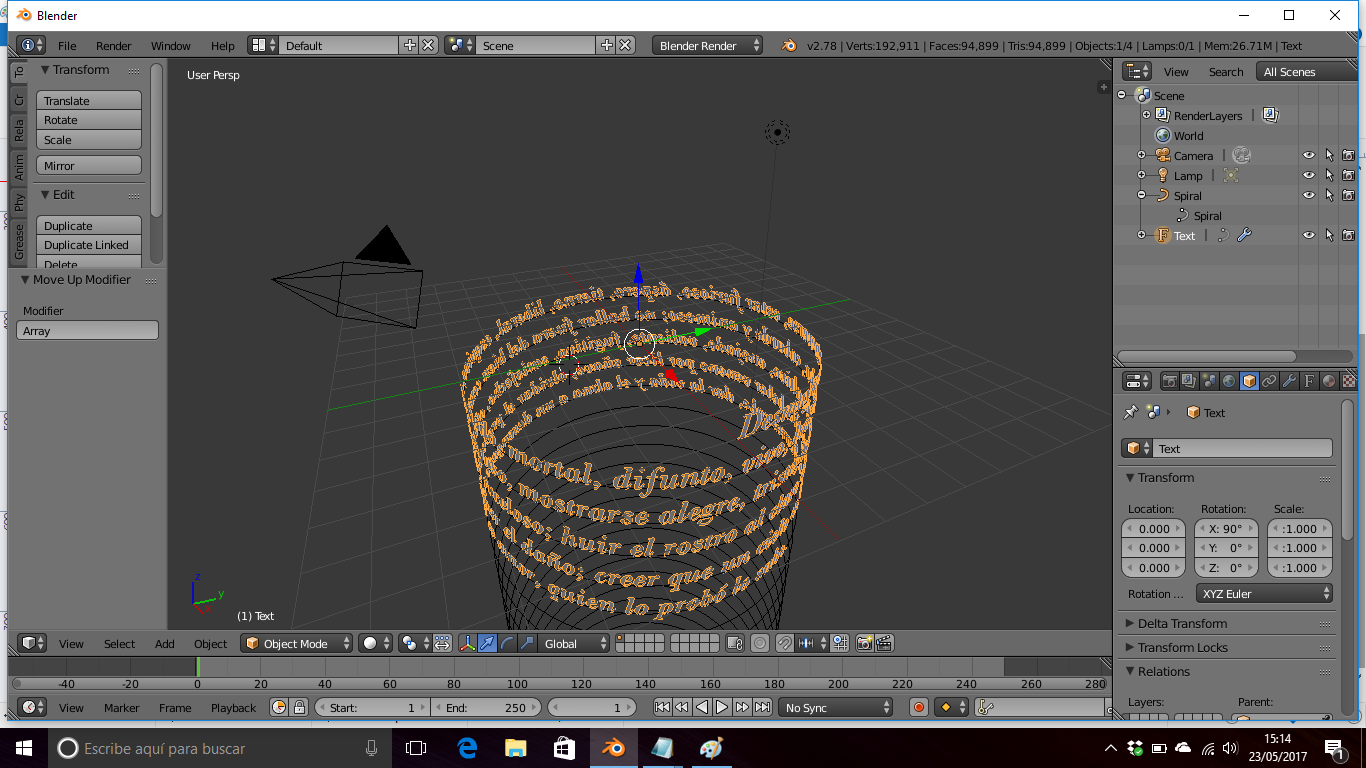
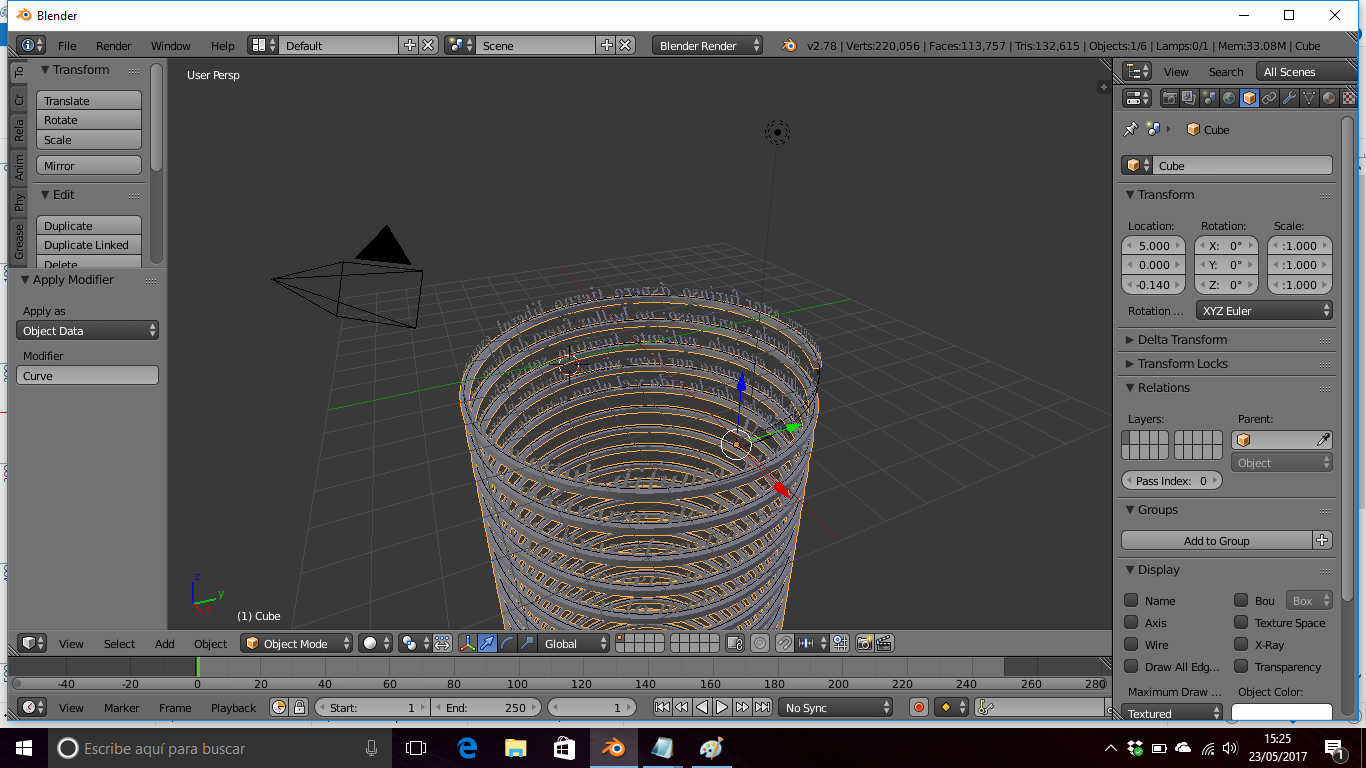
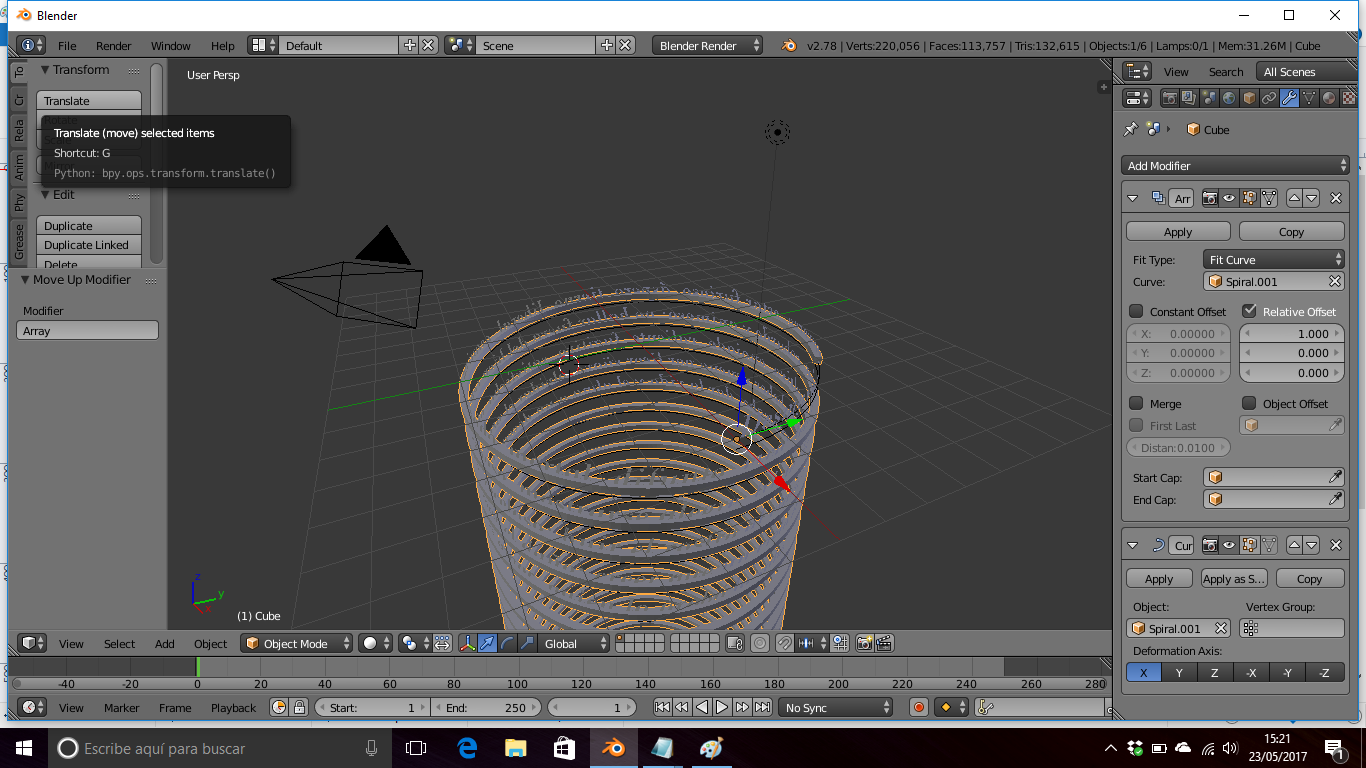
Since we want to make a solid object, we need a "guideline" wich acts as support for our vase.
We will create a copy of the spiral.
We select it and then click on: Object => Duplicate object (or shift D).
Using the Properties => Object => Translate box (or simply the mouse, if we are able to make sure we move on Z axis only), we move the second spiral (in this tutorial it's called Spiral.001) a bit below the letters. But make sure the first letters have an spiral under it!
Now we will make a mesh following the path of this spiral:
Add a Cube:
Add => Mesh => Cube
Select the following parameters:
Radius: 0.1
Location X: 5, Y:0, Z:0
We will add two modifiers. The first modifier is the array modifier, it makes many copies of our cube. The second one is the "curve" modifier we used with our text.
First the Array modifier:
Properties panel => Modifiers => Add modifier => Array
On fit type, select:
Fit type: Fit Curve
Curve: Spiral.001 (its the copy of Spiral).
Now the Curve modifier:
Add modifier => Curve
Object: Spiral.001 (copy of Spiral).
Apply all modifiers.
You should see now a solid spiral.
If you don't see it, try to change the order of the modifiers (use the arrows on the modifier box).
Now move the box spiral to the best z height with transform location.
Properties panel => Object => Transform=>Location Z: ... (fine-tune it with the arrows).
You can add a copy of the spiral if you want a second one over the letters.
Giving Volume to the Text
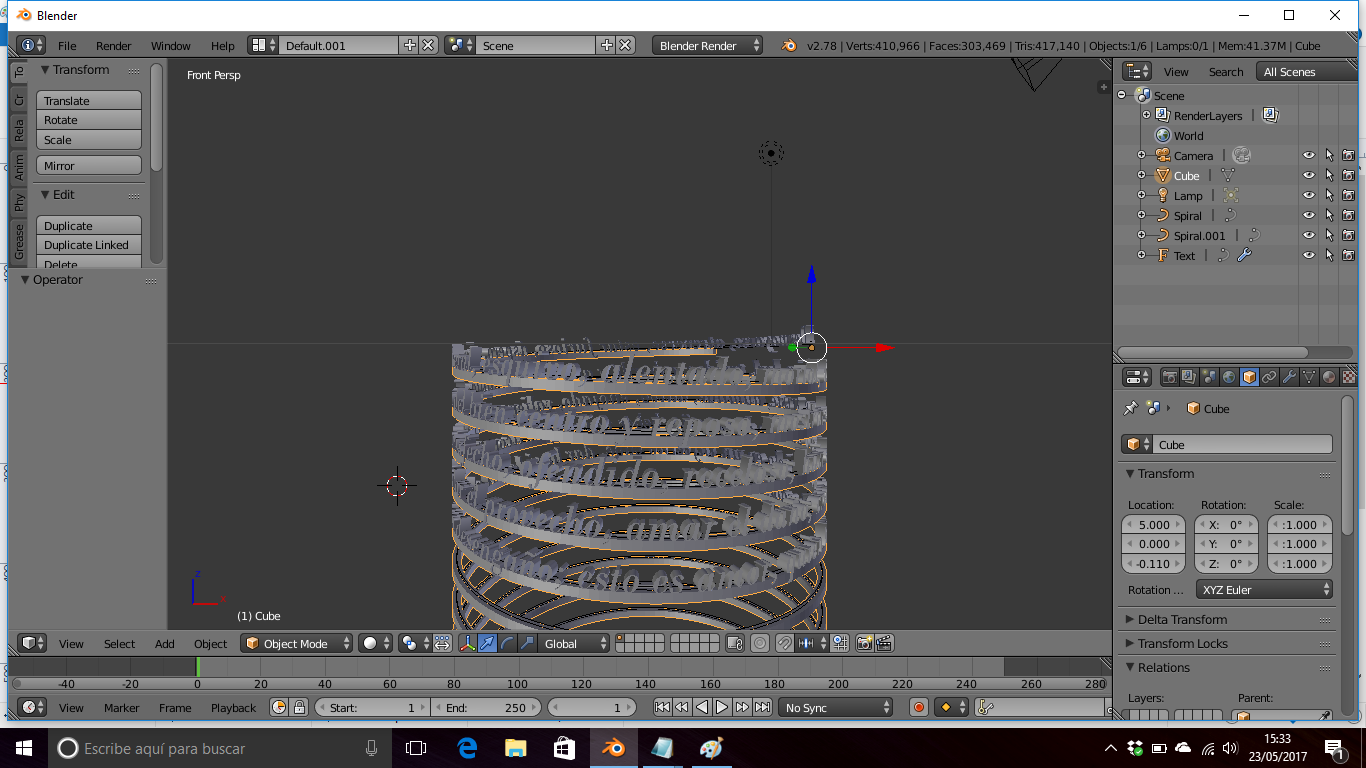
The text is a plain object. If you intend to 3d-print it, you have extrude it to give letters some volume.
Select the Text object.
Properties panel => Object Data (the one with the F icon) => Geometry => Extrude
Since the radius of our guideline "Cube" was is 0.1, a good extrusion could be 0.125, just enough to make text pop up from the guideline in order to see the font descenders.
Fine Tuning
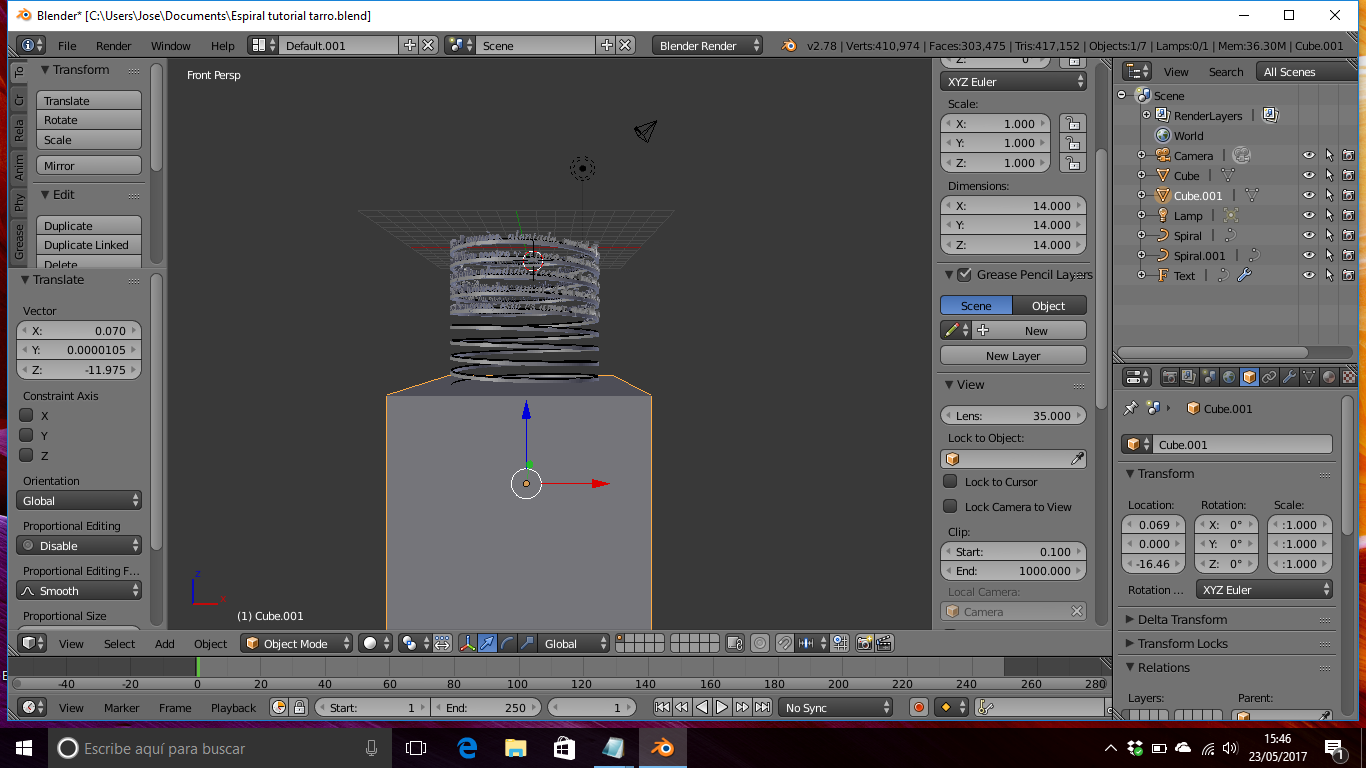
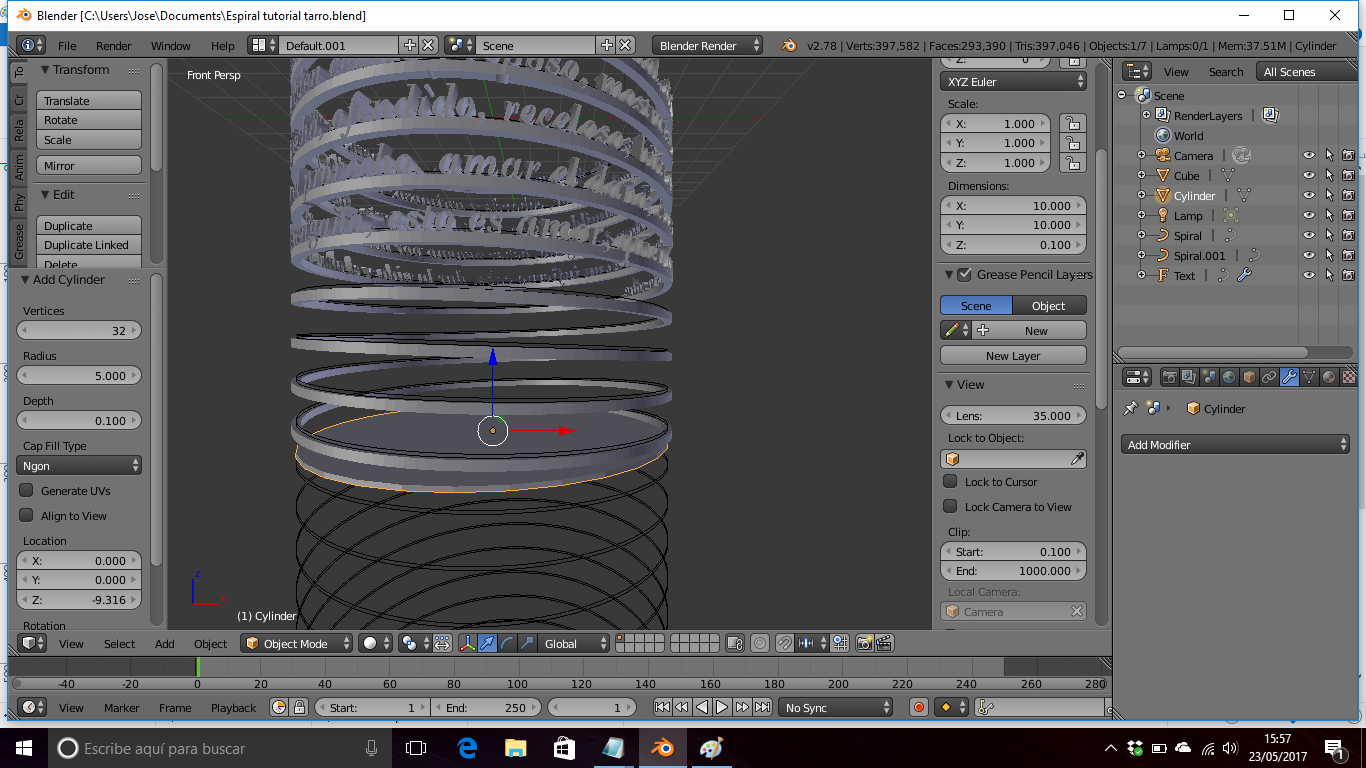
Now is time to fine-tune the Z position of our "guideline" Cube object.
On the screen layout choser (on top of screen) press the "+" icon to add a view, then on "View" select "front" (or press numpad 1).
You want also to fine tune your item height; you can do that by using boolean modifiers:
In the "front" view, add a cube:
Add => Mesh => Cube
Radius: 7,
Location X: 0, Y:0, Z:5
The new cube is called "Cube.001".
Move it so it cuts the spiral where you want the base to be, i.e., its top is just where you want the base of your spiral to be.
Add a Boolean modifier to the original "Cube" object (the spiral guideline), select "Difference" and select "Cube.001" (the second cube) as cutting object.
Select the "Cube" (spiral guideline) object.
Properties panel => Modifiers => Add modifier => Boolean
Operation: Difference
Object: Cube.001
Then hit "apply" to apply the modifier.
The guideline solid should have been truncated so it is a bit shorter. If you still have some guideline to cut, replace "Cube.001" and repeat the operation.
The final touch is adding a base to the spiral. You can do it by simply adding a cylinder with radius 5 and depth 0.1 on the bottom of your spiral.
Add => Mesh => Cylinder
Radius: 5
Depth: 0.100
Location: X: 0 Y: 0 Z: (select where you want to base to be).
Save to STL and Print It With Cura.
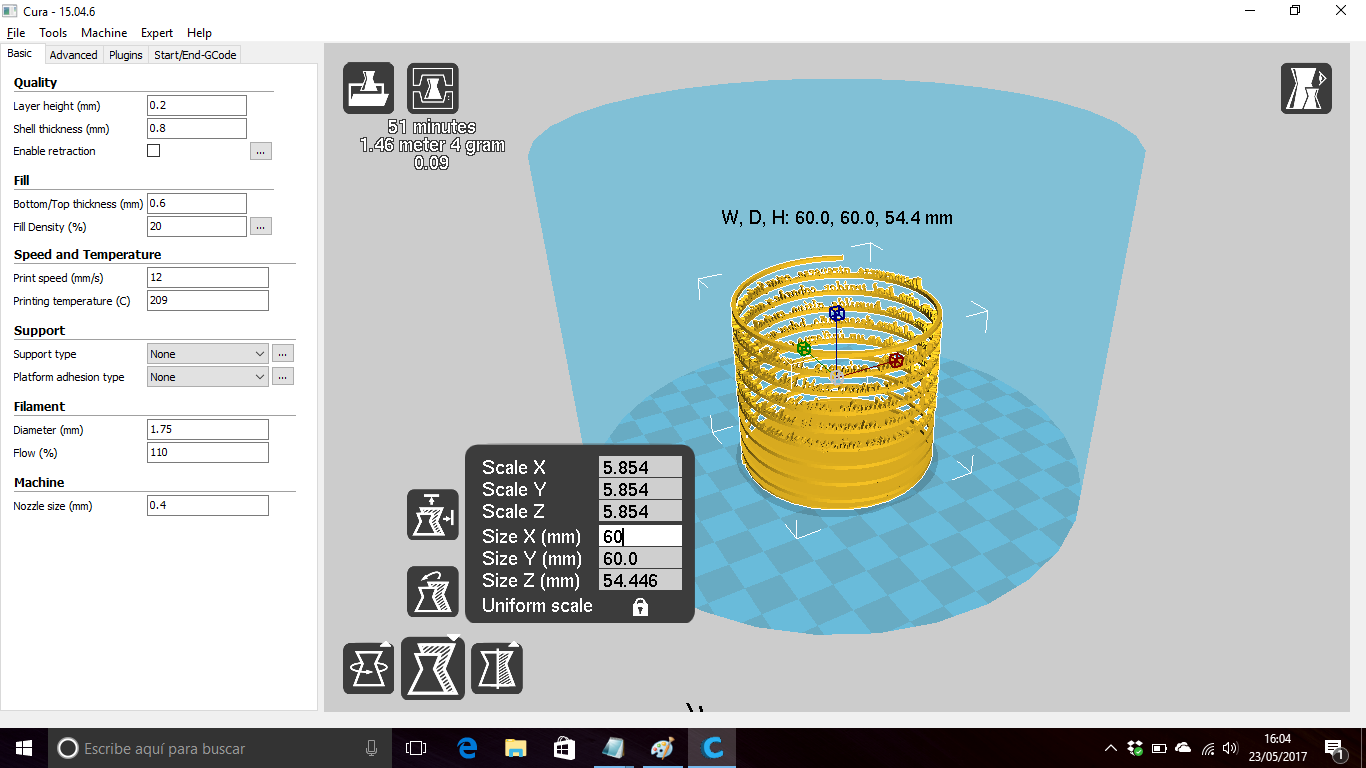
STL is the most usual format for 3d printer objects, and Blender has native support for STL exporting. If you don't see the "Export to STL" option, it means you have disabled the Export to STL addon. Please reenable it.
Start saving your file:
File => Save => select a name AND press "Save as blender file."
Please note that pressing "RETURN" DOES NOT save the file, you have to press the "Save as blender file" button).
Then export to STL:
File => Export => Stl => Select a name AND press "Export STL"
Please note that pressing "RETURN" DOES NOT save the file, you have to press "Export STL" button. I learned it the hard way.
Print it with Cura.
Cura is a 3d printing program, but it can also be used to fine tune some values in case you are going to a 3d print shop.
Blender counts in pixels, so Cura will not understand the "5.00" radius we used in blender as "5 cm". We have to resize our image.
Press on the Scale icon.
Select X size.
A value between 50 and 60 mm (5-6 cm) is a good size for a pencil holding glass.
You can now print your ítem, or save it to send it to some 3d printing service.