Play Bluetooth on Sonos Using Raspberry Pi
by replayreb in Circuits > Raspberry Pi
27484 Views, 24 Favorites, 0 Comments
Play Bluetooth on Sonos Using Raspberry Pi
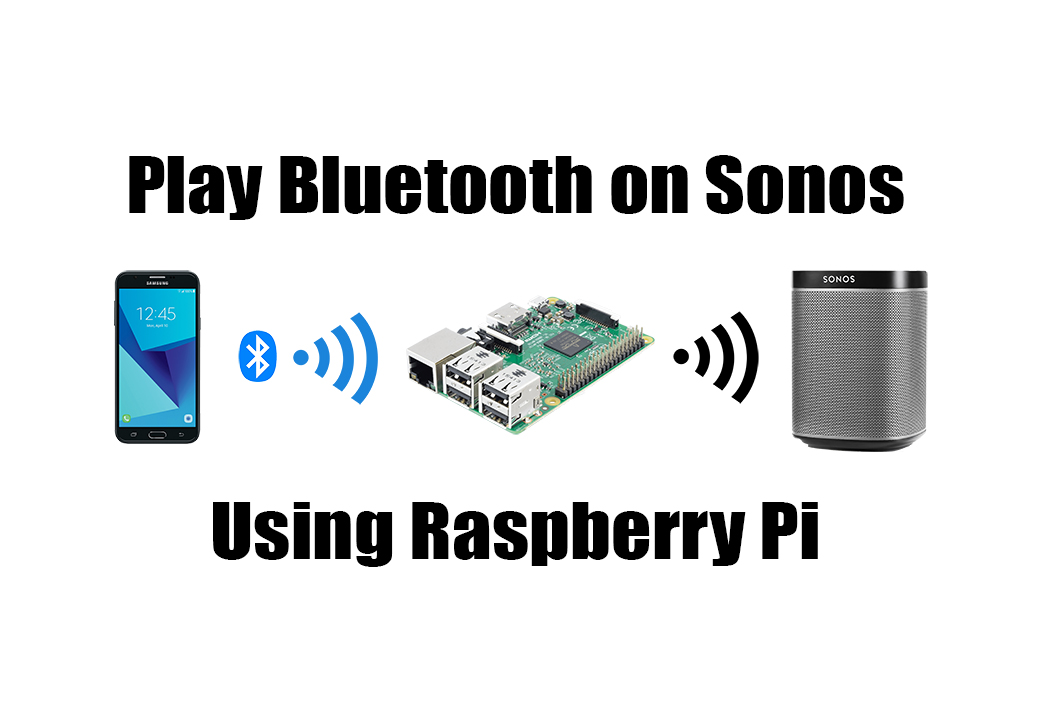
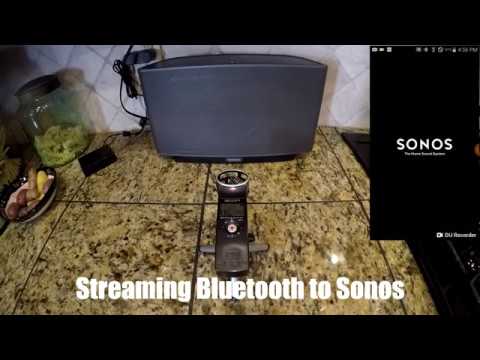
I previously wrote an instructable describing how to add an aux or analog line-in to Sonos using a Raspberry Pi. A reader asked if it would be possible to stream bluetooth audio from his phone to Sonos. It is easy to do this using a bluetooth dongle plugged into the line-in of the more expensive Sonos Play:5 or Sonos CONNECT; however, you lose fidelity converting bluetooth (digital) to analog then back to digital and if you only own one of the less expensive Sonos speakers then this is not an option. This instructable describes how to set up a Raspberry Pi to stream bluetooth audio from your phone to any Sonos speaker.
NOTE: Keep in mind that we are going to be transmitting bluetooth audio from a phone to the Raspberry Pi and converting it into an mp3 stream before sending it to Sonos, so there will be a delay of a couple of seconds. If you are using this to watch a video, the audio will be out of sync.
What you will need:
Raspberry PI 3 Model B (there is a newer, faster Model B+ available but I stuck with the regular Model B because I have read of some problems with the B+ locking up and also the B+'s wifi and bluetooth radios have metal shielding around them to make them FCC compliant when installed inside another device but I wanted maximum bluetooth range and was afraid the shielding could hinder it)
A desktop or laptop computer with a microSD card reader
Monitor or TV with HDMI input (for initial setup only)
USB or bluetooth keyboard and mouse (for initial setup only)
Plastic Raspberry Pi Case(I'm using a plastic case for this project to maximize bluetooth range)
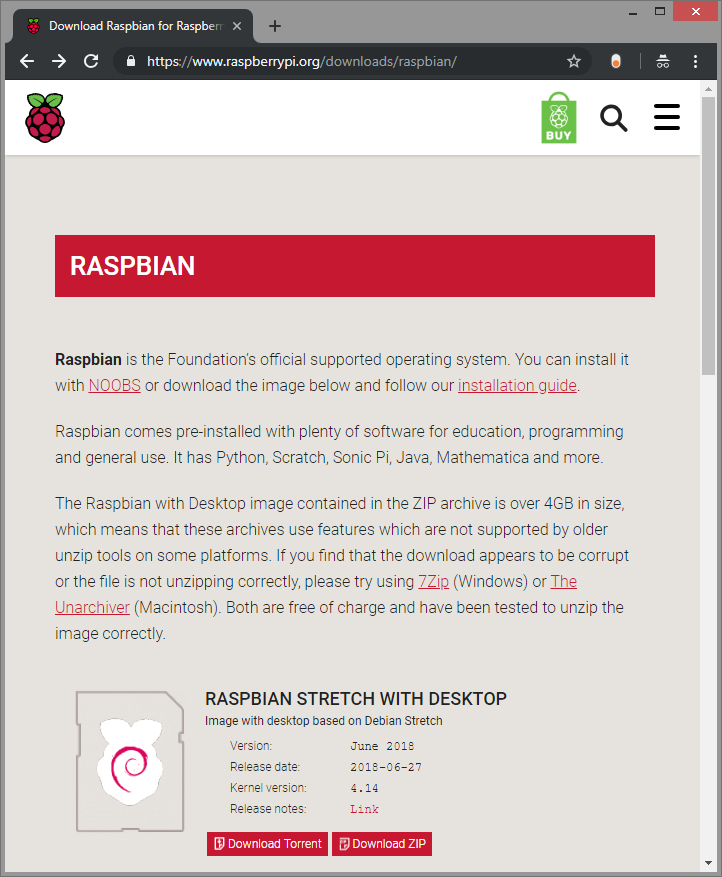
Navigate to https://www.raspberrypi.org/downloads/raspbian/ on your regular computer and download "RASPBIAN STRETCH WITH DESKTOP".
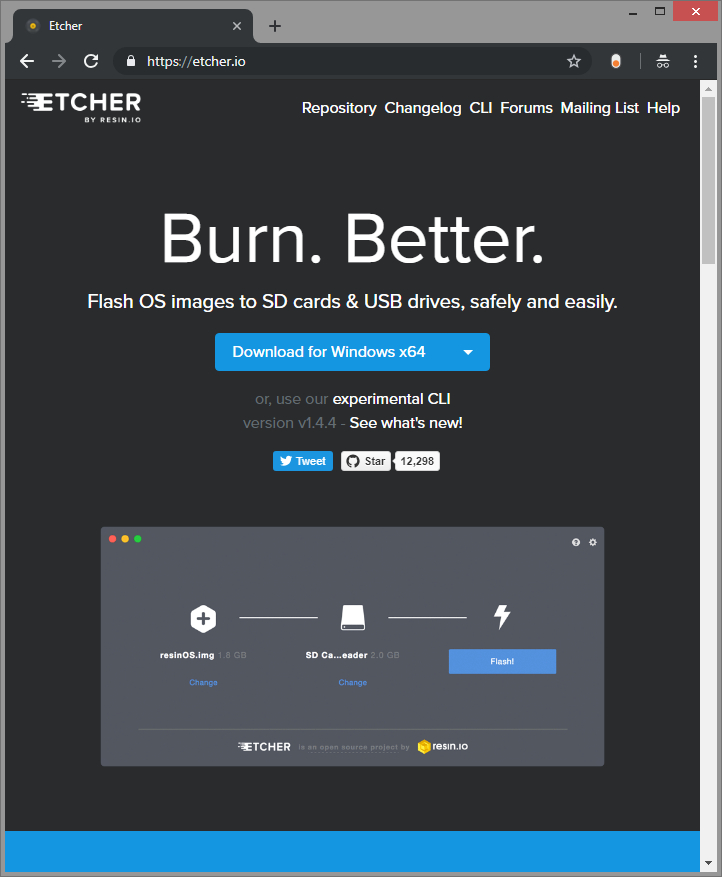
Also go to https://etcher.io/ and download Etcher and install it.
NOTE: In my previous instructable I described how to download NOOBS to install Raspbian; however, this method is a little bit faster. Either way is fine.
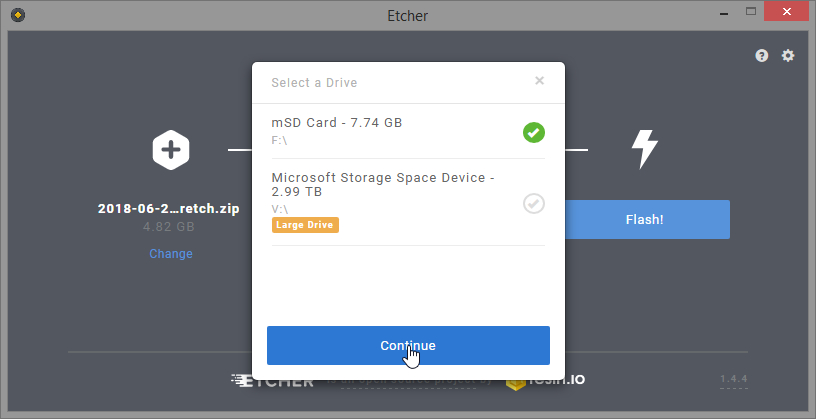
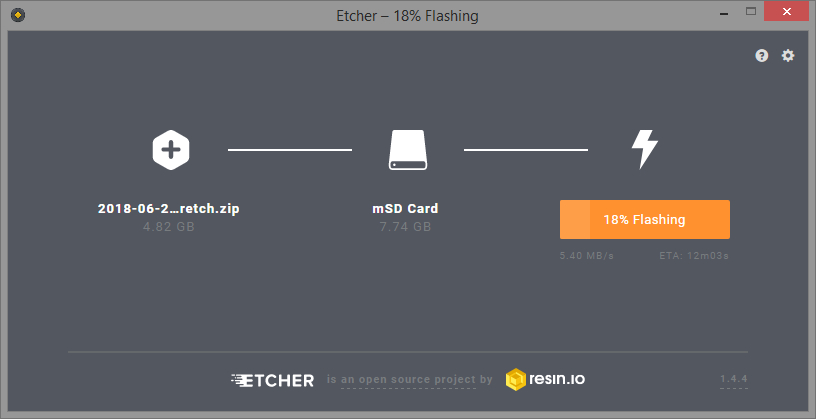
Run Etcher and click Select image and browse to the zip file. Click on Select drive and browse to the microSD card then click Flash!
NOTE: Some of these next steps are similar to my previous instructable so skip ahead if you already have root password, static IP and VNC set up.
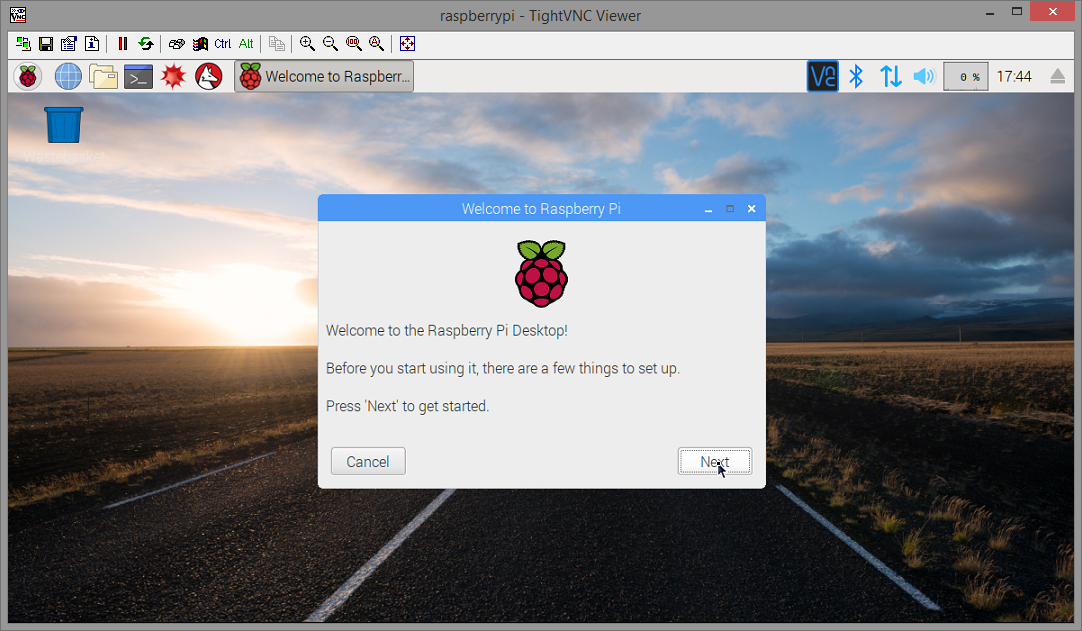
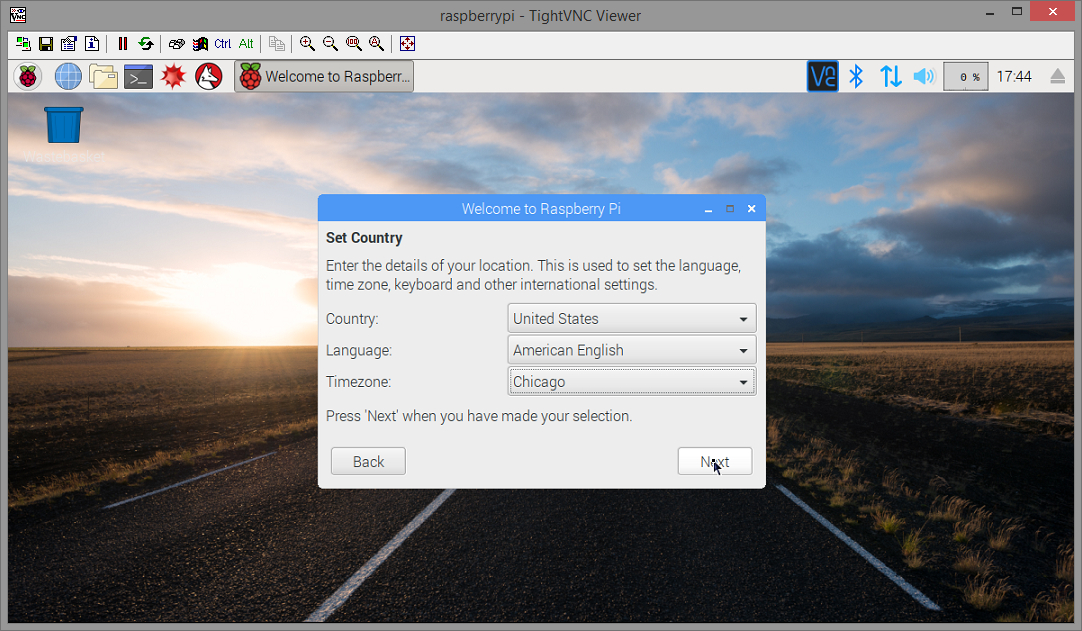
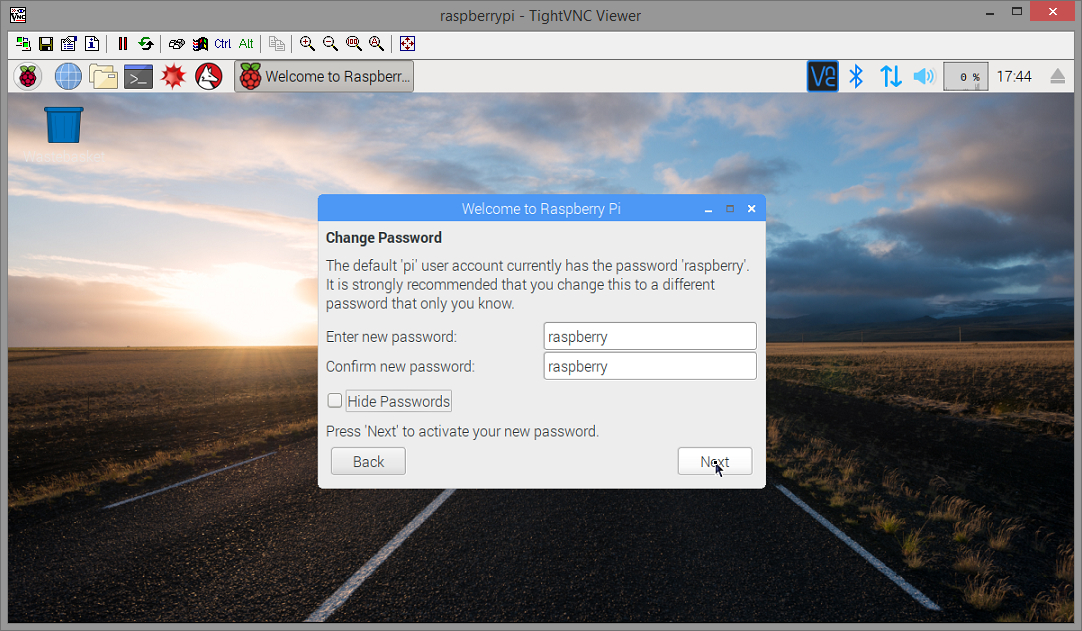
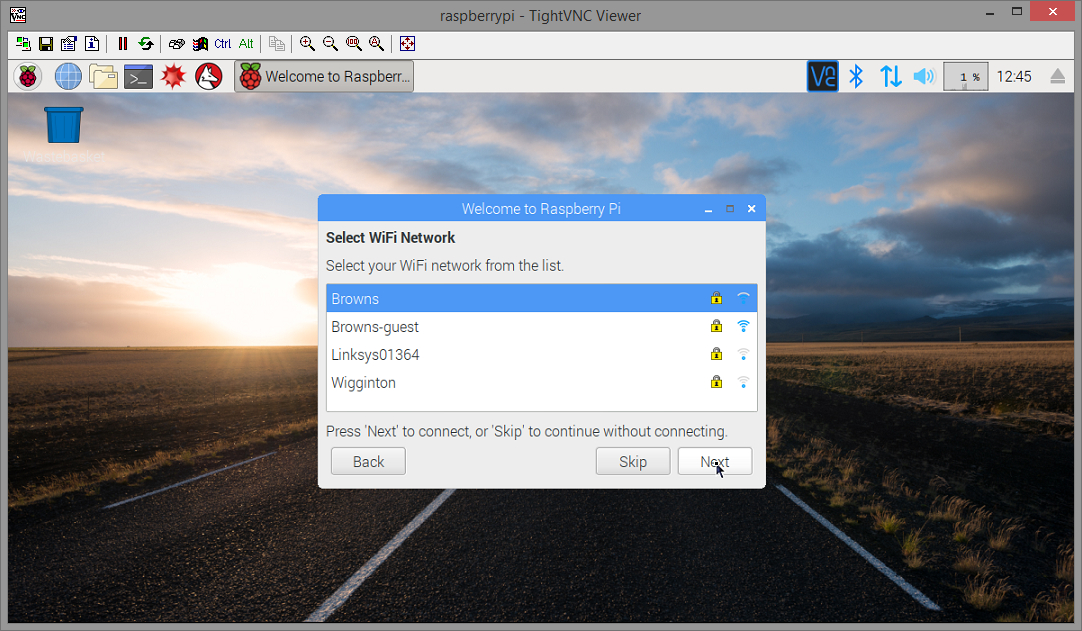
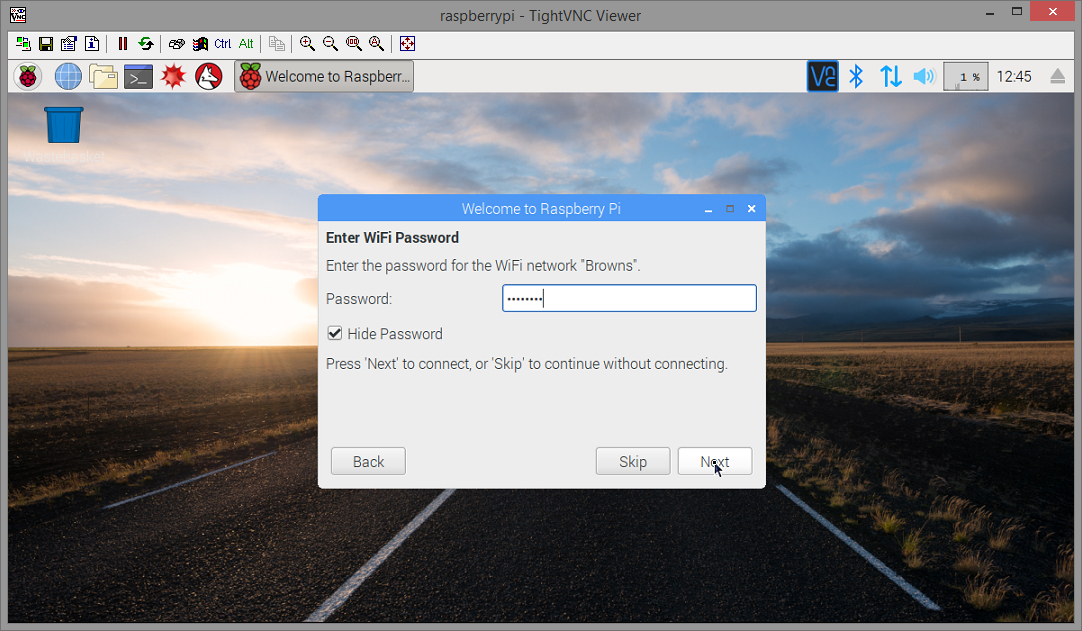
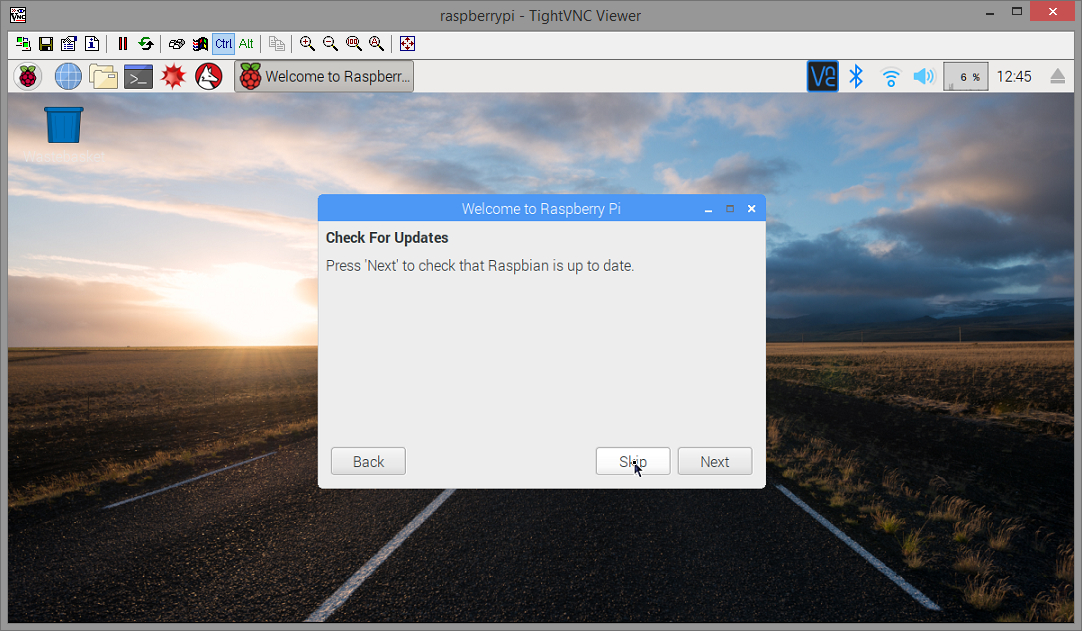
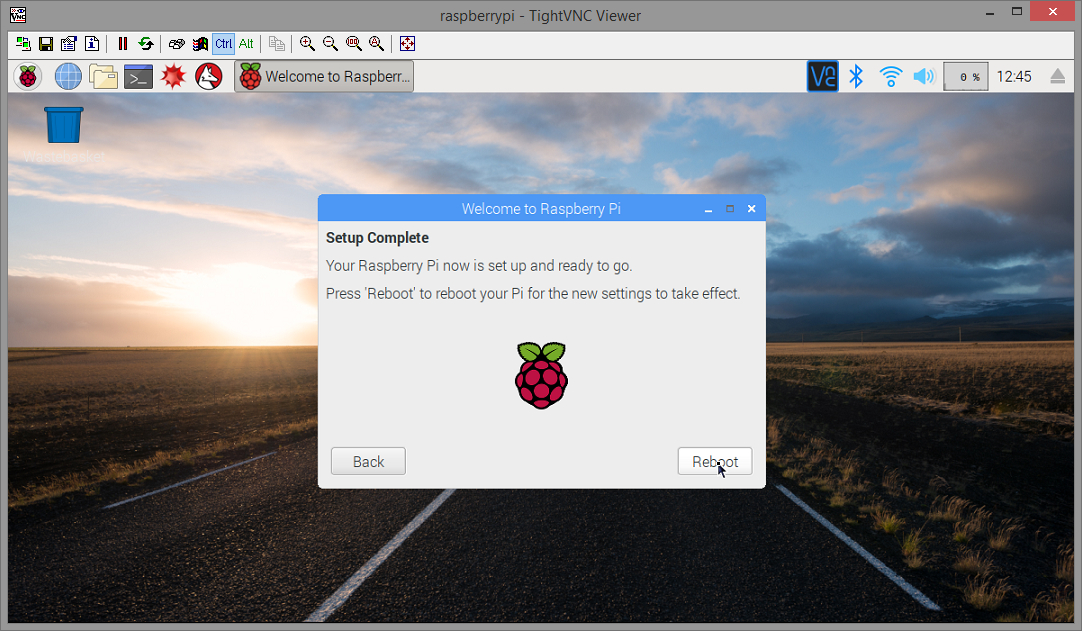
Insert the microSD card into the SD card slot on the underside of the Raspberry Pi. Connect an HDMI cable from the Raspberry Pi to your monitor or TV. Connect the USB keyboard, mouse and finally the Micro USB power cable. After it boots the Raspbian desktop will appear. It will walk you through several settings but I would recommend NOT checking for updates. Click Skip. I kept getting a "blueman.bluez.errors.DBusFailedError: Protocol not available" error when trying to pair bluetooth after all the updates were installed so I had to start all over again.
TIP: If you don't want military time, RIGHT-click on the clock, select Digital Clock Settings and change the Clock Format from %R to %r
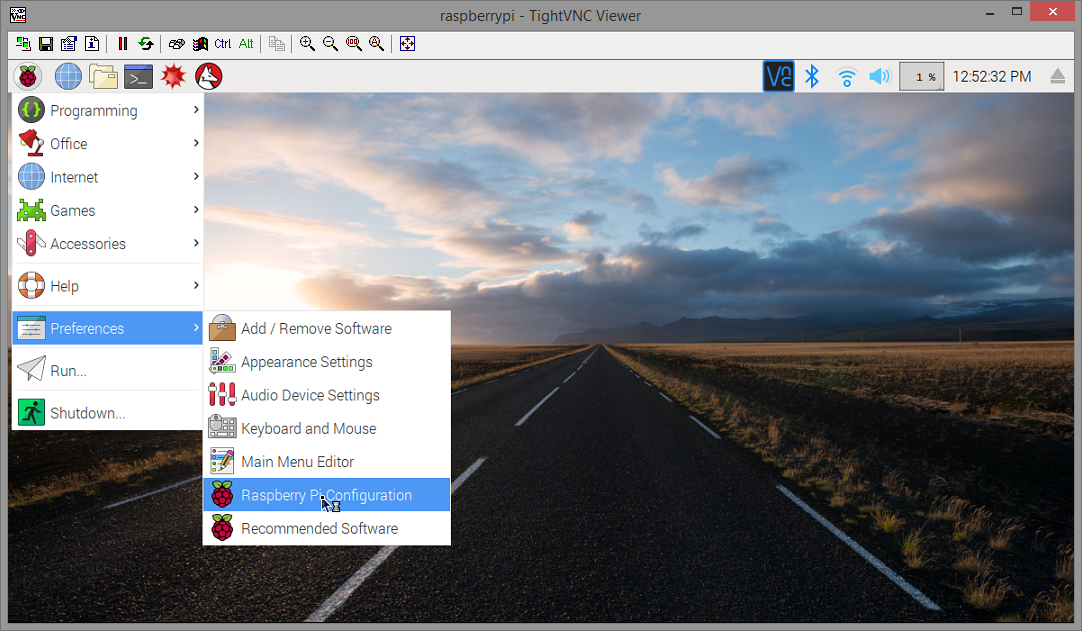
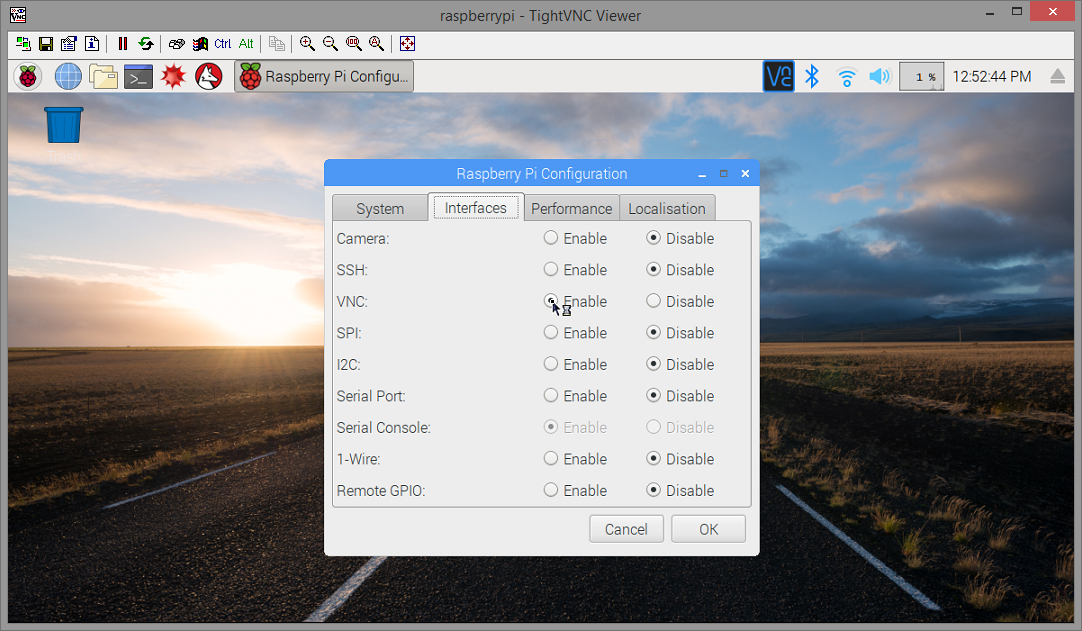
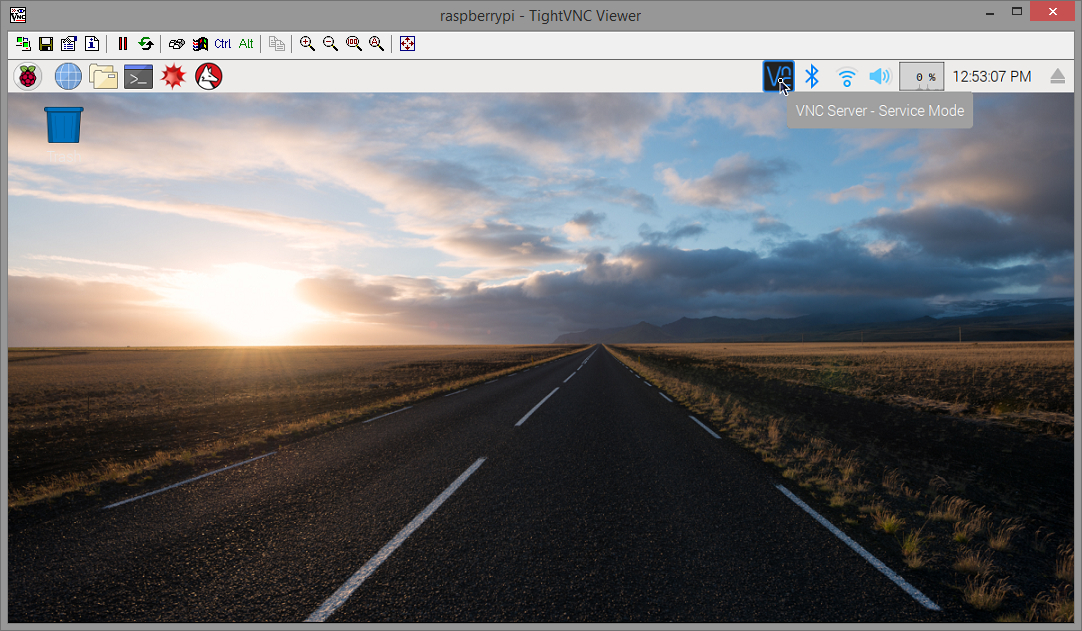
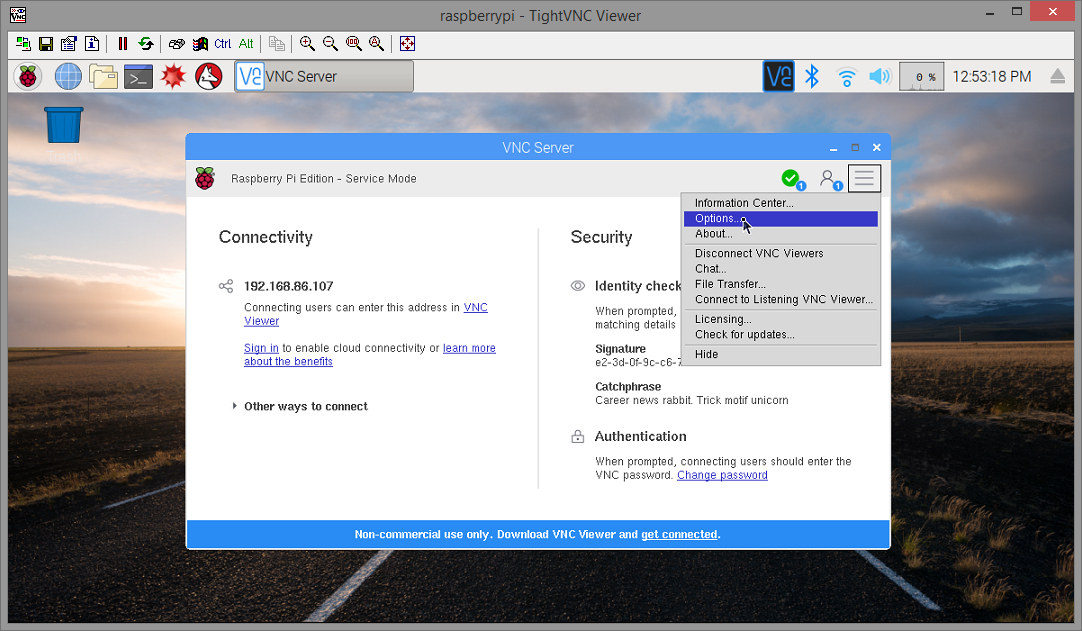
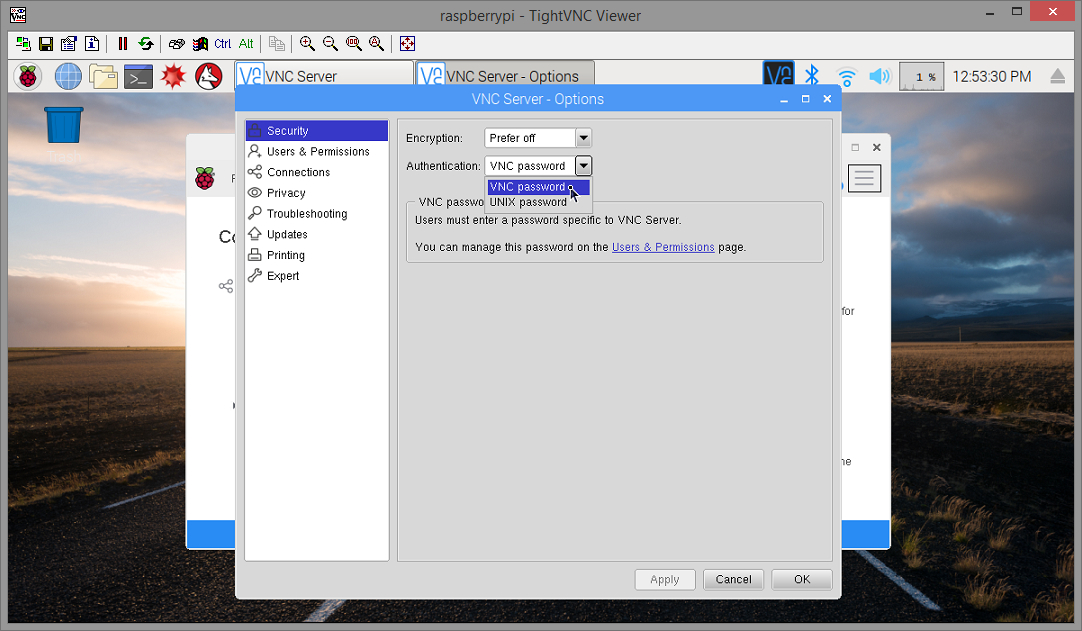
Next we're going to enable the built-in VNC server. This makes things so much easier as you can simply copy and paste commands via VNC rather than typing them. Select GUI Menu > Preferences > Raspberry Pi Configuration > Interfaces. Click Enabled next to VNC and then OK. After a few seconds a VNC icon will appear on the taskbar. Click it and then the menu icon at the top right (box with 3 horizontal lines) and then Options. In the Security options set Encryption to "Prefer off" and Authentication as "VNC password" then click Apply. A password box will pop up. Enter "raspberry" (without the quotes) for the password into each box and click OK.
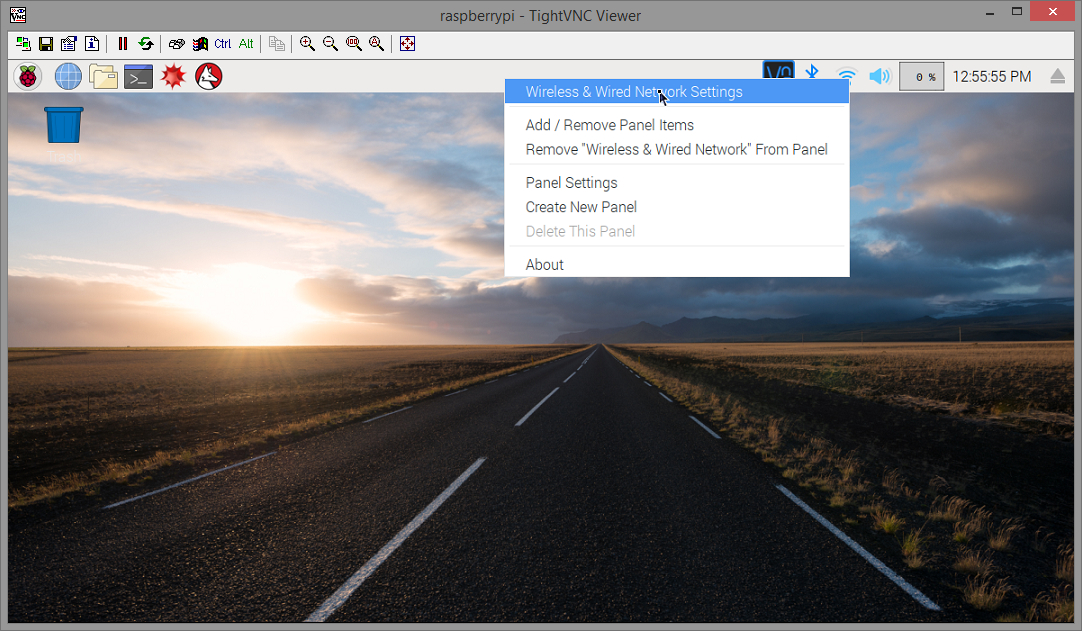
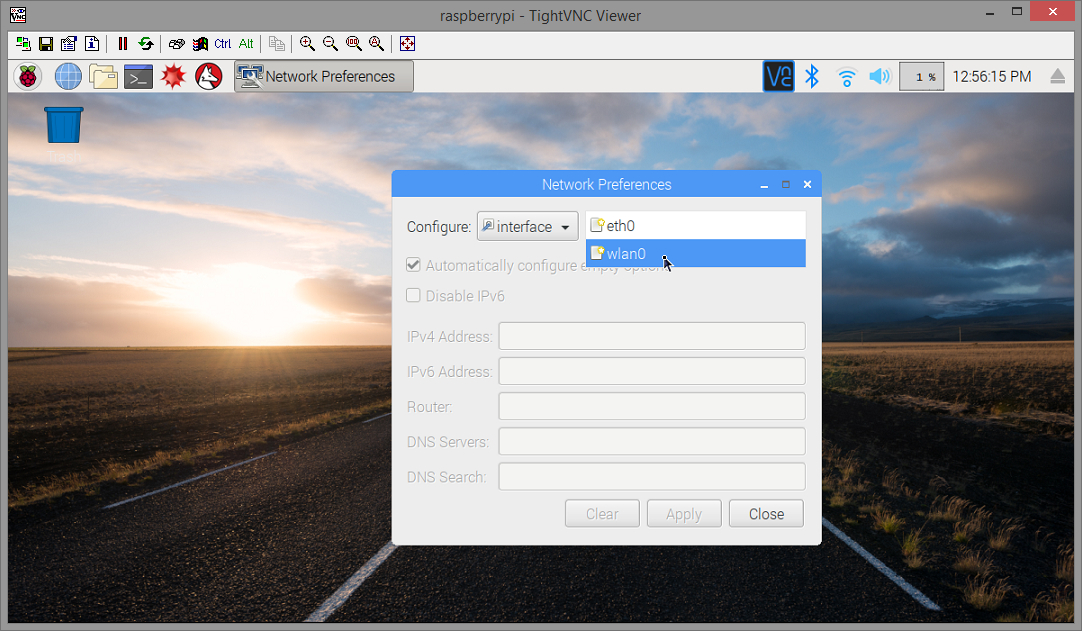
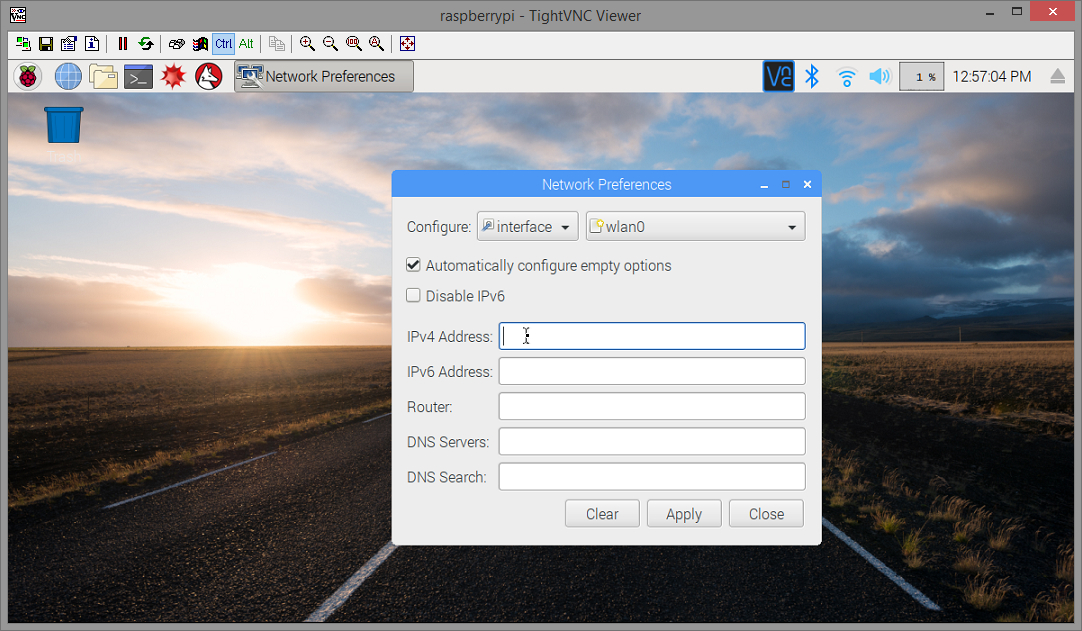
Before we go any further we need to assign a static IP address. If your Pi's IP address is randomly assigned by your router's DHCP server, then the IP address could change later and you wouldn't be able to connect via VNC (or Sonos for that matter). RIGHT-click the network connections icon on the taskbar (the little up and down arrow icon) and select "Wireless and Wired Network Settings". LEFT-click the upper right box and select "eth0" to configure the ethernet connection or "wlan0" for wireless. I would advise assigning a static IP to only one or the other. I had a problem when I first set up my Pi where I assigned the same static IP address to both connections and my Pi's wireless locked up and I couldn't get it back working correctly so I had to start all over installing the OS. Anyway, enter the IP address you want in the IP address field and enter your router's IP address in both the Router and DNS Servers field. Click Apply and Close.
NOTE: It may be easier to assign a static IP address using your router's DHCP IP reservation feature if it has one. You may need the MAC address of the Pi or it may just show up in a list of connected devices on your router's admin page. If you need the MAC address then type in the command "ifconfig eth0" in the terminal window for ethernet or "ifconfig wlan0" for WiFi. Interestingly enough, the WiFi MAC address will show up on the line that begins with "ether"
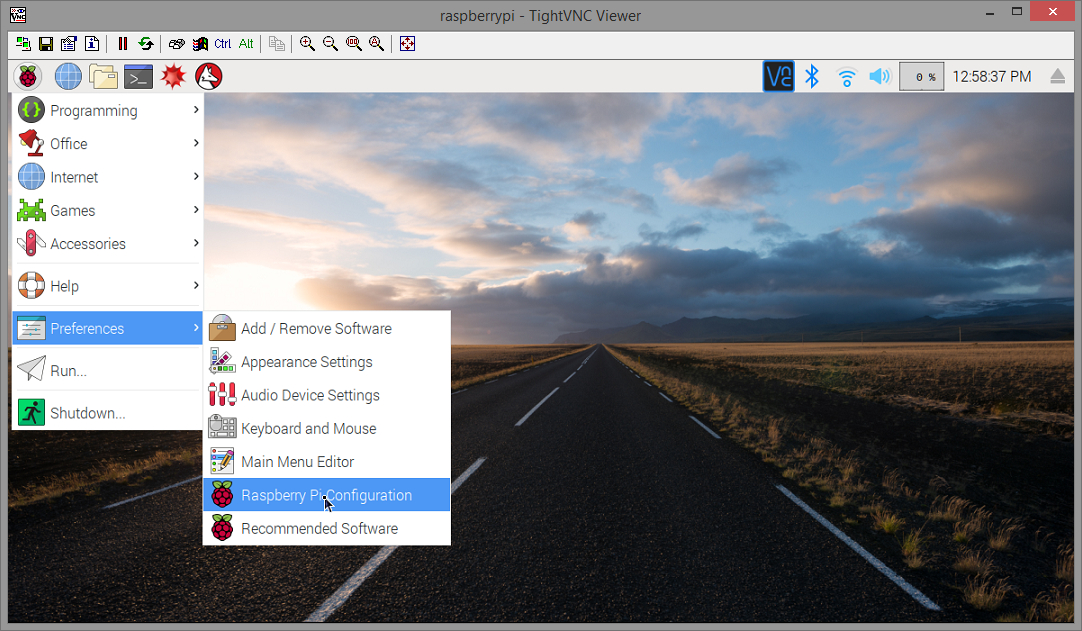
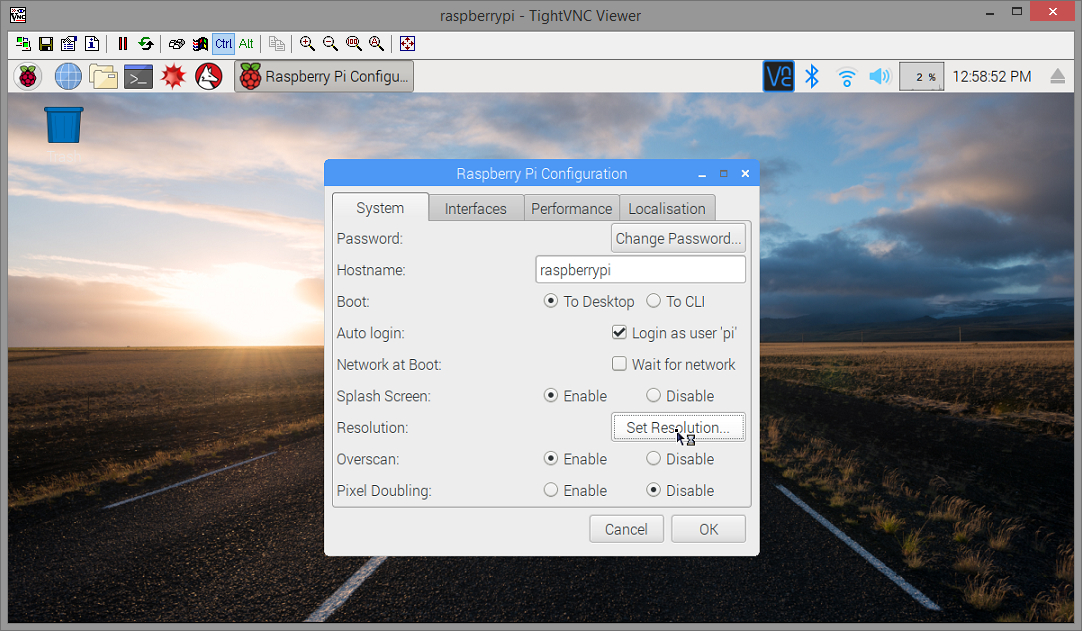
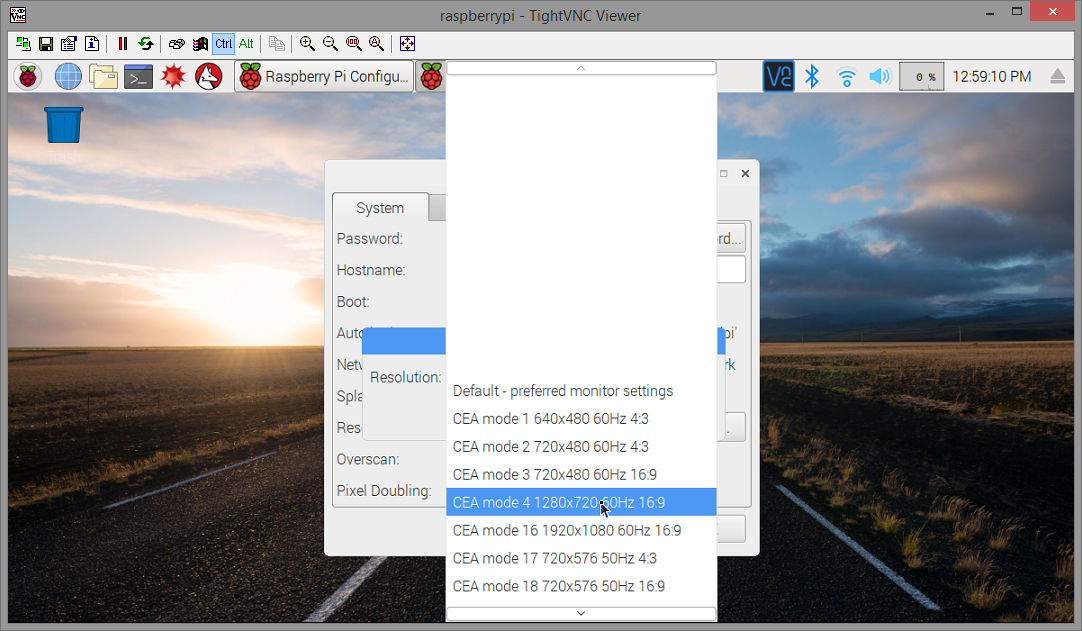
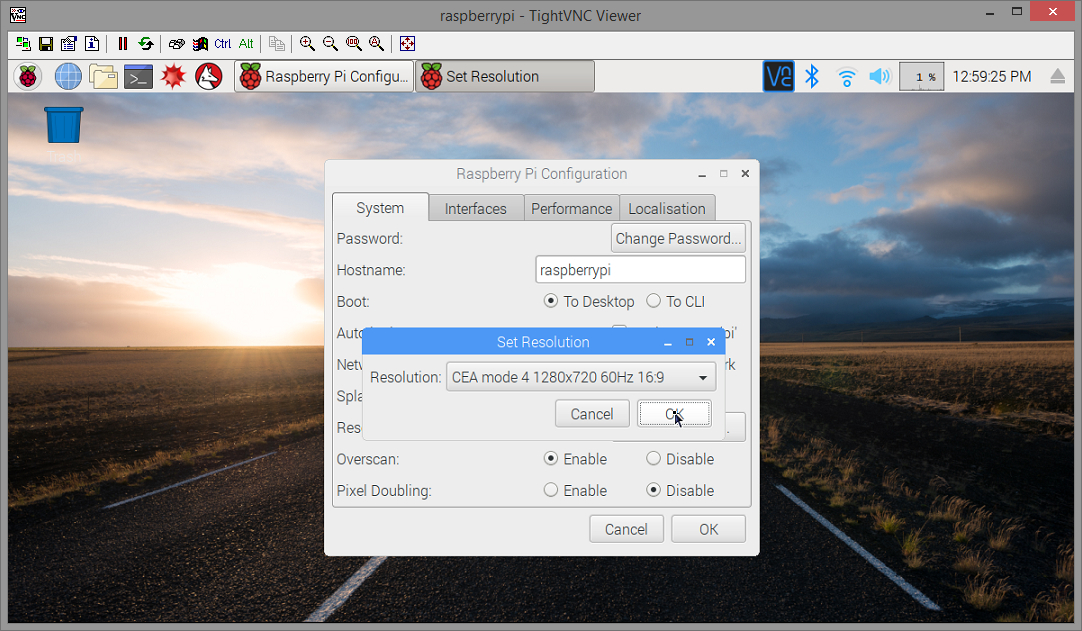
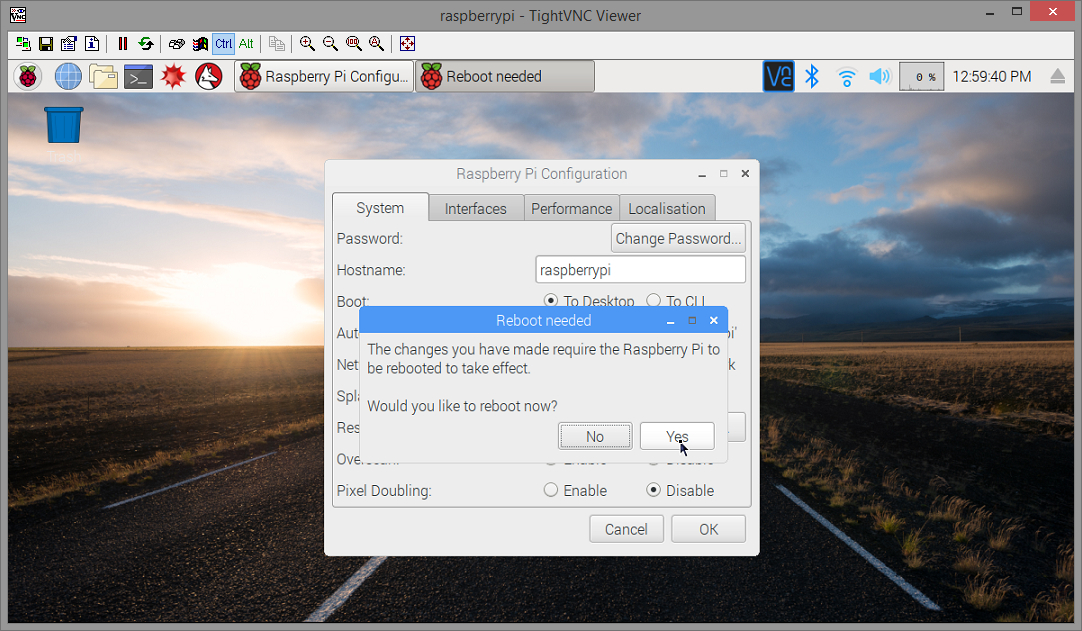
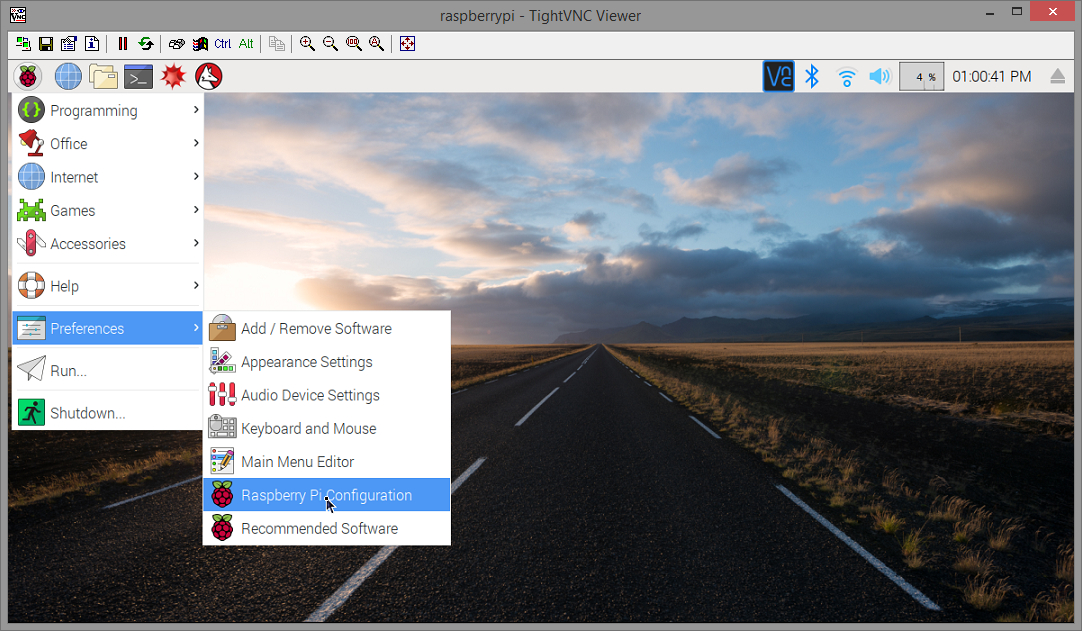
Next we need to set the default screen resolution. This may seem silly seeing as how we're already connected to a monitor but later when you connect via VNC without a monitor attached (headless, as they say) it will revert back to the Pi's default 640x480 resolution which is a very tiny screen to work with! Select GUI Menu > Preferences > Raspberry Pi Configuration > Set Resolution. Set it to 1280x720 or higher and click OK and Yes to reboot.
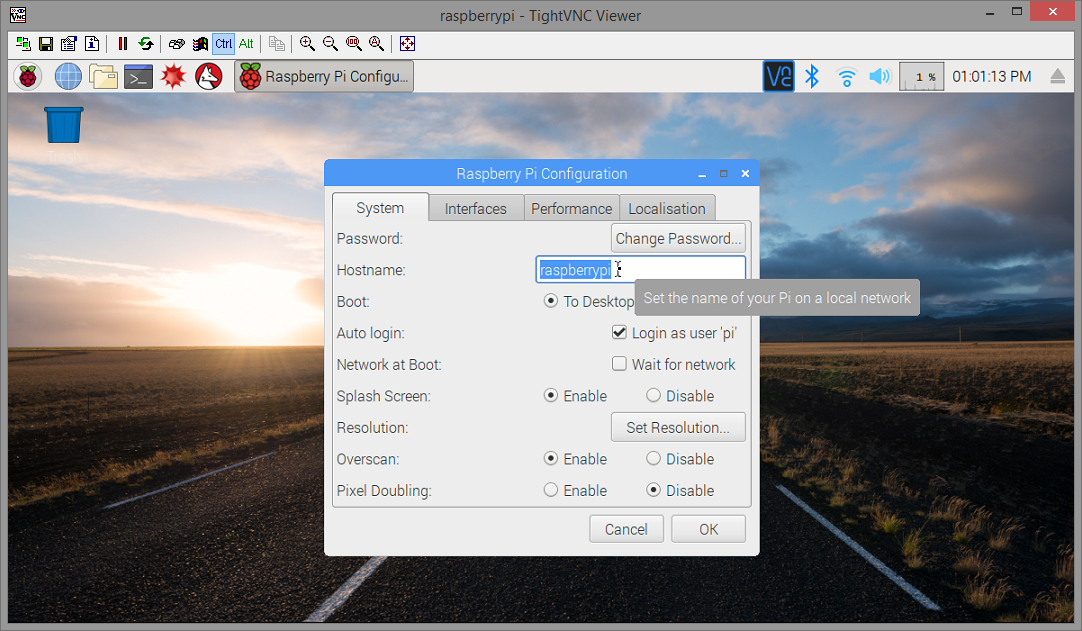
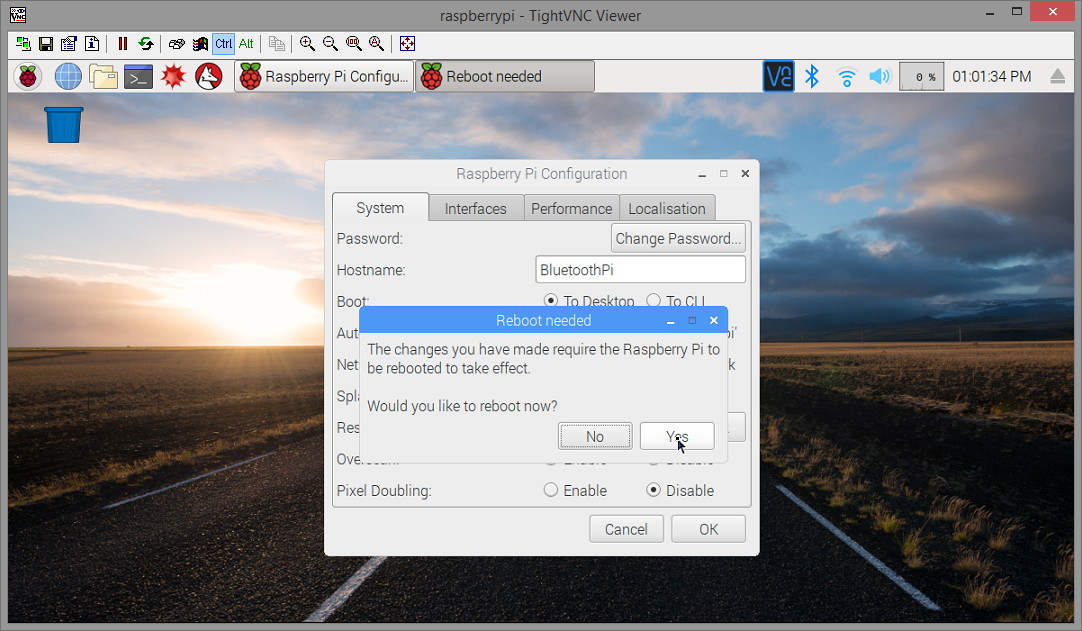
You may want to change the name of your Pi especially if you have more than one on your network. I renamed mine "BluetoothPi" to make it easily identifiable. It will ask you to reboot after renaming it.
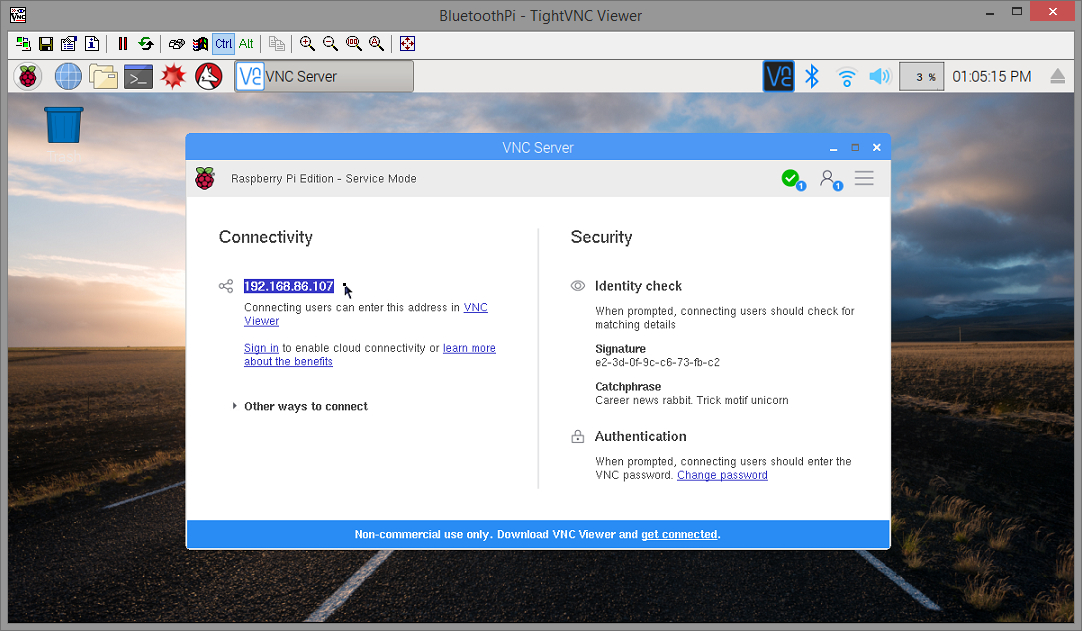
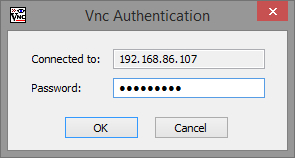
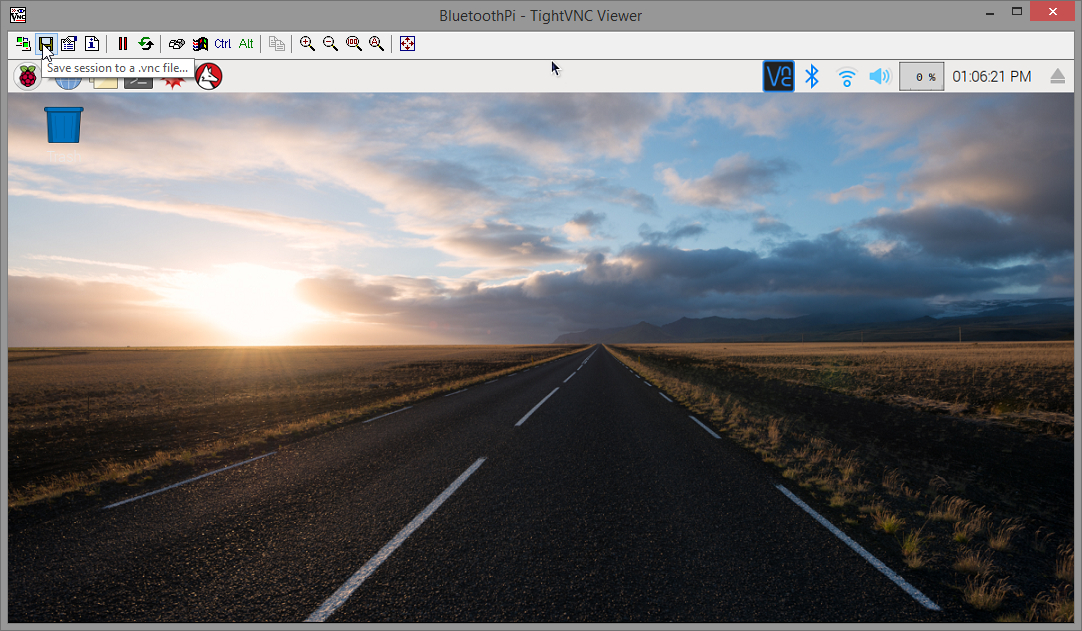
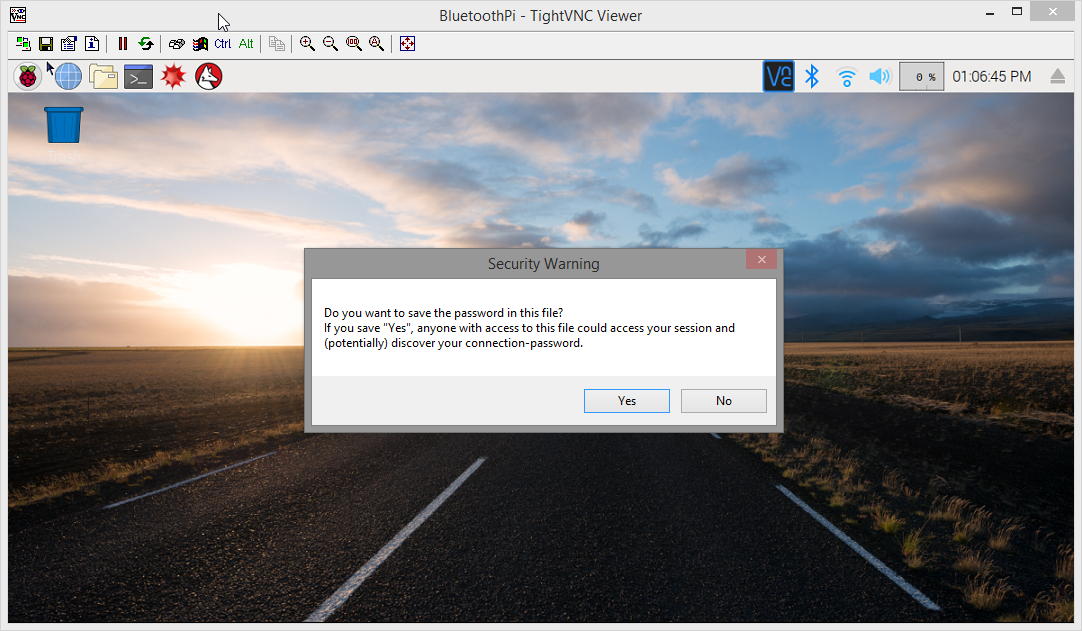
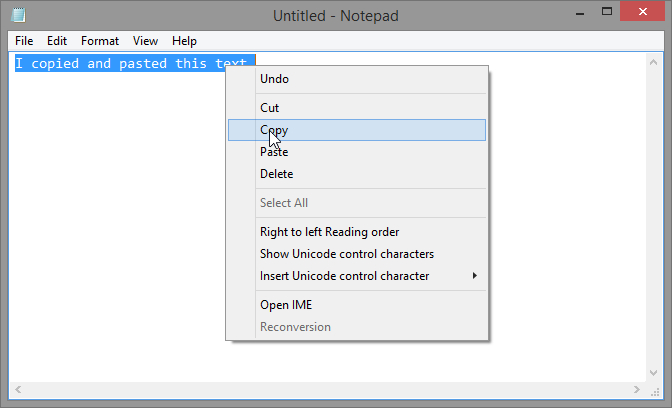
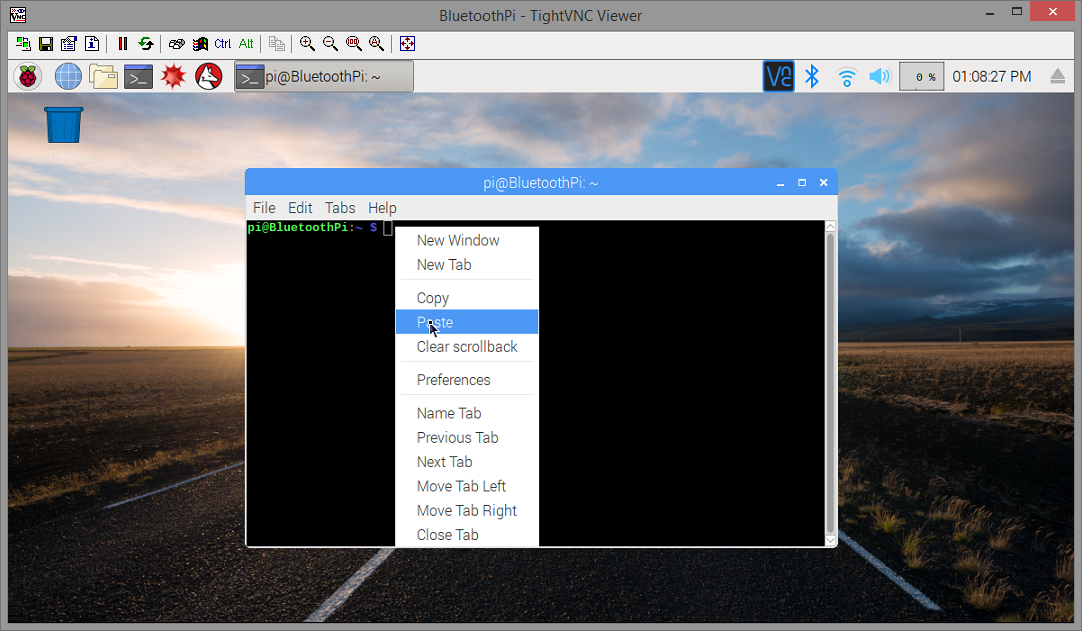
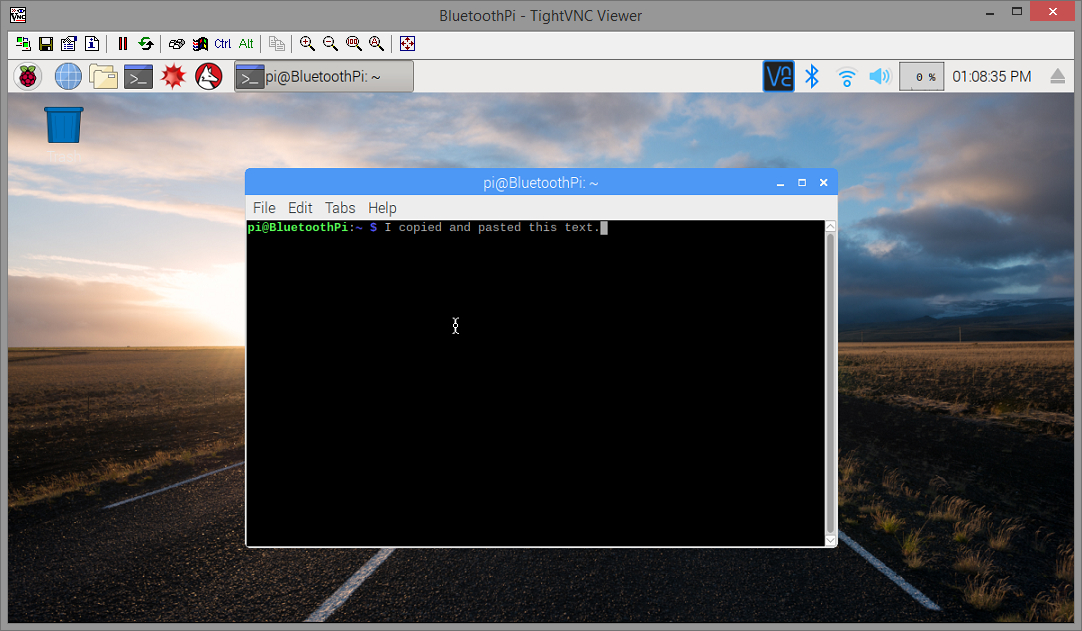
At this point you may want to start using VNC to control the Pi. Open up the VNC control panel on the Raspbian desktop again and look for the IP address under "Connectivity". Install and run a VNC viewer on your regular computer and use that IP address to connect and enter "raspberry" (without the quotes) as the password. I used TightVNC for Windows. After you've connected you can save the Pi's VNC connection as a shortcut on your desktop to quickly connect in the future bypassing the logon screen. You will get a warning about saving the password within the shortcut. To copy and paste into the Pi's terminal window, select or highlight the text or commands on your regular computer, hit Ctrl-C (literally hit the Ctrl and C key on your keyboard at the same time) or right-click and select "Copy", then activate the Pi's VNC viewer window and RIGHT-click inside the terminal window right on the cursor and select Paste.
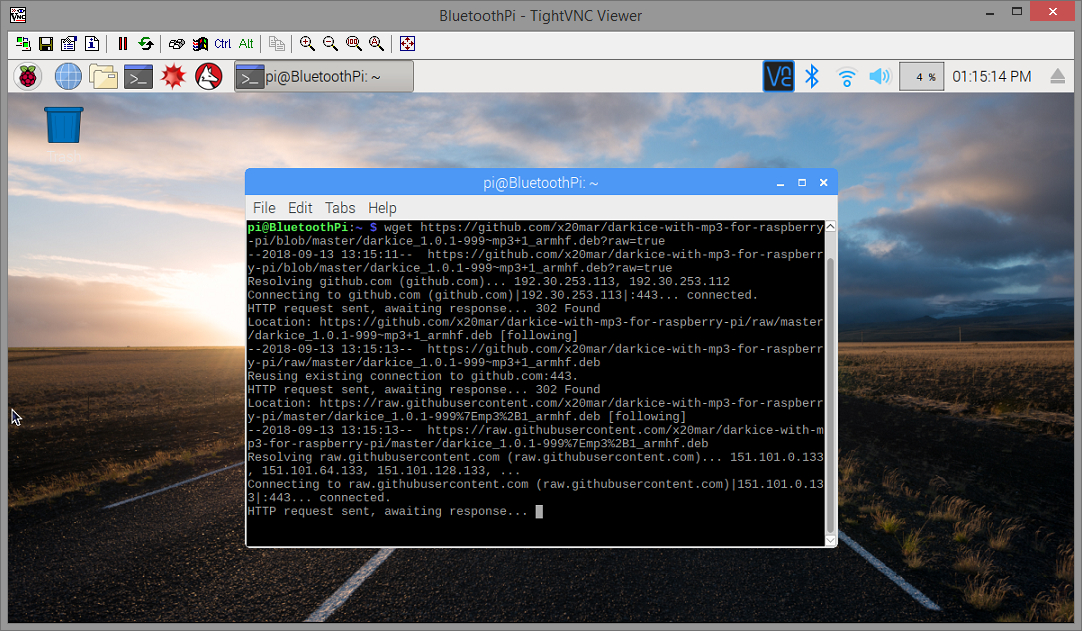
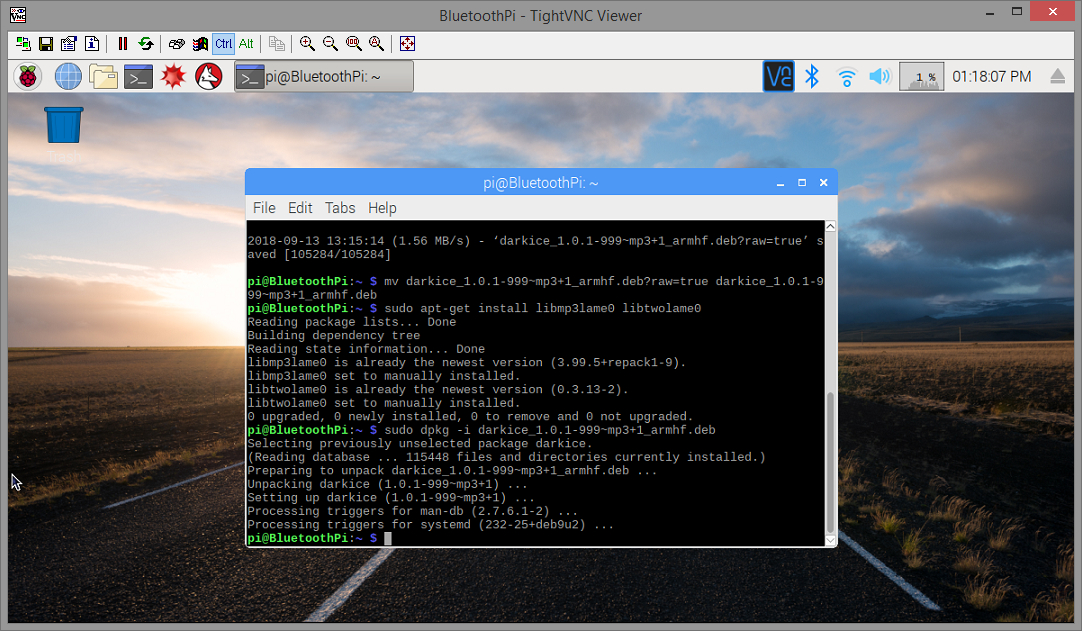
Next we are going to install two programs, Darkice and Icecast2. Darkice is what will be encoding our bluetooth audio source into an mp3 stream and Icecast2 is what will be serving it to Sonos as a Shoutcast stream. Copy and paste each of these lines in the terminal window one at a time followed by the Enter key each time:
wget https://github.com/x20mar/darkice-with-mp3-for-raspberry-pi/blob/master/darkice_1.0.1-999~mp3+1_armhf.deb?raw=true
mv darkice_1.0.1-999~mp3+1_armhf.deb?raw=true darkice_1.0.1-999~mp3+1_armhf.deb
sudo apt-get install libmp3lame0 libtwolame0
sudo dpkg -i darkice_1.0.1-999~mp3+1_armhf.deb
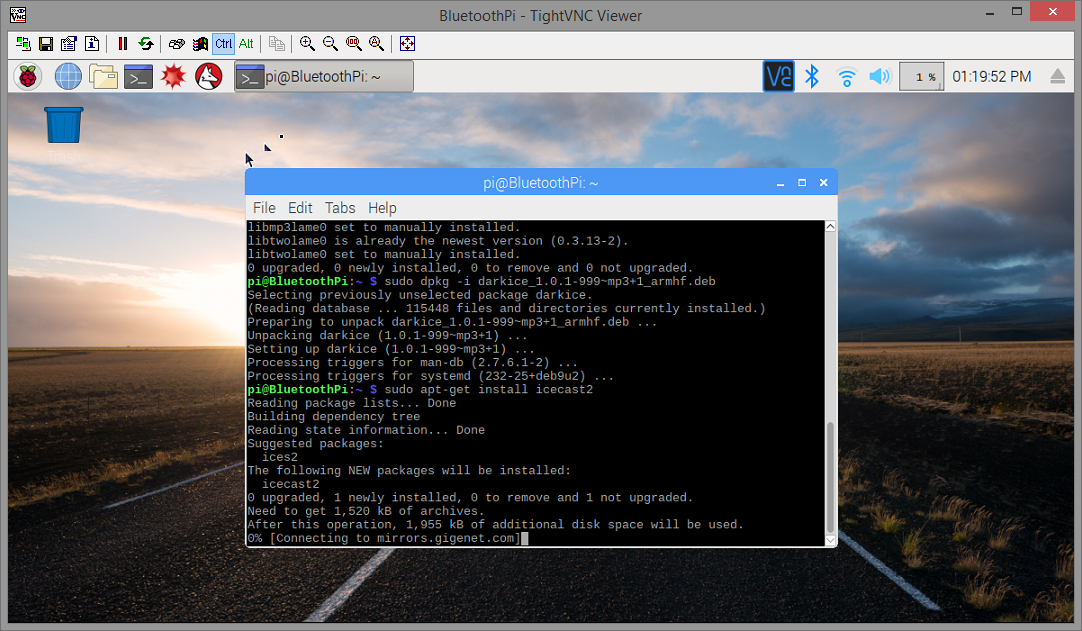
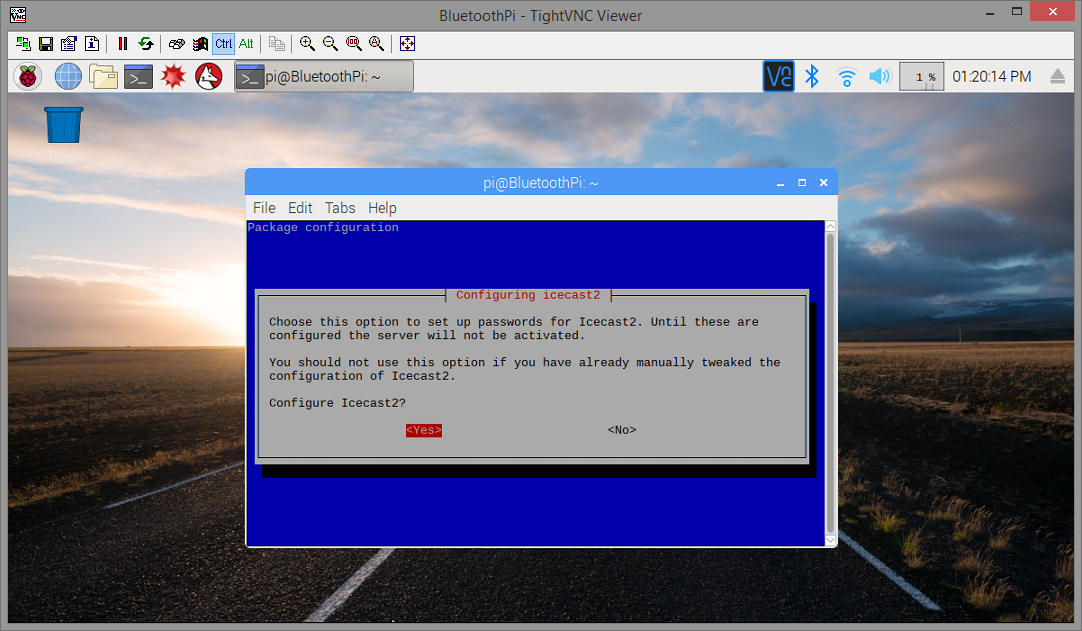
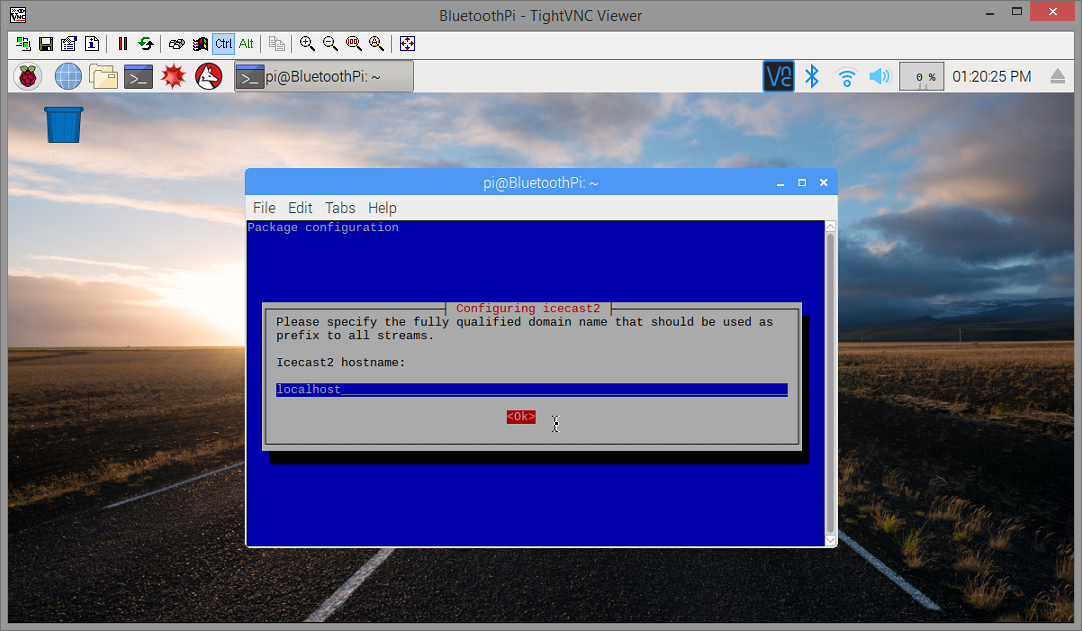
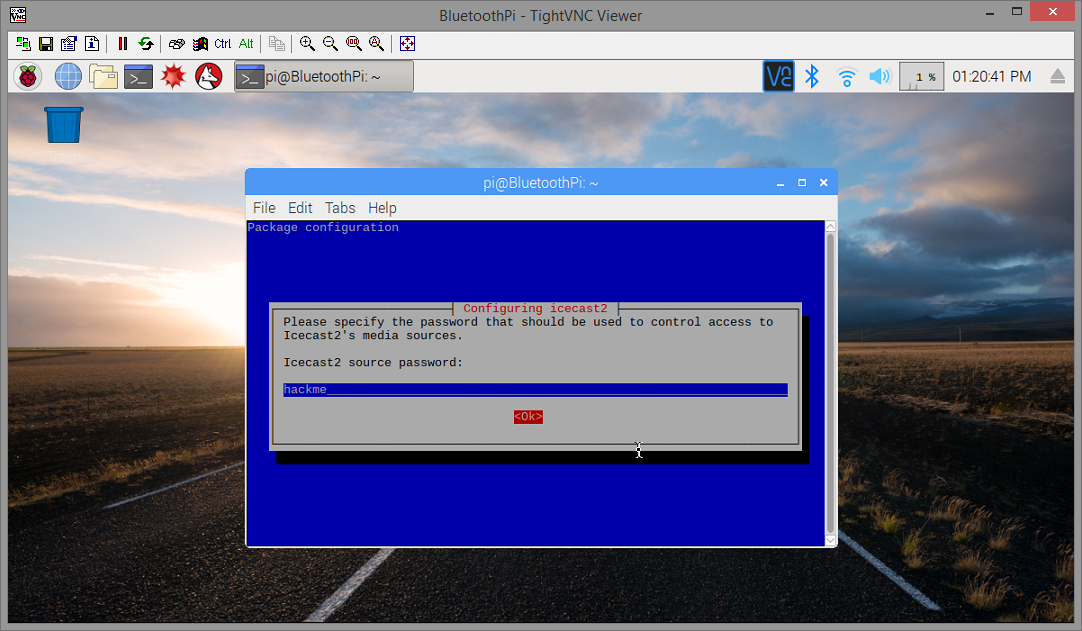
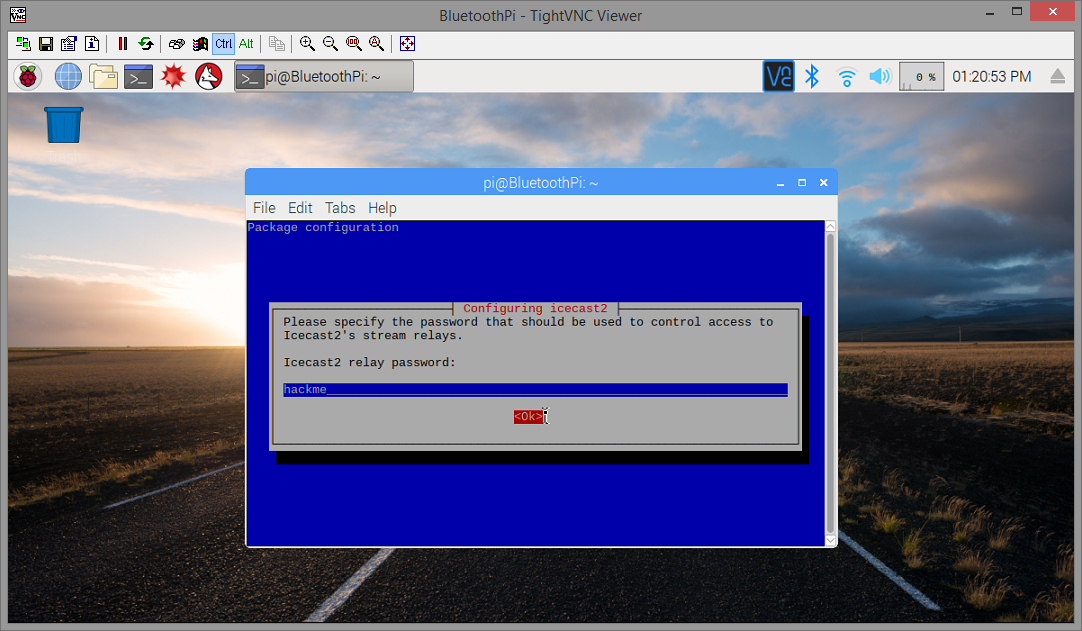
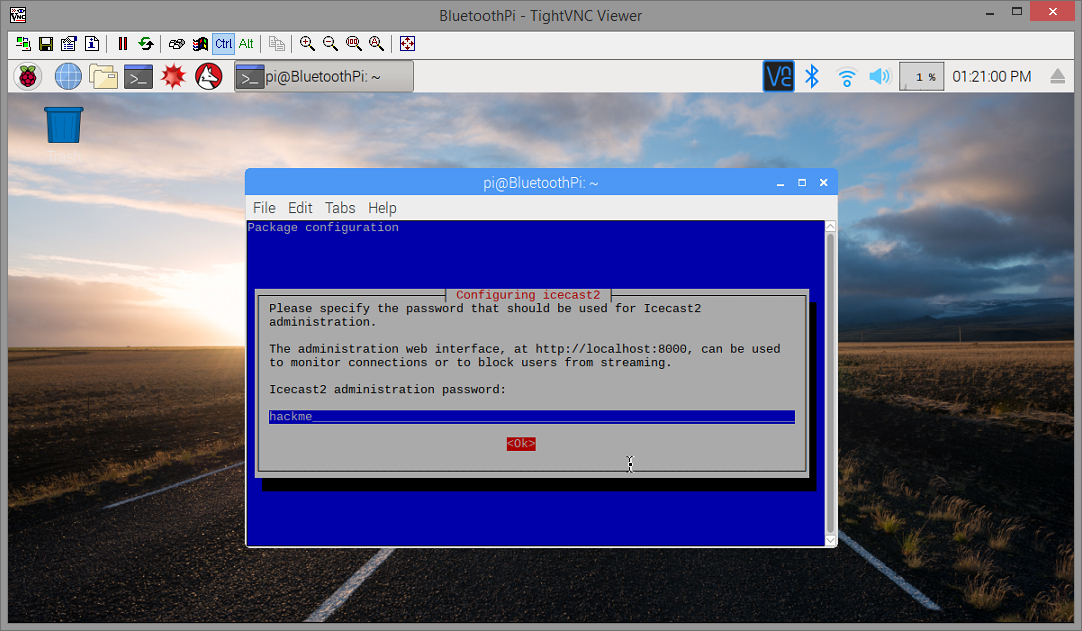
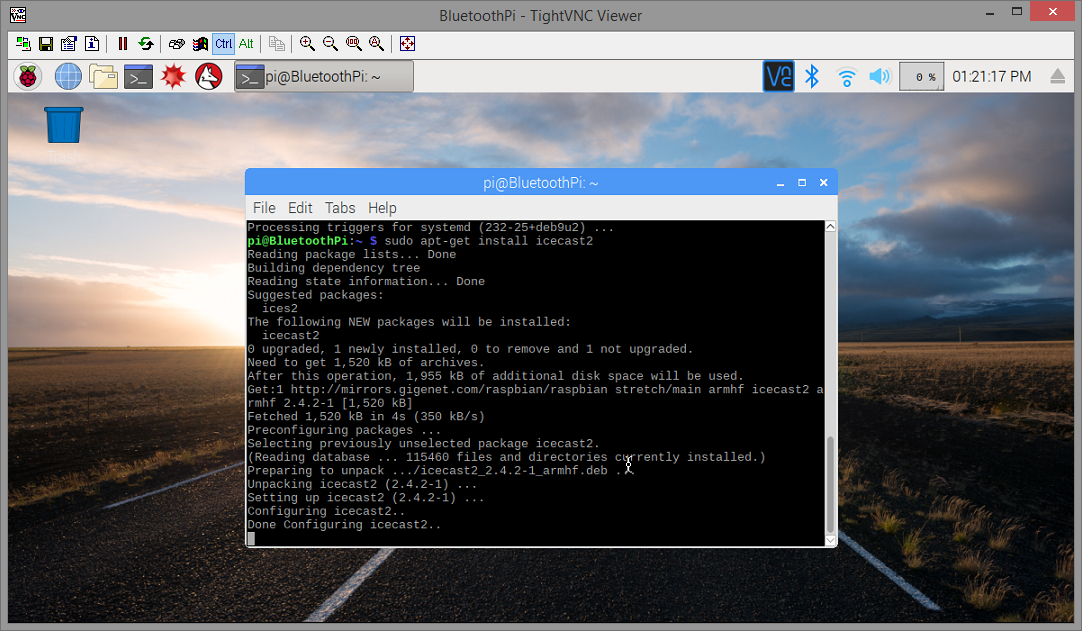
Now to install Icecast2. Type in "sudo apt-get install icecast2" followed by enter. After it installs a window will pop up asking if you want to configure Icecast2. Hit the left arrow key and enter to select Yes. On the second screen hit the down arrow key and enter to select OK to use the default hostname "localhost". On the next three screens hit the down arrow and enter key to agree to use "hackme" as the default source, relay and administration password. Even though we are agreeing to all of the default settings, these steps must be completed to activate the Icecast2 server.
sudo apt-get install icecast2
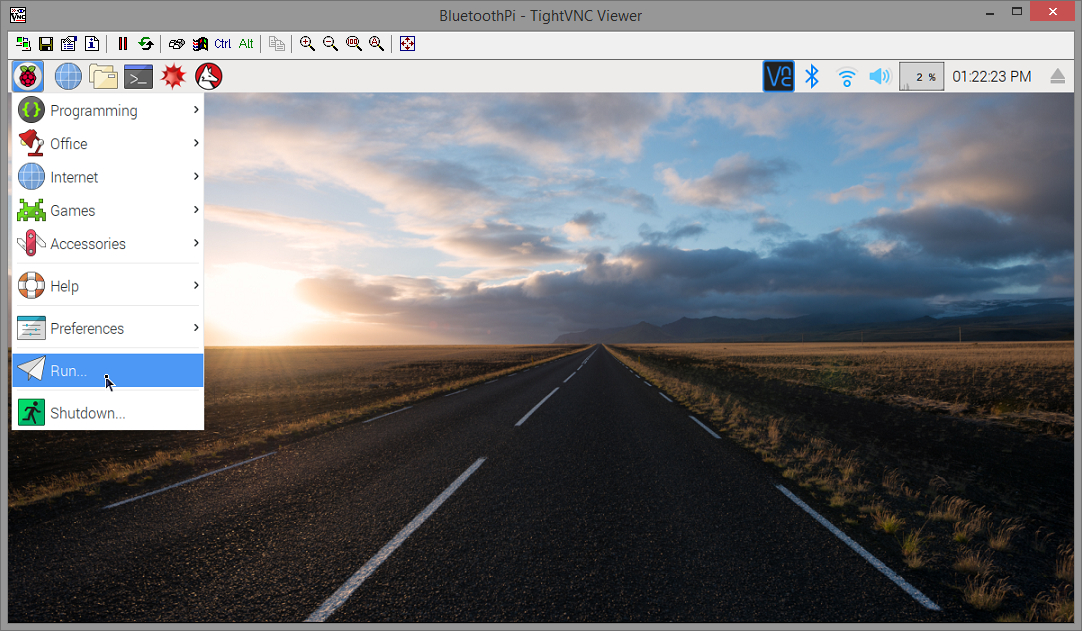
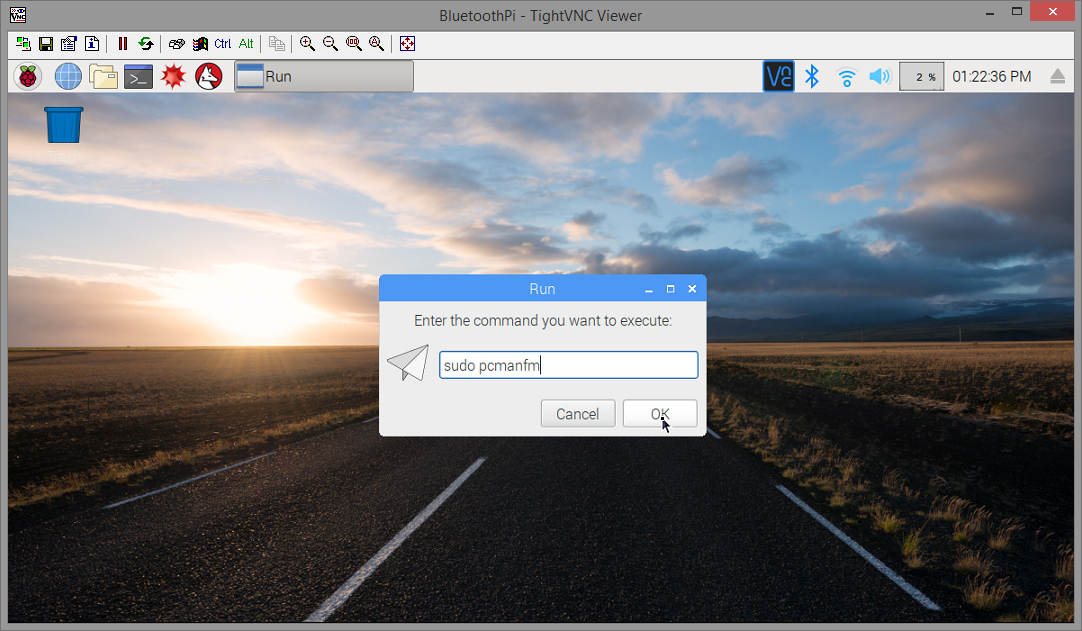
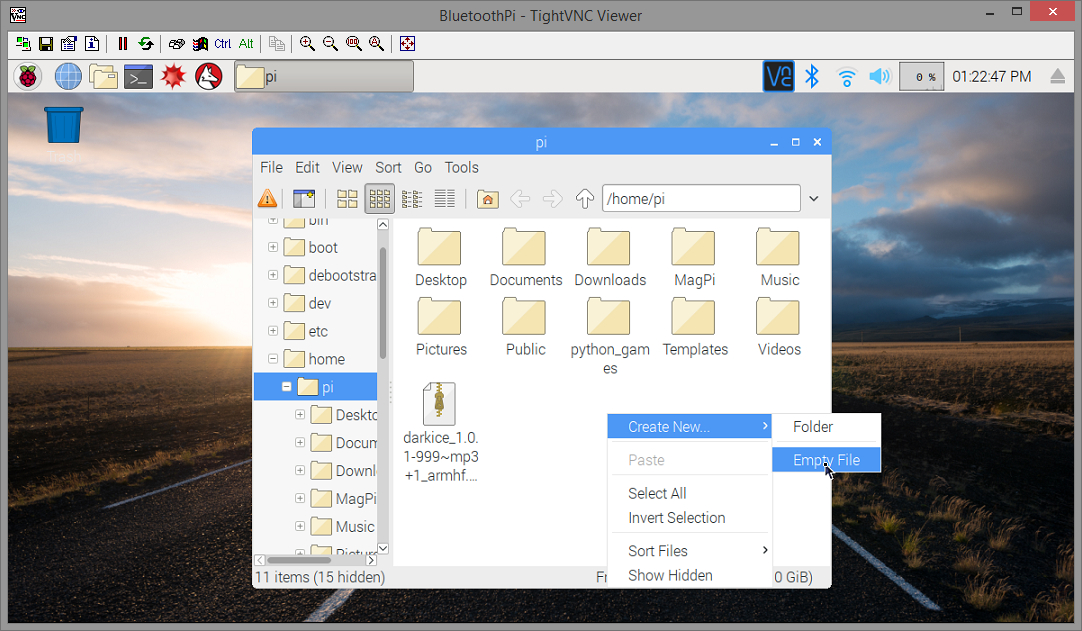
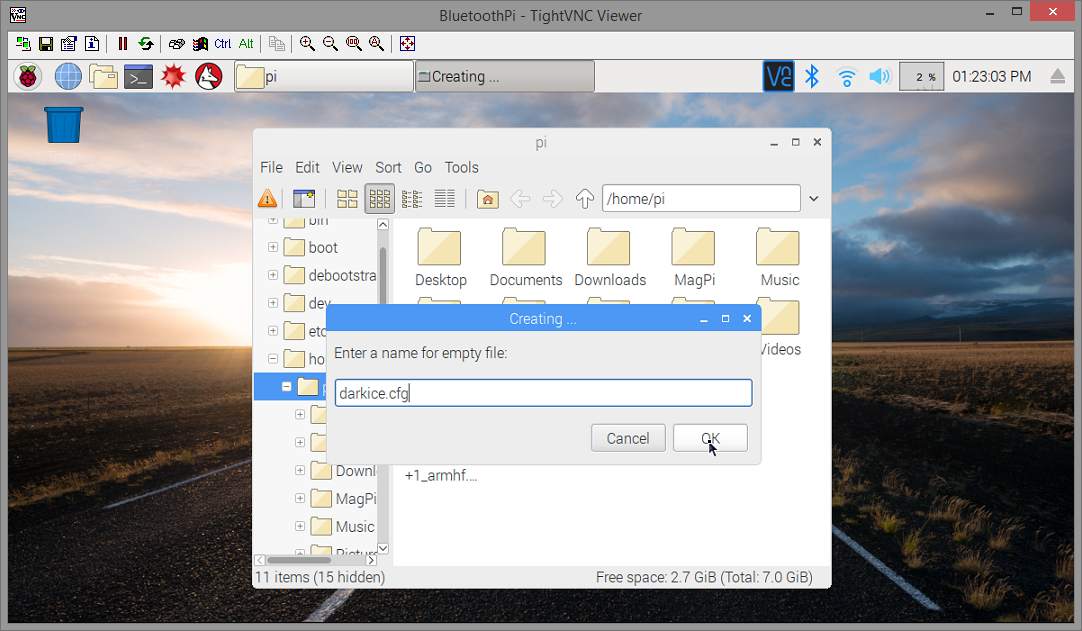
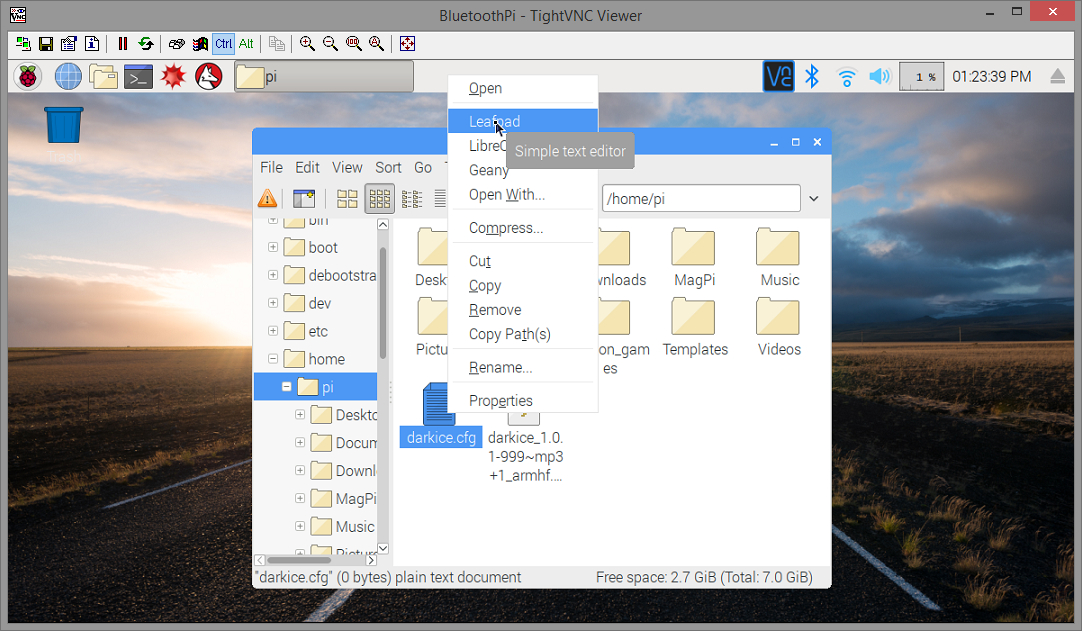
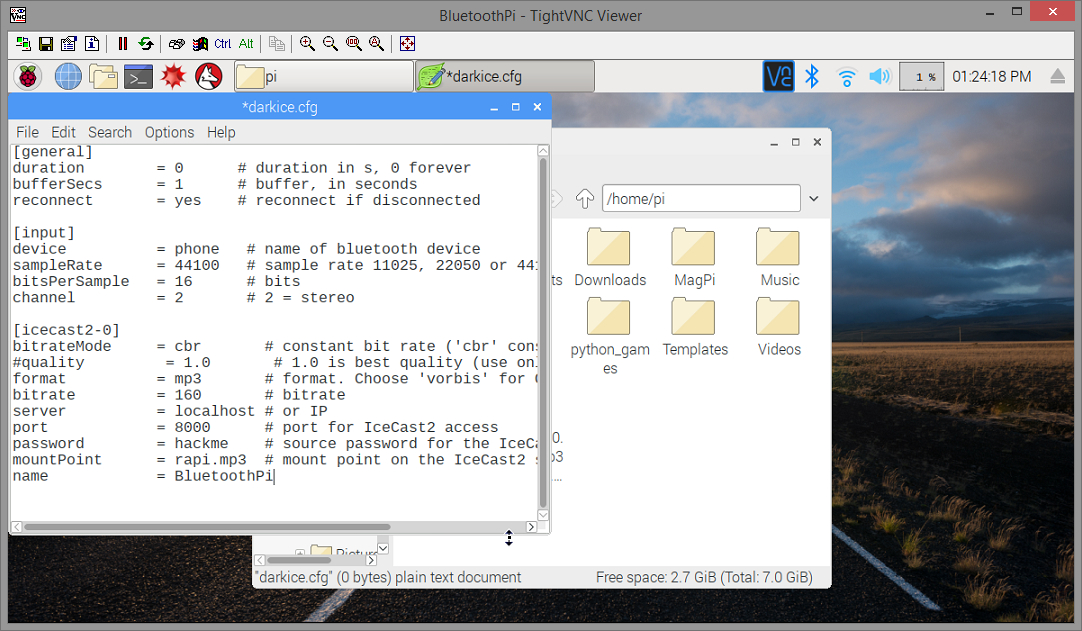
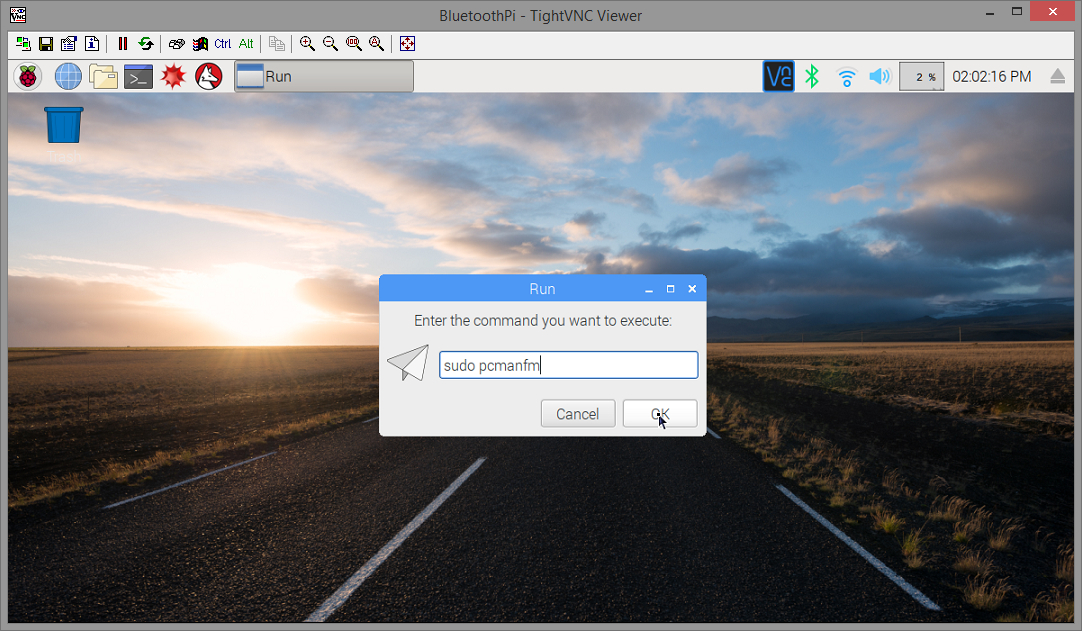
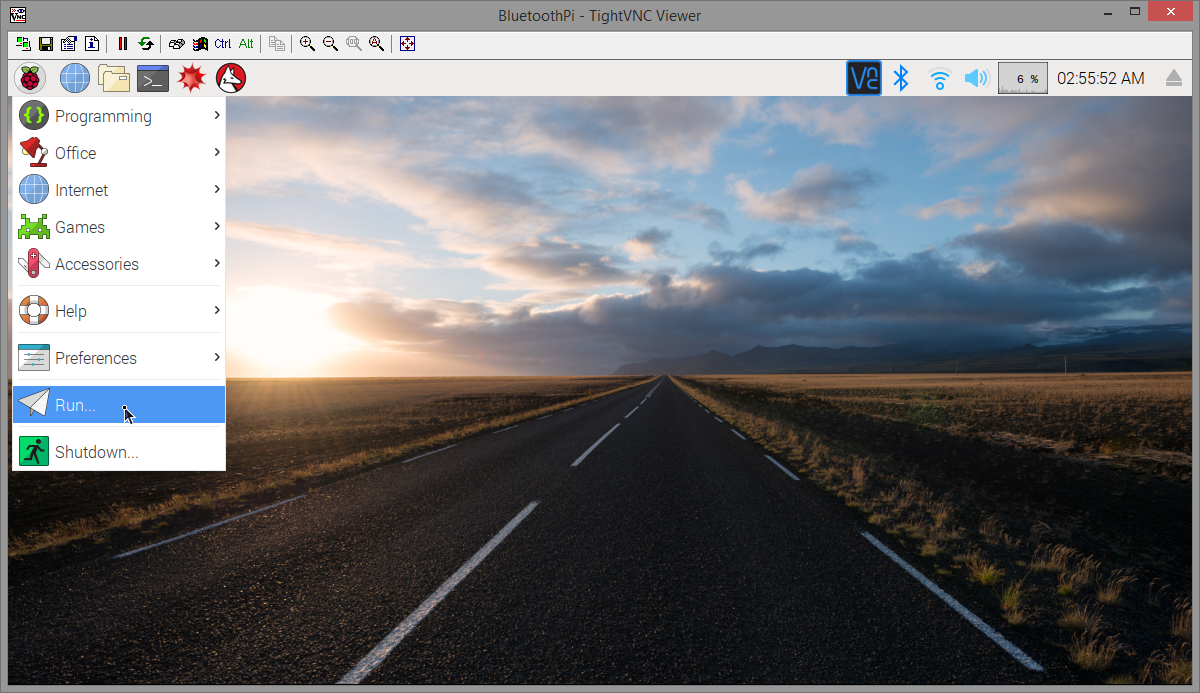
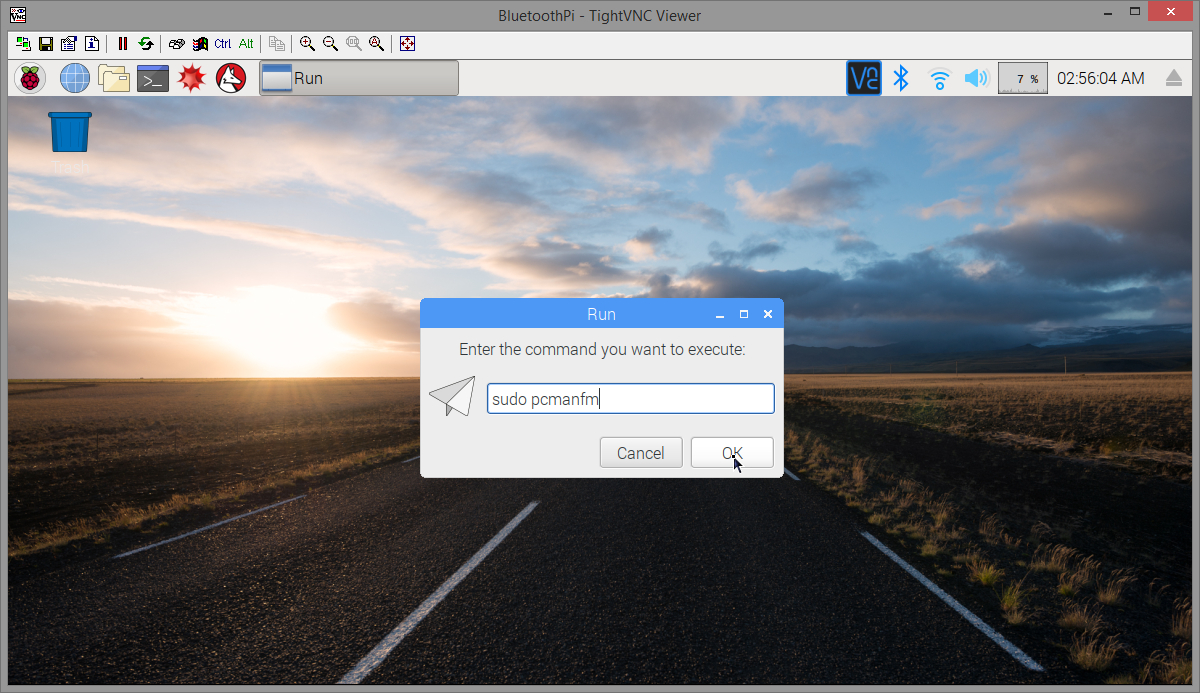
Next we need to run the GUI file manager as root user. To do this, select GUI Menu > Run. Type in "sudo pcmanfm" and hit enter. That will open up the file manager (the equivalent of file explorer for us Windows users) to the home directory (/home/pi) and you will see the leftover darkice installation file we previously downloaded. RIGHT-click in an empty space and select Create New and then Empty File. Name it "darkice.cfg" and click OK. Then RIGHT-click that newly created file and choose to open it with Leafpad (the equivalent of Windows notepad). Copy the lines below and paste them into Leafpad then click File and Save. You'll notice the "quality" line is commented out with a # in front of it. It is used only if you set "bitrateMode = vbr" (variable bitrate). You can't have a quality value set when using cbr (constant bitrate) or the stream will stutter and skip. Conversely, if you decide to use vbr then you need to comment out the "bitrate = 160" line and uncomment the "quality" line.
NOTE: The highest quality mp3 bitrate you can have is 320 kbps; however, both the WiFi and Bluetooth radios on the Raspberry Pi are on the same chip so if you max out the bandwidth of both, bluetooth audio can stutter or freeze. We are going to be changing a setting later that will remedy this however it limits the WiFi bandwidth somewhat so I reduced the audio bitrate for this project to 160 kbps since I plan to keep it on WiFi exclusively. If you are using ethernet it is not an issue and you can safely set the bitrate to 320 kbps.
[general]
duration        = 0      # duration in s, 0 forever
bufferSecs      = 1      # buffer, in seconds
reconnect       = yes    # reconnect if disconnected[input]
device          = phone   # name of bluetooth device
sampleRate      = 44100   # sample rate 11025, 22050 or 44100
bitsPerSample   = 16      # bits
channel         = 2       # 2 = stereo[icecast2-0]
bitrateMode     = cbr       # constant bit rate ('cbr' constant, 'abr' average)
#quality         = 1.0       # 1.0 is best quality (use only with vbr)
format          = mp3       # format. Choose 'vorbis' for OGG Vorbis
bitrate         = 160       # bitrate
server          = localhost # or IP
port            = 8000      # port for IceCast2 access
password        = hackme    # source password for the IceCast2 server
mountPoint      = rapi.mp3  # mount point on the IceCast2 server .mp3 or .ogg
name            = BluetoothPi
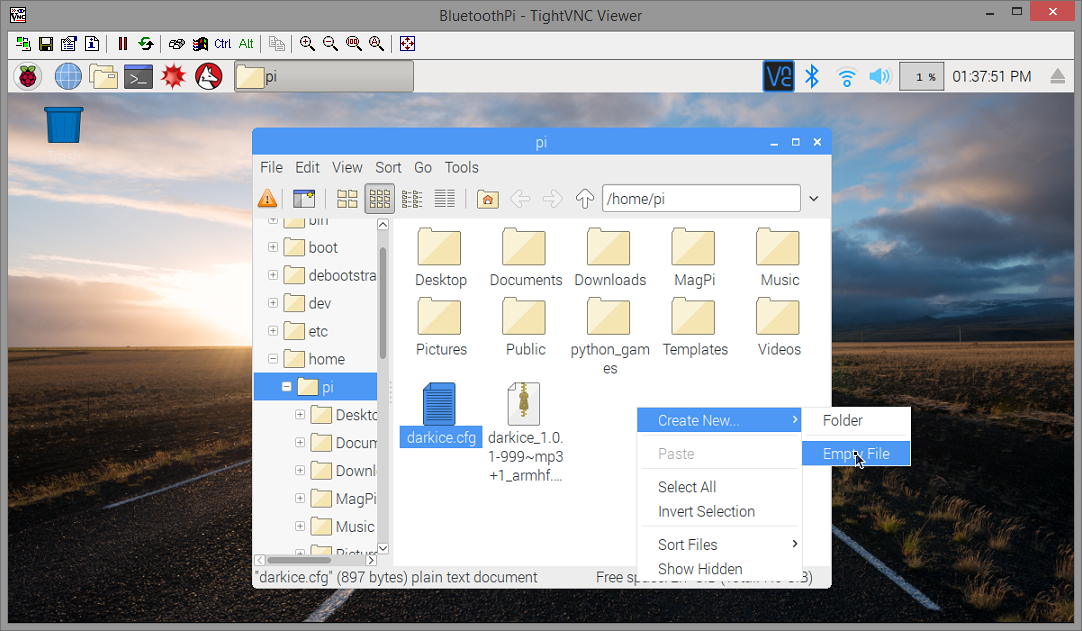
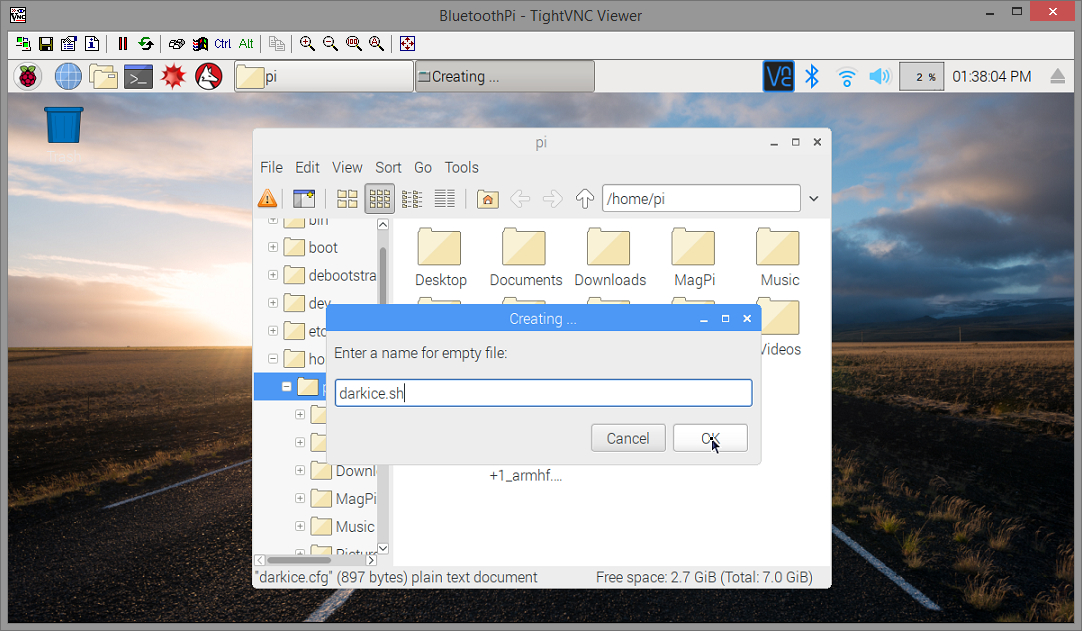
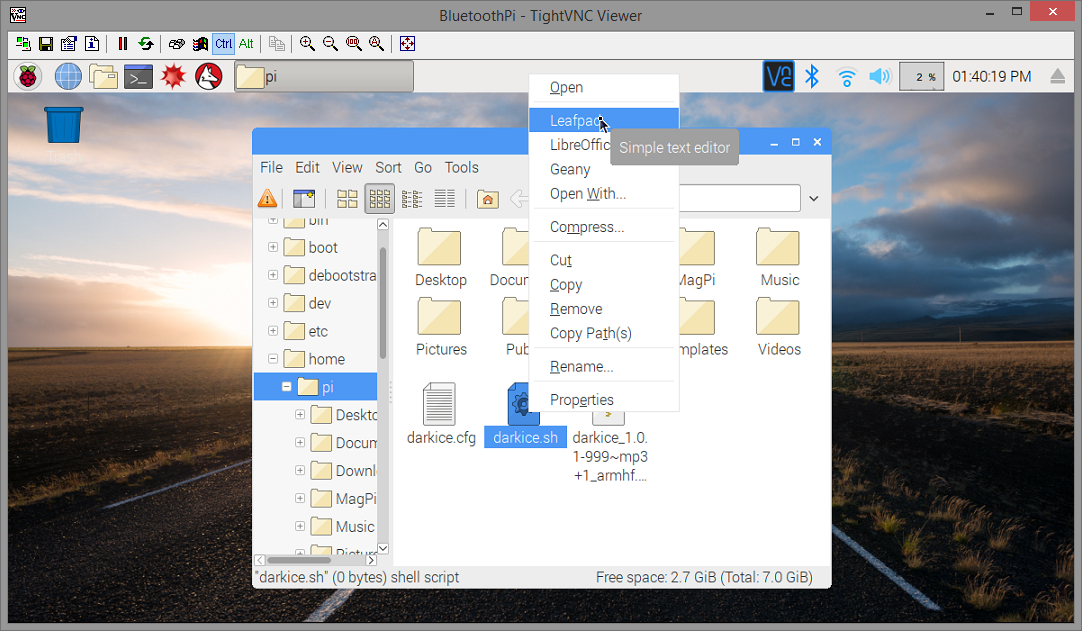
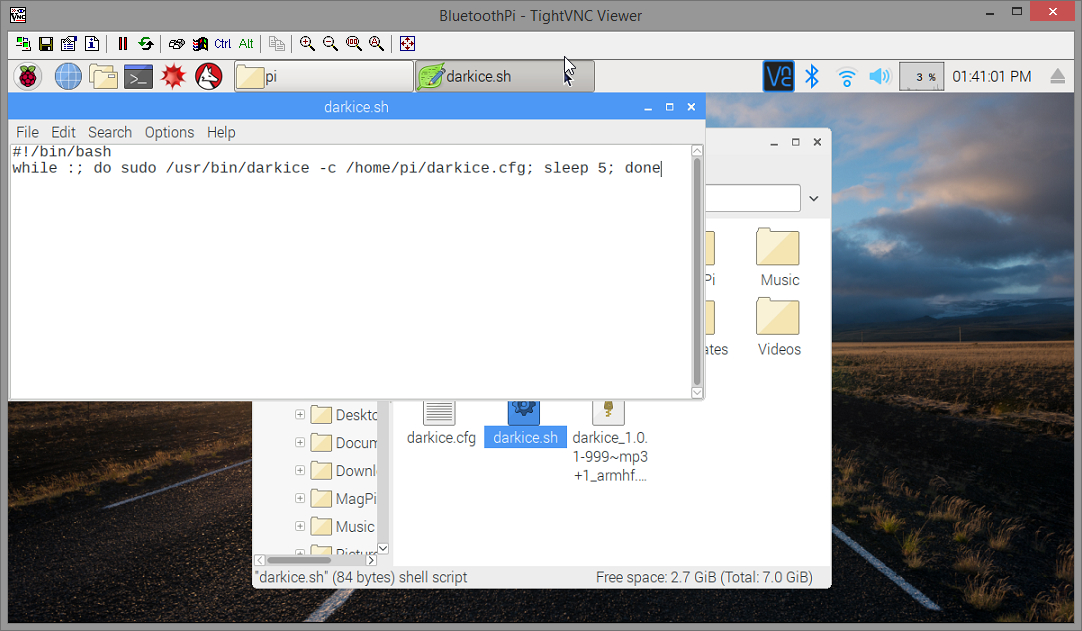
Next we need follow the same steps as before to create an empty file called "darkice.sh". An .sh file is the equivalent of a .bat or batch file for DOS or Windows. Open using Leafpad, copy and paste the lines below and save. If you followed my previous instructable you'll notice the line that starts Darkice looks a little different. I had to embed the code in a loop because whenever Darkice loses the bluetooth audio signal it will stop running and won't restart automatically even when the audio is restarted. I researched this problem a great deal and while there are complicated ways to automatically run a script whenever a bluetooth device is connected, Darkice will sometimes stop whenever the audio signal is lost even if the bluetooth device is still connected (e.g. if you close the YouTube app on your phone) so this is the easiest and most reliable way to make sure Darkice is running whenever bluetooth audio is present. If Darkice is already running, the command is ignored.
#!/bin/bash
while :; do sudo /usr/bin/darkice -c /home/pi/darkice.cfg; sleep 5; done
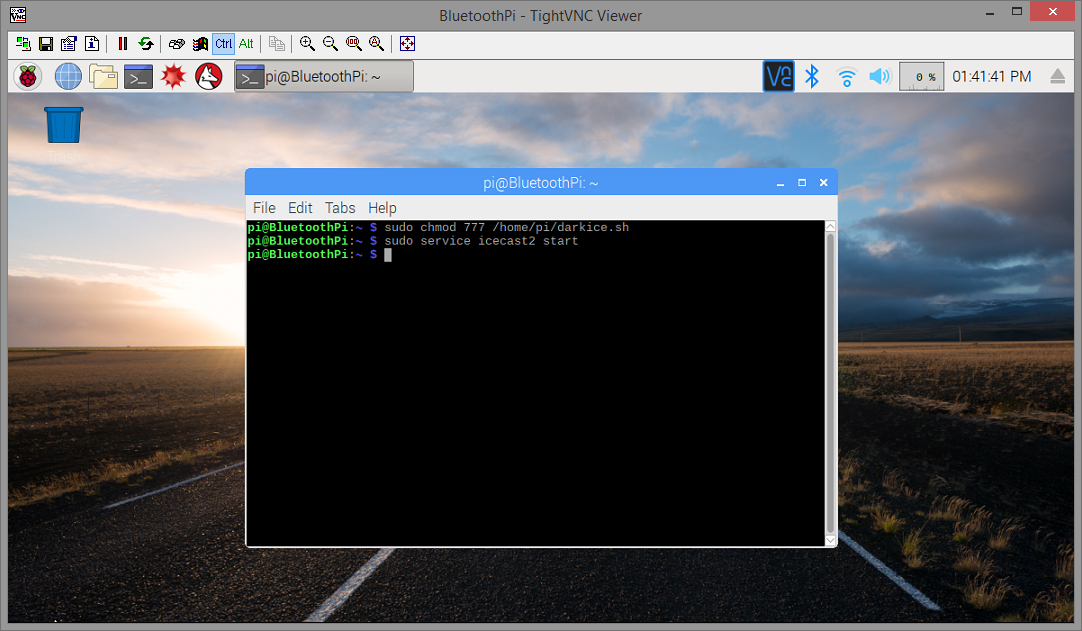
Next we need to run a command to make the darkice.sh file executable. Open the terminal window and type in "sudo chmod 777 /home/pi/darkice.sh" and hit enter. Now it's time to start the Icecast2 server service. Type in "sudo service icecast2 start" and hit enter.
sudo chmod 777 /home/pi/darkice.sh
sudo service icecast2 start
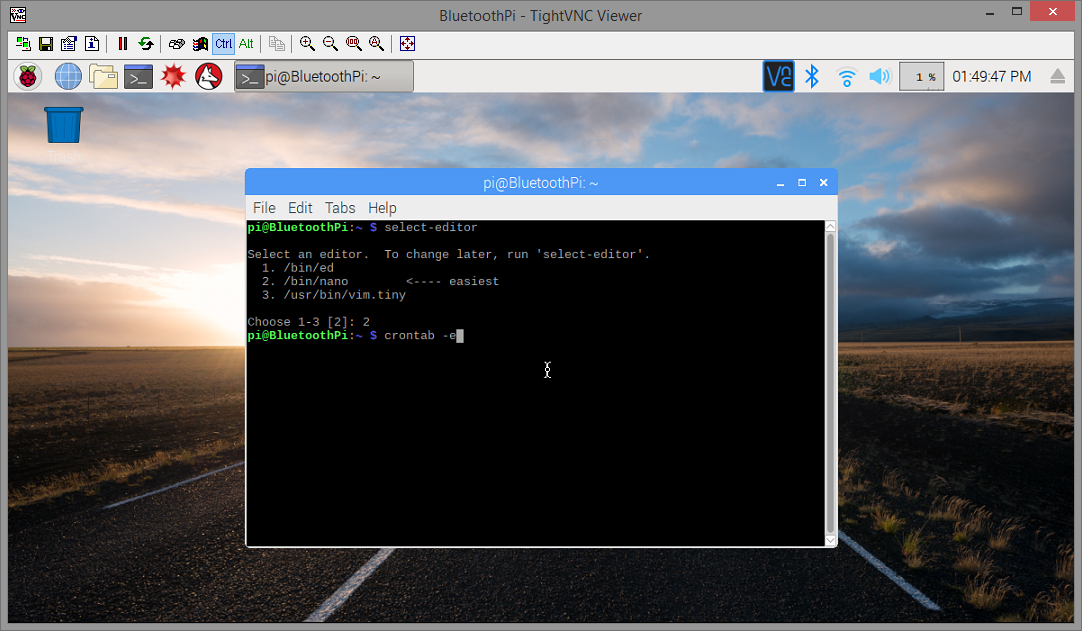
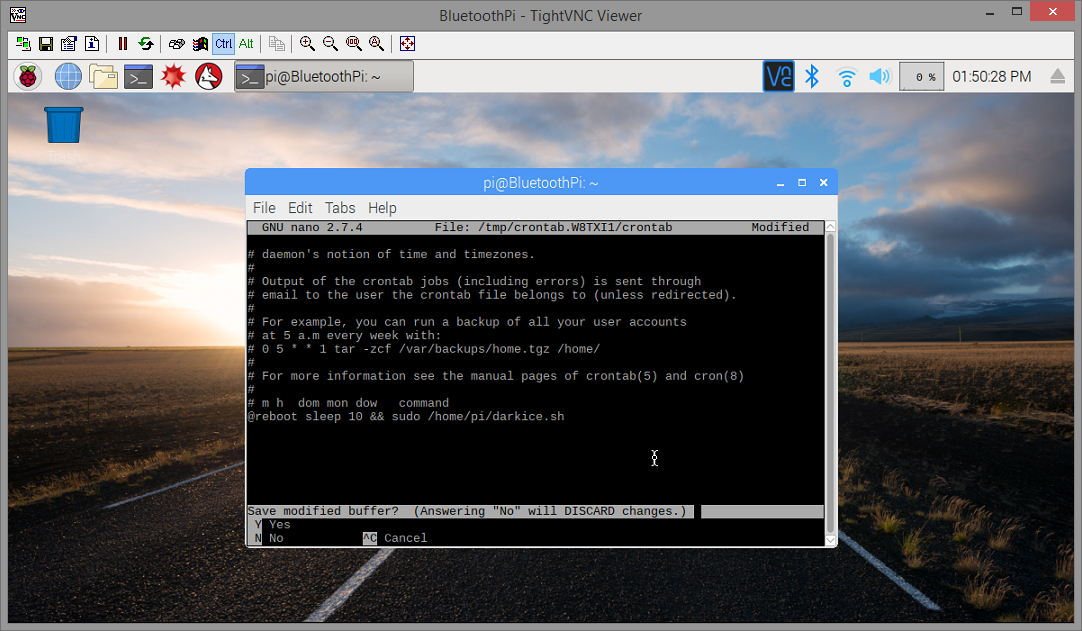
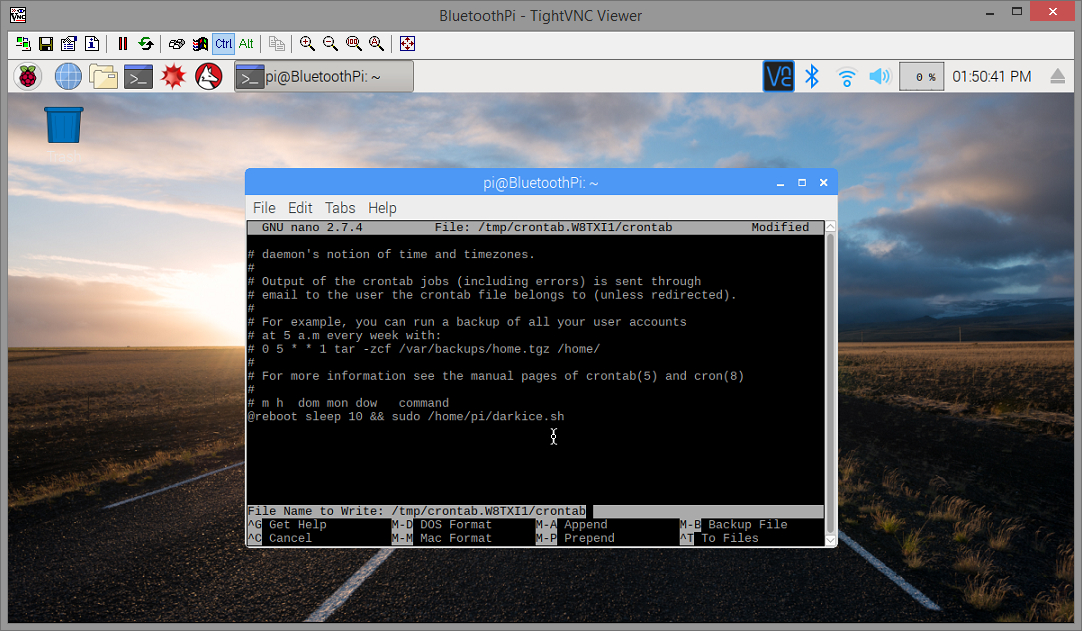
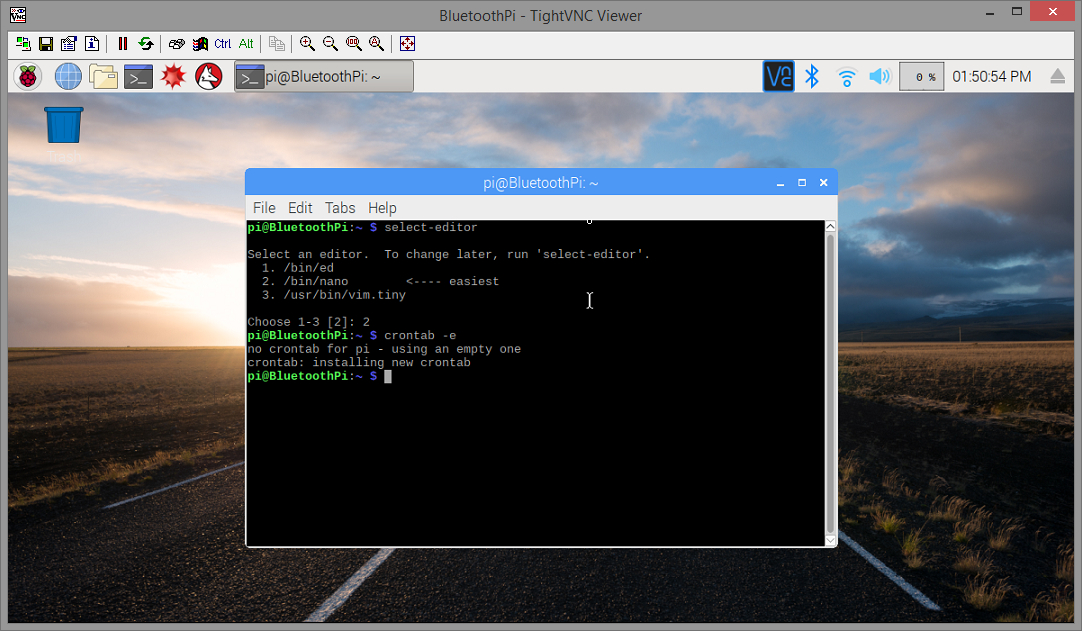
Next we need to tell Darkice to start automatically whenever the Pi is booted (the Icecast2 server runs as a service and already starts automatically after booting). First we need to select which text editor to use. In the terminal window type "select-editor" and hit enter. Type "2" to select nano editor and hit enter. Then type "crontab -e" and enter. Next hold the Down Arrow key down to scroll all the way to the bottom of the text file that appears and add this line "@reboot sleep 10 && sudo /home/pi/darkice.sh". Then hit Ctrl-X to exit and it will prompt "Save modified buffer?". Hit the Y key for Yes then Enter to confirm whatever filename is automatically generated.
select-editor
crontab -e
@reboot sleep 10 && sudo /home/pi/darkice.sh
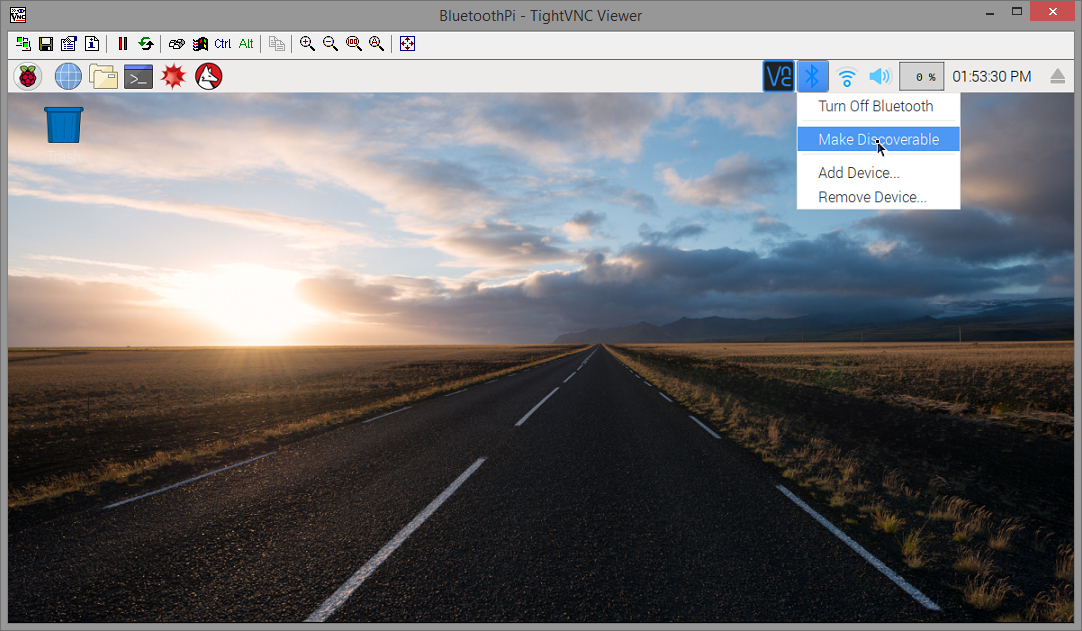
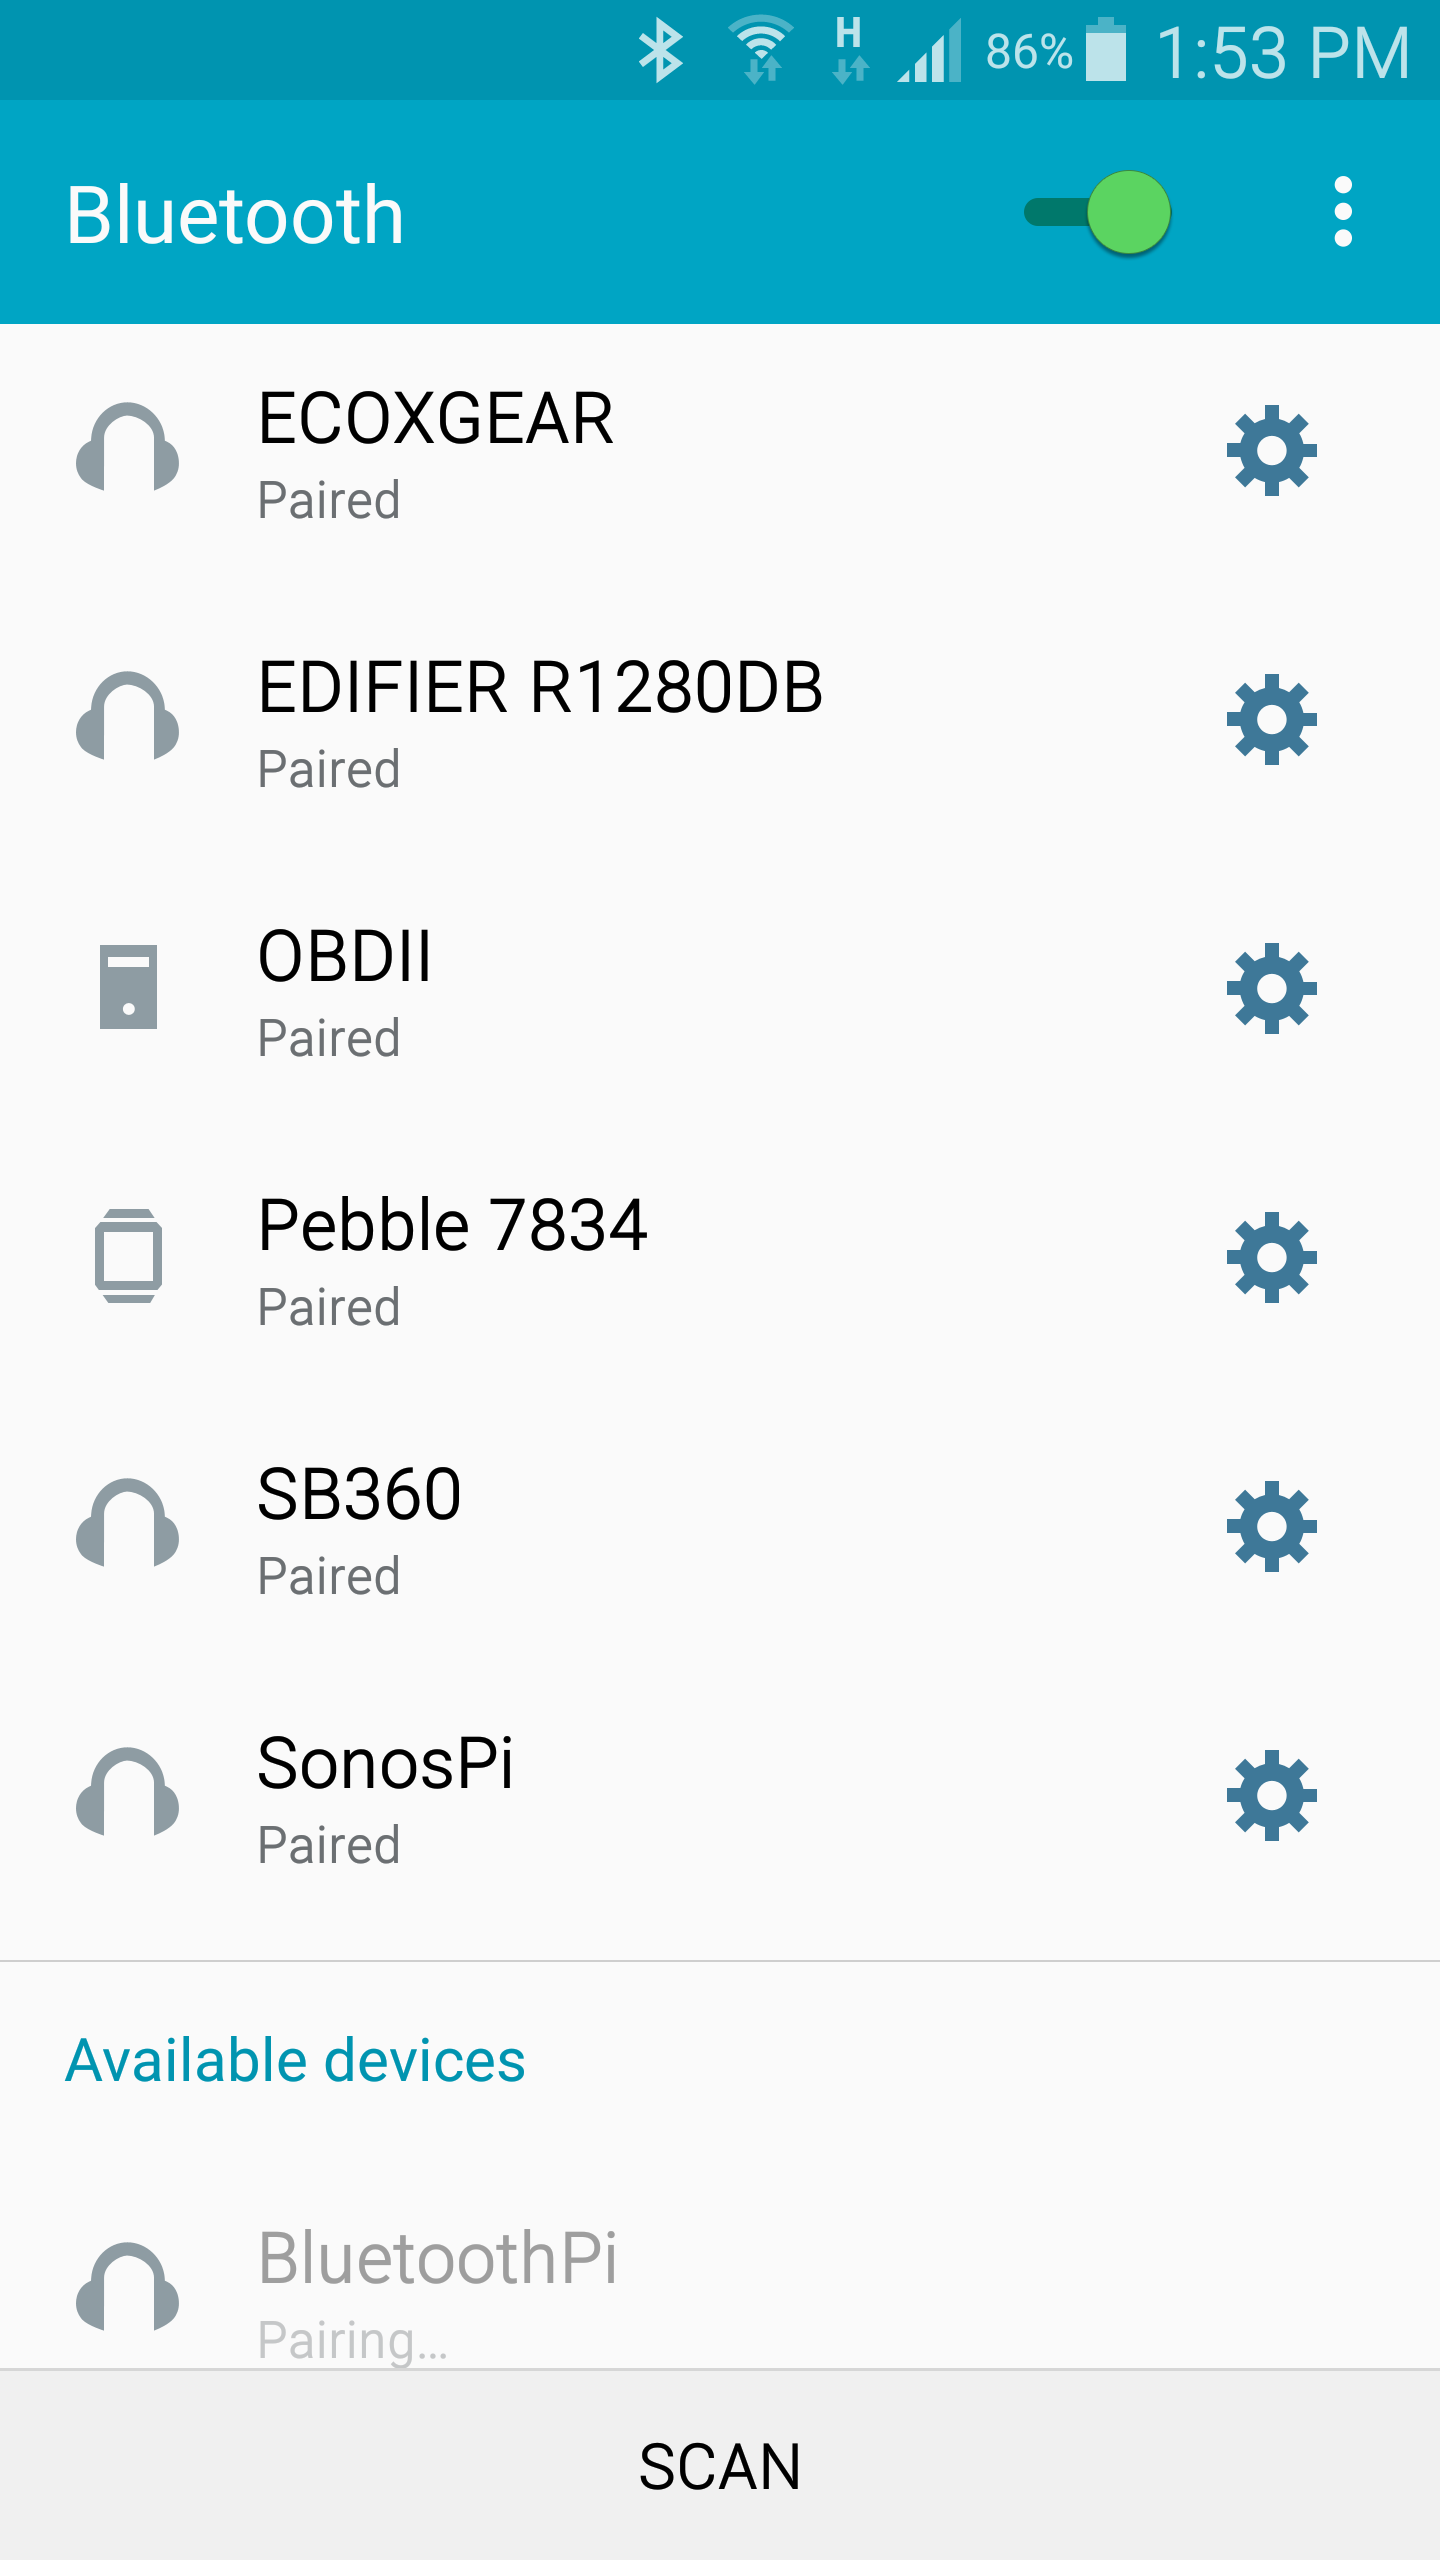
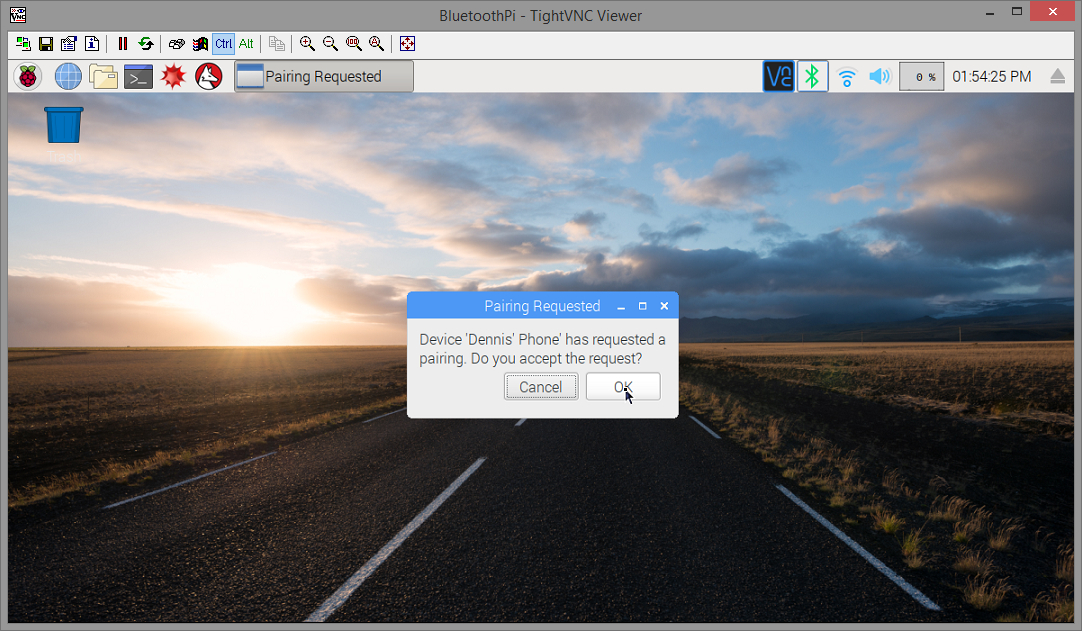
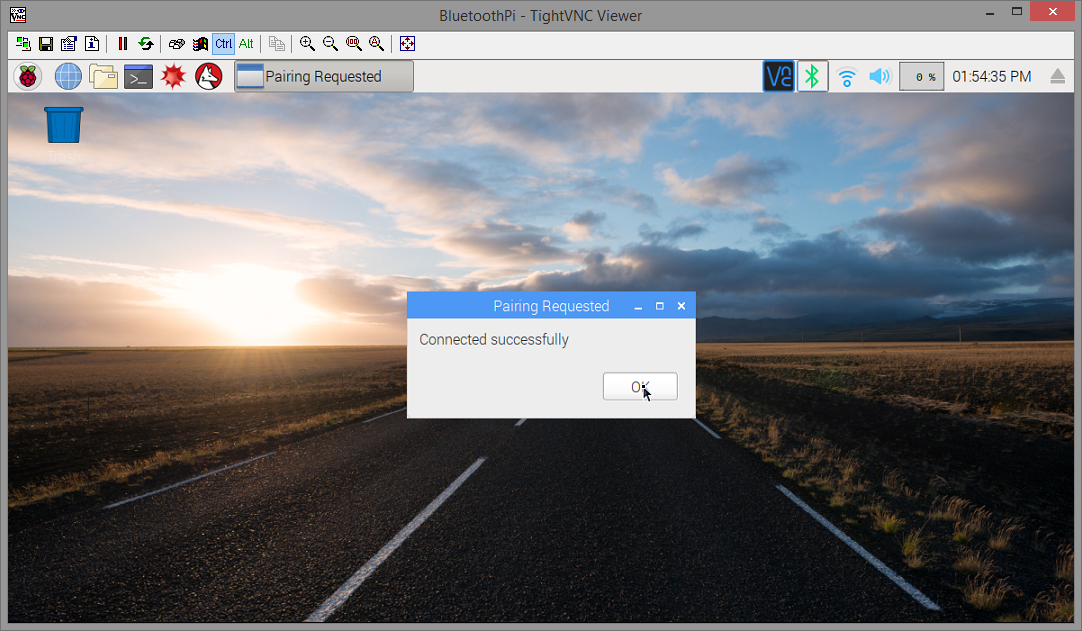
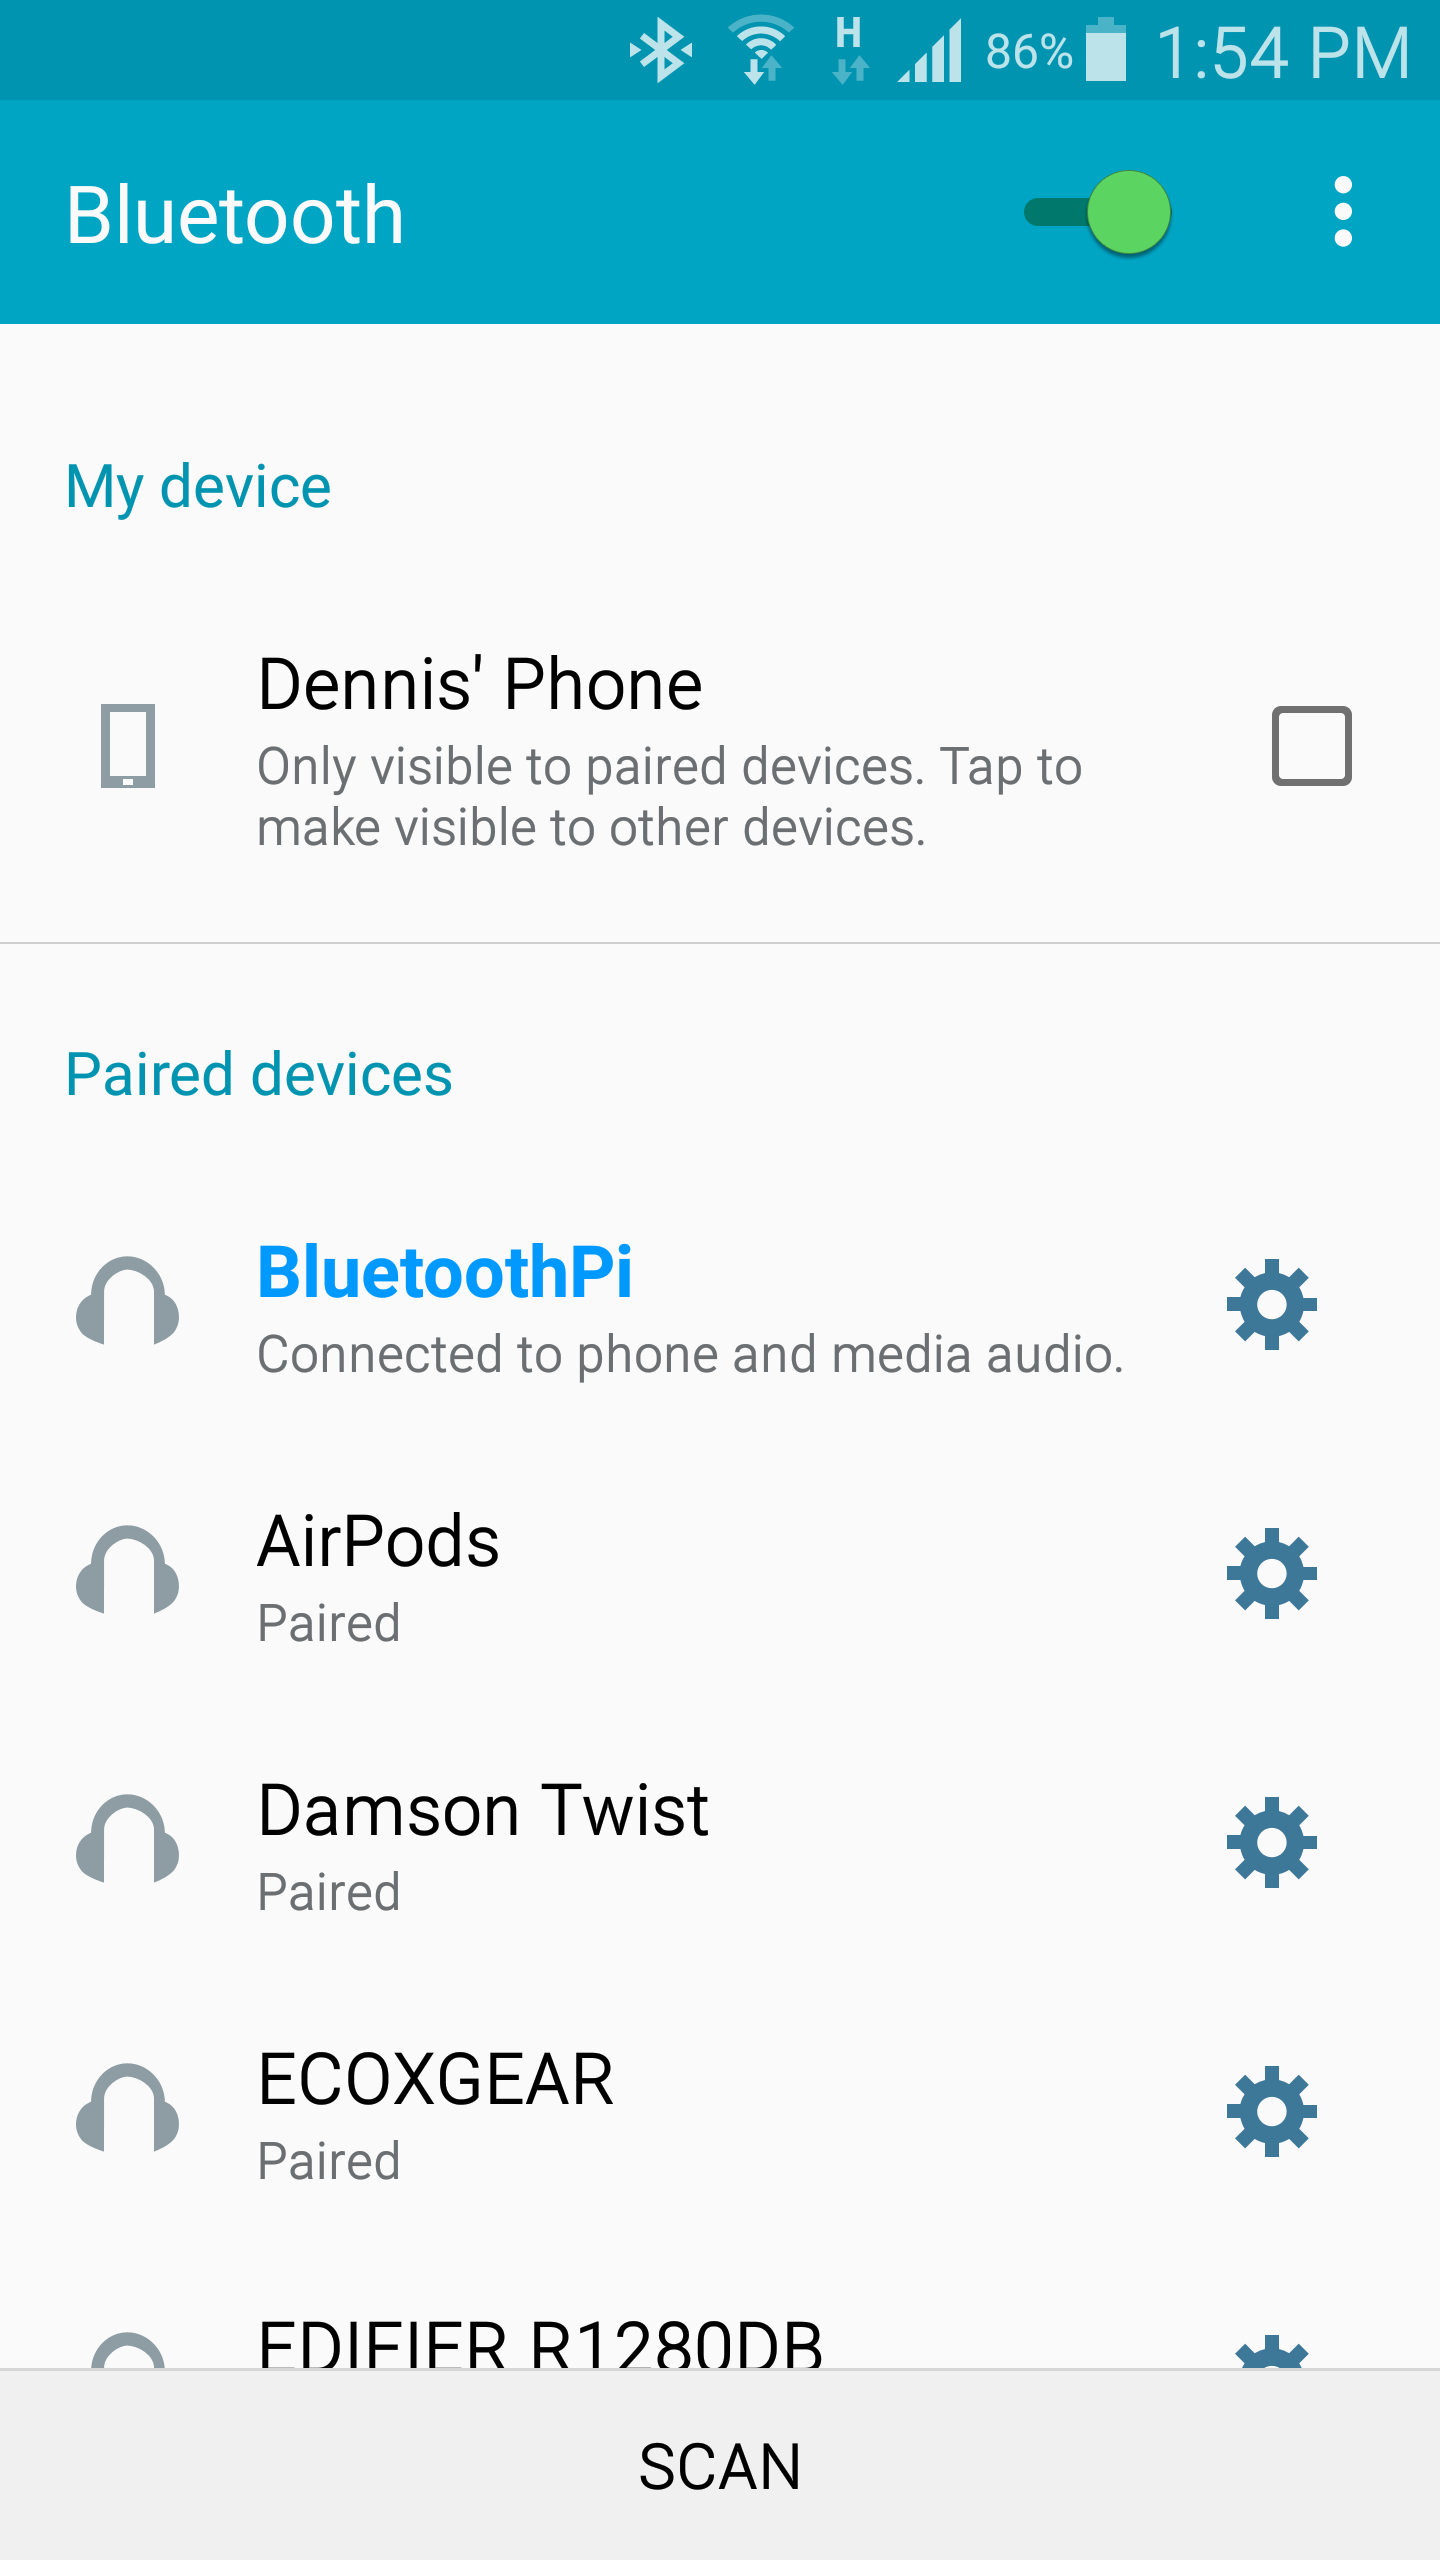
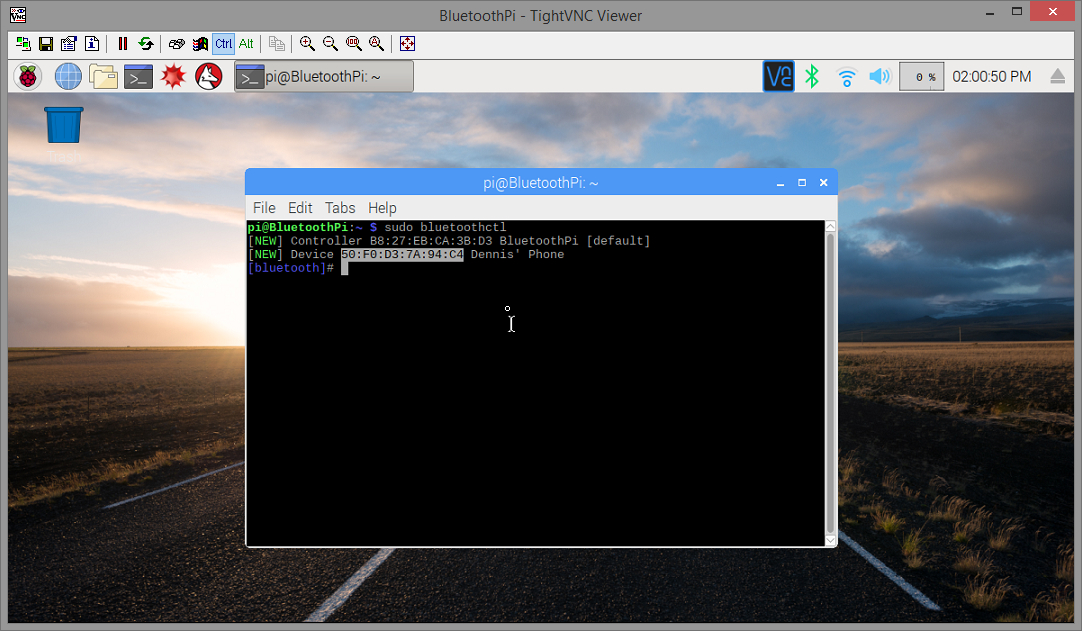
Pair your phone with the Raspberry Pi using the bluetooth icon on the desktop. It is important that you put the Pi's bluetooth in discovery mode and then pair from your phone. If you put your phone in discovery mode and try to pair it FROM the Pi then it may connect but give you an error saying there are no services on your phone the Pi can use, which is true. We're trying to send audio TO the Pi, not the other way around. After it is paired run this command in the terminal window to reveal your connected device's bluetooth MAC address:
sudo bluetoothctl
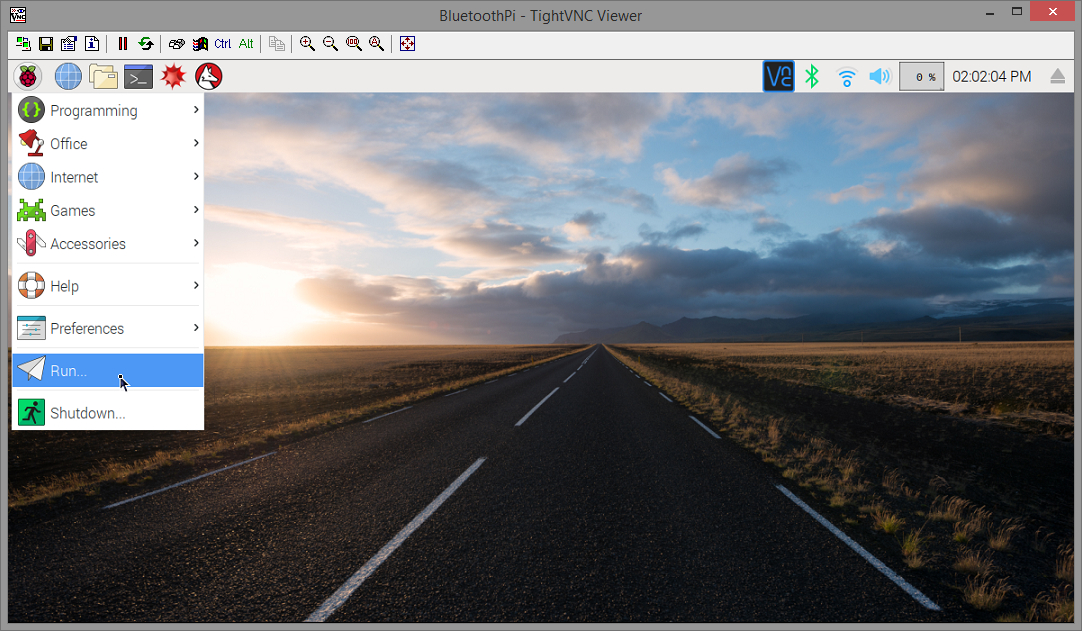
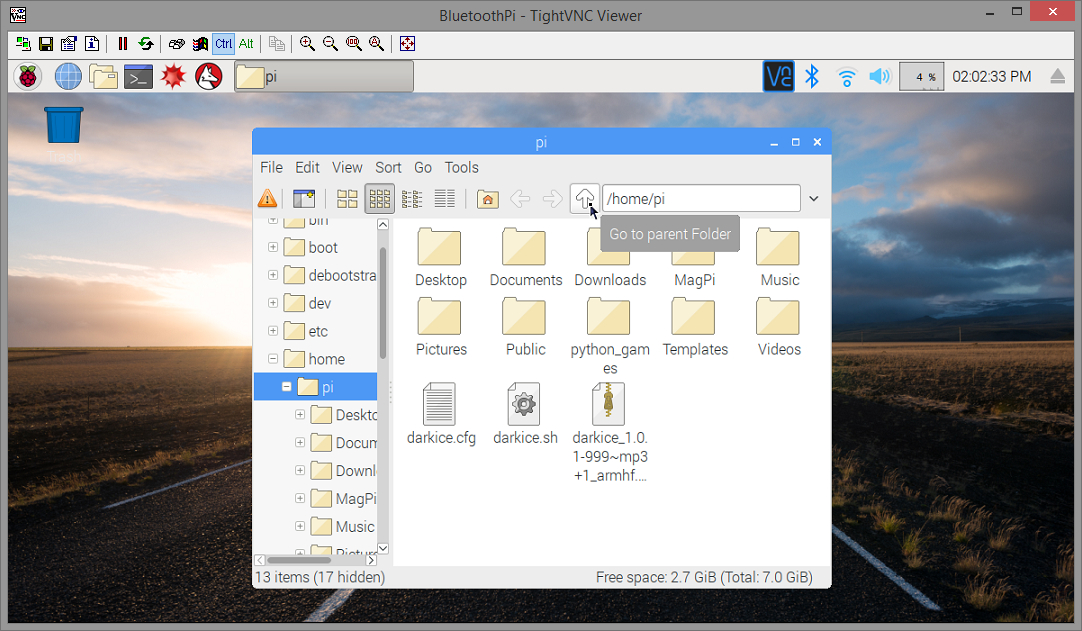
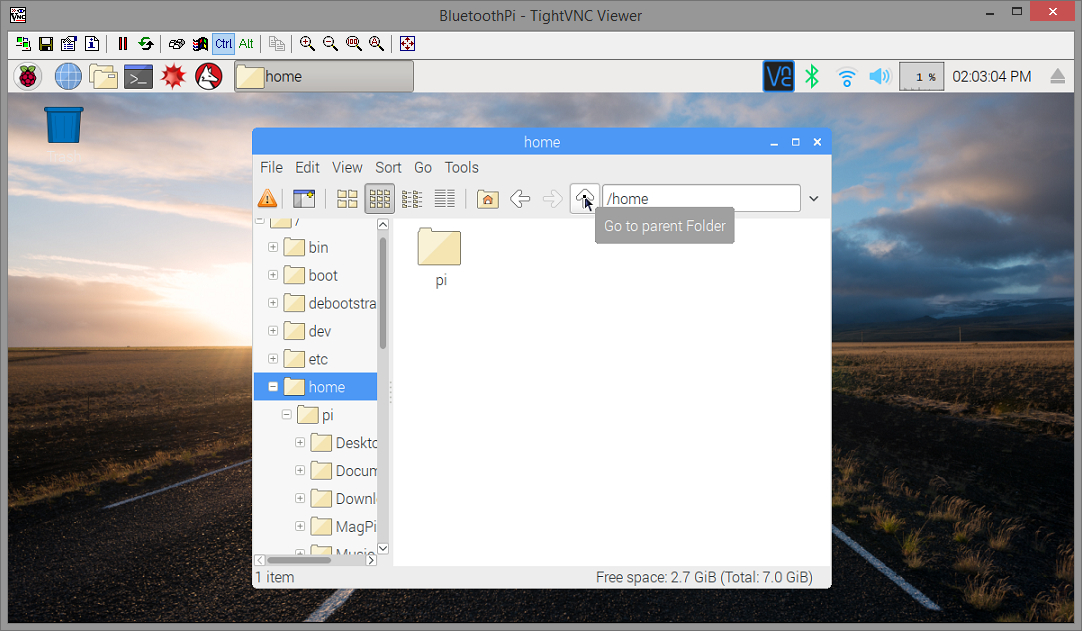
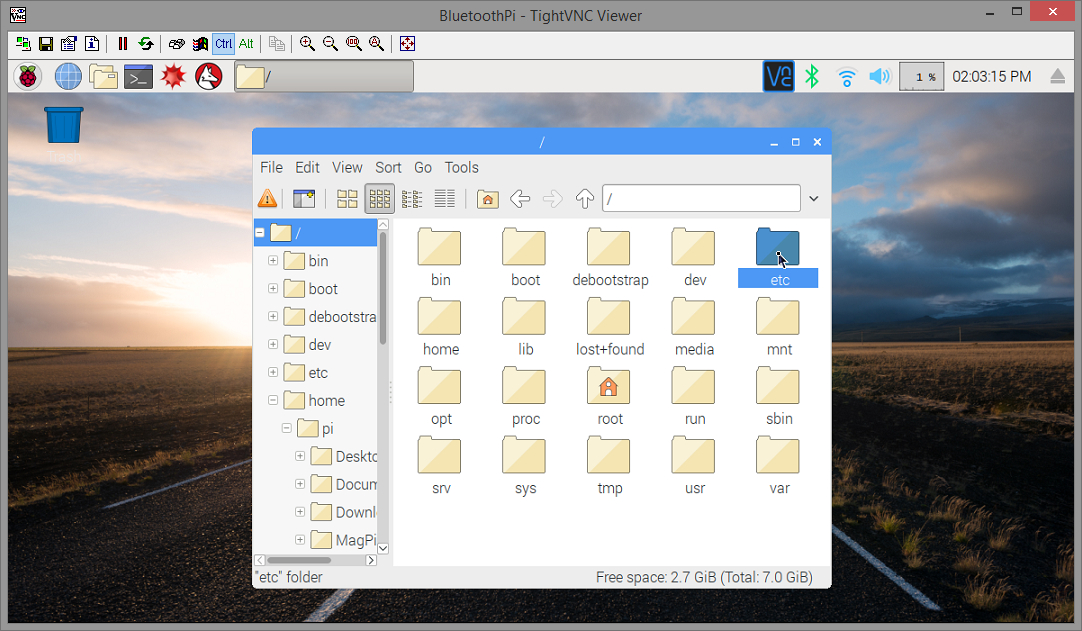
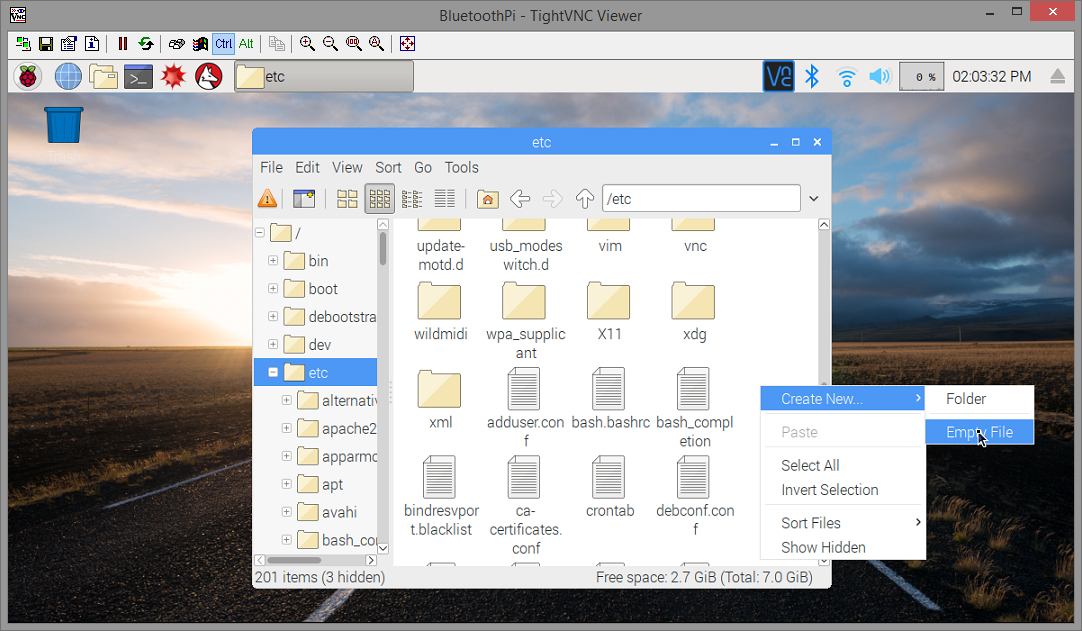
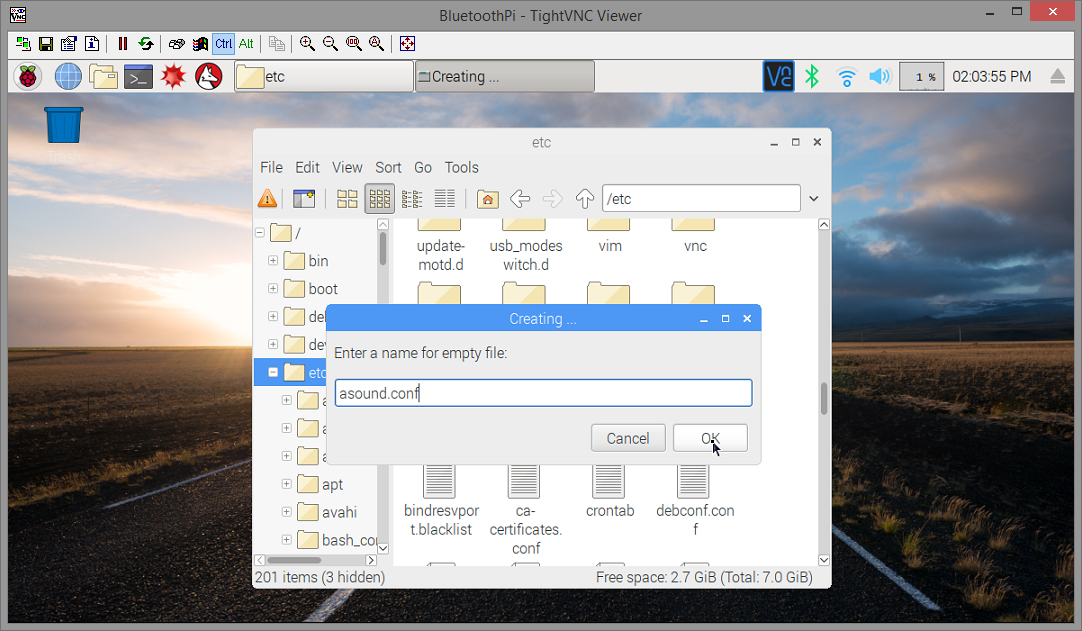
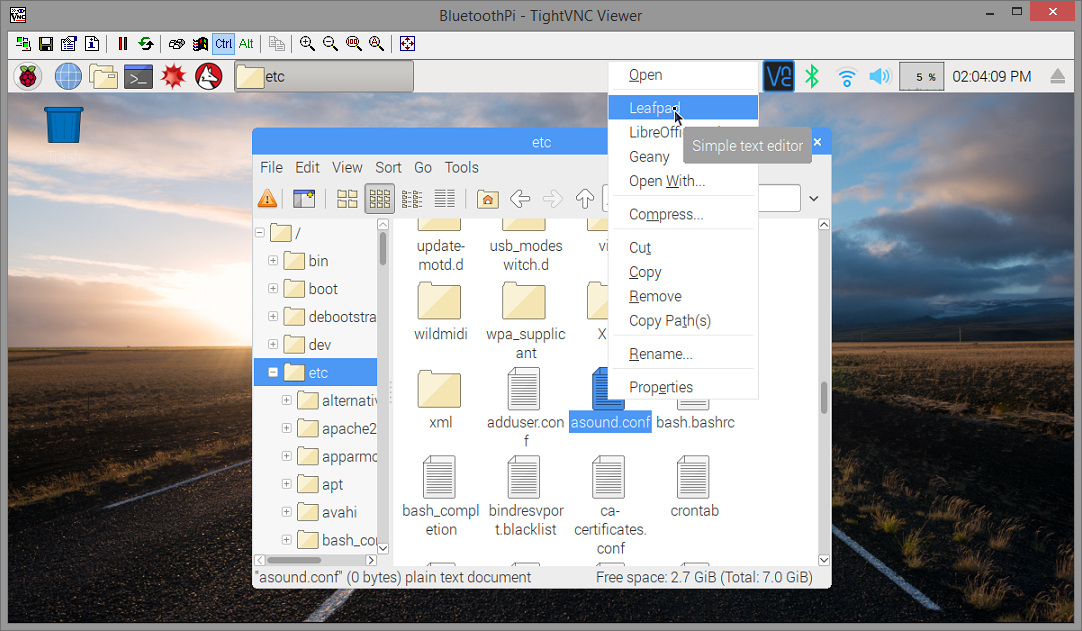
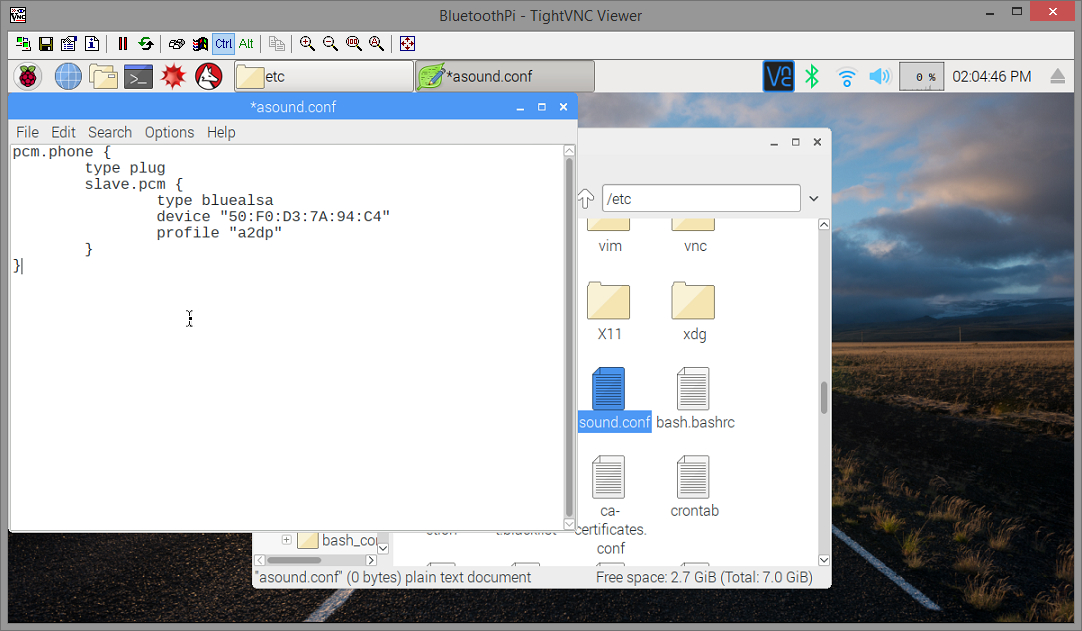
In order for Darkice to be able to use the bluetooth device as a PCM audio input we have to create a file in the "etc" folder called "asound.conf" (etc/asound.conf). Click the up arrow on the file manager a couple of times to go up to the root directory and then double-click the "etc" folder to open it. Scroll down and RIGHT-click in an empty space and create an empty file called "asound.conf" and copy and paste the lines below with your device's MAC address substituted for mine of course and save.
pcm.phone {
	type plug
	slave.pcm {
		type bluealsa
		device "50:F0:D3:7A:94:C4"
		profile "a2dp"
	}
}
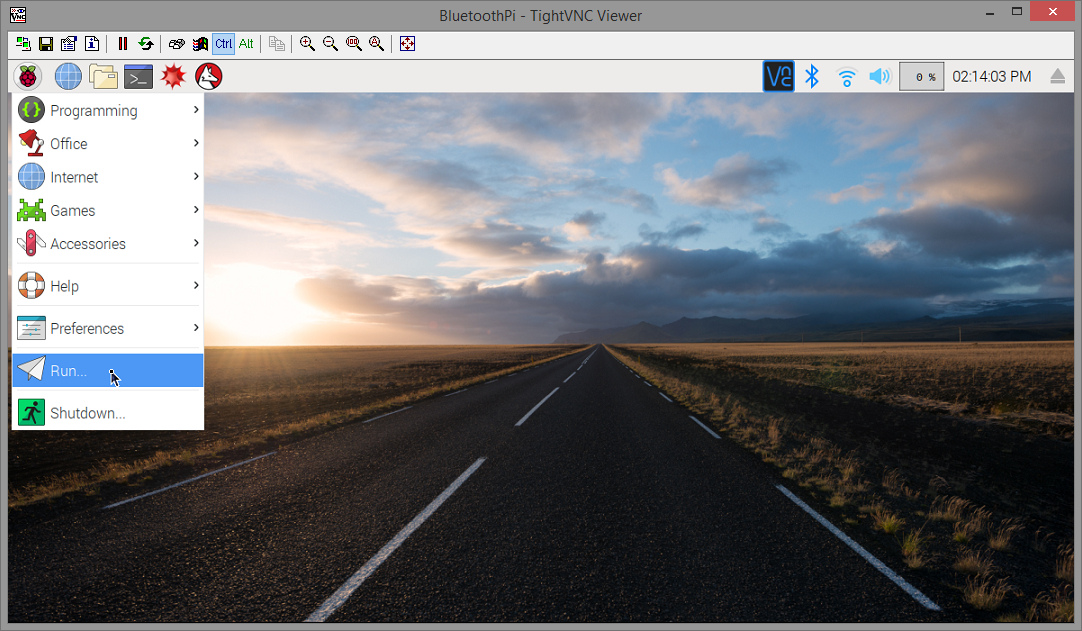
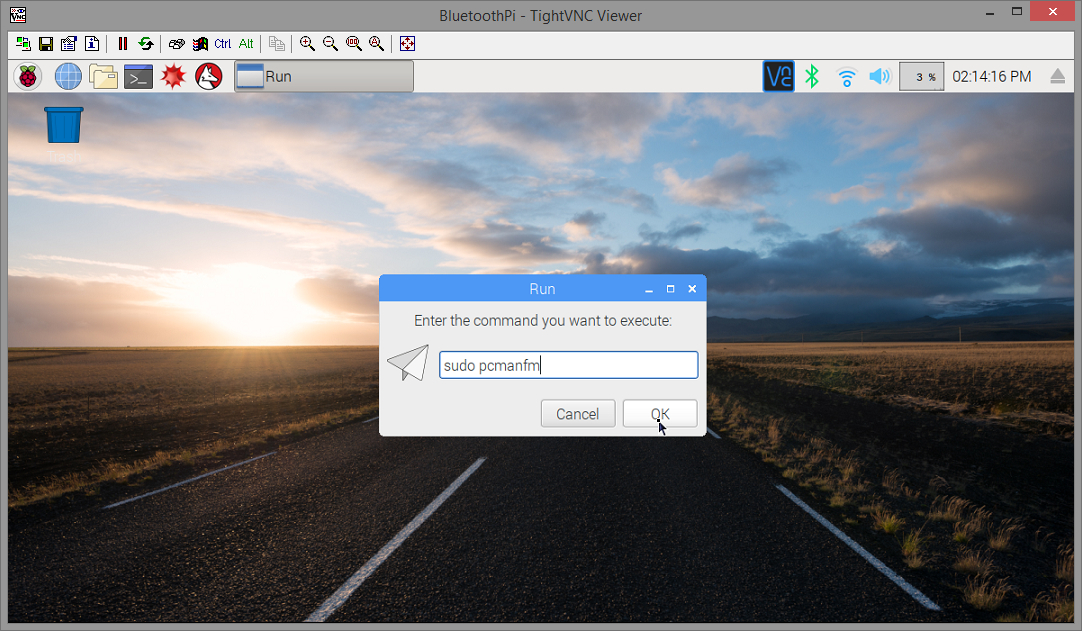
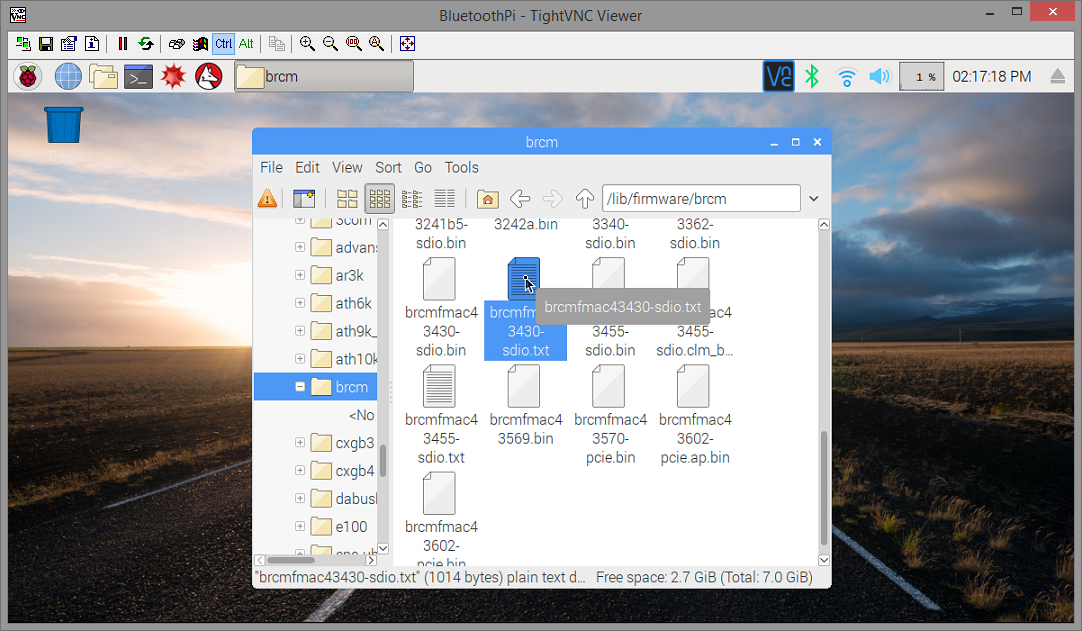
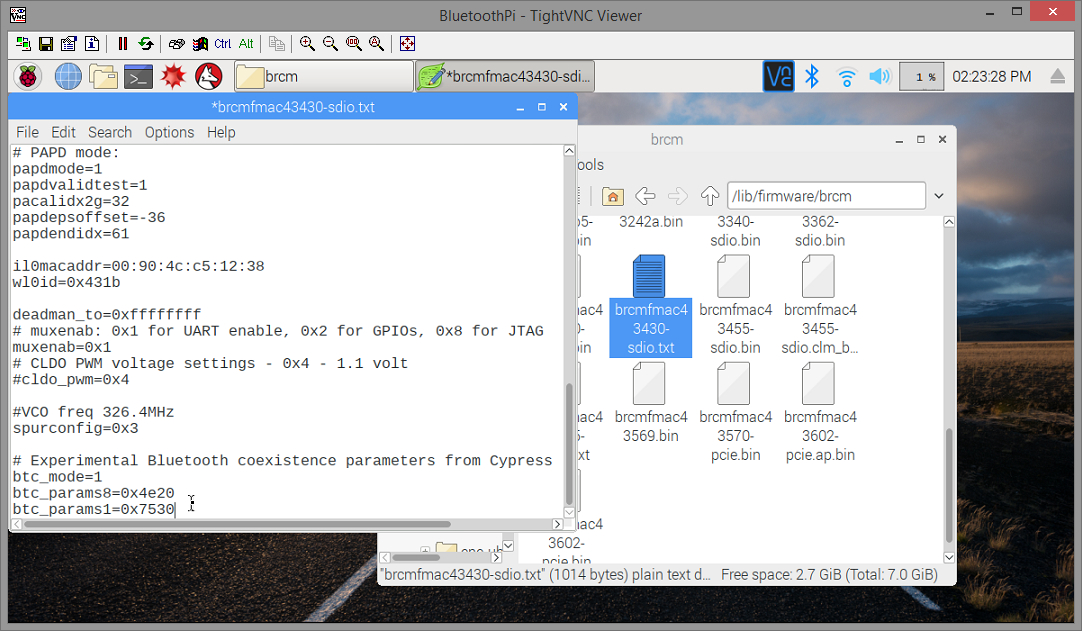
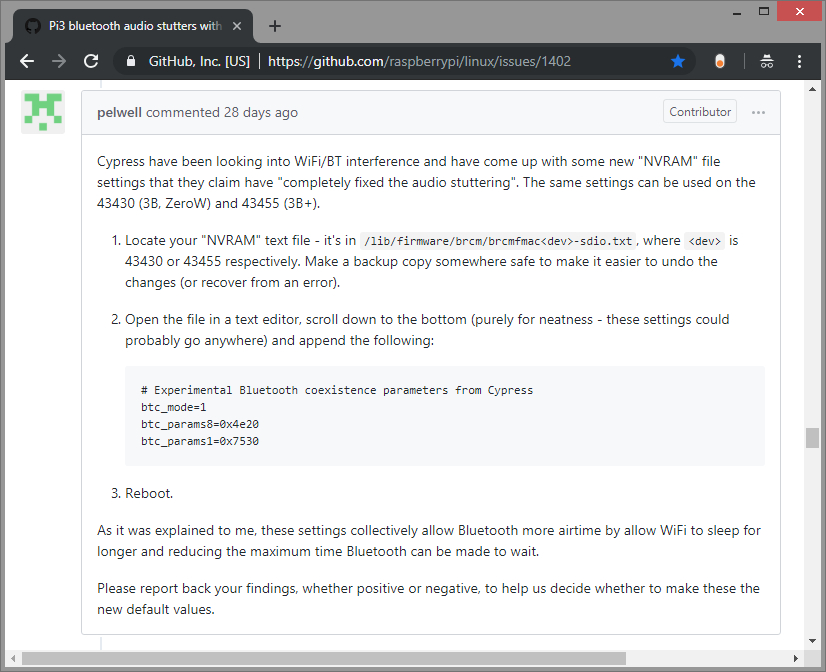
Both the WiFi and Bluetooth radios on the Raspberry Pi are on the same chip so if you max out the bandwidth of both, bluetooth audio can stutter or freeze. Some call it a bug and some say it's just a hardware limitation. We are going to be changing a setting that will remedy this. The credit for posting this fix goes to "pelwell" at https://github.com/raspberrypi/linux/issues/1402 Run sudo pcmanfm again to open the file manager and browse to /lib/firmware/brcm. Double-click the text file "brcmfmac43430-sdio.txt" to open it and add these lines to the bottom and save.
# Experimental Bluetooth coexistence parameters from Cypress
btc_mode=1
btc_params8=0x4e20
btc_params1=0x7530
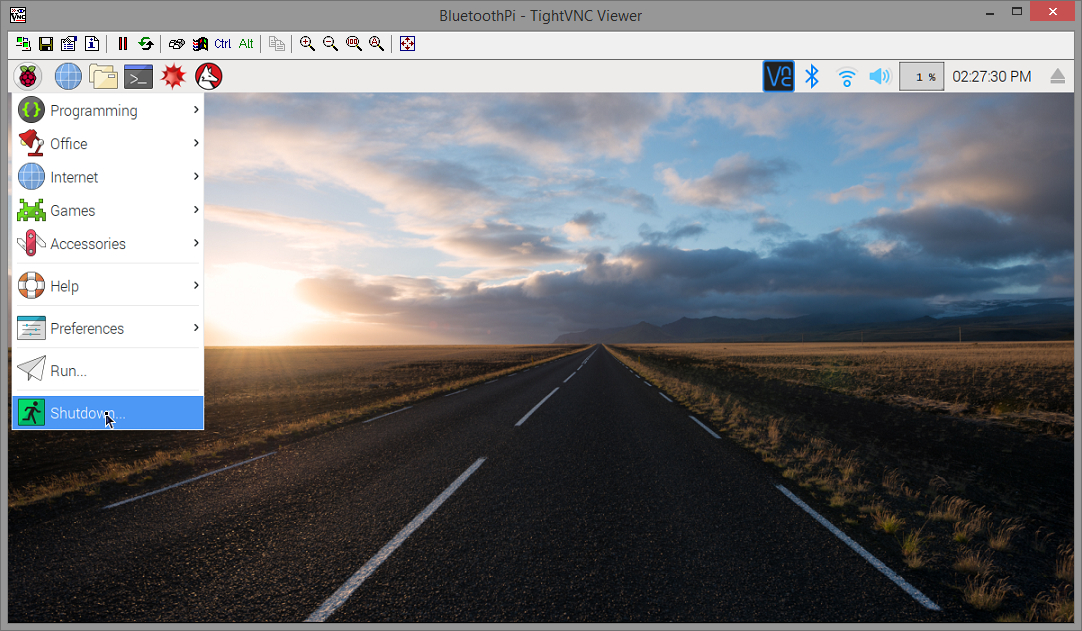
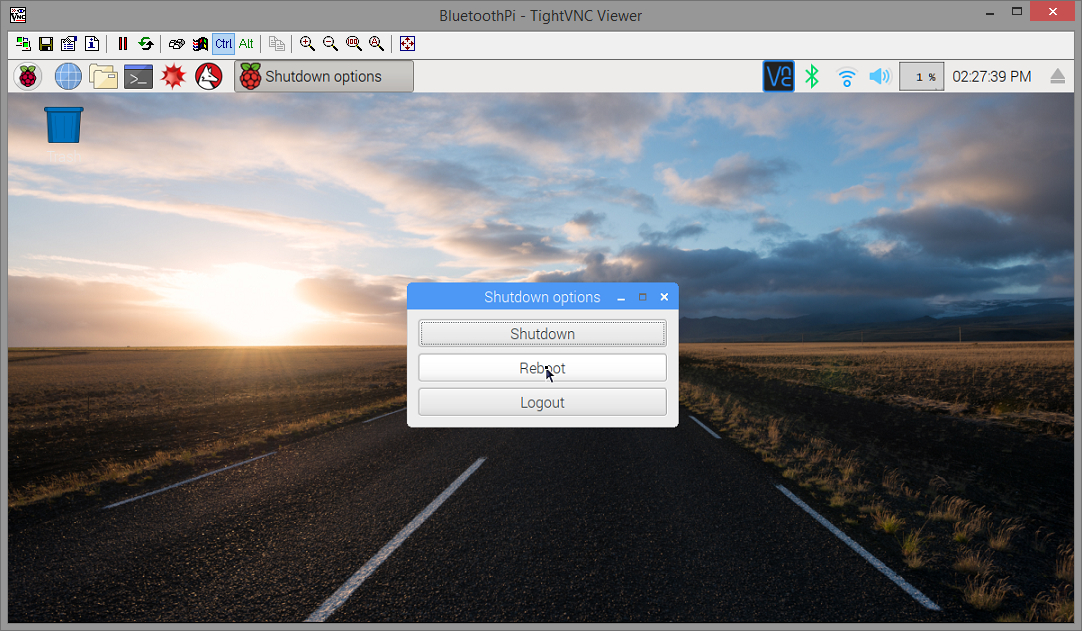
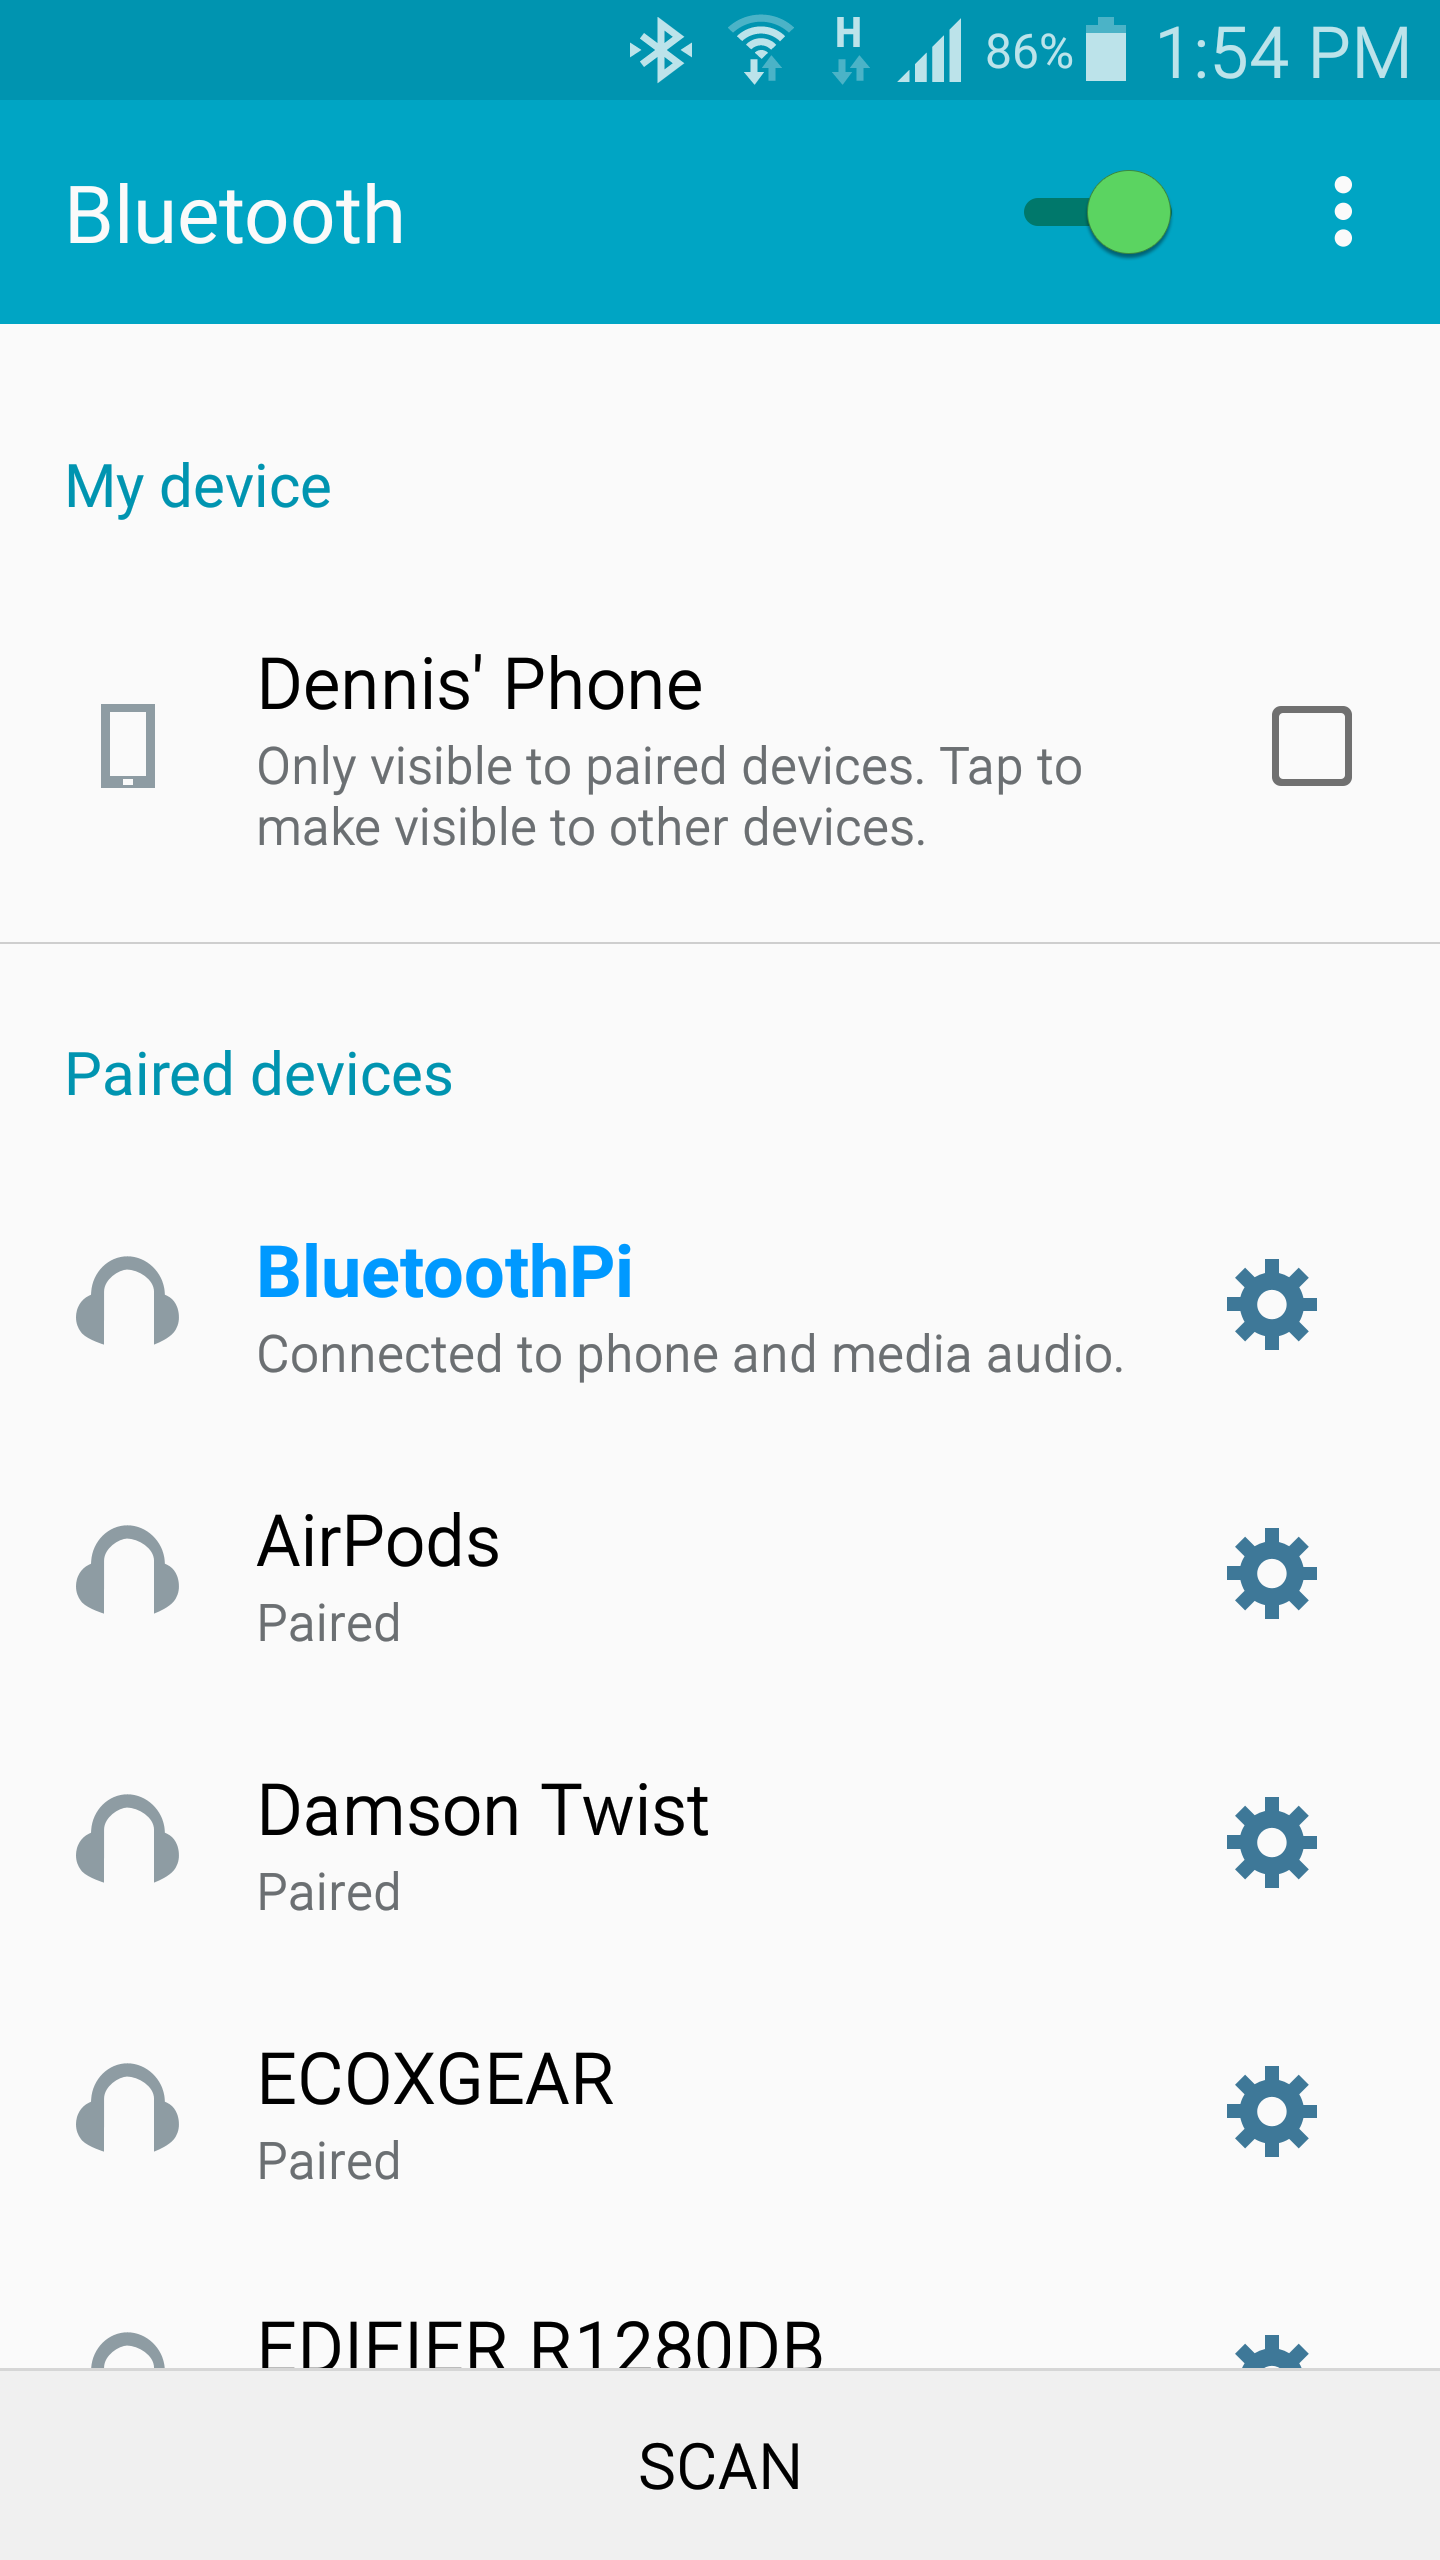
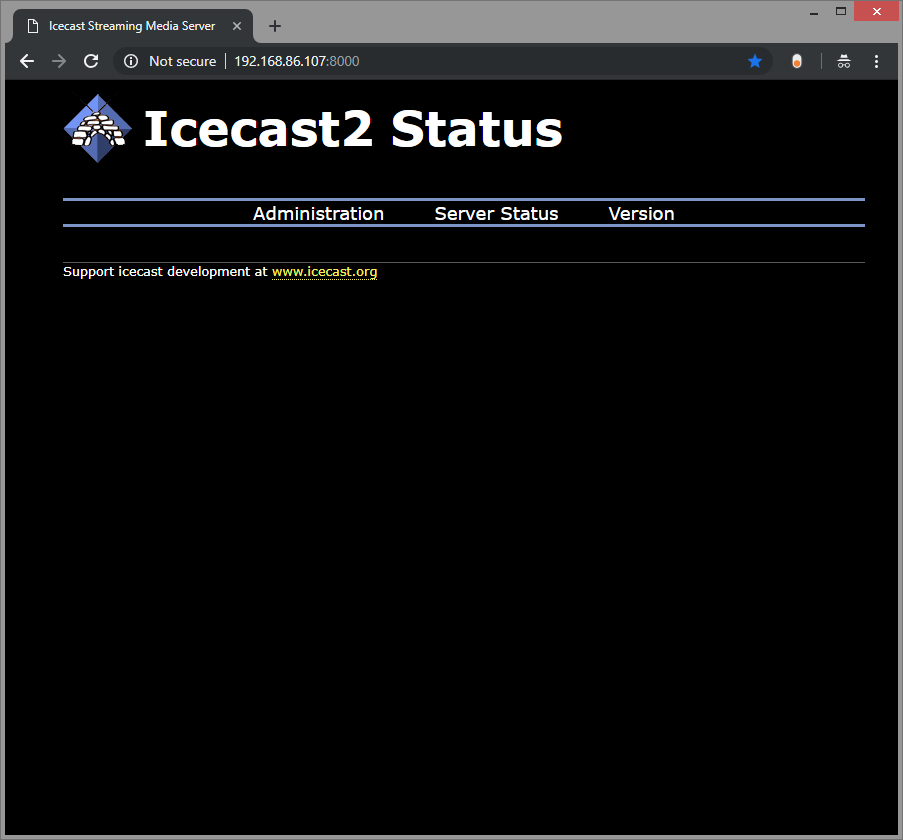
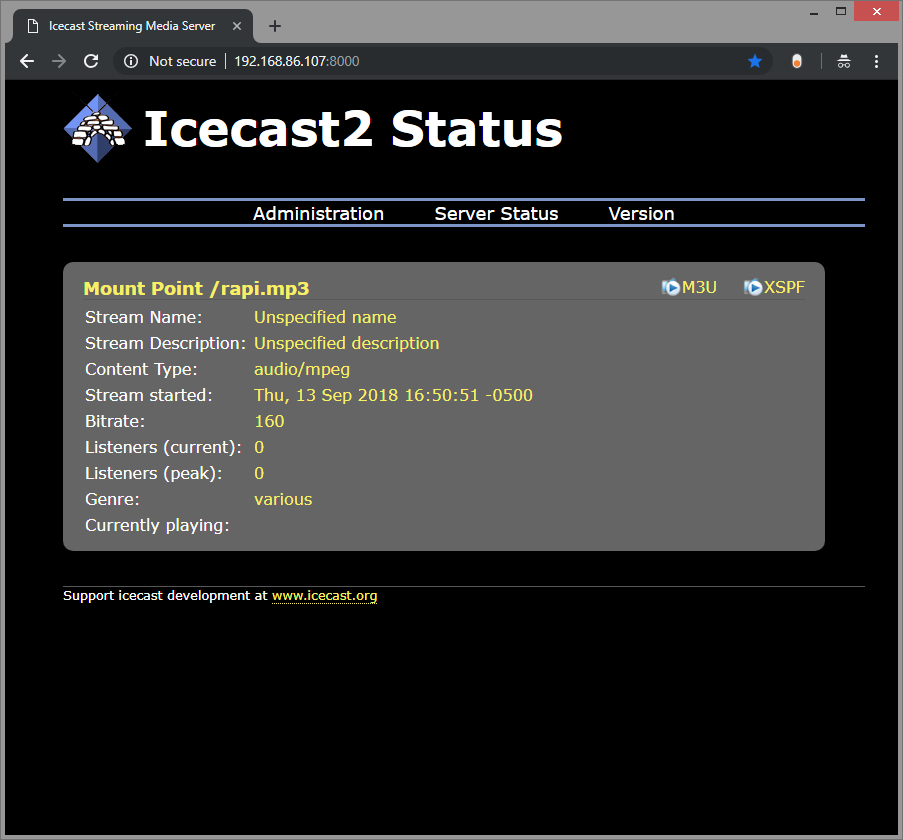
Click the GUI menu icon and select Shutdown and Reboot. If you followed all these steps precisely then your bluetooth audio server will start automatically anywhere from 30 seconds to a minute after clicking reboot. BEFORE you can add it to Sonos you must connect your phone's bluetooth to the Pi (simply tapping on it in your phone's bluetooth settings since it's already paired) and start playing audio of some kind and turn up the volume. Remember you won't hear any audio coming from your phone's speaker because it thinks it's connected to an external bluetooth speaker. One visual way to tell if Icecast is receiving bluetooth audio from Darkice is to open http://192.168.86.107:8000 in a web browser with your Pi's IP substituted for mine. Icecast is always running so you'll always see the status page but if Darkice is also receiving bluetooth audio then you'll also see the mount point and stream descriptor. Disconnect your bluetooth and refresh the page and it will go blank again.
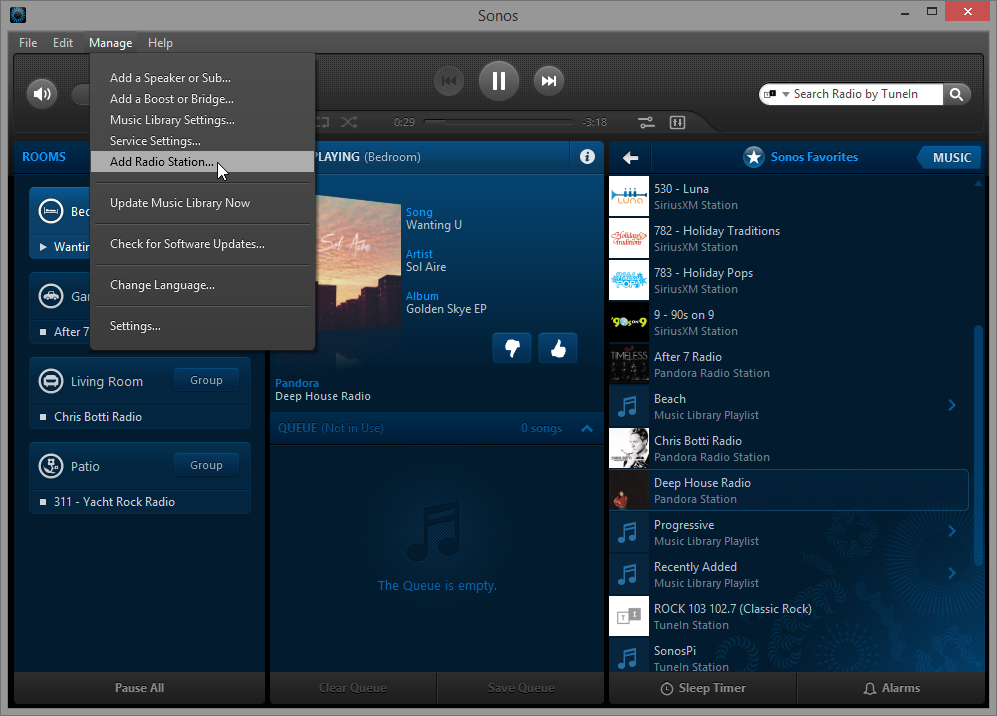
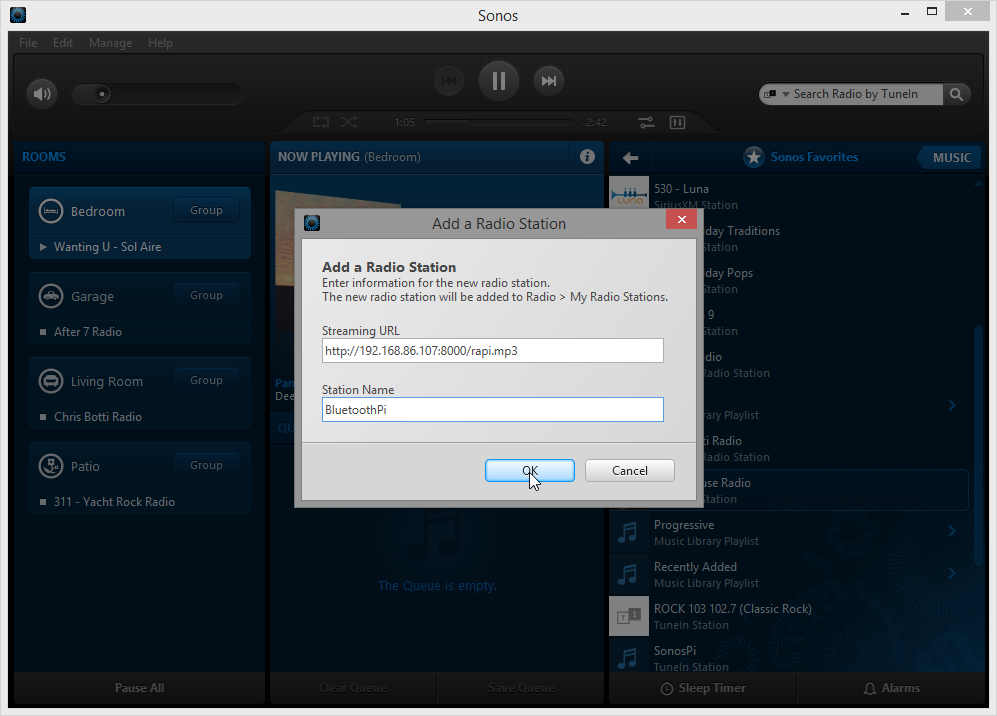
You must use the Sonos desktop controller app to add a custom stream to Sonos. Click on Manage > Add Radio Station and enter the url for the stream which in my case was "http://192.168.86.107:8000/rapi.mp3". Also enter a Station Name and click OK.
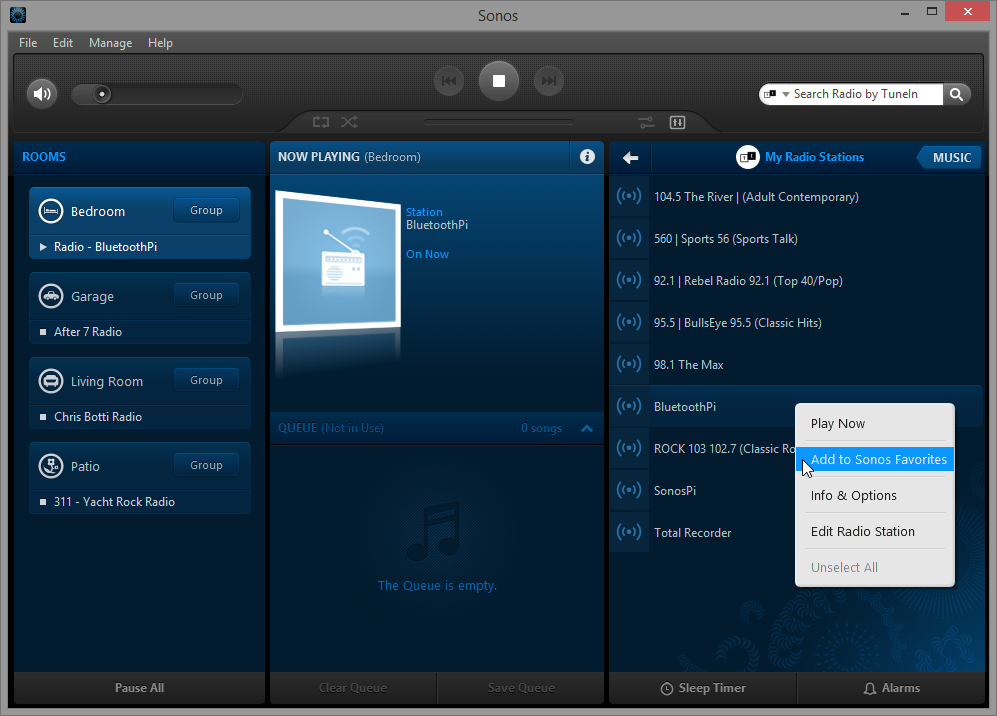
To play the custom radio station we just added, select "Radio by Tunein" and then "My Radio Stations". LEFT DOUBLE-click to play or RIGHT-click to edit or add the station to your Sonos favorites.
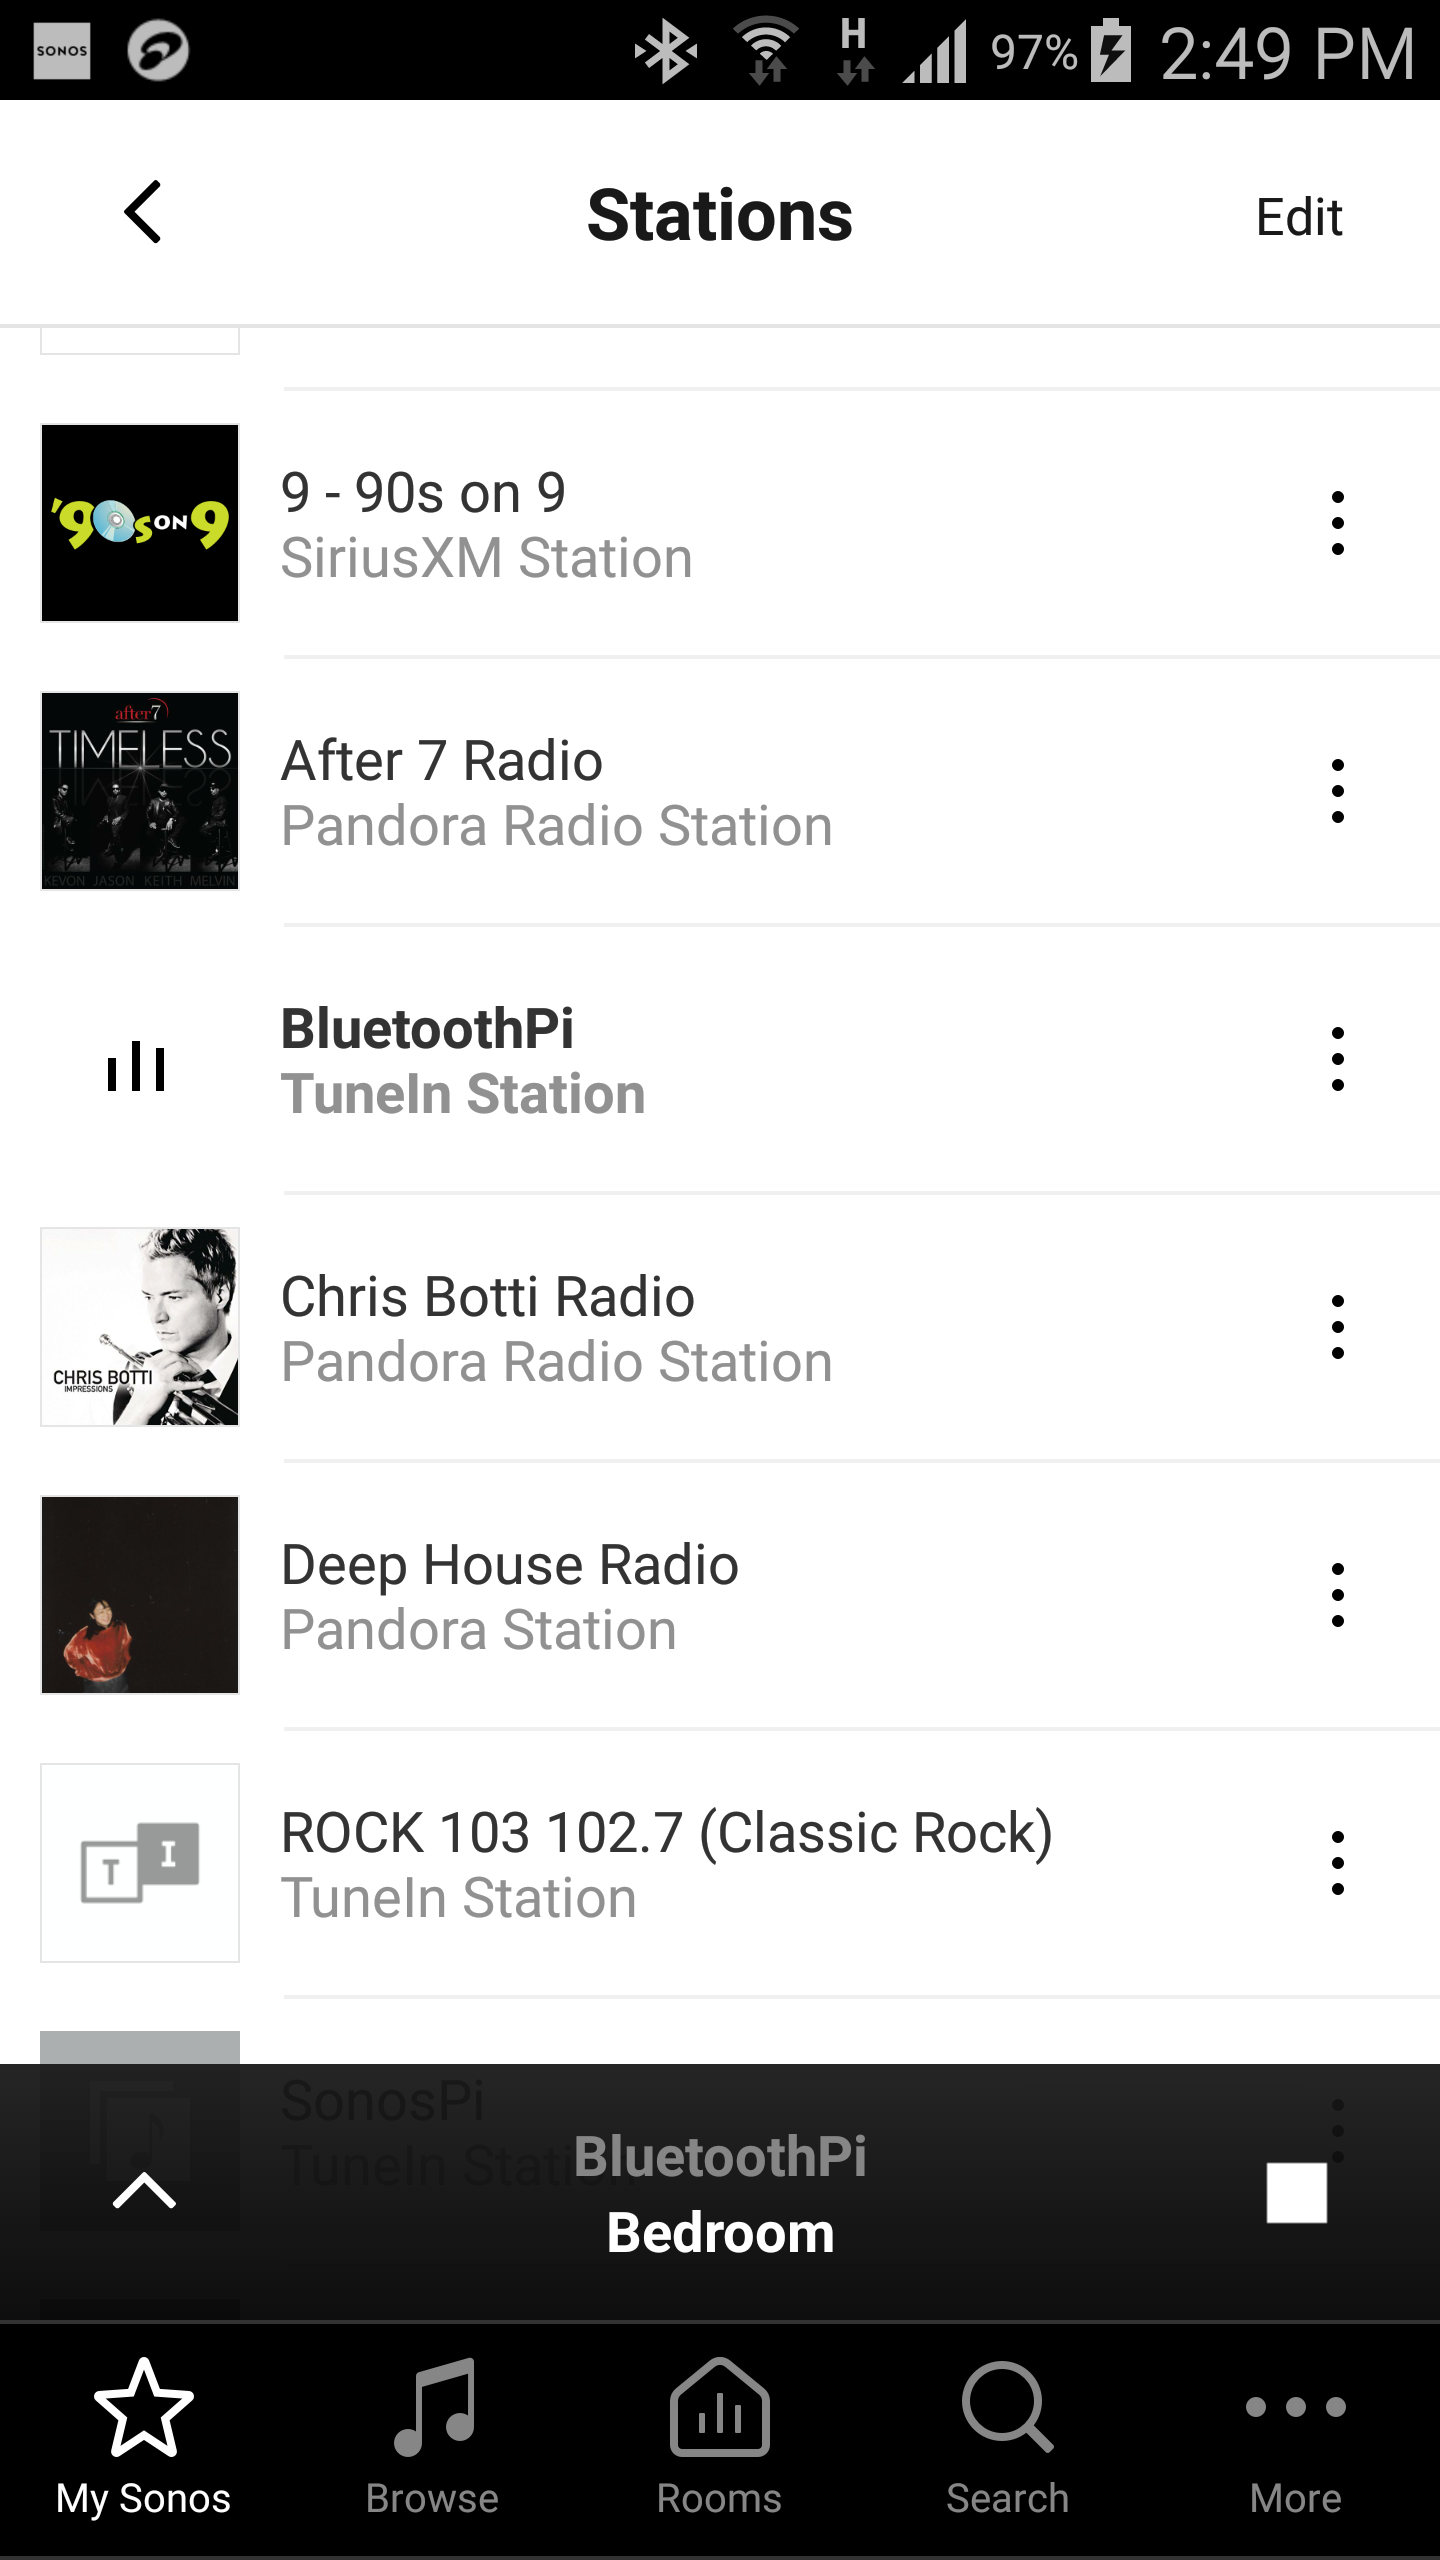
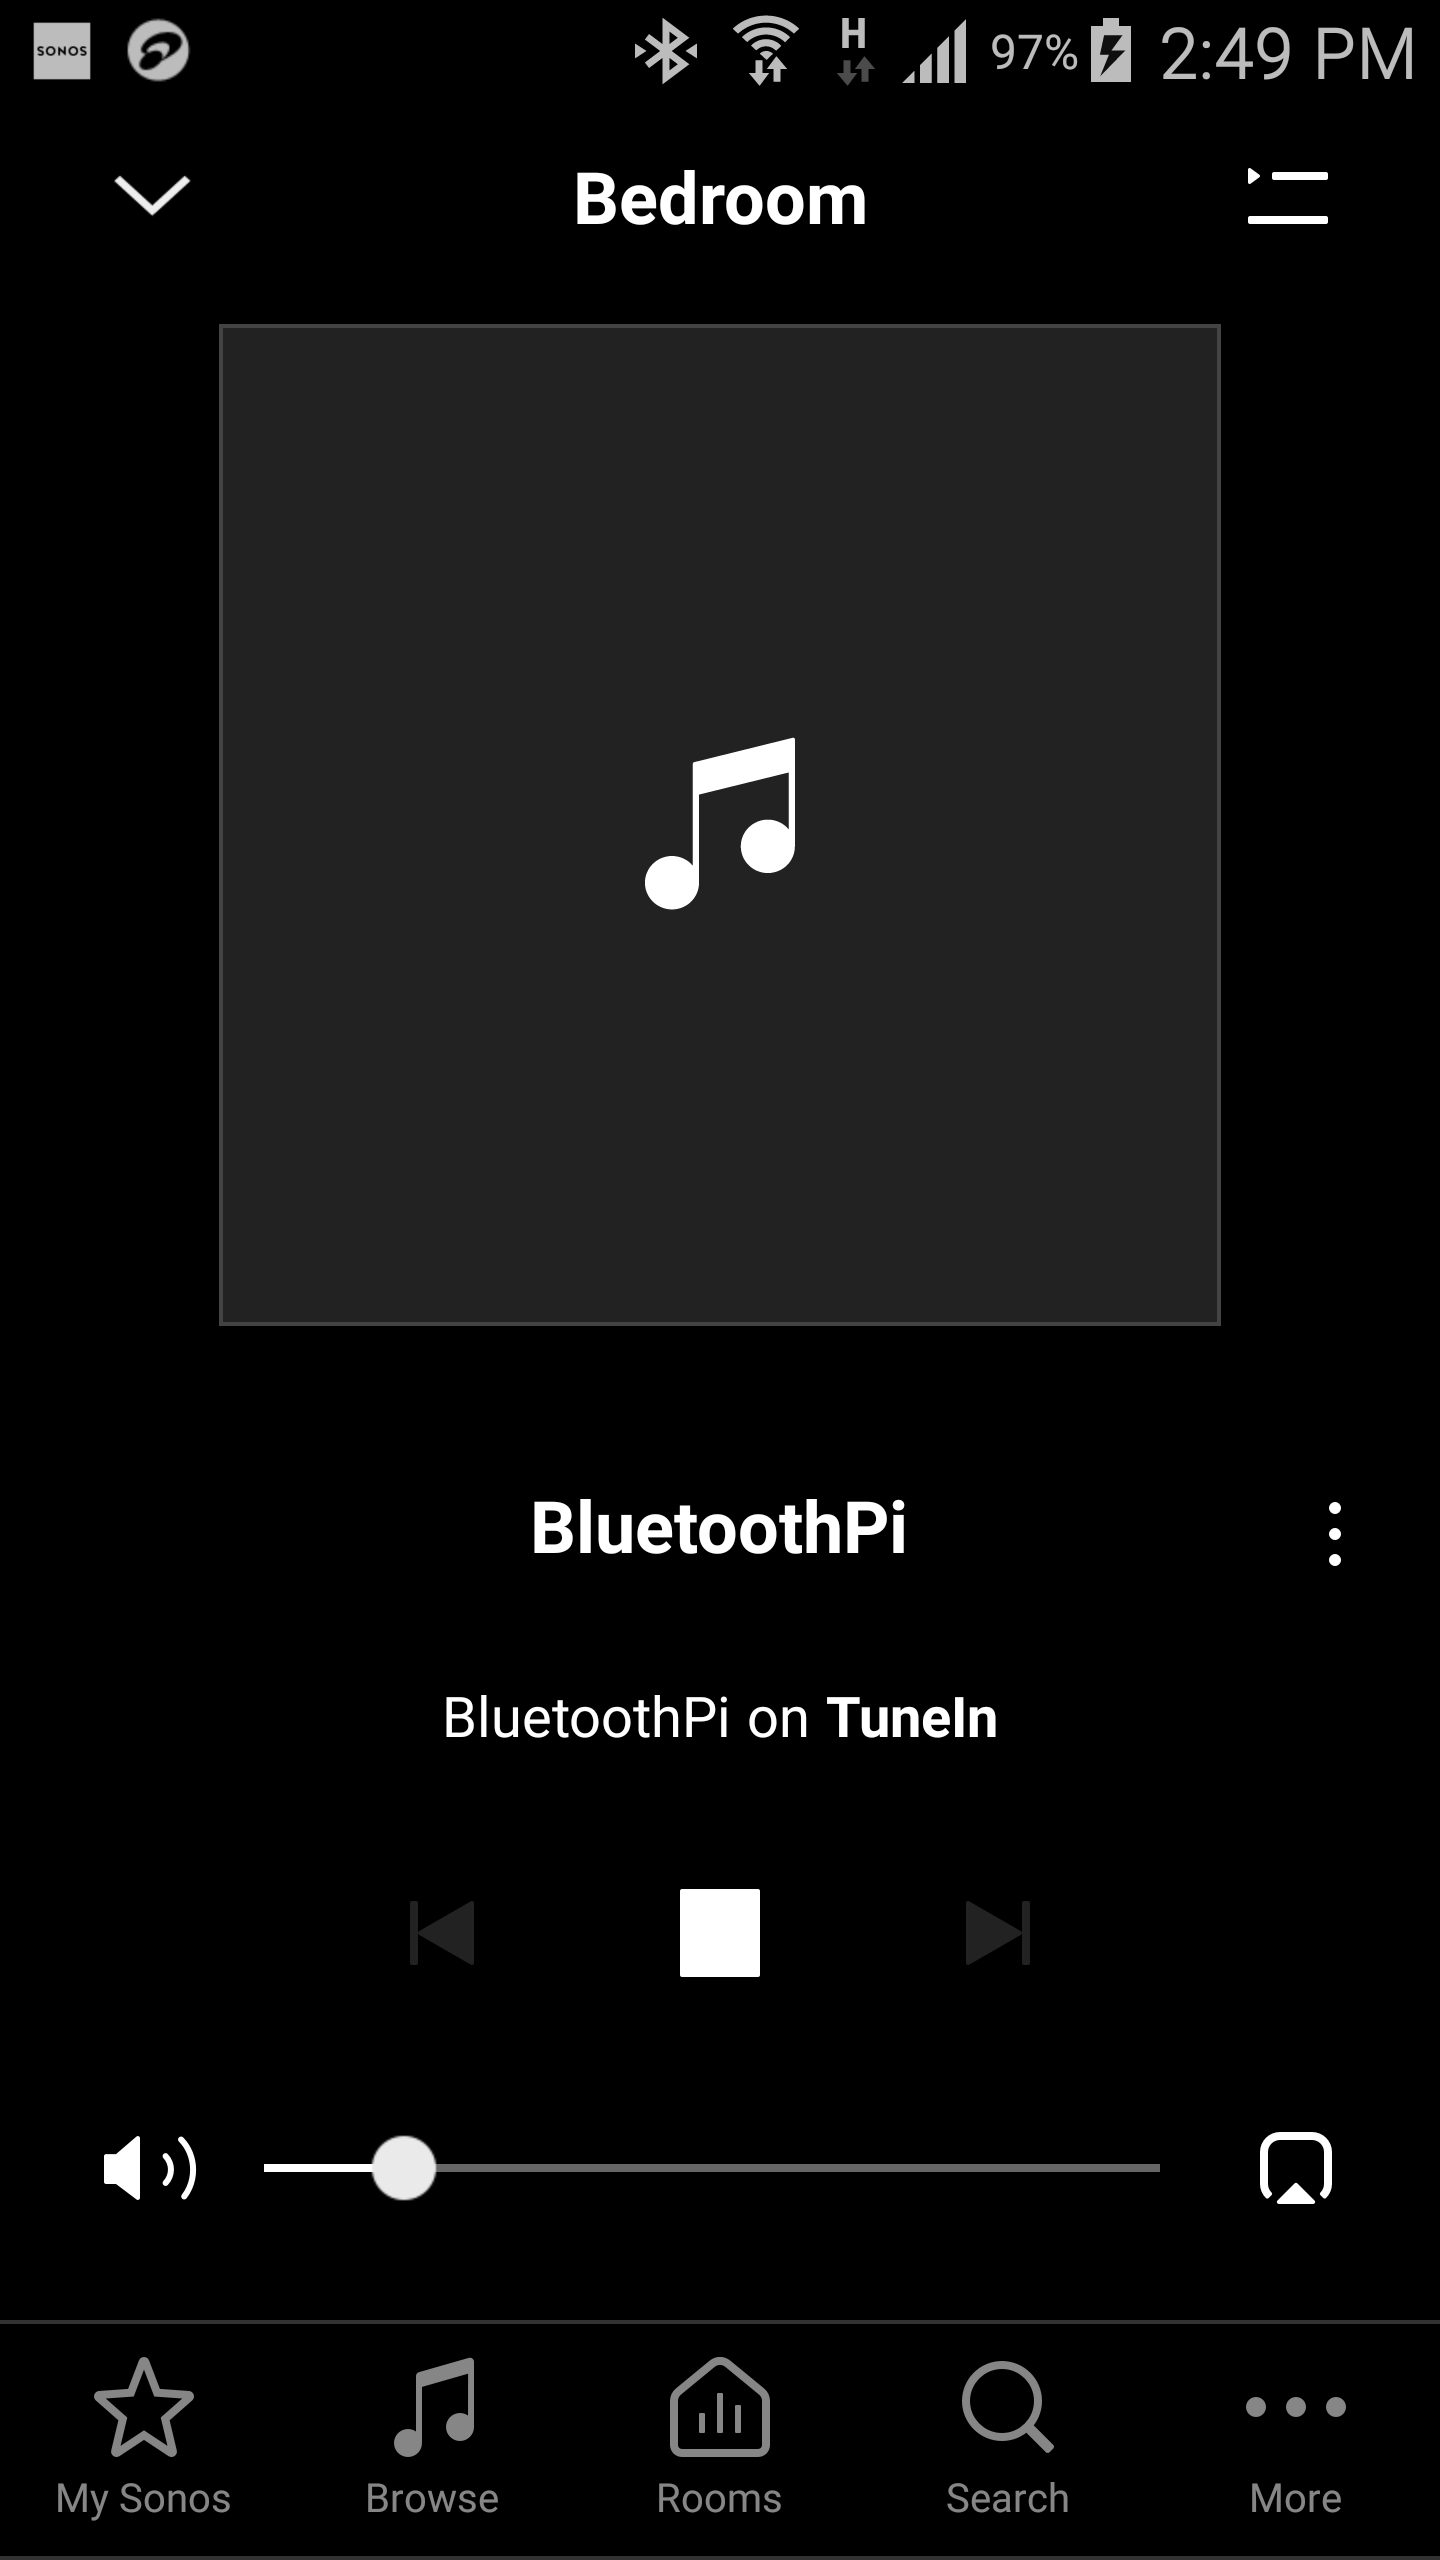
After adding the custom radio station it will immediately be available in your Sonos app. Open the app, tap "My Sonos" at the bottom, scroll down to "Stations" and tap "See All". Scroll down until you see your newly created station. Tap on it and it will start playing in your selected rooms. ̶R̶e̶m̶e̶m̶b̶e̶r̶,̶ ̶i̶f̶ ̶y̶o̶u̶ ̶d̶i̶s̶c̶o̶n̶n̶e̶c̶t̶ ̶y̶o̶u̶r̶ ̶b̶l̶u̶e̶t̶o̶o̶t̶h̶ ̶f̶r̶o̶m̶ ̶t̶h̶e̶ ̶P̶i̶ ̶t̶h̶e̶n̶ ̶t̶h̶e̶ ̶I̶c̶e̶c̶a̶s̶t̶ ̶s̶t̶r̶e̶a̶m̶ ̶w̶i̶l̶l̶ ̶d̶i̶s̶c̶o̶n̶n̶e̶c̶t̶.̶ ̶I̶f̶ ̶y̶o̶u̶ ̶s̶w̶i̶t̶c̶h̶ ̶a̶u̶d̶i̶o̶ ̶a̶p̶p̶s̶ ̶i̶t̶ ̶m̶a̶y̶ ̶d̶i̶s̶c̶o̶n̶n̶e̶c̶t̶.̶ ̶T̶o̶ ̶r̶e̶s̶u̶m̶e̶ ̶l̶i̶s̶t̶e̶n̶i̶n̶g̶ ̶o̶n̶ ̶S̶o̶n̶o̶s̶ ̶y̶o̶u̶'̶l̶l̶ ̶h̶a̶v̶e̶ ̶t̶o̶ ̶r̶e̶s̶t̶a̶r̶t̶ ̶p̶l̶a̶y̶i̶n̶g̶ ̶a̶u̶d̶i̶o̶ ̶o̶n̶ ̶y̶o̶u̶r̶ ̶p̶h̶o̶n̶e̶ ̶a̶g̶a̶i̶n̶ ̶A̶N̶D̶ ̶p̶u̶s̶h̶ ̶p̶l̶a̶y̶ ̶o̶n̶ ̶t̶h̶e̶ ̶S̶o̶n̶o̶s̶ ̶a̶p̶p̶ ̶a̶g̶a̶i̶n̶.̶ <---This has been fixed; see update below. Good luck and thanks for reading!
UPDATE: FIXED KEEPING STREAM CONNECTED WHEN BLUETOOTH DISCONNECTS
So bluetooth streaming was working perfectly with this setup EXCEPT Sonos would disconnect from the Icecast server whenever Darkice lost bluetooth audio such as when when you switched audio apps or just simply disconnected bluetooth which was a pain because you would have to get bluetooth audio streaming again before you could even hit the play button in the Sonos app. This became a huge problem when I was trying to stream audio to Sonos from my phone's WatchESPN app which is fullscreen only so I couldn't hit the play button in the Sonos app after getting the bluetooth audio started but when I closed the WatchESPN app the Sonos stream wouldn't start unless you had the bluetooth audio started first! Ugh! I have been pulling my hair out trying to come up with an elegant fix for this. I tried a different mp3 encoder called liquidsoap that has the option to send silent audio when it loses connection but I couldn't get it to work with bluealsa. I tried to mix the bluealsa stream with a secondary dummy soundcard alsa stream using dsnoop and asym to try to trick Icecast into thinking there was still an audio signal present but alsa really doesn't allow you to manipulate bluetooth audio very much. I then started investigating using a fallback mount point using a silent mp3 file in Icecast but Sonos would see the mount point name change and disconnect. I was using a test.mp3 file and accidentally designated it as the main mount point name one time instead of the fallback one and noticed Sonos simply switched to playing that file when it got disconnected from the bluetooth "rapi.mp3" stream. Eureka! It wouldn't automatically switch back over to to the bluetooth stream when it became available again so that got me to thinking why not just use the same mount point name? So what you have to do is create a silent mp3 file and give it the same name as the Darkice mp3 stream, "rapi.mp3", and hard code it as the main mount point in the Icecast2 configuration file. What happens is that whenever Sonos loses connection to the Darkice/bluetooth rapi.mp3 stream it just starts looping the other silent rapi.mp3 file until the bluetooth stream comes back online. This way you don't have to have the bluetooth audio going before you hit play in Sonos. Here's how to do it...
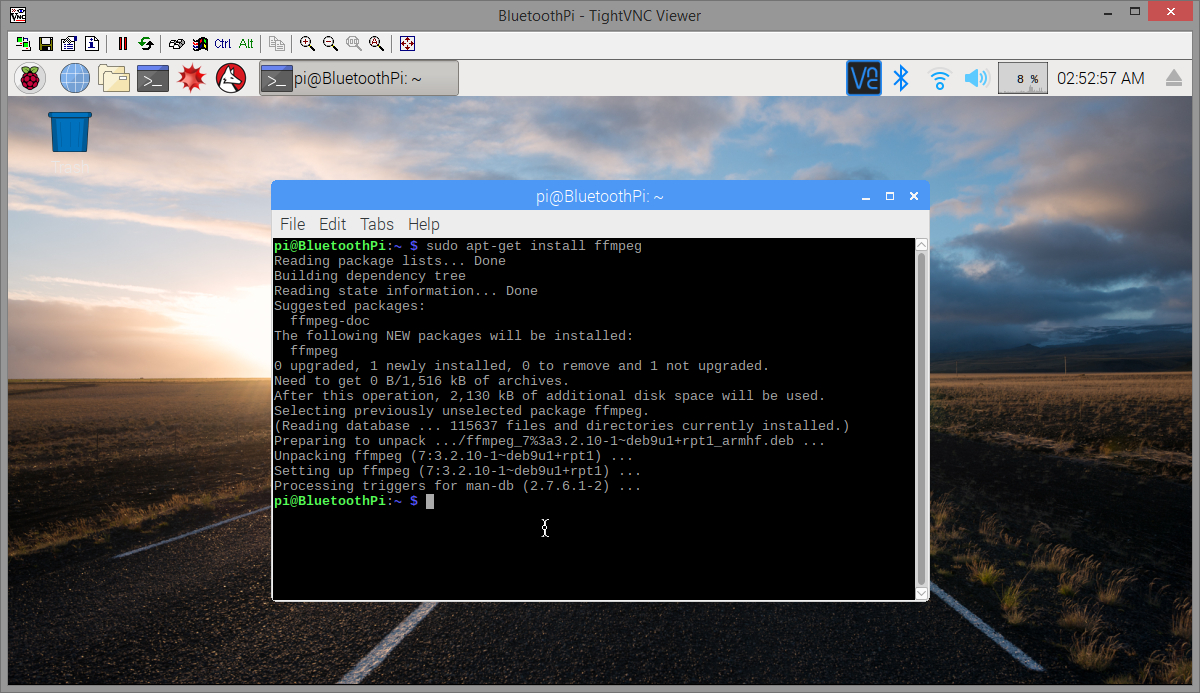
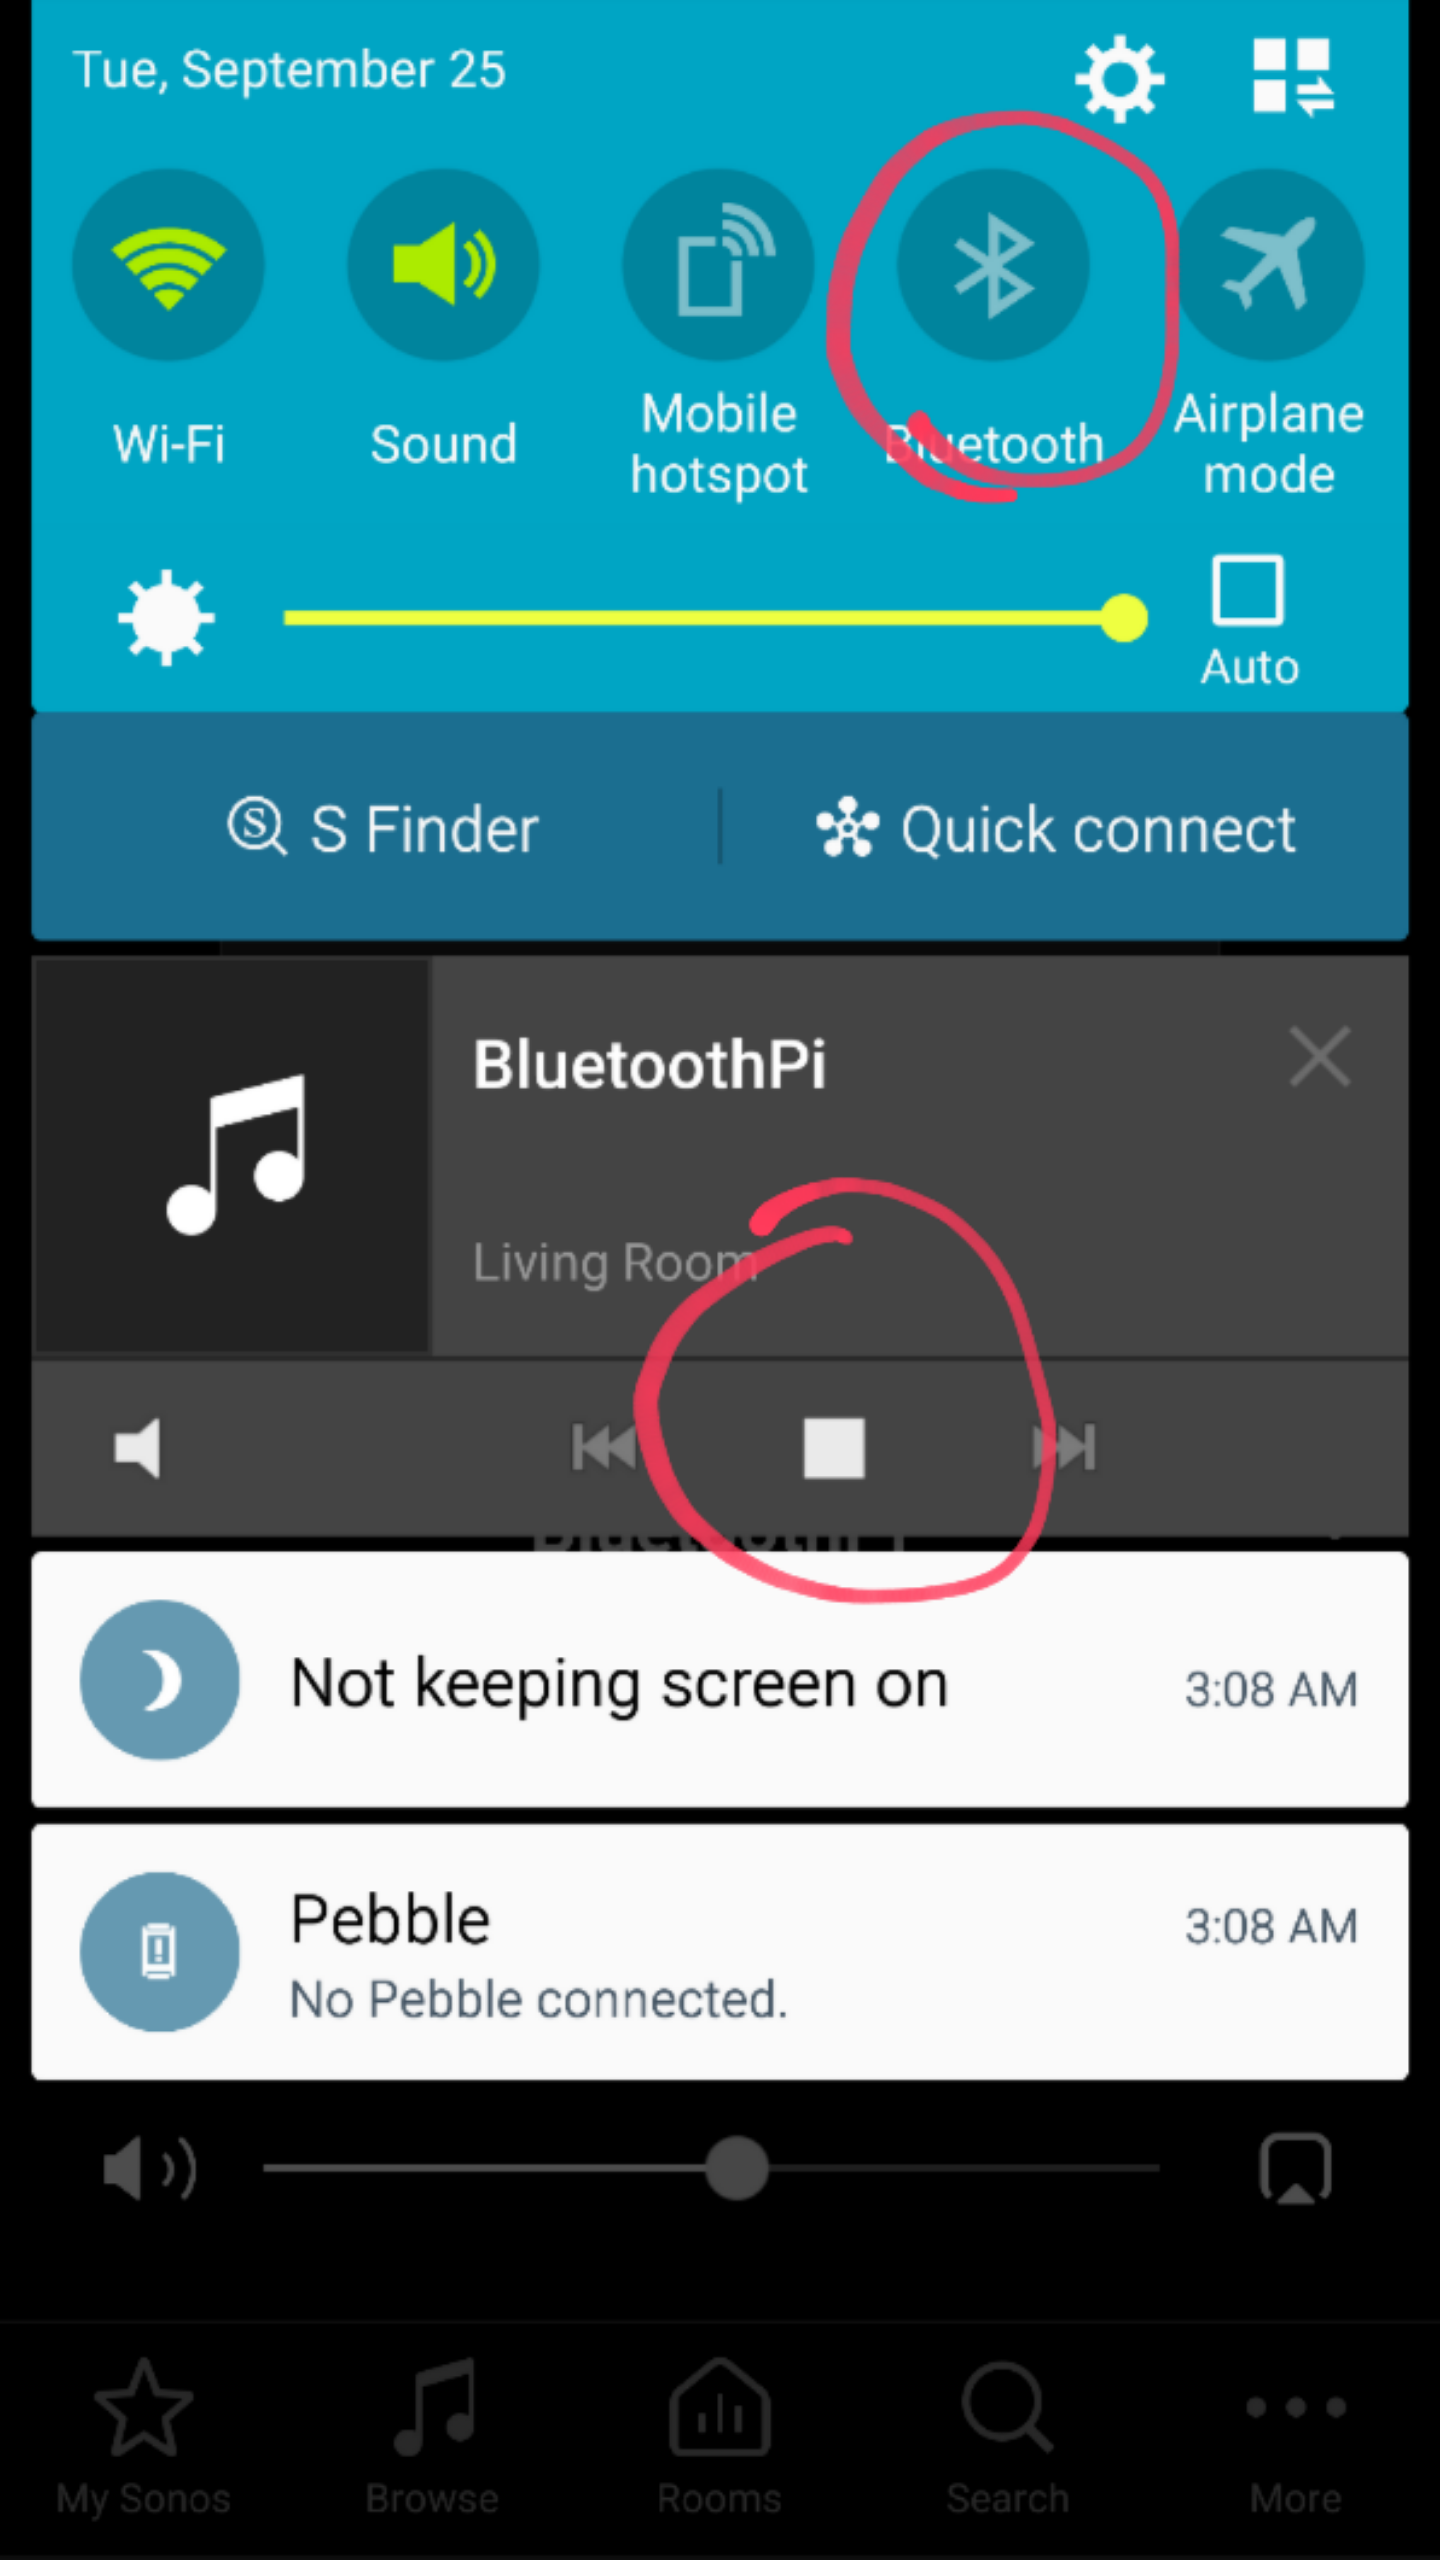
First we have to install ffmpeg to create a silent mp3 file. You could record a silent .wav file from an external soundcard and convert to mp3 using lame but since I don't have an external soundcard input for this project, using ffmpeg was the easiest solution. Open the terminal window and type in "sudo apt-get install ffmpeg" and hit Enter:
sudo apt-get install ffmpeg
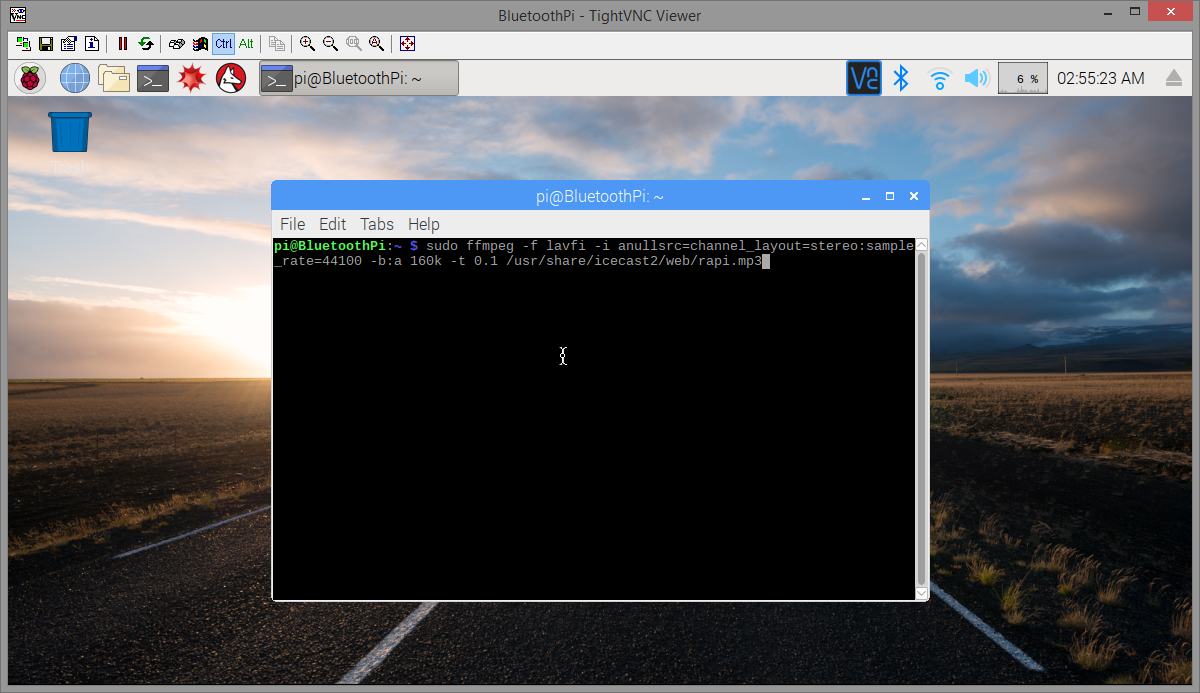
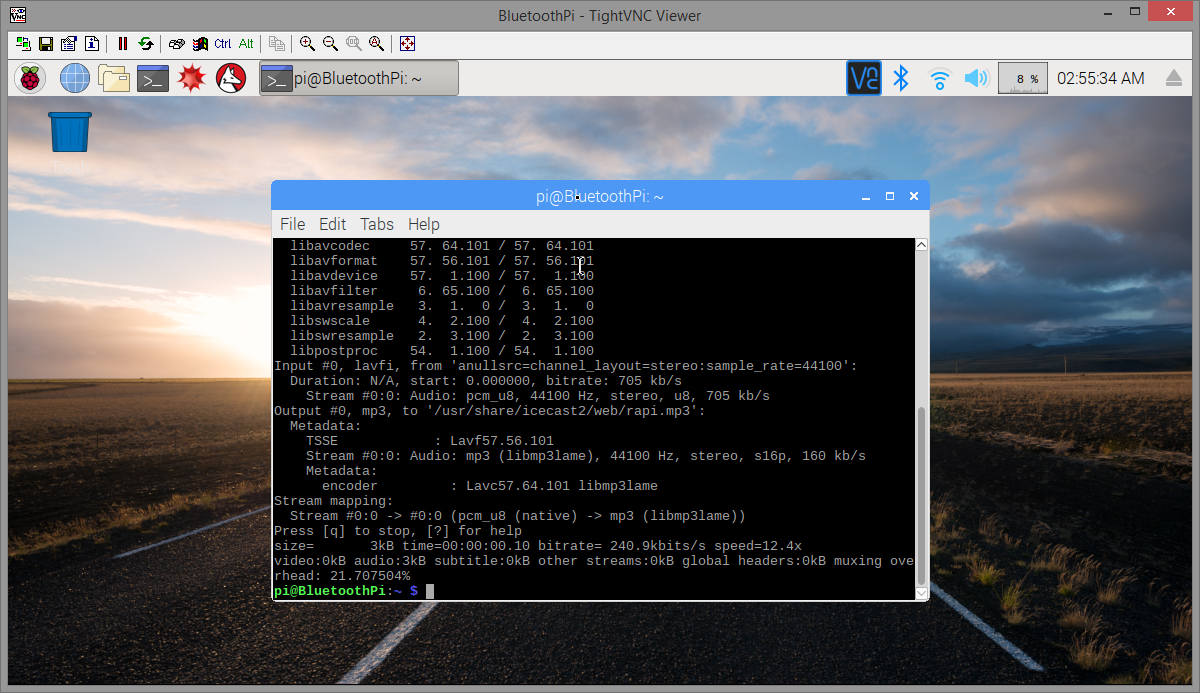
After it's installed copy and paste this long line to encode a silent mp3 file that's just one second in duration:
sudo ffmpeg -f lavfi -i anullsrc=channel_layout=stereo:sample_rate=44100 -b:a 160k -t 1 /usr/share/icecast2/web/rapi.mp3
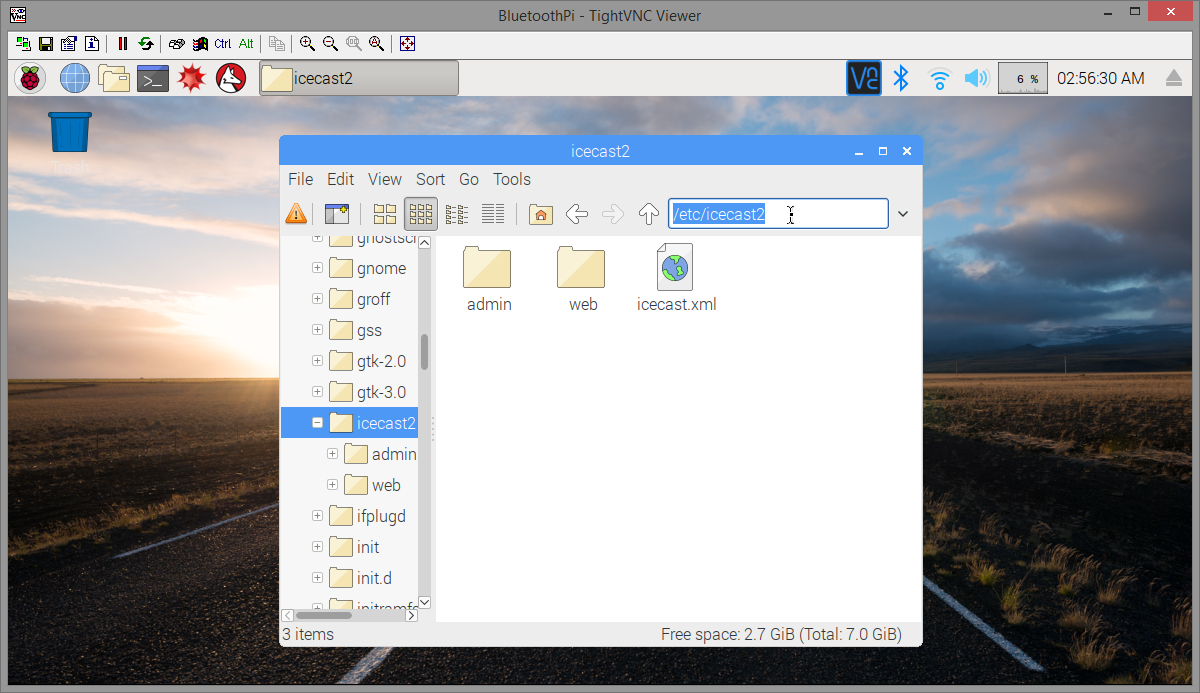
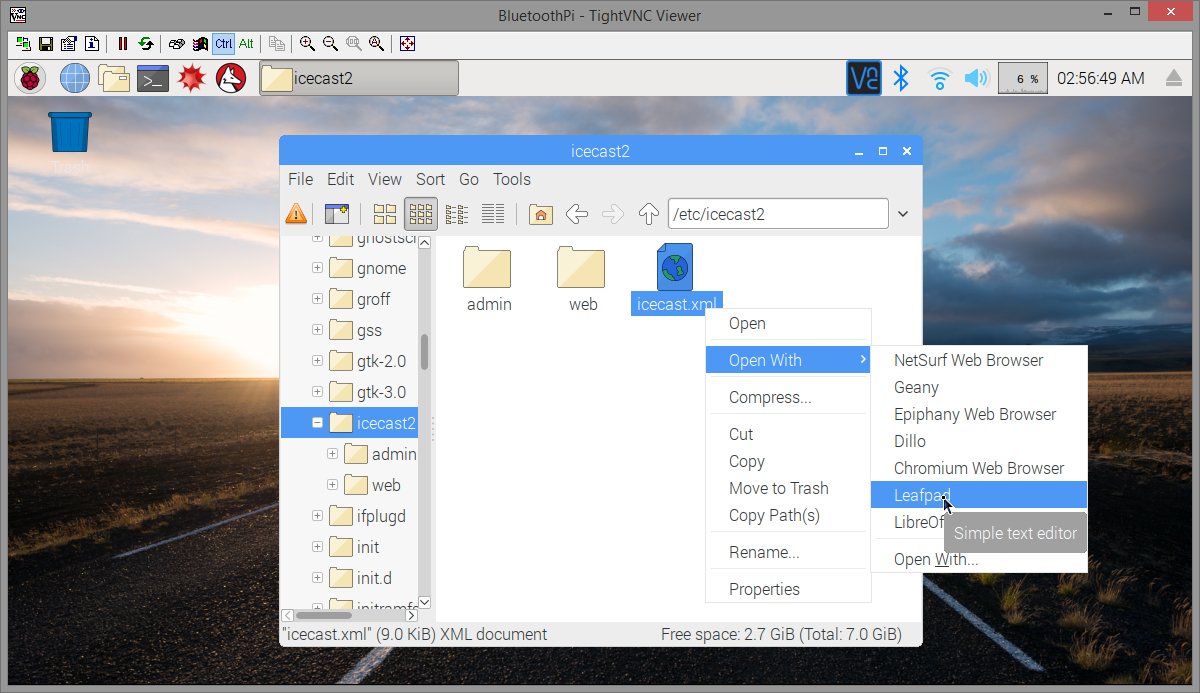
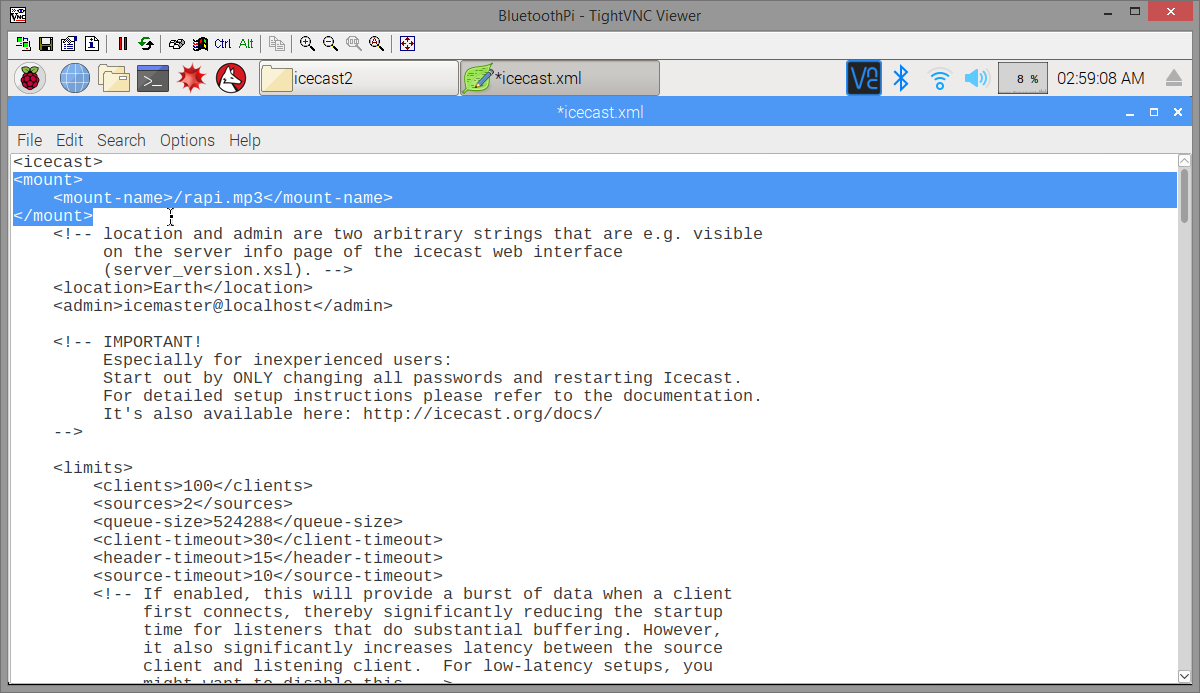
Open the File Manager as root using "sudo pcmanfm" and browse to "/etc/icecast2". RIGHT-click on "icecast.xml" and open using Leafpad and paste these lines just under the top "<icecast>" line:
<mount>
    <mount-name>/rapi.mp3</mount-name>
</mount>
Save and Reboot and you should now be able to start your custom Sonos bluetooth station before you've even connected your phone to bluetooth!
Addendum
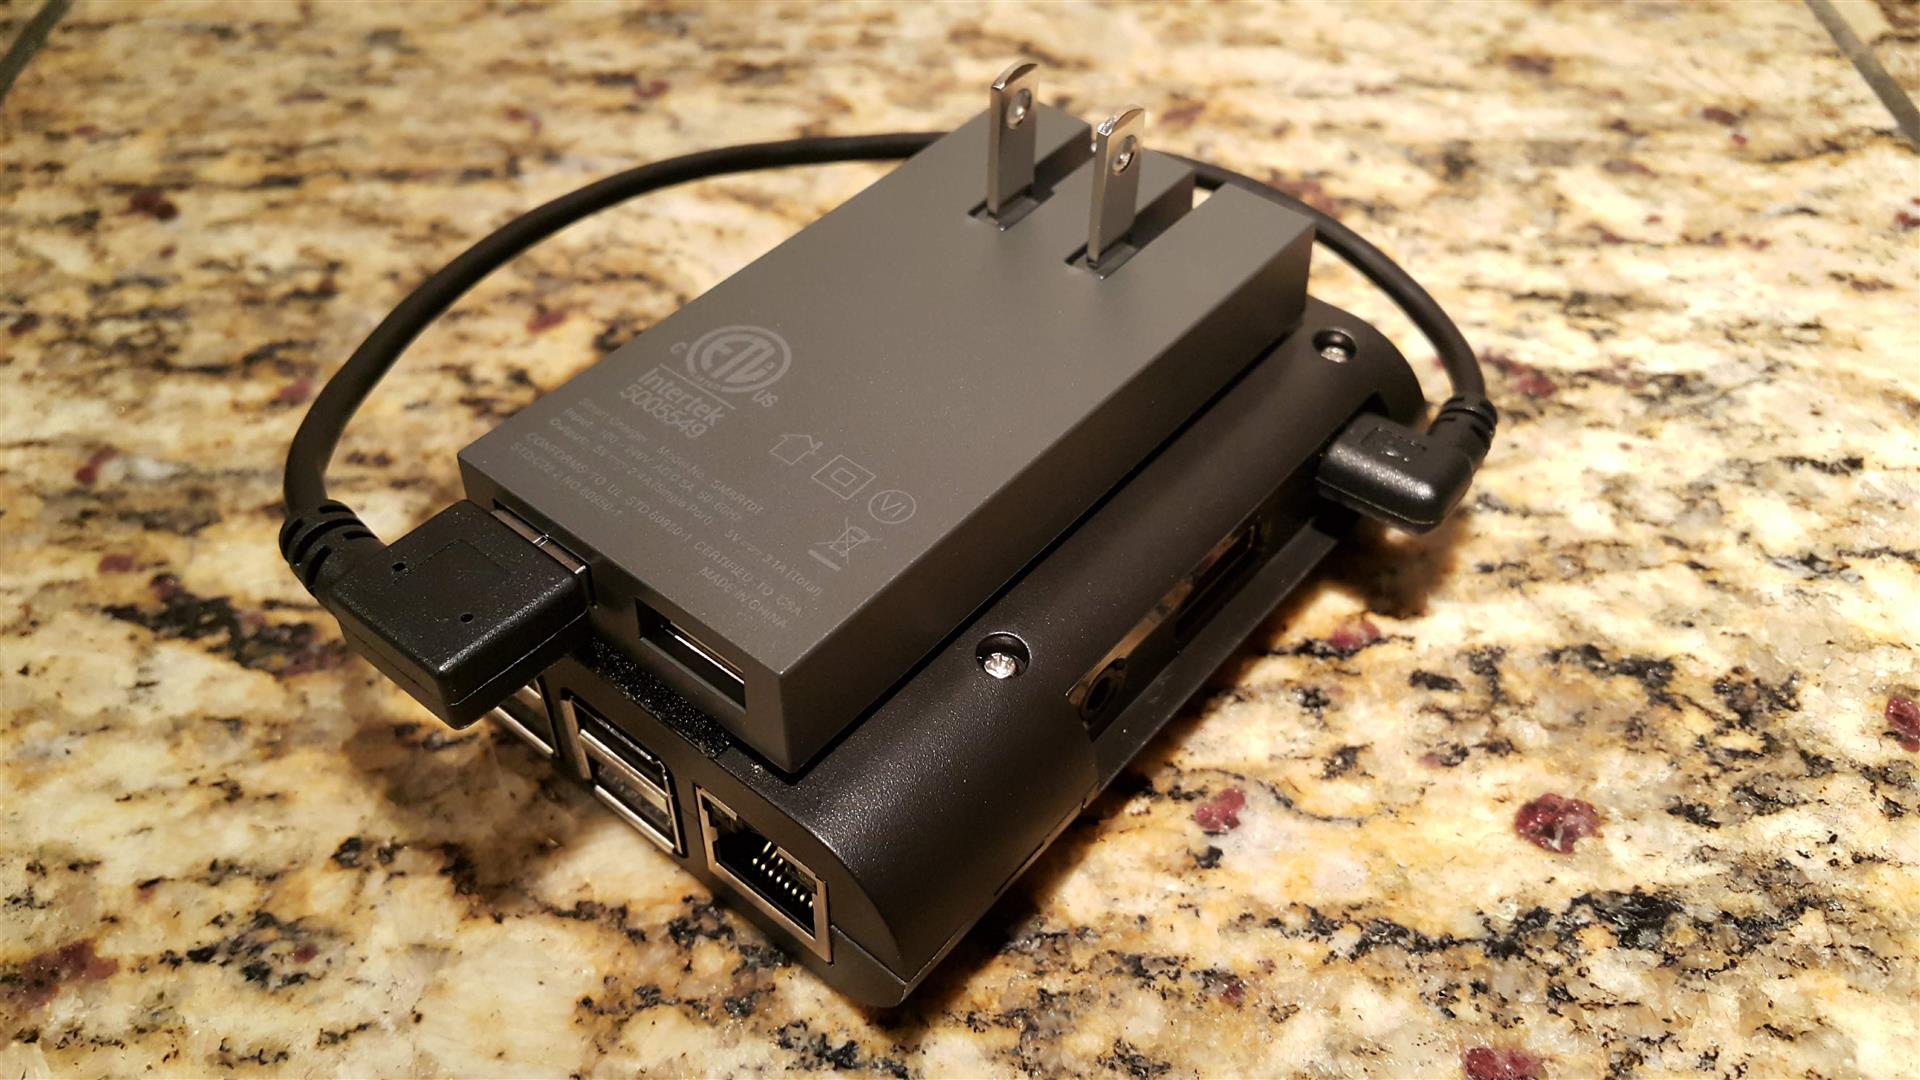
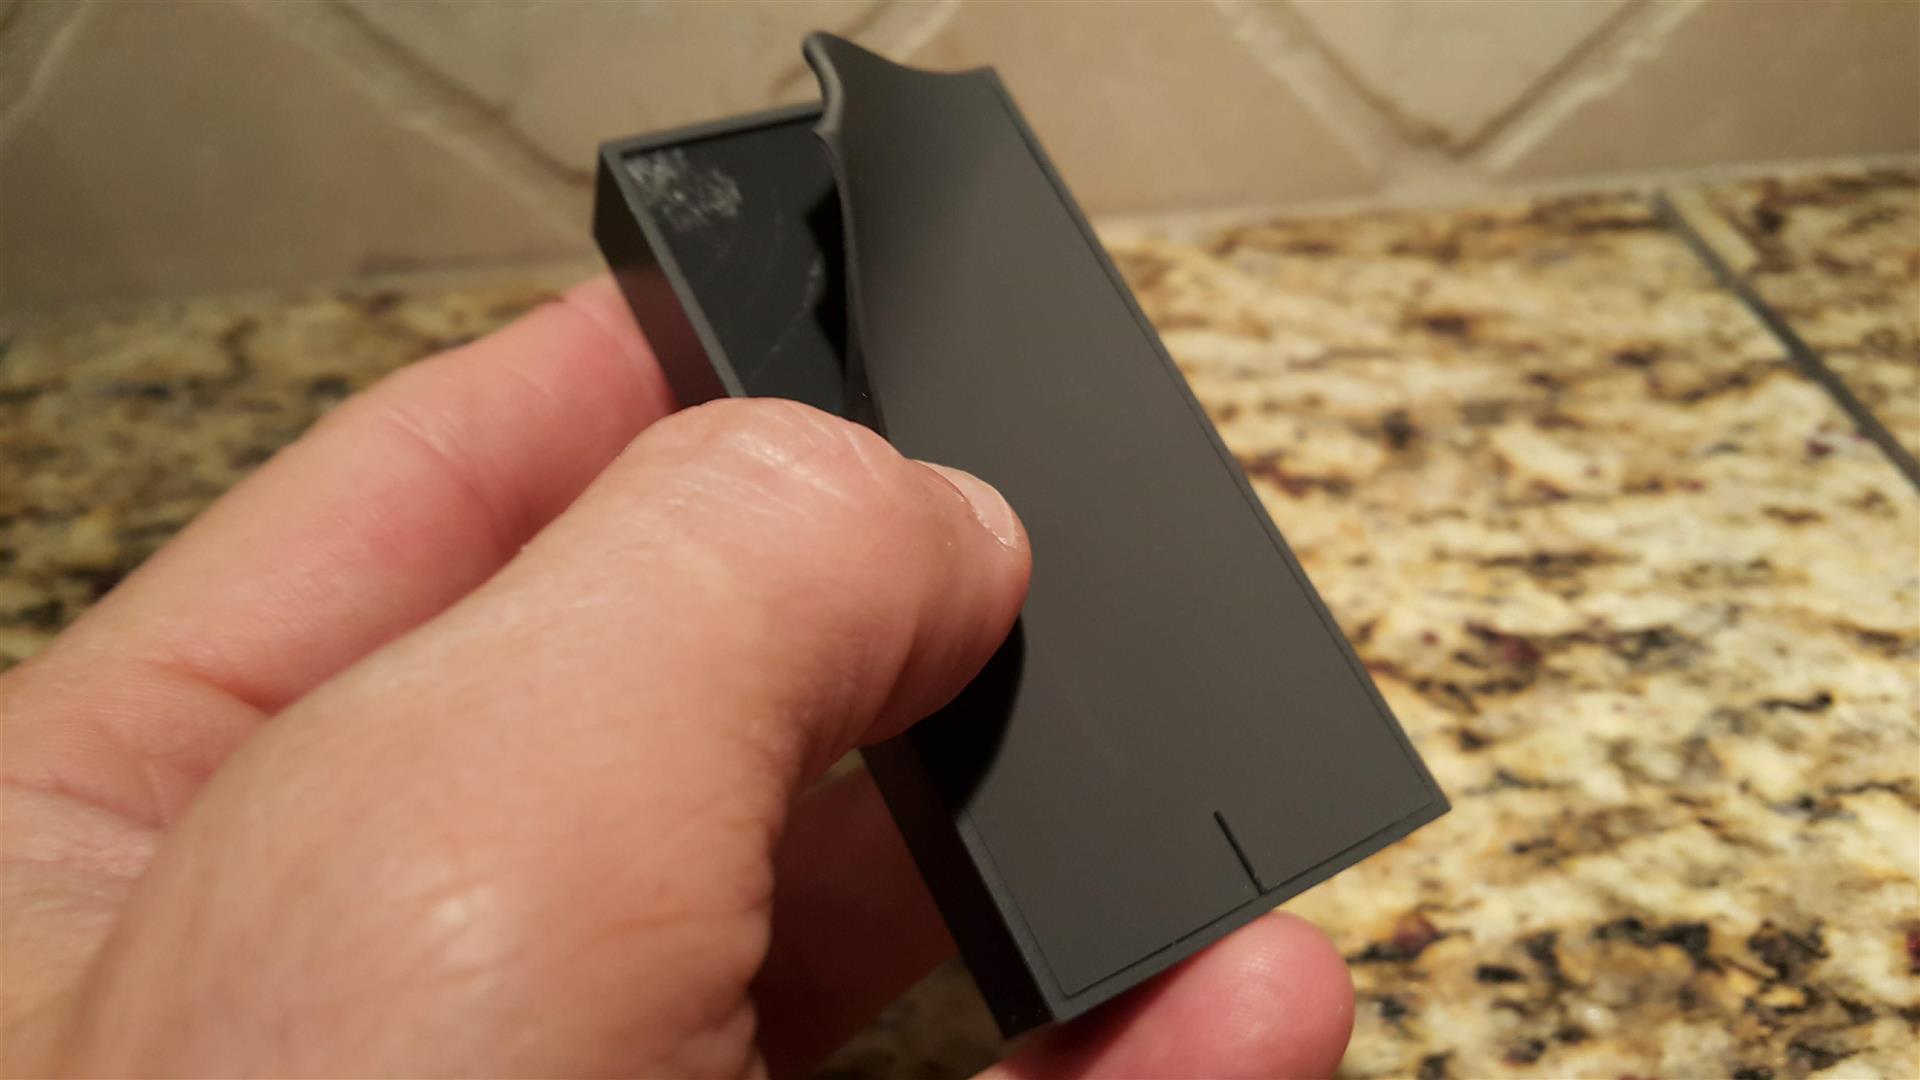
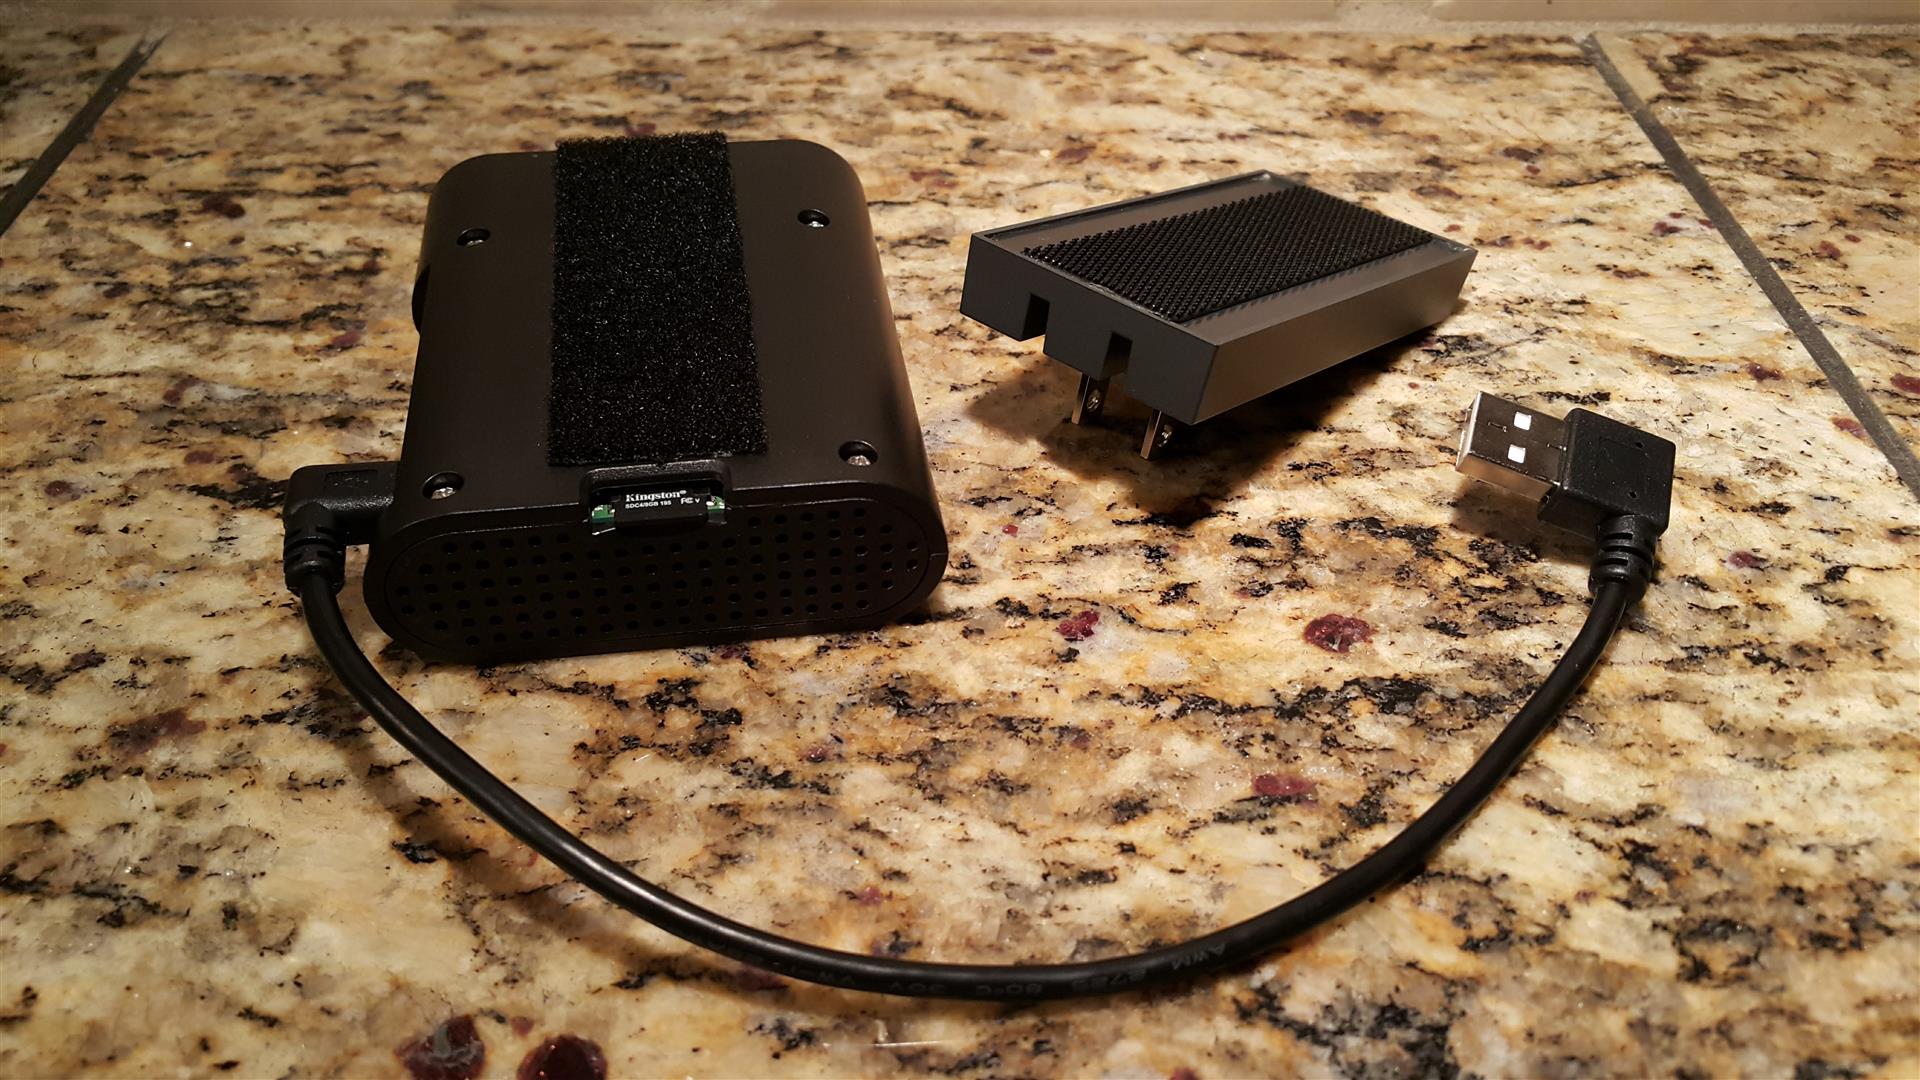
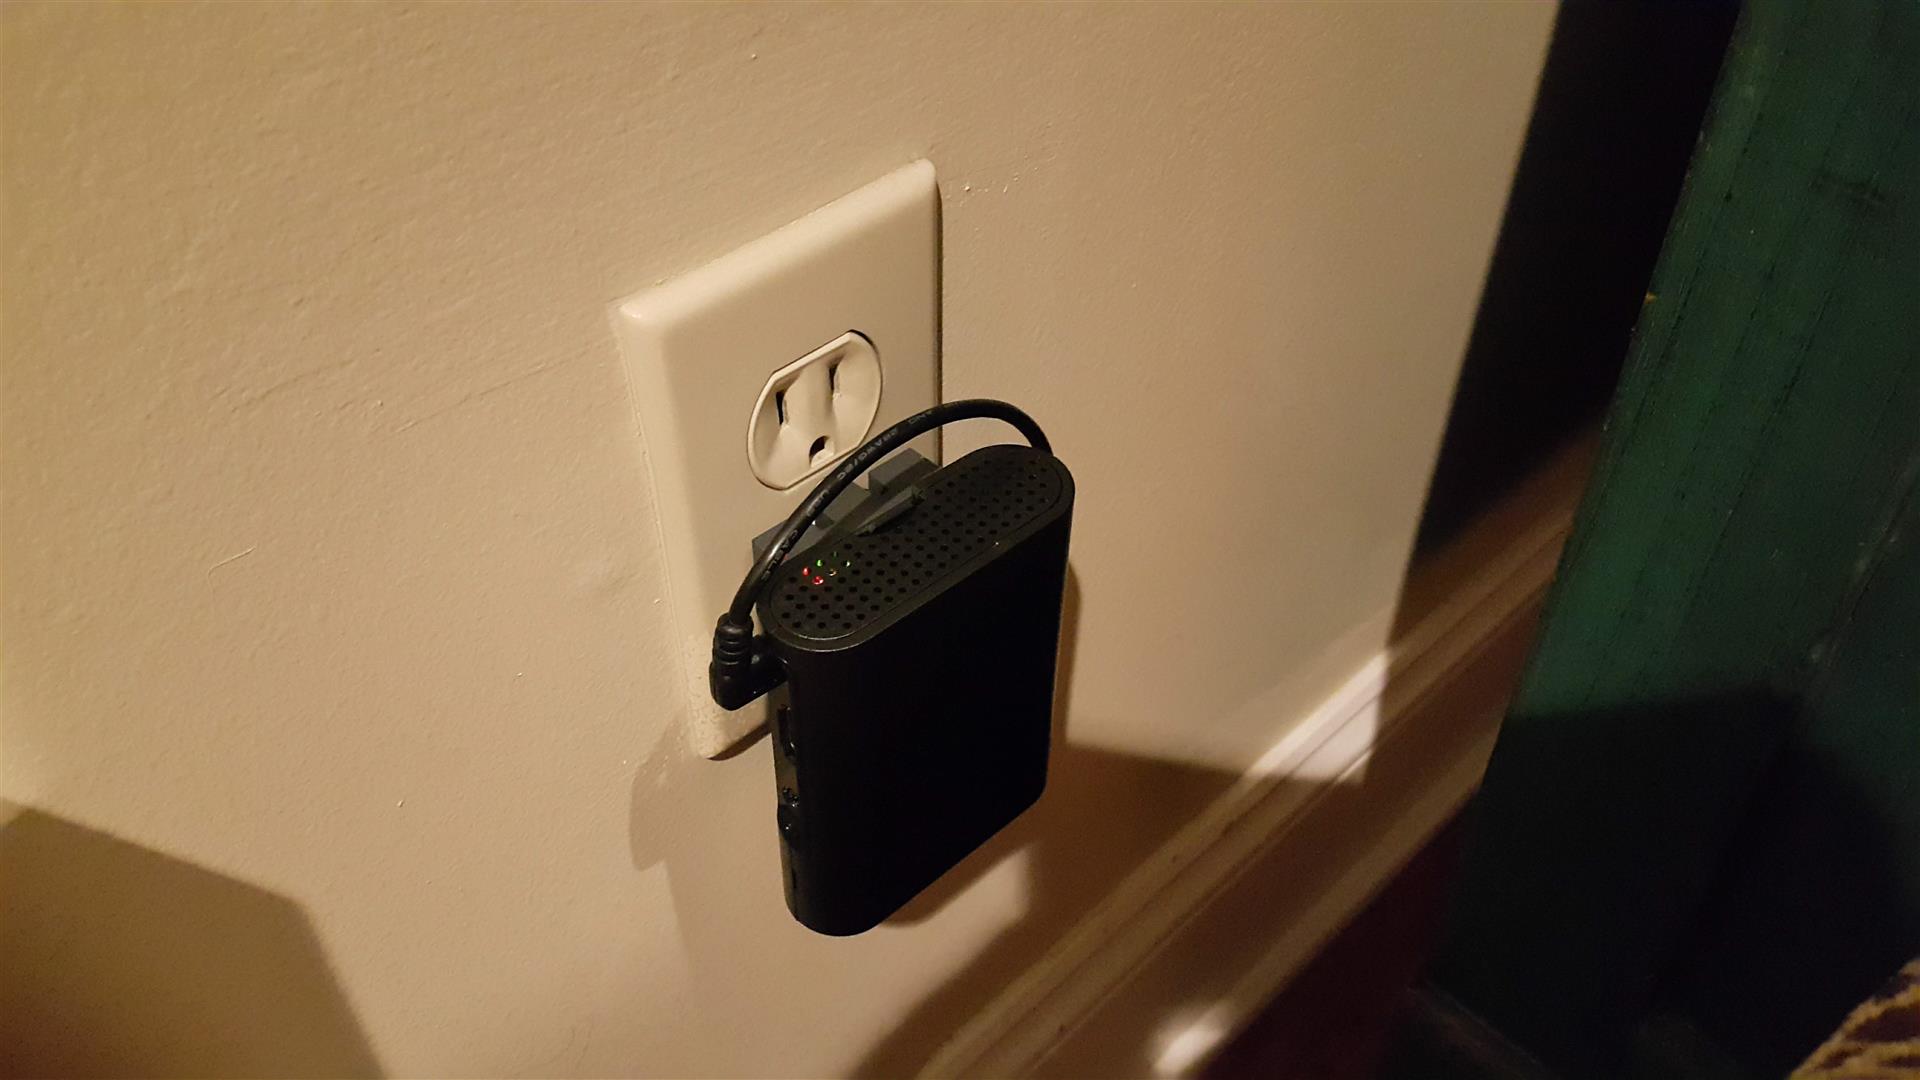
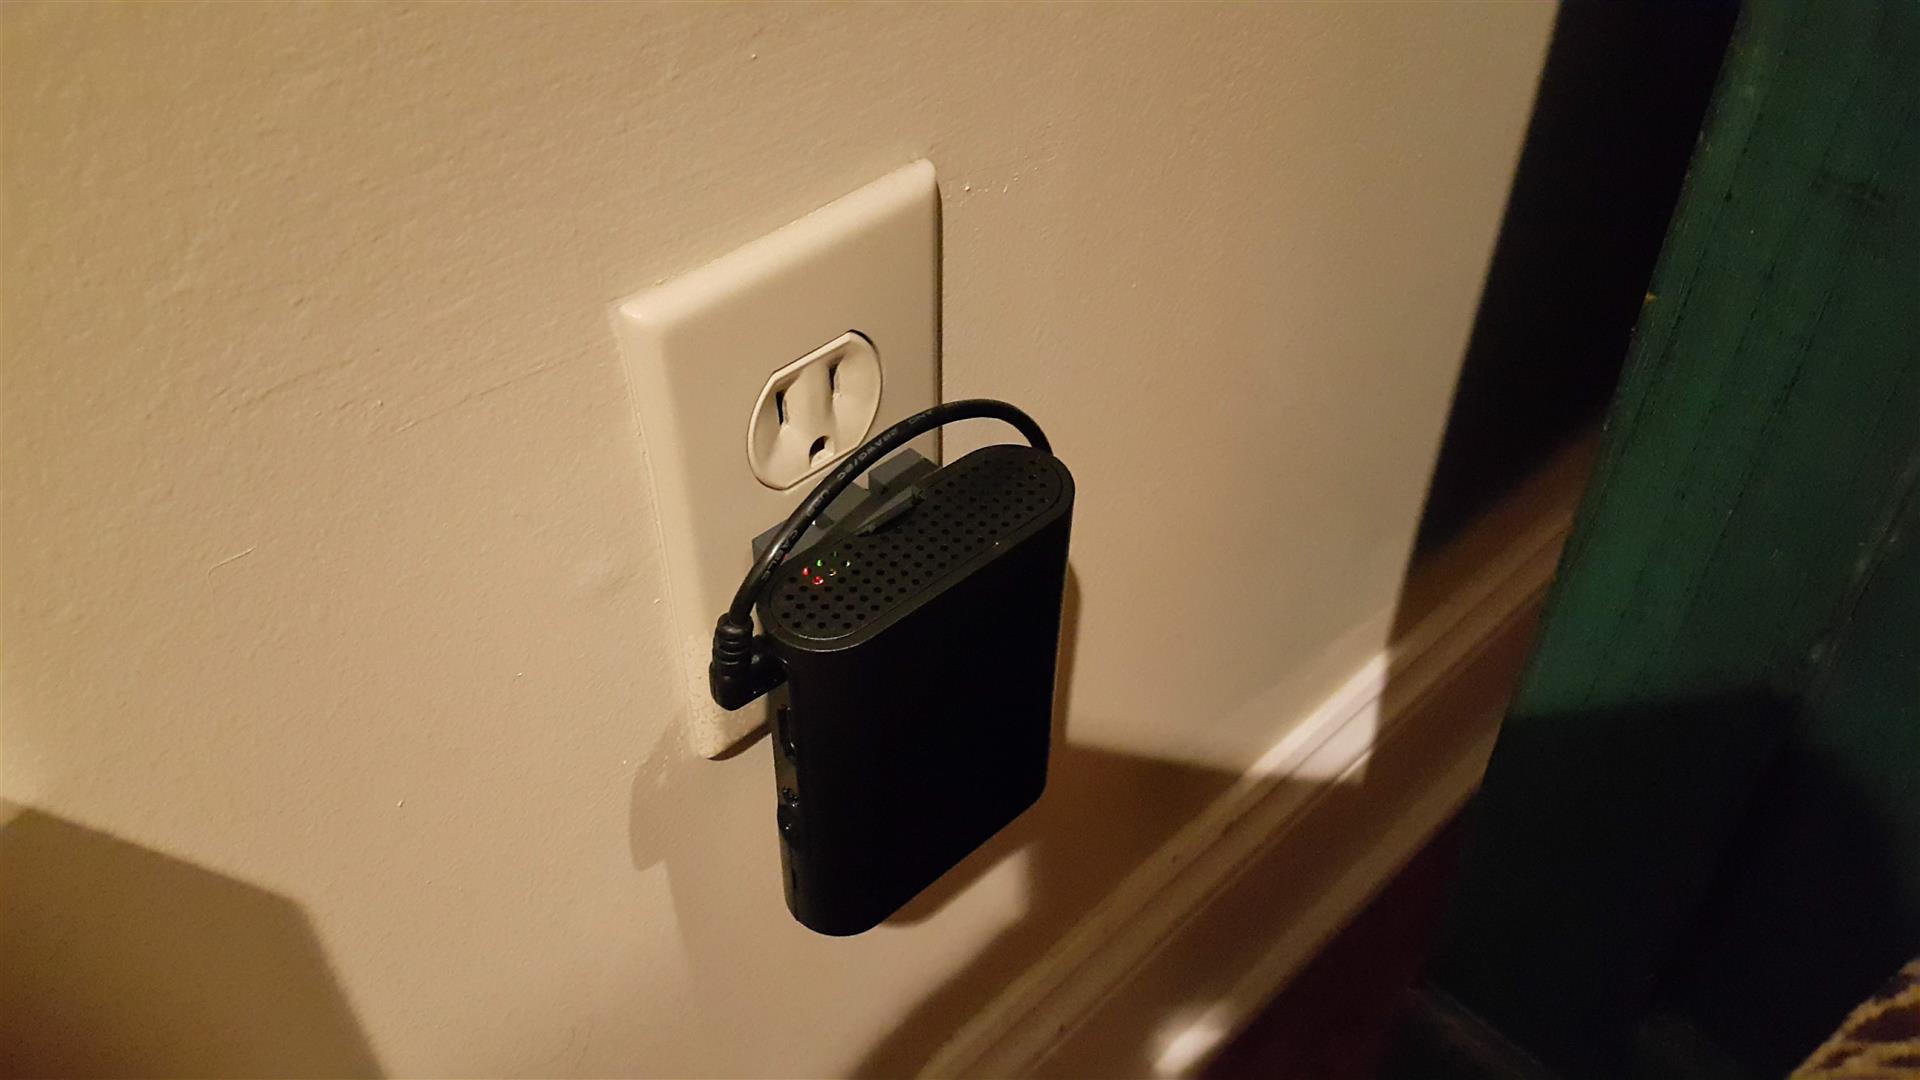
I wanted the Raspberry Pi and 110V AC to 5V DC power supply to be self-contained in one case so I could easily move it around the house but was surprised to find such a case doesn't exist. I may 3D-print one later but in the meantime I switched to using a different Raspberry Pi case and found a thin USB wall charger and short cable. The charger had a rubberized coating that I couldn't get clear VHB tape to stick to but it turned out it was a sticker that was easily removable; however, that created a small recess that made the VHB tape too thin so I used velcro.