Pixlr Transformation: Vampire Babe
by deliciouslydevious in Design > Photography
18362 Views, 10 Favorites, 0 Comments
Pixlr Transformation: Vampire Babe
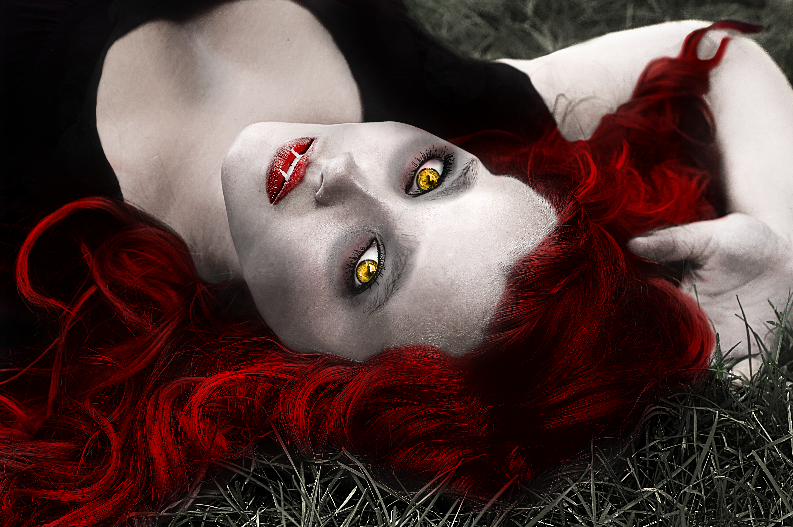
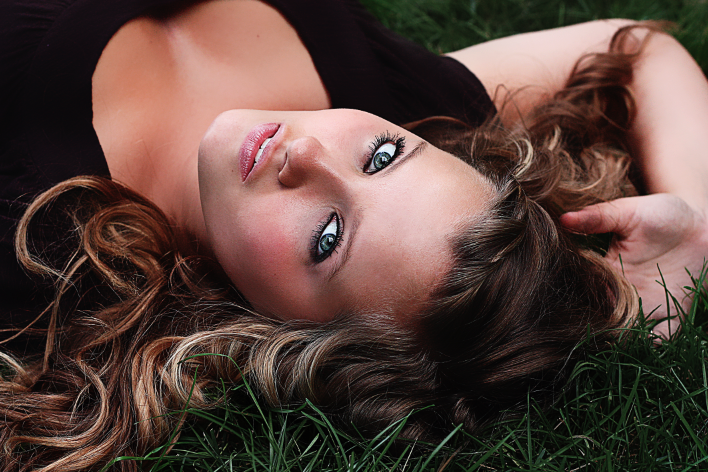
Halloween is lurking its way onto our calendars, so what better way to honor the day than a creepy Halloween Photo Instructable!
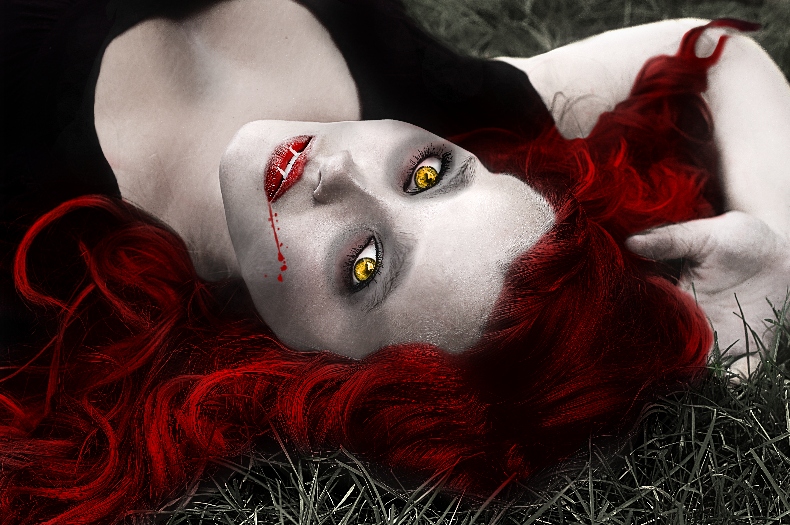
Tis the season to be vampy, muah-ah-ah-ah-ah-ah-ah-ah-ah! Let's be honest, vampires are everywhere. From Vampires Diaries, True Blood, to Twilight - we can't escape these blood-sucking monsters. In this Instructable, I'll show you how to transform yourself into a sexy Vampire Babe using the fabulous editing tool Pixlr.
Get Ready to Be Vampified!
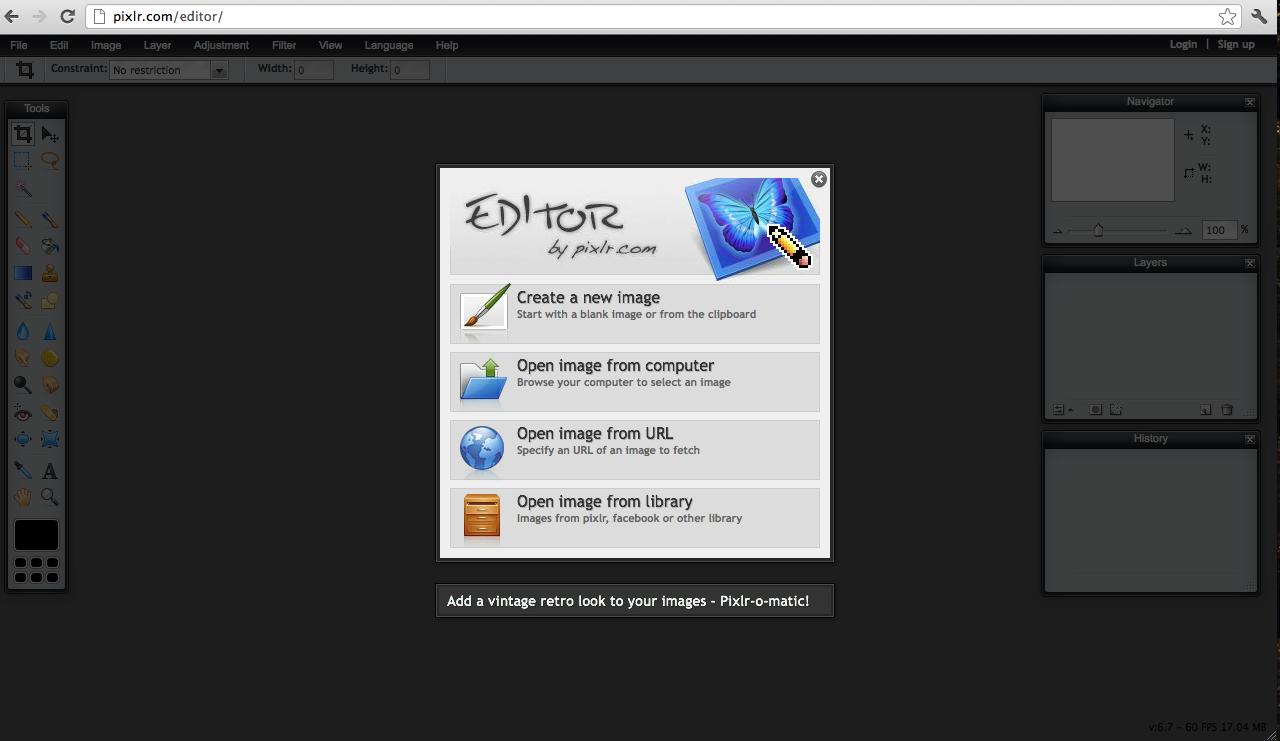
The first step of this Instructable is to open your image on the Pixlr site.
1) Enter http://www.pixlr.com/editor into your address bar.
2) Open an image you wish to vampifiy!
1) Enter http://www.pixlr.com/editor into your address bar.
2) Open an image you wish to vampifiy!
Just Bitten Lips
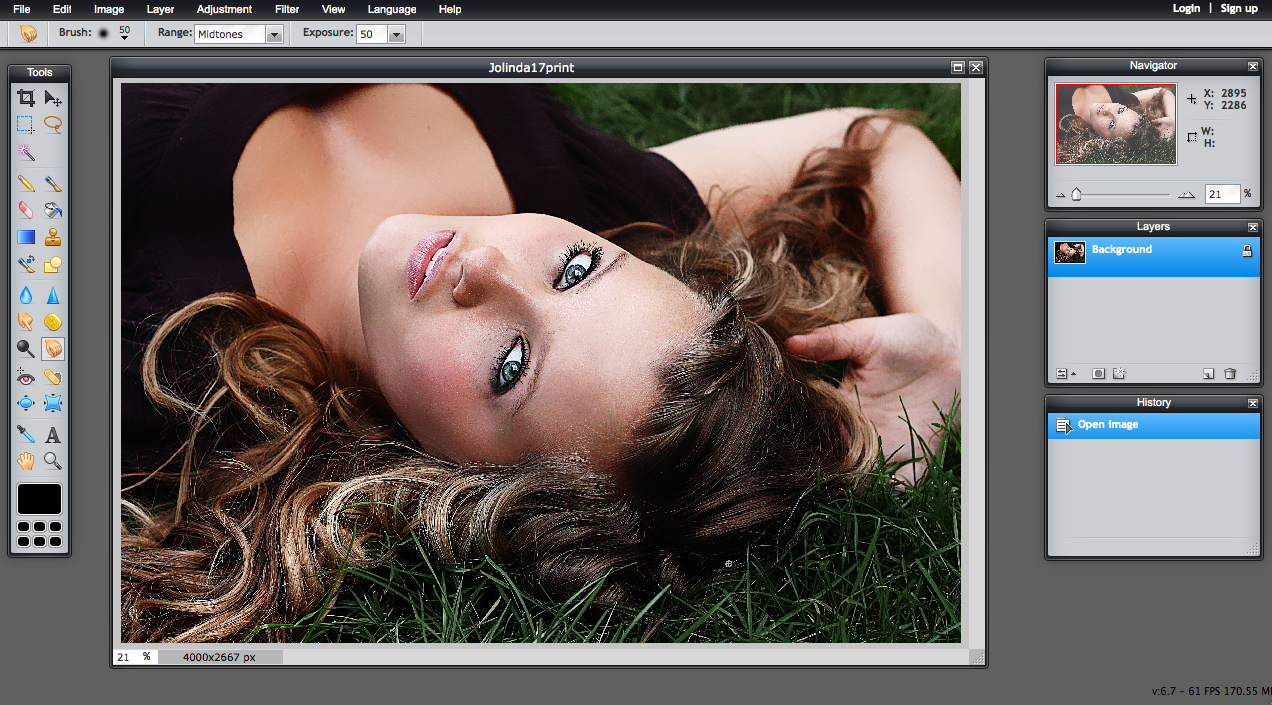
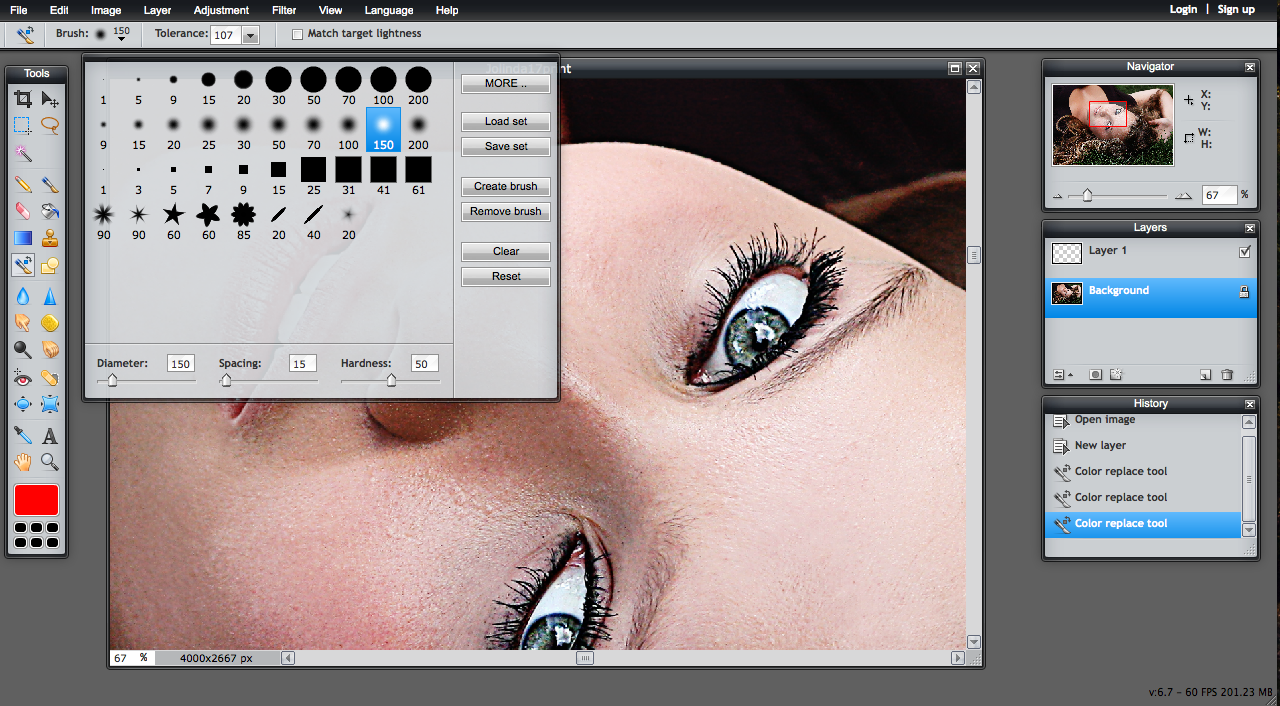
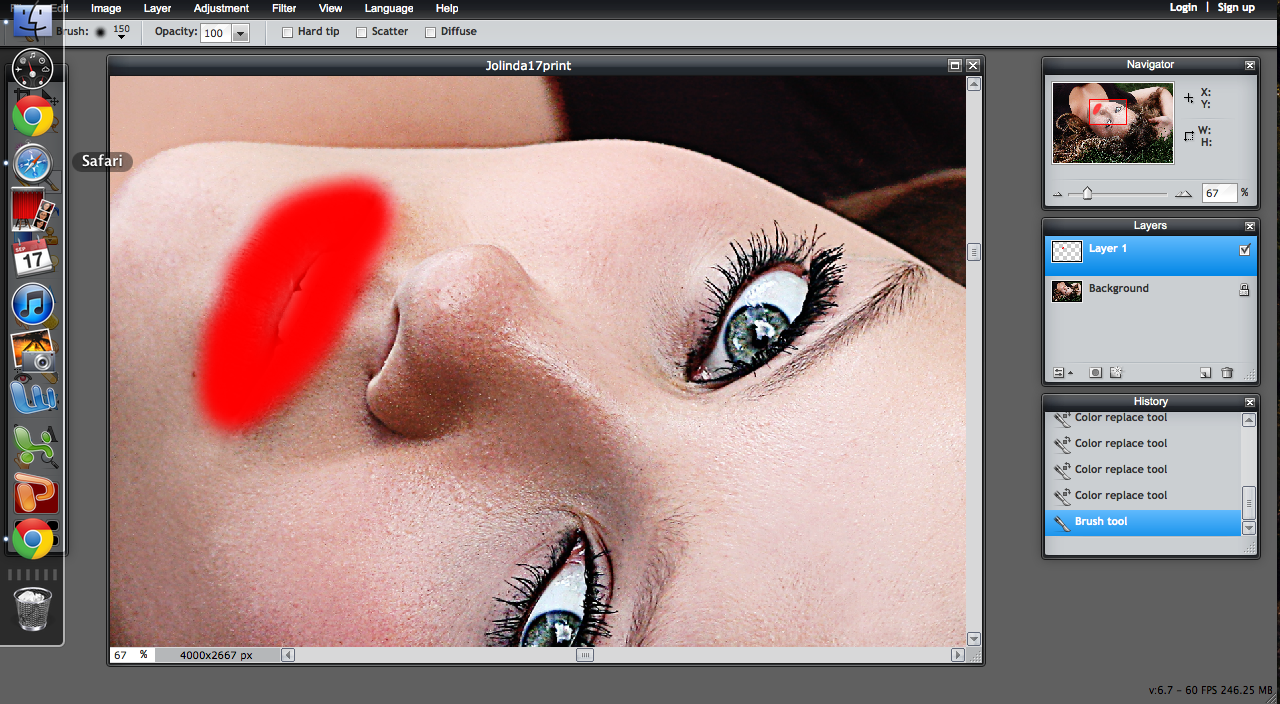
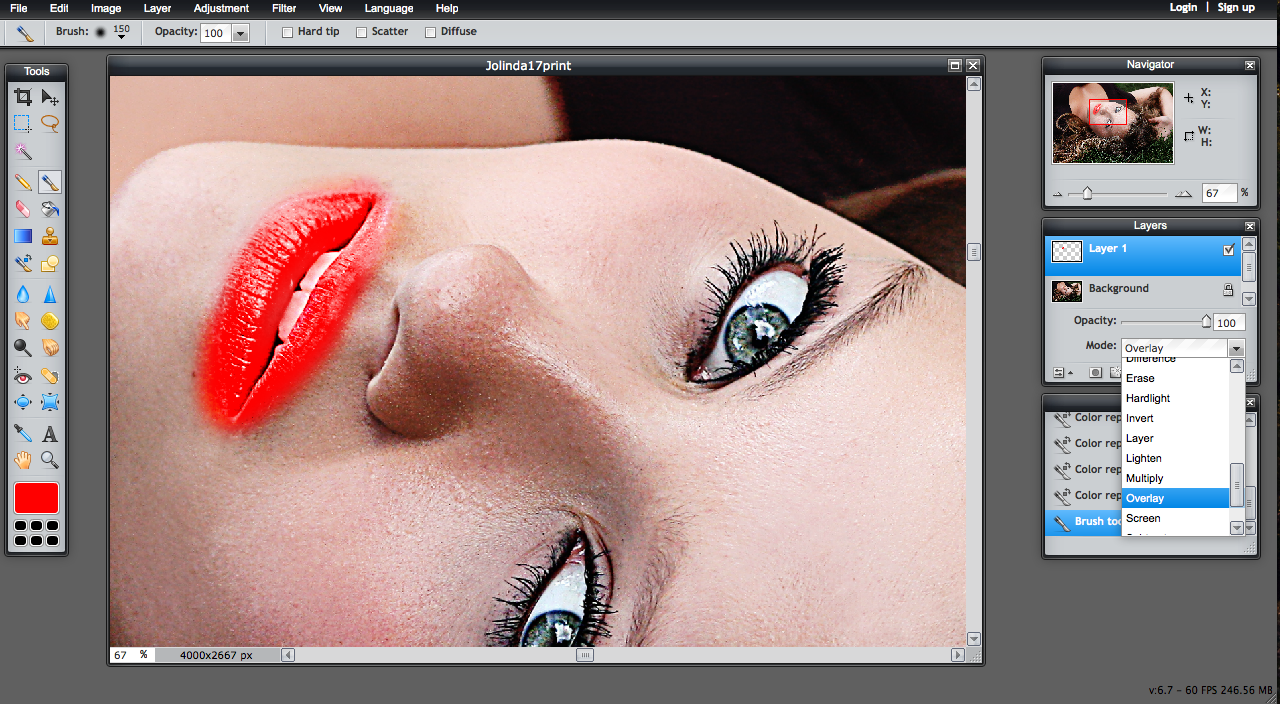
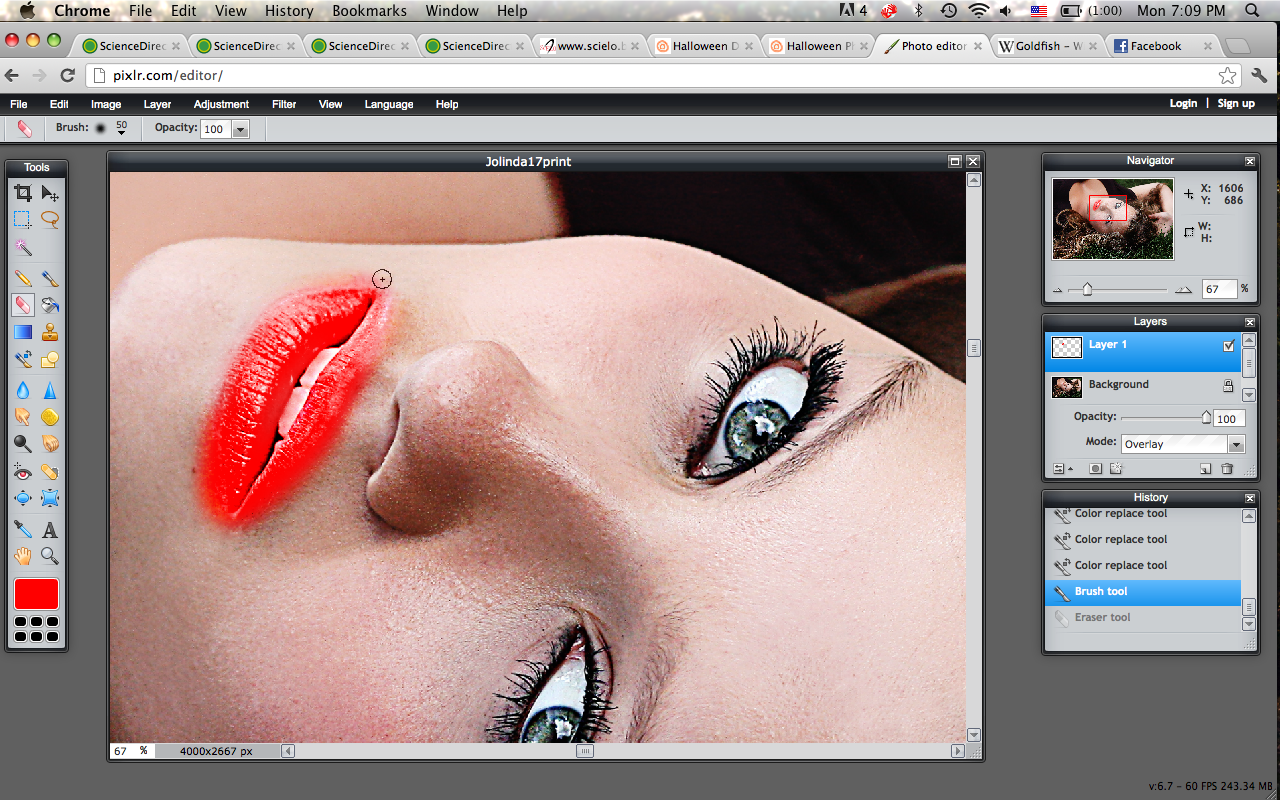
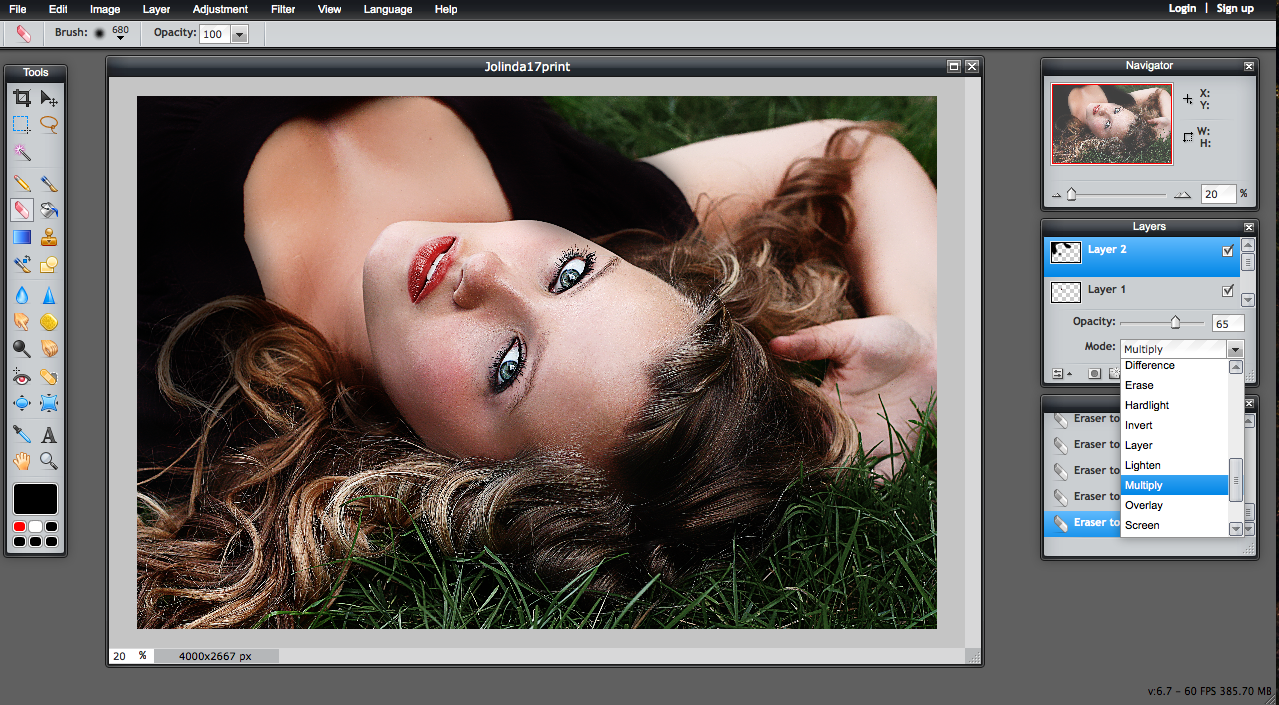
In this step, we'll be making some sexy vampire lips! Let's go!
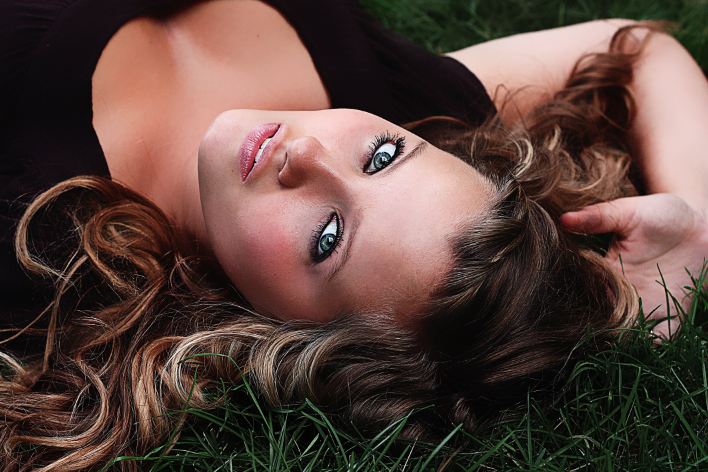
1) Open your photo to be "vamped" up! In this case, I senior I shot a couple of weeks ago.
2) Open a new layer by clicking "New Layer" under the "Layer" tab on the toolbar.
3) Select the Paintbrush Tool and change your color by clicking on the color square in the Tools bar on the left.
4) Paint on your color over the lips.
5) On the Layers pallet, move the lip color layer to Overlay on the dropdown menu and reduce to around 70%.
6) Use the Eraser tool to erase the color from the skin and teeth.
Play around with the color to find your desired look! I chose to go with a dark red on the outer corners, and created another layer to add a pop of bright red in the middle of the lips.
Pasty Pale Skin
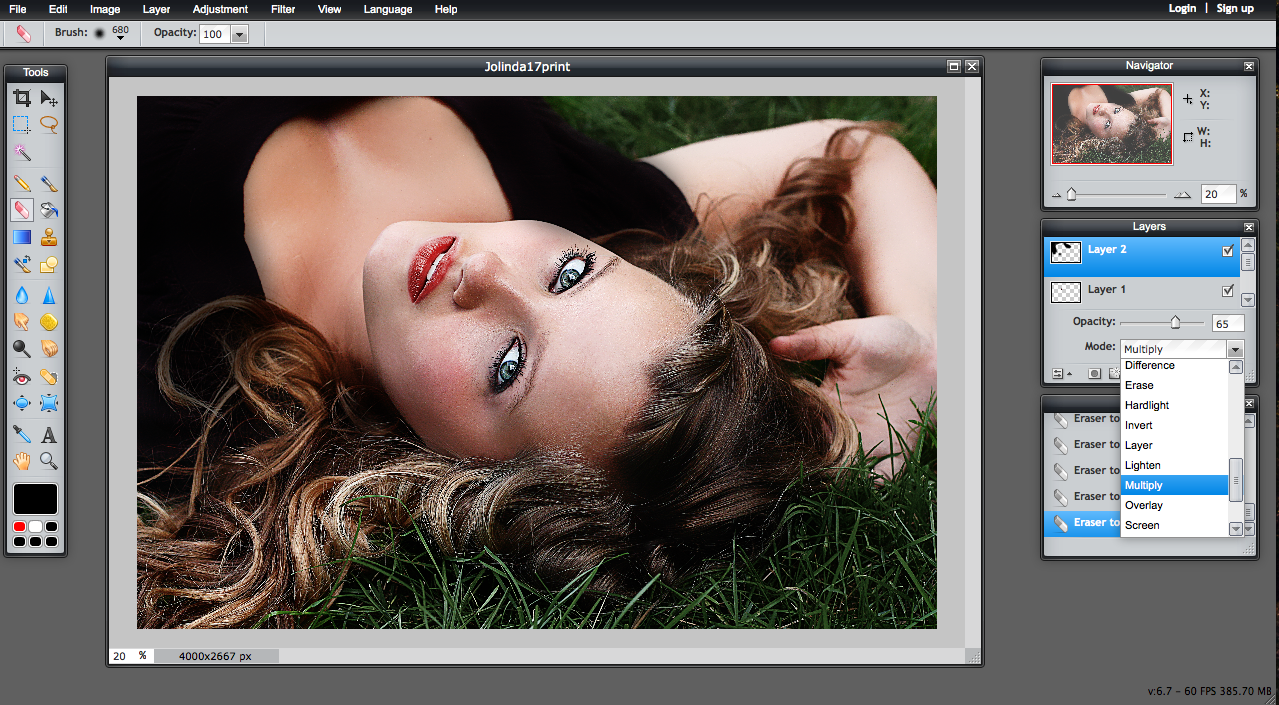
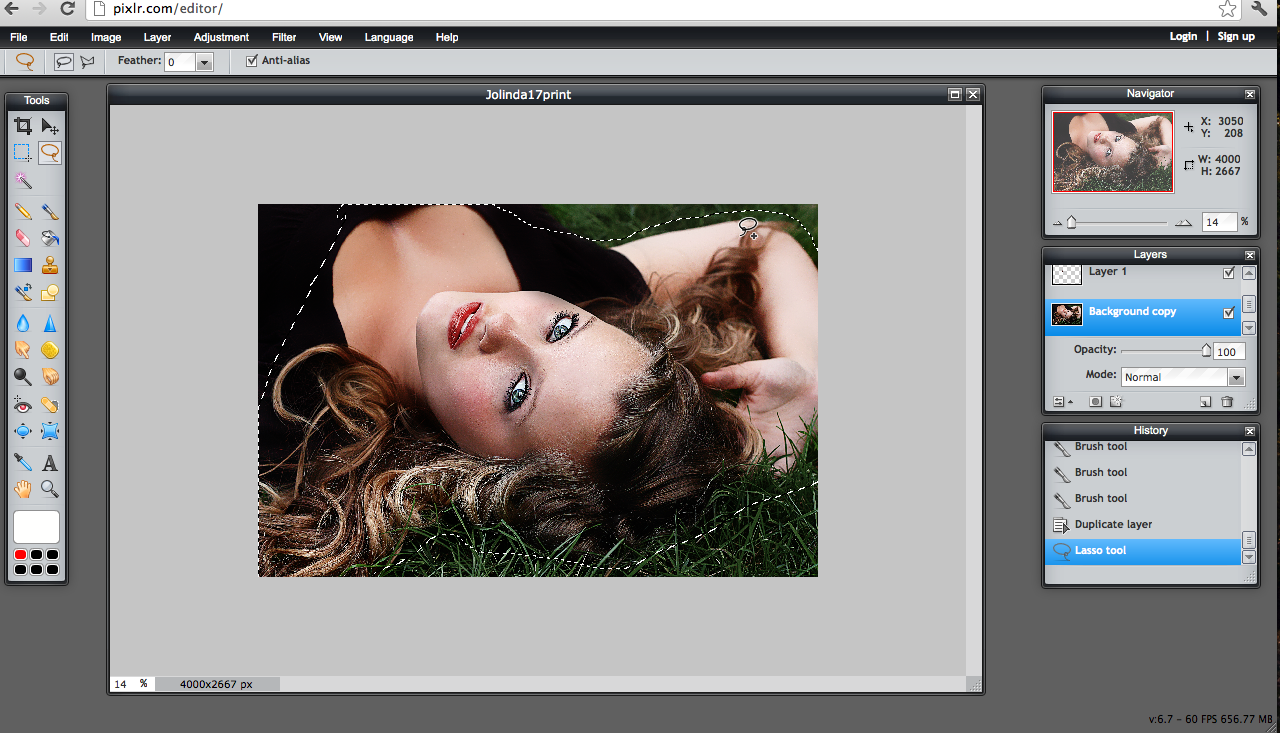
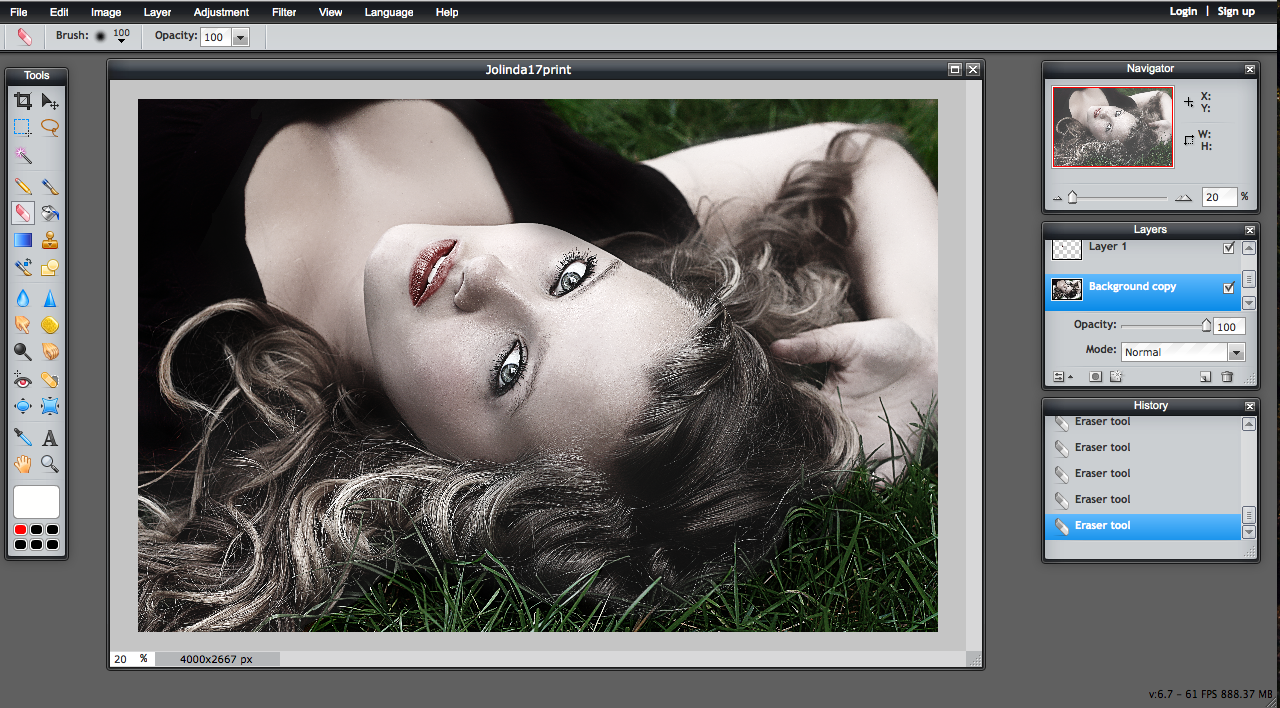
Now, we can't have a vampire without the pale, pasty skin we all know!
1) To begin, click the Layer drop down tab and select Duplicate Layer.
2) On this layer, using the Lasso Tool select areas of skin and hair you wish to make pale.
3) While selected, click the Adjustment tab on the toolbar, and select Hue & Saturation.
4) Decrease the saturation by sliding the Saturation tab to the left. You may also increase Brightness.
5) Return to your image and using the Eraser tool, clean up the image to be specific to the hair and skin.
Again, use these tools to create the desired effect.
Sexy Sunken Eyes & Cheeks
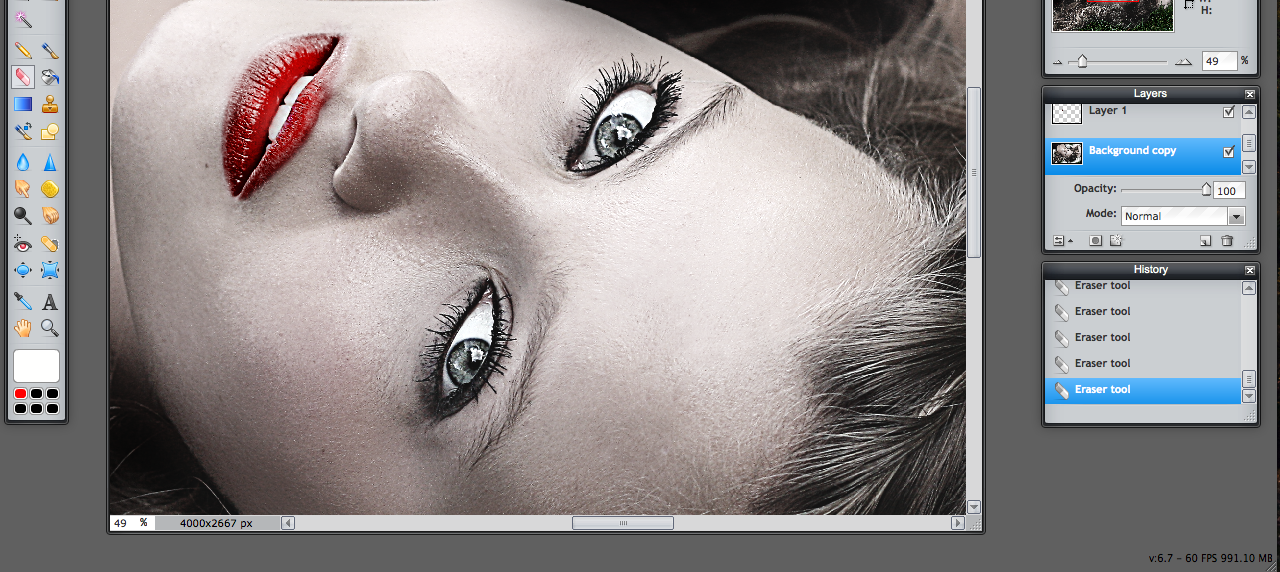
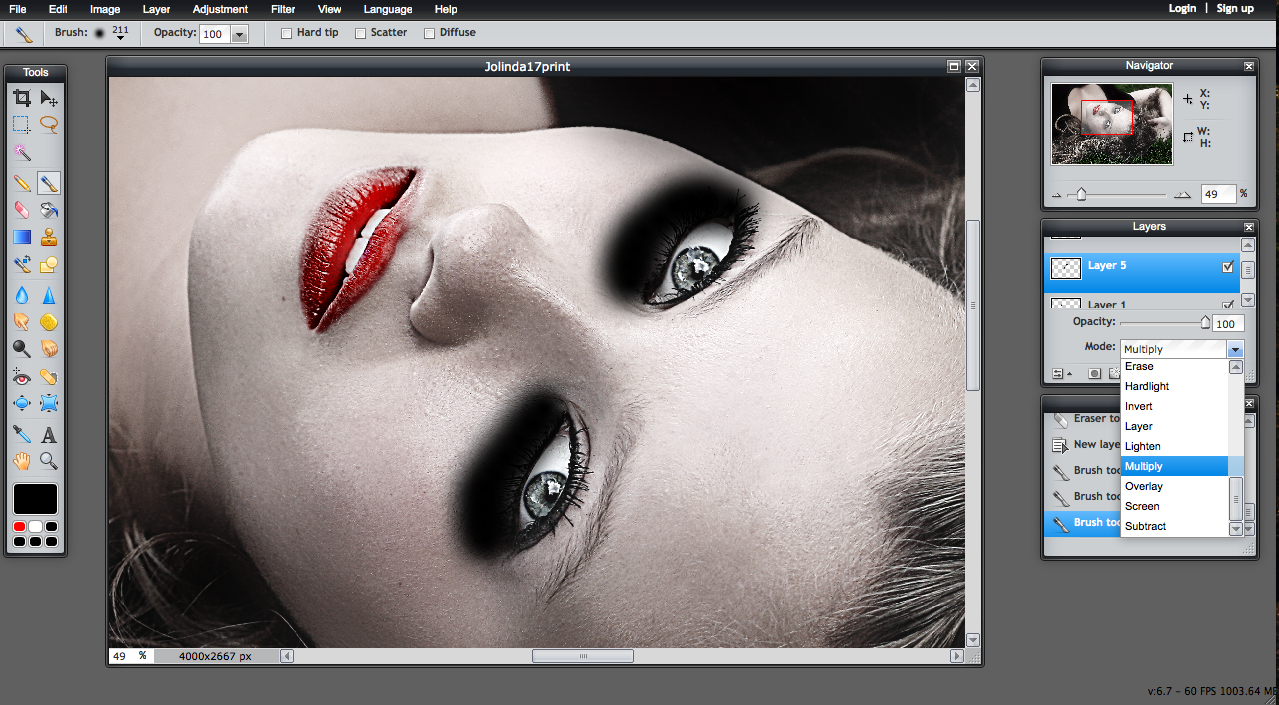
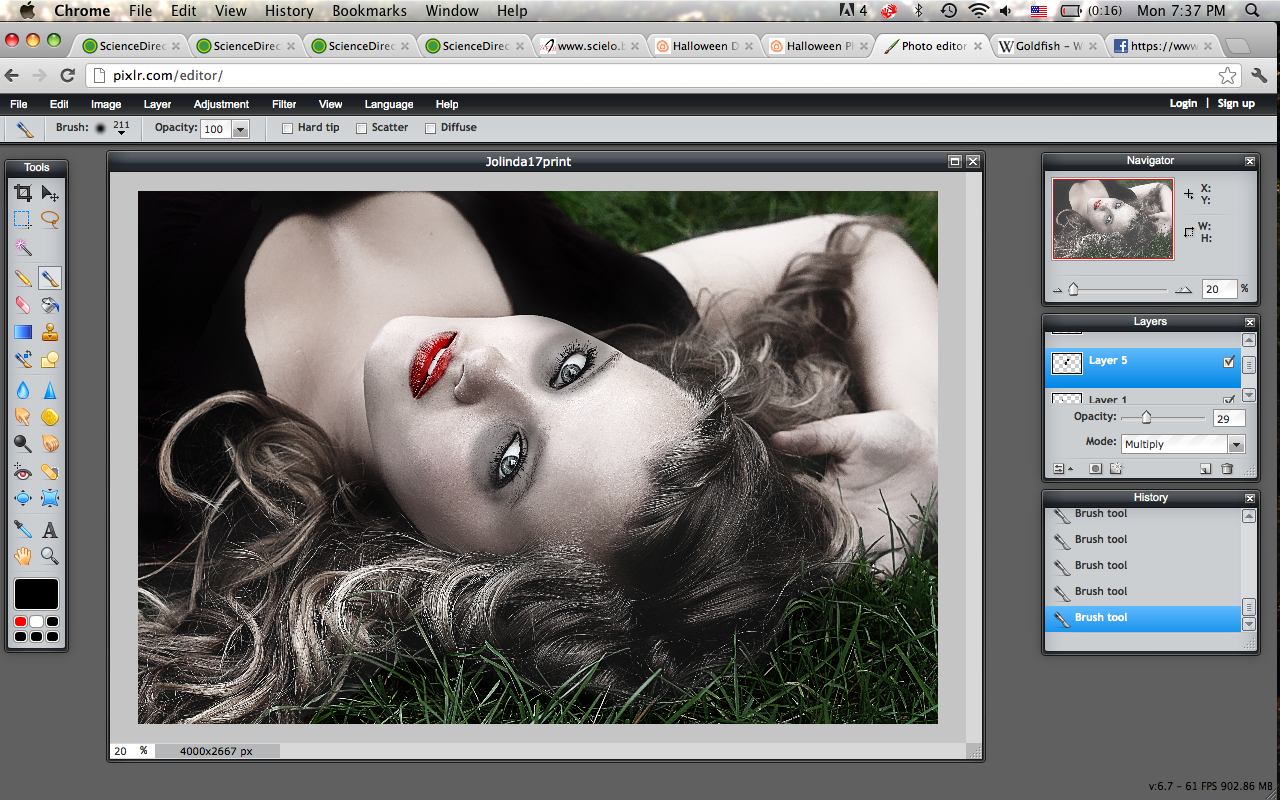
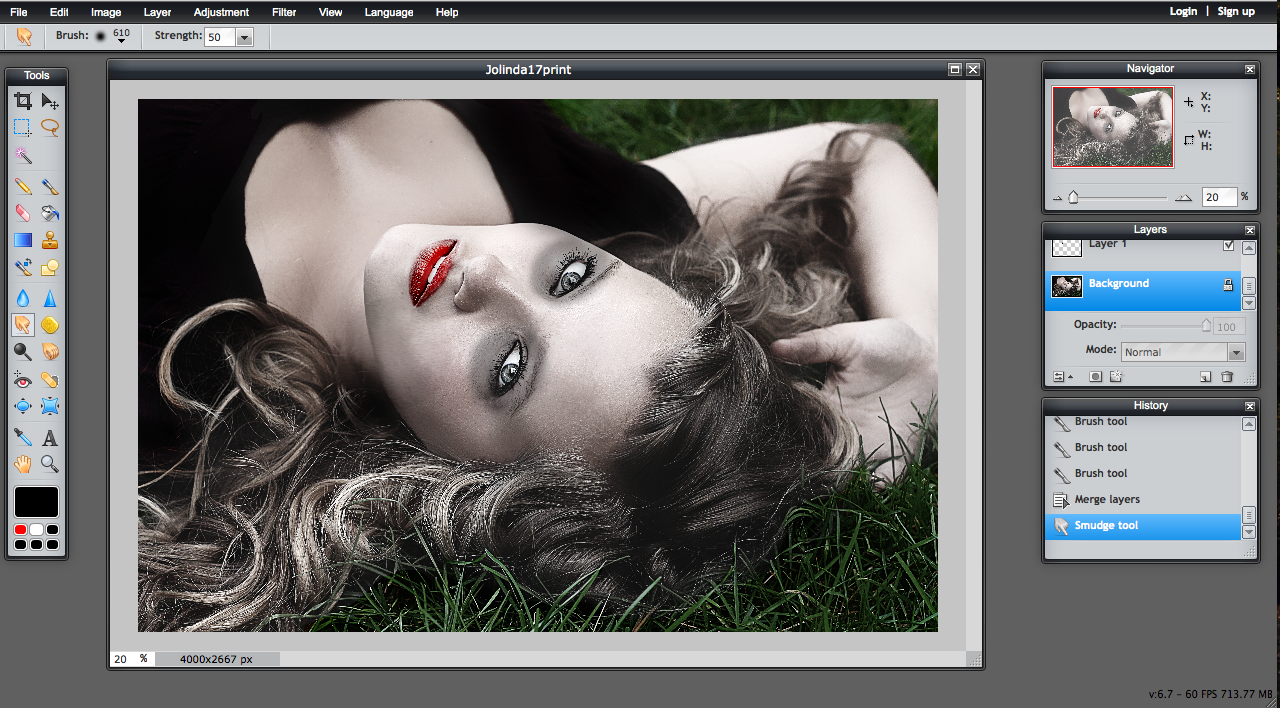
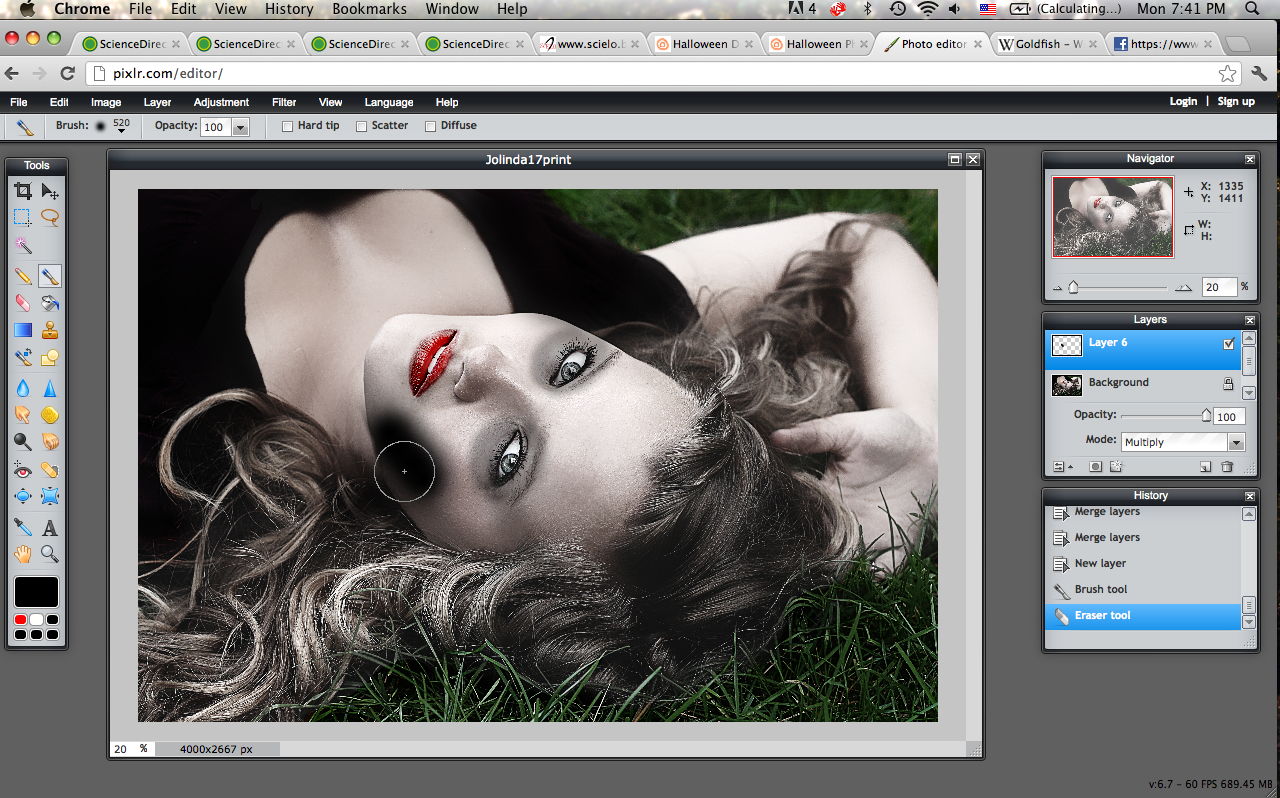
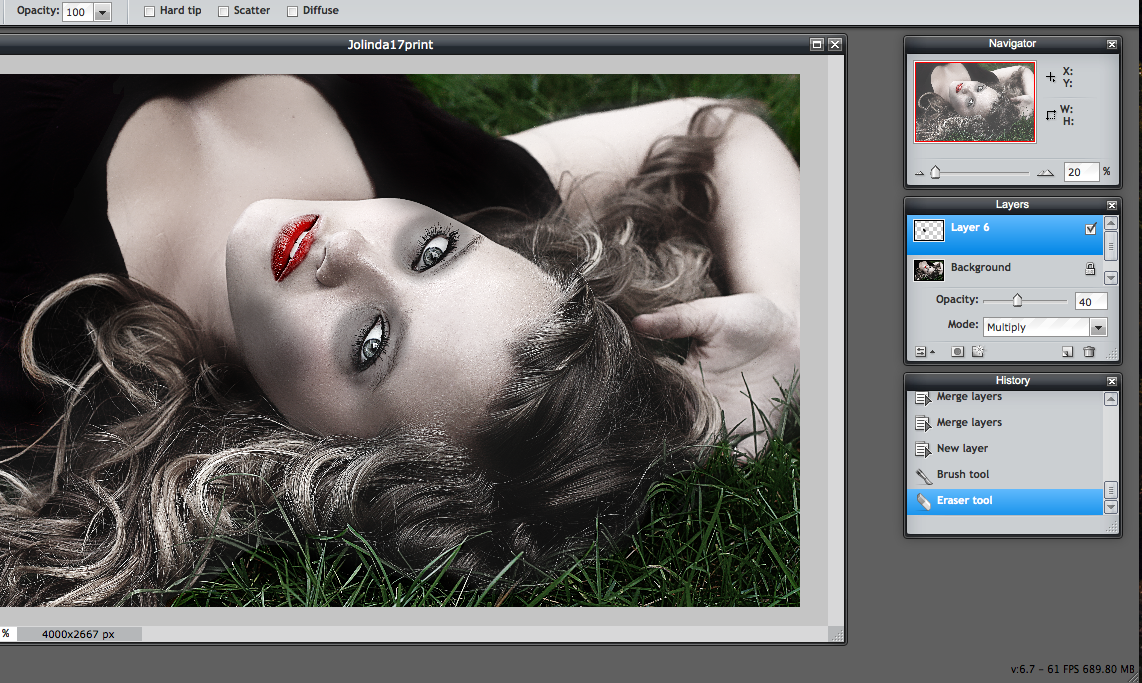
For this next step, we'll be creating the sexy sunken eyes most vampires are known for.
1) Creating a New Layer, use the Brush tool to paint black under both eyes.
2) Using the Opacity slider in the Layers pallet, reduce opacity to 20-30%.
3) Add additional shadows to increase a more sunken effect.
4) For cheeks, create another New Layer and use the same technique in hollows of cheeks.
After you have completed this step, right-click on the Background layer and select Flatten Image.
Sanguine Strands & Muted Grass
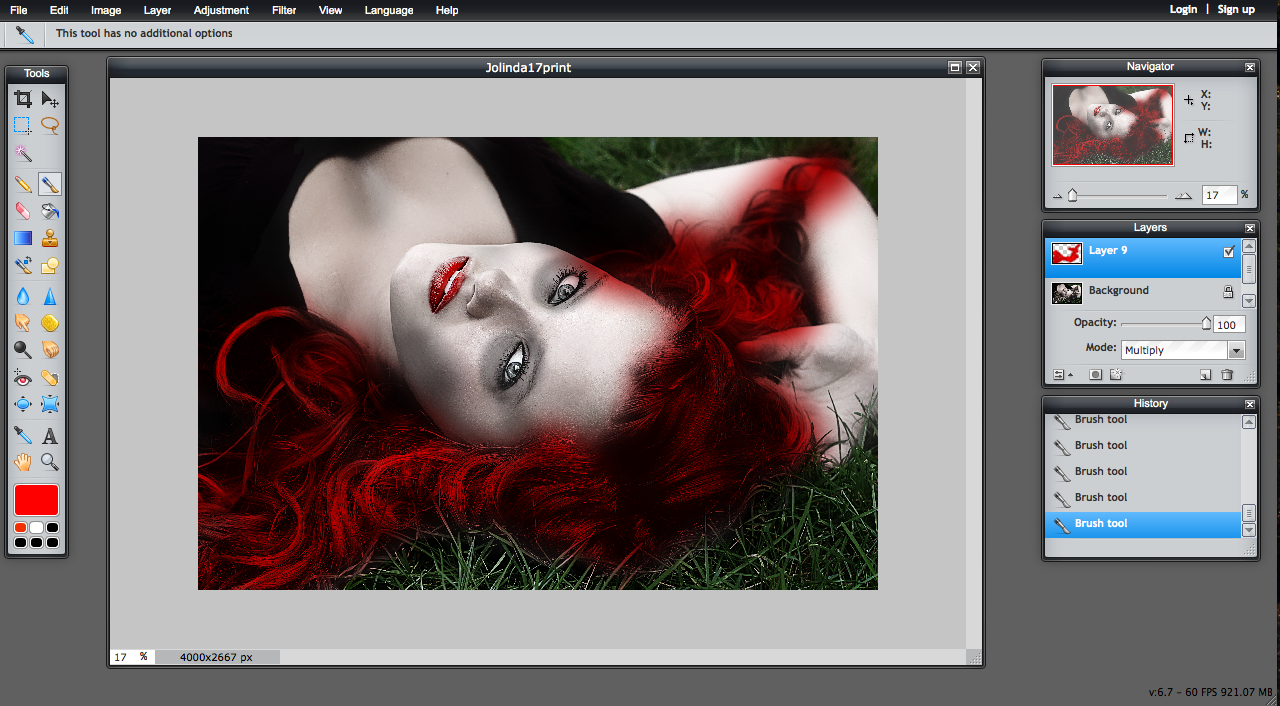
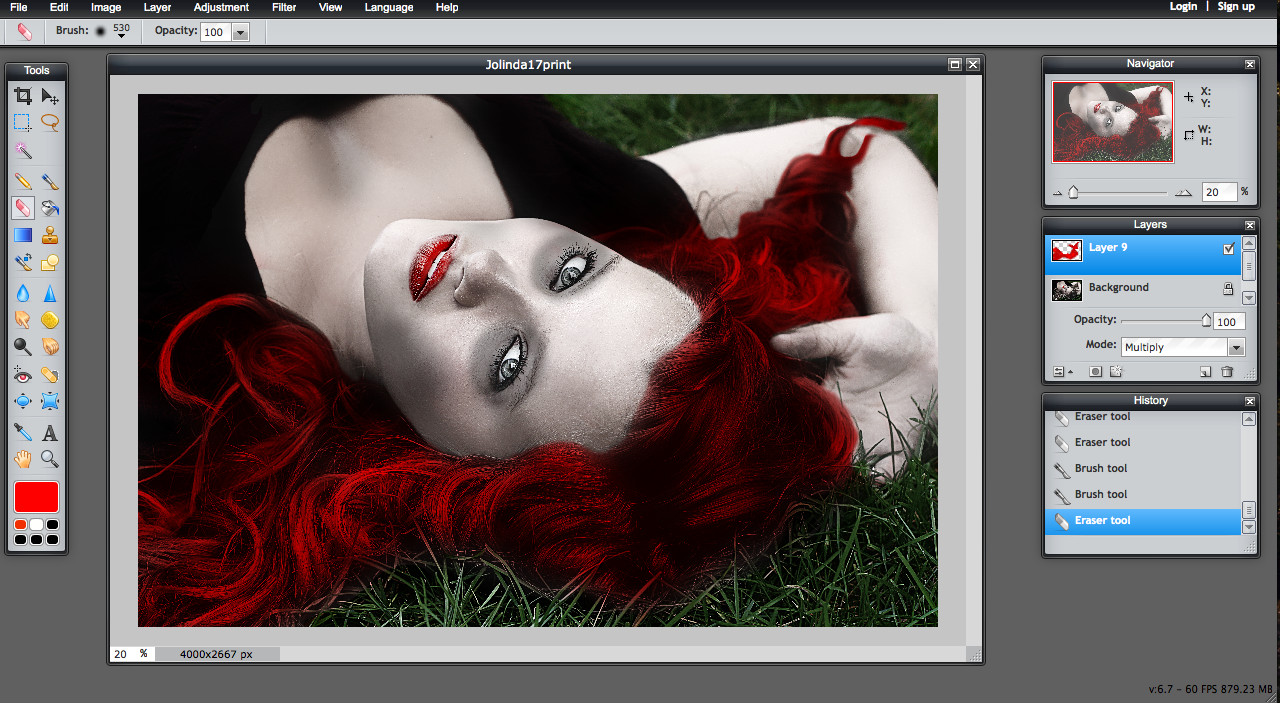
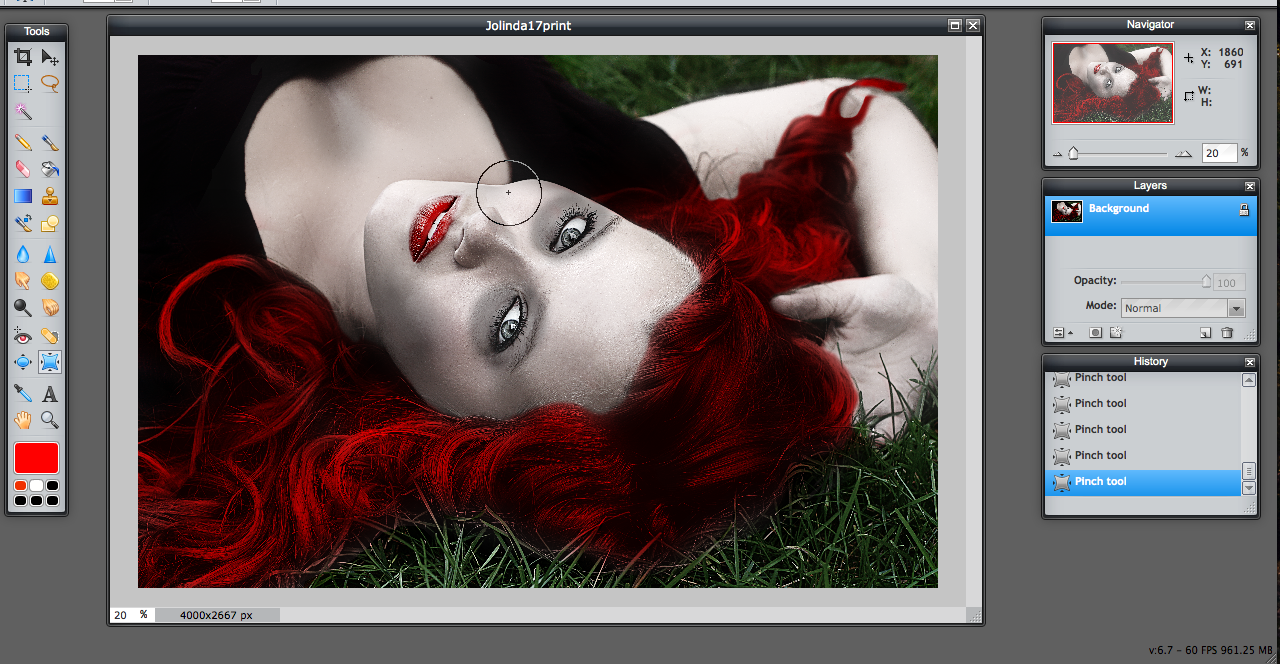
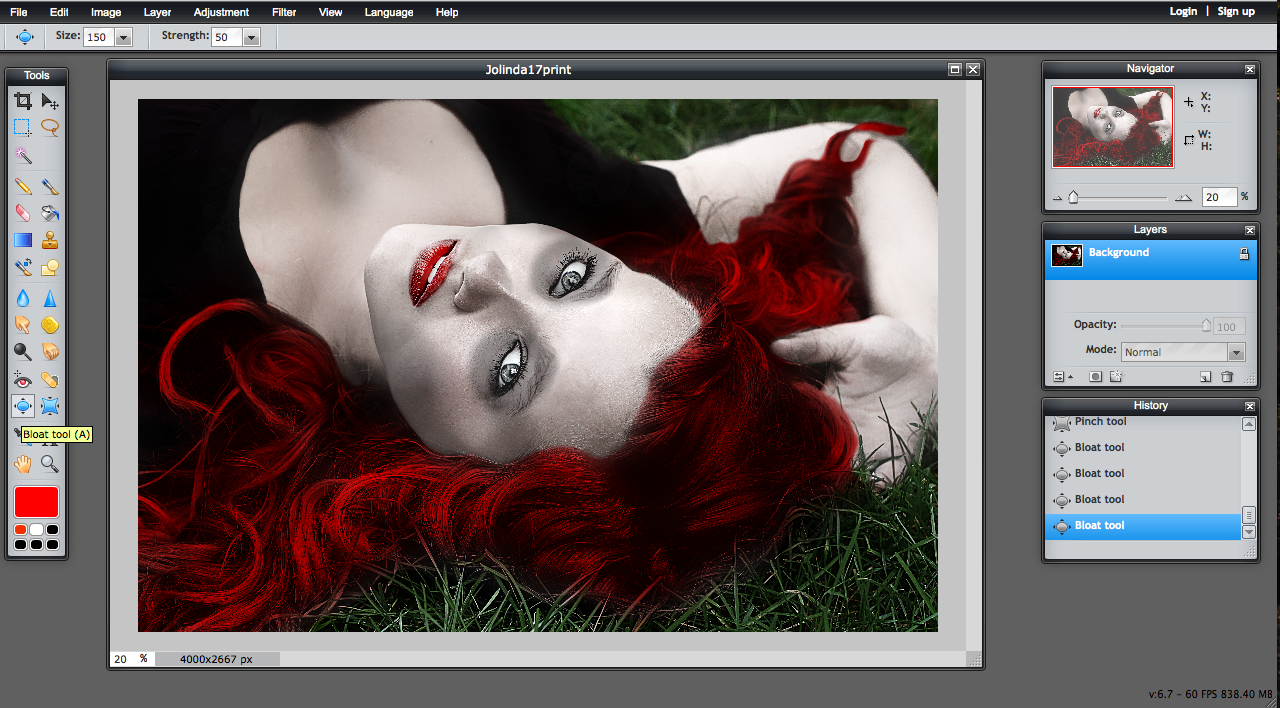
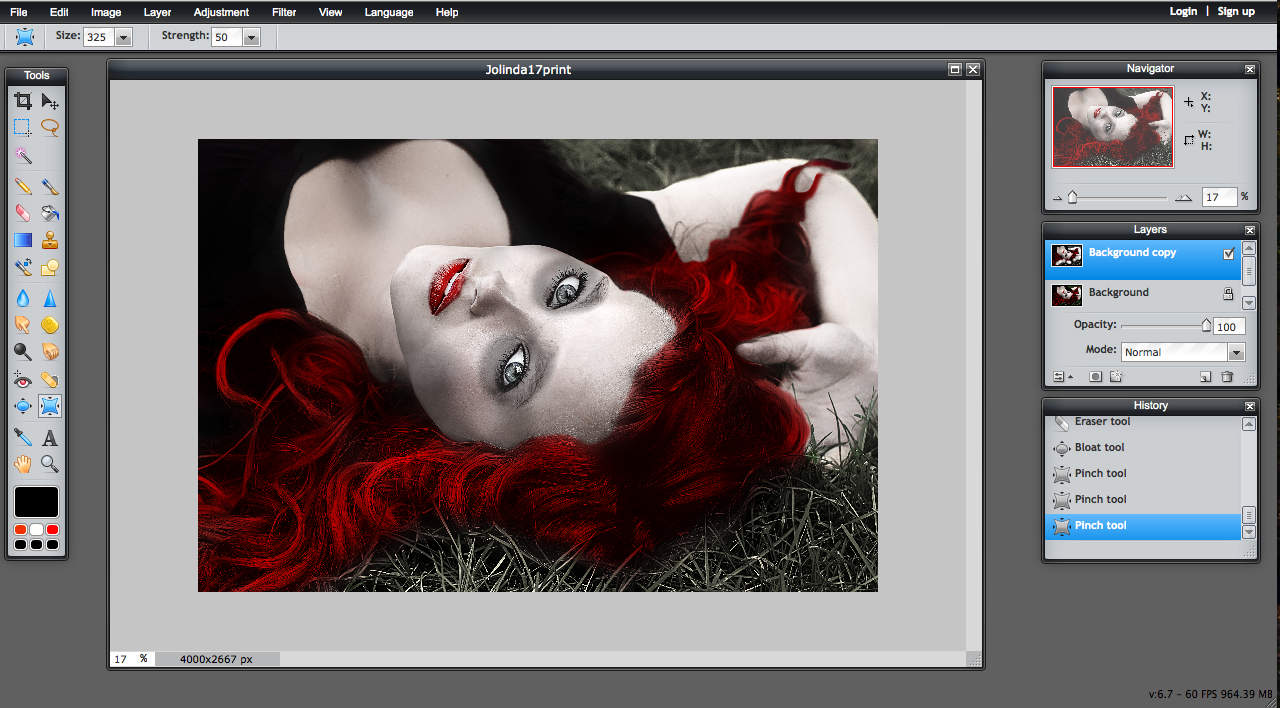
This next step will cover how to change bland hair, to soaked strands of sanguine.
1) Open a New Layer and use the Brush tool to paint on your desired color.
2) Select the Mode on the Layers pallet and select Multiply.
3) Clean up the face and skin using the Eraser tool.
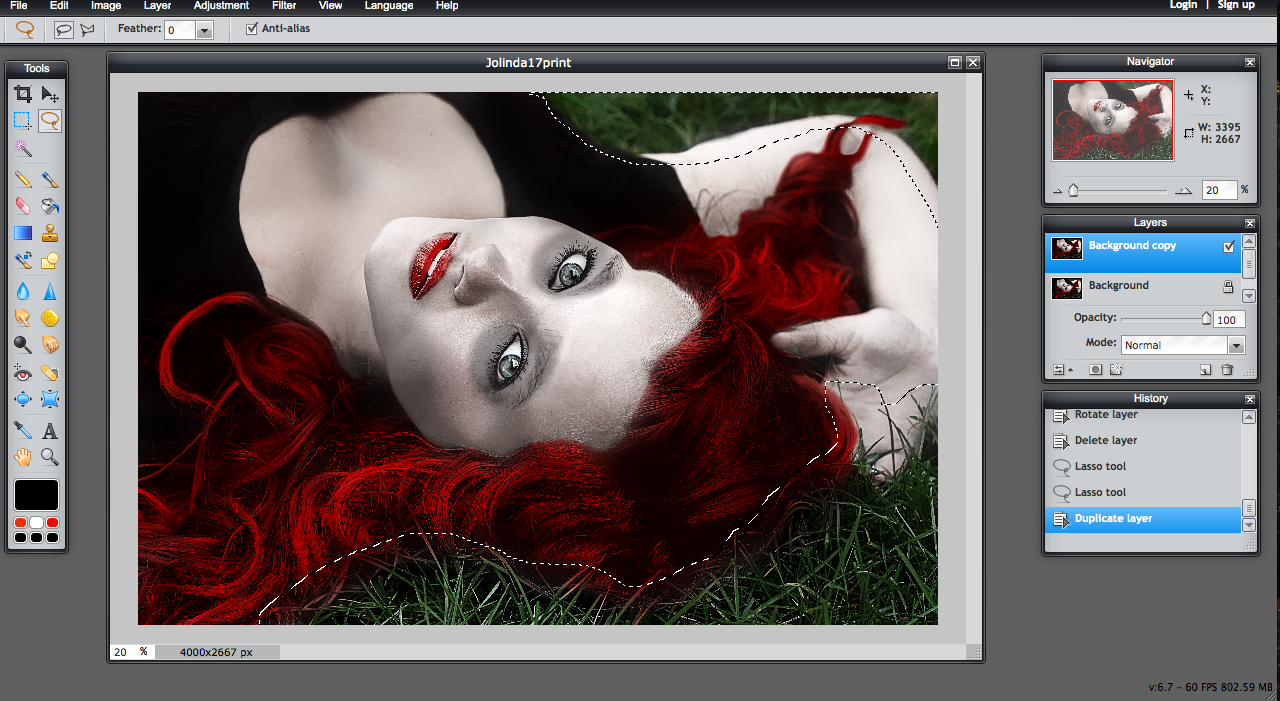
Now, we'll play around with the surroundings of the photo, in this case, the grass.
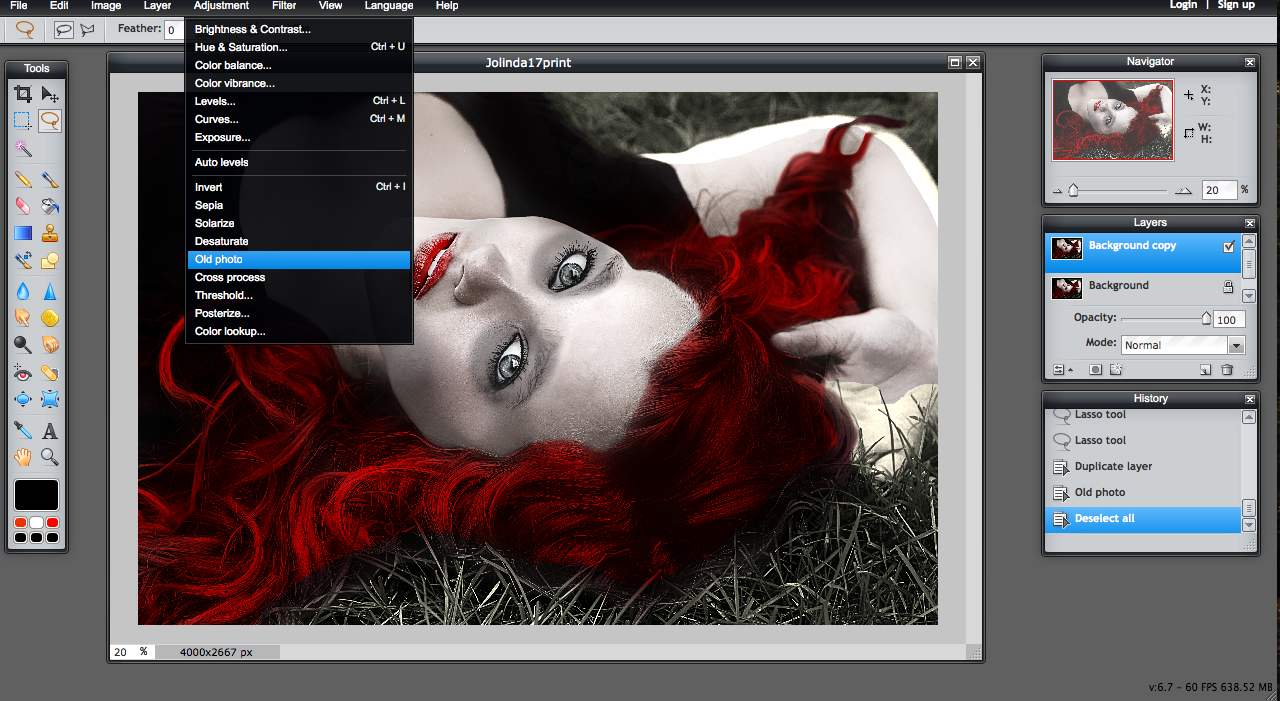
The grass is too saturated for the mood of this photo, so follow these steps to fix it in your own photo.
1) Using the Lasso tool in the Tools pallet, select the areas of grass.
2) Select the Adjustment tab on the toolbar, and select Old Photo.
3) Clean up the face and skin using the Eraser tool.
How cool is that!? Kudos to Pixlr!
Full Moon Eyes & Vampire Fangs
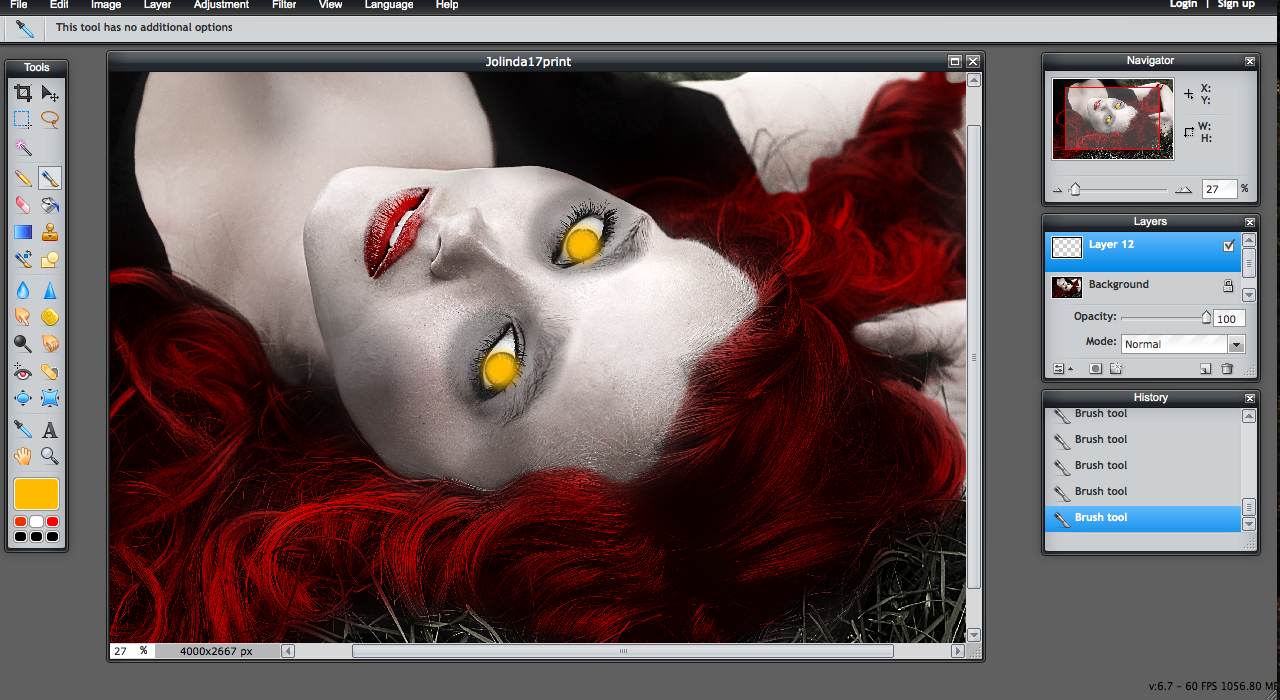
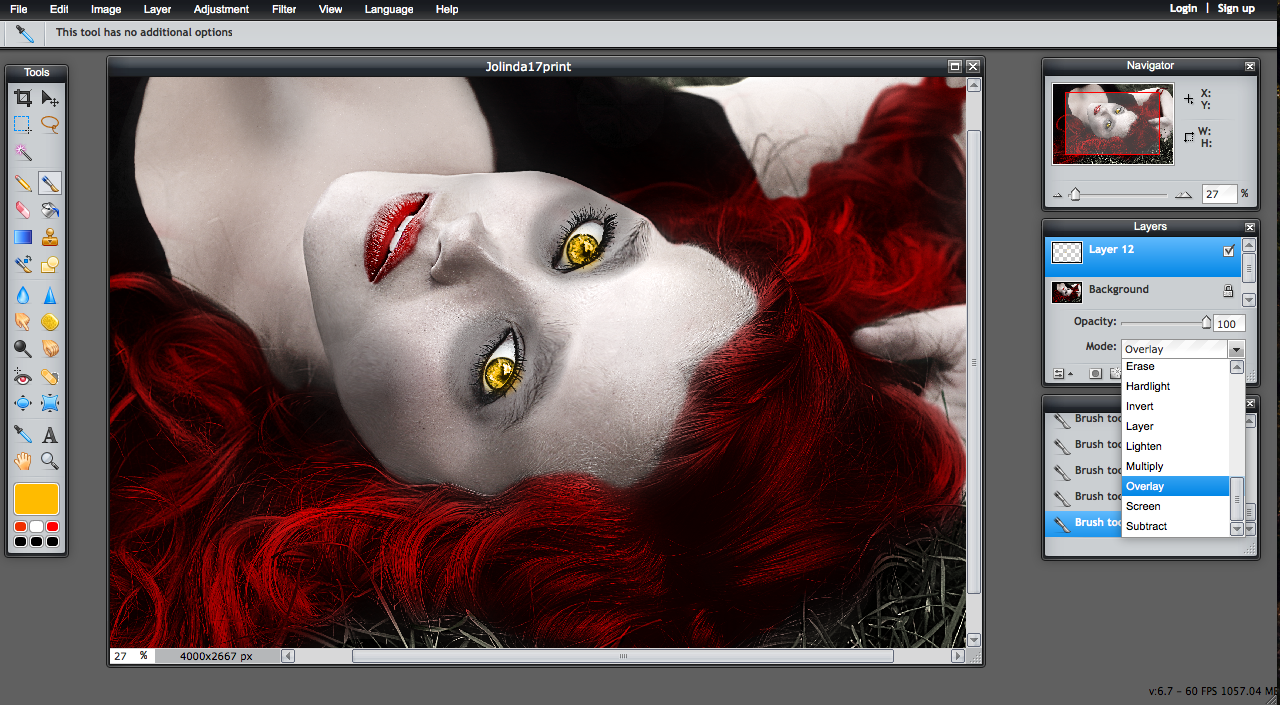
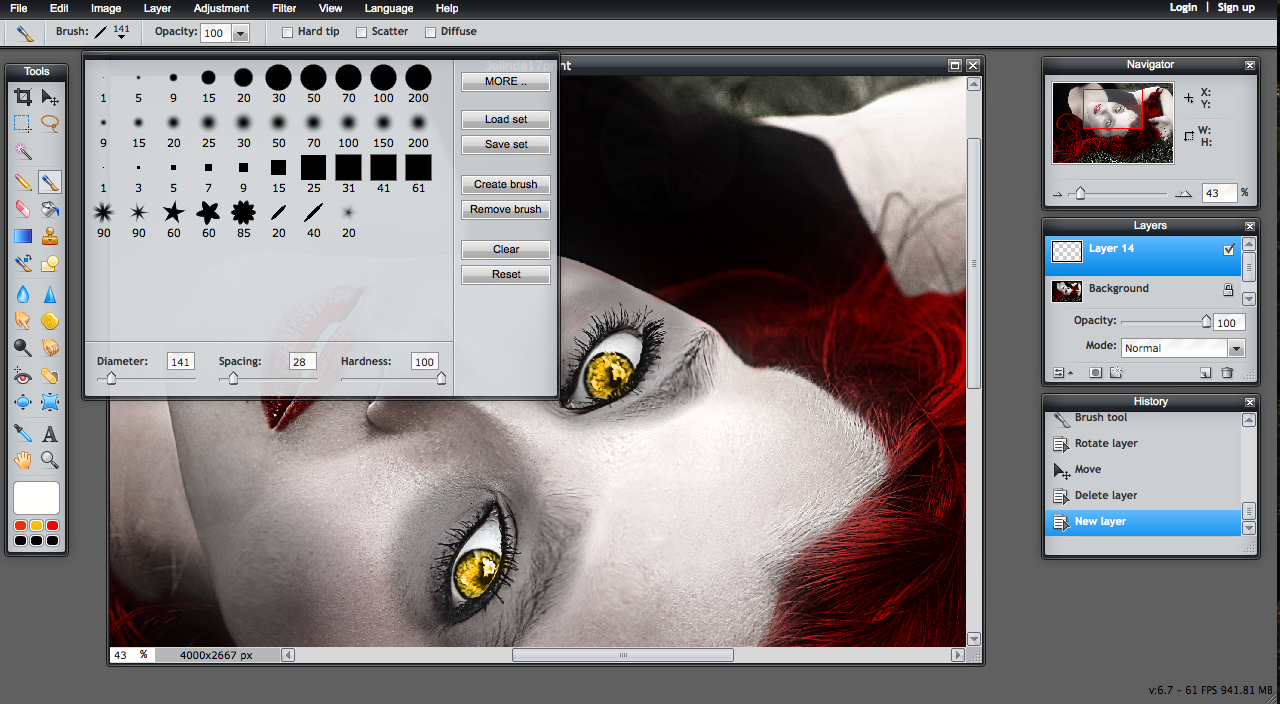
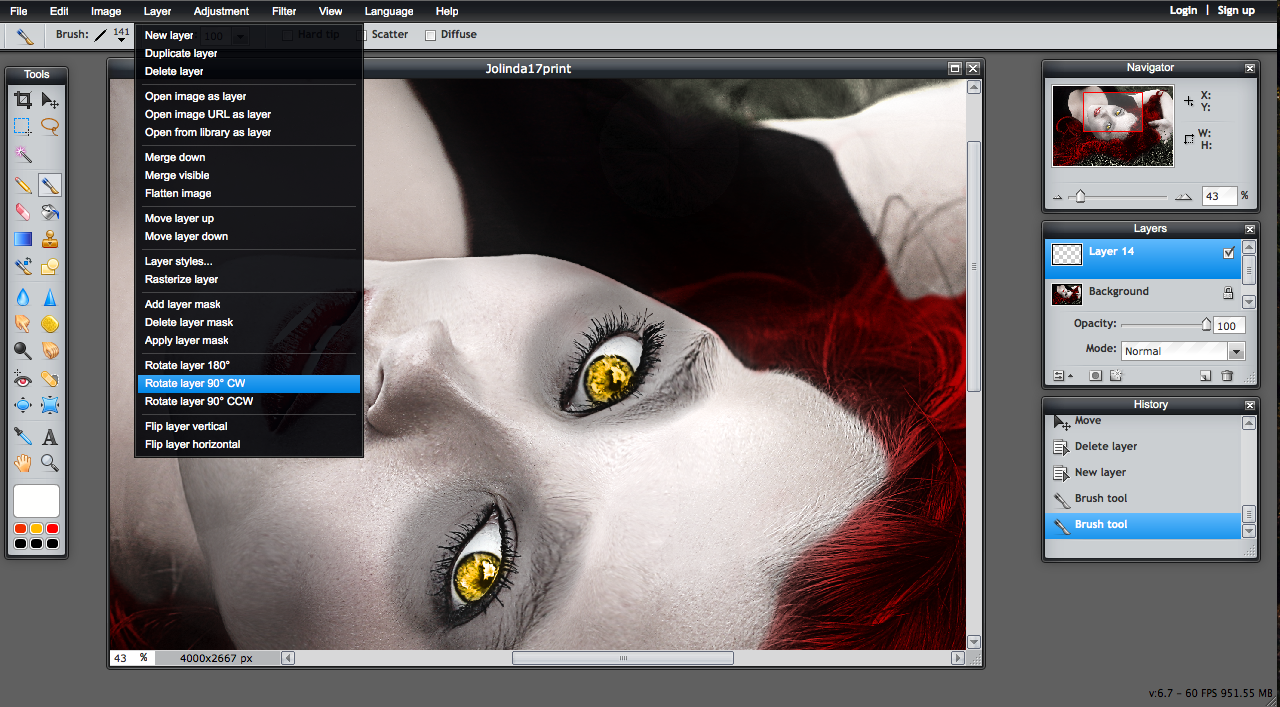
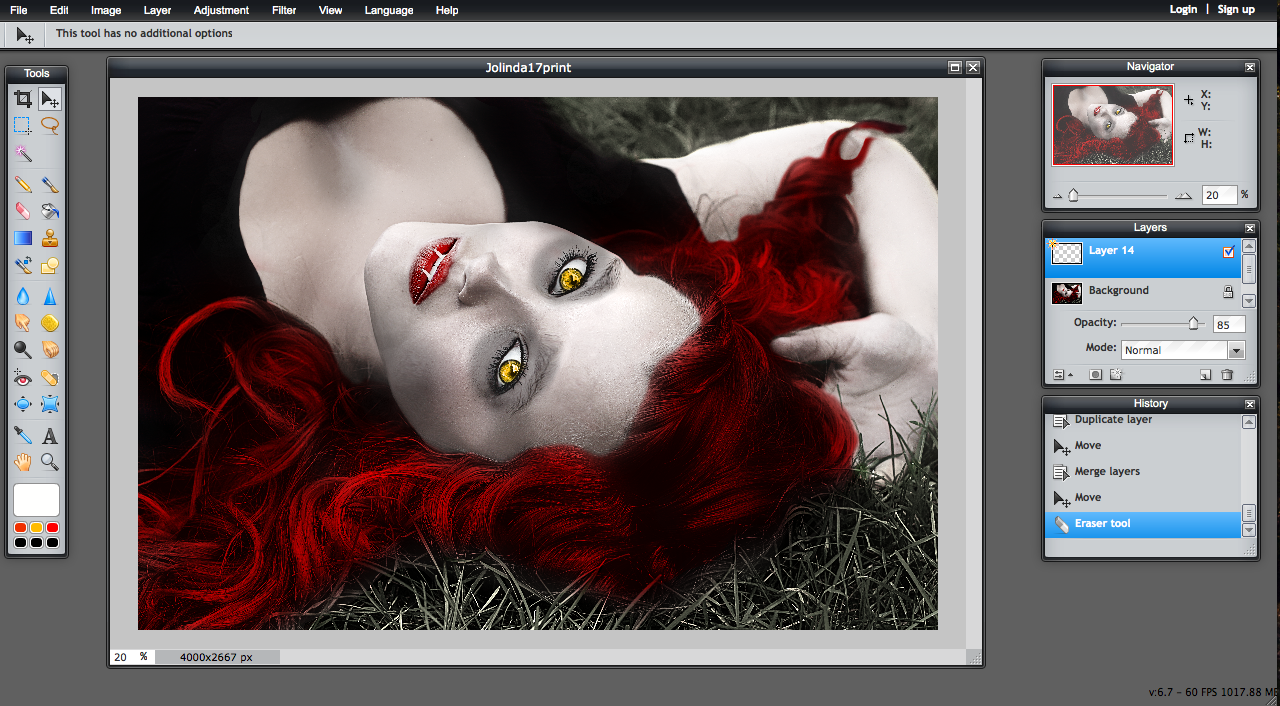
Now it's time to create some creepy, full moon vampire eyes!
1) Create a New Layer and Brush on yellow over the eyes.
2) Change the layer to Overlay in the Mode drop down menu.
3) Clean up the eyes using the Eraser tool.
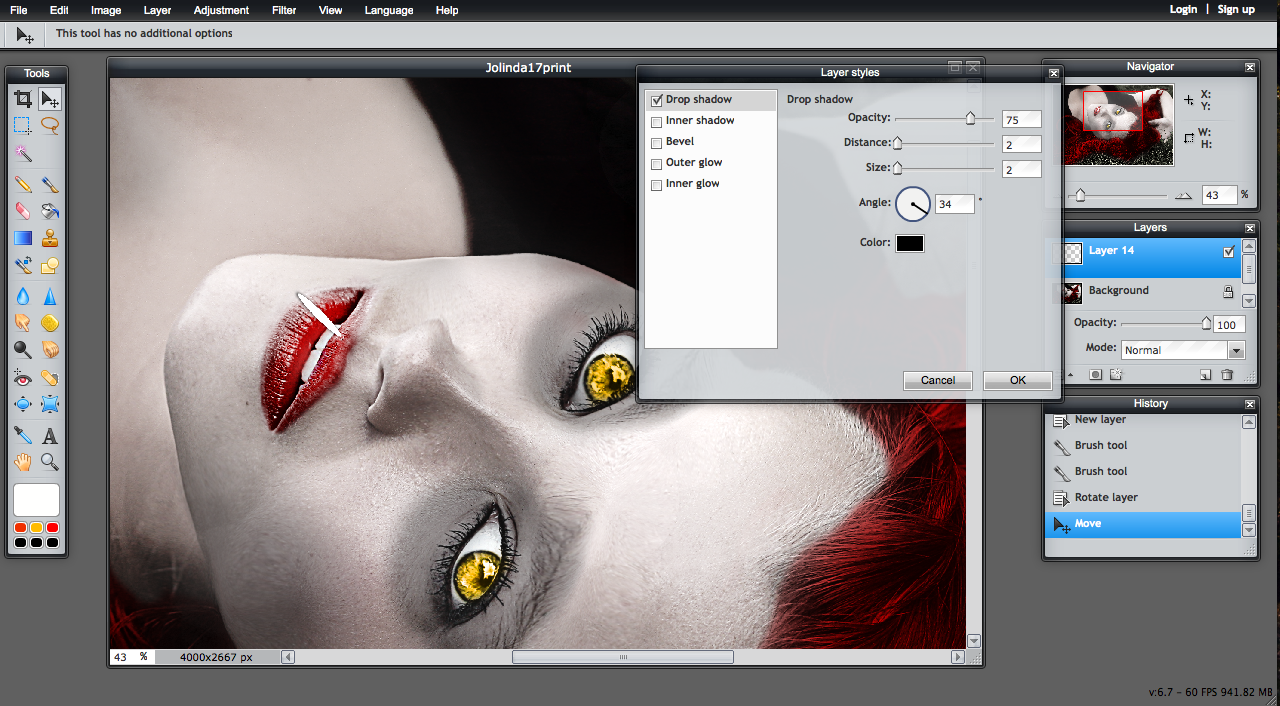
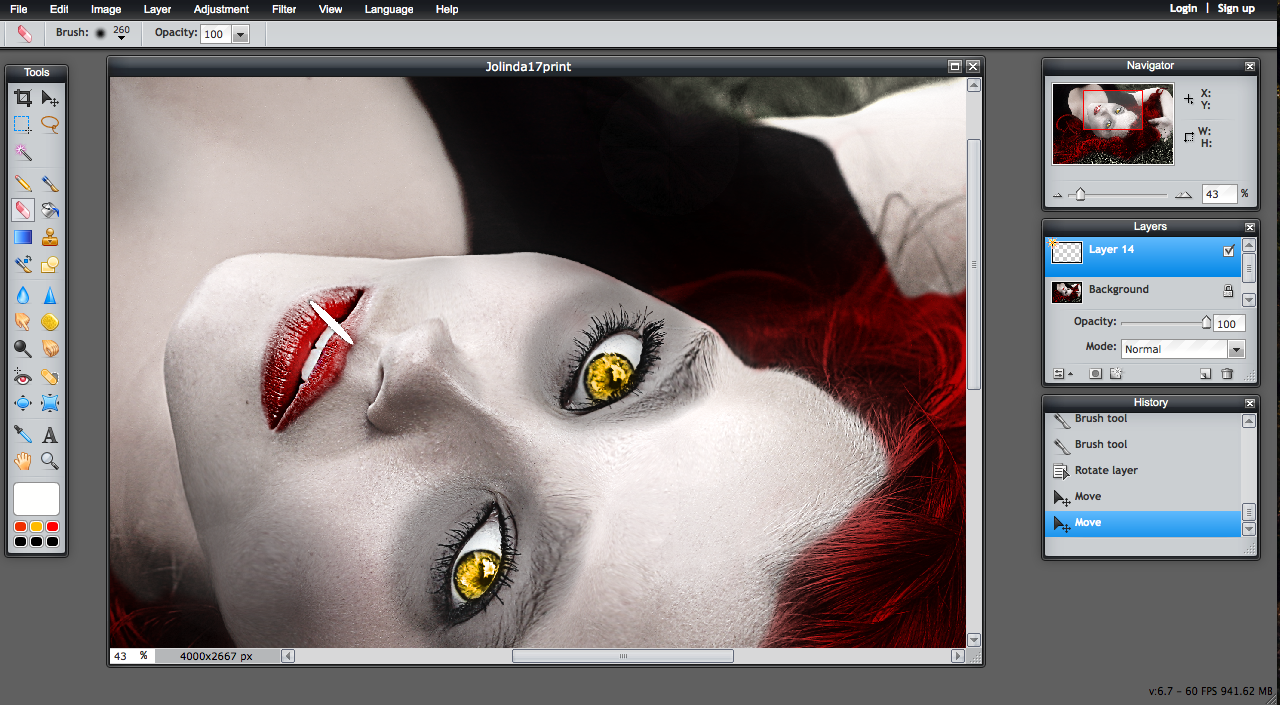
And we cannot have a vampire without some vampy fangs!
1) Create a New Layer and select the Brush tool.
2) In the top toolbar, select the ellipse shape brush and increase diameter.
3) Make a fang sized ellipse in the color white.
4) To give the fang some dimension, select Layer Style from the Layer toolbar.
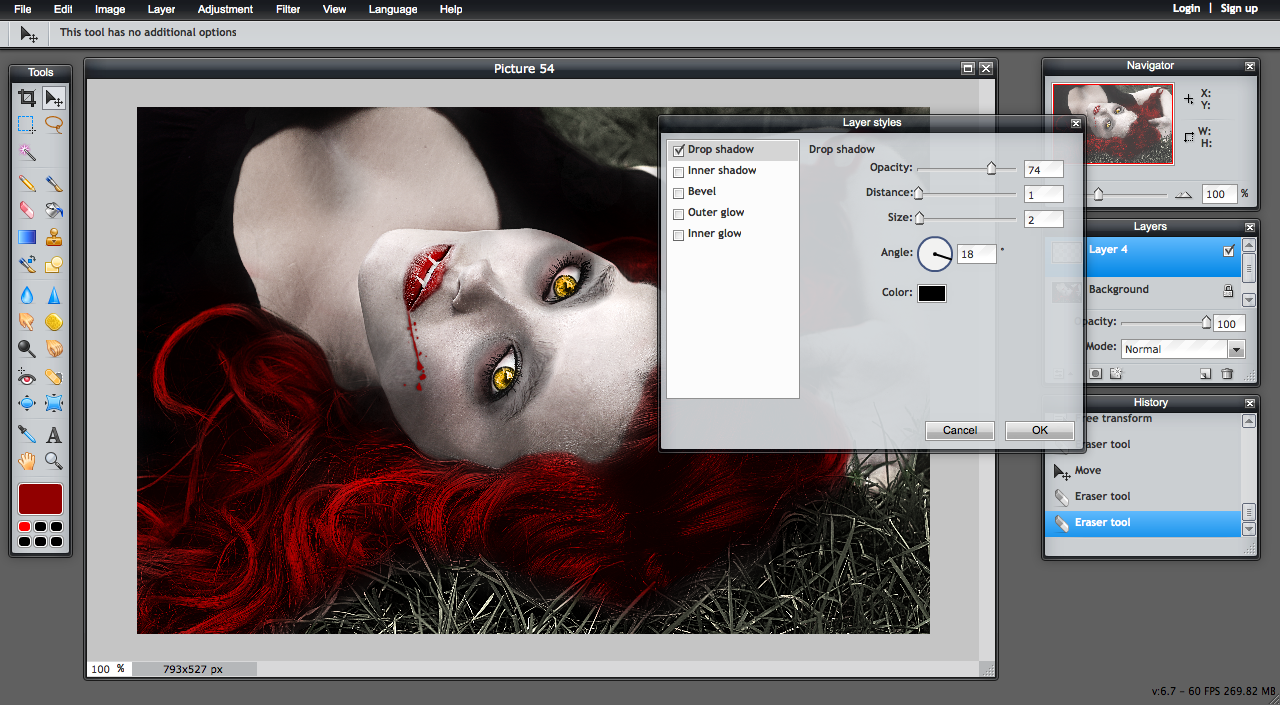
5) Add a Drop Shadow and play around with diameter and size.
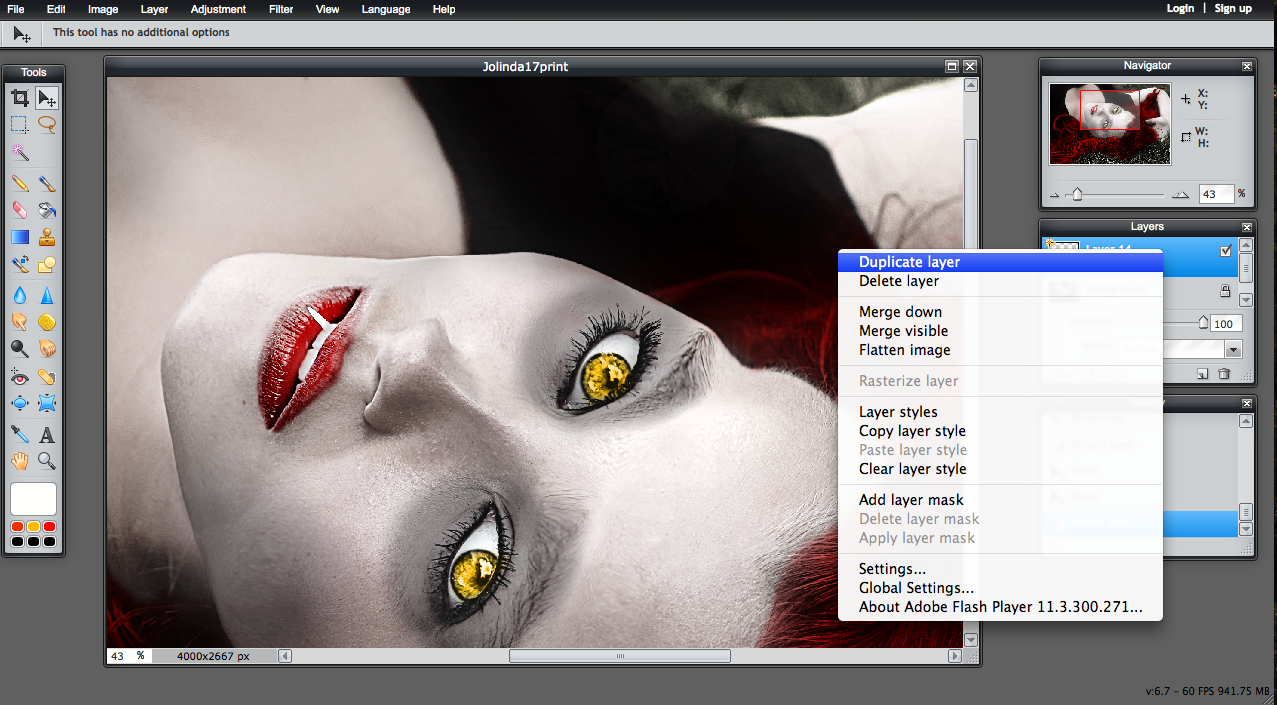
6) Duplicate that layer and erase the excess, and you've got some fangs!
Optional: Add Some Texture
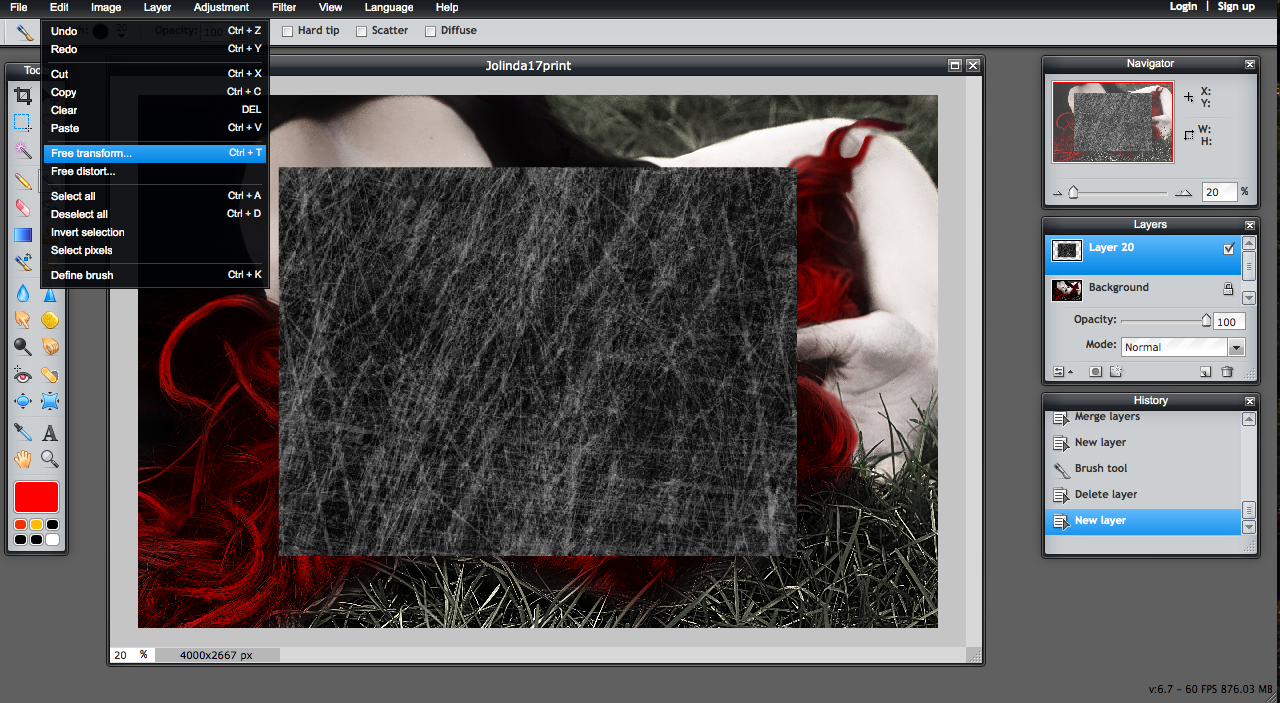
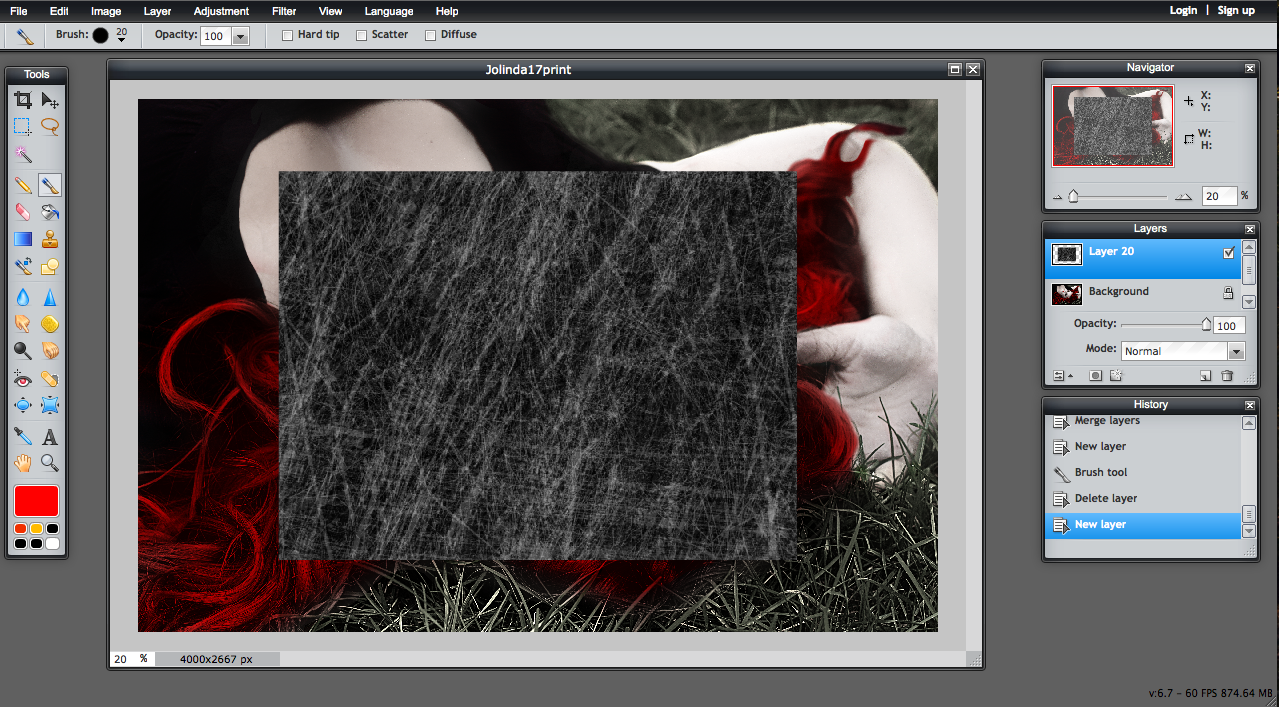
Finally, we can add some grungy texture!
1) Upload a scratched texture by Open as a New Layer under the Layer toolbar.
2) Under the Edit toolbar, select Free Transform to stretch the image out over the canvas.
3) Change the Mode to Overlay and reduce the Opacity to 15%.
1) Upload a scratched texture by Open as a New Layer under the Layer toolbar.
2) Under the Edit toolbar, select Free Transform to stretch the image out over the canvas.
3) Change the Mode to Overlay and reduce the Opacity to 15%.
Optional: Blood Spatter and Cracked Skin
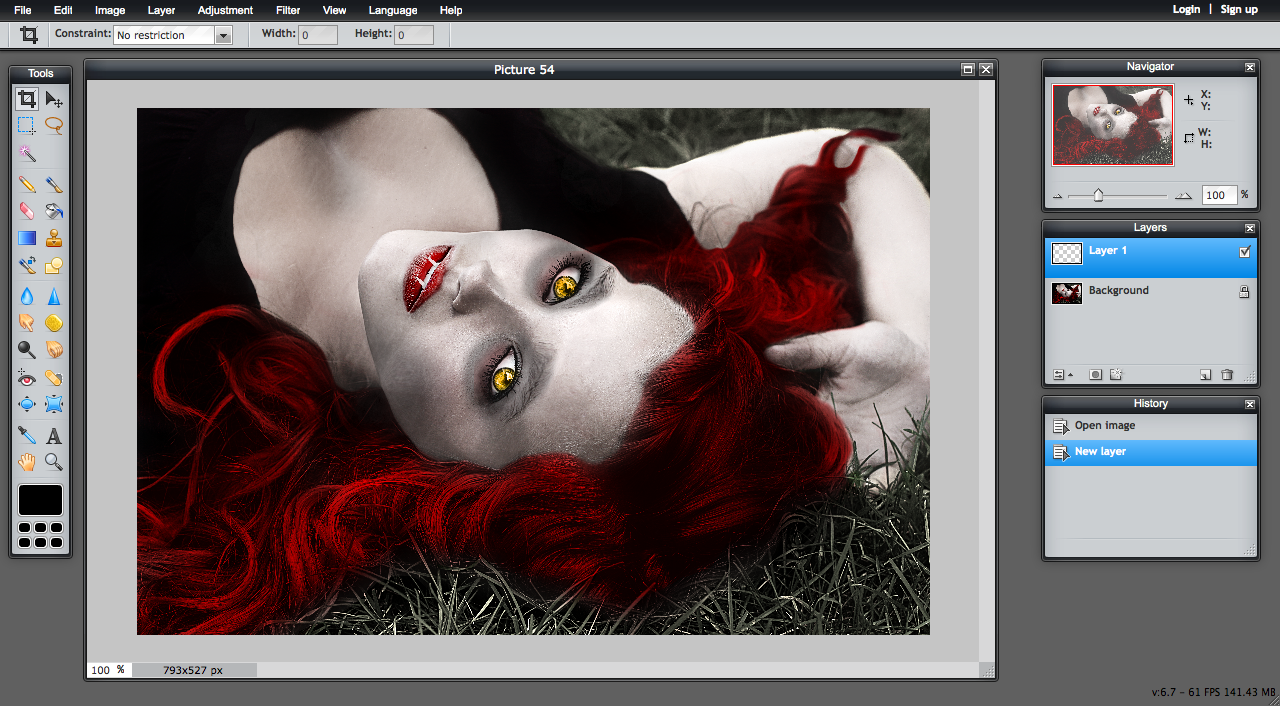
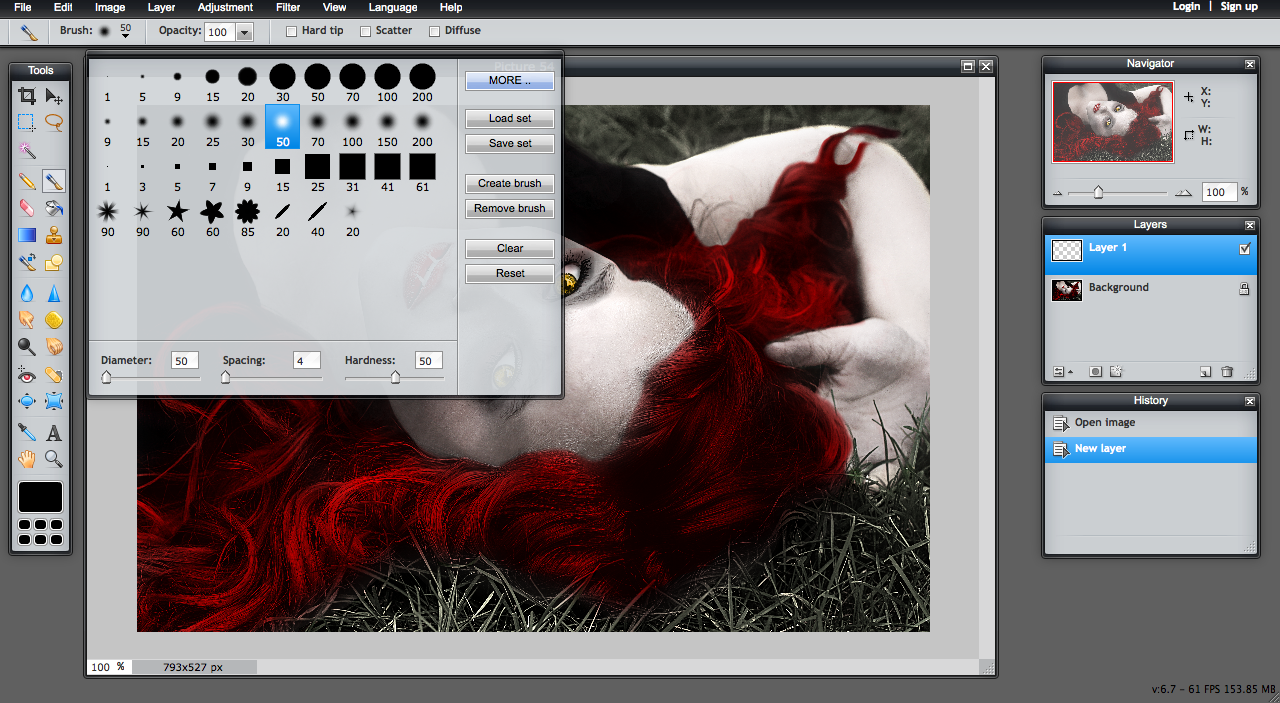
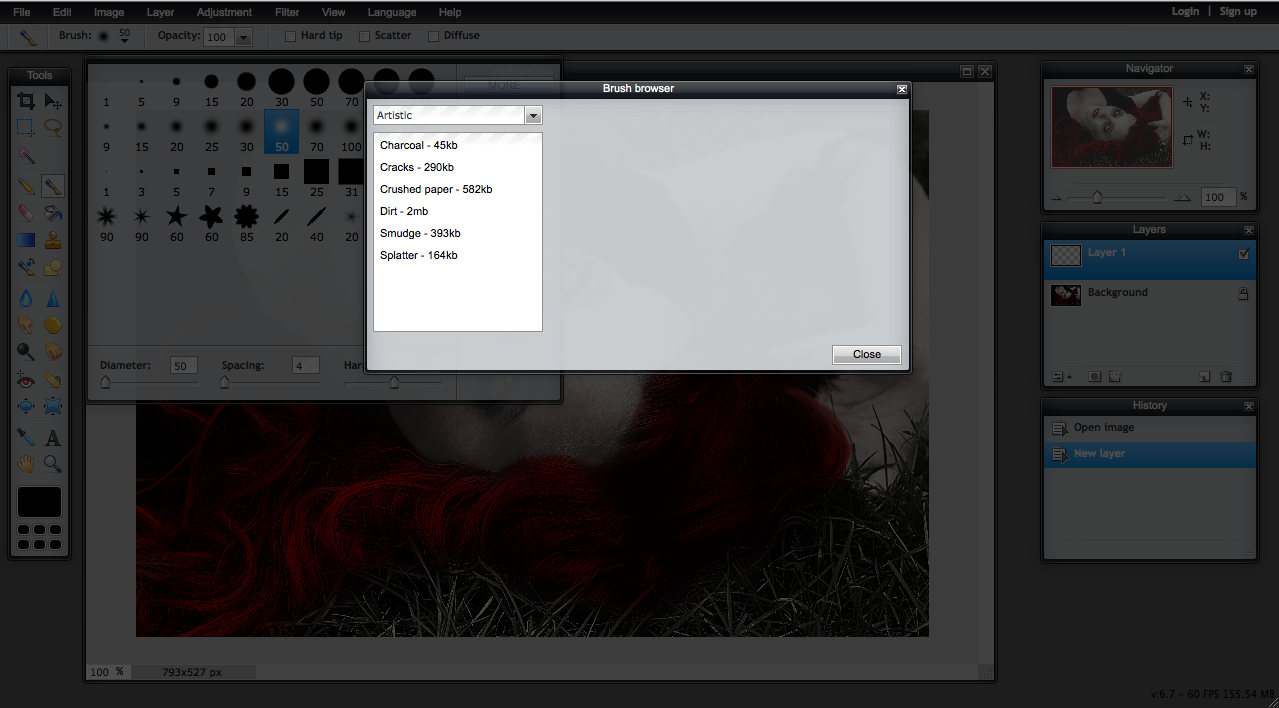
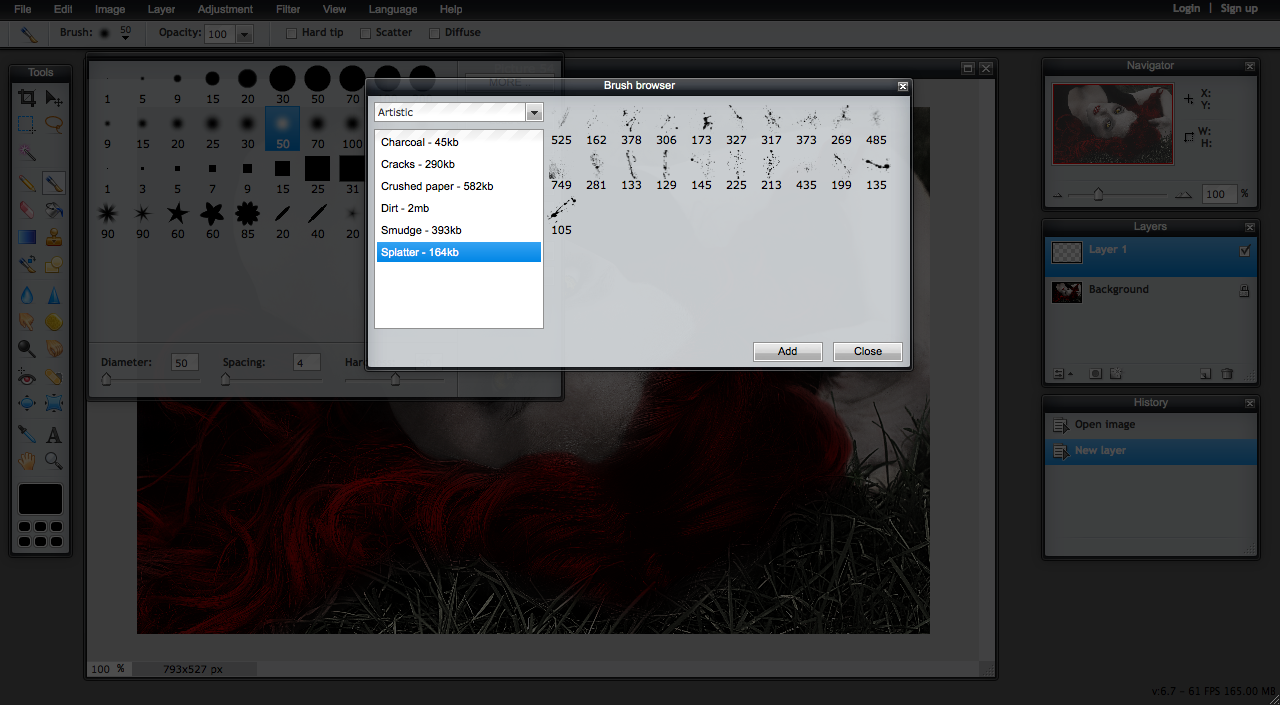
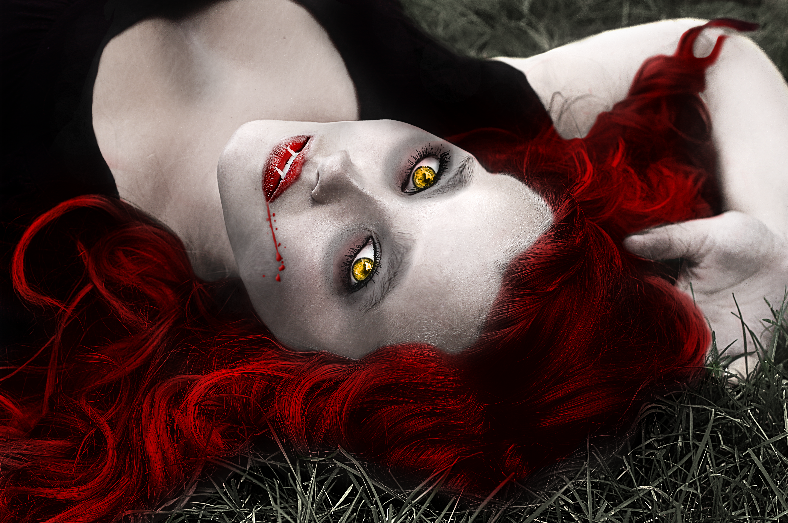
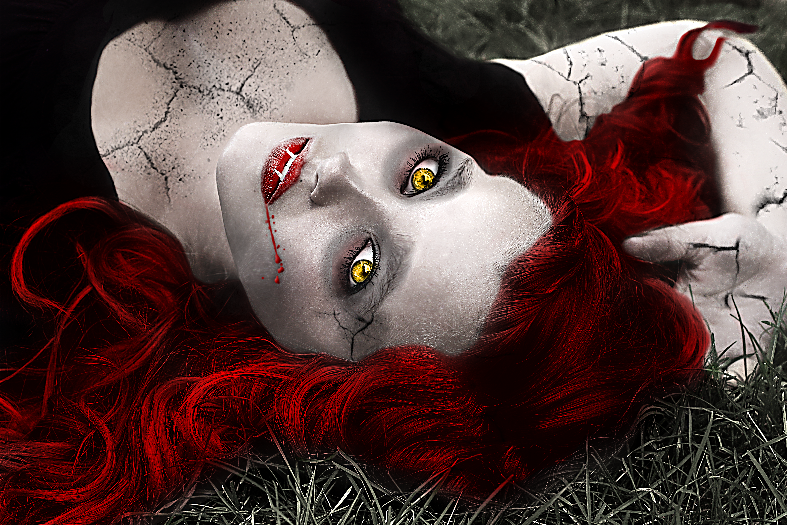
You can't really have a vampire without blood, so here we go!
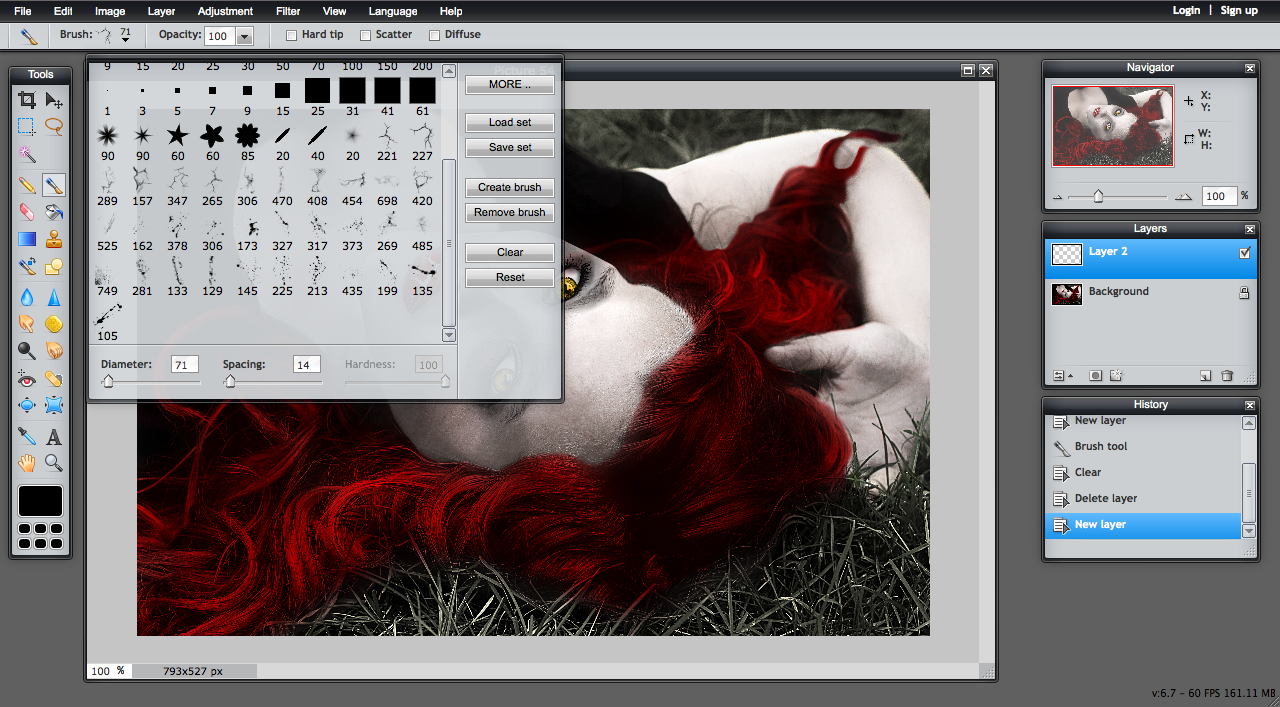
1) Open a New Layer and click on the Brush tool.
2) Click on the drop down arrow and click MORE from the options.
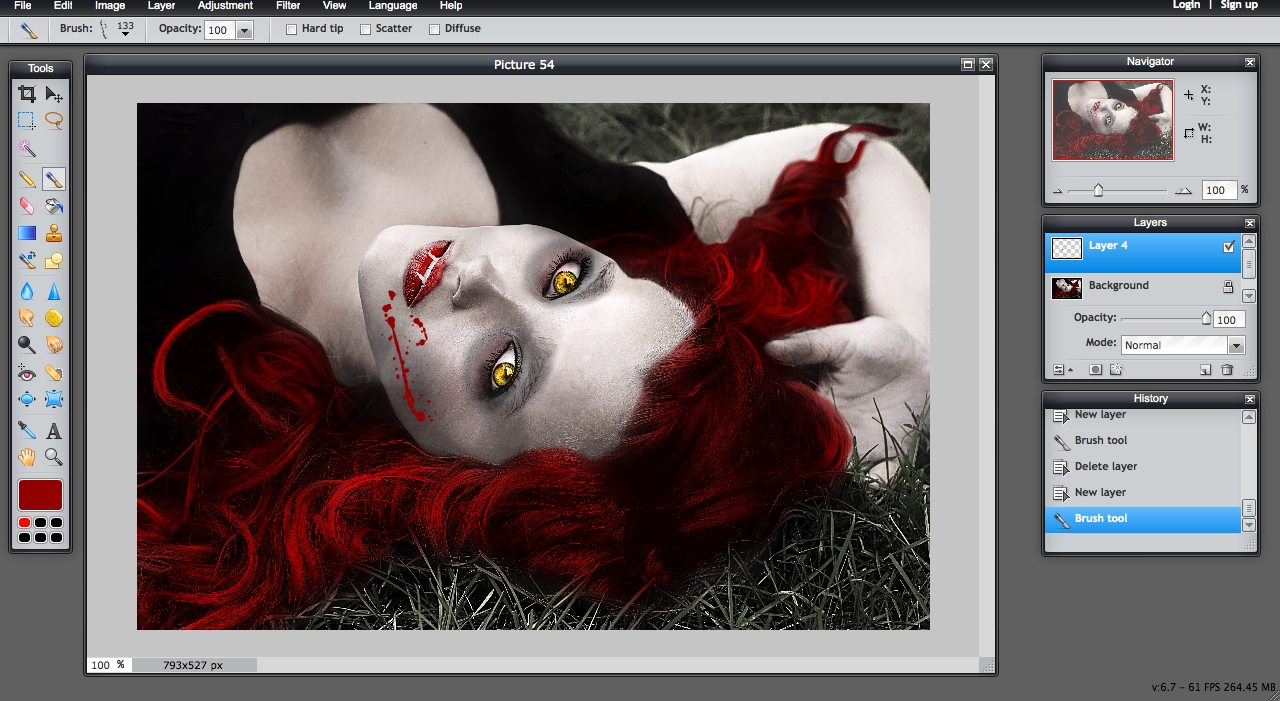
3) Pixlr has a bunch of fun brushes, but for this tutorial we'll add the Splatter brushes.
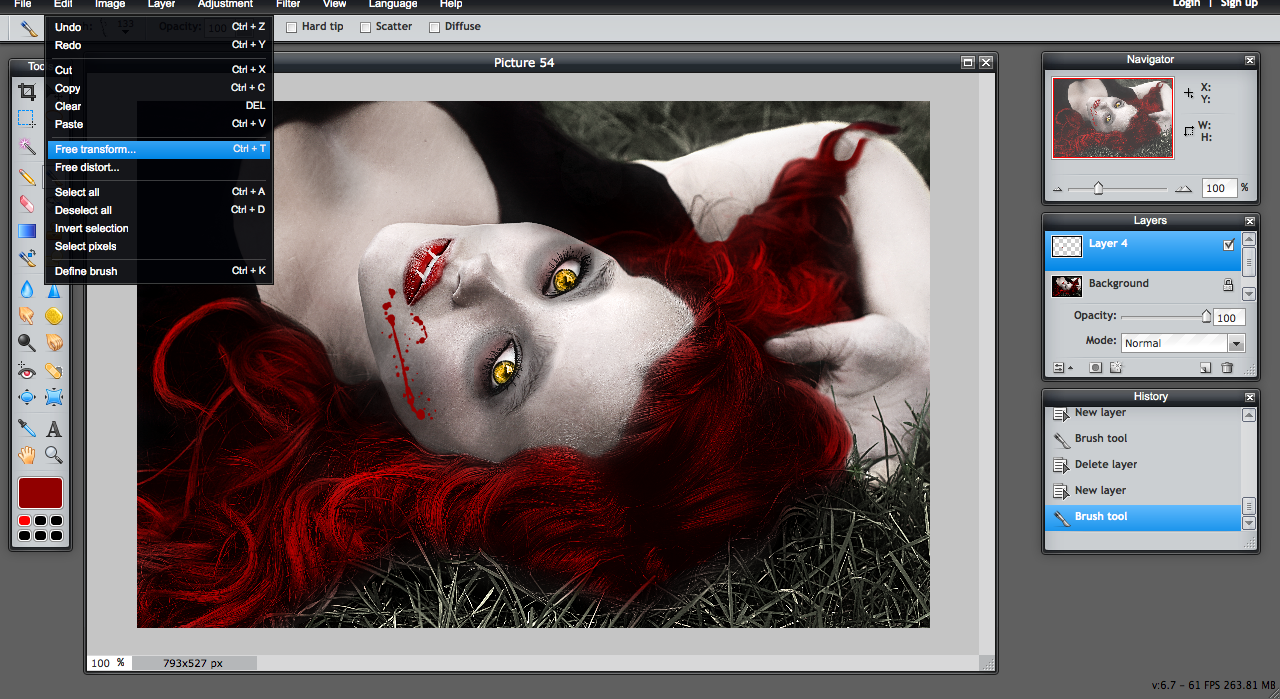
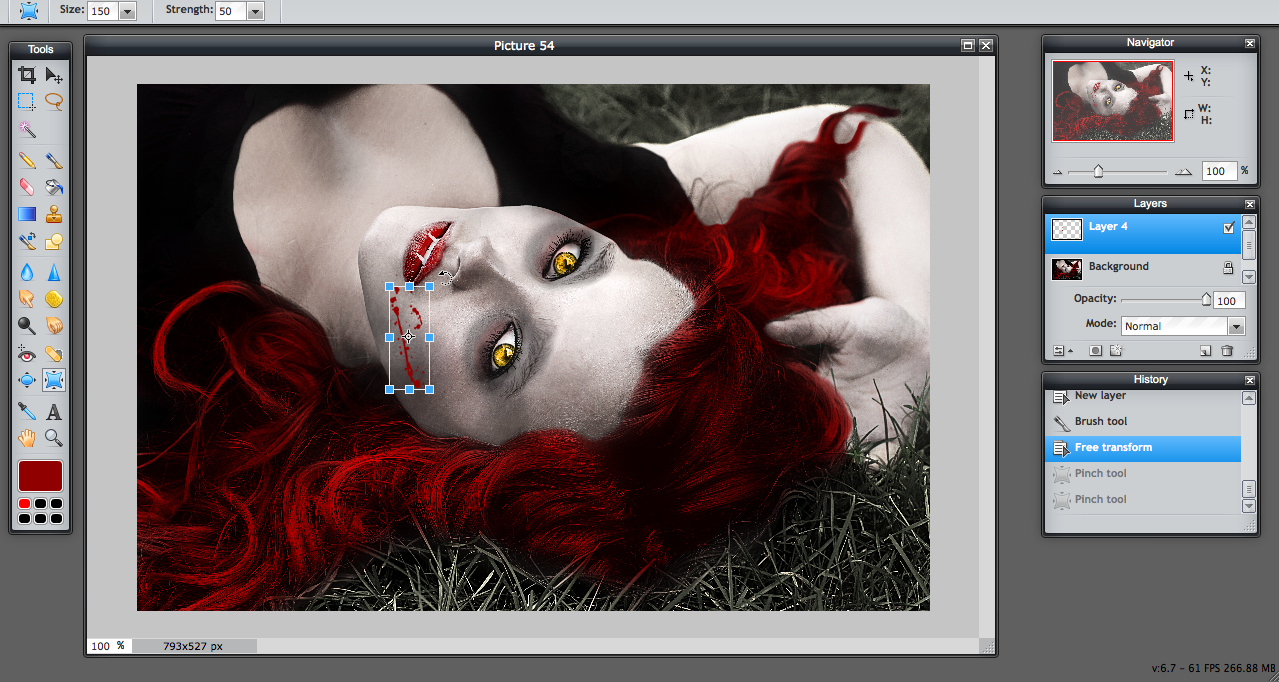
4) Place a spatter anywhere on the canvas. The go to Edit and select Free Transform.
5) Move your cursor just outside of the box, and the Rotate cursor will appear. Rotate the Spatter.
6) Clean up the spatter to make it your own using the Eraser tool.
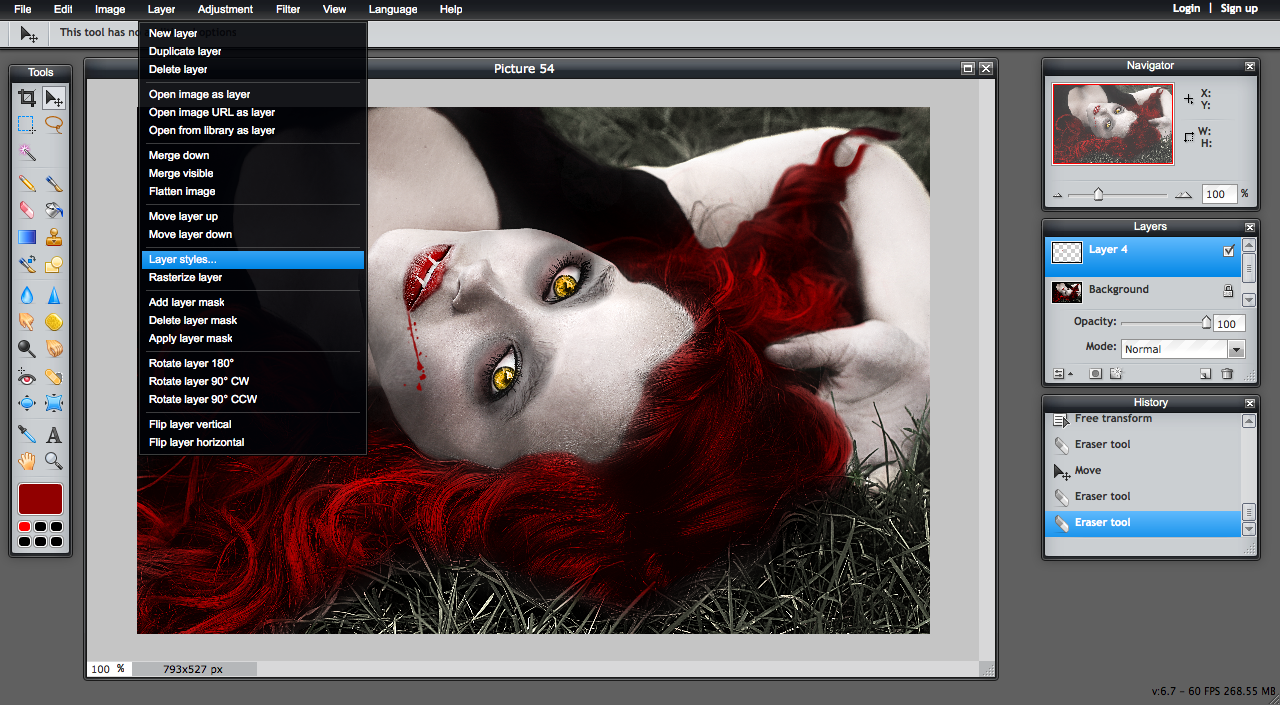
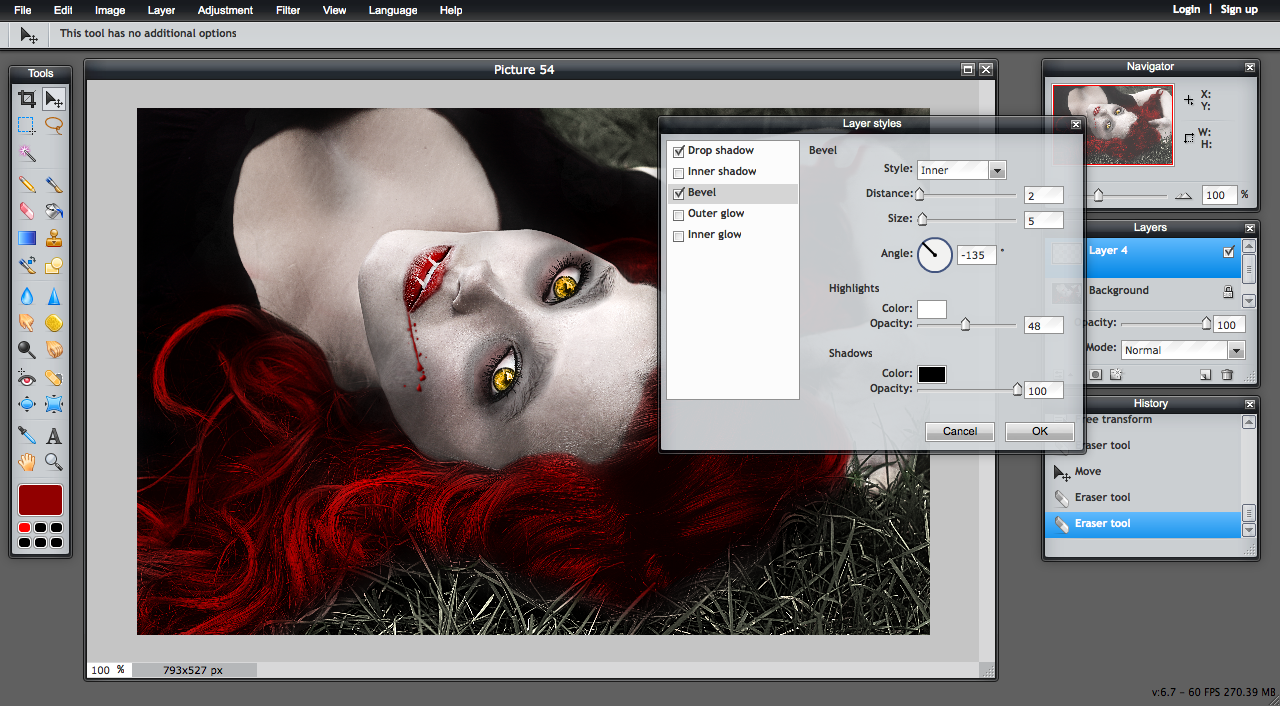
7) To add dimension to the spatter, go to Layer and select Layer Styles.
8) Play around with the Drop Shadow and Bevel options to make your blood spatter come alive!
Add cracks to the skins using the same techniques above, by adding the Cracks brushes to the Brush palette.
Once complete, select Filter on the toolbar, and select Unsharp Mask to sharpen your Vampire Babe!
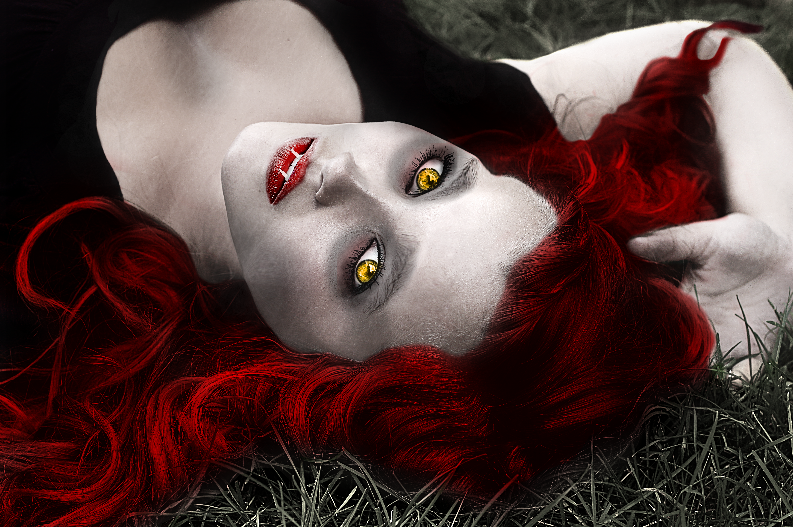
All Vamped Up!
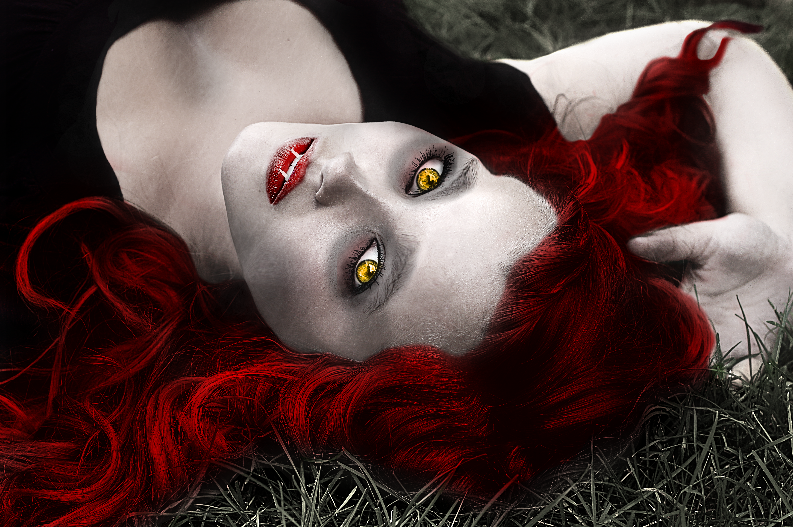
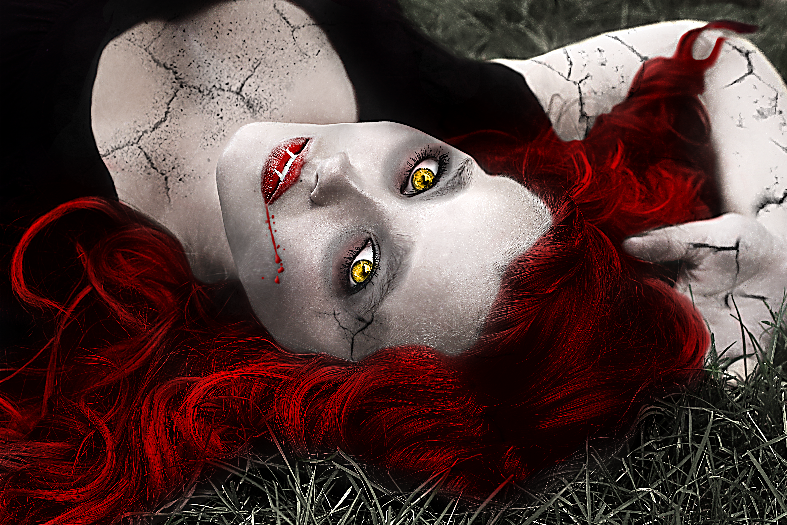
And now, if you've completed the previous steps, you are all Vamped Out!
I hope you enjoyed this Instructable, and I would like to give major credit to Pixlr!
I am so impressed with the quality of its editing and the wide range of tools available.
Have a Happy Halloween!
I hope you enjoyed this Instructable, and I would like to give major credit to Pixlr!
I am so impressed with the quality of its editing and the wide range of tools available.
Have a Happy Halloween!