Pixel Art Bookstand With Tinkercad
by chong227033 in Design > 3D Design
126 Views, 1 Favorites, 0 Comments
Pixel Art Bookstand With Tinkercad
Ever since I was a kid, I would watch the classic Pokemon Series without skipping any episodes. To me, it was a blast to explore the types of Pokemon that exist, the move sets, but most importantly - the friendship bond between the Pokemon and its trainer.
While stumbling upon this contest, the idea of creating a Pokemon clip certainly means that I have the opportunity to redesign my memories. During that time, I was also interested in Pixel Art, a digital art style. That was then a question that struck my mind: why not I combine my memories with my interests?
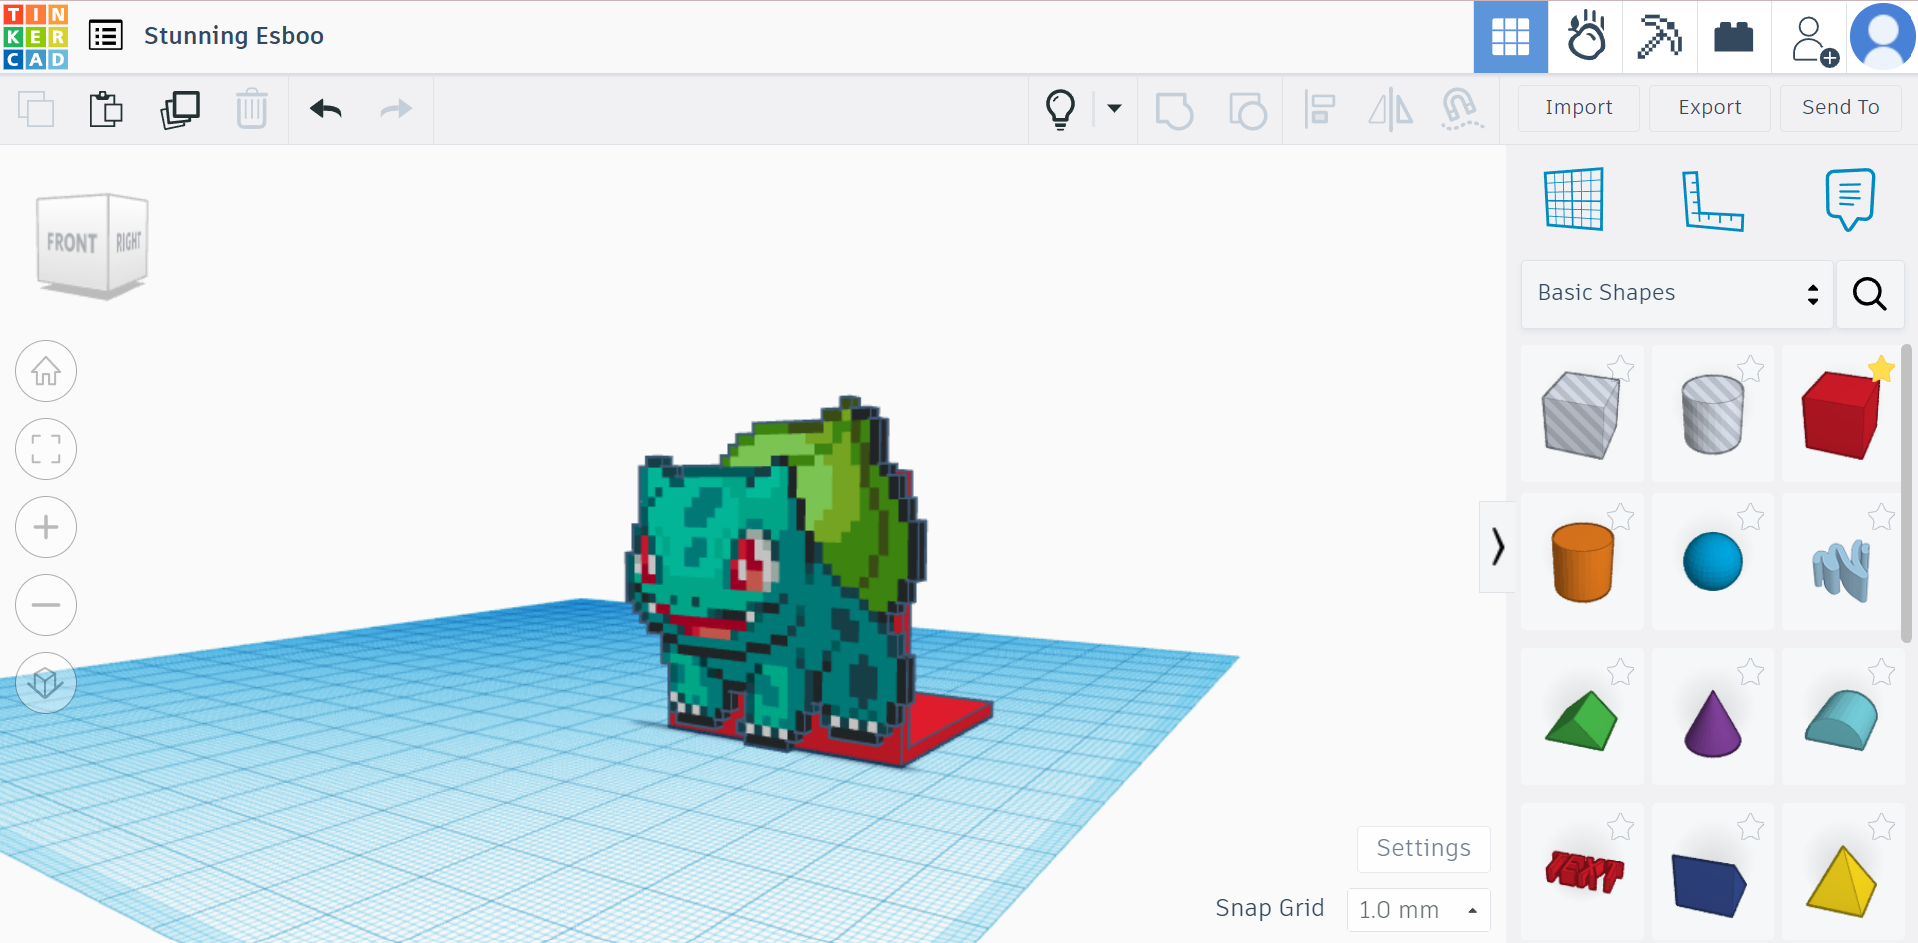
Below is a video clip of the final product and detailed instructions on crafting your own Pixel Art clip. In this example, I've made a Bulbasaur clip, a simple design that requires patience. So, without delay, let's immerse ourselves in this digital adventure and craft a Pixel Art clip that reflects our creativity!
Downloads
Supplies
- Computer
- Mouse
- Good Internet
Finding a Subject
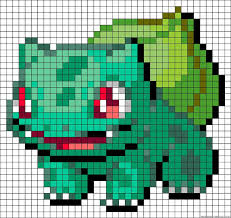
To make this type of clip, we need to have a certain decoration such as little flowers or a giant heart.
For starters, I looked up on the Internet and found a Bulbasaur Pixel Art Picture like the one shown above. It is advisable to find Pixel Arts with grids to aid you in producing this kind of prototype better.
This is because I have used another photo without grid and did something similar, which was much more difficult as I was having difficulty in identifying a specific number of boxes needed for a particular part. So, if you want to avoid your eyes from staring at the computer for a long time, it is best to opt for a solution that is more time efficient.
Creating the Subject
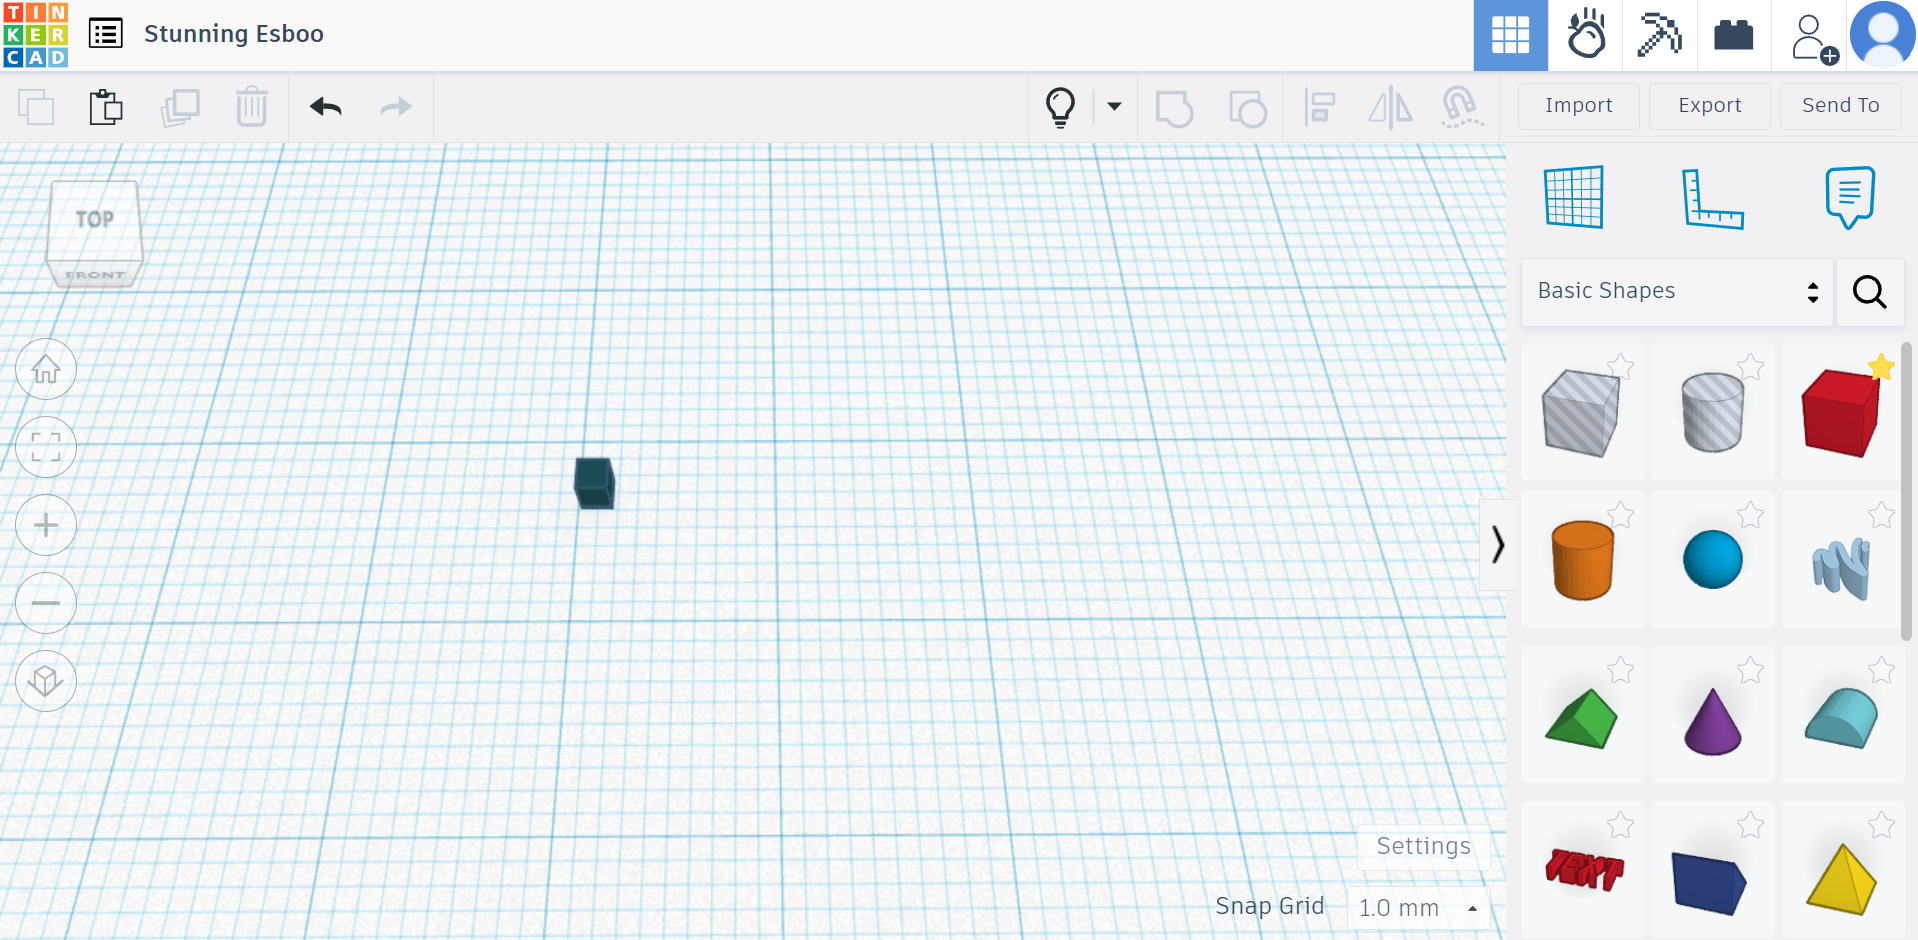
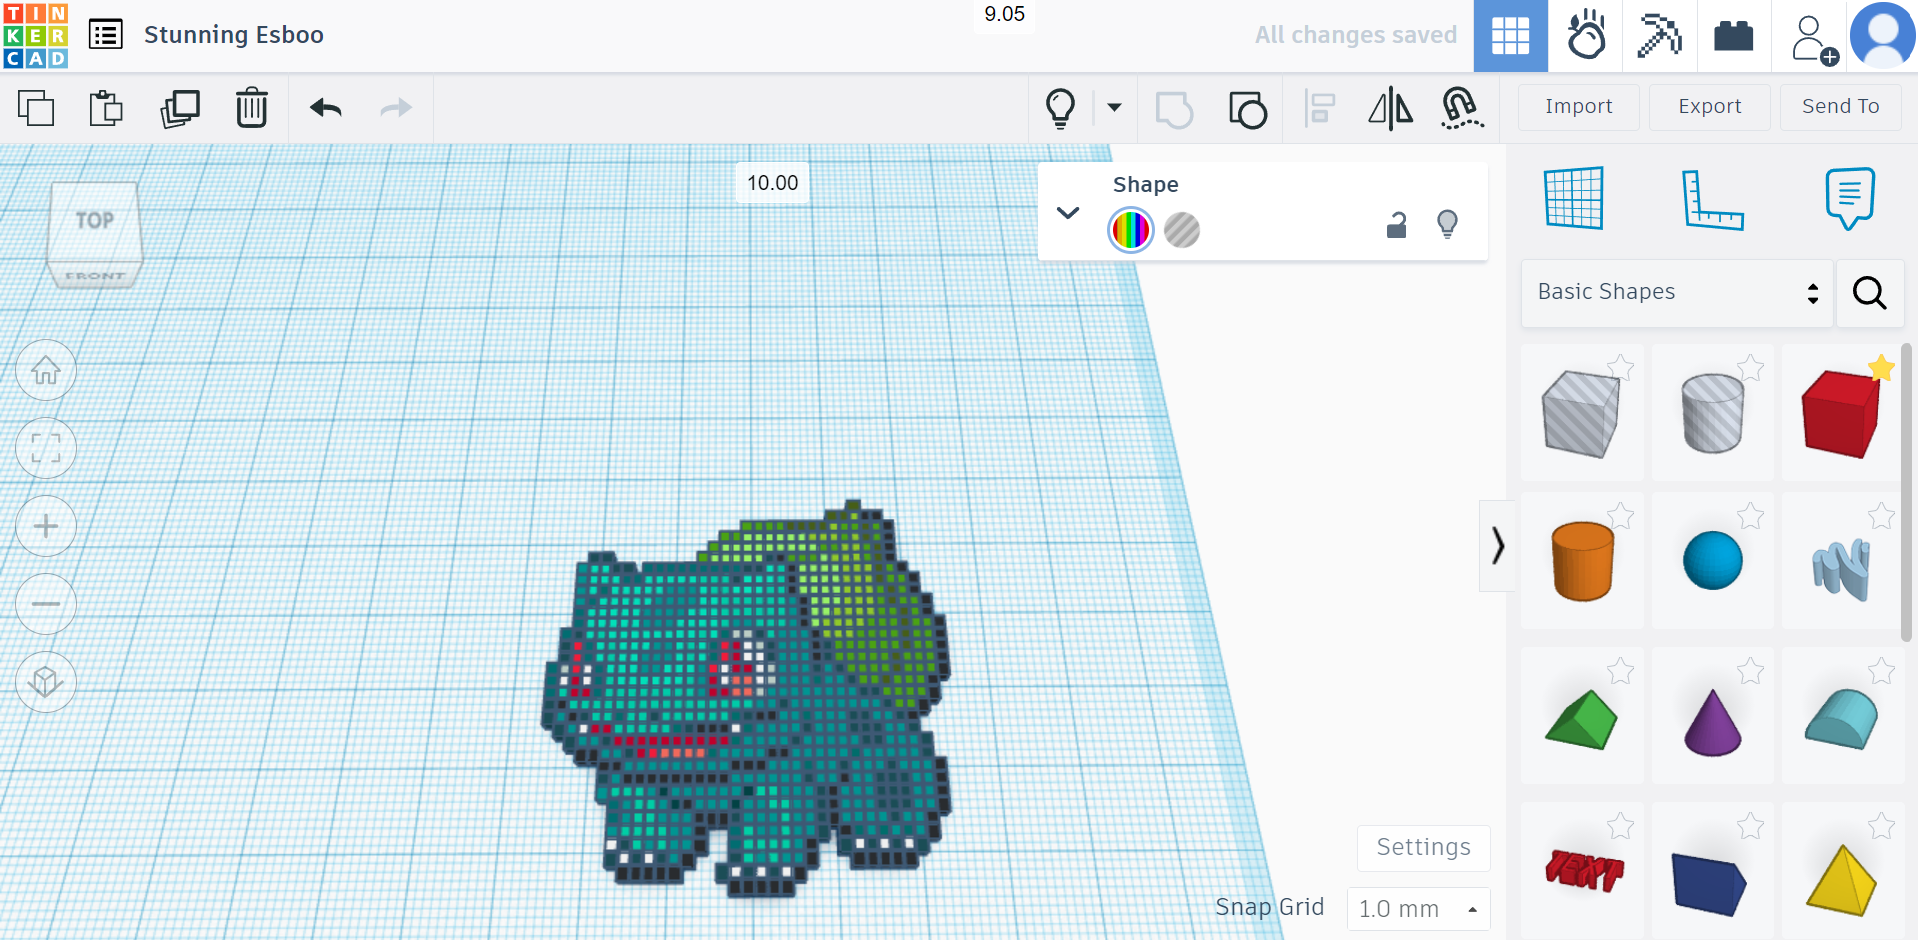
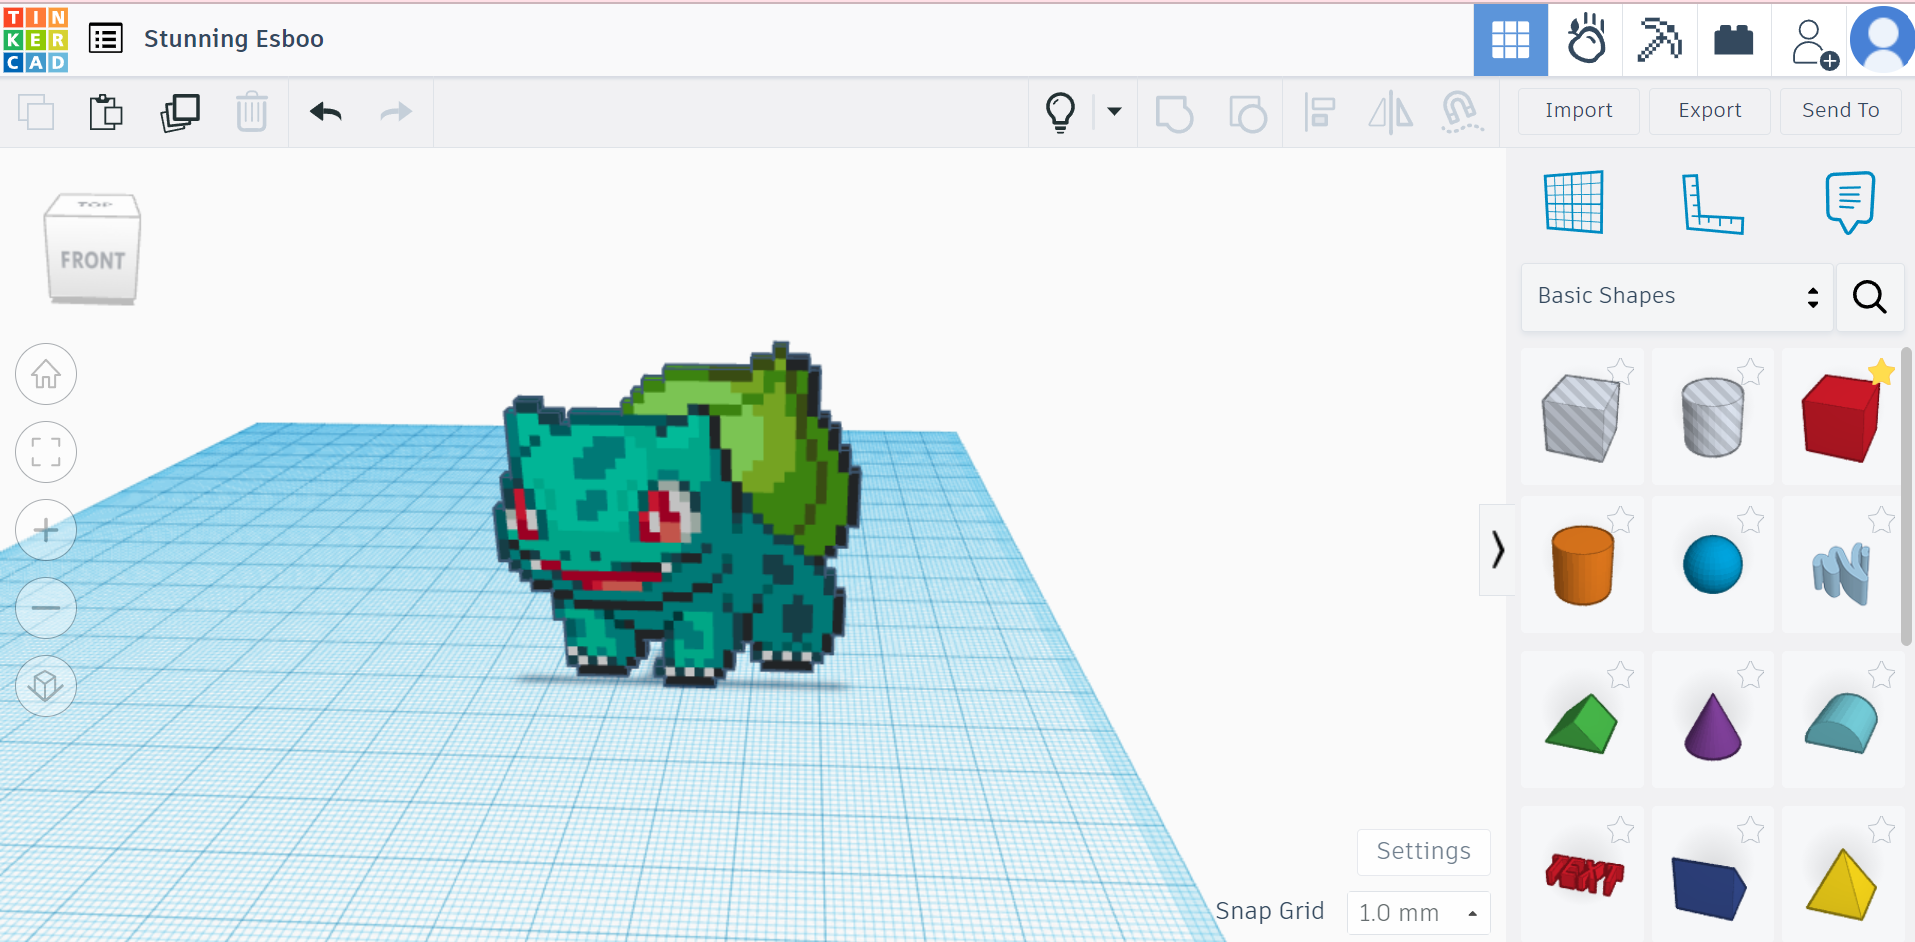
Step 2.1: Start by dragging a solid box and scale it to 2mm X 2mm X 2mm. You can start from anywhere of the picture that is comfortable to you.
Step 2.2: Repeat step 1.1 until all boxes have been placed. This may take some time, so be patient!
Step 2.3: Group EVERYTHING.
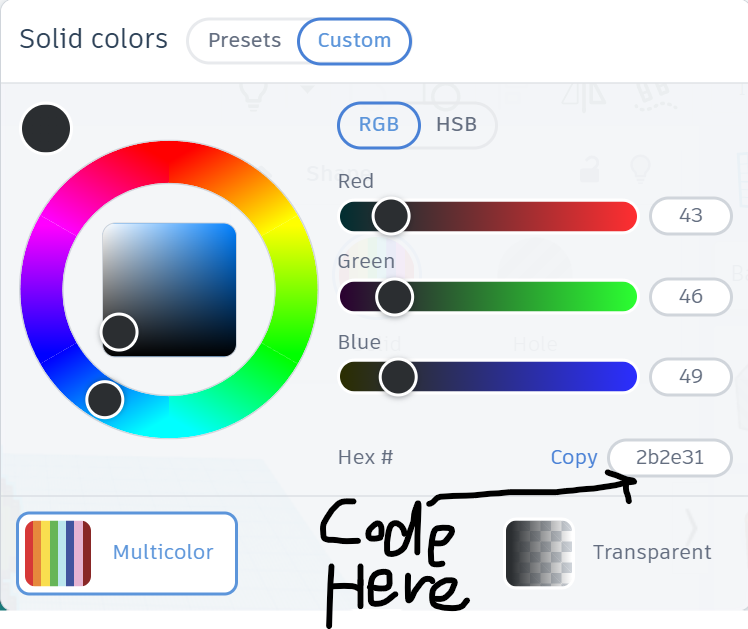
Take Note: there might be some colors that are difficult to customize by dragging the RGB scale only. You may use the color dropper feature in Google Docs, or any apps/websites you are familiar with.
Here's how to do it (Google Docs):
- Open a blank document.
- Go to text color and select "add a colour".
- Select the dropper.
- Click on the box you wanted on the reference photo to select its color. Once completed, a color code like "#f66e5f" will appear in a box. Copy the code and paste it in here (Fourth Picture)
Creating the Stand
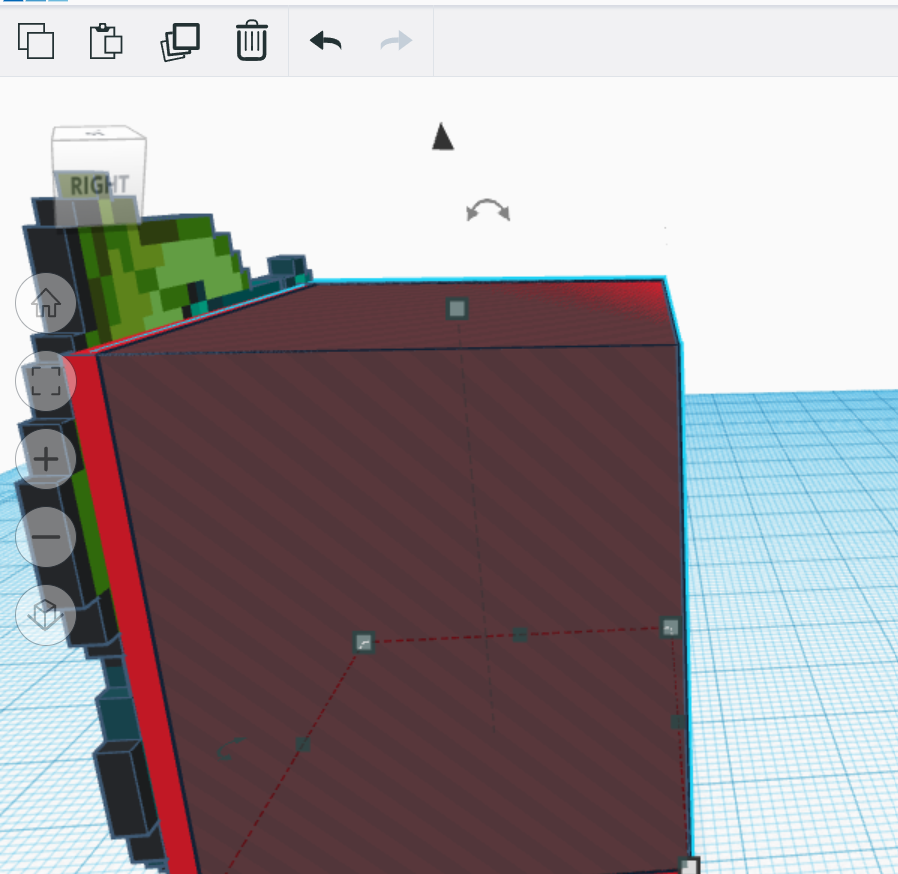
Step 3.1: Drag a solid box and scale to the measurements: 40mm X 35mm X 40mm.
Step 3.2: Drag a hole box and scale to the measurements: 40mm (Width) X 33mm (Length) X 38mm (Height). Place the hole box as shown and group the two boxes together.
Step 3.3: Group everything including the subject, and you are done!