Pixel Art: a Beginner's Guide

This is a beginner’s guide to pixel art. In this tutorial, I’ll be demonstrating some basic pixel art techniques, as well as methods of making the pixel art process easier and more efficient. This guide should be helpful to both those who have previous art experience and those who don’t. While we’ll focus on Microsoft Paint, the following techniques will be applicable to any art program that utilizes pixels (though I can’t guarantee the setup process for your program will be the same).
Required Materials:
-A computer with Microsoft Paint installed (though most other art programs will work fine)
-A mouse or drawing tablet. A tablet is good for those who are used to traditional drawing, but a mouse will do just as well.
1: Setting Up Paint
a. Open up Paint. You can find it in the Accessories folder of the Start menu.
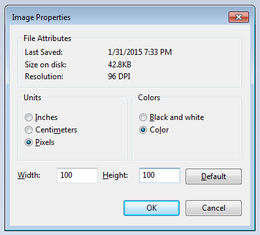
b. In order to begin, you’ll have to set up Paint so that you can work with individual pixels. Press Ctrl-E or go to the Paint Menu(upper left corner) and press Properties to open the Image Properties box.
c. Set ‘Units’ to Pixels, then set both the height and width of the canvas to 100. This should be enough space to get started.
d. Zoom in by going to the View tab and clicking the Zoom In button a few times. You can also hold down Ctrl and use the mouse wheel.
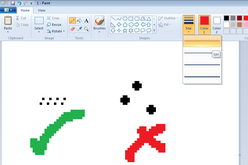
e. Select the pencil tool from the Tools list at the top of the screen. The pencil will be your tool of choice for drawing pixel art, since it can draw with pixel-perfect accuracy. If it produces large plus-shaped marks, you’ll need to set the Size of the pencil. Click the Size menu from the top of the screen and select “1px”.
2: Outlines
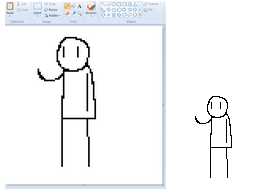
Let’s start by using the pencil tool to draw something simple. This step is the pixel equivalent of sketching, so don’t worry about making it look perfect just yet. If your drawing is more complex, resist the urge to draw in too many details. With pixel art, less is always more.
If you slip up, use ctrl-z to undo things. This works in most art programs as well as Paint. Trust me when I say you’ll be using this a lot.
Above is a quick doodle to demonstrate. We’ll call him Steve. The copy on the right is the full-scale image. At this size, some of the rougher areas of Steve start looking more pronounced: his left arm is definitely off, and there are blobs of pixels where his head meets his body.
3: Refinement
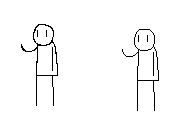
The next step is to refine your drawing's outline. Whenever possible, the outline should always be only one pixel thick. Zoom in close, making sure you take out every unnecessary pixel. Making the outline uniform will eliminate pixel blobs and make the image seem sharper.
Note that right-clicking with the mouse draws in your secondary color. If it’s set to white, erasing lone pixels becomes much easier.
The above image is a before-and-after of Steve's refinement process. Now that Steve’s outline is uniform, his arm looks much better, and the lines that make up his head and torso are much cleaner. I also re-drew portions of his head to be more rounded. If something doesn't look right, don’t be afraid to go back and re-draw it- It’ll be easier to fix a mistake the earlier you catch it.
4: Coloring
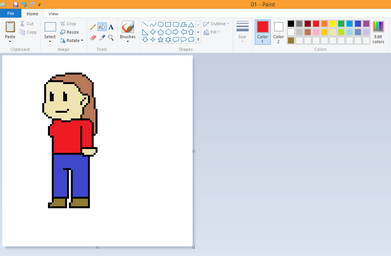

Coloring can be as simple or as complex as you want to make it. For all but the smallest pictures, the Fill tool is your best friend for starting out with coloring. Simply pick a color and click.
Note that the shape must be closed in order for the Fill tool to work right. If the screen suddenly fills up with one color, don’t panic. Simply use the trusty ctrl-z to undo and then find the break in the shape. Fill it in with the Pencil tool and you’ll be good to go.
The example image was colored in using only the default colors in the top right. These colors are decent enough to start out with, but if you want a specific color, you can use the ‘Edit Colors’ menu to the right of the color palette.
5: Editing Colors
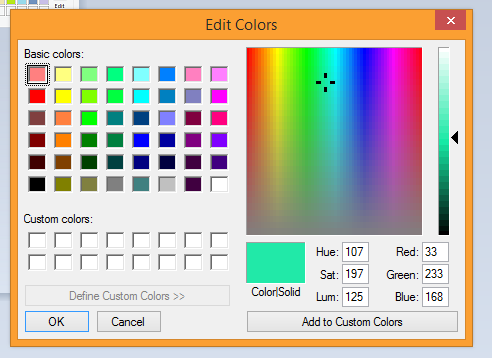
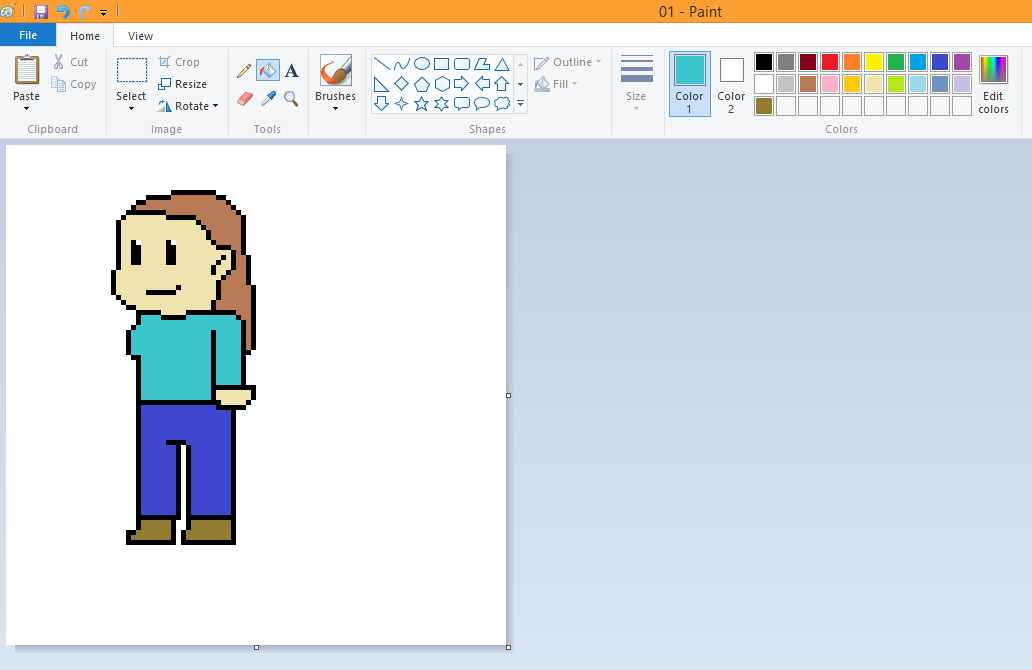
Using the Edit Colors menu, you can produce any color you want to use, or tweak your currently selected color. When you open the menu, it will automatically select your primary color. Use the color map to find a color you like, then press the OK button at the bottom left.
Once you press OK, the color you chose will become your new primary color, and you’ll be able to draw with it or color using the Fill tool. Simple as that!
6: Shading and Finishing
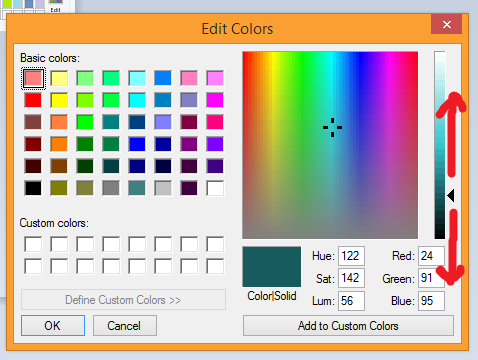
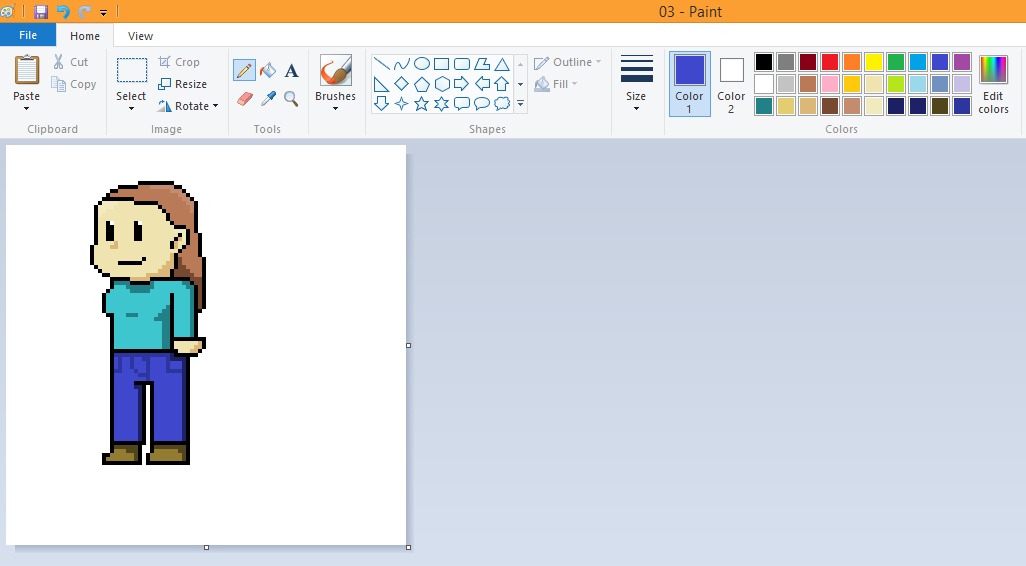
If you’re feeling daring and want to add some shading to your drawing, the Edit Colors tool is great for that too.
The vertical bar next to the color map controls the luminosity(lightness/darkness) of the selected color. If it isn't your selected color already, use the Color Picker tool(the icon underneath the Fill Bucket) to select the color of the area you want to shade , then use the Edit Colors menu to make the color darker by moving the slider downwards.
Good shading requires practice, so don’t be discouraged if it doesn't seem right at first- More traditional art tutorials would be a good place to look if you want to improve your coloring and shading skills. After you've done as much shading as you want, your picture is done!
7: Tips & Tricks
1. Don’t be afraid to experiment and mess around! The steps presented in this tutorial are good to get beginners started, but it’s important to not feel limited. Try to discover new techniques that work for you.
2. There are lots of tools in Paint that will help you save time. Be sure to make use of the Fill Tool and the Color Picker! Keyboard commands such as Ctrl-E to change the canvas size and ctrl-S to save your image are also invaluable.
Once you've got the basics down, the only thing you need is some practice and inspiration.