Pinoccio Hanging Enclosure (modeled in Fusion 360)
by alexglow in Circuits > Microcontrollers
1772 Views, 9 Favorites, 0 Comments
Pinoccio Hanging Enclosure (modeled in Fusion 360)
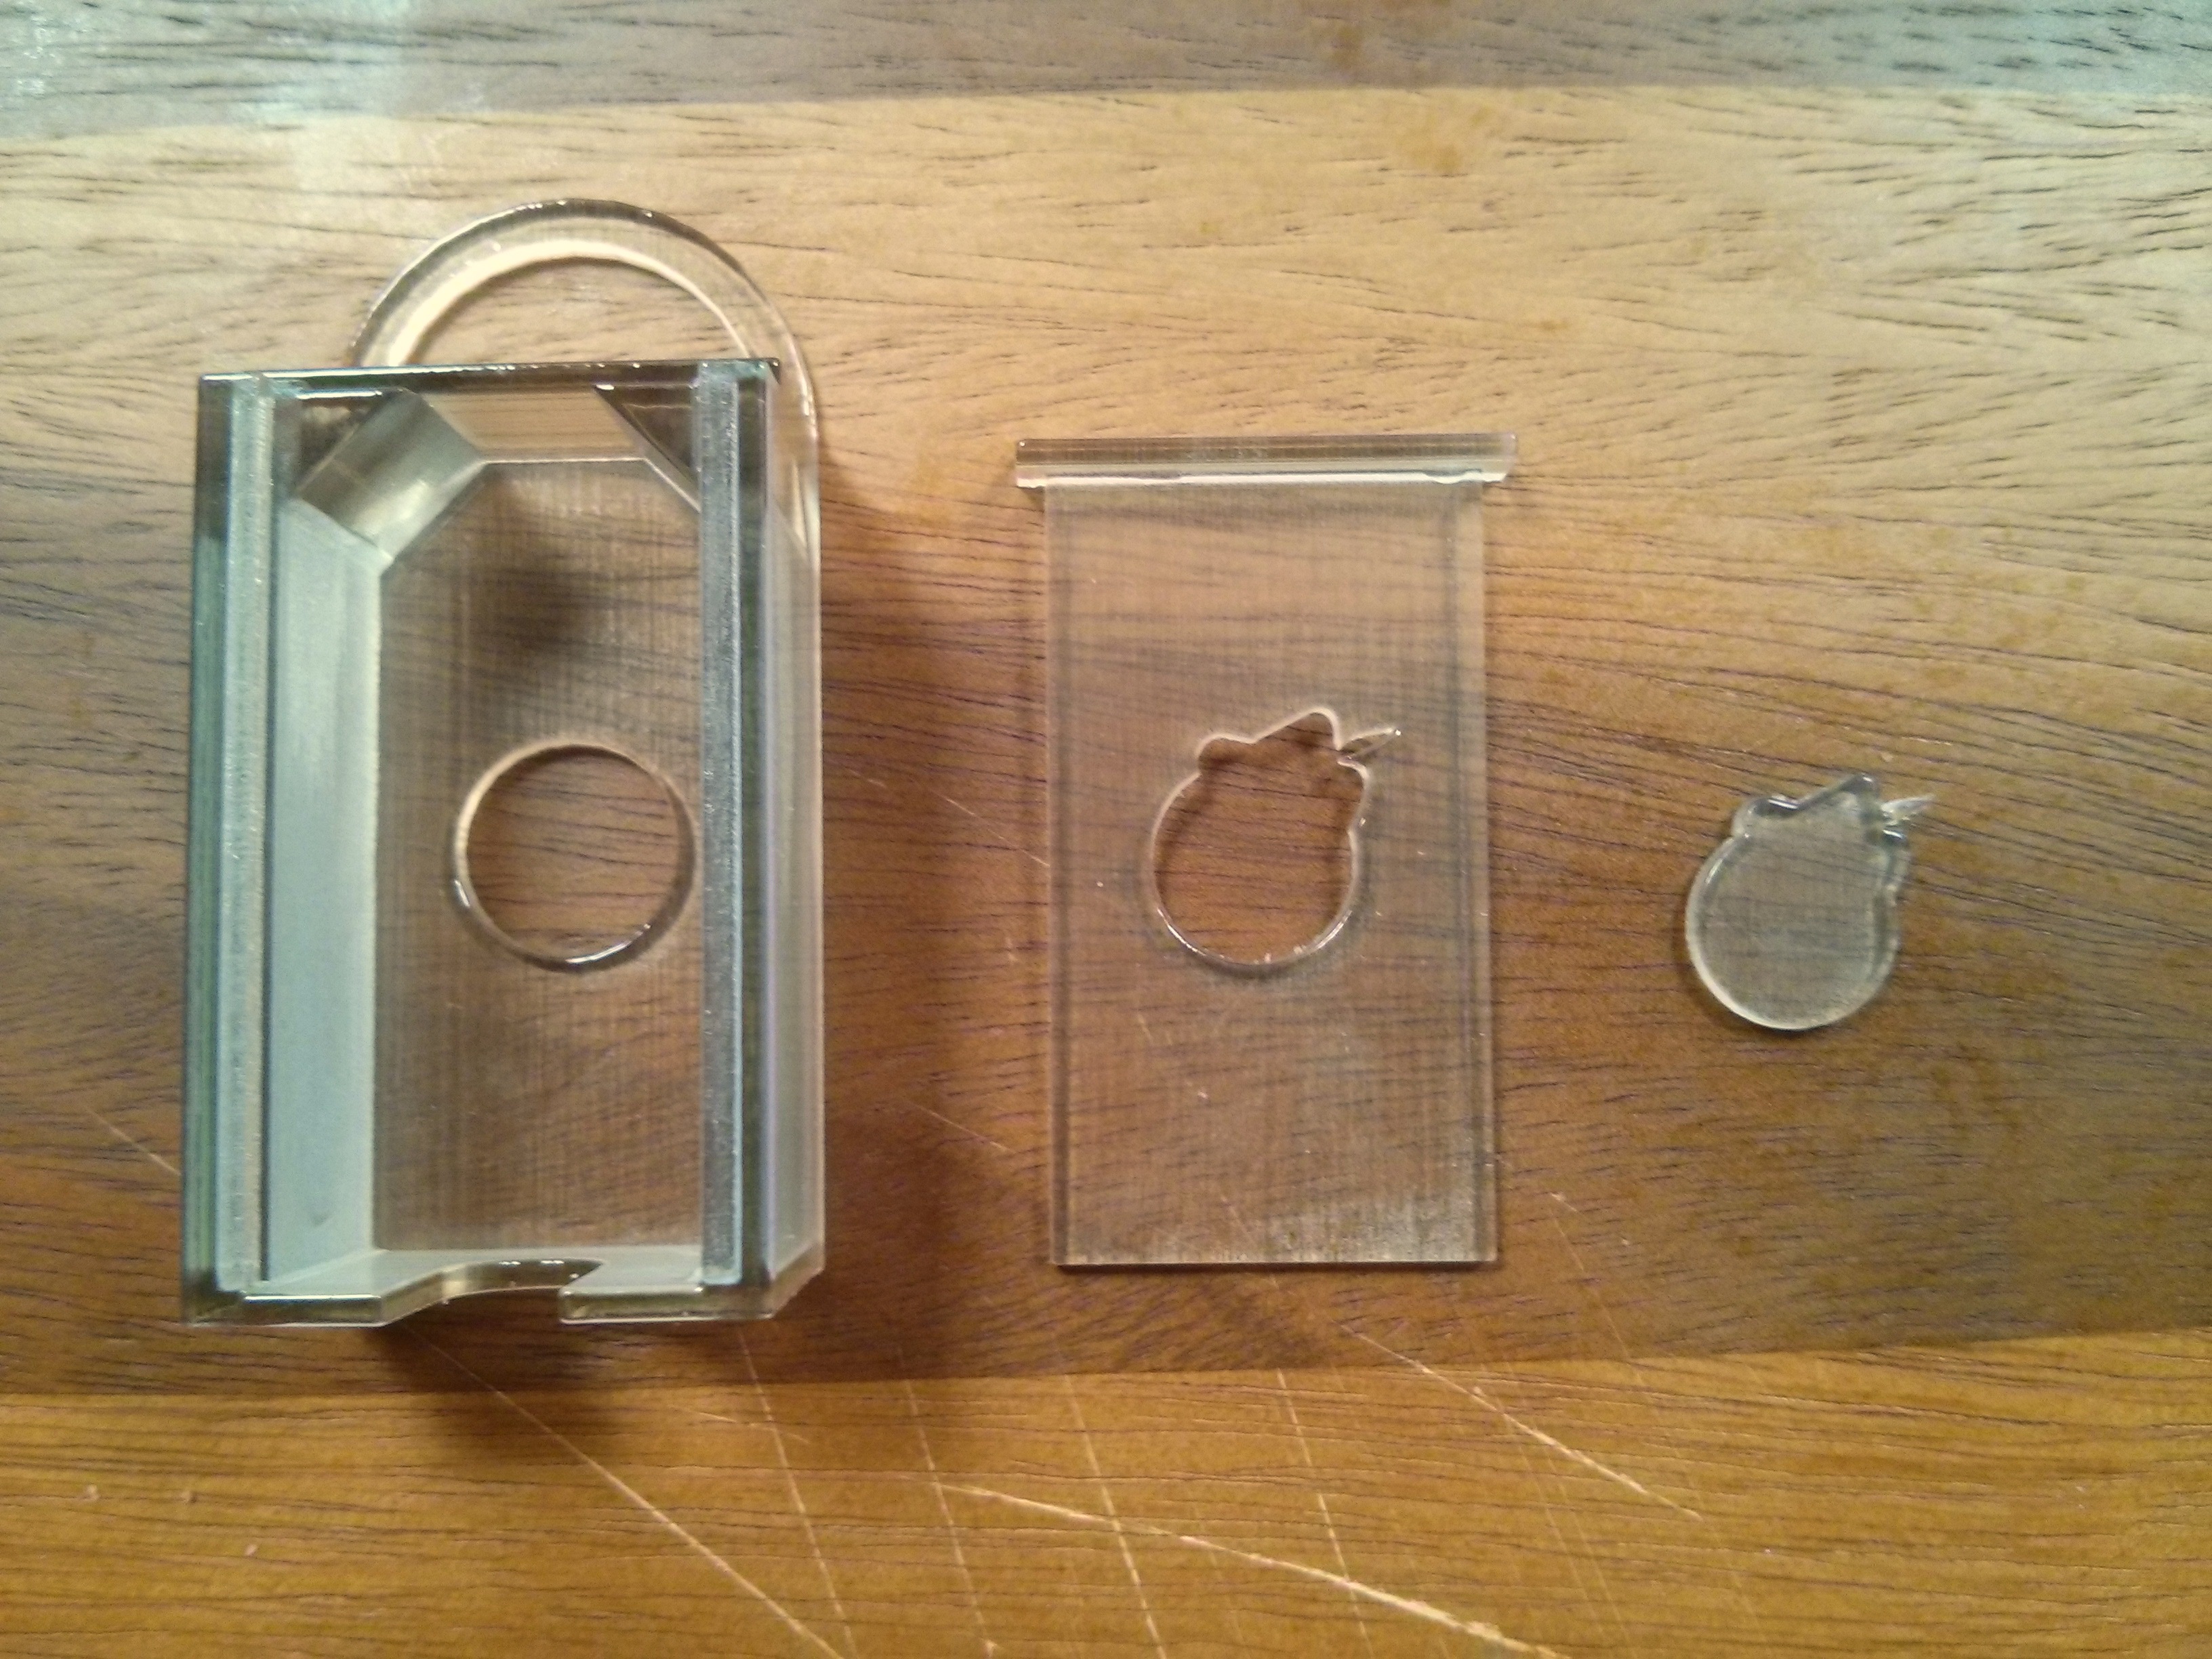
Heya! This is an enclosure for the Pinoccio - an open-source microcontroller compatible with Arduino, which comes with its own rechargeable battery. Each Field Scout (the basic board) can talk to every other one via radio networking, and one Lead Scout (a Field Scout with a WiFi backpack) hooks up the entire mesh network to the internet, so you can read/write to everyone remotely.
This enclosure features a sliding top, to keep your Field Scout safe and secure on its travels. And you can hang it anywhere indoors (weatherproof version coming soon!).
Here's a quick video demo, and you can download the printable .stl below.
This enclosure features a sliding top, to keep your Field Scout safe and secure on its travels. And you can hang it anywhere indoors (weatherproof version coming soon!).
Here's a quick video demo, and you can download the printable .stl below.
Downloads
Rough It Out
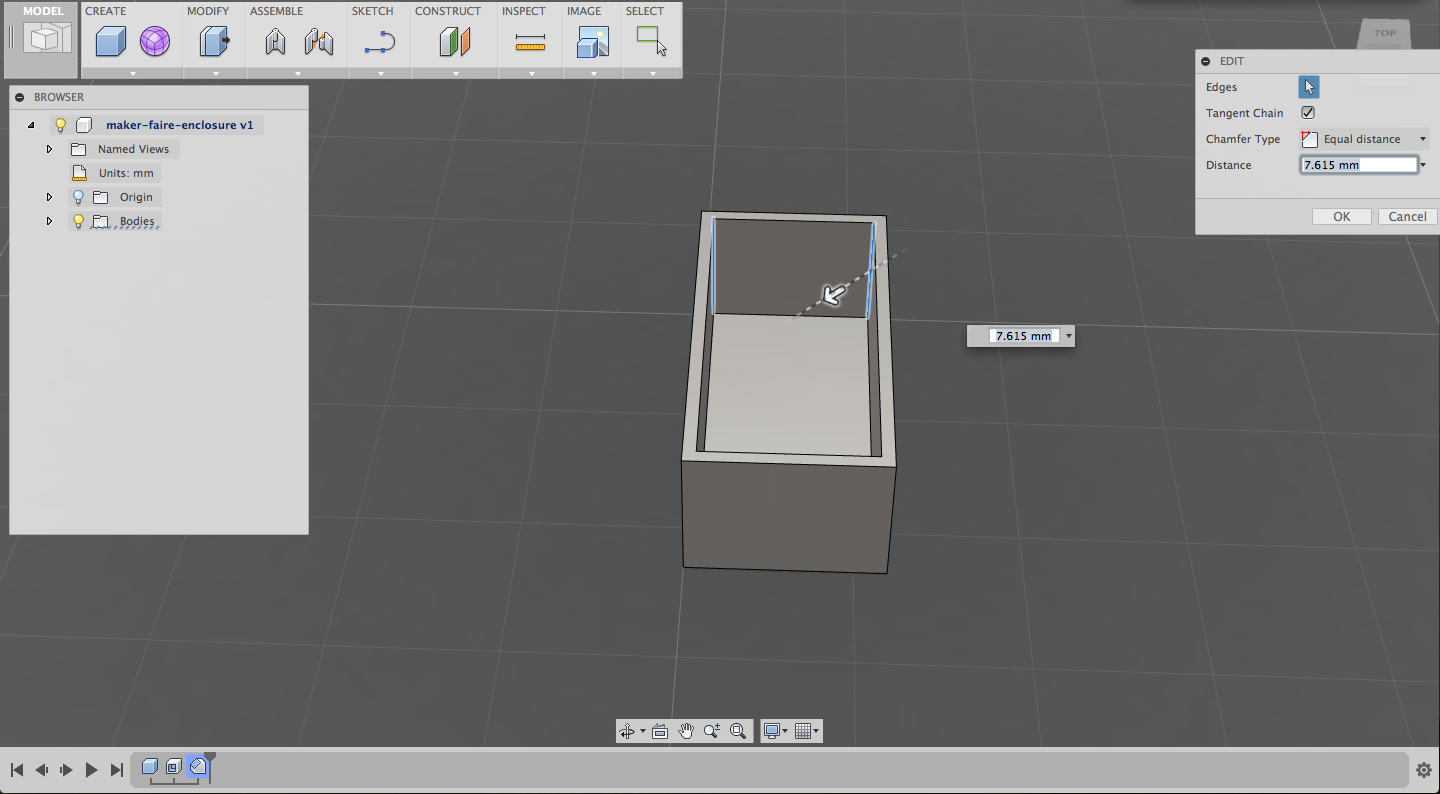
I started with the dimensions of the Field Scout to be housed. These are available on our Tech Specs page, and you can also download a 3D model of the Scout (sans battery) here.
I like working in millimeters in Fusion, so I took the rough metric specs ("52.578 x 25.146 x 11.684 mm, including the tiny bit of battery wire that hangs off the end"). There were a few considerations from here:
- Since those measurements may vary based on the thickness of Velcro used, I measured my own Scout and found that it came up to about 14mm tall.
- Obviously, you want a bit of wiggle room in the enclosure, so I've padded it out a bit and rounded up to even numbers: 54mm long x 26mm wide x 18mm high, for the inside cavity. (In the end, I had to tuck in the battery wire a little further to fit widthwise, so you might want to kick that up by 1mm or so.)
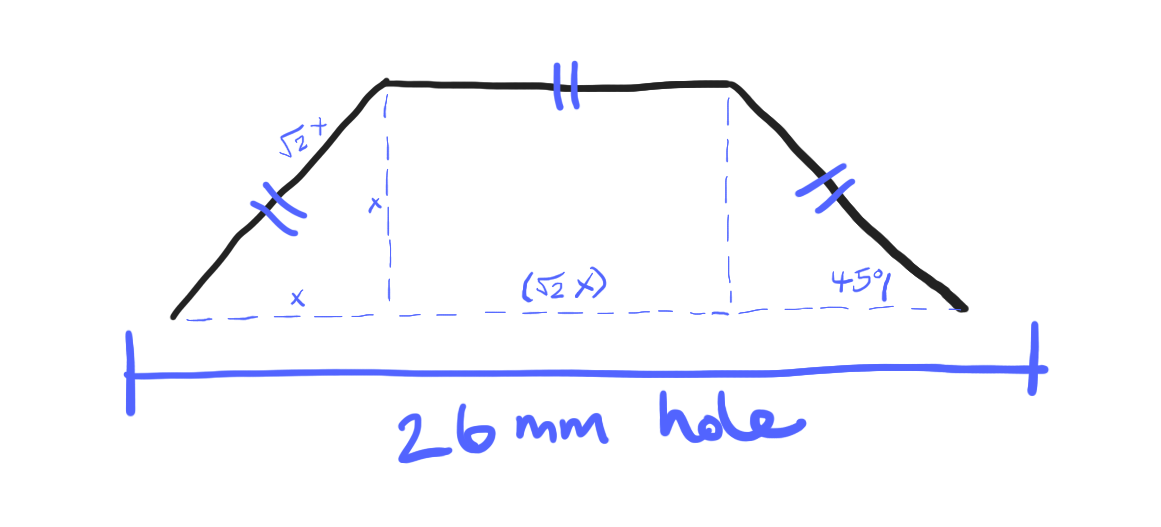
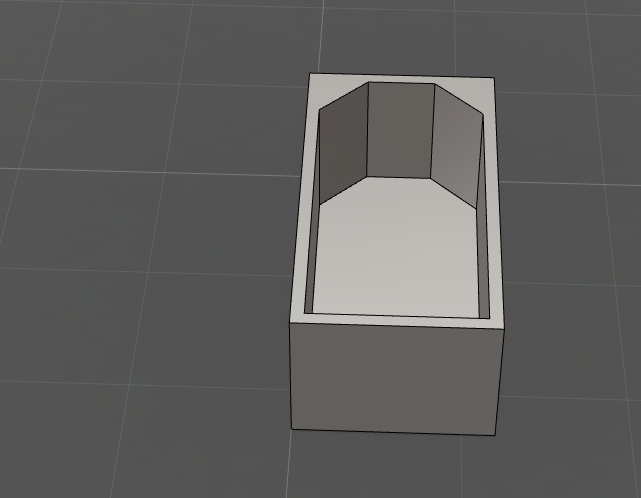
Finally, you see those cut-off corners on the Field Scout, on either side of the radio antenna? If you put four Scouts with their "heads" together, they make a perfect square, meaning that the corners are cut at a 45º angle. Also, the corner-edges and top-edge are of equal length (see diagram). To replicate this in my shell, I scraped together some high-school geometry:
- A right triangle (45º - 45º - 90º) has two equal legs of length x and a hypotenuse equal to √(2) * x .
- The inner width of the hole is 26mm, and it is made up of two right triangles and a rectangle. The rectangle's length is the same as the hypotenuse of each triangle.
- So, 26mm = x + x + √(2)x , which equals (2 + √2) * x , which is roughly equal to 3.414x . Divide 26 by 3.414 and you get the short side length, x.
Make It Work
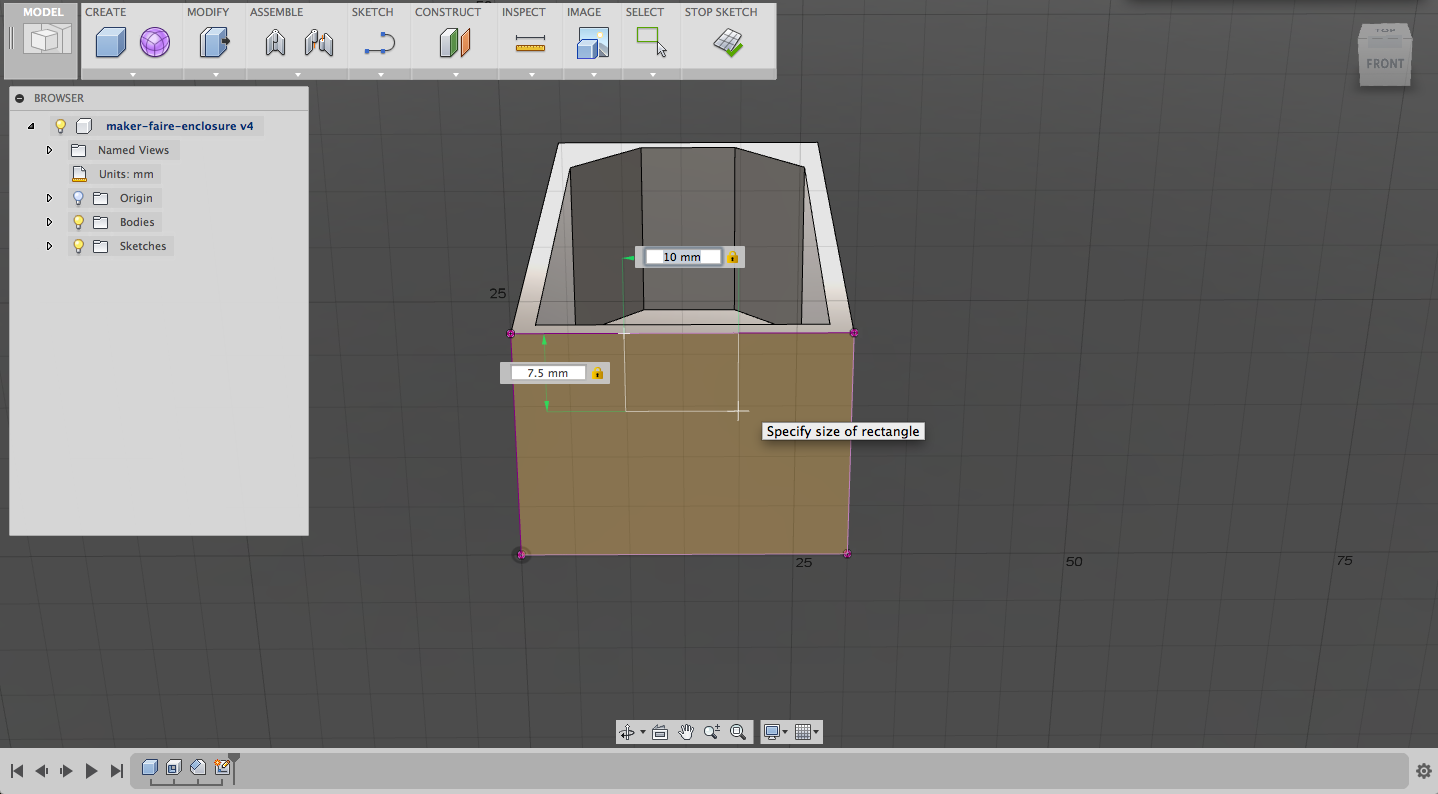
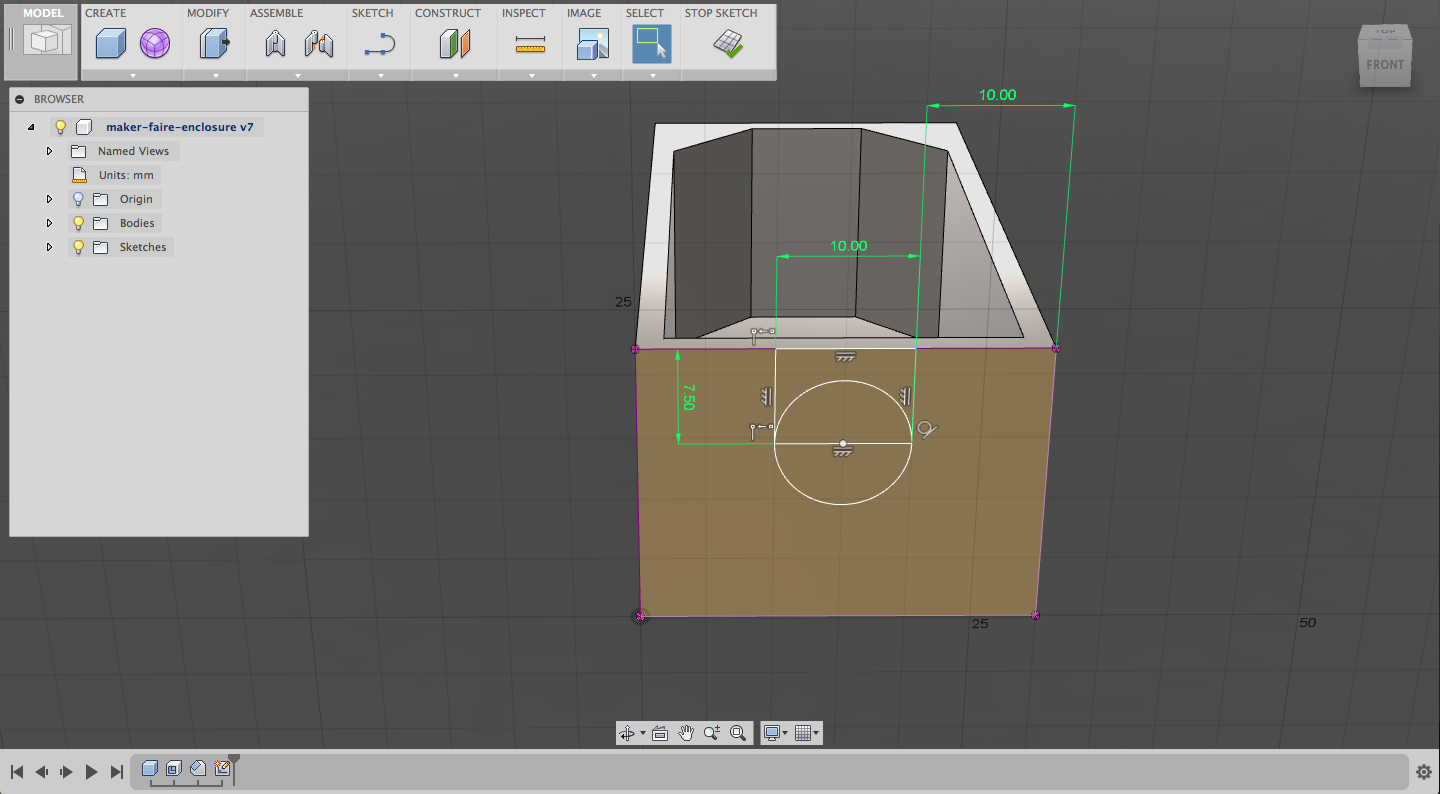
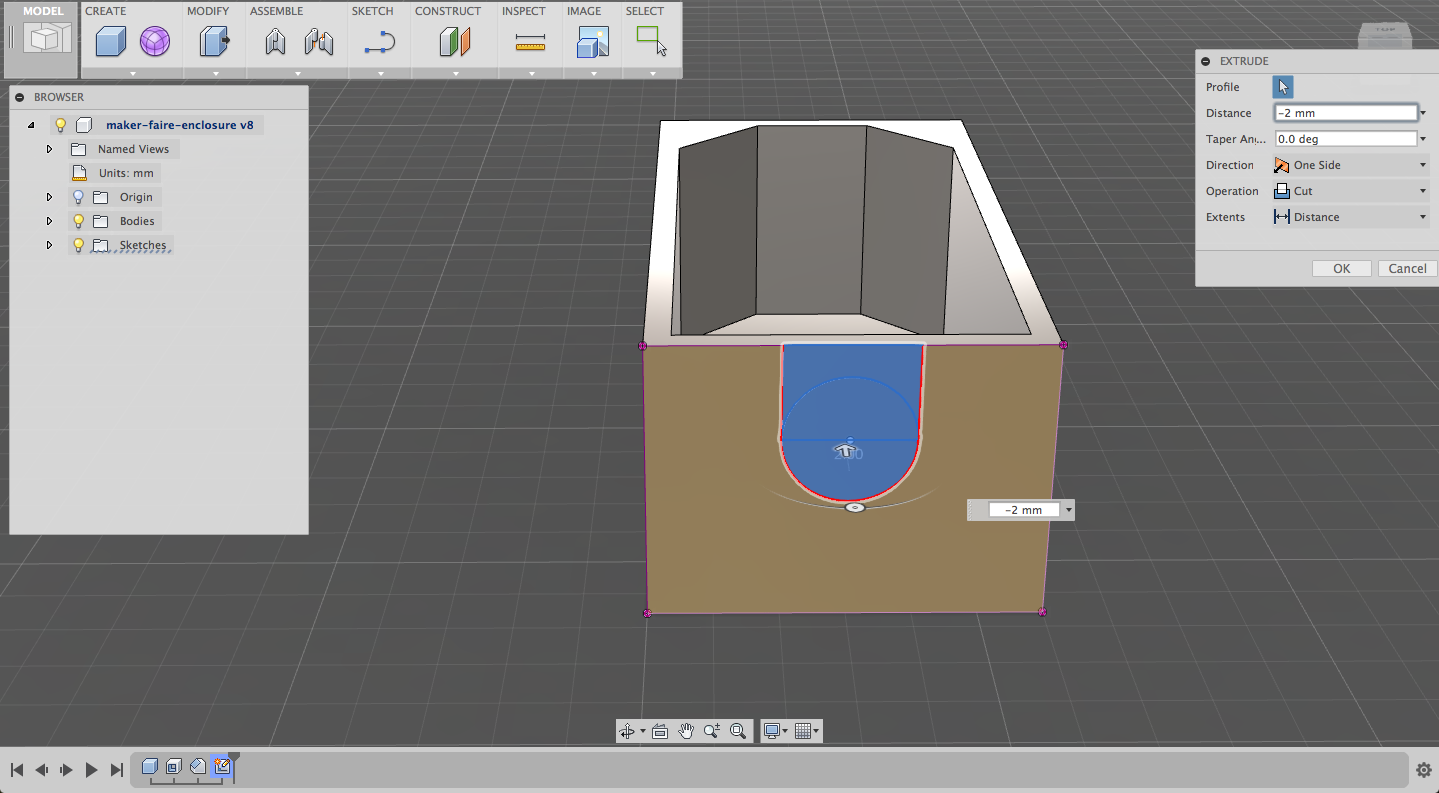
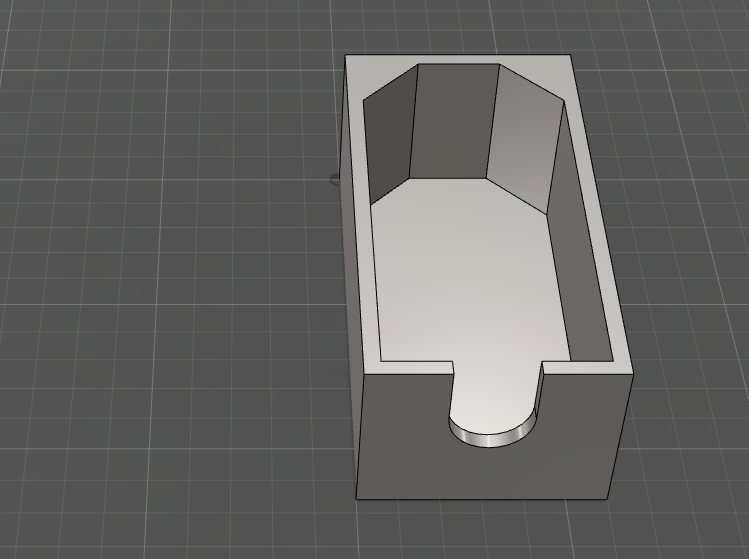
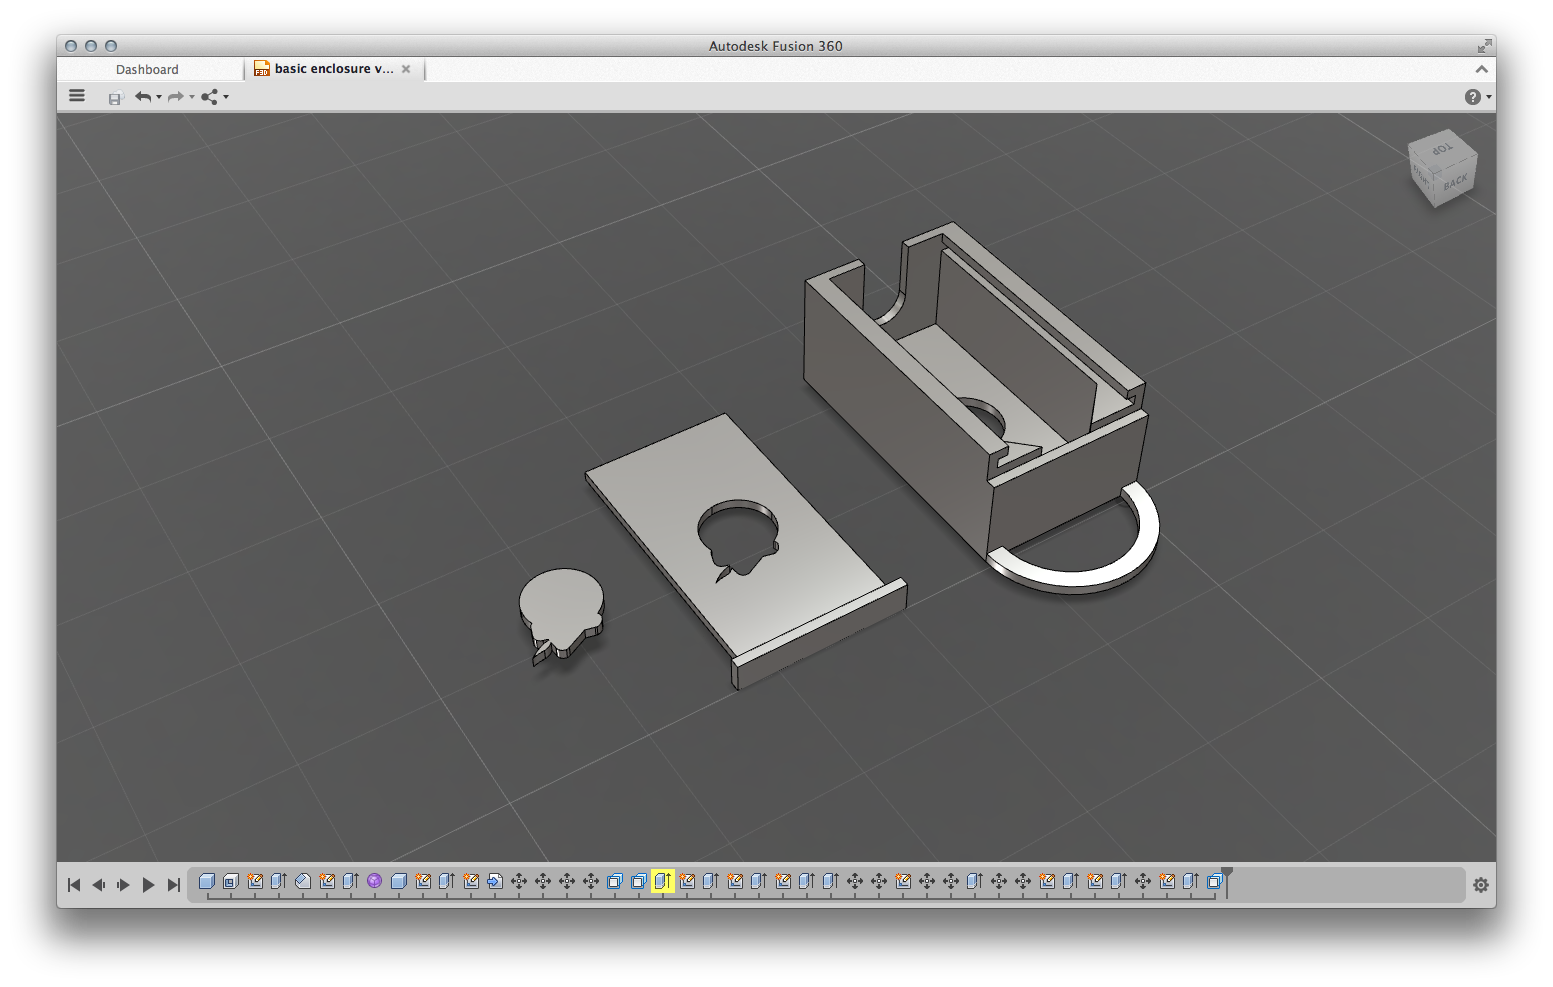
I'd been roughing out some hinged monstrosity, but in the end, a classic sliding cover seemed the most functional. First, though, I added a hole for the USB-Micro charging cable.
Creating the Cable Slot
Opposite the chamfered corners, I used Sketch > Create Sketch to place a conceptual sketching surface on the outside wall. Based on the size of my cable, I created a 10mm-wide rectangle (Sketch > Rectangle > 2-Point Rectangle) and dropped it down 7.5mm from the top edge, then added a 2-point circle along its bottom edge with the same 10mm diameter. This drew a round-bottomed slot, so you can put the Scout in the enclosure while it's plugged in.
To ensure that the slot is centered, using Sketch > Dimension, select a side edge of the rectangle and the parallel edge of the enclosure, then enter 10mm for the length. This will force the slot to stay centered on the 30mm box.
When you're done, click Stop Sketch.
Now, you can select the rectangle and circle (using Shift+click to select multiple elements), and use Press Pull on them with a value of -2mm. This retracts them through the wall, creating a hole with the right shape.
The Lid
I used the same techniques to add a 4mm-wide wall onto the top of the box, then cut a 2mm-deep (and tall) slot in the bottom of the inside edge. 2mm should be a sturdy thickness, but not bulky.
The lid is 1.9mm high, but the full 26mm wide, such that it slots in under this top edge. With these dimensions, the sides grip, but the top and bottom do not bind, making the lid fit securely without needing to be forced. (Your mileage may vary, though, based on your printer.)
I also put a lip on the top of the lid, which makes it feel sturdier and gives you a hold to get it out. Plus, this makes it match up with the lip running around the rest of the enclosure, which looks nice. :)
I also put a hole in the bottom of the enclosure, in case you'd need to stick a finger in there to pop out the Scout, but that hasn't been necessary with these dimensions.
Get Fancy
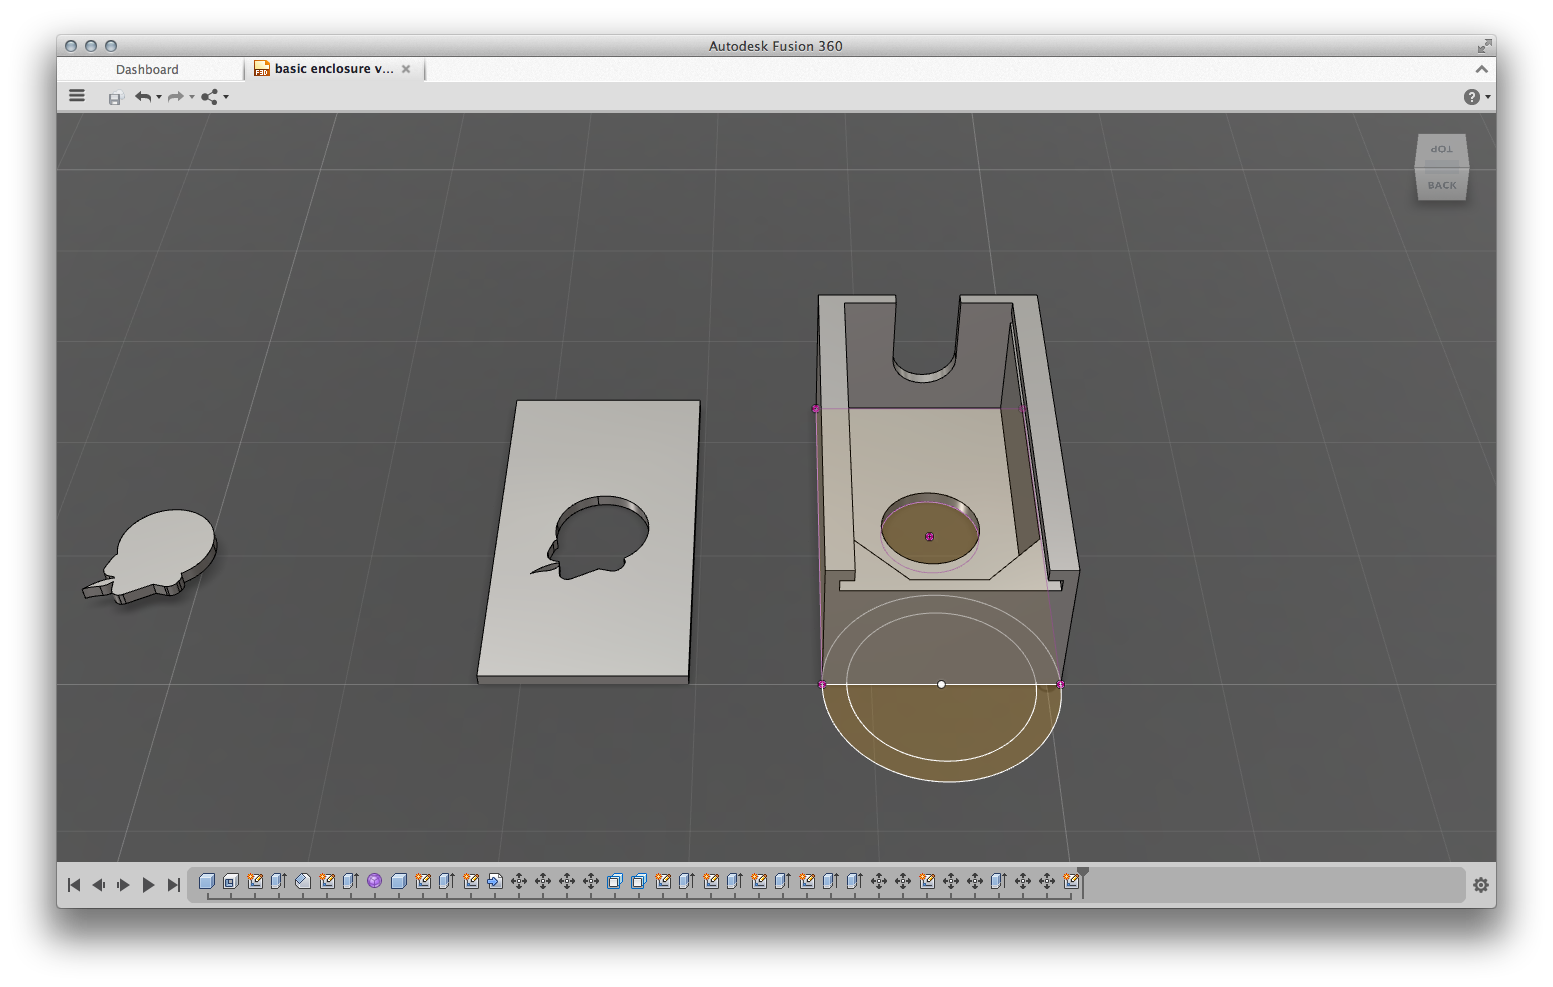
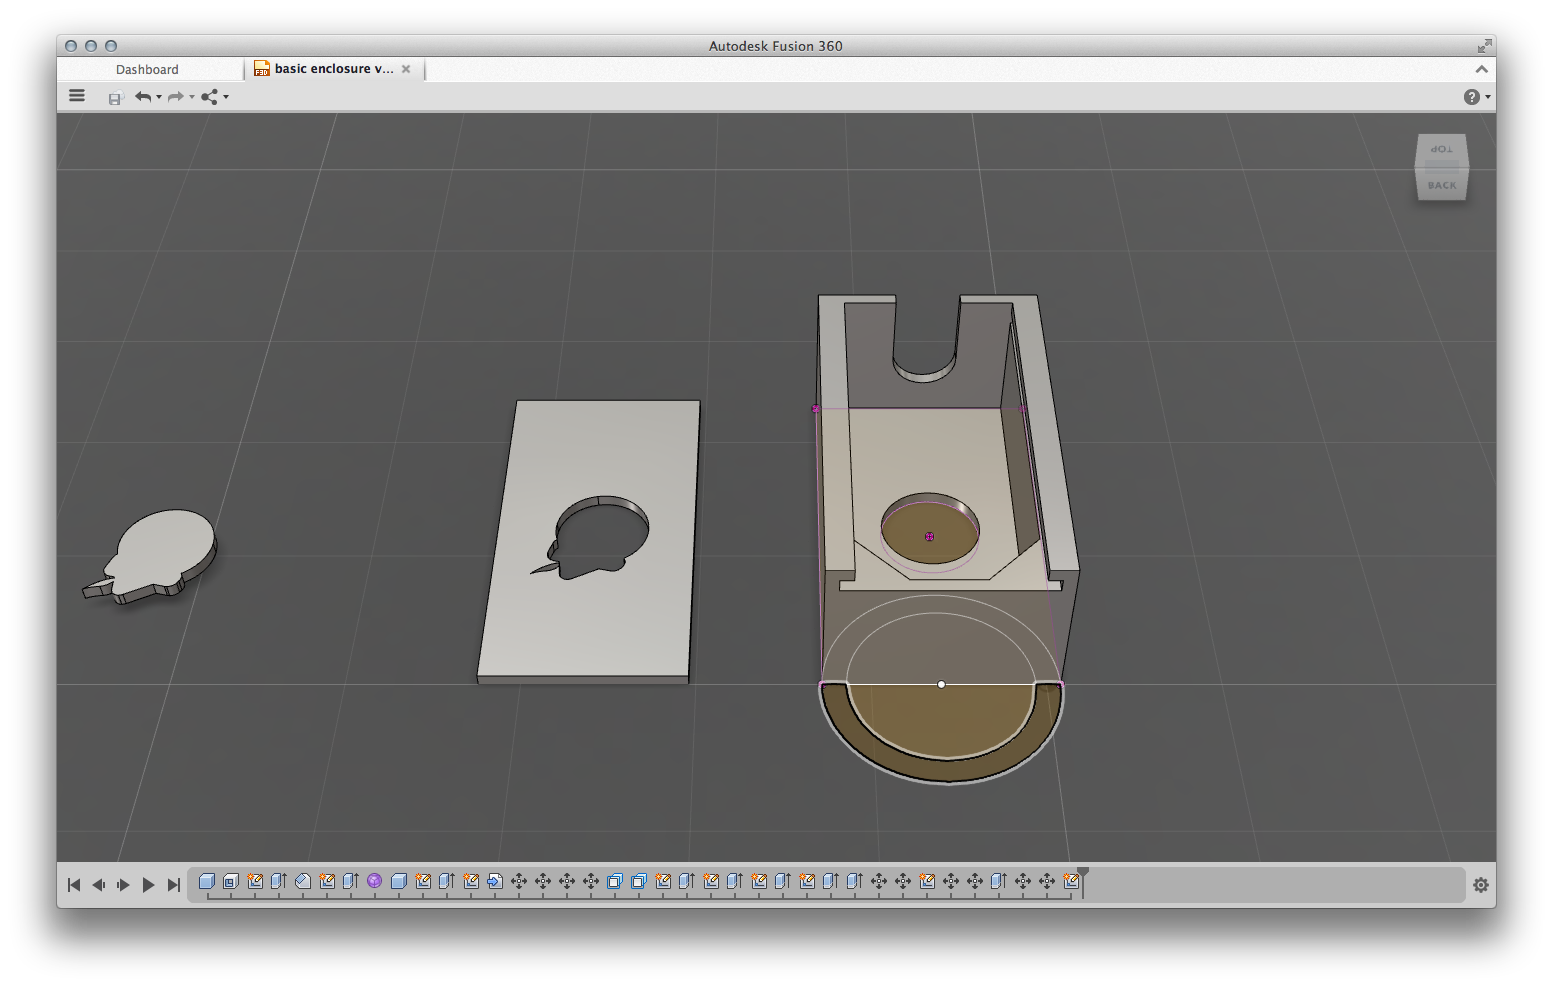
I wanted two more features: a hole to see the LED through, and a hanger to assist with putting the Scout anywhere it's needed.
Hanger Loop
The hanger was relatively simple: the Sketch tool lets you extend a sketch beyond the surface it's attached to, so I made a big circle the same diameter as the box, divided it in half with a line, and created a smaller circle 4mm less in diameter (so that the distance between the circles is, yes, 2mm). From there, I could use Press Pull to extrude it upward. It was automatically joined with the body of the enclosure. Sweet!
Logo Cutout
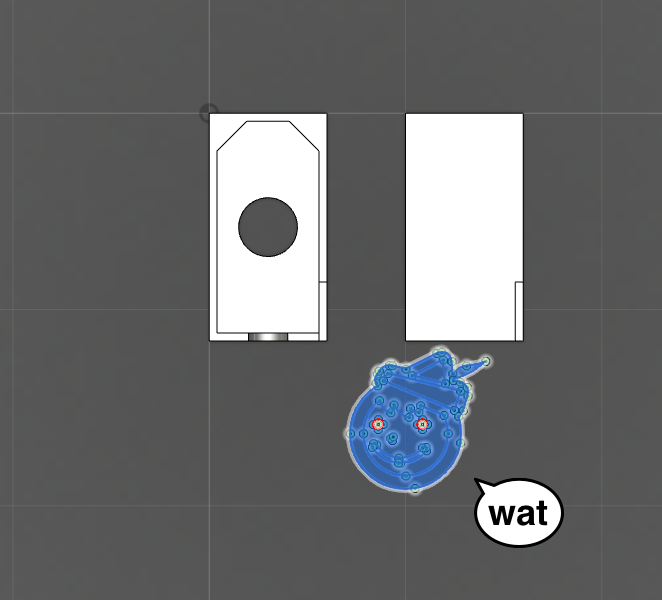
The logo was a little tougher. To do something like this, you need an .svg vector file of your image, which can be exported from Adobe Illustrator. Then, use Sketch > Import SVG to bring the image into your design. The SVG will be MASSIVE! So, with it selected, use Create > Create Base Feature to make it editable, and then Modify > Scale to bring it down to something manageable. Beware: your image may become surprisingly creepy when you select it (see diagram).
Our logo has a bunch of adorable facial features and whatnot, which I deleted to make an outline.
It's difficult to move this sketch around in Fusion, but you can move your elements to the sketch instead. Then, use Press Pull to extrude it whichever way you want, creating a cutout or an embossed image.
I made an extra little charm thingy, just for fun. I'll probably add a loop and make a few of these as cell phone charms.
Notes
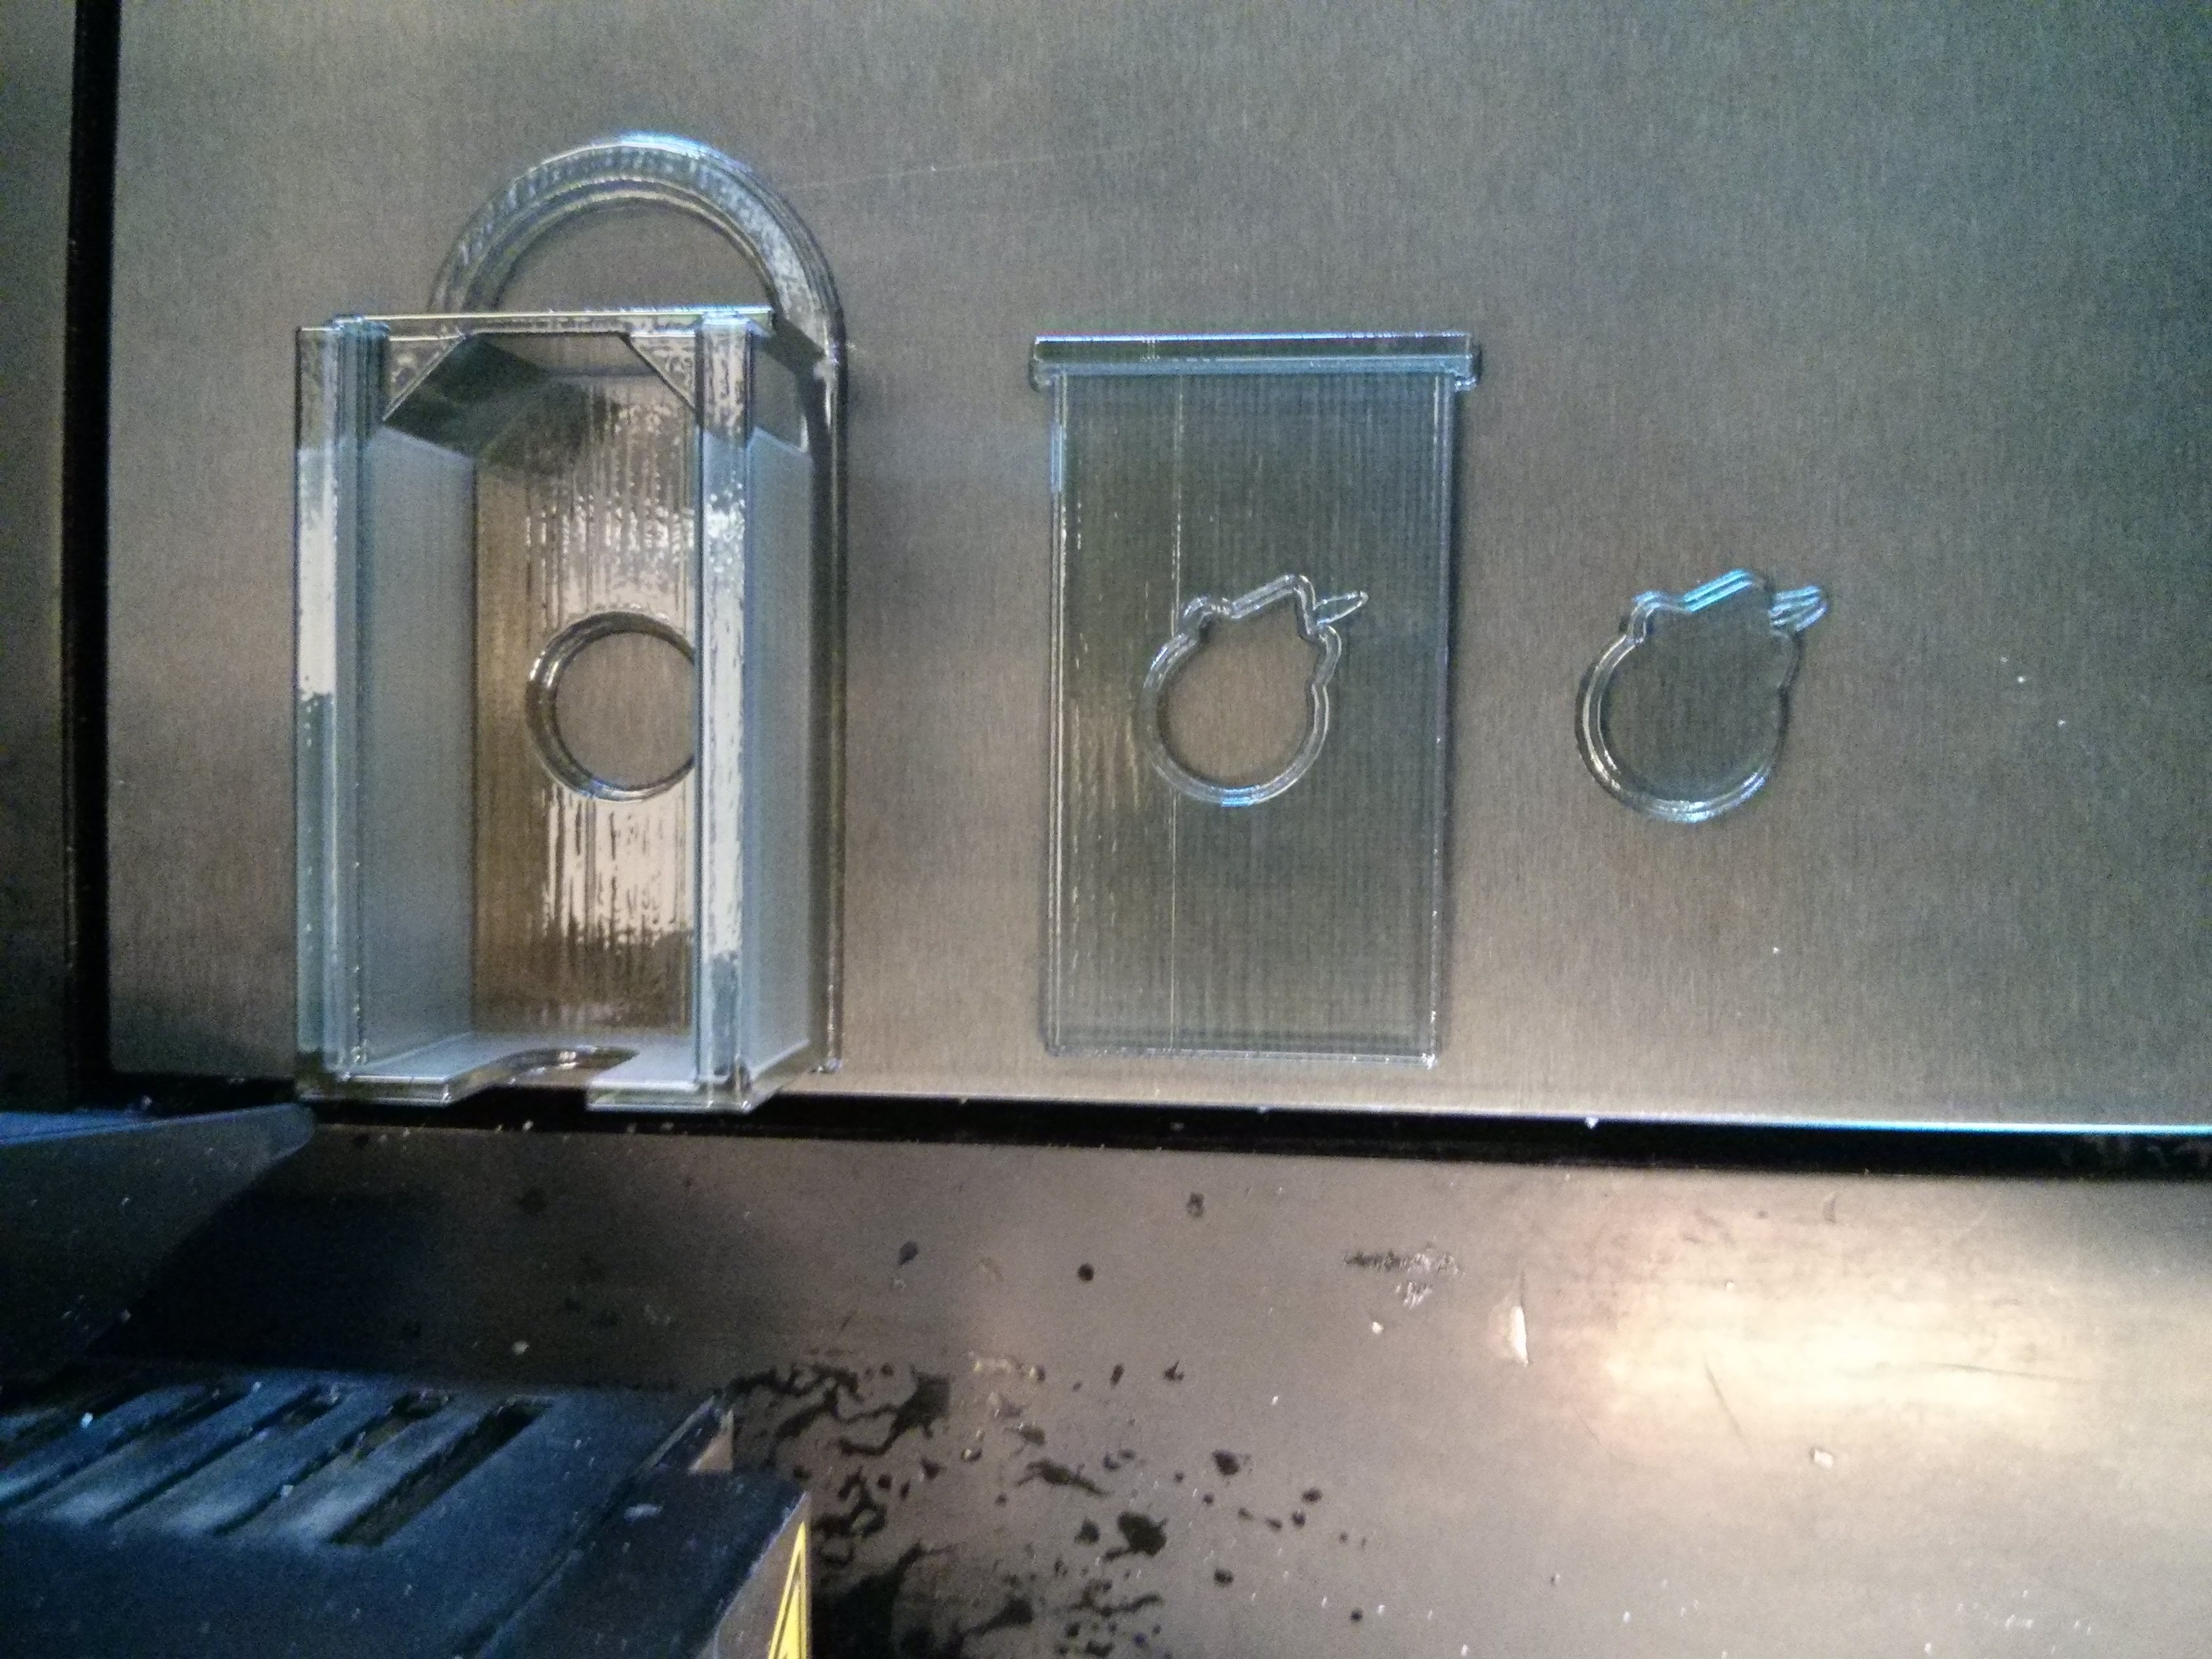
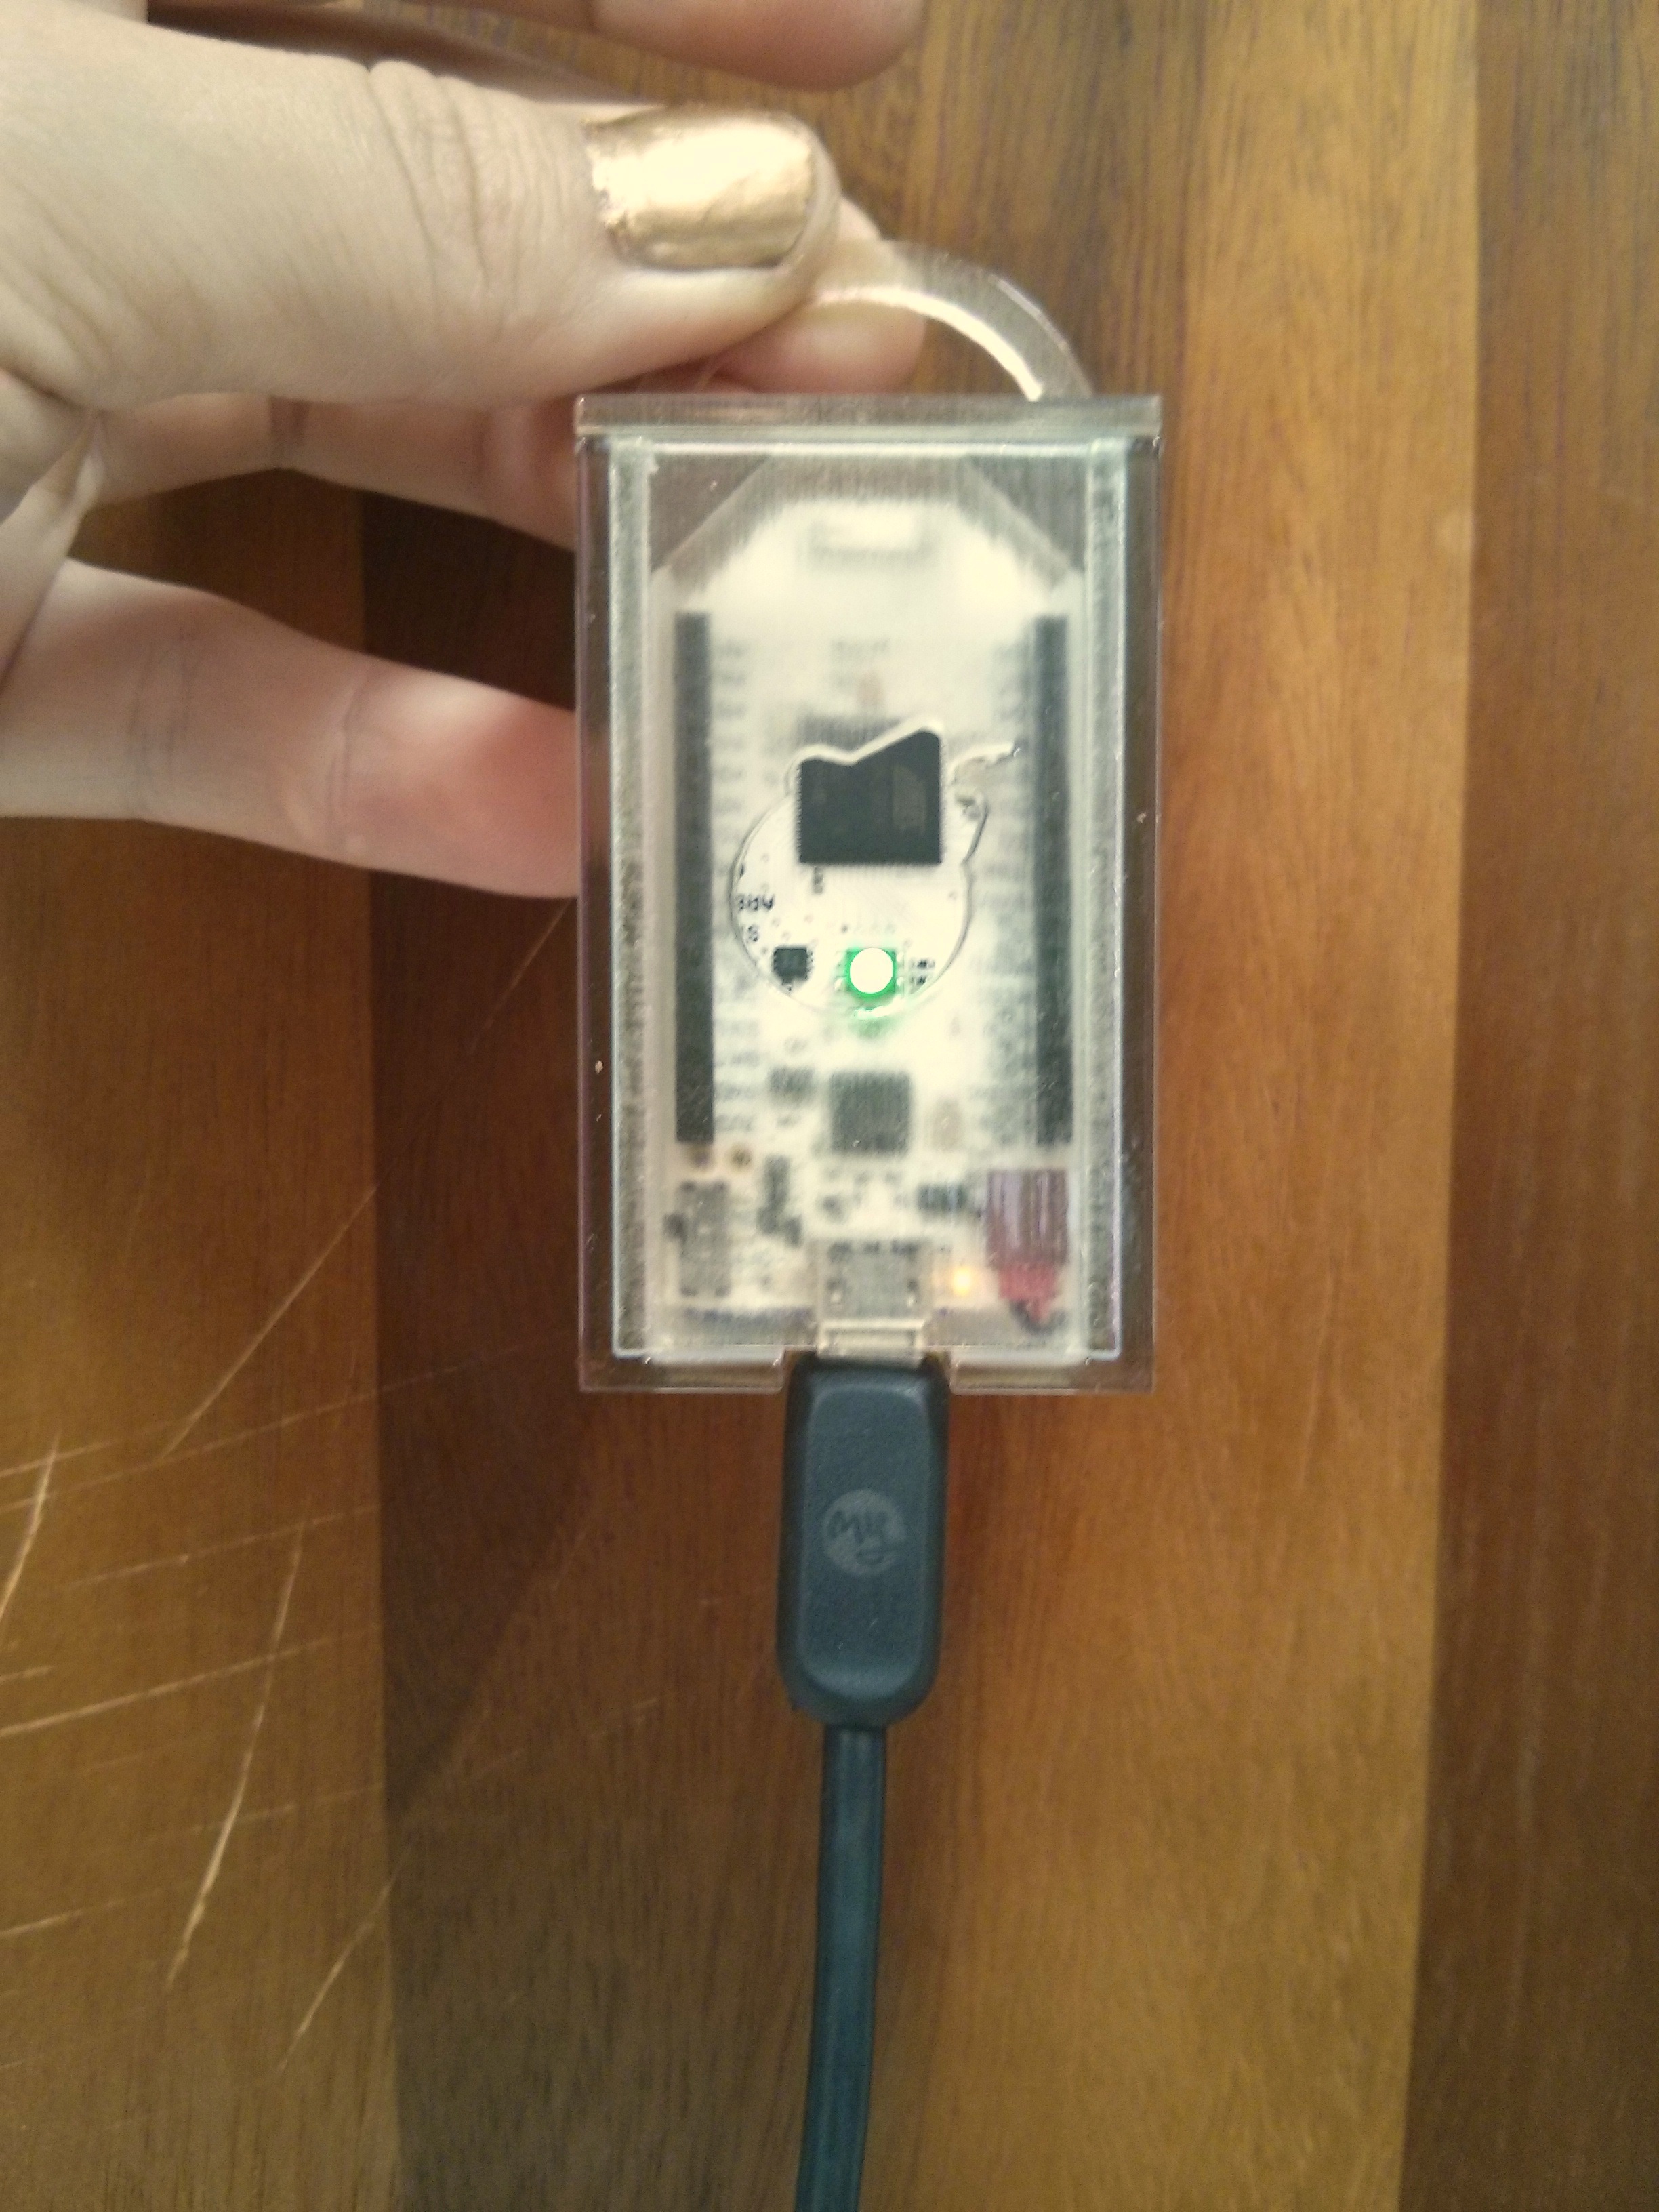
Success! This printed well on the first try, which was very exciting. At the Instructables Fabulousplex in SF, we use Objet Connex 500 printers. This was made with Vero Clear, a rigid plastic. It came out with a nice frosted effect from the printing, which could presumably be polished away for a crystal-clear gloss finish. I've uploaded the current model to Thingiverse.
Here are a few things I'll keep in mind for next time:
Here are a few things I'll keep in mind for next time:
- Make the hole just a tad wider, to prevent having to tuck in the battery cable.
- The logo cutout is even with the enclosure's bottom finger-hole, but not centered on the LED. Both should be moved down in the next version.
- I'm not sure how this will print on a printer that doesn't add support material. My awesome colleague Ryan is getting one made, and we'll report back with results!
- I'd like to add a hole for the switch - perhaps using the extra switch pins and something mounted to the enclosure itself. Could be useful on the upcoming weatherproof version!
- You should, of course, be able to replicate this in any CAD software of your choosing. If there's a particular one you'd like to see, we should be able to whip up a tutorial without too much trouble. Just leave a comment and let me know!
- Fusion 360, at the time of writing, tends to crash somewhat frequently, but I've found that you can ameliorate this by working offline. I've only done that when the WiFi went out at home, but perhaps there's a setting you can toggle as well.