Pill Box With Vetric Cut2D
In this Instructable I will show you how I make a Pill box out of an off-cut I had left over from another project, you can just about use any wood to make this box.
I was going say Easy Pill Box within the title but decided against it, as its only easy if you have a CNC Machine and Vetric Cut2D etc, the process beyond that is fairly straight forward though.
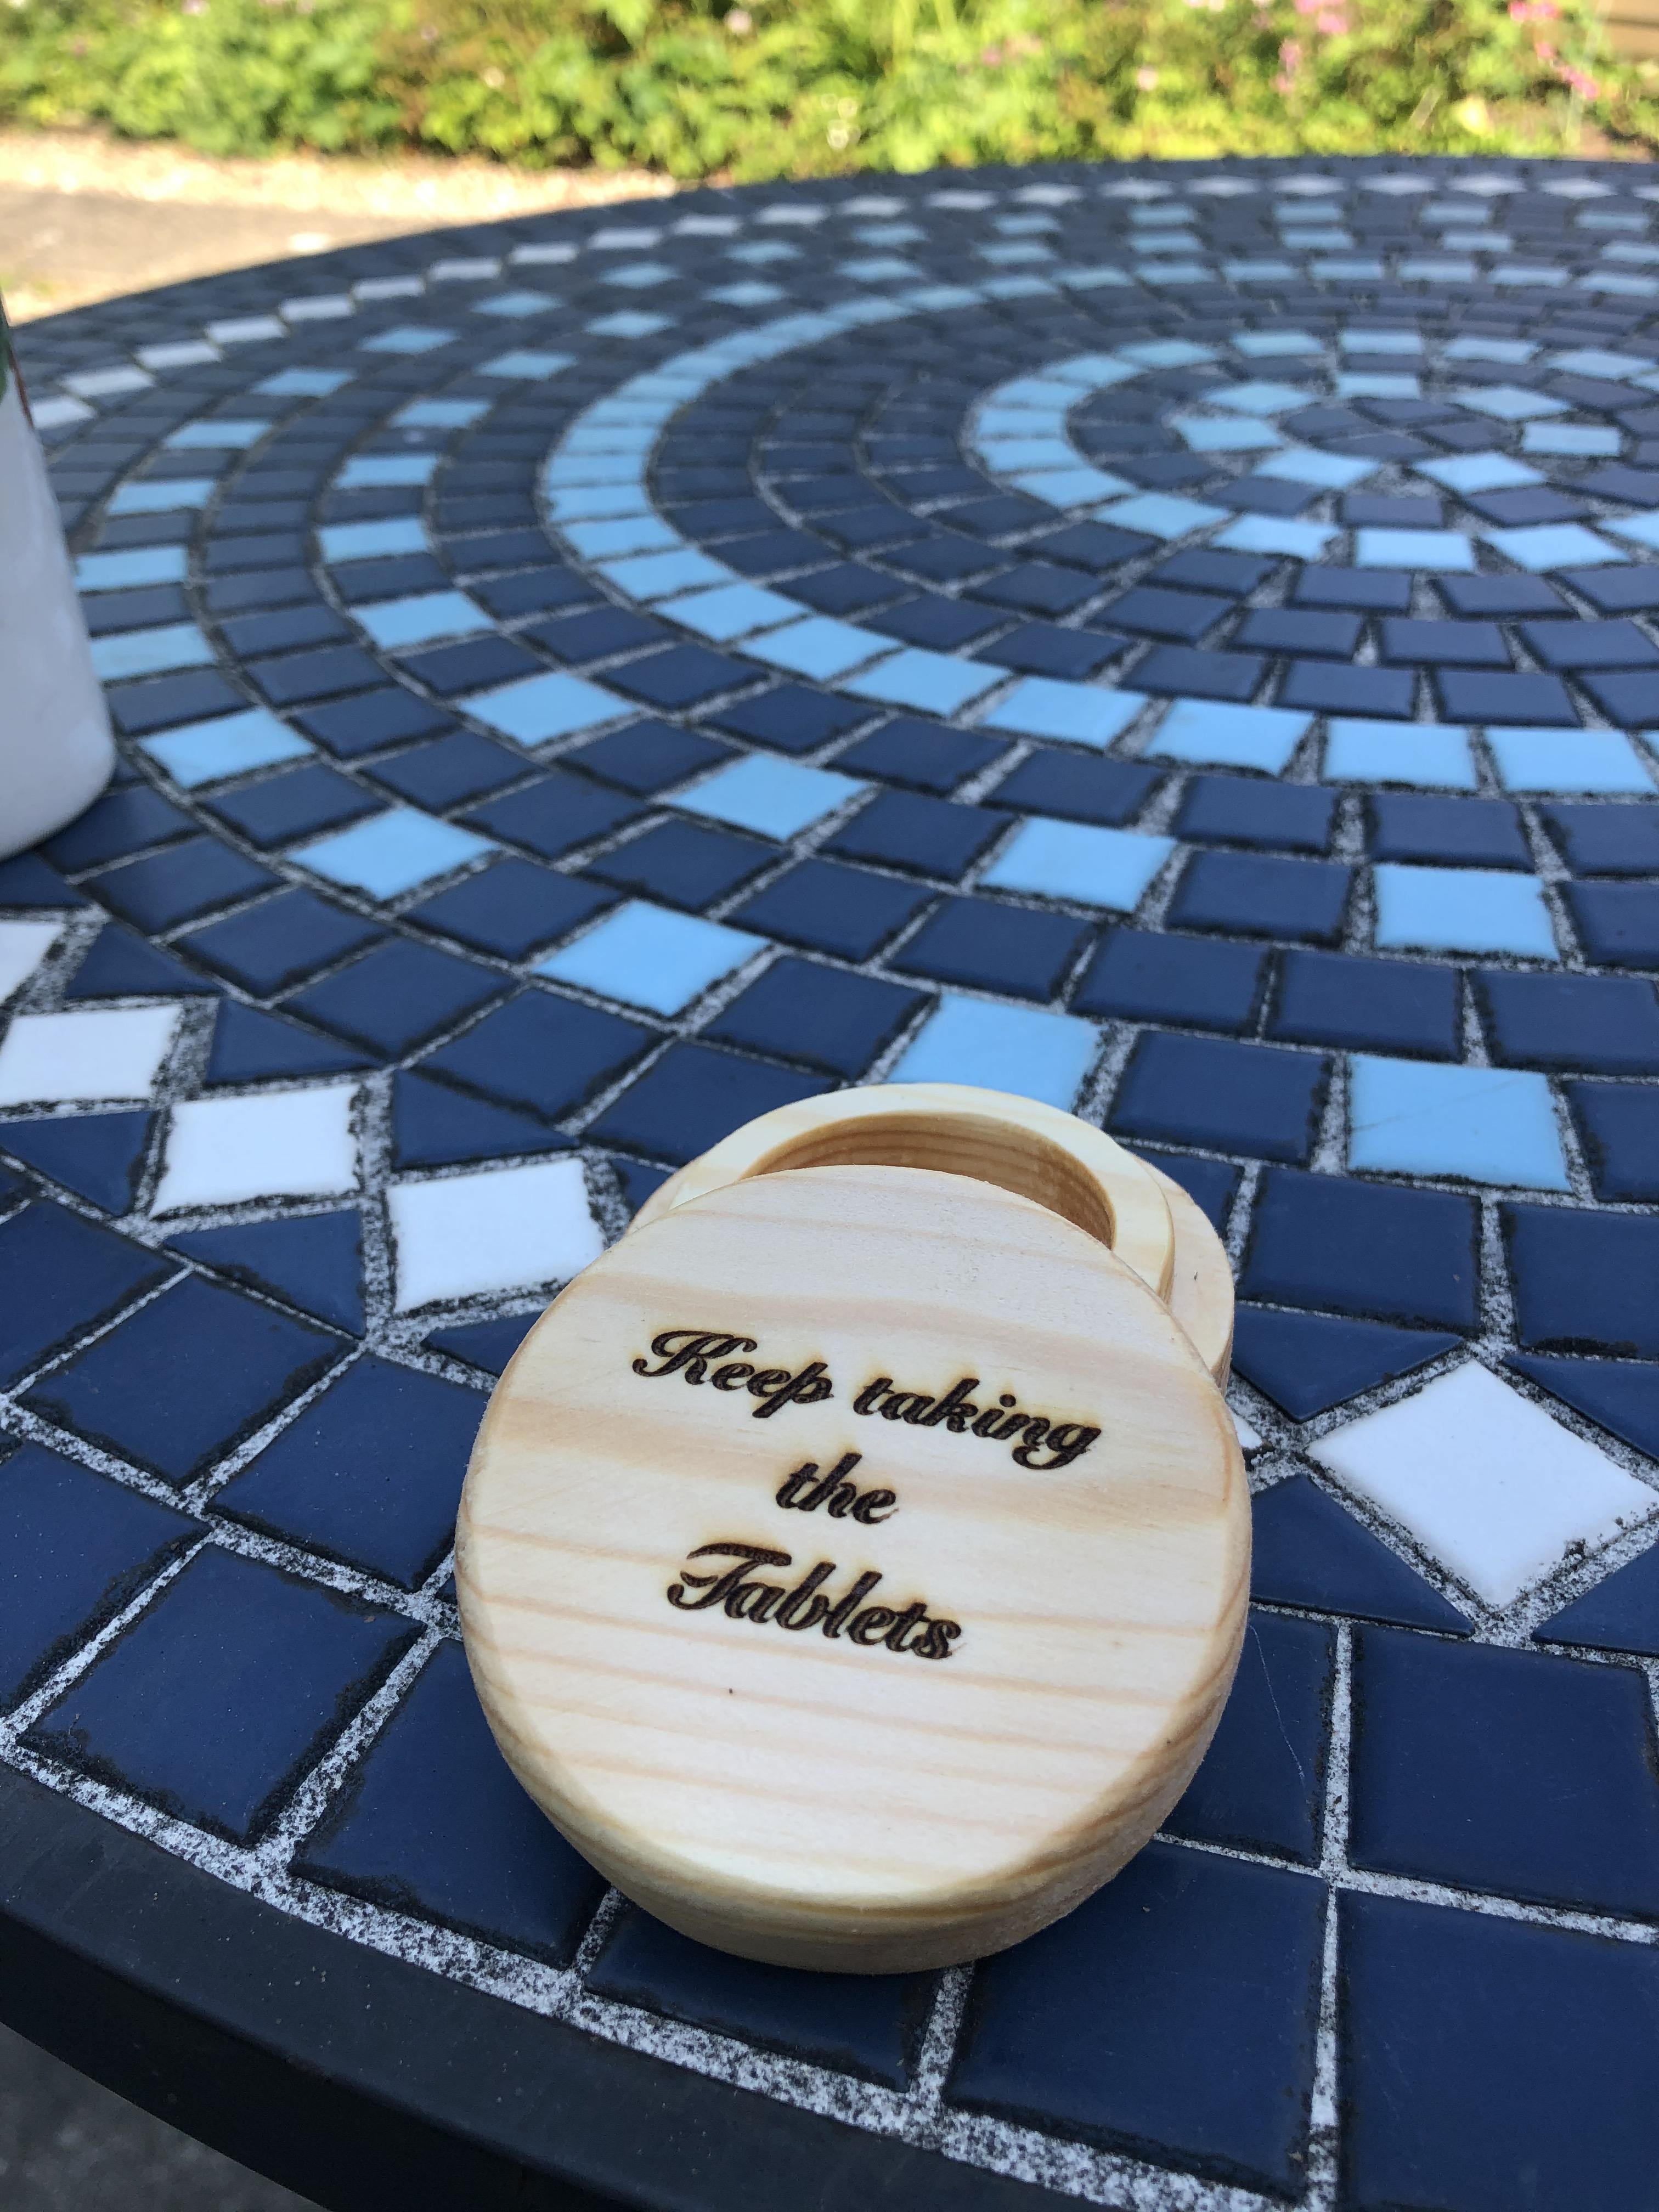
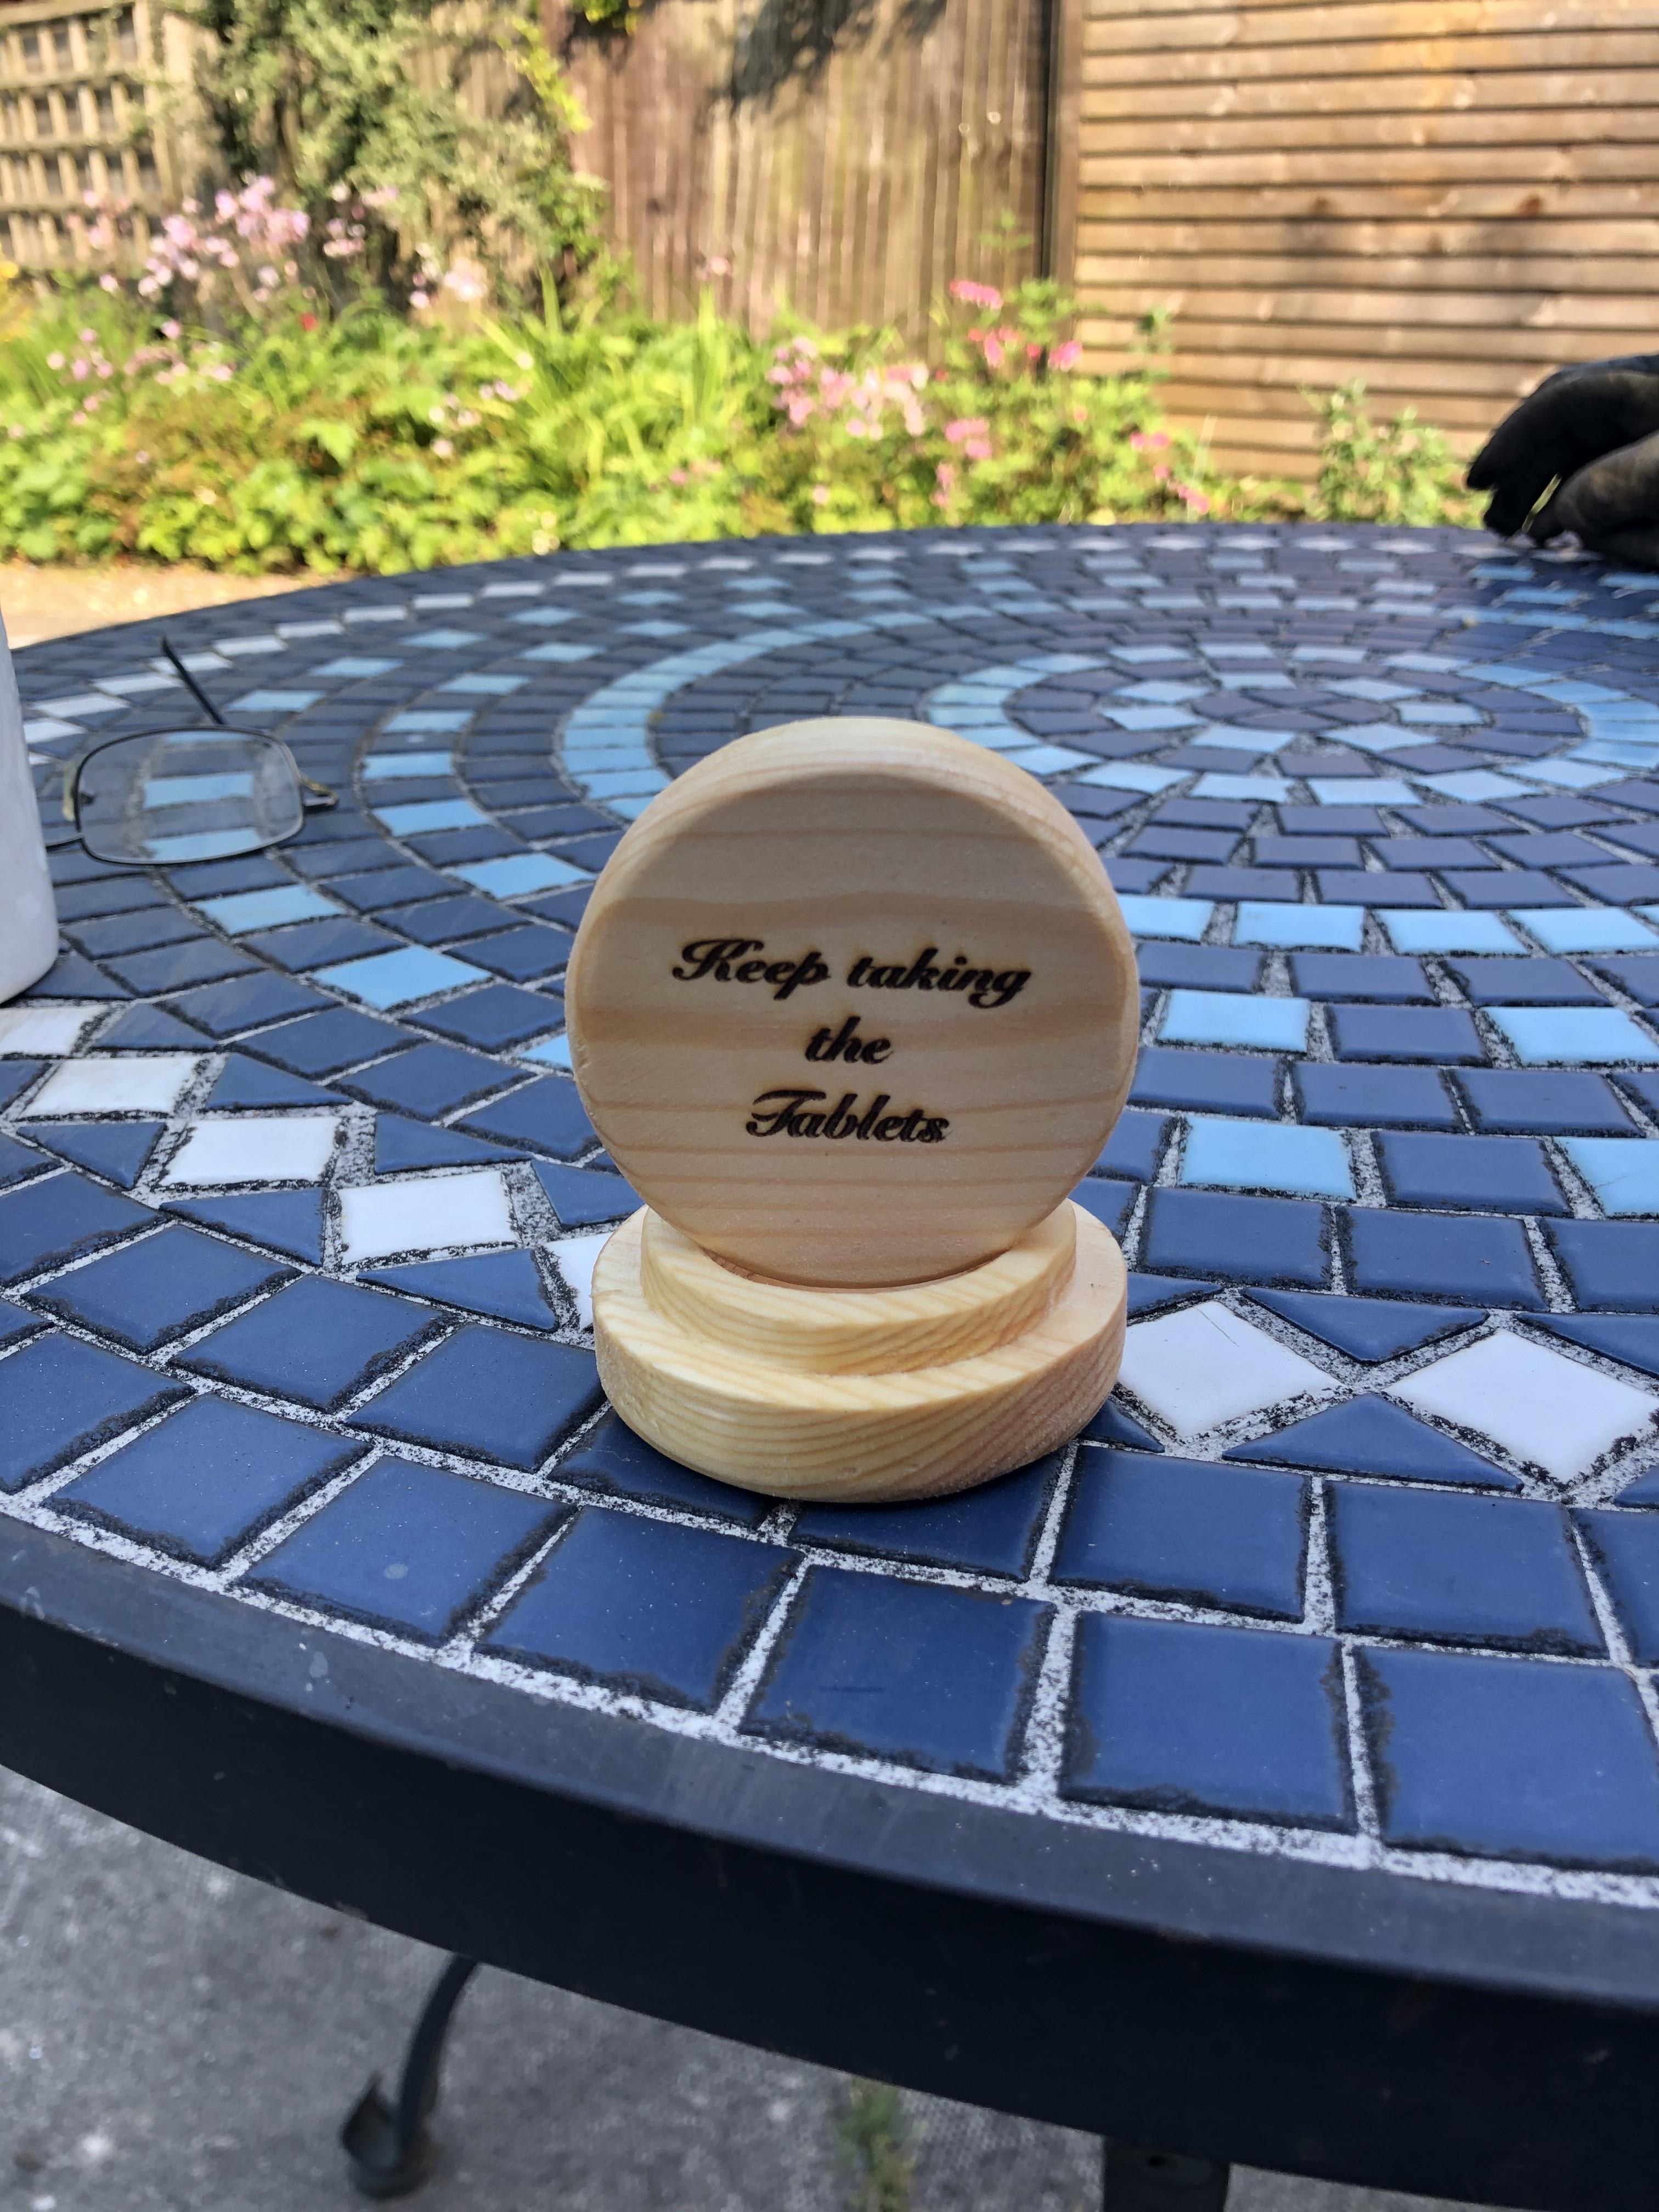
I lasered some light hearted text on both the lid and inside the box.
Lets get started:
Same as always with CNC and Laser operations.
Please ensure you have the correct Personal Protective Equipment:
Eye protection for both CNC and Laser operations.
Ear Protection
Dust mask rated for the work you are carrying out.
Supplies
Suitable piece of wood, depth approximately 200mm width x 100mm height, 20mm depth
6mm Flat Router bit
Medium and fine grit sandpaper
Boiled Linseed oil or could be Stain/ Varnish whatever finish you desire
CNC Machine
Laser
Creating the Design in Cut2D
Same as always we do the setting up of the stock, so we populate the boxes with the relevant dimensions and on this occasion I am starting cnc operations from the center of the stock.
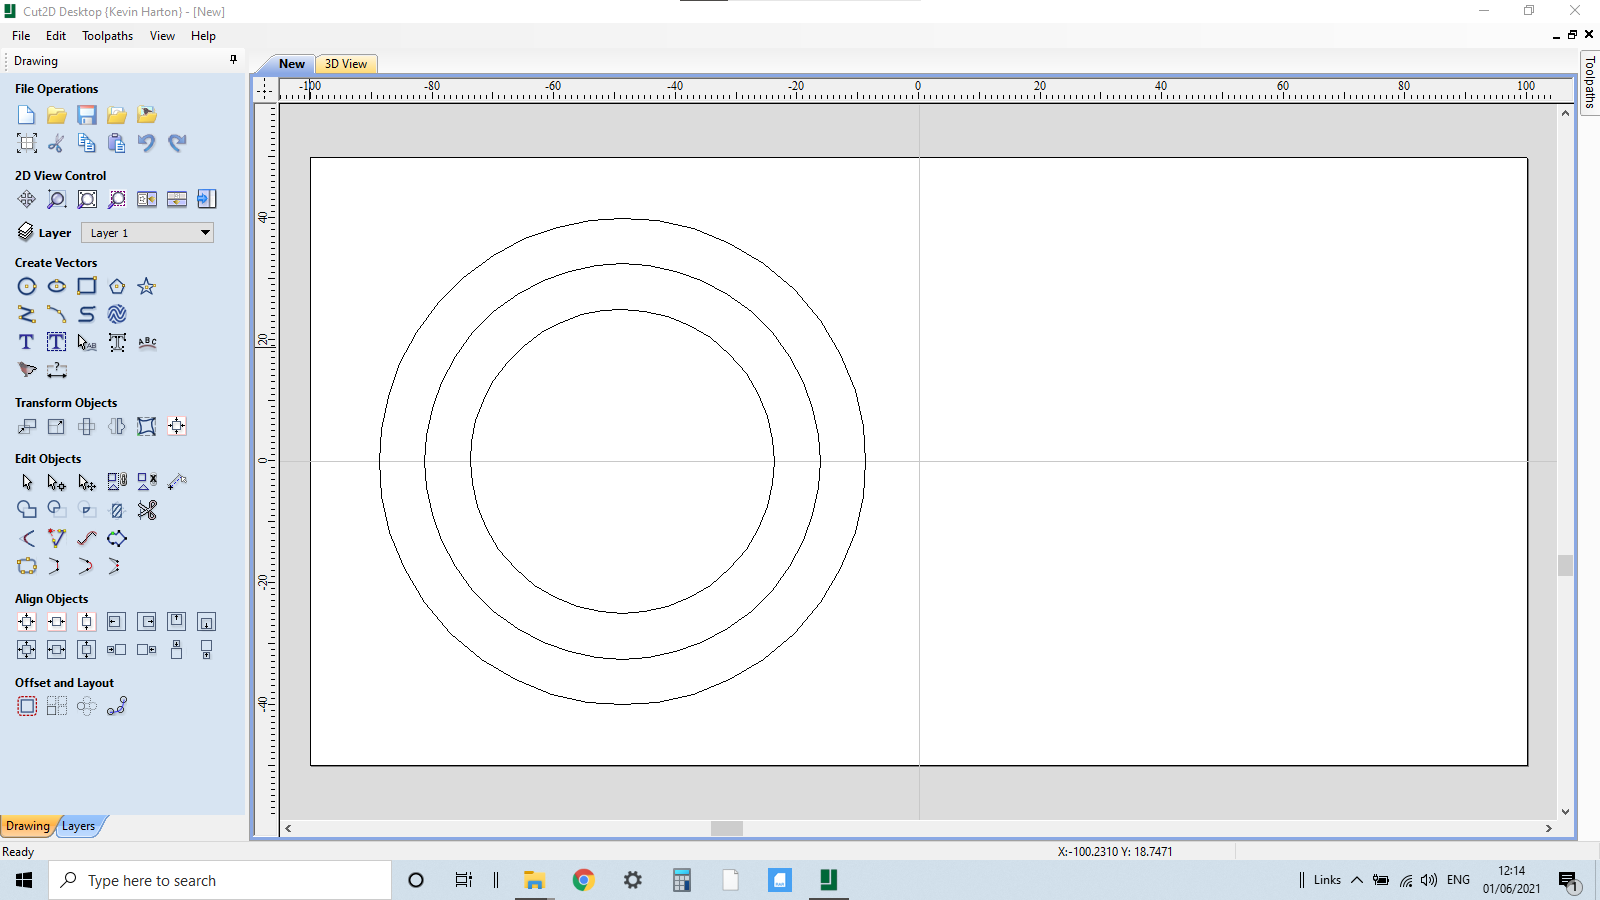
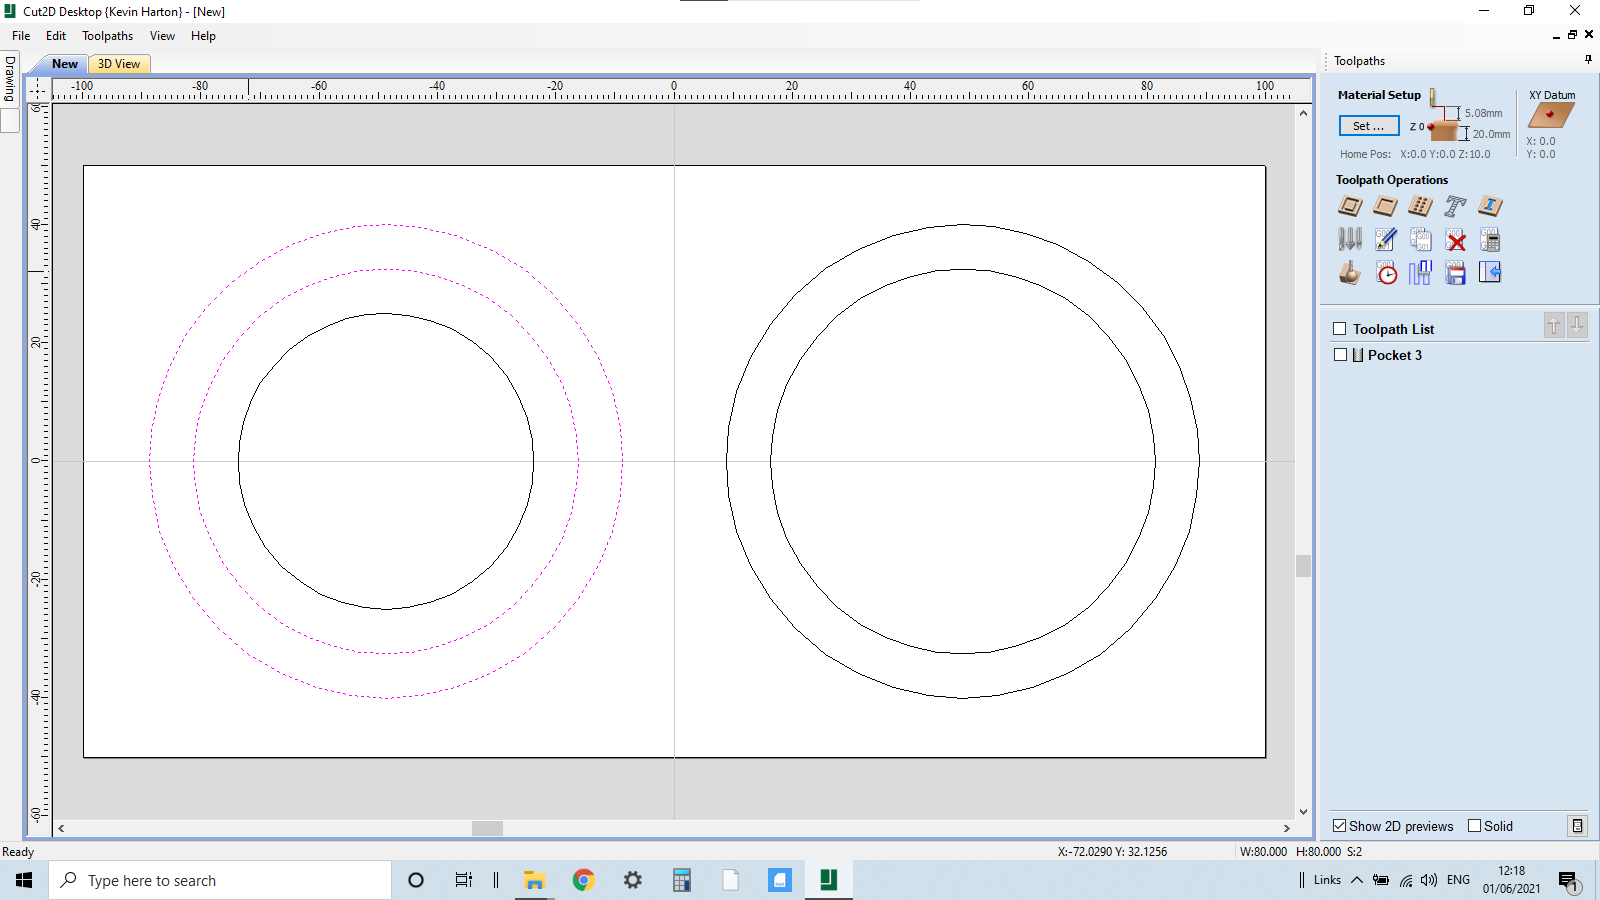
We will sketch out the base of the pill box first
With this done we can now create our first circle, this can be any size you want depending on the stock you are using.
We then offset or create another circle 6mm to the outside of the first circle, then another, this will be the pill box lid
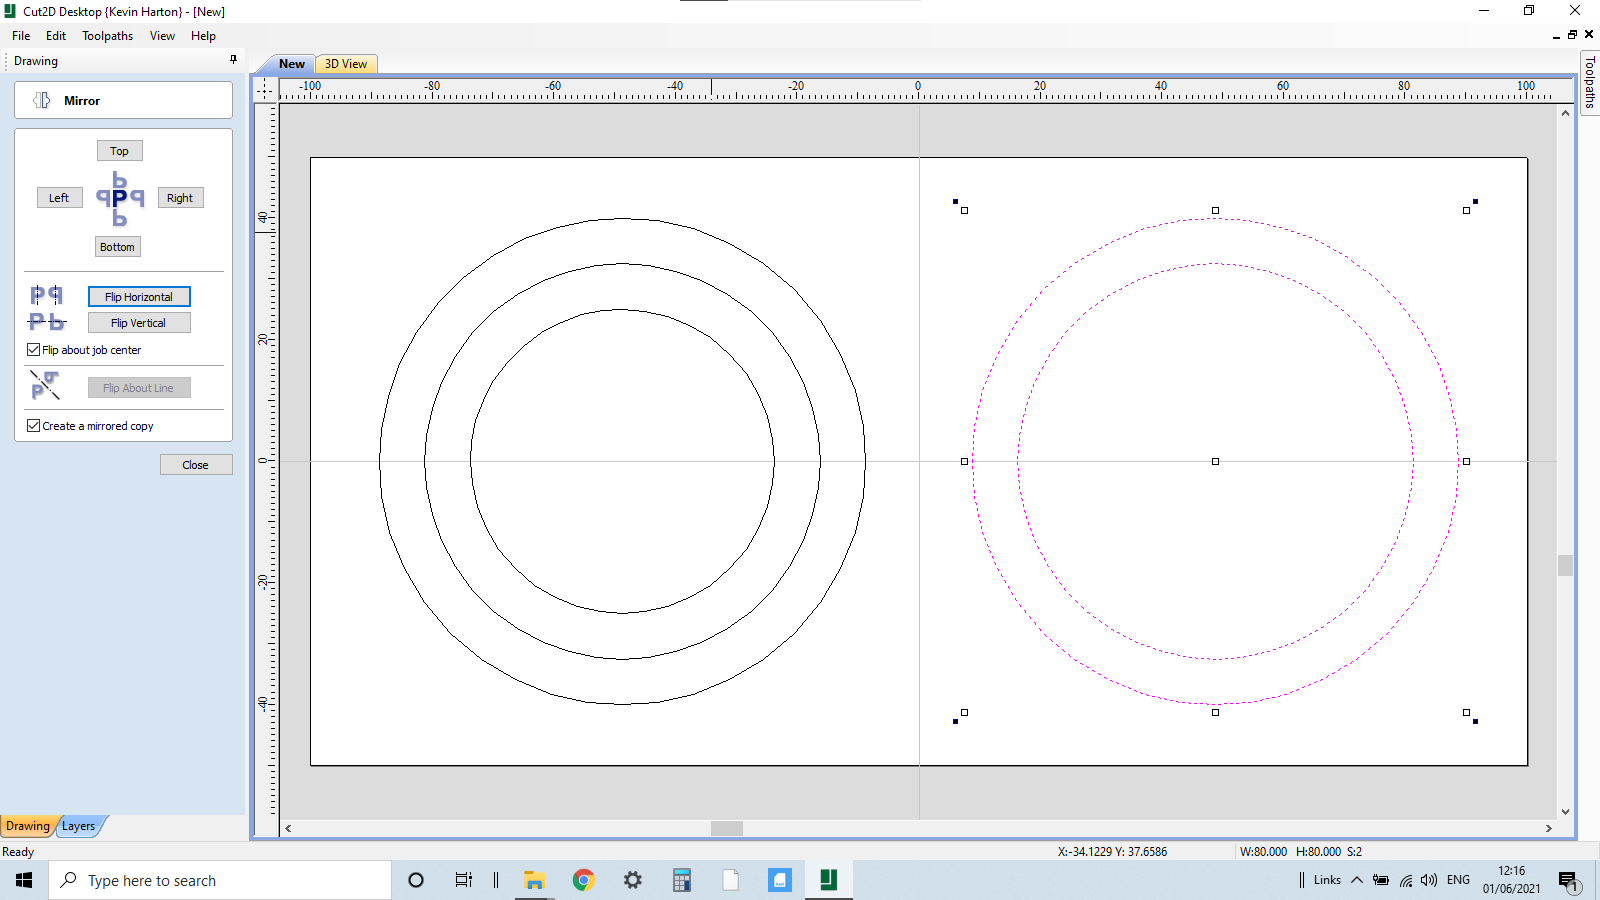
We can now copy and paste the whole of this sketch adjacent to the first, or use the mirror function and flip horizontally, I never created an offset between the base and lid, I will sand manually to achieve a snug fit
We can delete the inner circle as its not required for the lid.
That's the sketch design finished, we can now move onto creating tool paths for box.
Creating Toolpaths for the Pill Box Base and Lid
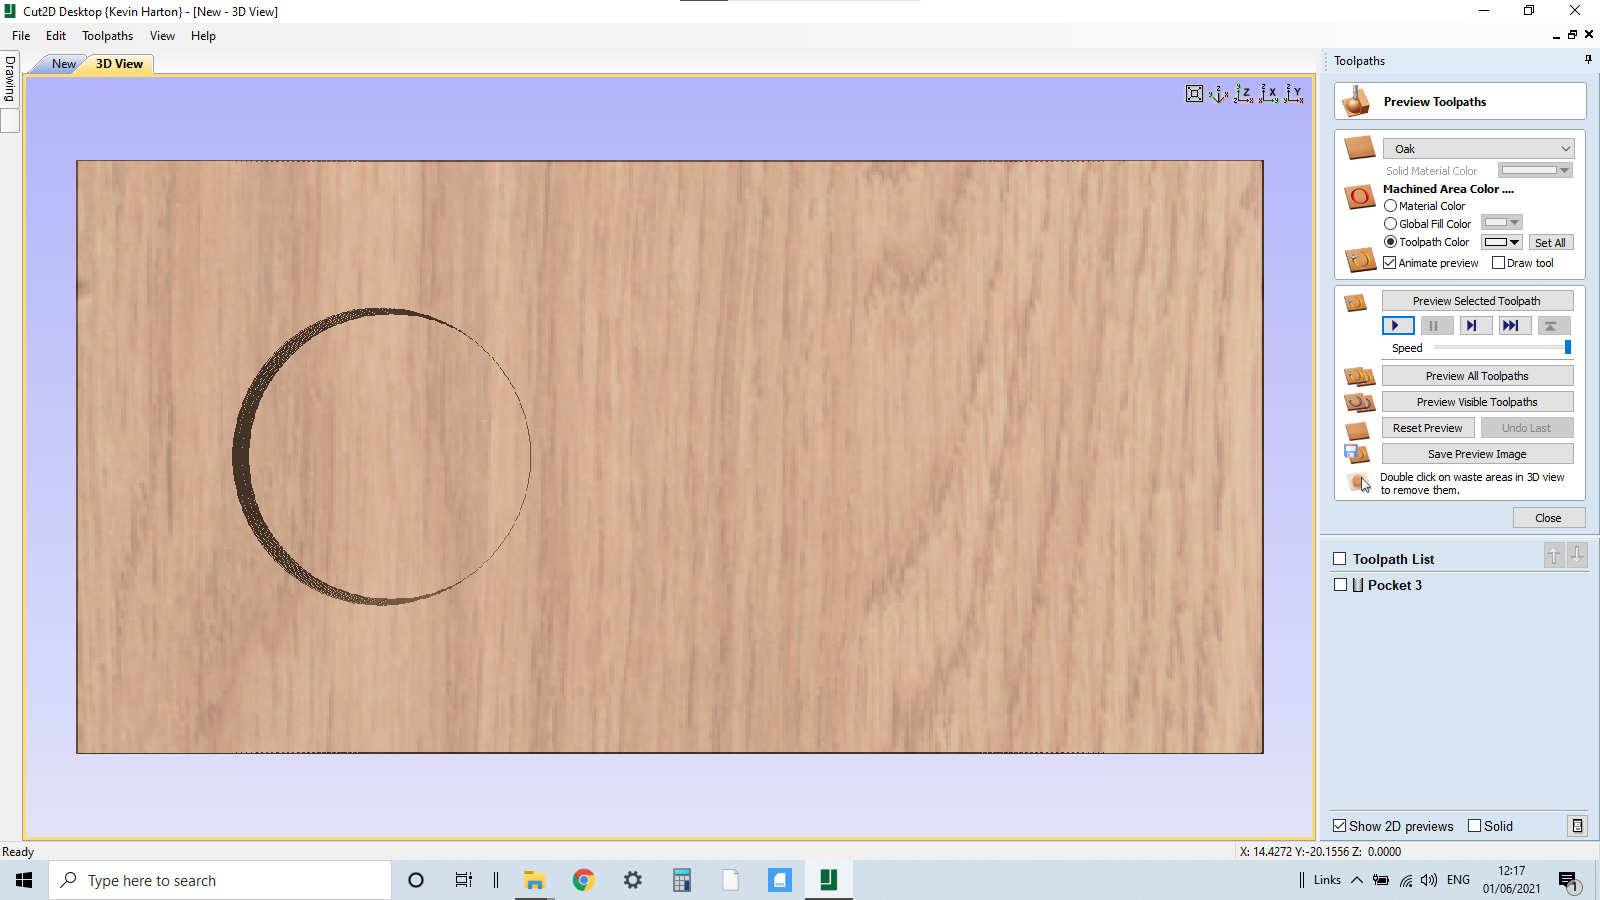
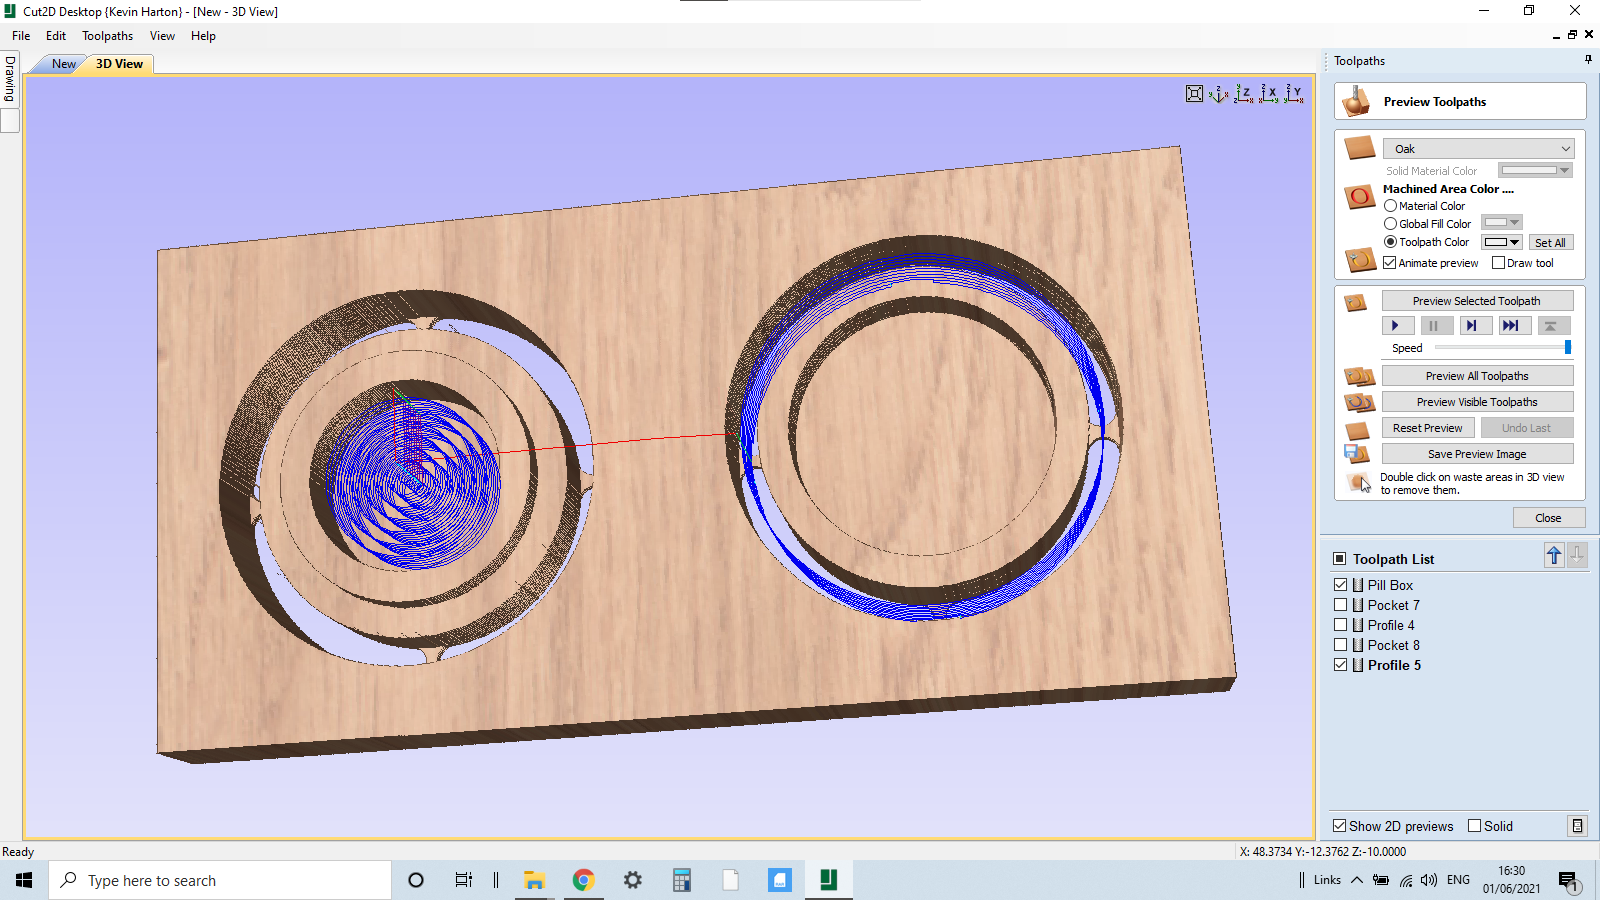
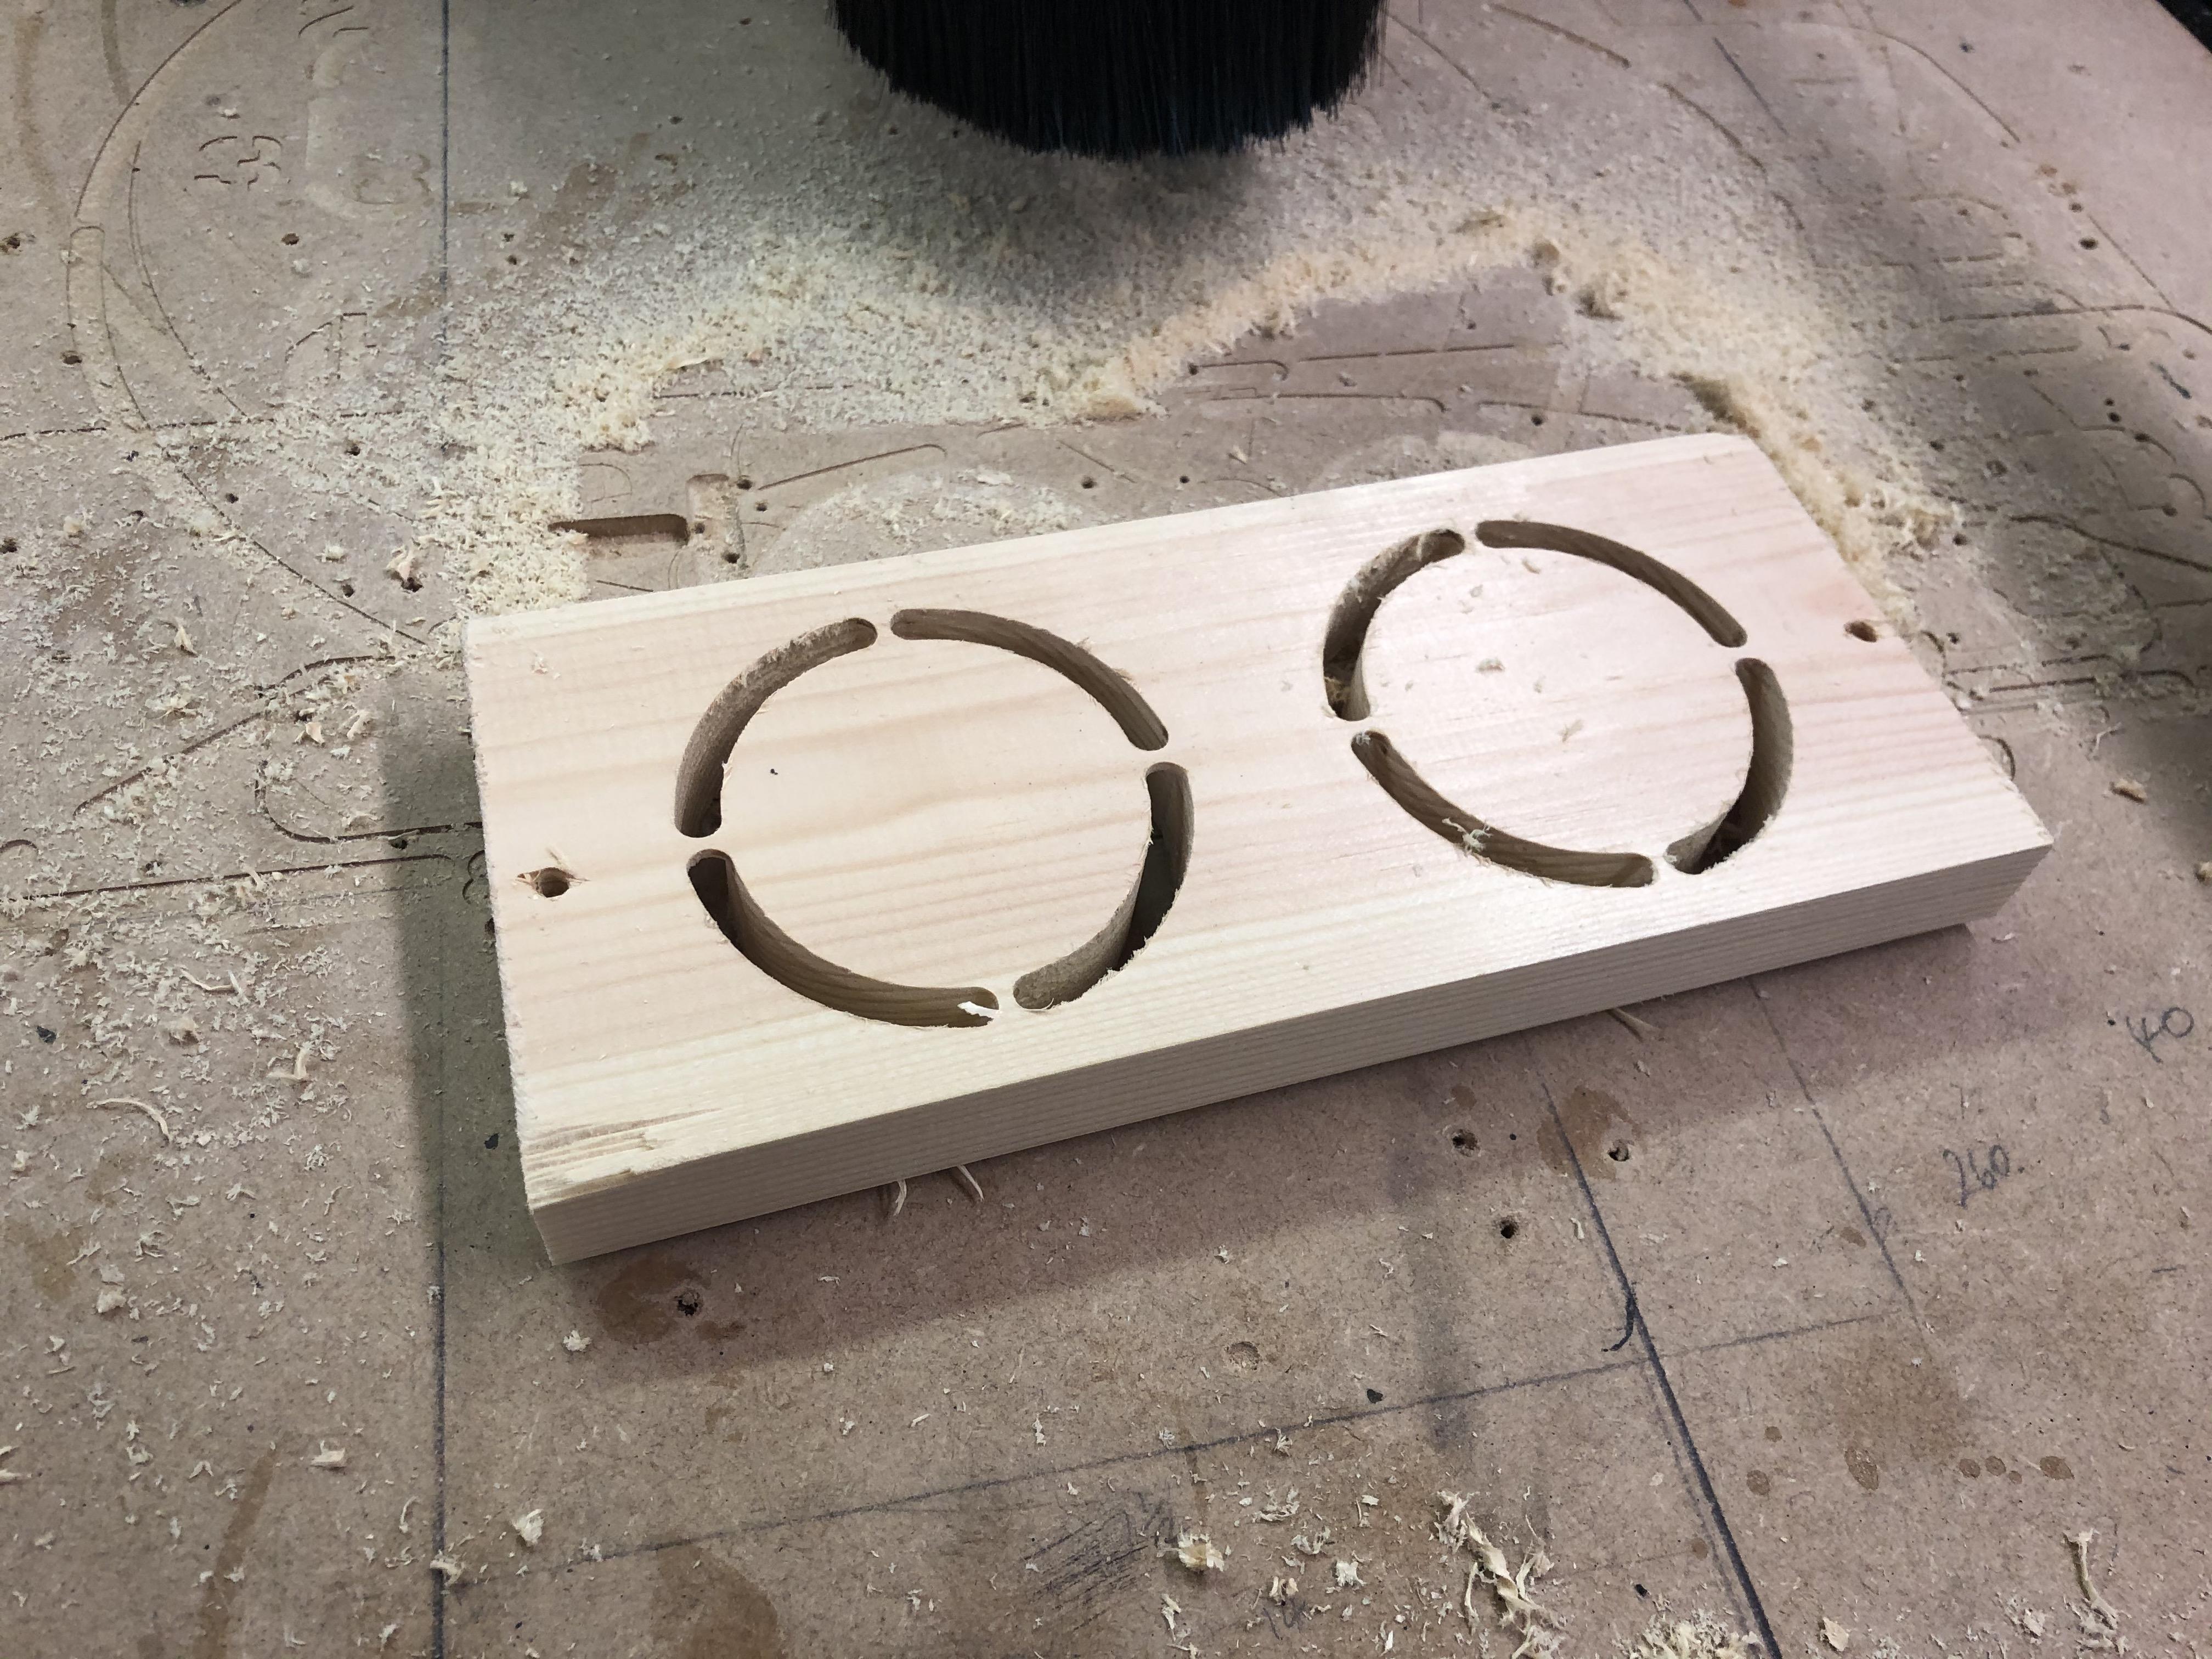
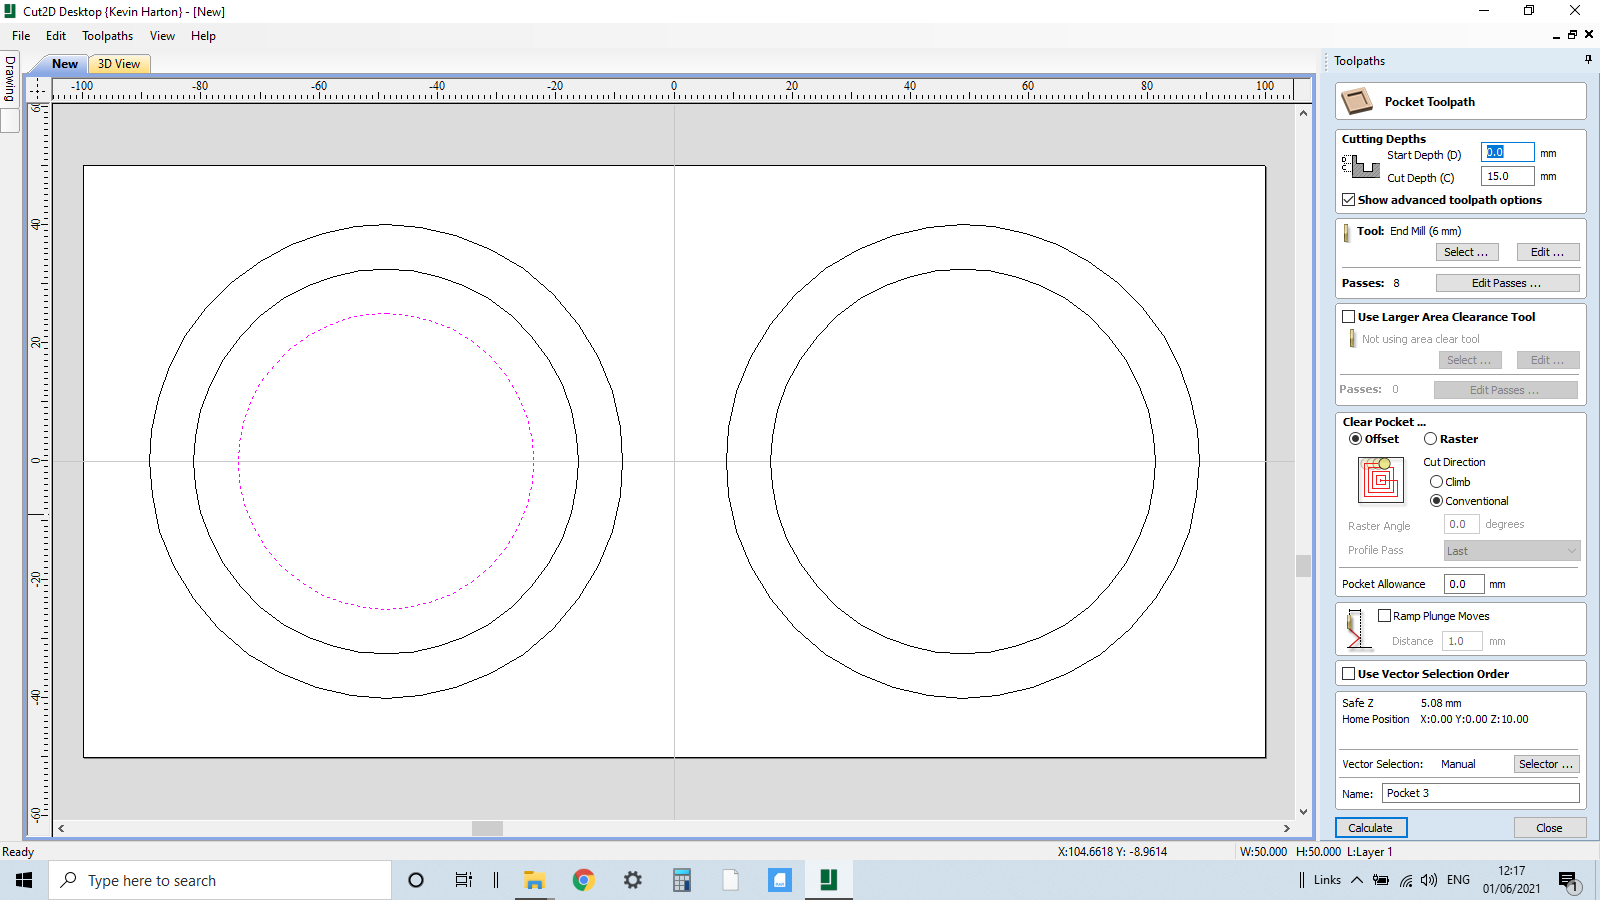
So in the Toolpath section, our first operation is cutting out a pocket for the pills, this will be depth 15mm and we are using a 6mm flat router bit, highlight the inner circle on the base, Calculate, review, rename file.
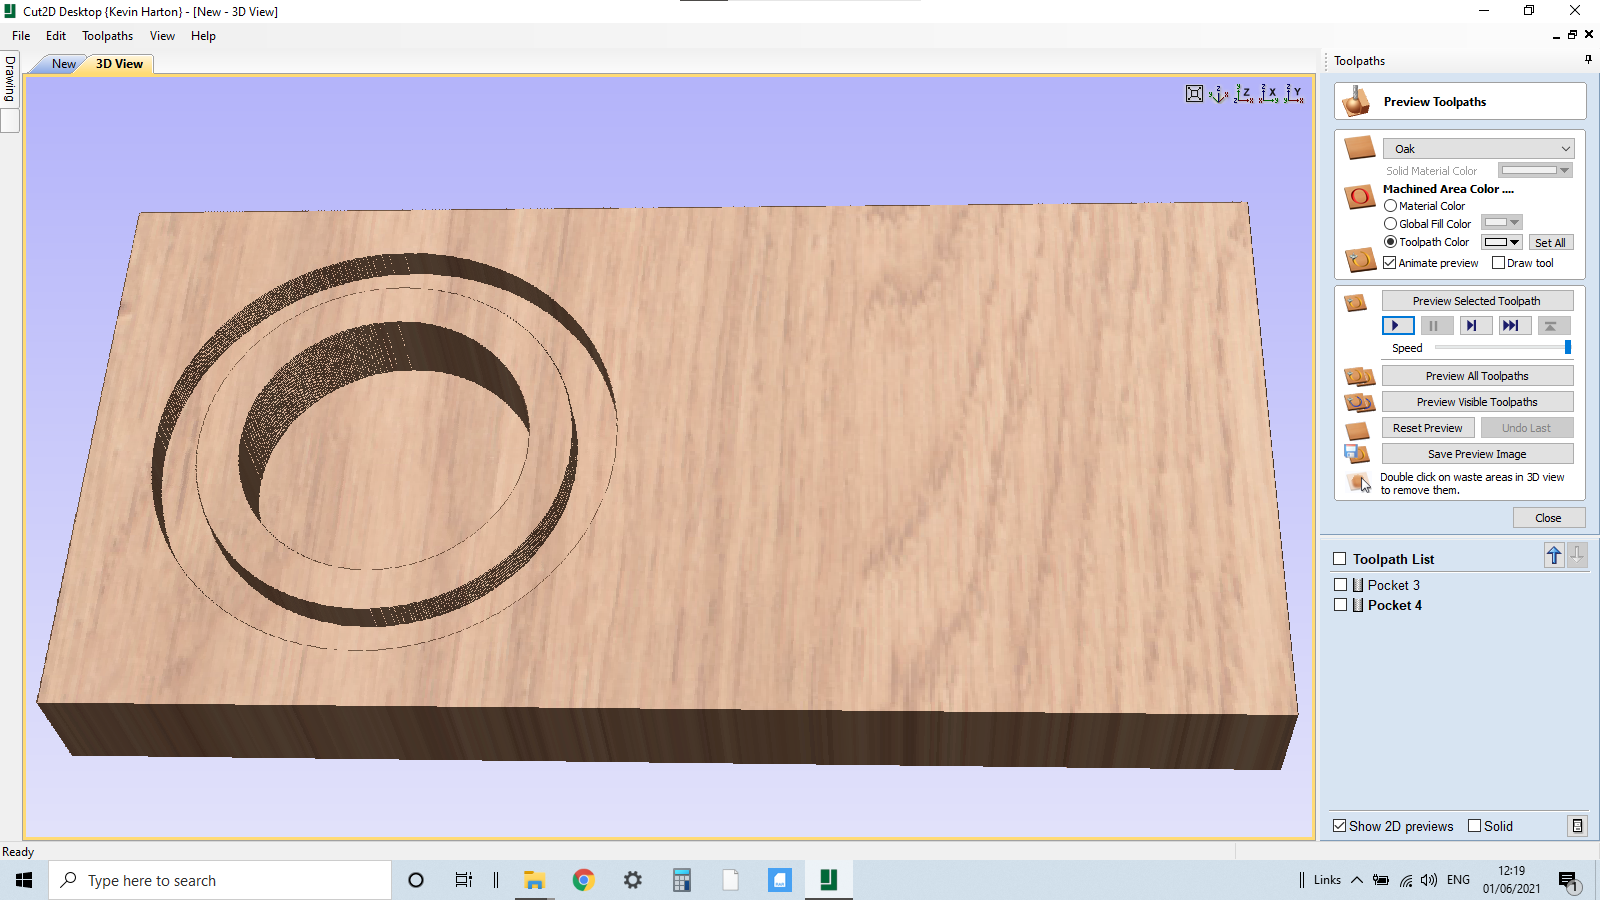
The next operation is forming the raised lip so we can locate the lid and hopefully make it a snug fit so highlight the 2 outer circles on the base sketch and create a pocket @ 6mm, Calculate, review, rename file.
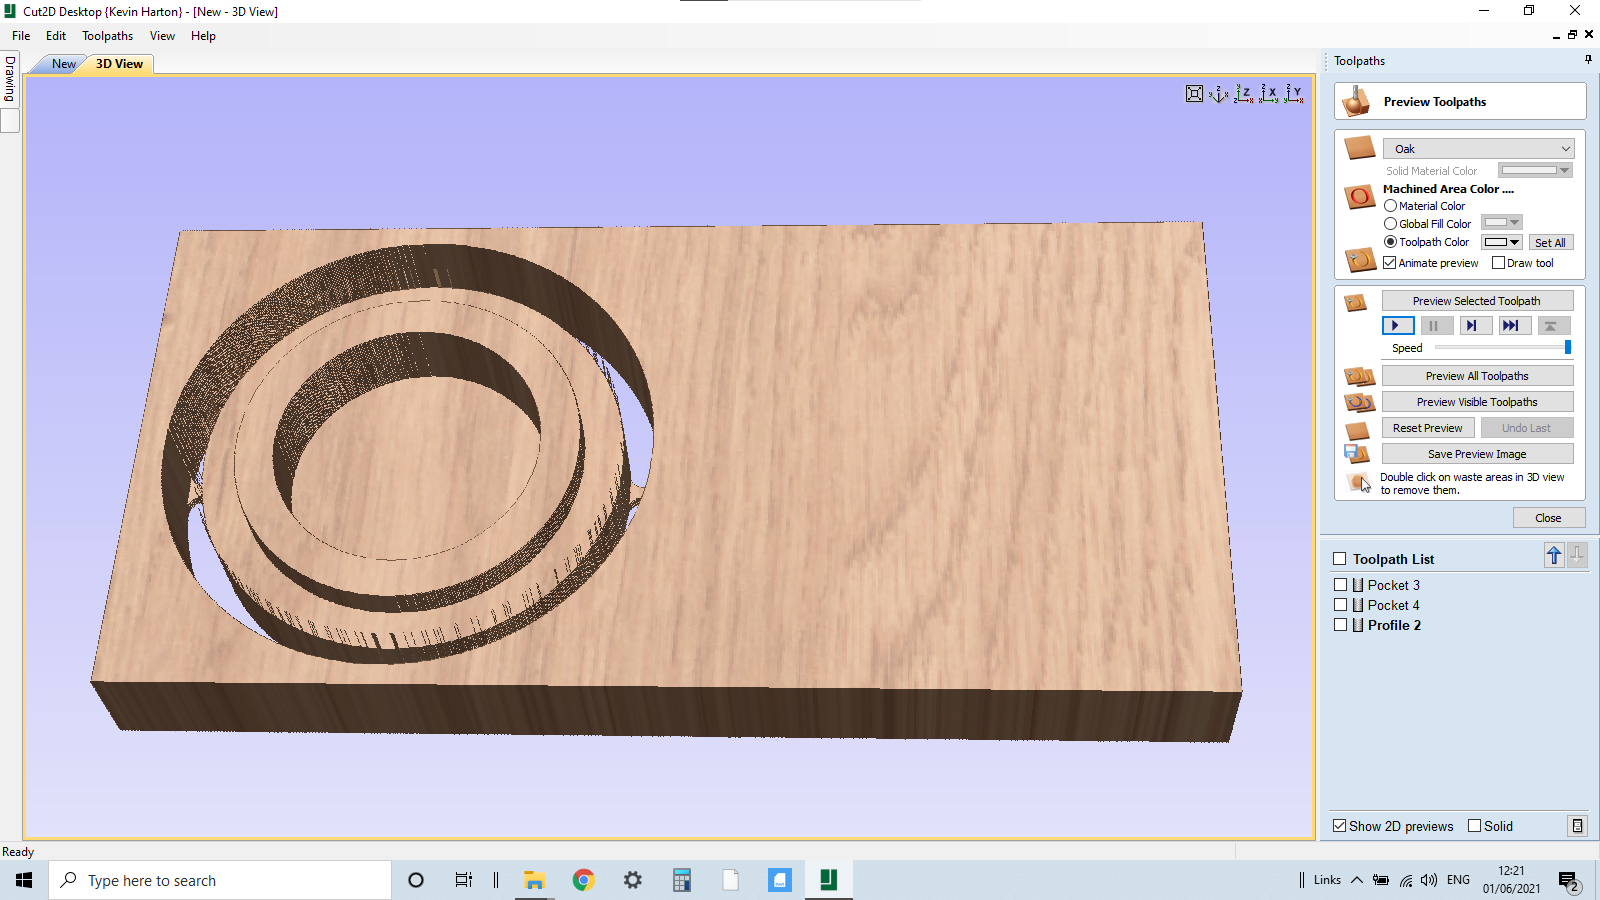
The final operation on the base is a profile cut, we need to add tabs and we also need to ensure our bit cuts right through, my stock depth is 20.02mm so I made it 20.04mm leaving tabs just to cut off.Calculate, review, rename file.
The lid cutting operations are slightly different for the pocket @ 10mm, the profile is the same as the base.
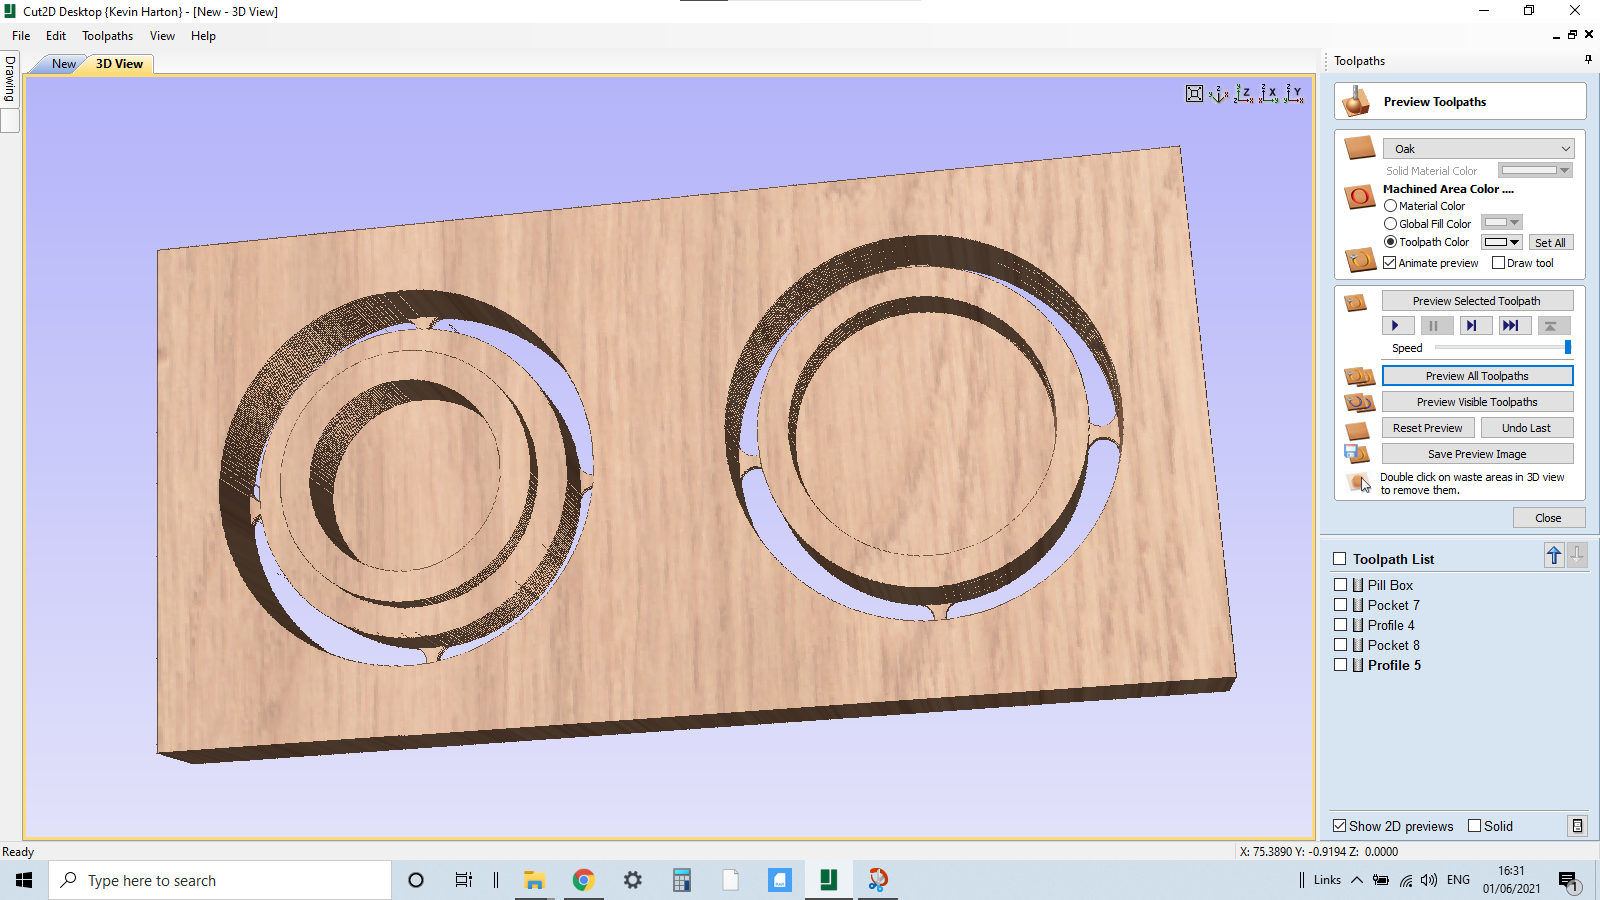
We are using the same router bit for all cutting operations so select all boxes on the Toolpaths and save.
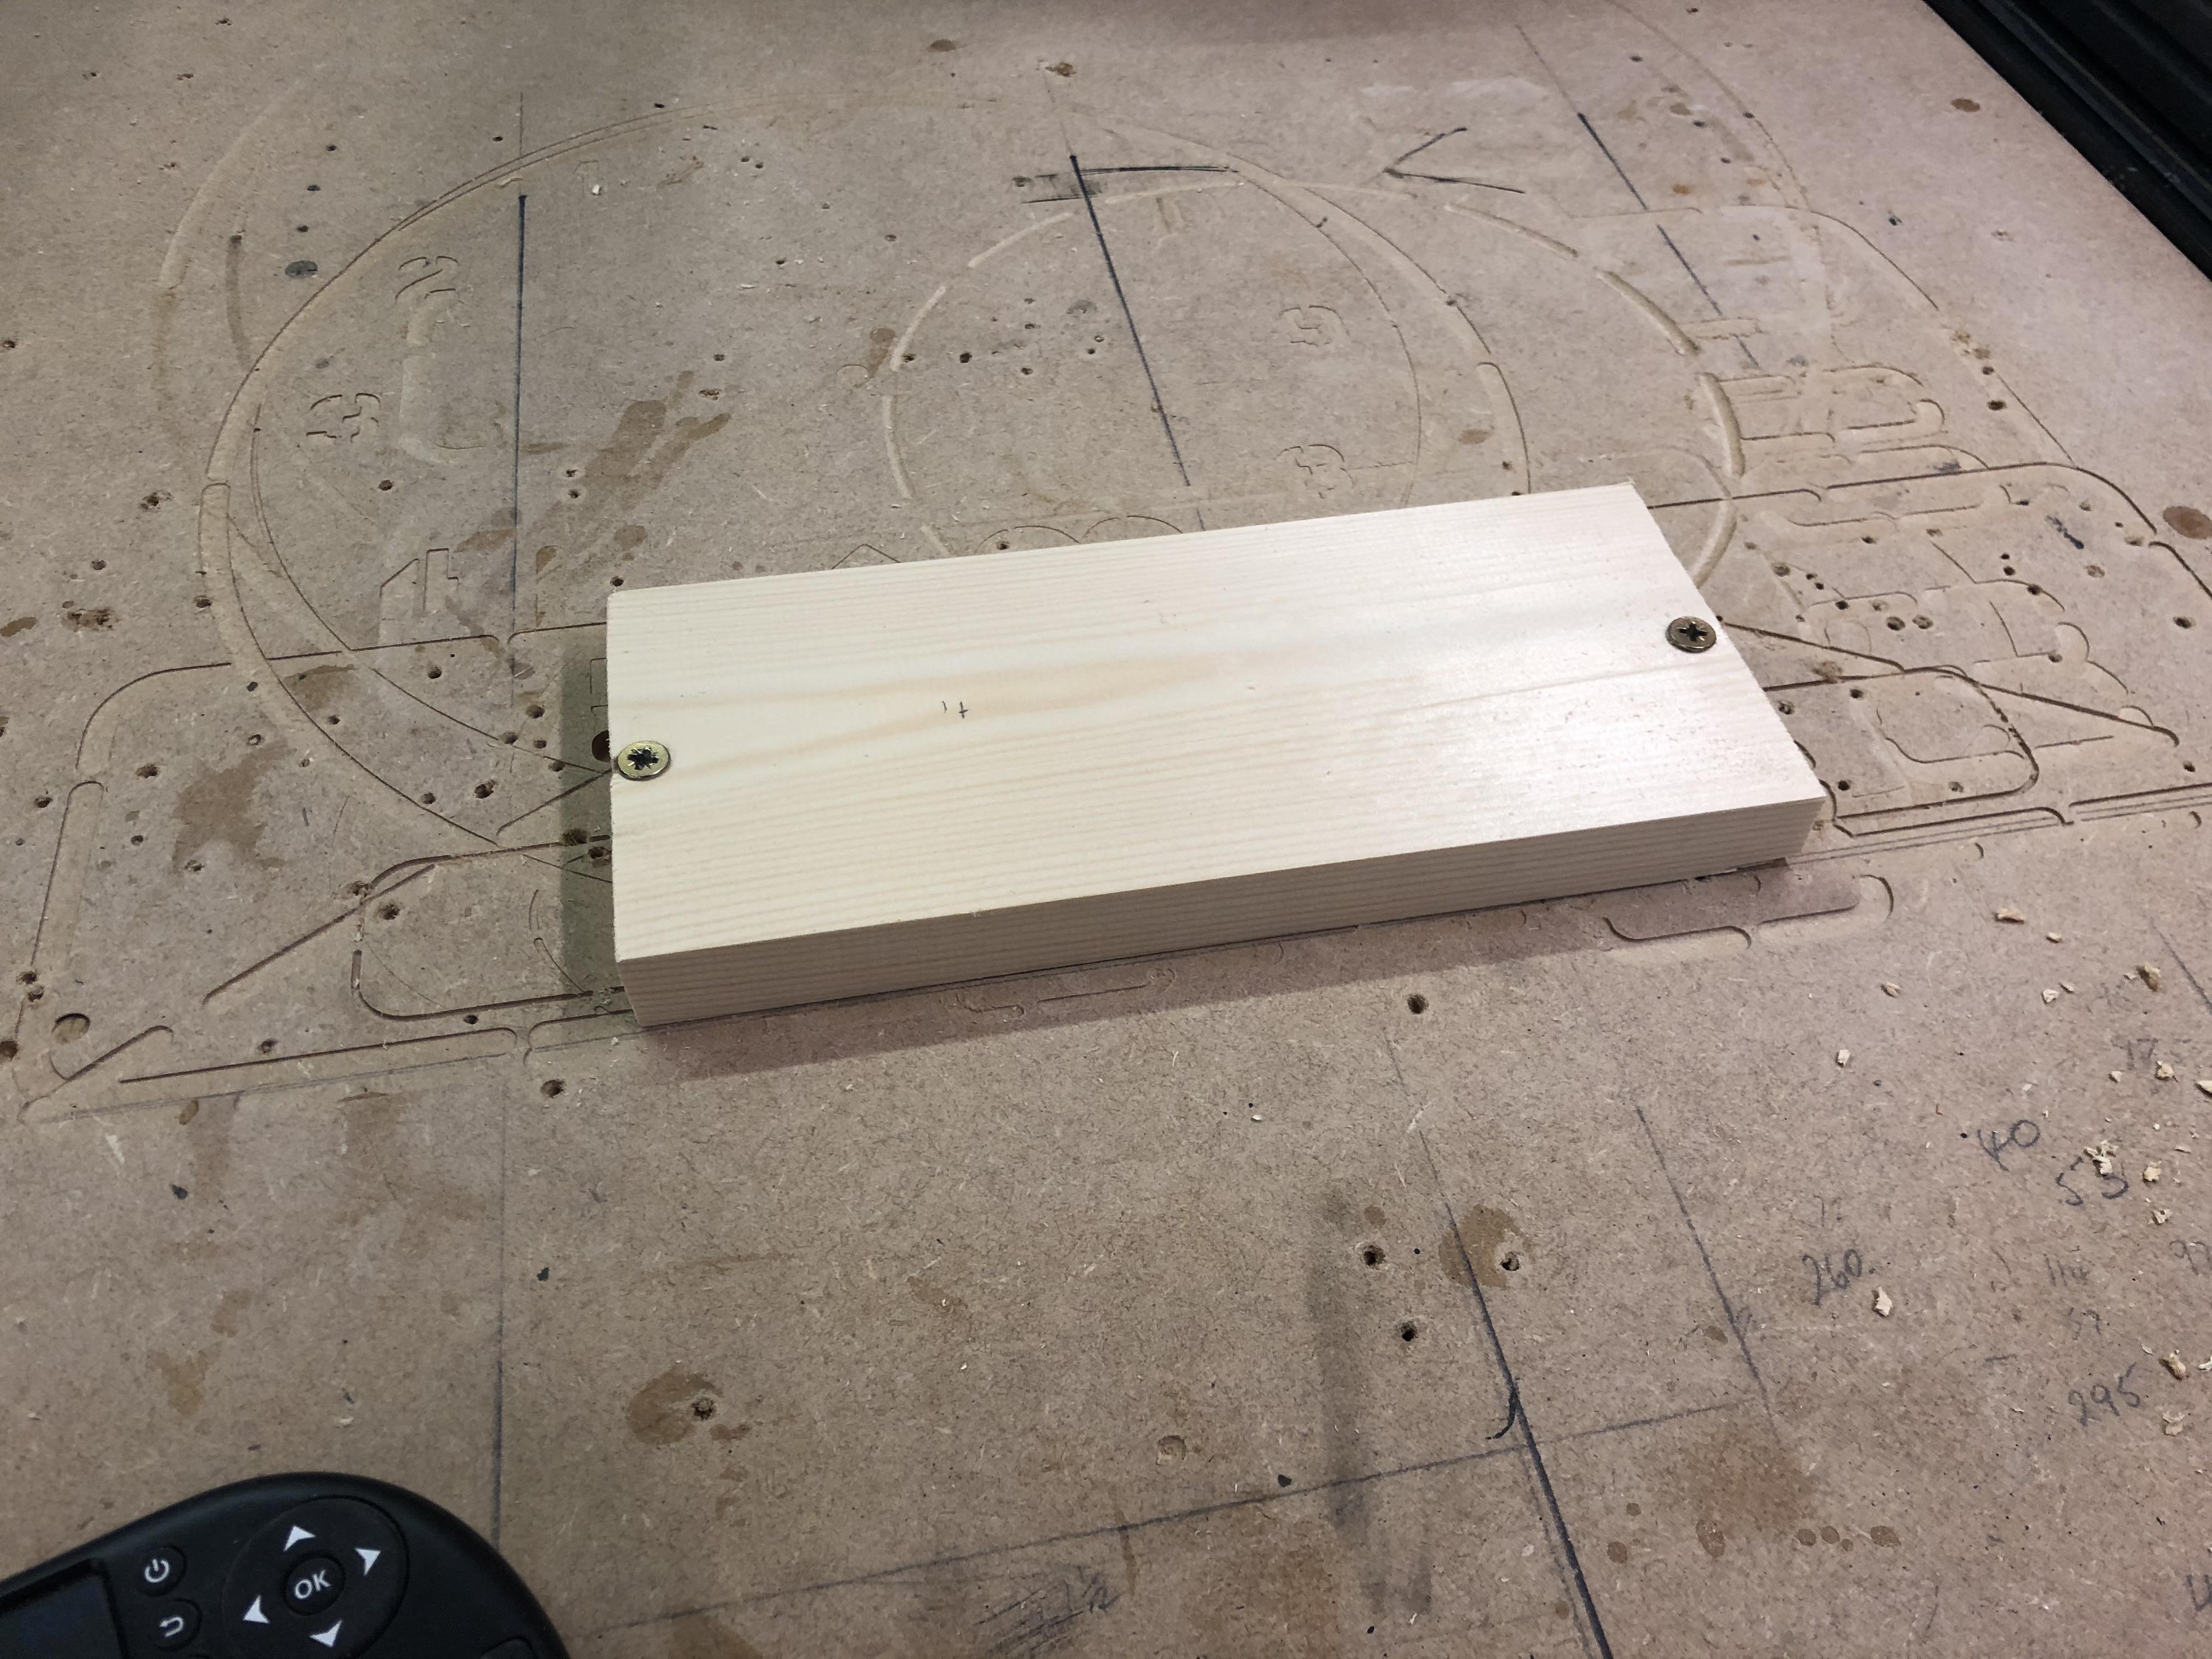
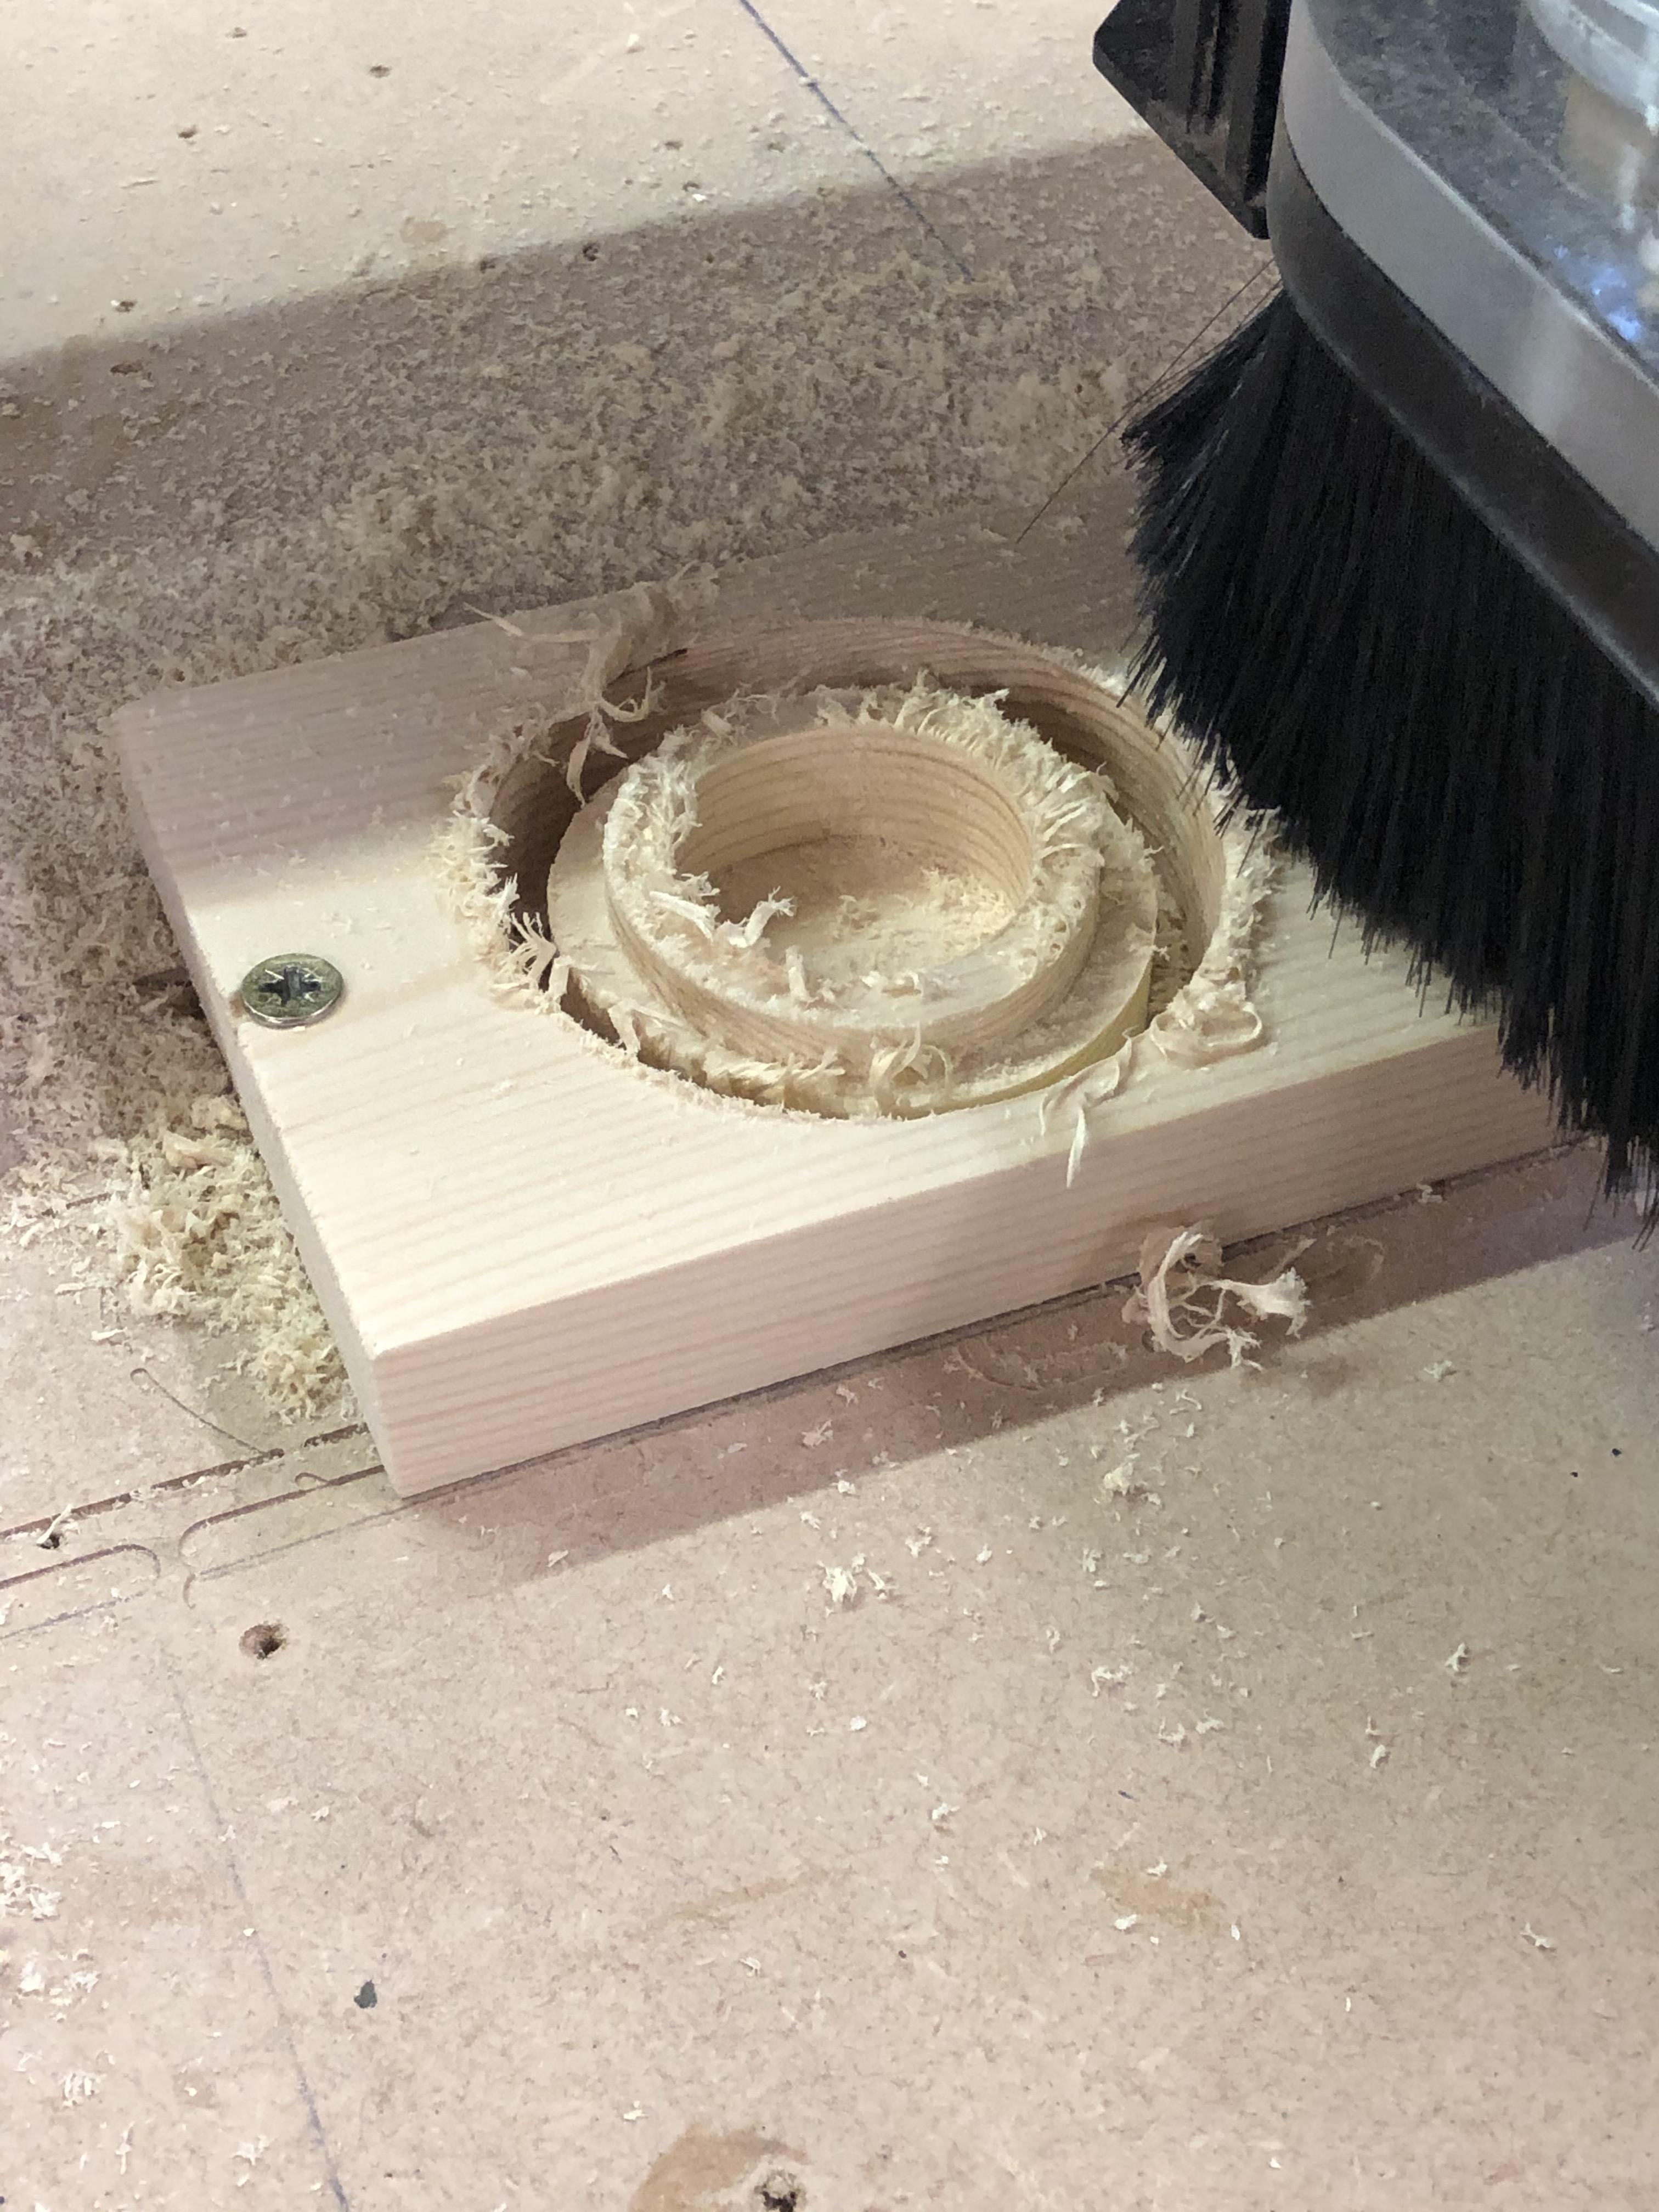
Send the file to the CNC machine and cut out the base and lid.
Finishing Off the Pill Box and Summary.
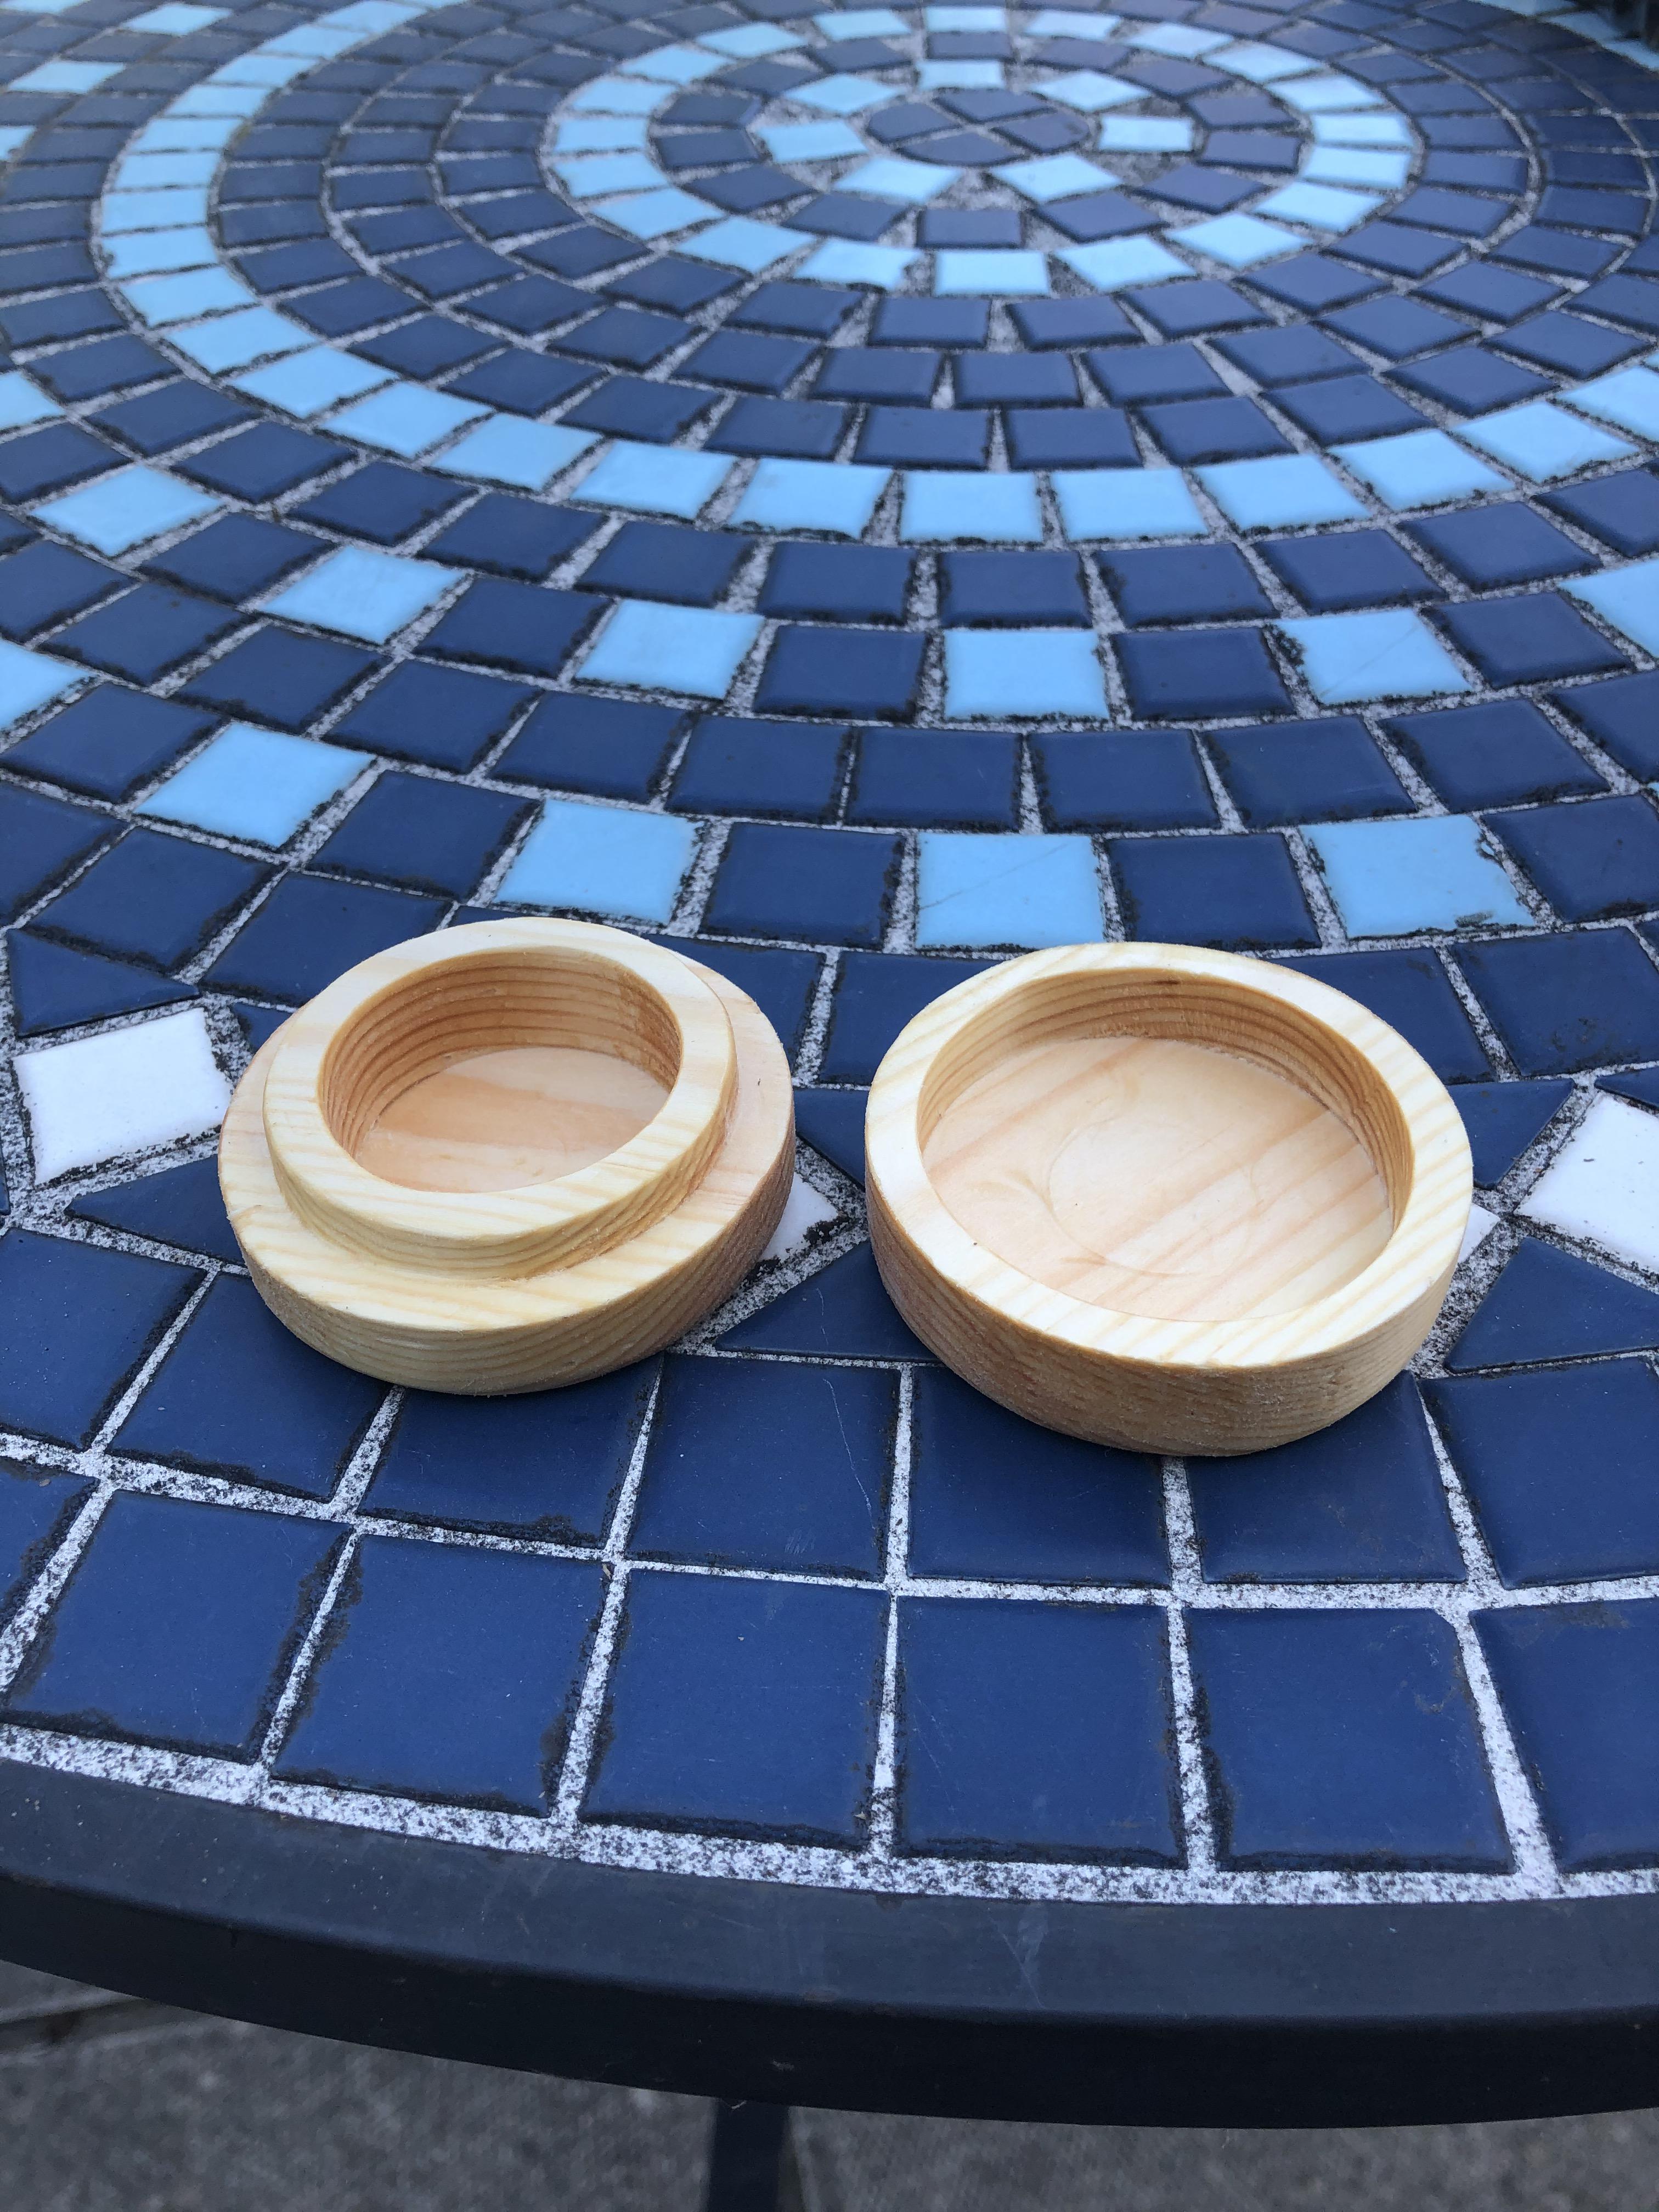
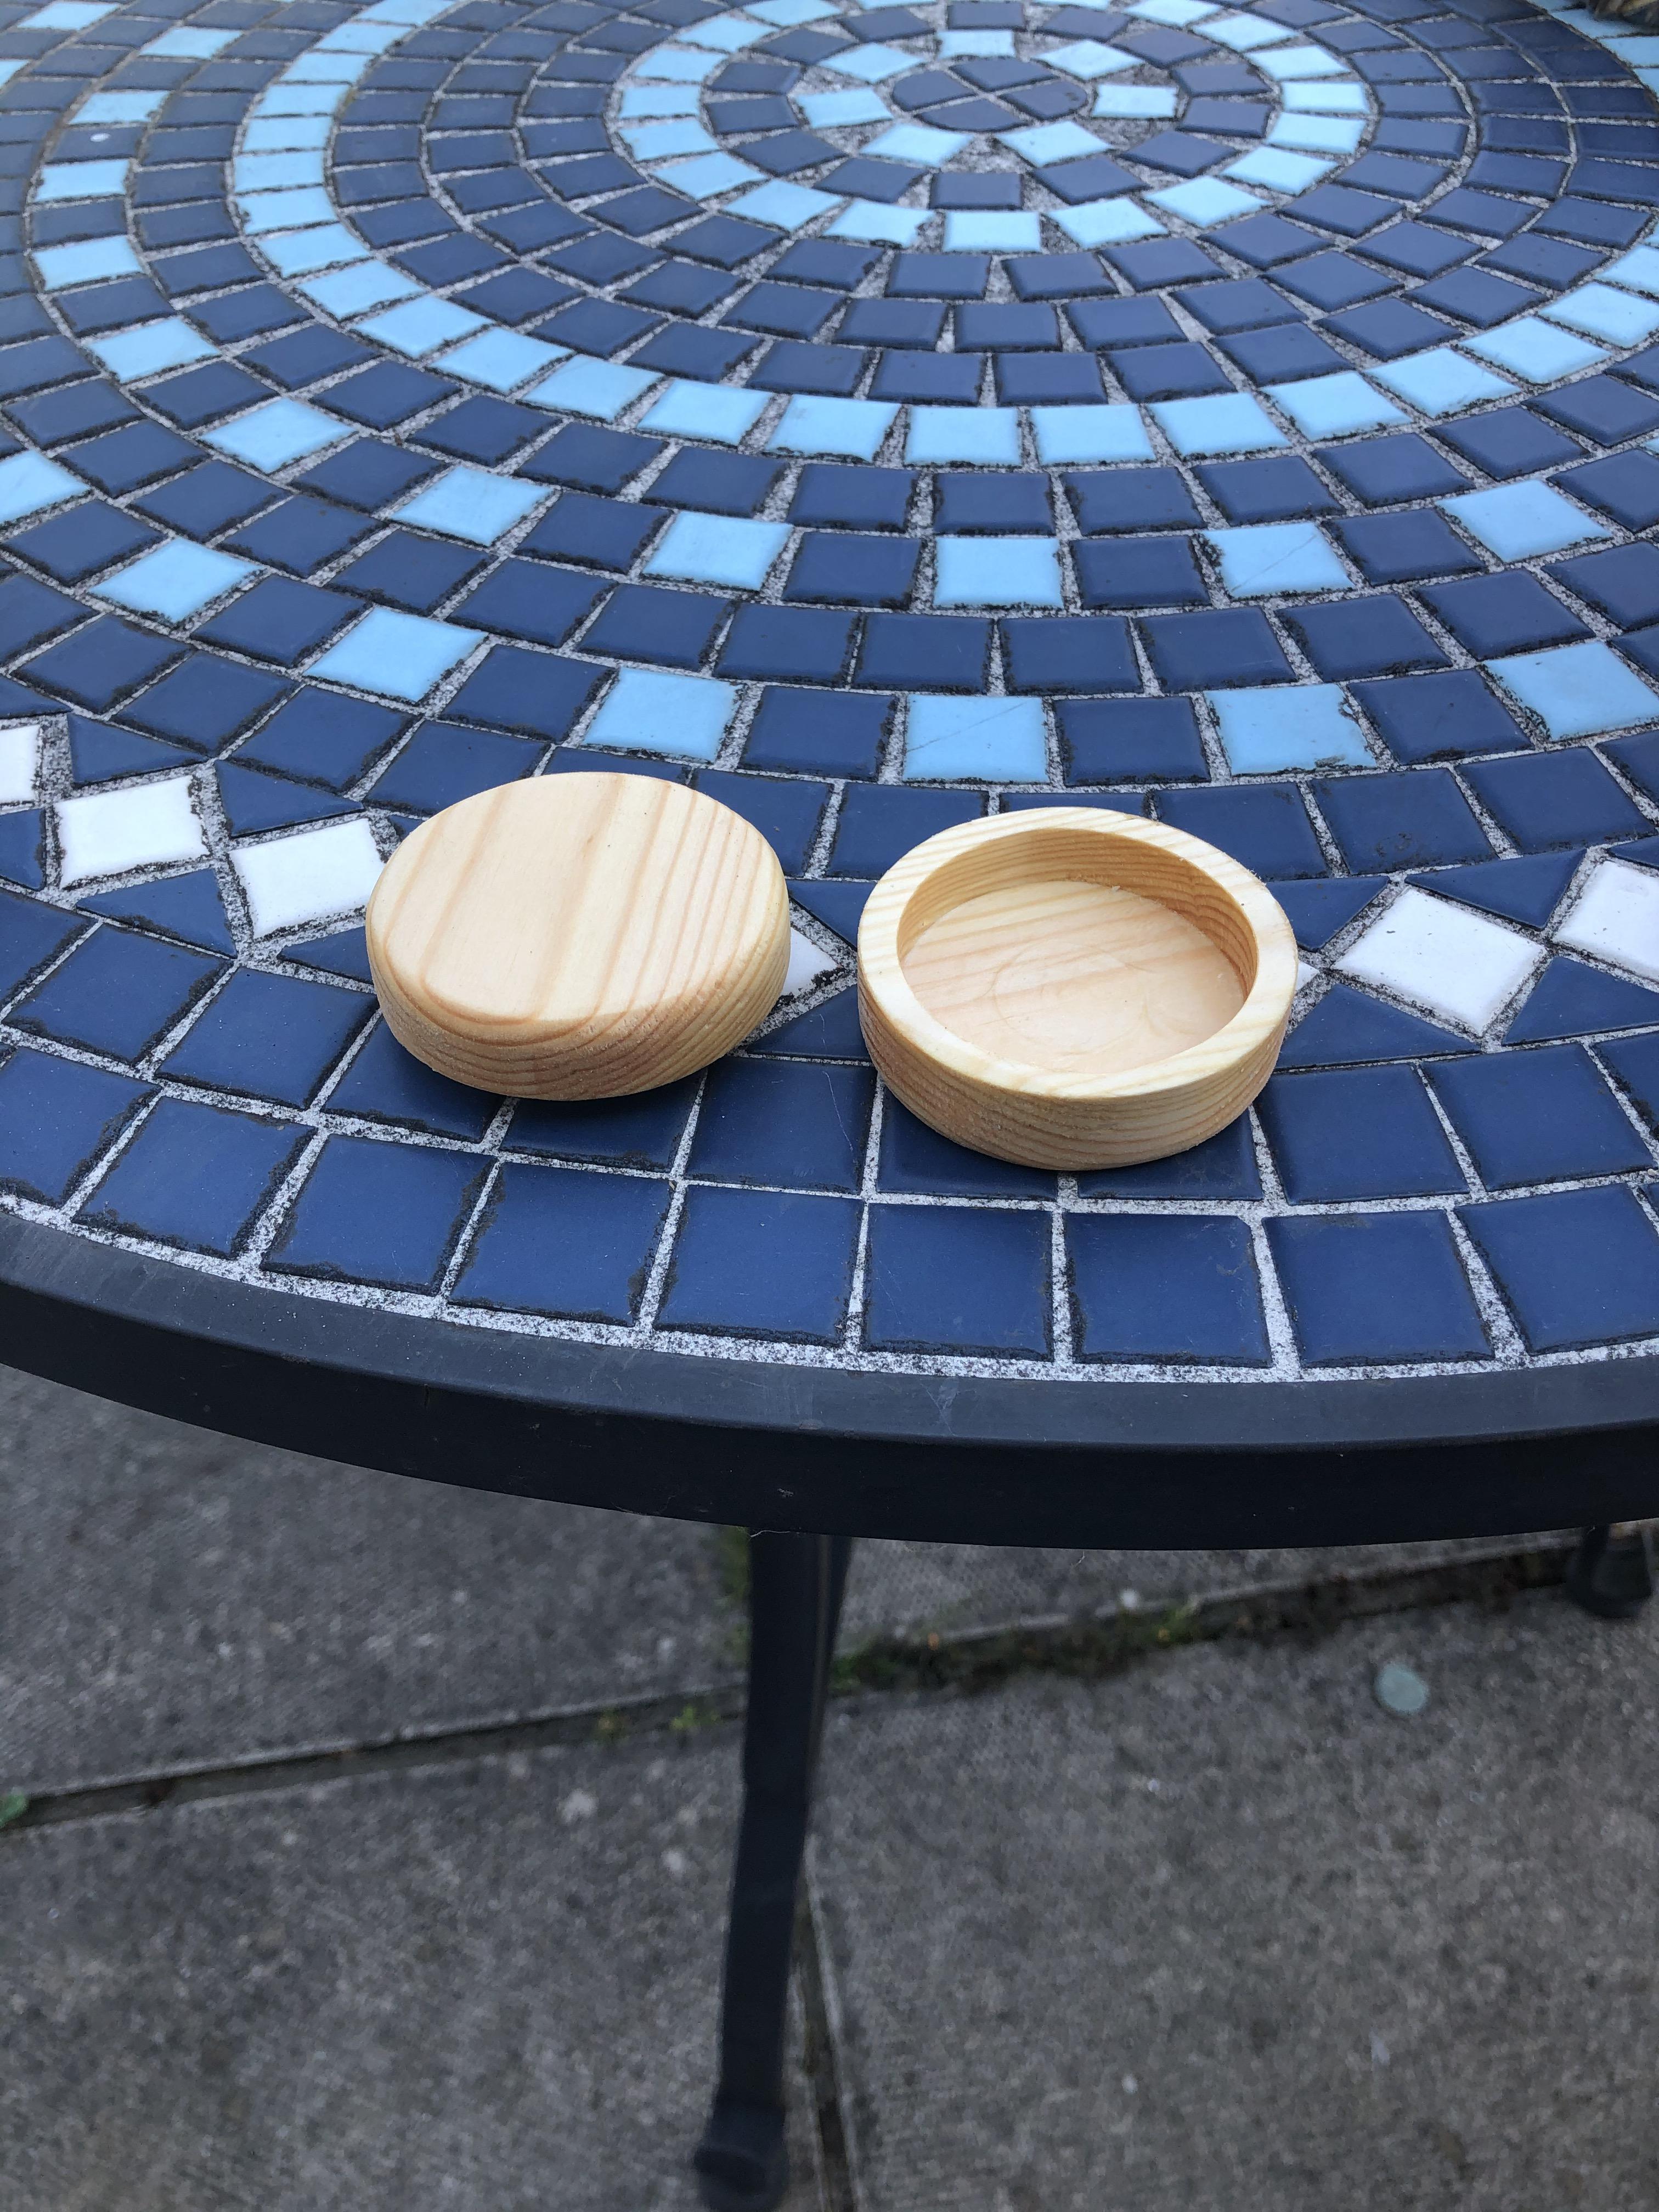
The base and lid can now be removed from the CNC machine then remove tabs and sand as necessary for a snug fit, I used a dremel with sanding drums for this, an offset in the design can be used if you prefer to do this.
I routed the edges of the Lid and Base so it loosely resembled a Pill/Tablet and then lasered the lid.
The Pill box was then finished off with boiled Linseed oil.
The wood I used for this pill box was not the best, it was just cheap spruce to make garden benches, the box turned out ok, but whichever wood you opt for the principle is the same.
I hope this Instructable gives you some good pointers with Vetric Cut2D and thanks for looking.