Pie (pi) Playing Cards

Each number/ face card has a specific ingredient of popular pies or items related to pies in someway. The cards themselves were designed to look like pie crust (front) in a pie pan (back). The playing card box was made to look like the typical container that pies are placed/ sold in.
Quick Guide of the Cards:
1. Coconut = Coconut Cream Pie
2. Cherry = Cherry Pie
3. Banana = Banana Cream Pie
4. Pumpkin = Pumpkin Pie
5. Apple = Apple Pie
6. Lemon = Lemon Meringue Pie
7. Lime = Key Lime Pie
8. Blueberry = Blueberry Pie
9. Orange = Orange Creamsicle Pie
10. Pecan = Pecan Pie
Jack (J) = Flour
(Q) = Rolling Pin
King (K) = Forks (for an eatend pie)
Joker = The number Pi and Symbol
Supplies
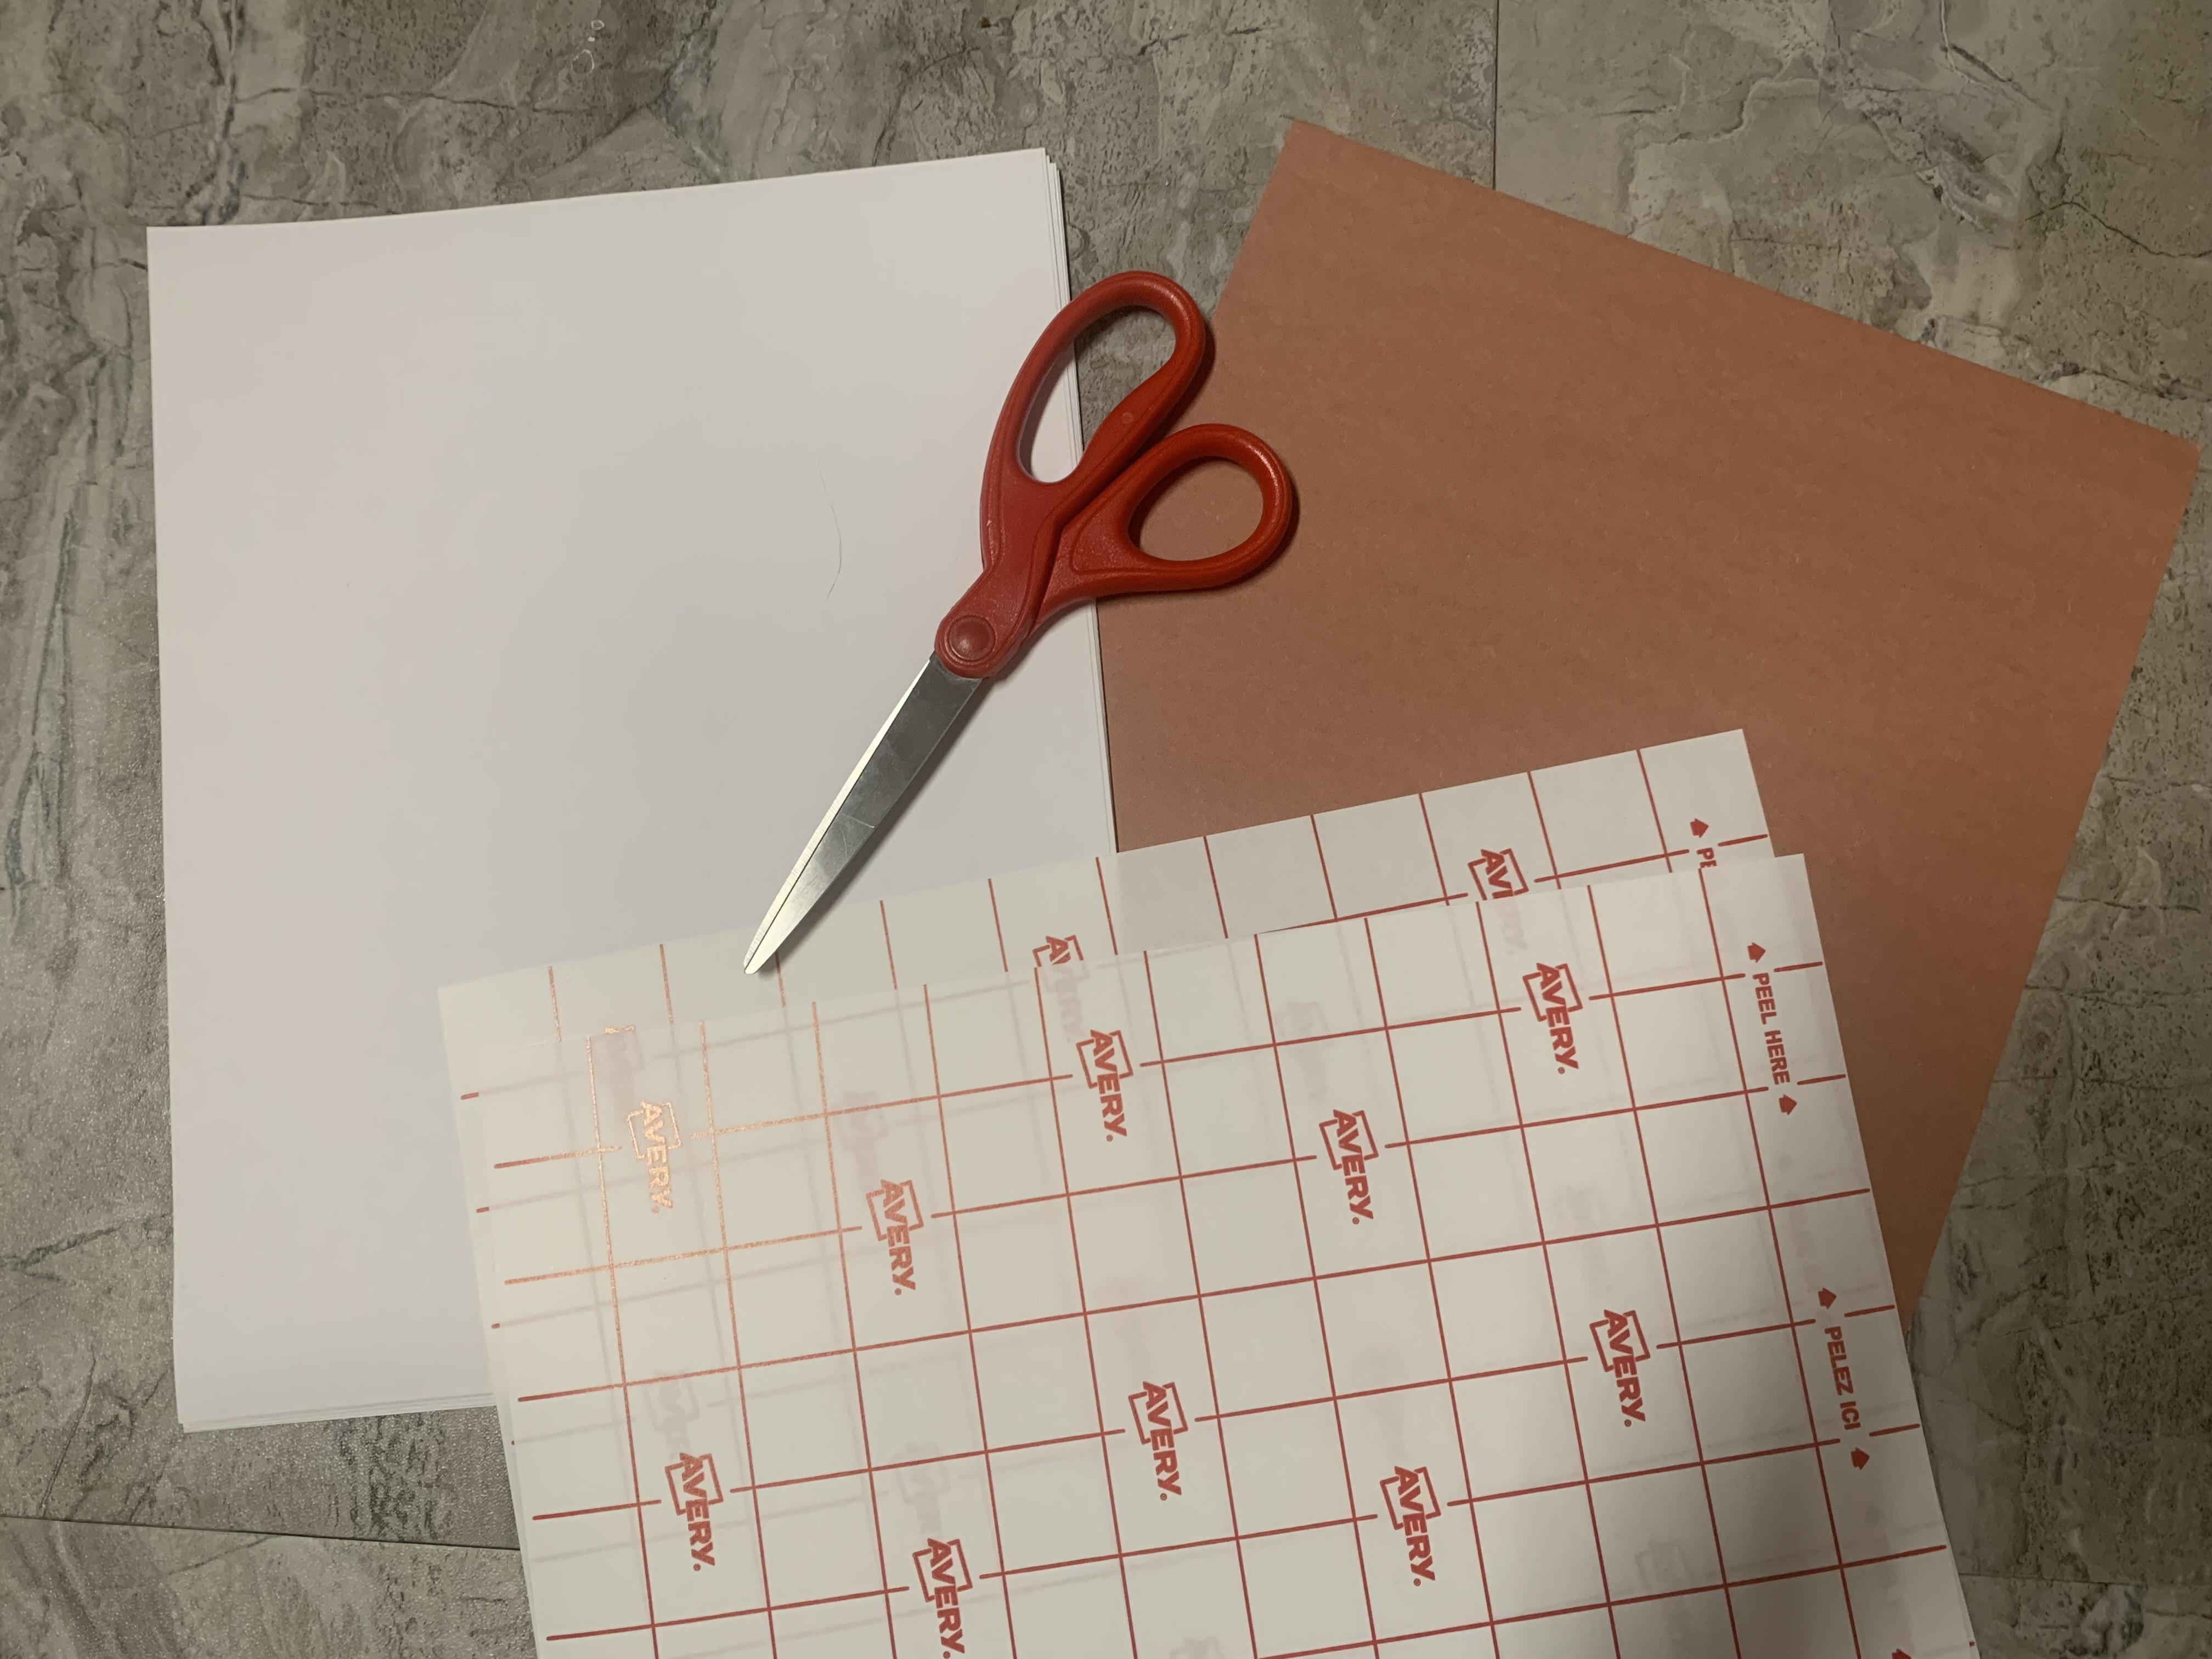
Materials:
- 10x - White cardstock paper (any kind of paper also works)
- Scissors
- Access to a Printer
Optional Materials:
- 20x - Laminating sheets / Duct tape to protect the cards
- 1x - Brown / Tan paper for card box
Files:
Design the Cards (or Use Provided File)


I drew each ingredient / items in procreate, then placed all the files into adobe illustrator to set up each card. You are welcome to change and make your own pie cards.
Just in case you don't have any of the software I used for this project I made a printable file for everyone to use.
Print the Cards

You can use any kind of paper you want, but cardstock paper is recommended.
If you have a printer that is able to print double sided, use this feature. The file was made with double sided printing in mind. If your printer does not have this feature (like mine) print the odd pages first then reinsert the pages flipped over (blank side of paper) then print the even pages.
***Disclaimer***
I used a Cricut Maker 3 to cut these cards and you may need to print accordingly with that software.
Laminating Cards (optional)

I used self-adhesive laminating sheets (Avery 73601) to place over the stickers (front and back) so they could last longer. This can also be achieved with clear duct tape.
Cutting Out the Cards

I used a Cricut maker 3 to cut out the cards. I downloaded the file (provided) into Cricut design space and used the "print and cut" settings, then placed the printed pages into the machine to begin cutting.
If you do not have a Cricut, you can cut the pie shape itself or cut into squares by hand. (which ever way is easier for you)
Playing Card Box (Optional)
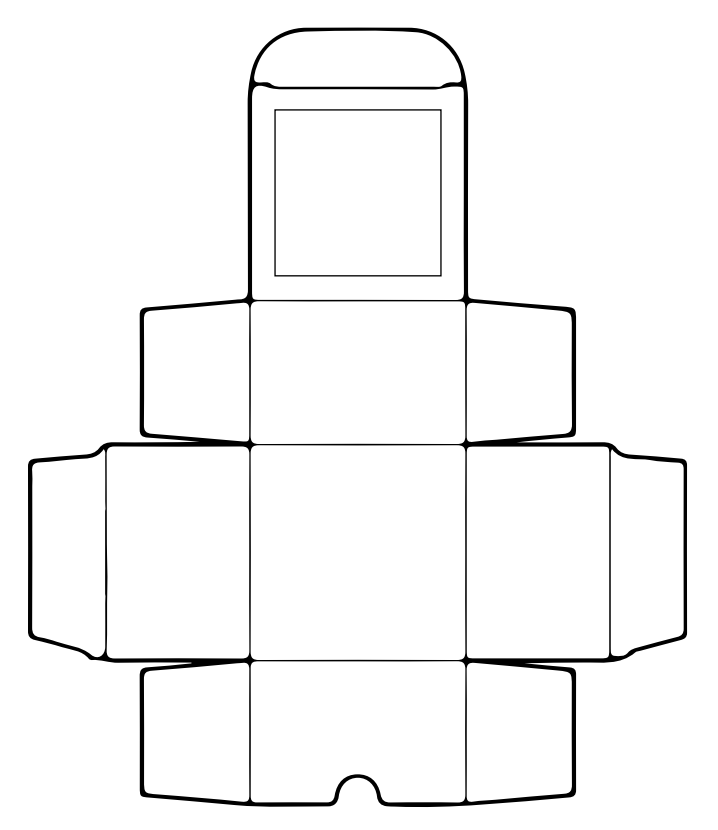
Package up the cards as if it is a real pie! The box was designed to look like a typical pie box to match with the cards. (File also provided) Print and cut using the method used for the cards. I cut out a little window (shown in file) and covered the window with clear tape so the cards would not fall out.
Complete!
Enjoy your Pie (pi) Playing Cards!