PiTextReader - an Easy-to-Use Document Reader for Impaired Vision
by rgrokett in Circuits > Raspberry Pi
19255 Views, 66 Favorites, 0 Comments
PiTextReader - an Easy-to-Use Document Reader for Impaired Vision
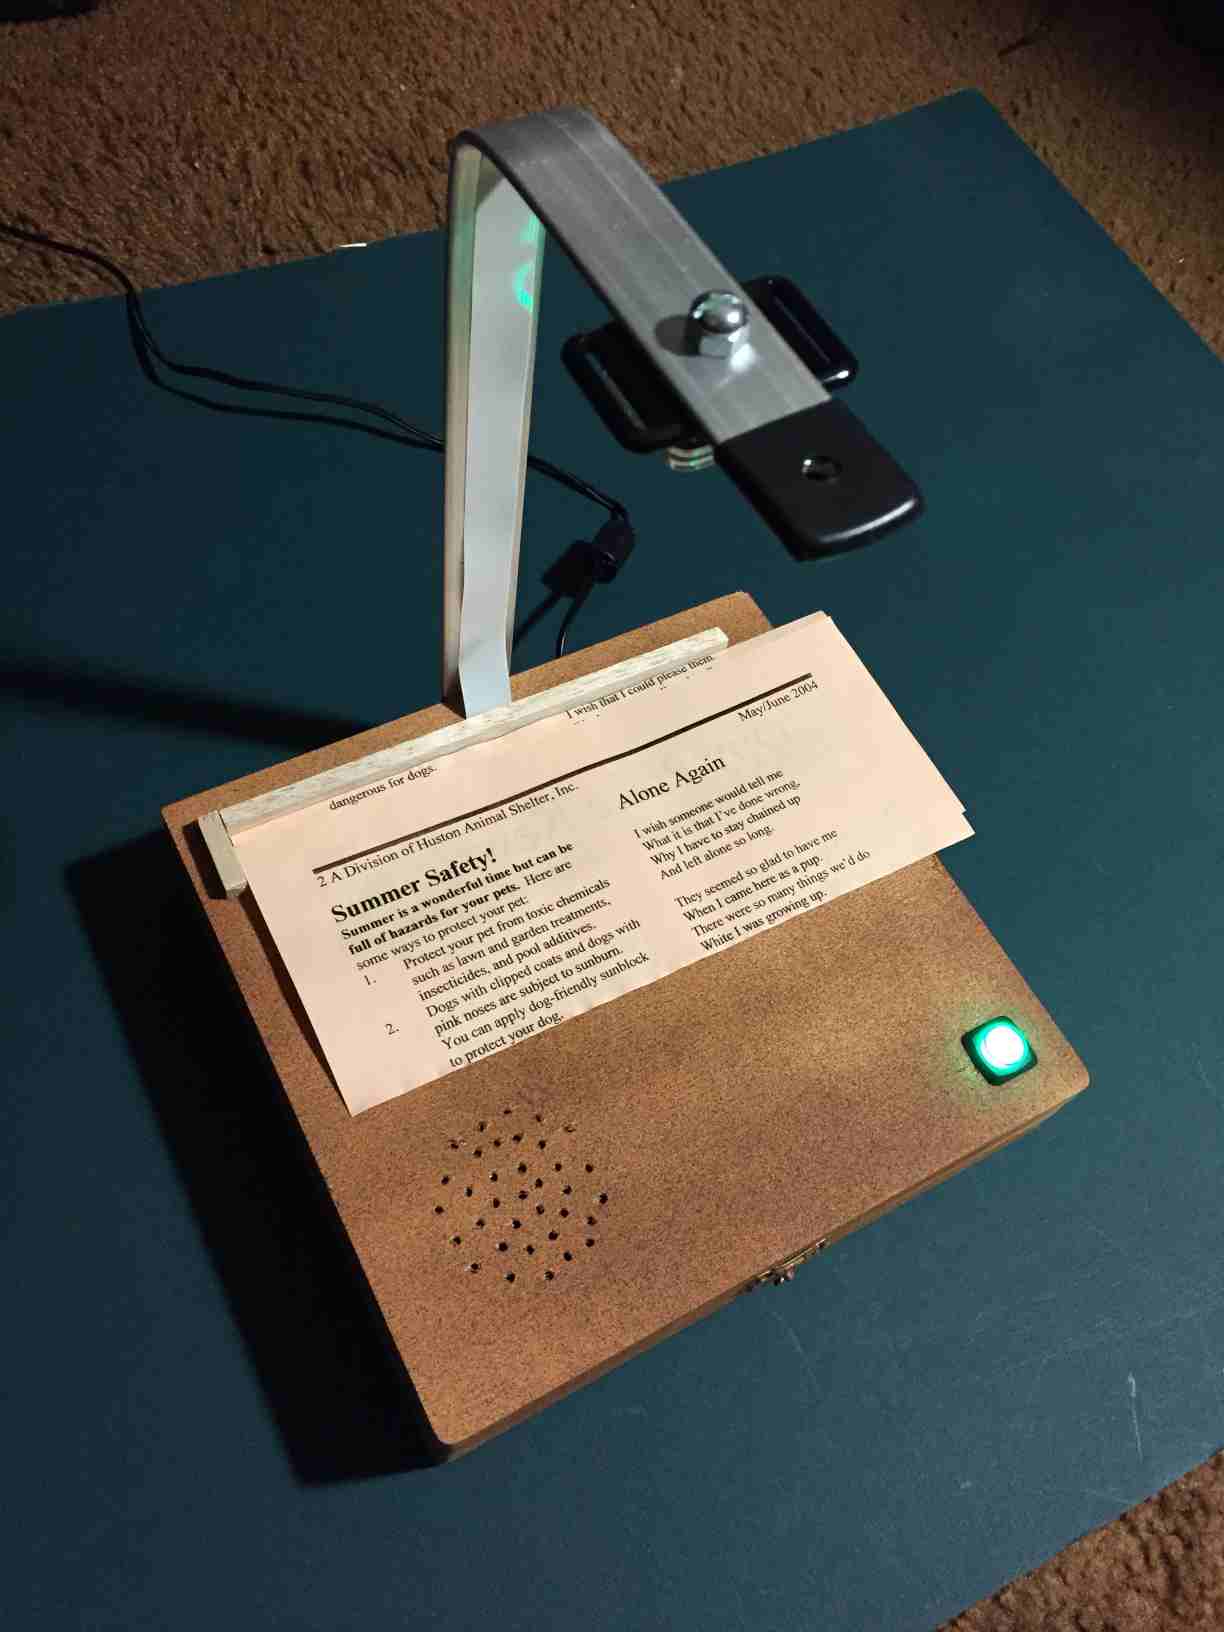
Overview
Update: Short video demo: https://youtu.be/n8-qULZp0Go
PiTextReader allows someone with impaired vision to “read” text from envelopes, letters and other items. It snapshots an image of the item, converts to plain text using OCR (Optical Character Recognition) and then speaks the text using text-to-speech.
The Reader is designed to be as absolutely simple to use as possible. No Internet needed, no graphical interface, only one button. Just place the item to be read onto the stand and press a button. After a few moments, the text will be read back to them.
I designed this for an elderly parent with eye sight issues such as macular degeneration, but can be used more broadly for anyone wanting printed text translated into audio speech.
There are many readers available, most though, cost thousands of dollars or are for someone who is tech savvy requiring Internet connectivity and the use of a smart phone. This reader is designed to be completely standalone with no internet and no interface other than a large push button.
Pros
- One button to control
- No Internet connection required
- No graphical user interface to navigate
- Total cost less than $100
- Always ready to go
Cons
- OCR can be limited due to fonts, colors, text size, etc.
- Speech sounds like Stephen Hawking
- Works best for small sections of black text on white paper.
Hardware
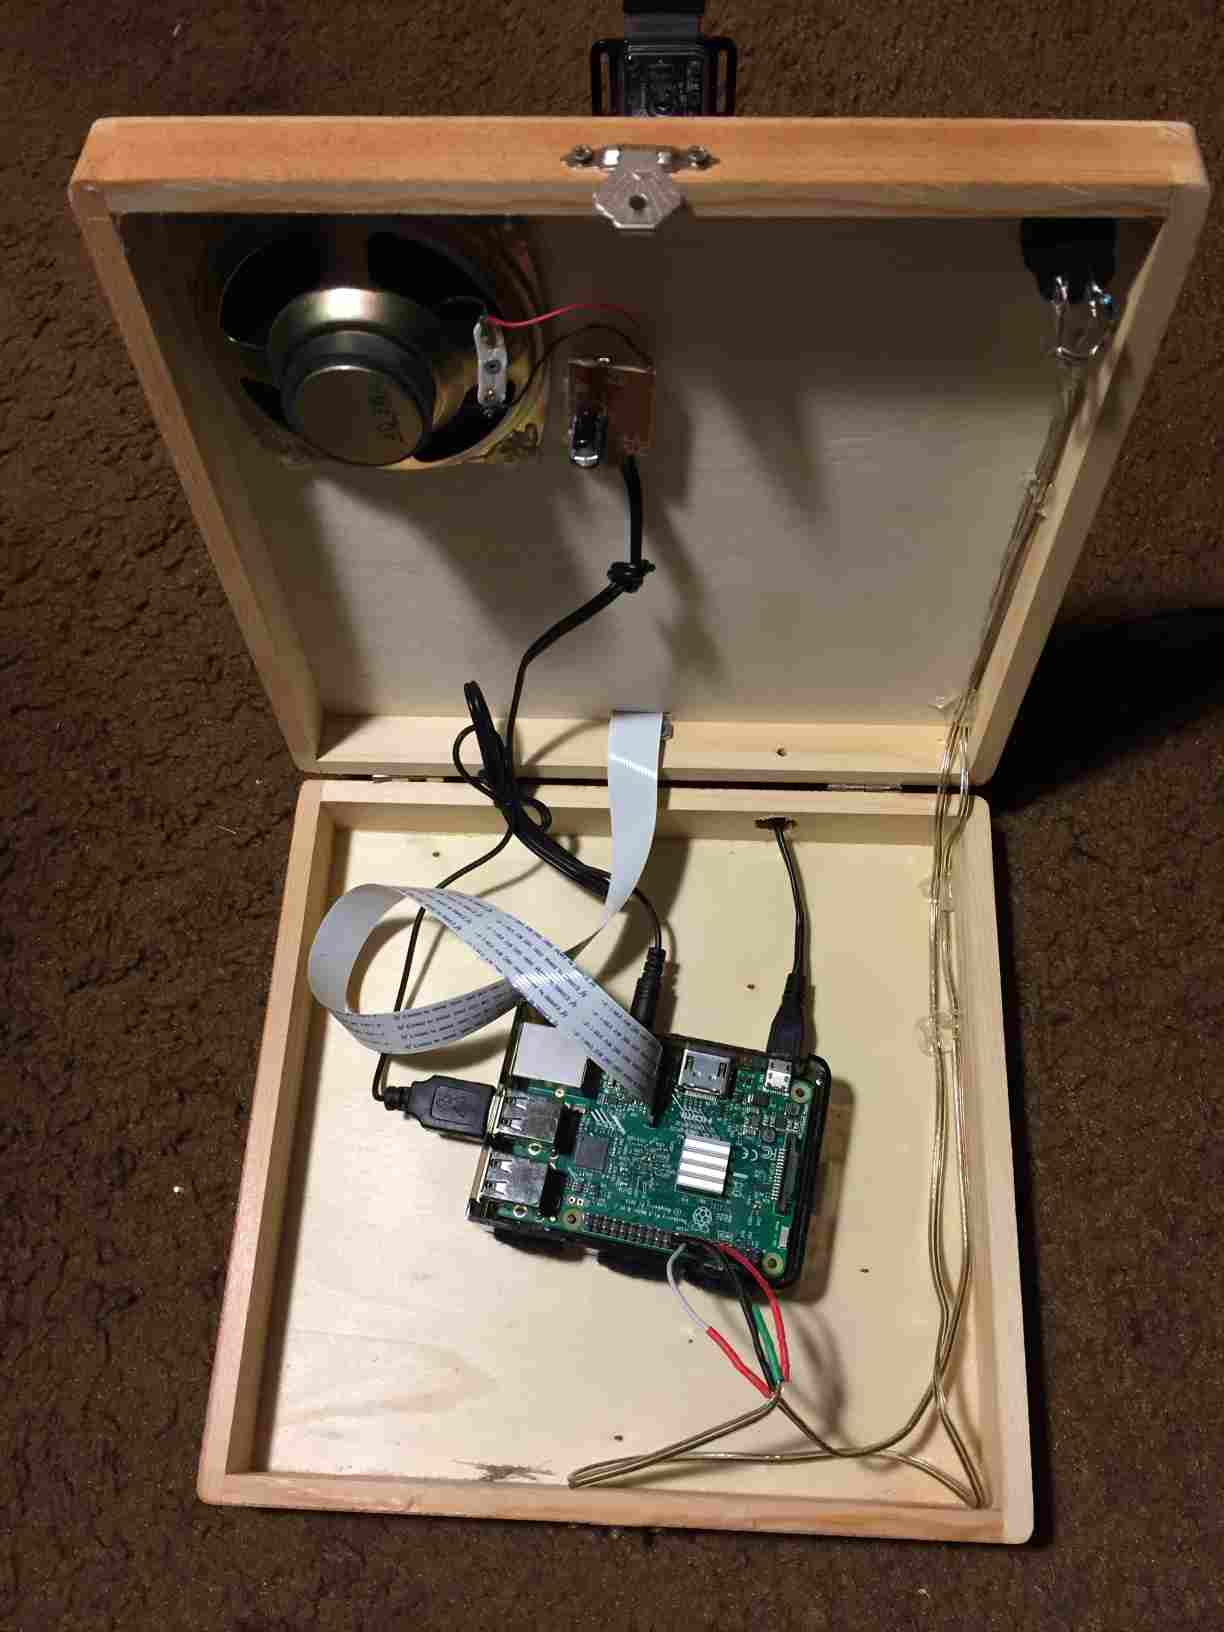
- Raspberry Pi 3 (needs the horsepower!)
- 8GB + micro SD card
- 5v 2A DC power supply for Raspberry
- Raspberry Pi Camera (Regular or NoIR)
https://www.adafruit.com/product/3099 - 24” Raspberry Pi Camera cable
https://www.adafruit.com/product/1731 - Camera mount or case
https://www.adafruit.com/product/3253 or
https://www.adafruit.com/product/1434 - Lens adjustment tool (to focus the camera)
https://www.adafruit.com/product/3518 - USB powered mono speaker (tiny size preferred!)
https://www.adafruit.com/product/1363 - Large Push button – Momentary with LED
https://www.adafruit.com/product/1440 - 330 ohm resistor for above button LED
- Wooden box 8”x8”x2” from Michaels or other large Art supply stores.
- Scrap wood for building camera stand:
- 8”Lx1”Wx1/2”T flat strip
- 5”Lx1”Wx1/4”T flat strip
- 6”Lx1/2”x1/2” square dowel for a placement guide
- Screws, glue, wire, solder etc.
Hardware Construction
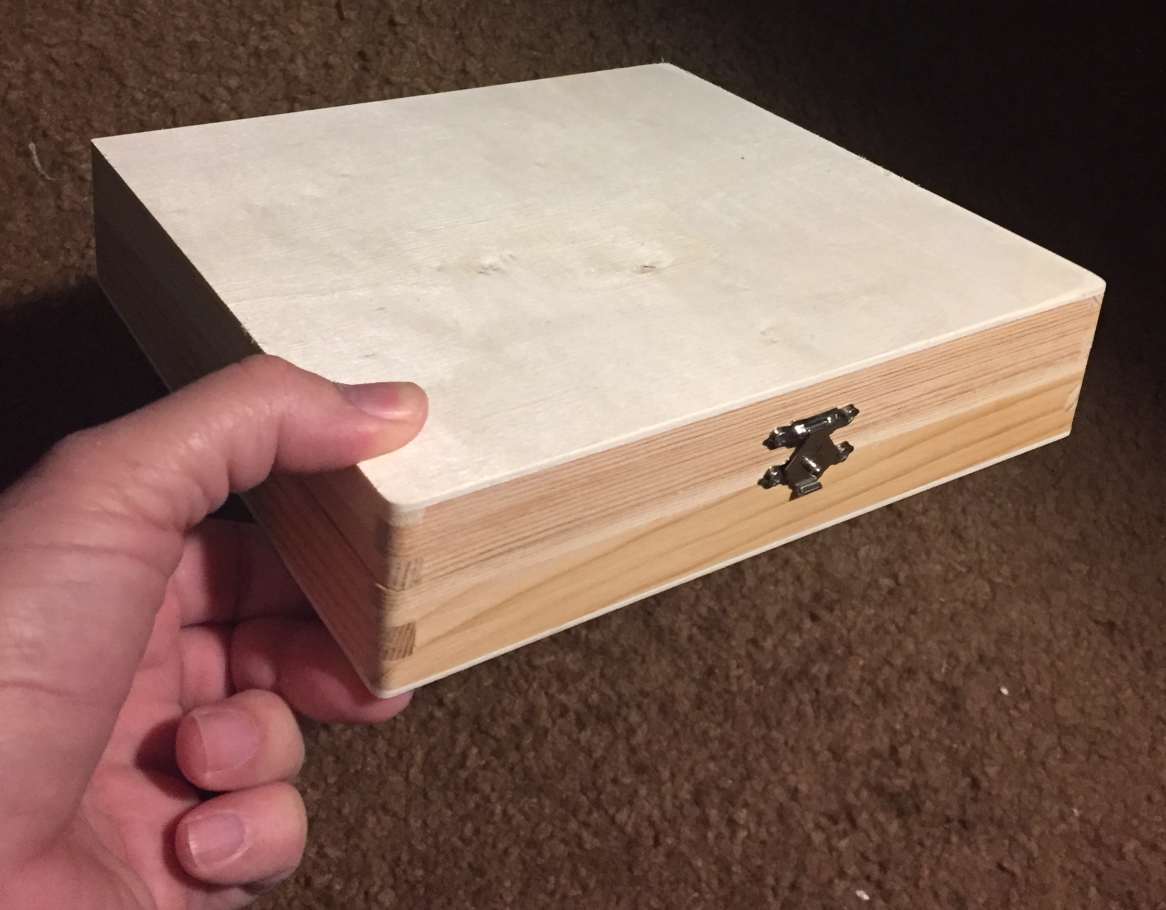
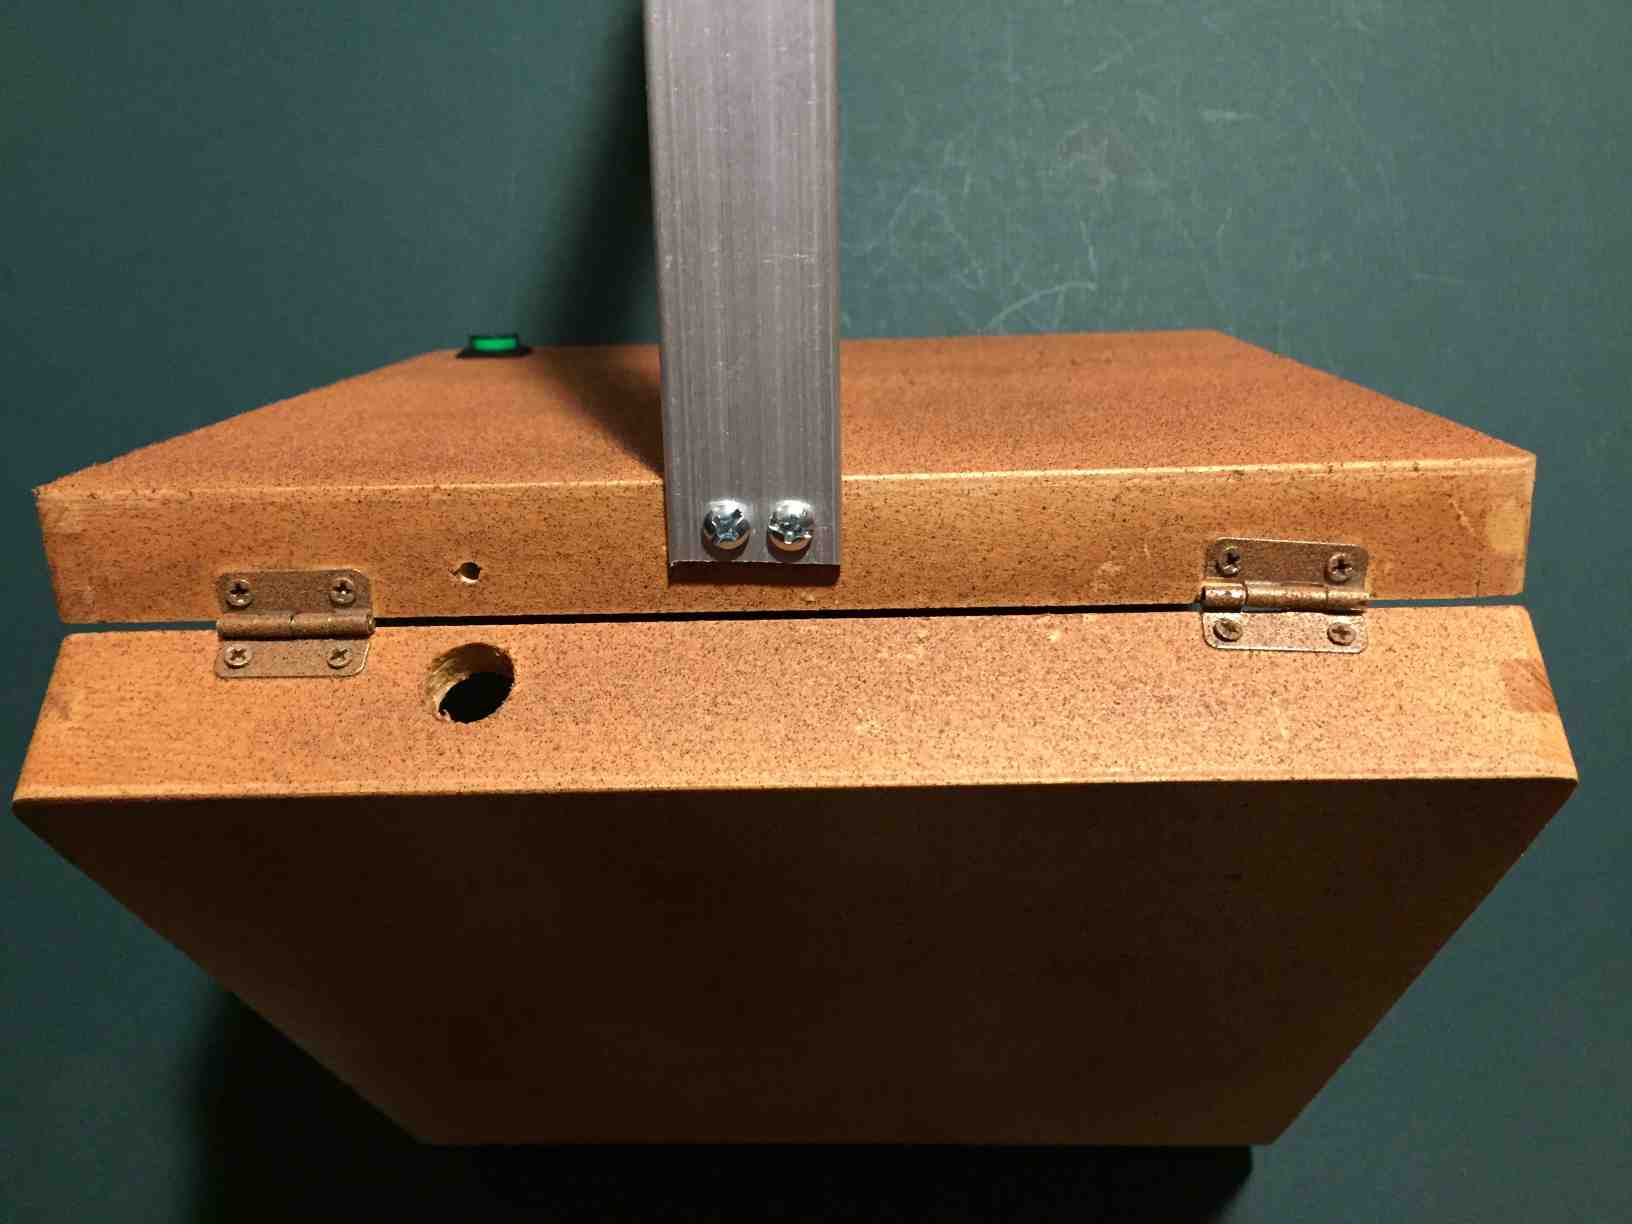
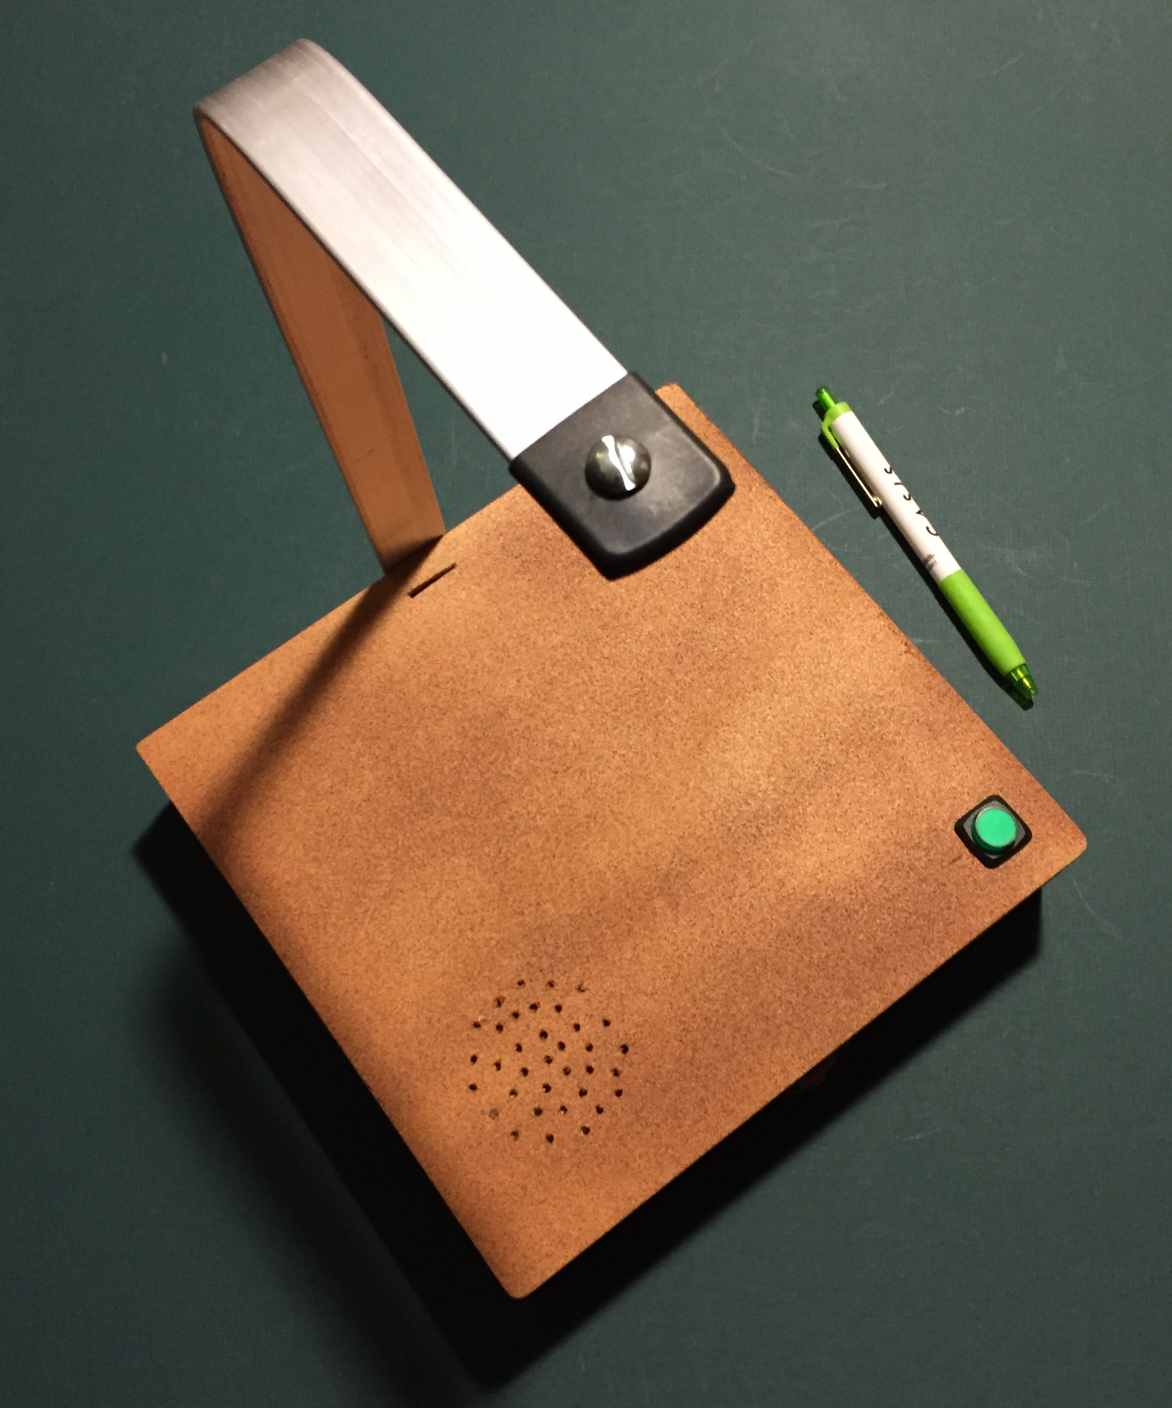
Using the 8”x8” box:
1. Drill hole in the back for the power cord.
2. Drill hole on the front right corner for the momentary button
3. Drill hole(s) for the speaker. (see audio step 12 below)
4. I used a piece of 2”x1/4”x13” aluminum strip for the camera mount, but wood strips work too.
a. Mount the 8” flat wood strip on the back of the box LID. (be sure it is attached to the LID and not the bottom of the box, else you won’t be able to open it!)
b. Mount the 5” flat wood strip on top of the 8” vertical with screws and glue.
NOTE that the height of the camera determines the size of the document and the focus needed. You may want to go higher for larger area documents.
5. Cut a 1”x1/16” slit in the box top near the 8” vertical for the camera cable to pass thru.
NOTE: For the electronics, I suggest NOT to permanently mount the components yet, so that you can easily make adjustments.
6. Connect the 24” camera cable to the camera. DO NOT CONNECT TO RASPBERRY yet.
Hardware Cont...
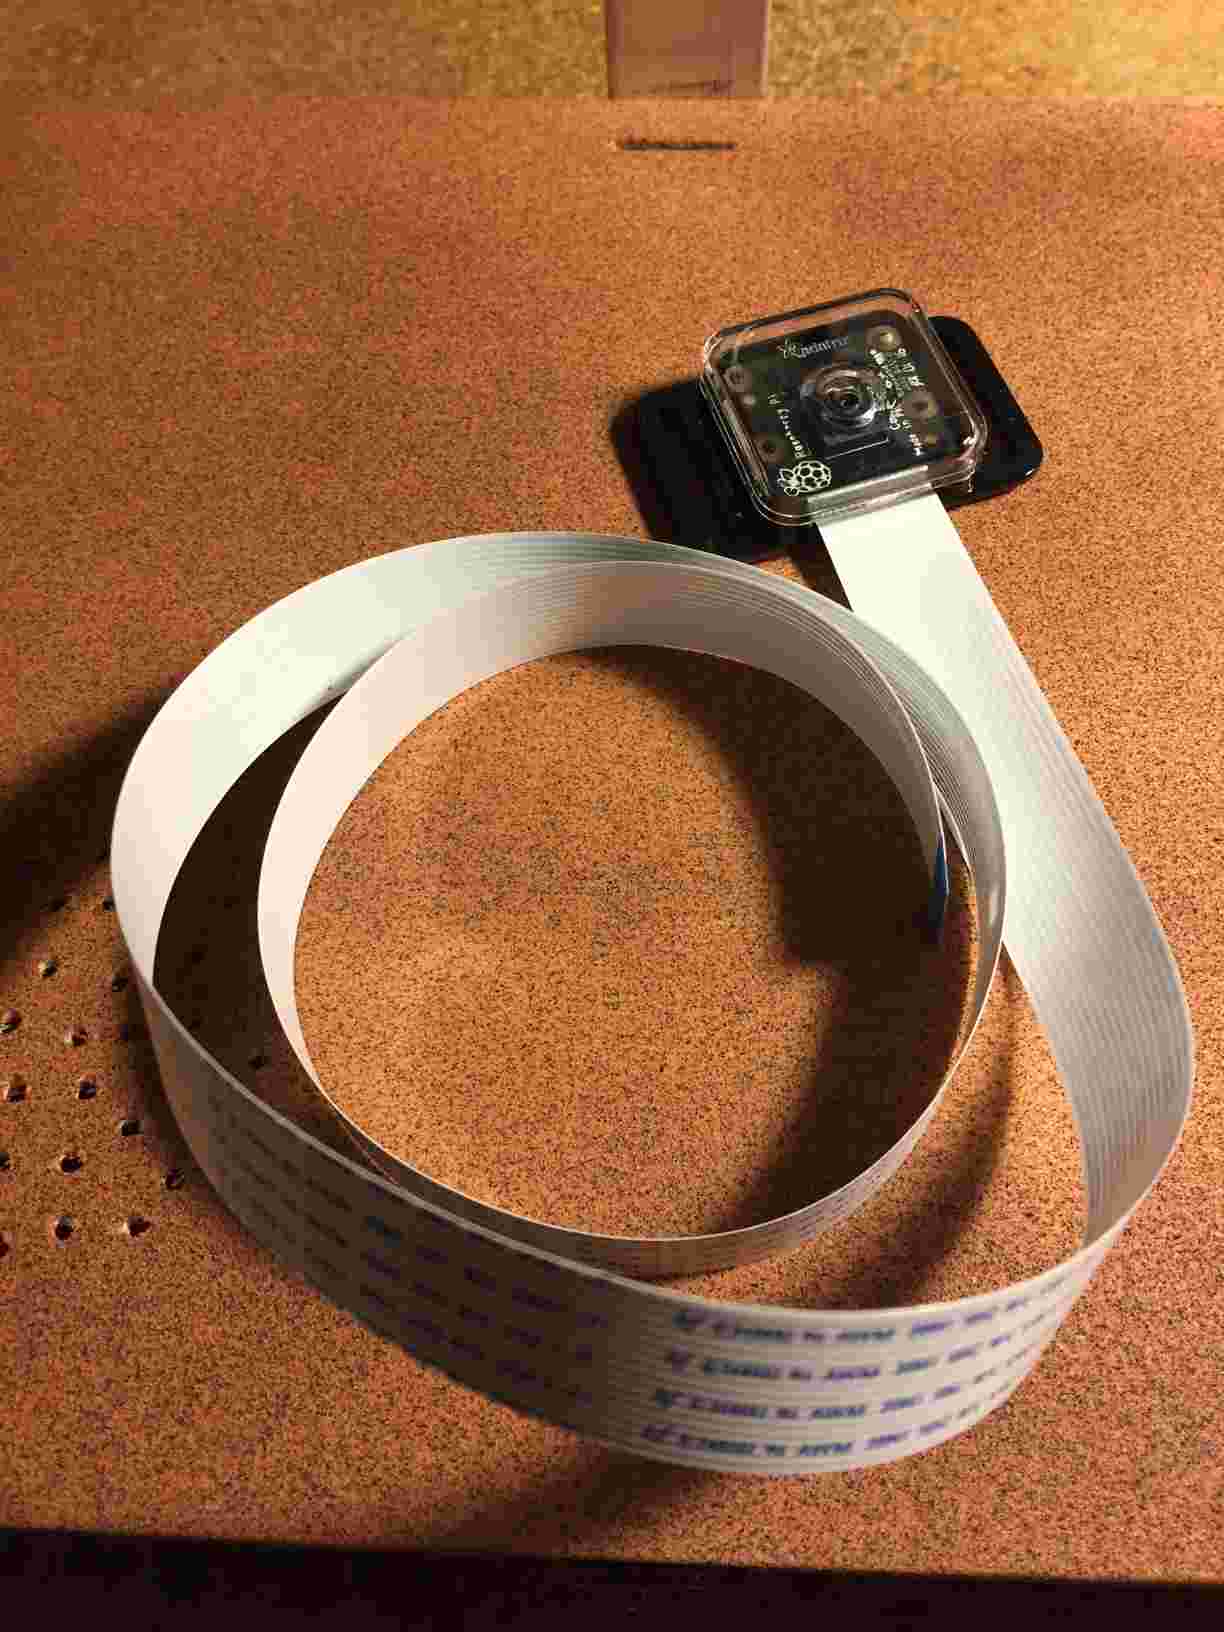
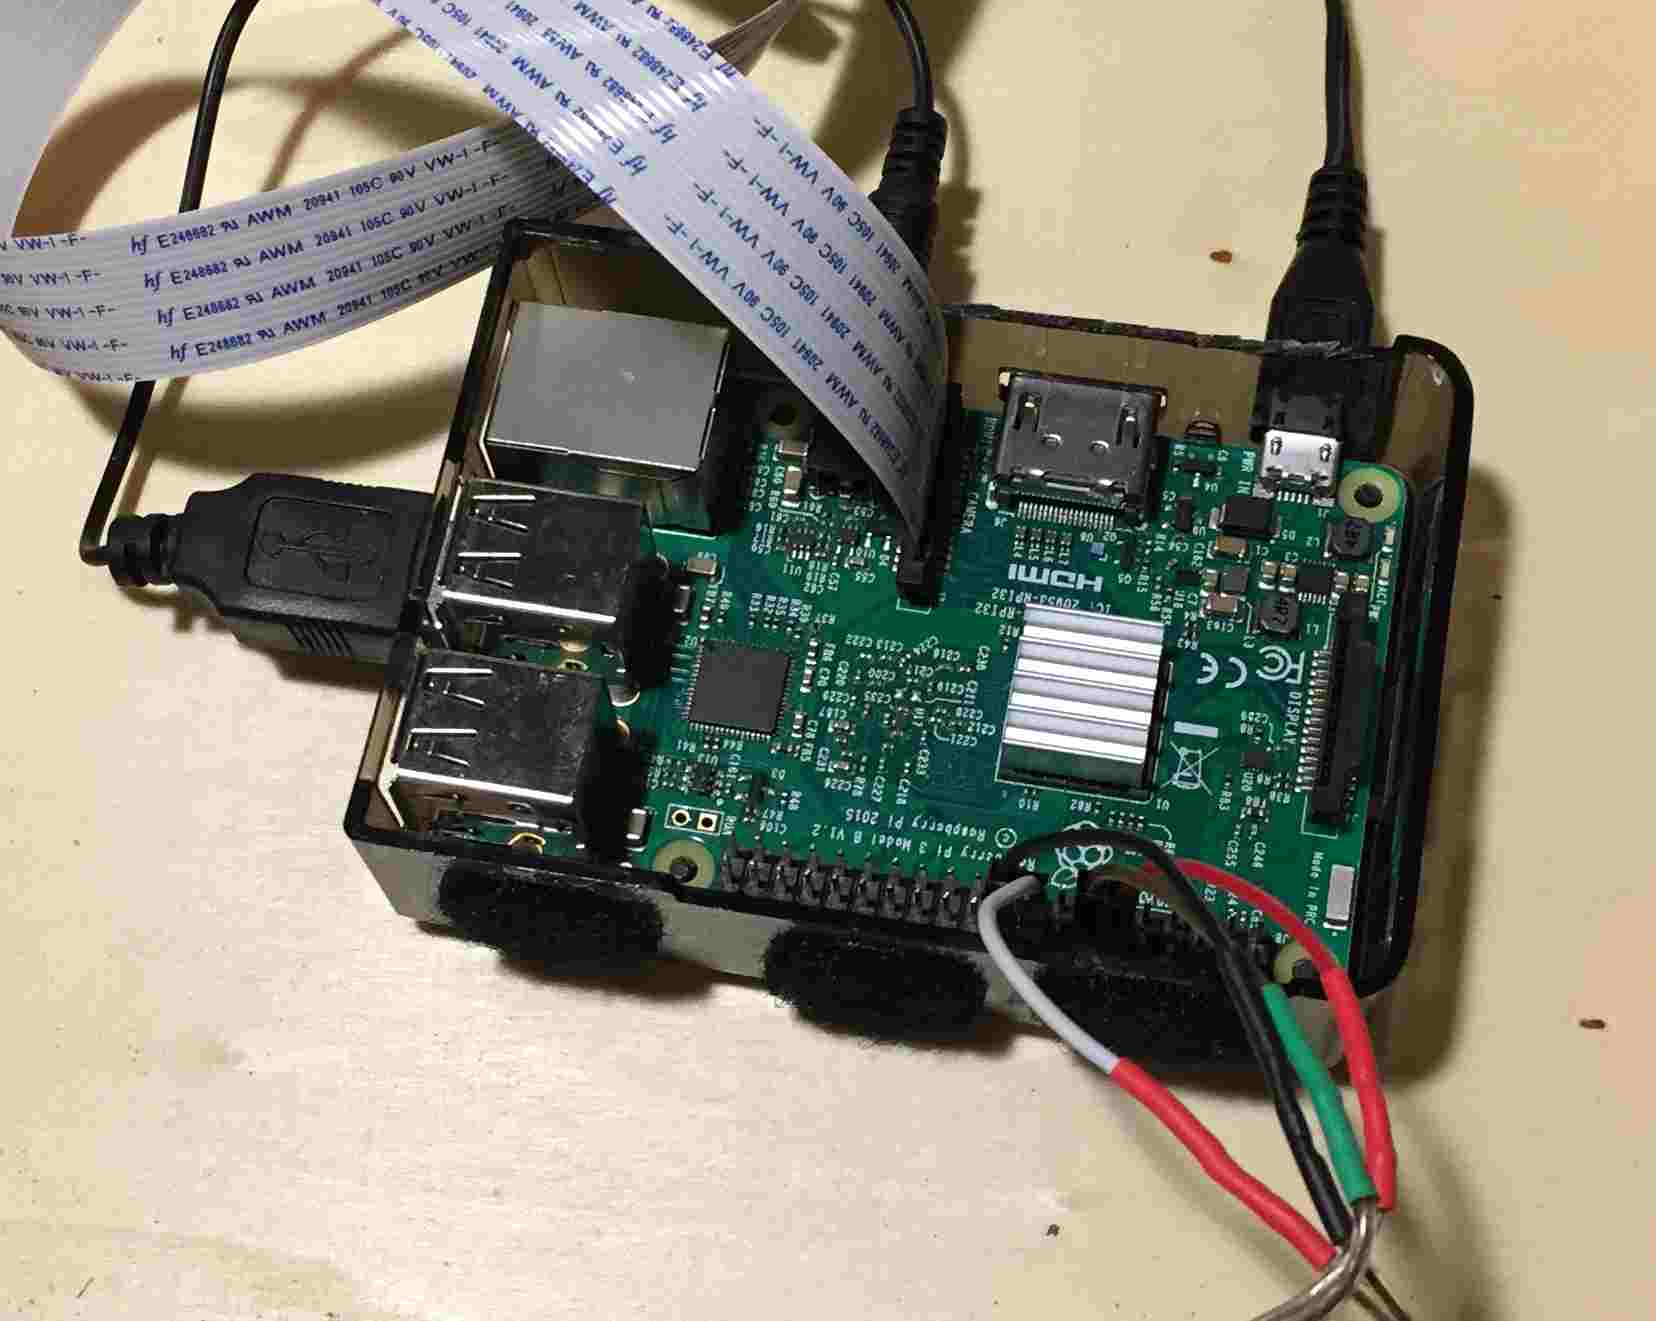
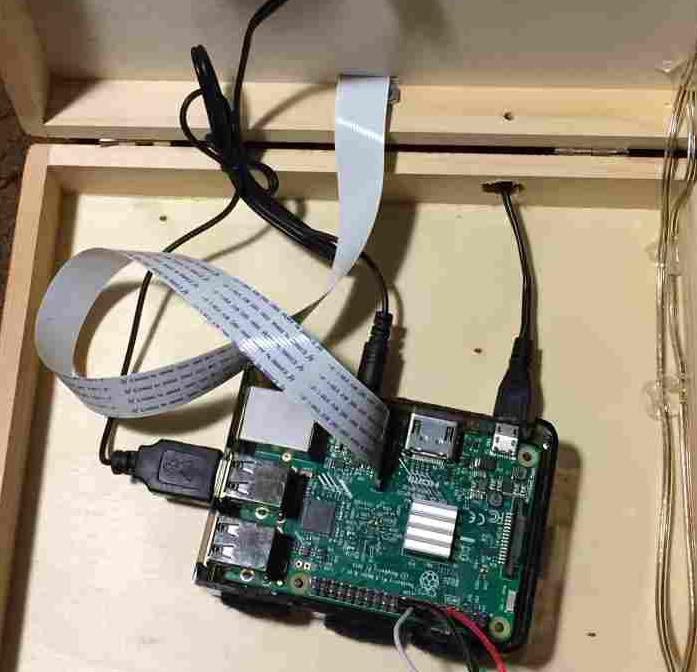
7. Mount the camera facing downward from the end of the 5” wood strip. I suggest waiting before placing the camera in its case so that you can focus the lens easier once running!
For initial focusing, use the Adjustment tool and turn the lens counter clockwise 1/4! turn.
8. Run the camera cable down thru the slot then attach it to the Pi. (Be sure Pi is OFF!)
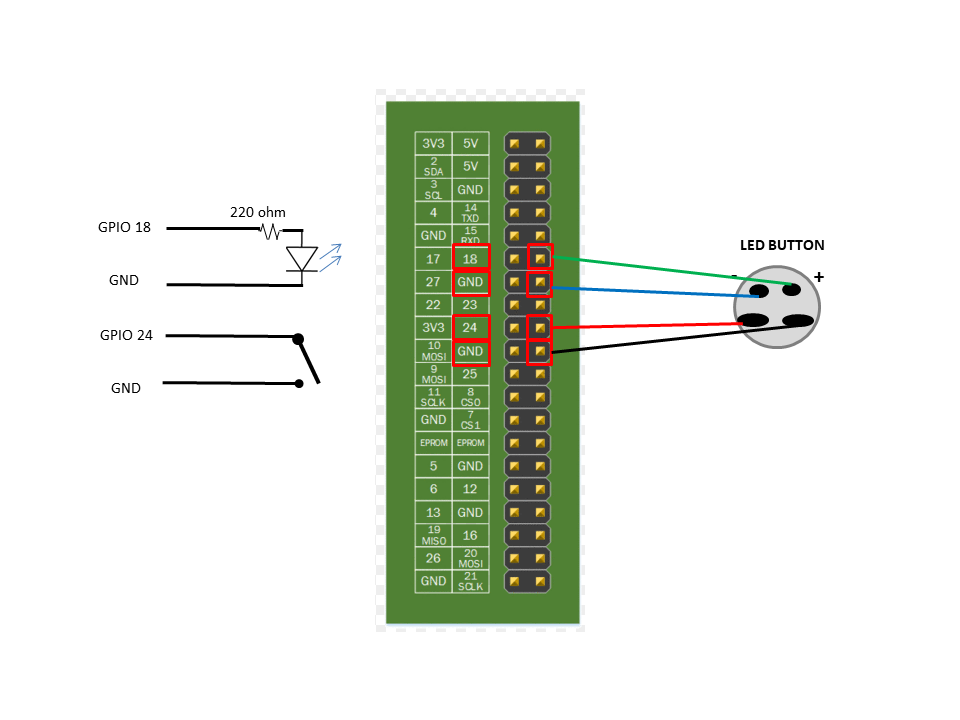
9. Install the momentary button and connect wires between it and Pi GPIO pins 24 and GND.
And connect the button’s LED through a 220 ohm resistor to Pi GPIO pins 18 and GND.
10. Run the power supply into the box and plug into the Pi. You need to use strain relief such as hot melt glue or similar to plug the hole in the box so the cable can’t pull out.
Audio Hardware Install...
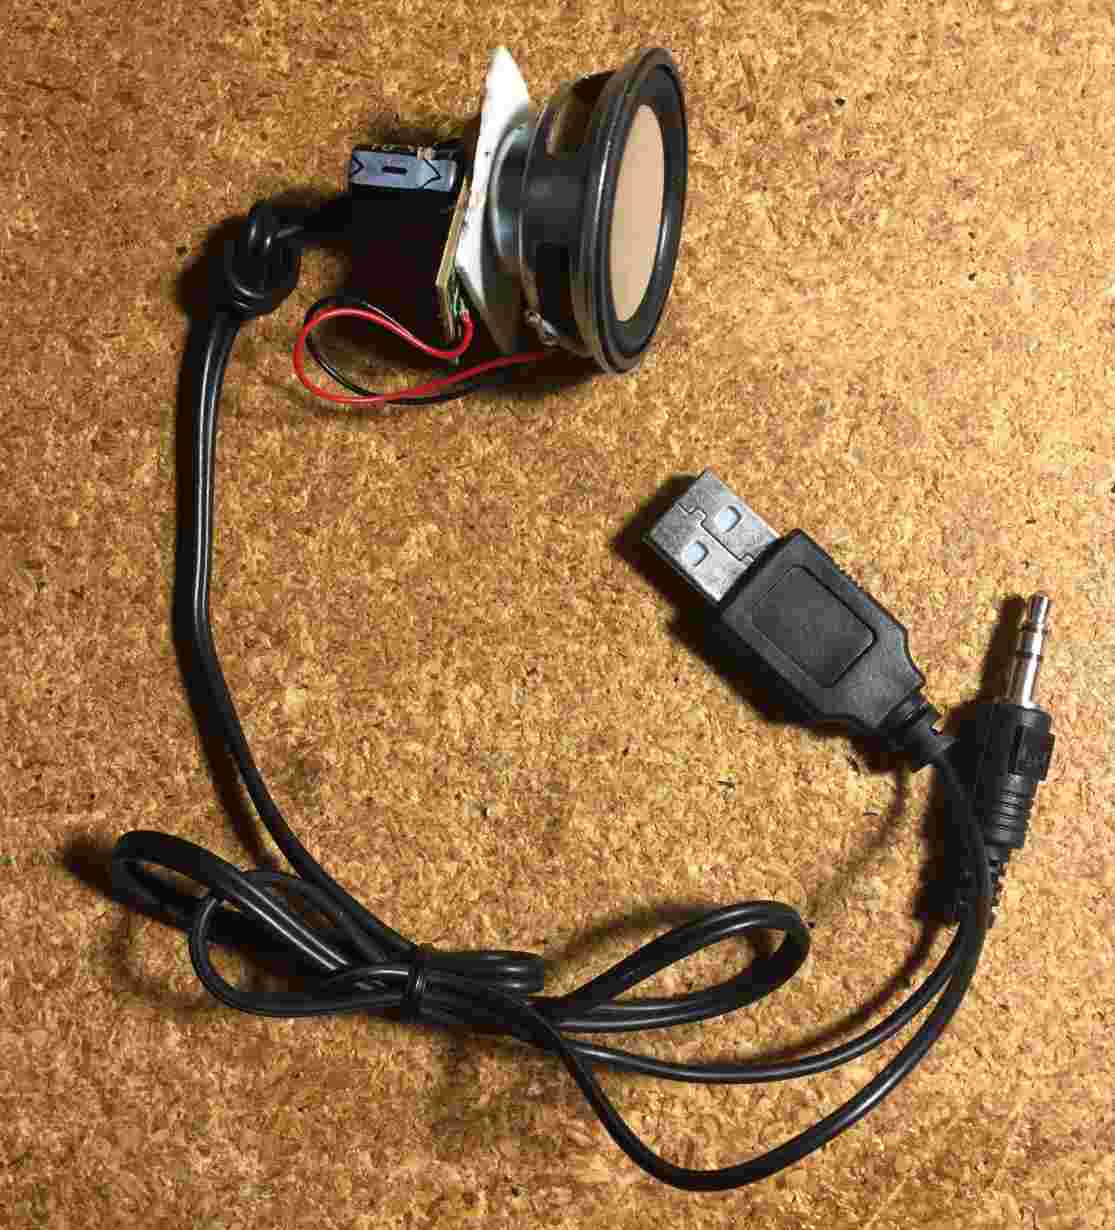
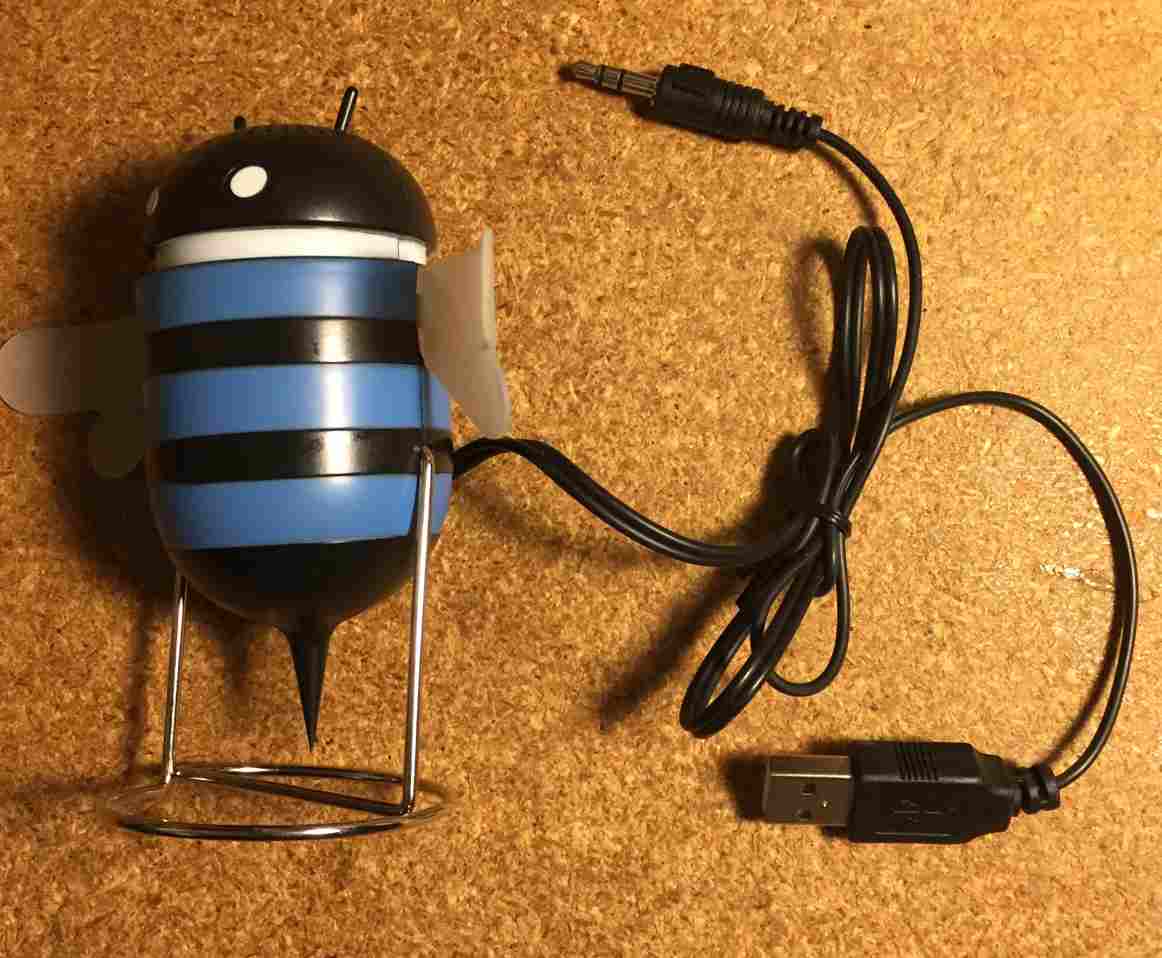
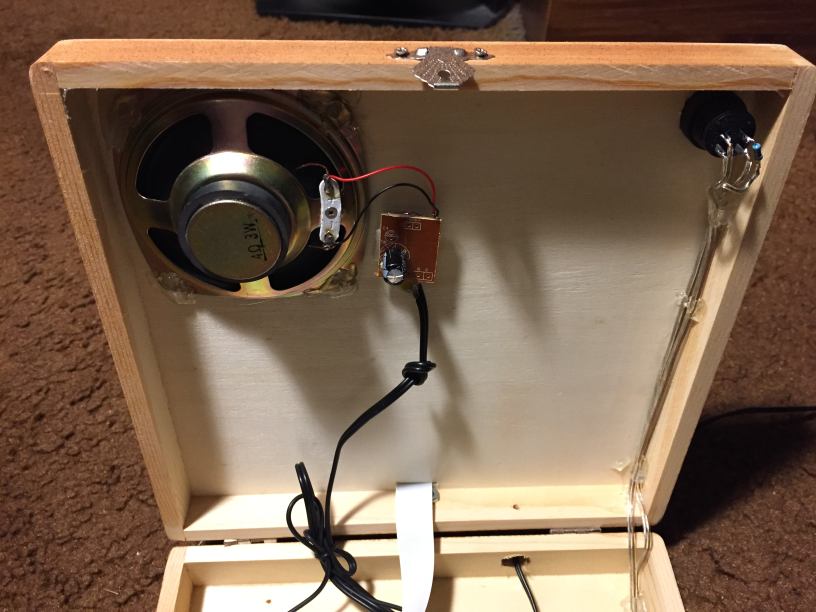
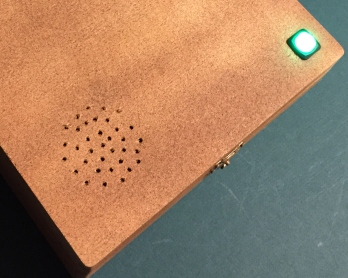
11. For the audio, I used a mono speaker that used USB power and mini jack audio.
I removed the electronics and speaker from the original plastic case, and plugged the audio plug into the Pi audio jack and USB cable into Pi USB. I also replaced the original tiny speaker with a larger 3” one for much better sound quality.
Since I mounted the speaker under the lid of the box, I drilled multiple small holes in the shape of a speaker grill.
12. Finally, check connections, particularly the camera cable and GPIO connections.
DO NOT POWER UP THE PI YET. Continue to software setup first…
There is no On/Off switch, as it is assumed that the Pi should be running all the time so it is ready to read something immediately. It only uses a few watts and can run 24/7 without issues.
It is possible for the SD card to become corrupted if unplugged or power failure, but it is rare. I have never had a unbootable SD card, yet. But do not plug into a power strip that is turned off/on regularly.
Operating System Setup & Configuration
Format an 8GB or larger microSD card with Raspbian Jessie (or Stretch) Lite (no GUI for this project).
https://www.raspberrypi.org/downloads/raspbian/
You will need to access the Raspberry remotely via SSH. On Windows, you can use PUTTY SSH terminal program. On Mac, just bring up a command terminal window. Alternately, you can temporarily plug a keyboard and HDMI monitor in just to get it built, but SSH makes it easier to work on later.
---------------------------------------
Did you know?
If you install Raspbian Jessie on an SD card using a Windows PC, you can create two files on the card to configure WiFi and SSH access before you boot it on a Raspberry?
For this, assume your SD card is currently mounted as K: on your PC:
1) Install the latest Raspbian Jessie image to the SD. For this project, Jessie Lite should work. https://www.raspberrypi.org/downloads/raspbian/
2) With notepad, create a file called just “ssh” and use Save As “All files” to K:\ssh The file can contain anything. It’s the filename that is important. Must NOT be “ssh.txt”!!!
3) With notepad, create a file called “wpa_supplicant.conf” with following:
<p>ctrl_interface=DIR=/var/run/wpa_supplicant GROUP=netdev<br>update_config=1</p><p>network={
   ssid="mySSID"
   psk="mypassword"
   key_mgmt=WPA-PSK
}</p>
Use Save As “All files” to K:\wpa_supplicant.conf
Again, do not let Notepad change it to “wpa_supplicant.conf.txt”!!
When you boot the Raspberry the first time, Jessie will look for these and connect to your Wifi. You will have to look on your Router for the IP address, though, since its auto assigned using DHCP.
---------------------------------------
Now ready to install to your Pi:
1. Insert the microSD card into the Pi and plug in the power now.
2. To remotely log in to your Raspberry Pi, you will need to find its IP address. You can try:
$ ssh pi@raspberrypi.local
Or from Putty, enter hostname: pi@raspberrypi.local
Otherwise, you will need to see if your Router will show the IP addresses of your local devices.
Once logged in as pi user:
3. Update your Raspbian OS:
$ sudo apt update
$ sudo apt upgrade
4. Configure the Raspberry and enable the camera:
$ sudo raspi-config
a. Change User Password
b. Interfacing Options -> Camera -> Enable
c. Finish
d. Reboot
Application Software Installation
Now log back into your Pi and you are ready to install the PiTextReader application.
1. Install initial required software:
$ sudo apt install git –y
2. Download the software:
$ cd /home/pi
$ git clone https://github.com/rgrokett/PiTextReader.git
$ cd PiTextReader
$ sh install.sh
You can safely rerun the install.sh multiple times, if needed.
3. Place a simple document to be read and run the test program which sets the volume, plays some text-to-speech audio and takes a picture.
$ sh test.sh
If you get any error messages, check Troubleshooting below. Edit the test.sh program to adjust the volume if necessary.
4. The test program saves a photo to “test.jpg”. You will need to copy this image over to a PC so that you can see the focus and the field of view. A quick & dirty way to do this is to start a tiny web server on your Pi and use a browser:
$ python -m SimpleHTTPServer 8080 &
Then browse to http://{IPaddress}:8080/
Click on the test.jpg
Use the Lens adjustment tool to focus the camera.
Re-Run the test.sh program as often as needed.
NOTE: if you need to adjust the raspistill camera settings, you will need to also edit the pitextreader.py program with the new settings.
CAMERA = "raspistill -cfx 128:128 --awb auto -rot 90 -t 500 -o /tmp/image.jpg"
5. $ sudo reboot
The Pi should come up and run automatically, ready for operation.
Operation
When you boot the Pi, you will hear a “OK Ready” as well as see the button LED light up.
Anytime the LED is lit, the unit is ready to go.
Put some printed text under the camera, preferably just a few lines of black text on white paper.
Note that the camera doesn’t need a lot of light, particularly the NoIR. Ambient room light was fine for mine. Too much light causes uneven lighting and distorts the OCR.
Press the button.
The LED should light and a camera click sound as well as speech “OK working” should sound.
After a few seconds, the text should be read. If the text is distorted, font too dark or too light, sideways or upside down, then the result will be gobbly-gook speech!
It can take between 5-30 seconds to convert and start reading, so be patient. The more text, the longer it takes.
If you need to stop reading, you can press the button while the audio is still playing (the LED is off.)
Once the speech is completed, after a couple seconds, the LED comes back on and you will hear “OK Ready” again. It’s ready to take another scan.
Note that the distance the camera is set for the Raspi camera and for just a portion of a 8x10 document. I found it is best to read parts of a document at a time as full pages can be hard to listen to. Many of the things needed to be read are smaller text, so if the camera is too far away, it can’t resolve.
To troubleshoot, check below, particularly the SCANNING AND OCR section.
If all is well, permanently mount all the components to complete the construction.
Troubleshooting
1. CAMERA
Verify the camera is enabled via
$ sudo raspi-config
Interfacing Options -> Camera
Reseat the ribbon cable as this is delicate and must be exactly aligned. If necessary, google “raspberry pi camera troubleshooting” to look for similar issues. Also google the error message you get when running the test.sh program.
2. AUDIO
You do have volume up?
$ sudo amixer -q sset PCM,0 100%
Run audio test
$ aplay /usr/share/sounds/alsa/Front_Center.wav
No audio still? Force audio out the jack:
$ sudo raspi-config Advanced Options -> Audio -> Force headphone jack
3. SPEECH
If audio above sounds good, then try:
$ flite -t TEST
Google error messages, if any.
Rerun the install.sh
Yes, the speech sounds a bit like Stephen Hawking.
4. SCANNING AND OCR
This is the biggest area of tuning needed. For the OCR to work properly, the camera image must be good quality; the document must be smoothly lit, not necessarily brightly though.
The text must be flat and clear. Not all fonts are readable.
To verify the quality, examine the two files:
/tmp/text.txt and /tmp/image.jpg
You can start the tiny web server and use a browser:
$ cd /tmp $ python -m SimpleHTTPServer 8080 &
The text in the image should be plain and readable. The image should be right side up, good contrast, in focus. You may need to flip the document around if it’s upside down. (remind the user that if they hear gobbly-gook, then try flipping the document around. ) If the image has poor contrast, you will need to improve the lighting, too much or too little can cause problems. Uneven lighting will also cause parts of the text to fail. You can find more help by googling “tesseract-ocr help”
5. HDMI MONITOR/KEYBOARD
Yes, you can plug a keyboard & monitor into the Pi, esp. if you can’t find the IP address or can’t access via SSH. There is no GUI interface and this may turn off the sound unless your monitor has a speaker.
6. INTERNET/WIFI
If the WIFI isn’t working, you can just temporarily connect an Ethernet cable and use that.
This project doesn’t need Internet or WiFi once you have completed the installation and setup.