PiNAS - the Raspberry Pi NAS
by araymbox in Circuits > Raspberry Pi
382880 Views, 1646 Favorites, 0 Comments
PiNAS - the Raspberry Pi NAS
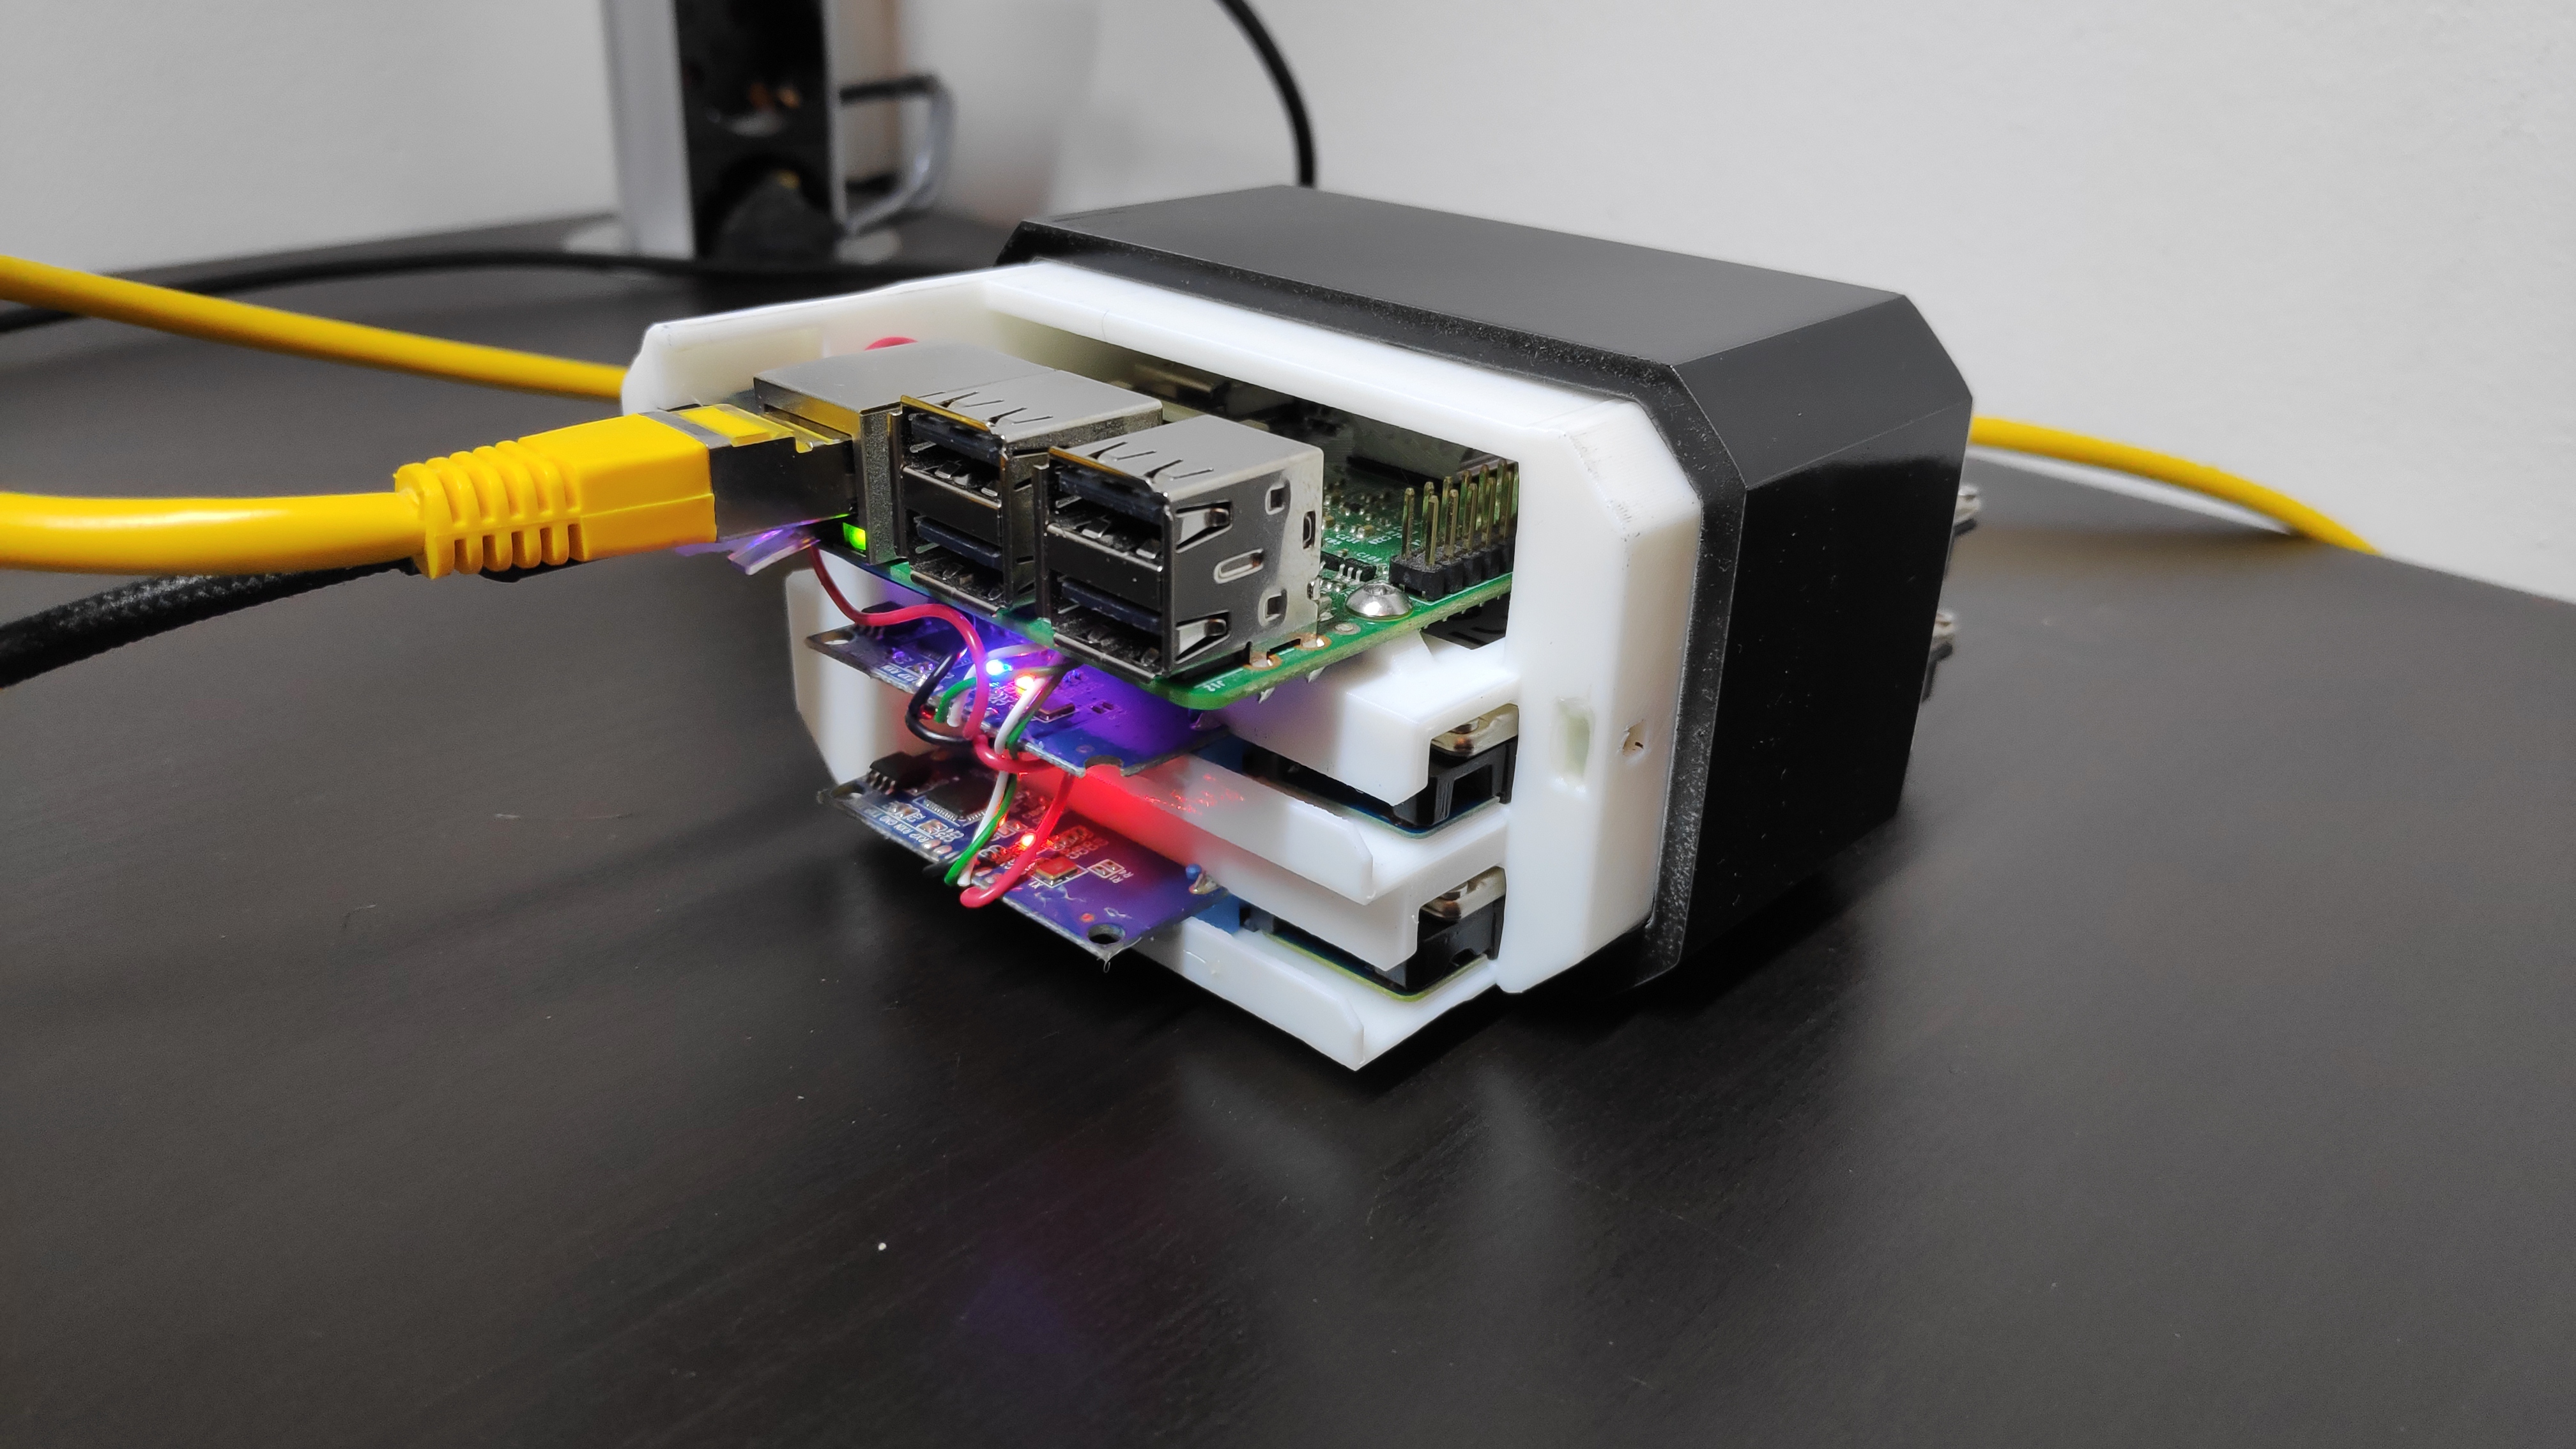
Intro:
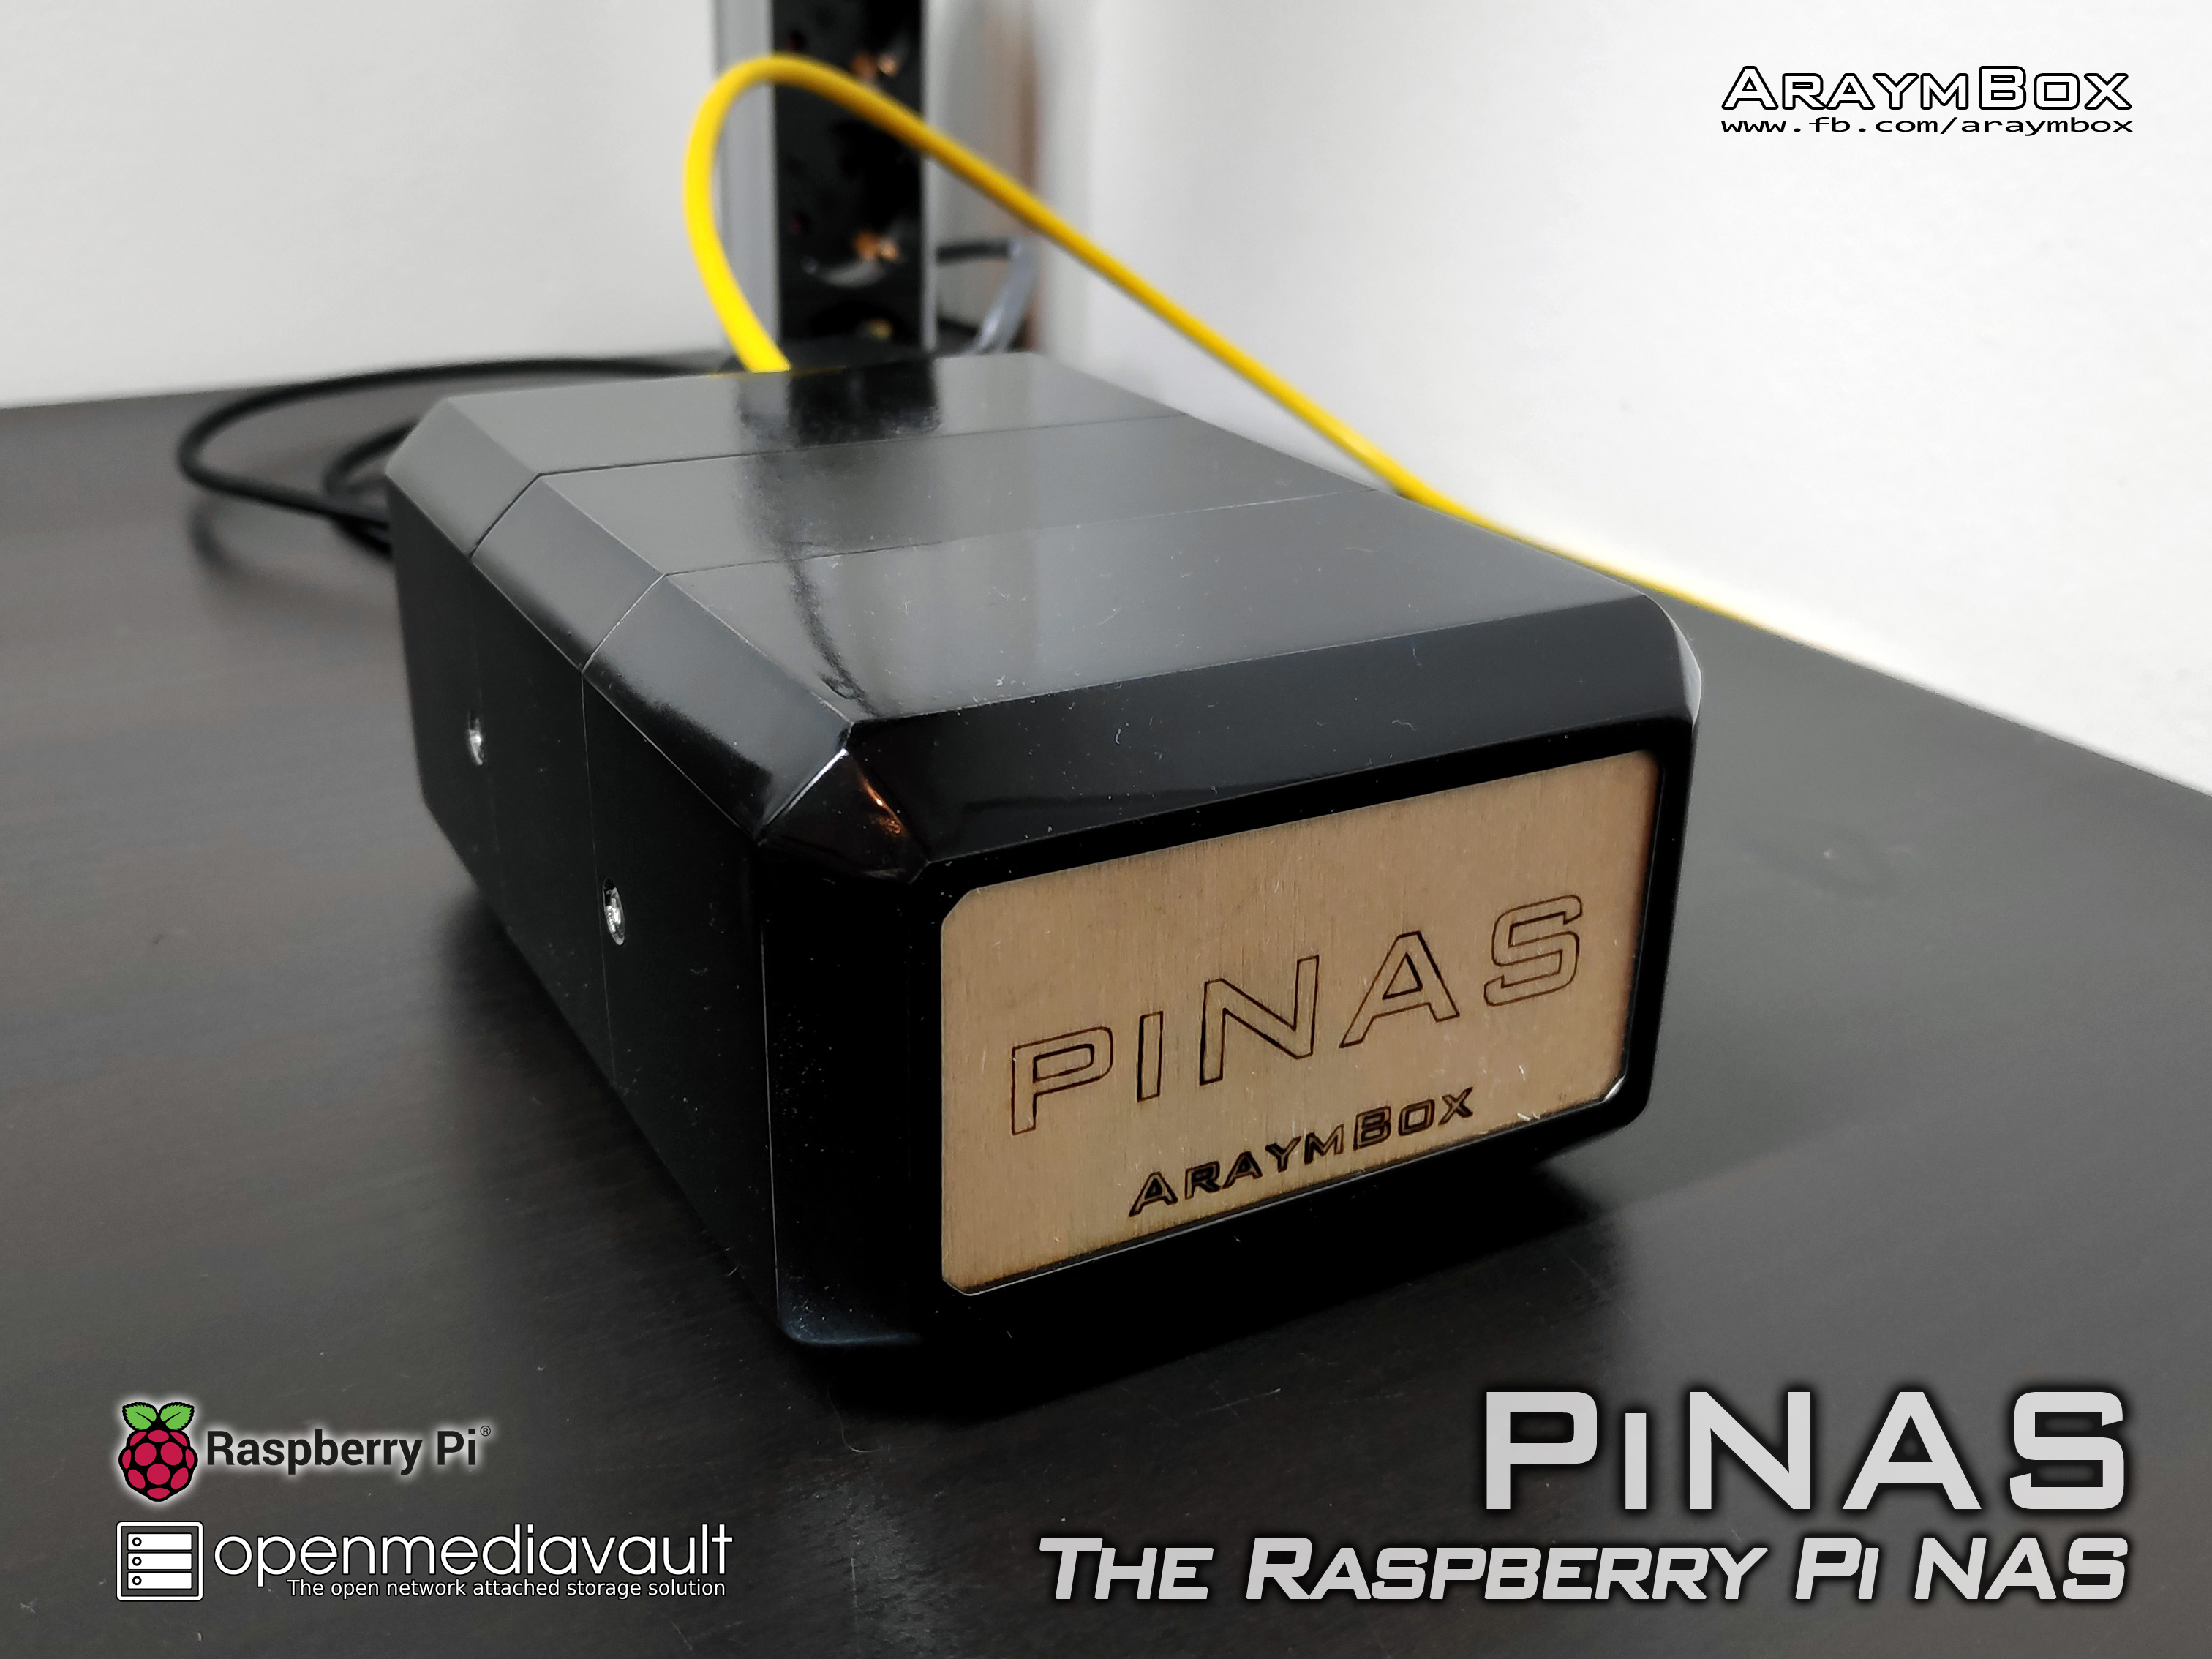
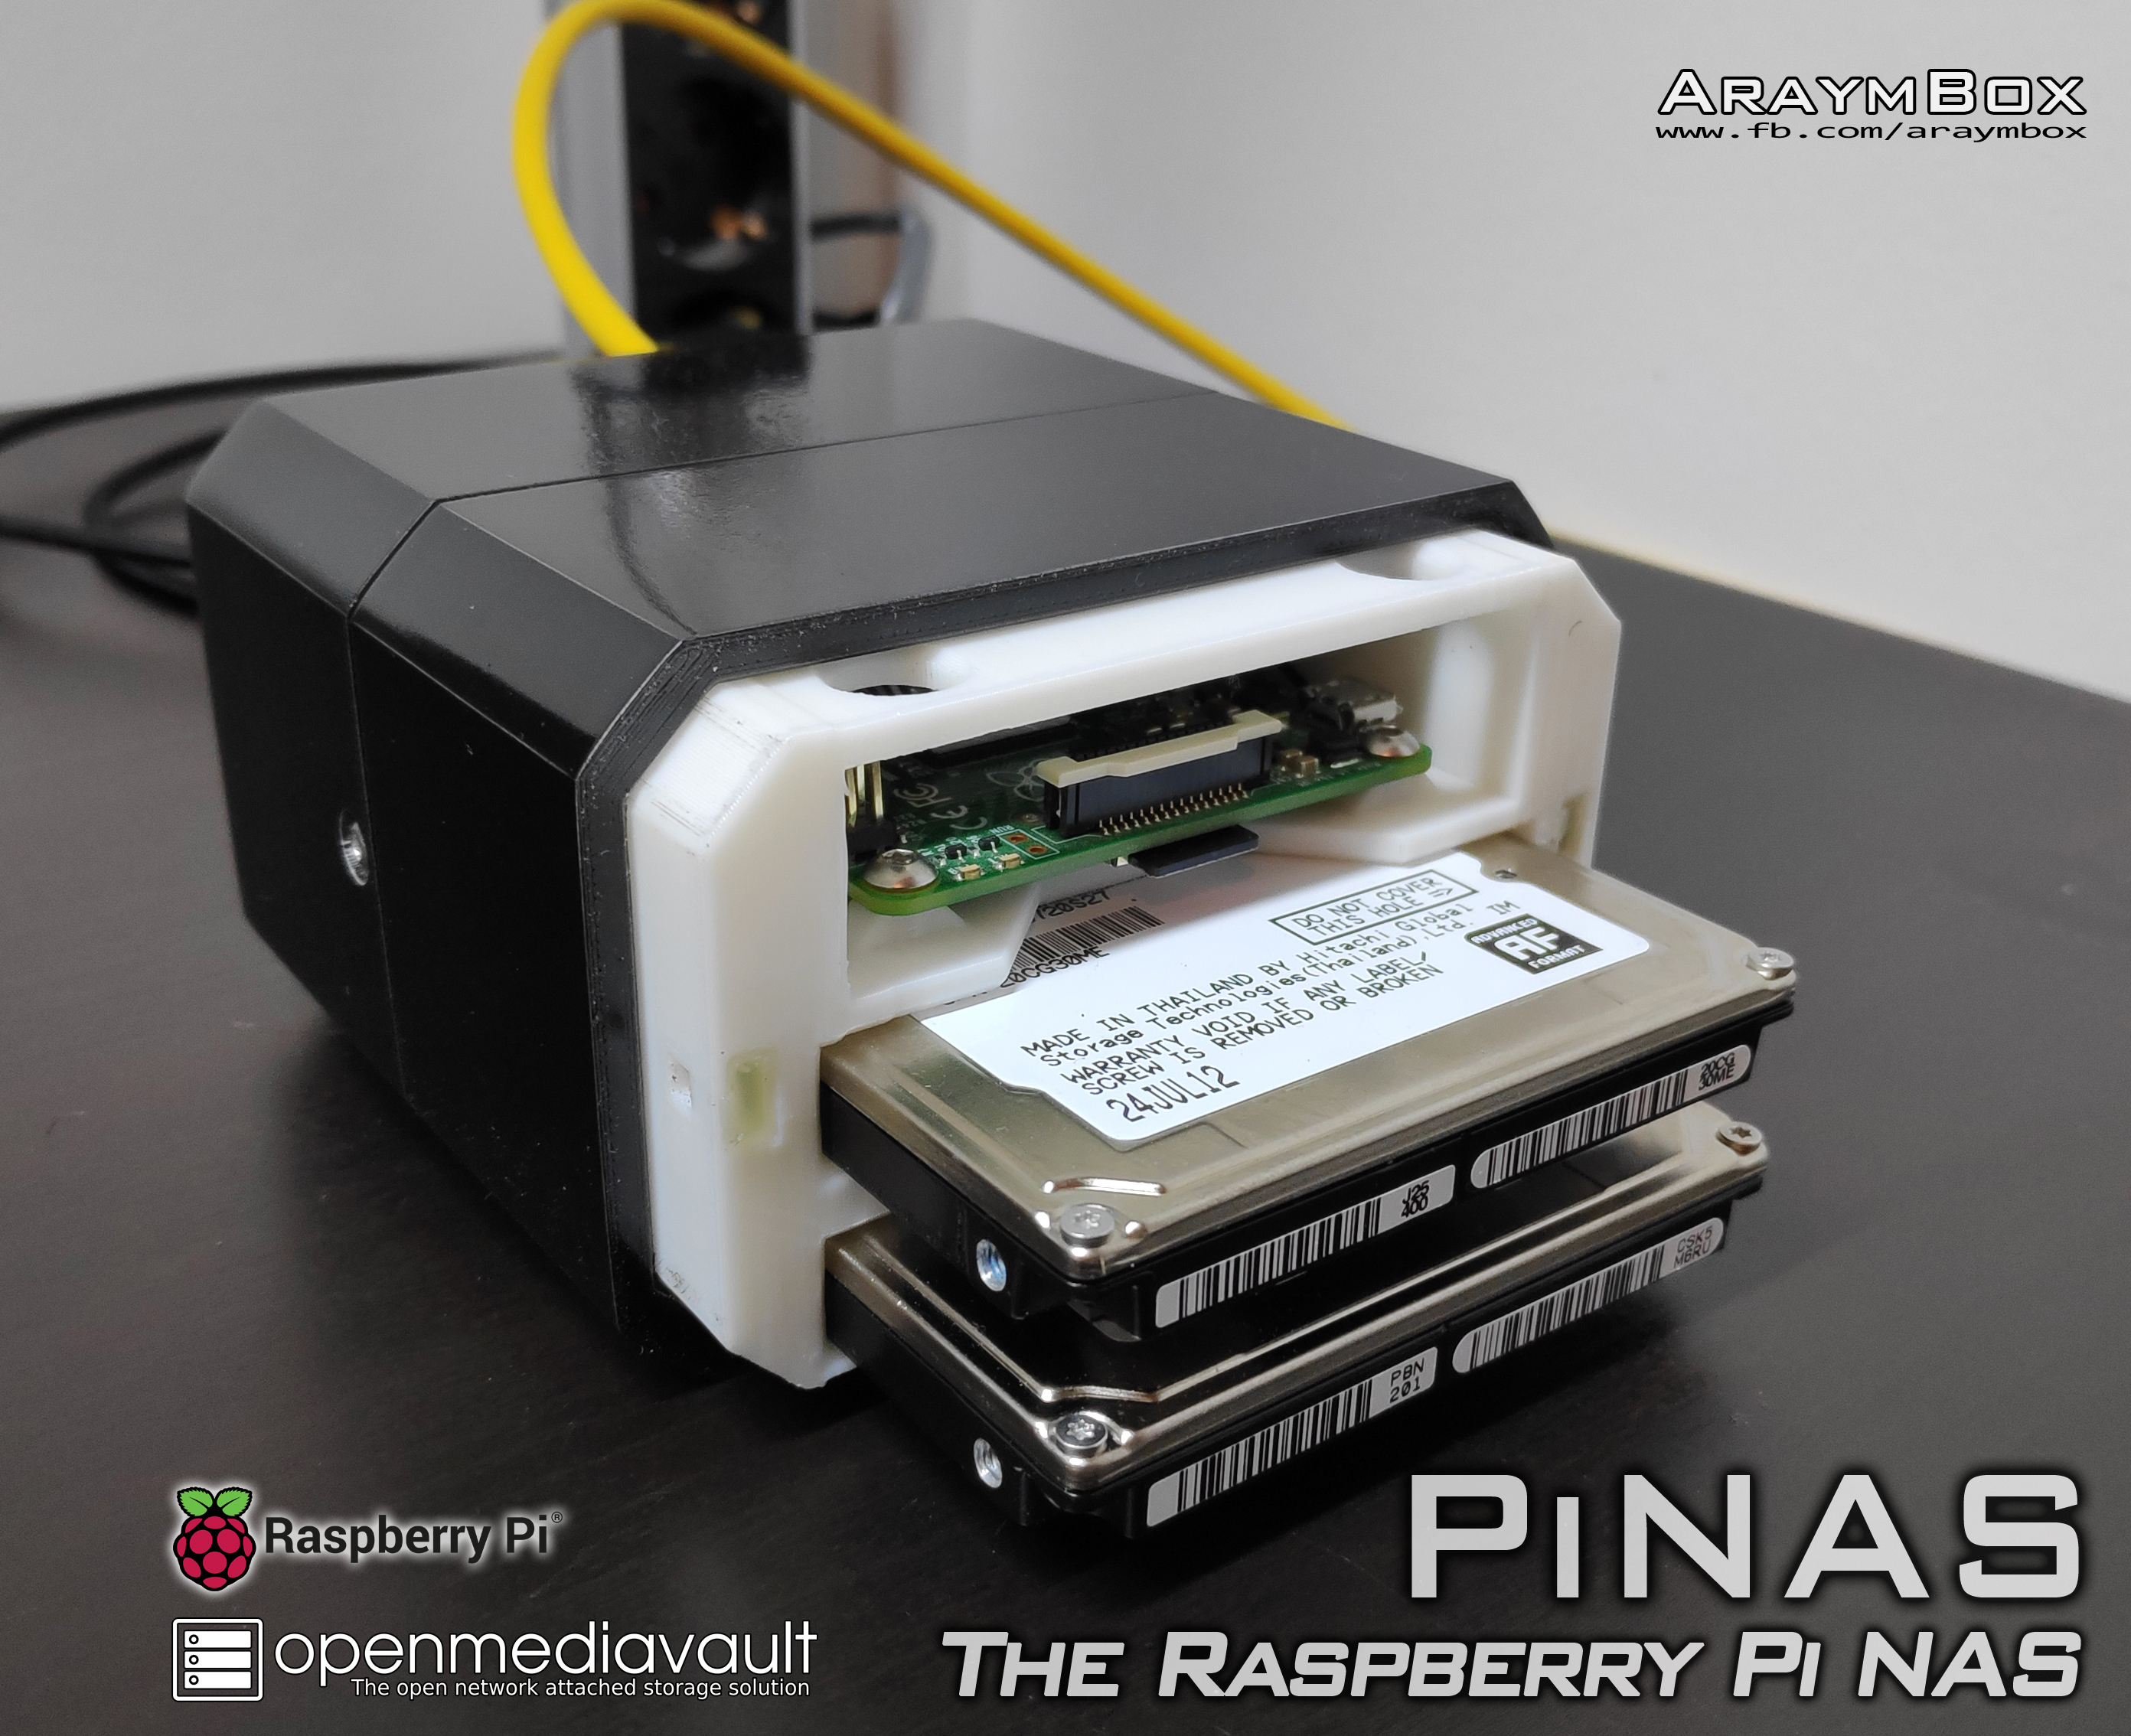
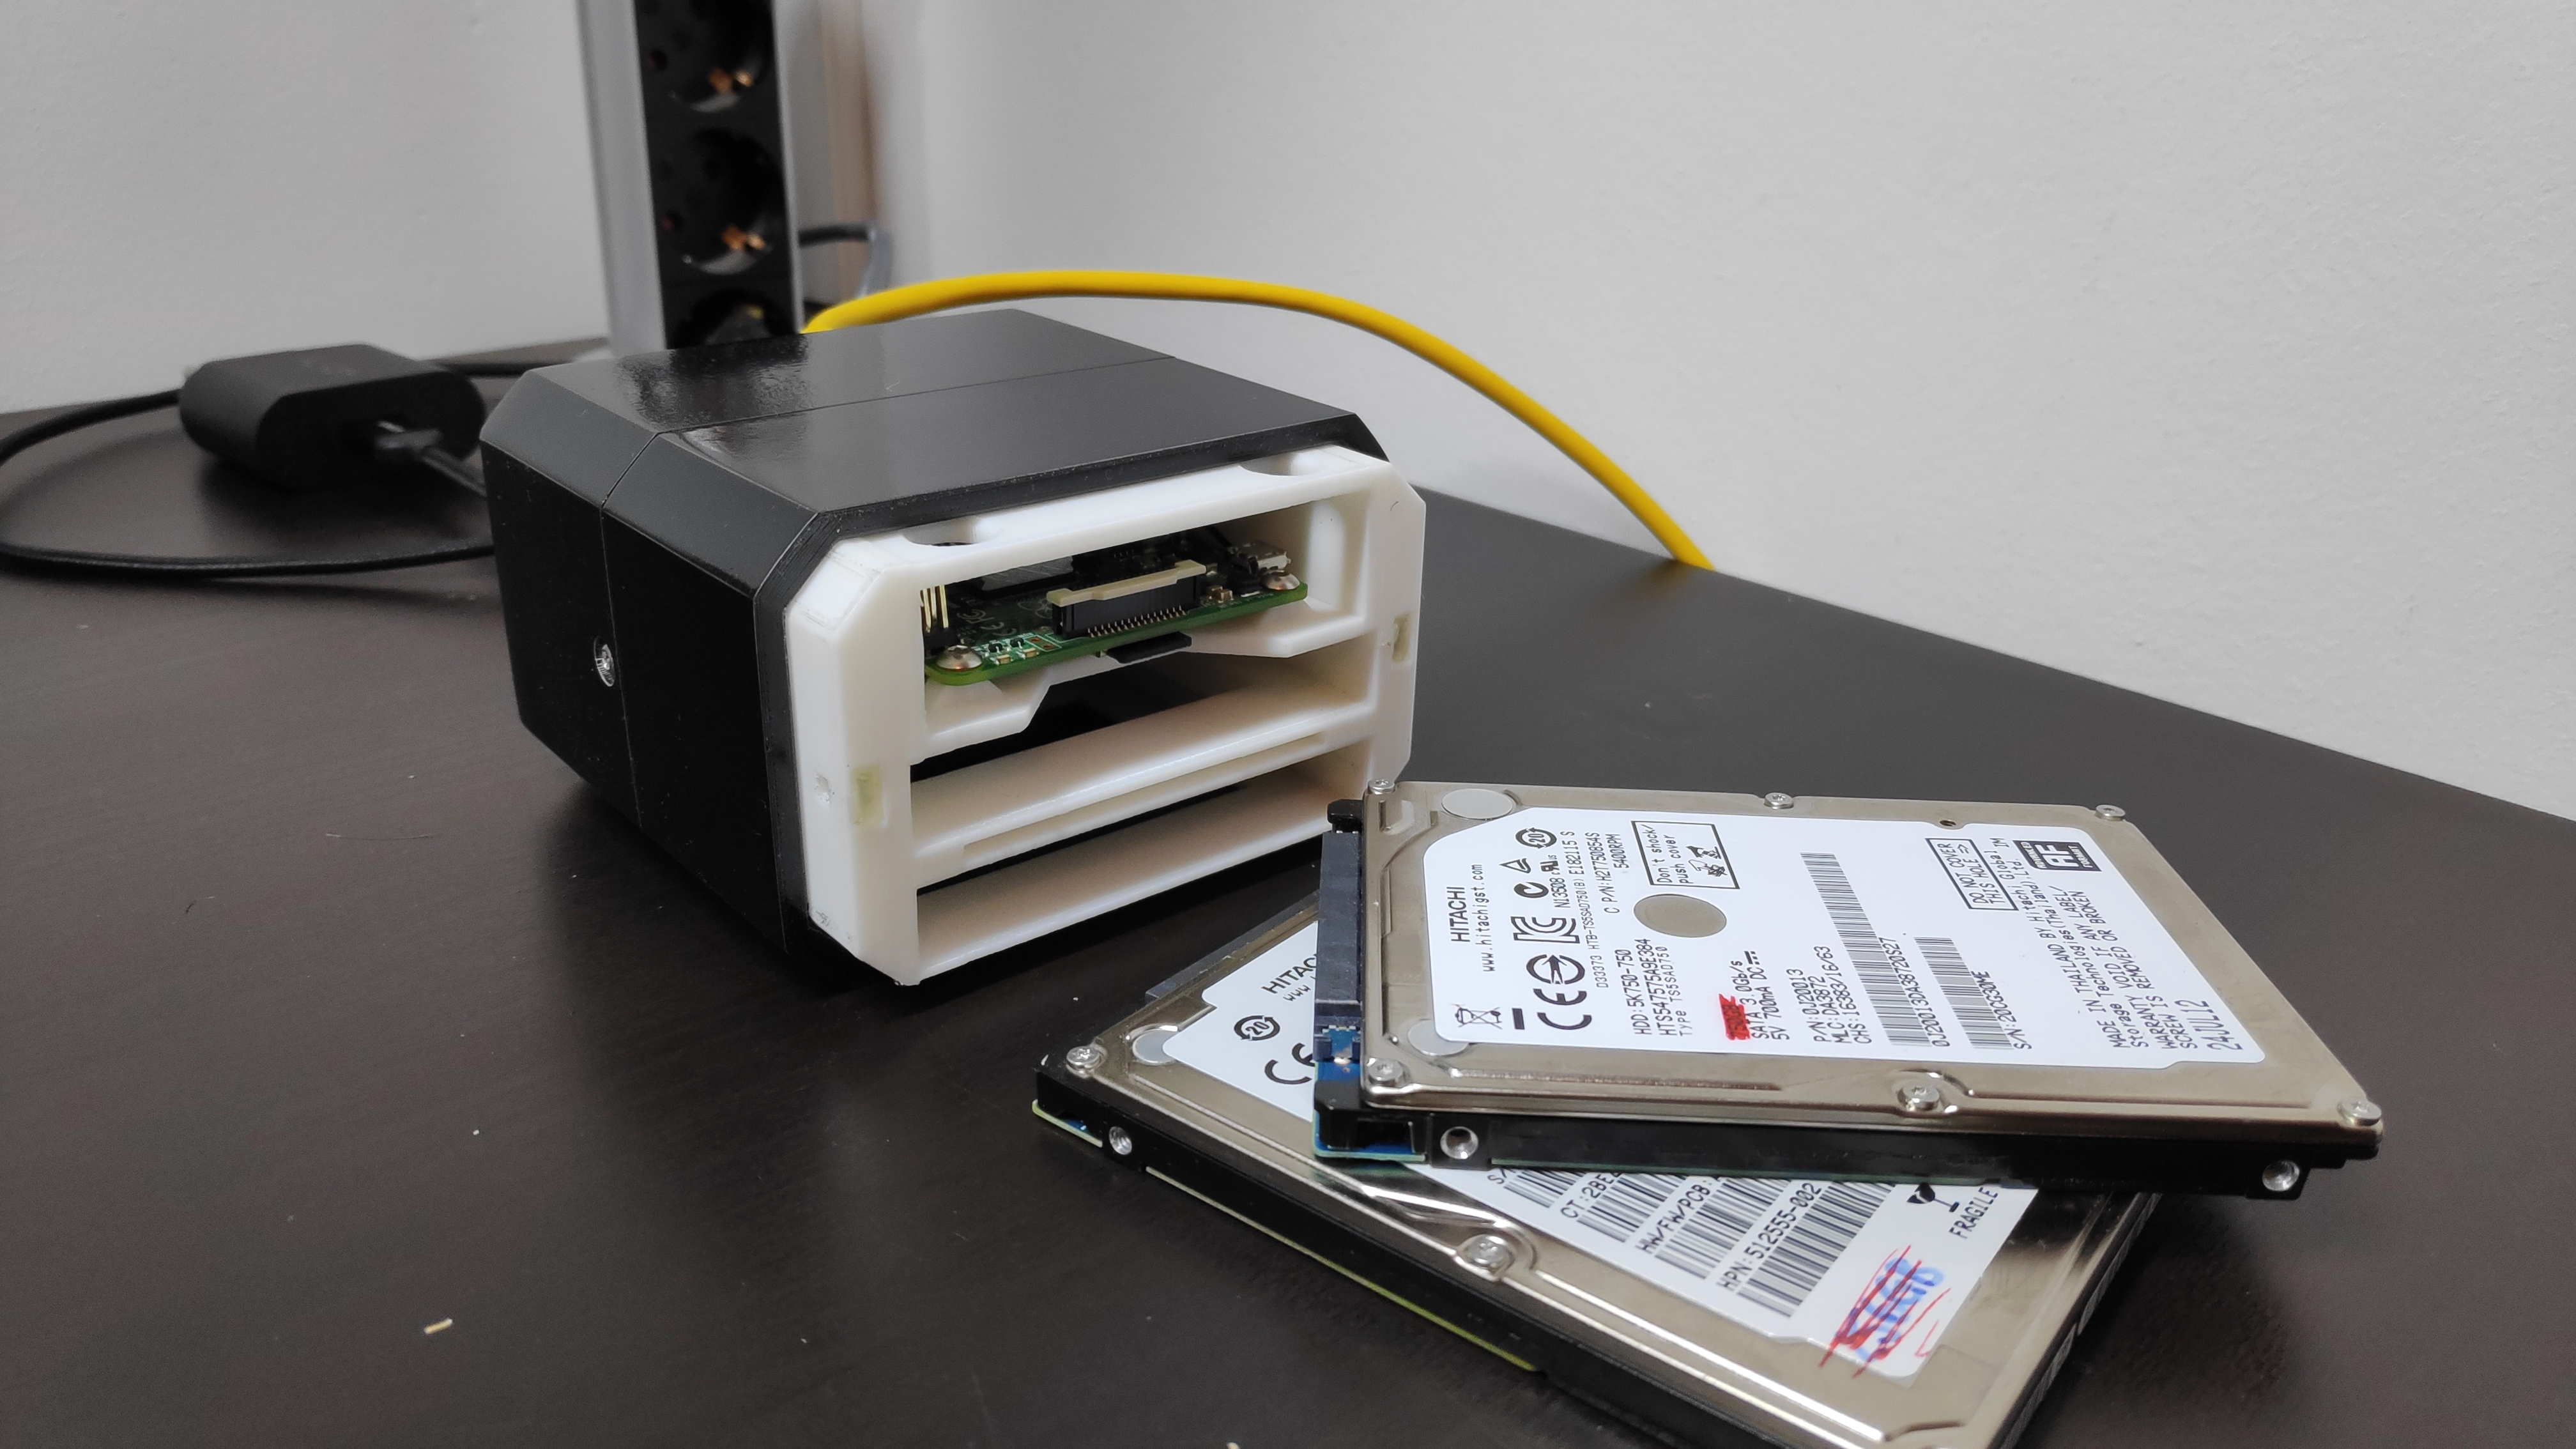
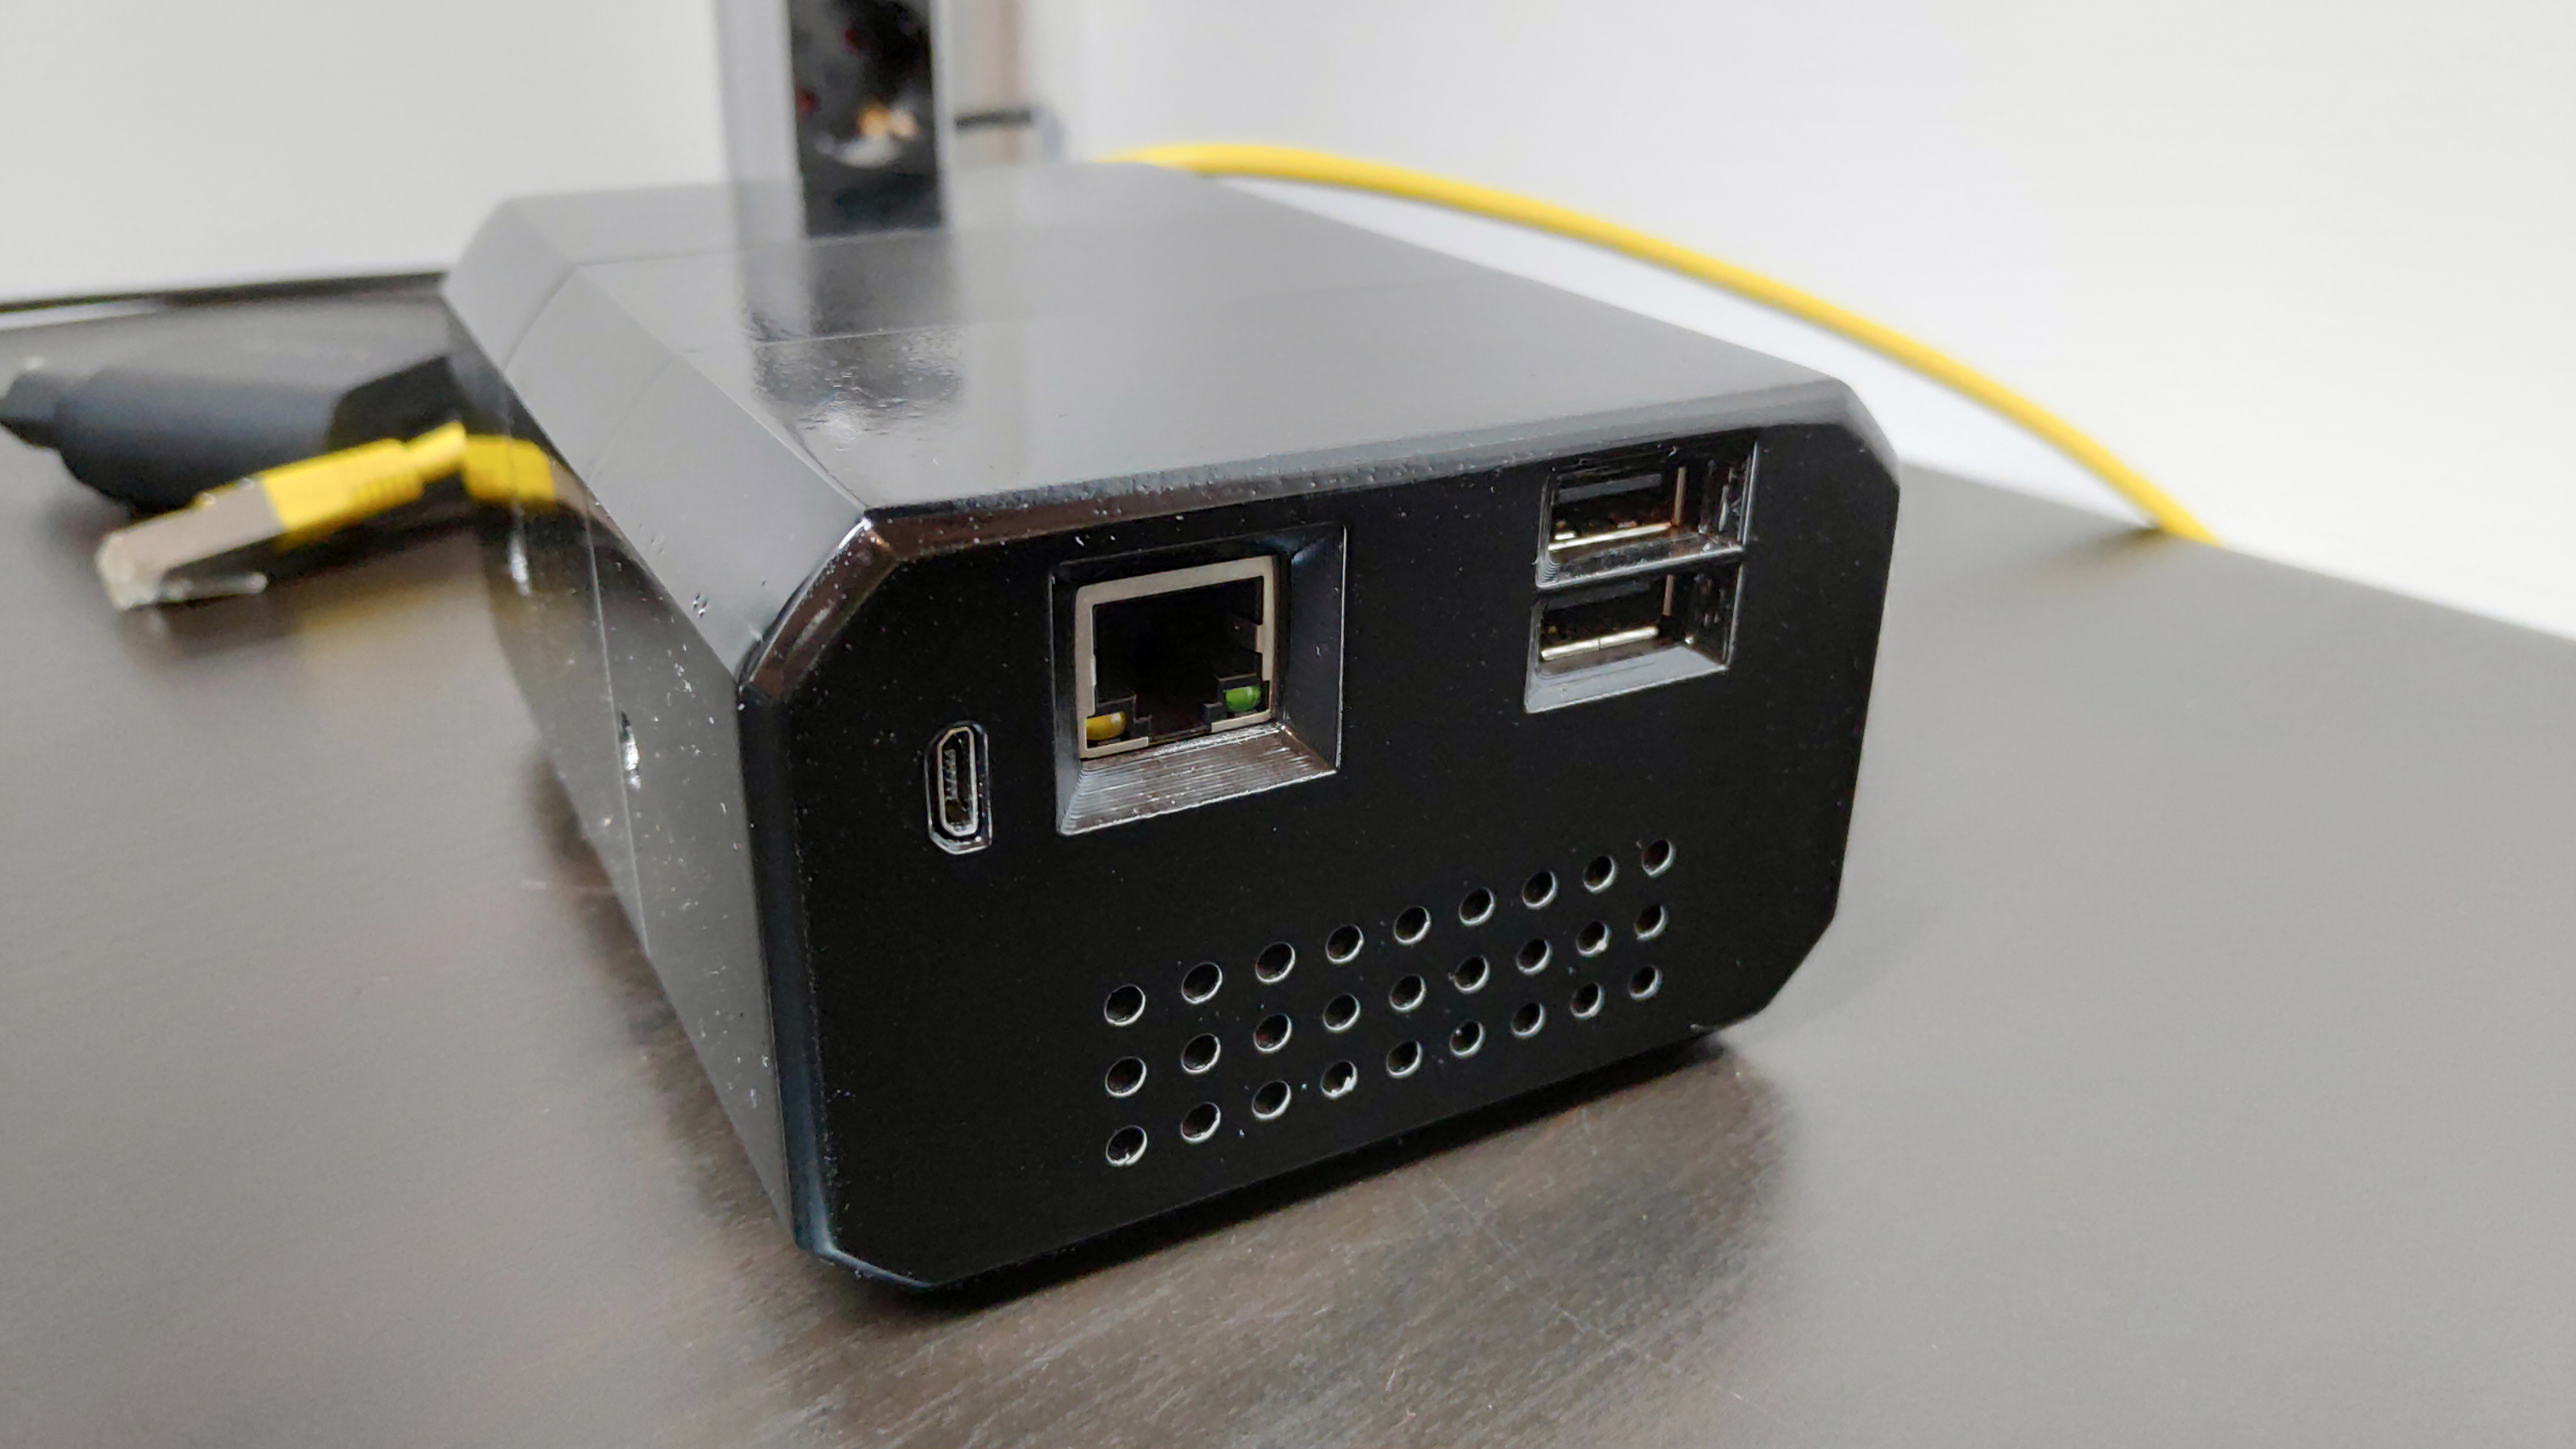
This instructable describes the build of a very compact Raspberry Pi powered two bay network attached storage (NAS).
Features:
- Super small
- Easy to build
- Simple setup
- Cheap
- Perfect for learning about network, file system, security mechanisms
- Raspberry Pi 2 or 3 can be used (Pi 4 with some tweaks)
- Powered by a single USB cable
- Can use WiFi
- Uses notebook hard drives
- Hard drives are hotswappable
- Two USB ports for further hardware
- Easy to open case
If you like the PiNAS check out my page AraymBox for other projects. You can also post ideas on how to improve the design.
Note:
Please note that English is not my first language. If you find any mistakes or something is not clear feel free to tell me and I'll try to fix it. Same goes for general mistakes. If you have any suggestions for improvements please let me know.
Content:
Step 03: 3D Print Post-processing (optional)
Step 04: Preparing the SATA to USB Adapters
Step 05: Preparing the Inner Case
Step 06: Wiring and Assembly: Raspberry Pi
Step 07: Wiring and Assembly: USB Breakout Board
Step 08: Wiring and Assembly: Installation
Step 09: Wiring and Assembly: HDD Adapters
Step 10: Case Assembly: Faceplate (optional)
Step 11: Preparing the SD Card
Step 13: Configuring Open Media Vault
Step 14: Configuring OMV: System
Step 15: Configuring OMV: Storage
Step 16: Configuring OMV: Access Rights Management
Materials & Tools
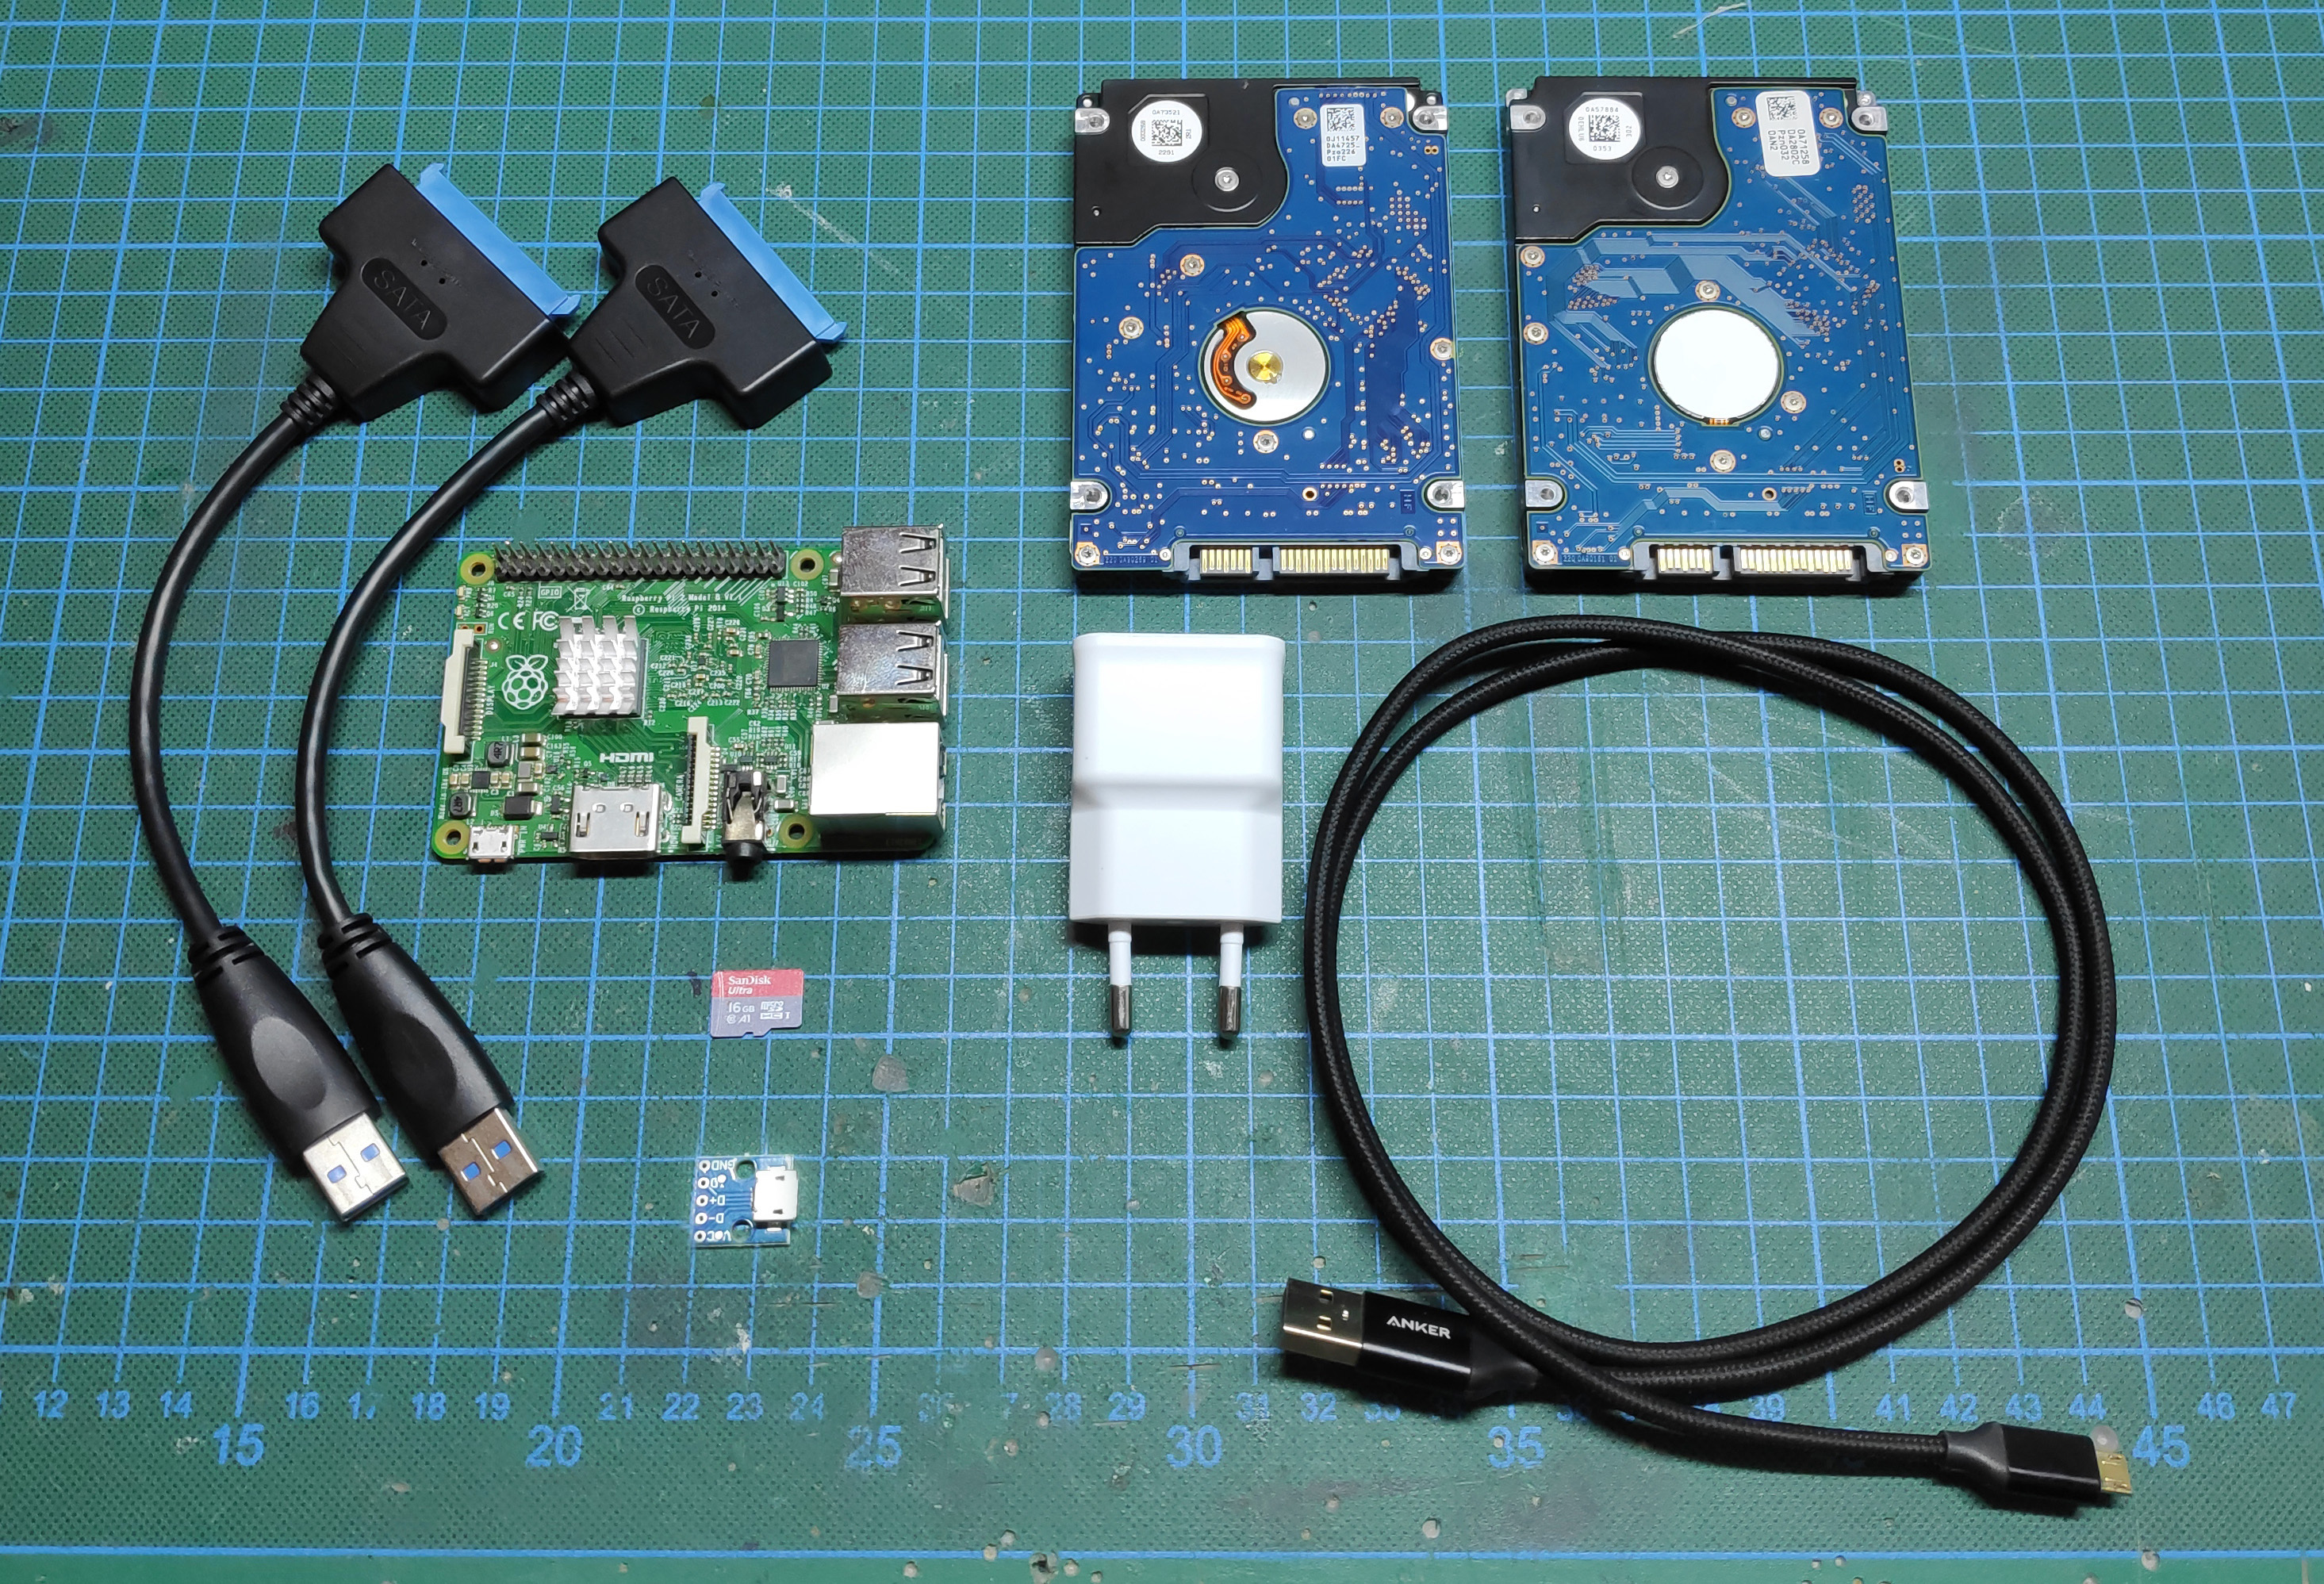
Make sure you have everything you need for the build. There is nothing more annoying than stopping your project because you have to wait for some small part being delivered.
You do not have to buy the listed parts and material from given links. These are examples and show the required properties of the parts.
Parts:
- 1x Raspberry Pi 2 or 3 [$35.00]
- 1x micro SD Card - 8GB or 16GB [$5.79]
- 1x Female Micro USB breakout board [$6.99]
- 2x SATA to USB adapter [$7.99]
- 2x 2.5" Hard drives
- 1x Raspberry Pi power supply (5V / min. 2A) [$9.99]
- 4x Bolts: M3x8mm
- 4x Bolts: M3x6mm
- 4x Nuts: M3 square
- Wires (e.g. from an old USB cable)
Tools:
- Soldering Utilities
- Screw drivers
- Hot glue gun
- 3D Printer or 3D Printing service
3D Printing the Case
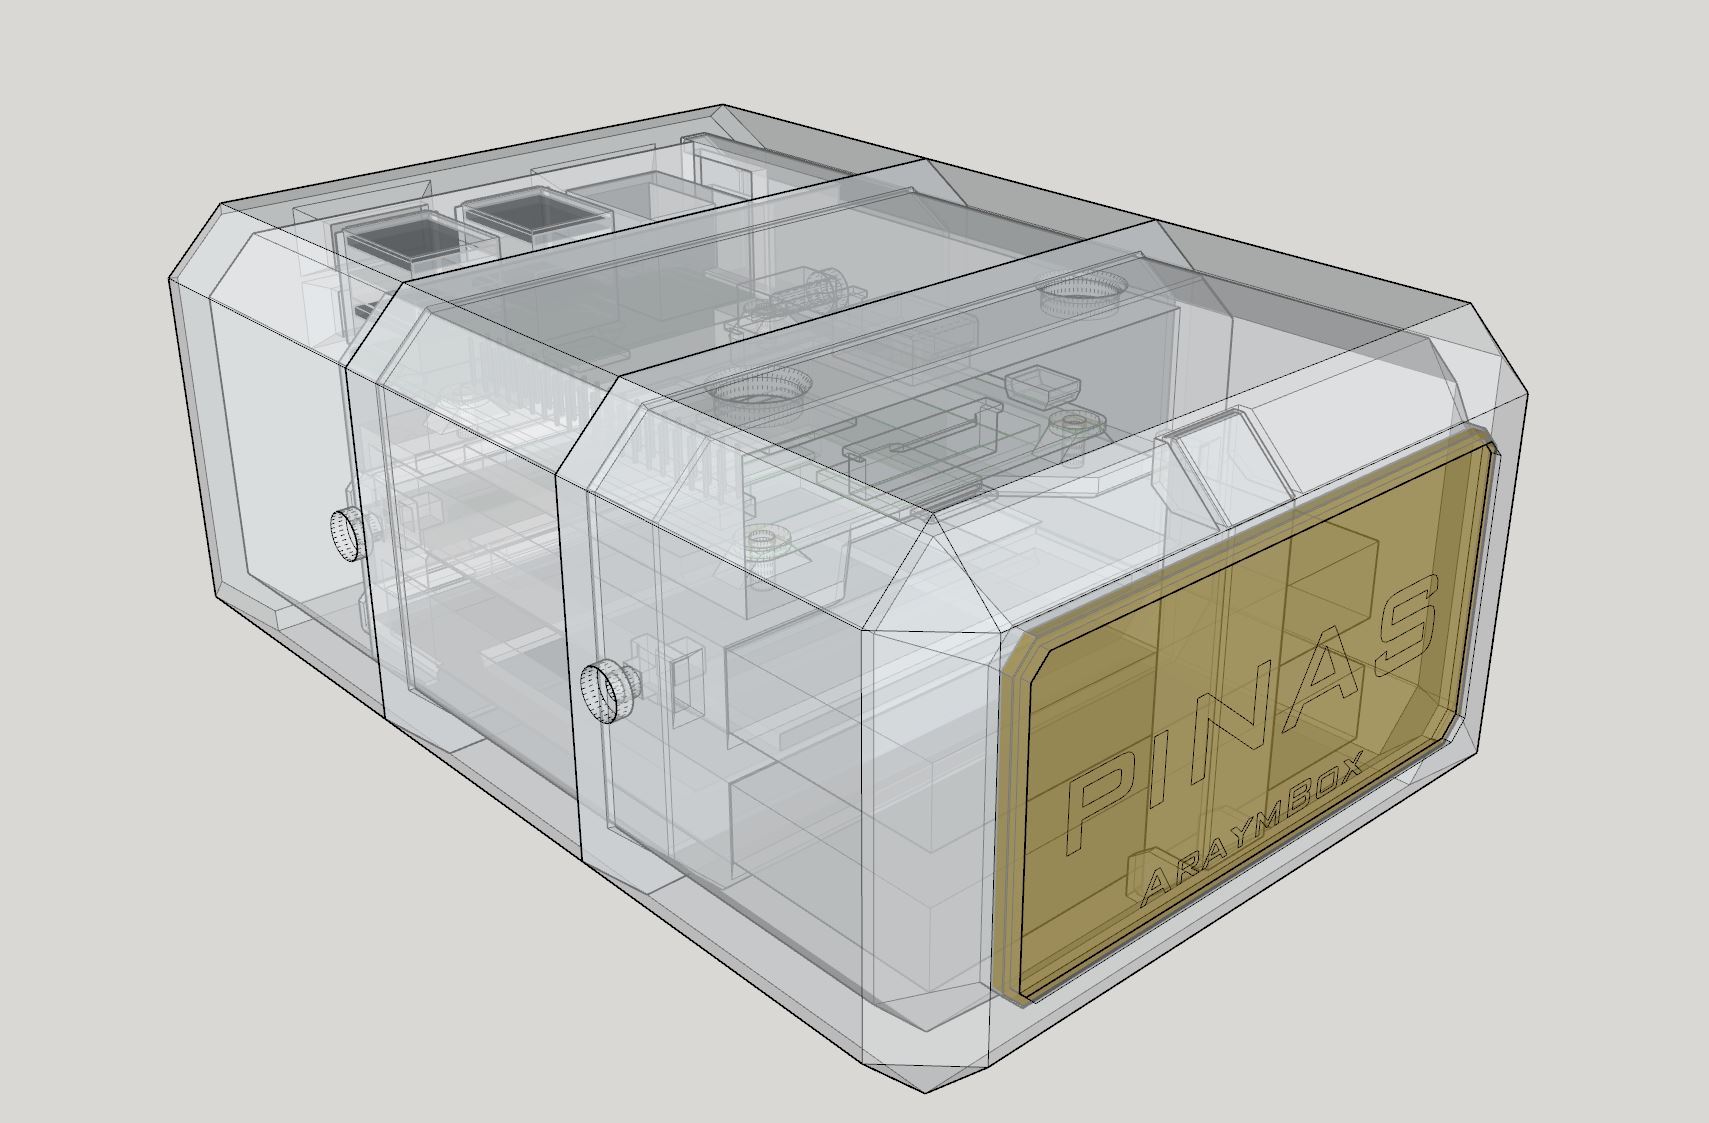
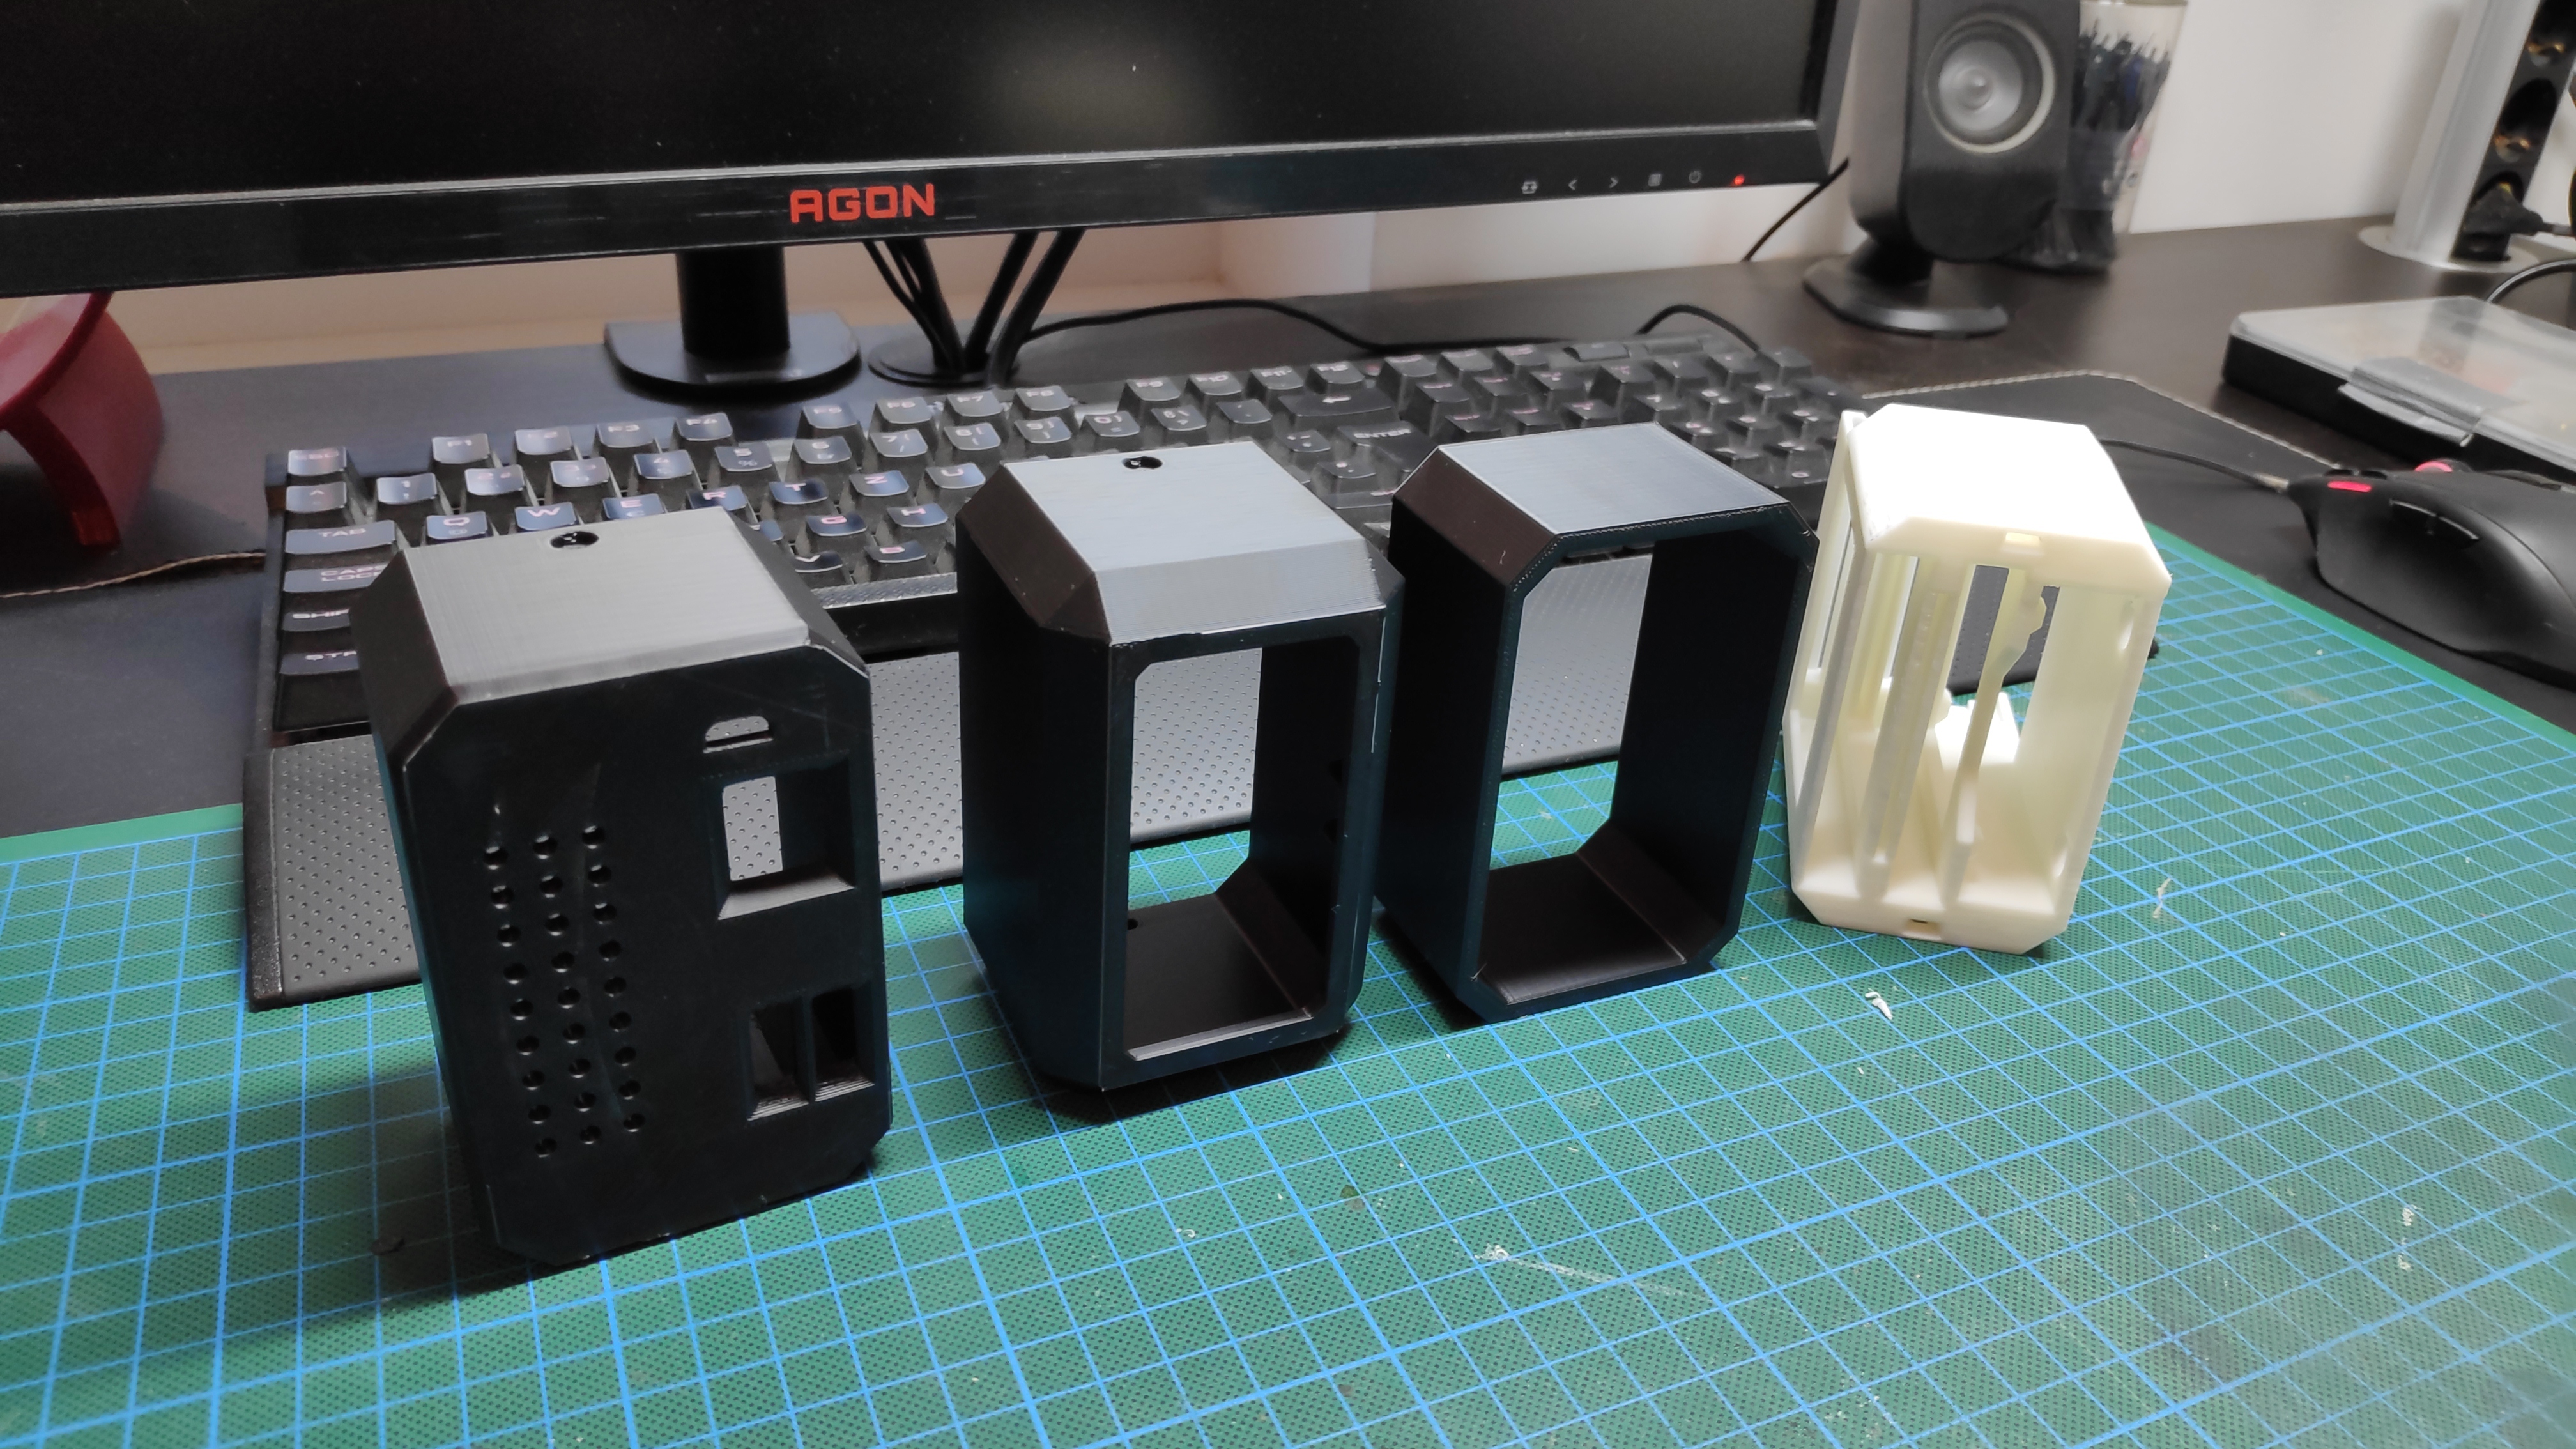
I've designed the case to be as simple as possible:
- Only 4 parts
- Can be printed without supports
- Held together by 4 bolts
- Easy to open for maintenance
The inner part of my case was printed with PLA and the 3 outer shells with ABS. I've used ABS for the shell because I wanted to paint it and ABS is much easier for post-processing. You can also use PLA or try any other filament.
If you do not have a 3D printer you can use a 3D printing service.
Download:
You'll find the 3D files on this page (I'll keep it there to avoid redundancy):
3D Print Post-processing (optional)
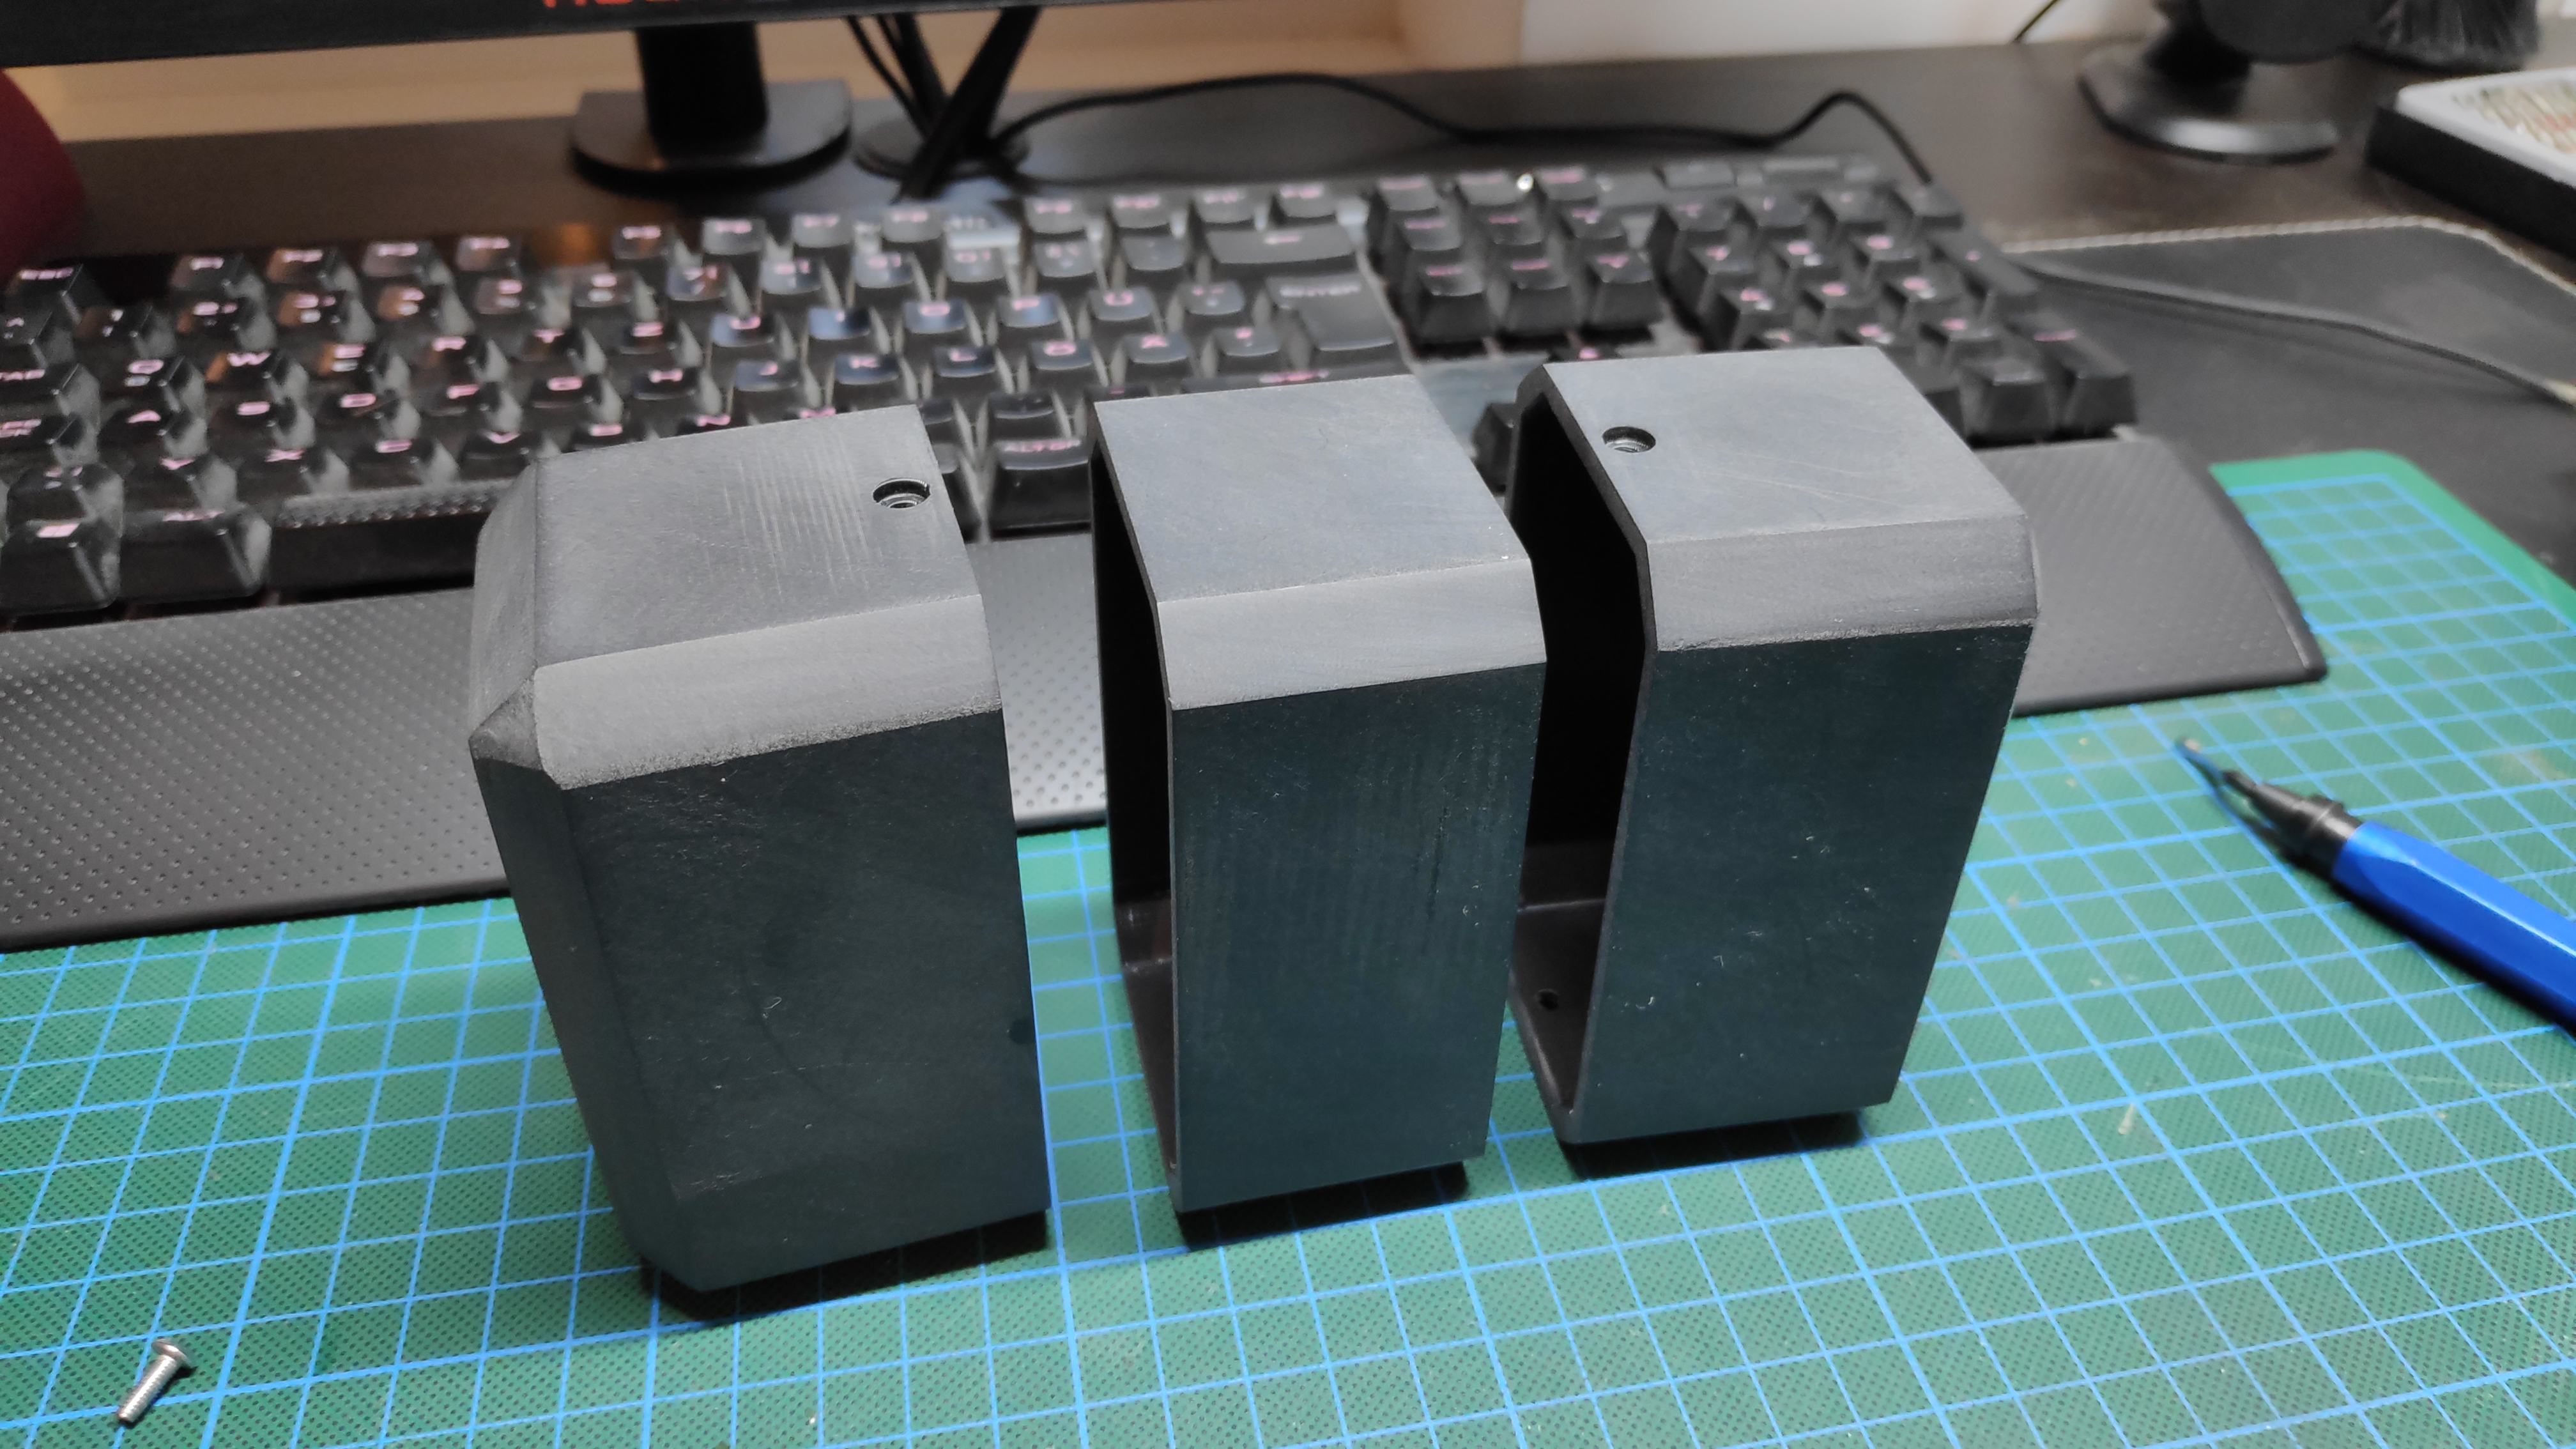
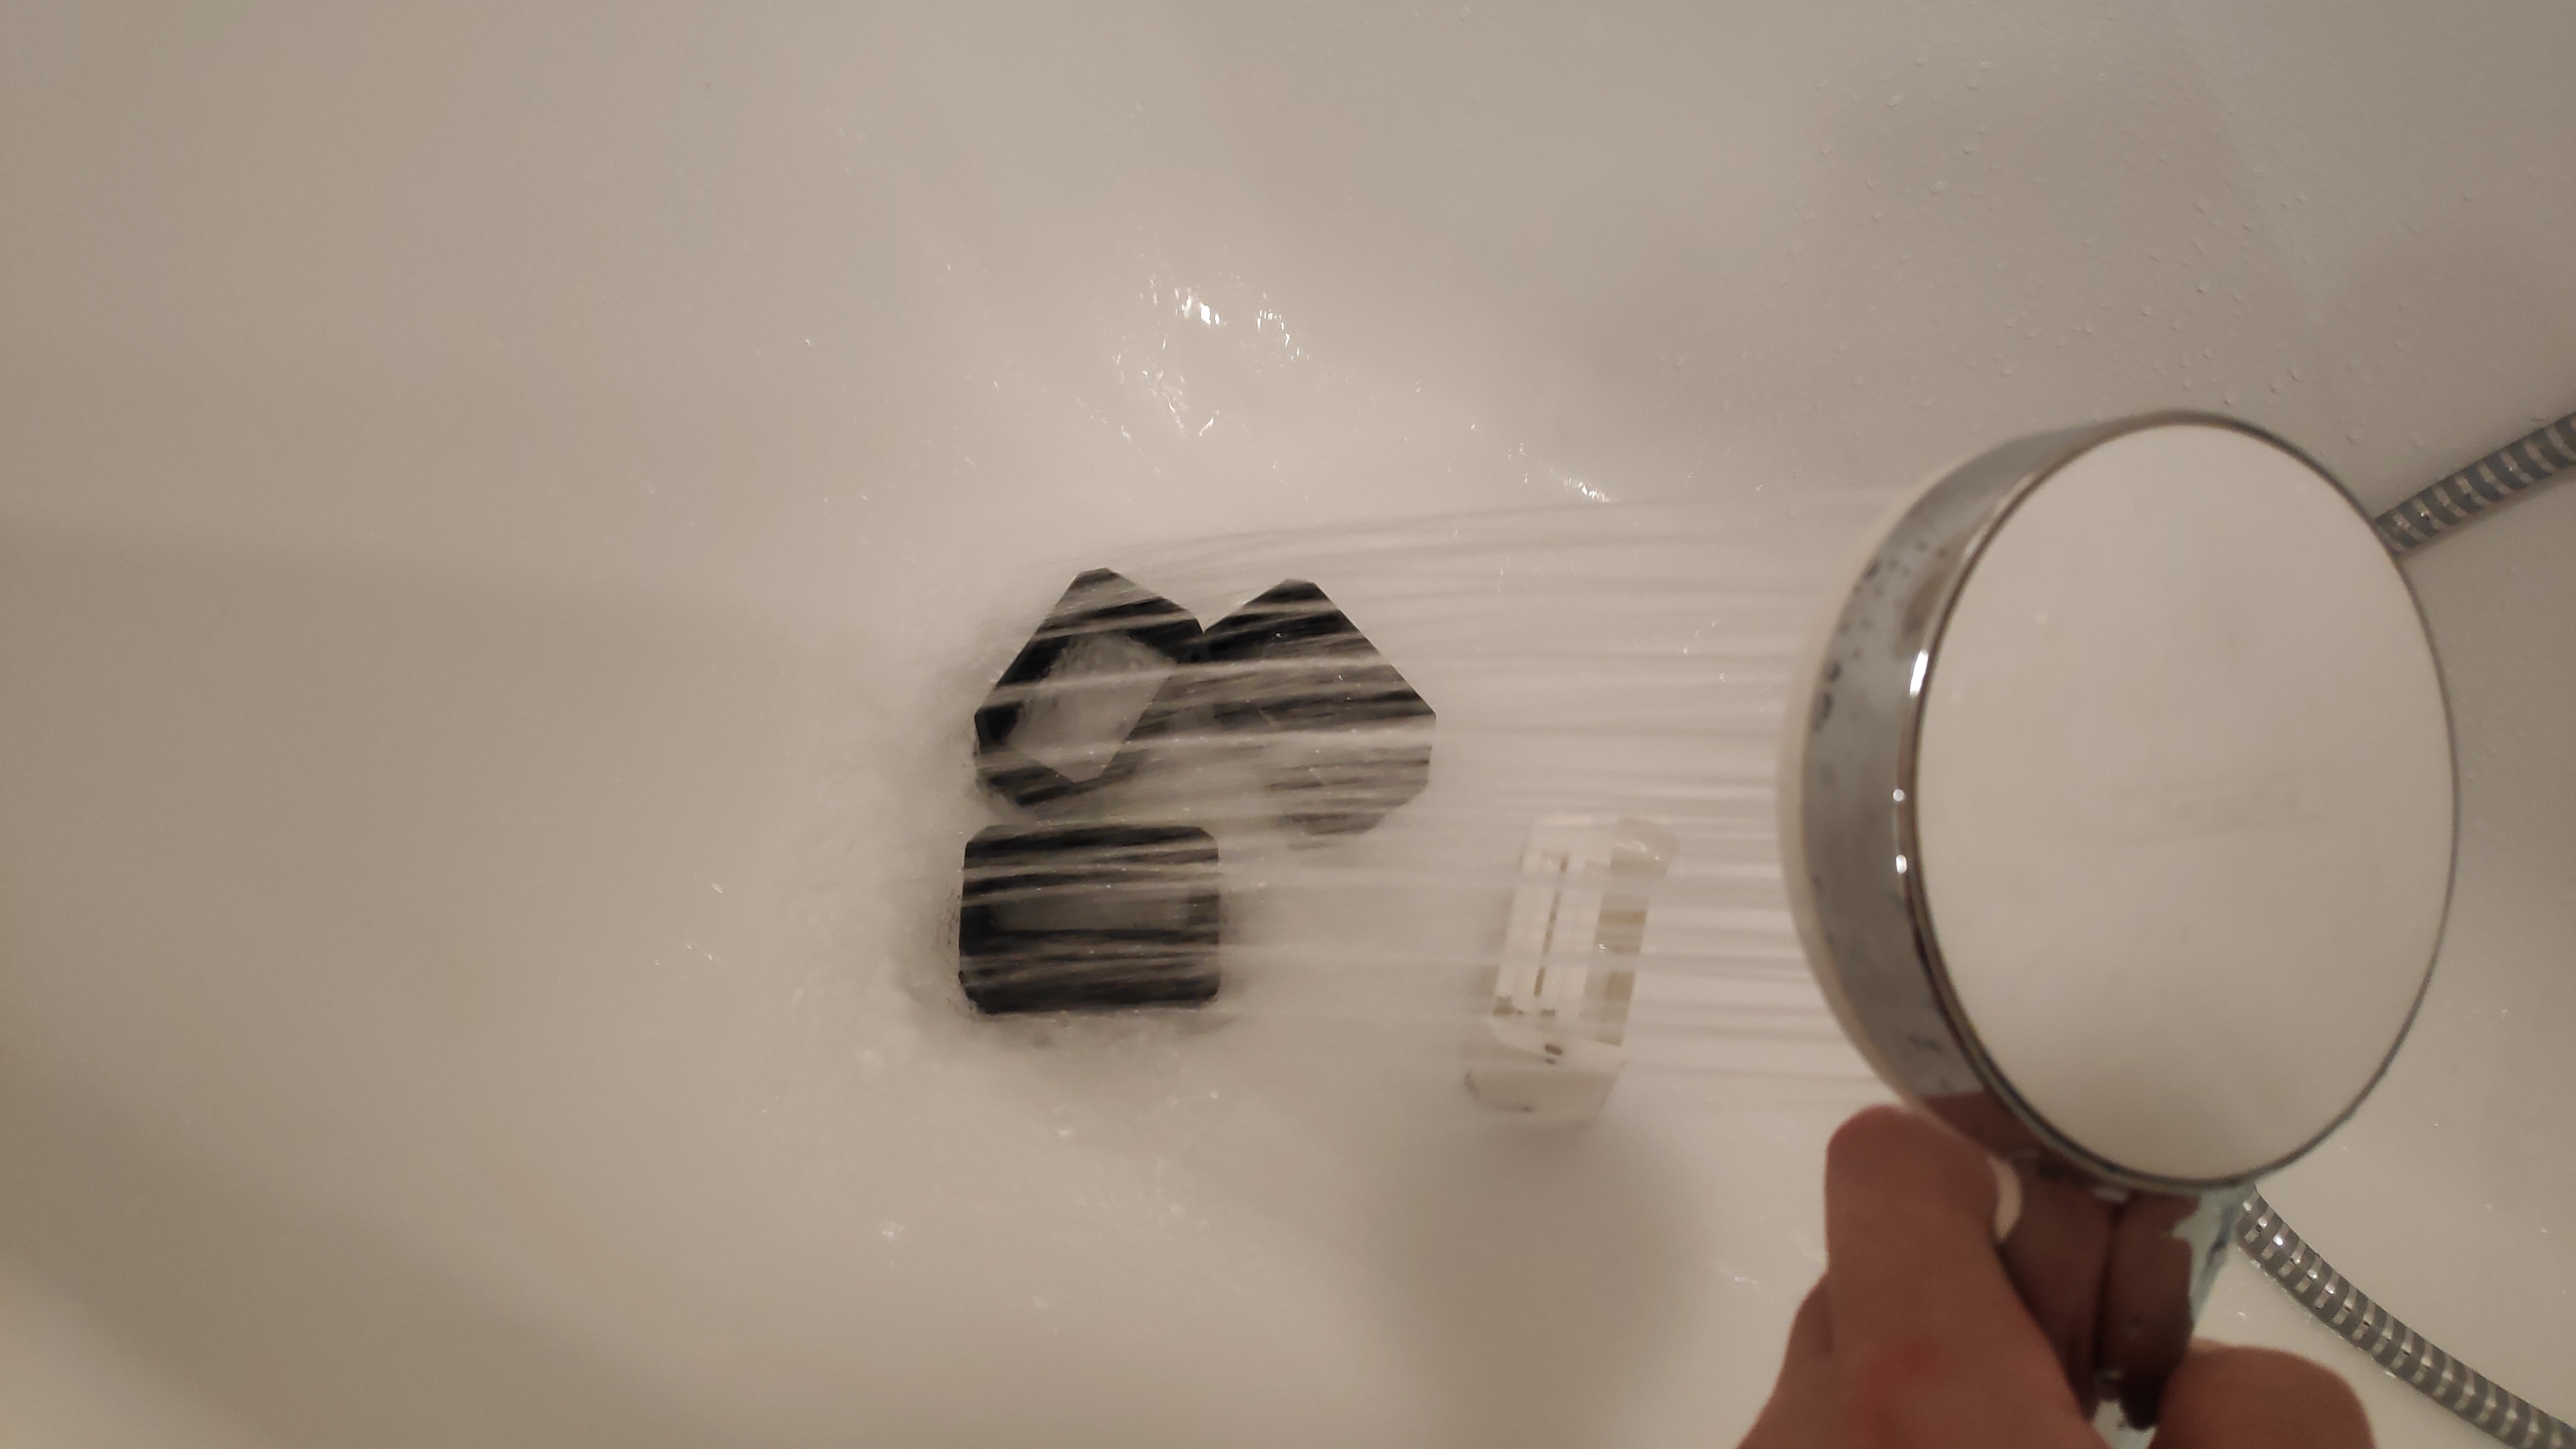
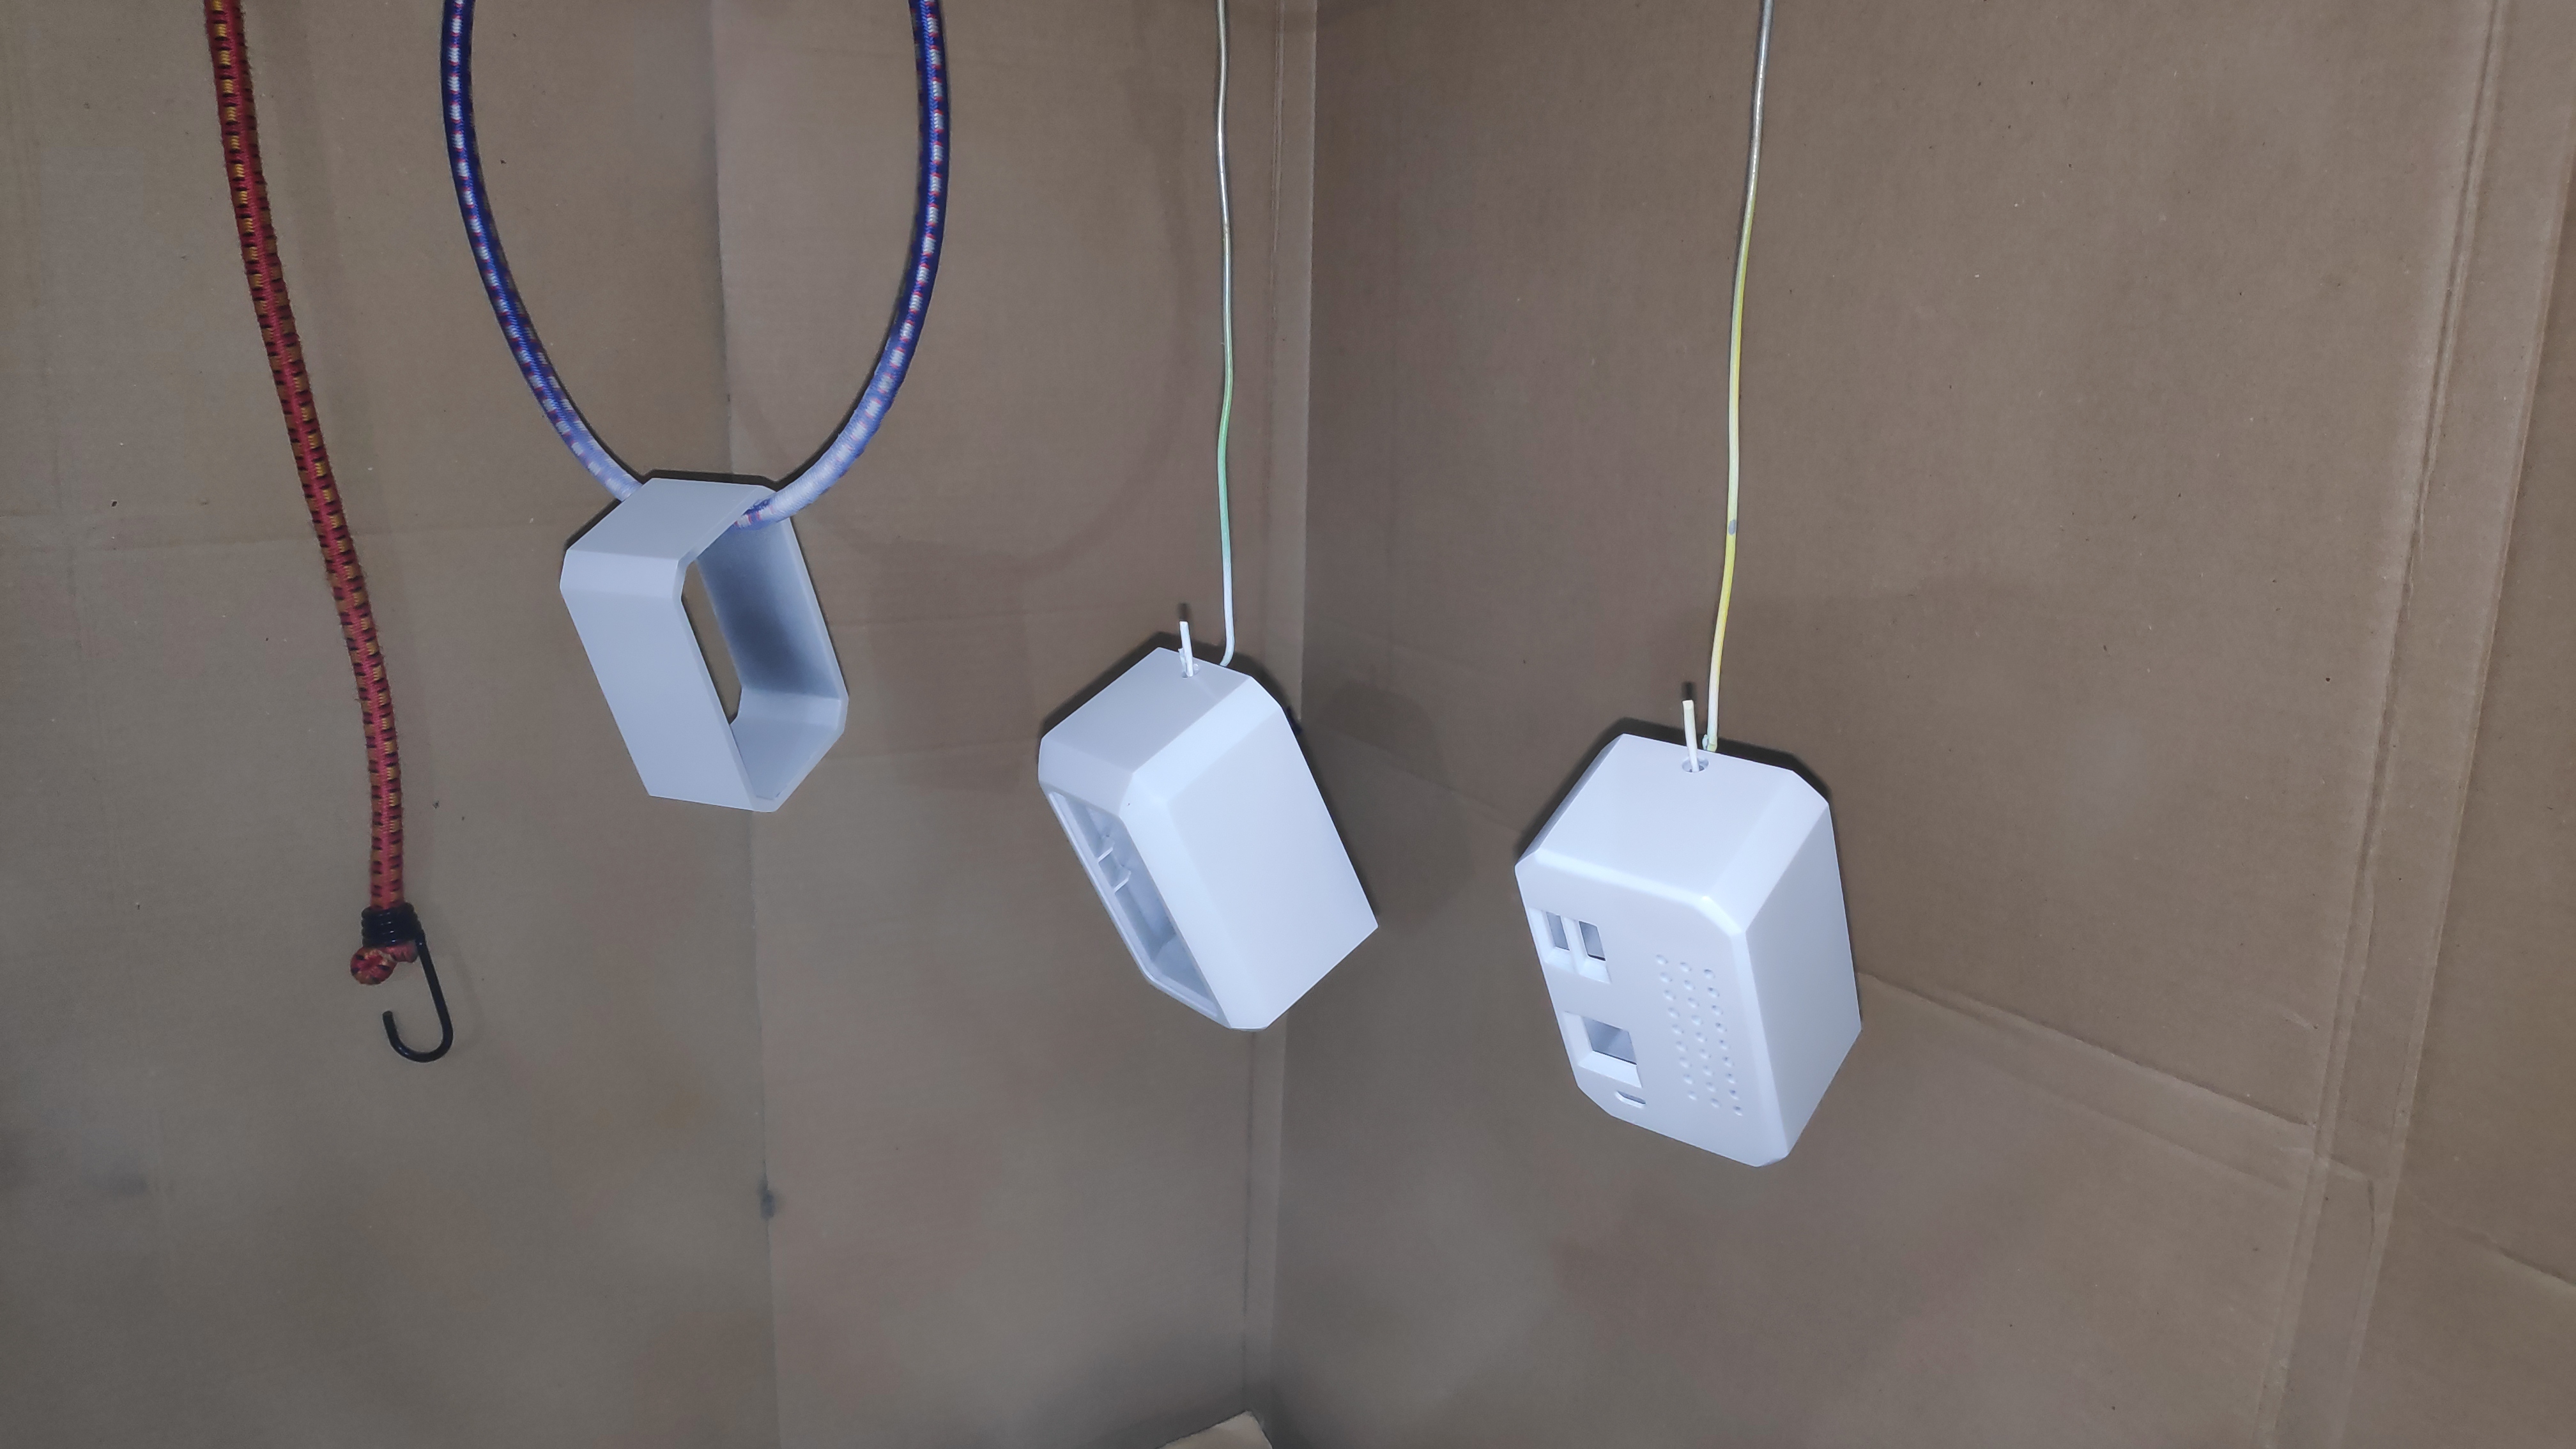
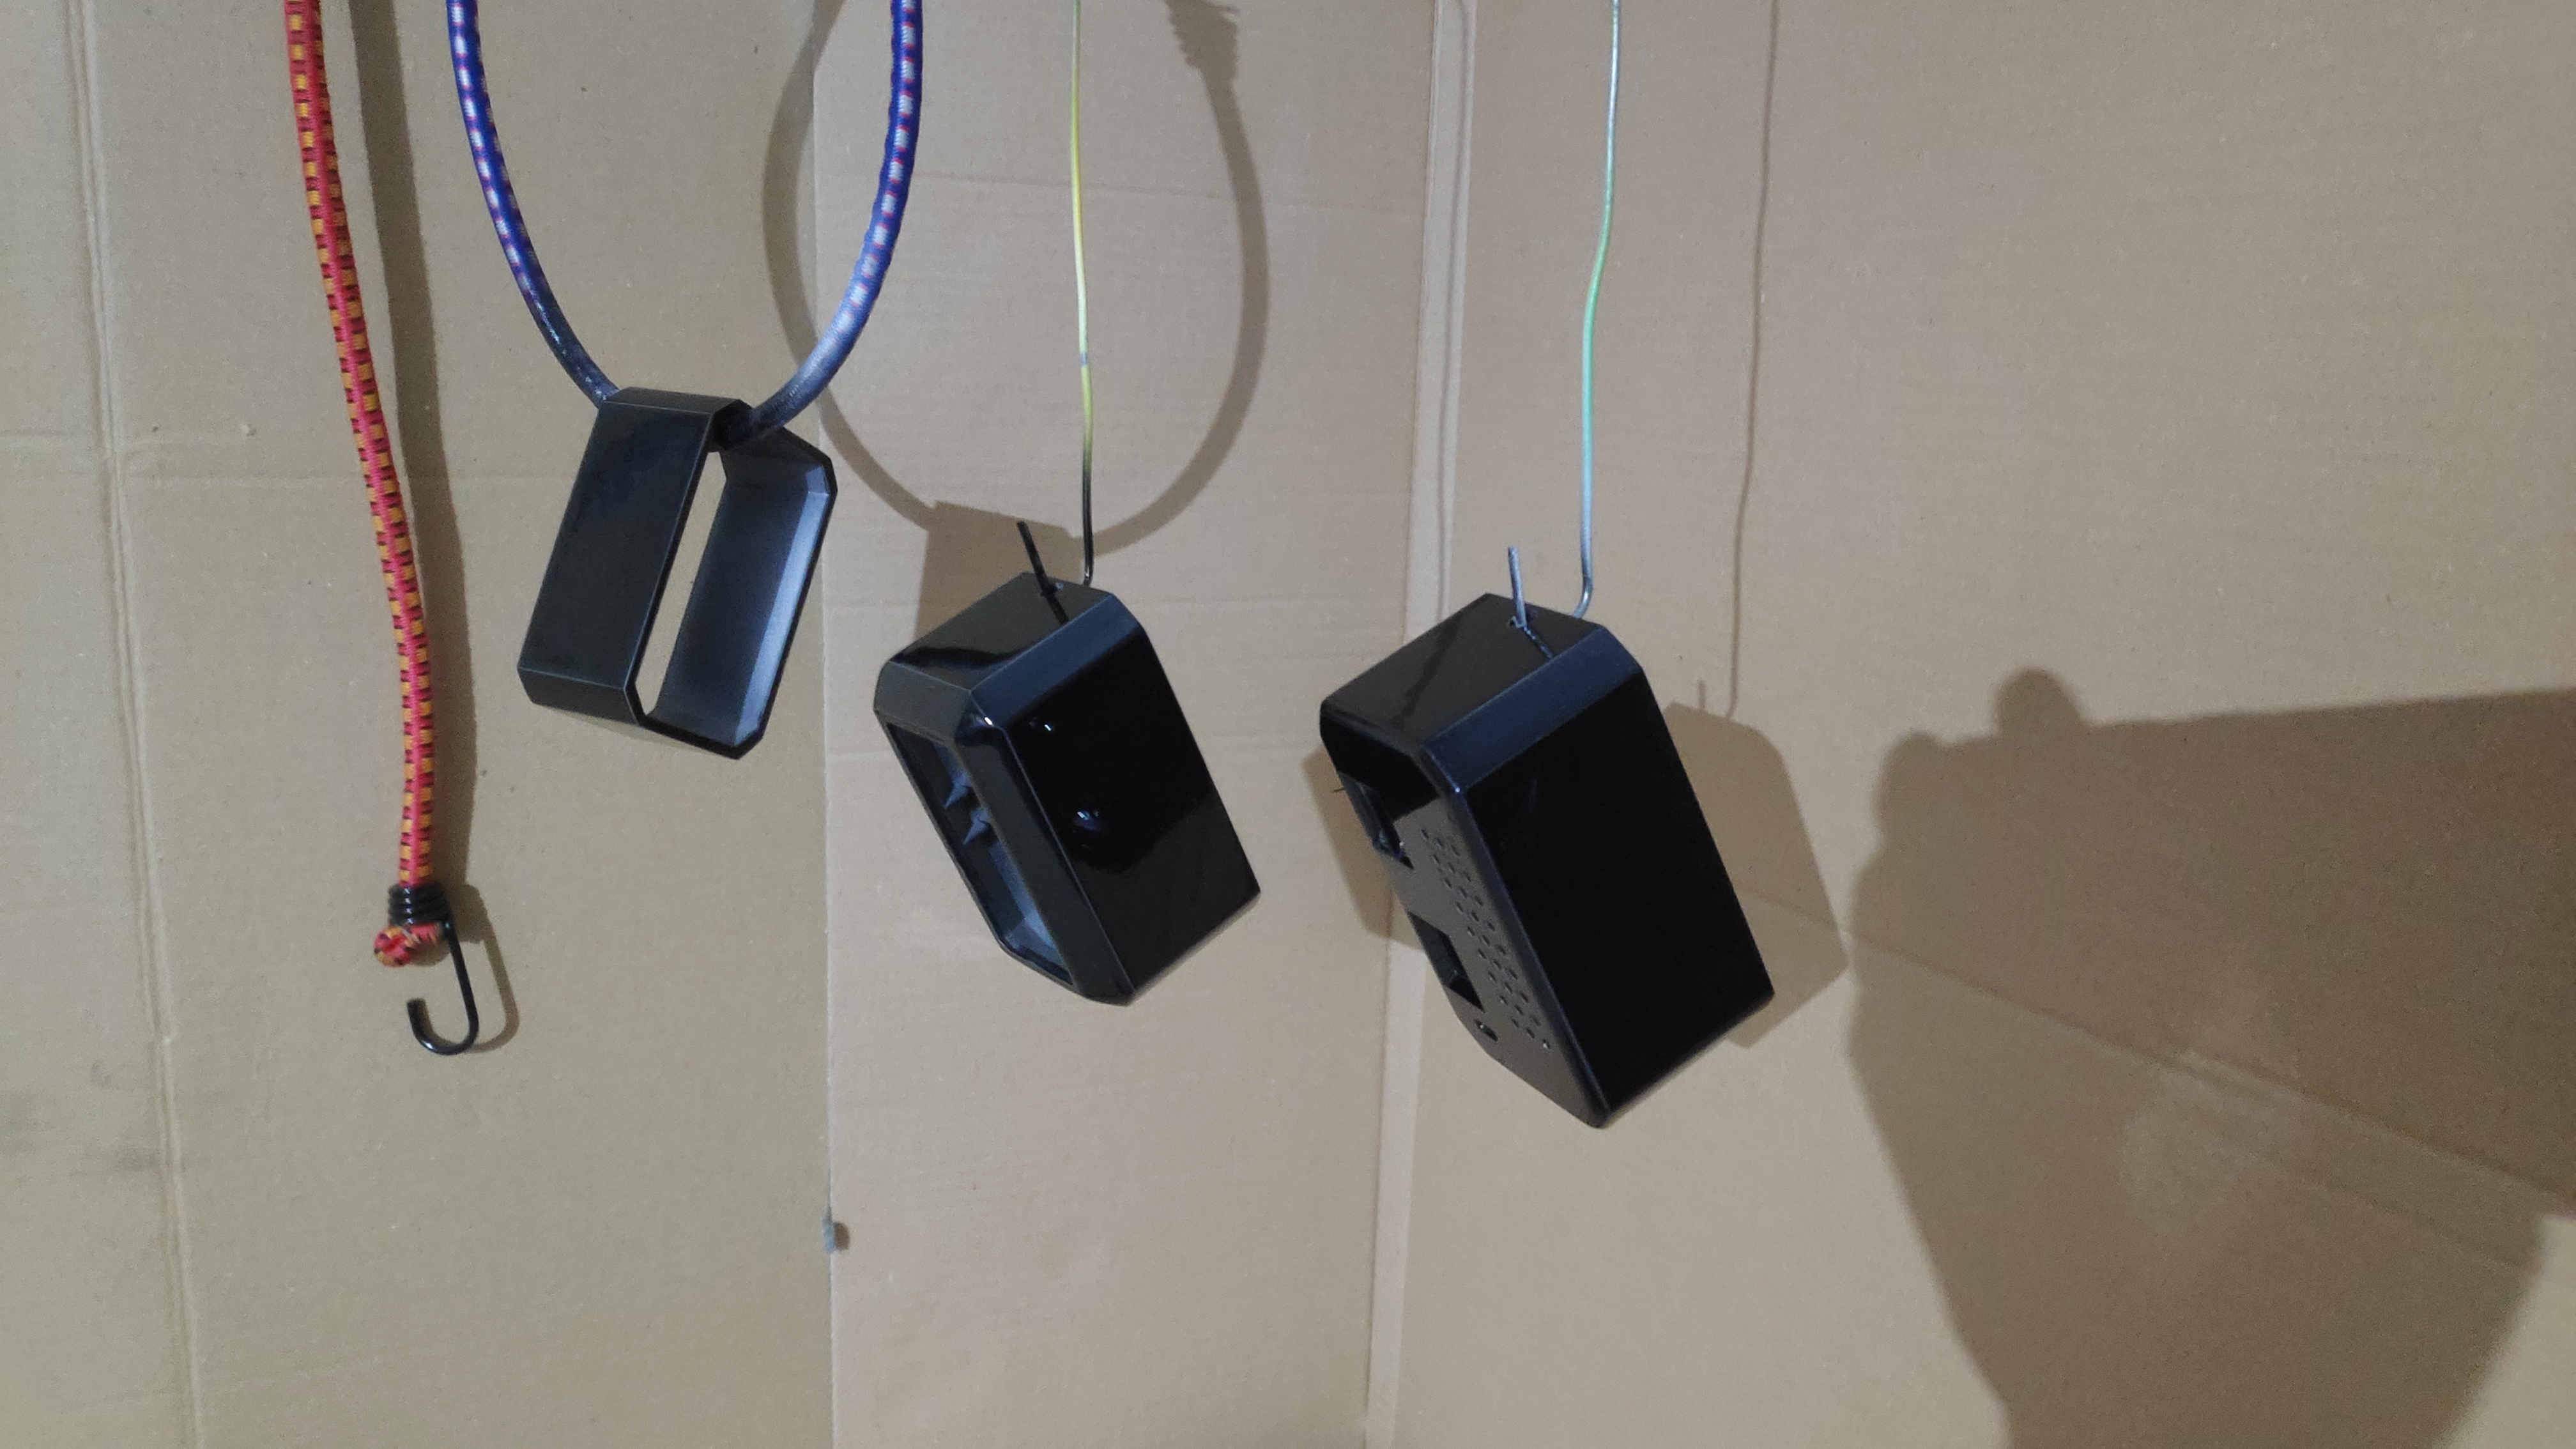
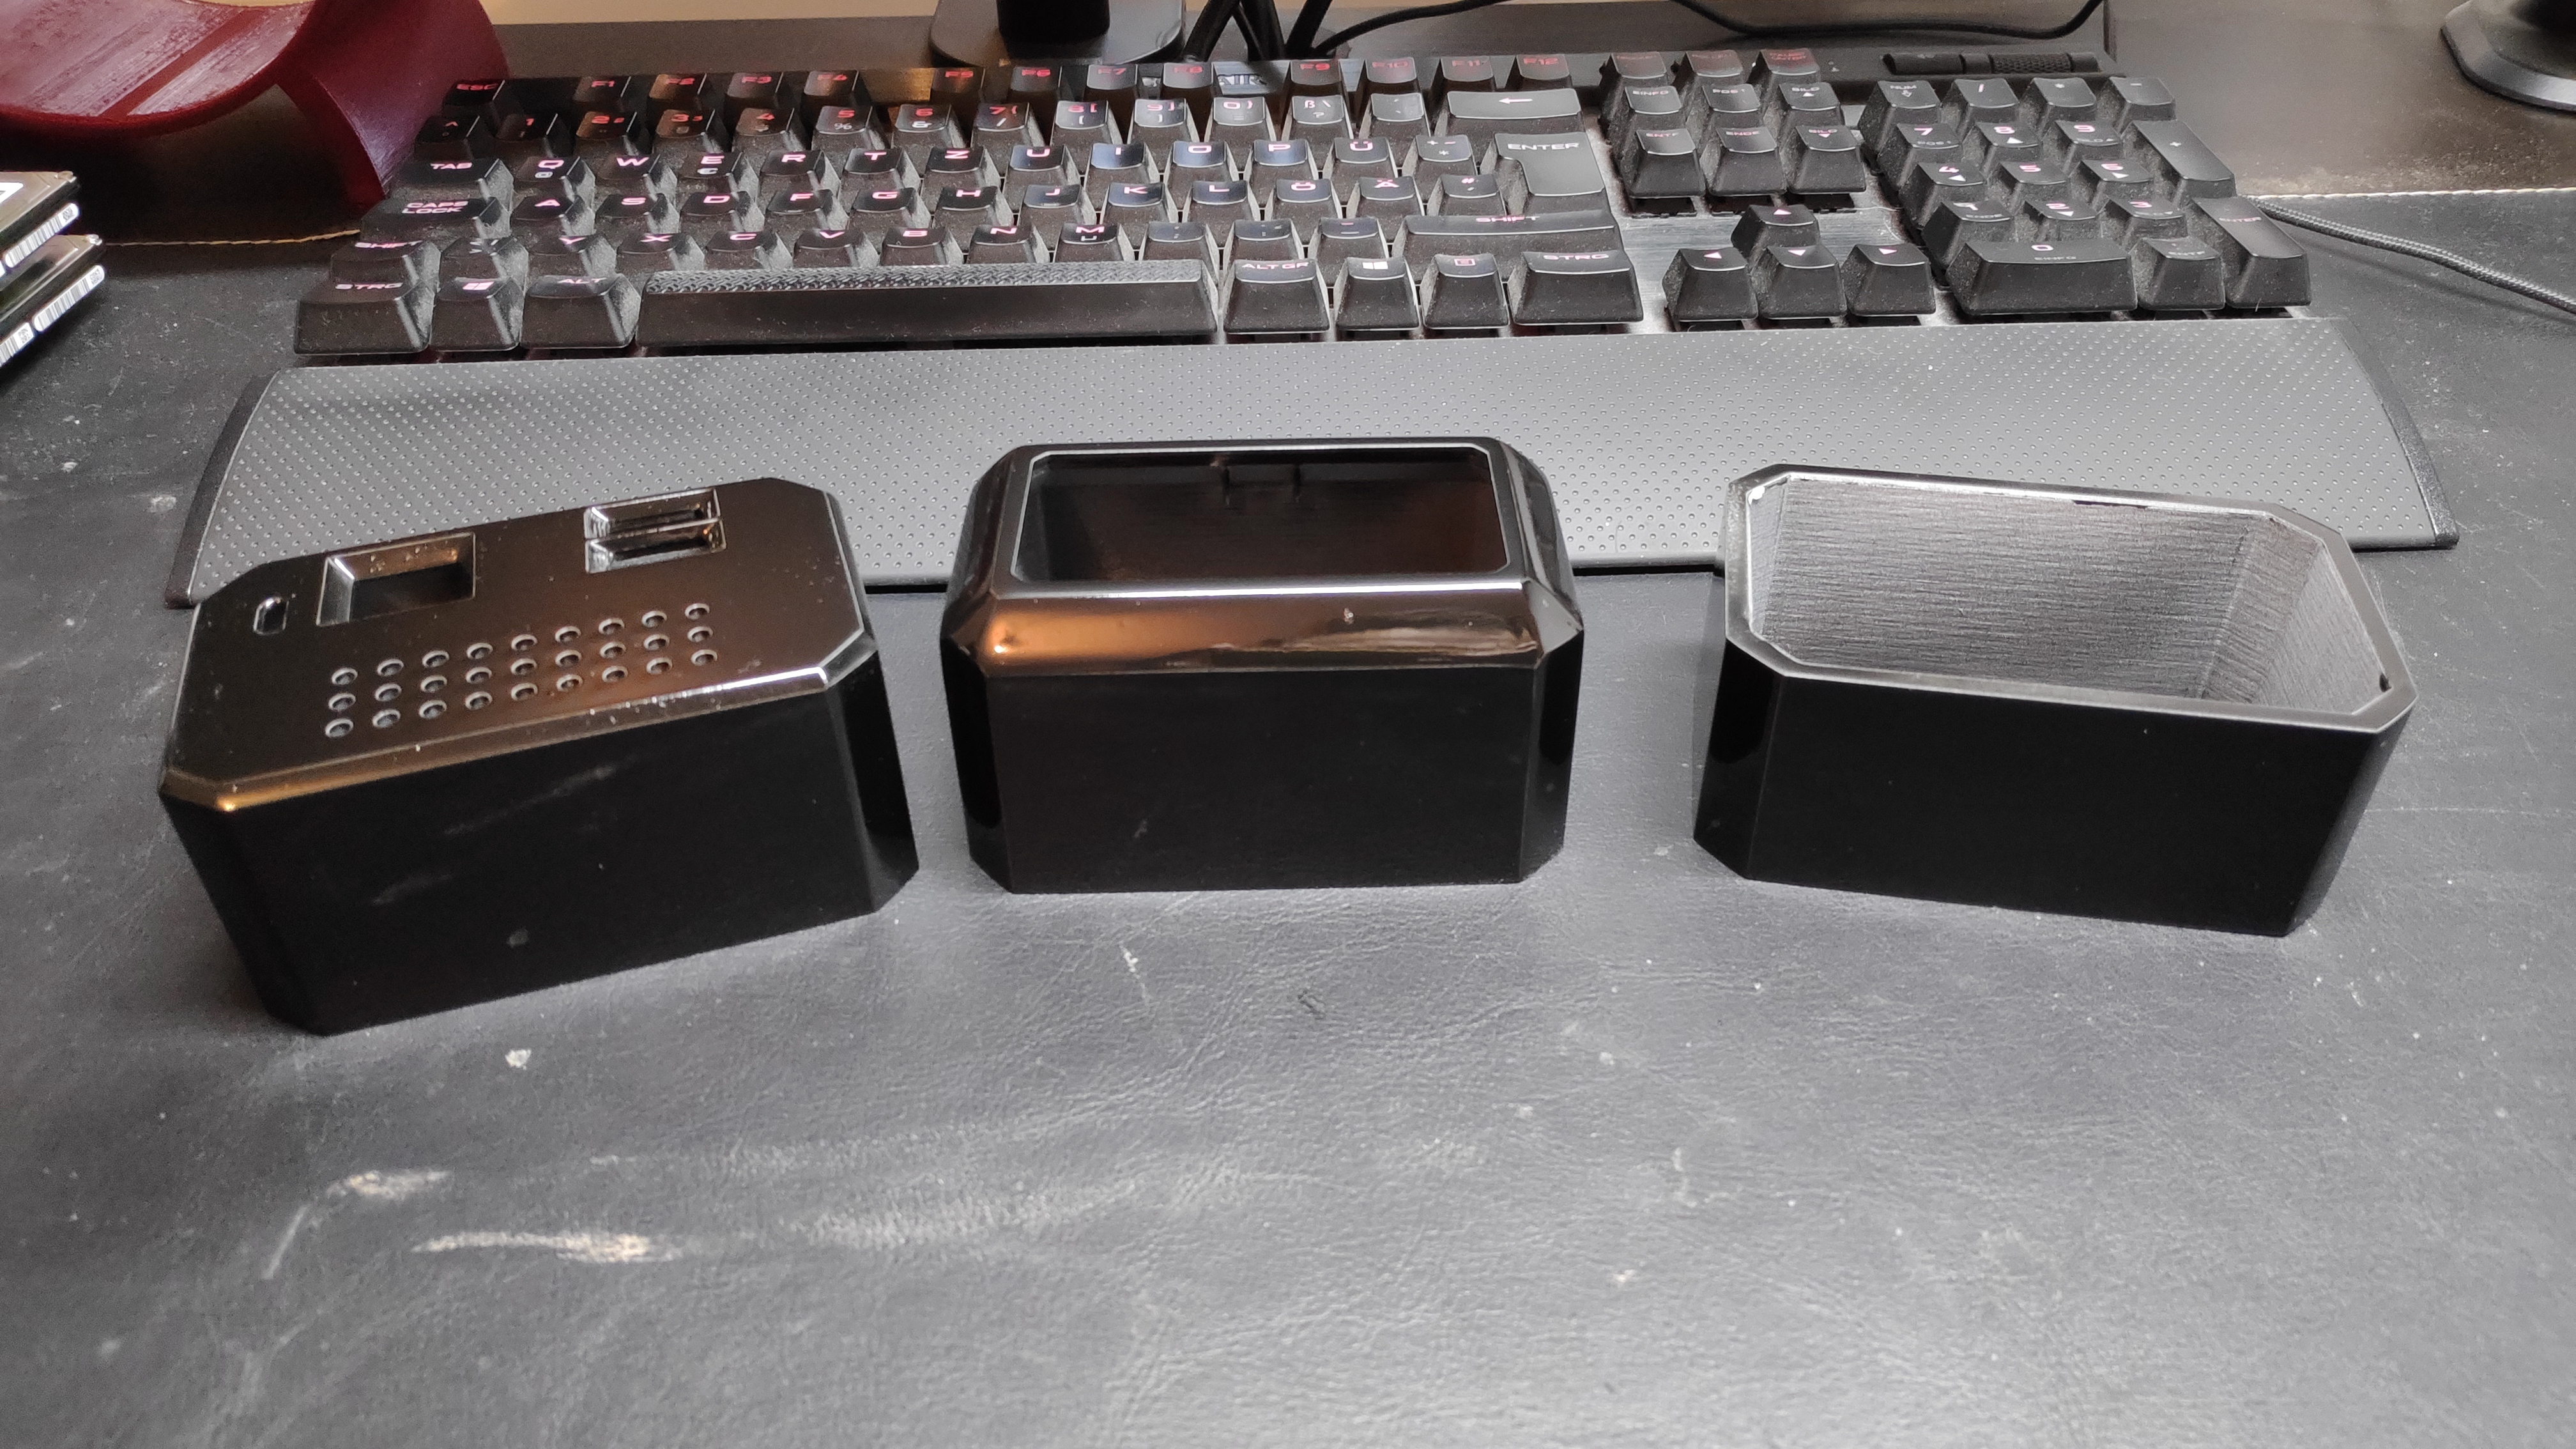
Depending on your taste this step is optional.
3D printed parts are not perfect - they have small cracks, holes, bubbles, visible layers, etc. If you want a decent smooth glossy look you have to take an extra step and post process the parts.
Here is what I've done to the 3 outer case parts:
1. Sand the parts:
- run 1: use 120 grit sanding paper
- run 2: use 240 grit sanding paper
- run 3: use the wet extra fine sanding sponge
2. Clean the parts:
Wash the parts with clear water and let them dry
3. Paint:
- Spray a thin layer of paint primer. Let it dry for 24 hours.
- Check the surface.
- Spray a thin layer of paint. Let it dry for 24 hours.
Preparing the SATA to USB Adapters
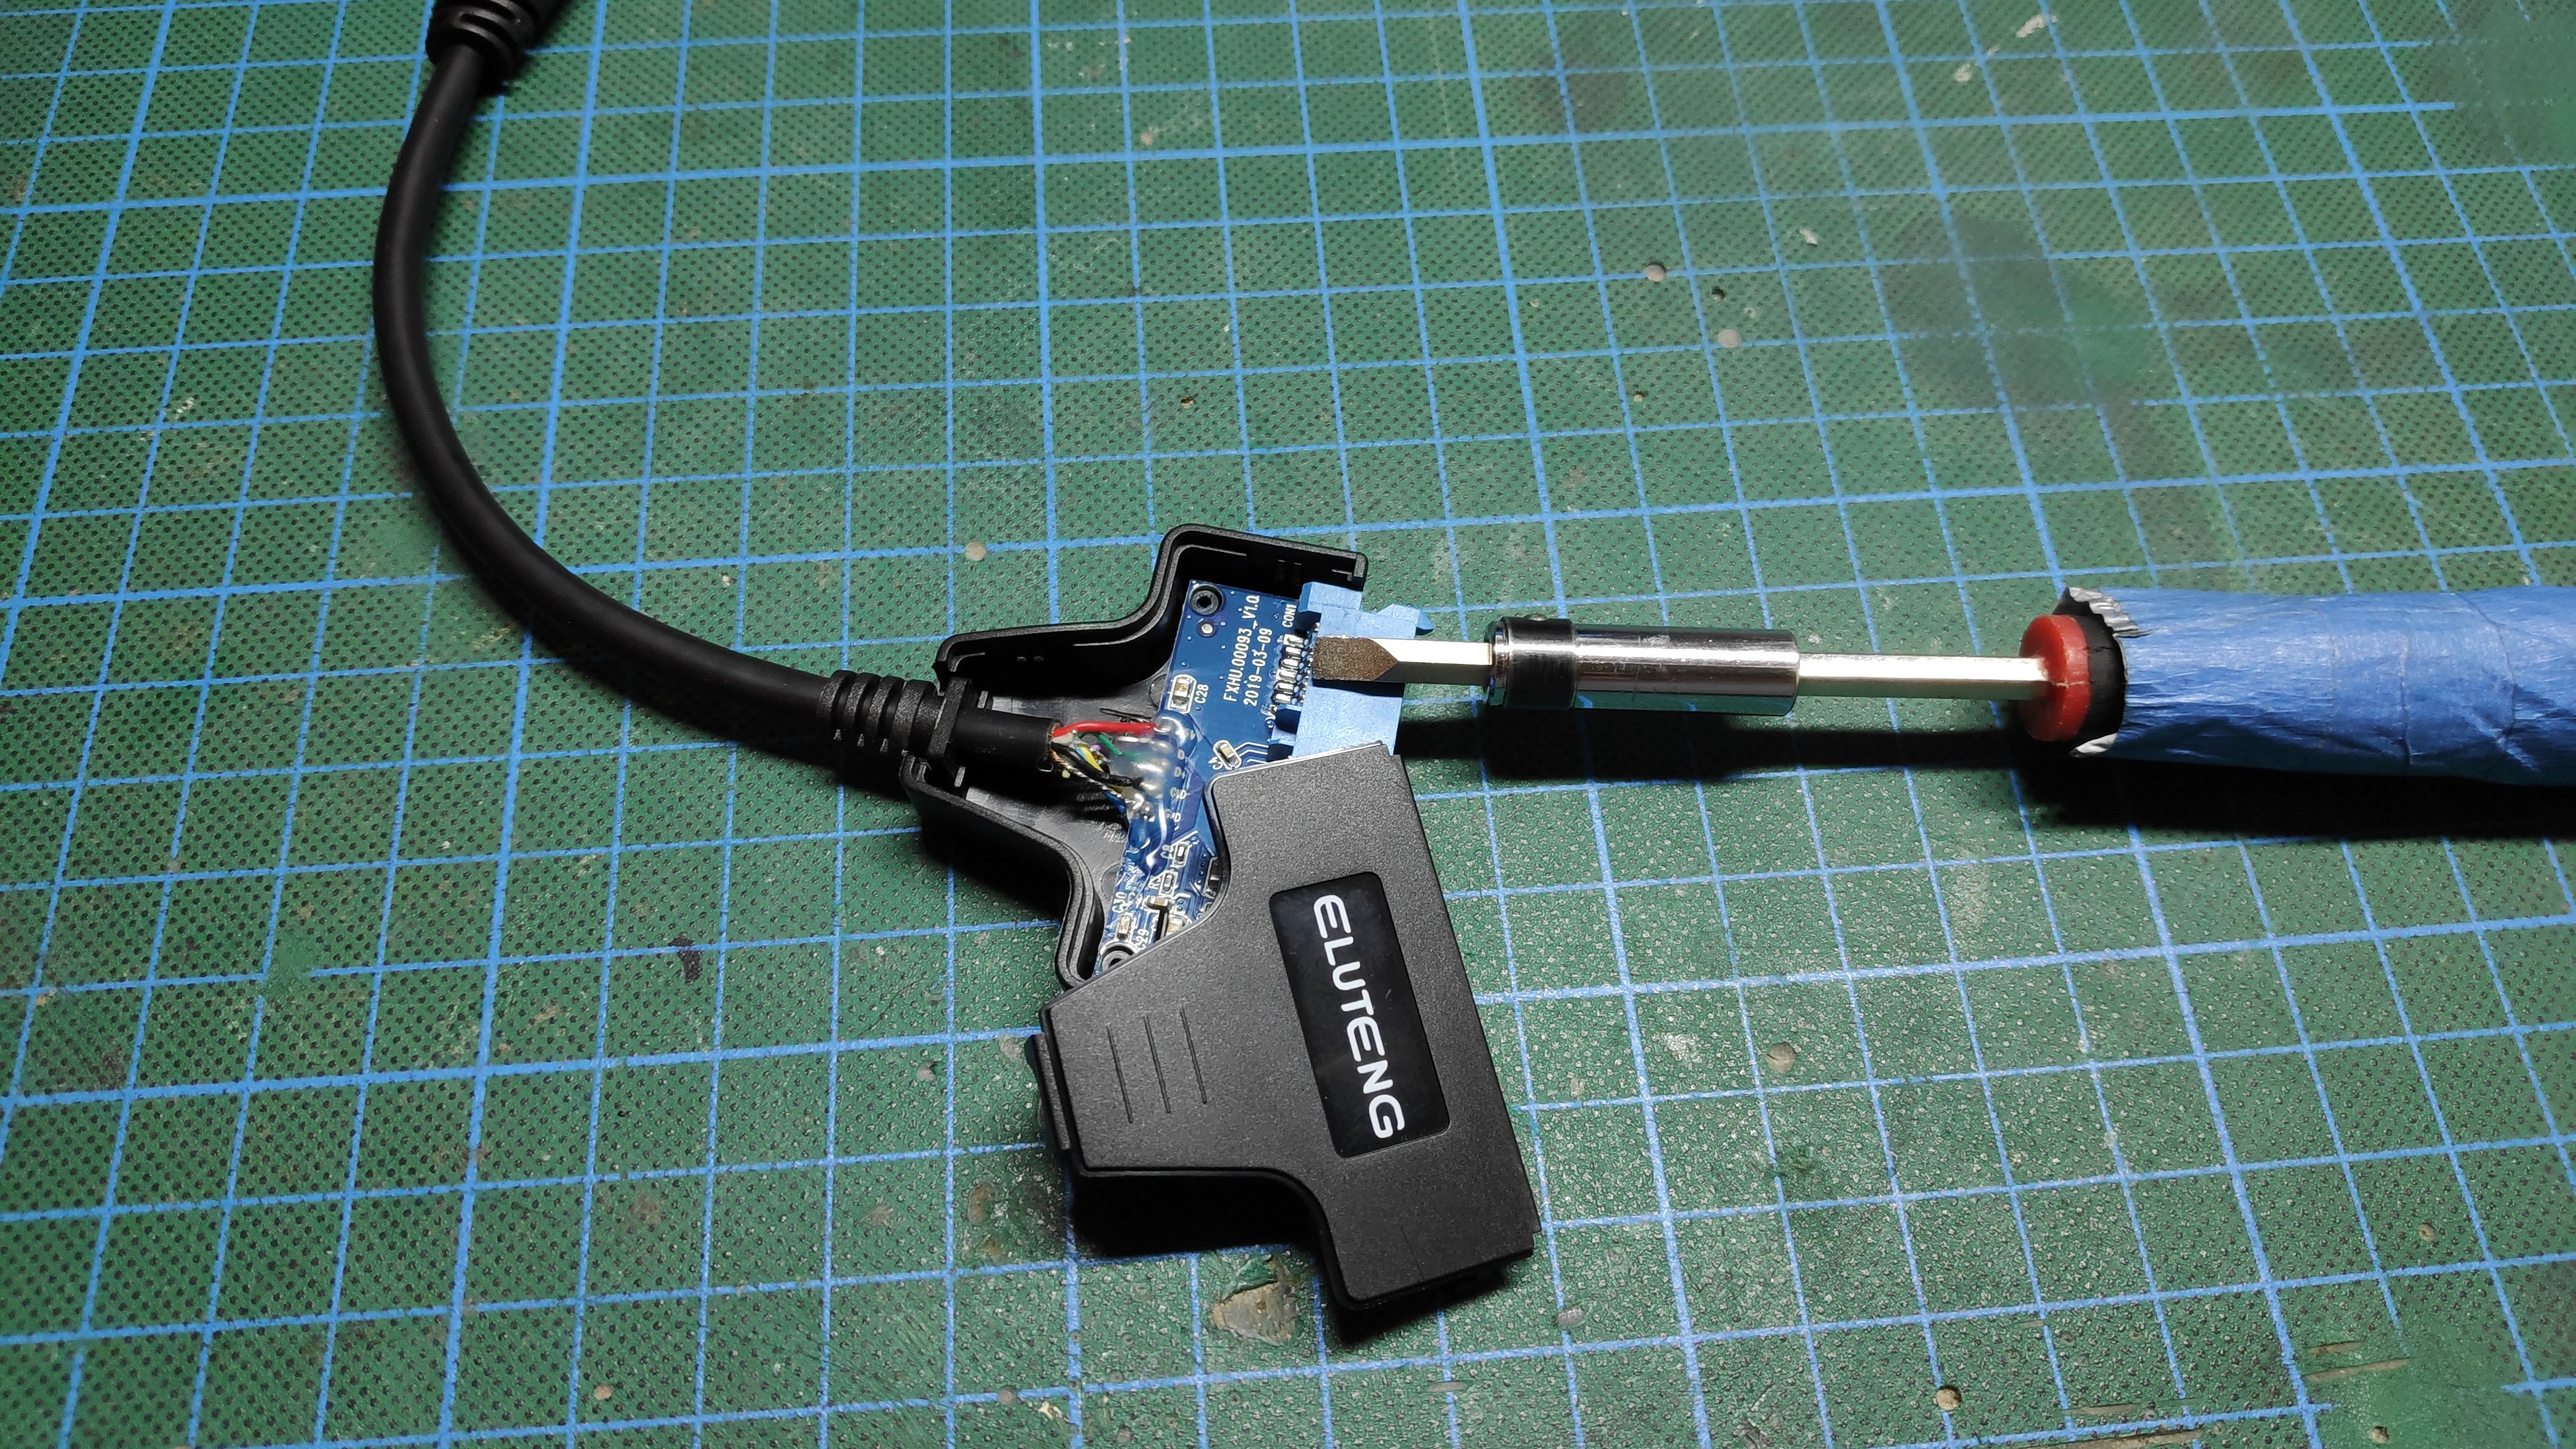
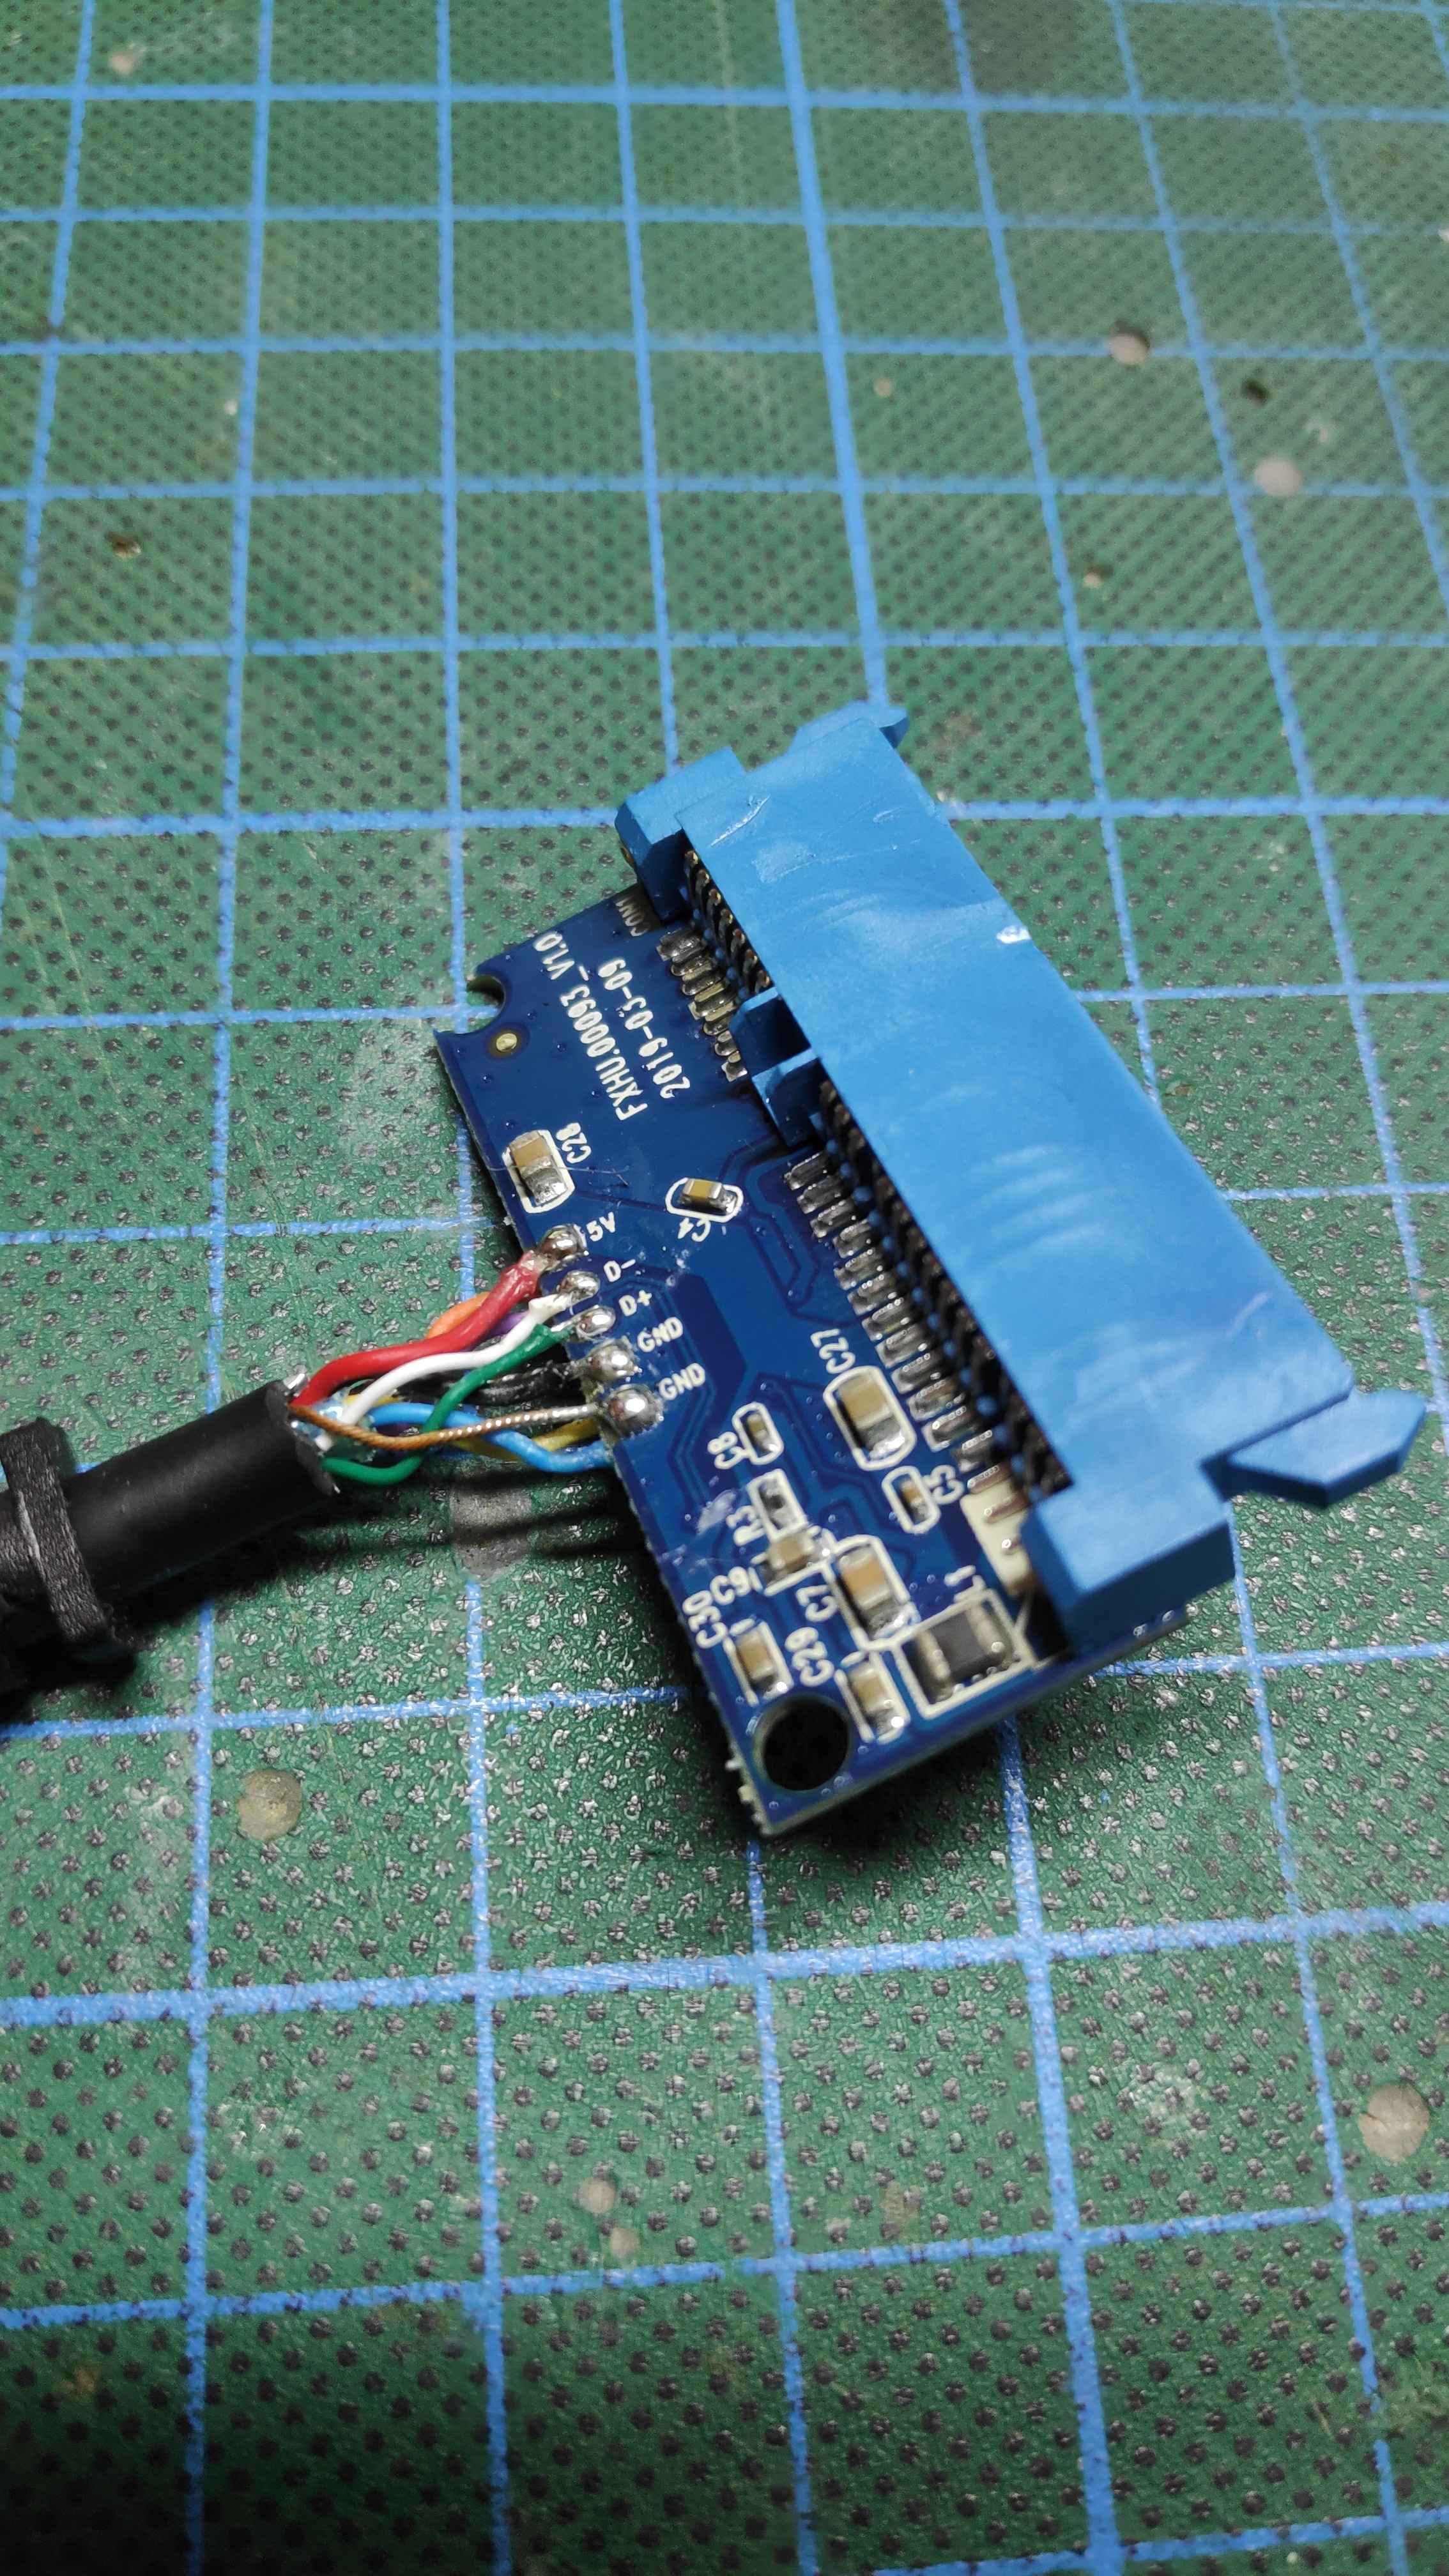
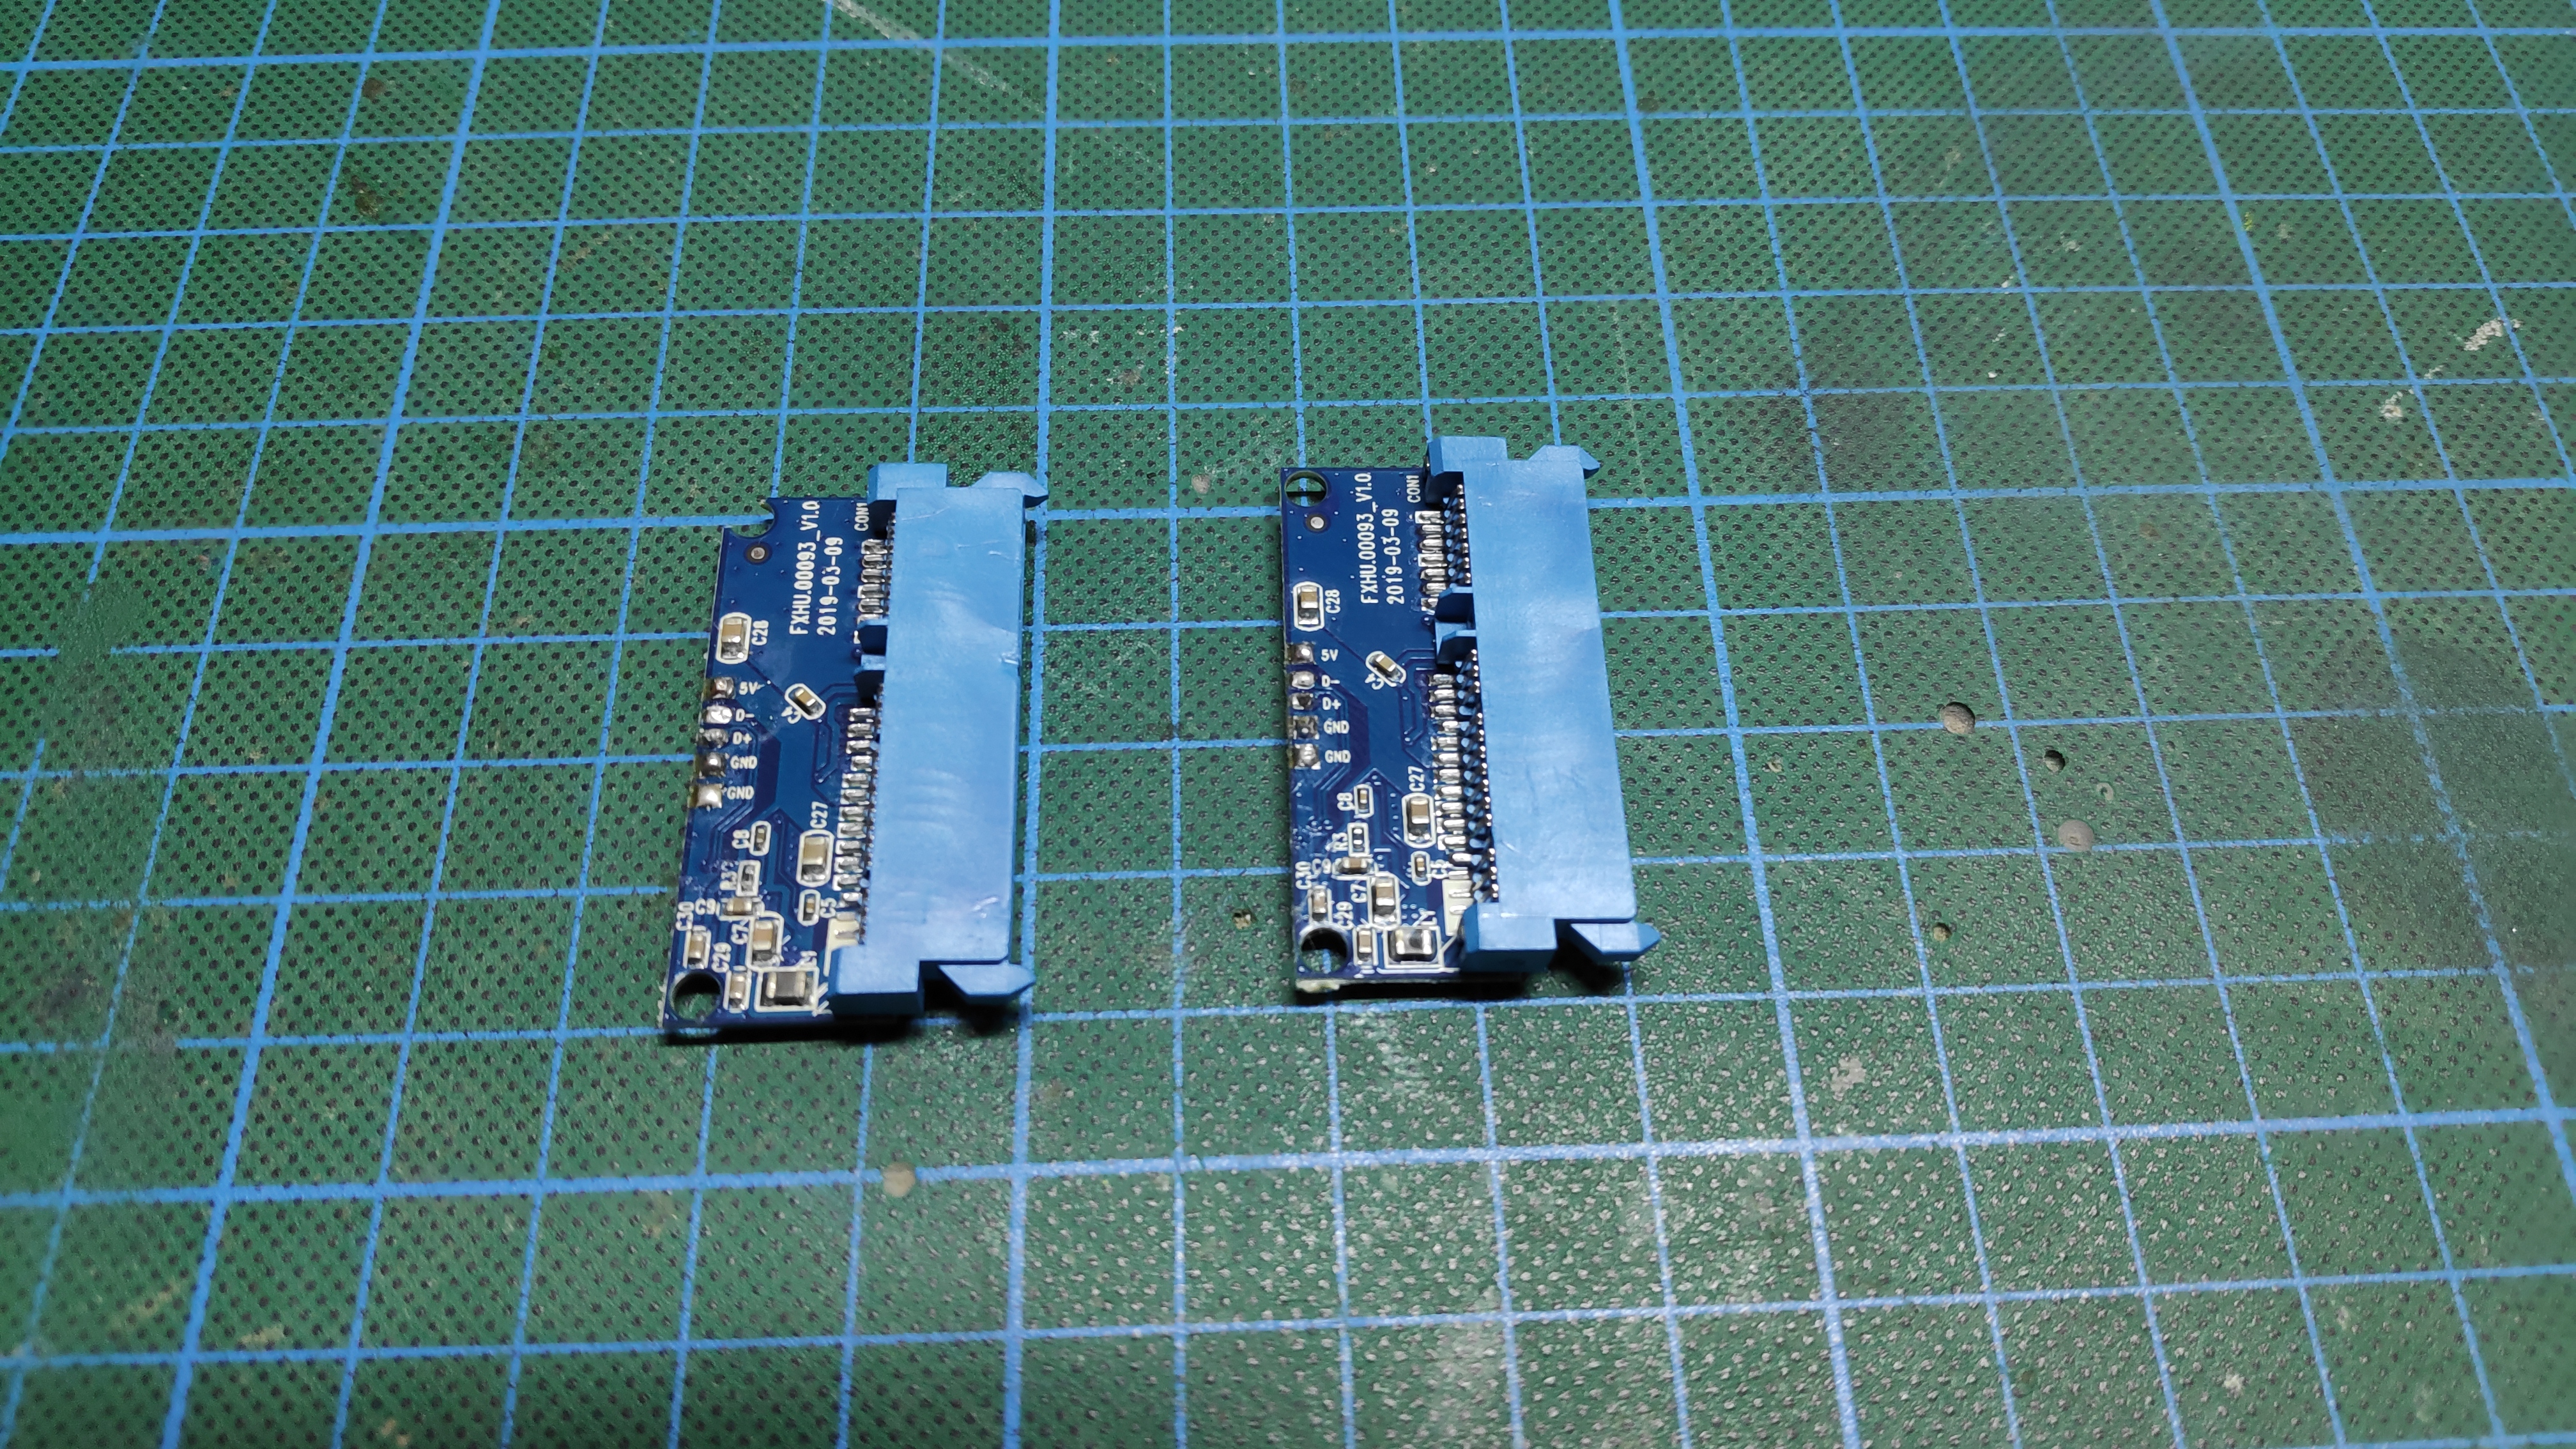
In this step we're going to prepare the SATA to USB adapters for the assembly.
Follow these steps to disassemble the adapters:
- Lift the lid of the case.
- Remove the PCB and the cable from the case.
- Remove the hot glue.
- Unsolder the USB wires from the PCB.
Preparing the Inner Case
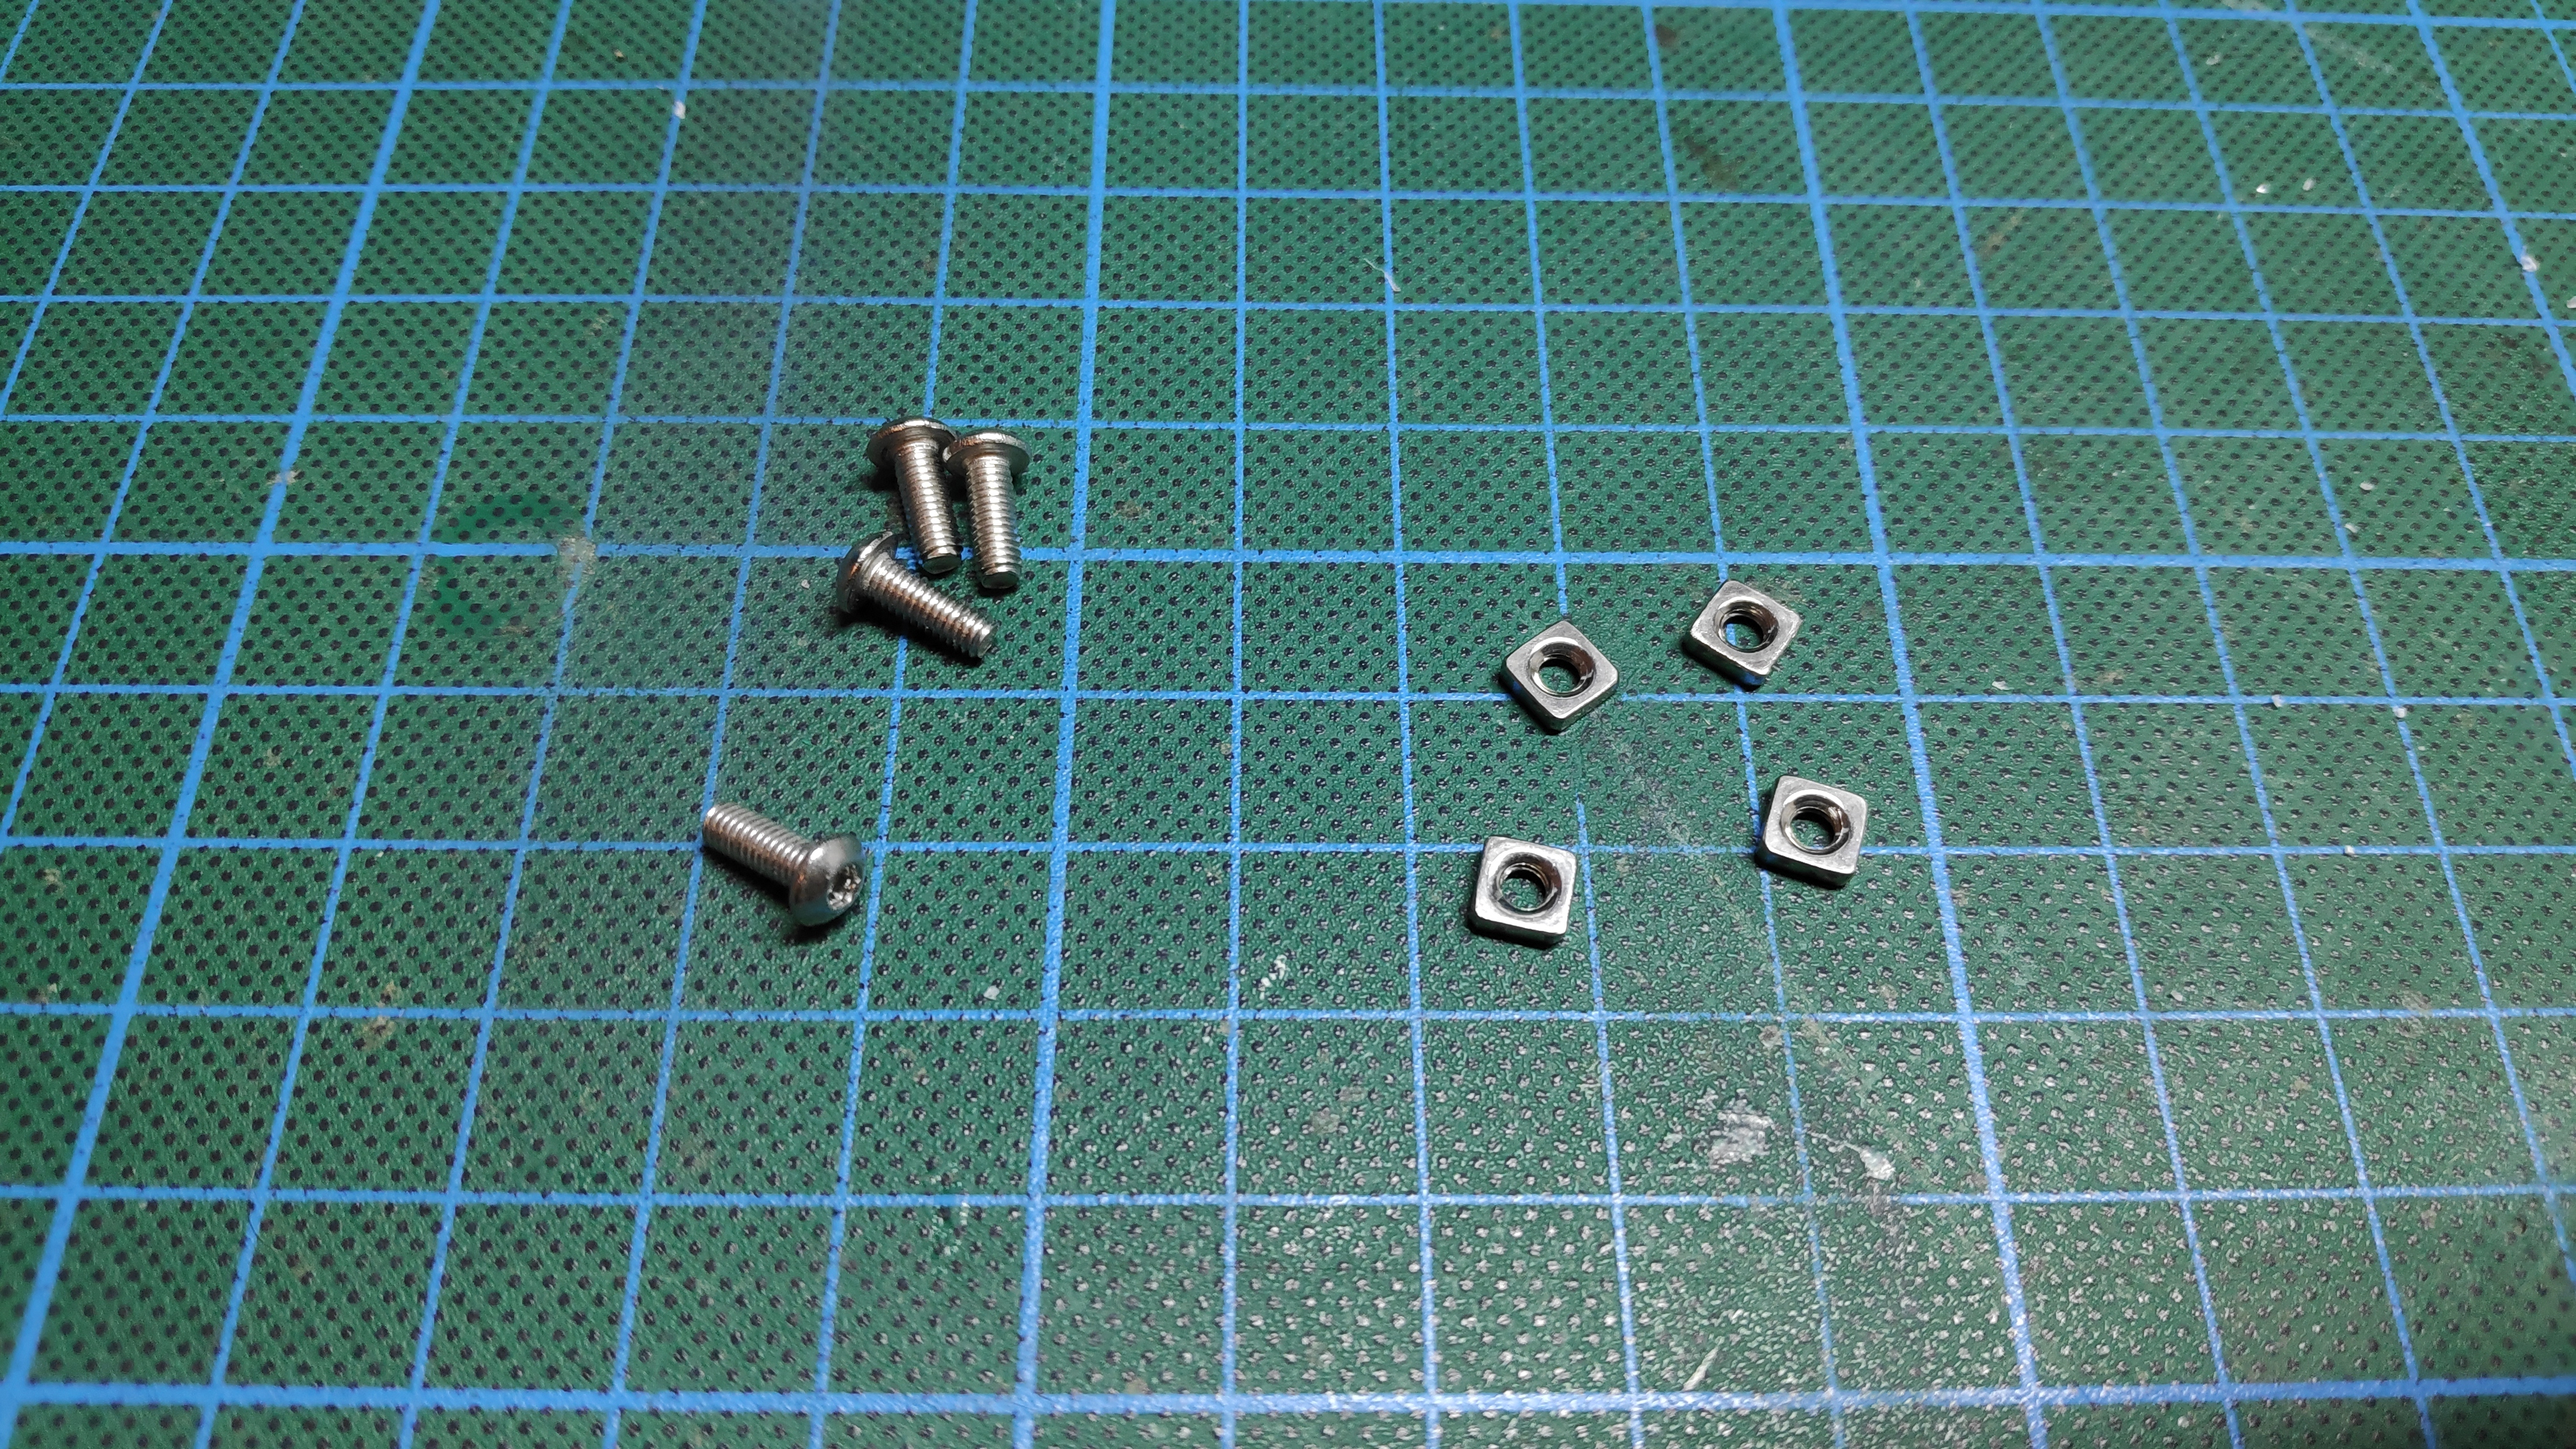
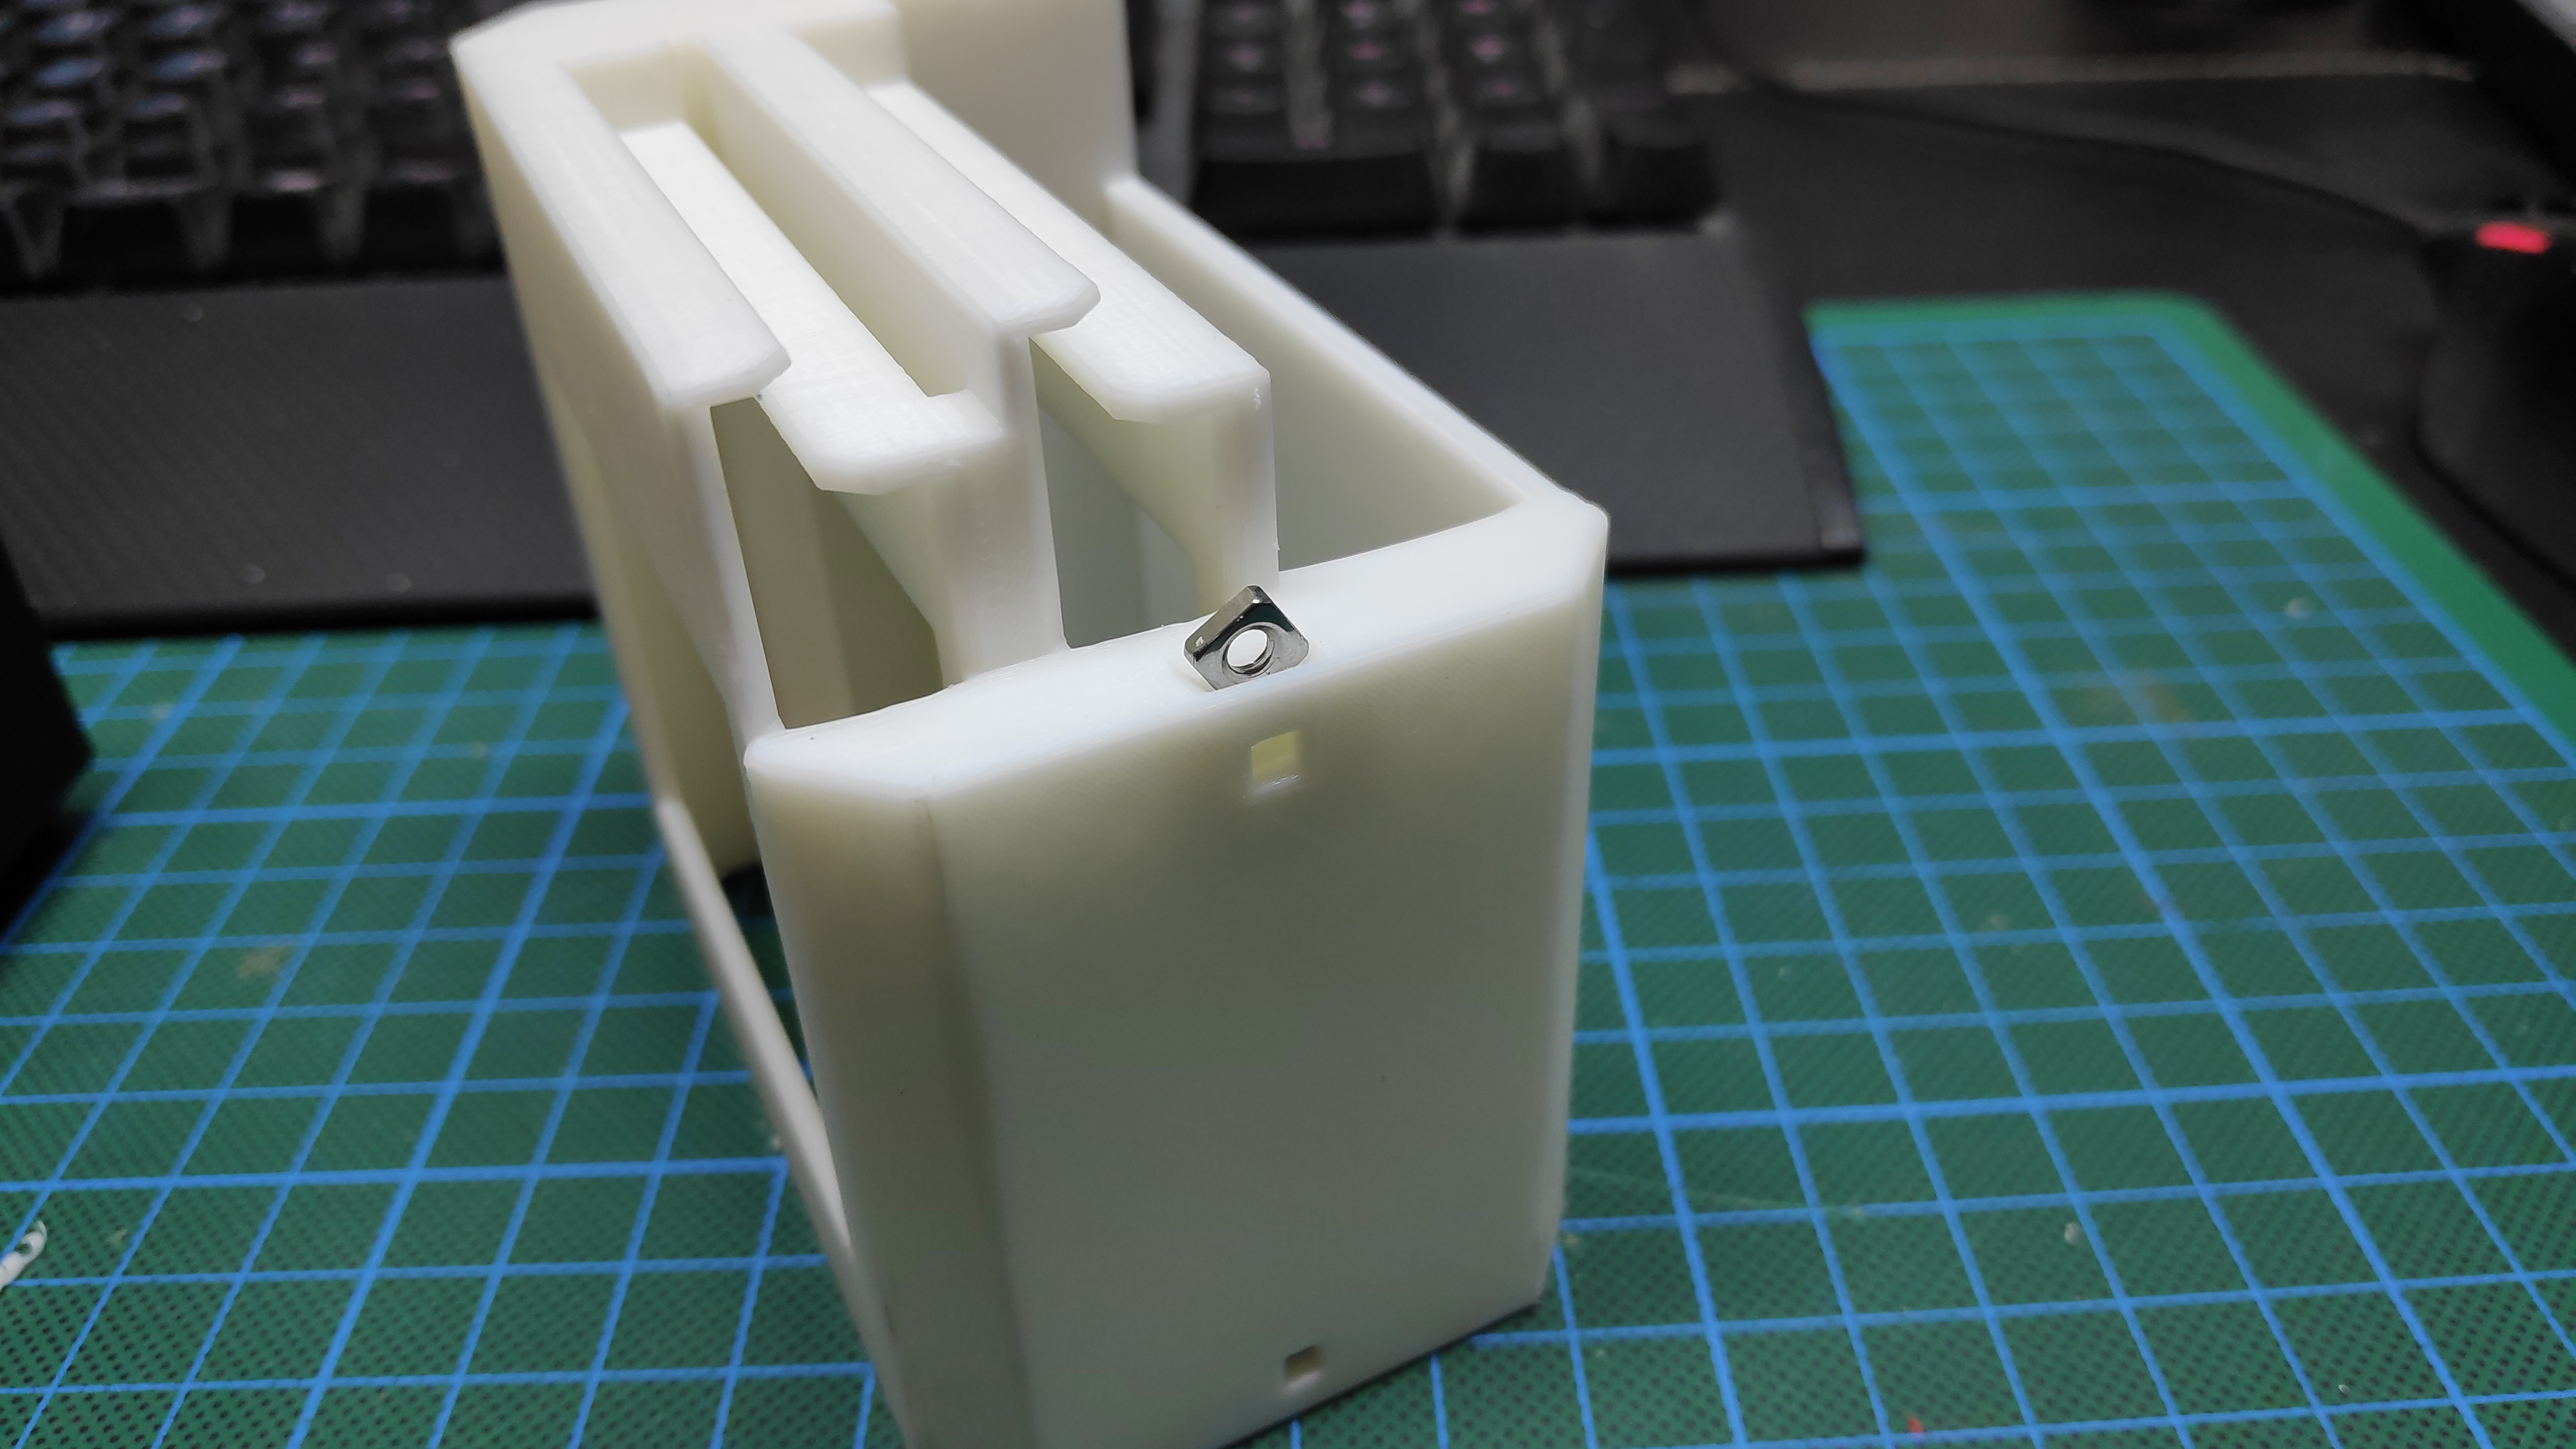
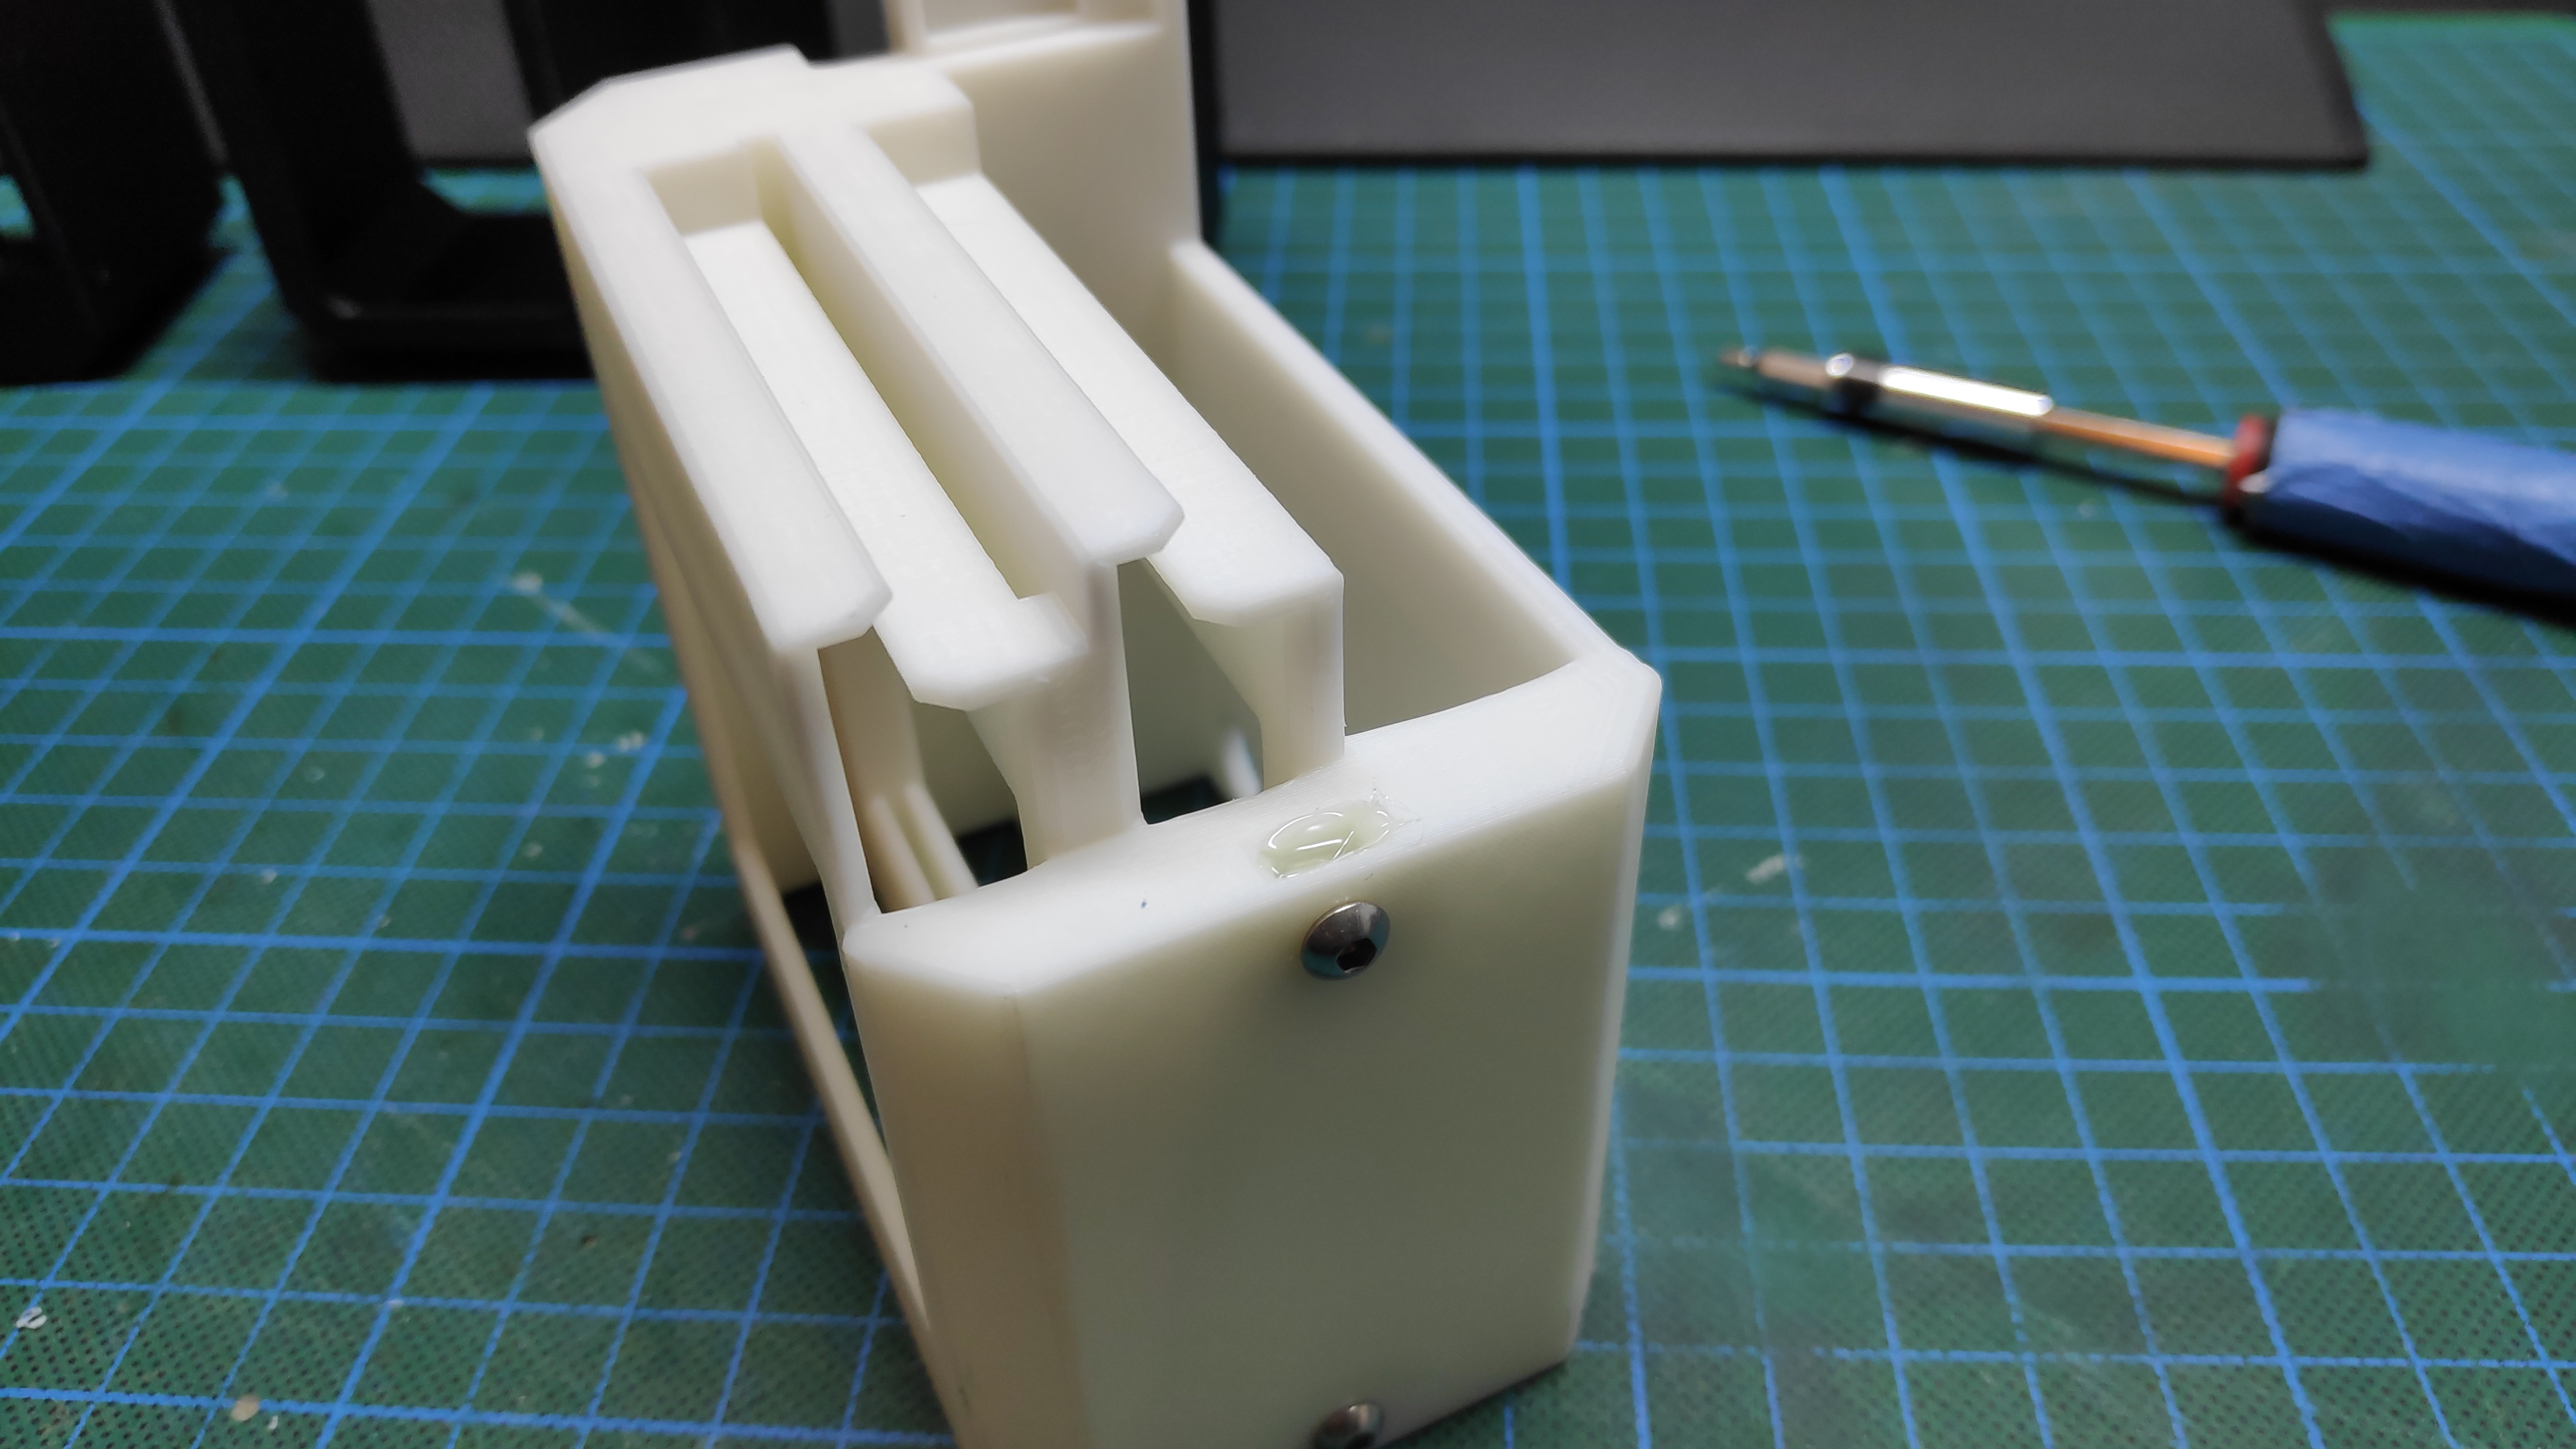
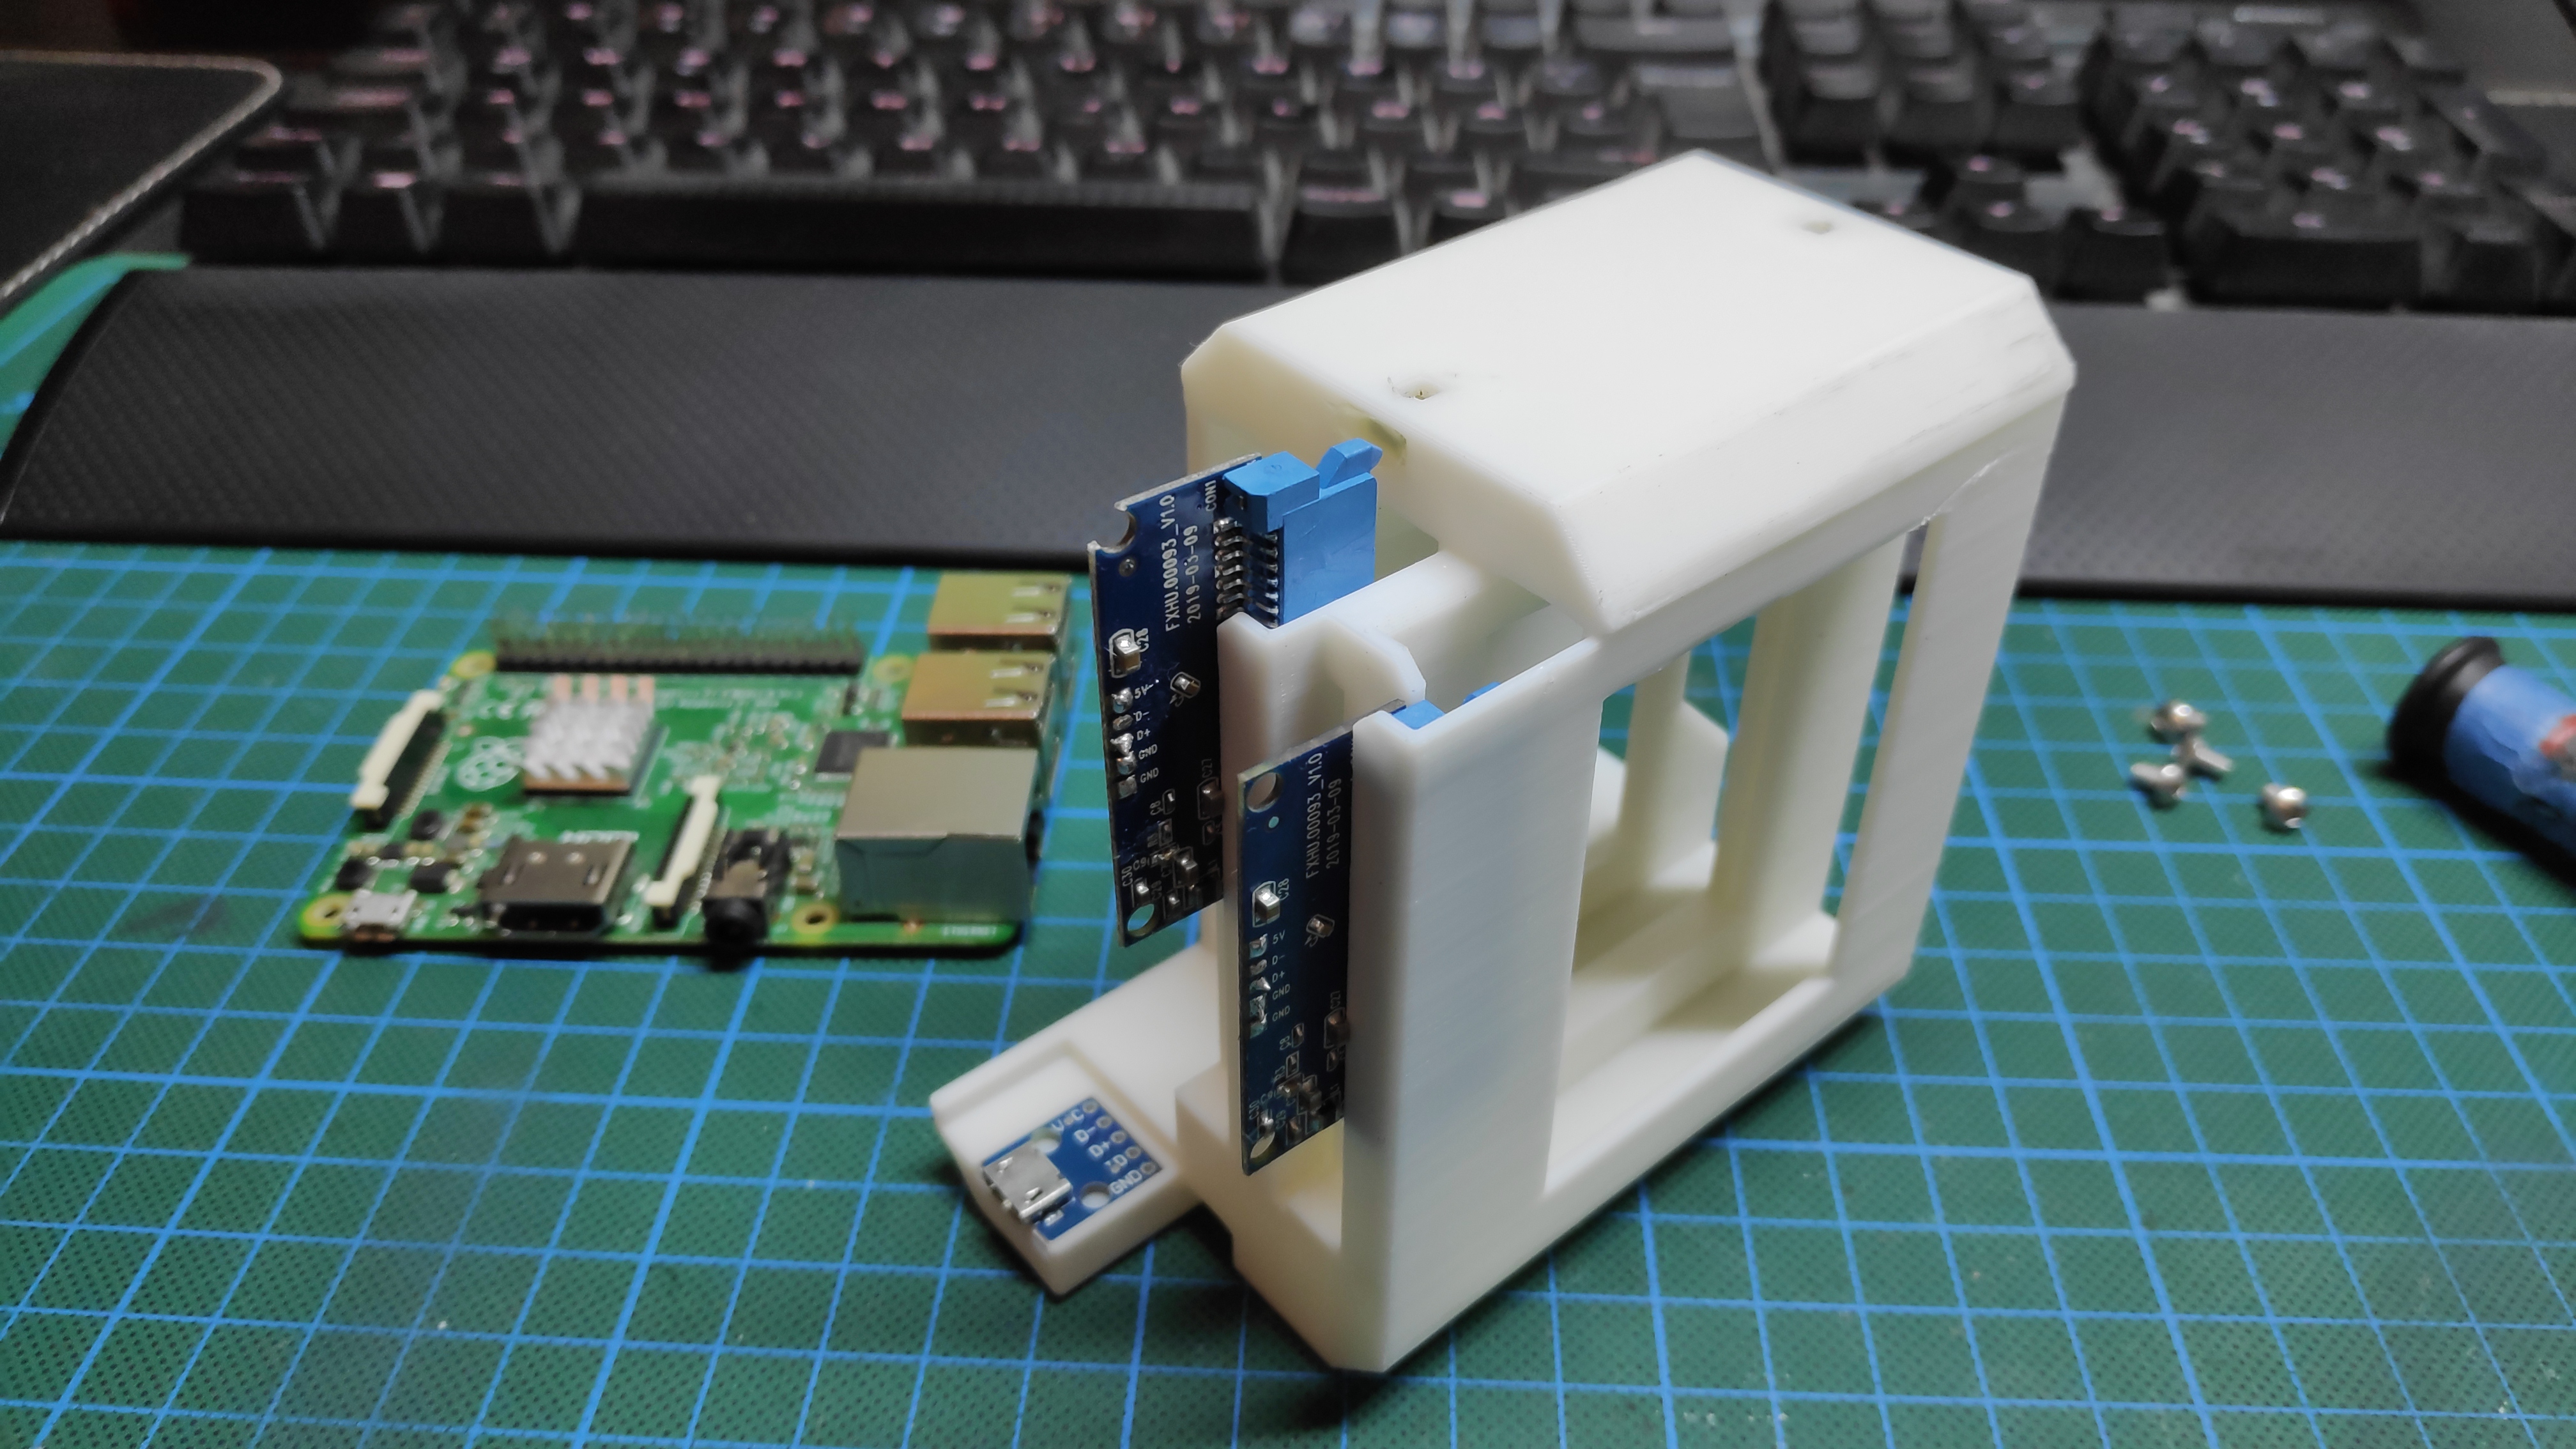
In this step we're going to prepare the inner part of the case for the assembly.
Follow these steps to add the nuts:
- Check if there is any debris in the slots for the nuts and remove it.
- Slide all four nuts in the slots.
- Secure the nuts with the M3x6mm bolts to keep them in place.
- Apply a small amount of hot glue to the slots to secure the nuts.
- Remove the M3x6mm bolts.
Check if all parts fit in their dedicated place.
Wiring and Assembly: Raspberry Pi
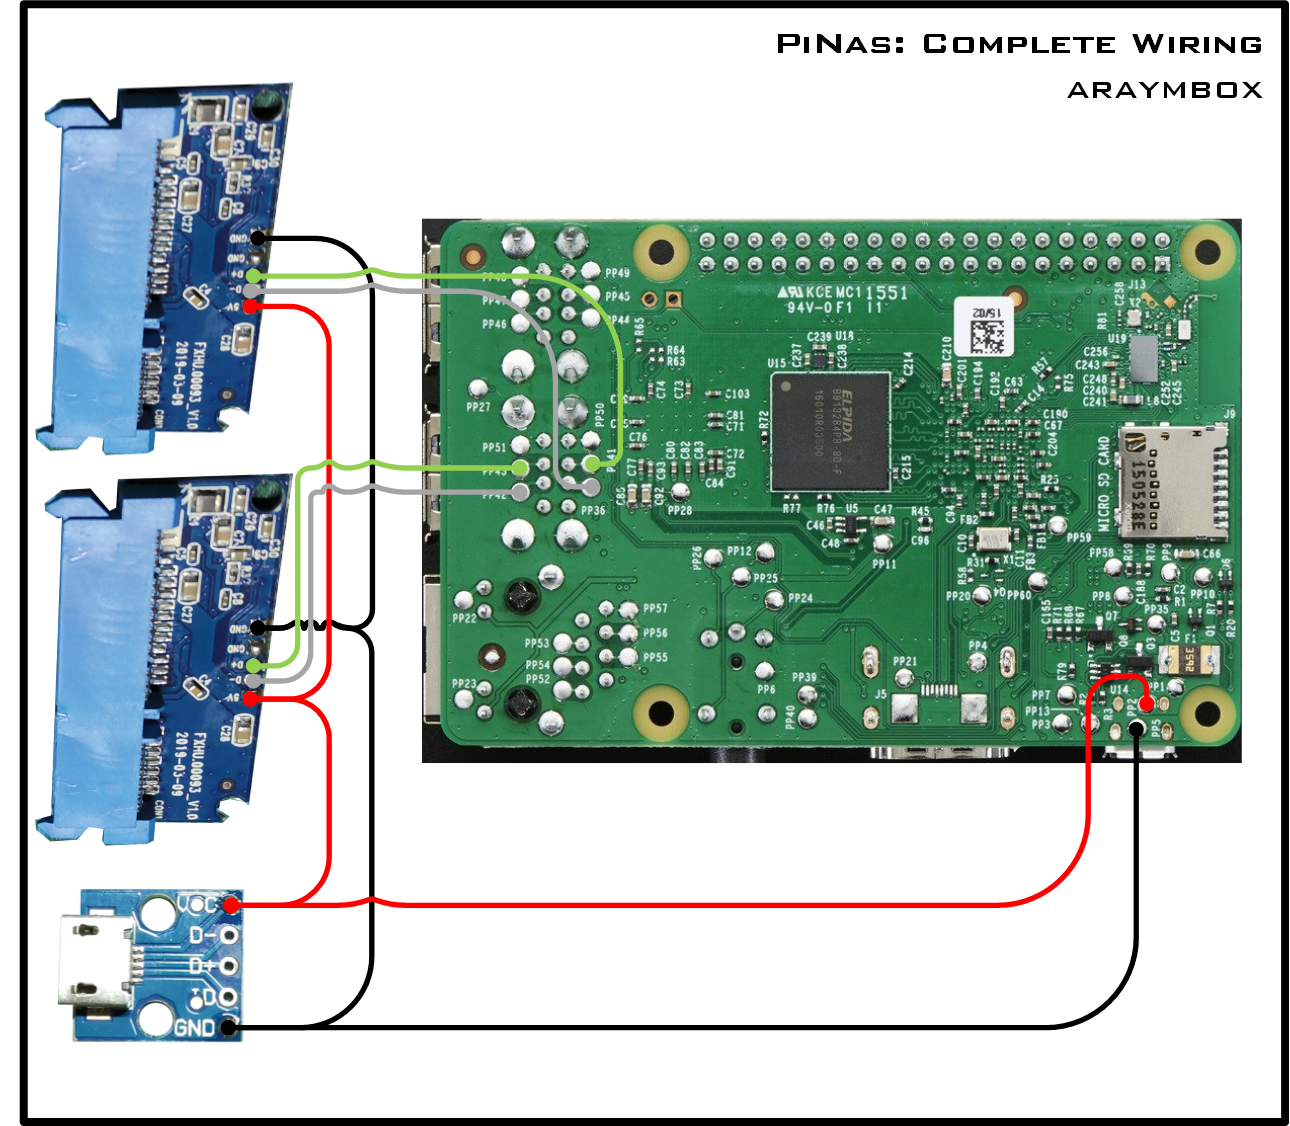
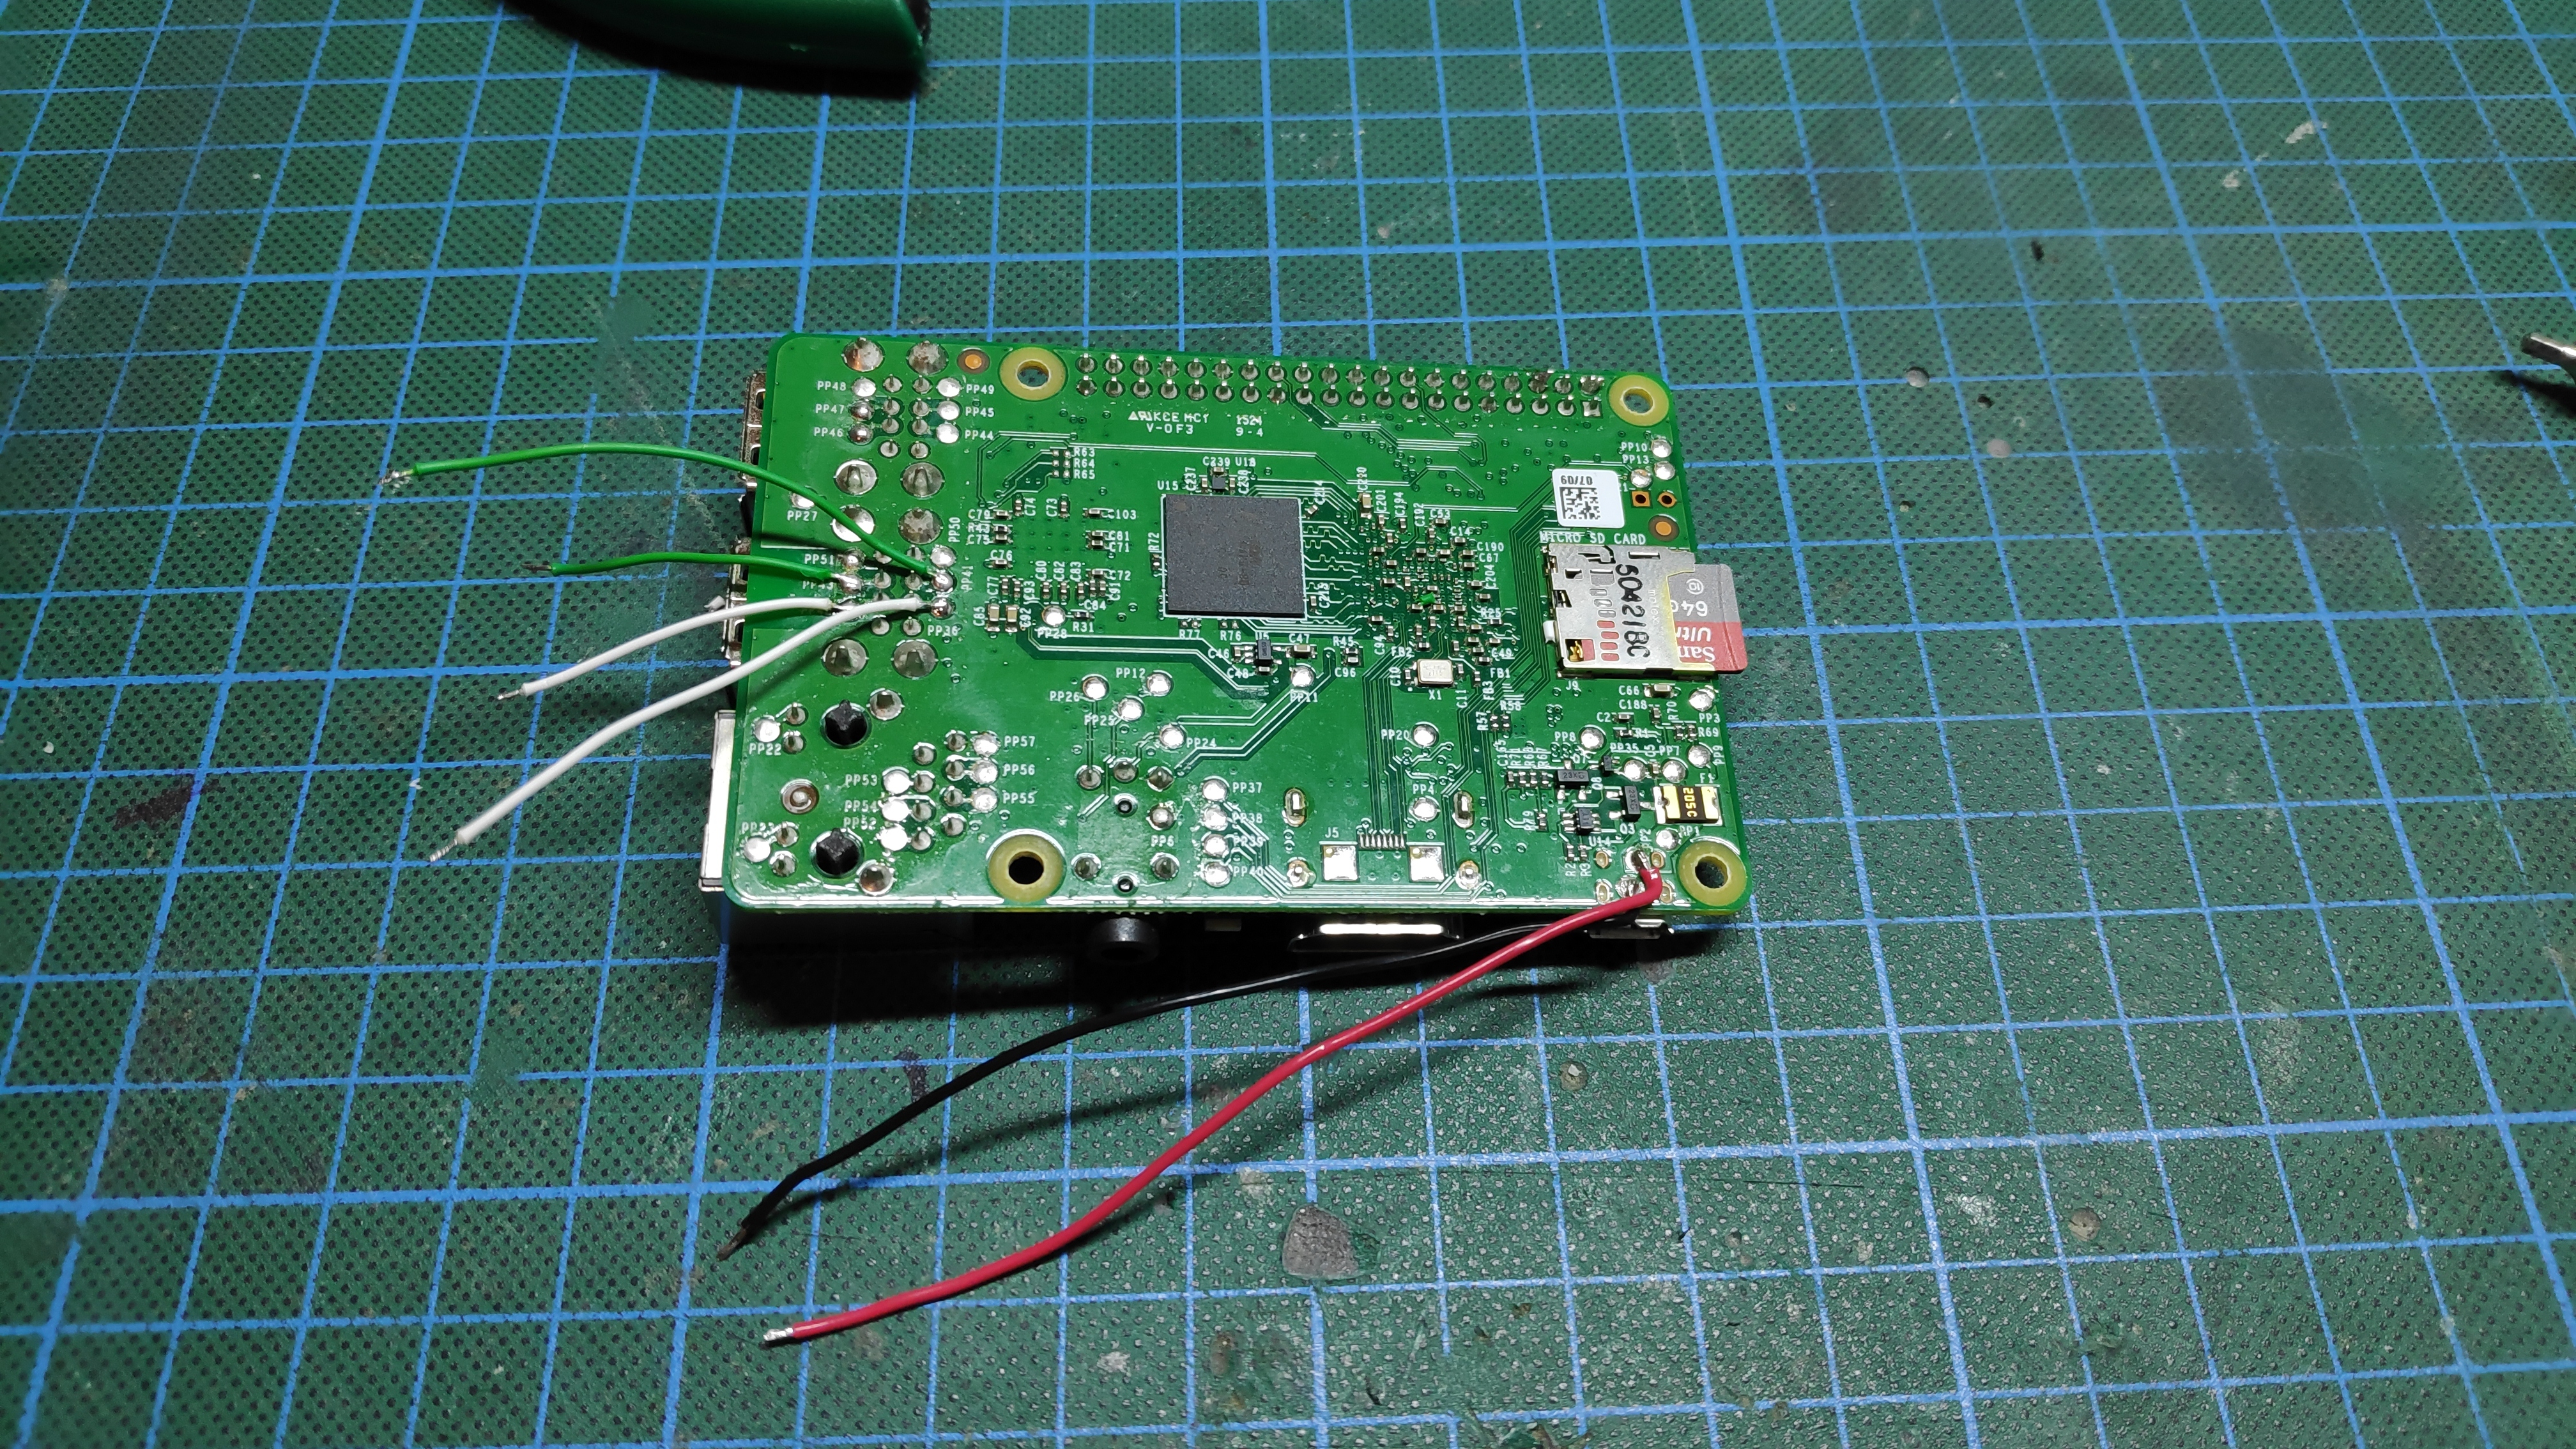
In this step we'are wiring up all the electronics and put it in place.
Always double (and triple) check your soldering.
Solder all wires to the RasPi first:
- Start by soldering all the required wires to the RasPi
- The pictures in this step show all required wiring points.
Wiring and Assembly: USB Breakout Board
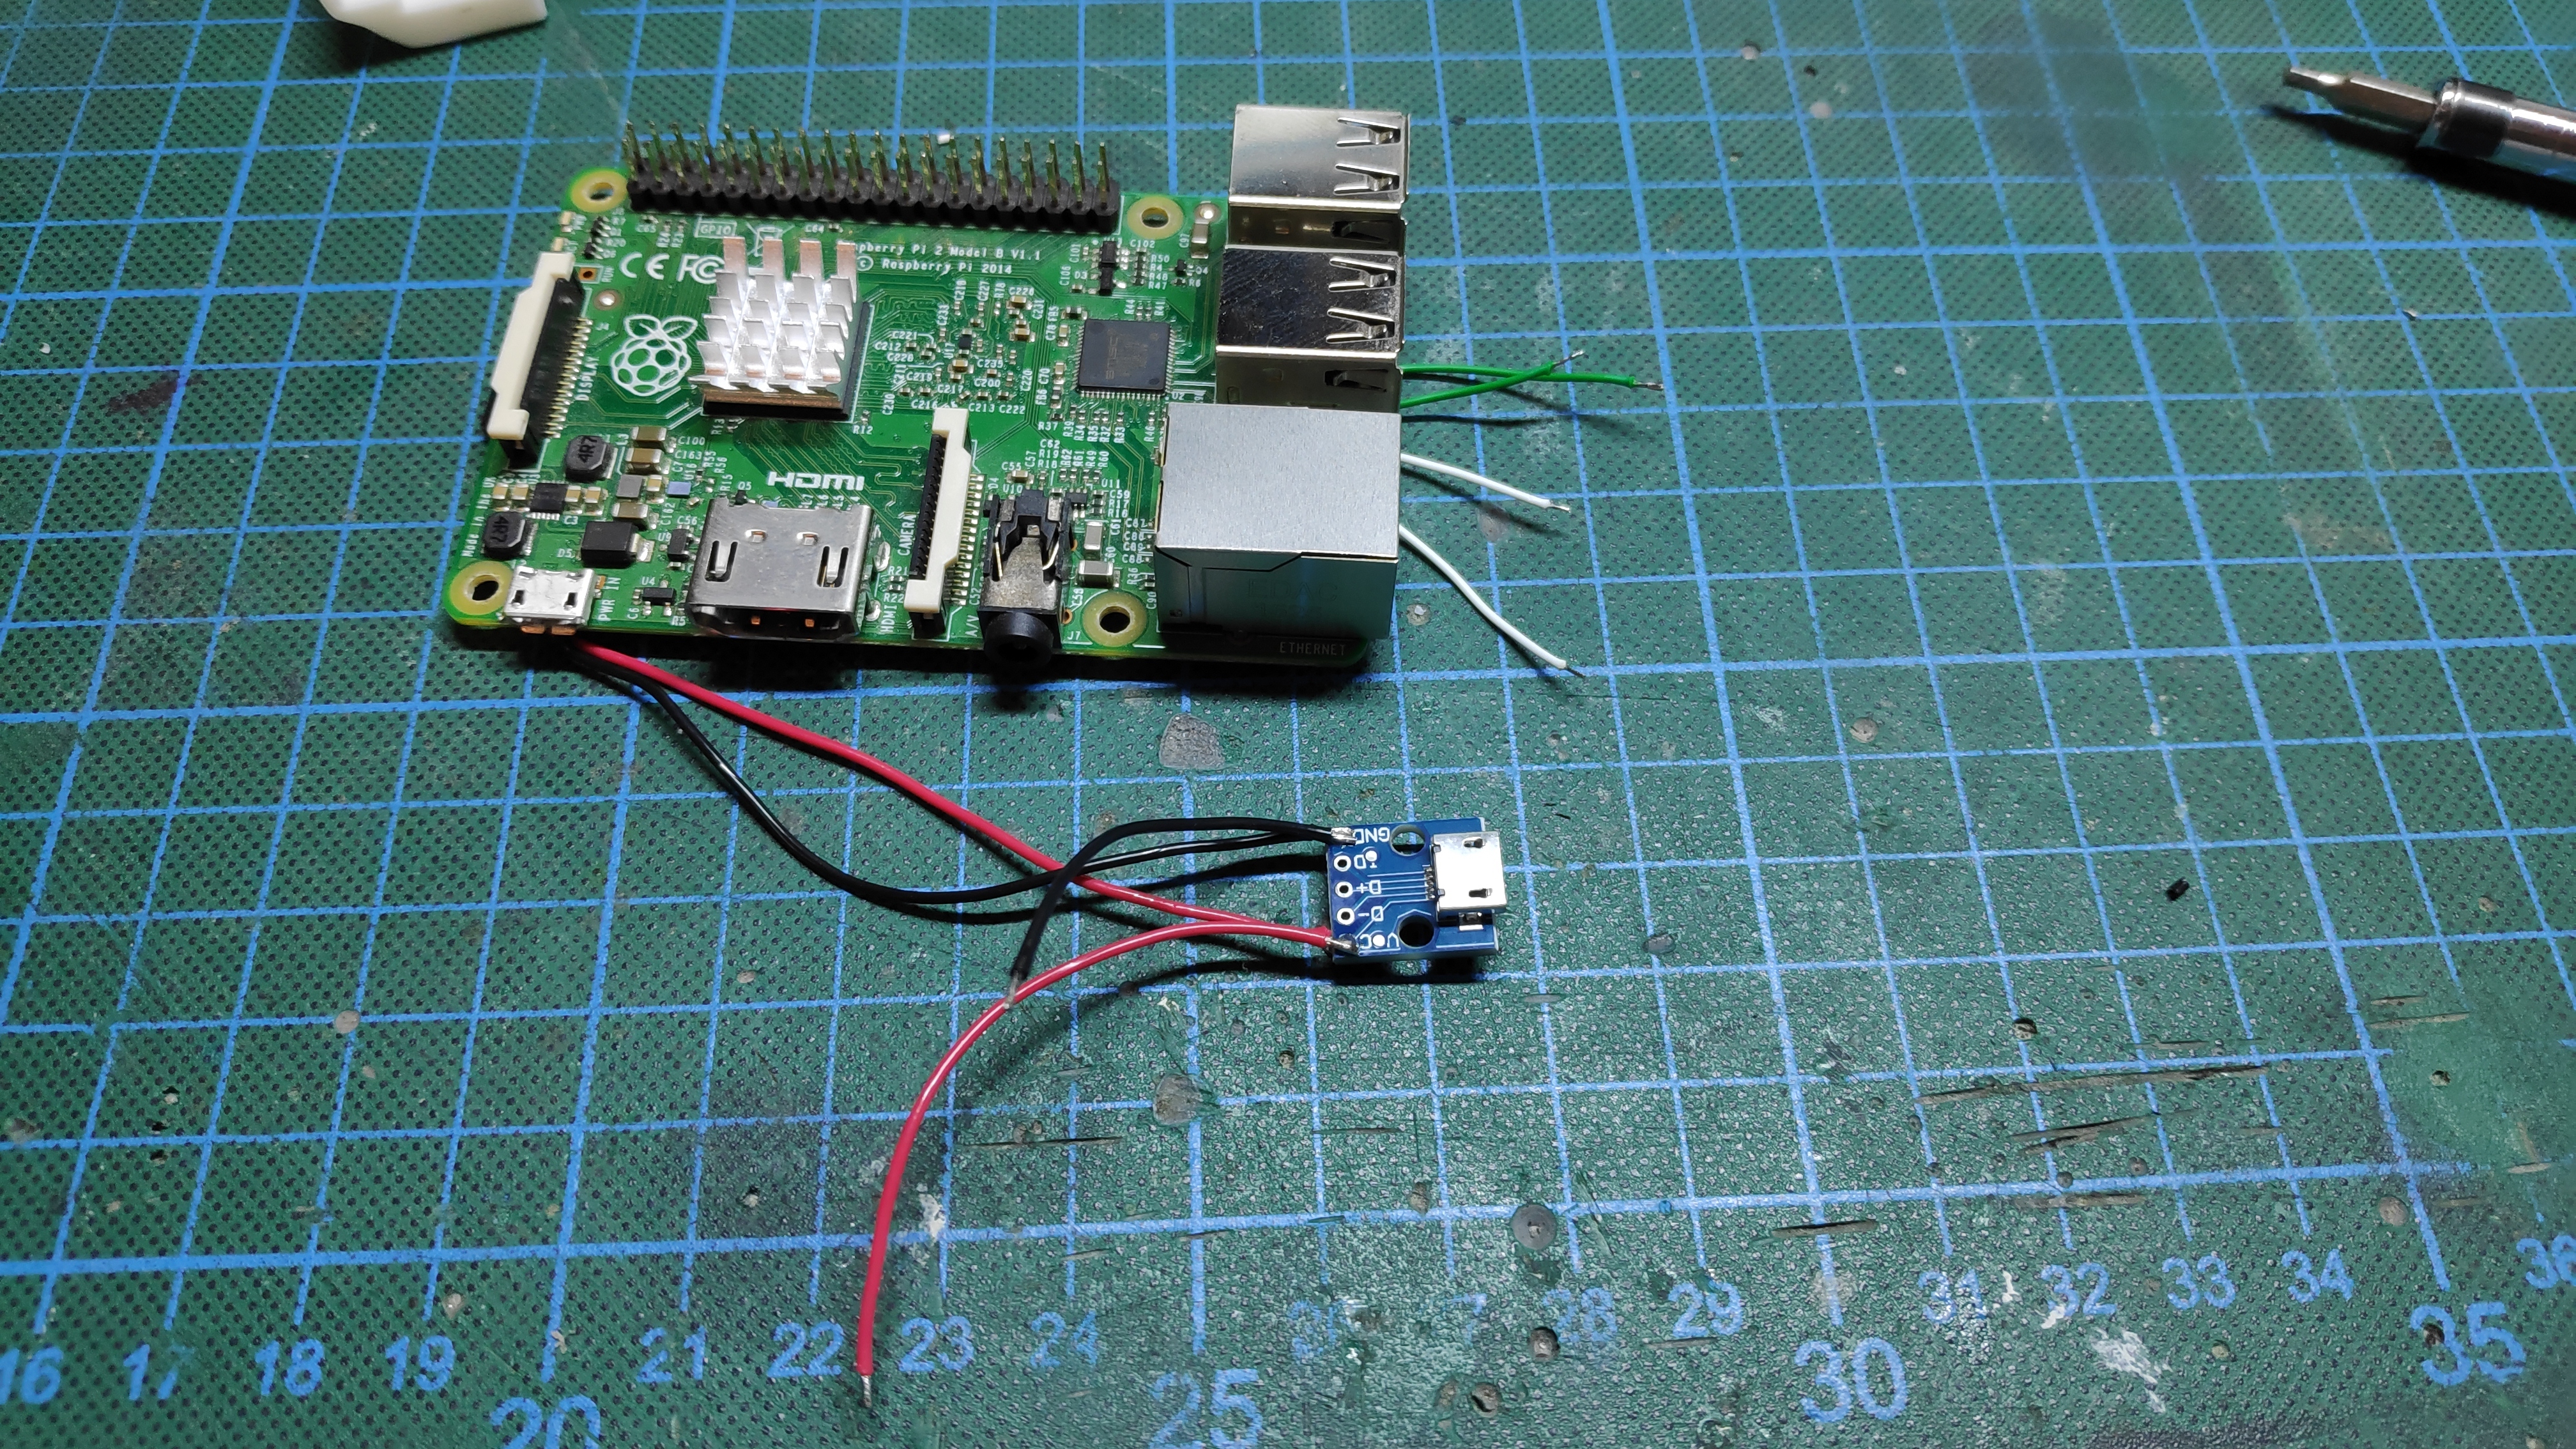
Add the Female micro USB breakout board:
- Add the Female micro USB breakout board to the wires of the RasPi
- Solder the wires to the breakout board which supply the adapters with power
- The pictures in this step show all required wiring points.
Wiring and Assembly: Installation
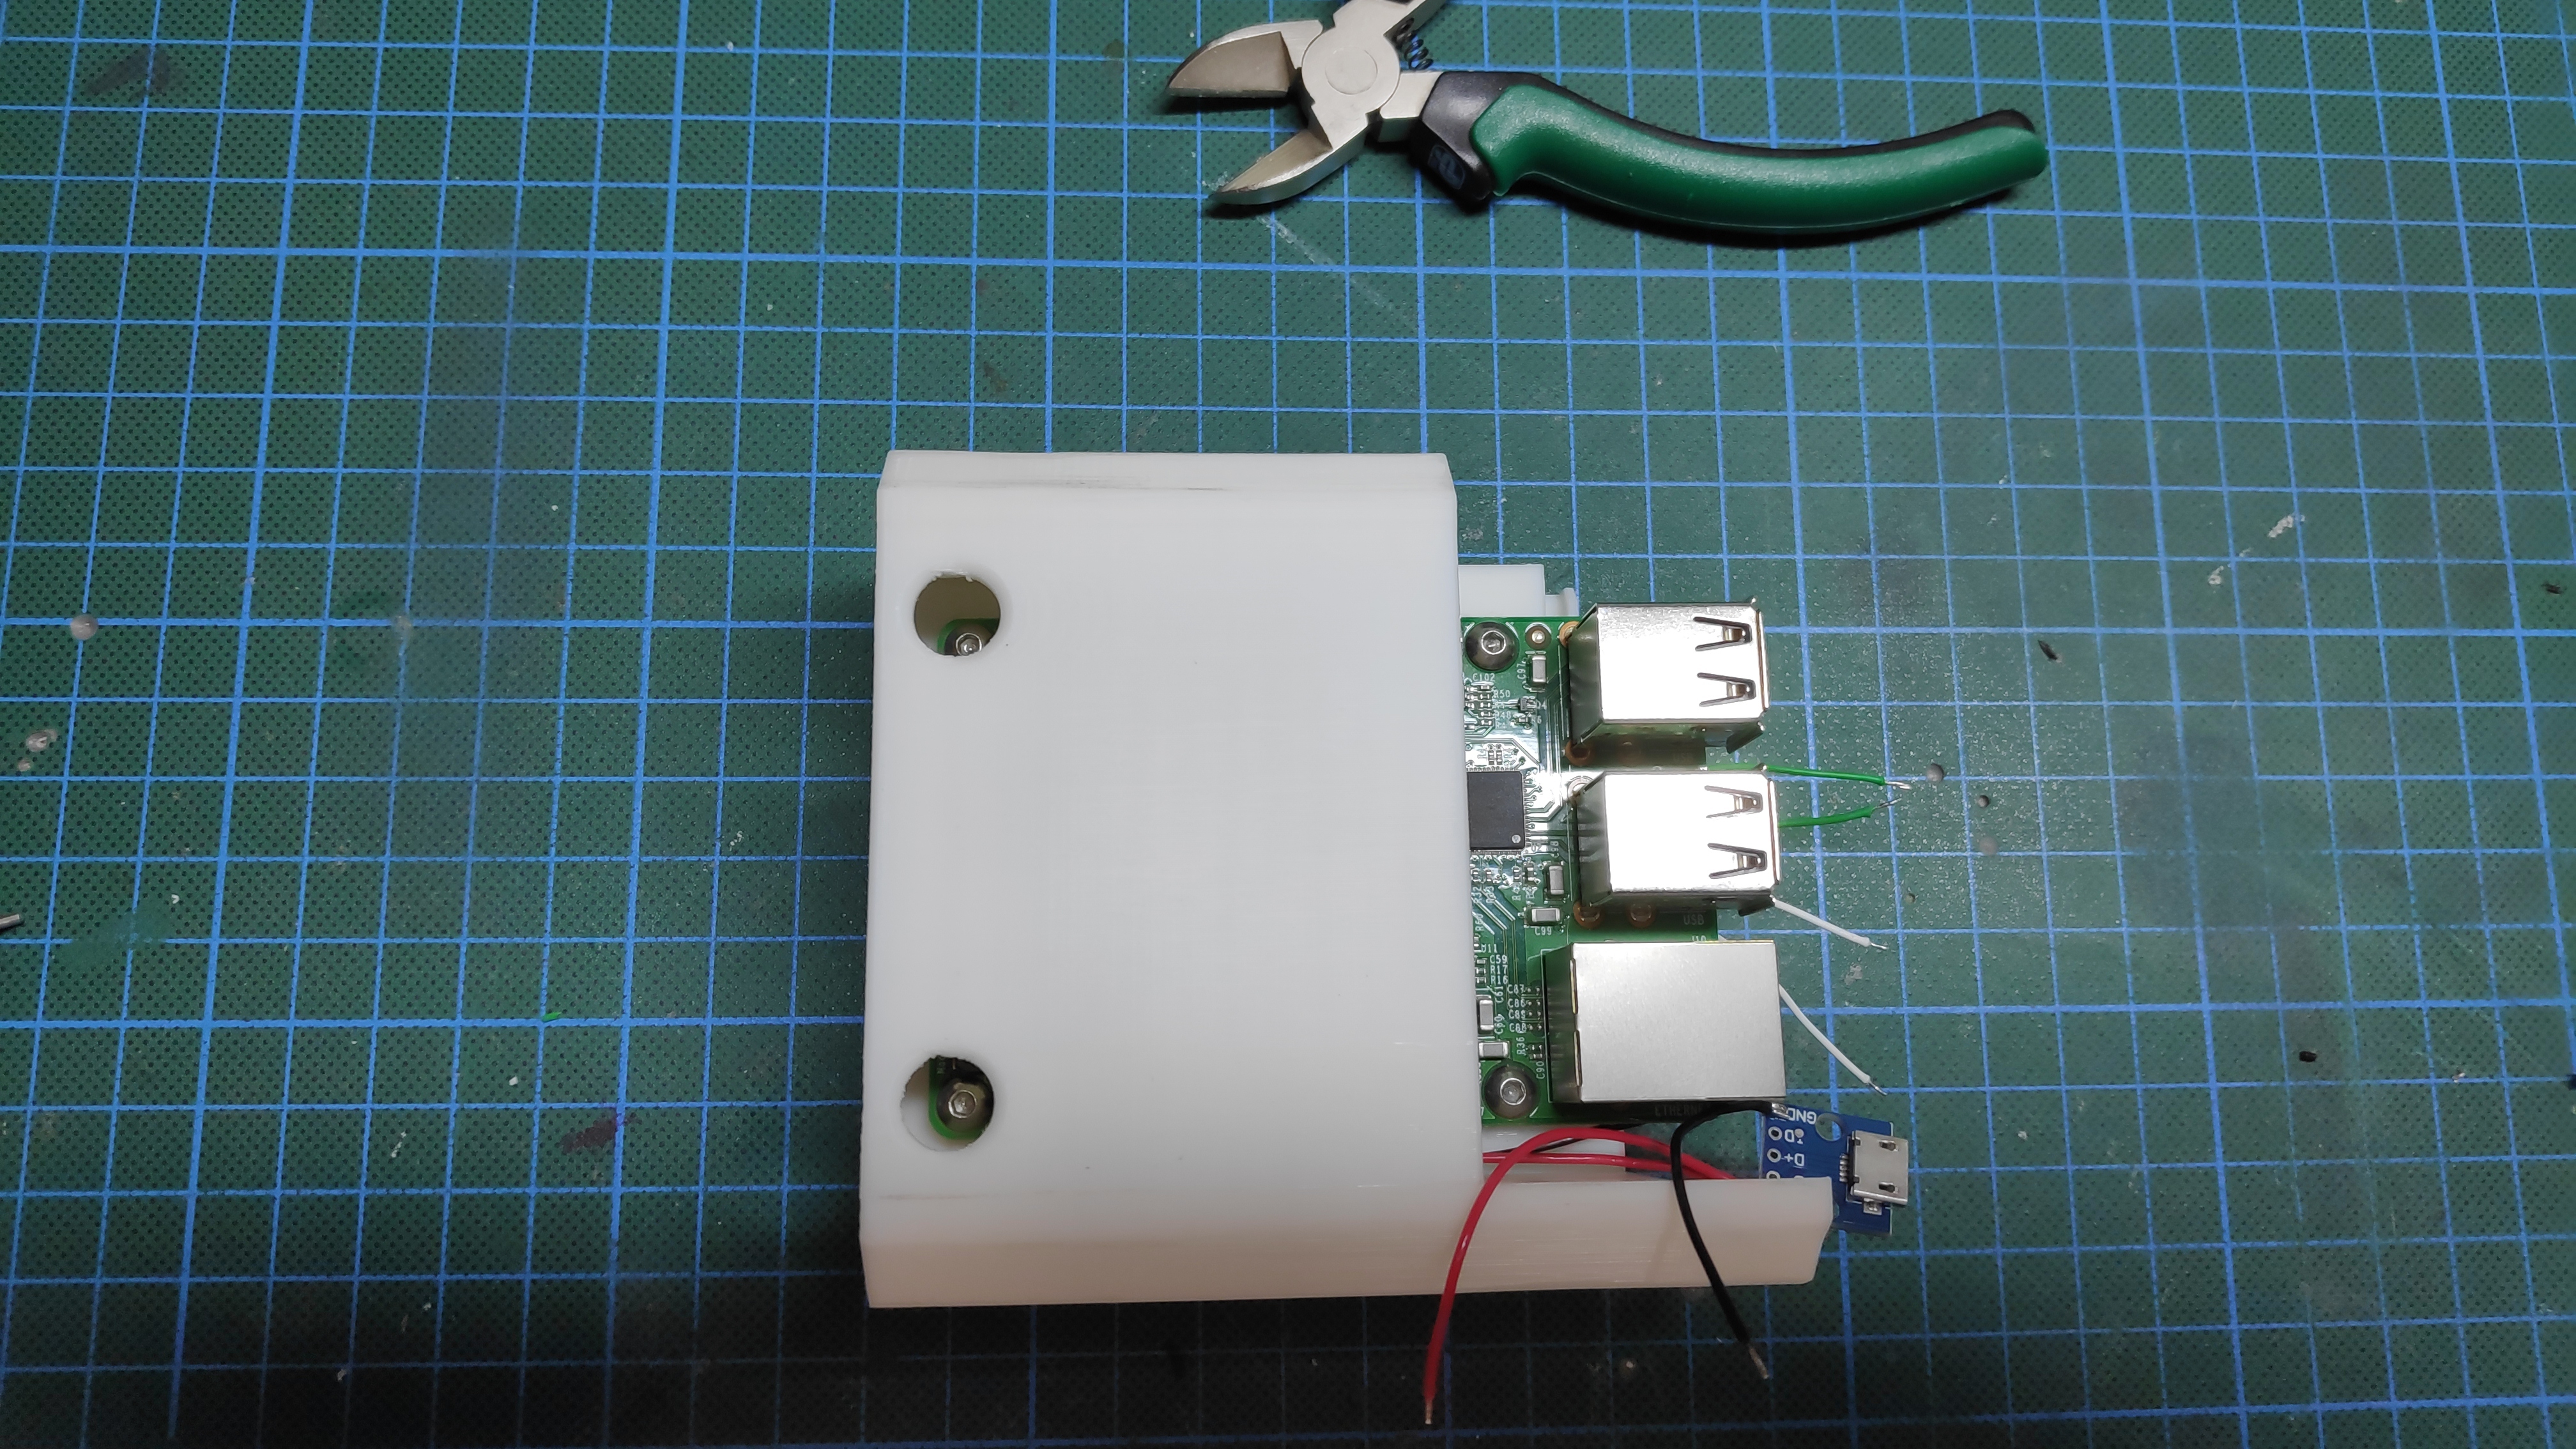
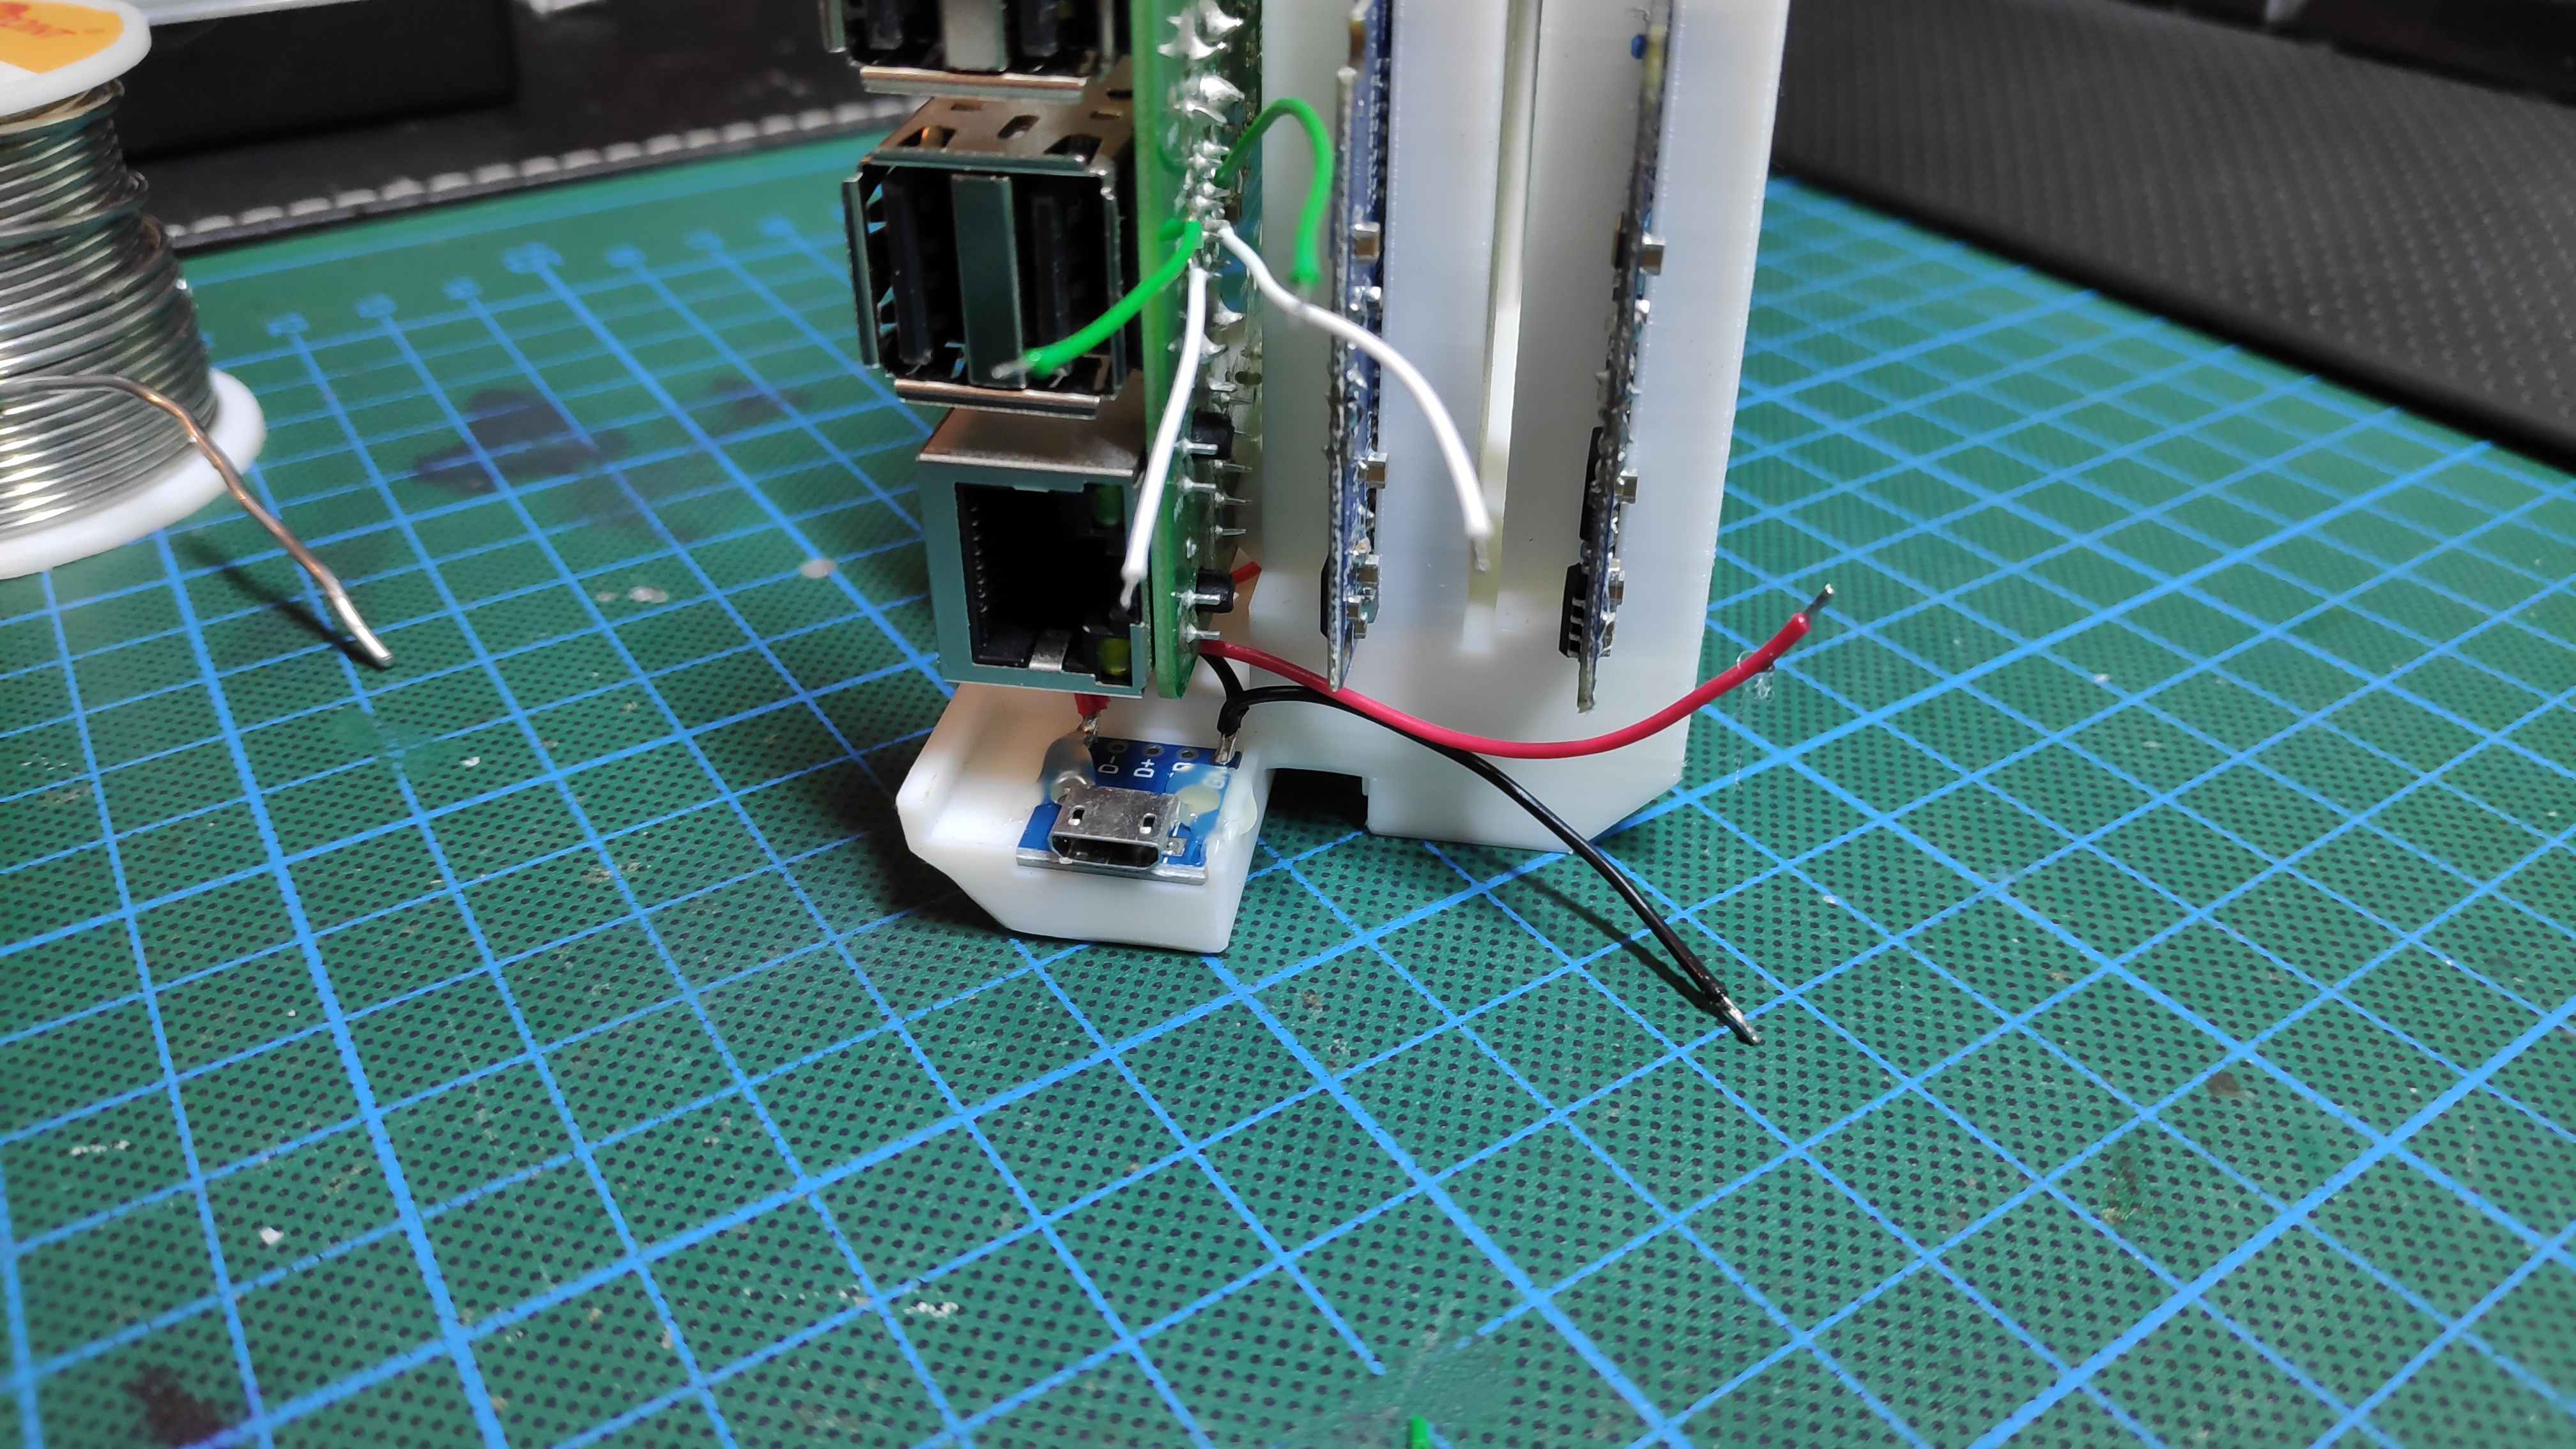
Install the RasPi and the USB breakout board:
- Slide the RasPi into its place.
- Secure the RasPi using the M3x6mm nuts.
- Place the USB breakout board in the dedicated recess.
- Secure the USB breakout board using a small amount of hot glue.
Wiring and Assembly: HDD Adapters
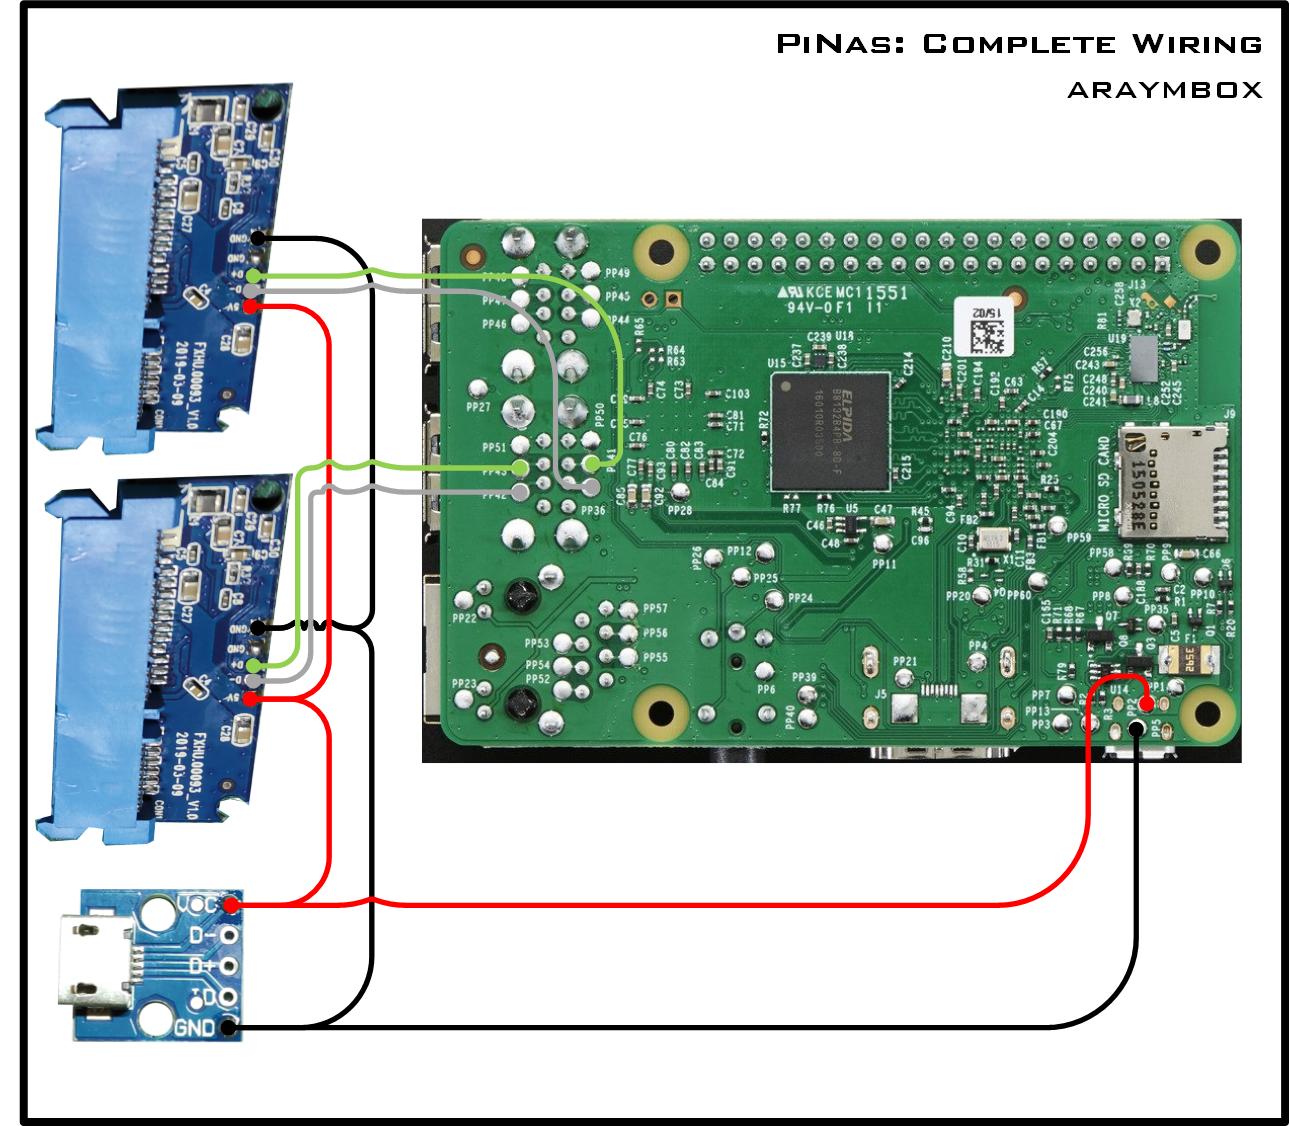
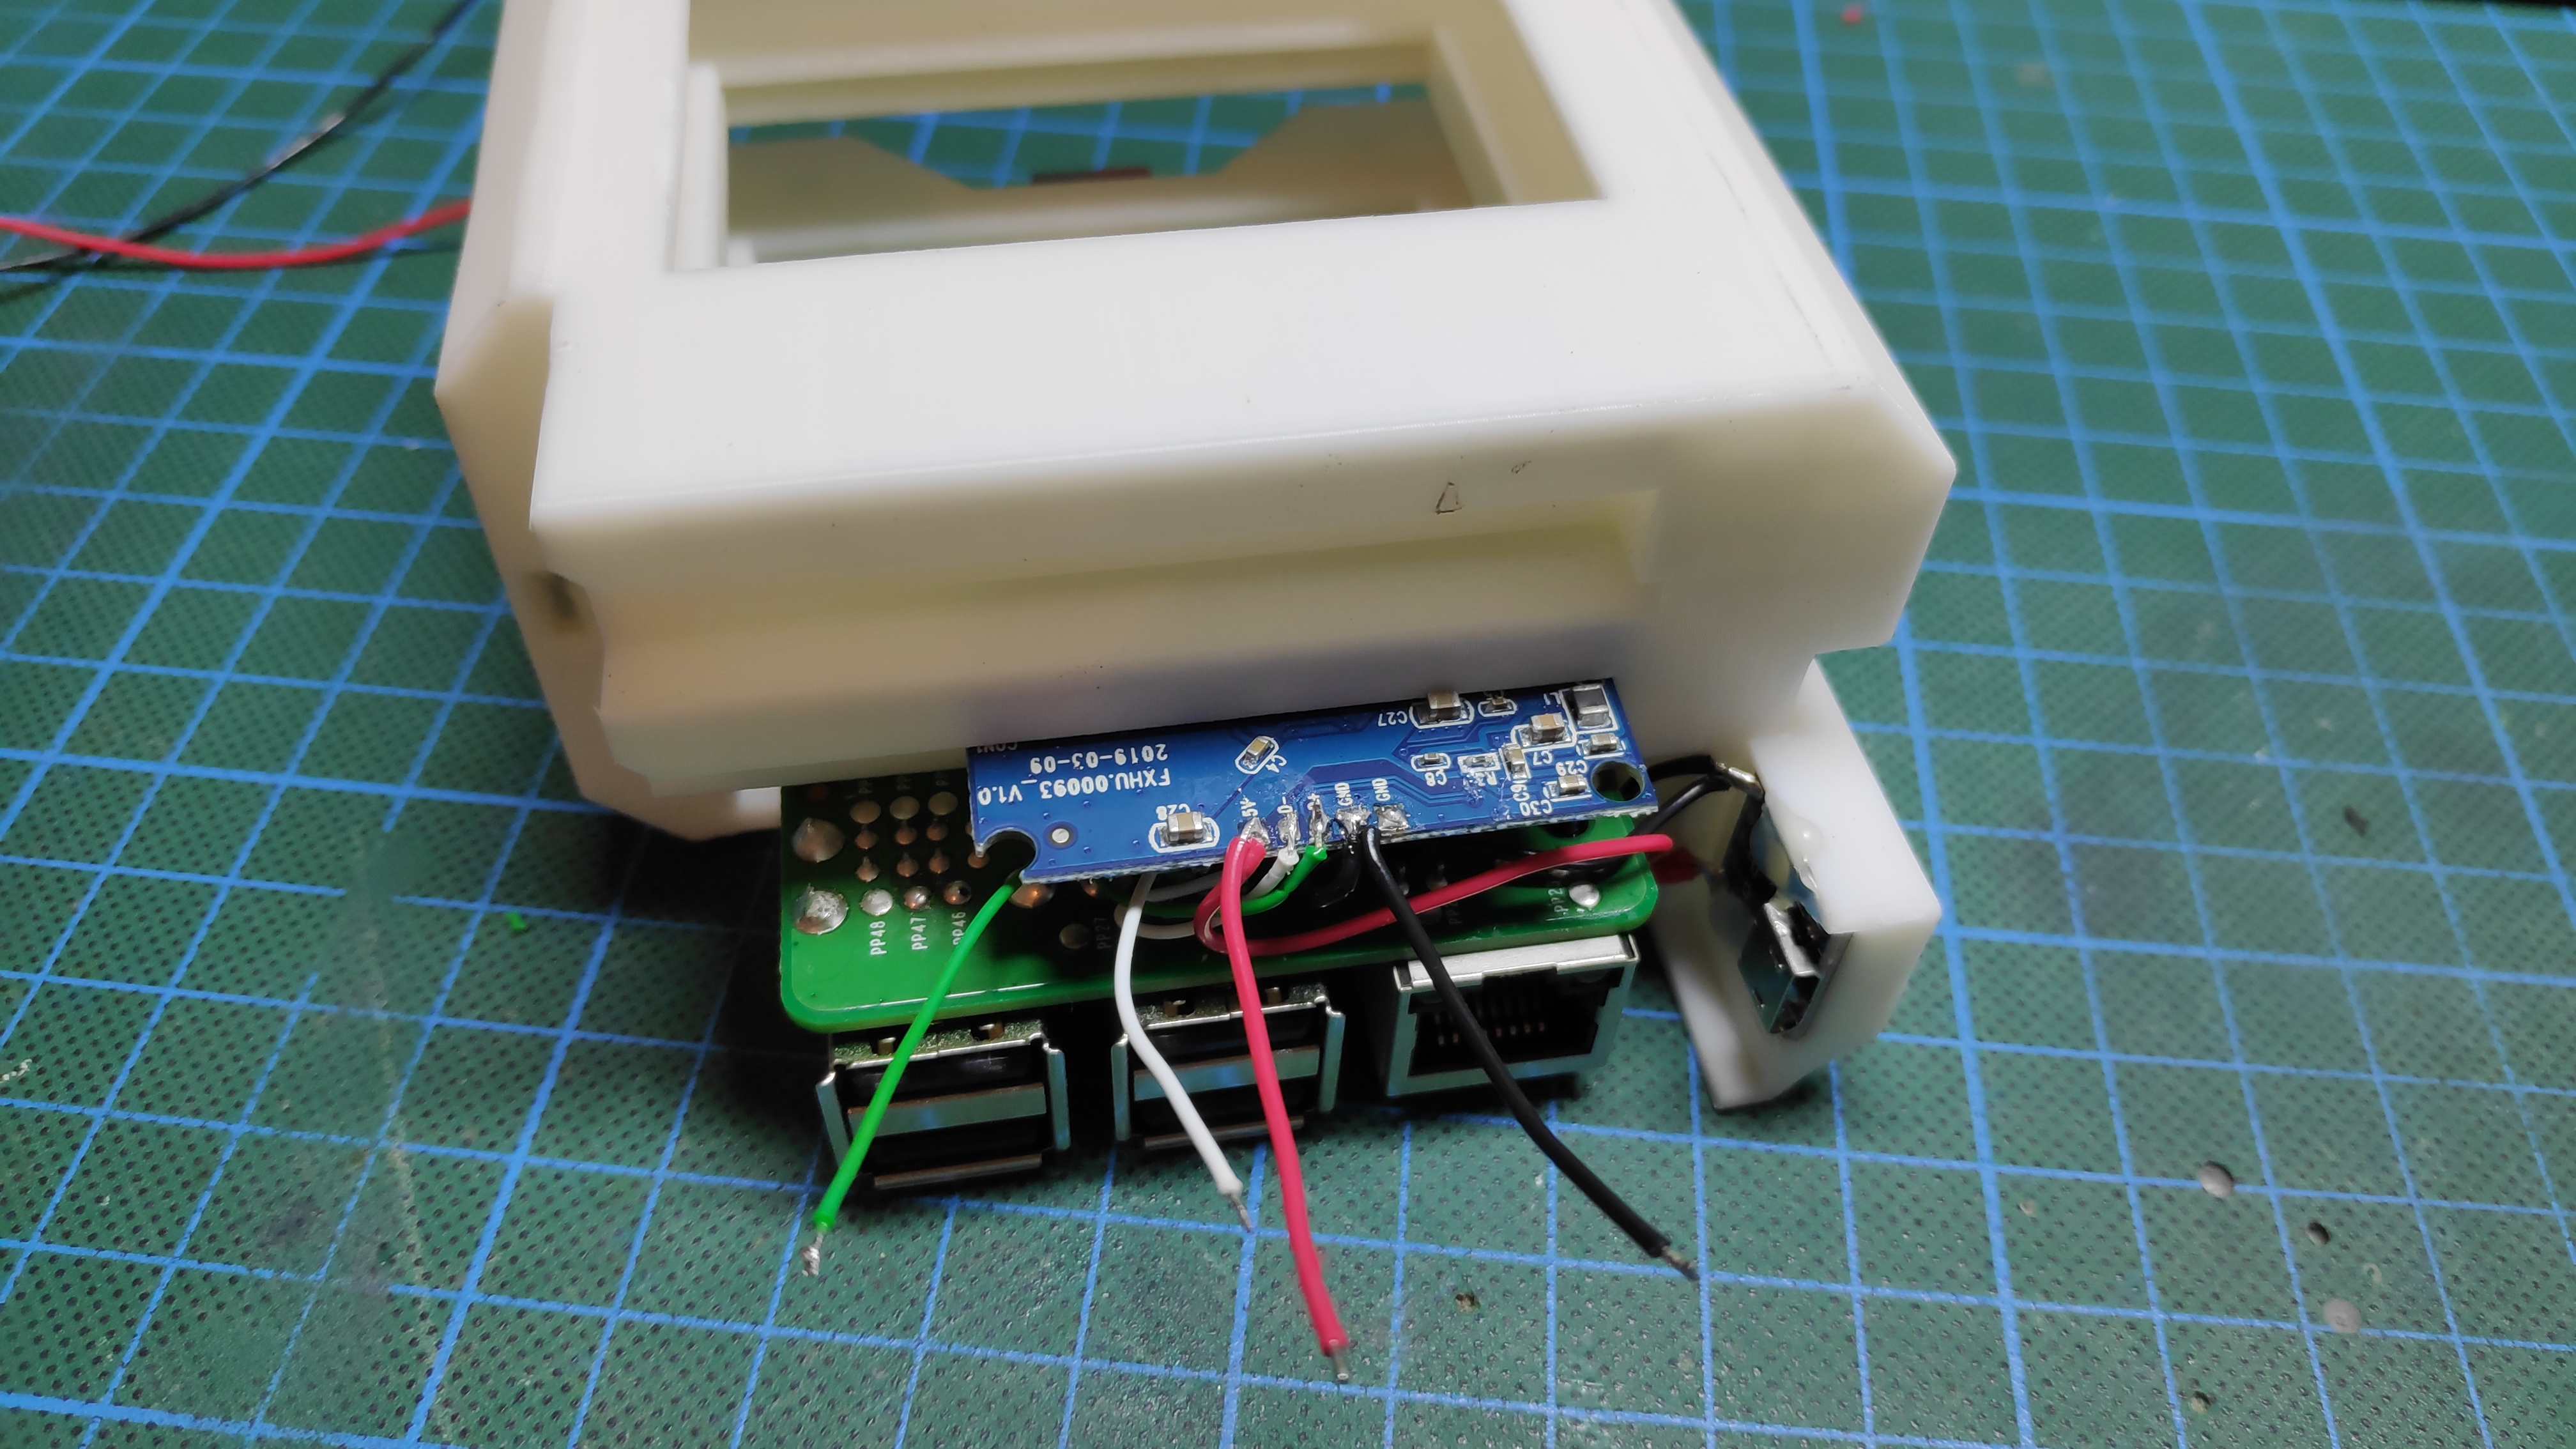
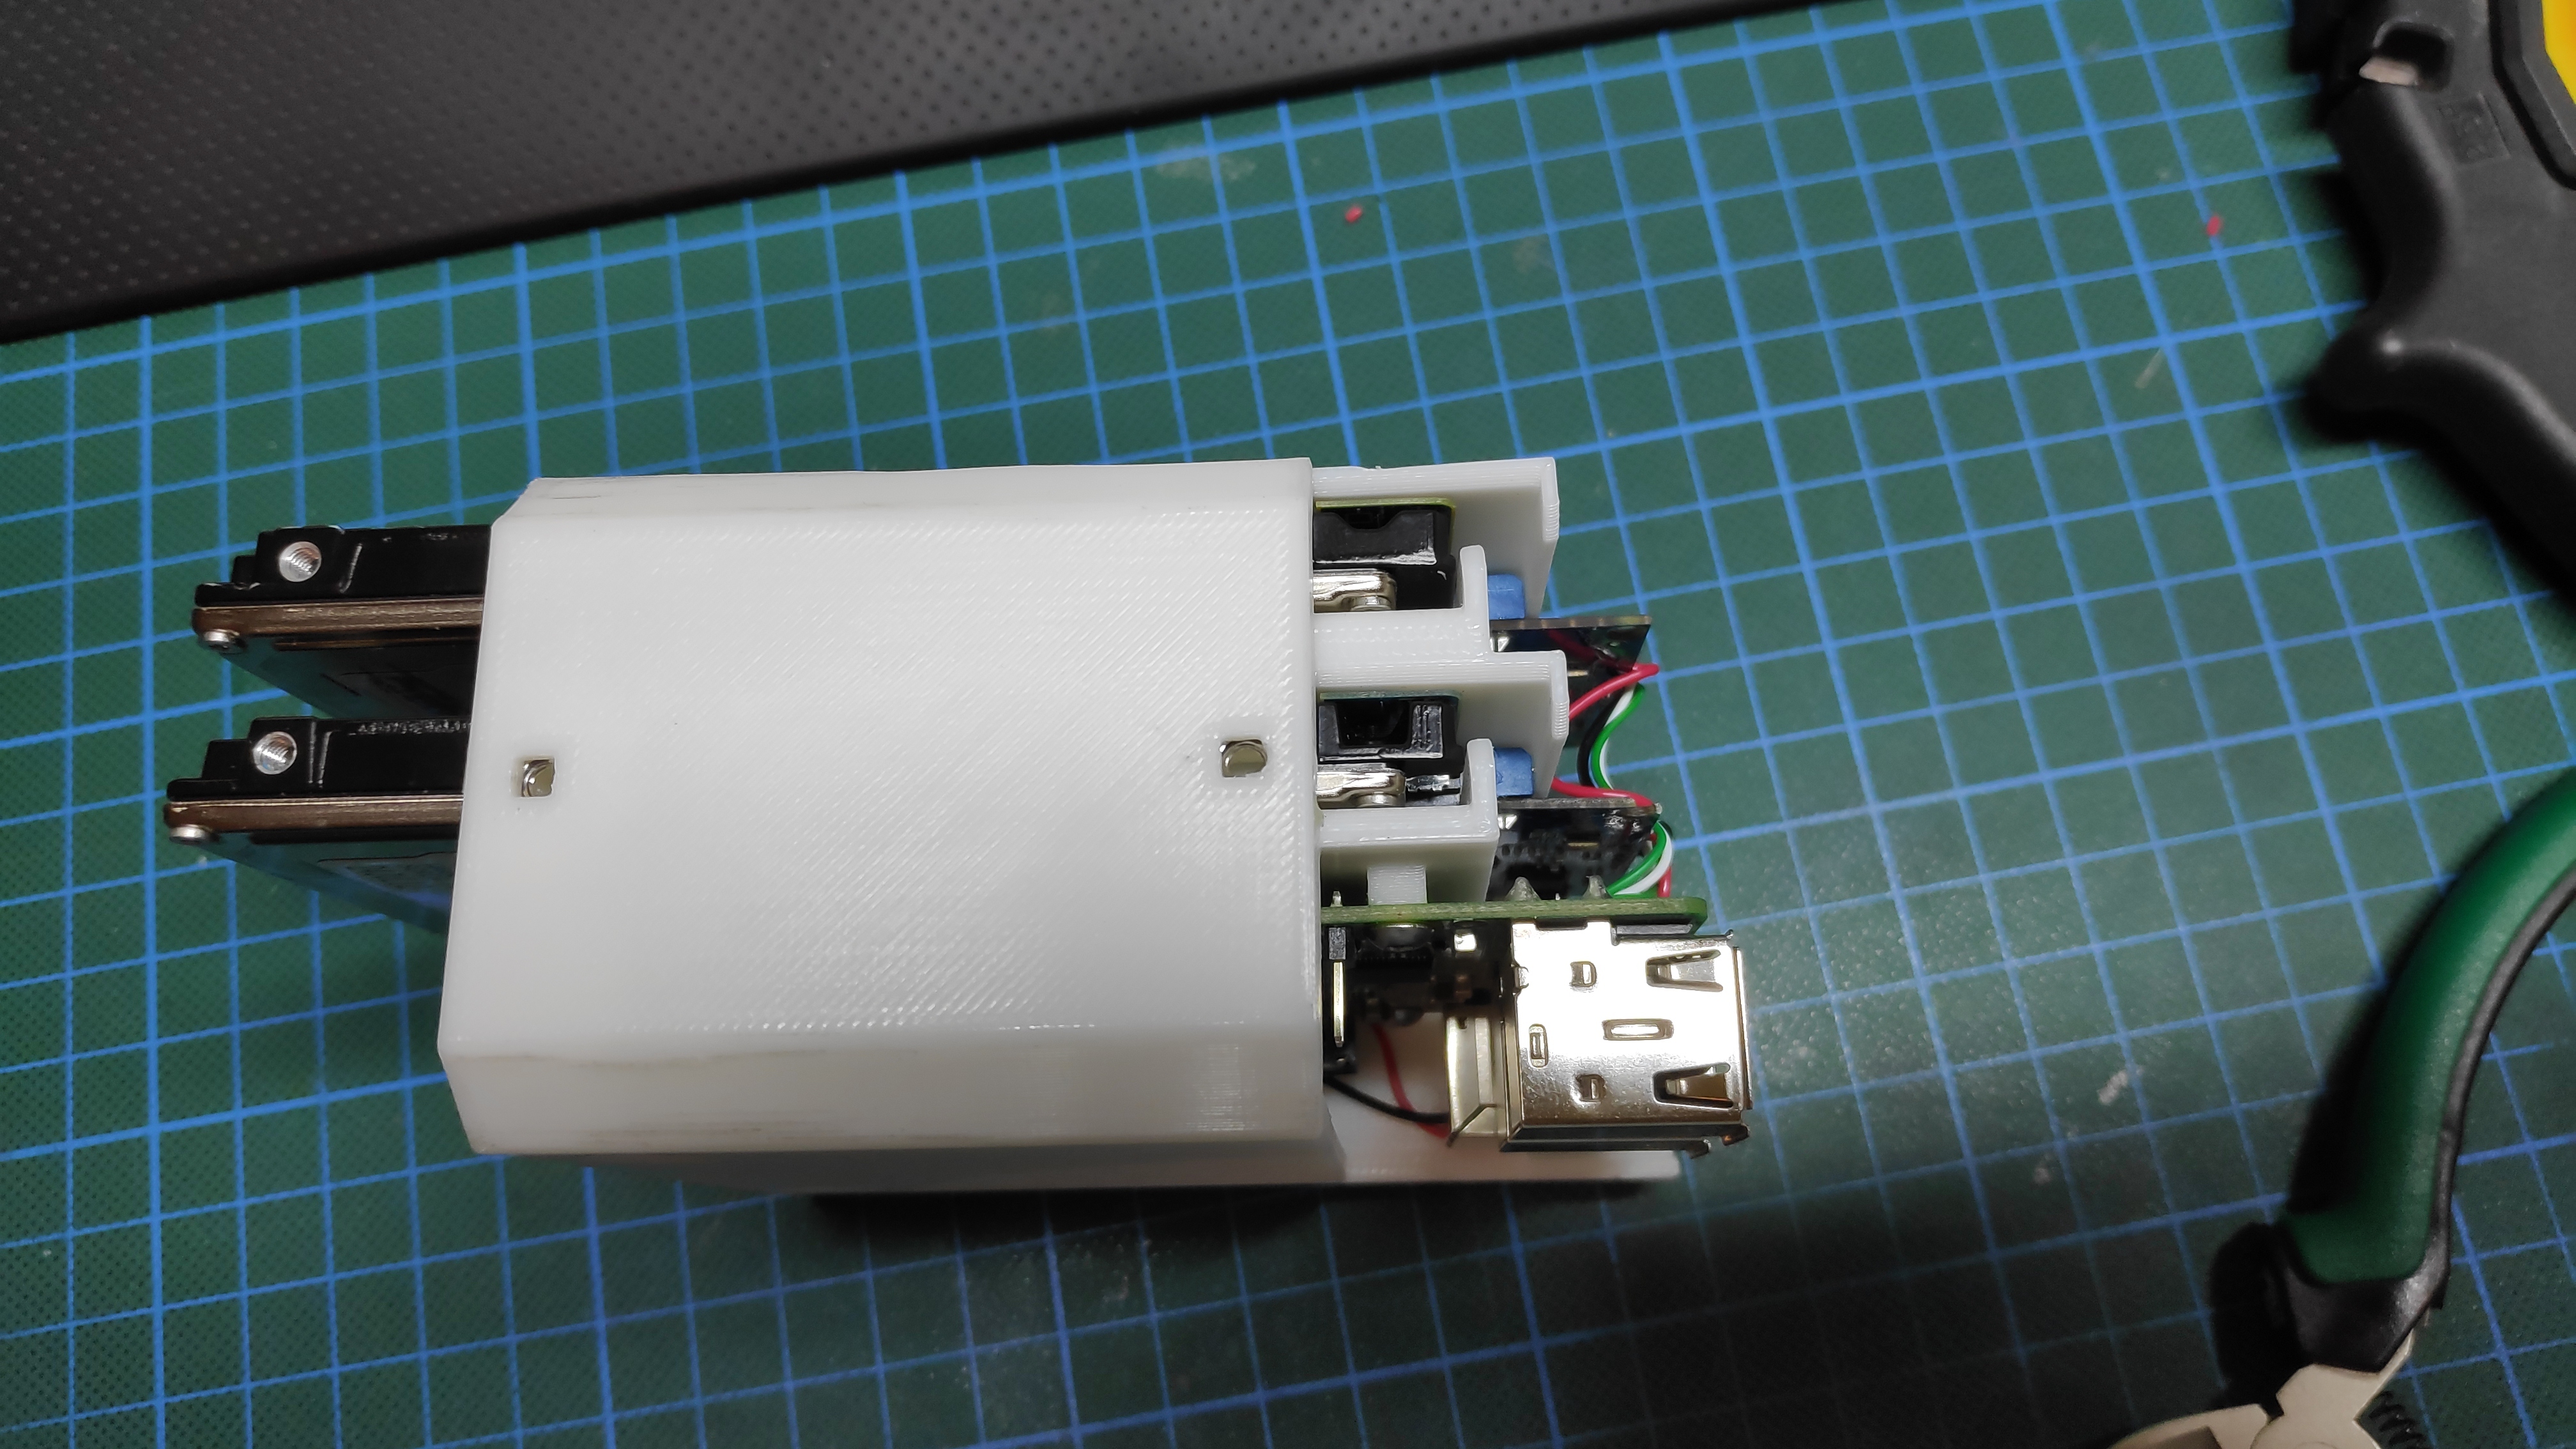
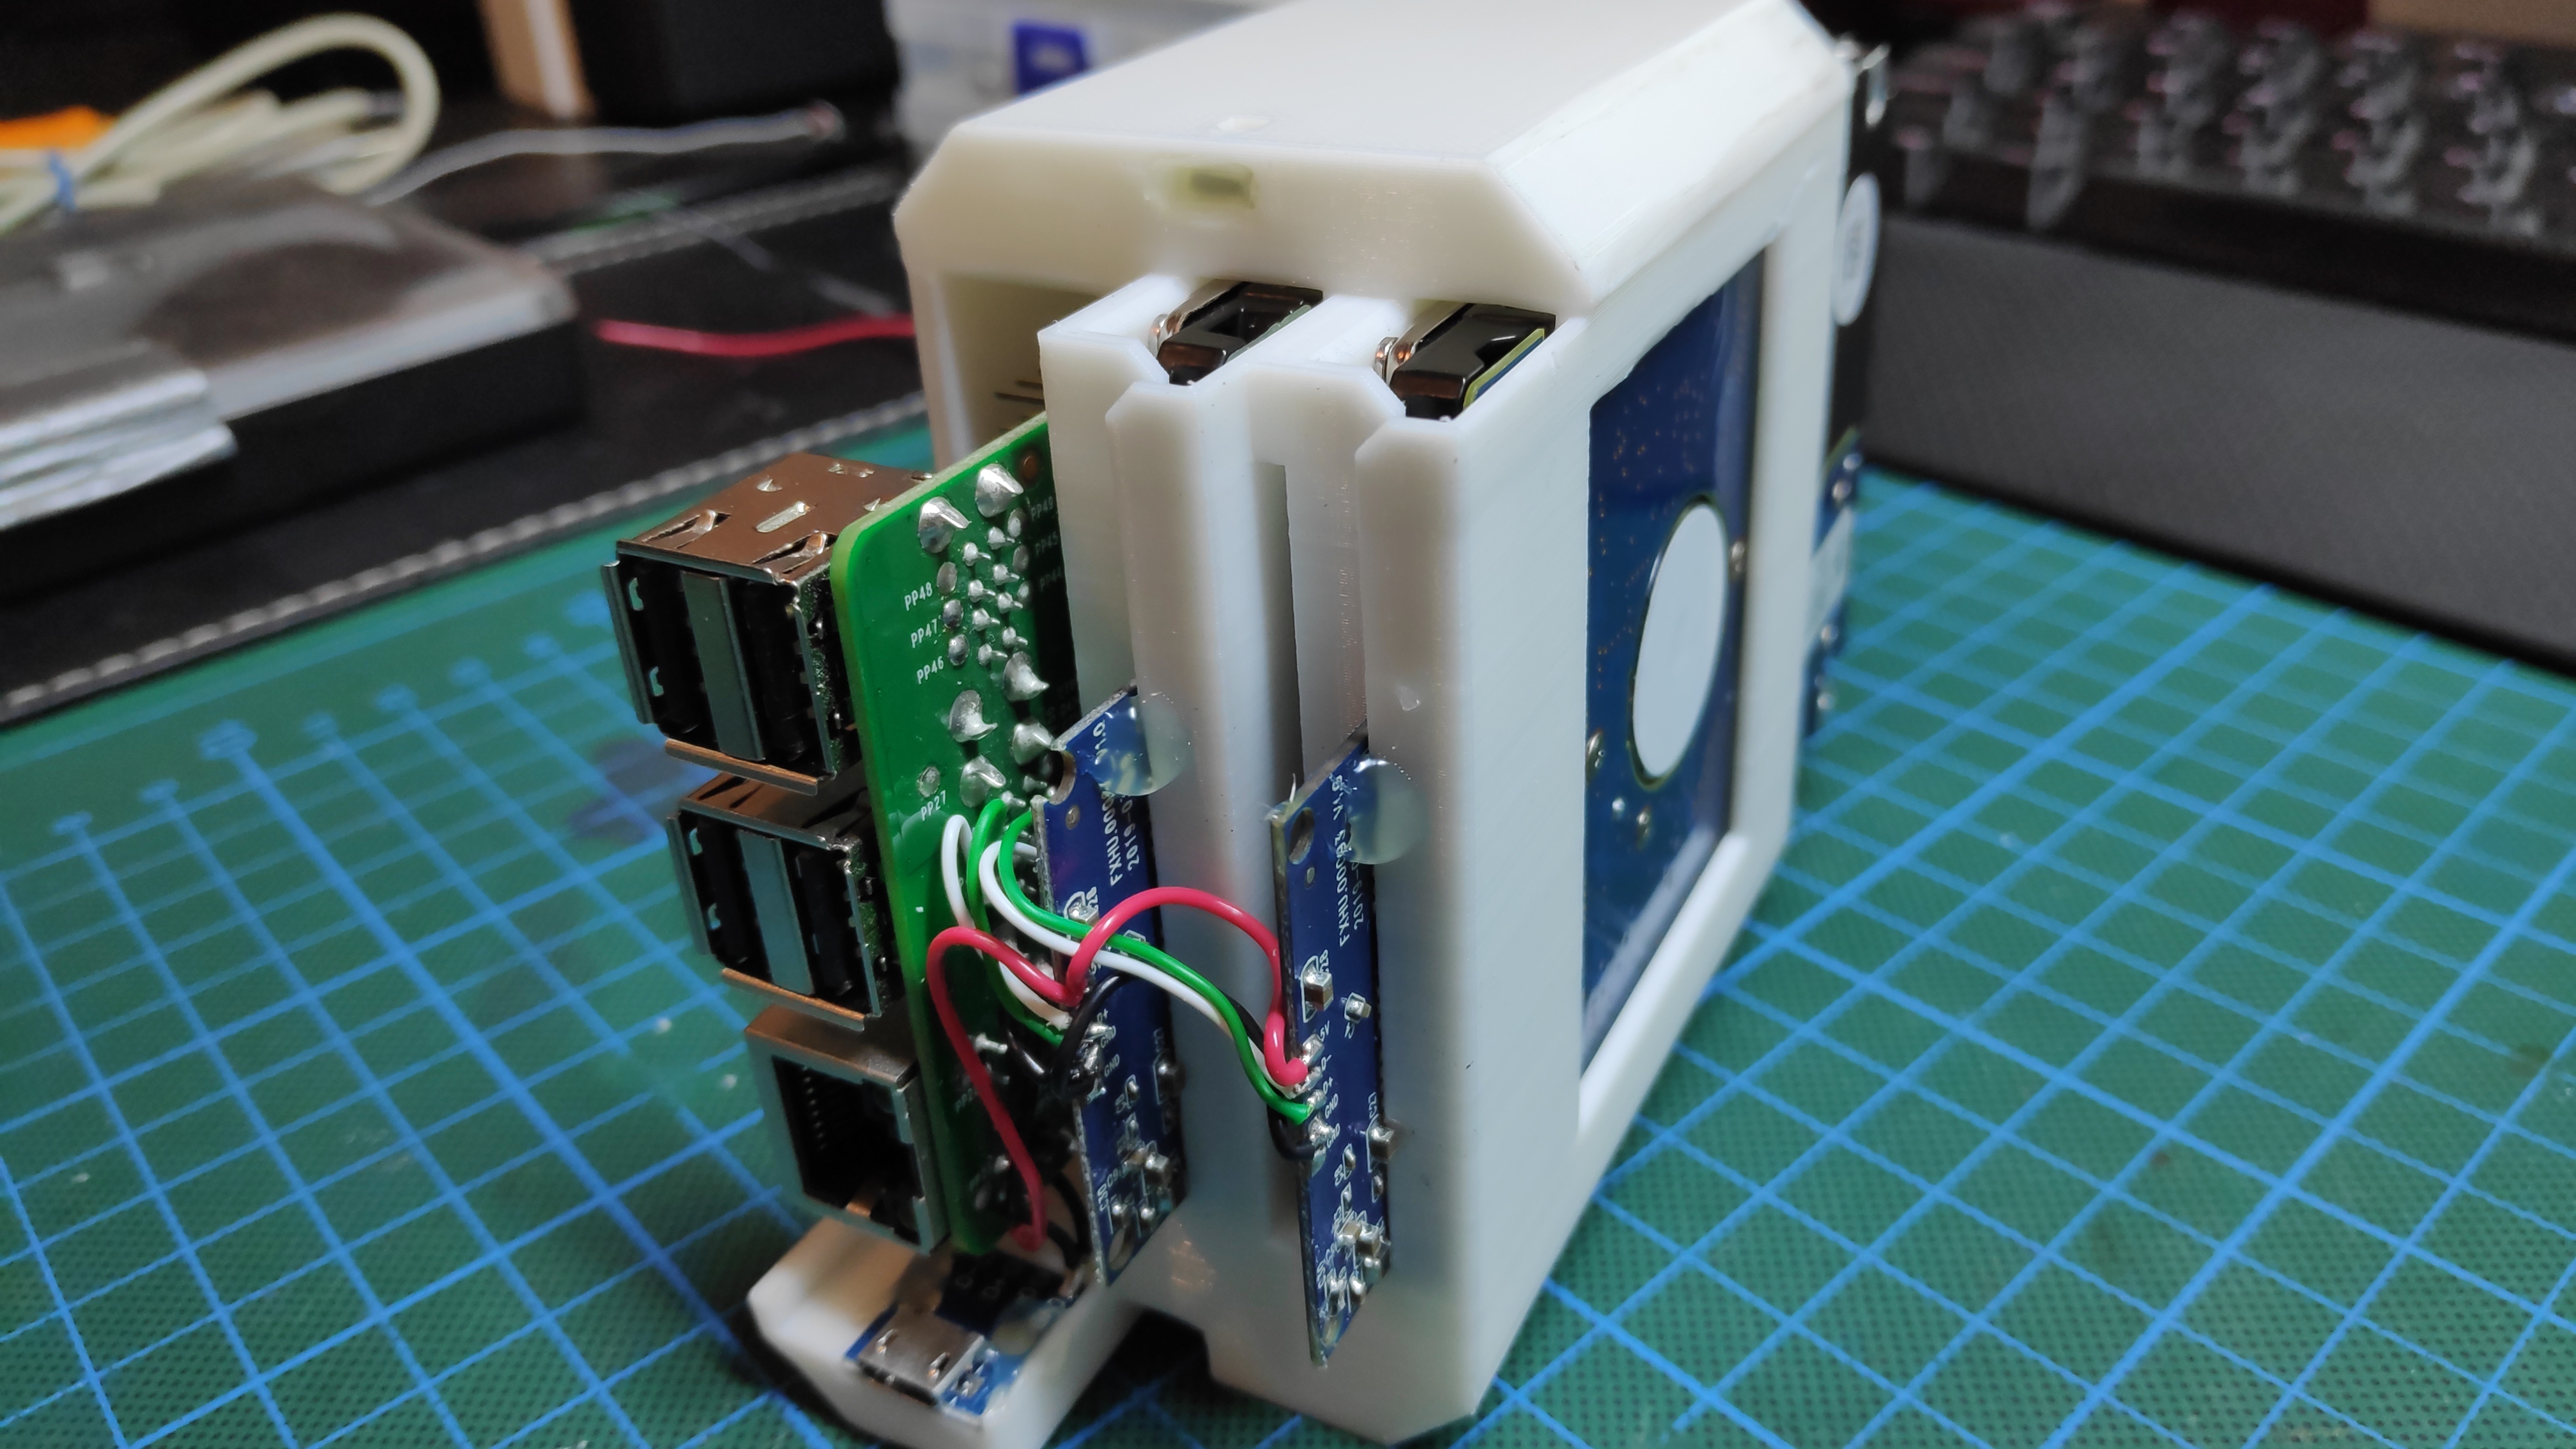
Install the top HDD adapter:
- Slide in the top HDD adapter (the one right under the RasPi)
Solder the top HDD adapter:
- Solder the data and power wires to the top HDD adapter.
- Add the wires which will supply the lower HDD adapter.
- The pictures in this step show all required wiring points.
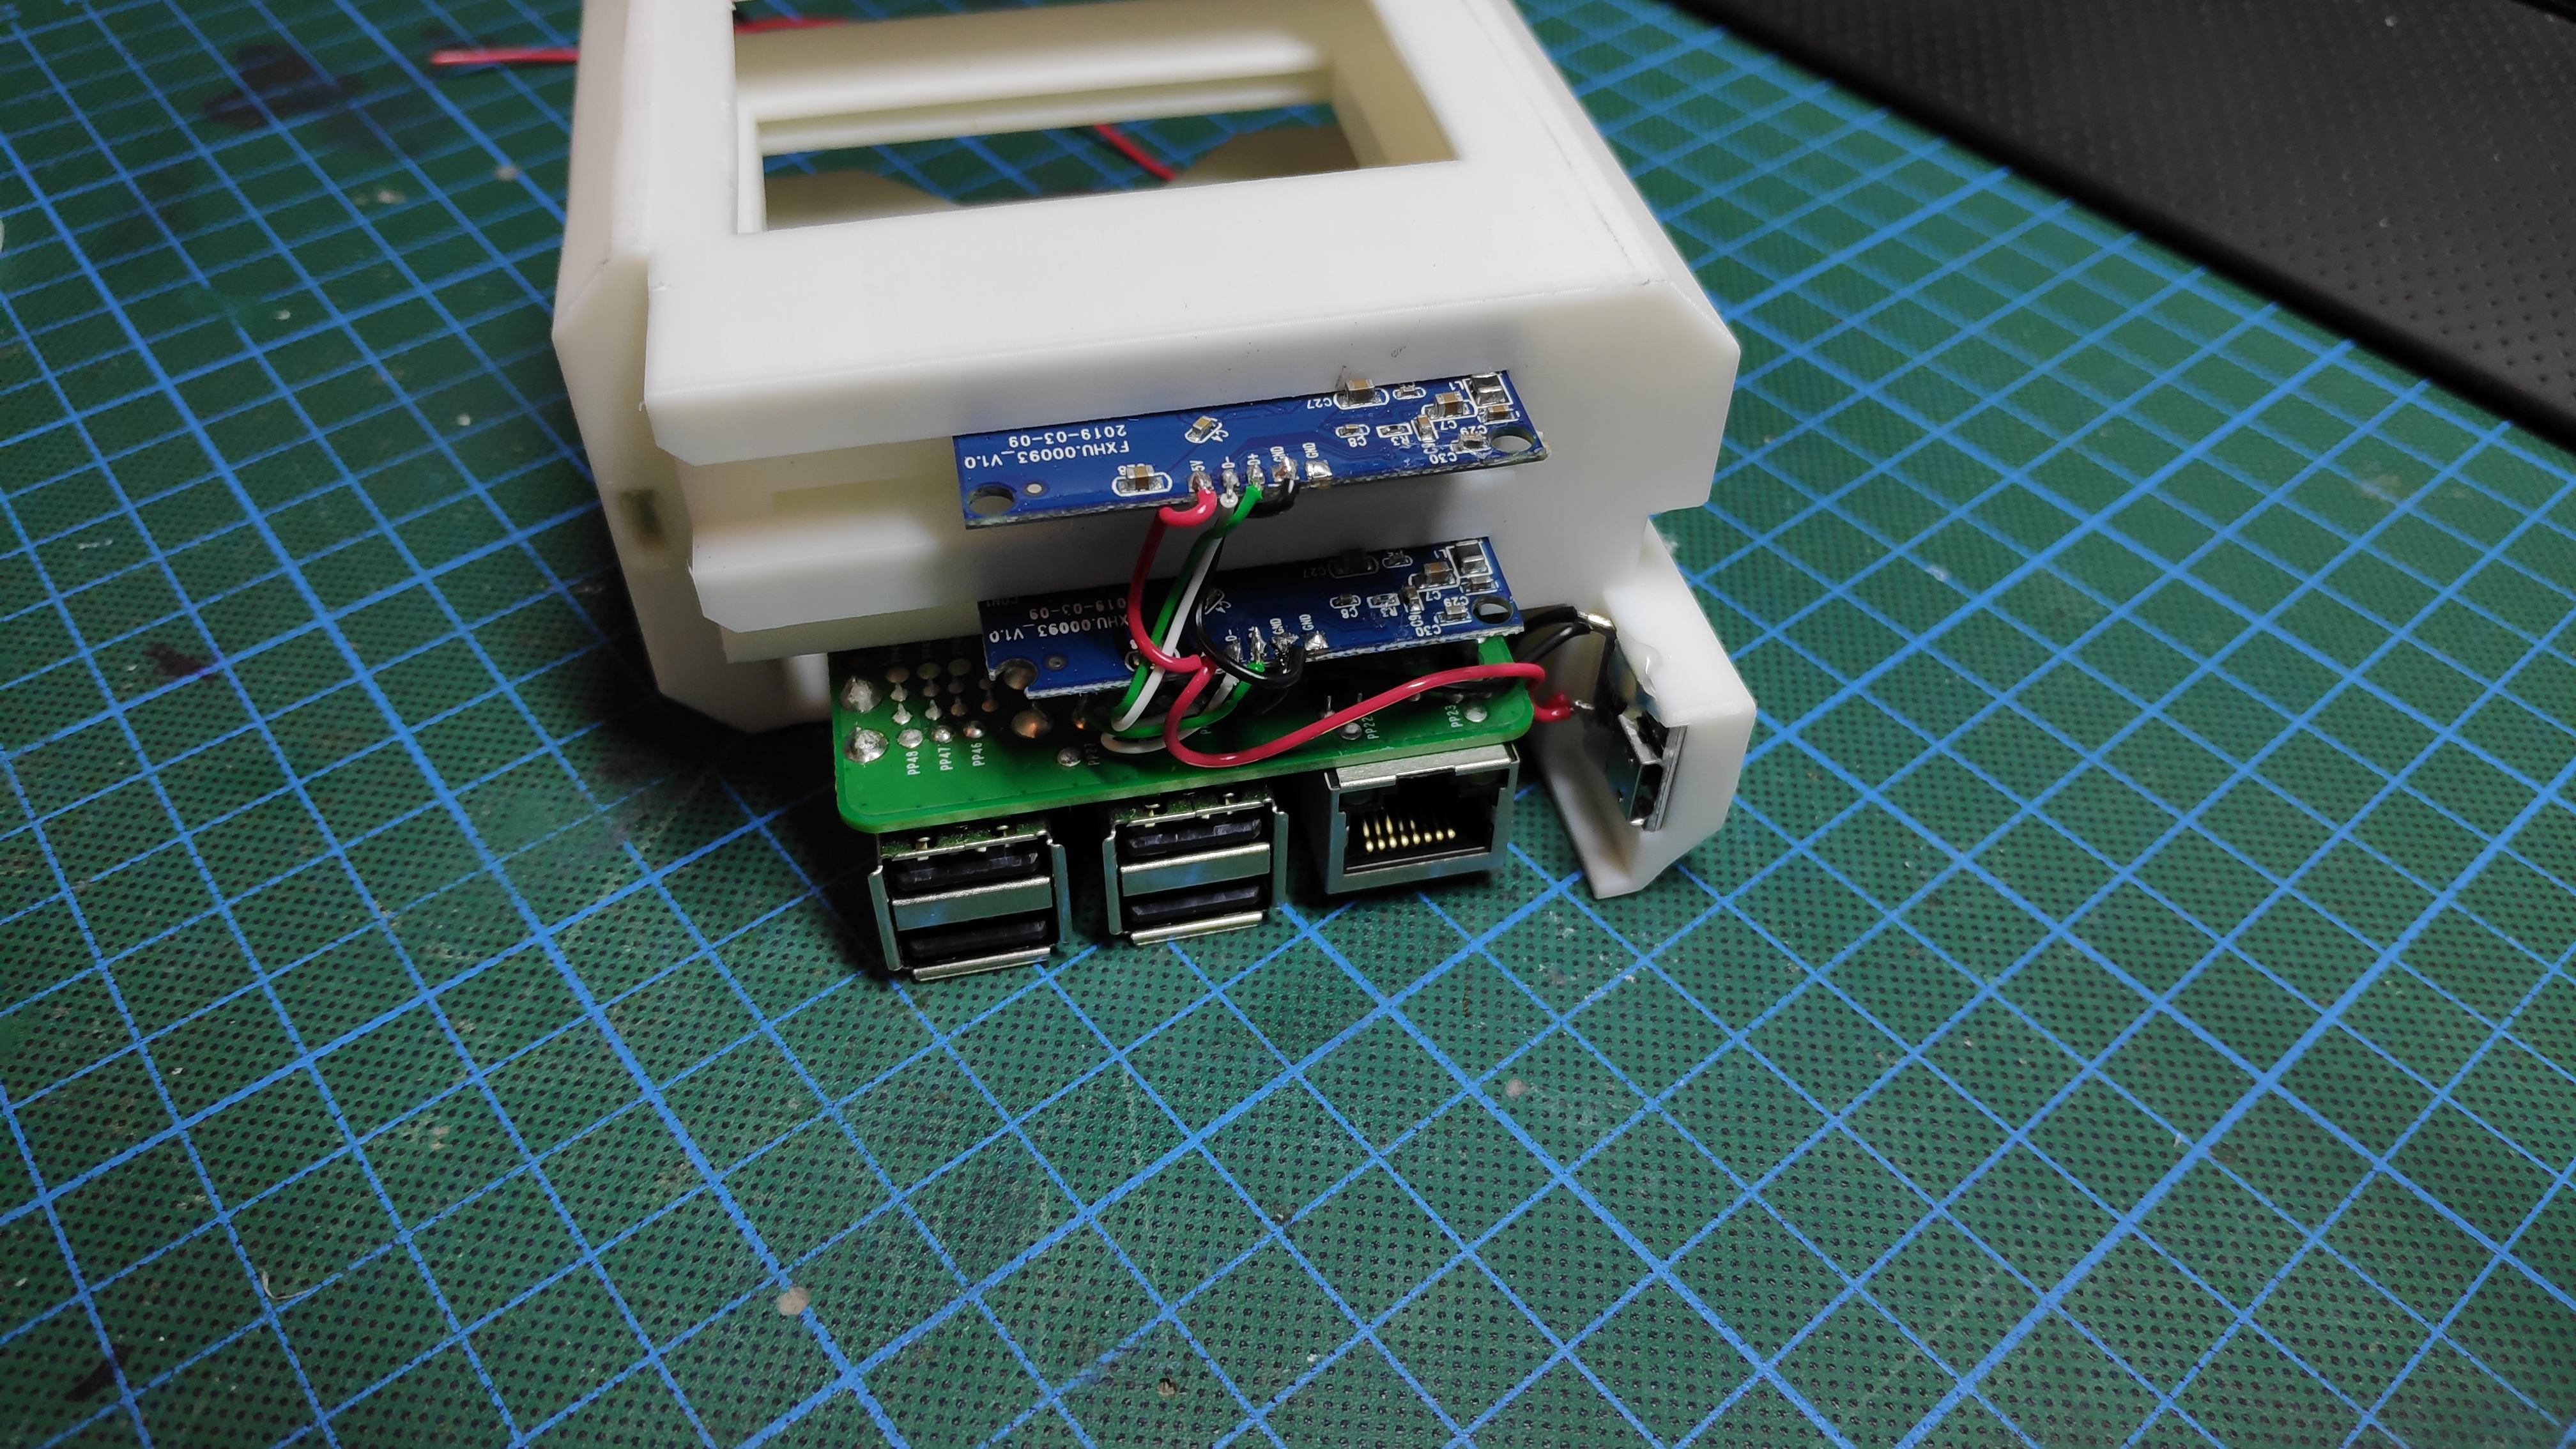
Install the lower HDD adapter:
- Slide in the lower HDD adapter.
Solder the lower HDD adapter:
- Solder the data and power wires (coming from the top HDD adapter) to the lower HDD adapter.
- The pictures in this step show all required wiring points.
Align the HDD adapters:
- Slide in both hard drives.
- Make sure the HDD adapters plug into the hard drives with only little force.
- Secure both HDD adapters using a small amount of hot glue (see picture).
- Remove both hard drives.
Case Assembly: Faceplate (optional)
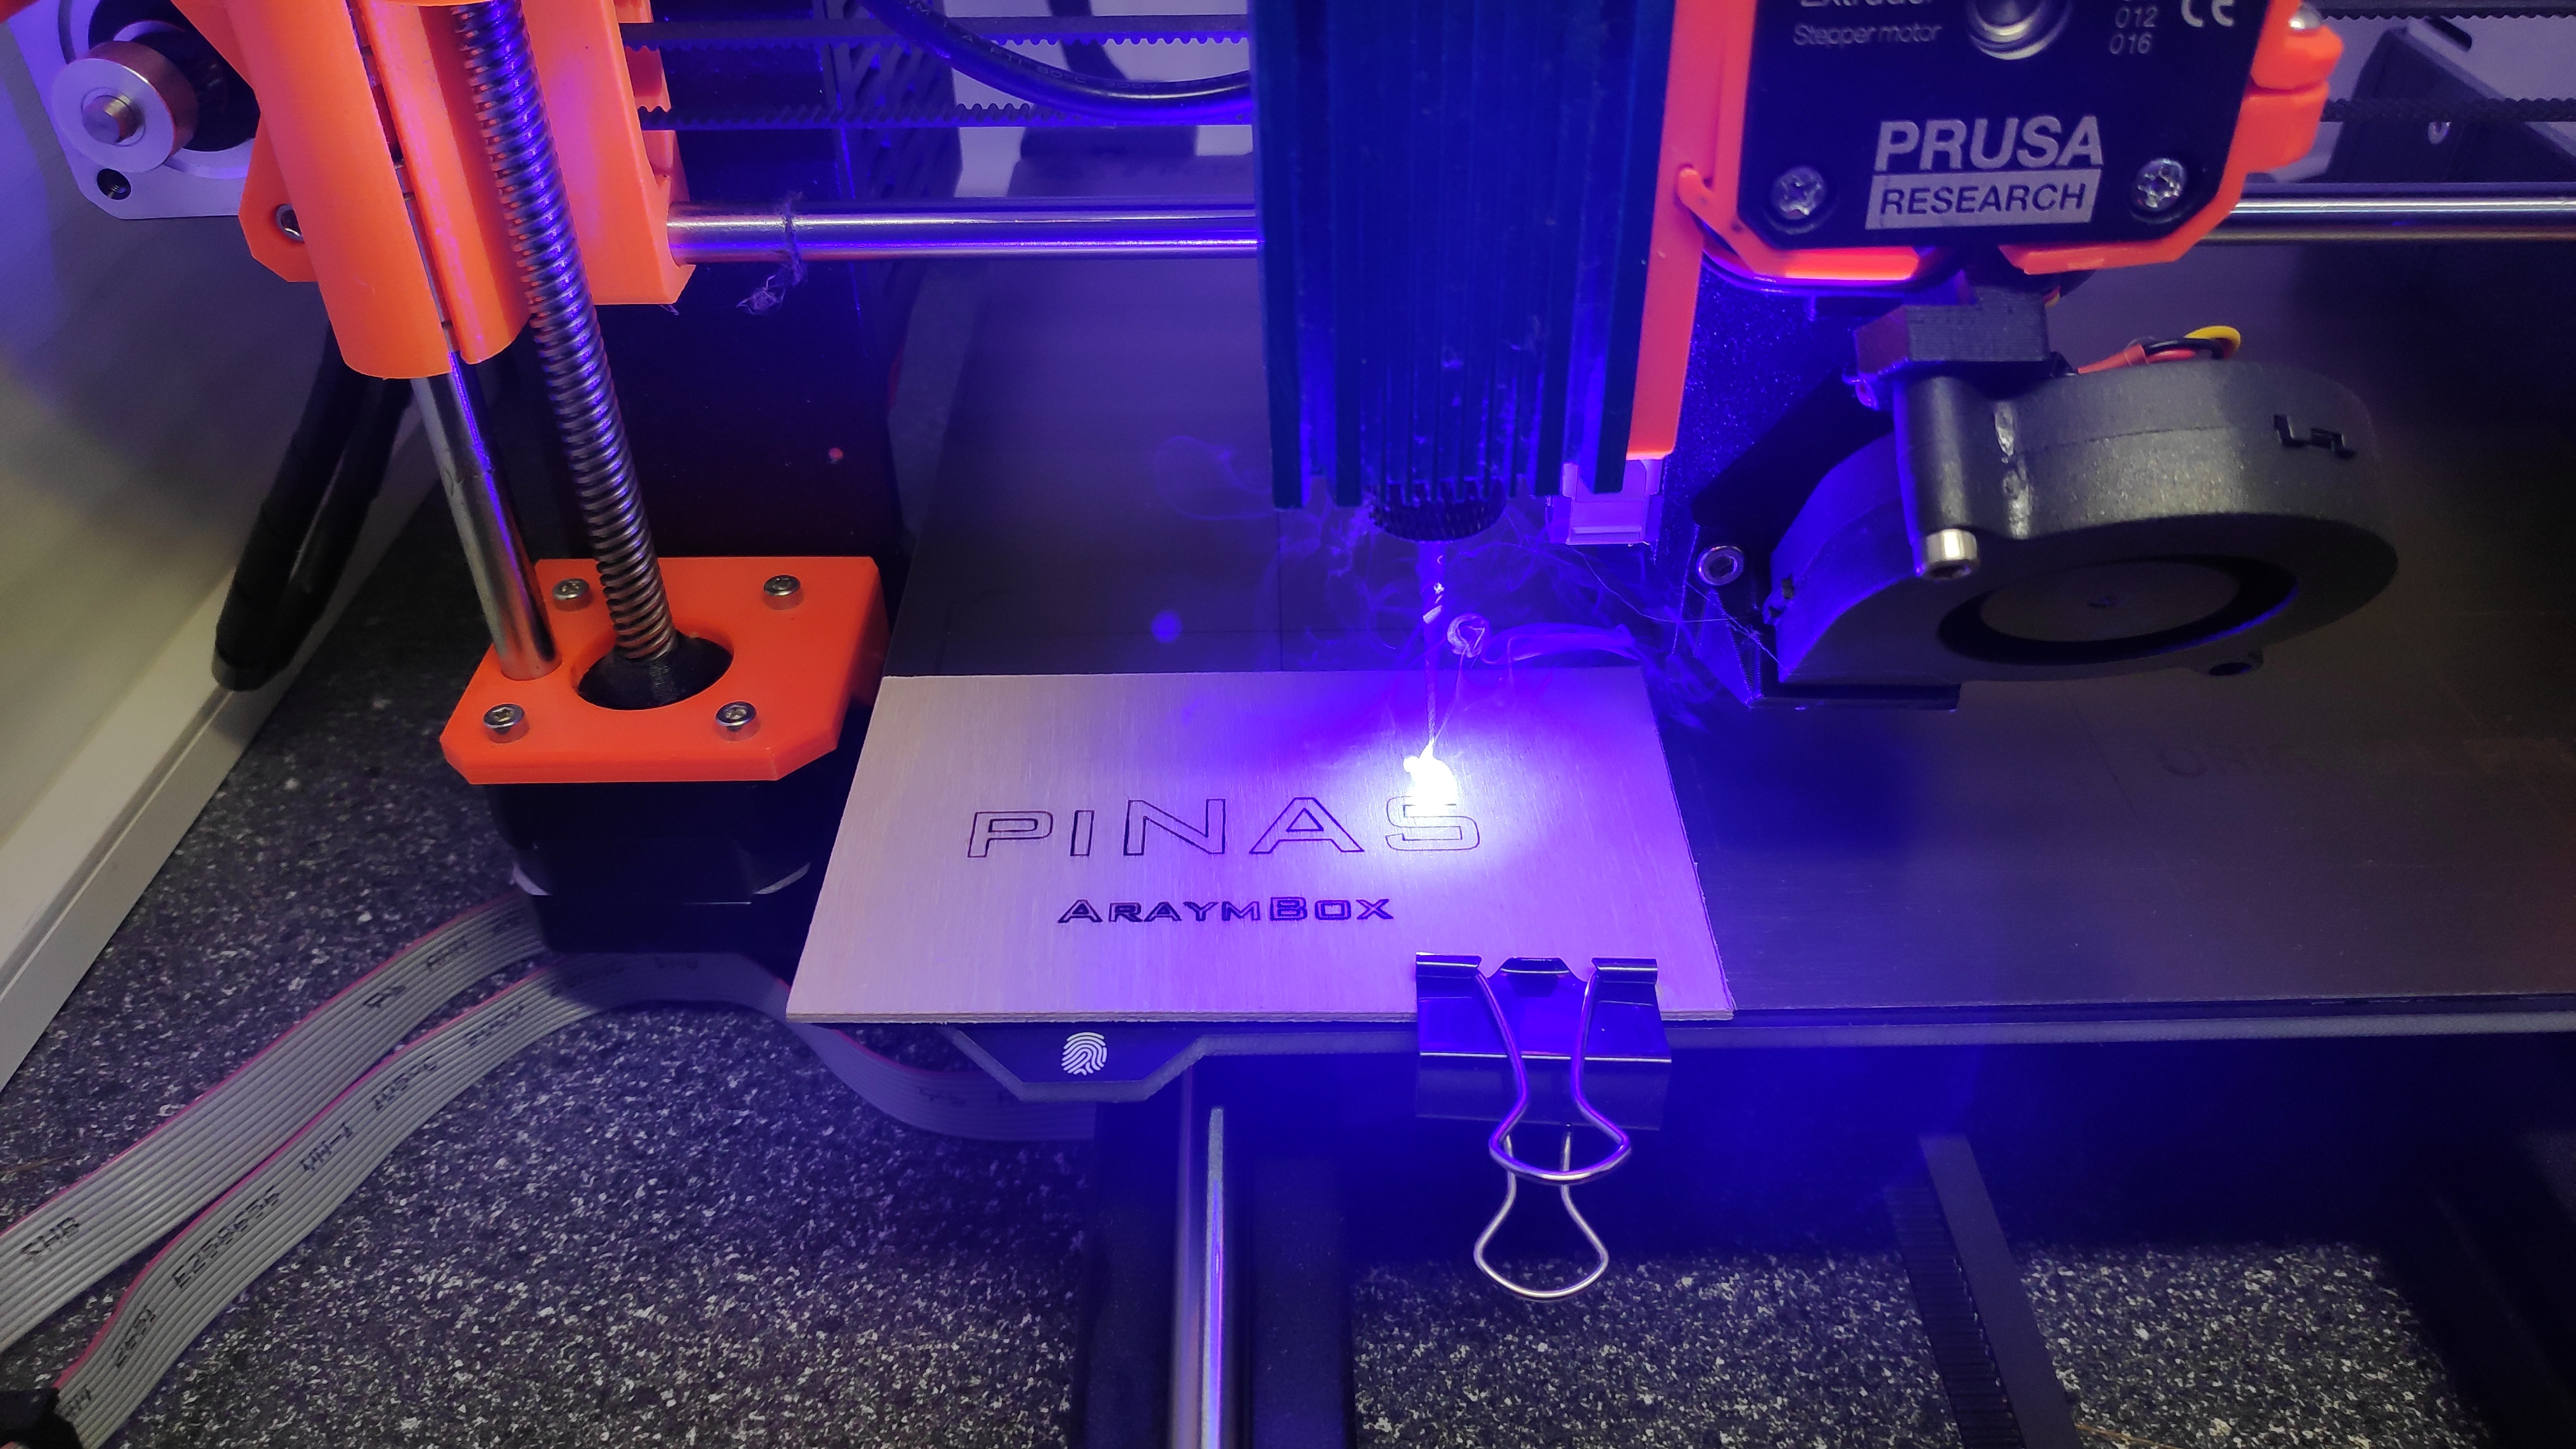
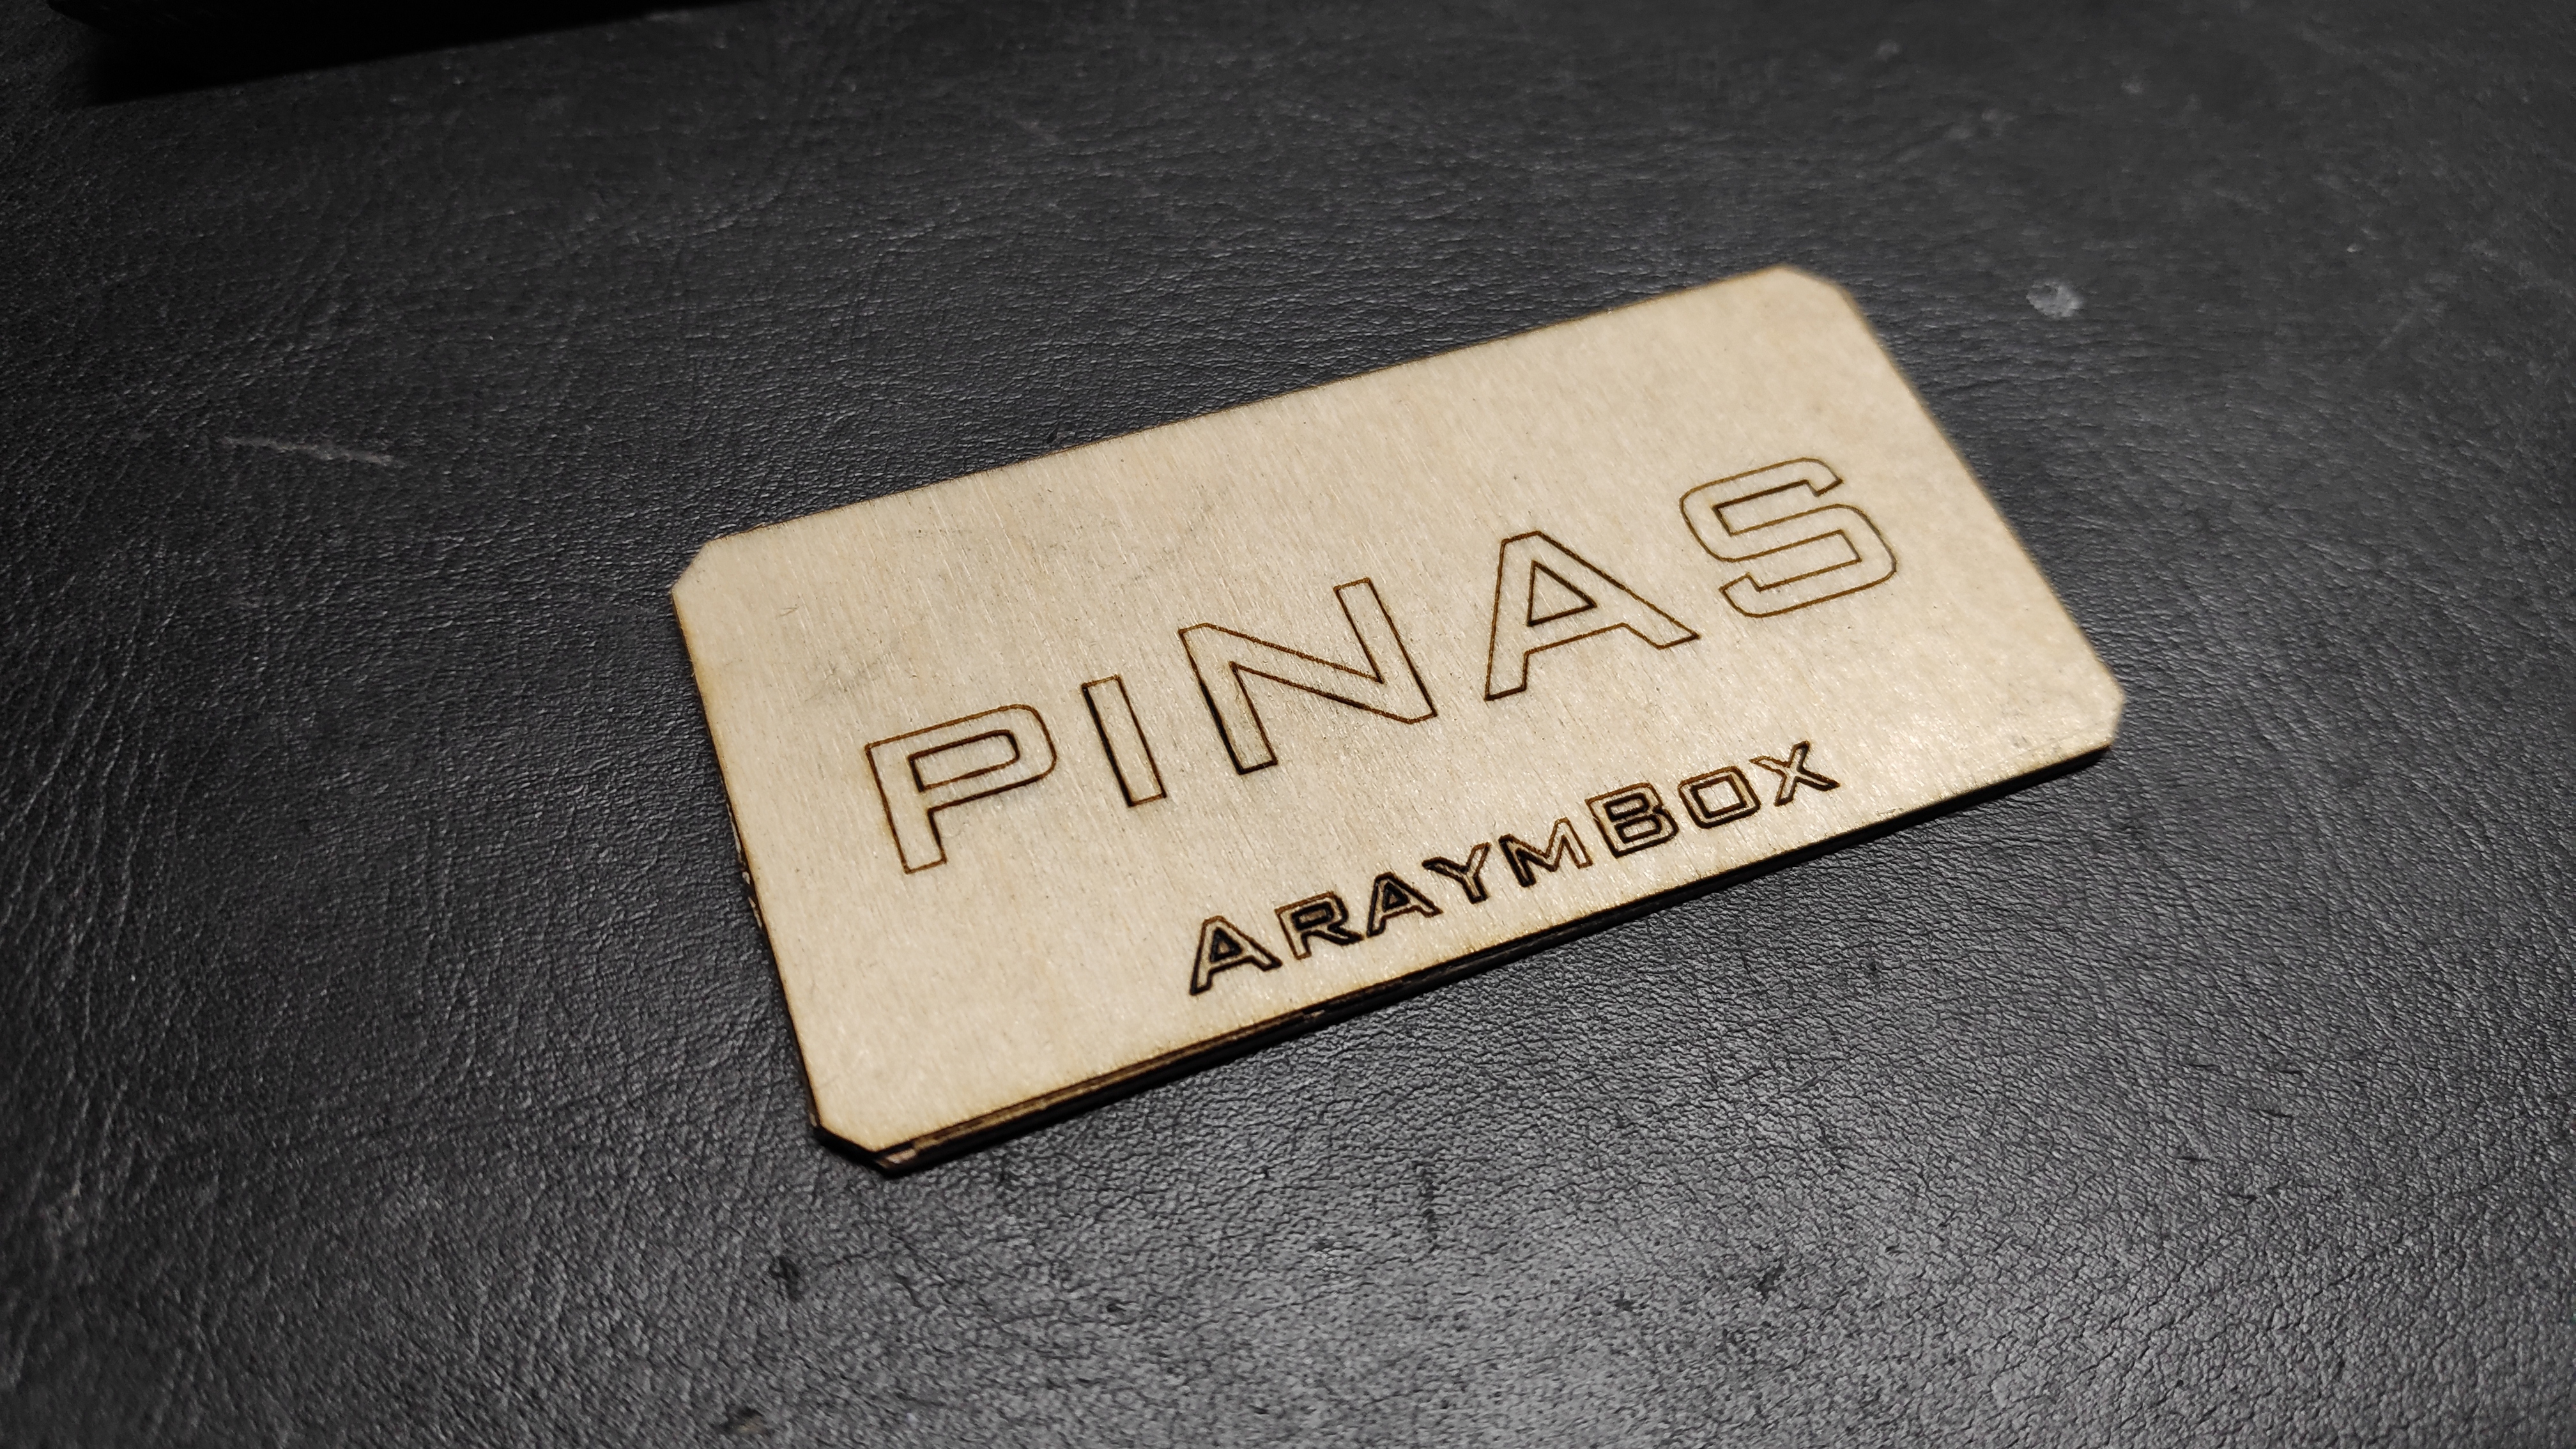
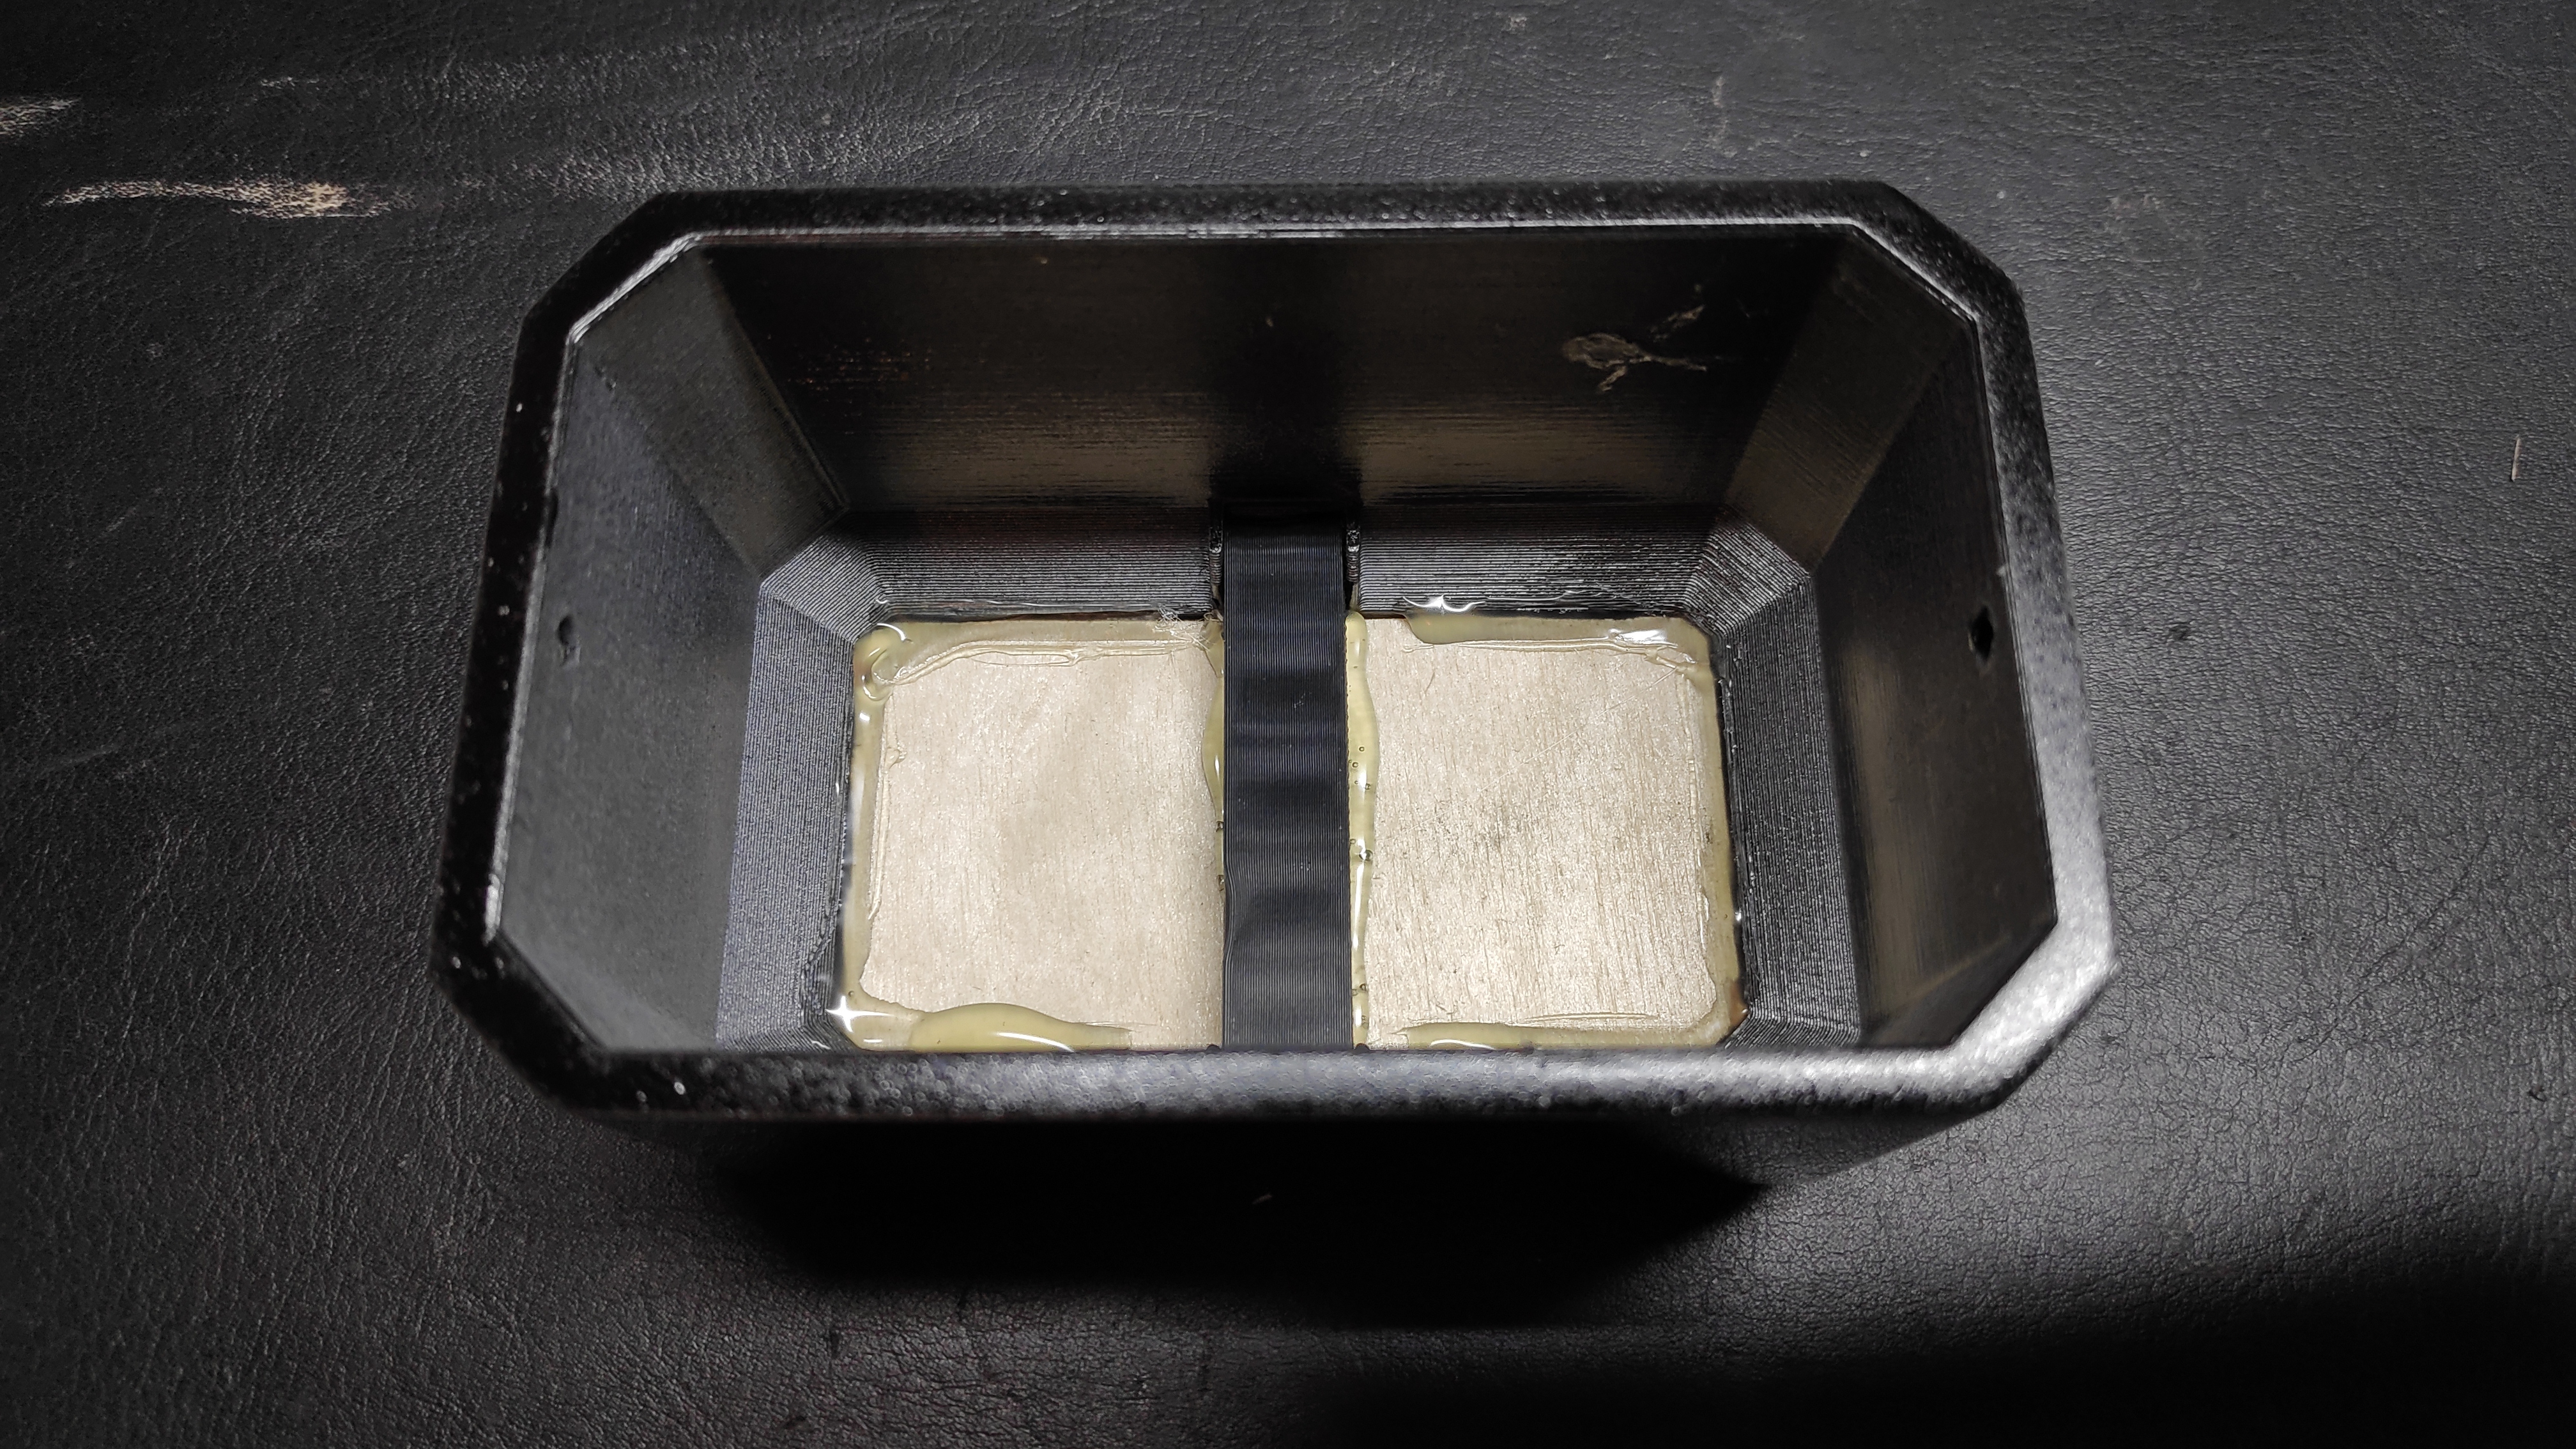
Depending on your taste this step is optional.
The files which need to be printed (thingiverse) also contain optional parts which you can use if you want to add a wooden (or else) faceplate.
- Print the optional parts.
- Create the faceplate (e.g. laser engraving).
- Place the faceplate into the optional front piece of the case.
- Secure the frontplate with some hot glue.
- Place the optional HDD stopper on the faceplate.
- Secure the HDD stopper with some hot glue.
Preparing the SD Card

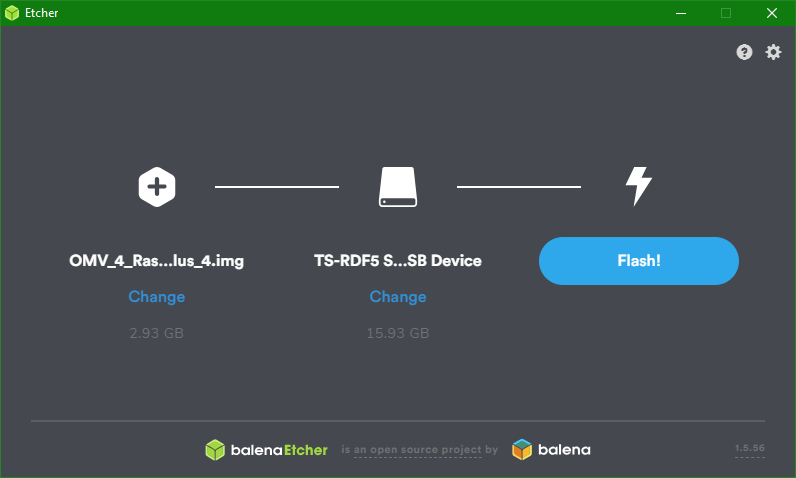
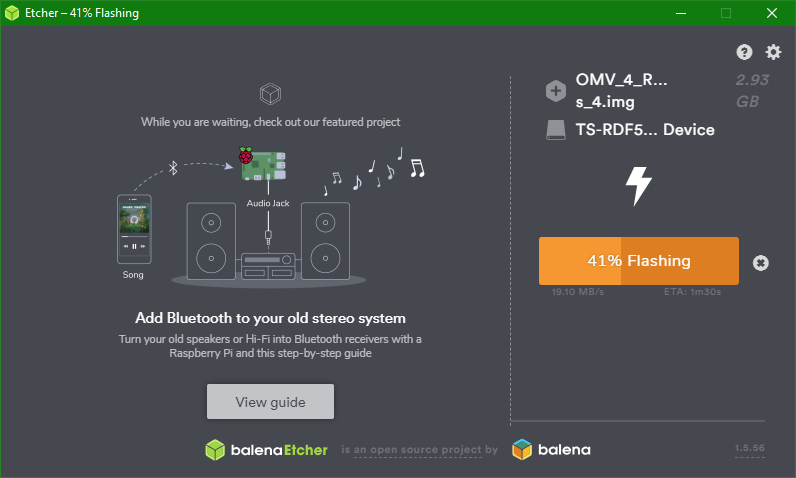
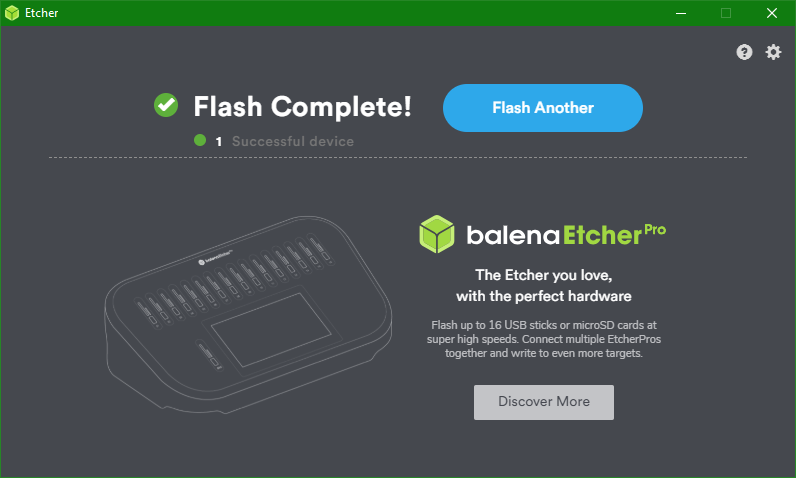
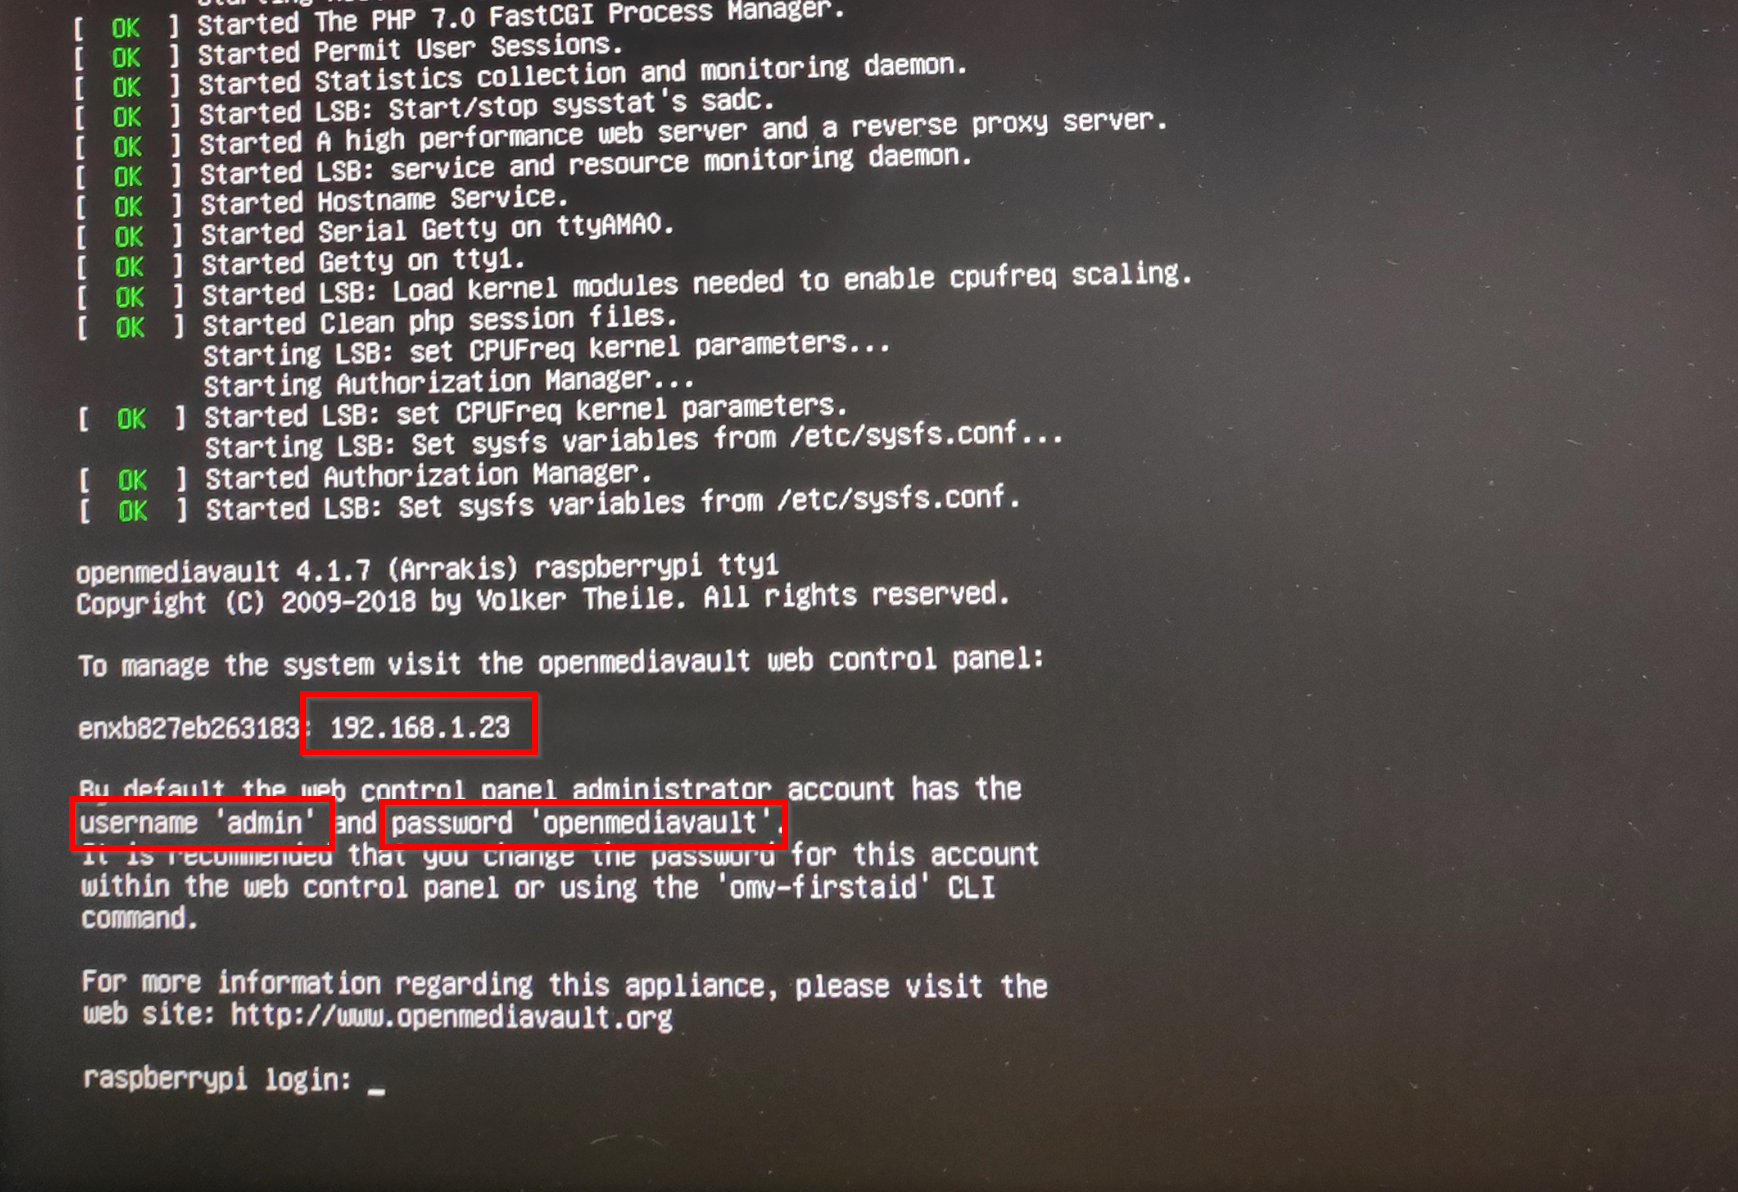
Now that we have finished most of the hardware part it's time to look at the software.
In this step we're going to download all needed software, write the Open Media Vault image to the SD card and start RasPi for the first time.
Required Software:
- Balena Etcher: A tool used to write data from an image to a SD card
- Open Media Vault: The operating system for the PiNAS
Preparing the SD Card:
- Plug the SD card into your Windows PC.
- Make sure Windows detects the card.
- Open "My Computer" or "This PC" or the Windows Explorer and remember the drive letter of the SD card. In my case it was F:\ (differs from systems to system). Make sure it's really the letter of the card and not some of your harddrives.
- Start balena etcher.
- Select the Open Media Valut image.
- Select the drive letter of the SD card.
- Click Flash!
- Wait until the flashing has finished.
- Unplug the SD card.
Starting the Raspberry Pi:
- Plug the SD card into the Raspberry Pi.
- Connect the Raspberry Pi to a screen using an HDMI cable.
- Connect the Raspberry Pi to your network using an ethernet cable.
- Power up the system by connecting the power cable to the Raspberry Pi.
- You'll see the automatic starting procedure on the sceen.
- Wait until you see the same message as shown in the last picture in this step. It takes some time - around 20 minutes for me.
- Remember the IP-address, the username and the password shown on the screen.
- Power off the RasPi.
- Remove all cables.
Case Assembly
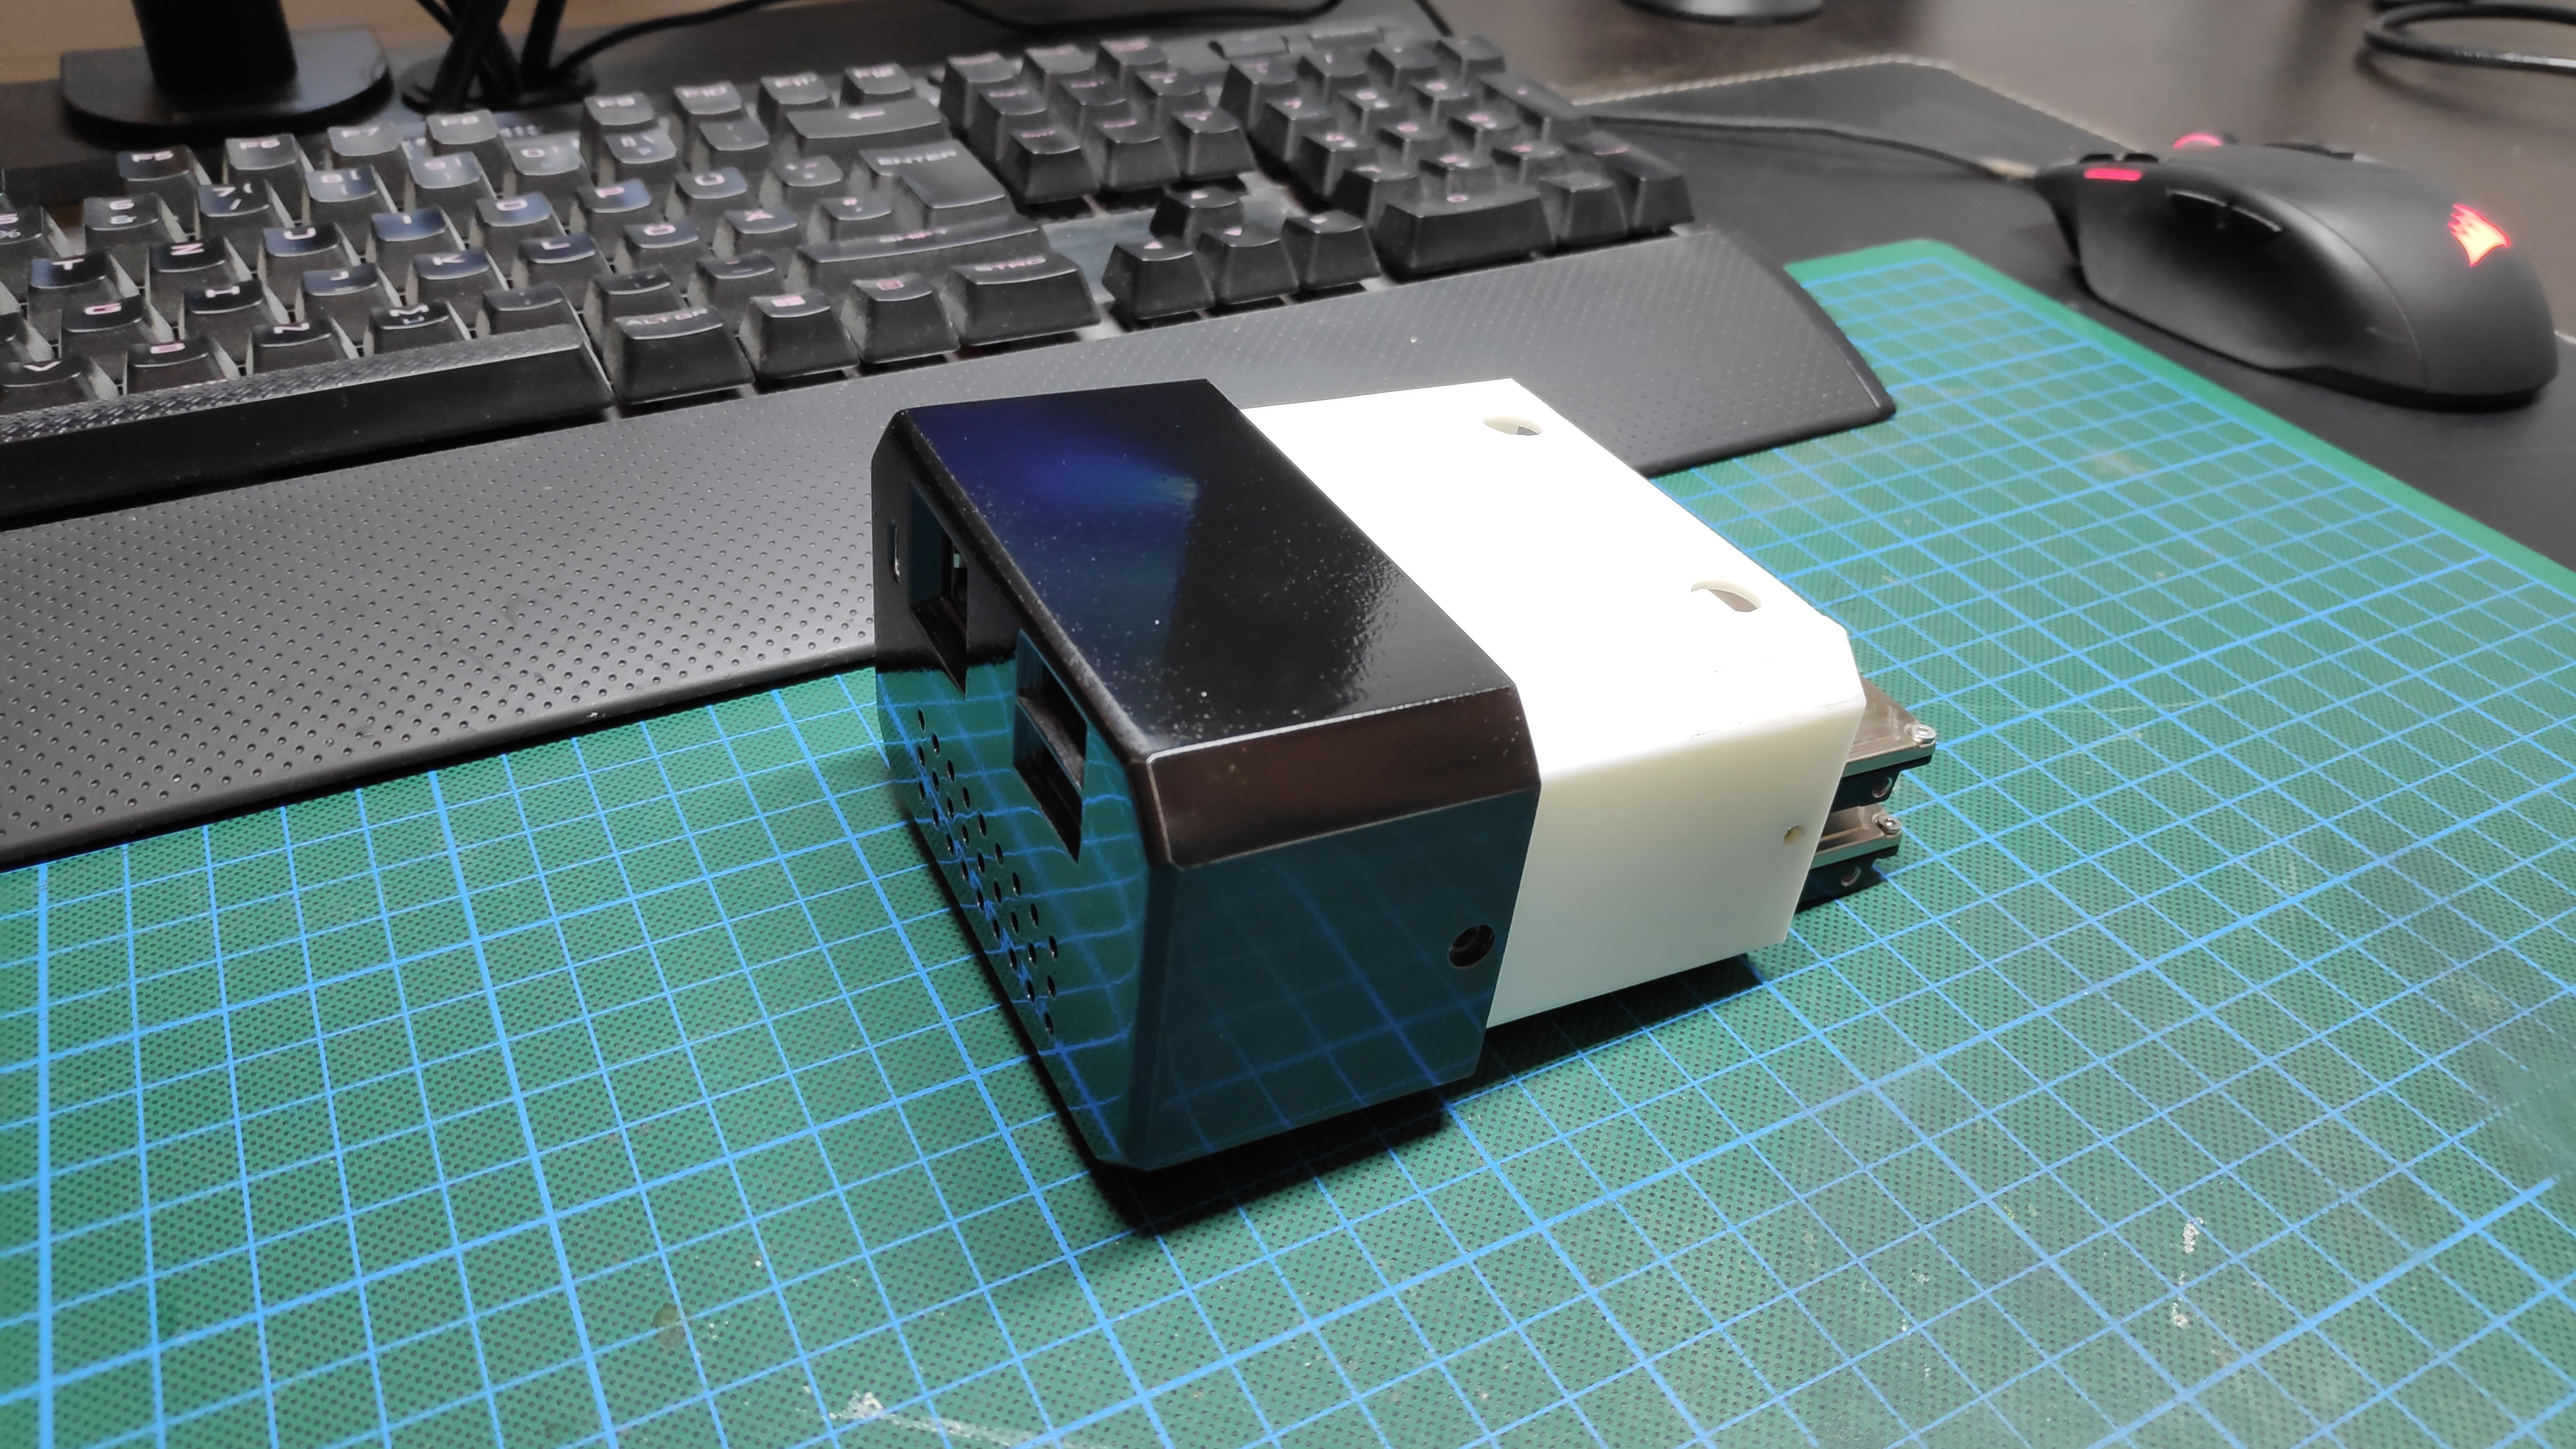
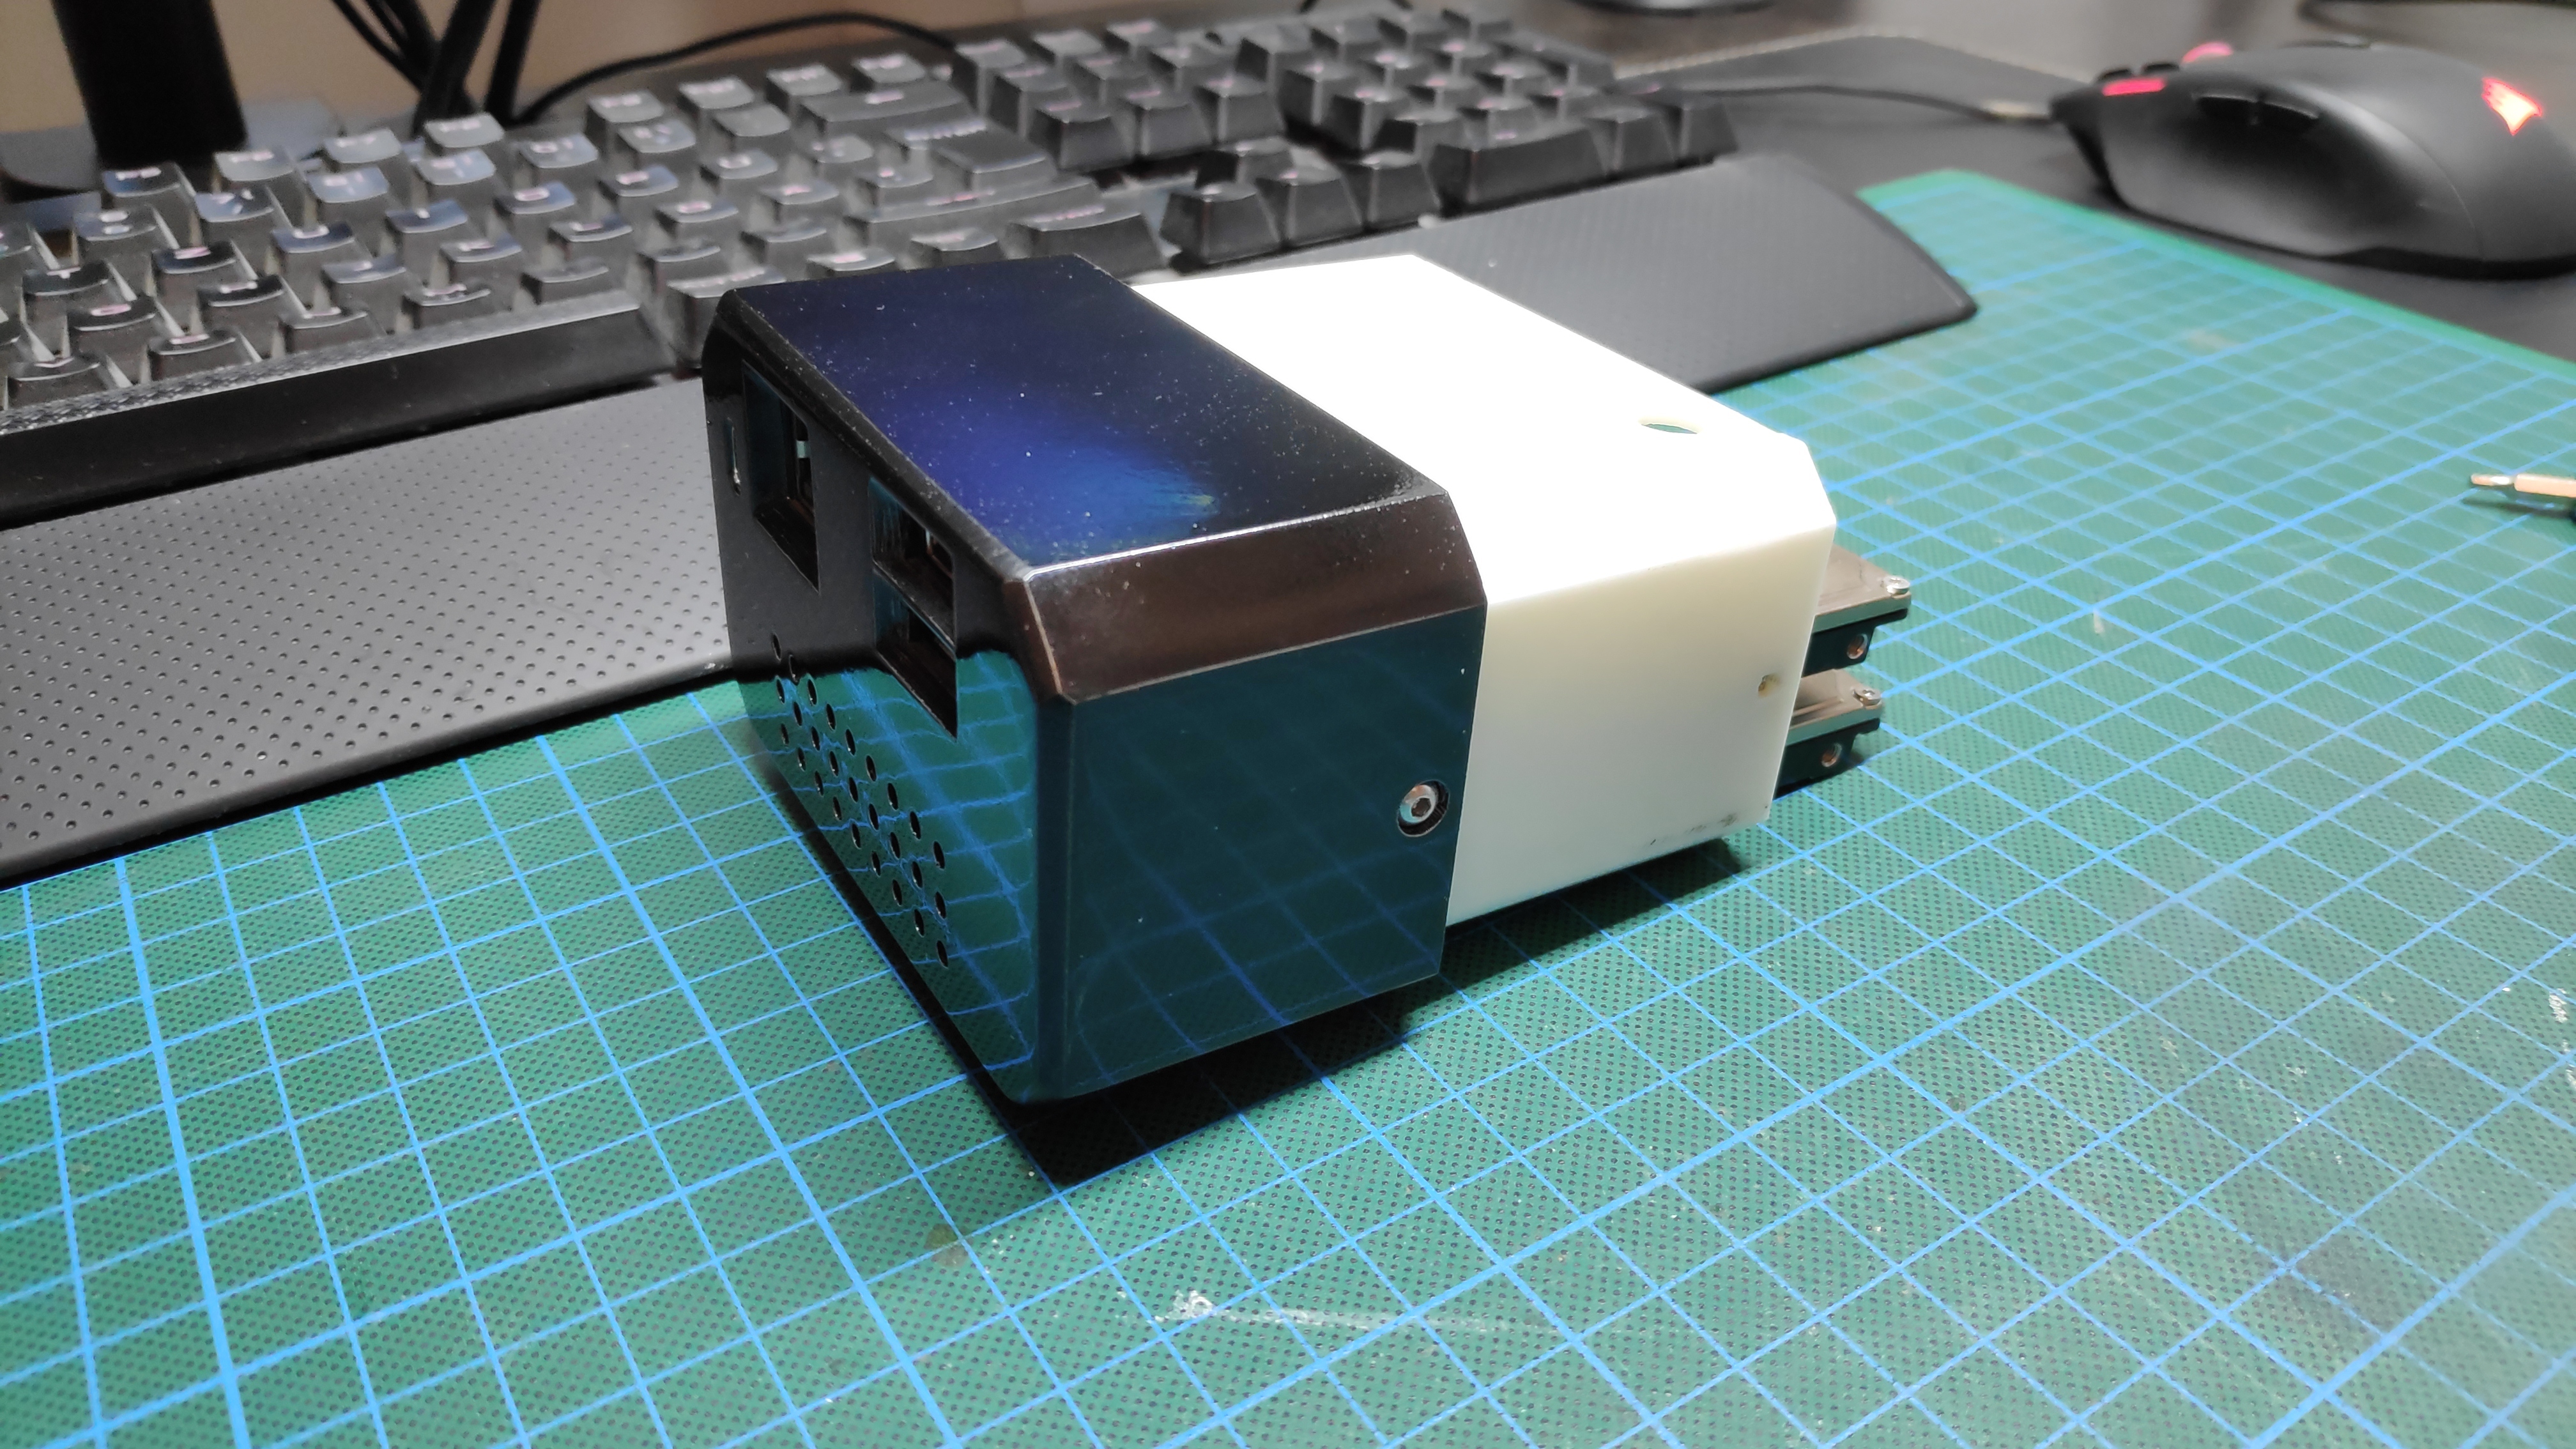
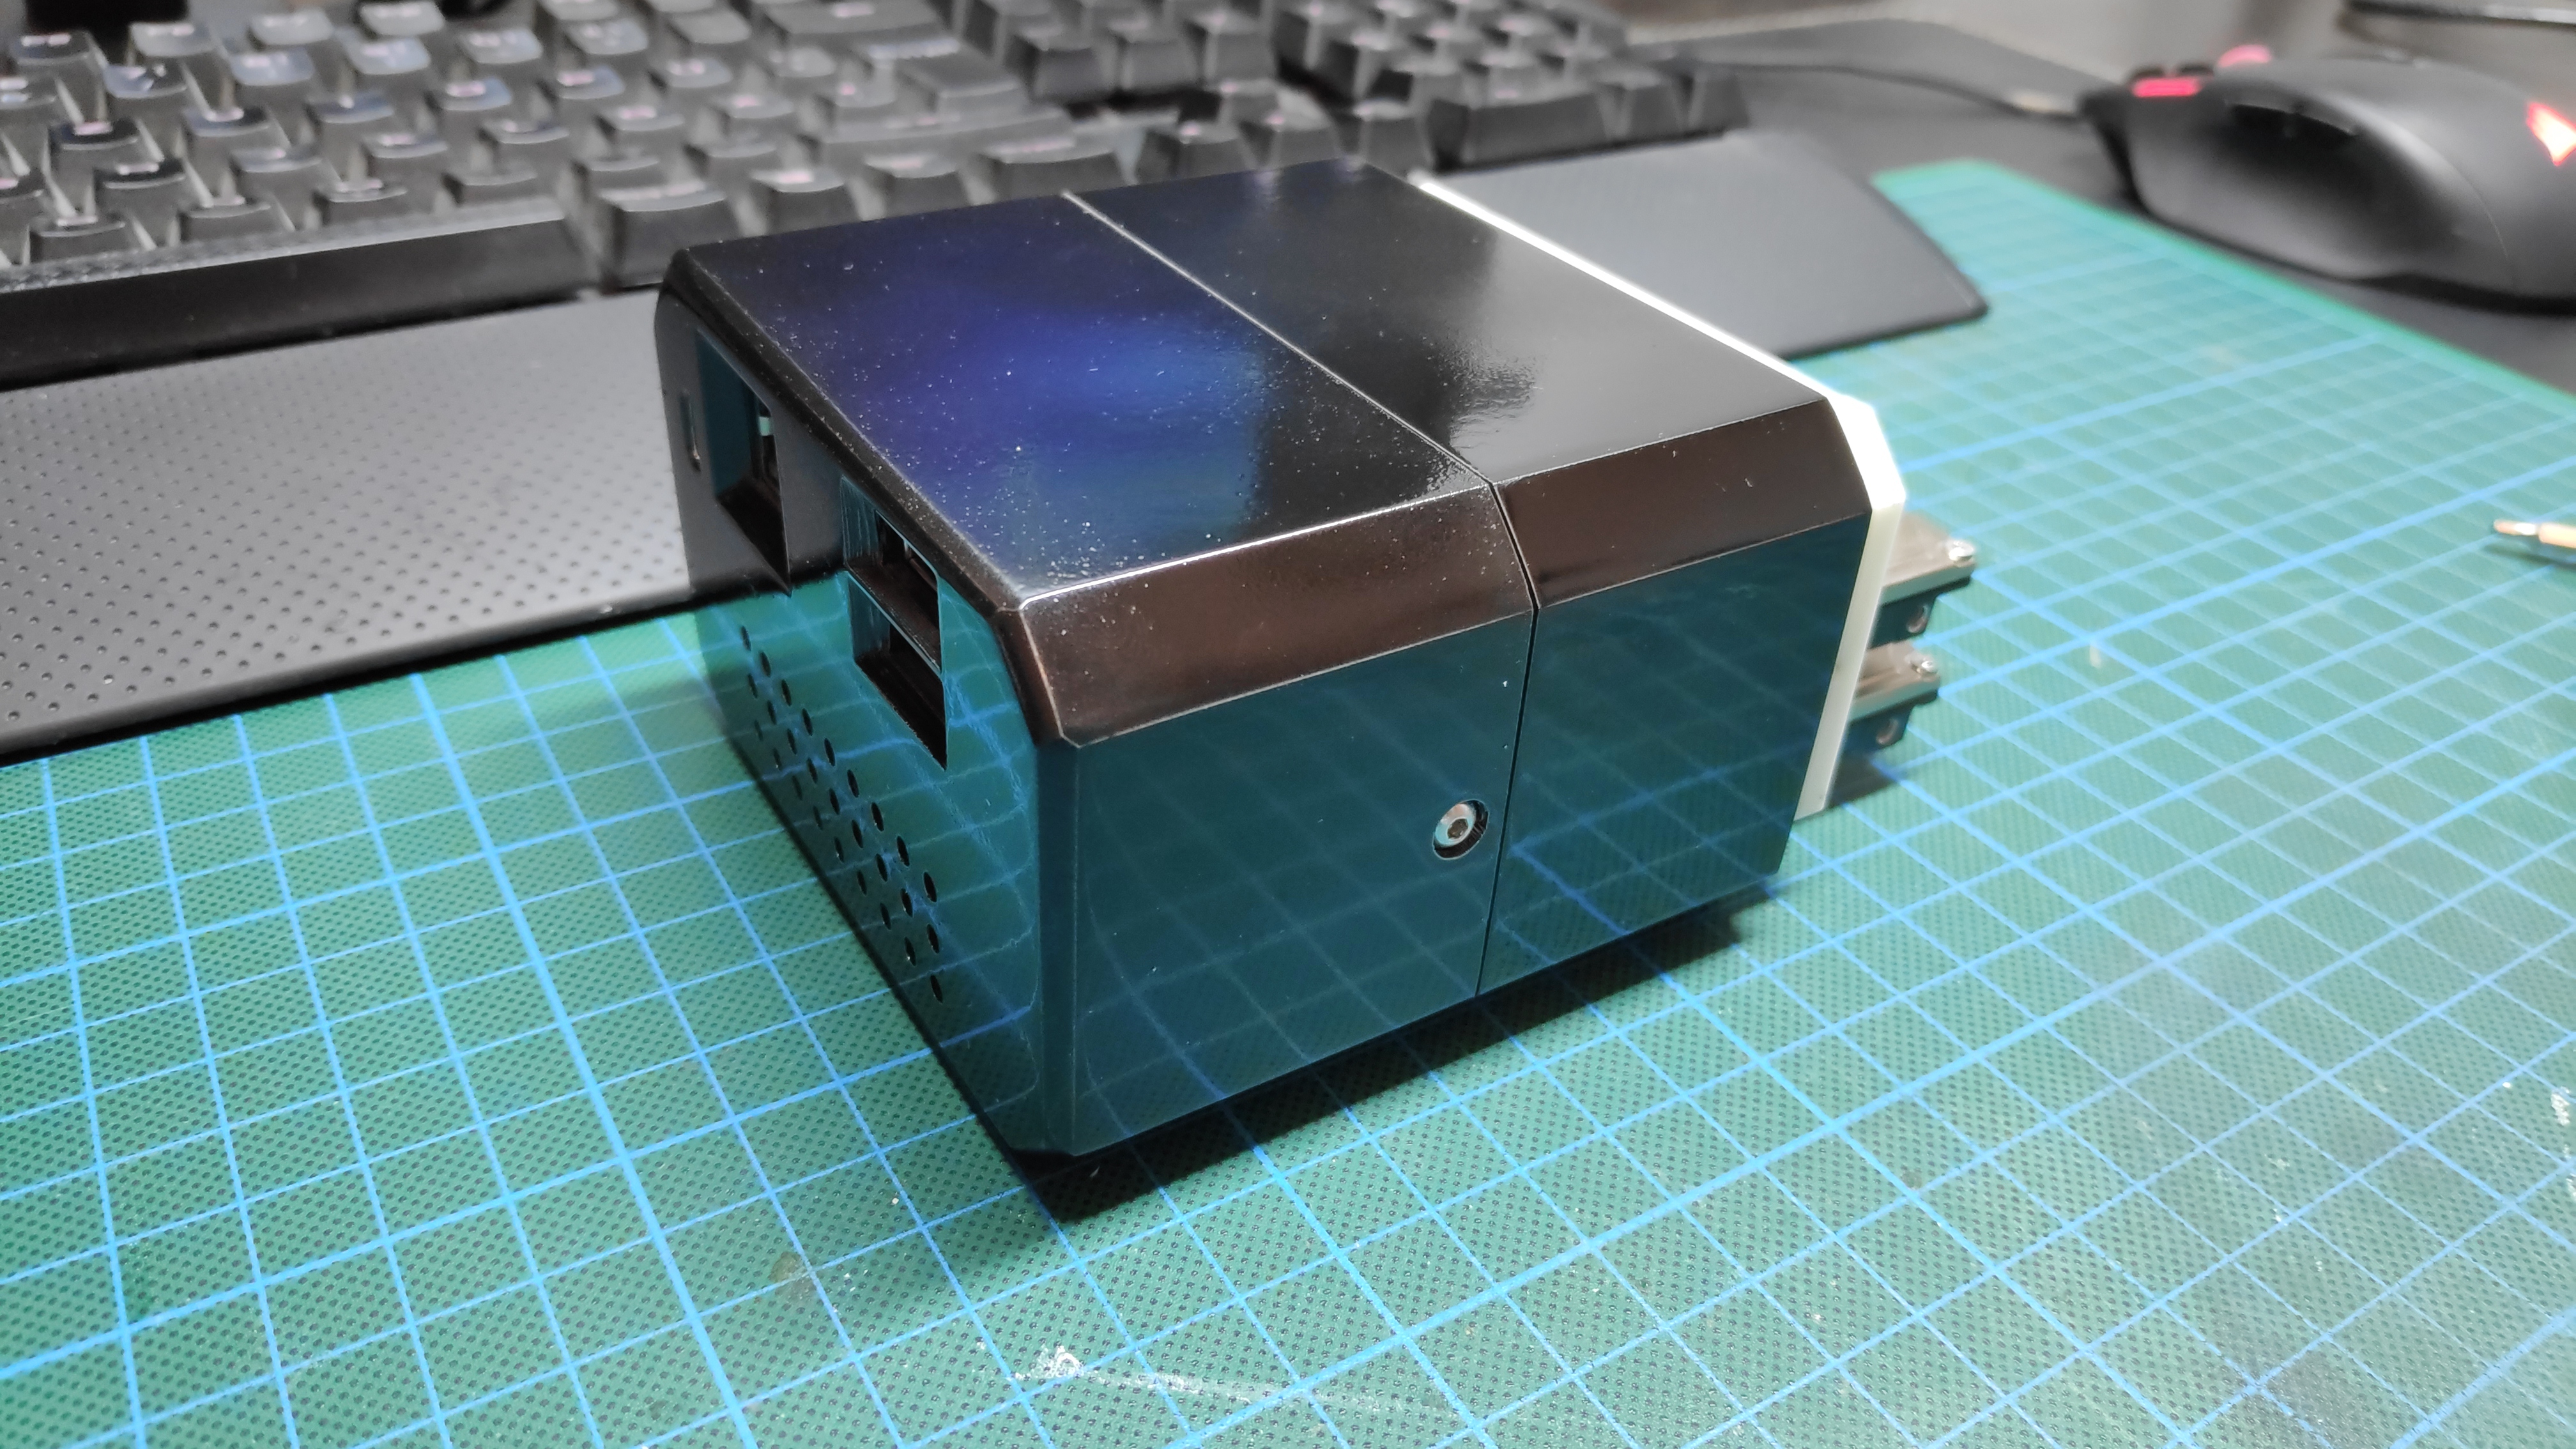
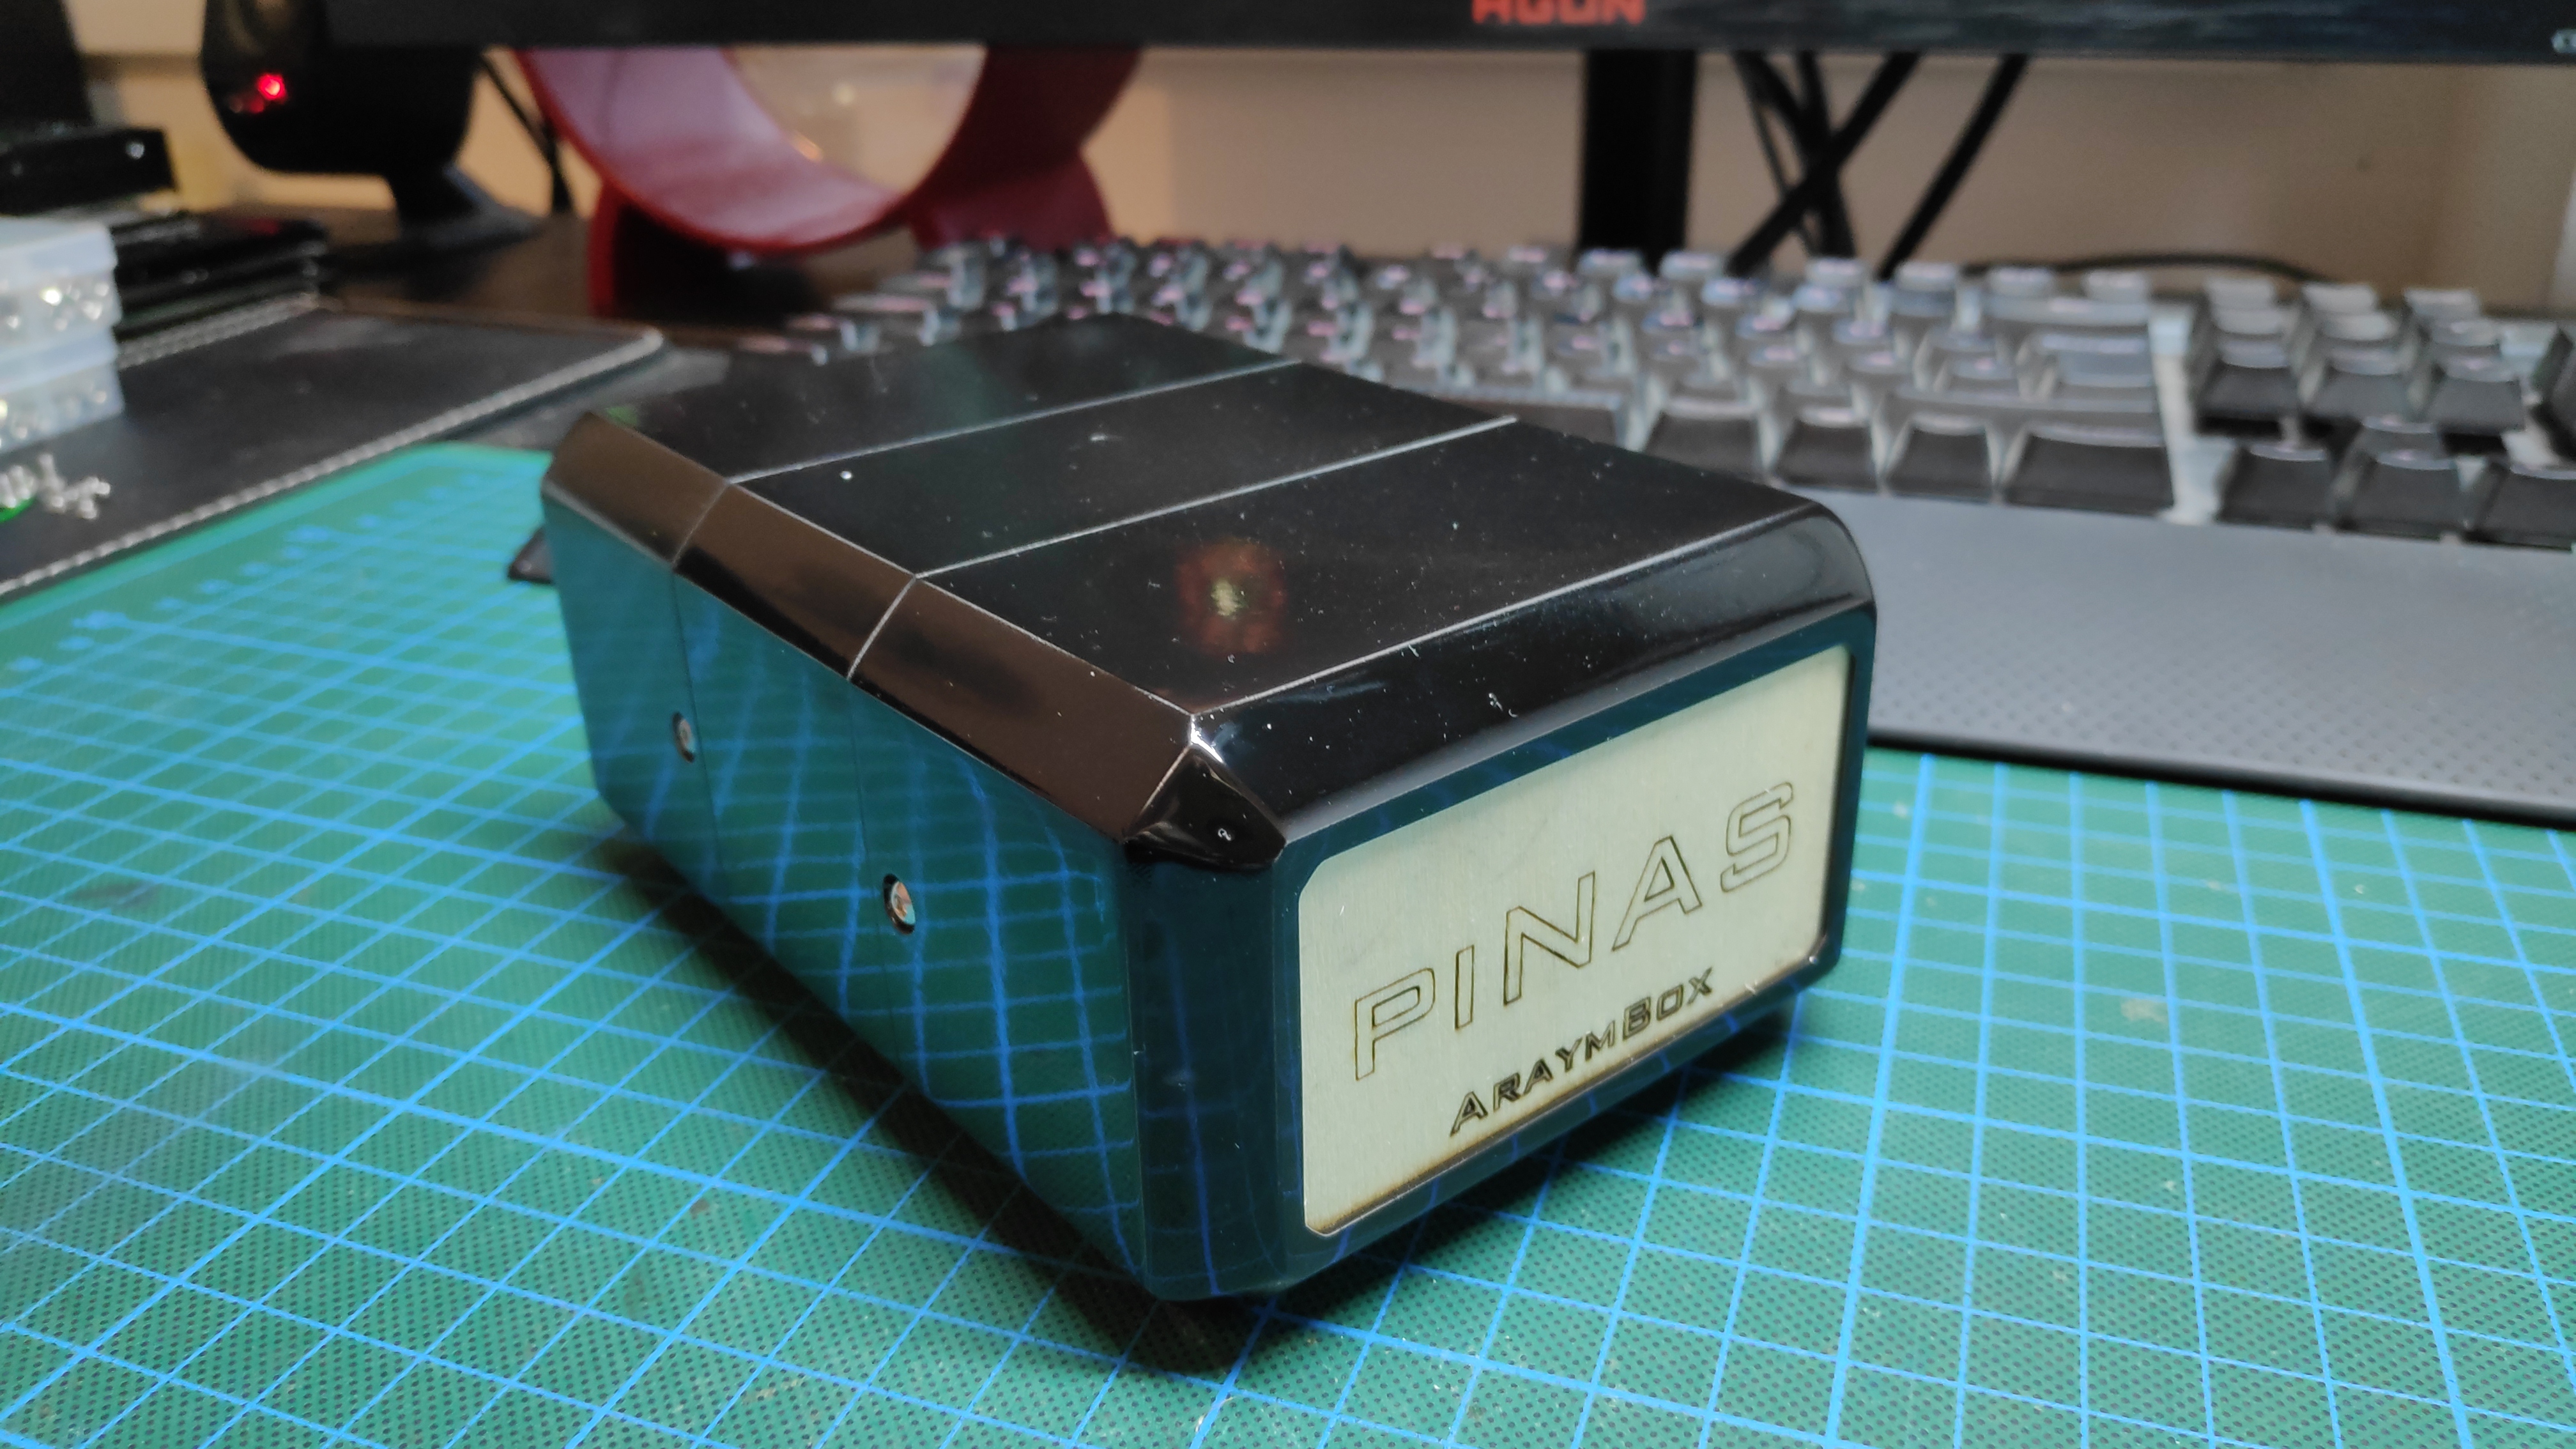
Now you can put together the PiNAS
- Carefully slide on the back piece of the case and make sure the micro USB port meets its cutout in the case.
- Secure the back piece of the case with two M3x8mm bolts.
- Slide on the middle piece of the case.
- Slide on the front piece of the case.
- Secure the back piece of the case with two M3x8mm bolts.
Configuring Open Media Vault
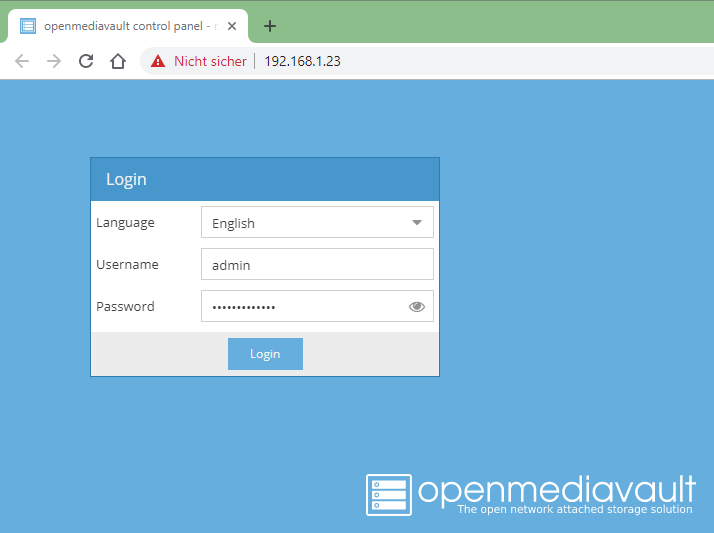

Now we're going to configure Open Media Vault.
After logging into Open Media Vault you'll see a tree view on the left side. All settings are separated into 5 main sections:
- System
- Storage
- Access Rights Management
- Services
- Diagnostics
The following steps show the most important settings in these sections.
Starting the Raspberry Pi:
- Connect the Raspberry Pi to your network using an ethernet cable.
- Power up the system by connecting the power cable to the Raspberry Pi.
- Remember the IP-address, the username and the password shown on the screen.
First Login:
- Start your favorite internet browser (firefox, chrome, ie, etc.).
- Type in the IP-address of the PiNAS into the address bar of the browser.
- You should now see the authentication mask of Open Media Vault.
- Select you language.
- Enter the username, password and click Login.
Configuring OMV: System
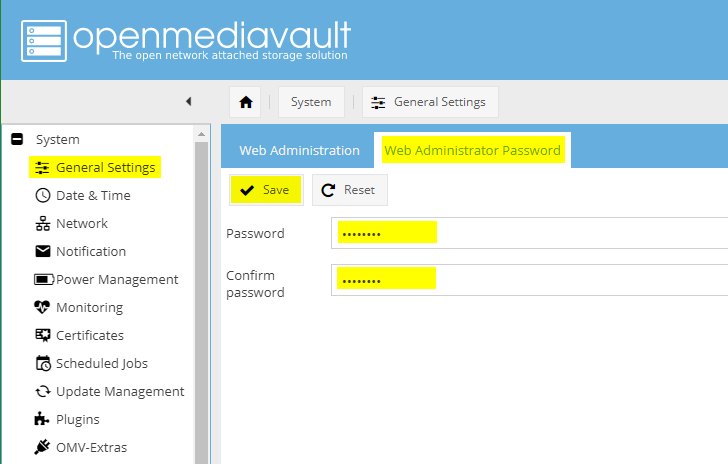
General Settings
- Open tab Web Administrator Password
- Set and confirm a new password
- Click Save to save
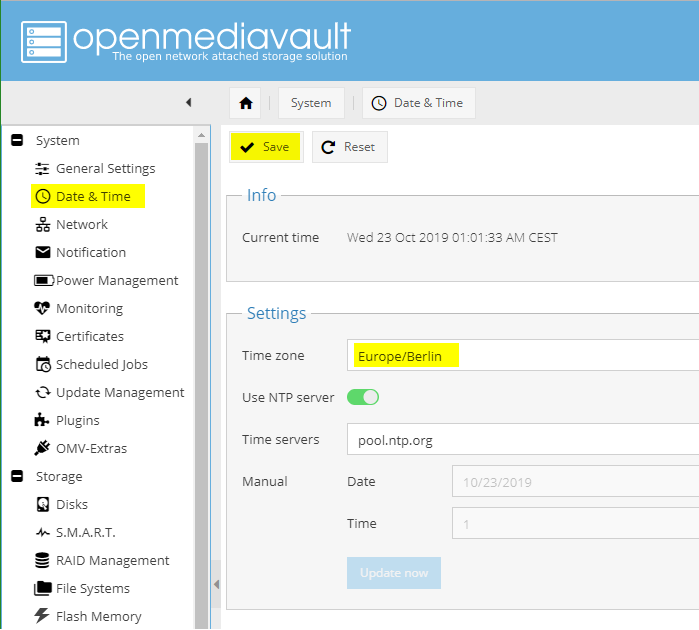
Date & Time
- Select you time zone
- Enable the NTP (Network Time Protocol) feature and set a time server
- Click Save to save
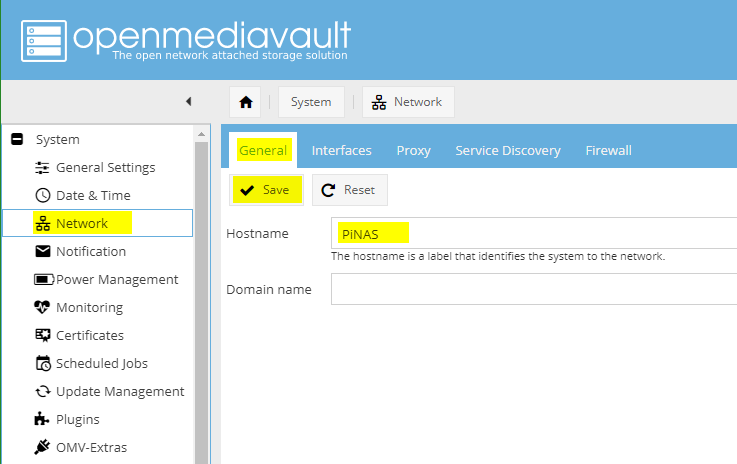
Network
- Open tab General
- Give your PiNAS a hostname (name in your network)
- Click Save to save
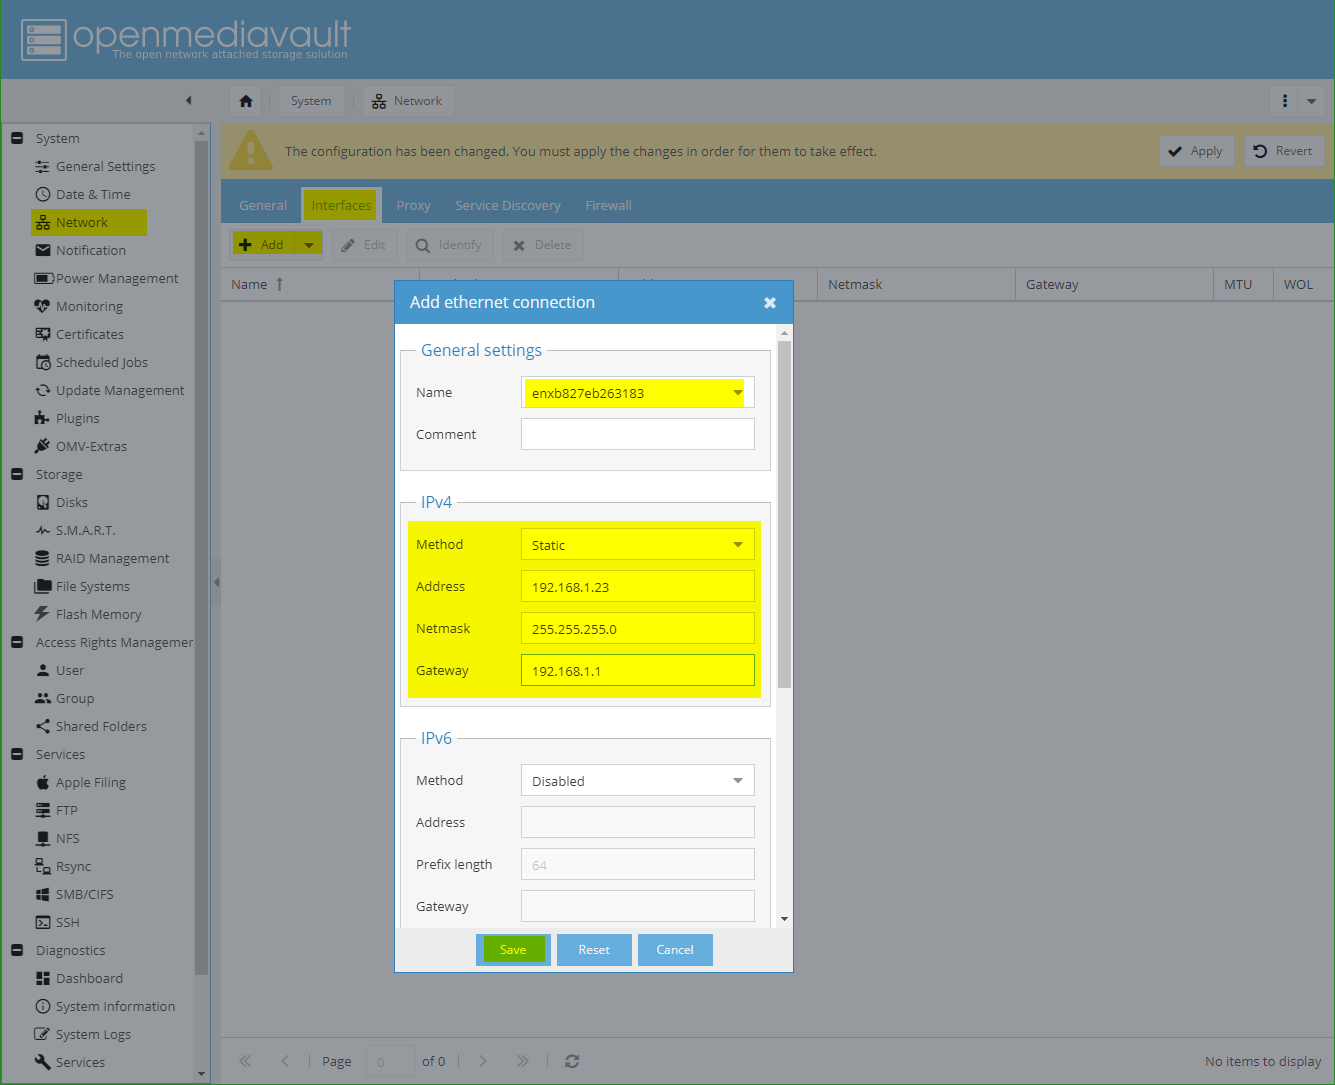
- Open tab Interfaces
- Press Add
- Set a static IPv4 address so it does not change after reboot
- Click Save to save
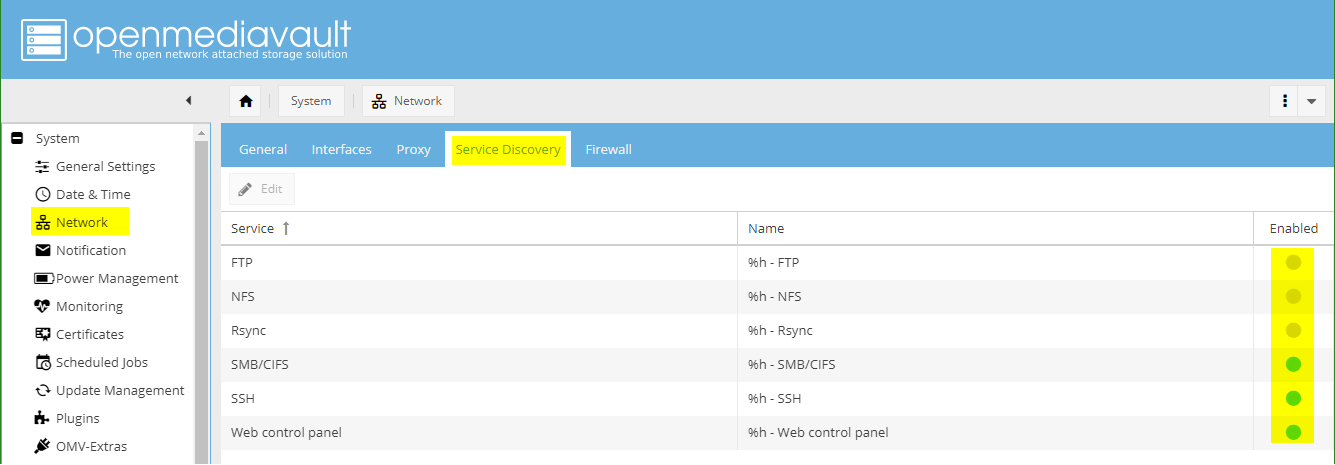
- Open tab Service Discovery
- Activate the services you need
Configuring OMV: Storage
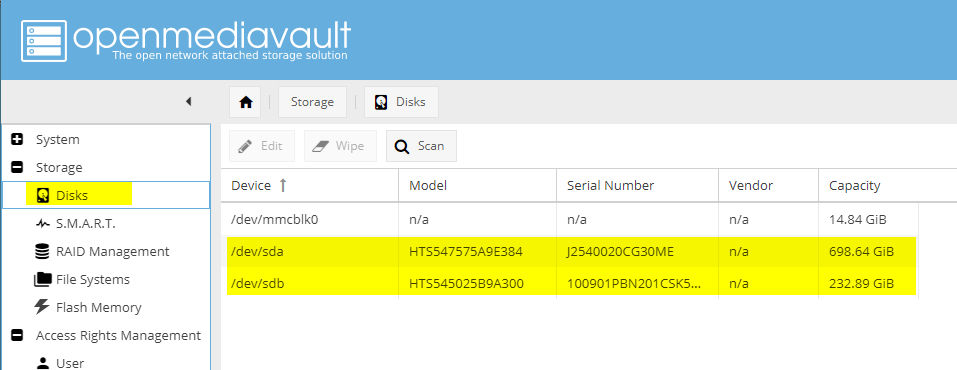




Disks
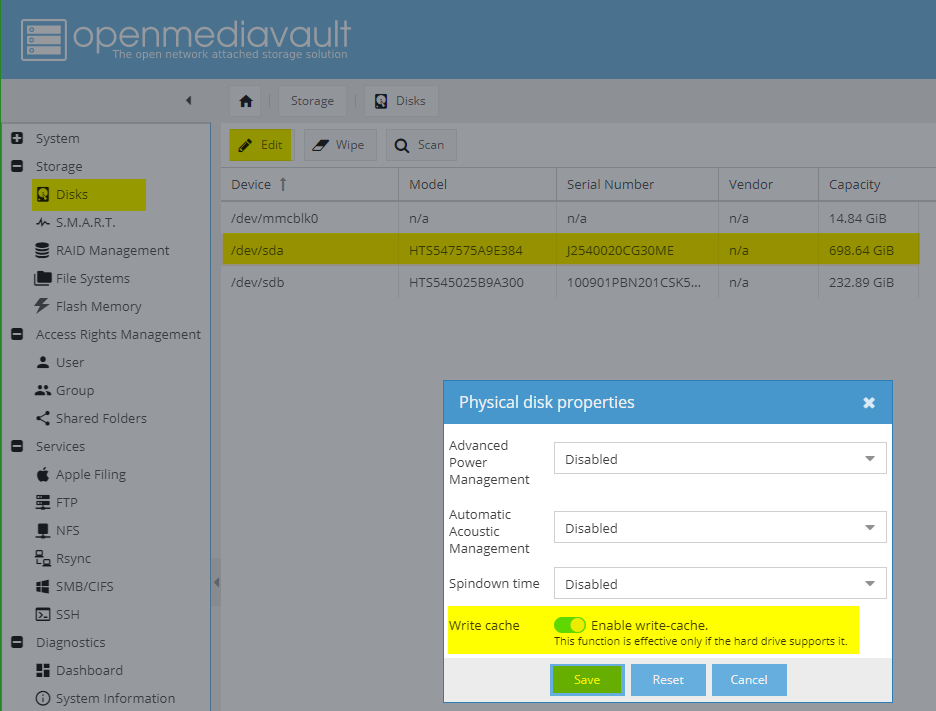
- Make sure both drives were identified and listed (typically they are mounted as sda and sdb)
- Select a disk click Edit
- Enable write-cache
- Click Save to save
- Do the same for the second disk
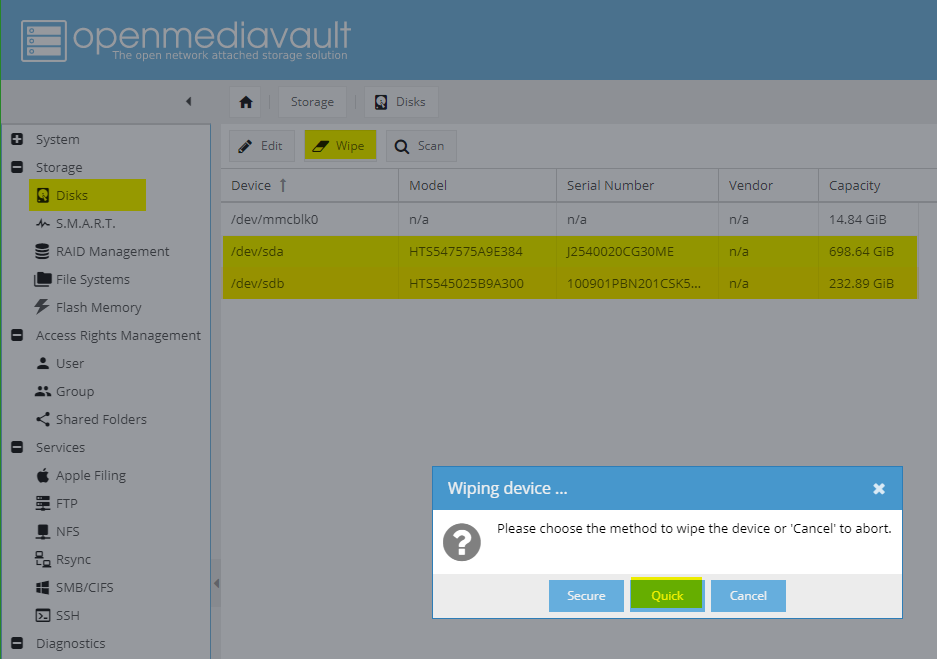
- Select a disk click Wipe
- Click Quick to remove all data from the disk
- Do the same for the second disk
RAID Management
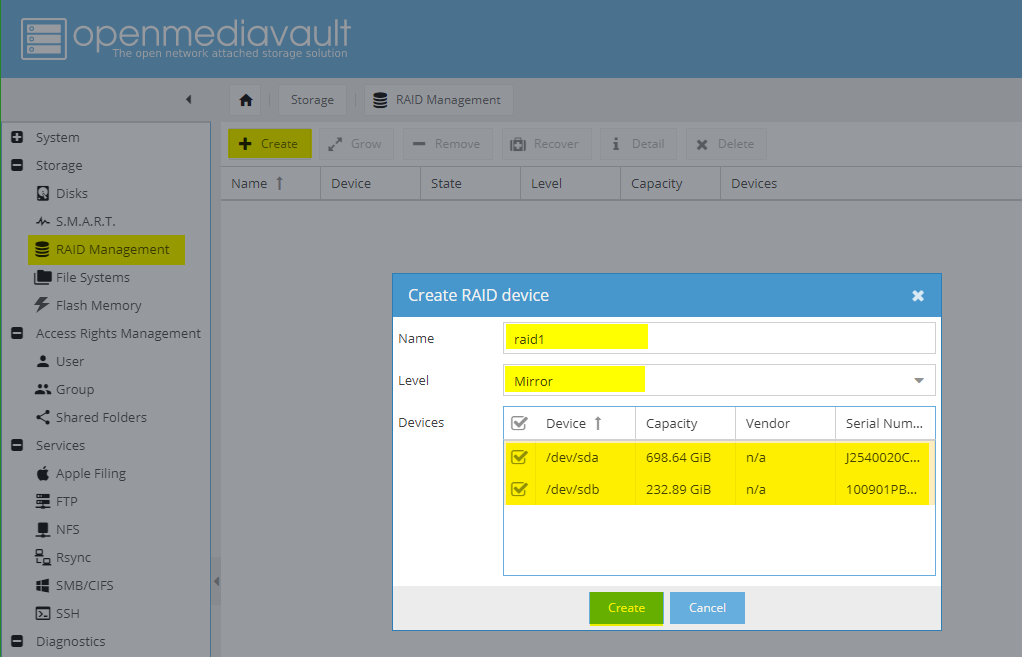
- Click Create to create a new RAID (Redundant Array of Independent Disks)
- Give your RAID a Name - e.g. raid1
- Select your RAID Level - e.g. Mirror (RAID Level 1)
- Select the Devices you want to add to the RAID - select both your disks
- Click Create to create the RAID using the selected disks
- The new RAID 1 is now resyncing
- When syncing has finished the State of the RAID changes to clean
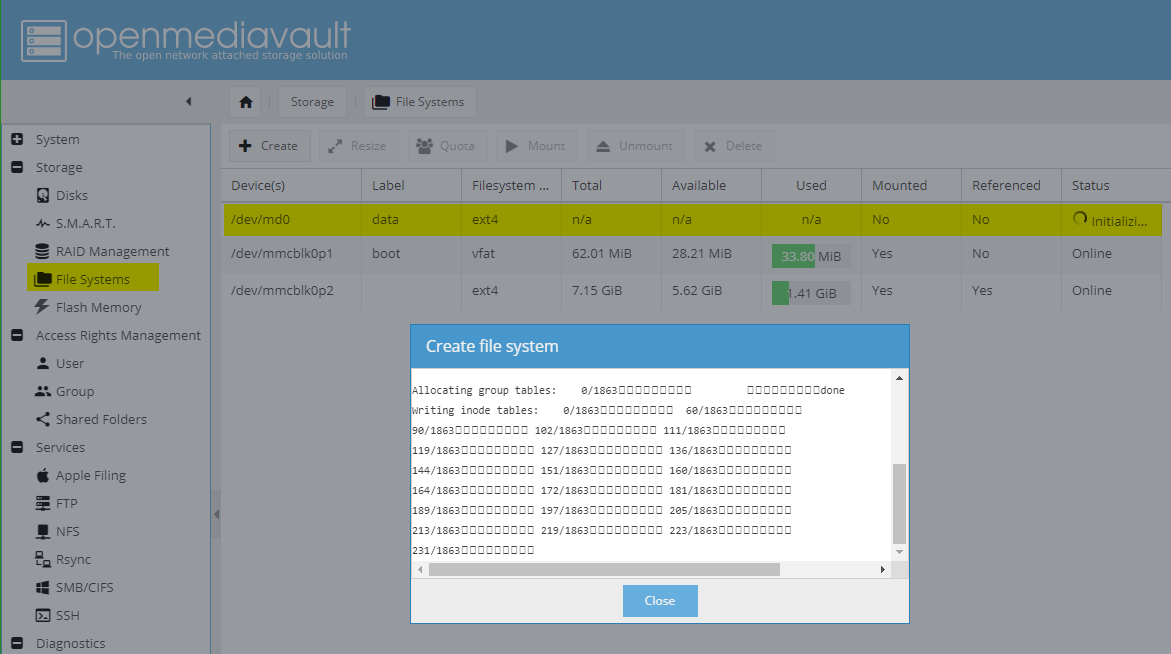
File Systems
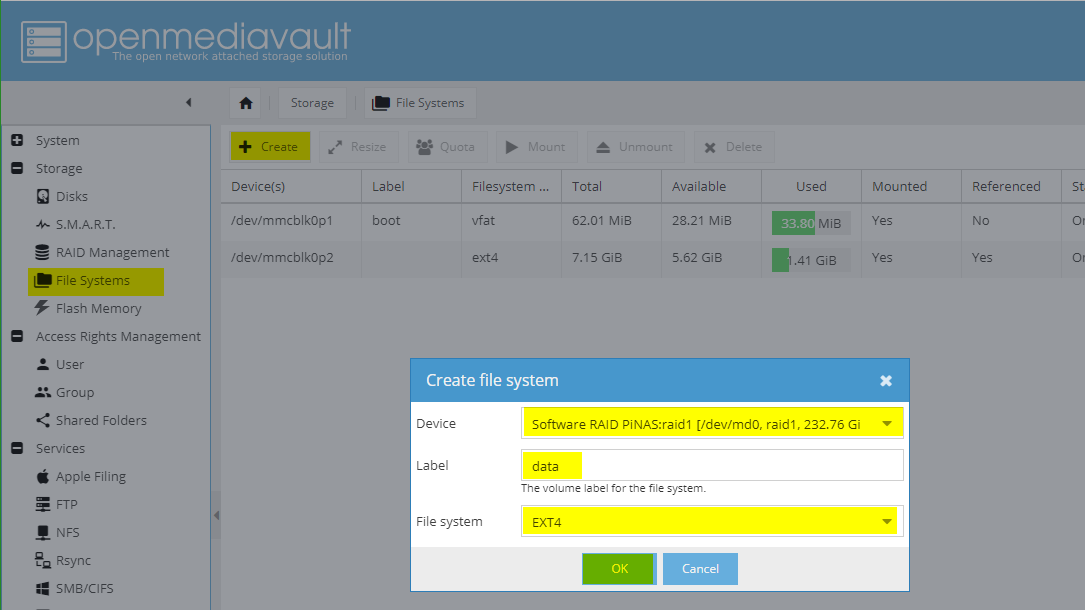
- Click Create to create a file system
- Select your Device (your previously created raid1)
- Give your file system a Label to identify it easily
- Select your desired file system type
- Click OK to create the file system
- Wait for your file system to finish initializing (Status has to be Online)
- Select your initialized file system and press Mount to make it available
Configuring OMV: Access Rights Management
User
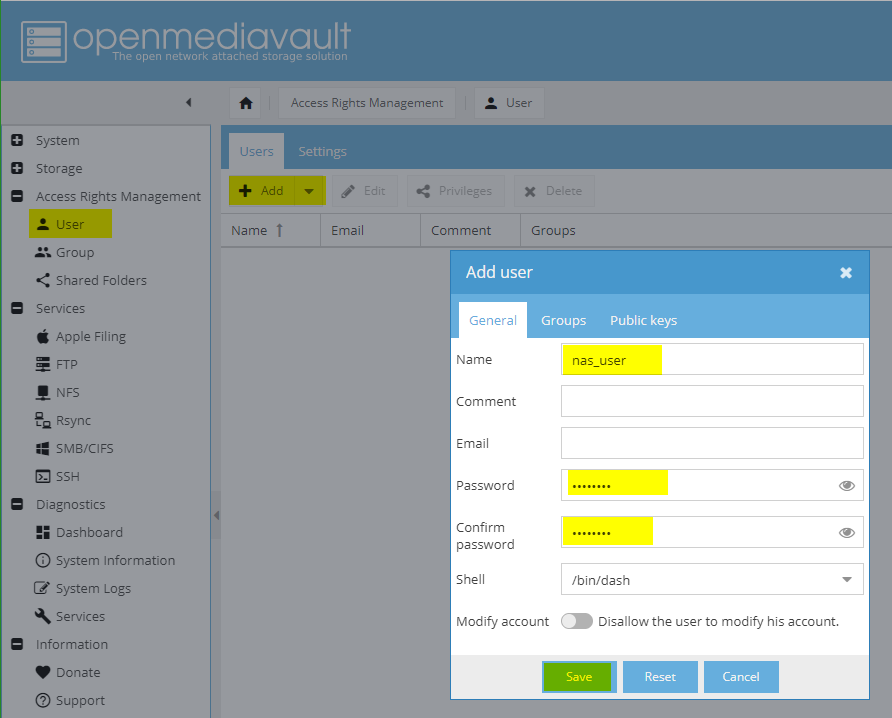
User accounts are necessary to access the file system of the PiNAS
- Open the tab Users
- Click Add to create a new user
- Enter a Name for the user
- Set and confirm the password for this user
- Click Save to save
Group
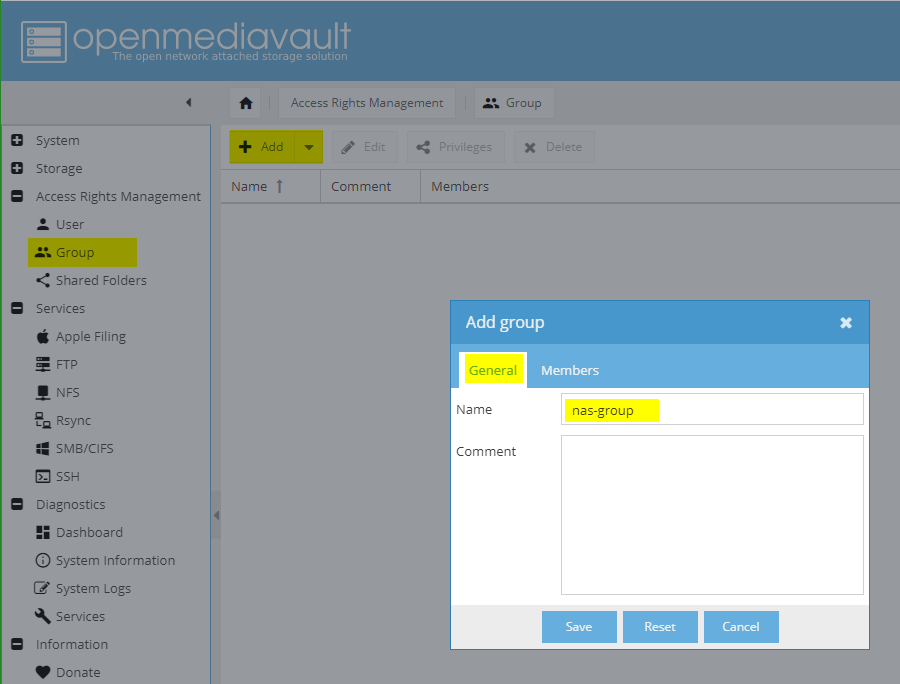
It's easier to manage user groups instead of every user individually.
- Click Add to create a new user group
- Open tab General
- Enter a Name for the user group
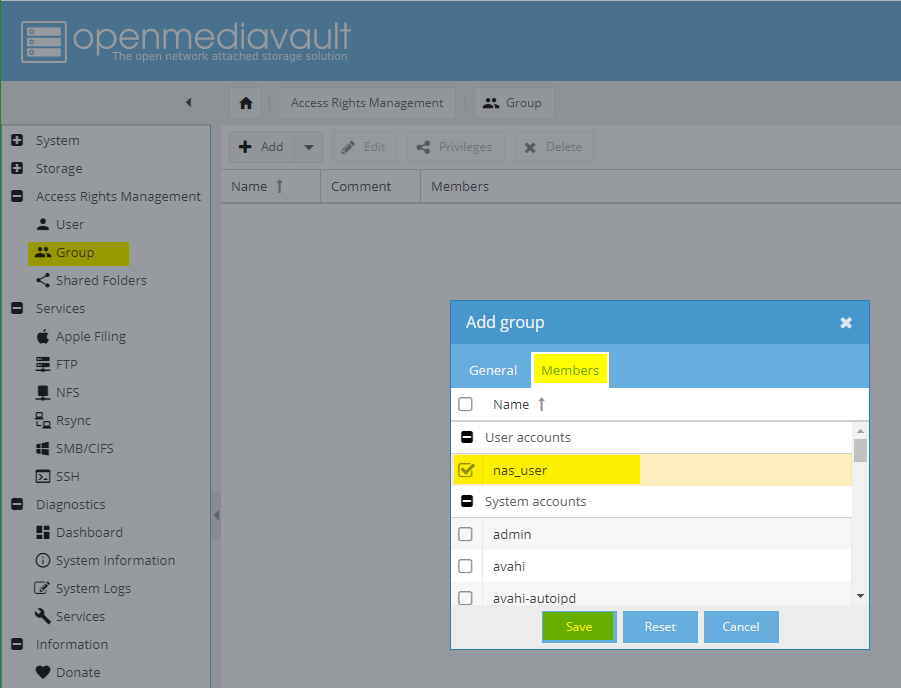
- Open tab Members
- Select the users you want to add to the group (e.g. the one you created)
- Click Save to save
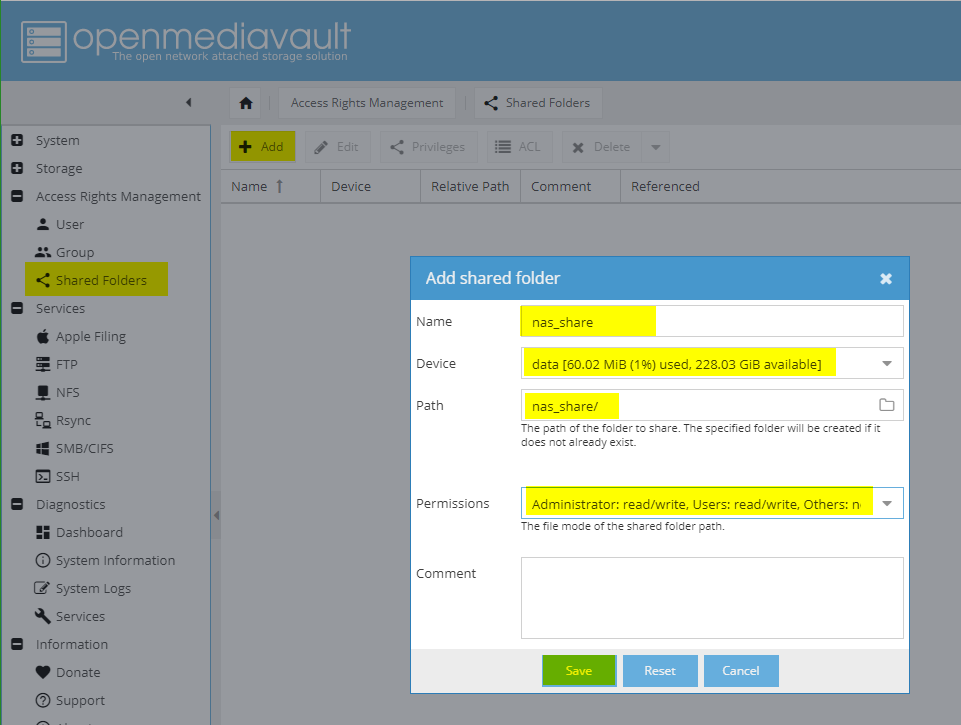
Shared Folders
In order to access the file system of the PiNAS from another machine like a PC shared folders are required.
- Click Add to create new shared folder
- Enter a Name for the new share folder (this name will be connected to other machines)
- Select the Device where the shared folder will be created on (your previously created file system)
- Select or enter the Path of your shared folder
- Set your desired Permissions for this shared folder (more permissions will be set in the next steps)
- Click Save to create the shared folder
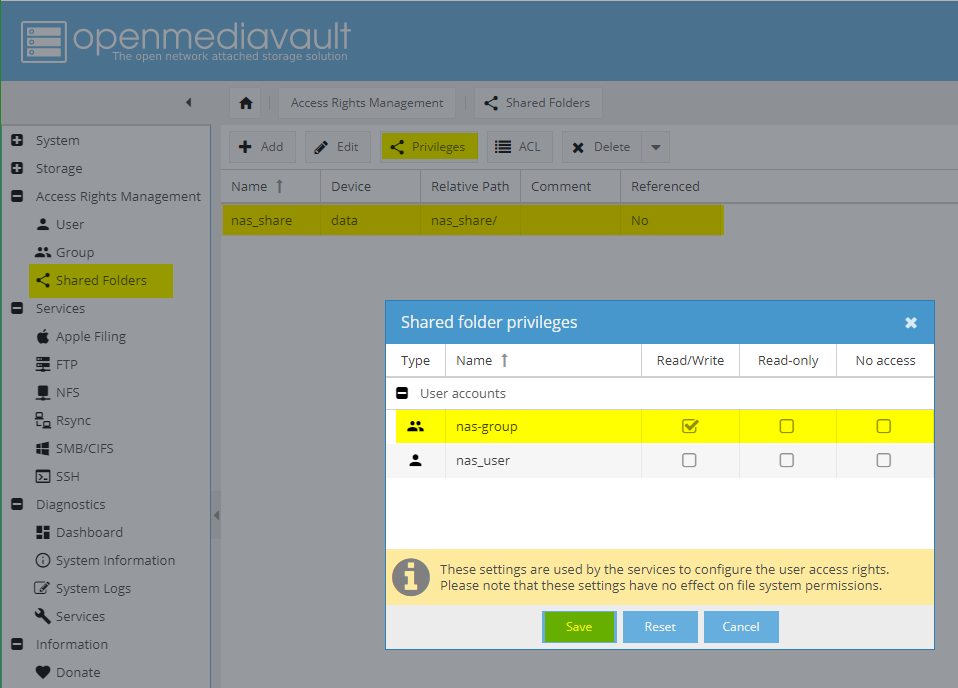
- Click Privileges to set them for users or user groups
- Set your desired privileges to your users or/and groups
- Click Save to save your settings
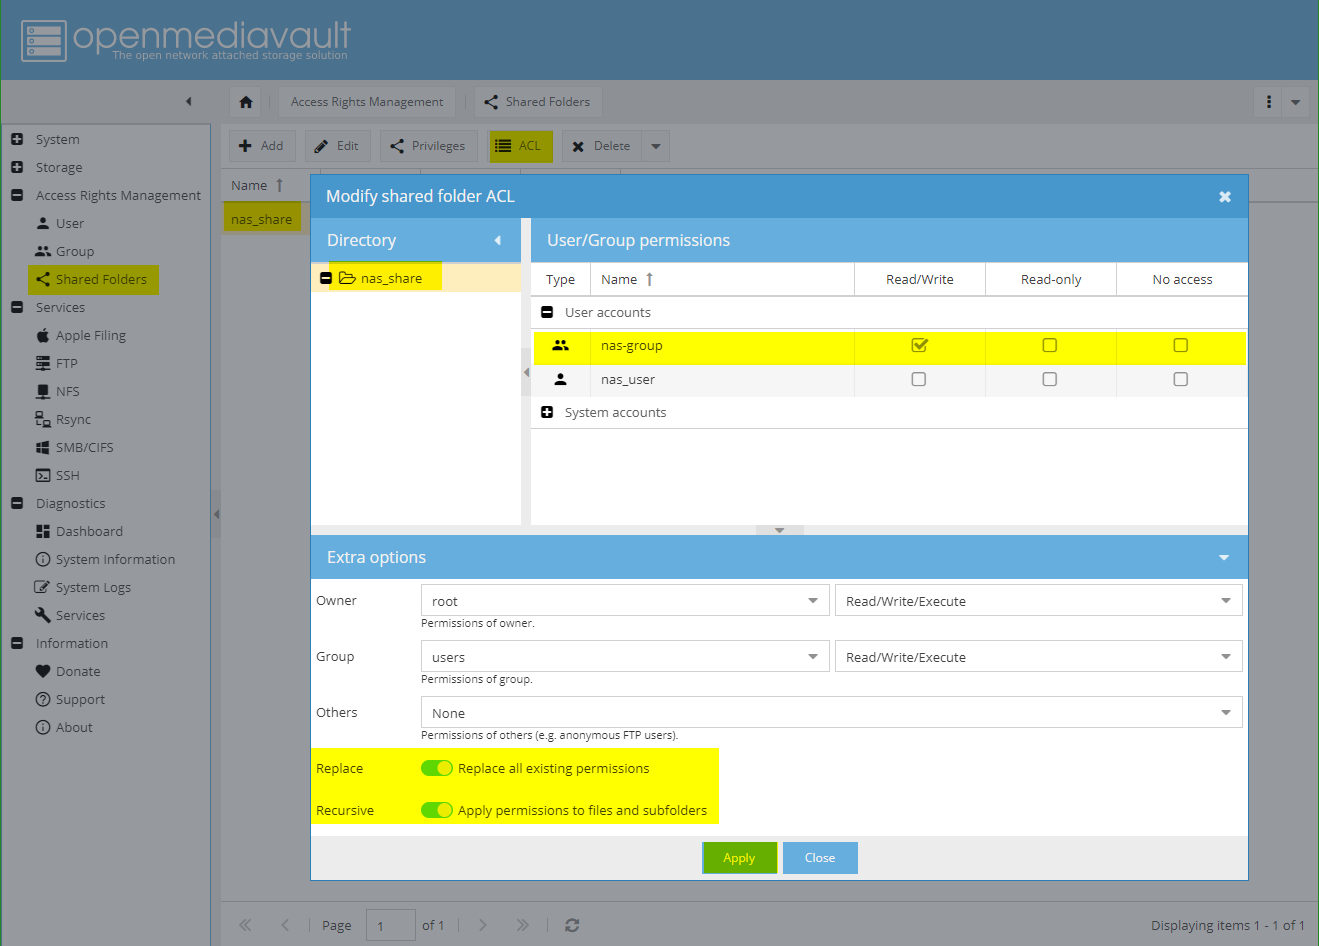
- Click ACL to create a new Access Control List for your shared folder
- Set your desired User/Group permissions (e.g. Read/Write) for your users and groups
- Enable Replace all existing permissions
- Enable Apply permissions to files and subfolders
- Click Apply to create and apply the ACL
Configuring OMV: Services
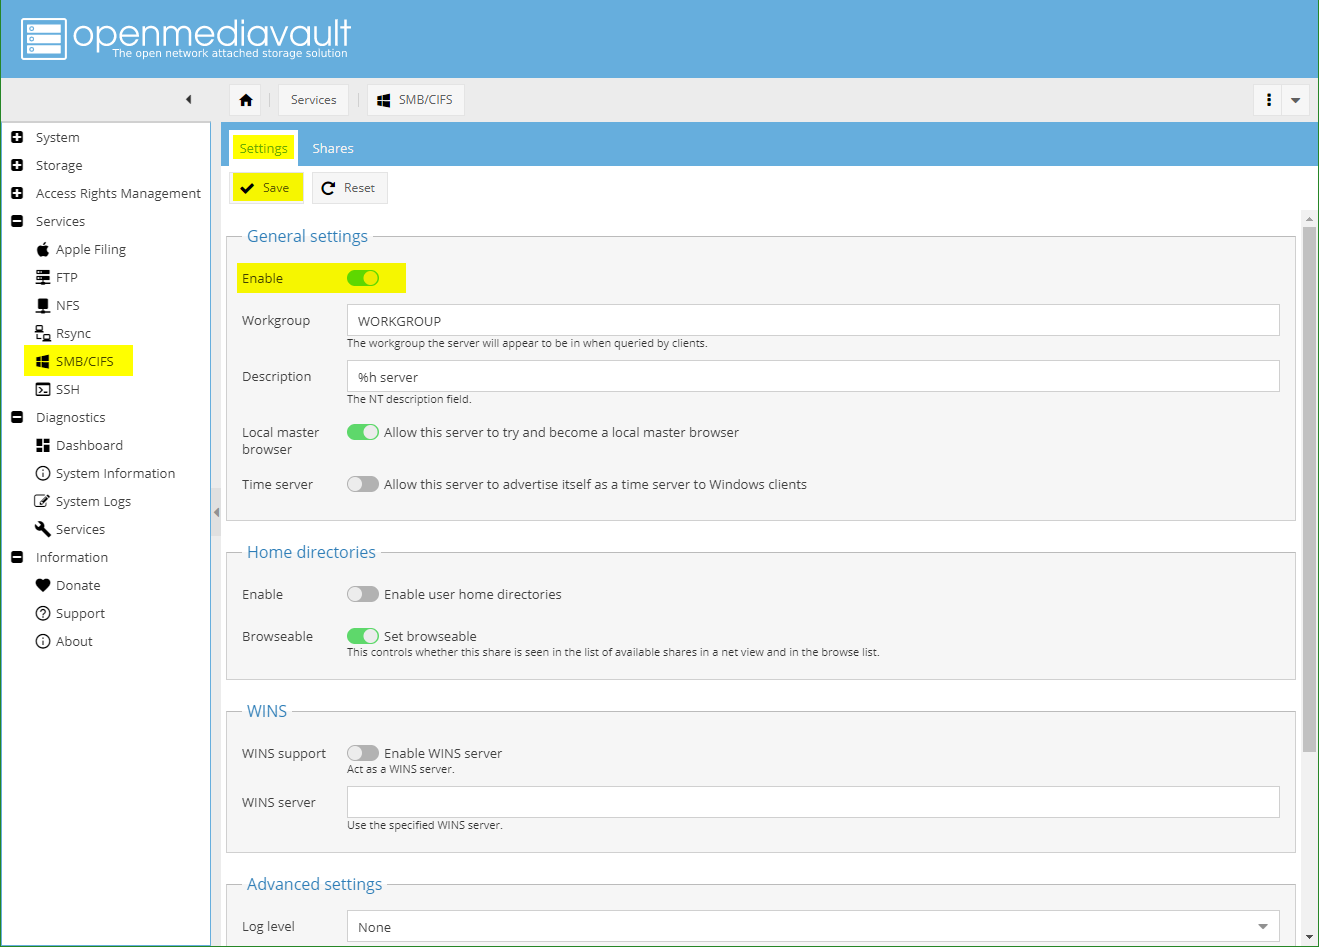
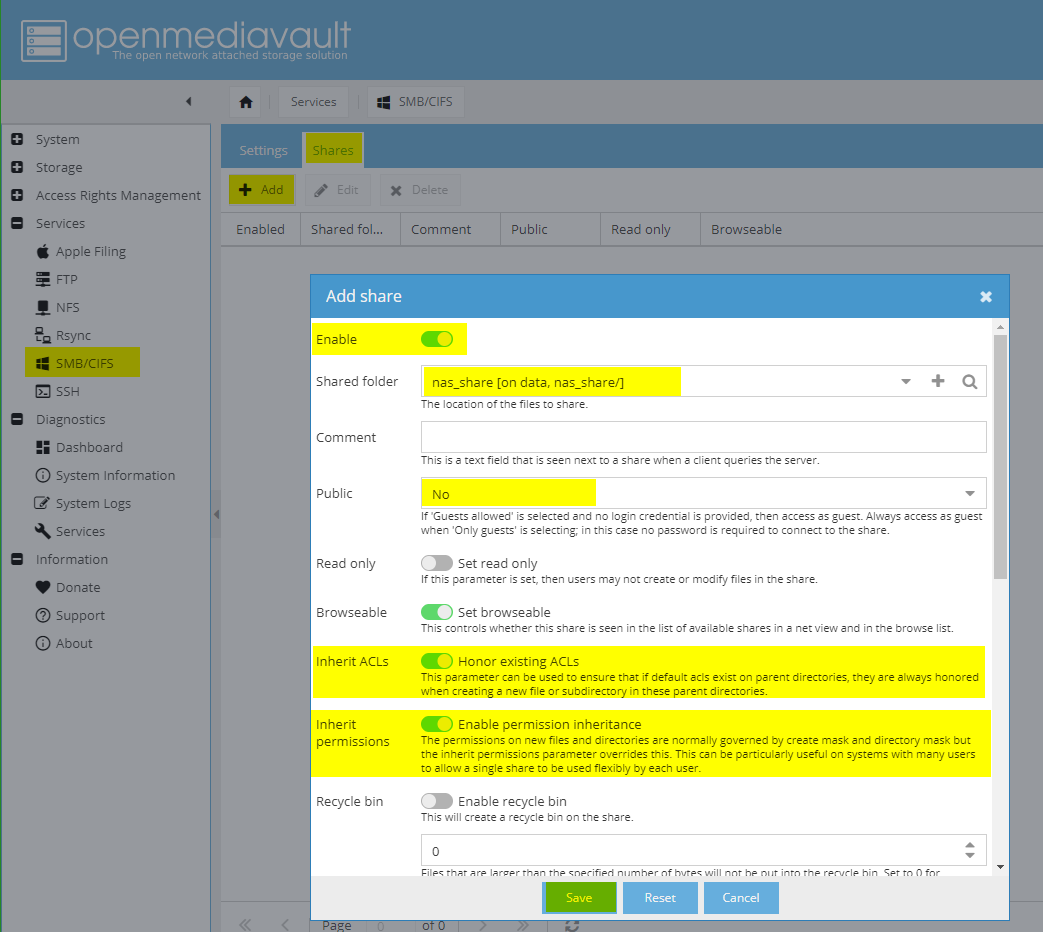
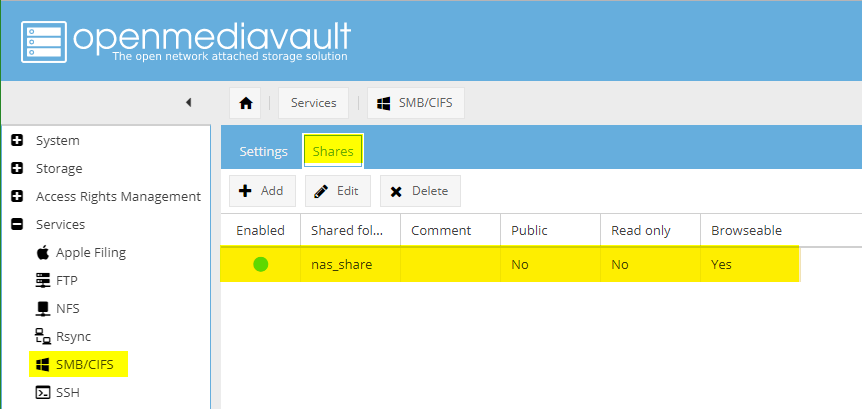
This part describes how a SMB share (mainly used in Windows environments) will be created and used. Open Media Vault gives you a lot more possibilities to present your PiNAS to other devices in your network.
SMB/CIFS
- Open tab Settings
- Enable SMB/CIFS
- Open tab Shares click Add to create a new SMB share
- Enable the new share
- Select a shared folder (the one you created before)
- Select if the share will be Public (visibly listed by PiNAS)
- Enable Honor existing ACLs (inherit ACLs)
- Enable permission inheritance
- Click Save to create the new SMB share
Using the NAS
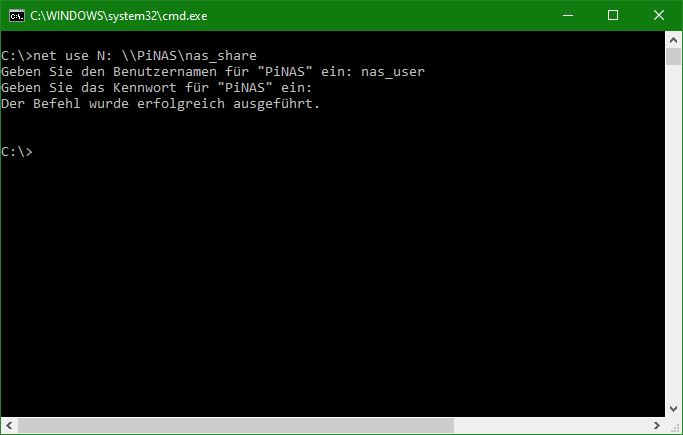
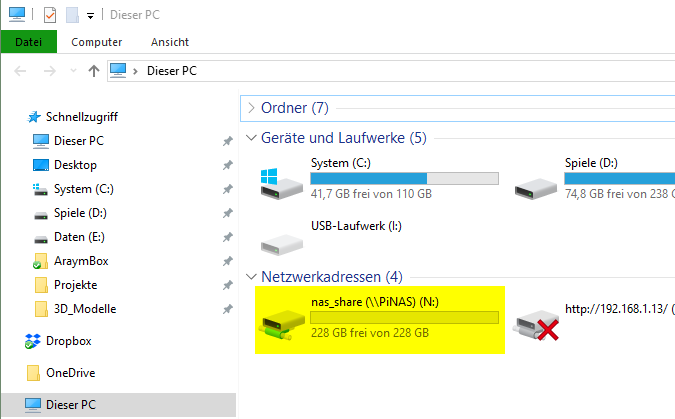
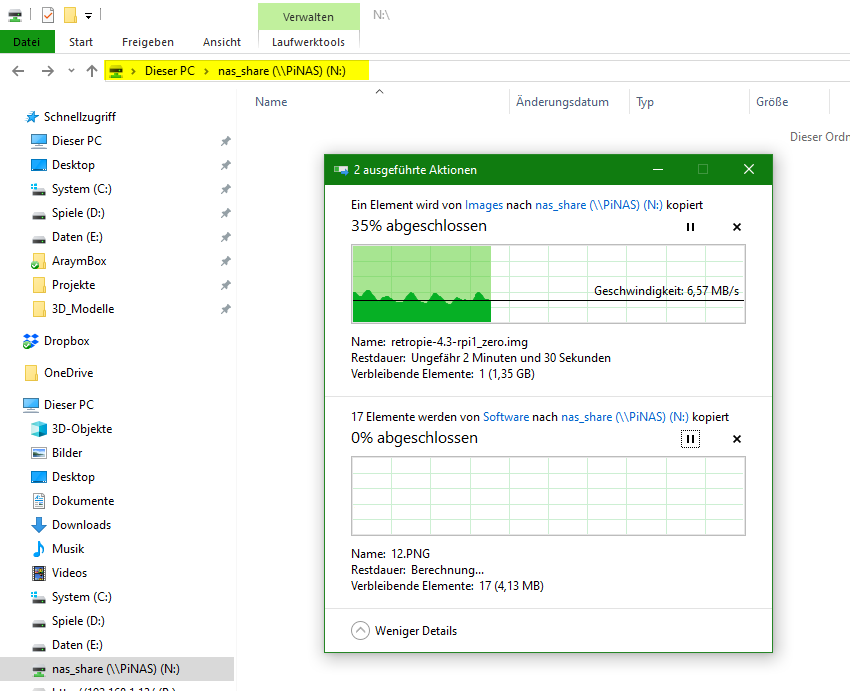
Now PiNAS is ready for your data.
Connect the PiNAS share to your PC:
- Press the Windows Button on your keyboard, type cmd and press Enter. A Windows command prompt should pop up.
- Type the following command to connect the PiNAS share:
net use N: \\PiNAS\nas_share
- The command prompt should now ask you for a username to authenticate with. Enter the PiNAS username nas_user.
- Now the command prompt wants the password for nas_user - type it in and hit Enter.
- The command prompt should say something like The command completed successfully.
Write Data:
- When you open Windows Explorer you should now see the new group Network Location.
- In this group all your mapped network folders are listed - just like the connected nas_share.
- Now you can drag and drop data to this drive and back it up on the two mirrored disks of the PiNAS.
Final Step
Congratulations:
- Congratulations you've build your own Raspberry Pi powered Network Attached Storage.
- Have fun backing up your data or messing around with this type of technology.
- Show some love, comment, share and have a nice day.
- You can also tip me on thingiverse if you feel to.
Change History
04-FEB-2020:
- Published.