PiEyeR Enhanced Thermal Camera
by rgrokett in Circuits > Raspberry Pi
24718 Views, 199 Favorites, 0 Comments
PiEyeR Enhanced Thermal Camera
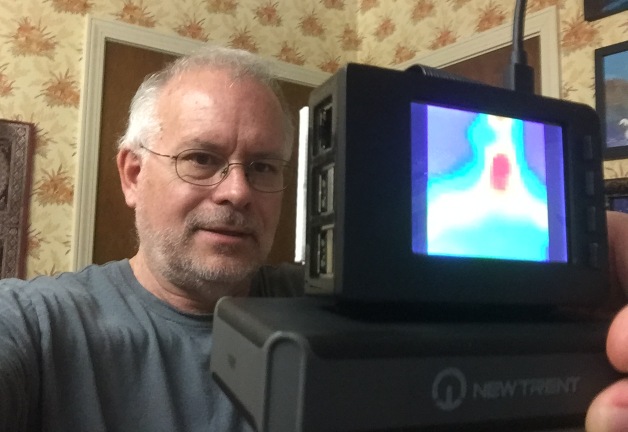
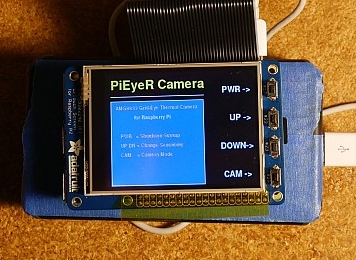
Overview
The Adafruit AMG8833 IR Thermal Camera board can provide a “FLIR™”-like Far Infrared imaging camera at about 1/10th the price of previous Far IR Thermal imaging units. Of course, the resolution and sensitivity are not as high as more advanced cameras, but hey, for $39 it’s a great deal.
With this project, I took the excellent Adafruit tutorial Raspberry Pi Thermal Camera by Dean Miller and added extra functionality to the software and hardware.
New Features:
- Safely shutdown/power up Raspberry
- Automatically runs software at powerup
- Battery Powered for portability
- Uses PiTFT GPIO buttons
- Sensitivity controls
- Potential for future additions
Note that IR Thermal Cameras are NOT the same as NOIR cameras. The former uses only the heat given off by the object being imaged, while the latter requires an infrared light source such as IR LEDs (or the Sun) to illuminate the object.
Hardware & Software
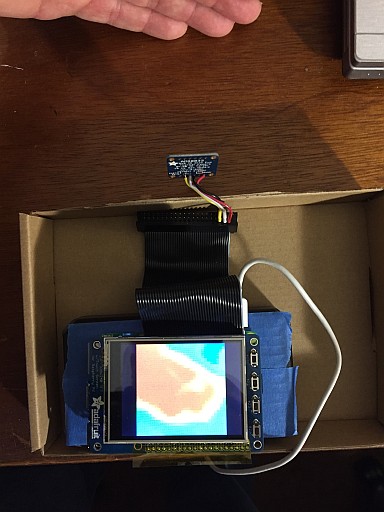
- Raspberry Pi 3 (note: a Pi Zero can be used, but see the Pi Zero instructions here.)
- Adafruit AMG8833 IR Thermal Camera Breakout
- Adafruit PiTFT Plus Assembled 320x240 2.8" TFT + Resistive Touchscreen
- Adafruit Faceplate and Plastic Case for piTFT and RaspberryPi 3
- Adafruit 40 Pin GPIO Cable
- Adafruit 2X20 Pin IDC Box Header
- 5V USB Battery (such as external cellphone rechargeable) 3000mah or larger
- 4GB or larger micro SD card for Raspberry
- Wire, connectors, etc. to match your connections
- Custom Raspbian Jessie Lite for PiTFT (described below)
- Adafruit Libraries for PiTFT and AMG8833 (described below)
- SSH & Putty for Windows
- RaspiThermalCam from Github: https://github.com/rgrokett/RaspiThermalCam
Preliminary Setup
NOTE: If you already have set up a Raspberry Pi with an Adafruit PiTFT Plus 320x240 screen and AMG8833 Thermal Camera module as shown in the Adafruit Tutorial (https://learn.adafruit.com/adafruit-pitft-28-inch-resistive-touchscreen-display-raspberry-pi/easy-install) then you can skip to the RaspiThermalCam Software in section II. below. Otherwise, continue to the next step...
Hardware Setup - Install PiTFT Display
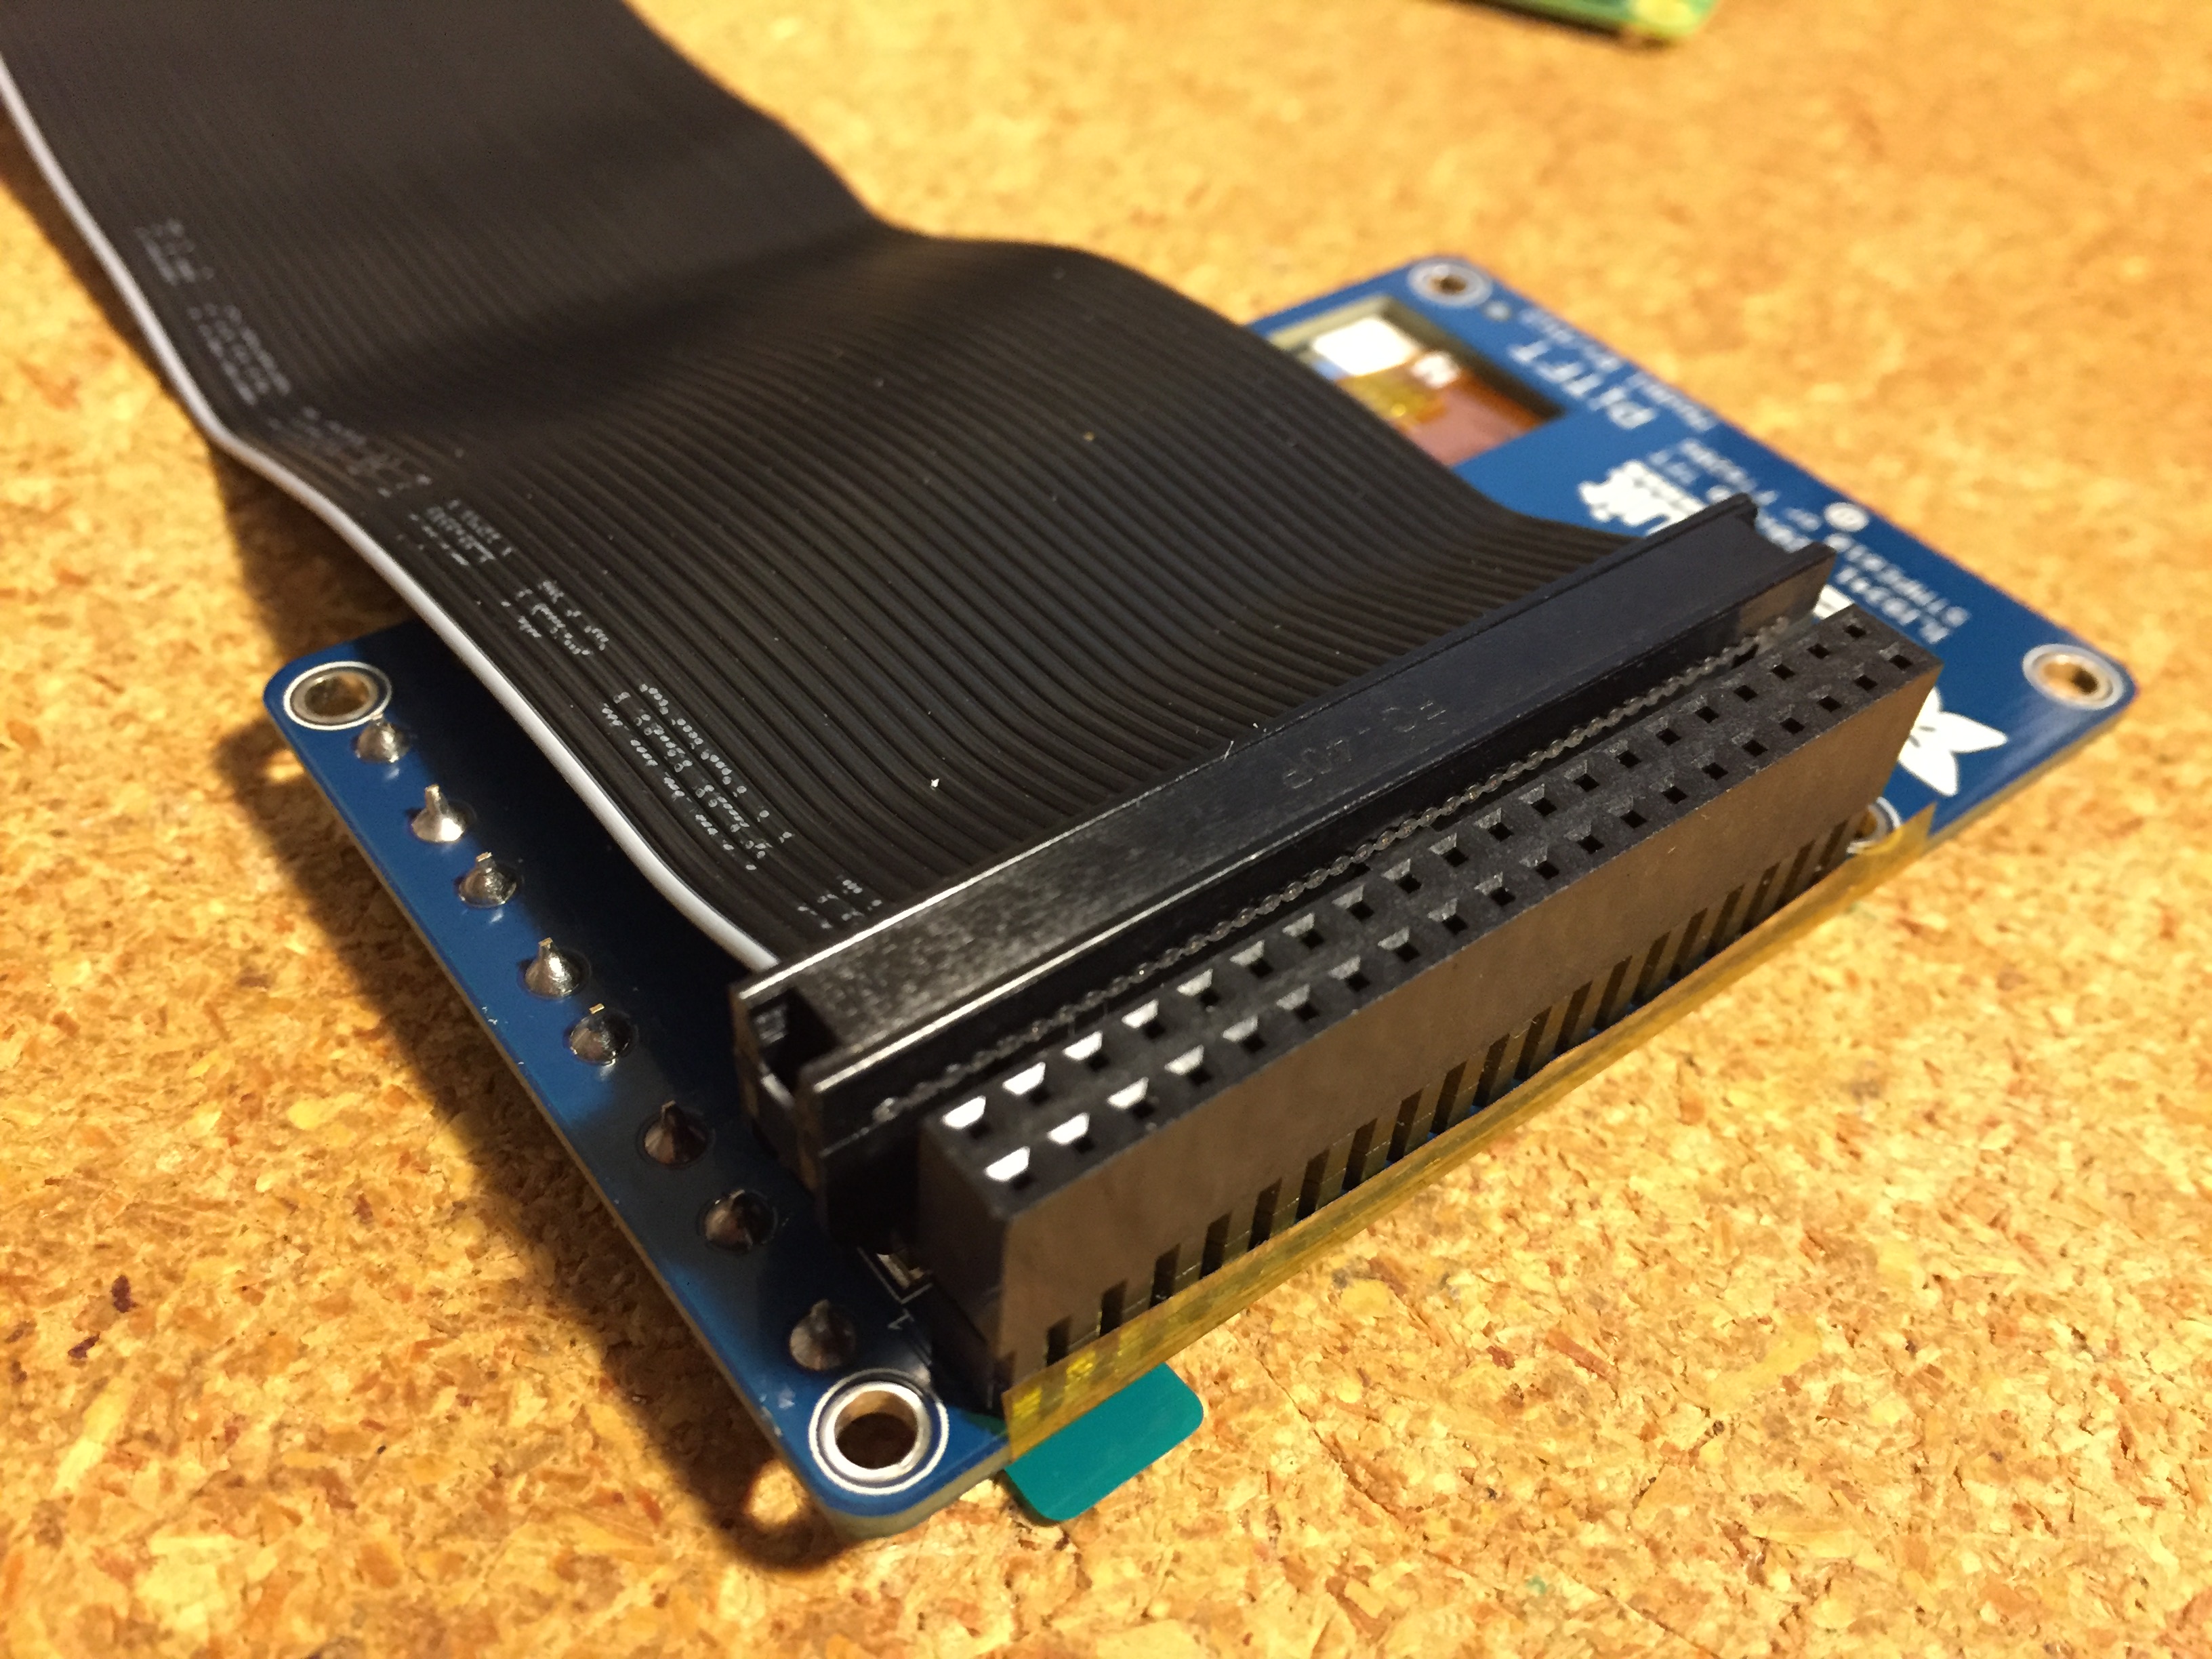
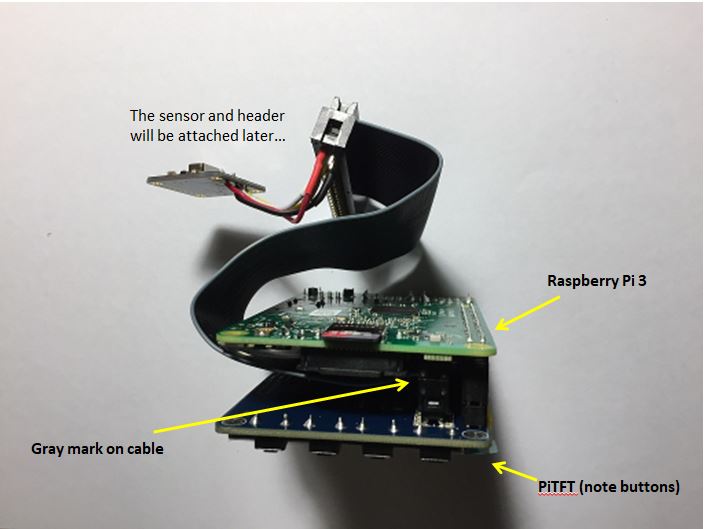
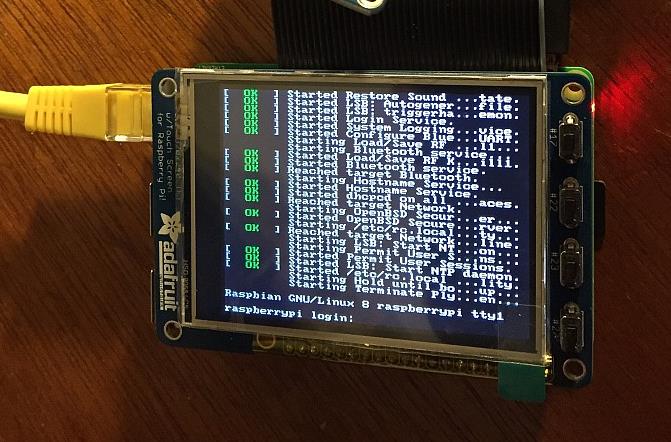
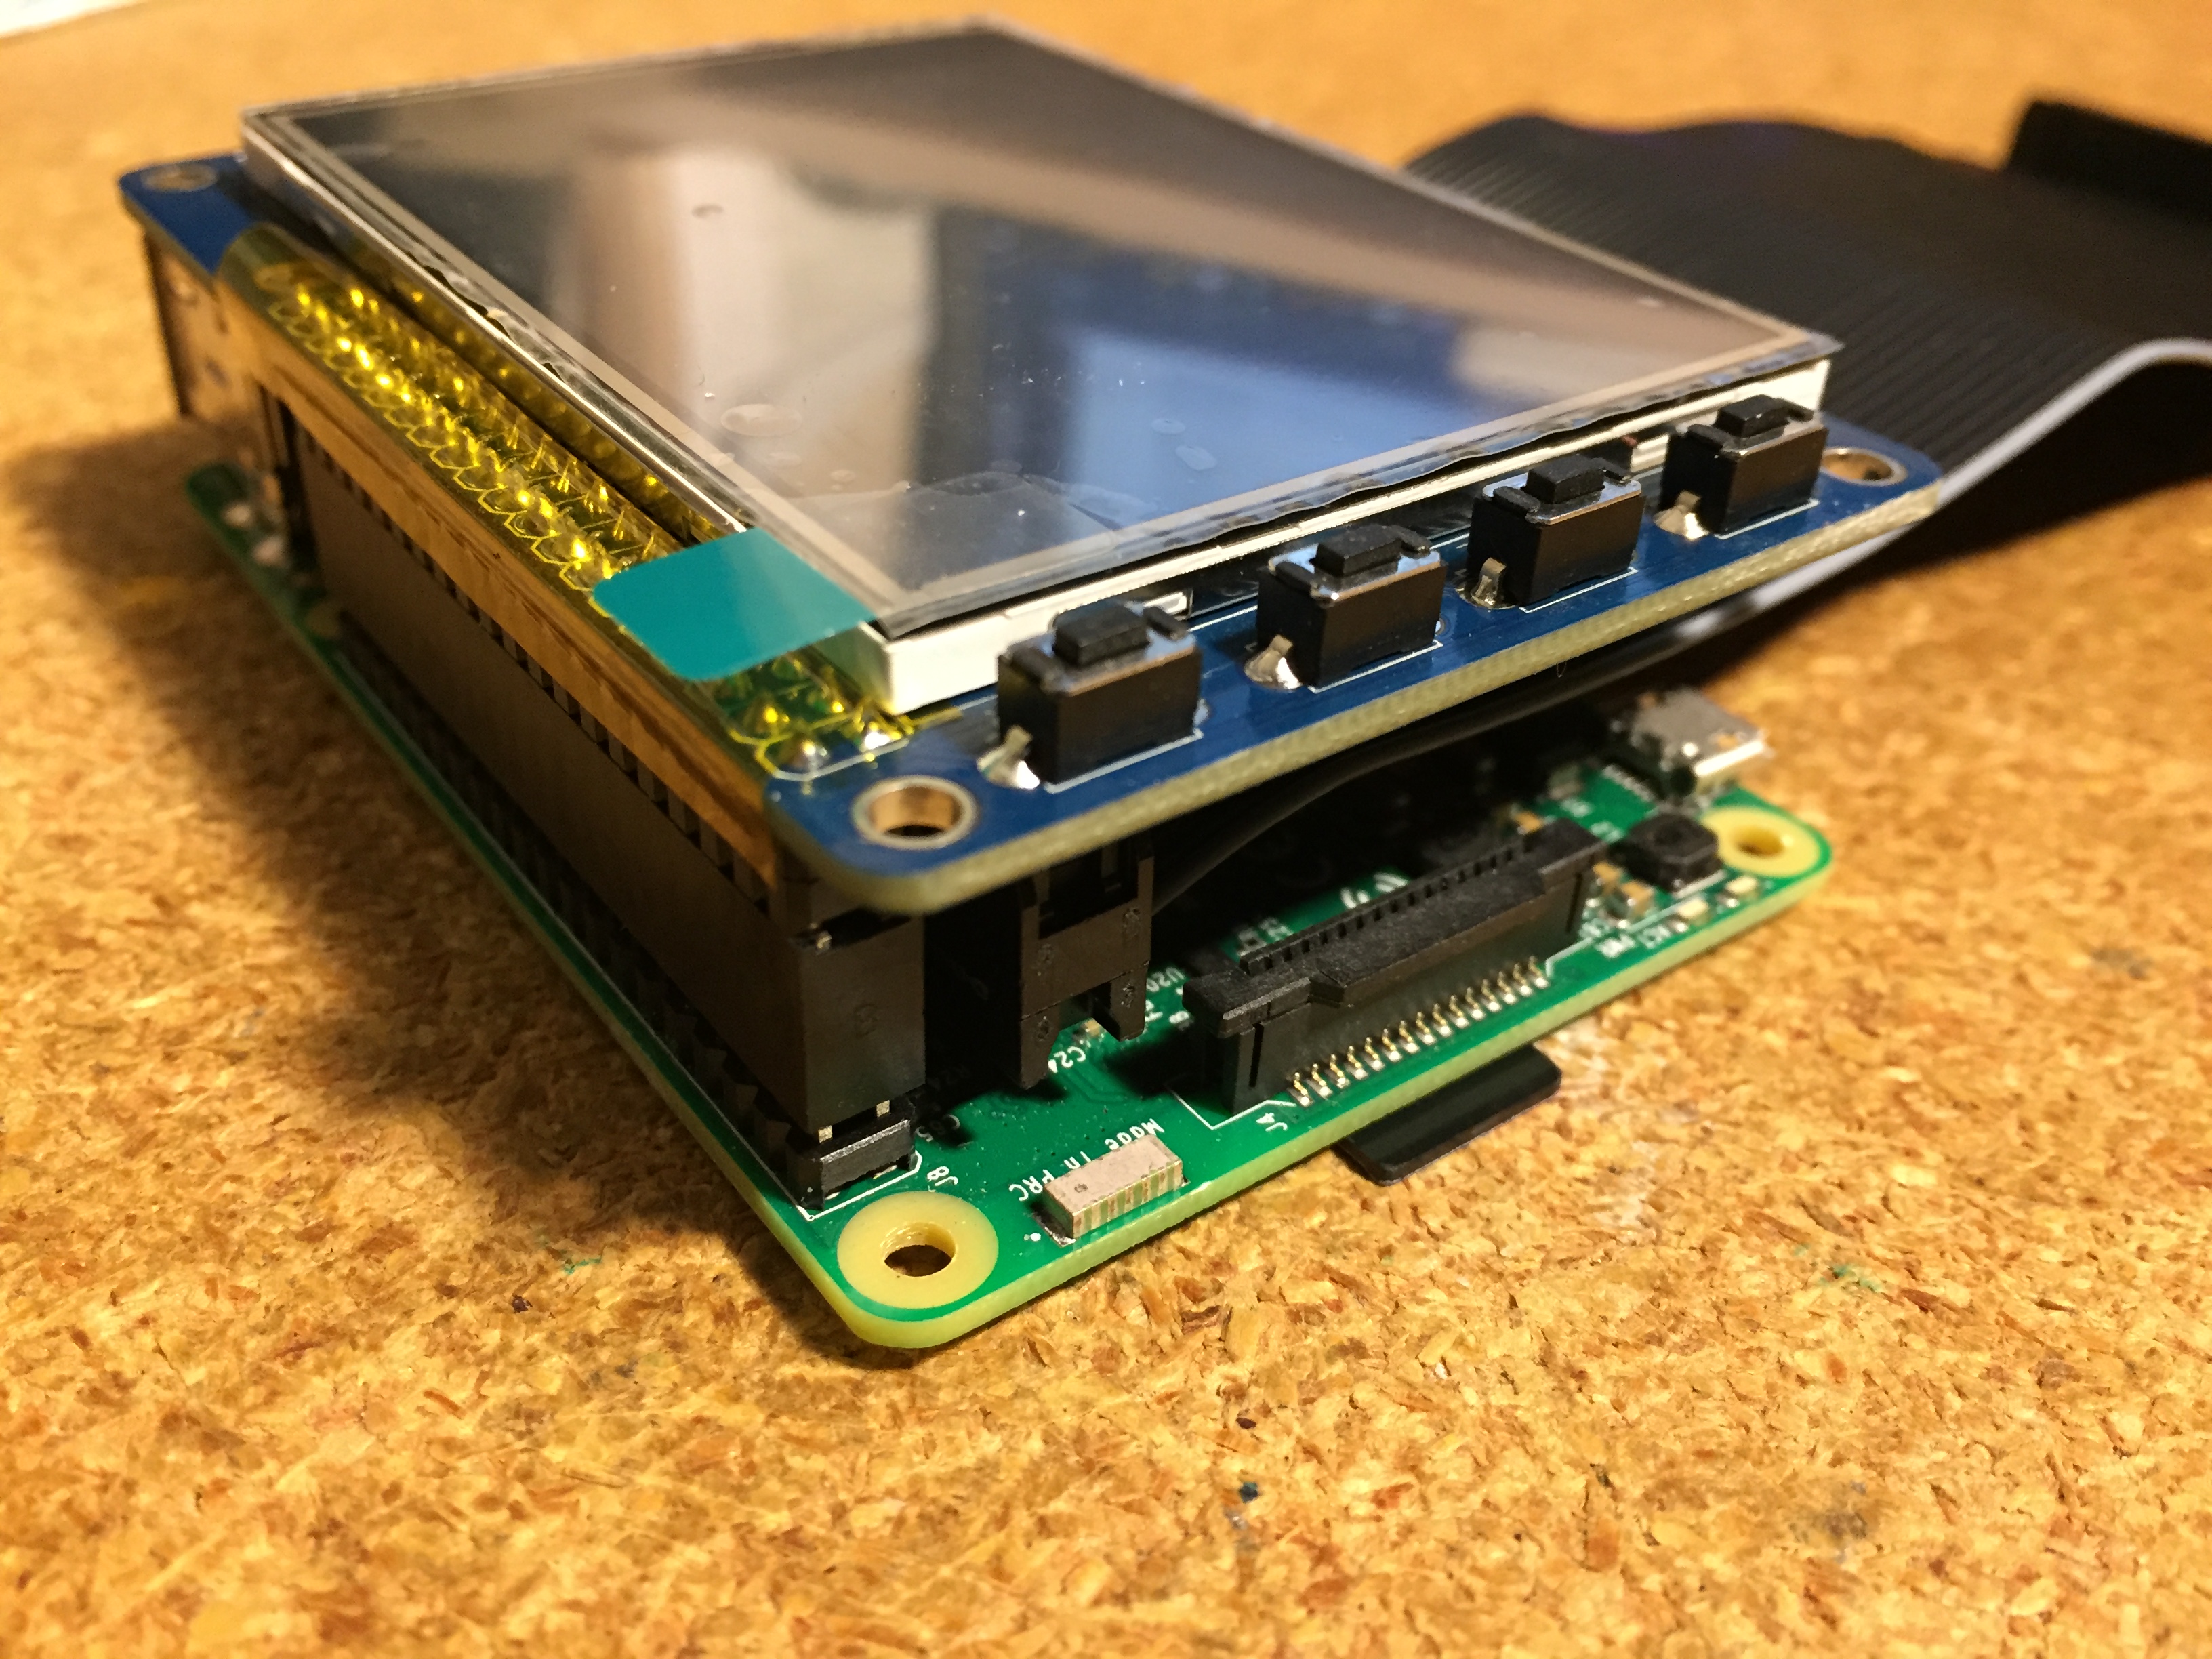
Because the PiTFT Resistive Touch screen requires modifications to the Raspbian kernel, it is STRONGLY suggested to start fresh with the pre-built Raspbian Jessie image from Adafruit. This already contains all the necessary drivers for the PiTFT screen.
Note that this is going to be a “headless” installation, thus will not be using the Raspbian GUI. You will be using the linux command-line to configure and program the Raspberry. The easiest way to access is to set up SSH and WiFi or Ethernet connectivity and use a remote terminal program like Putty.
The below instructions are taken from Adafruit PiTFT tutorial at the URL below. If you have difficulties or want to see the full instructions please visit the Adafruit tutorial FAQ.
PiTFT Installation Steps
1) Download the piTFT Raspian Jessie Lite from Adafruit to a PC:
https://s3.amazonaws.com/adafruit-raspberry-pi/201...
2) Install this image on a 4GB or larger SD card. If you need help here, check out instructions at
https://www.raspberrypi.org/documentation/installa...
3) Insert the micro SD card into the Pi. But do not turn on yet.
4) Before installing the piTFT onto the Pi, plug the 40 pin GPIO Cable into the back of the piTFT.
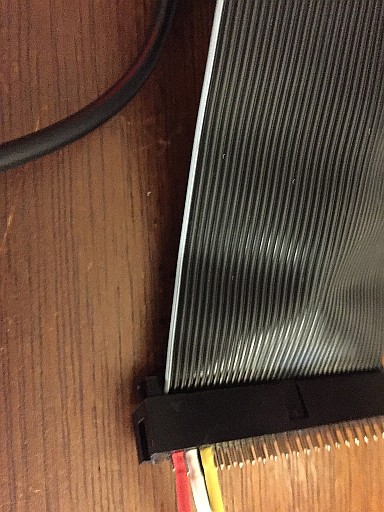
BE SURE to position the GRAY line mark on the cable on PIN 1 of the piTFT male connector. Note that there are two connectors on the PiTFT module; a female connector that plugs into the Raspberry Pi, and a male connector that this cable connects to.
This will be used to connect the Thermal Camera module later.
(Actually, you only need 4 wires to connect the camera, but due to dimensions, it’s easiest to just use this ready-made cable as is.)
5) Now plug in the PiTFT onto the Raspberry Pi itself. Again, look at the photos to see which way it should go. (gray to pin 1)
6) Verify that the GRAY line mark on the GPIO cable is positioned as shown.
Now you are ready to test the PiTFT and Raspberry Pi. (The IR Thermal Sensor will be installed later).
7) Connect a USB keyboard into one of the Raspi ports. (No mouse is needed). This will make it easier to initially log in and find the IP address that is assigned. Otherwise, you’ll need to check your router for the IP assignment.
8) For network connectivity, the easiest is just plug in an Ethernet cable, though you can set up WiFi manually via wpa_supplicant.conf if you prefer.
Note that once the IR camera is completed, you won’t need networking, so wifi isn’t needed.
9) Connect 5V power and let your pi boot. If all goes well, after a few seconds, the PiTFT screen should show boot messages and then a login prompt.
If you do not see any display, verify your connection (bent pins?), power supply and SD card are all good. Also see the Adafruit FAQ
10) Login & passwd are the default “pi” “raspberry”.
11) Locate the IP address using $ ifconfig –a
Now you can remotely log in using SSH Putty using pi@YOUR_IP_ADDRESS
You can unplug the keyboard once you successfully ssh in.
(Remote access is only needed just to make it easier to complete the setup, not for normal use.)
12) Update your package manager: $ sudo apt-get update
IMPORTANT NOTE! Do NOT run “apt-get upgrade” or “rpi-update”!
This would overwrite the custom Adafruit kernel needed to run the PiTFT. If you do, probably easiest is to just start over. Or consult the Adafruit FAQ above.
This Pi will not be accessible from the Internet, so security patches aren’t as critical.
(If paranoid, just turn off WiFi and only use Ethernet cable.)
AMG8833 Image Sensor Setup
The following is excerpted instructions from Adafruit’s Thermal Camera tutorial. Feel free to examine it for more details:
1) Run the following to install the Raspberry Library and Adafruit GPIO
sudo apt-get install -y build-essential python-pip python-dev python-smbus git
git clone https://github.com/adafruit/Adafruit_Python_GPIO.git
cd Adafruit_Python_GPIO
sudo python setup.py install
sudo apt-get install -y python-scipy python-pygame
sudo pip install colour Adafruit_AMG88xx
This installs all the packages and libraries needed to drive the IR Image Sensor.
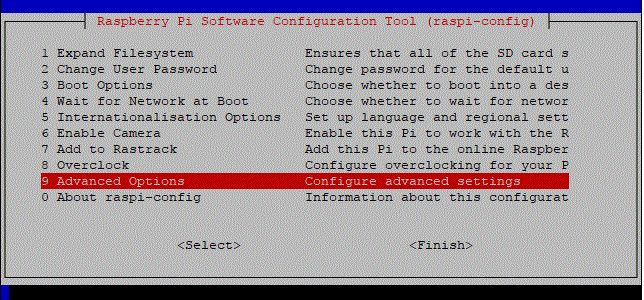
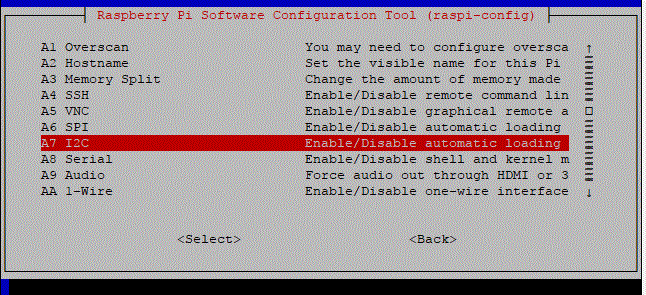
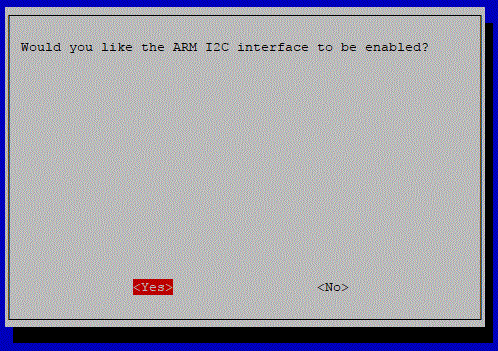
2) Enable the I2C Interface for the IP camera: $ sudo raspi-config
Navigate to 9 Advanced Options and select A7 I2C then select Finish
3) Shutdown Raspi and unplug the power cable (and Ethernet cable, if connected):
$ sudo shutdown -h now
Wiring the IR Module

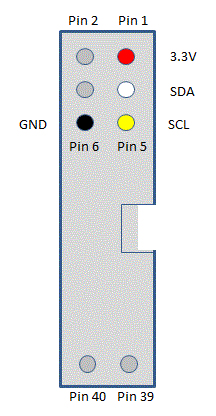
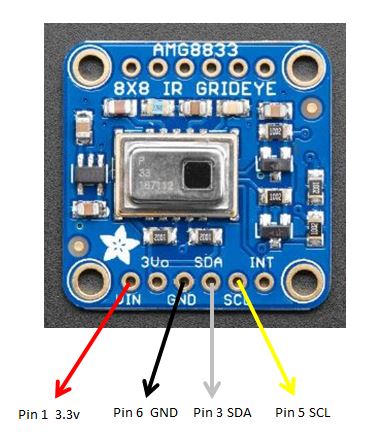
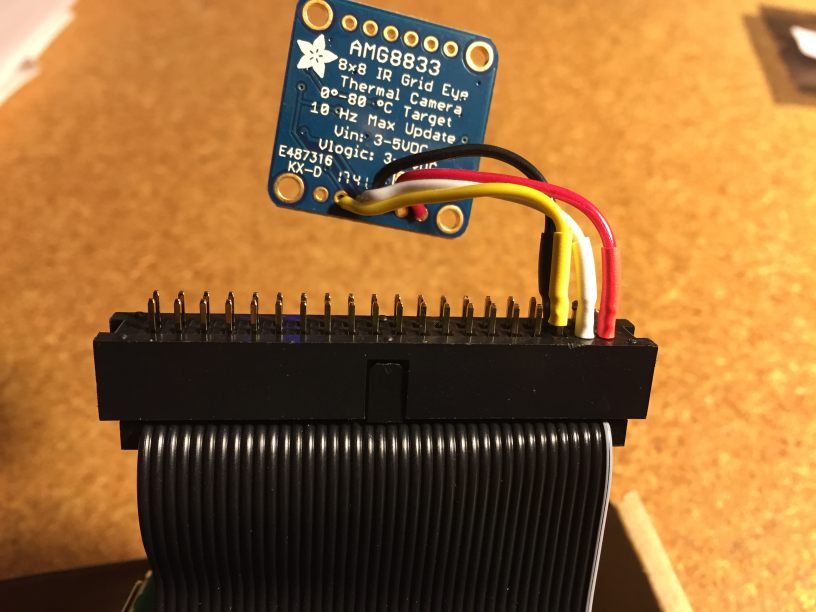
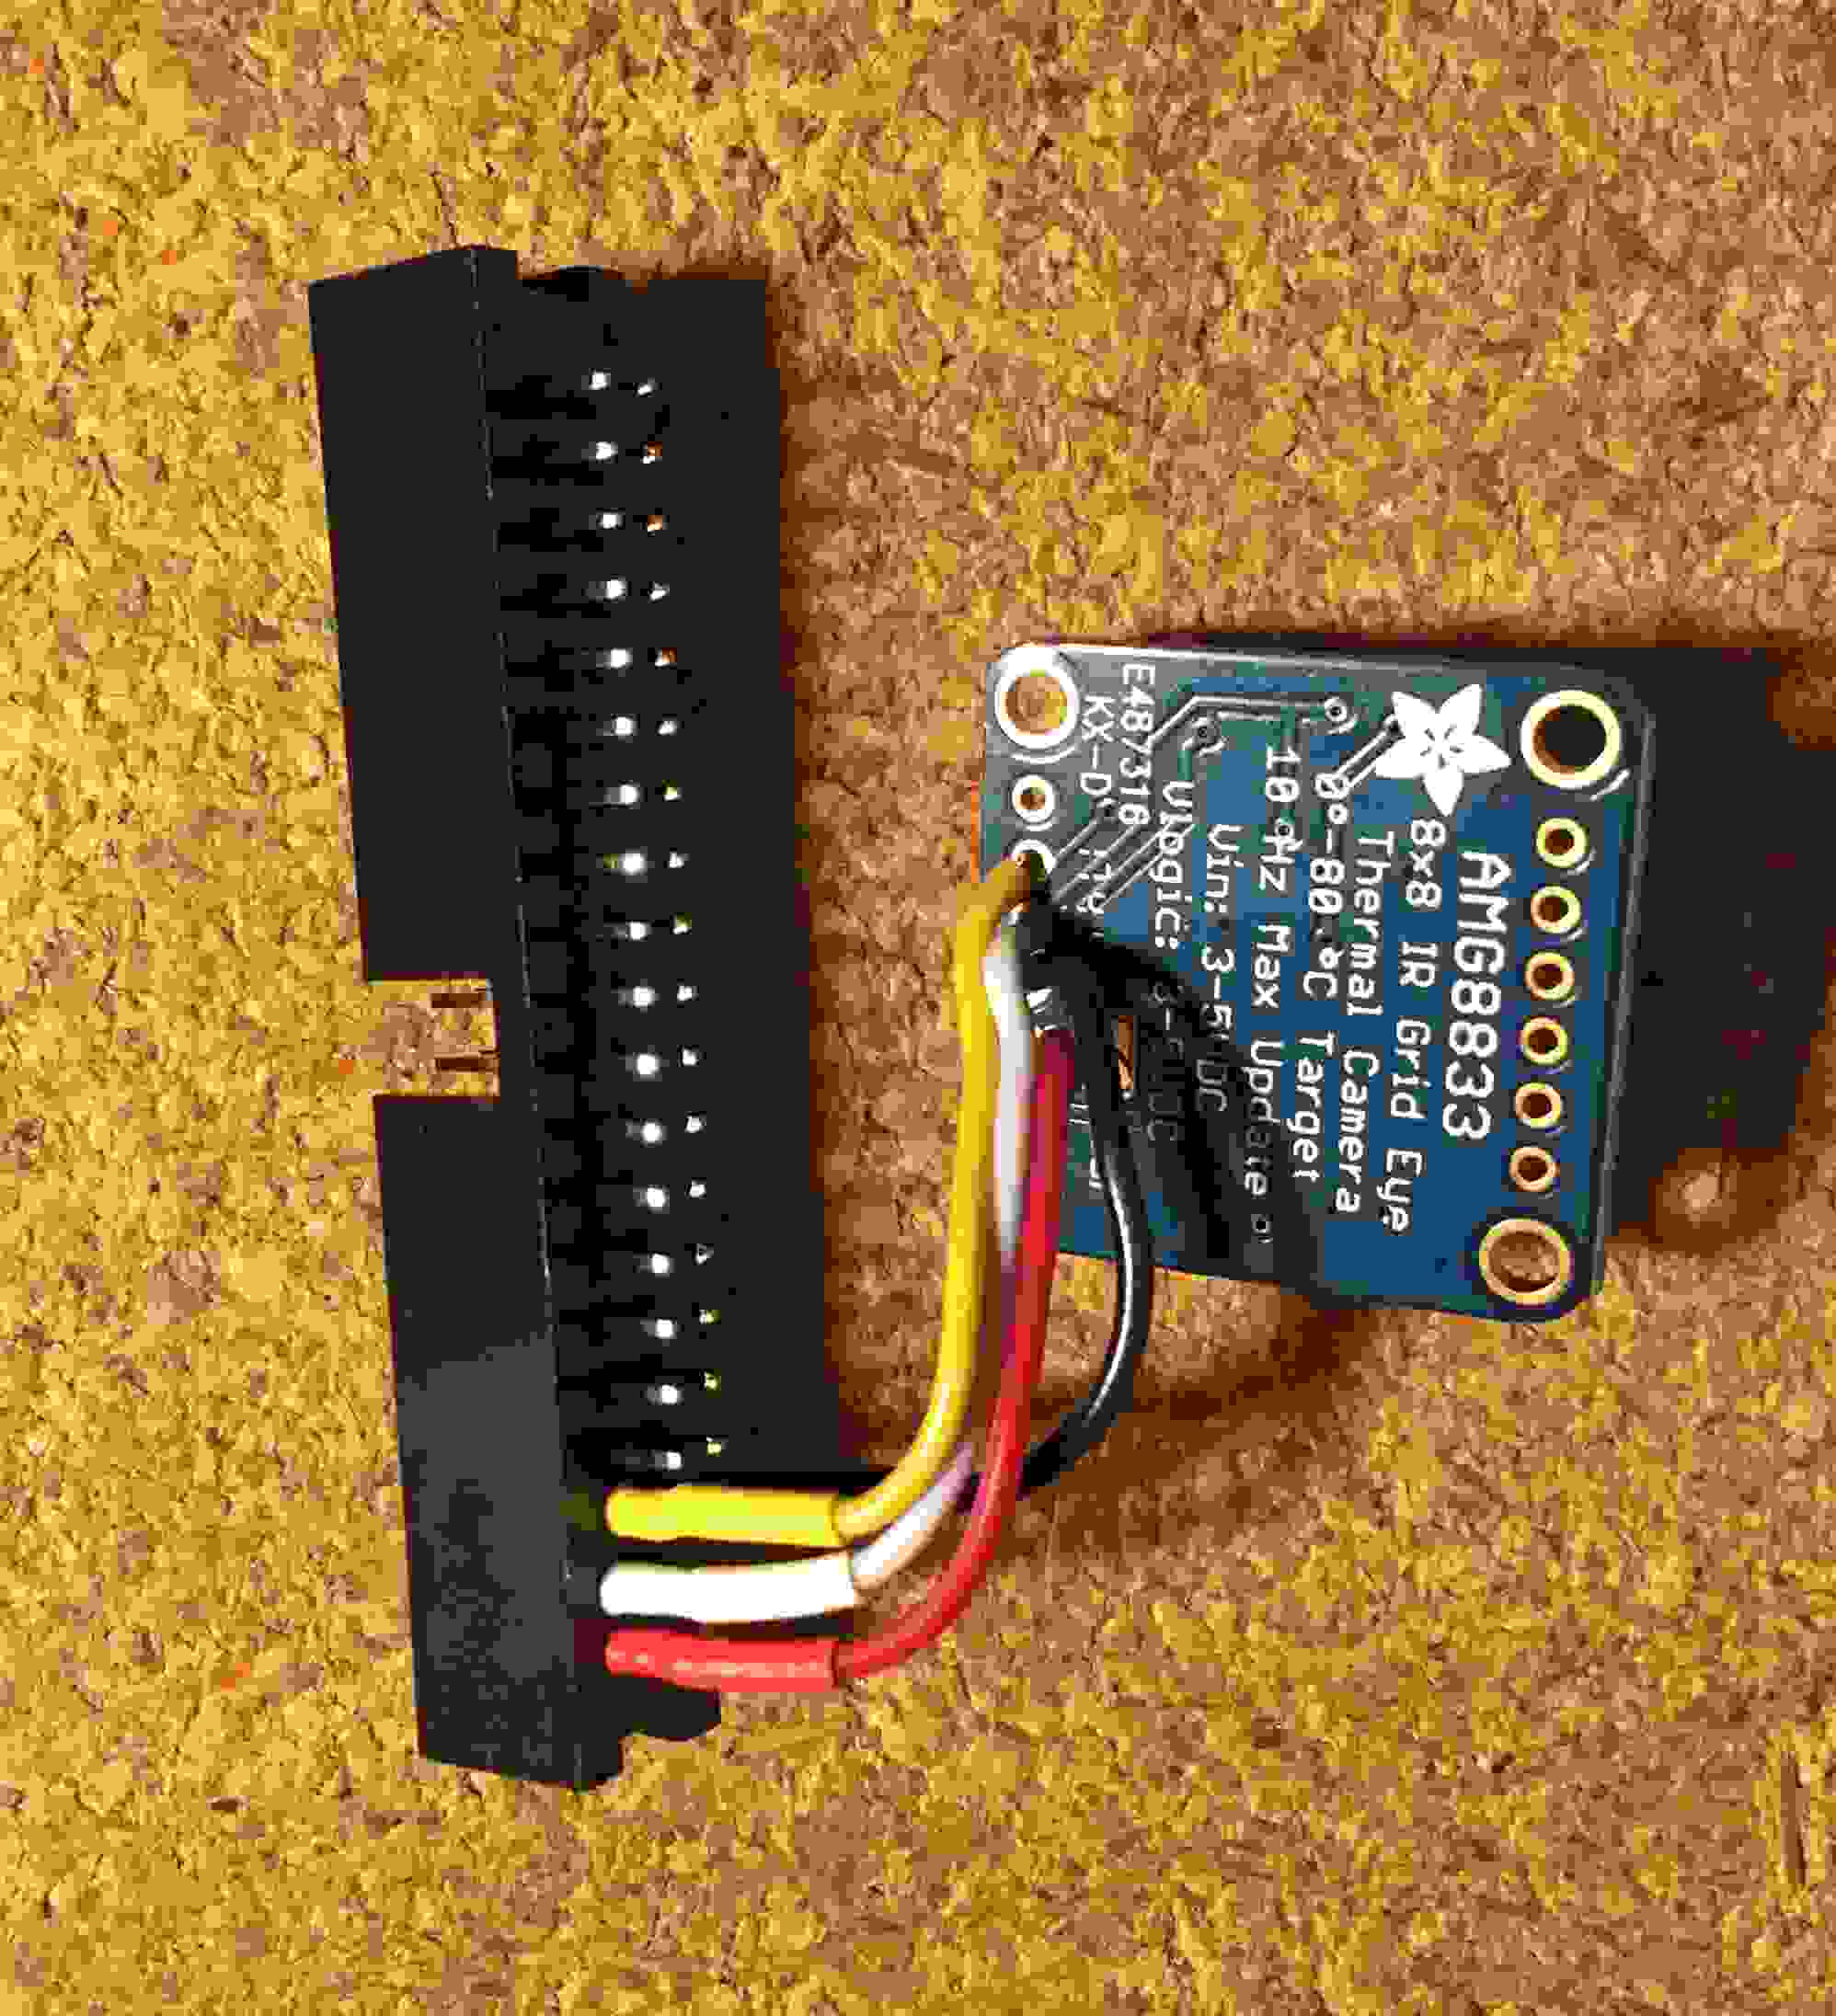
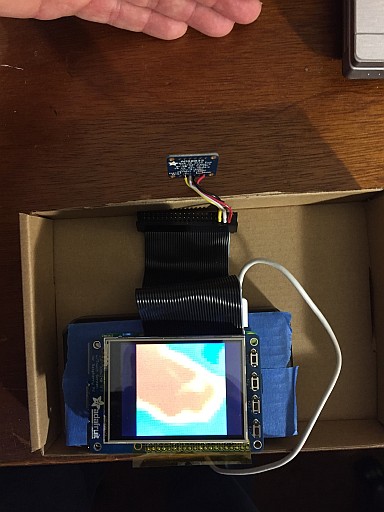
You will be connecting only 4 pins of the AMG8833 IP to the 2x20 IDC Box Header and plugging this into the 40 wire GPIO cable.
For the most reliable wiring connectivity, I suggest soldering 4 short wires to the pins on the IR module and to the 2x20 Header. Use a needle point soldering iron and magnifier for best results. Use heat shrink tubing to protect the connections.
Be sure to note the direction positioning of the Header. There is a cutout key and a tiny arrow marking pin 1. (This is inverted from GPIO diagrams due to the cable/header arrangement)
Also note the direction that the IR camera should be pointing away from the bottom of Raspi.
4) Plug in the Box Header onto the GPIO cable, noting that pin 1 of the header should match the gray marked wire on the cable.
Smoke Test Time (Please no smoking here!)
5) Plug in the 5V power and Ethernet cable again.
6) Log into the Raspberry via SSH (or using the PiTFT screen and keyboard)
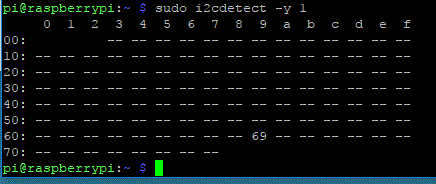
7) Run $ sudo i2cdetect -y 1
You should see the “69” entry. If not, did you enable the I2C interface via raspi-config? Also verify wiring!
8) Run the Example code:
cd ~/
git clone https://github.com/adafruit/Adafruit_AMG88xx_python.git
cd Adafruit_AMG88xx_python/examples
sudo python thermal_cam.py
If all is well, you should see a heat map image when you wave your hand or stand in front of the camera!
Once completed, the camera should be facing forward, like a digital camera:
The LCD screen towards you and camera towards (hot) object.
Part II - RaspiThermalCam Software
(If you had previously used the Adafruit tutorial to set up your Thermal Cam, just jump to here to add the enhancements)
Now that you have a working Raspberry Pi Thermal Camera, the
next step is to add extra software functionality and package everything into a more portable unit.
1) Install GIT, if needed:
$ sudo apt-install git
2) Download the RaspiThermalCam software
$ cd ~/
$ git clone https://github.com/rgrokett/RaspiThermalCam.git
3) Run the Installation script
$ cd RaspiThermalCam
$ ./install.sh
$ sudo reboot
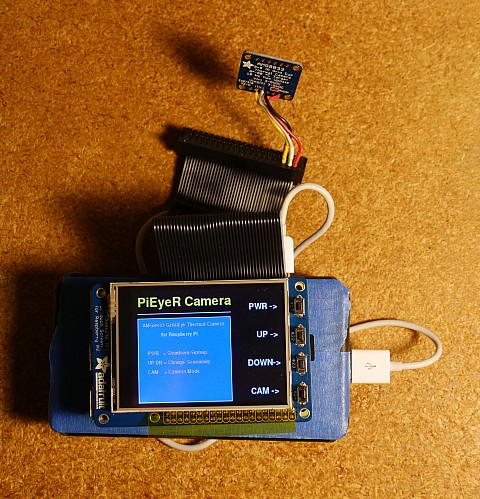
Once rebooted, you should see the new PiEyeR screen.
See Troubleshooting if needed.
The 4 buttons on the TFT screen have been re-mapped to GPIO functions as shown:
Button GPIO Desc
1         17      Safely Shutdown/Start up Raspberry (Does not remove 5V power, must be done usually via the 5V USB battery on/off switch)
2         22      Increase Sensitivity (while in Camera Mode)
3         23      Decrease Sensitivity (while in Camera Mode)
4         27      Start/Stop Camera Mode
(If needed, you can remap the buttons to your TFT screen’s GPIO pins by editing the "raspitherm.py" program.)
3D Printed Case
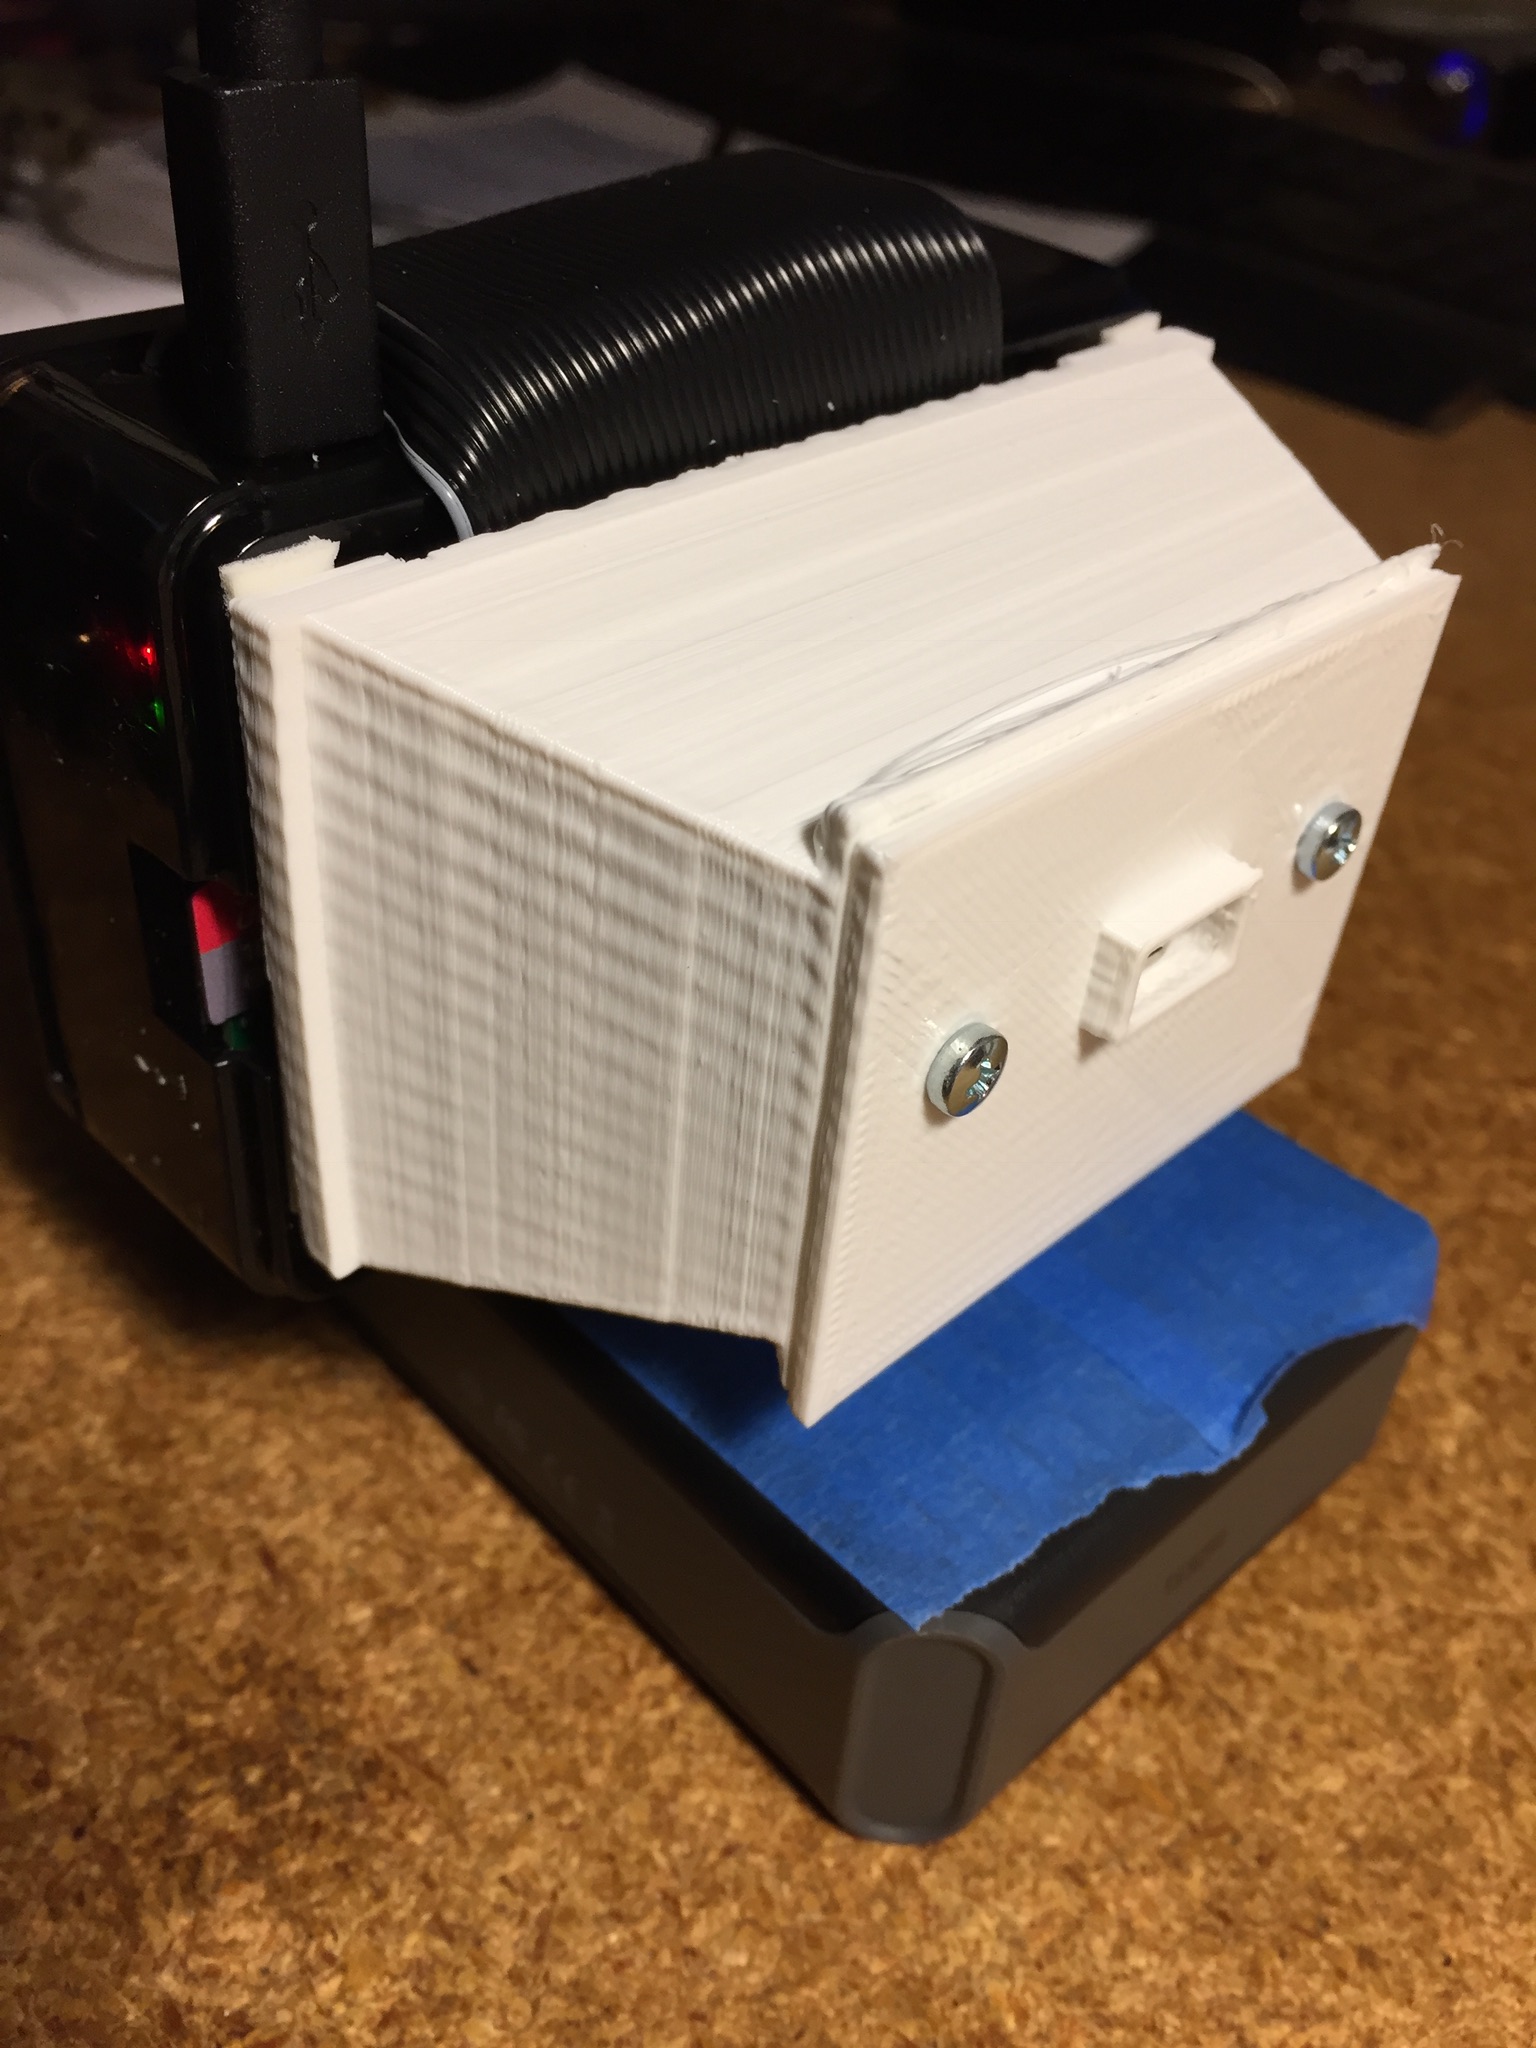
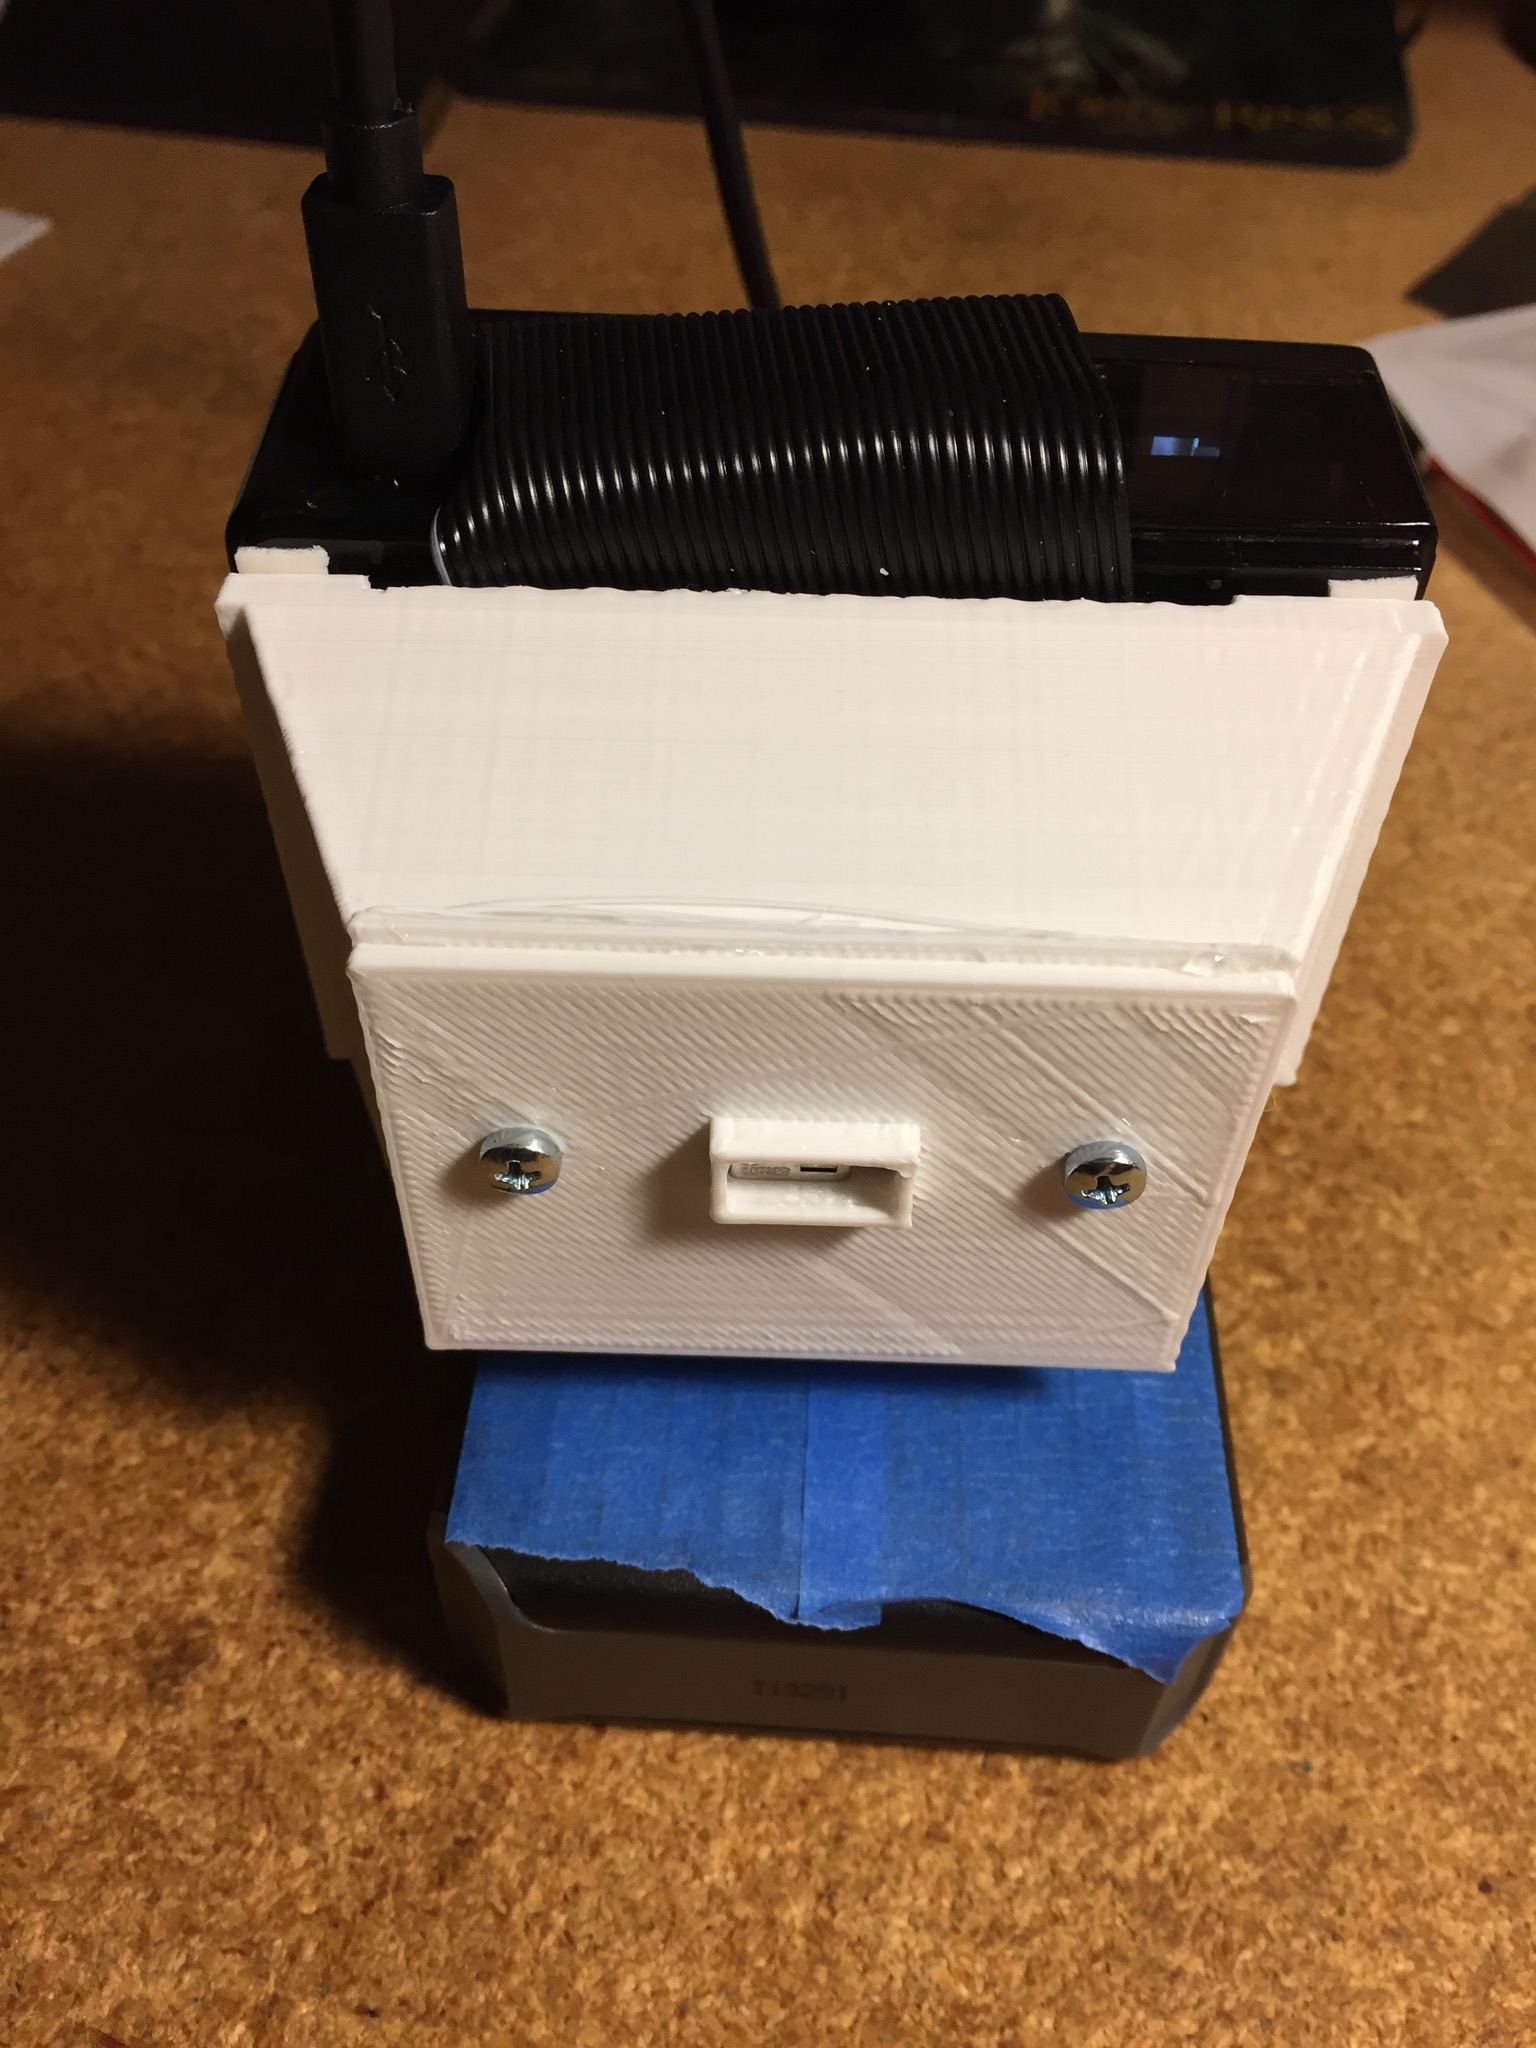
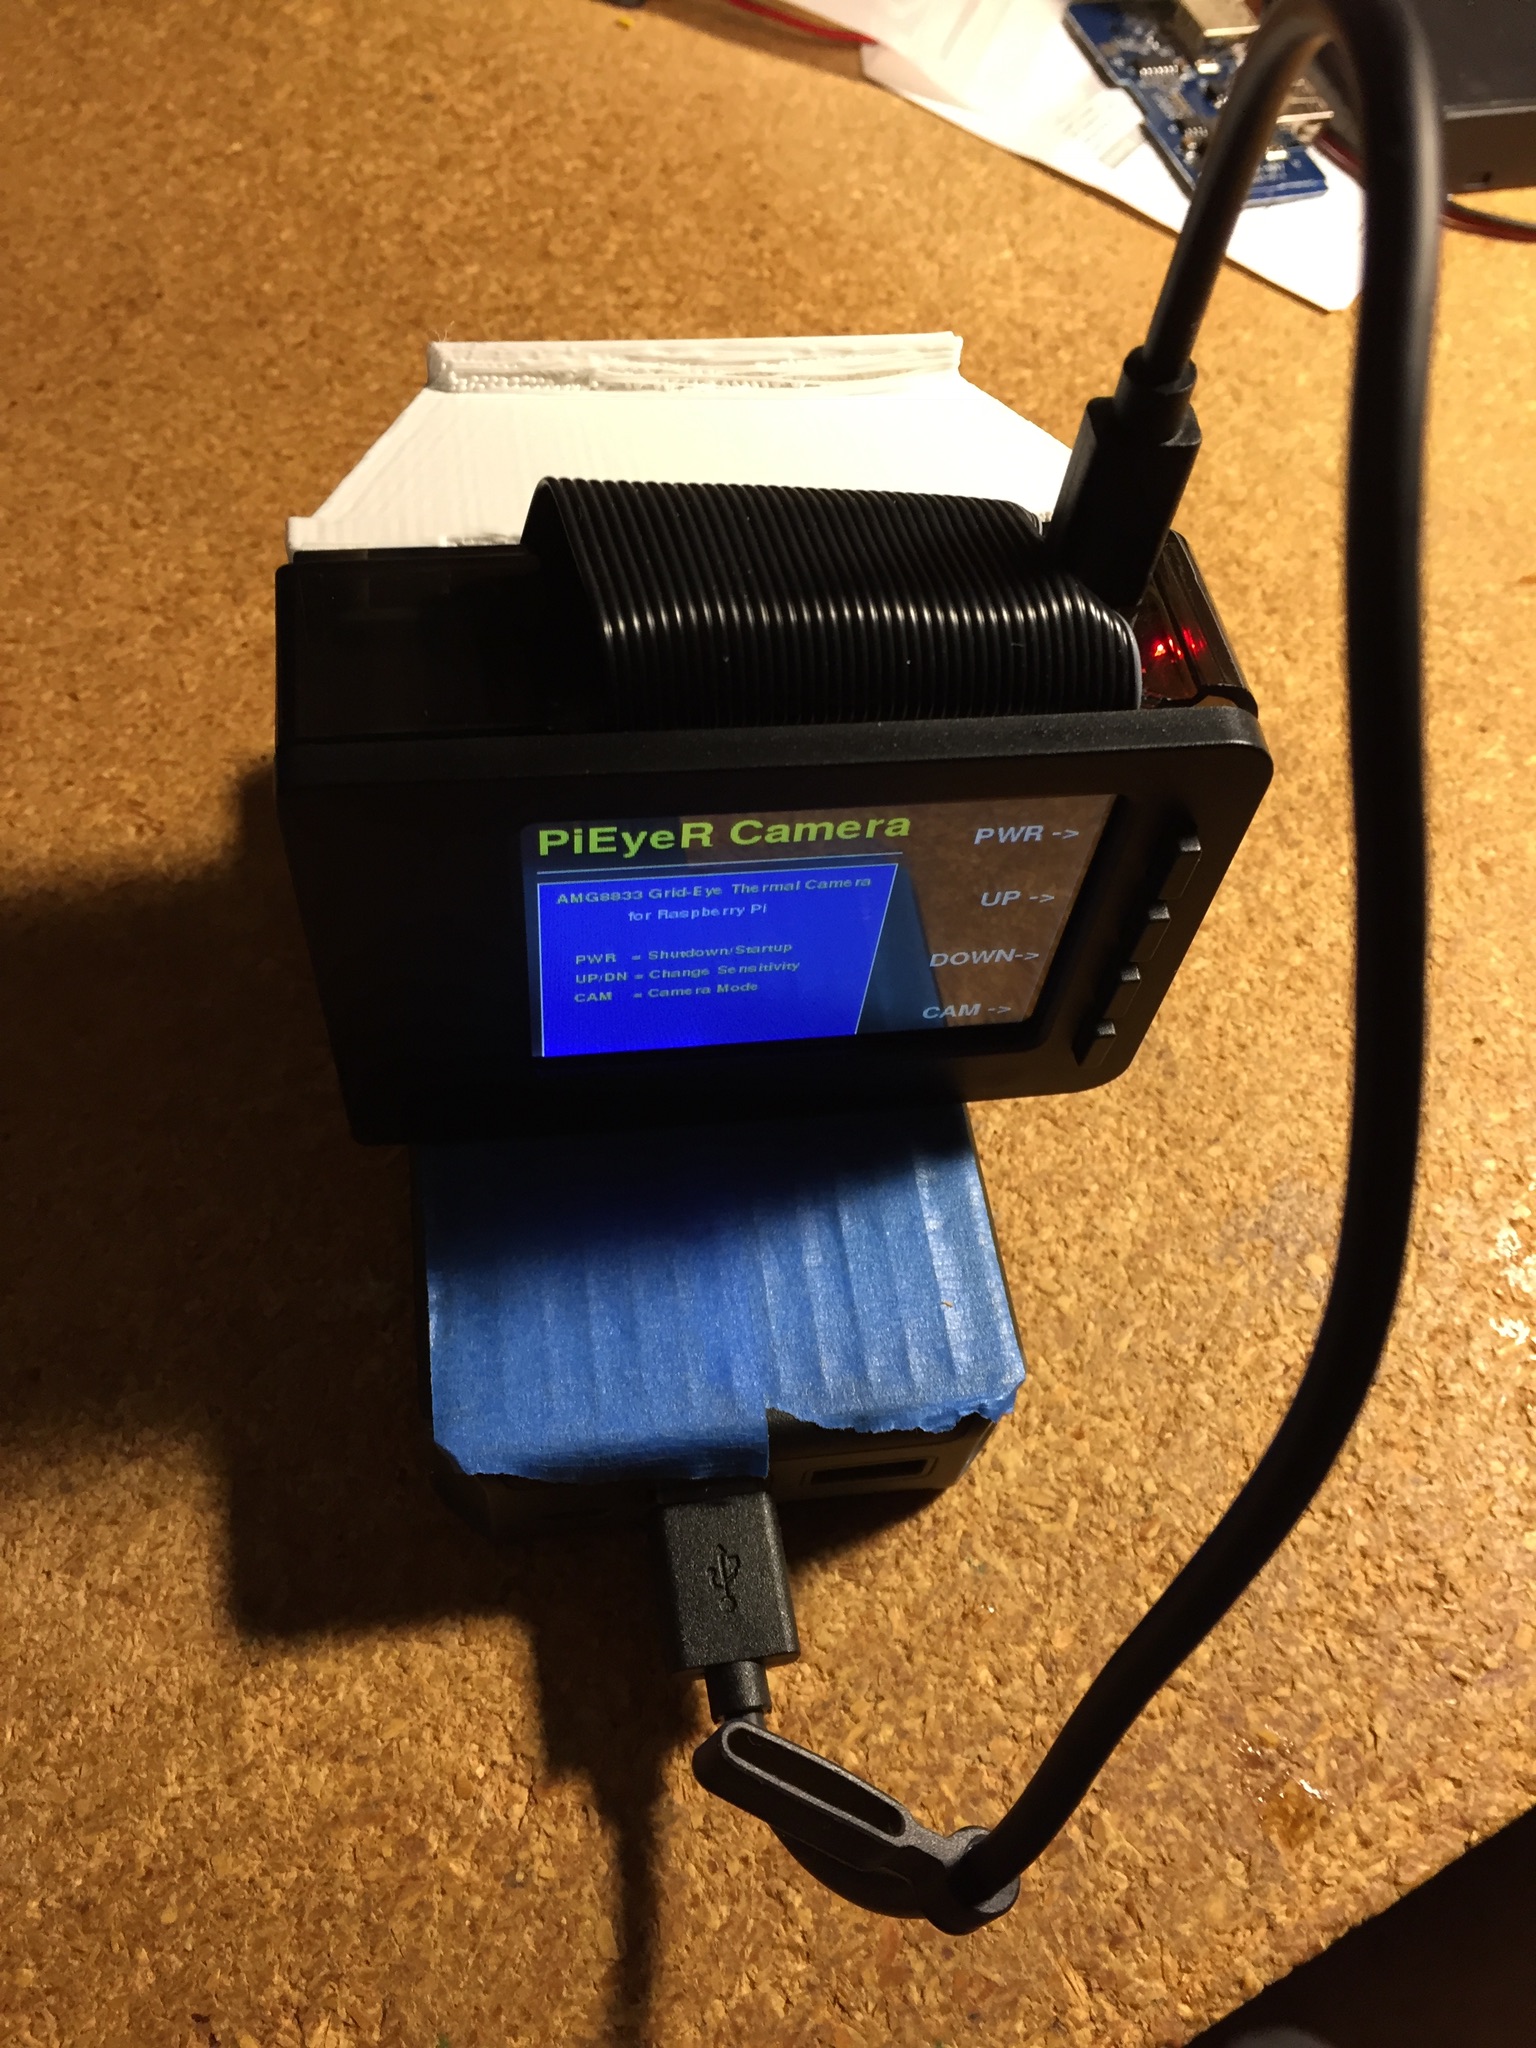
The RaspiThermalCam/stl/ subdirectory contains STL files for 3D printing a simple front-end case for the thermal sensor. It’s currently not very fancy and expects the Raspberry Pi 3 and PiTFT screen to use the Adafruit faceplate and case.
1. Print out the three pieces; body, front plate, back bracket.
2. Clip out the support tips along one edge of the wide end of the Body. This is where the ribbon cable will go thru.
3. Slip the Body over the AMG8833 camera module and cables, wide end towards the Raspberry Pi case.
4. Pull the camera module up through the front (narrower) end of the Body.
5. Place the camera through the hole in the front plate. Note that the ridge on the front plate faces OUTWARDS, thus helps protect the imager.
6. Place the bracket behind the camera module circuit board. The camera should be just lightly held in place by the bracket
7. Use two small screws/nuts to attach the bracket to the front plate with the camera sandwiched between.
8. Currently, I just glued the front plate to the Body. The camera can still be removed from the case by removing the screws and back bracket.
9. I also just attached the wide end of the Body to the Raspberry Pi case using hot melt glue, which can be cut or melted to open it back up.
NOTE that you cannot cover the front lens of the AMG8833 as most glass or clear plastics will absorb the far-infrared, thus be opaque to the camera.
Since my next version of the PiEyeR is to try to replace the Raspberry Pi 3 with a Zero W, all of the case designs will change.
Feel free to design a better case and let me know!!
Future Features
- 3D Printed front case parts for the camera
- Switch to using Raspberry Pi Zero W for lower cost & power/smaller size
- Add new mode button features for middle buttons
- Get pygame Touch Screen working for PiTFT
- Add Camera Screen Snapshot feature
The Faceplate, buttons, and Raspi Case can be used to enclose the Raspberry and TFT screen.
3D Printed Case (future)
This document and GitHub will be updated with the .stl parts and instructions for a simple case for the Imager, once completed. It’s not fancy and you may need to modify it, if your components are larger than what I used.
Uh Oh, Trouble!
**I don't see any new screen, only the boot messages and login.**
Did you run the ./install.sh script? Try running $ crontab -l and see if you see a @reboot line:
@reboot sudo python /home/pi/RaspiThermalCam/raspitherm.py >/dev/null 2>&1
You did set up your Pi Thermal Camera as detailed in the Adafruit tutorial? (https://learn.adafruit.com/adafruit-amg8833-8x8-thermal-camera-sensor/raspberry-pi-thermal-camera)
**I get a python error message**
Most likely there is a missing python package. The last line of the Python error should say what is missing. Try Googling that message. Else, leave an Issue at Github.
**My screen is mangled up, but the buttons seem to work**
Are you using the PiTFT Plus 2.8" 320x240 screen?
**My buttons don't work or are on the bottom not side of the PiTFT**
You have a different screen. If you have GPIO buttons on botton of TFT, you can try remapping them in the raspitherm.py program.
**The Touchscreen doesn't work**
Bugs in the SDL software used by pygame software make for inconsistent operation of the touch screen. We have to wait for a better solution. This program doesn't use the touch, just buttons.
**My Camera screen is all BLUE or all RED**
Press the Sensitivity buttons (middle two) to increase/decrease sensitivity
**My Camera doesn't work**
Try manually running tools/thermal_cam.py program.
This is the same program from Adafruit with no modifications. You may need to kill the raspitherm.py program first by editing the crontab:
$ crontab -e
comment out the @reboot line #@reboot ...
**What can I see with it?**
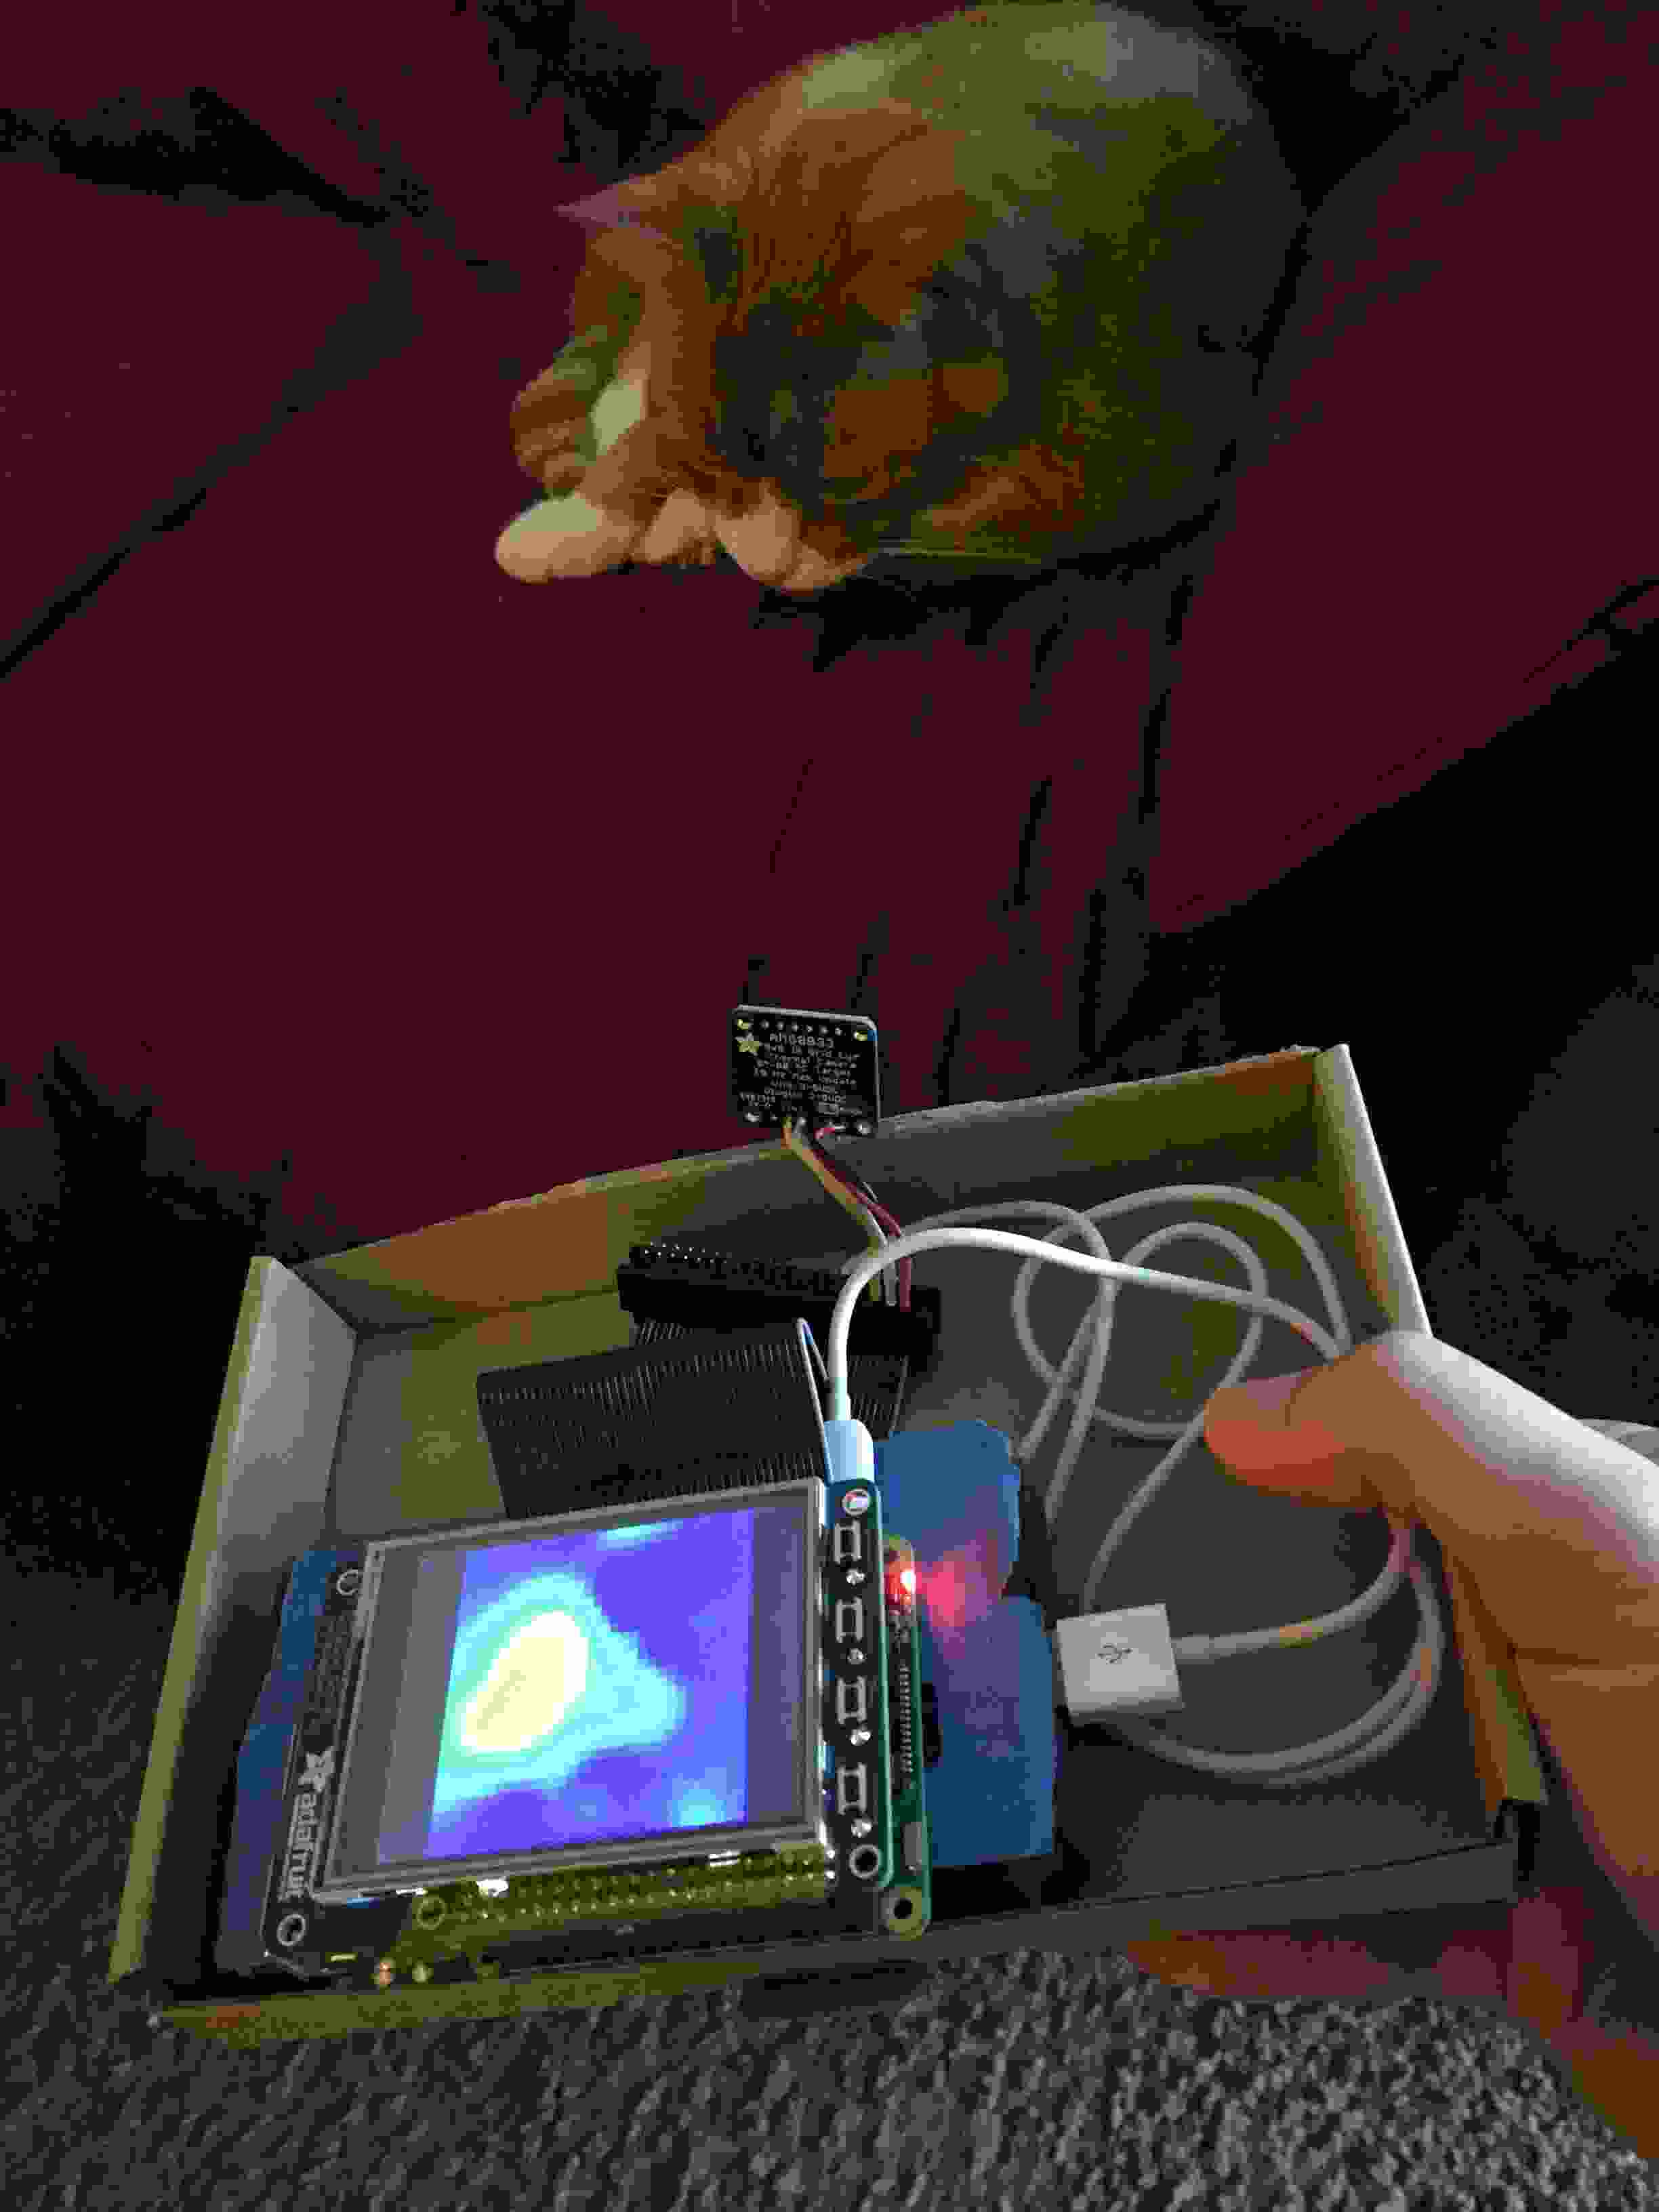
Find a cat.
They glow hot!
So do water heaters!