Pi Shaped Necklace Using Tinkercad
by AwesomeRiham in Design > Digital Graphics
296 Views, 3 Favorites, 0 Comments
Pi Shaped Necklace Using Tinkercad
Using tinkercad I'm going to show you how to make a pi shaped necklace.
Supplies
1. Tinkercad and some experience using it.
2. 3D printer if you are planning to 3D print it out
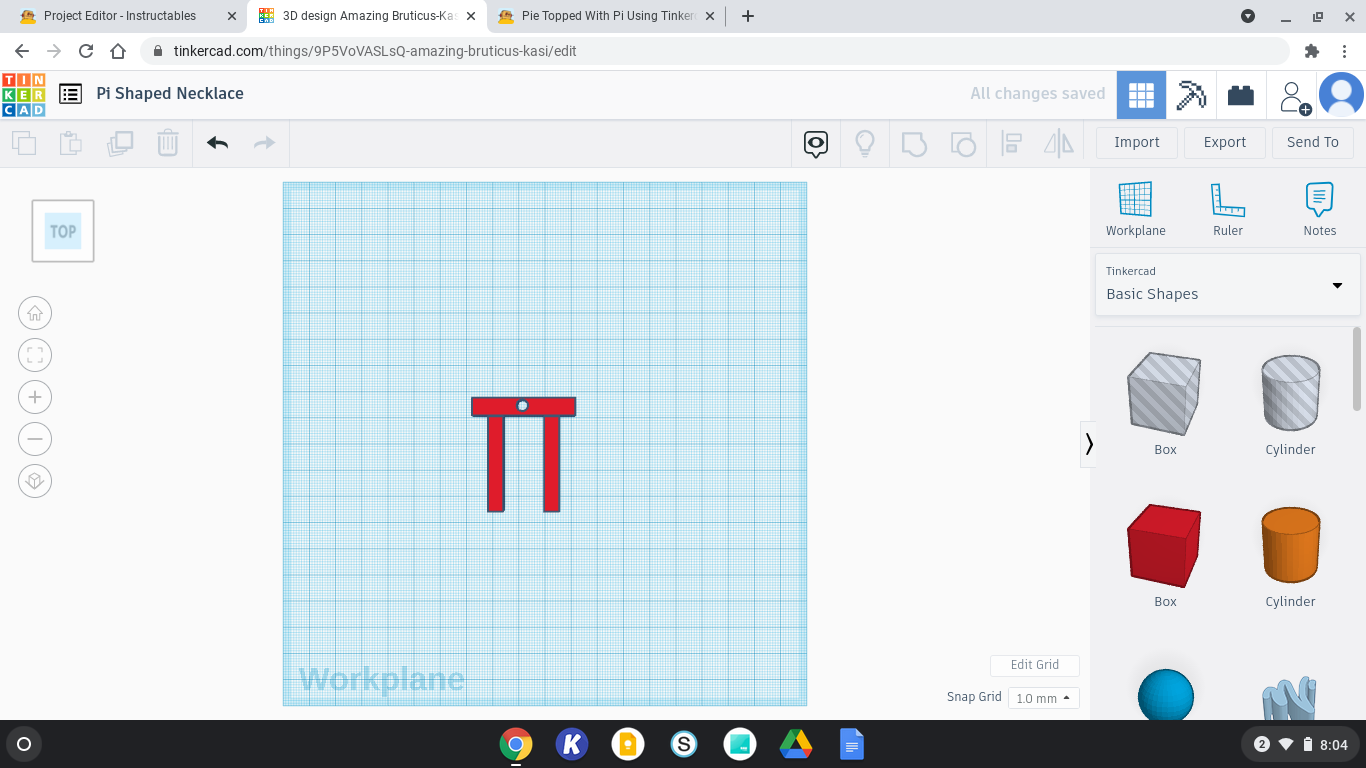
Making the Legs
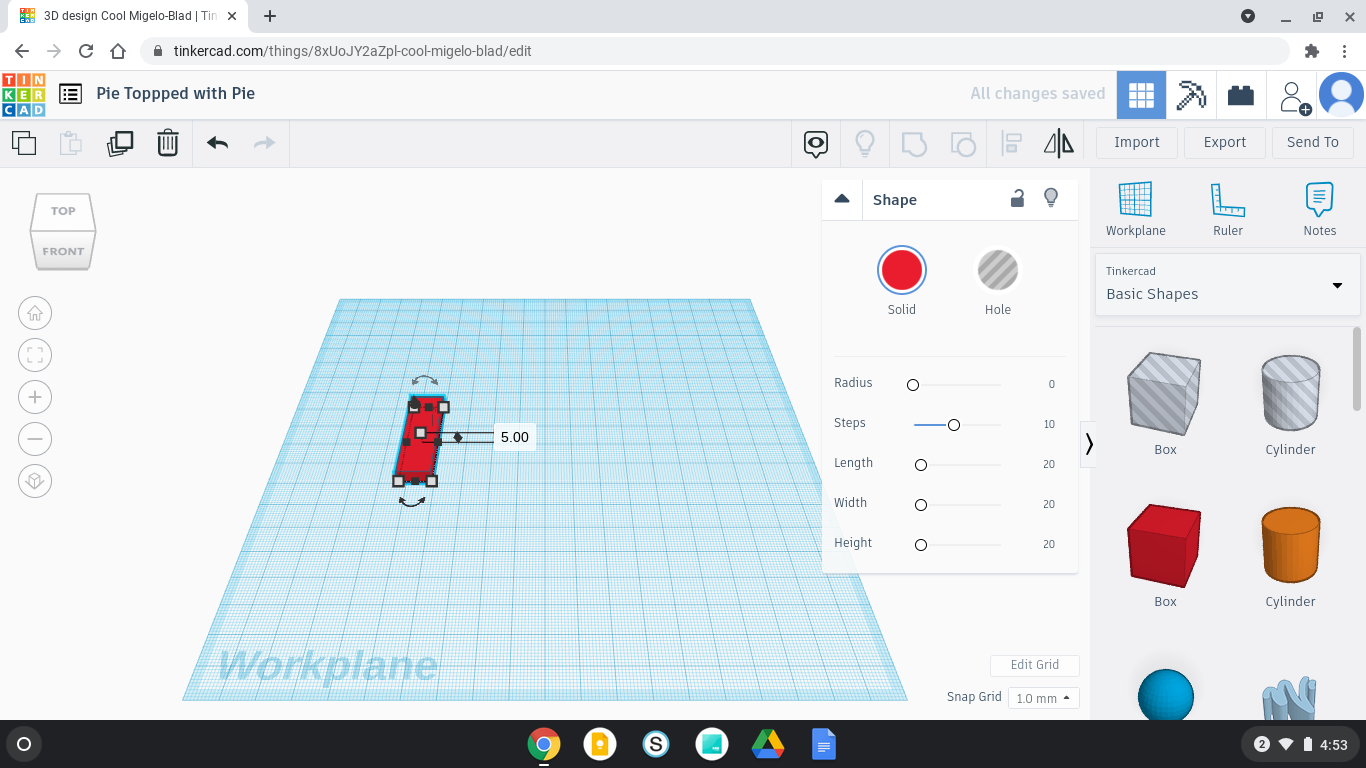

Get a square and press the corner and put the length as 35 and width as 5 then press the dot on top and enter 5. Click on the square and press ctrl+d and press the right arrow on your keyboard and that should move the other one to the right.
Making the Top
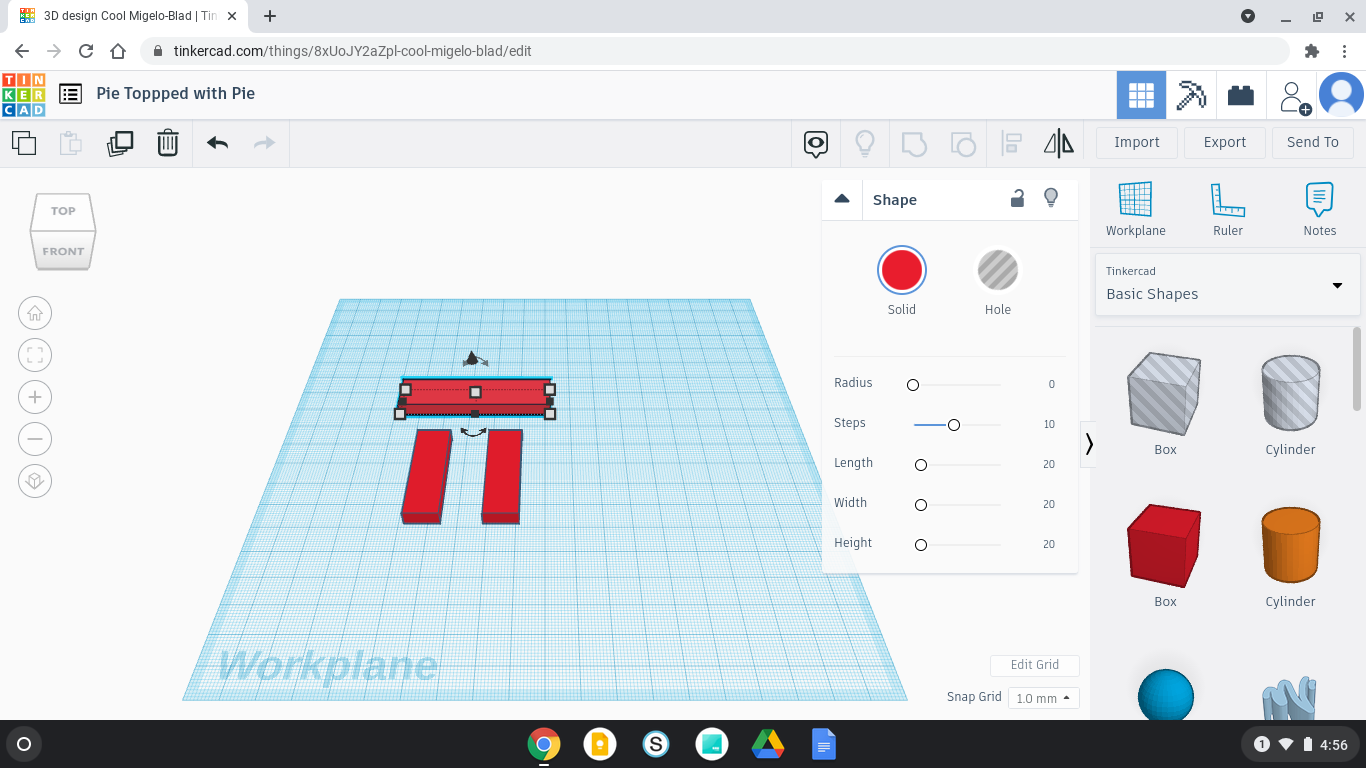
Get another square and press on the corner and put in 6 as length and 38 as width and height 5. Put it in front of the legs then select it then press ctrl+g. If you don't know how to press somewhere on the workplane keep holding and pretend your dragging something and a box appears then do this and make sure it is in the box then press ctrl+g.
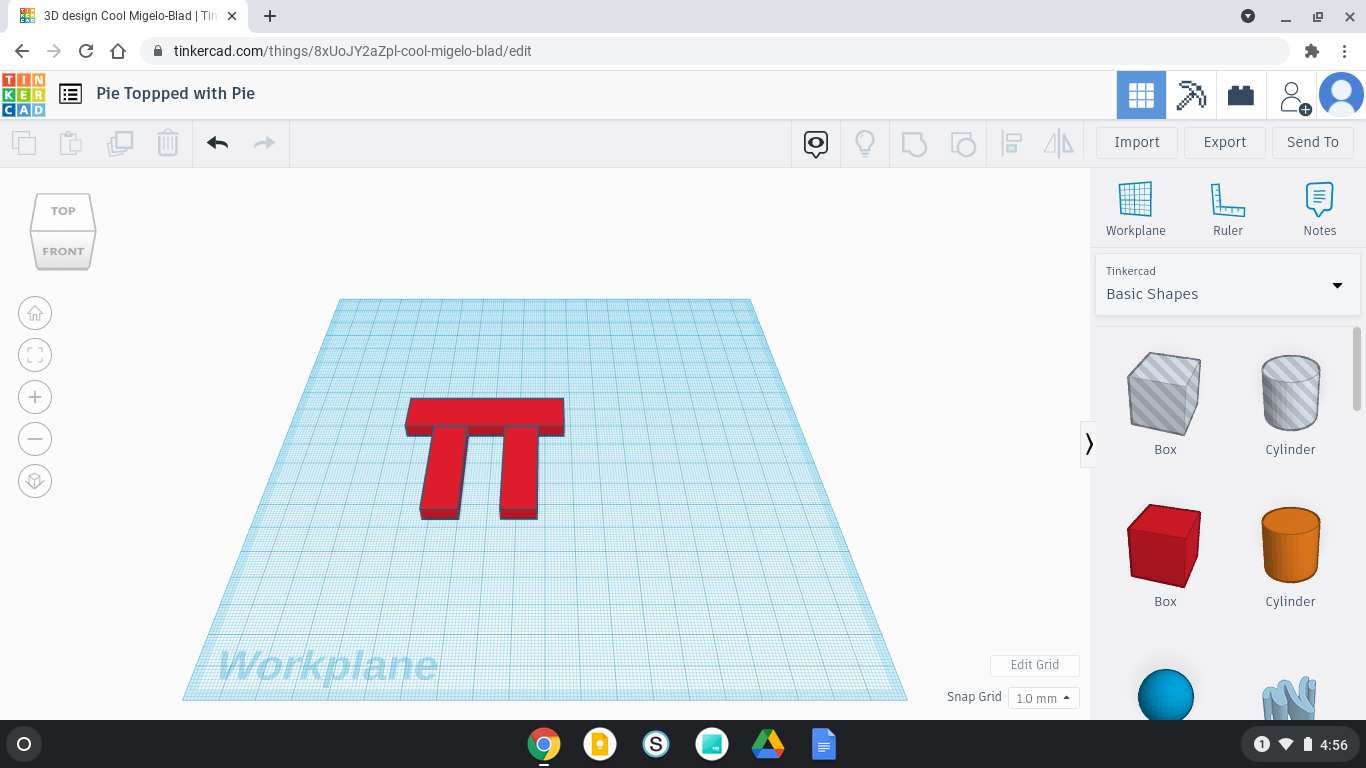
Making a Hole on Top

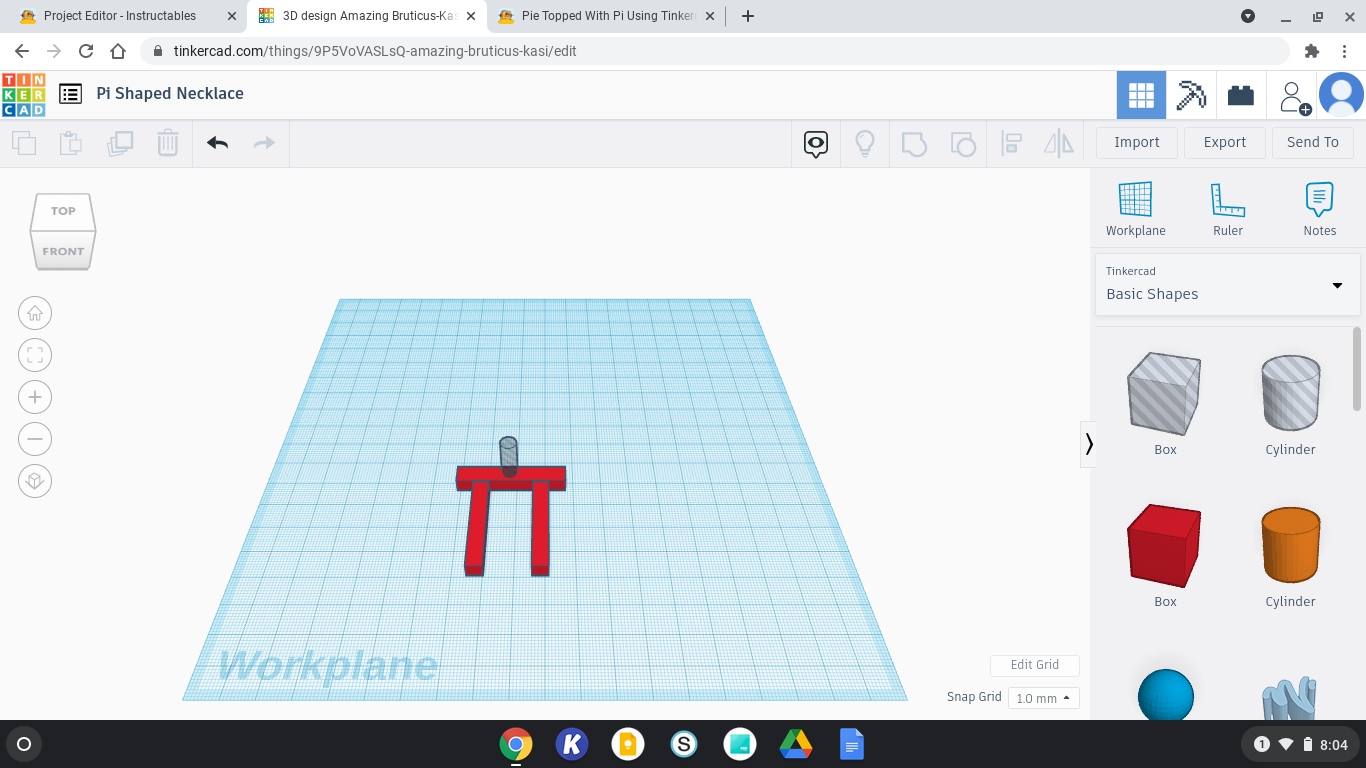
Get a grey cylinder and press the dot on the corner and put 5 in the 2 boxes. Put it in the midlle of the top and select it then press ctrl+g.
Finished!

Now if you want you can 3D print it out and tie a string in the hole and wear it.