Pi-Powered Thermal Printer Camera
by jocomakerspace in Circuits > Electronics
12861 Views, 80 Favorites, 0 Comments
Pi-Powered Thermal Printer Camera
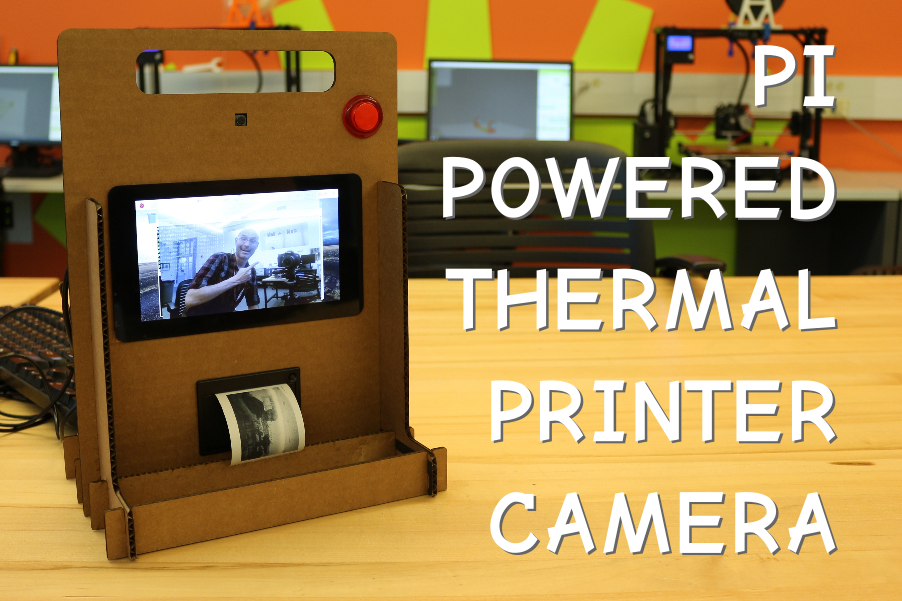
Do you miss your old Polaroid instant camera, or your old Gameboy Classic's black and white camera? So do we, when we feel really nostalgic! In this Instructable, we will show you how to make your own instant camera using a Raspberry Pi, a Pi camera and screen and some electronics and a bunch of cardboard!.
The Things You'll Need
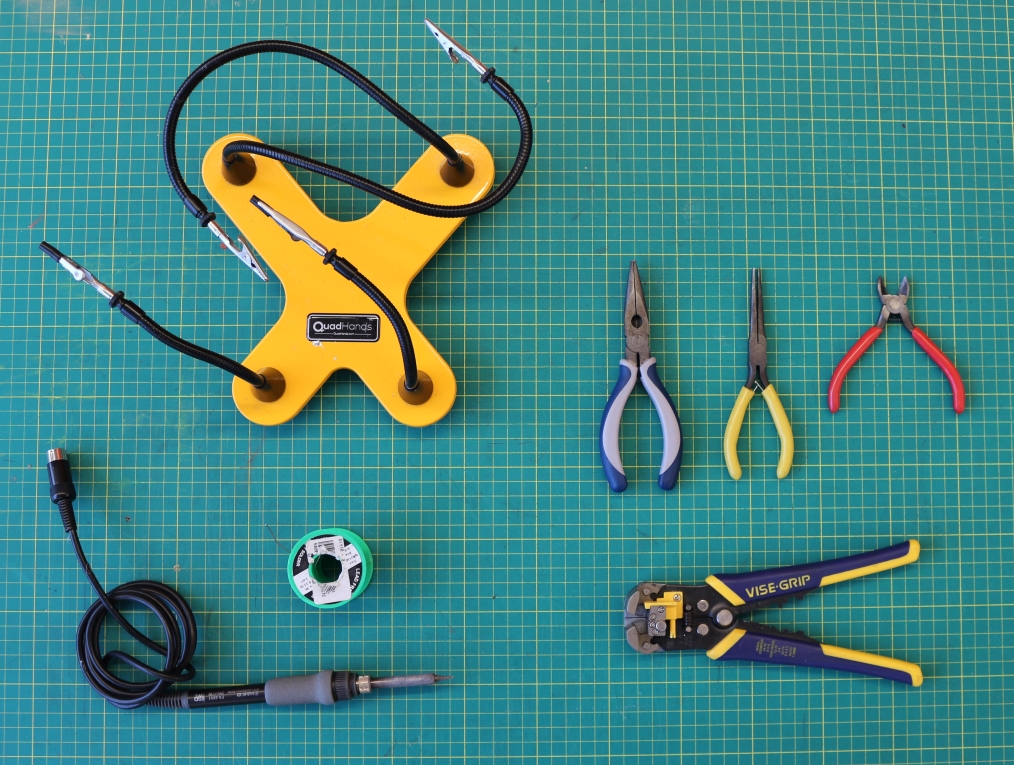
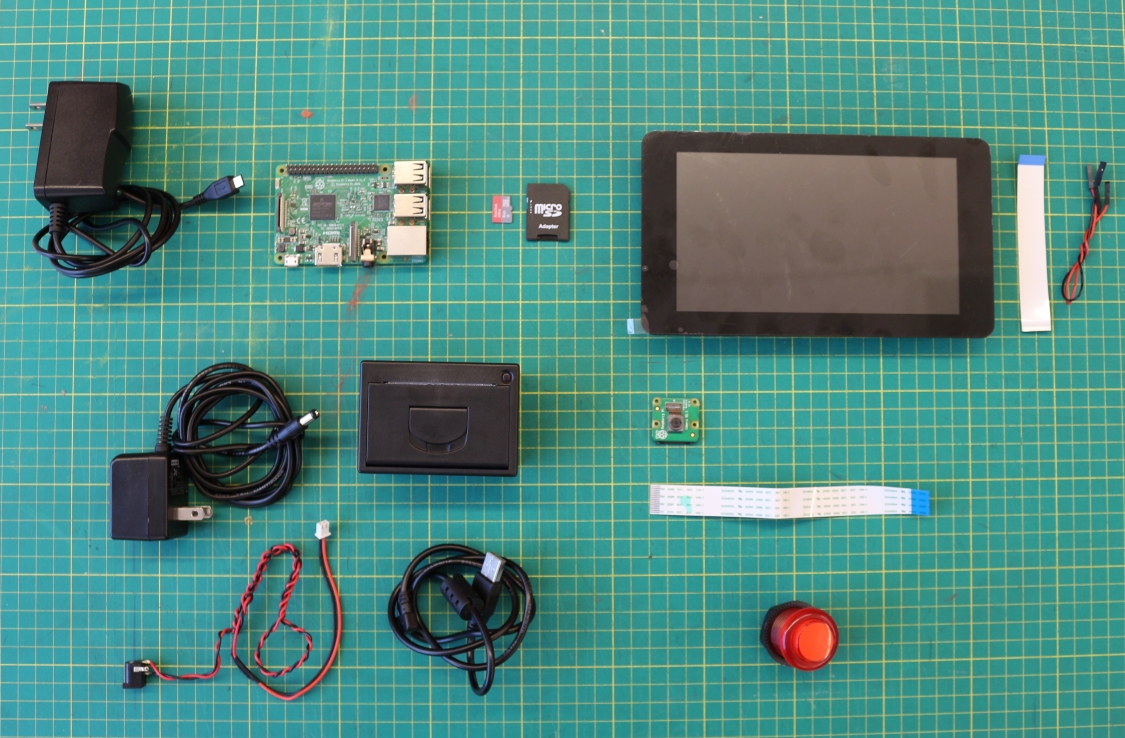
For this project, we used the following supplies:
- A Raspberry Pi 3B or 3B+ with microSD card (this model is our go-to for builds, but this project should work with other Raspberry Pi models)
- A Raspberry Pi camera module
- A 3 amps, 5V microUSB power supply
- An official Raspberry Pi touchscreen
- A USB thermal printer - we used one of Adafruit's tiny thermal 3D printer
- A switch - we used one of Adafruit's arcade button from a previous project, but any switch will do
We also used the following tools:
- A third hand tool, to hold your electronics while you solder
- Pliers - the flat, needlenose and cutting kinds
- A wire stripper - to save you time prepping wiring
- A soldering iron and solder
Prep Your Raspberry Pi for Anything
For this project, we will be using a Raspberry Pi we prepped using our previous tutorial. If you’re starting from scratch, it’s a great way to make sure we are using roughly the same setup!
Feel free to setup your Raspberry Pi with this guide then come back here to continue with our Thermal Printer Camera project!
TIP - There are BIG changes happening for the Raspberry OS these days! As we write this update to this project, Raspberry OS "Bullseye" has introduced a lot of important changes for the Raspberry Pi camera module. We will update this project for Bullseye as soon as possible but in the meantime, we temporarily recommend you use Raspberry Pi OS "Buster" for this project to save yourself a lot of compatibility trouble. There are important risks to running older versions of an operating system, so make sure to install all the available updates as soon as possible!
Cutting Your Cardboard Camera Frame
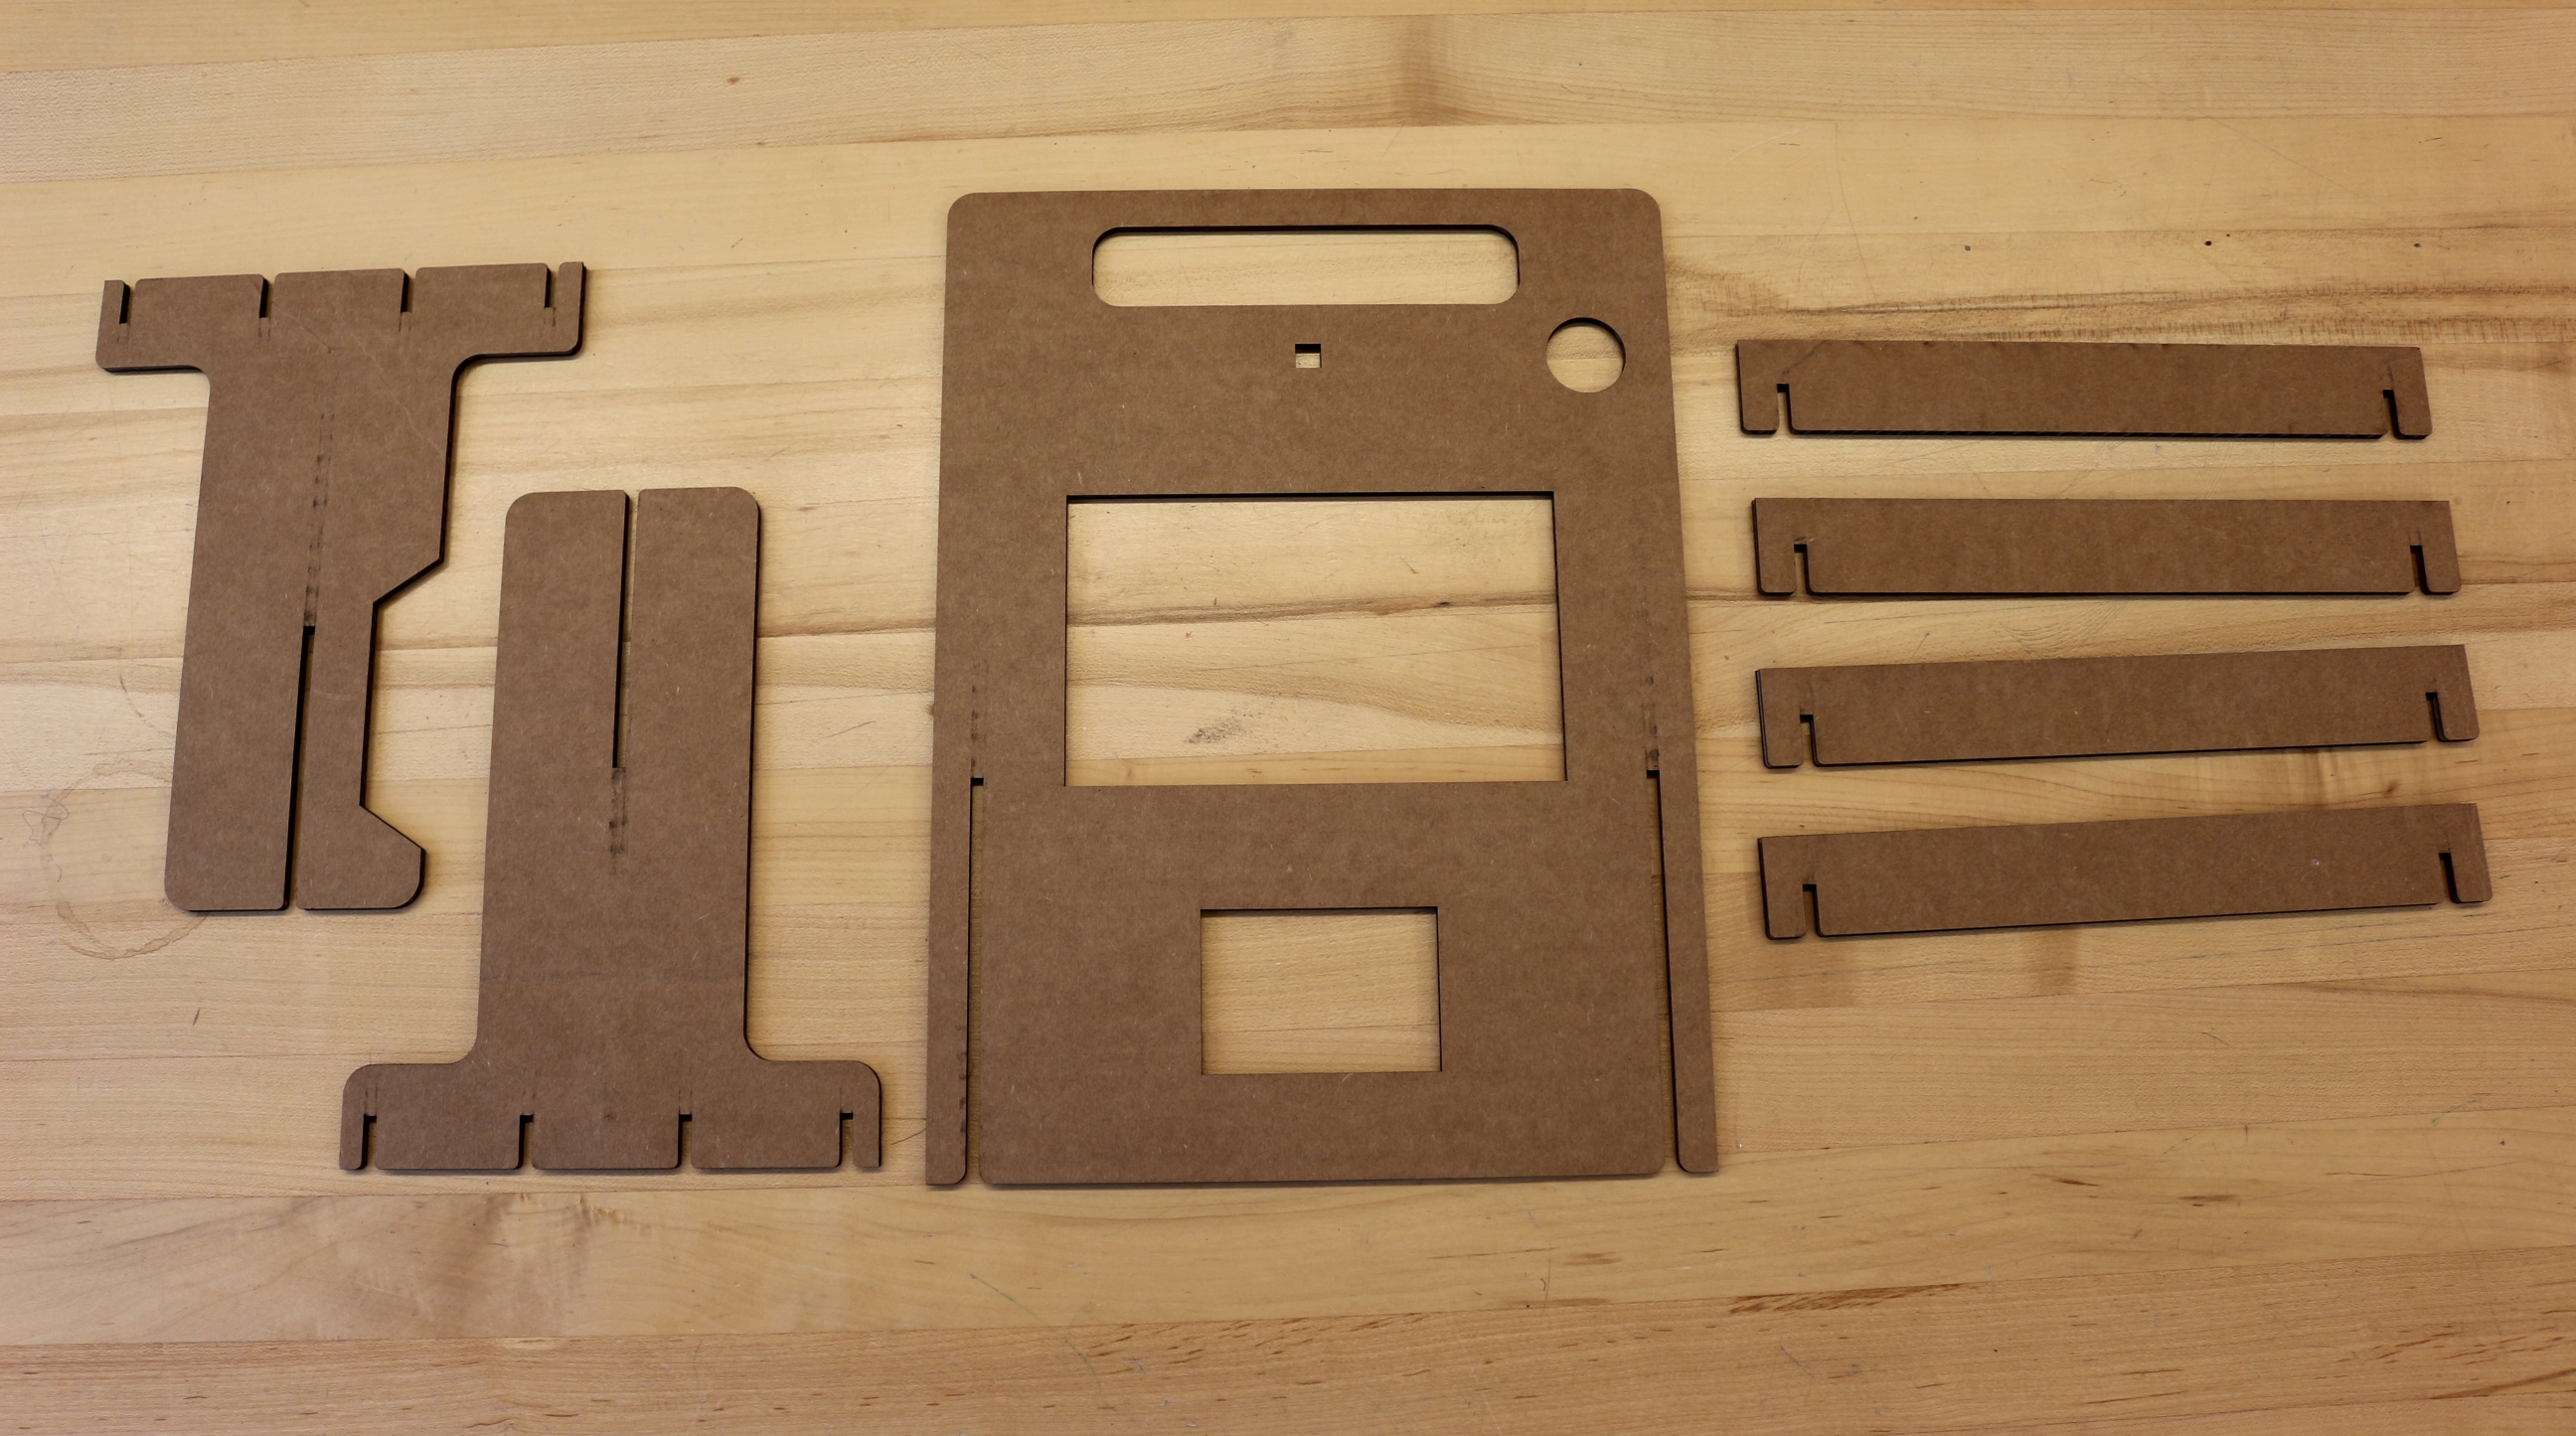
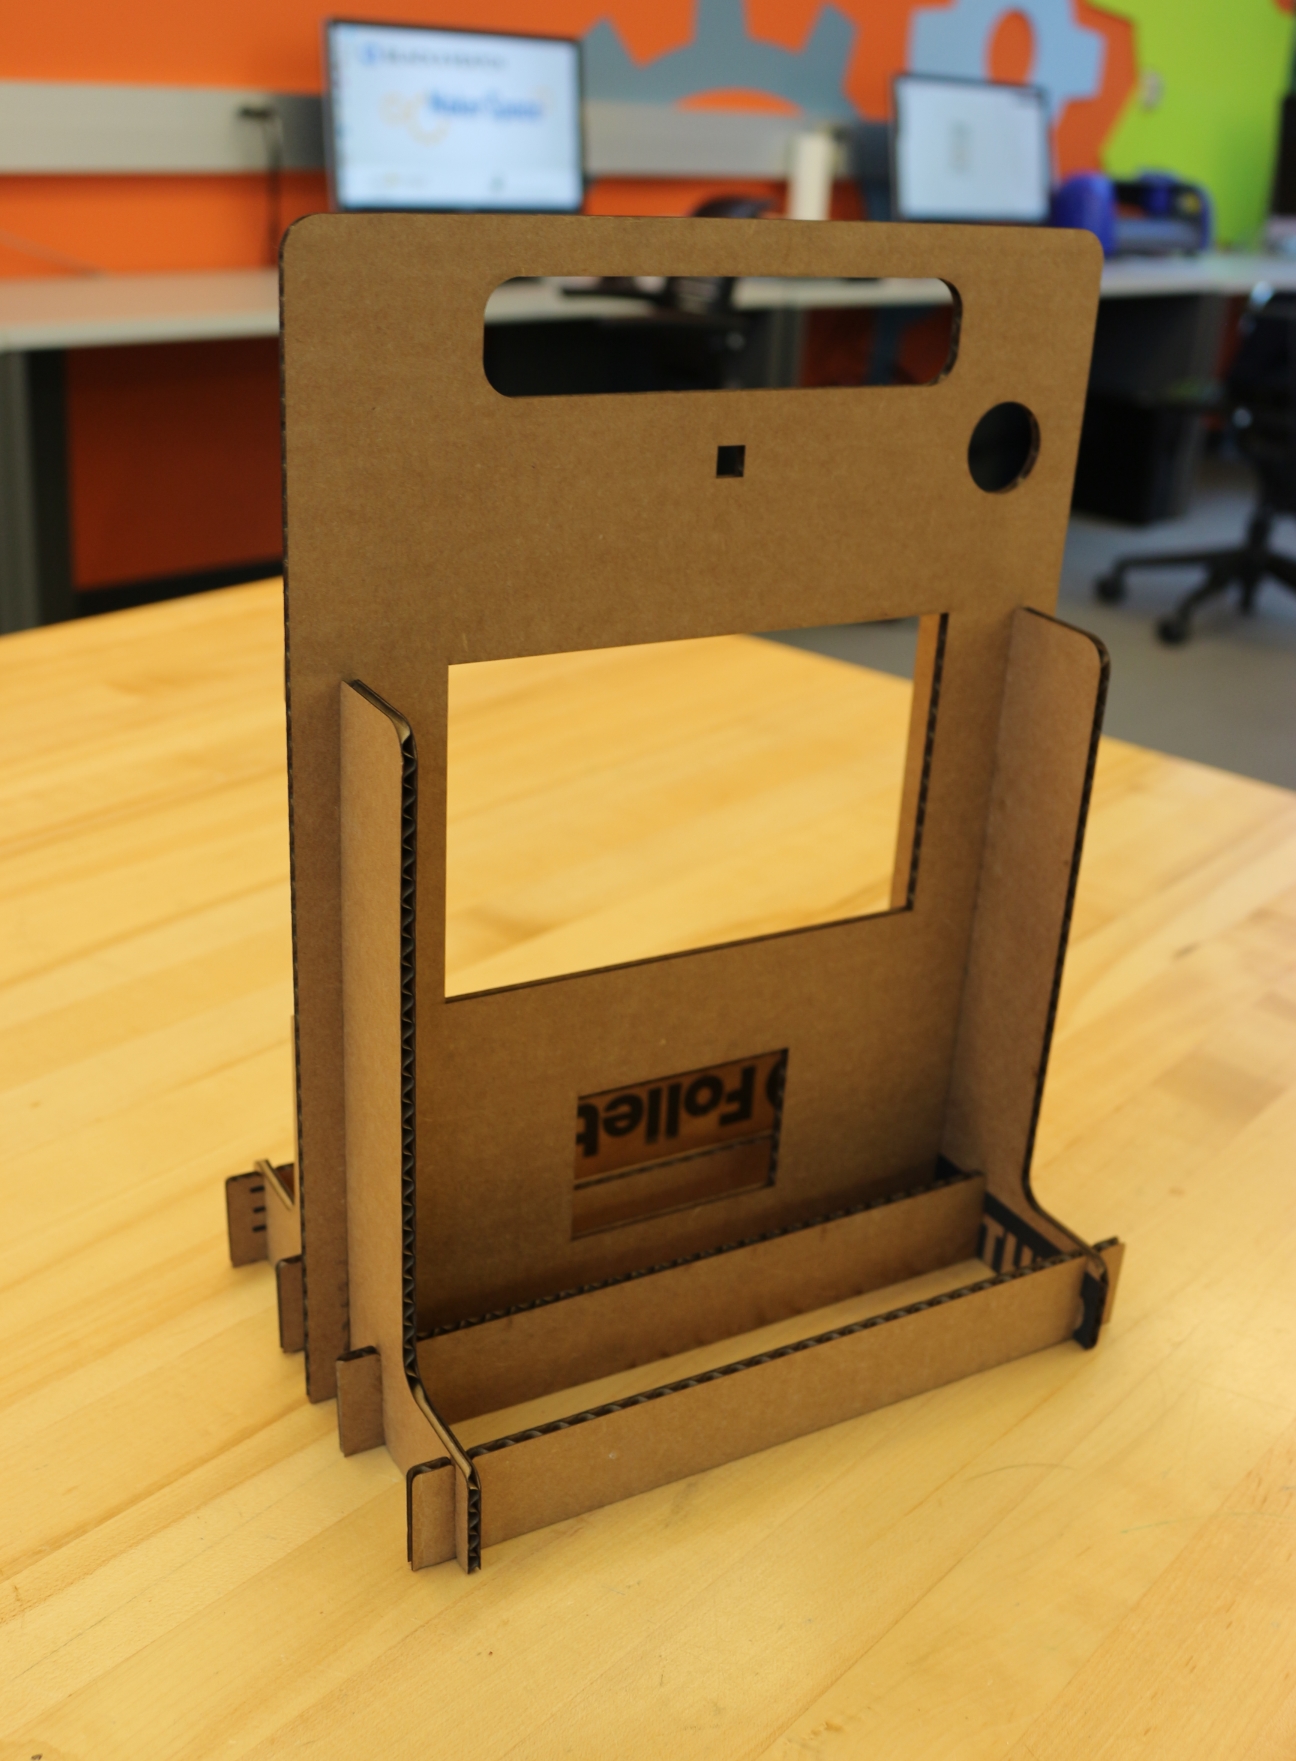
We designed a cardboard frame so we can easily move our camera where we need it - for example, if you need better lighting or to take it to an event.
You can download the vector files for laser cutting from Github, or you can use it as a guide to cut your own with an X-acto blade or a box cutter. For this Instructable, we will assume you’re using our cardboard frame!
Prepping and Mounting Your Touchscreen
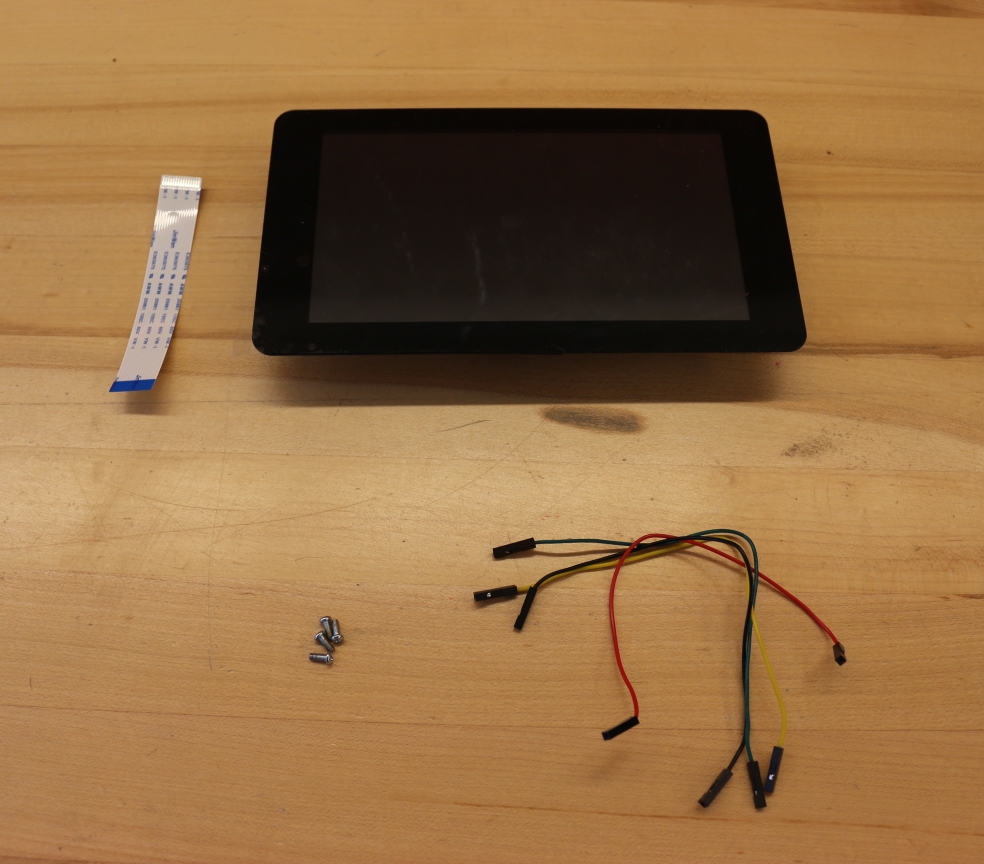
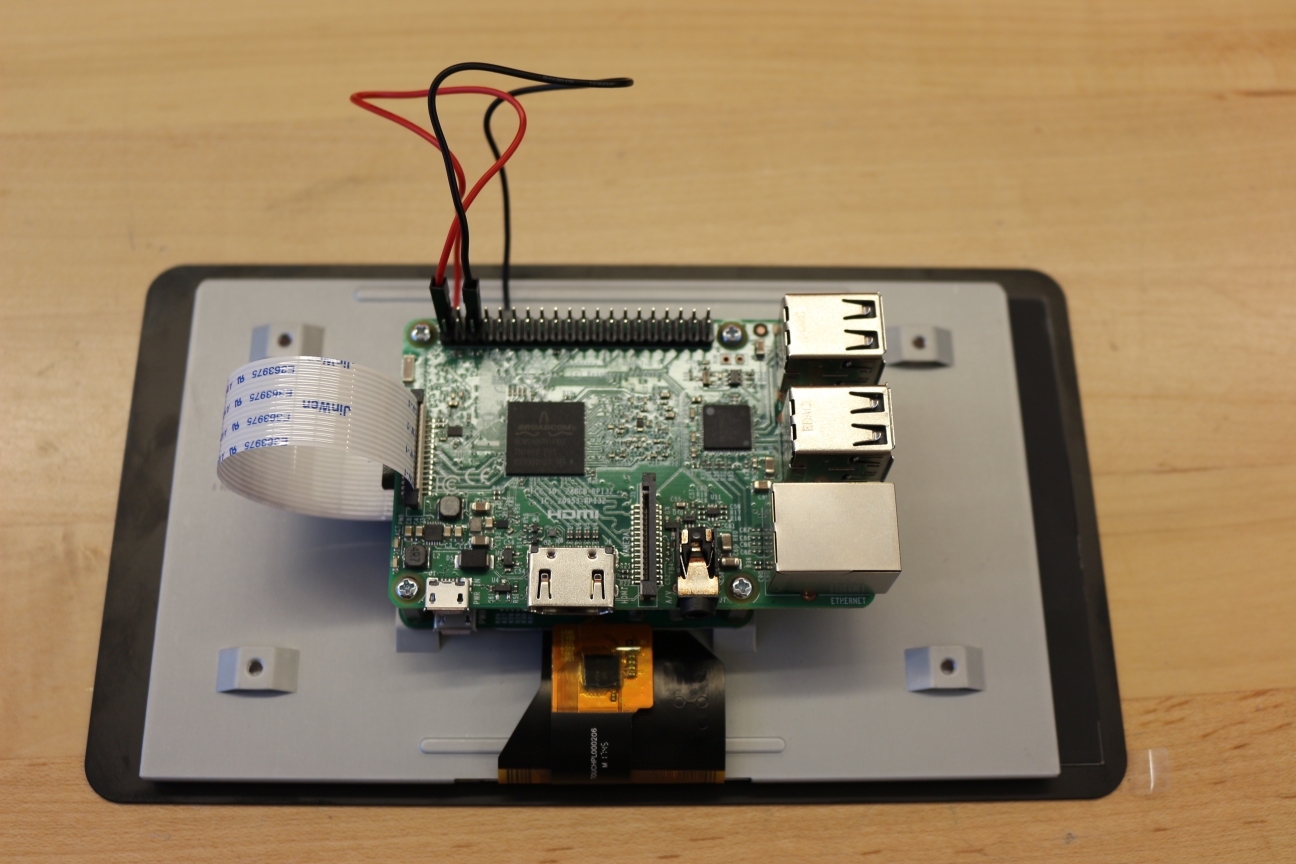
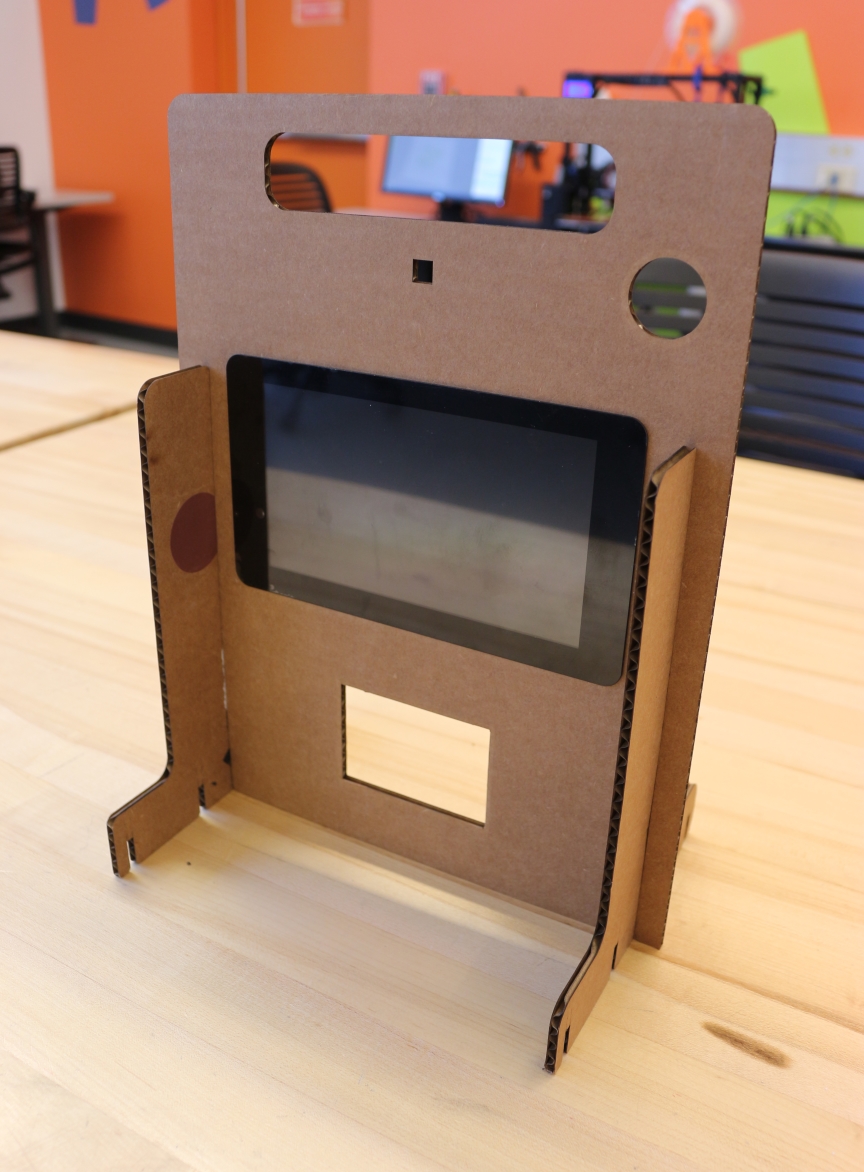
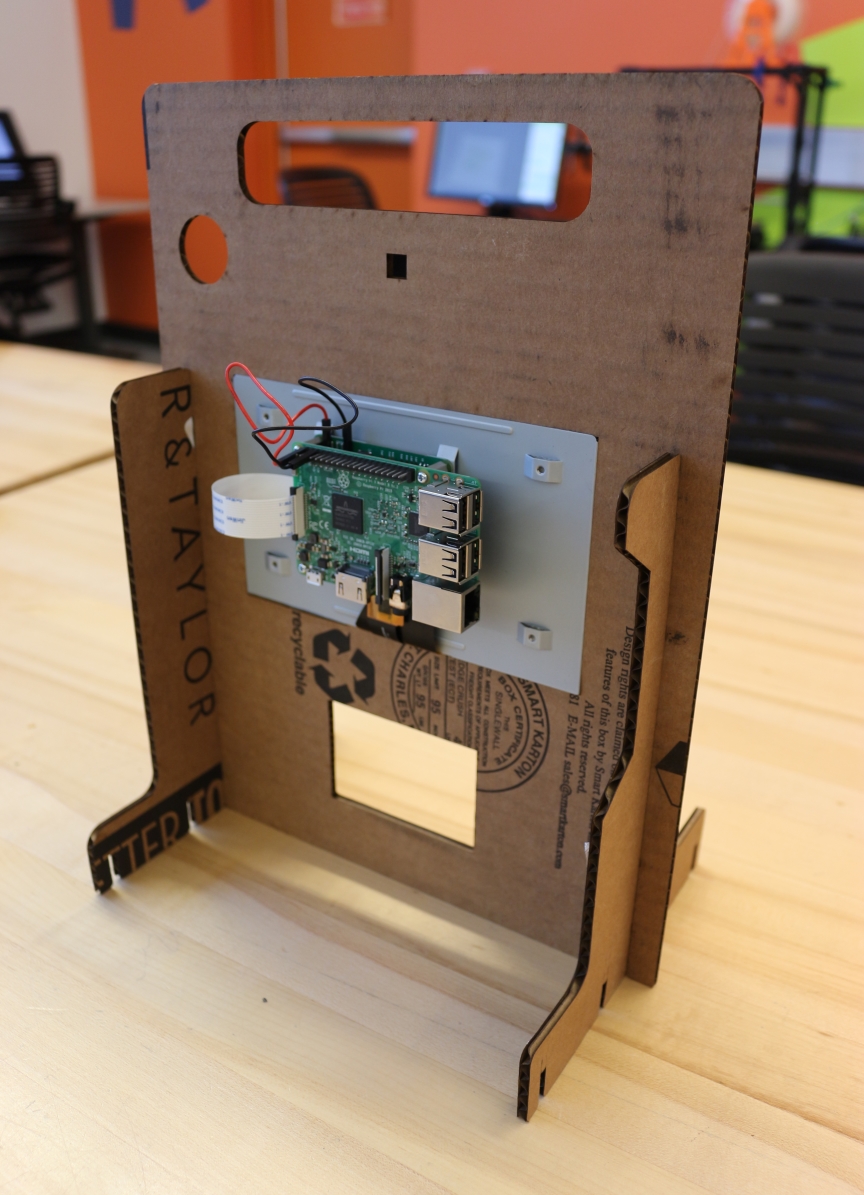
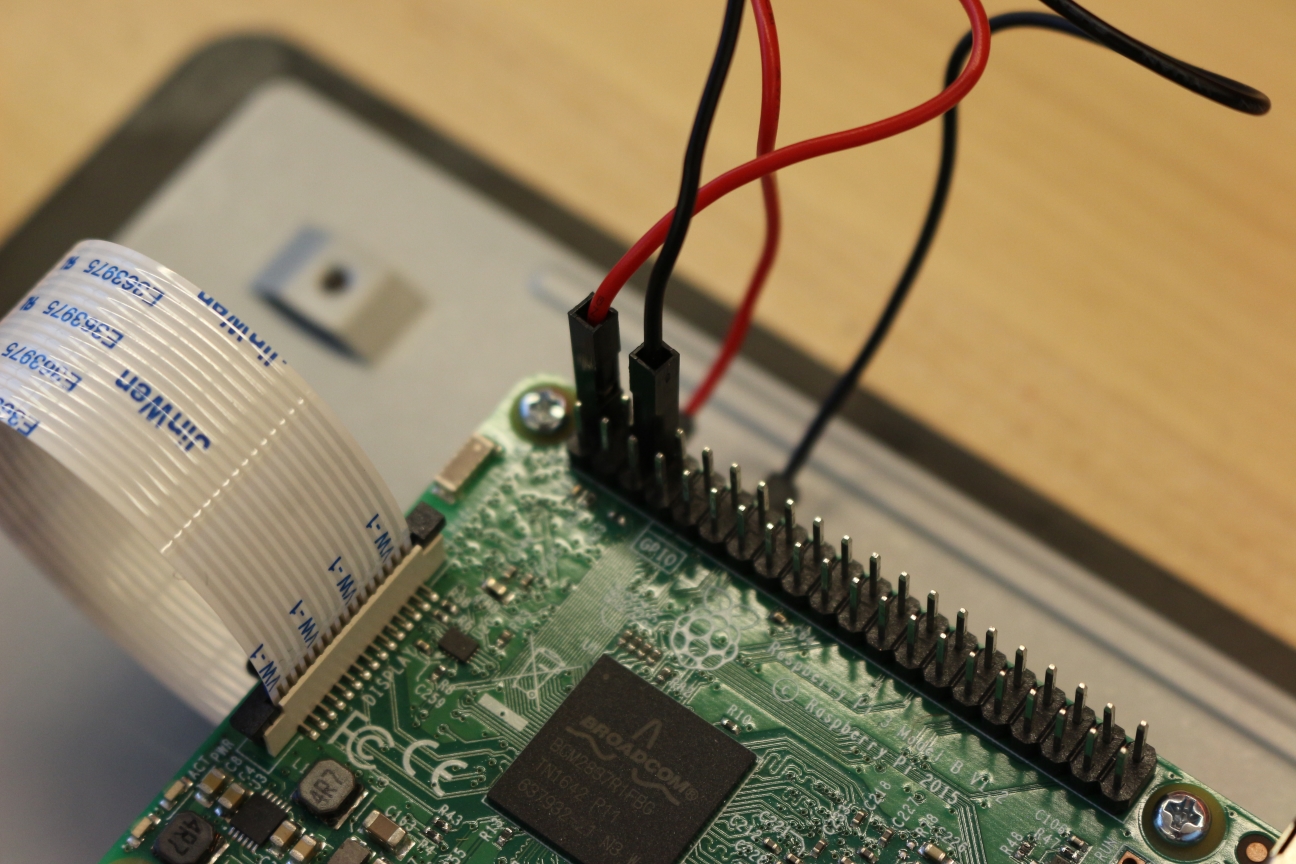
Open your touchscreen box and check that you have:
- your video cable
- your mounting screws
- your DuPont cables
- your touchscreen
If you have everything, you're ready to go!
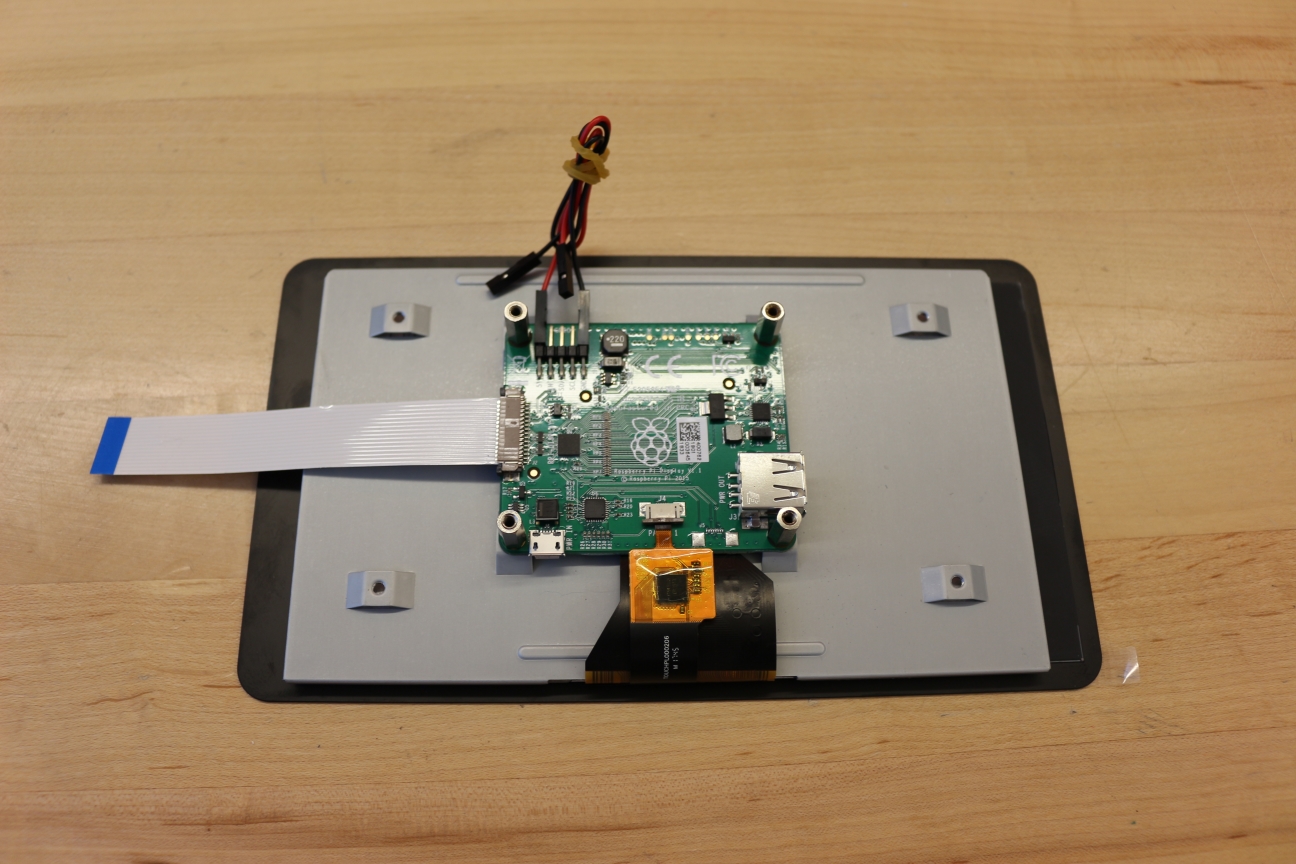
- Connect the red DuPont cable on the 5V pin on the screen board
- Connect the black DuPont cable on the Ground pin on the screen board
- Sit your Pi on top of the posts on your touchscreen
- Screw your Pi in place
- Connect the red DuPont cable to a 5V pin, and the black DuPont cable to a Ground pin on your Pi
Power your screen and your Pi through the microUSB port on your screen. If everything went well, the Pi and Screen should both turn on!
When you're happy that everything seems to work correctly, turn everything off and unplug your Raspberry Pi power supply.
Prepping and Mounting Your Camera Module
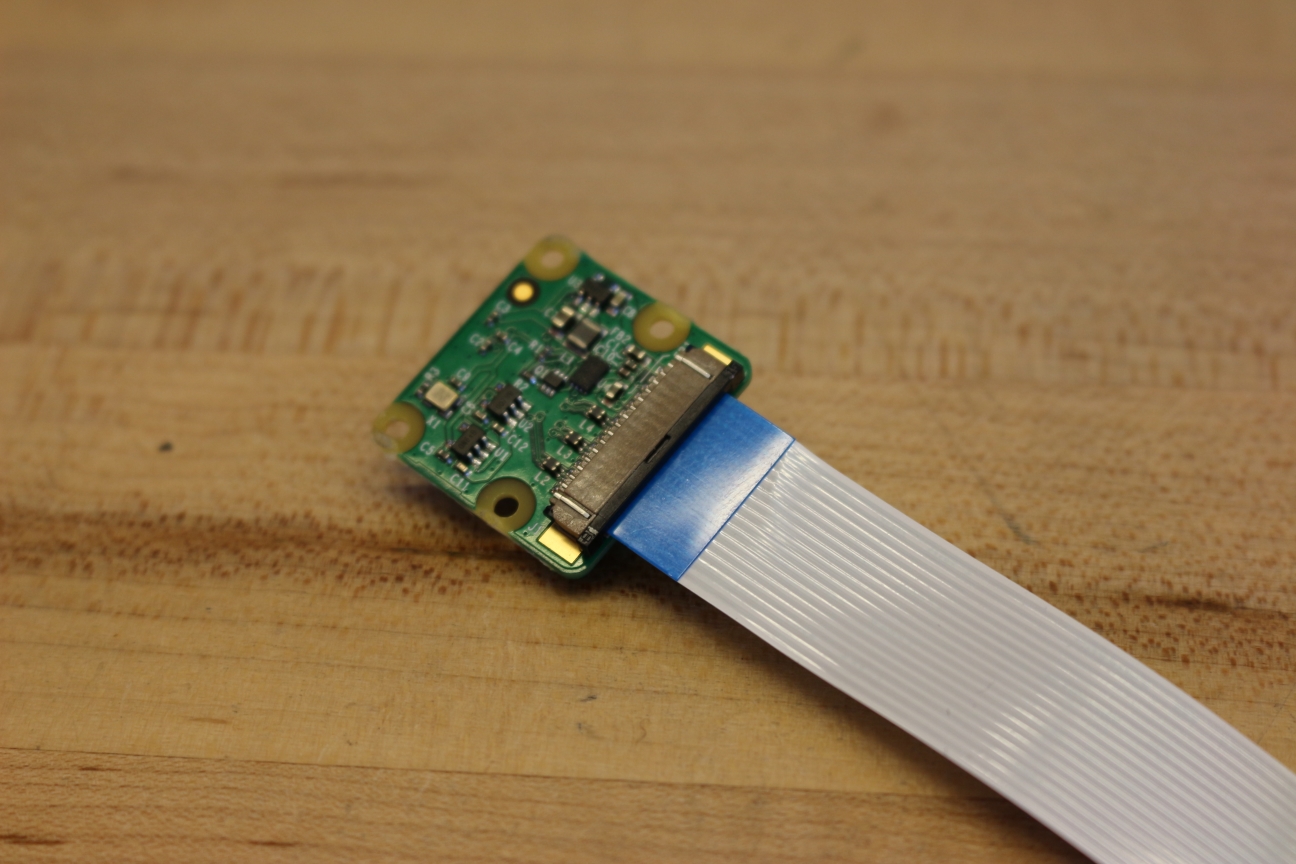
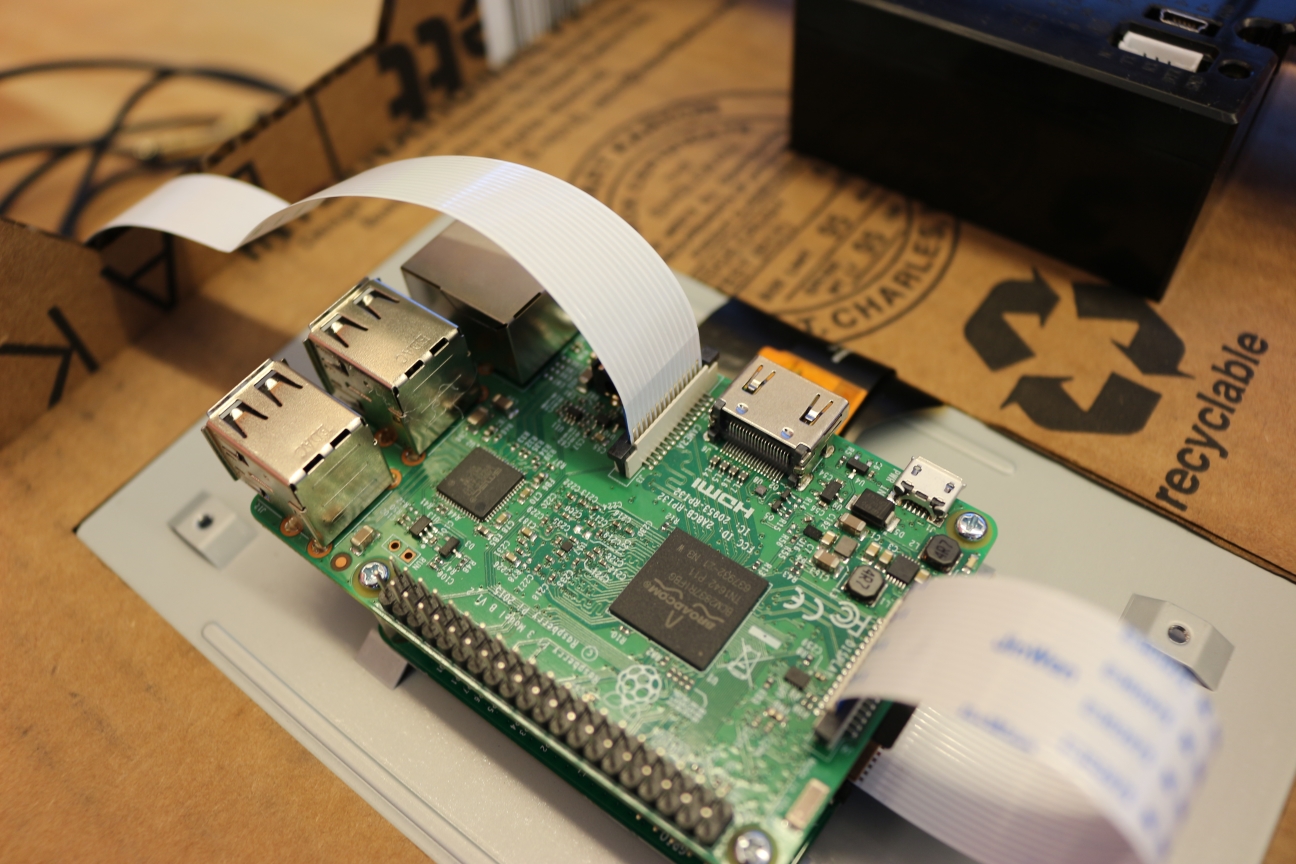
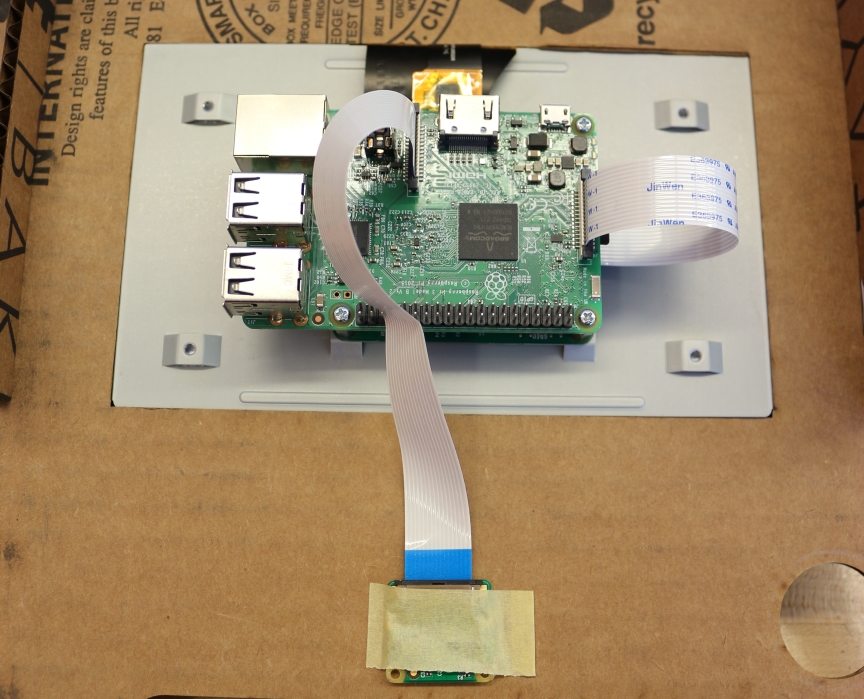
TIP - The Pi camera module is one of the most sensitive pieces of electronics we’ve worked with and we have seen some get fried just because of static electricity. Touch something big and metallic in the MakerSpace or around your home to ground yourself, like one of the laser cutter, a dishwasher or a fridge!
Open your Pi camera module box and check that you have:
- your Pi camera module
- your Pi camera cable
If you do, great! Time to connect the camera module to your Pi:
- Gently pull up the brown tab on the camera module's port
- Insert the end of your cable all the way into the port, silver contacts of the cable against the contacts in the port
- Push the tab back down to secure the cable in place
- Gently pull the camera port's brown tab up on your Pi
- Insert the other end of the camera cable inside the port, silver contacts turned towards the screen port on the Pi
- Push the camera port's brown tab back down to secure the camera cable in place
Finally, secure the Pi camera module in the cardboard frame from the back with a piece of duct tape.
Prepping and Mounting Your Thermal Printer
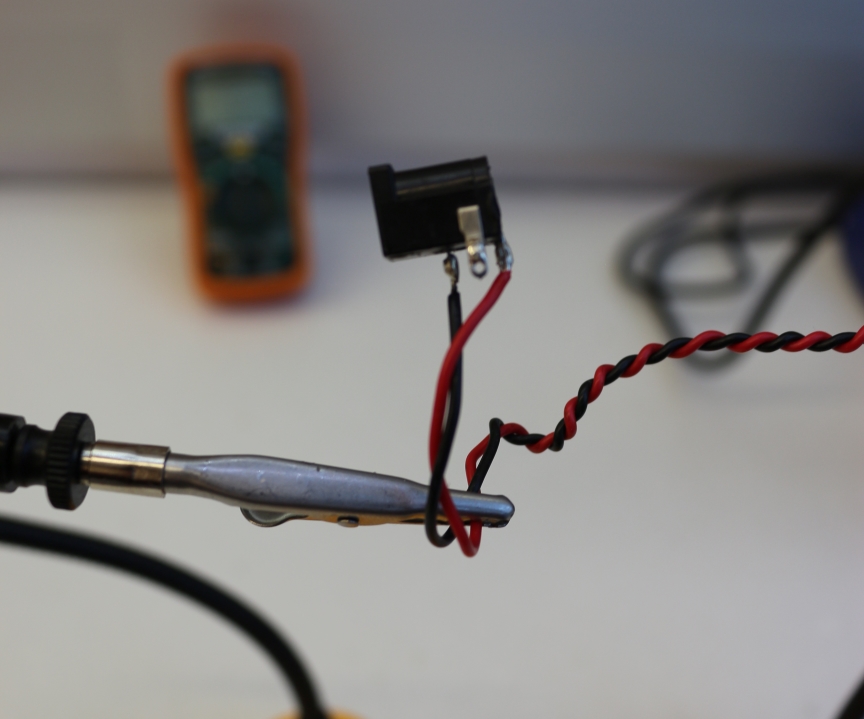
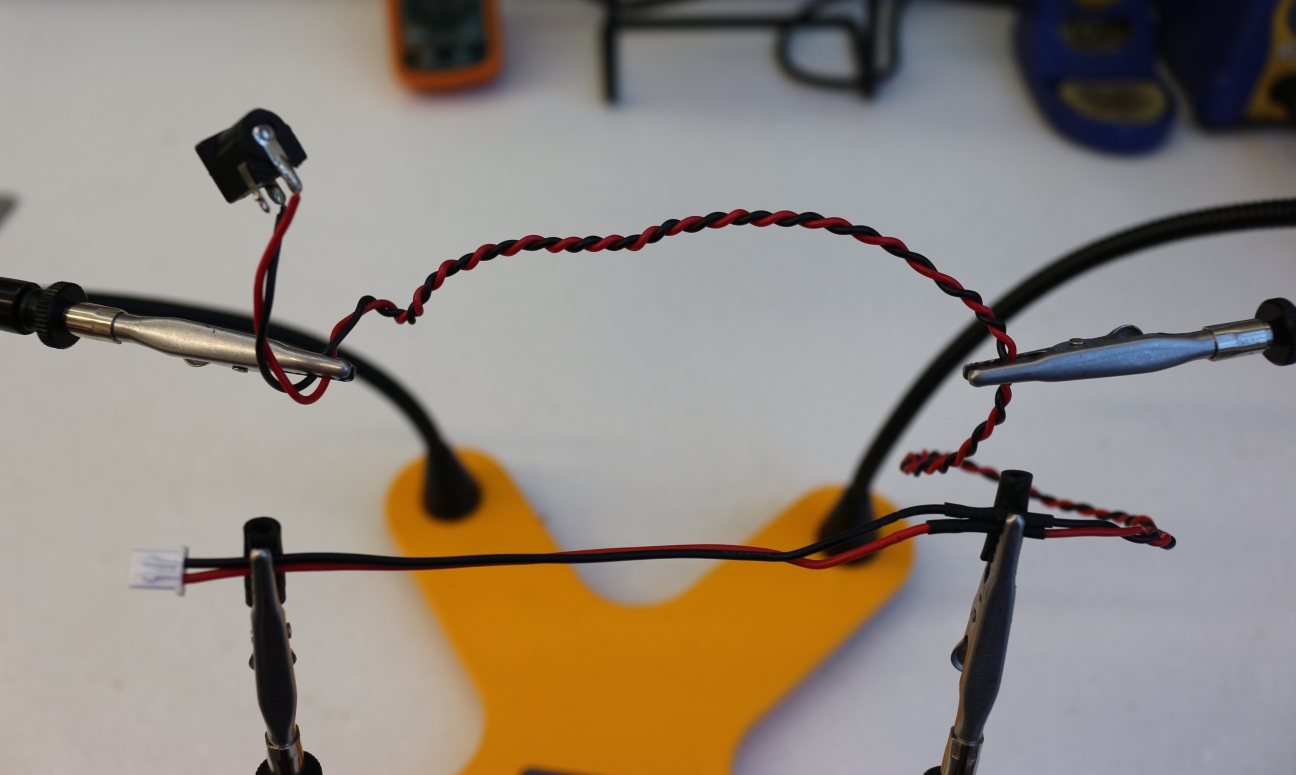
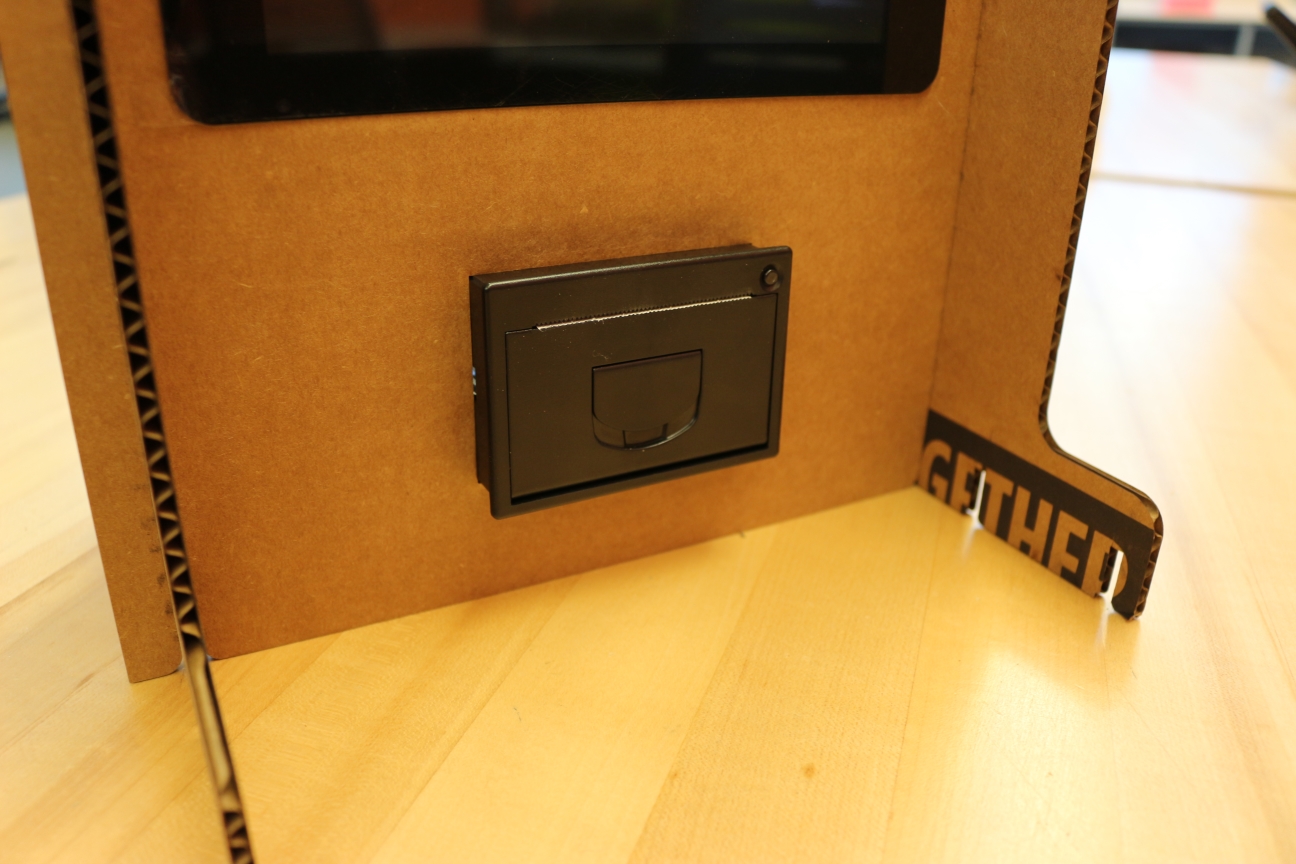
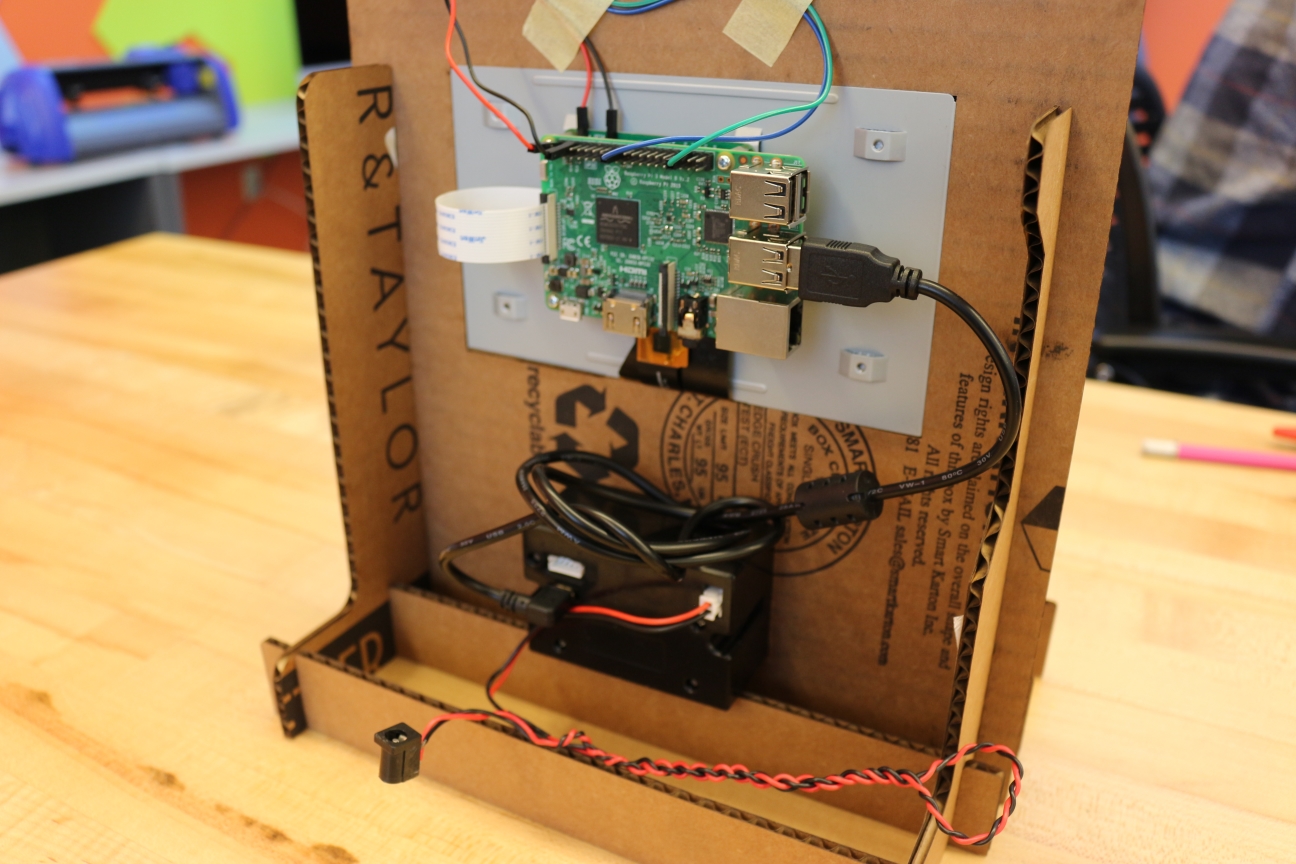
Time to check your printer package! For this step you will need:
- Your thermal printer
- Your printer power adapter
- The connection cables that came with your printer
If you have everything, you're ready to prep your printer for power!
TIP: First time using a soldering iron? Check out Adafruit’s guide to excellent soldering first!
Turn on your soldering iron and:
- Tin the back and front pins of your barrel plug
- Strip and tin some red and black wire
- Solder the red wire to the back pin
- Solder the black wire to the front pin (if you want to use some heathshrink tubing to insulate the wires, now is the time to cut it to size and slip it on the wires!)
- Solder the red and black wires to the corresponding wires on the power connector that came with your printer (if you used heat-shrink tubing, you can heat it now to make it hug, insulate and secure your wires)
TIP - Not all barrel plugs are created equal! The positive and negative pins on the barrel plug we used might not be the same on the one you will be able to buy. If you have ANY doubts, we recommend you test the pins using a multimeter and your power supply. If you don't know how, Adafruit has a great tutorial on multimeters, why they're awesome and how to use them.
Your printer is ready! You can now place it into the frame:
- Feed your printer in through the front of the frame, with the door opening down
- Connect your power wires and USB cable from the back
- Connect the USB cable to the Pi
- Connect the power adapter to the barrel plug
Prepping and Mounting Your Switch
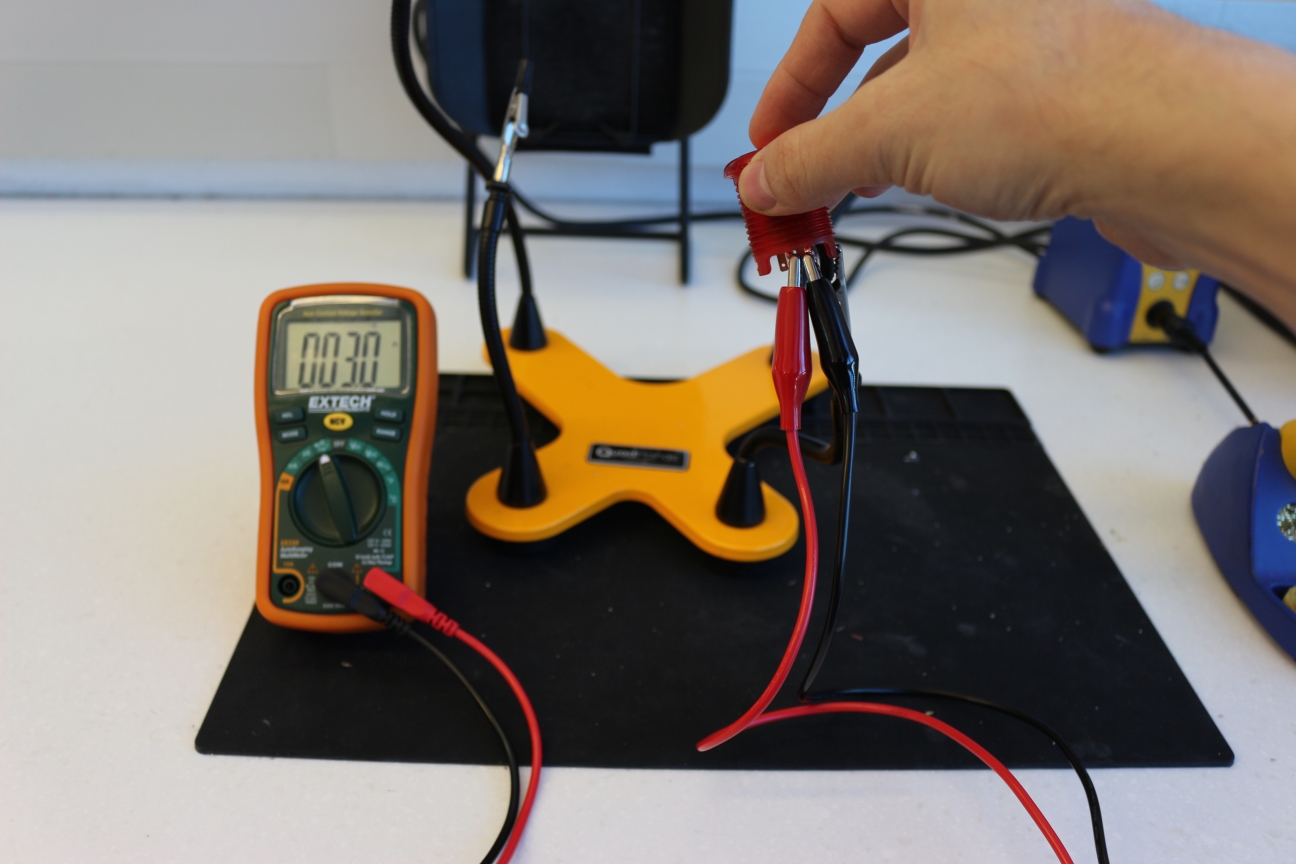
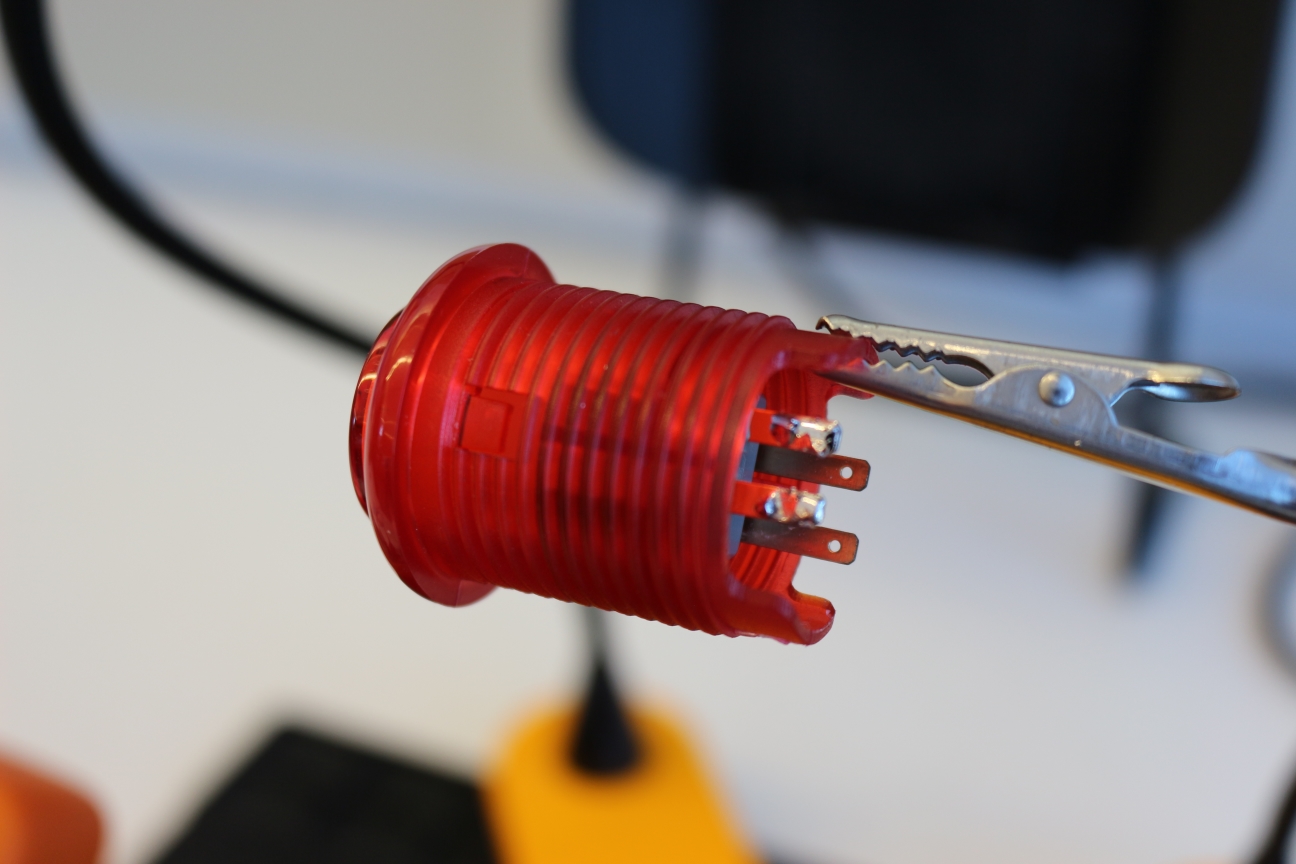
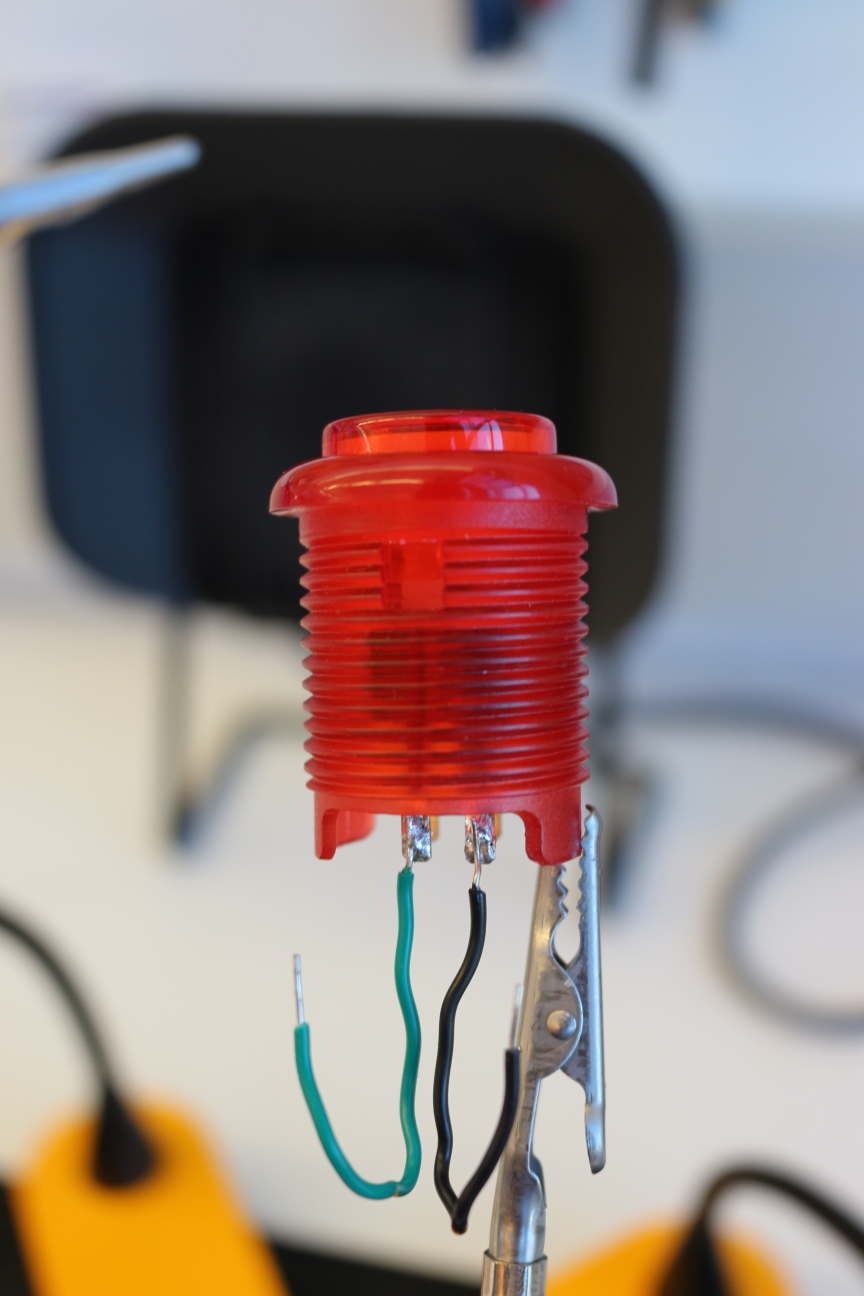
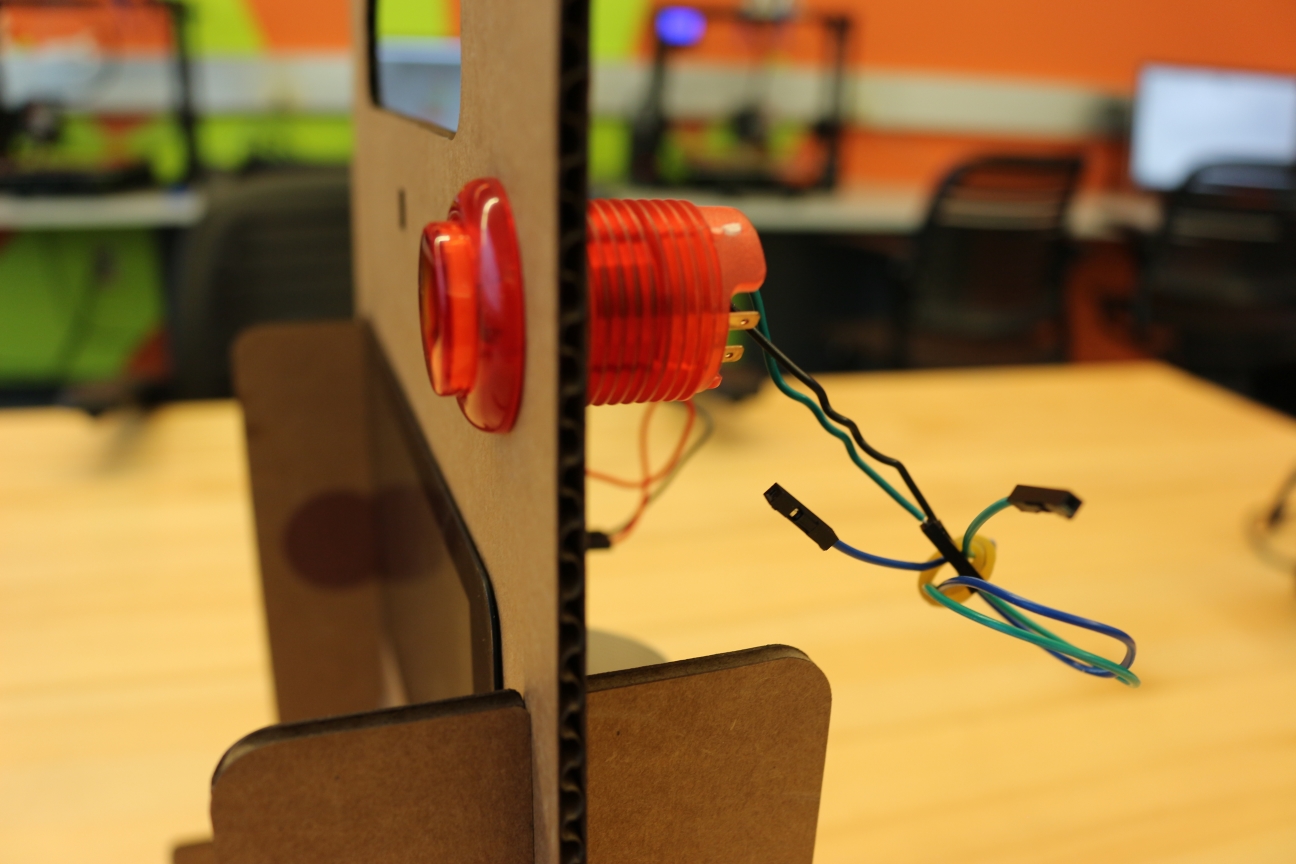
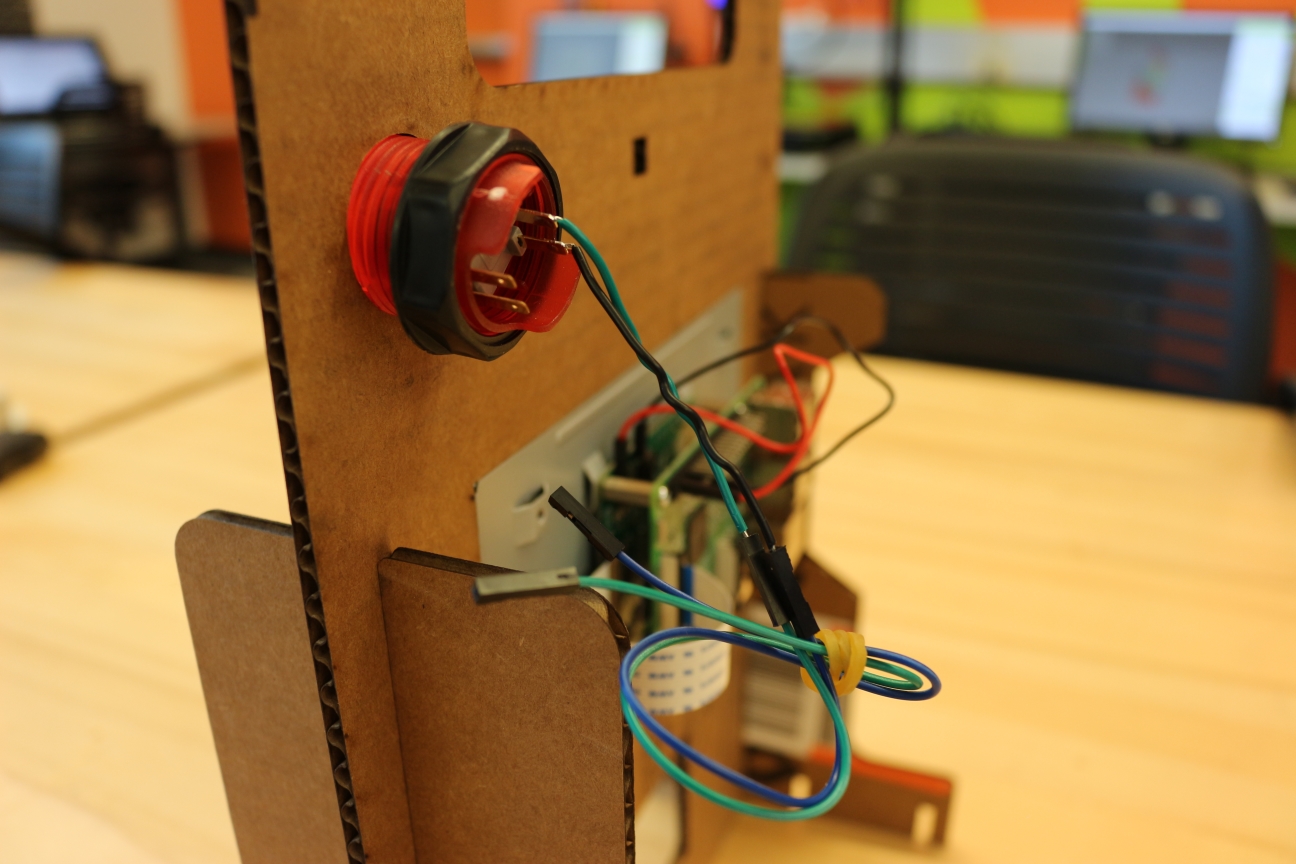
Now let's take a look at the button that will let us take pictures!
- Your button
- A couple of DuPont cables or wires
These buttons often have four pins. If you don’t know which pins are connected to the switch in the button, use a multimeter’s continuity mode to identify which pins are connected when you press the button! These big buttons are designed with arcade machines in mind, so the other pins are often reserved for an LED in the button to light up.
After you identified the switch's pins, turn on your soldering iron and:
- Tin the switch pins with a little solder
- Strip and prep some wires the same way you did for your printer’s power wires, this time using some DuPont wires (or regular wires, in case you just want to solder everything on your Pi’s pins)
- Solder your wires to your switch’s pins
- Feed your switch through the hole on your cardboard frame, wires first. Secure your switch from the back with the screw ring, but not all the way
- Connect the black DuPont cable to a Ground pin on the Raspberry Pi, and the other cable to your Pi’s GPIO 16 pin - with the GPIO pins closer to you, that will be the third pin from the left
TIP - If the pin numbers on the Raspberry Pi seem confusing and you can't remember which is where...Don't worry, neither can we! That's why we use that handy Raspberry Pi GPIO pins reference from Pinout.xyz all the time. They also have pins reference for many, many other popular electronics boards!
Installing Your Printer
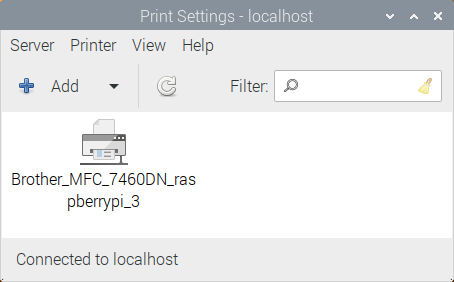
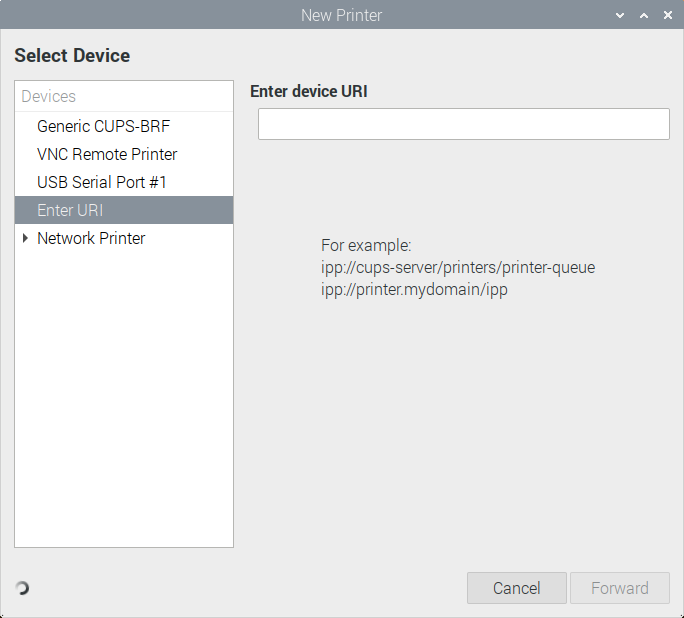
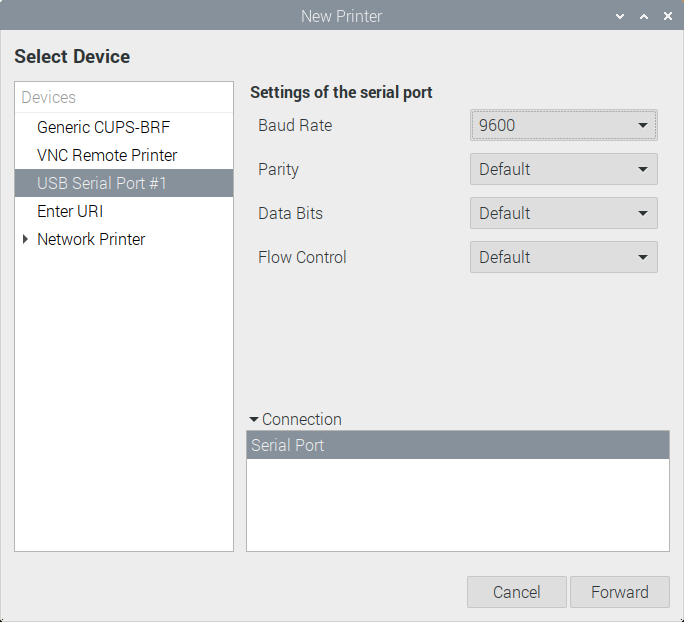
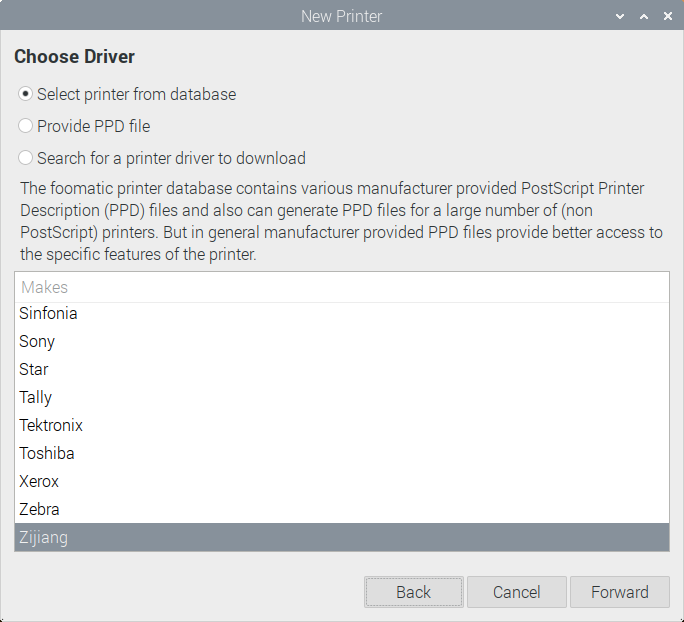
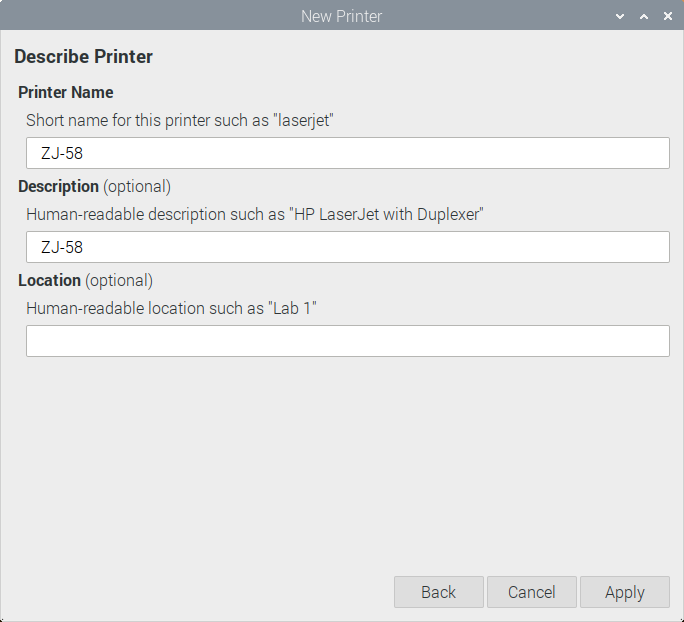
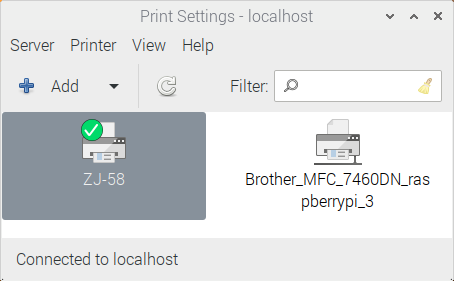
Now that we took care of most of the hardware for this project, let's work a little more on the software side of things - starting with the thermal printer!
Before starting, check that your thermal printer is connected to the Raspberry Pi with its USB cable, and plug in the power supply for the printer before turning on your Raspberry Pi.
TIP - We are only covering installing your printer over USB in this tutorial, but it is actually possible to connect it over a serial connection as well. If that's what you would like to do, make sure to turn off the connection over the Serial port in the Interfaces section of the Raspberry Pi Configuration tool! Fail to do that, and your thermal printer will constantly spit out gibberish on paper.
Is your Raspberry Pi all powered up and connected to the Internet? Great! Let's make sure your the operating system is up to date. In your Terminal, type:
sudo apt-get update
sudo apt-get upgrade
This might take a little while (sometimes it's even taken us 2 hours!), but once everything is up to date we can install printer support on your Pi. Still in your Terminal:
sudo apt-get install git build-essential cups libcups2-dev libcupsimage2-dev wiringpi
This will install all the essentials we need to support your printer and project:
- git is a tool used to download software from the code-hosting platform GitHub, among other things
- build-essentials will let us build software for our Raspberry Pi after we download it
- cups, libcups2-dev and libcupsimage2-dev are tools for managing and using printers (the paper kind, not the 3D kind)
- wiringpi will let us use the pins on the Raspberry Pi to trigger taking pictures
Next, let's add the drivers for your printer. Still in your Terminal, type:
cd /home/pi/
git clone <a href="https://github.com/adafruit/zj-58" rel="nofollow"> https://github.com/adafruit/zj-58
</a>
cd zj-58
sudo make
sudo ./install
Execute each command one after the other, giving each of them time to finish before moving on to the next.
TIP - Did you notice that cd /home/pi/ command? It lets us "go home" - that is, go to the Home folder for where every file and folder that belongs to the user named pi on the Raspberry Pi is stored. By creating files and folders there, we will make sure we can do everything we need for this project - or if you want to sound fancy, that you have "all the necessary permissions and user privileges"!
Now that we have created and installed the drivers for your thermal printer, it's time to install your printer on your Raspberry Pi! Check the following steps and the pictures above - it might look like a lot, but I promise we're just trying to be thorough!
- Click on the Raspberry Pi icon on your desktop to open the main menu
- Click on Preferences, then Print Settings
- Once the Print Settings tool opens, click on Add to...add the new printer!
- On the screen that popped up, select the entry from the Devices list for your printer - most likely it will be the USB Serial Port #1 entry, but your printer might show up differently
- On that same screen, click the Baud Rate menu under Settings of the serial port. Pick the value that matches your printer - for the printer we are using that's 9600 bauds - and click Forward
- The Pi will start looking for a driver for your printer. Click on Zijiang all the way down the list on the new screen that popped up, then click Forward
- Check that ZJ-58 and Zijiang ZJ-58 [en] are selected on the new screen that popped up, then click Forward
- The final screen showing up lets you pick a name and description for your printer. We usually leave these as is by default, but name it whatever you like then click Apply
This was the last step! Your printer should now be installed and you even have the option to send a test print to it. It's a very basic test print but that's fine - its only job is showing us that the printer can actually receive instructions from the Raspberry Pi.
If everything worked out - great! Make sure there is a green "Check" mark on the printer icon - in other words, make sure your thermal printer is the default printer - and you're ready to move on to the next step.
If your printer is not recognized or the installation didn't follow through, turn off your Raspberry Pi and go over the previous steps for the printer - both the hardware steps and software steps, to make sure the printer is working and that it has all the software it needs. And reach out to us in the comments if you run into any trouble!
Activating the Raspberry Pi Camera Module
A pretty important step in this project is making sure your Raspberry Pi camera module is actually activated! Otherwise it won't work, even if you connected it right.
- From the Raspberry Pi start menu, click on Preferences
- Click on the Raspberry Pi configuration tool in the menu
- Once the Raspberry Pi Configuration tool starts up, click on the Interfaces tab
- On the Camera line, click on the Enable radio button
The Raspberry Pi will prompt you to restart. Click Yes and your camera module should be recognized on the next boot!
Install the Picture-Taking Script
To install the picture-taking script, you can just copy the code we made available on Github. It's a simplified and commented version of a script by Philip Burgess, automatically setting up the exposure for the camera.
In your terminal, type:
cd /home/pi/
git clone  https://github.com/jocolibrarymakerspace/thermal_...
Once again, give each command time to finish executing before typing the next one! This step will create a folder named thermal_printer_camera in your home directory, and download all the necessary files there.
To test your setup now, go to the thermal_printer_camera folder using the Terminal:
cd /home/pi/thermal_printer_camera
Give yourself the permissions necessary to run the picture-taking script with the following command:
sudo chmod +rx thermal_printer_camera.sh
And now run the script!
./thermal_printer_camera.sh
A few instructions should show up to welcome you to the Thermal Printer camera, explain how to print pictures, as well as how to stop the script and turn off the Raspberry Pi. You're ready to take picture!
Just push the picture taking button you hooked up to your Raspberry Pi earlier: a preview should appear on your screen so you can strike a pose, and after a few seconds your picture should come out on the thermal printer!
If it's not working out, don't panic! Turn off your Raspberry Pi, double-check all your connections and go over the previous steps. Once you've made sure everything is connected correctly and all the software we need is in the correct place, everything should work out.
If your thermal printer camera is still not working, let us know in the comments and we'll help you as much as possible!
Starting Our Picture-taking Script on Boot
Now that everything seems to work on demand, let's have the picture-taking script start automatically when we turn the Pi on! In your terminal, type:
sudo nano /etc/xdg/lxsession/LXDE-pi/autostart
This will let us edit the file that manages programs on desktop startup on your Raspberry Pi: it will open the text files that lists the commands to execute on startup, regardless of who is logged in. Use the arrow keys or your mouse to navigate to the end of the second line in that file, and press Enter to start a new line. Then, add the following:
/home/pi/thermal_printer_camera/thermal_printer_camera.sh
This will start the camera software up with your Raspberry Pi on boot. Press CTRL+X to exit, confirming changes with Y, then press Enter.
Now is a good time to reboot your Pi and test it out! Nothing special should show up on your screen, but when you press the switch the camera should activate, and the Pi will give you a preview on your screen for a few seconds before printing out your picture!
Would You Like to Know More?
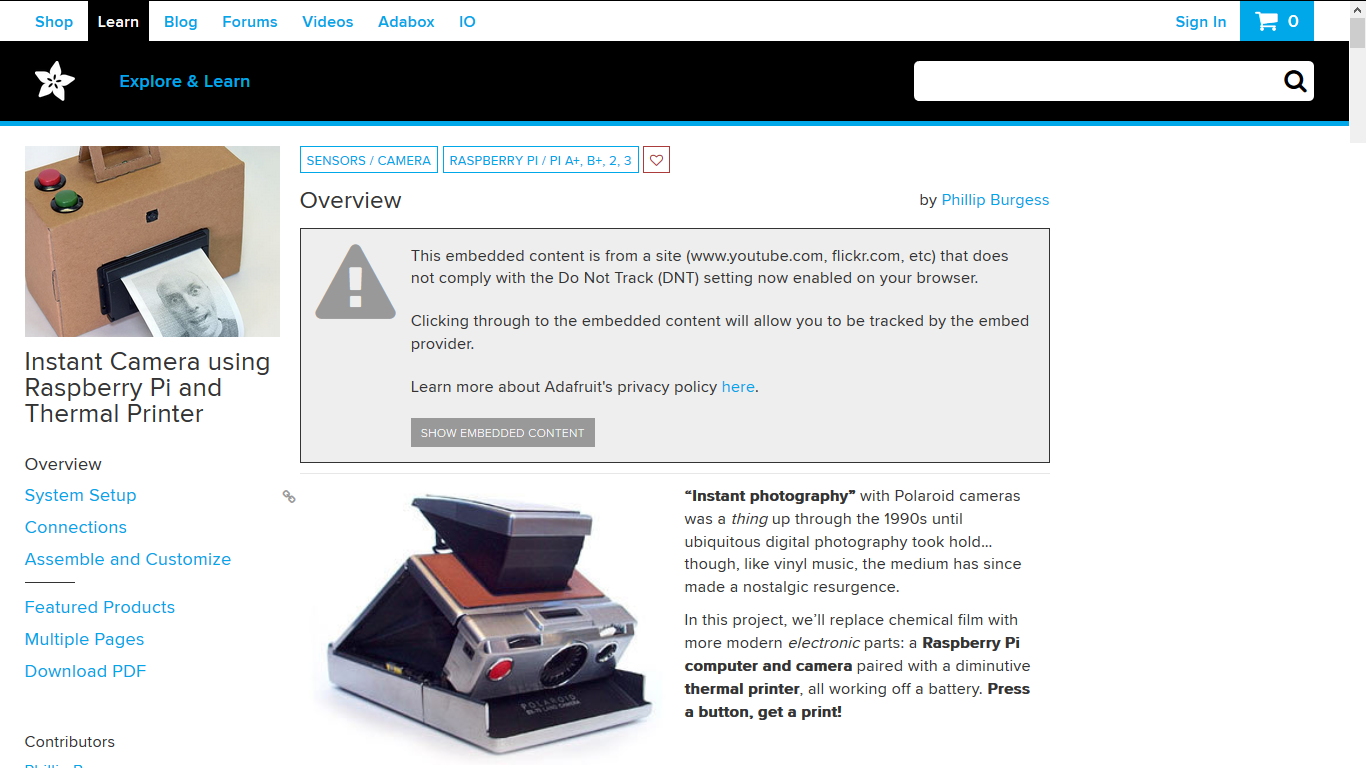
This design was inspired by Phillip Burgess's tutorial "Instant Camera using Raspberry Pi and Thermal Printer"
at https://learn.adafruit.com/instant-camera-using-raspberry-pi-and-thermal-printer?view=all
We used this camera and a fancy laser cut wood frame for our 2018 Library Lets Loose fundraising event, and are already gearing up for the next! Find out more on the Johnson County Library Foundation website at https://www.jocolibraryfoundation.org/