Pi Pad Hot Pad
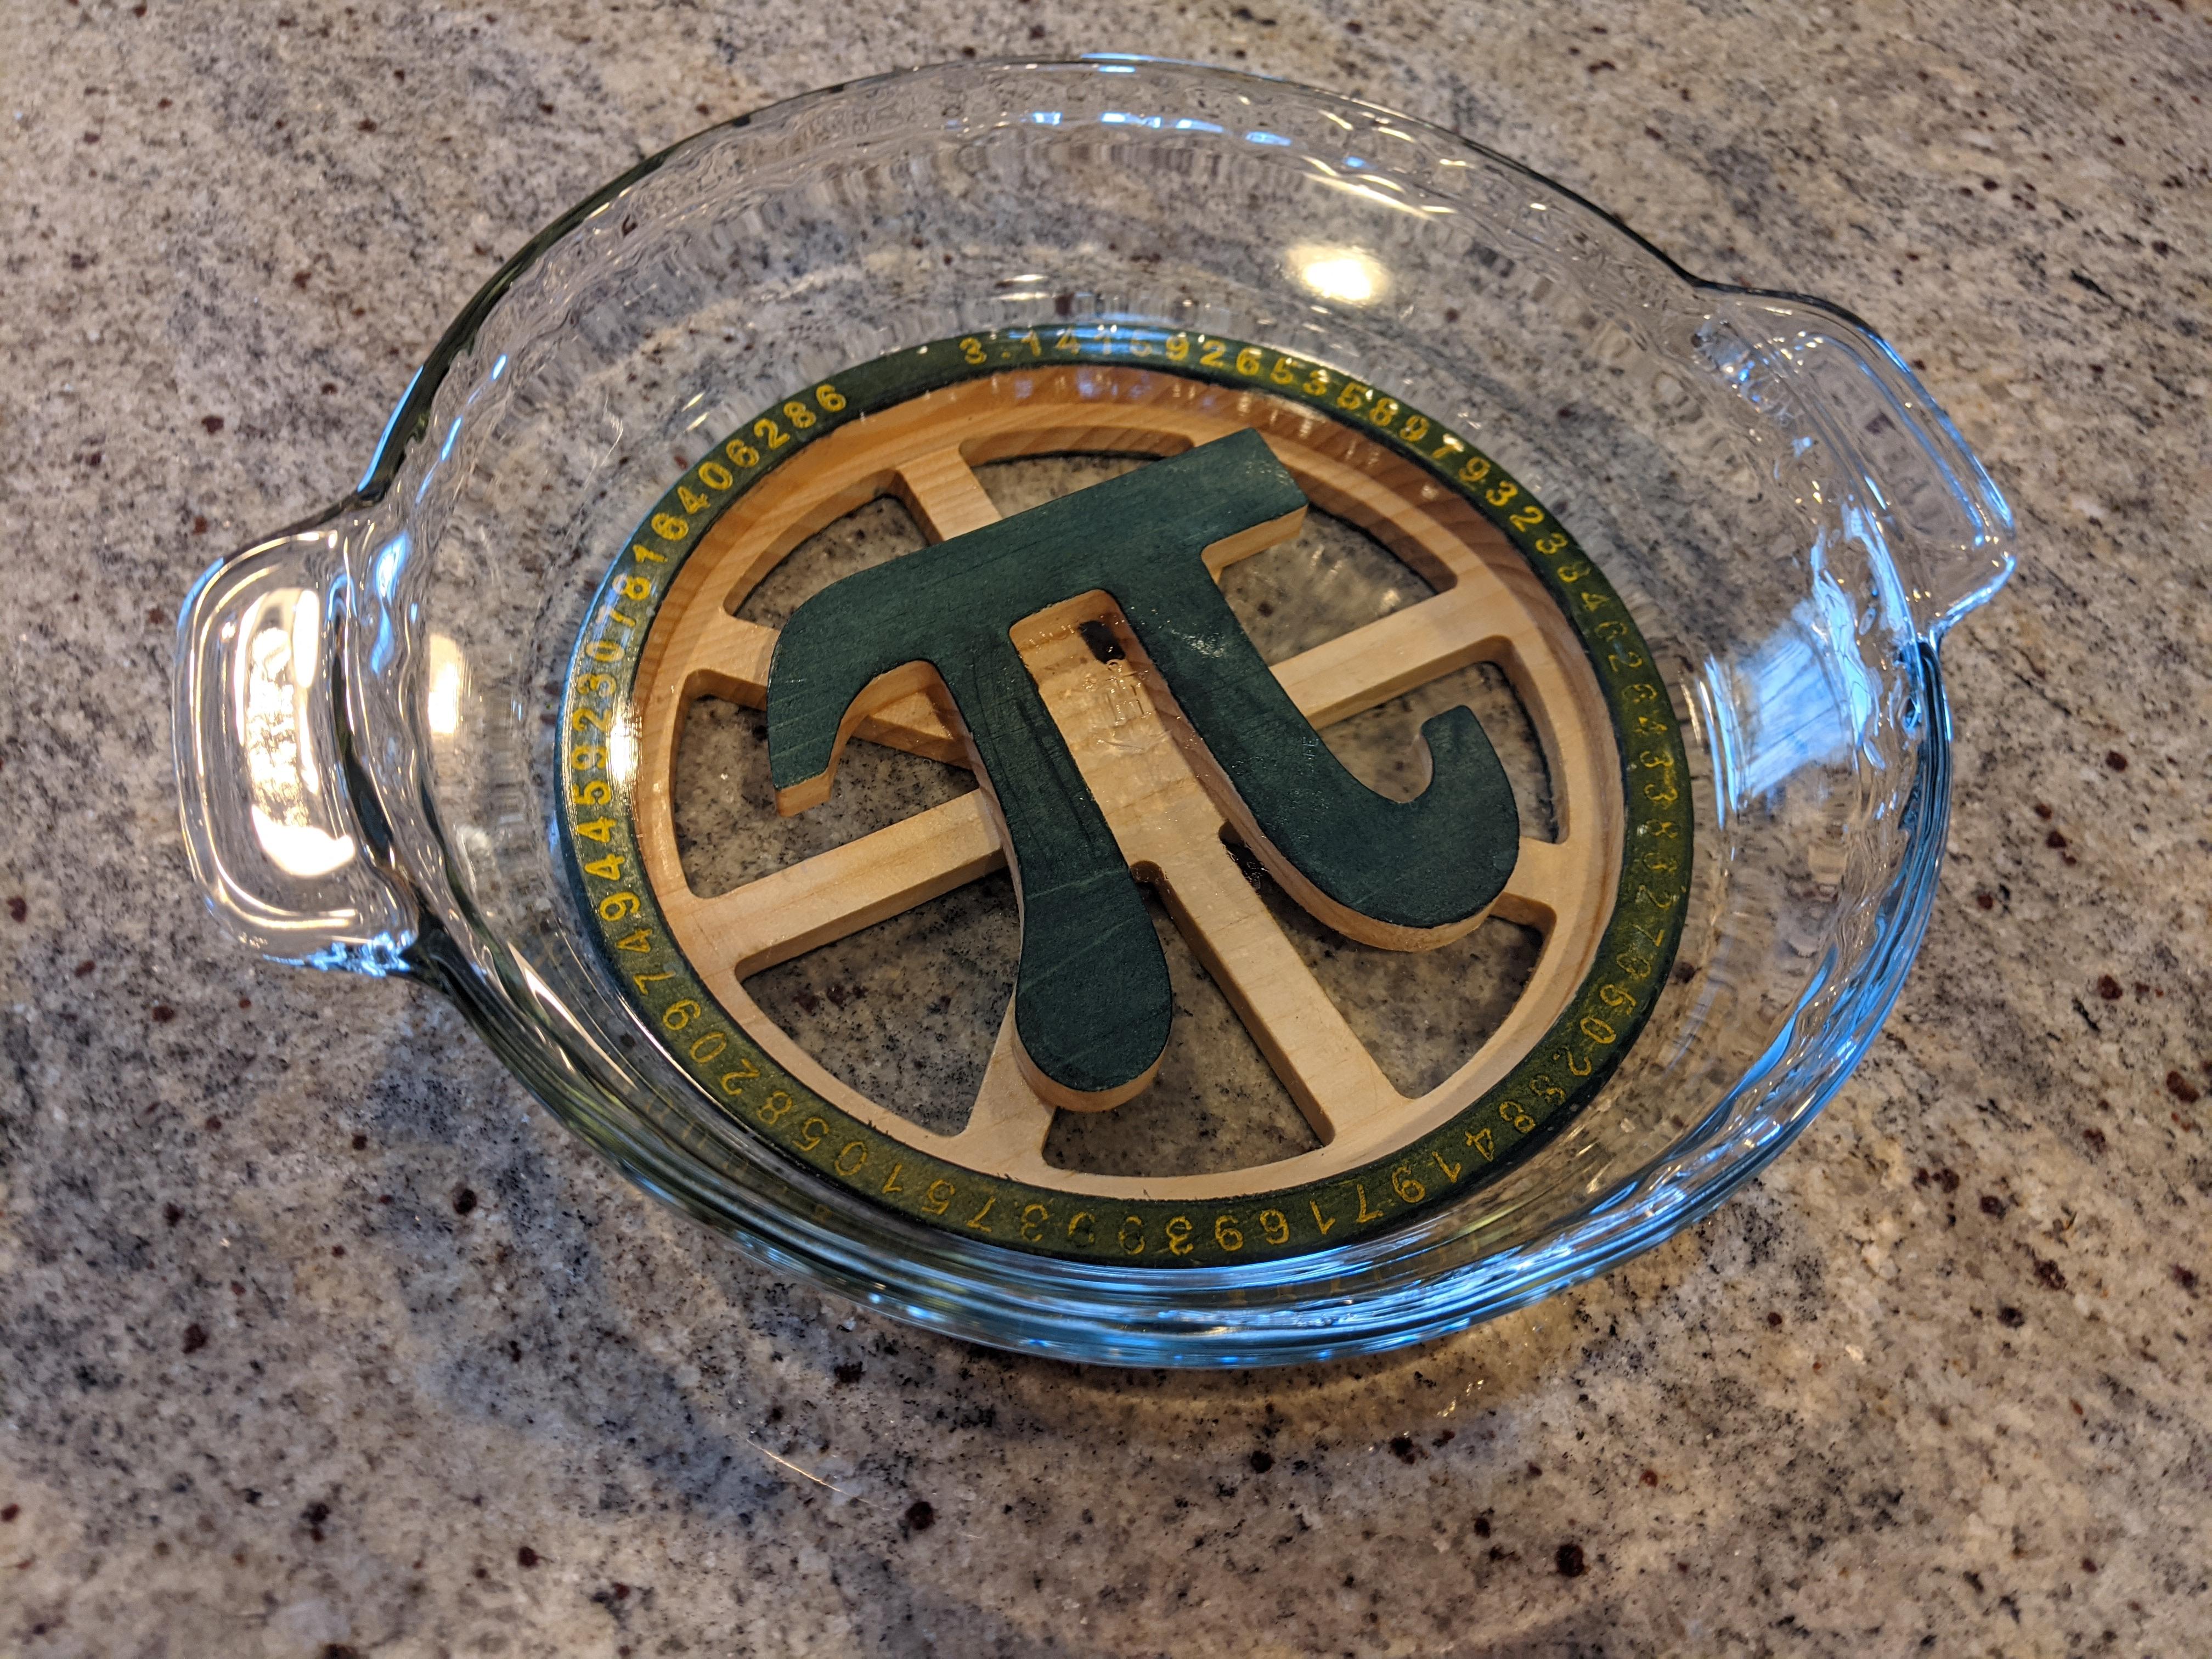

This is a CNC'd wooden Pi hot pad for your favorite Pie. Also stained green since we're so close to St Paddy's Day. It requires a CNC router and a piece of 3/4" wood to fit the 8" diameter round. Both SVG and DXF files are provided.
Supplies
CNC wood router
3/4" thick lumber to fit 8" diameter hot pad
Download the Vector Files
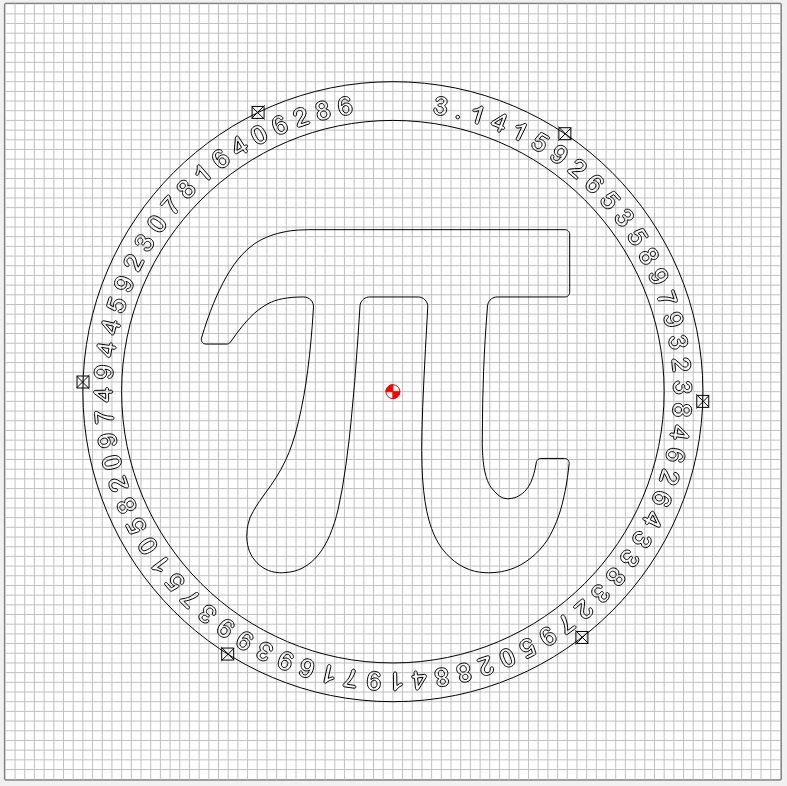
Download the Pi_pad_front and pi_pad_back SVG and/or DXF files for import into your CNC programming software.
Pi_pad_front Gcode Preparation

Import the Pi_pad_front vector graphics into your CNC prep softare. I use CarbideCreate for my Shapeoko router. I find it easiest to set the origin (0, 0) at the center of the circular shape.
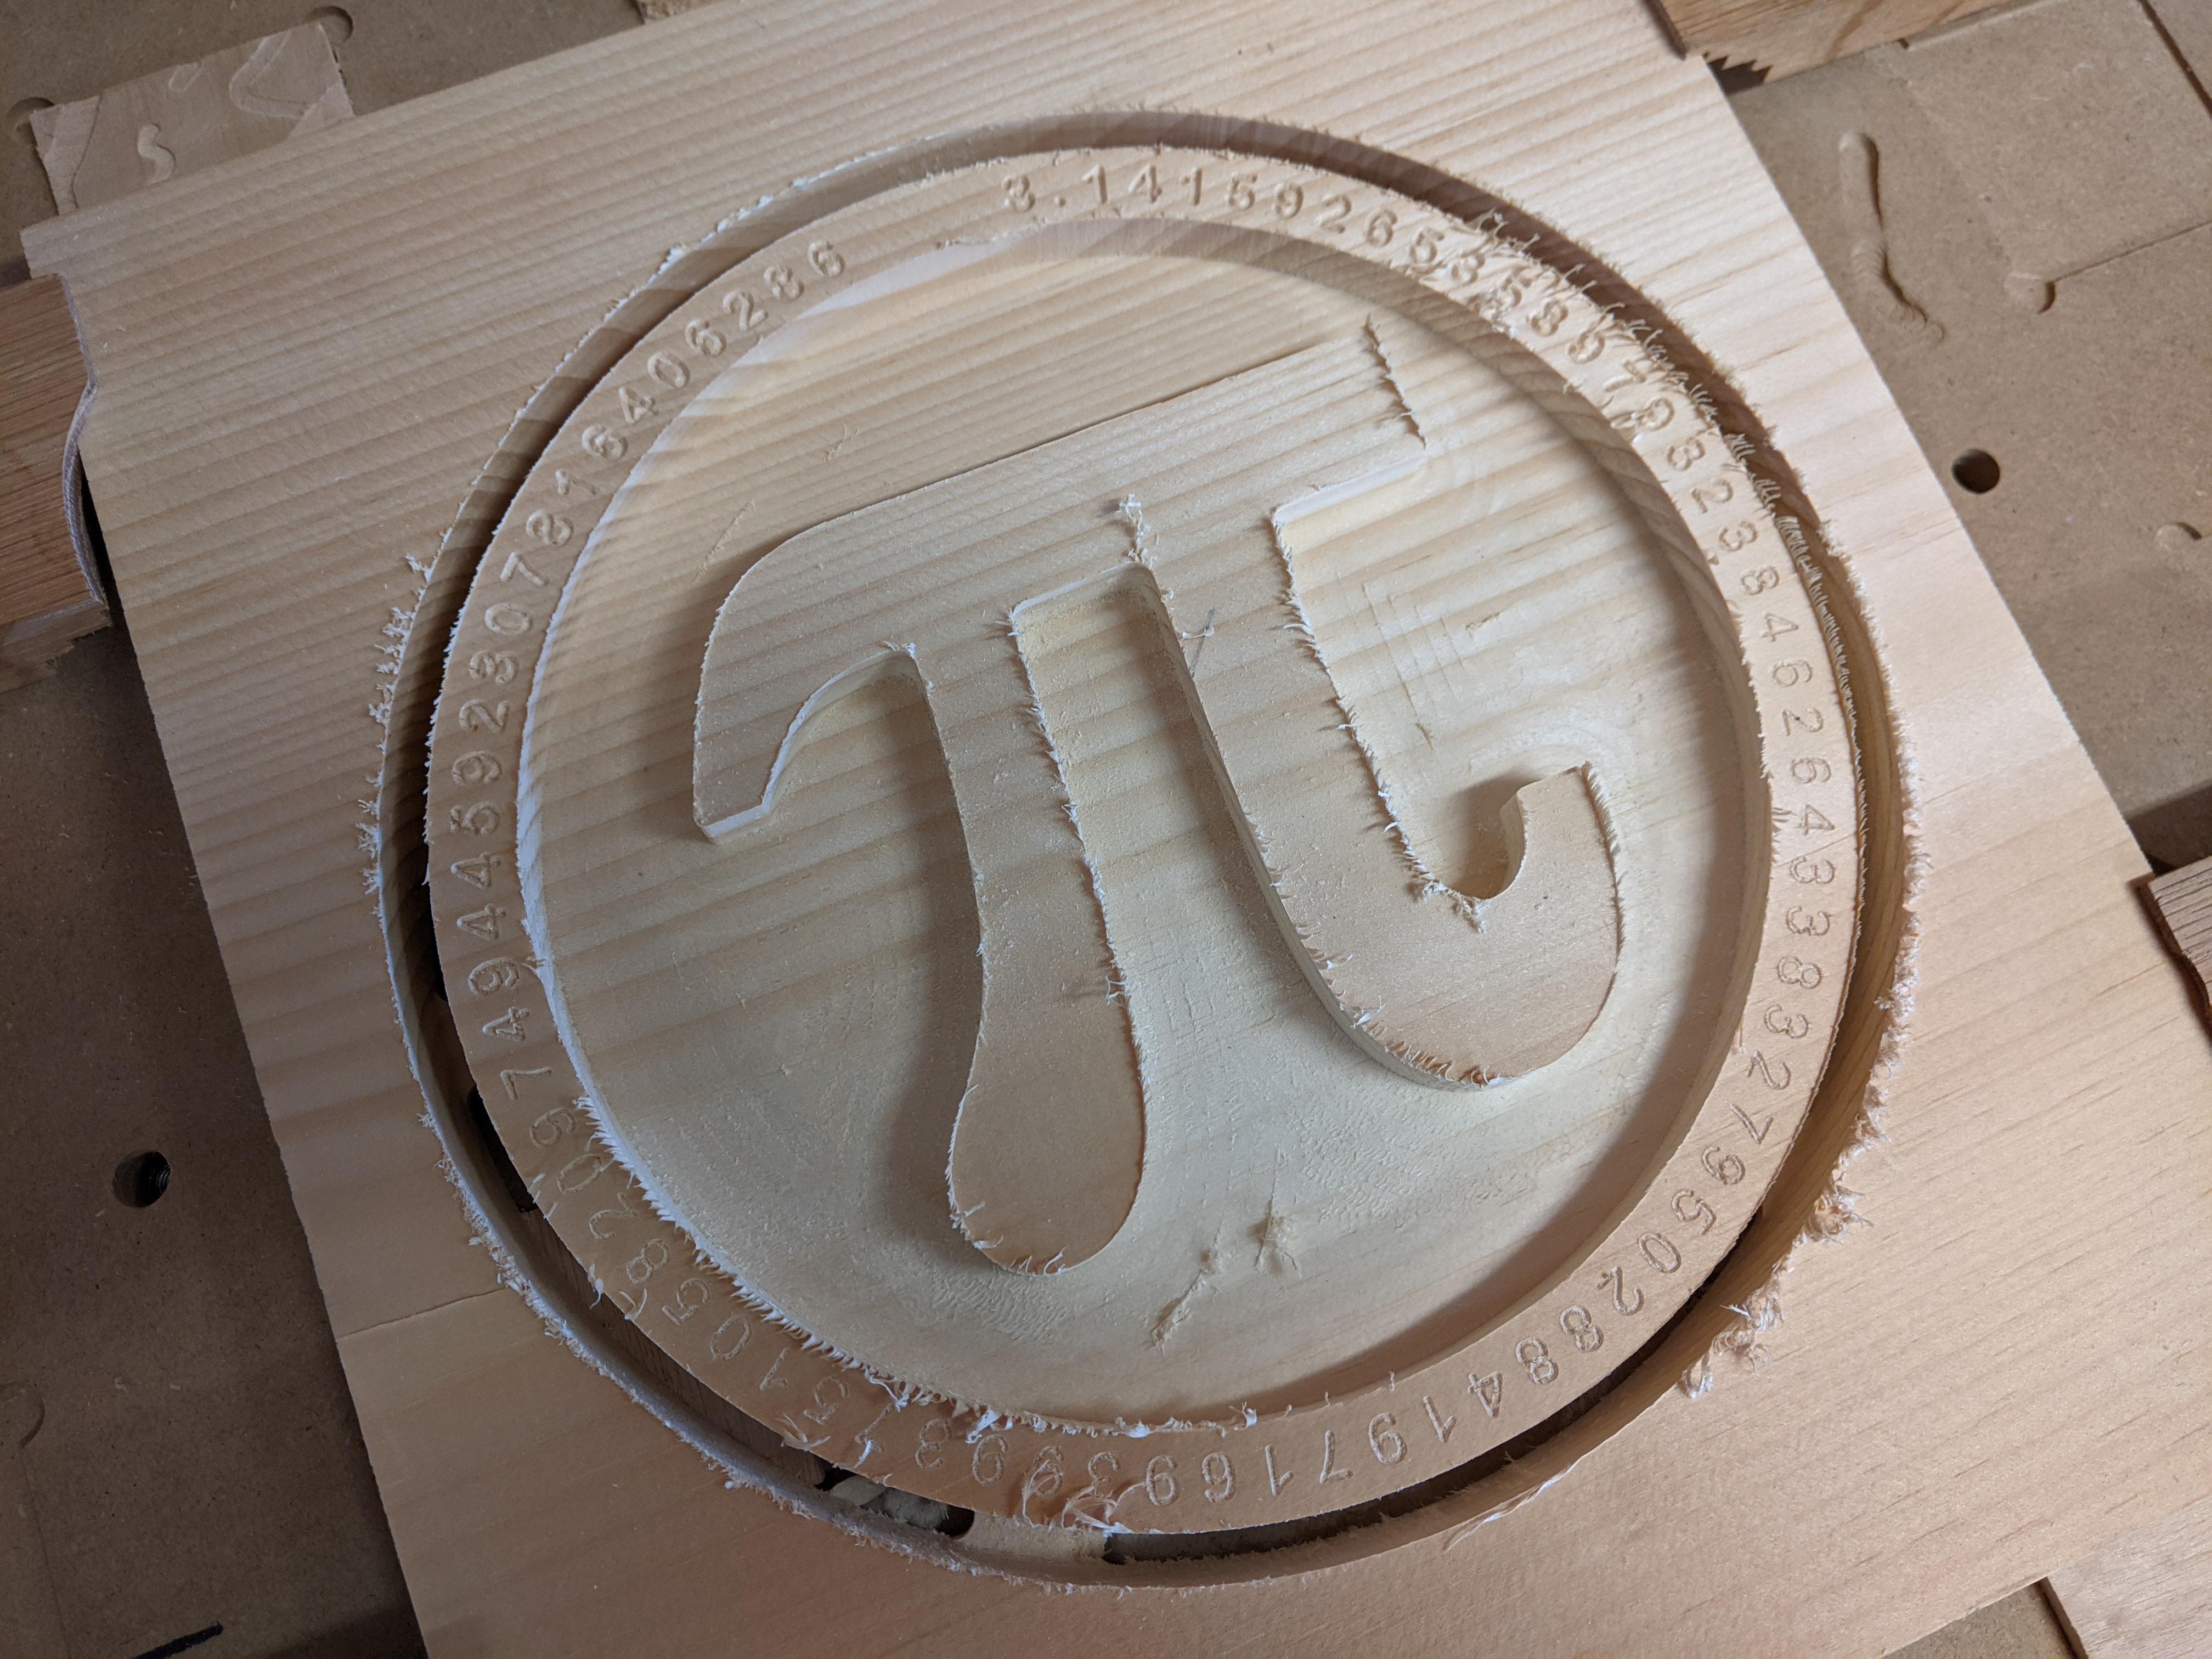
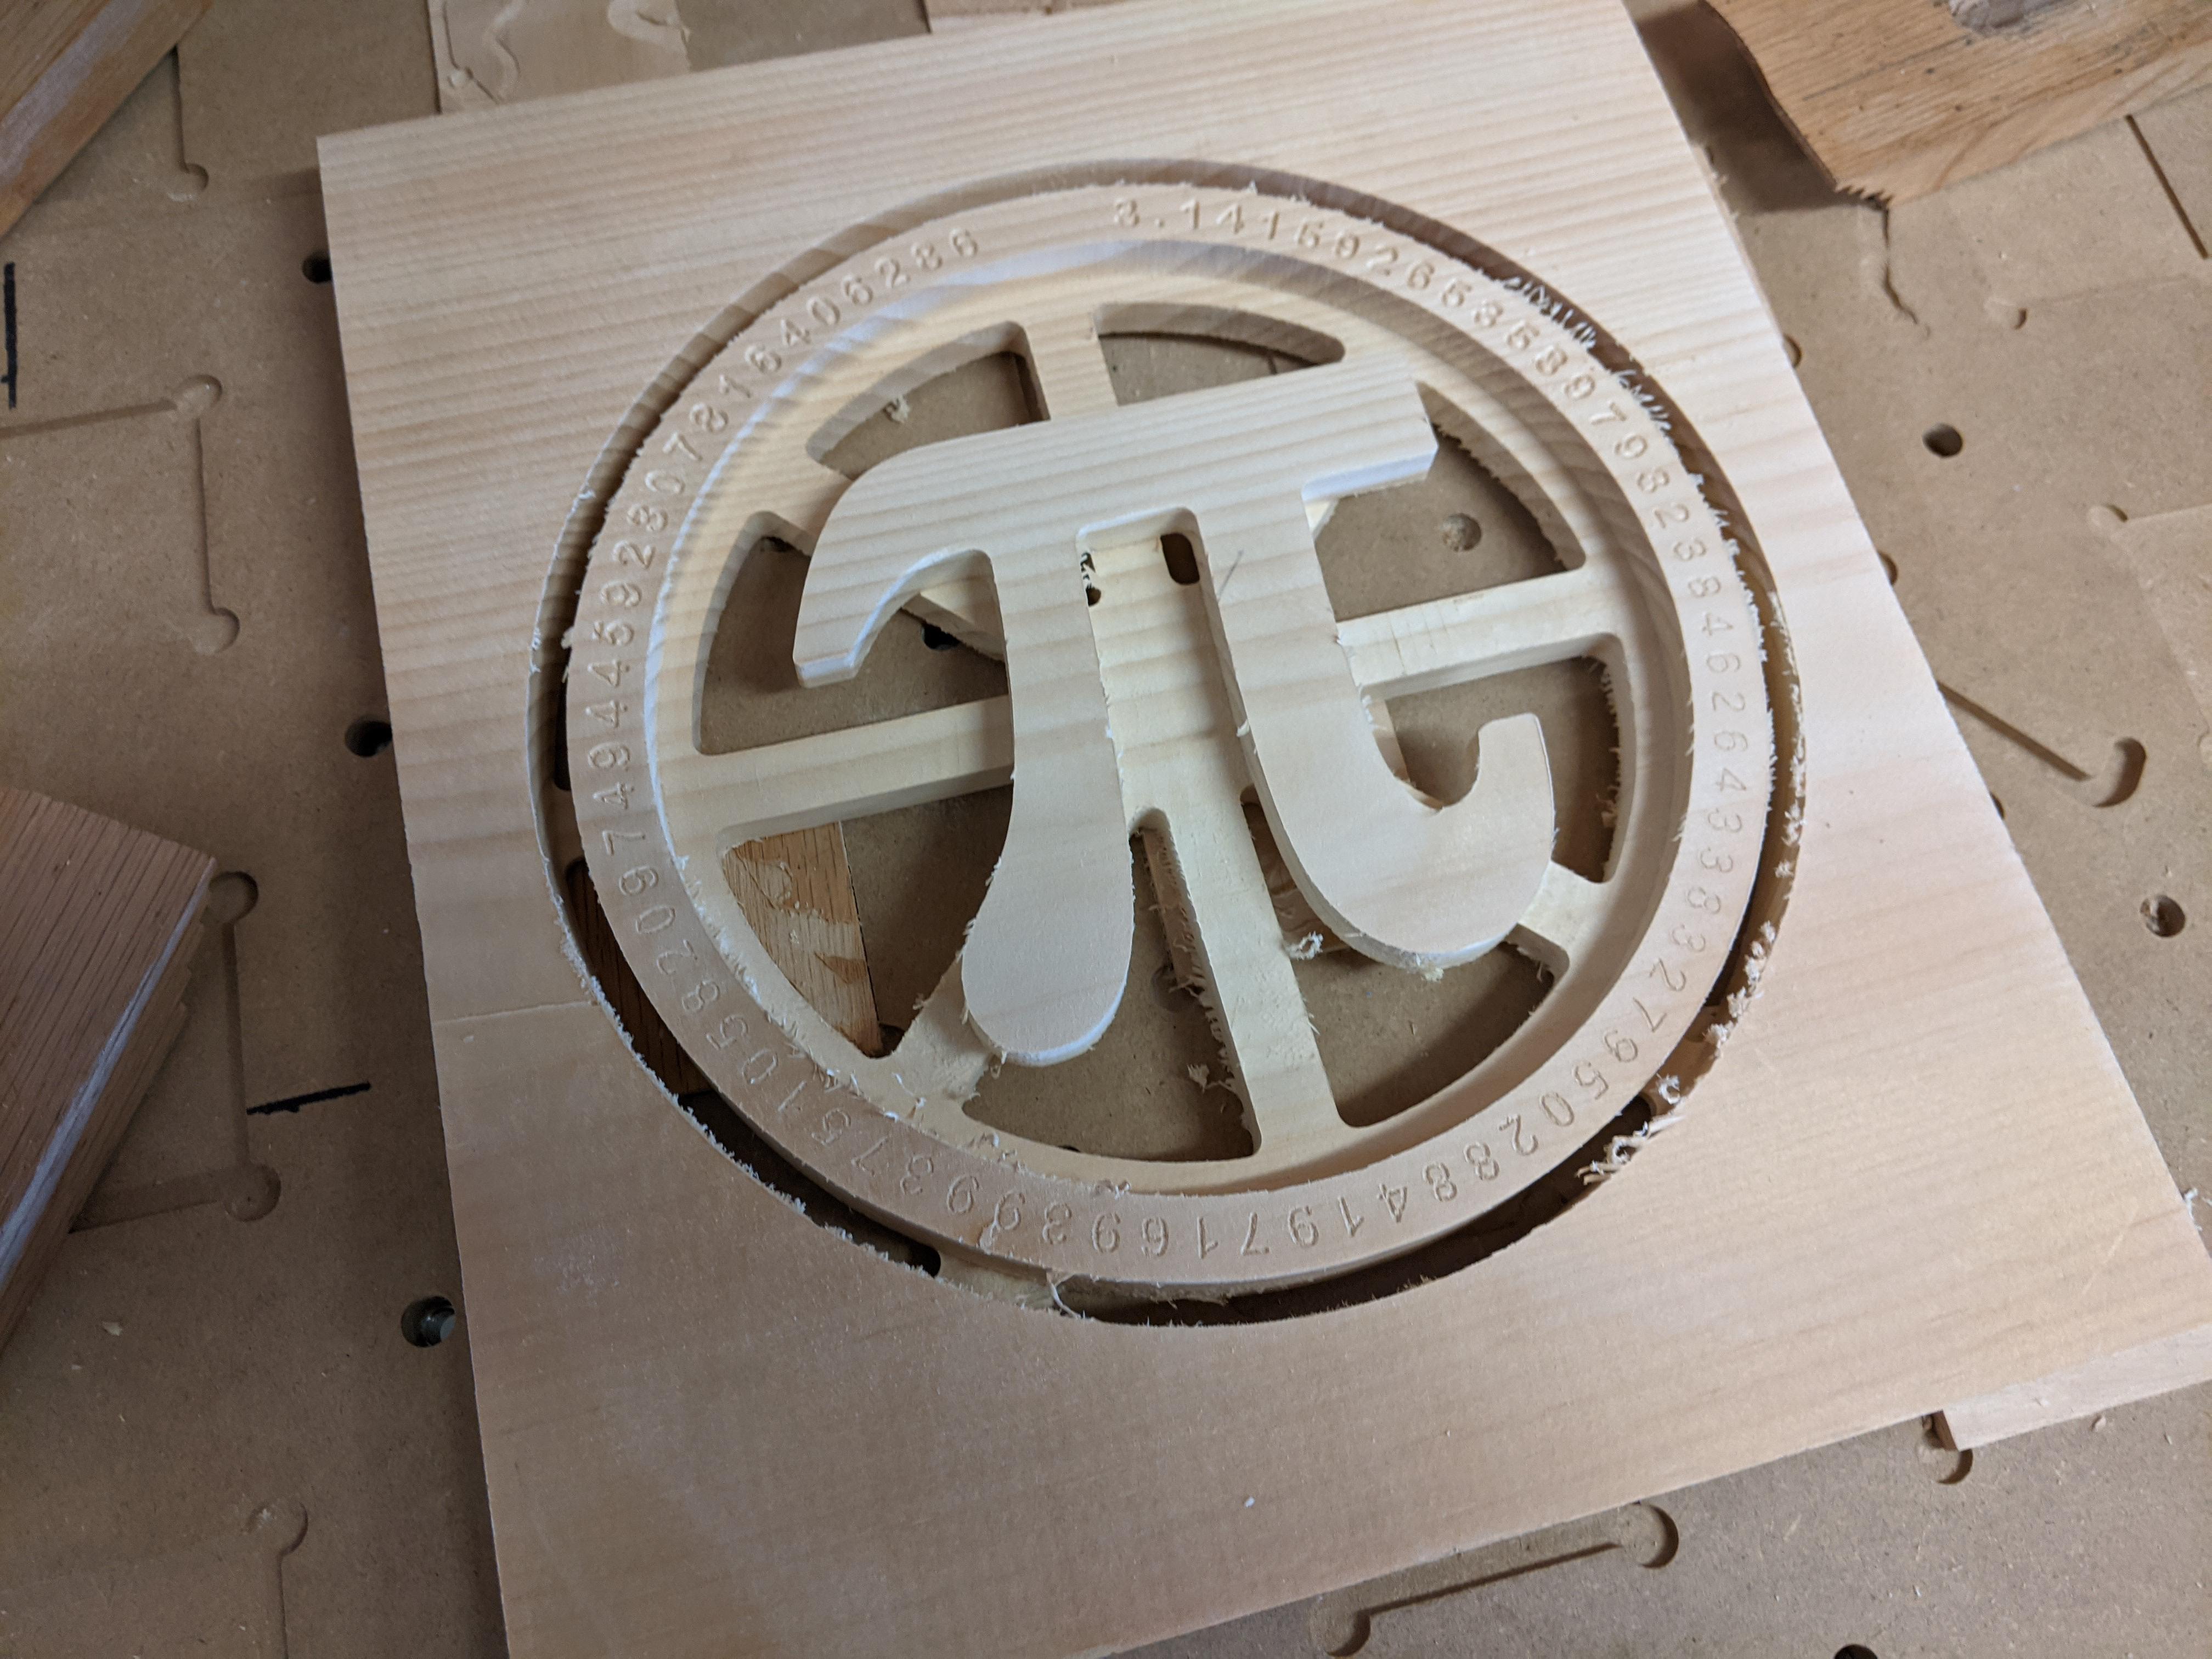
Select the "Pi symbol" and the "inner circle". Program to cut just over half the depth of the wood (.390") using a .25" diameter flat bit. Next select the "outer circle" and program to cut full depth, leaving tabs to hold keep the PiPad attached. Save this gcode.
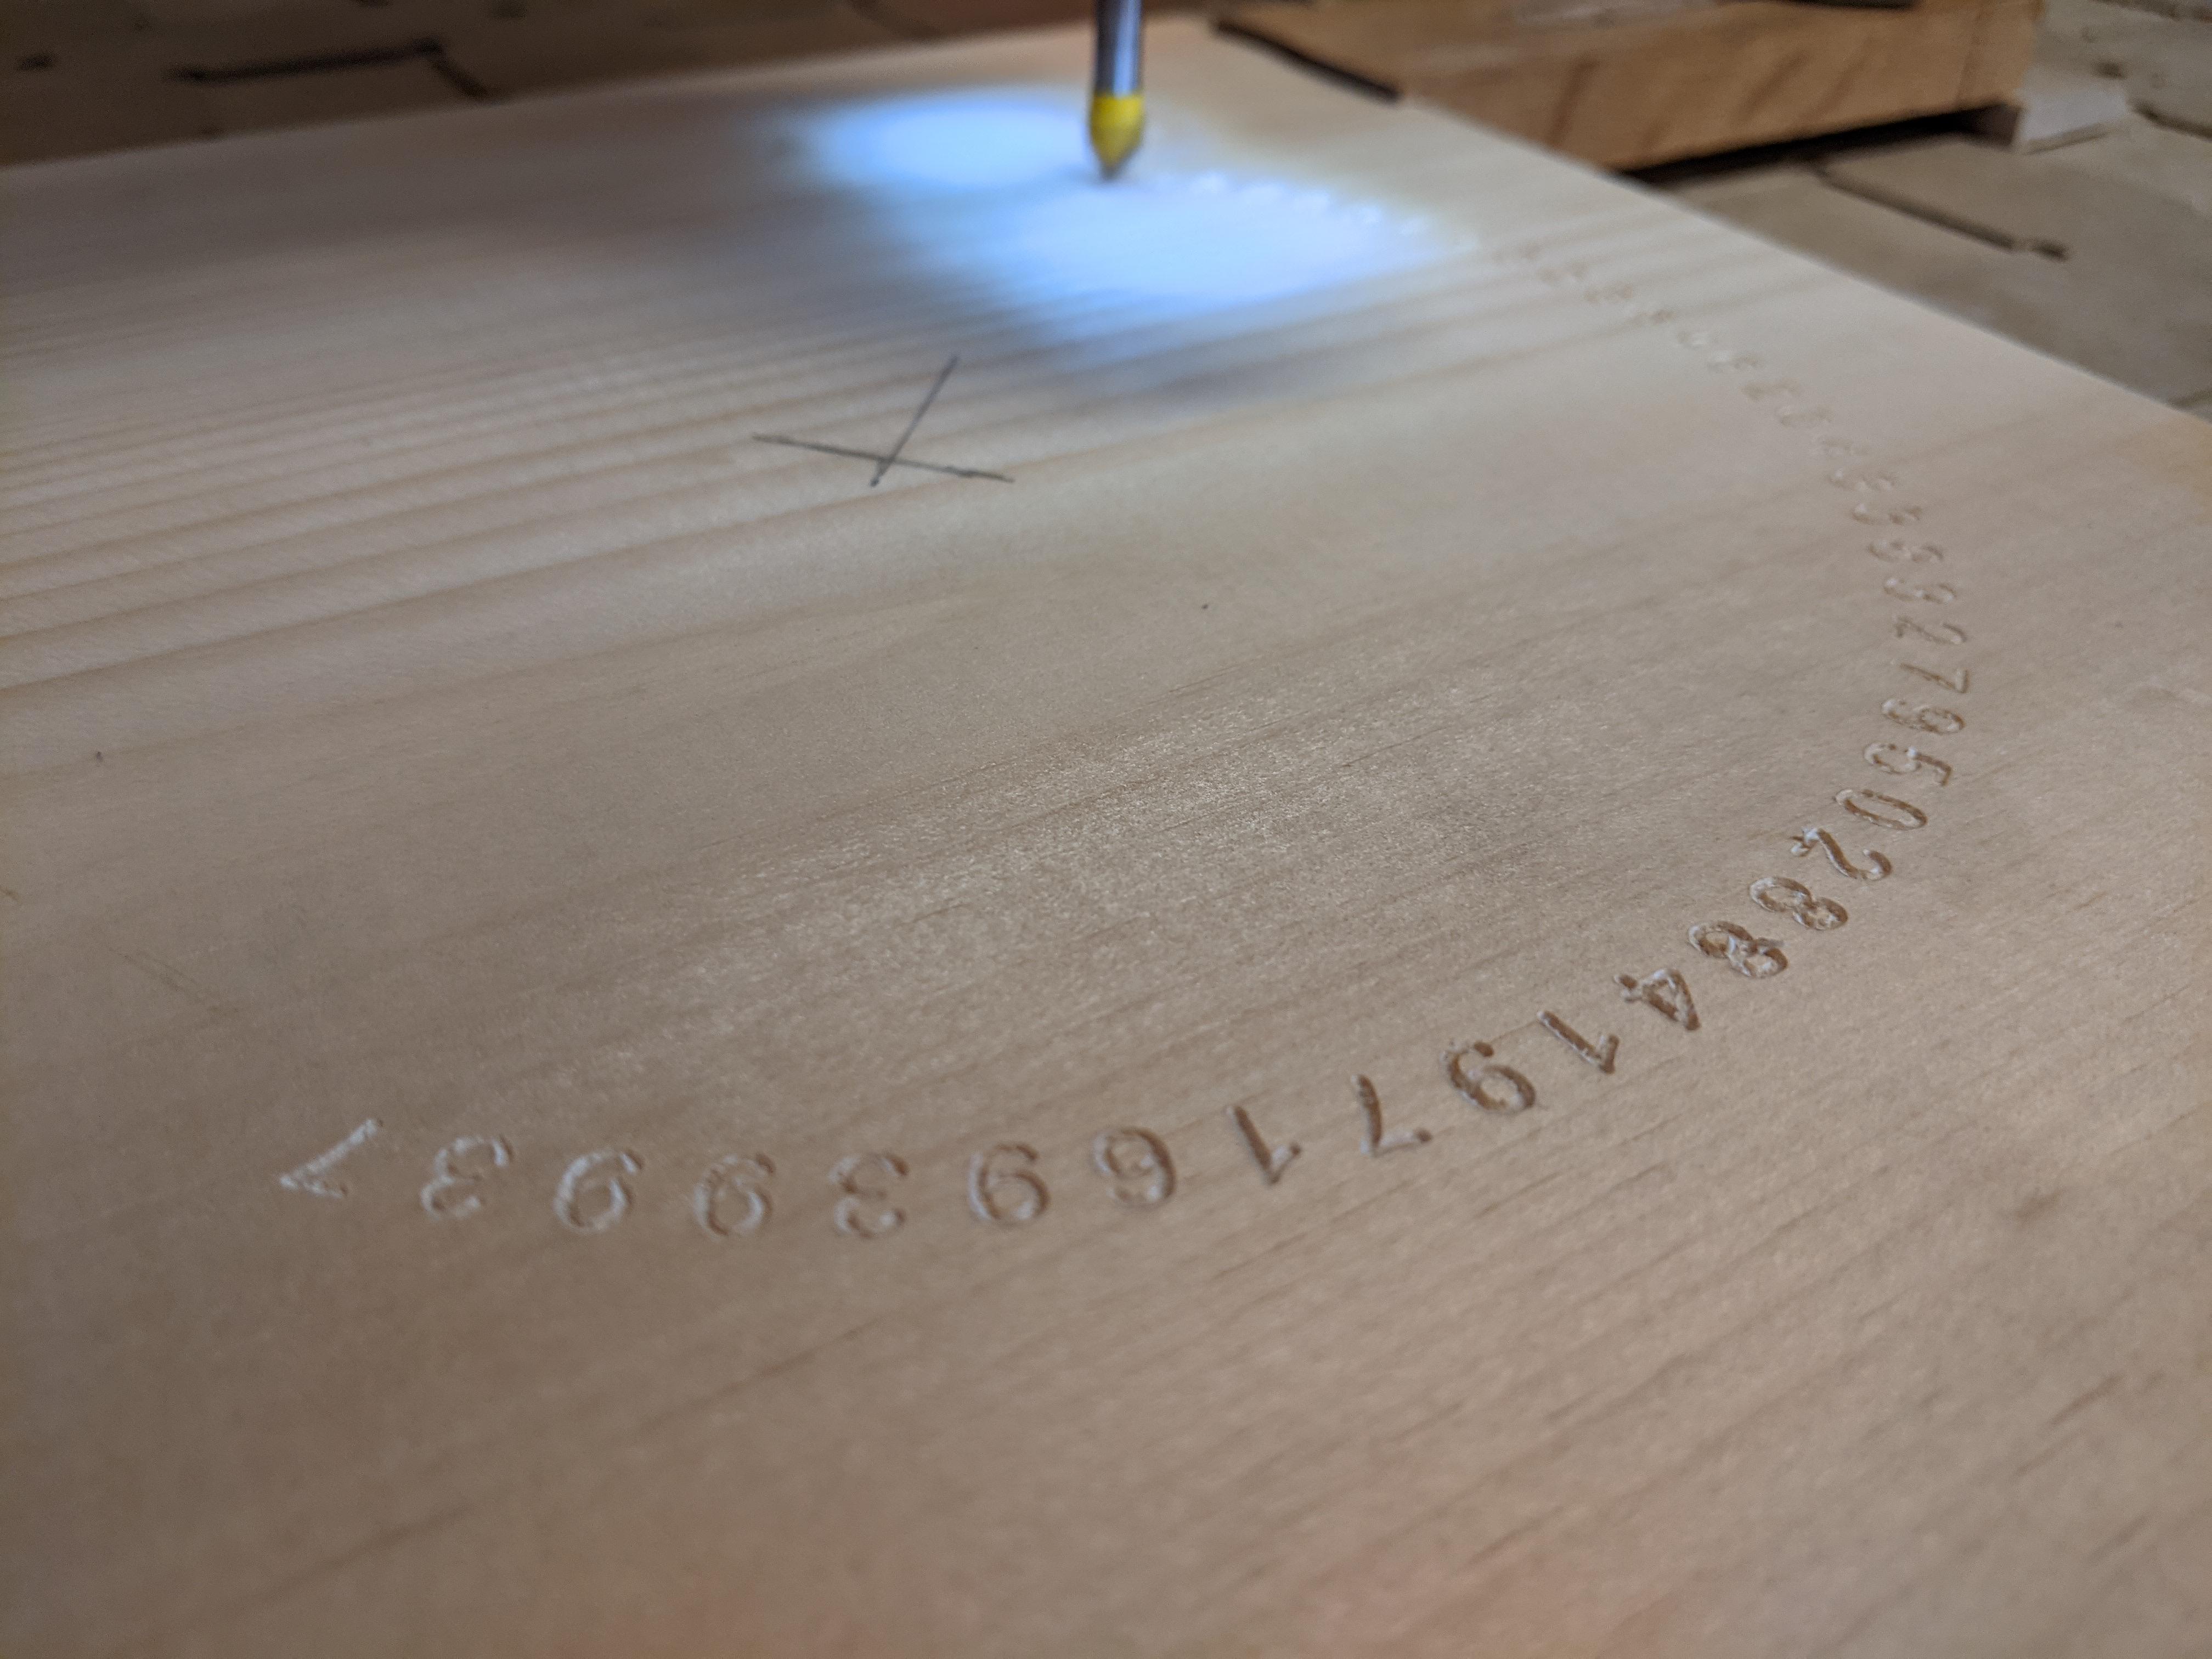
Next select all of the small perimeter numbers "3.1415....." for engraving. Select a Vee-bit cutter and perform an engraving operation. Save this gcode separately.
Pi_pad_back Gcode Preparation
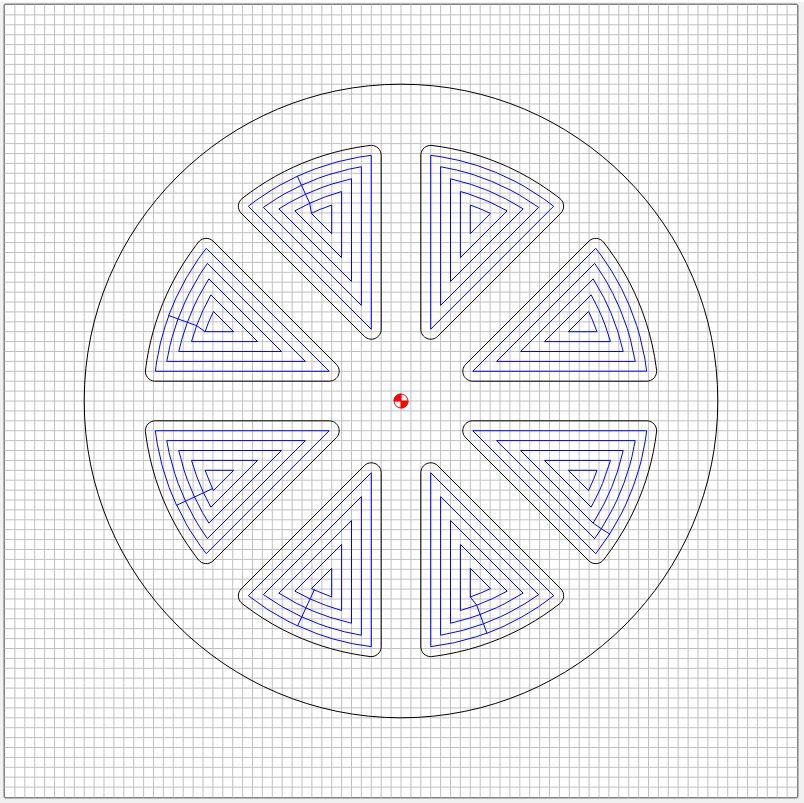
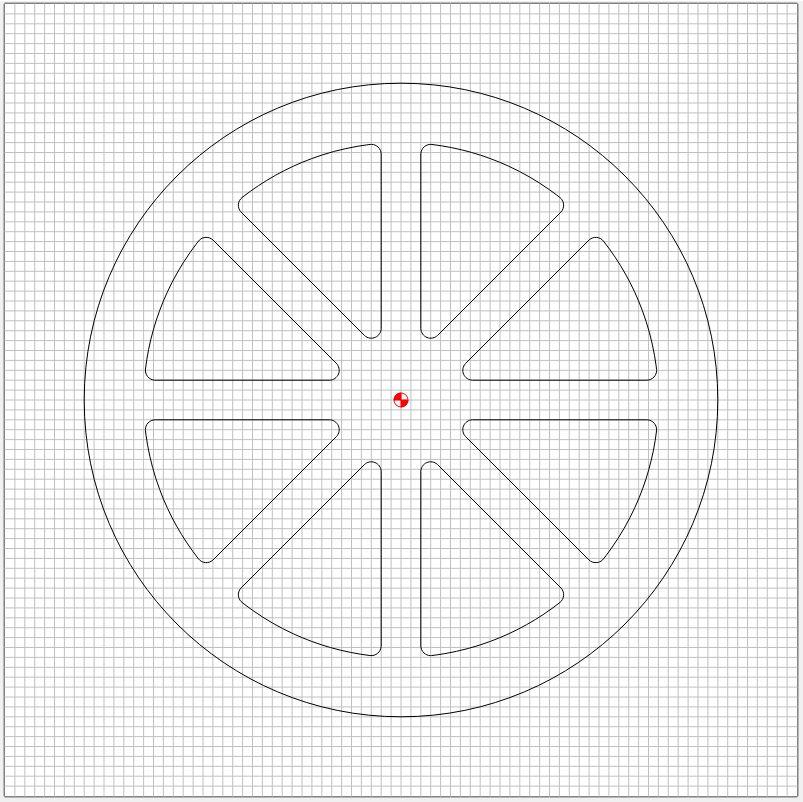
Start a new CNC program. Import the Pi_pad_back vector file. Again, I find it easiest to set the origin (0, 0) at the center of the circular shape. Select the pie triangles. Program to cut just over half the stock thickness (.390") using a .25" diameter flat bit. Save this gcode.
Set Up Your Workpiece
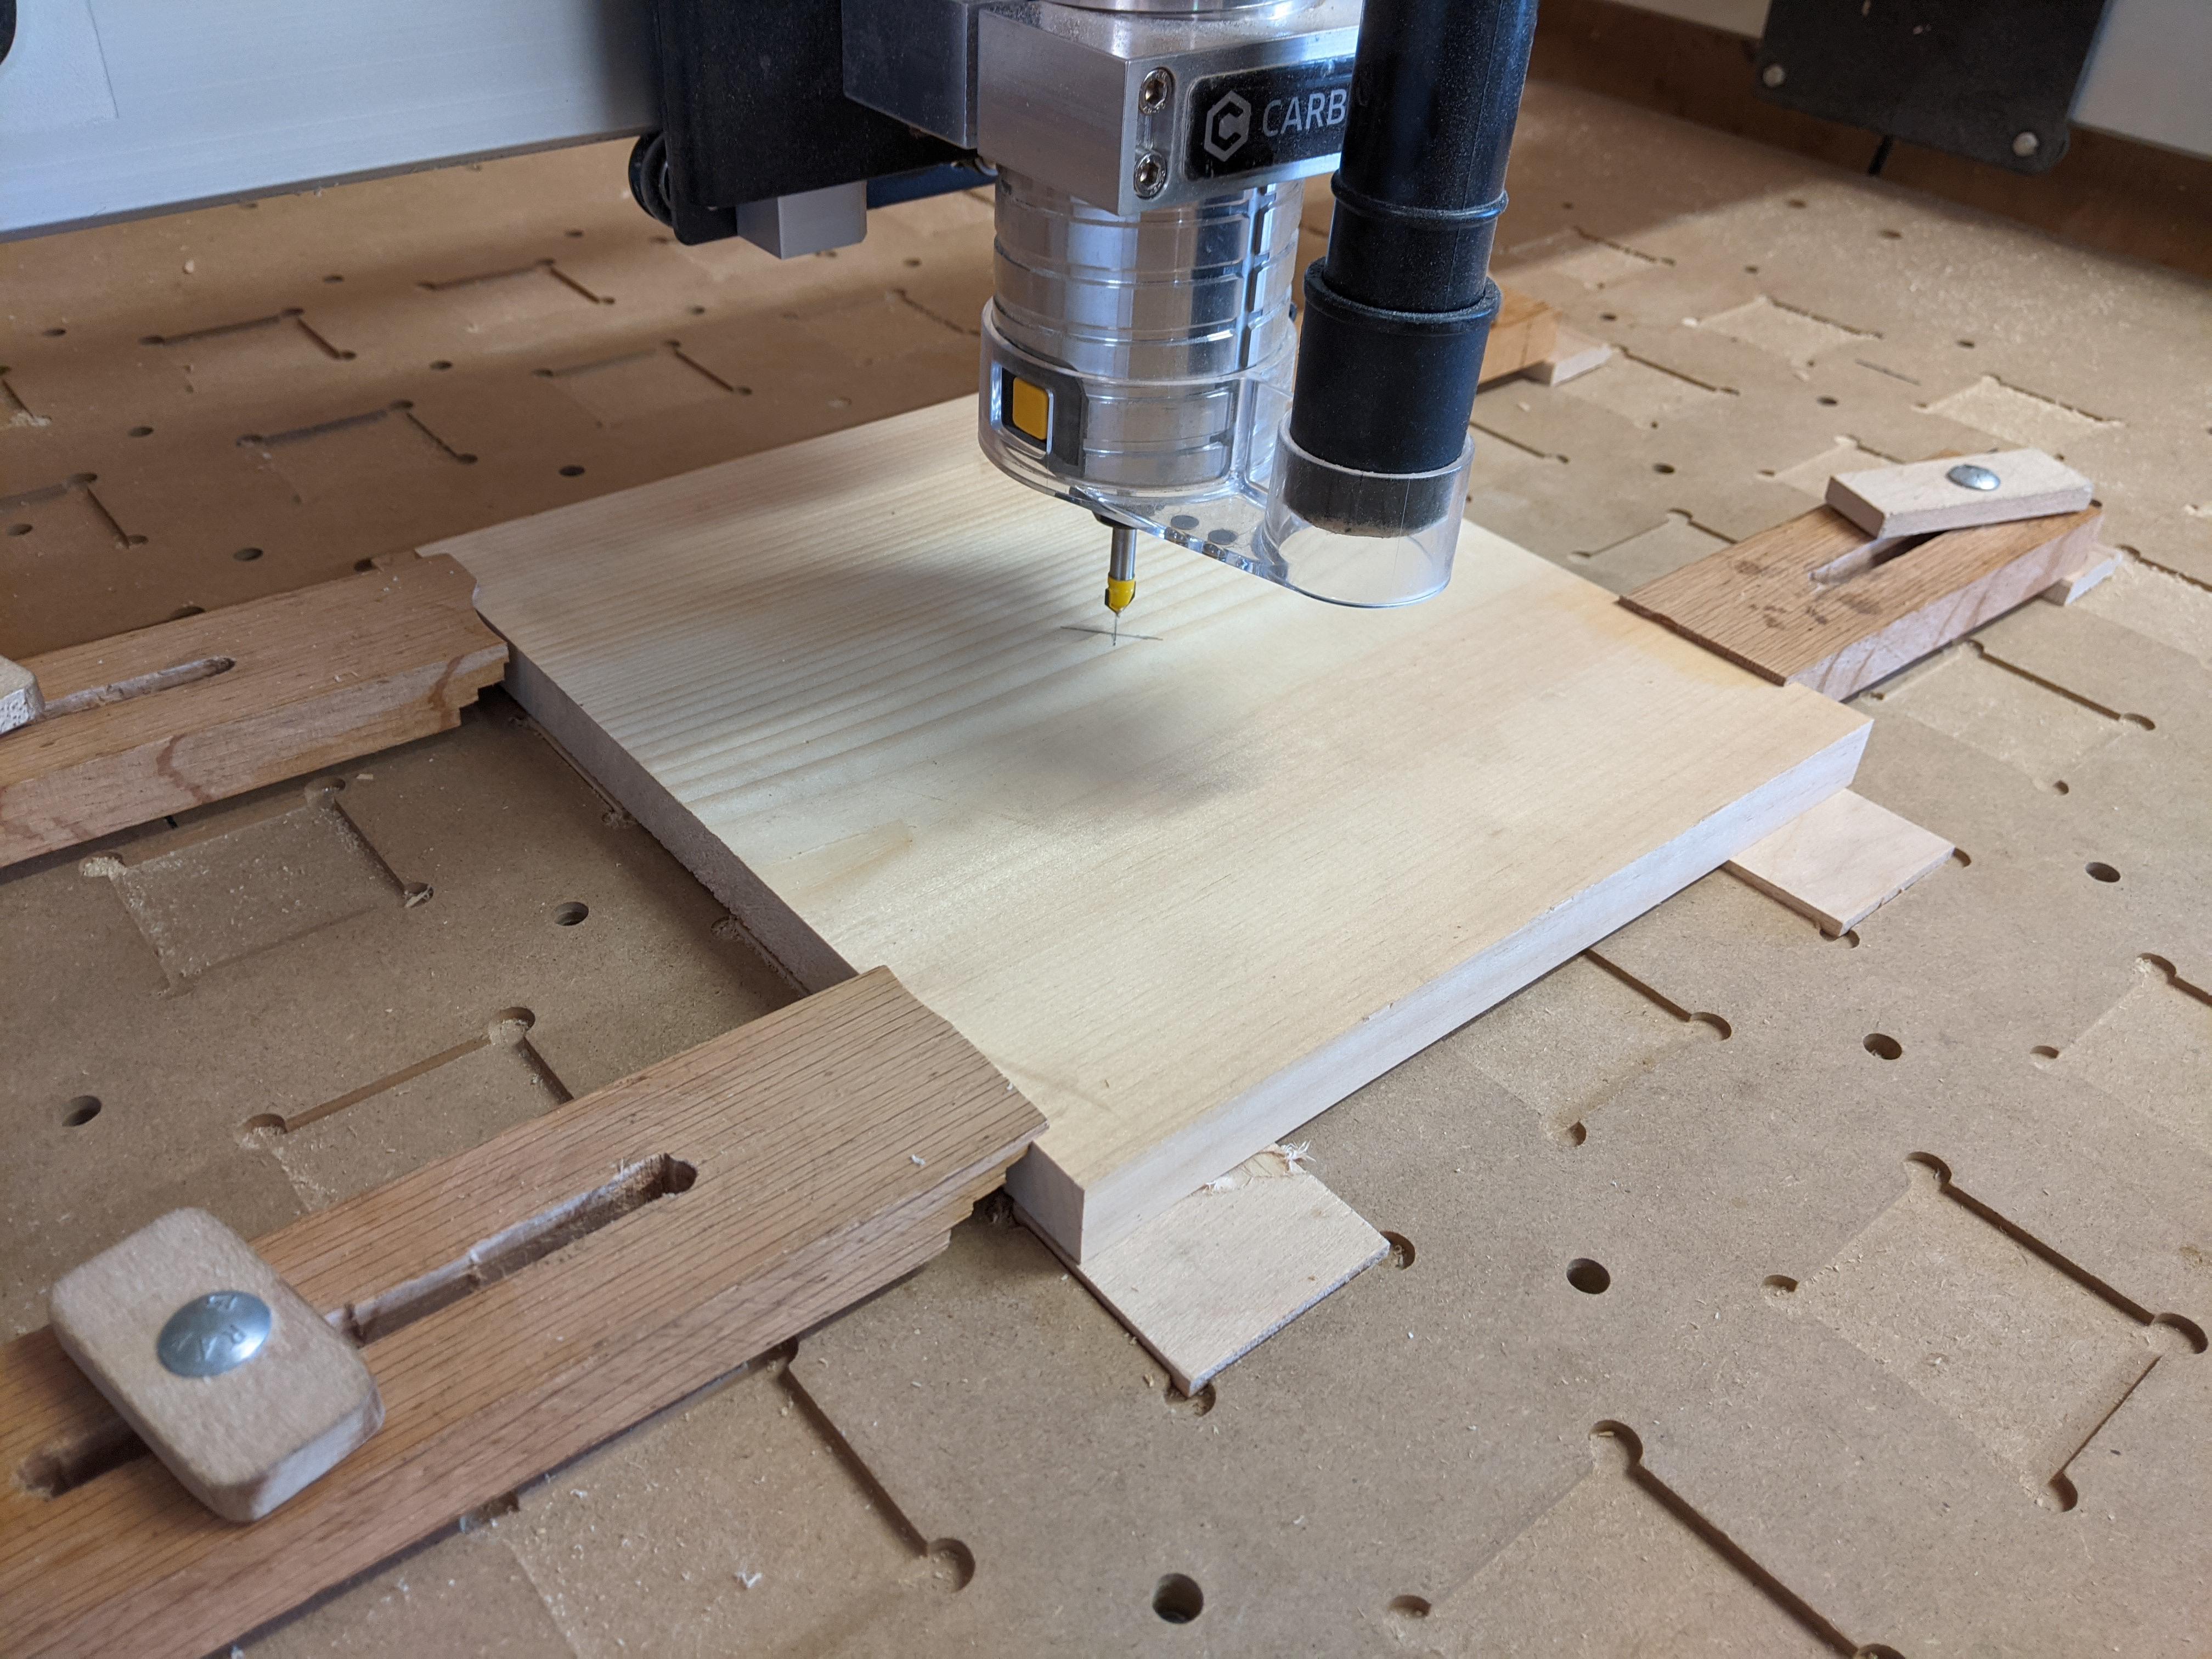
Clamp down an appropriate sized workpiece. The one shown is about 10" x 12". With the v-bit installed, zero your router appropriately. I set up my files to have the origin at the center of the pad to make it easy to re-position when the pad gets flipped over.
Run the V-bit Engraving Gcode
Run the Front_pi Carving Gcode

Replace the v-bit with the .25" flat bit. Re-zero the 'z' depth. Run the gcode.
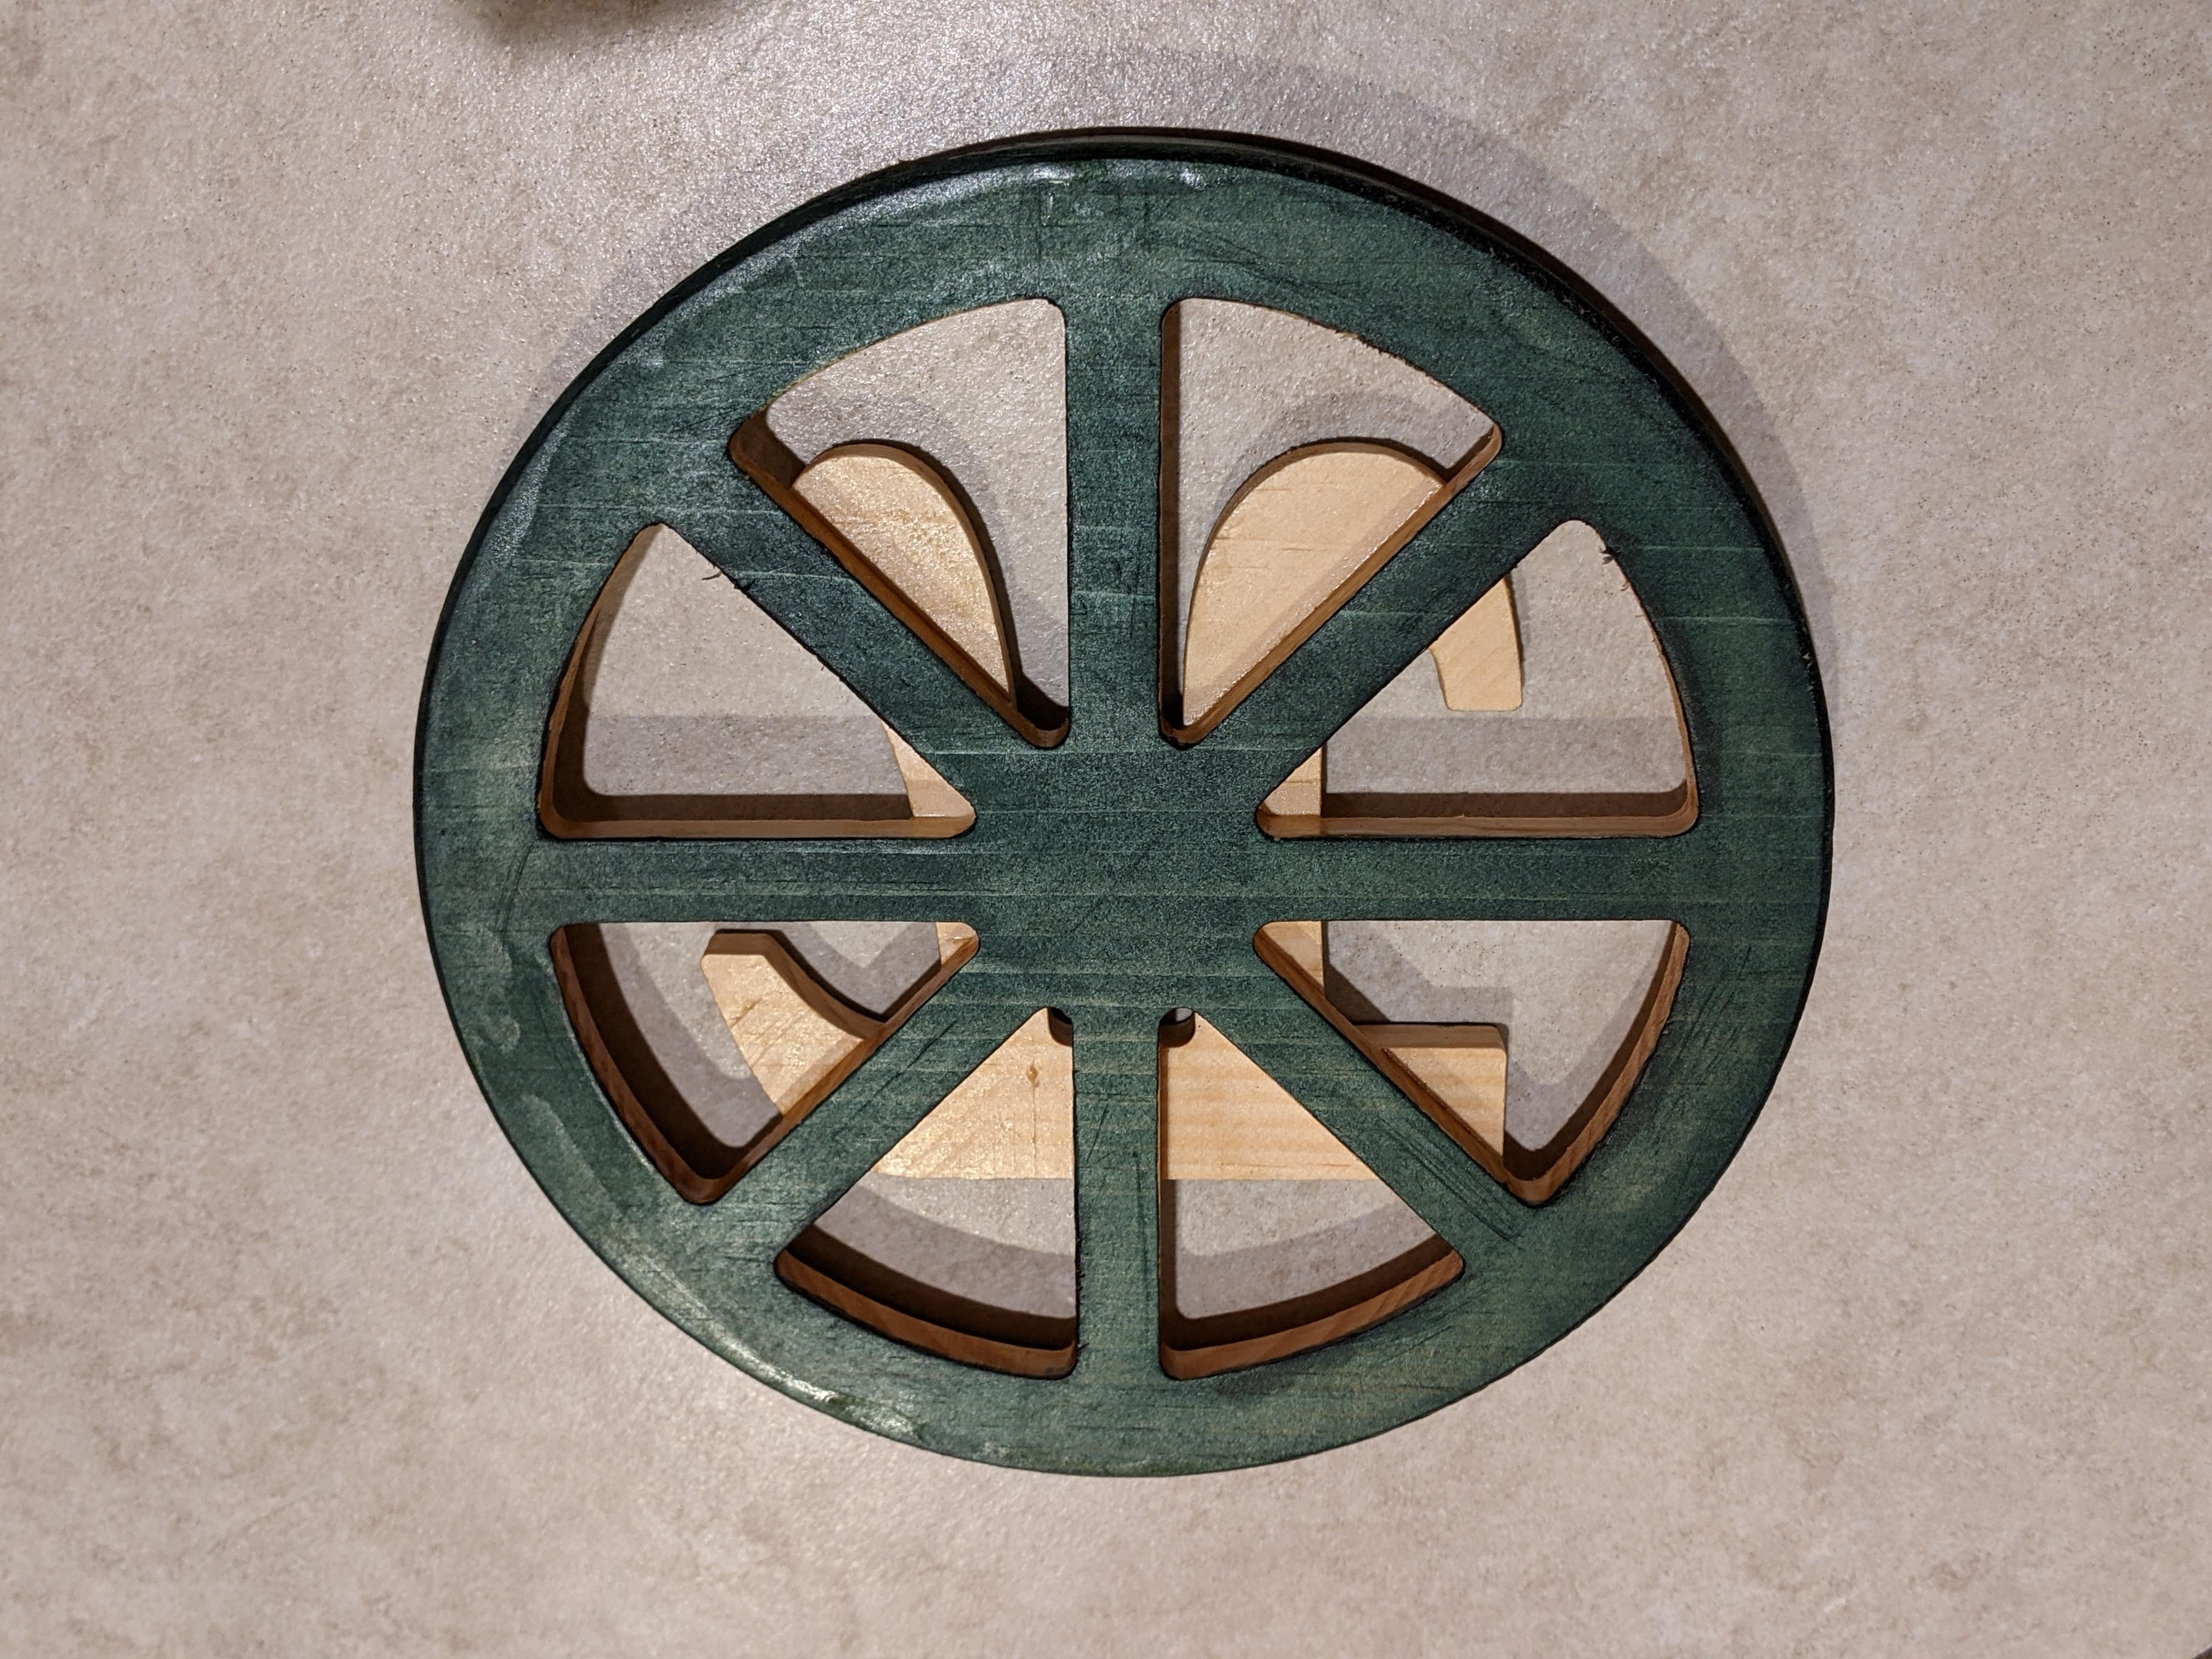
Carve the Pi Pad Back Side
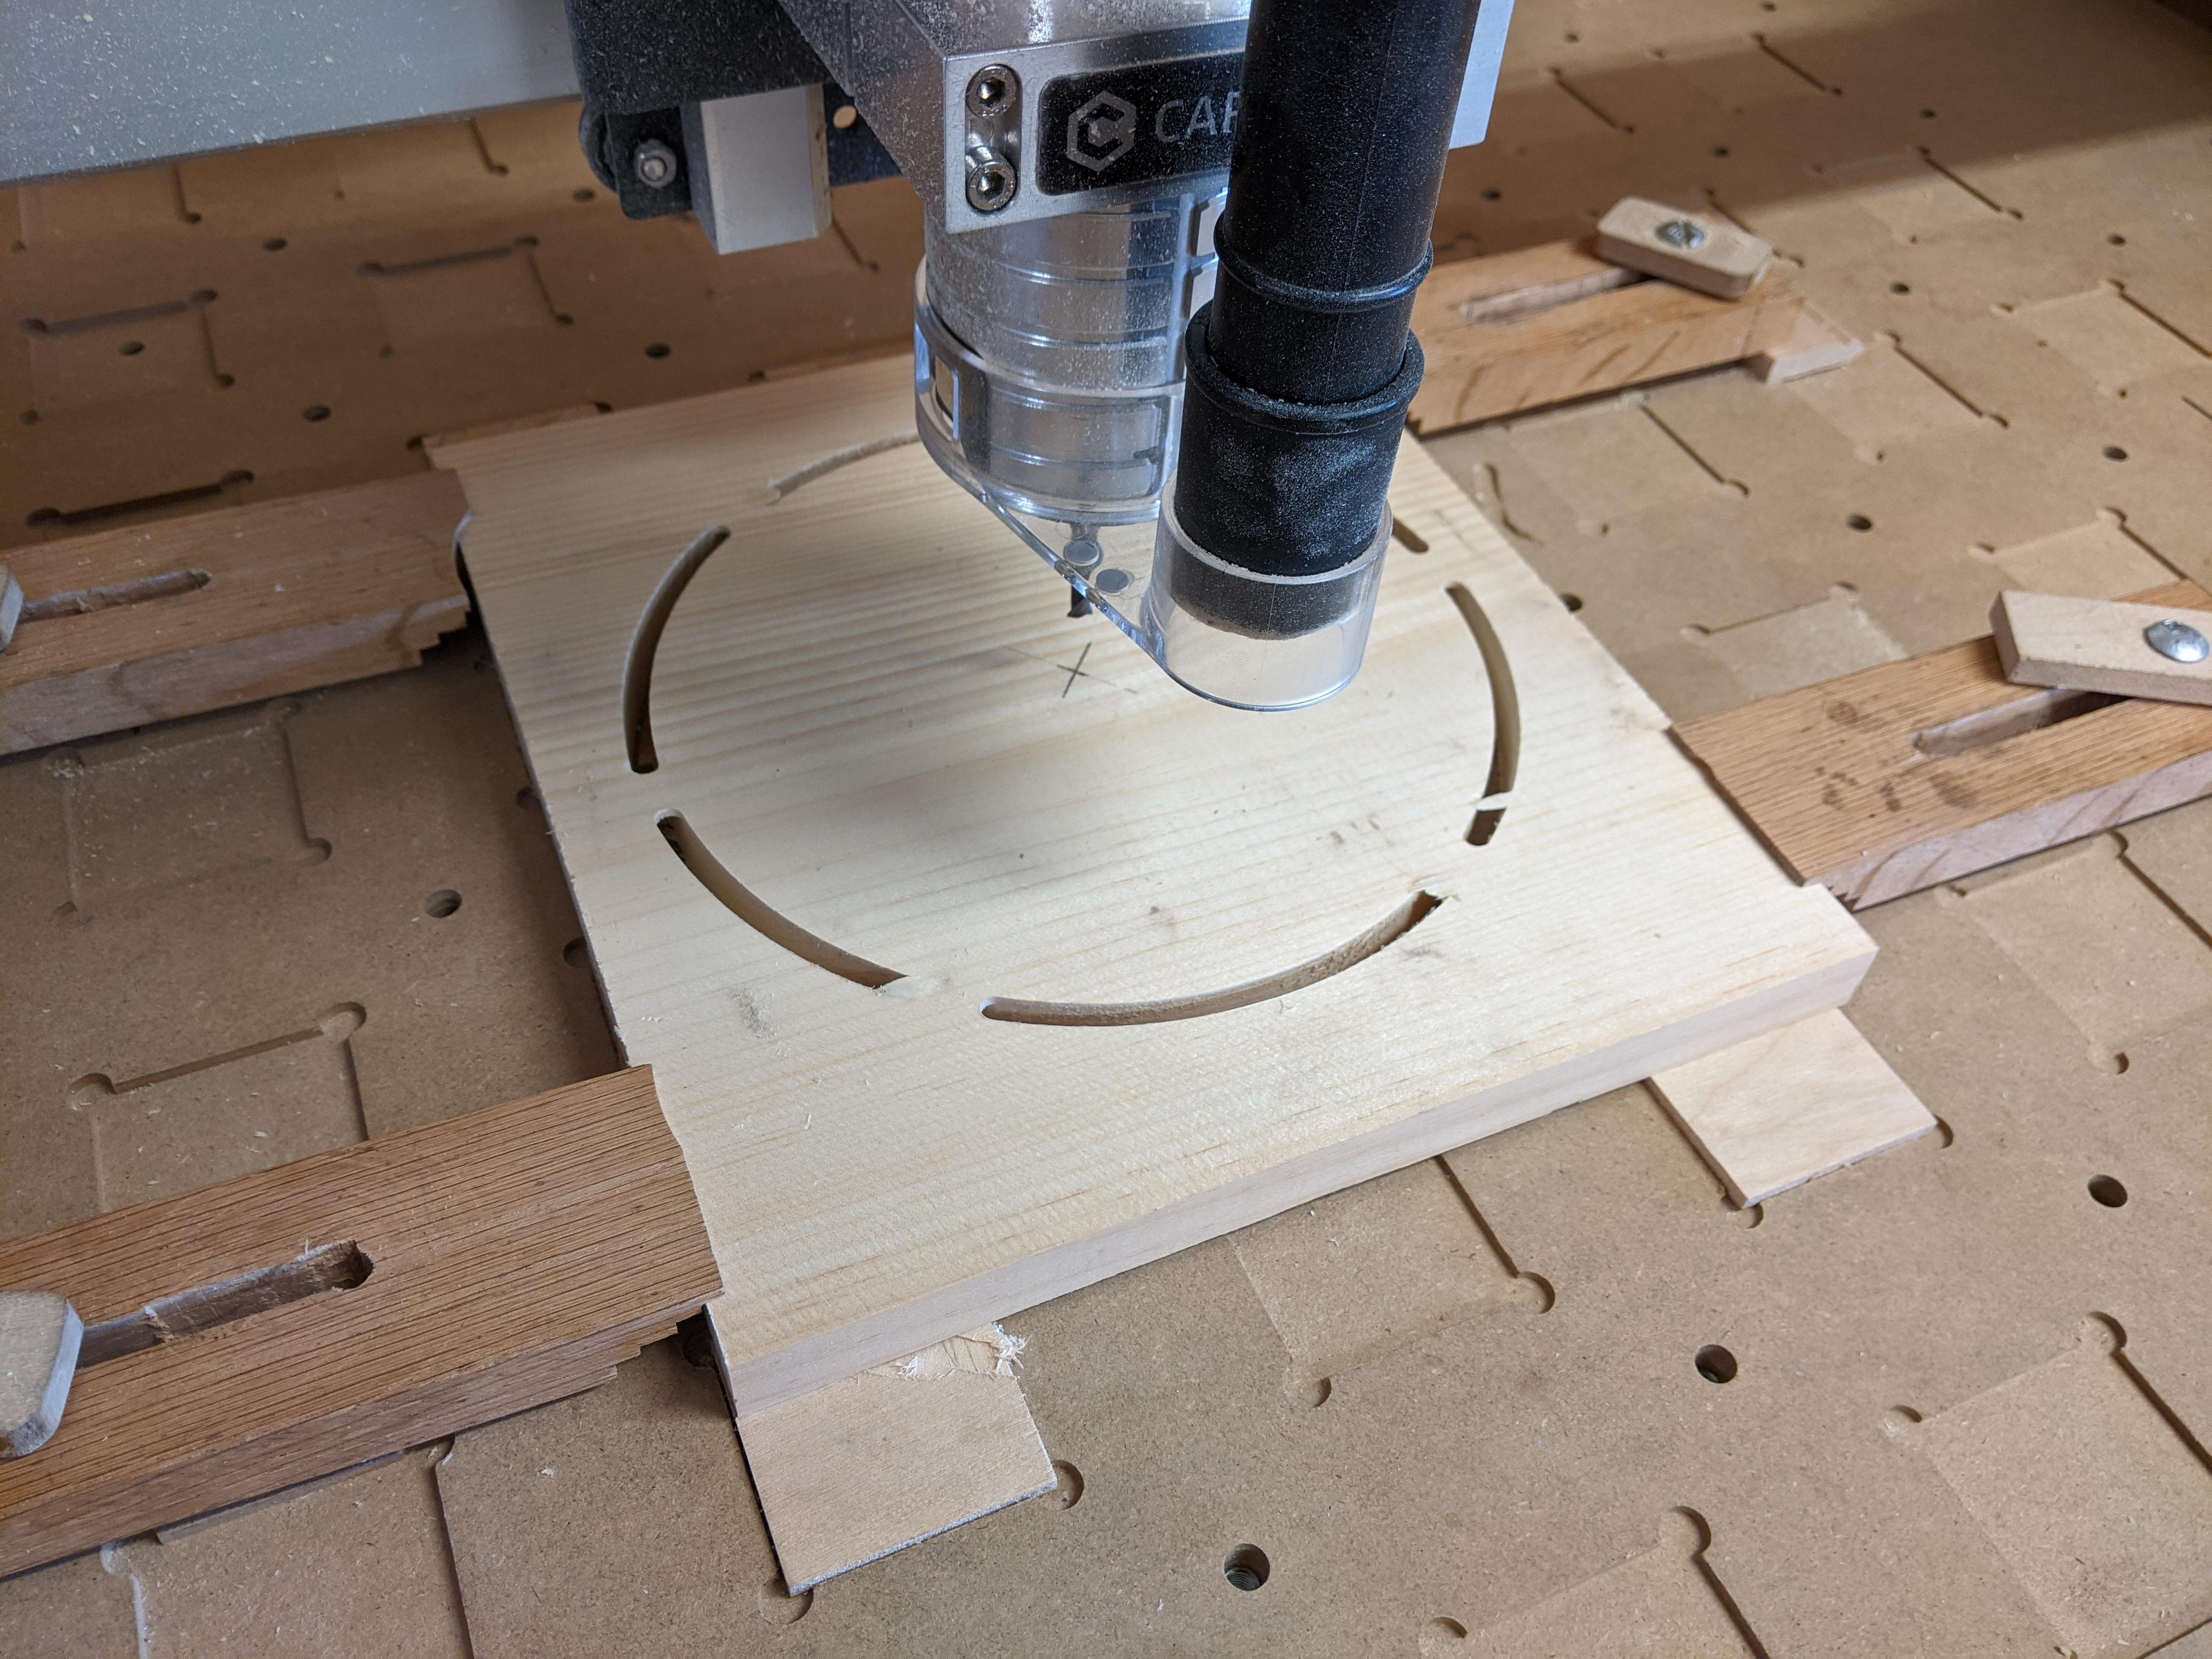
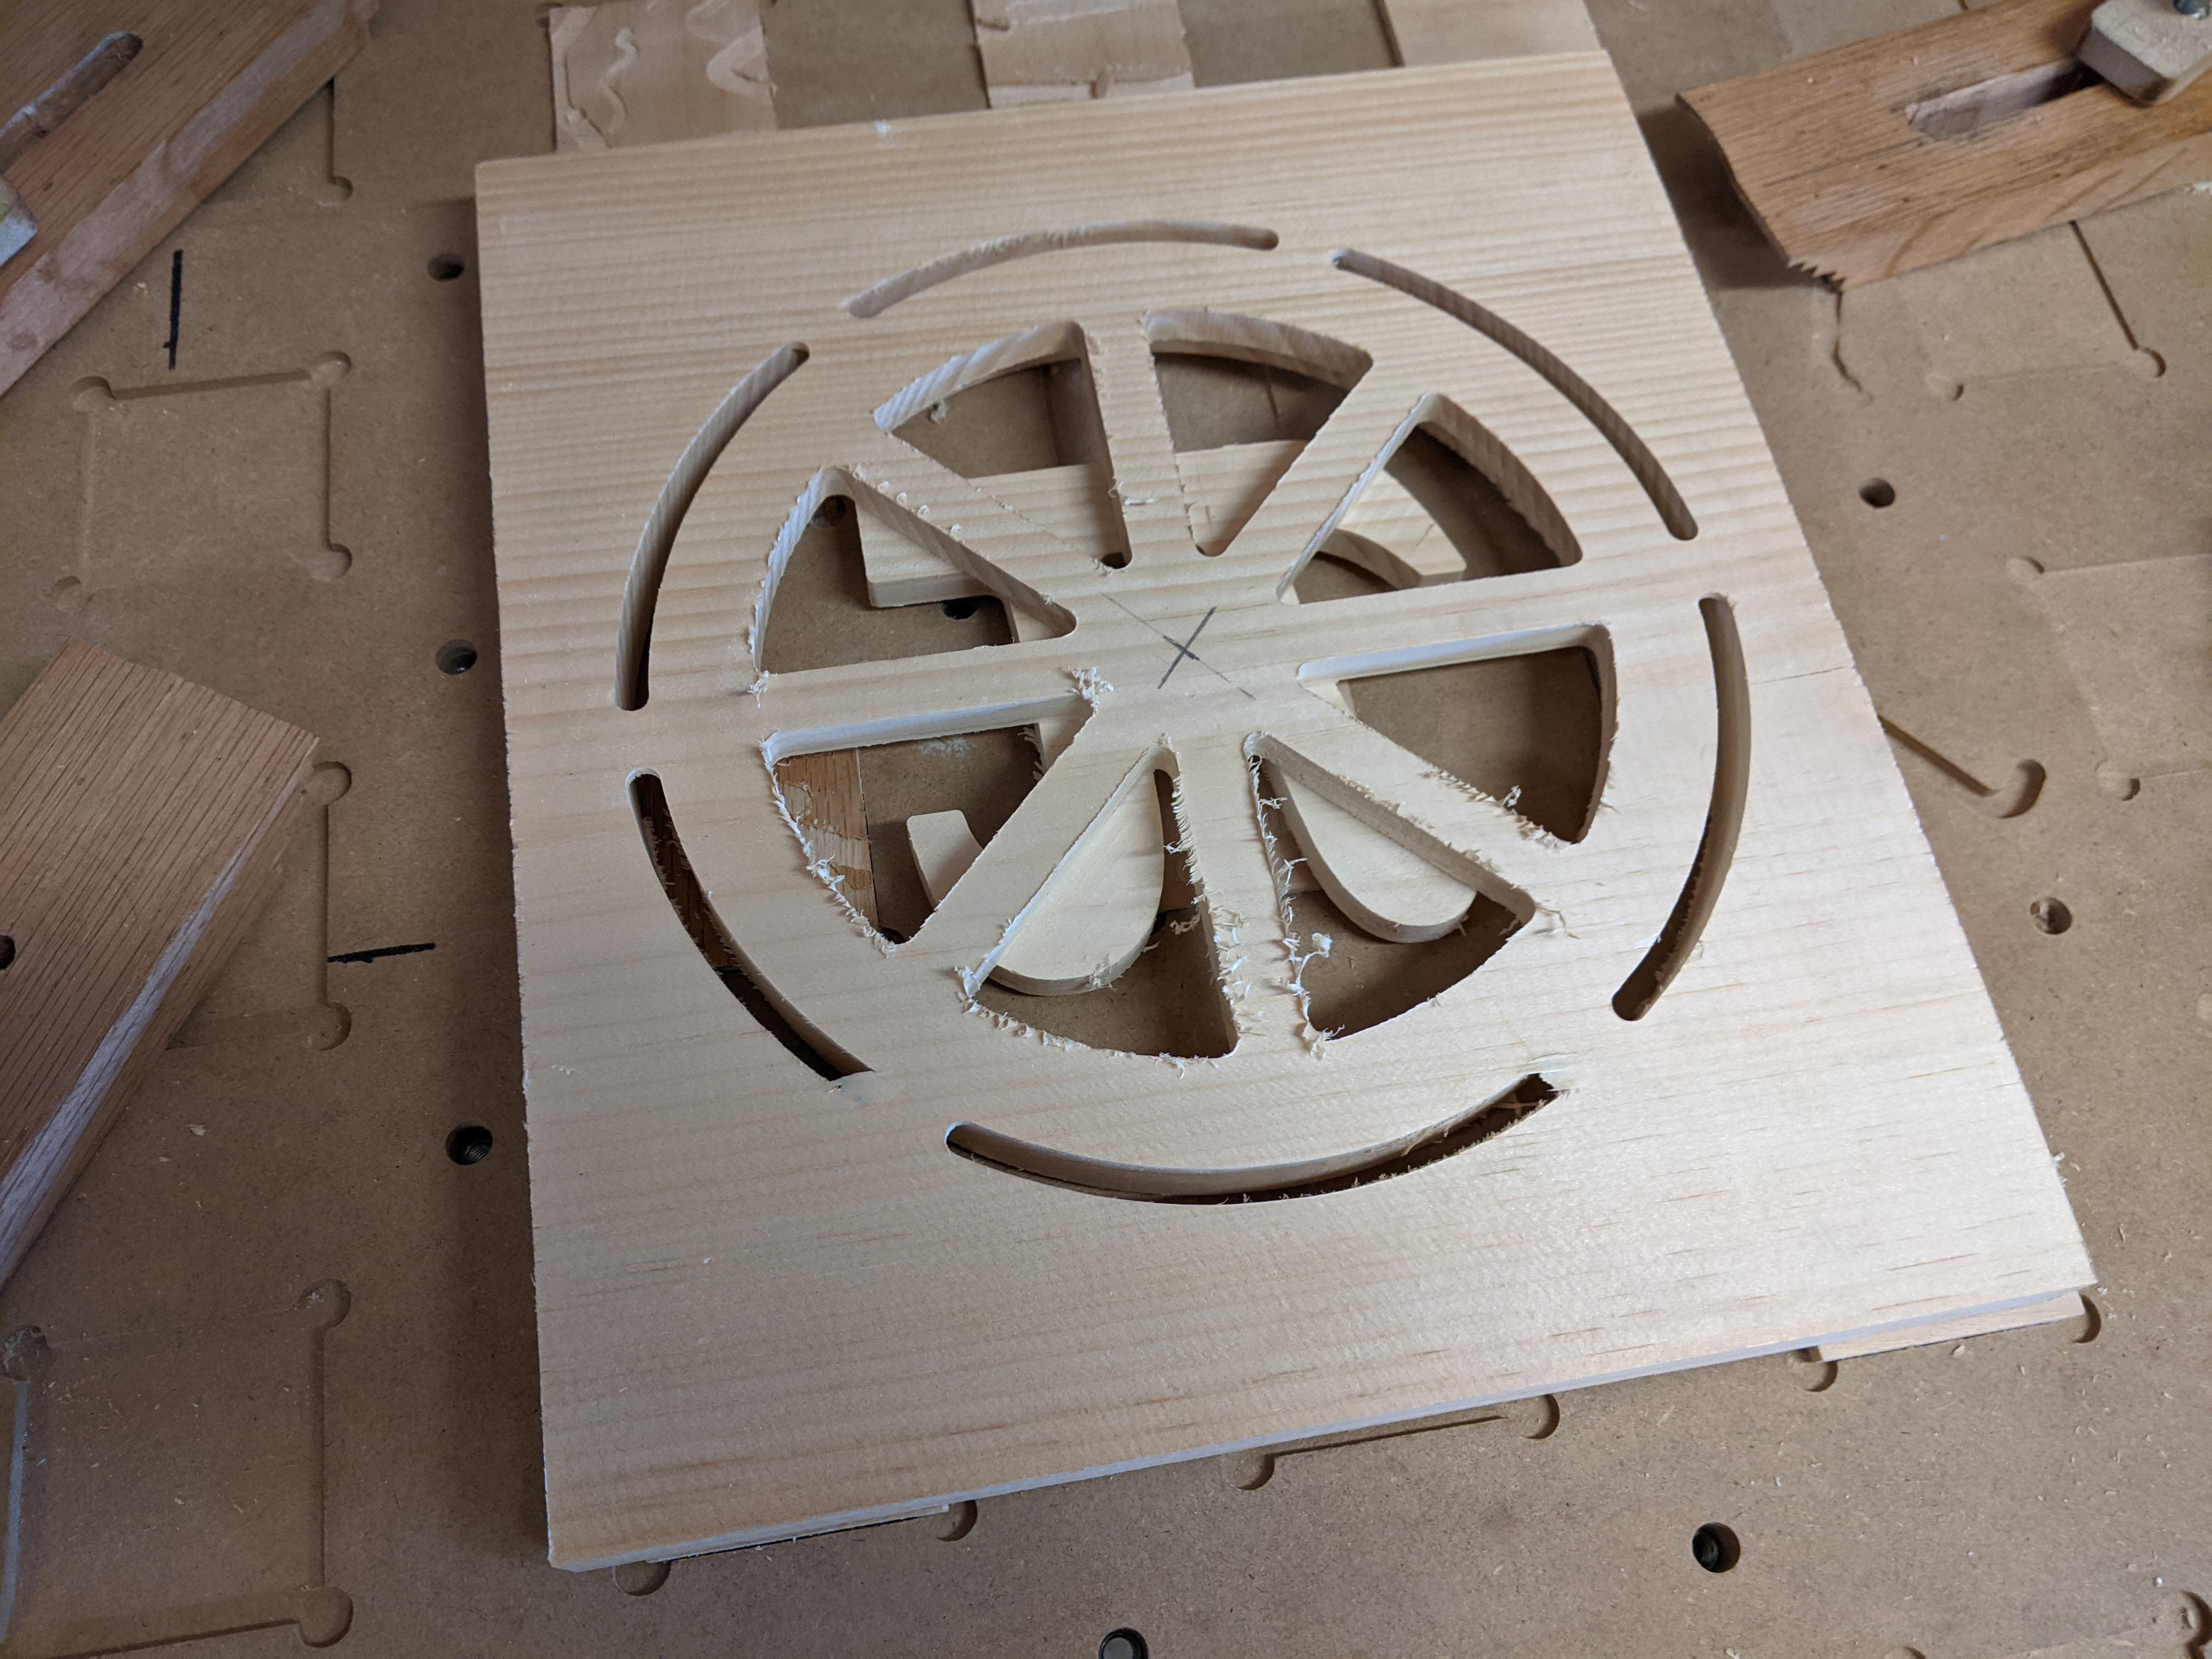
Unclamp, flip the workpiece, and re-clamp. Re-zero at the center of the Pi pad. Run the back side gcode to carve out the pie triangles.
Remove and Sand
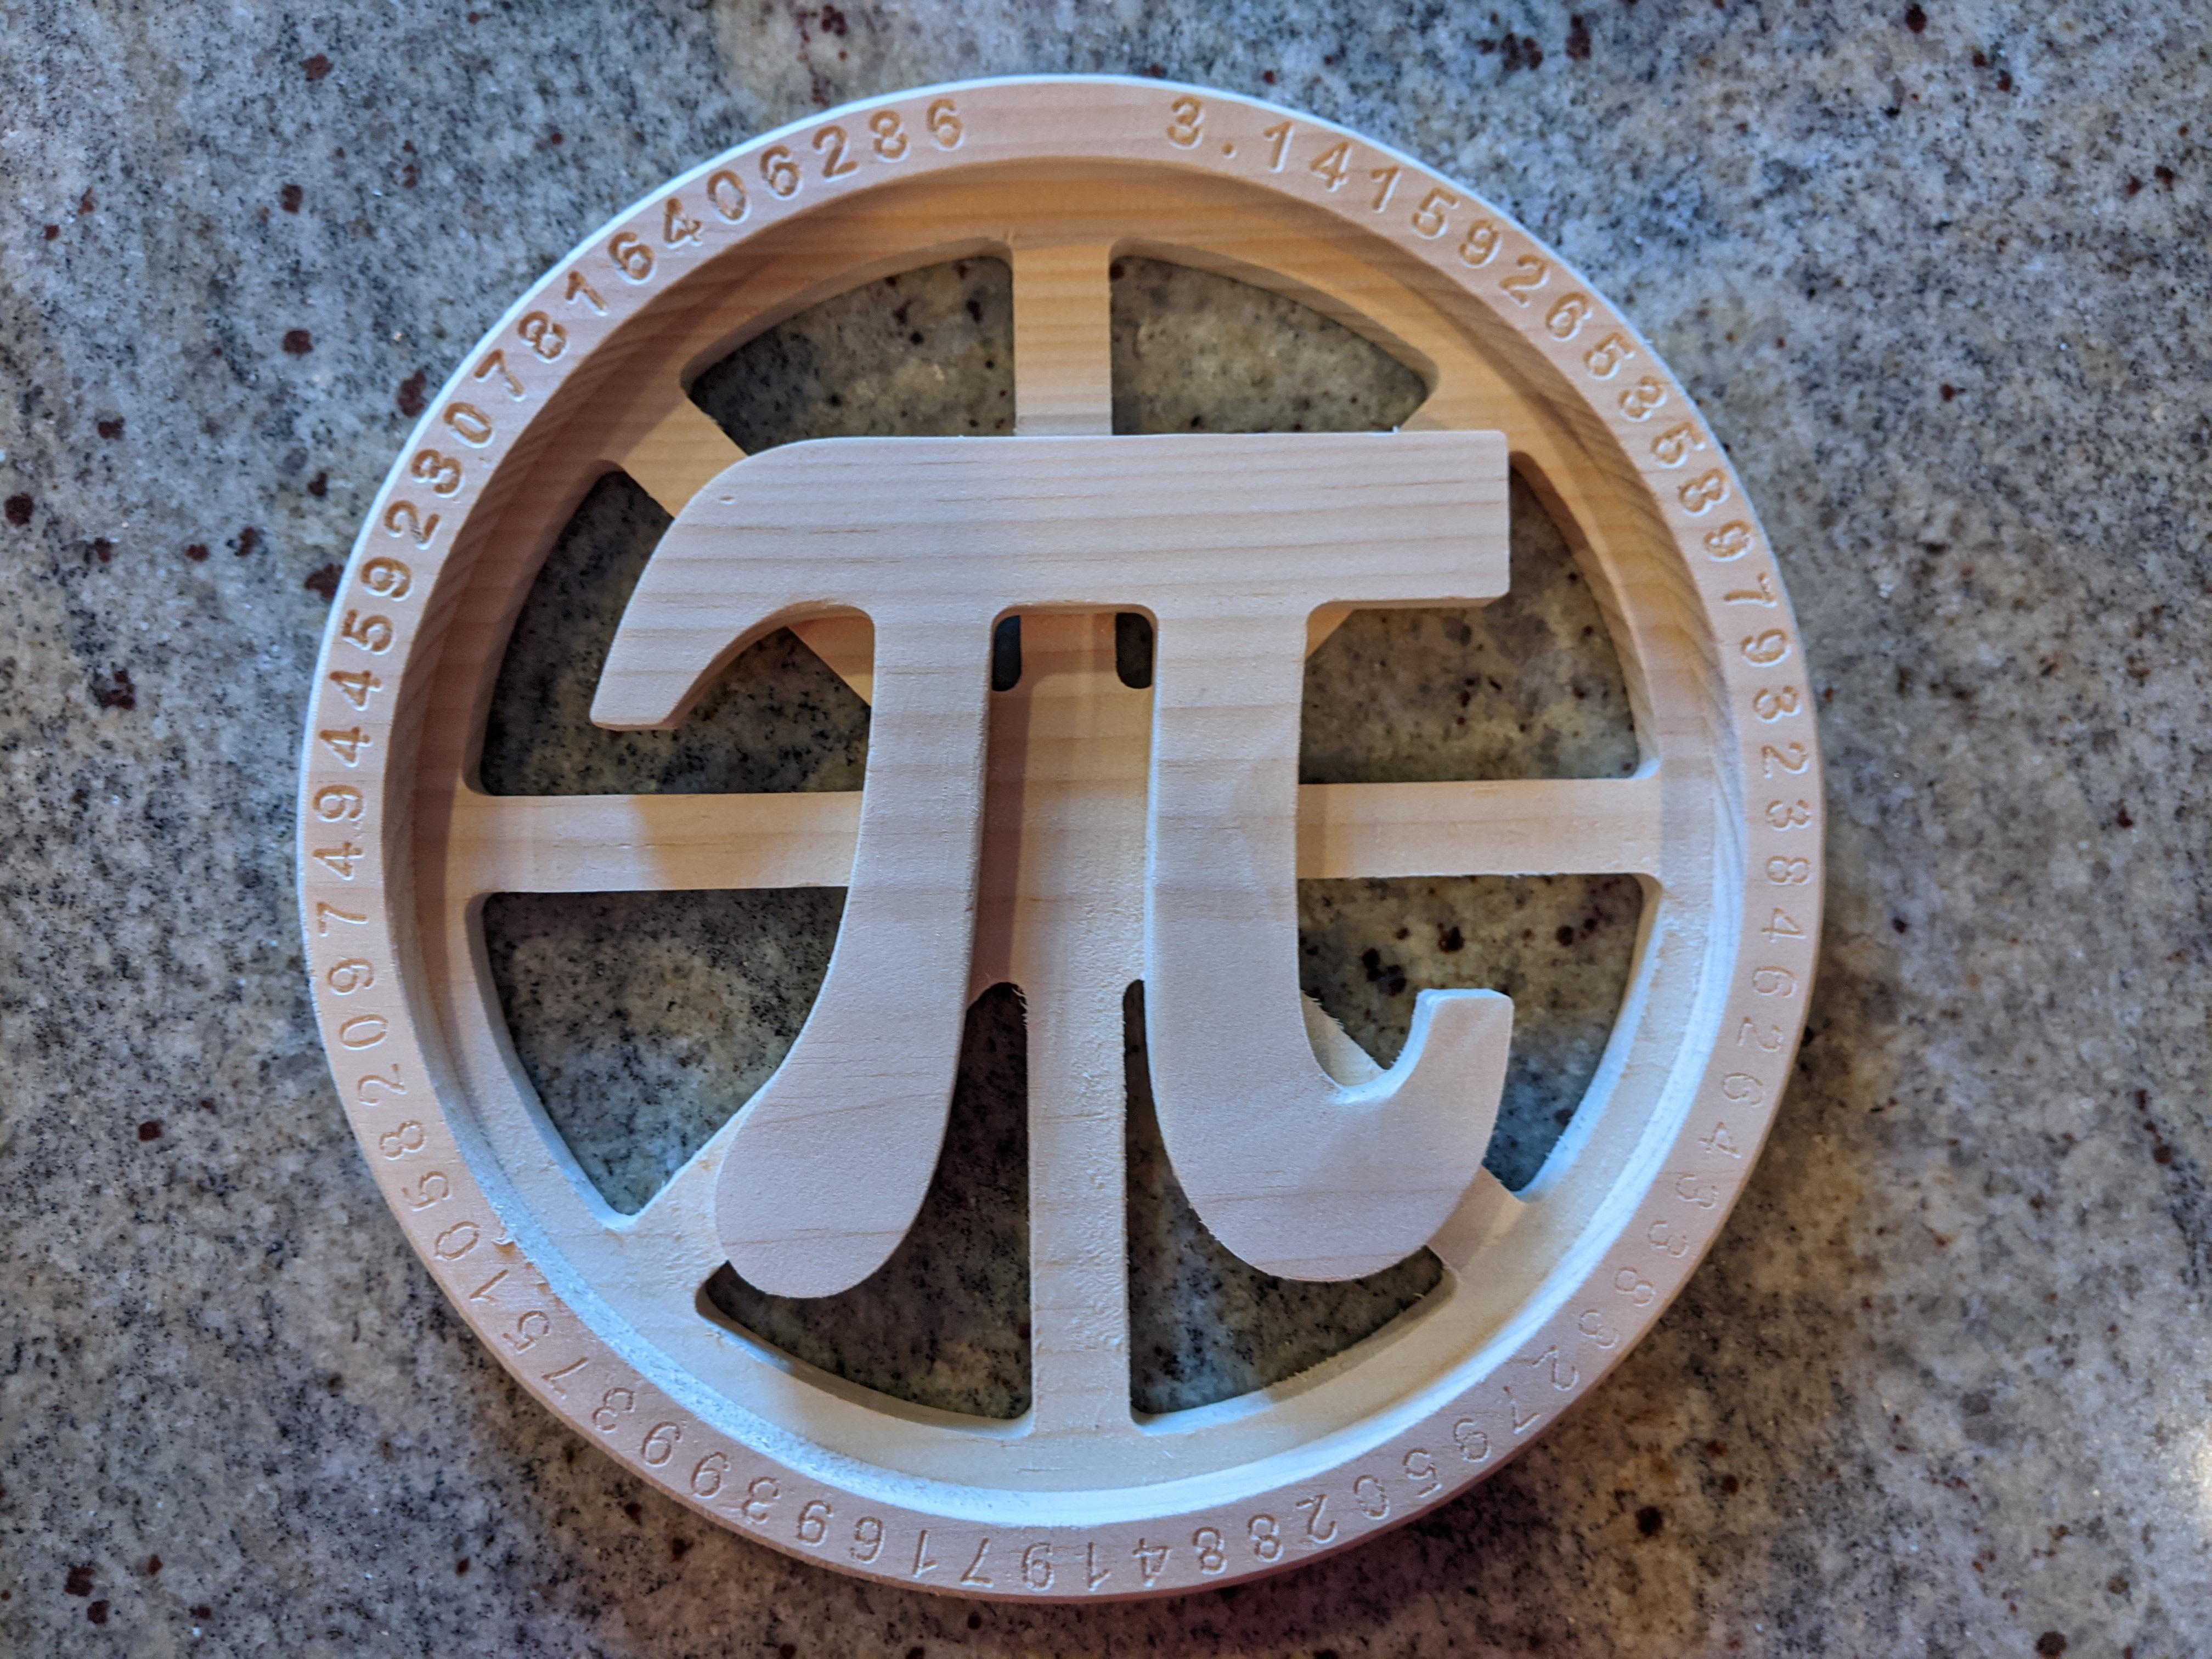
After unclamping the workpiece, cut the tabs to separate the Pi pad from the workpiece. Sand smooth. I also hand router the outside perimeters with a 3/16" round over bit to soften the edges.
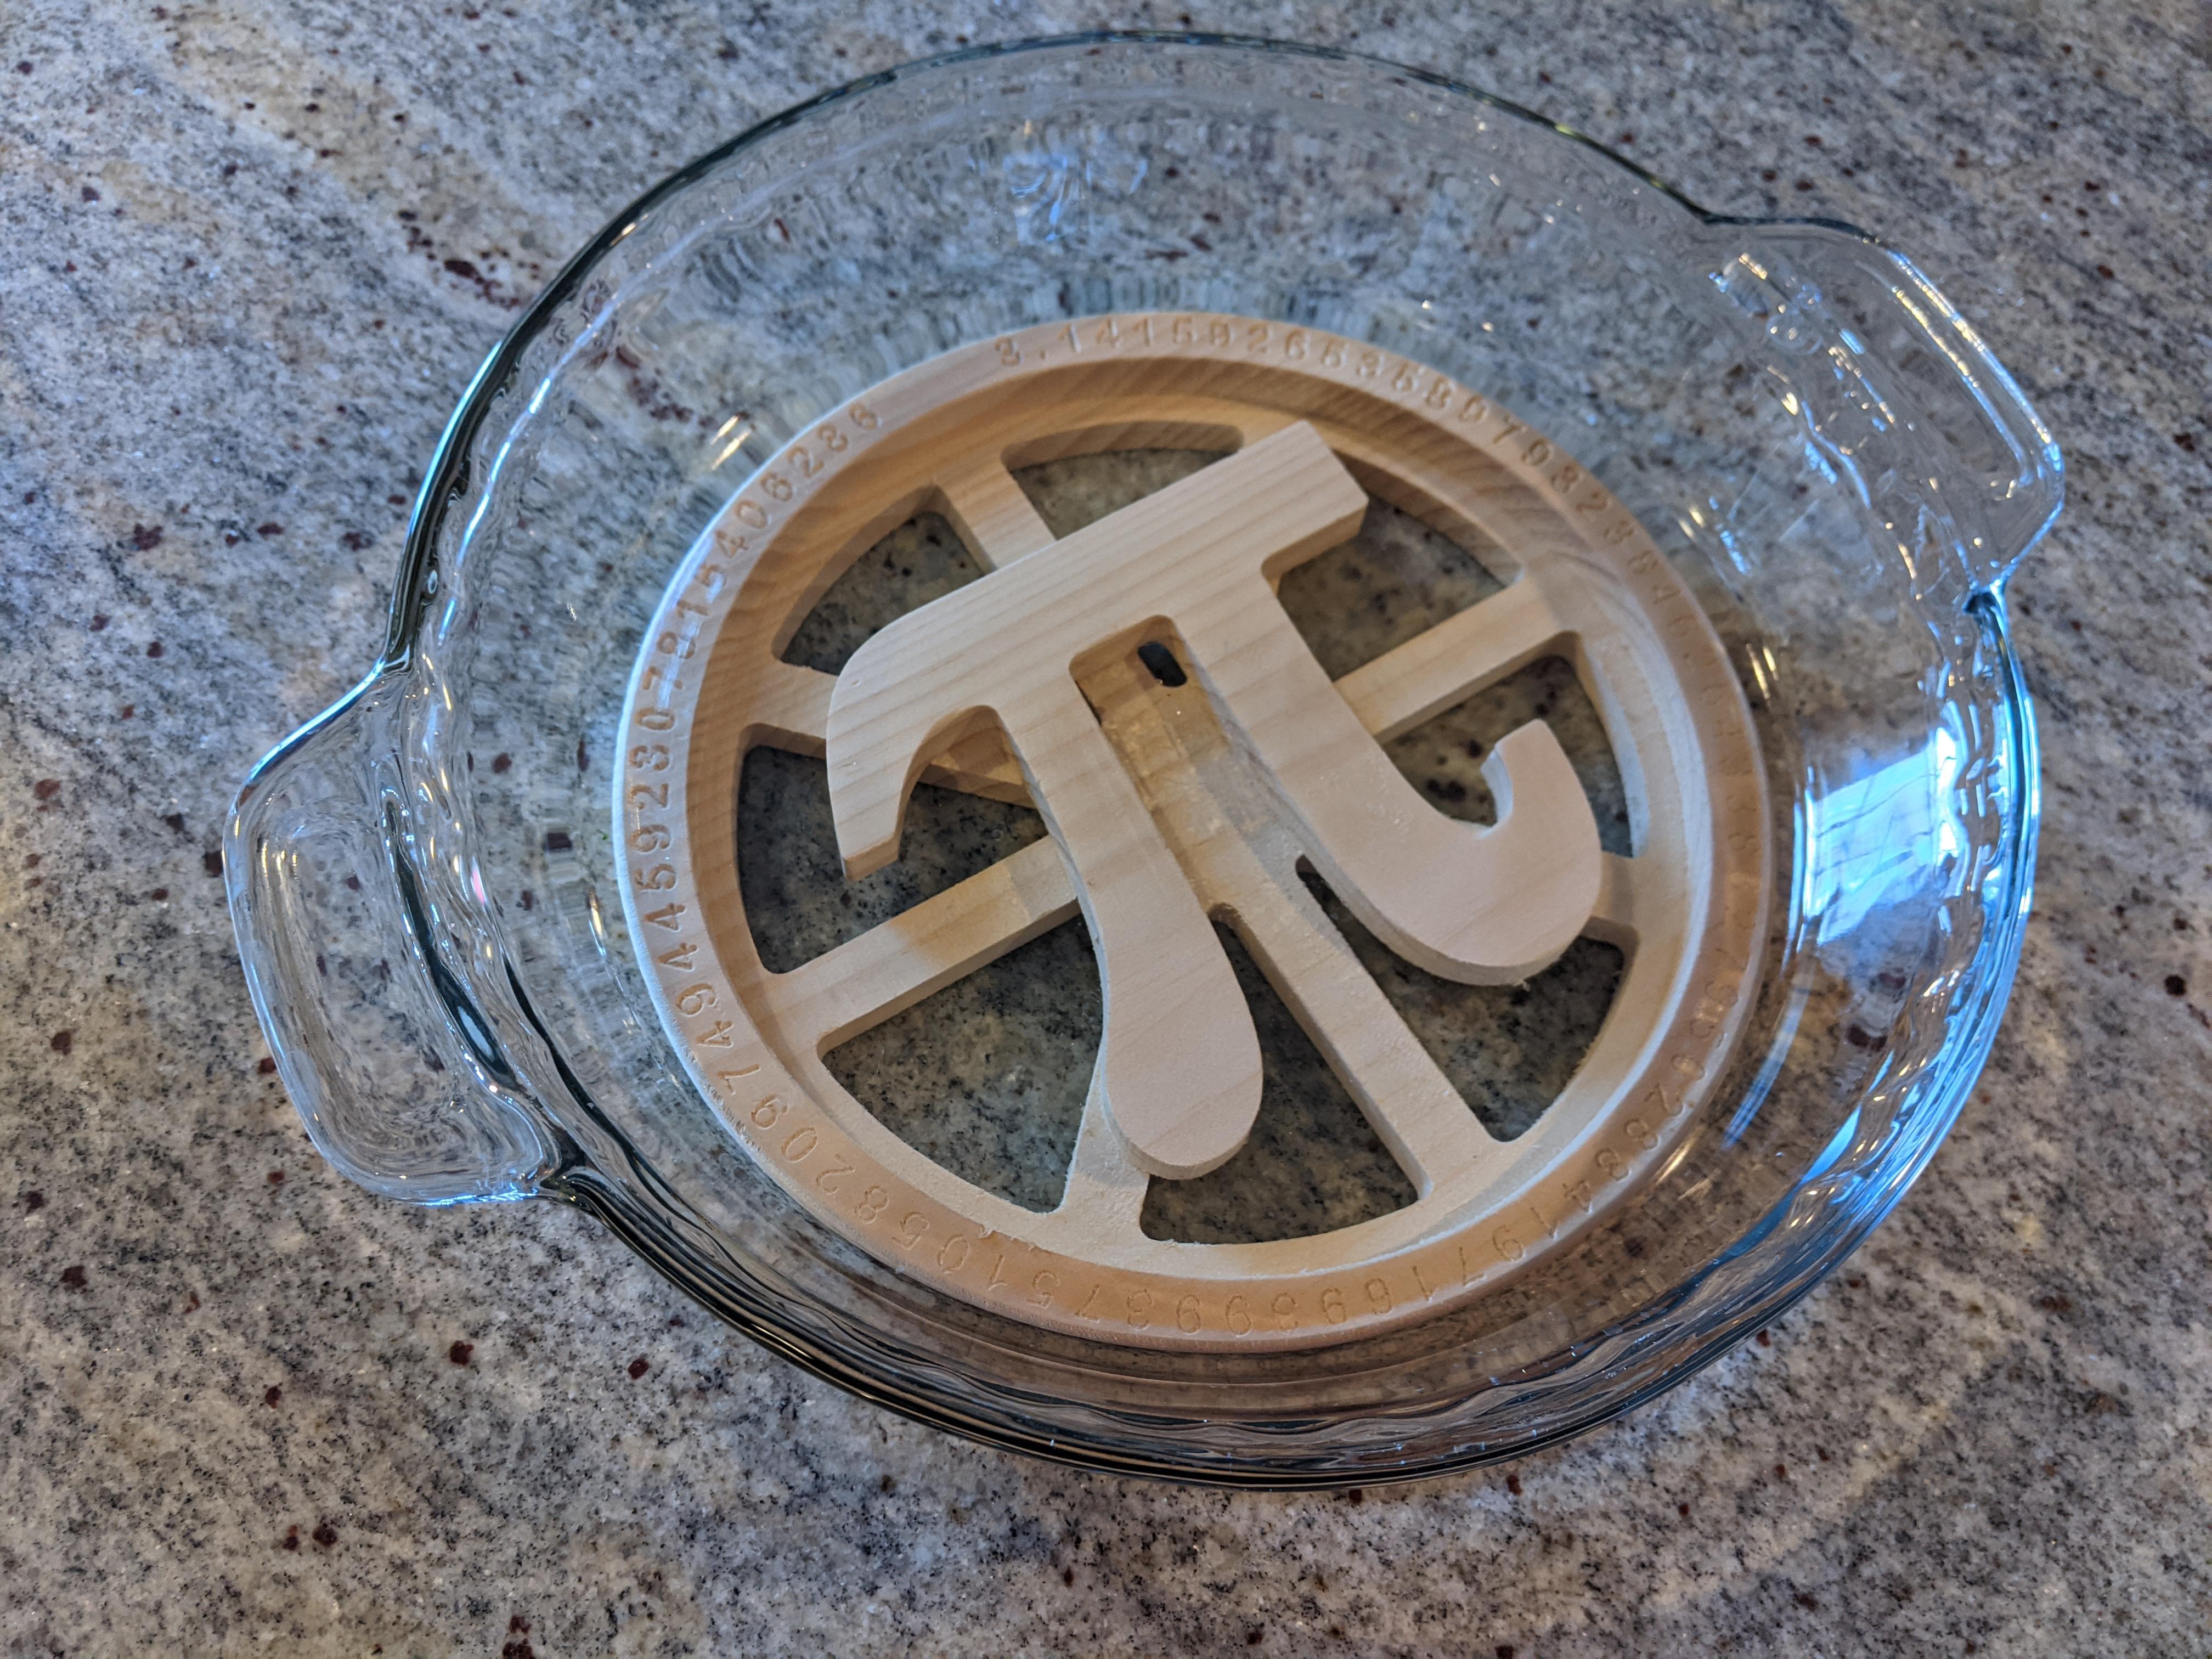
Feel free to stop after this step and begin using your new Pi pad, or continue on to the final step if you'd prefer to add some color.
Stain or Color to Suit Your Taste

I applied a green stain to the external surfaces in honor of St Paddy's Day. It really makes the Pi symbol pop out from the background. I also squeegeed yellow paint into the engraved letters for contrast. After things dried, I applied a coat of clear polyurethane to protect. With all of these coatings, you do need to be more careful with very hot dishes because the coatings can stick to your dish if they are not rated for high temperatures.
Enjoy a slice of your favorite pie and show off your unique Pi pad to all your friends!