Pi Obstacle Detector
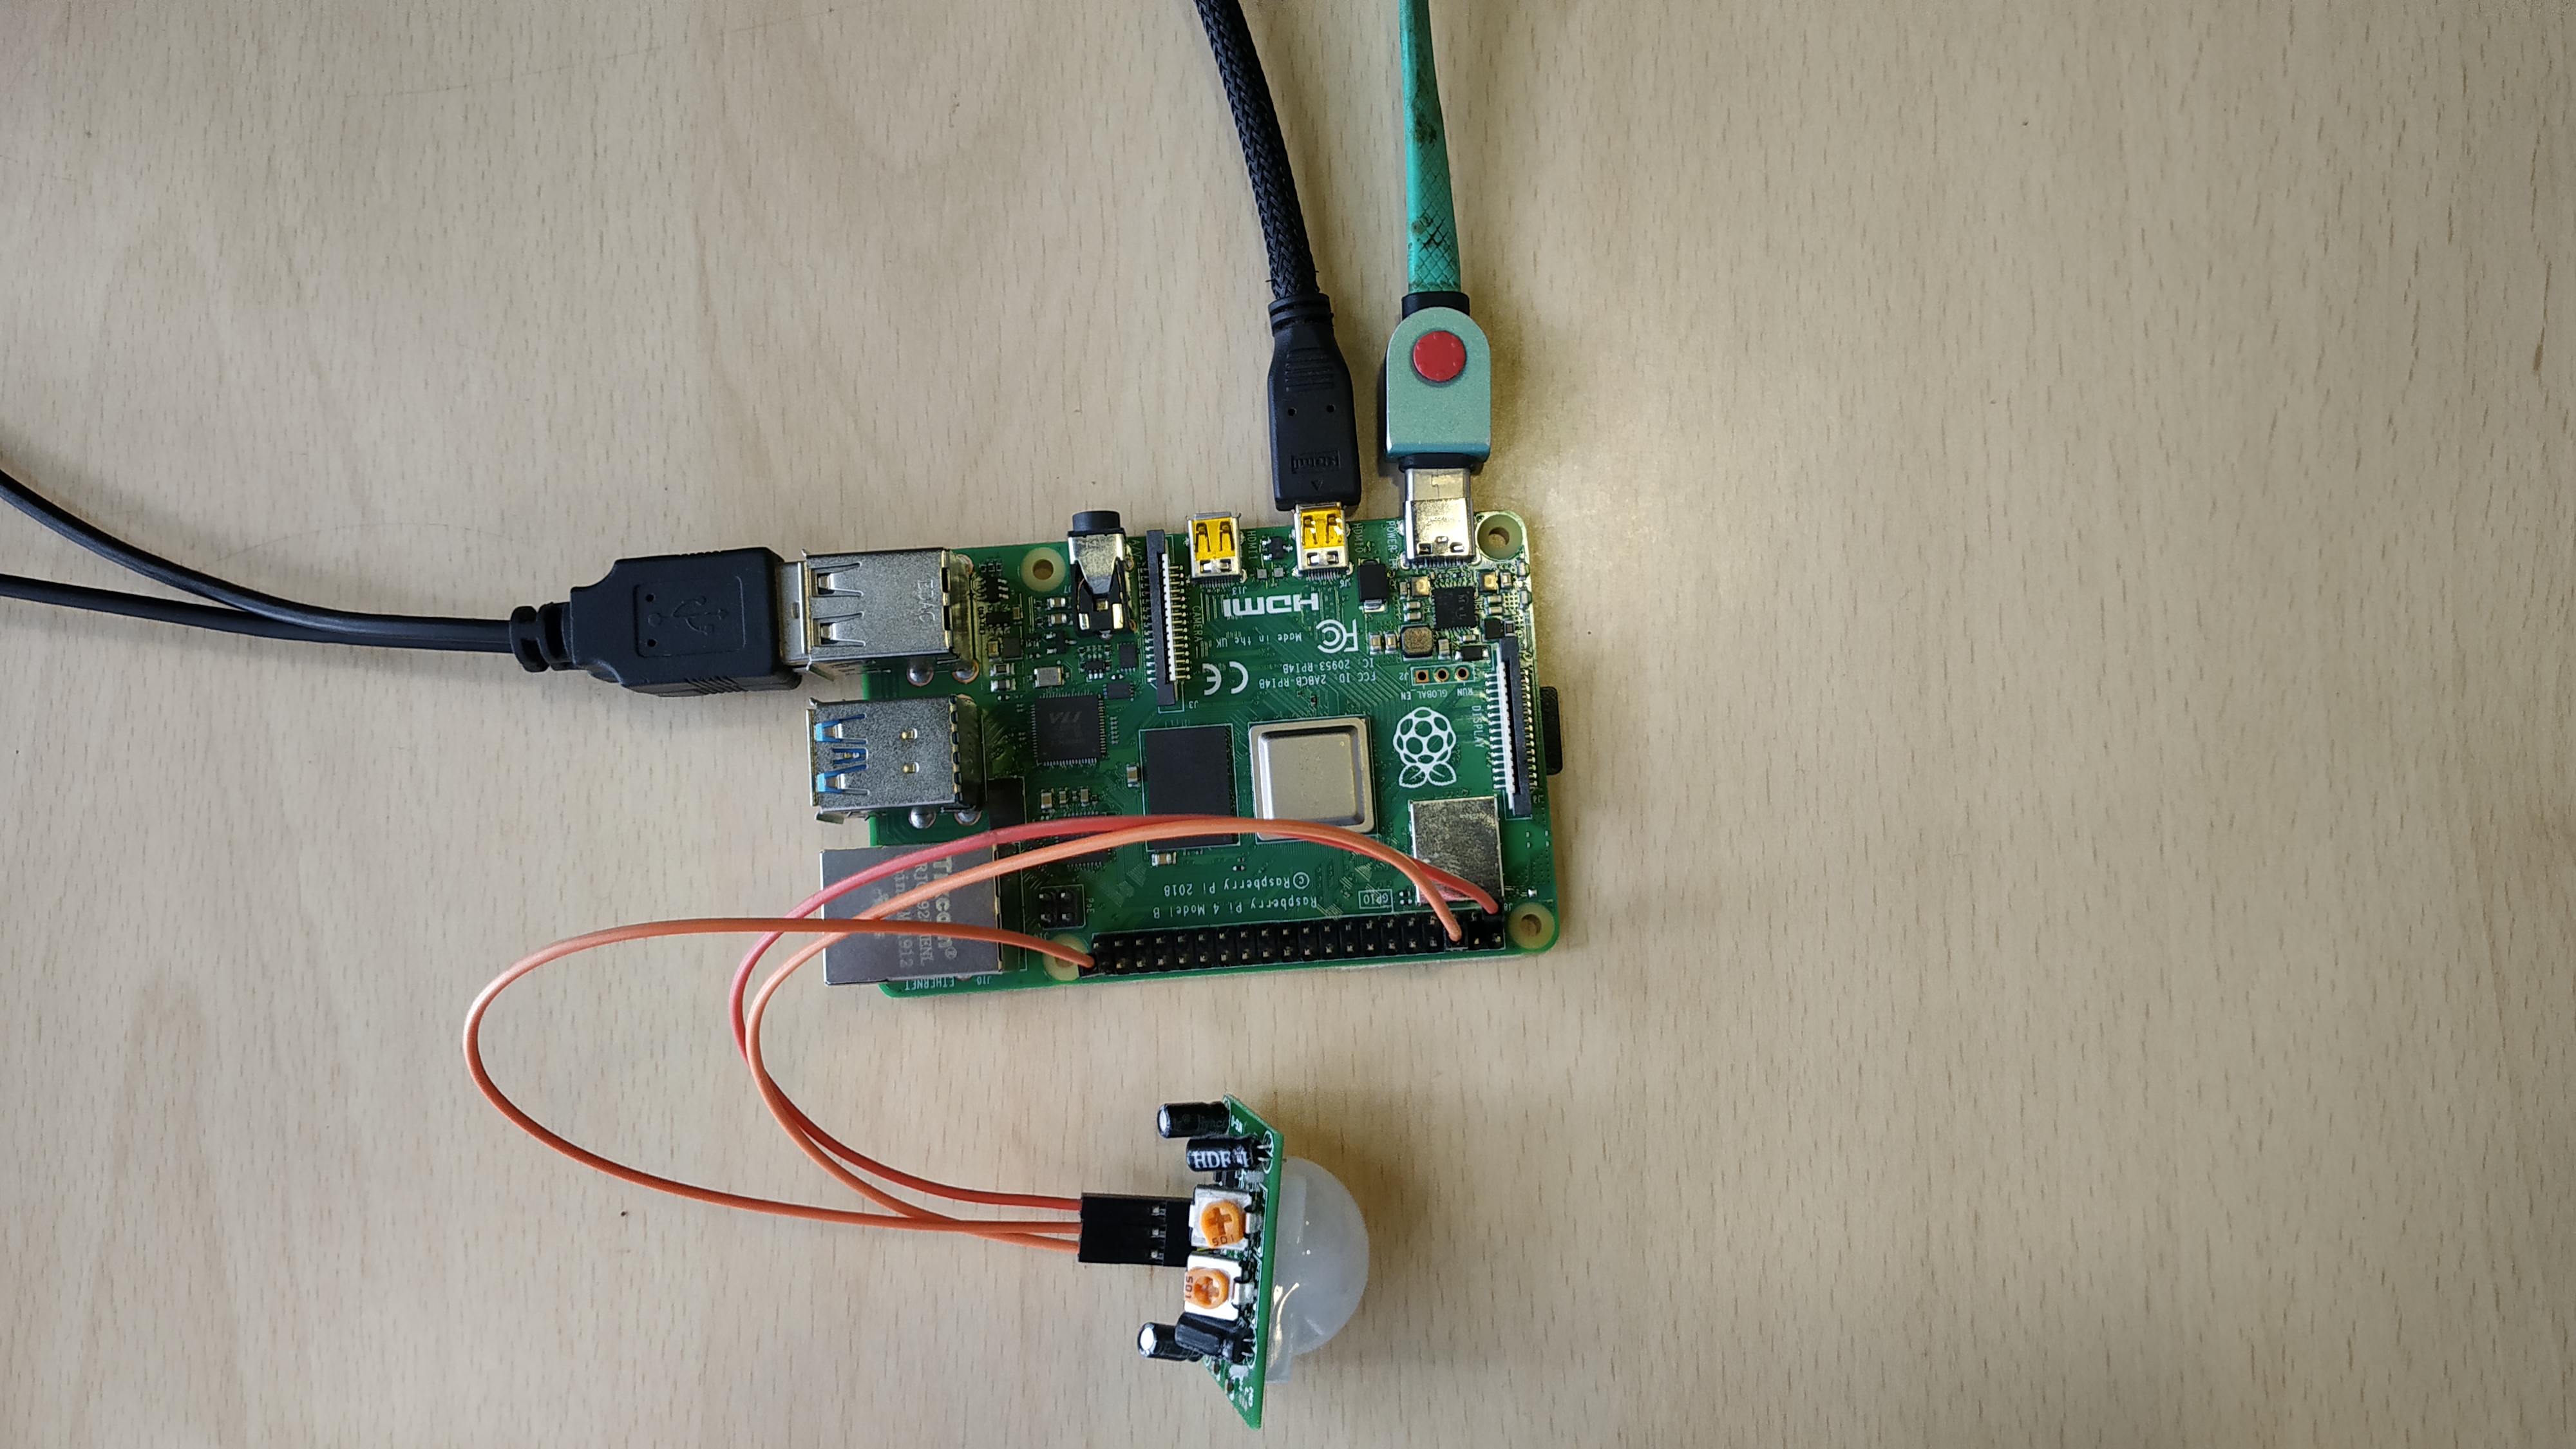
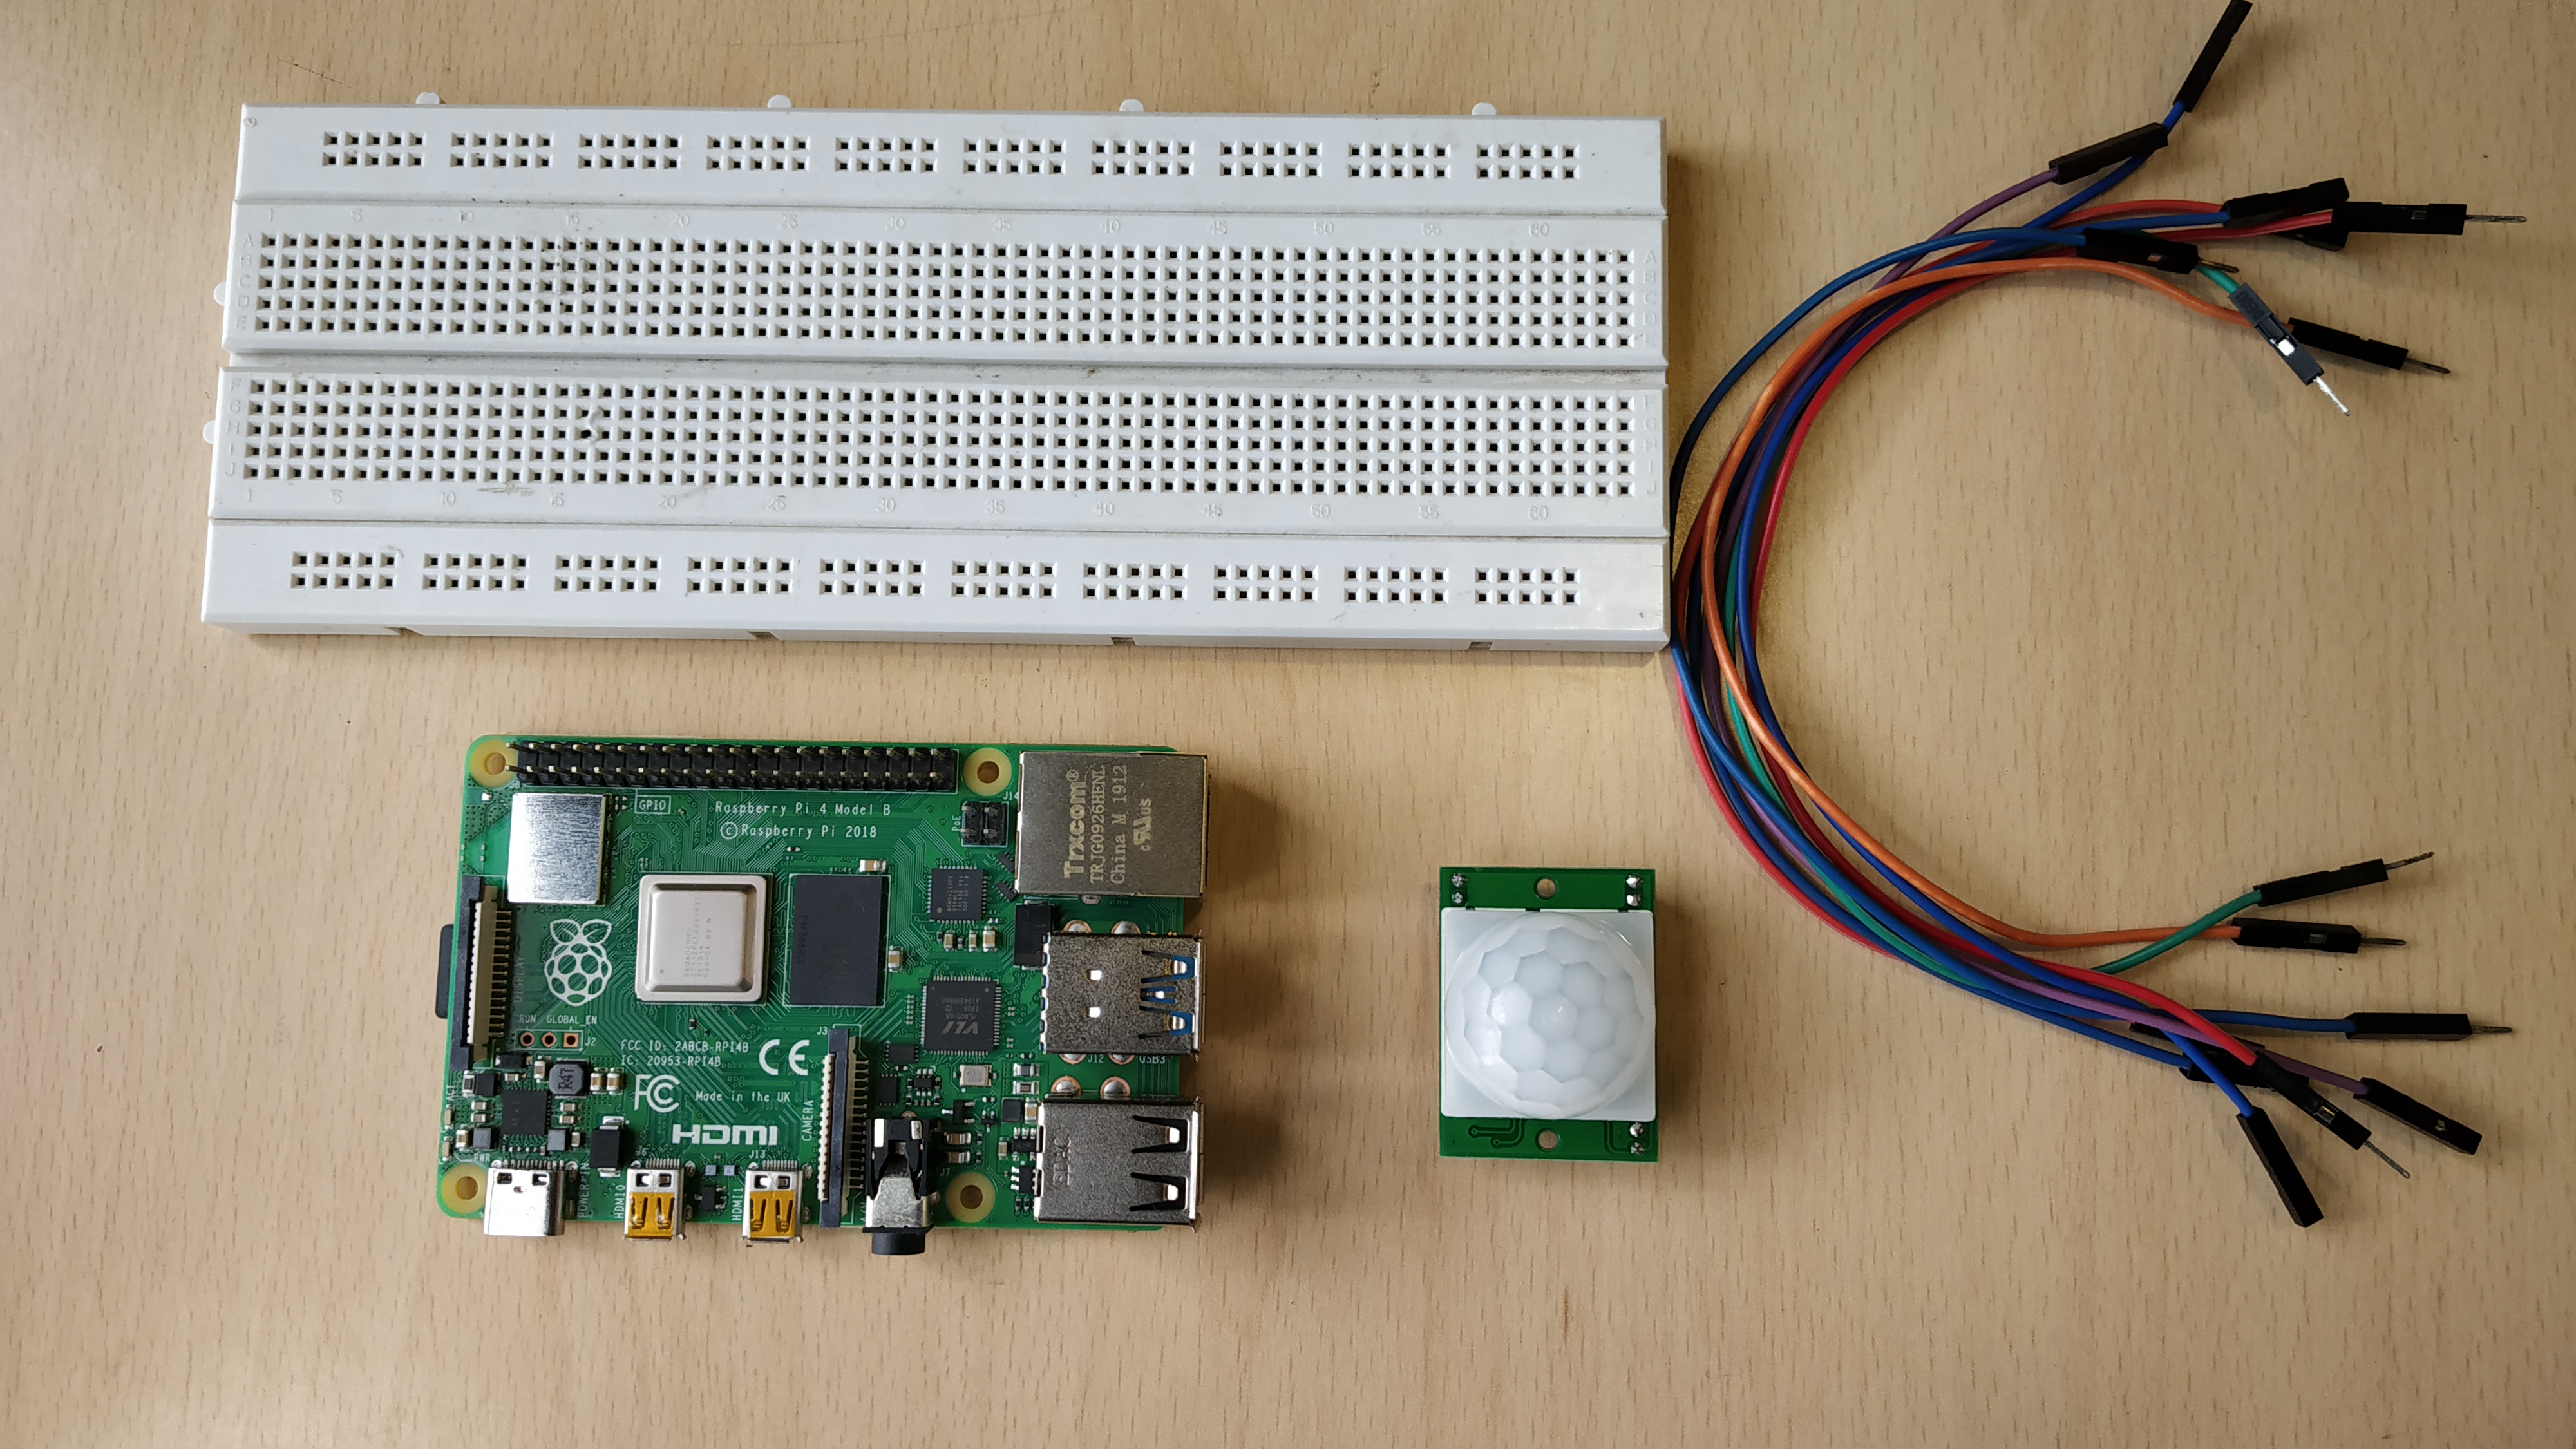
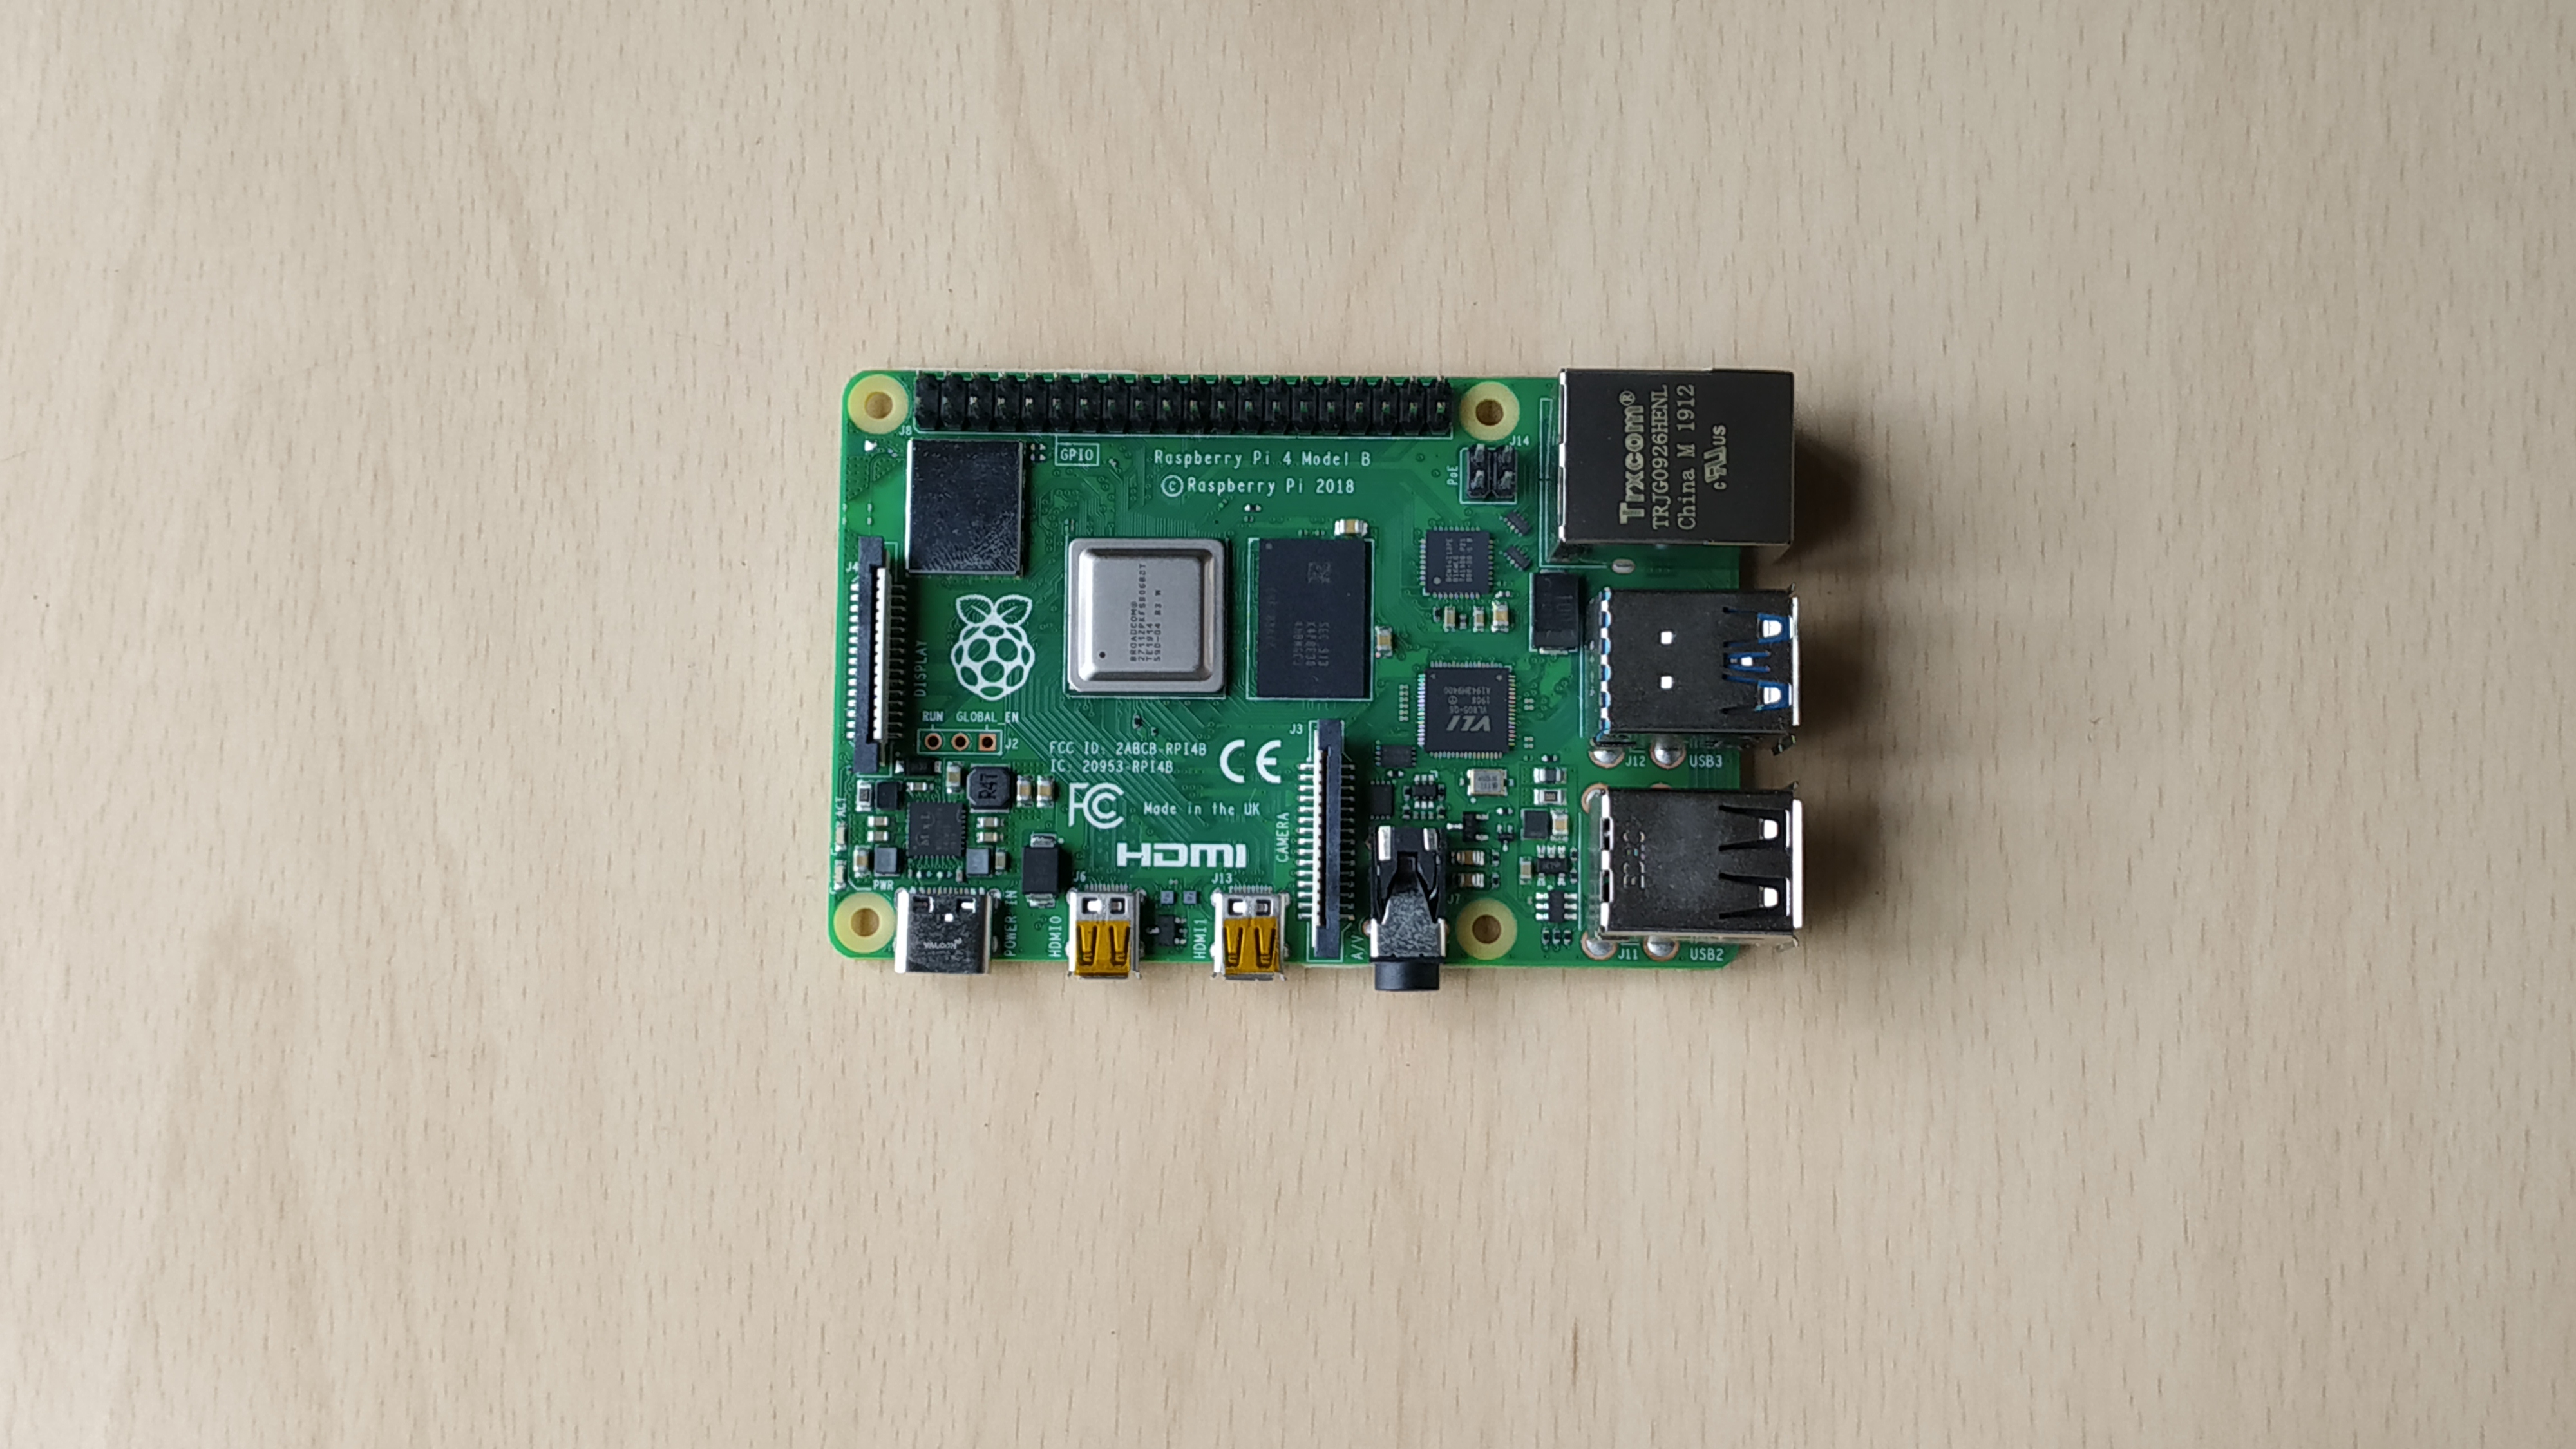
Hi guys, in this instructable we are going to use a PIR sensor for detecting obstacles.
So let us Jump into it.
Supplies
- Raspberry Pi 4B (any variant)
- Raspberry Pi 4B compliant power supply
- 8GB or bigger micro SD card
- HDMI Monitor
- micro-HDMI Cable
- Mouse
- Keyboard
- Laptop or another computer to program the memory card
- PIR sensor - Buy
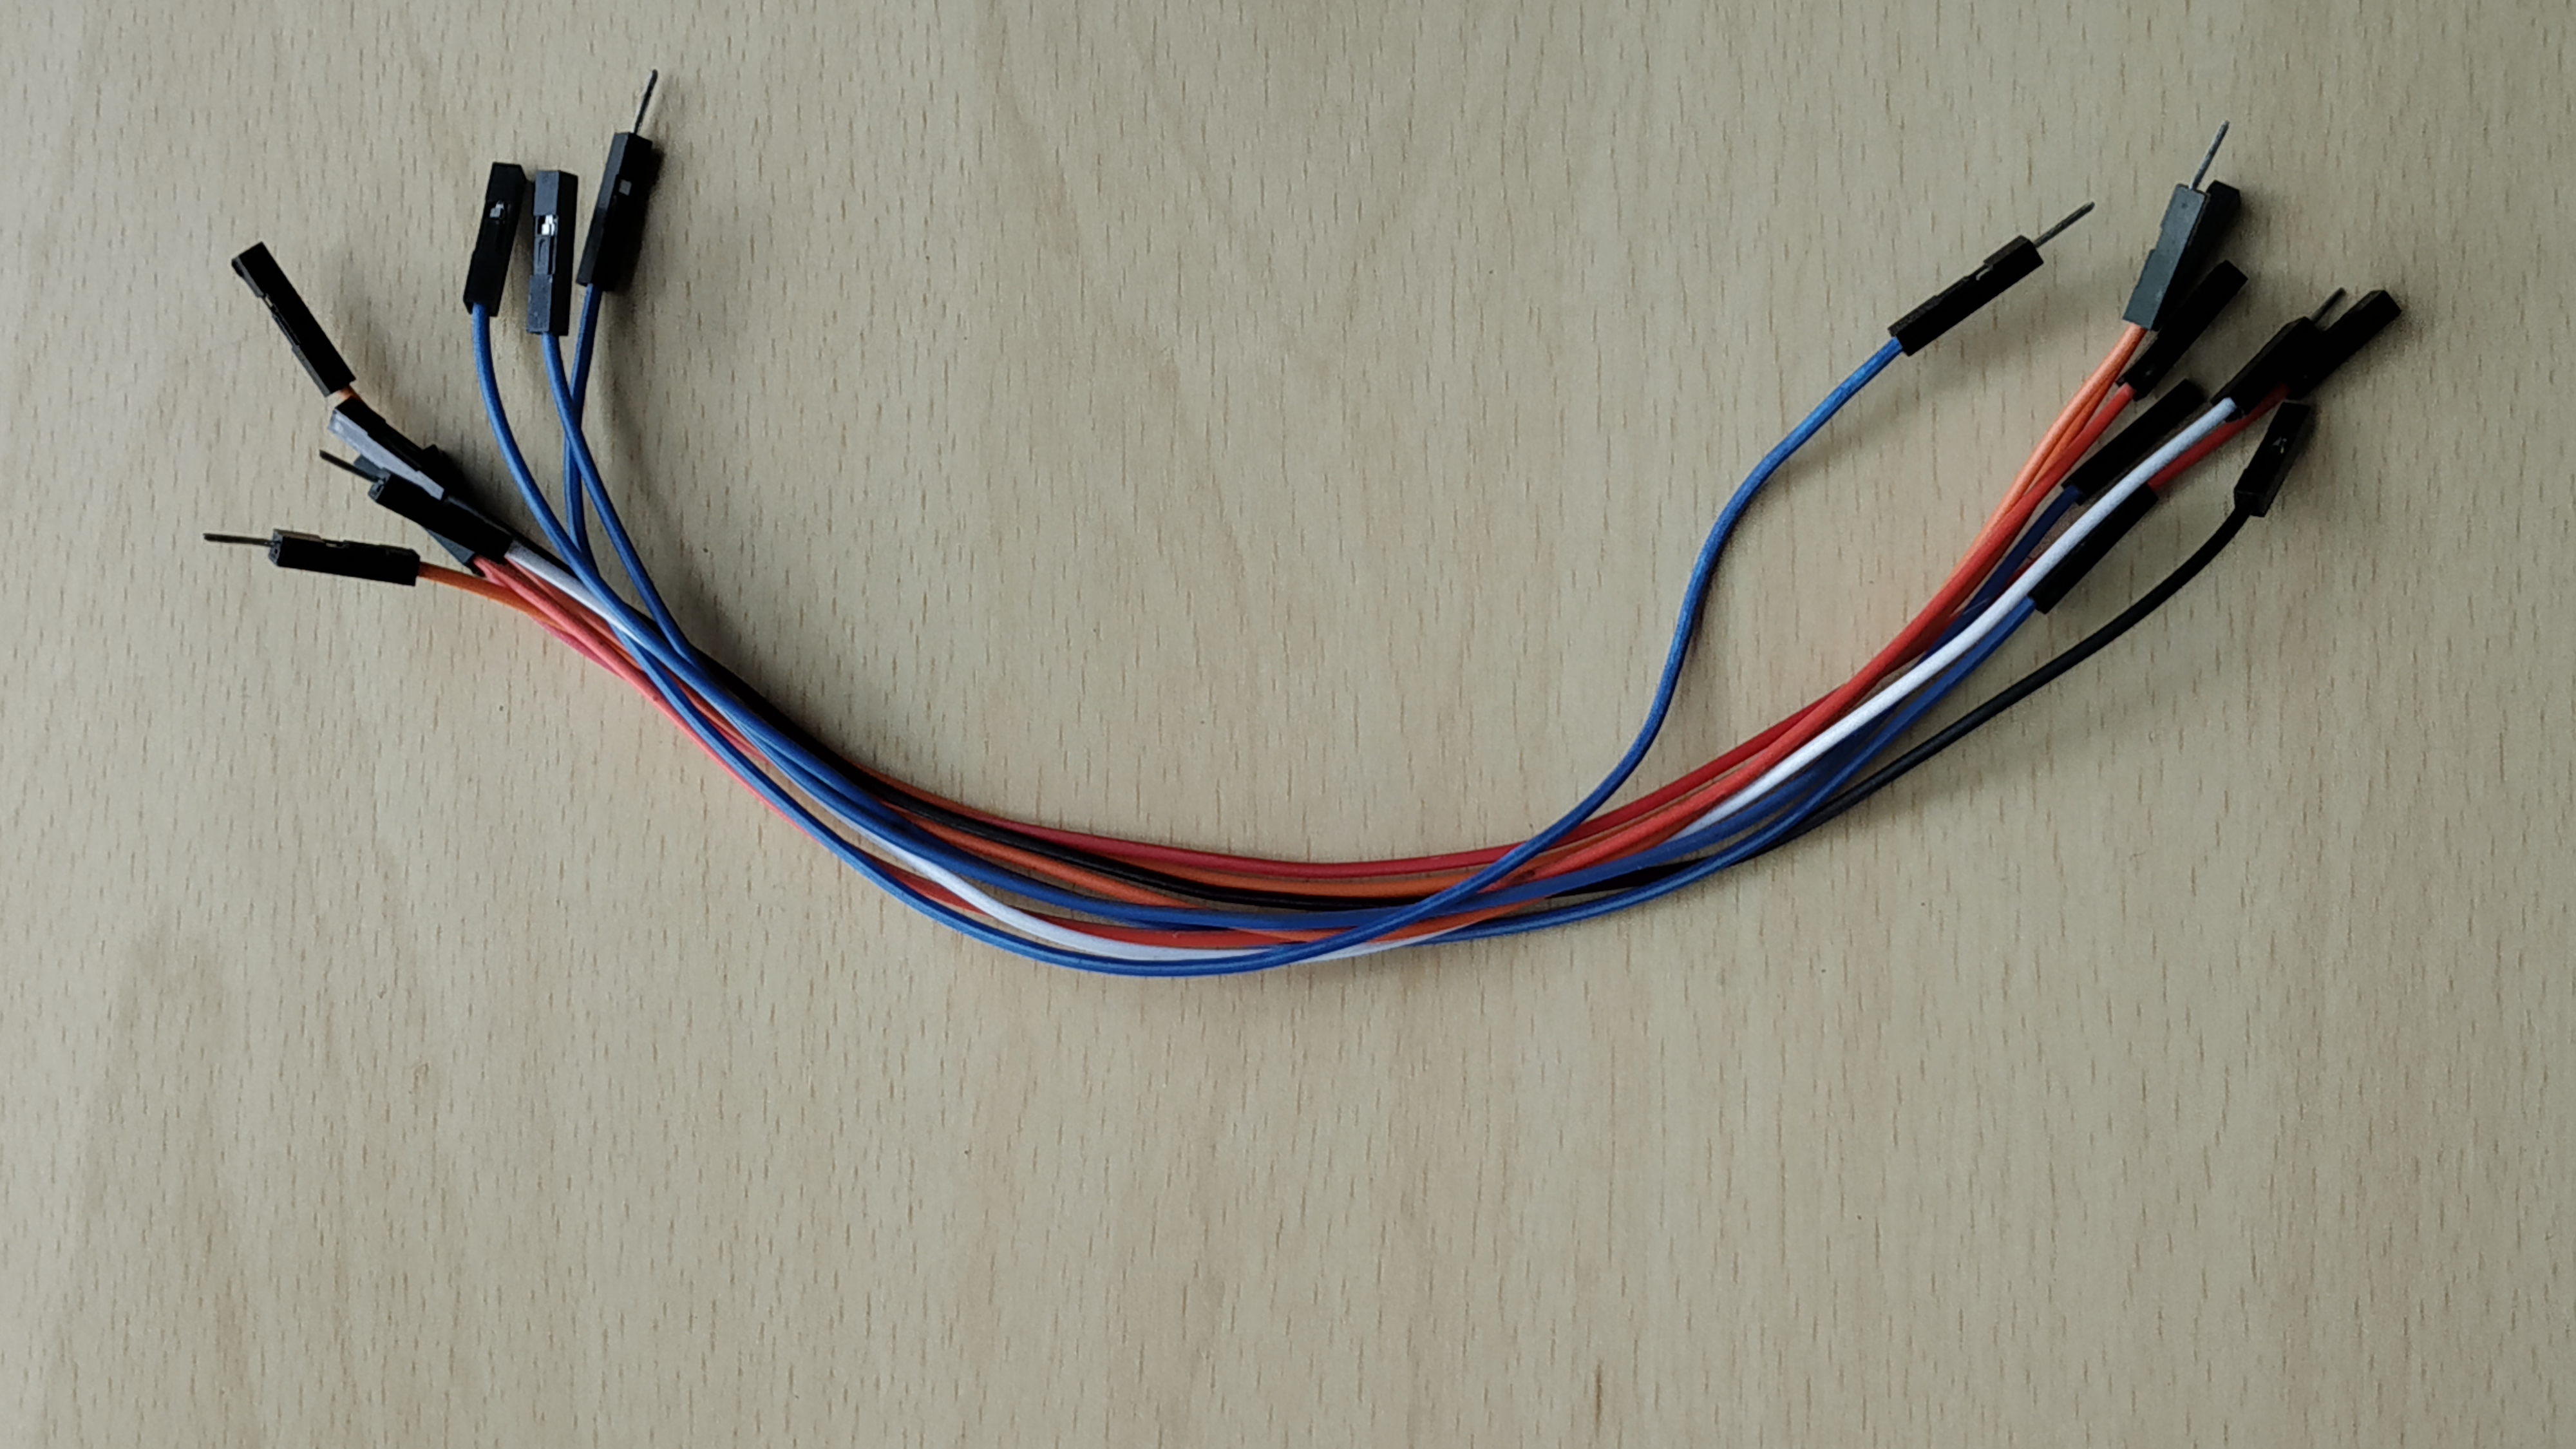
- Connecting wires (3x Female to Female Dupont wires)
Preparing the Raspberry Pi 4
Install Shunya OS on Raspberry Pi 4
Shunya OS is an operating system like Android or Raspbian which runs on devices like Raspberry Pi, Orange Pi, Tinker board, etc.
1) Download Shunya OS from the official release site
2) Load Shunya OS on the SD-card using the steps given below:
- Right-click on the zip file downloaded and select Extract here
- Once the file is extracted double click on the extracted folder in which you will find the image file (OS file) and release info.
- Right-click on the image file(.img file)
- Select Open with -> Disk image writer
- Choose Destination as SD Card Reader
- Enter your password this will start loading the SD-card with Shunya OS. Be patient and wait for the process to complete (100%)
3) Insert micro SD card into Raspberry Pi 4.
4) Connect mouse & keyboard to Raspberry Pi 4.
5) Connect Monitor to Raspberry Pi 4 via micro-HDMI
6) Connect the power cable and Power ON the Raspberry Pi 4.
The Raspberry Pi 4 should boot up with Shunya OS. After the OS boots up you should see a login screen.
Here are the login details:
Username: shunya
Password: shunya
Install Shunya Interfaces on Raspberry Pi 4
Shunya Interfaces is a GPIO library for all boards supported by Shunya OS.
To install Shunya Interfaces we need to connect it to the wifi with internet access.
1. Connect to the wifi using the command
$ nmtui
2. Installing the Shunya Interfaces is easy, just run the command
$ sudo apt update && sudo apt install shunya-interfaces
Understanding the GPIO Pins Raspberry Pi
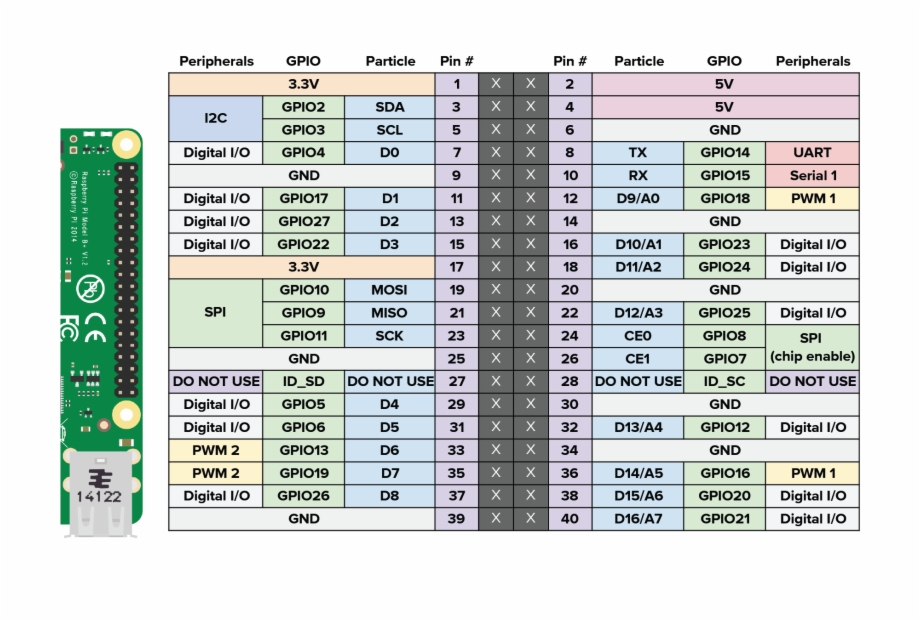
GPIO (General Purpose Input and Output) pins are hardware pins which can be controlled by software on the Raspberry Pi 4.
GPIO pins are digital by nature and setting them HIGH or 1 by software will produce 5V or 3.3V at the hardware pin and setting then LOW or 0 by software will produce 0V at the hardware pin.
Raspberry Pi 4 contains 40 pin headers which are GPIO pins except for 14 special pins that provide Power (3.3V or 5V) or Ground (GND).
Connect Stuff Together
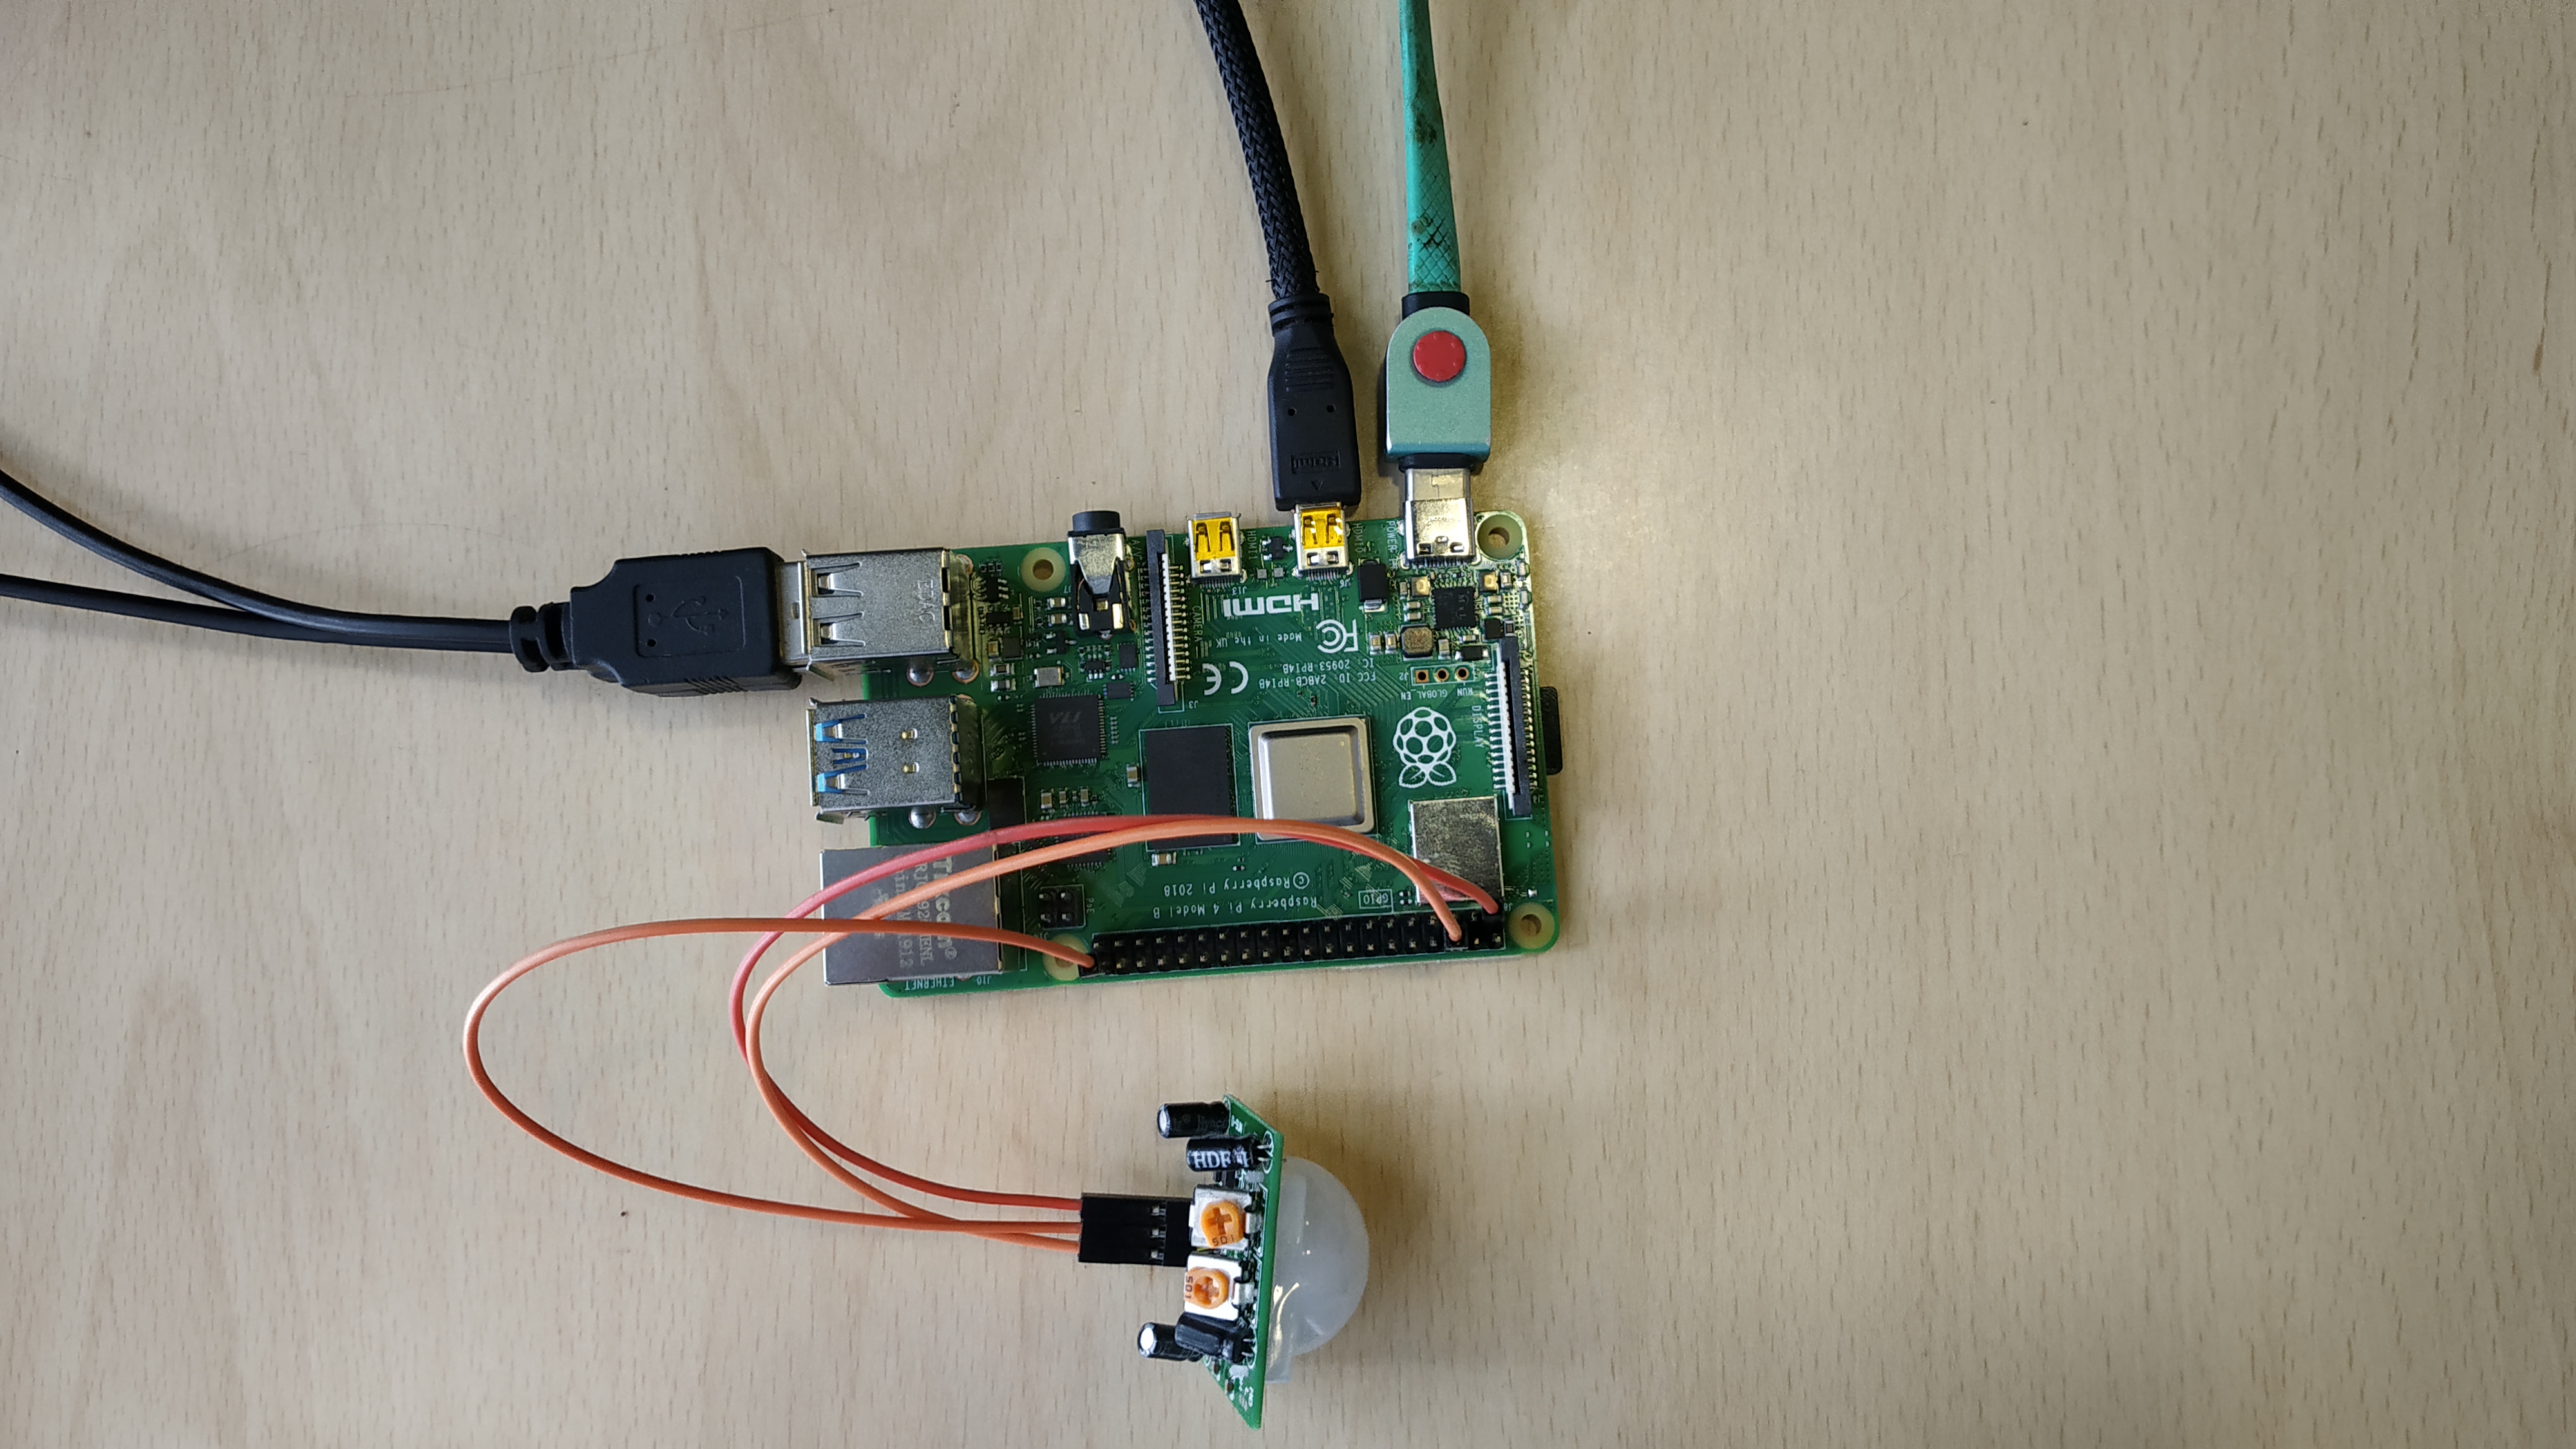
Before we start,
Warning - Wrong connections can destroy your Raspberry Pi. Make sure you never connect Vcc and GND to each other (short circuit). Always recheck your connections before powering on the Raspberry Pi 4.
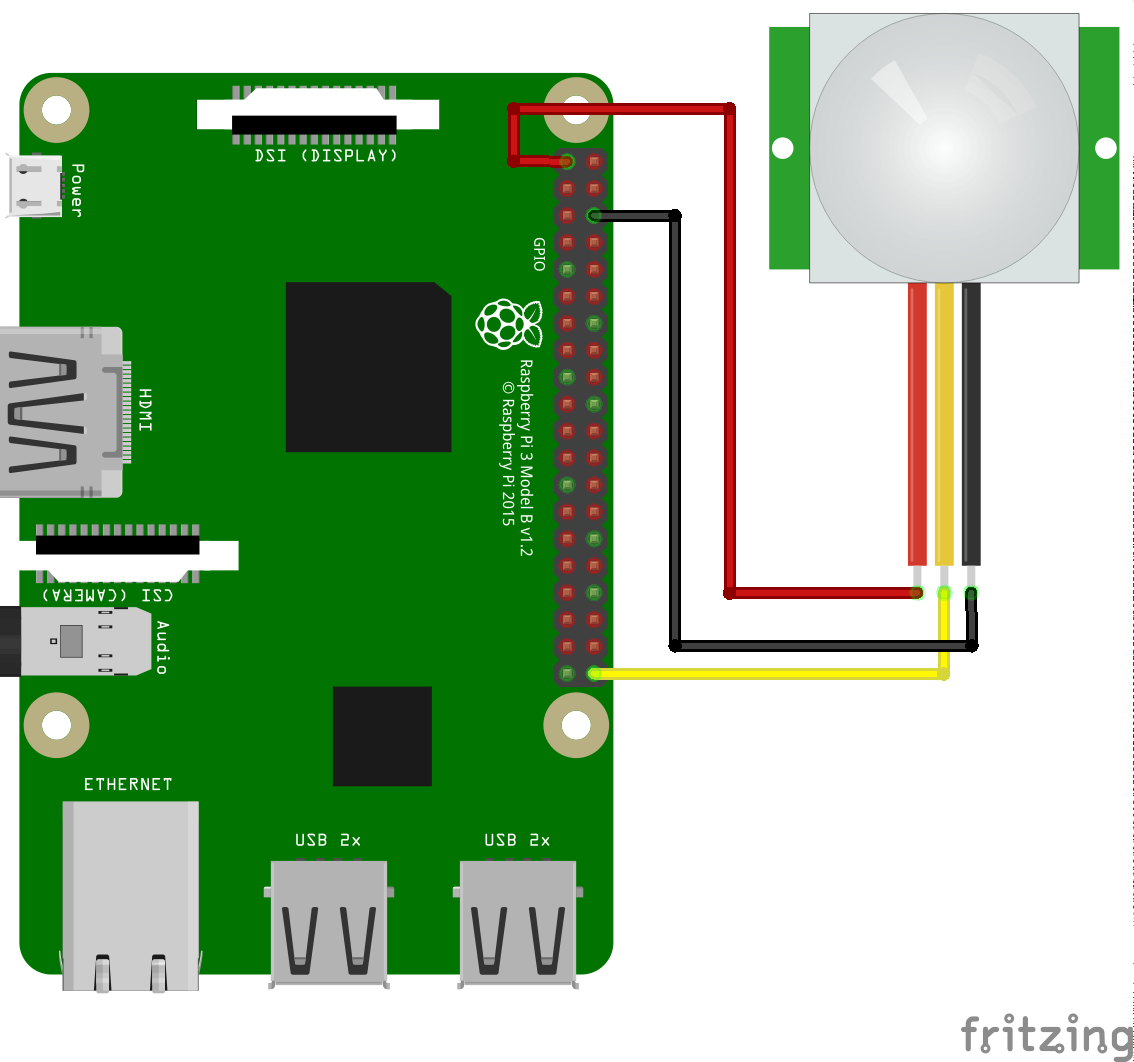
The PIR sensor module has 3 connections Vcc, GND and Out
- Connect Vcc to Pin 1 on the Raspberry Pi 4 Pin 1.
- Connect GND to Pin 6 on the Raspberry Pi 4 Pin 6.
- Connect Out to any Pin 40 on the Raspberry Pi.
Check your connections against the attached Diagram and the photos.
Mini-intro to Shunya Interfaces
Shunya Interfaces is a C library, with syntax similar to Arduino. It runs on Shunya OS and is made for devices like Raspberry Pi, Orange Pi, Tinkerboard etc.
For writing code for the PIR sensor, we will be using 5 functions
- shunyaInterfacesSetup() - Initialize Shunya Interfaces library
- pinMode (physicalPin, INPUT) - Set GPIO pin as INPUT or OUTPUT
- digitalWrite(physicalPin, HIGH) - Write High or low to a GPIO pin
- digitalRead(physicalPin) - Reads GPIO pin
- delay(miliseconds) - Add delay in miliseconds
For more details on Shunya Interfaces API, checkout Shunya Interfaces API docs.
Writing & Compiling Code
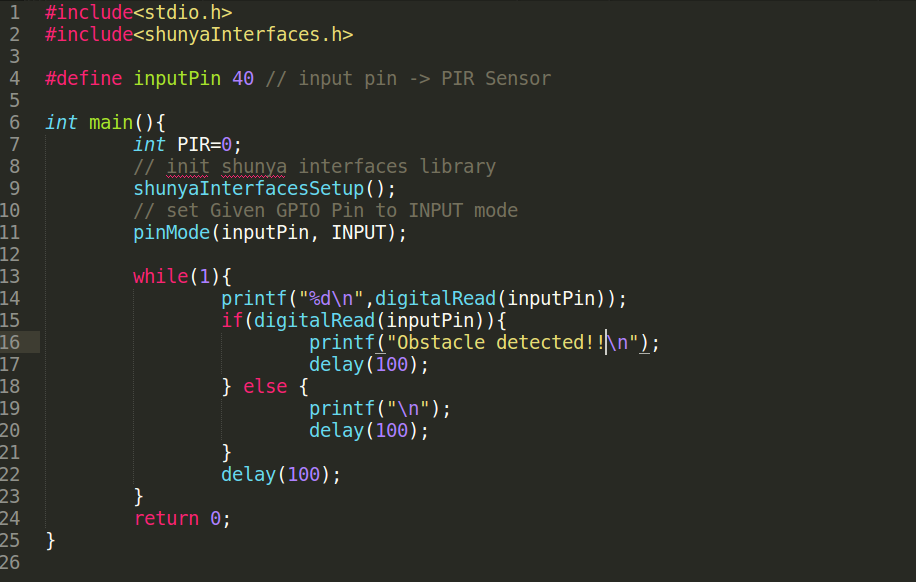
- Download the code given below.
- Compile it using the command
$ gcc -o pir pir.c -lshunyaInterfaces
Downloads
Let's Start Detecting Obstacles
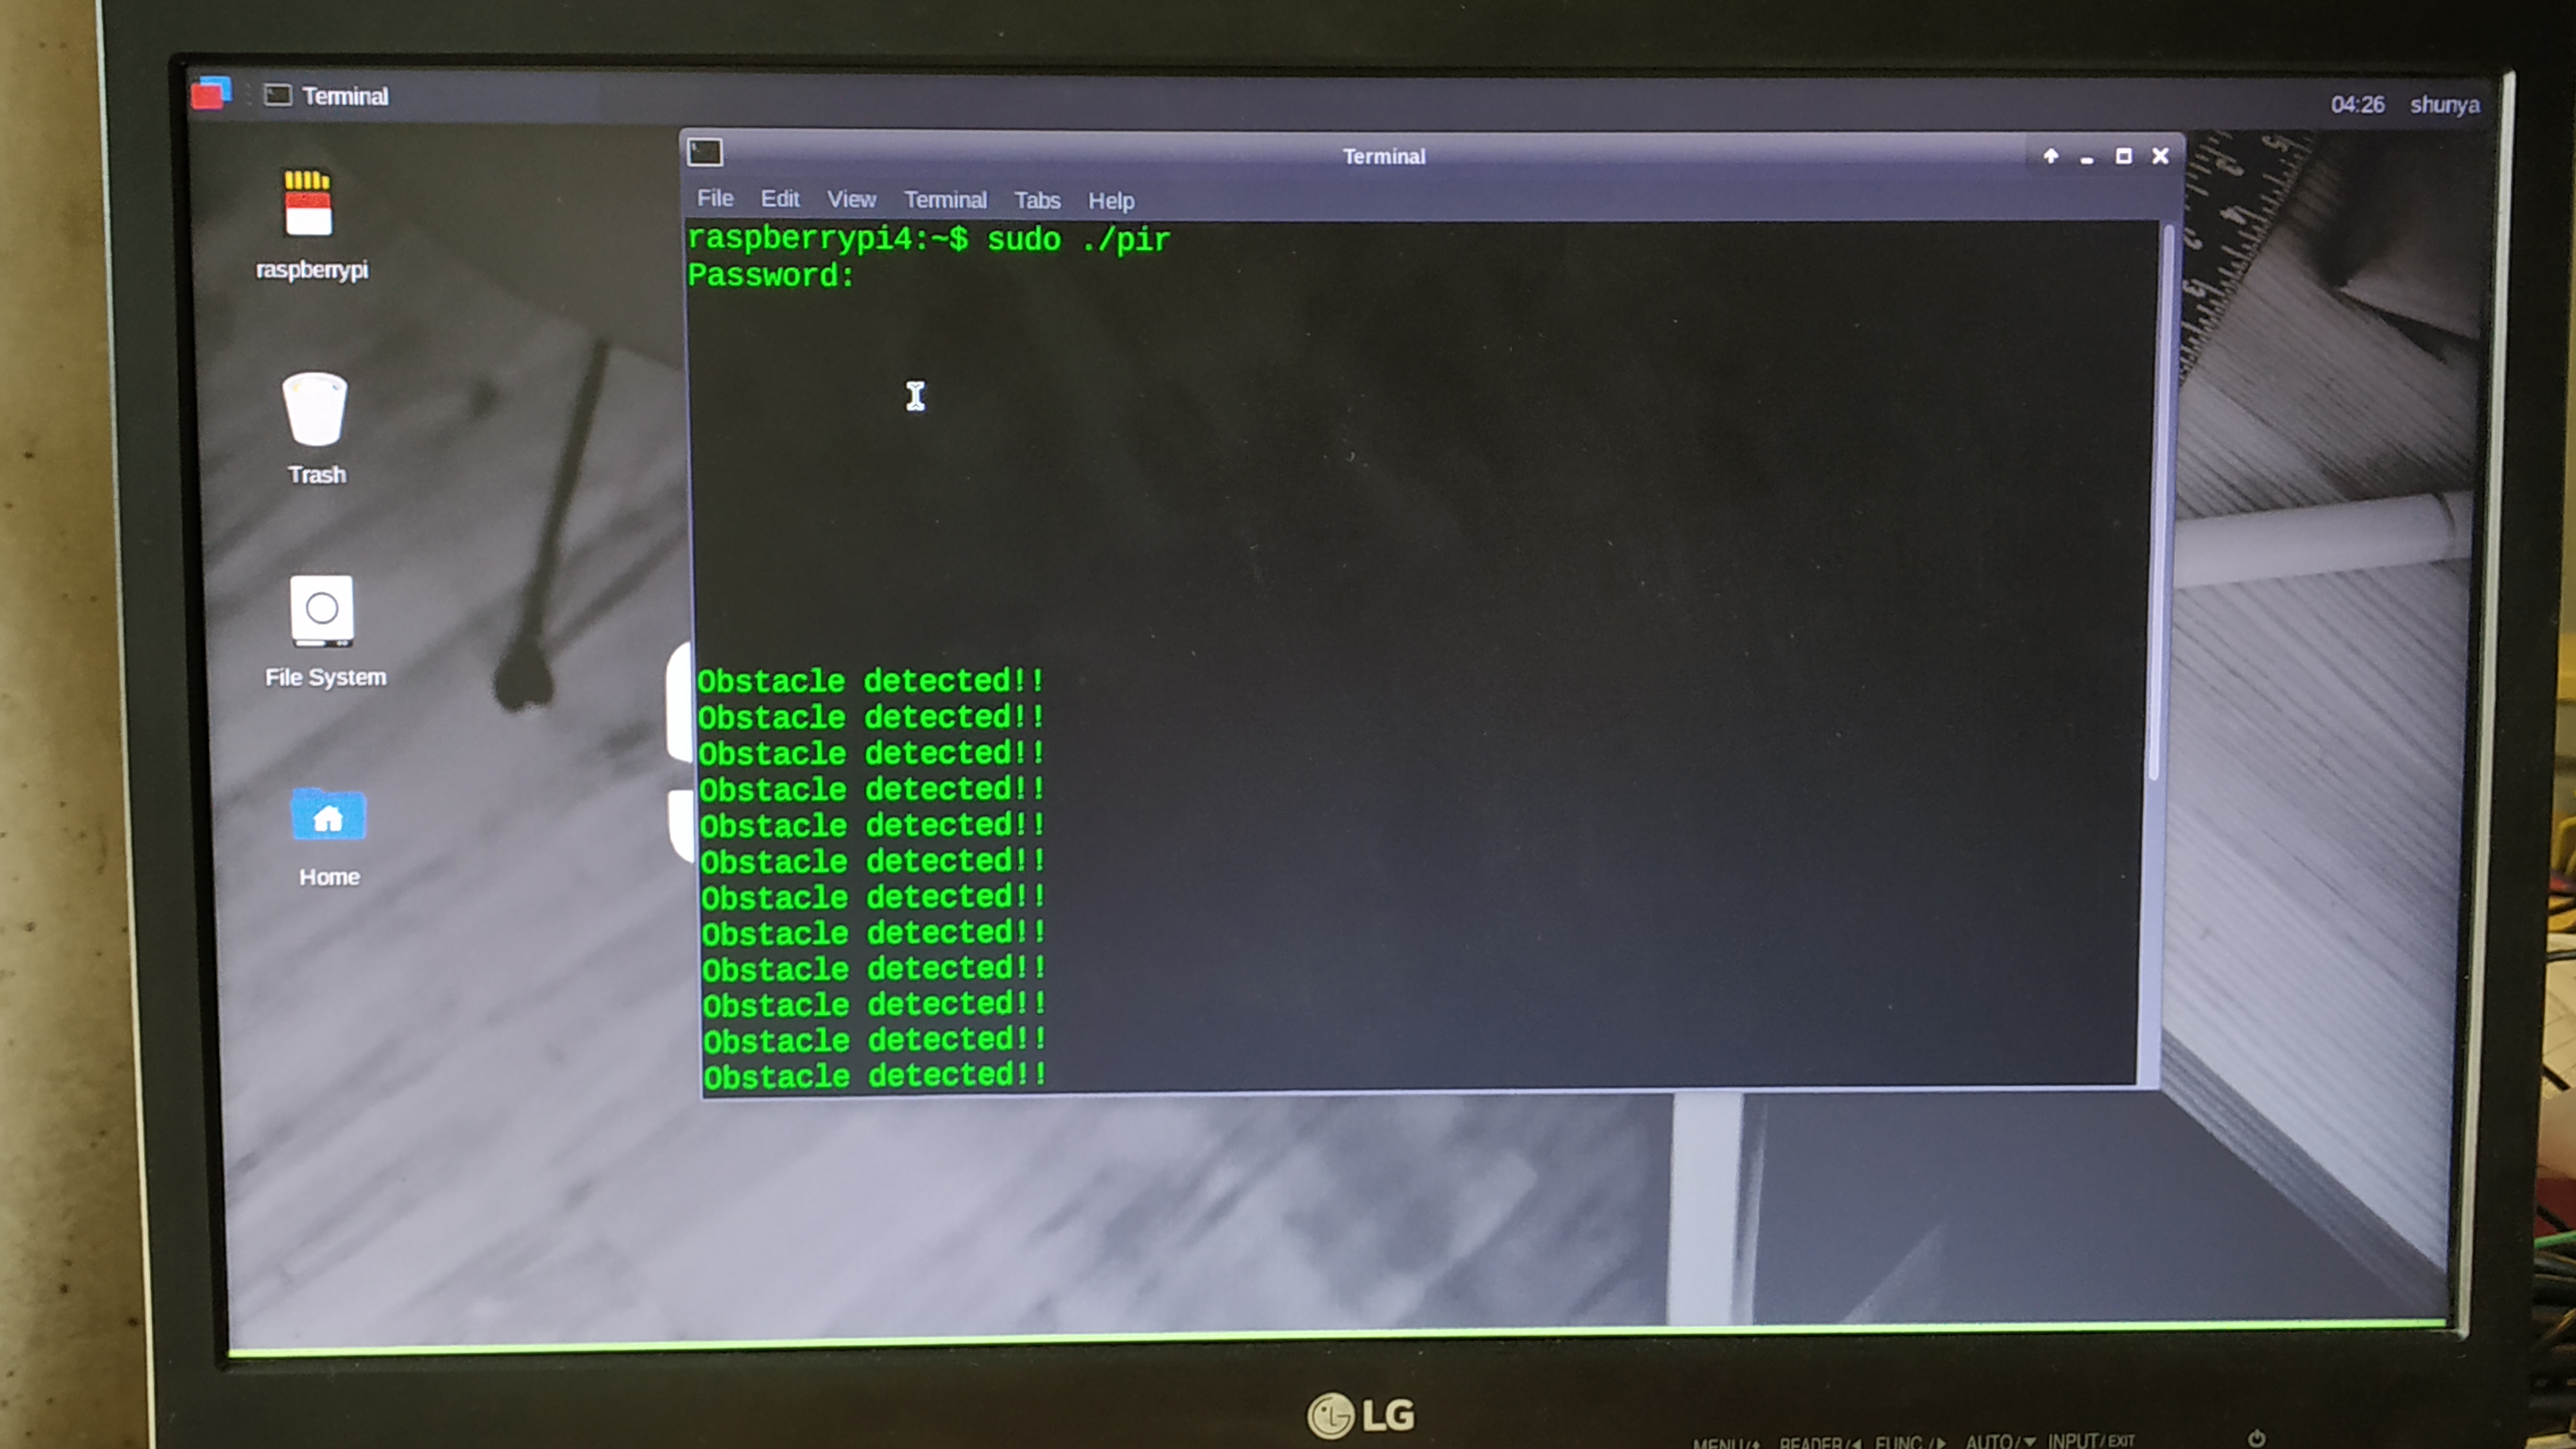
To start detecting obstacles
- Open Terminal Ctrl + Alt + T
- And Run command
$ sudo ./pir
Whenever the obstacle gets detected, you will see the "Obstacle detected" printed.
Yatta! You did it!
Have you tried this yet? What will you do next? Take this and improve on it.