Photoshop a Fantasy Mummy Axe
by solipsism in Craft > Digital Graphics
4245 Views, 7 Favorites, 0 Comments
Photoshop a Fantasy Mummy Axe
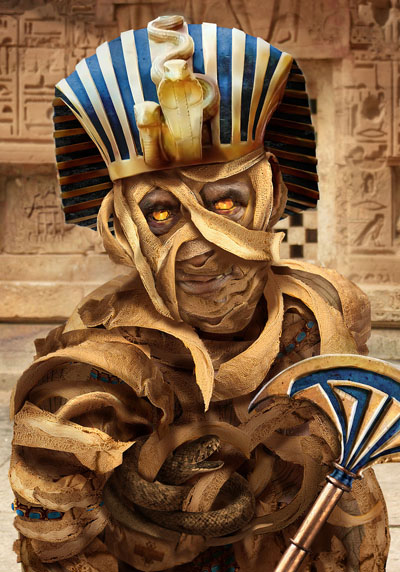
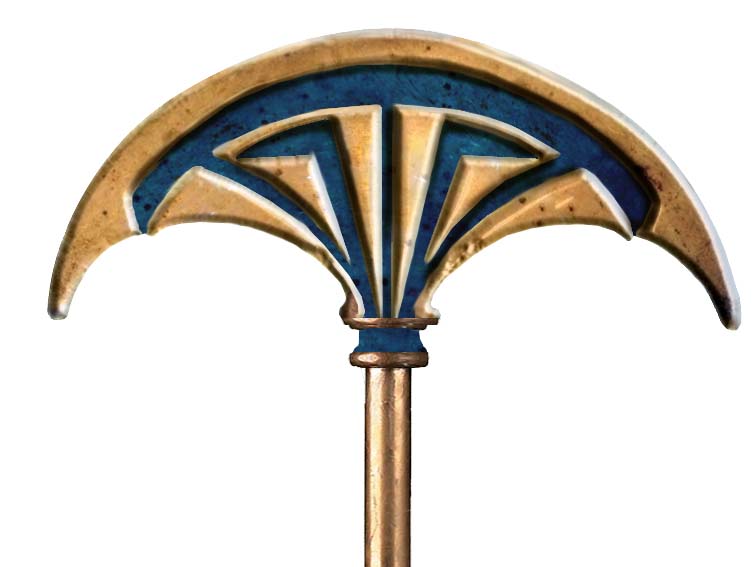
This tutorial is the first step in creating a fantasy photoshop of a mummy wielding an axe.
Today we will build the axe, mostly from scratch.
The screen captures are from Photoshop CS2, but should be applicable to most versions with little difficulty.
This tutorial assumes you know some basic workings of the program, basic layers, the simple tools, and dragging and dropping.
Today we will build the axe, mostly from scratch.
The screen captures are from Photoshop CS2, but should be applicable to most versions with little difficulty.
This tutorial assumes you know some basic workings of the program, basic layers, the simple tools, and dragging and dropping.
Source Picture, Some Old Metal From a Blade
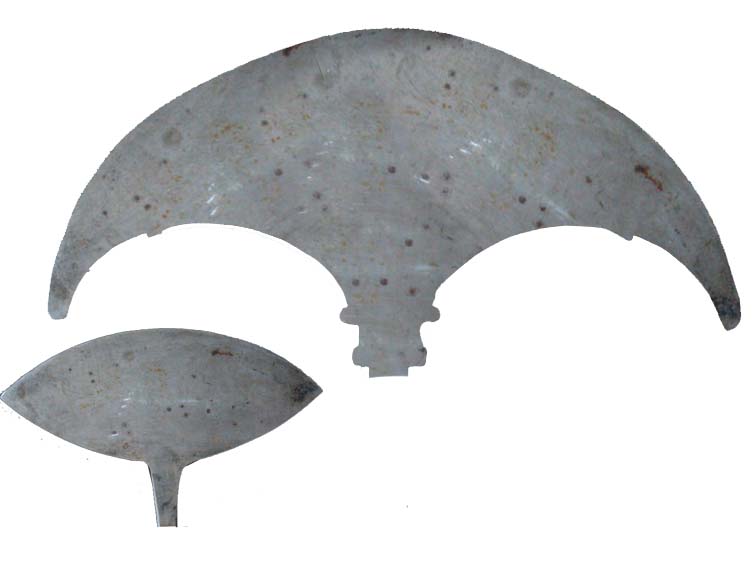
cut out the metal from its background, duplicate it a bunch of times (copy-paste) and spread them around, then :
use the clone tool to fill in any gaps and smooth out any dark/light patchy parts. With the selection
method of your choice (mask/erase) make the silhouette of the axe head. (in the layers panel: name the layer by double clicking on the text label and typing)
use the clone tool to fill in any gaps and smooth out any dark/light patchy parts. With the selection
method of your choice (mask/erase) make the silhouette of the axe head. (in the layers panel: name the layer by double clicking on the text label and typing)
Duplicating the Axe and Cutting Out the Design
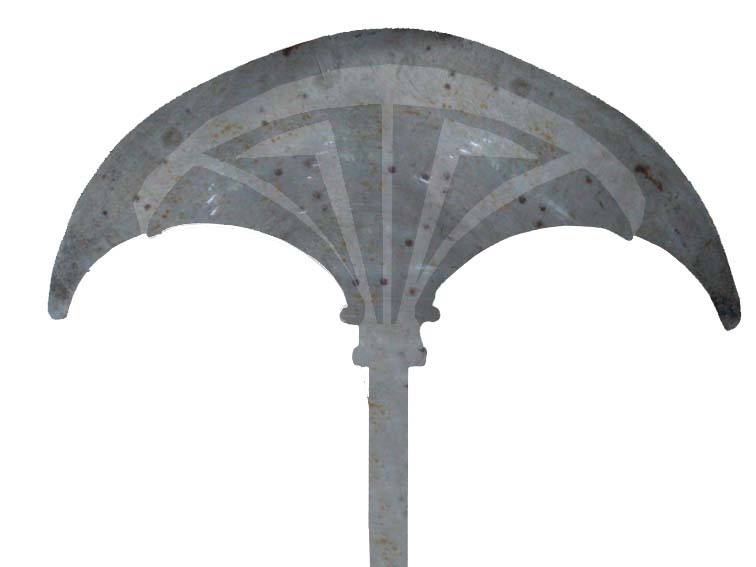
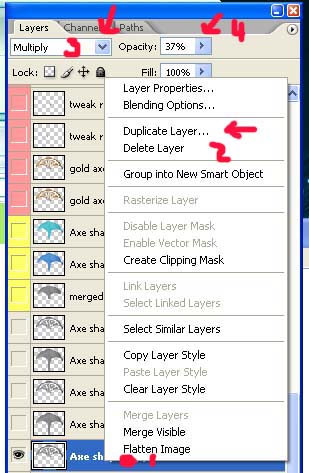
Duplicate the axe (in the layers panel: right click on the layer's name - duplicate layer)
Set the top layer blending mode at the top of the layer panel to MULTIPLY (from normal) so that you
can see it on top of the original layer.
With the dark layer selected, Delete/Erase/mask out the areas that will be raised gold areas.
note:(I think I actually did this by cutting out shapes placing them where I wanted, flipping them,
merging them and then selecting them at 255 with the magic wand to get a selection pattern going back to the dark layer pressing delete and then turning off the extra shape layer.)
Beveling the Design
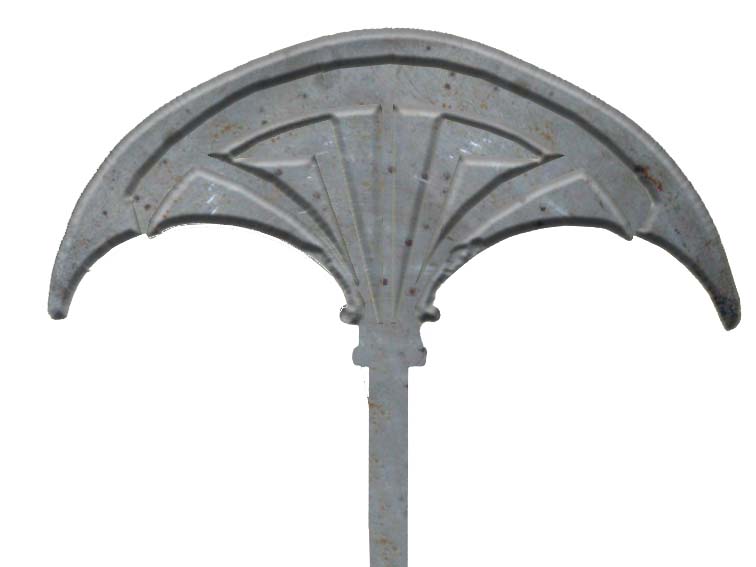
(this is a good time to save)
Put the Blending mode of the top layer back to "normal" in the Layer panel (from multiply) and turn
off the original grey layer below it.
Now we can do a layer effect in the layer panel. Make sure the top layer is active by selecting it.
Right click the label of the top layer and get a pop up menu. Choose "blending options" to get the
"Layer Style" popup menu.
Check the boxes for Inner Shadow, Inner Glow and Bevel&Emboss. Each Type has its own screen when you double click it.
We will set each one next.
Tweak the Bevel
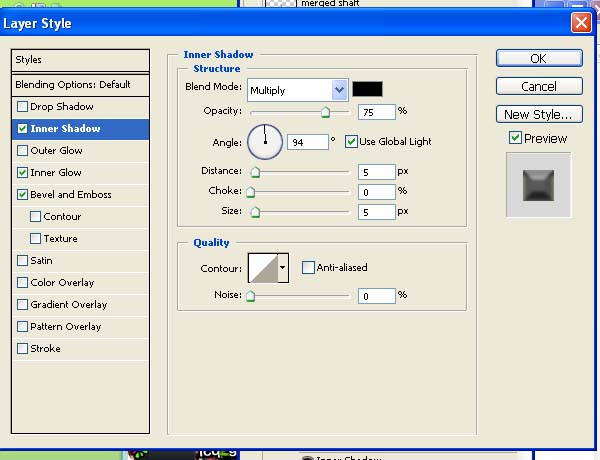
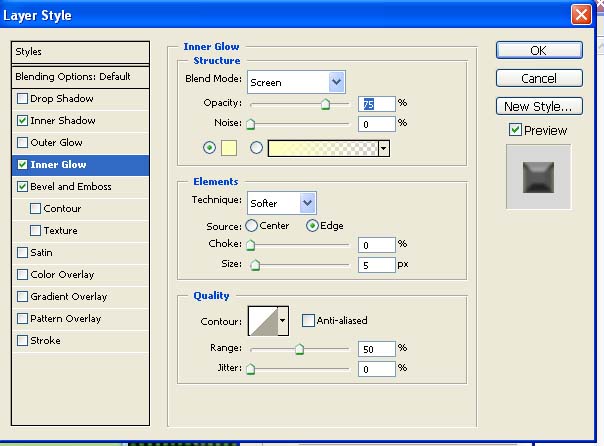
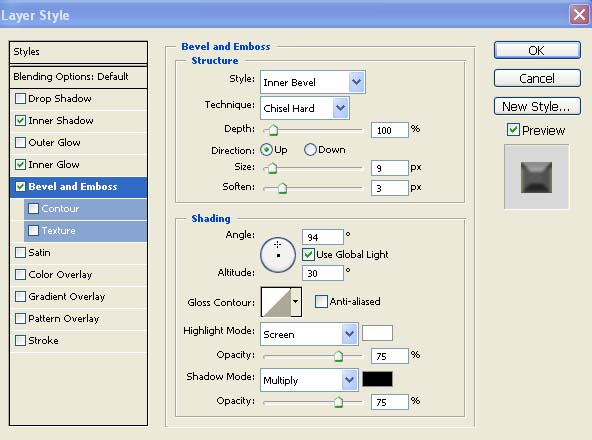

Basically you want a nice 3-tone shape not too dark and not too light that we can colour.
Double click on"Inner Shadow" and play with the settings. I used : Blend Mode=multiply, Opacity=75%,
Angle = 90, Distance=5px, Choke=0, Size=5px.
Double click on the Inner Glow and play with the settings. I used: Blend Mode = screen, Opacity=75, Size=5px (which is roughly the default)
Double click on Bevel&Emboss. I used: Style=Inner Bevel, Technique=Chisel Hard, Size=9px, Soften=3px, and Highlight and Shadow modes set to 75% screen multiply.
Colour the Metal Gold.
Duplicate the beveled layer give it a name ("x") and make it invisible again by clicking the "eye" icon in the layer panel. (we need the settings later)
Somehow we need to rasterize the visible beveled layer with the blending options applied to it.Since "right click - rasterize" is not available yet do one of the following
a. make a white layer underneath, merge the two and then remove the background (probably with magic wand tool)
OR
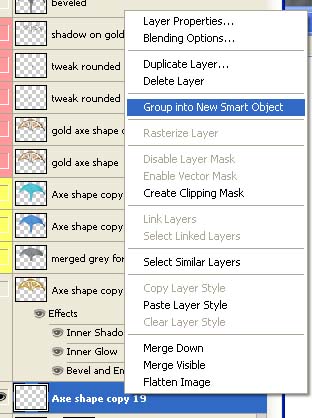
b. group it into a "smart object" (right click on the layer in layers panel and in the pop-up select
"group into smart object") and then repeat but choose "rasterize layer".
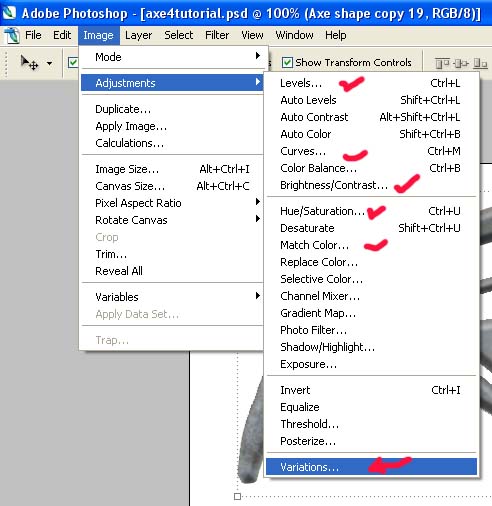
We need to change the grey beveled layer gold. You can do this with the method of your choice. In the top toolbar:
image]adjustments]{*pick one* and fiddle with it}
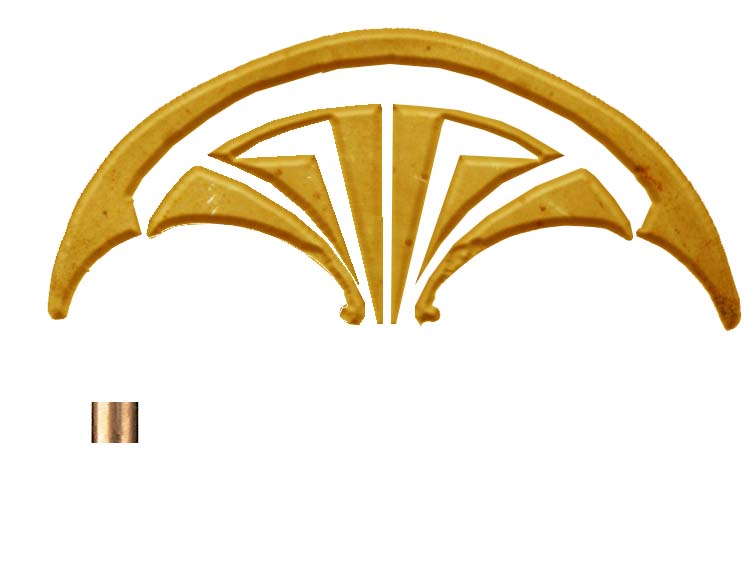
repeat until you get a nice orangey-yellow.
Re-bevel for Highlights
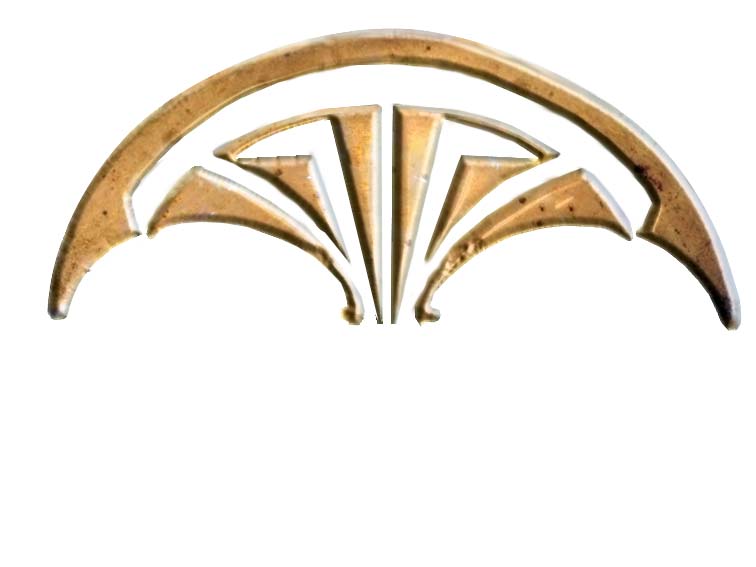
6. The colour will be great but the highlights and overall colour will not be right, we need to bevel
it again.
Since we saved a copy of the original (x) , we can use those settings. Turn the original
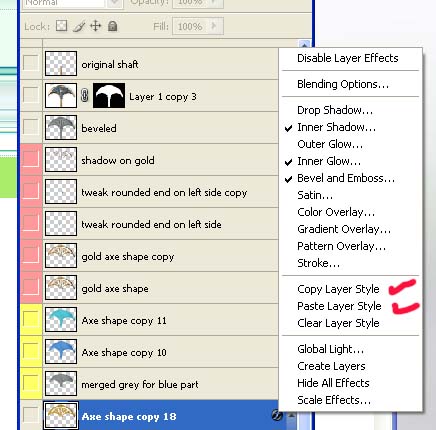
layer back on temporarily to clone it's blending layer style. On layer x, right click on the icon for
blending options that looks like a circle with an f in it. In the pop up select "copy layer style".
Turn layer x off now, and select our rasterized beveled layer. Right click on the layer to get the
same menu and "paste layer style". Now we should have highlights and shadows again.
Tweak the Gold Layer
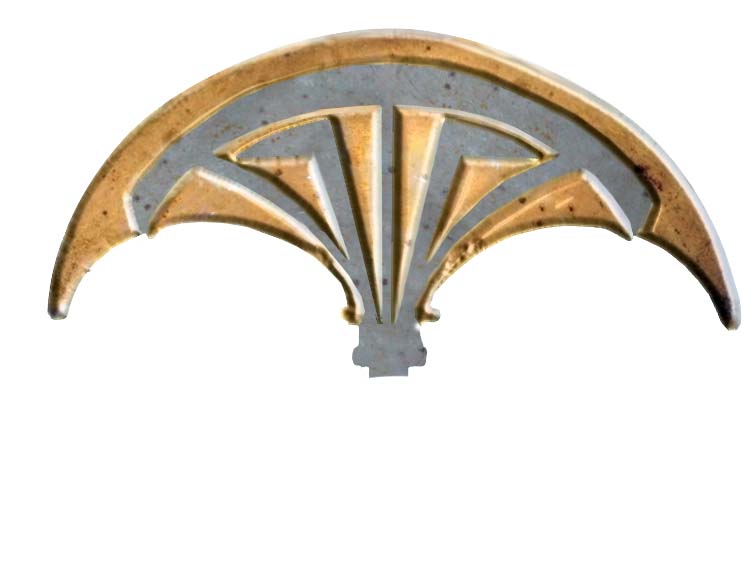
Turn the first grey layer back on if need be and view the work. If the gold layer is a little
raggedy, clean it up now, edges should be sharp and metallic looking. I used the clone tool a bit to
make the edges stronger where needed especially on the curly-cues.
raggedy, clean it up now, edges should be sharp and metallic looking. I used the clone tool a bit to
make the edges stronger where needed especially on the curly-cues.
Blue Layer.
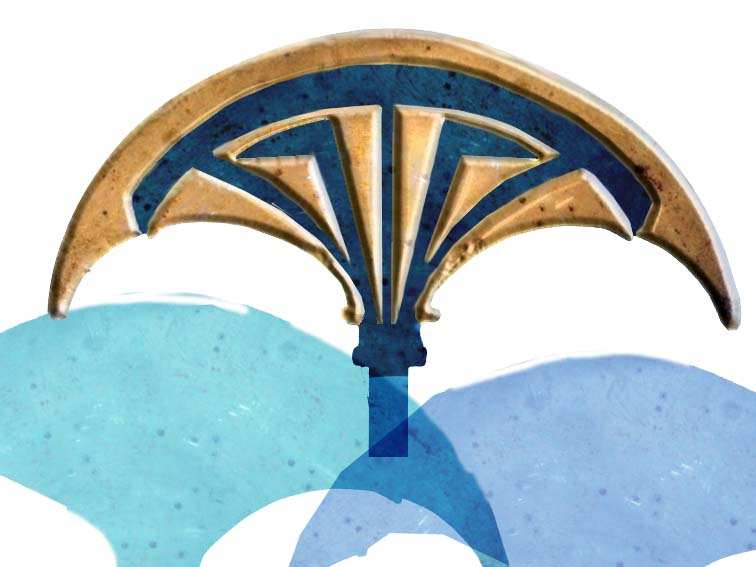

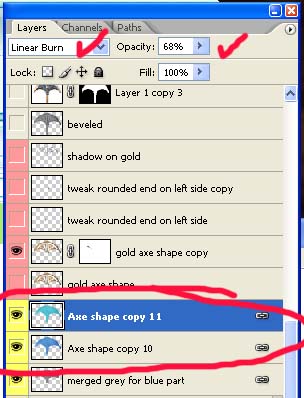
Duplicate the bottom grey layer a couple times and turn them some nice blue and turquois colours.
using the method of your choice:
In the top toolbar:
image]adjustments]{*pick one* and fiddle with it}
Play with the opacities and the Blending modes in the Layer panel, until you get the stack to make a
nice ultramarine dark blue. (I used multiply and linear burn)
using the method of your choice:
In the top toolbar:
image]adjustments]{*pick one* and fiddle with it}
Play with the opacities and the Blending modes in the Layer panel, until you get the stack to make a
nice ultramarine dark blue. (I used multiply and linear burn)
Gold Shaft
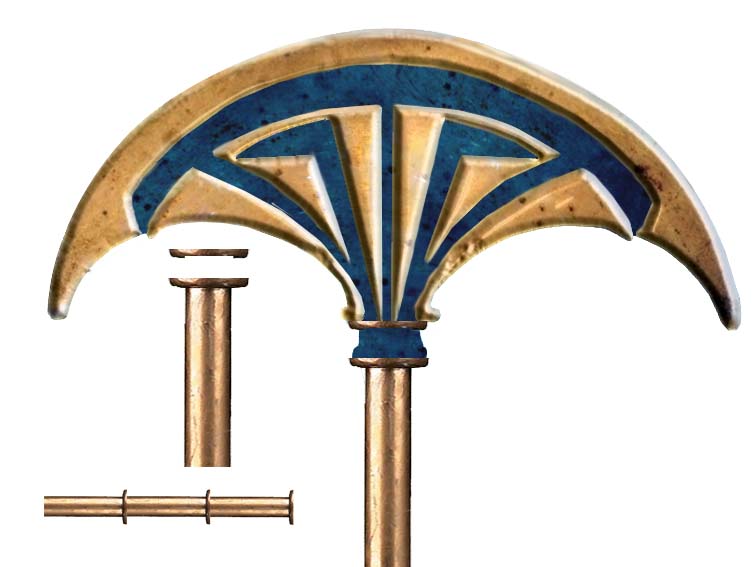

9. For the shaft, I had a brass lamp source which I cut out and modified a bit for the shaft. I then
duplicated the same image over and over to make the shaft longer. The little ridges I left on for
decoration.
(the alignment tools are helpful for making the shaft parts stay in line, they are at the
top of the page when you have the selection tool active, multi-select all the layers you want while
holding down shift, and then press the align icon)
Shadows
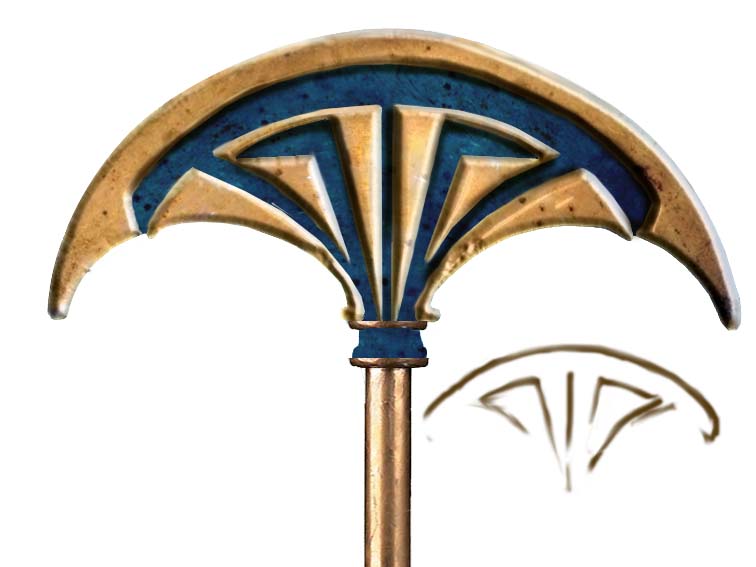
For contrast I took the eyedropper tool to select the shadow of the shaft to get a nice
brown-green colour. I made a new layer on top of everything and with a soft brush 17px or so, wide,
just quickly went over some of the dark edges. I set the blending mode in the layers panel to
"multiply" when I was done.
brown-green colour. I made a new layer on top of everything and with a soft brush 17px or so, wide,
just quickly went over some of the dark edges. I set the blending mode in the layers panel to
"multiply" when I was done.
Merging the Easy Way on Transparent Background


To merge it all (for dragging to the main Mummy image) you make a new blank layer on top of everything, turn off any layers you don't want seen (including any white or coloured backgrounds) then press these 4 keys at once:
alt + Ctrl + Shift + e
this creates a new merged image all the visible layers and dumps it into the last layer created.
I duplicated that merged layer, tweaked some stuff with the clone tool, cleaned up some edges, added some shines here and there with clone, and then sharpened it a bit.
for sharpen go to the top toolbar and choose:
filter]sharpen]sharpen
I then dragged the axe to the Mummy image. (Tutorial for mummy later)