Photoshop Tutorial How to Change Background With a Lot of Hair Like a PRO in 5 Easy Step
by rnmr in Craft > Digital Graphics
10292 Views, 29 Favorites, 0 Comments
Photoshop Tutorial How to Change Background With a Lot of Hair Like a PRO in 5 Easy Step


Hi to all Instructables,
I want to share with you a knowledge about changing background in photoshop, actually, there's a lot of tutorials that had been tackled this, but what I see from them is that they don't focus much on details, especially on the hair part, other photo studio tend to use software applications too for refining their work, examples are:
http://www.webforu.com/images/Graphics/ImageEditin...
https://kharartdotcom.files.wordpress.com/2014/07/...
as you may notice, there is a little weird problem with the cutting and editing of the photos, so what I will show you is how you can change the background of any images, especially the details on the hair. I hope you may find it interesting and helpful.
so lets take the first step.
OPTION: if you already know other parts of the project, you can jump/skip on to pages that you only need to know.
STEP 1- about layering
STEP 2 - 3 - removing background
STEP 4 - Furnishing the hair
So now lets Start!
1. we need to get a photo of a person, man or woman that we can edit, you can pick those who has a lot of hair, in this case I get an image on the google as an example.
http://wundergroundmusic.com/wp-content/uploads/20...
as you can see his hair is wavy, this is what we really needed.
2. get a background that you will fill on the canvass, this is also important as you need to replace the backgound image of the photo. in this case, I chose
http://webneel.com/wallpaper/sites/default/files/i...
3. open your photoshop, stretch and get ready for the magic to happen :)
1. Opening the File to Photoshop
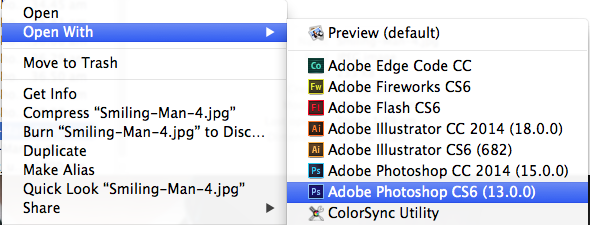
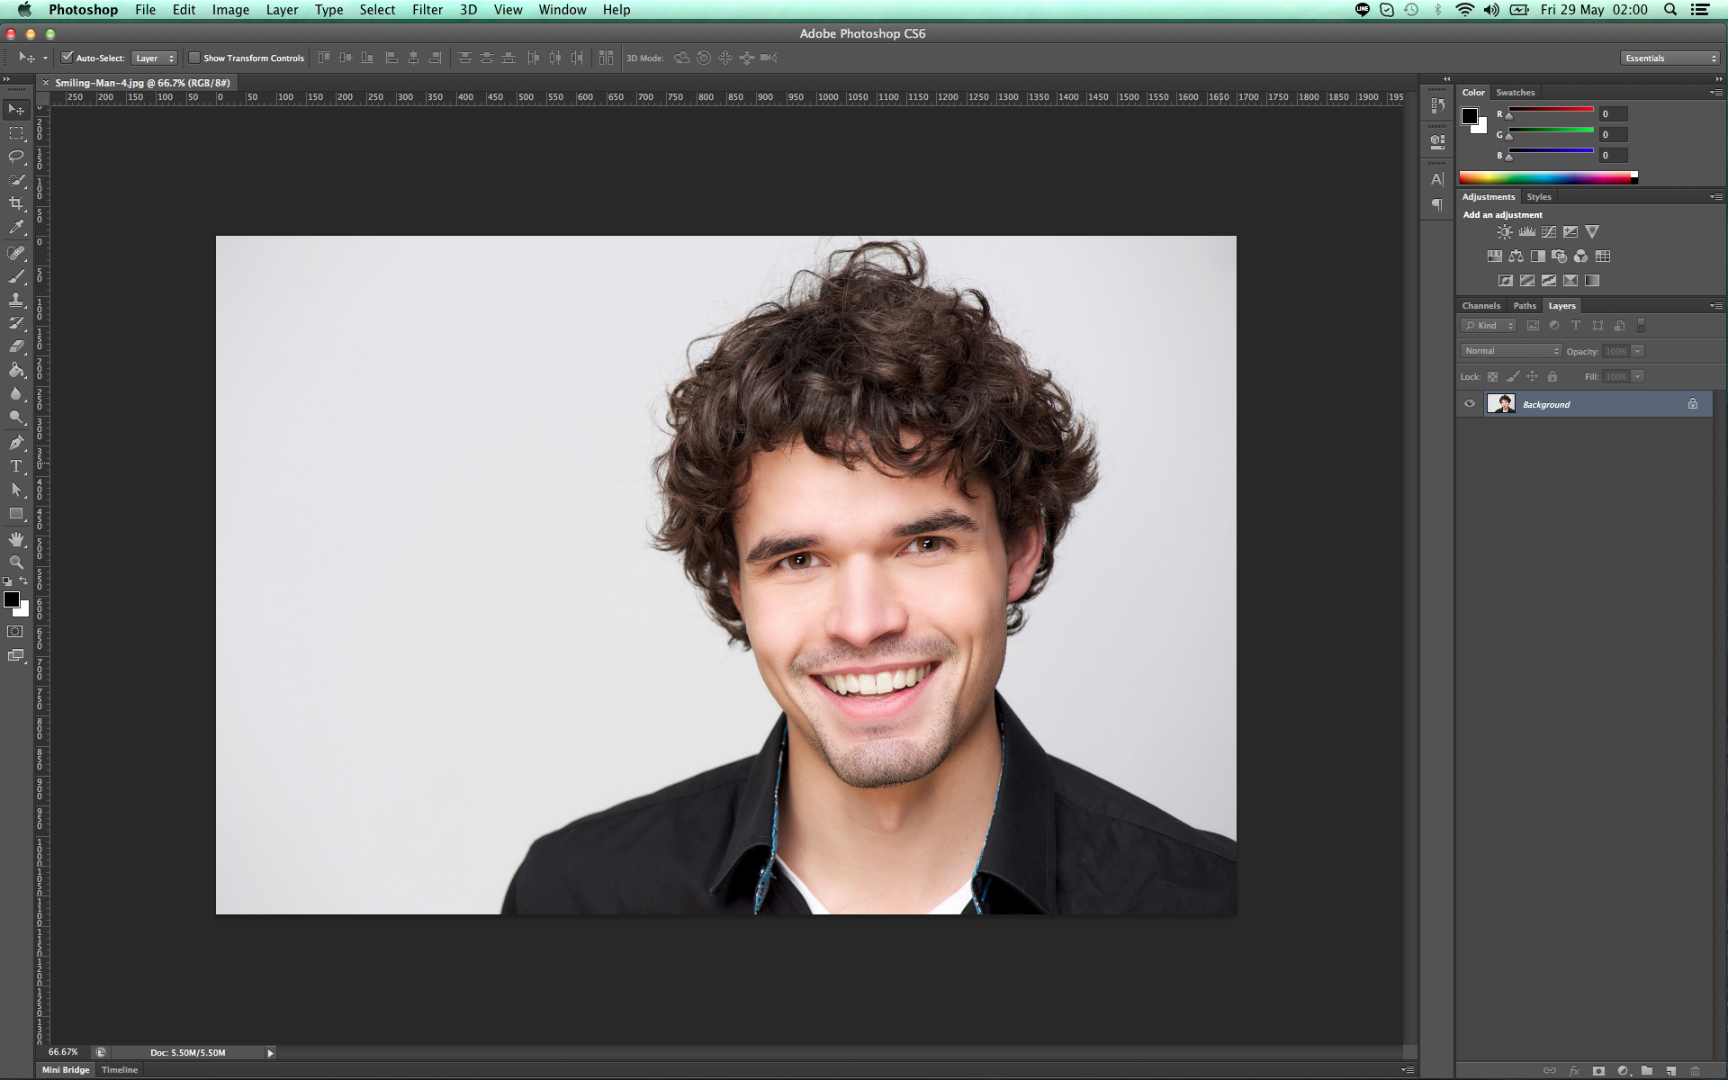
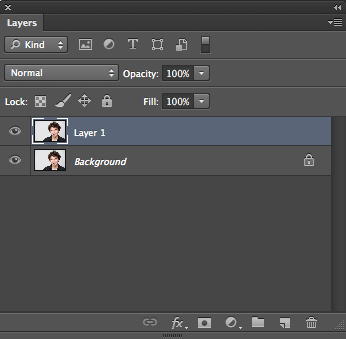
so as you open the file, follow this shortcut buttons for duplicating the layer
1. DUPLICATE THE LAYER
a. ctrl + J - windows
b. cmd + j - mac
just duplicate the layer, so we won't touch the original file ( incase we need to get back )
you can should on your layer panel that a new layer with the same image have been added.
* if you can't see your layer panel go to window > layer or hit F7 on your keyboard.
2. Removing the Subject From the Original Background
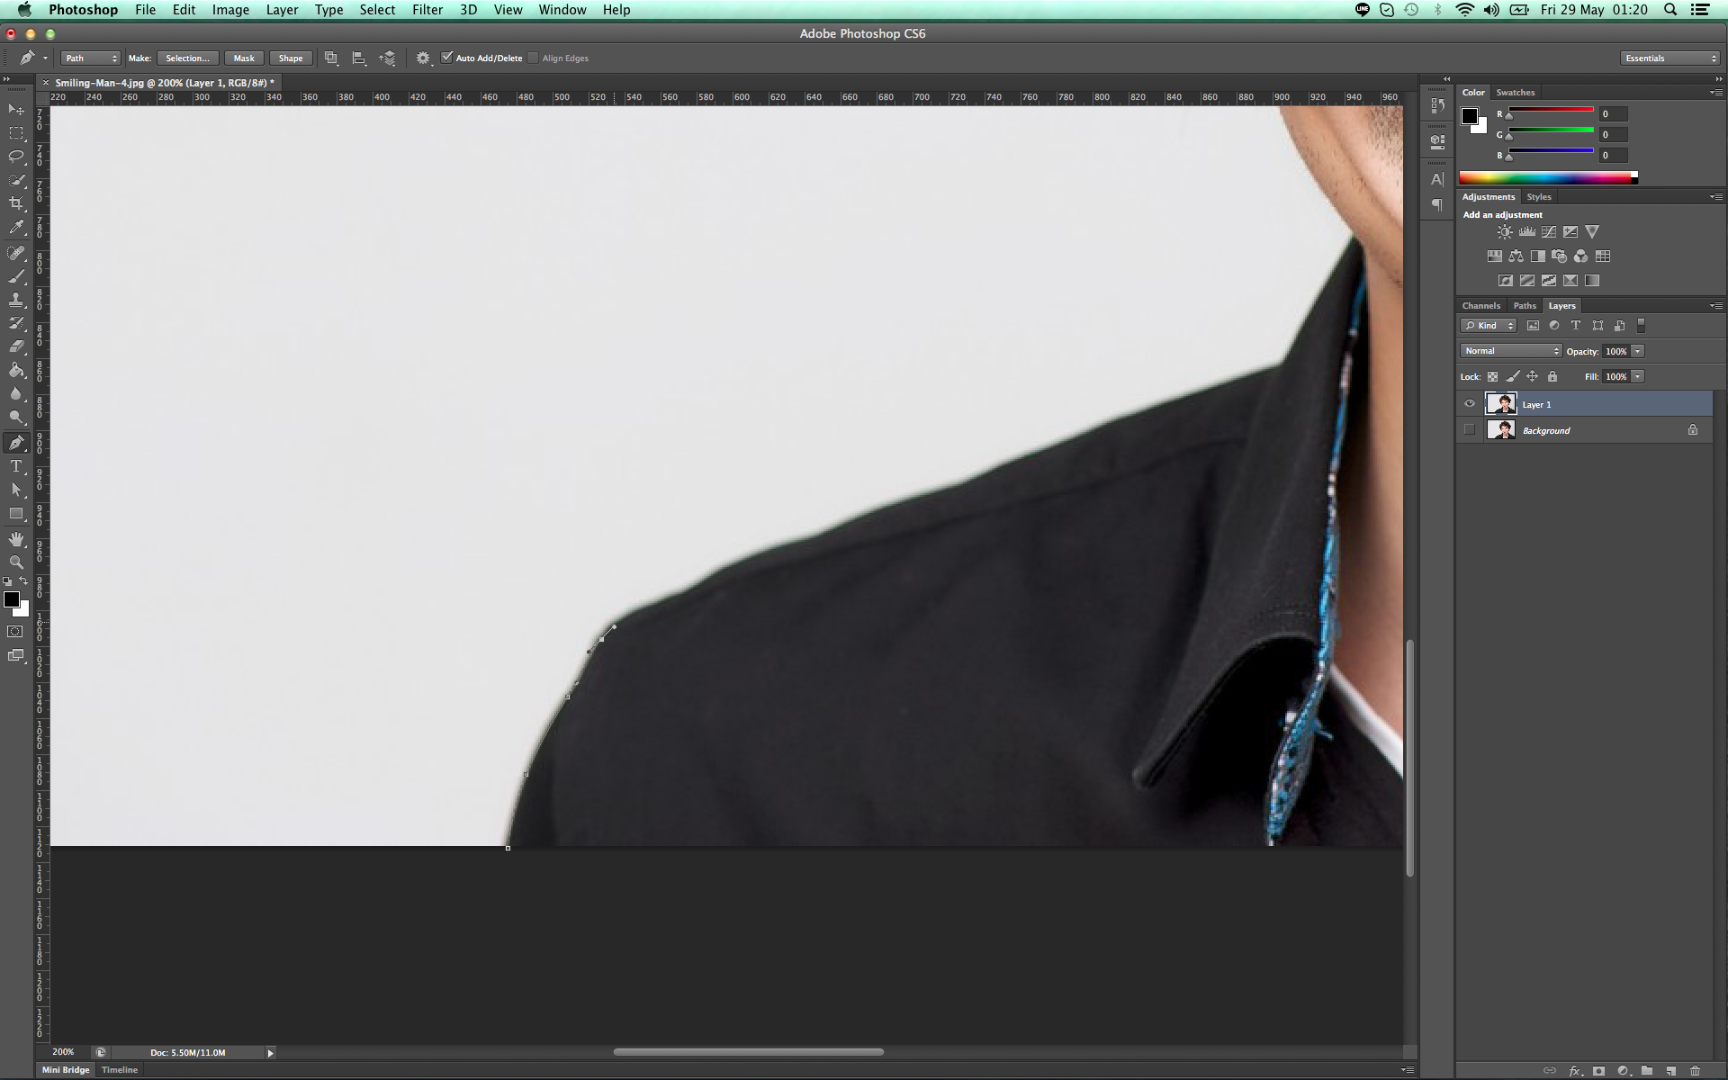
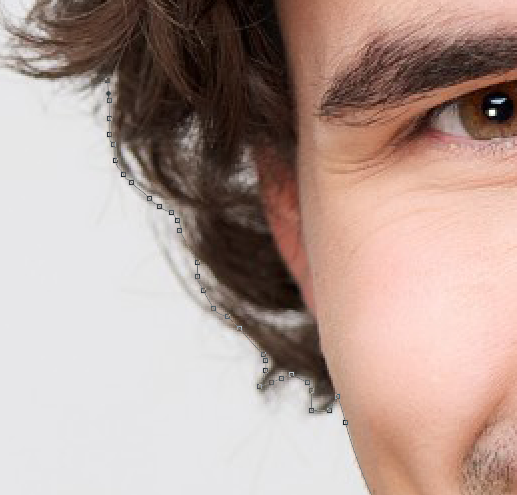
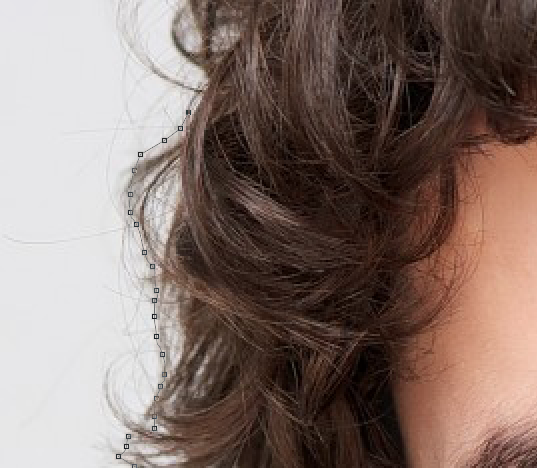
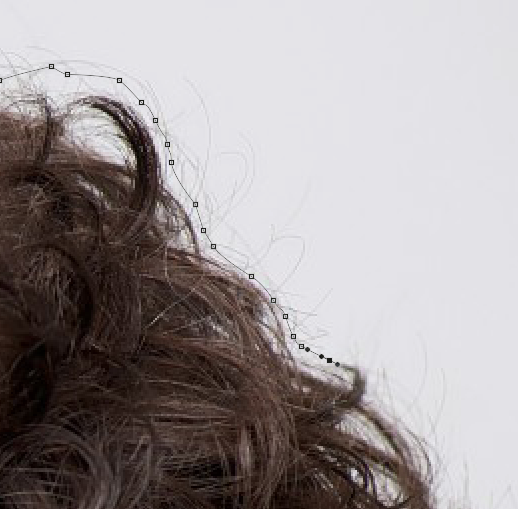
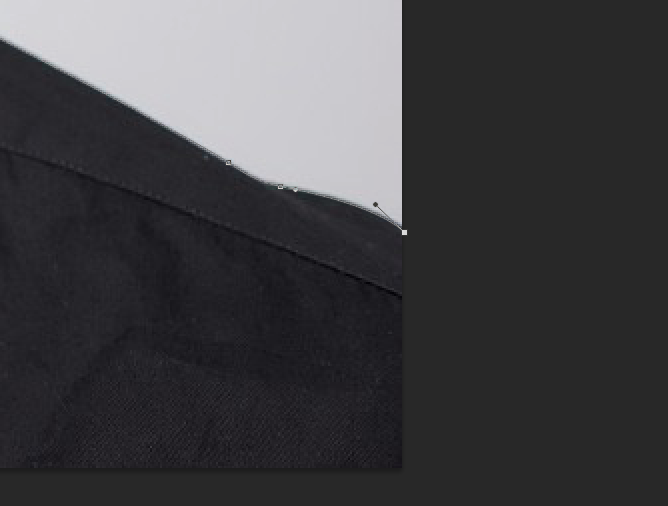
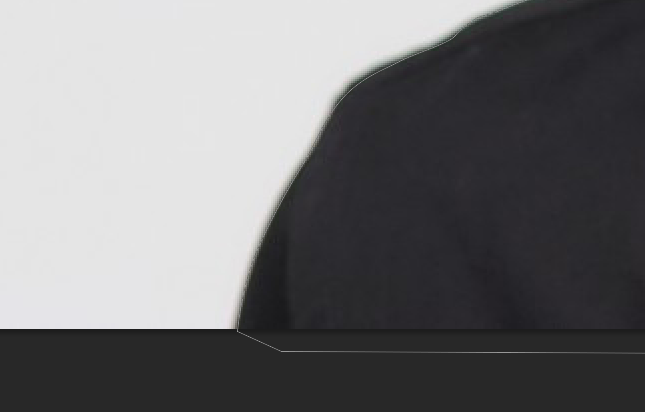
3. REMOVING THE SUBJECT
as your top layer selected, hit P on your keyboard to activate the PEN tool, we are now tracing the image of the man, and start removing it on its original background.
now you need to zoom in on the photo to see the details, to do this use shortcut keys cmd + and cmd - or ctrl + and ctrl - if you are using windows PC.
now with your pen activated, zoom-in to the portion of the subject where you will start your tracing. In this case I start on his right shoulder, tracing from left to right of the image.
now referring to the image I uploaded, you will see that I trace the image where I want to remove but I make a pixel adjustment when tracing the hair so we can catch the effect of his wavy hair and the details of it.
continue and finish the path with the image instructed.
3. Removing the Subject and Duplicating on New Layer

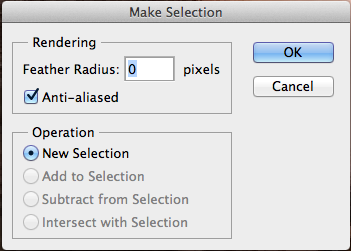
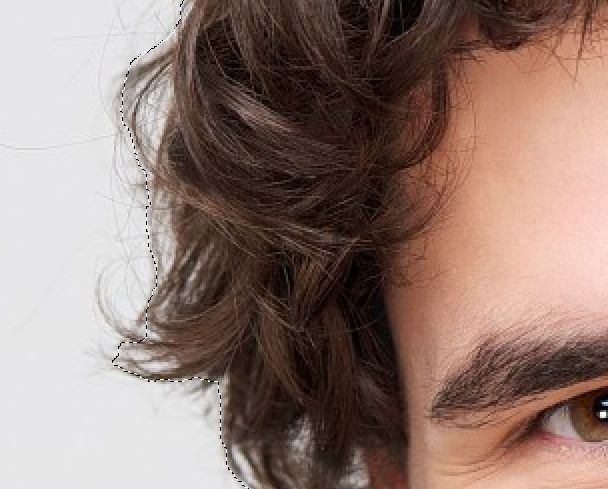
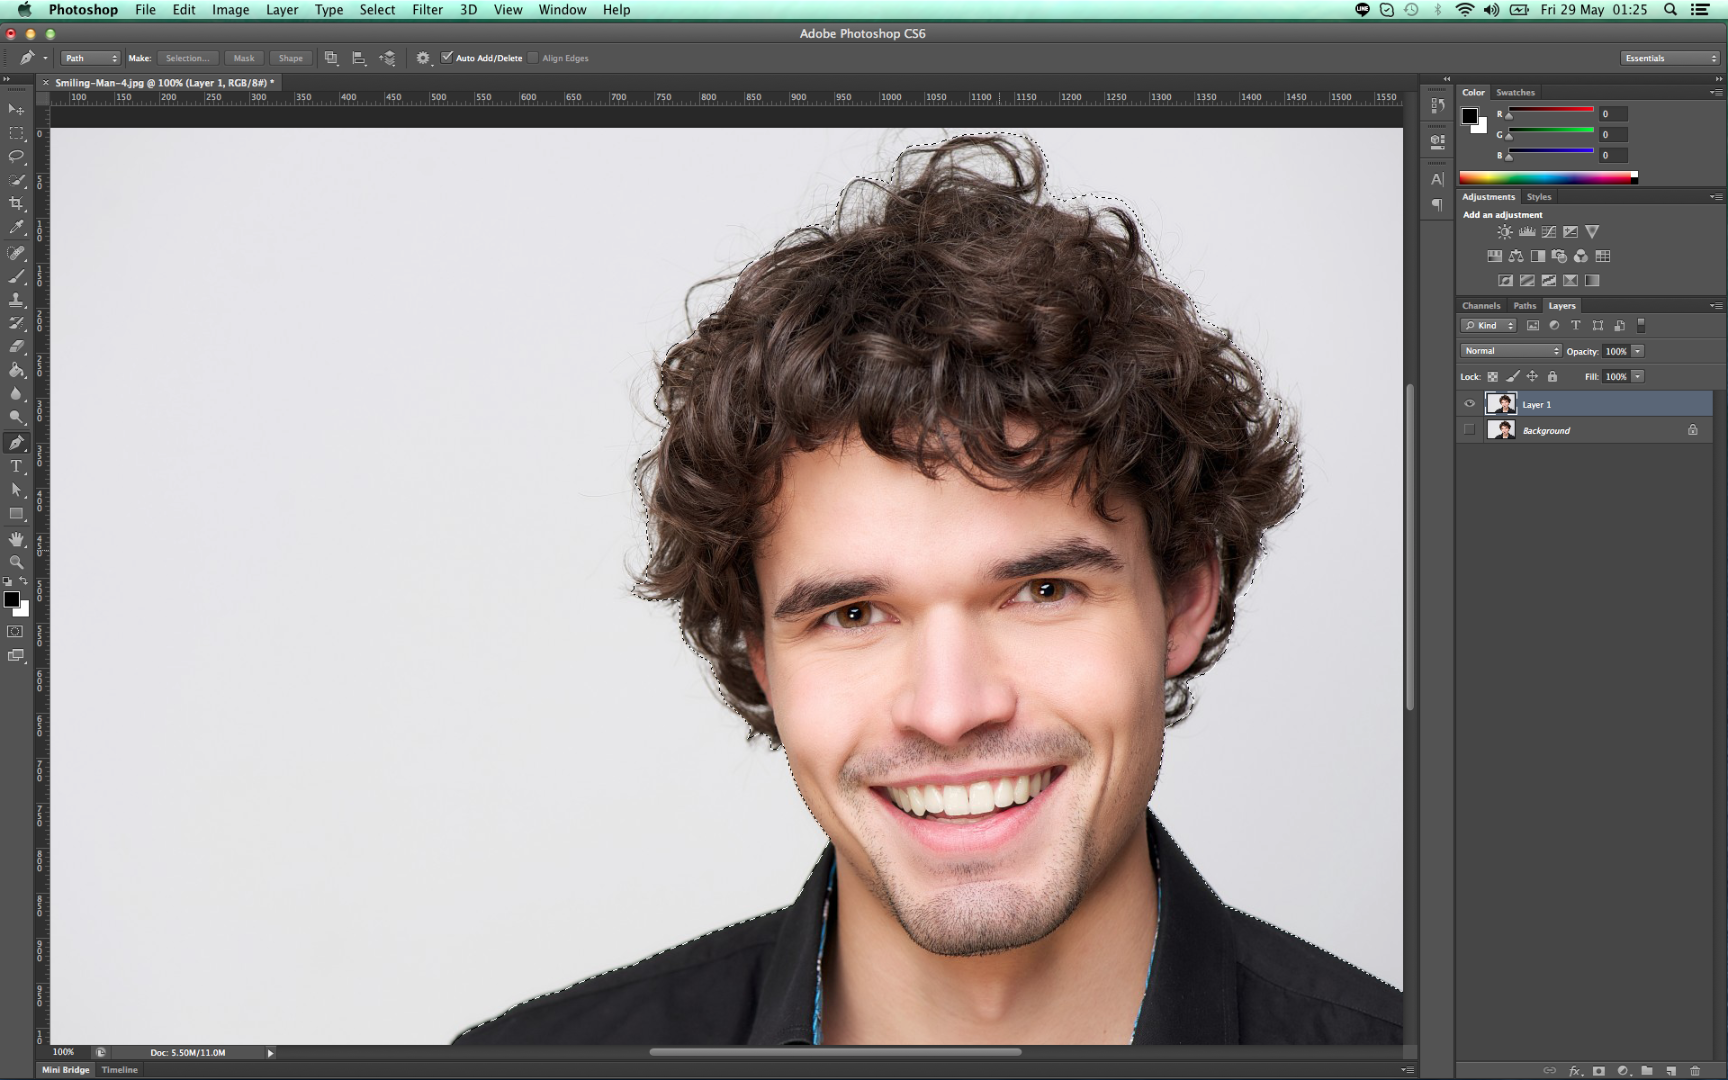
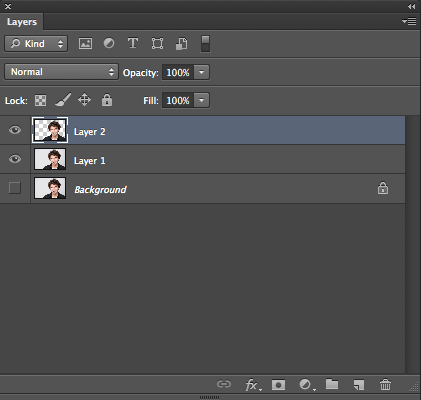

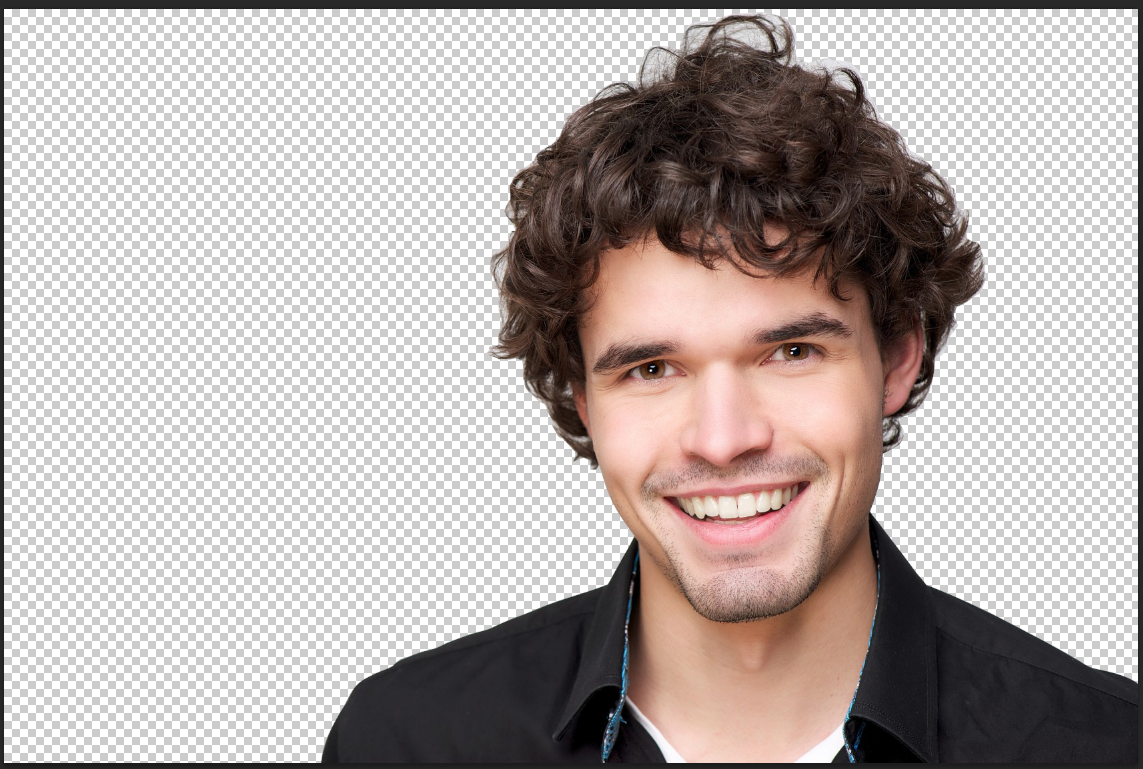
Now you have your traced pen closed, with your layer 1 selected, navigate to the image shown and hit the slection button, this will pop the make selection window and you need to fill the radius to 0.
with layer 1 selected on the layer panel hit cmd+C and cmd+V or ctrl+C and ctrl+V on your computer, this will copy and paste on the same postion your selected portion of the image.
you should saw now an additional layer will appear on your layer panel. disable all layer except from the top layer that has currently made. now you can see that your image is now separated in the background, now we can start furnishing the hair for a PRO detail.
4. Adding New Background and Furnishing the Hair
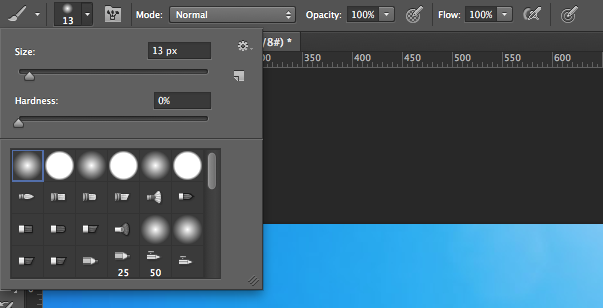
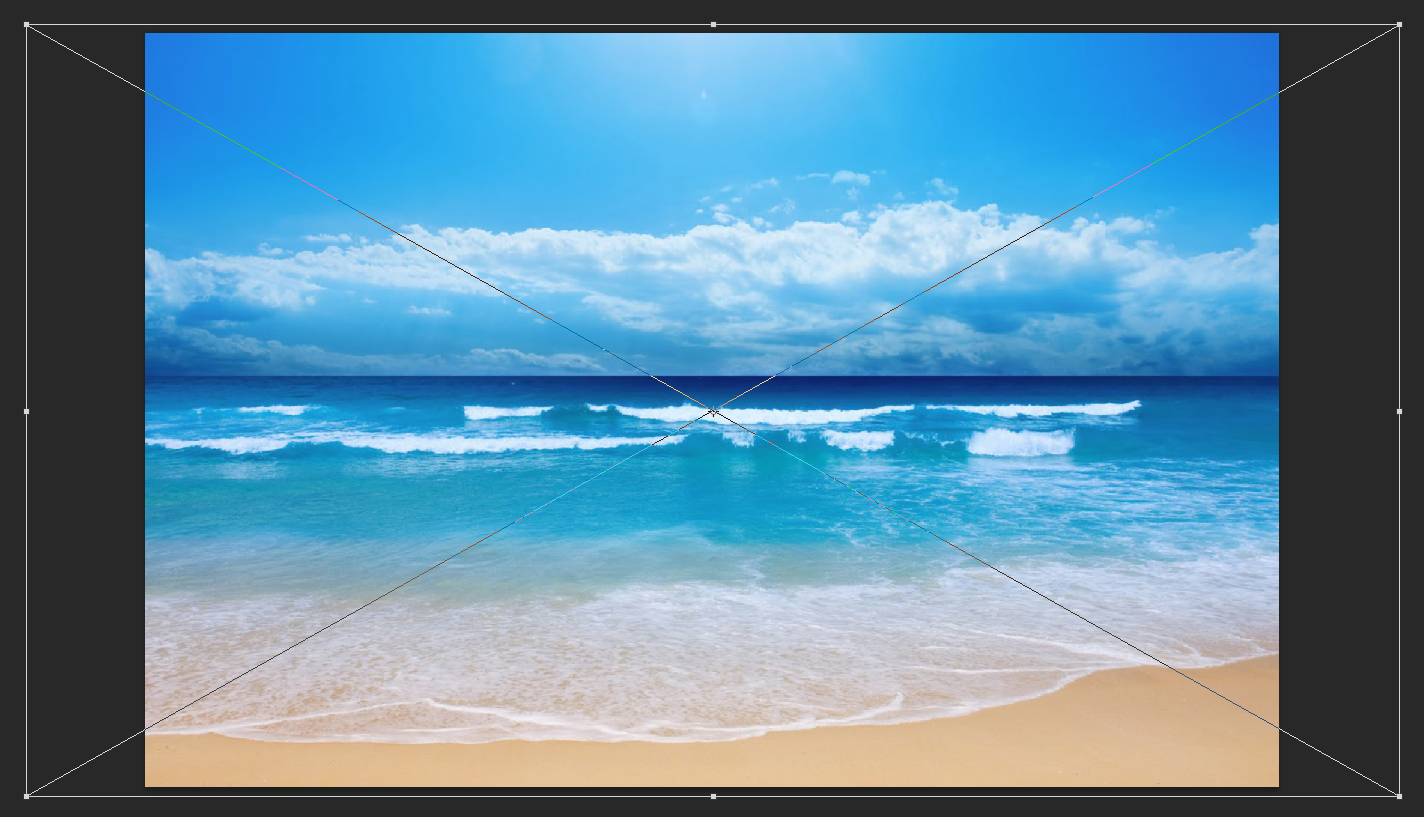
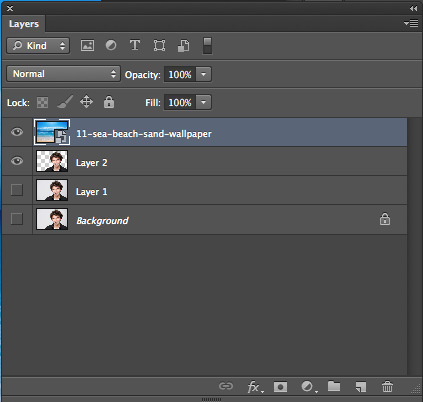
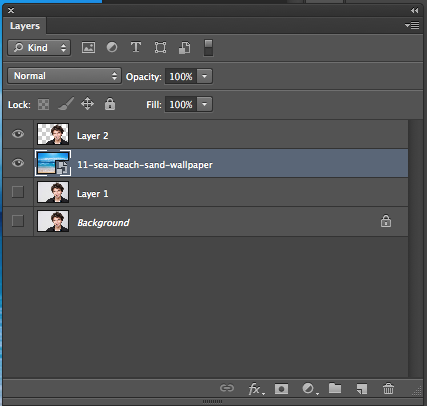
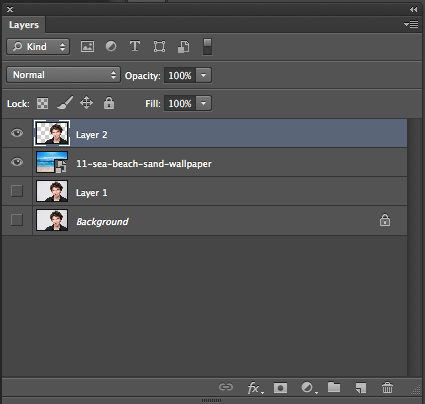
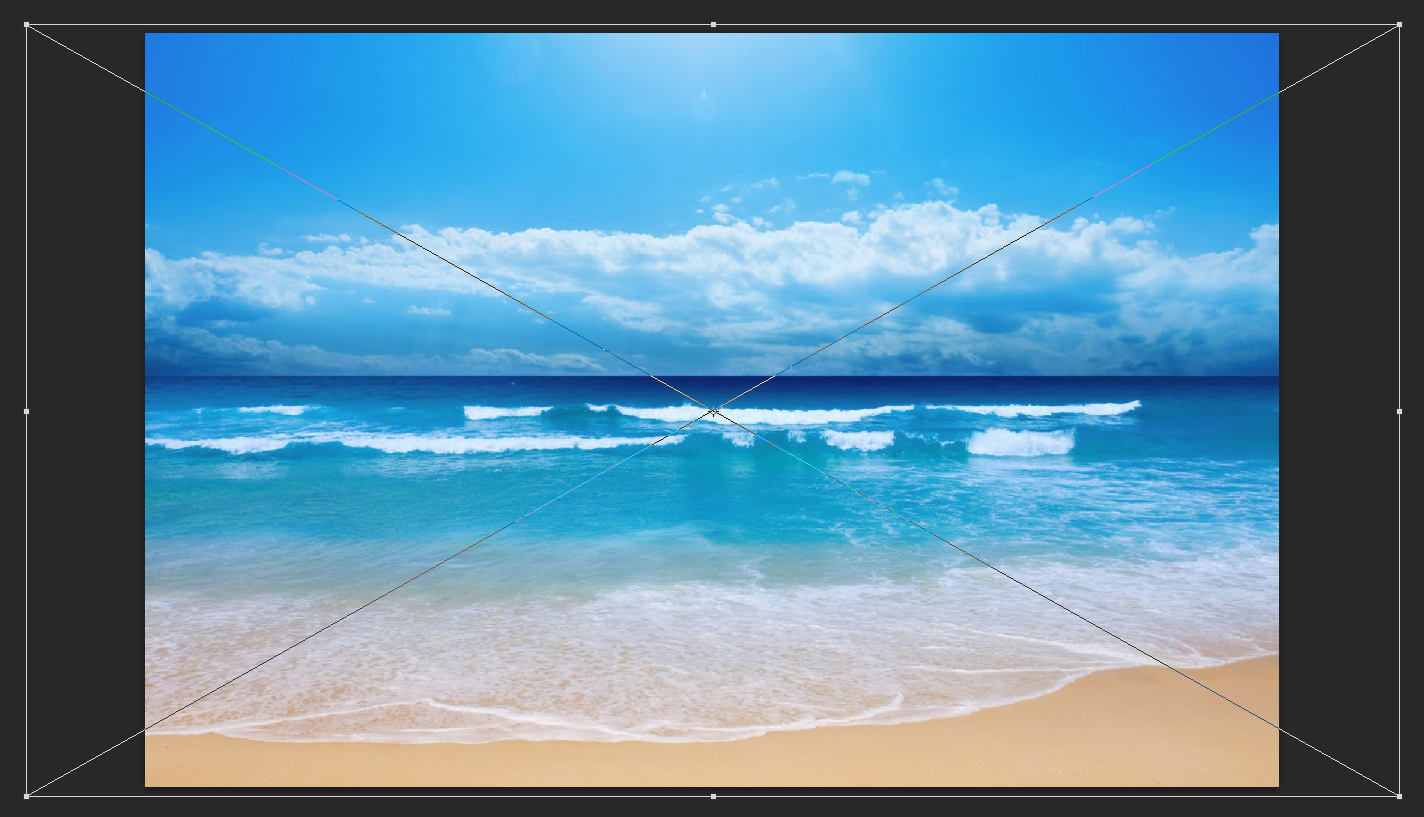
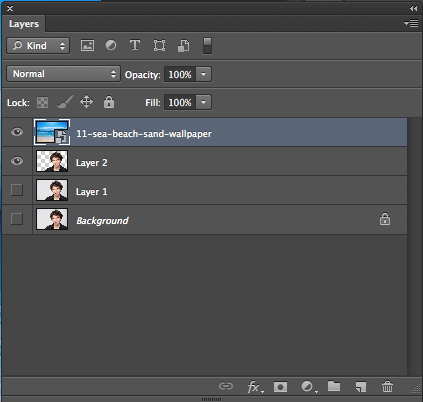
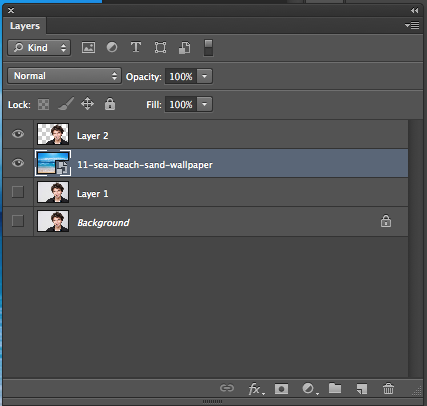
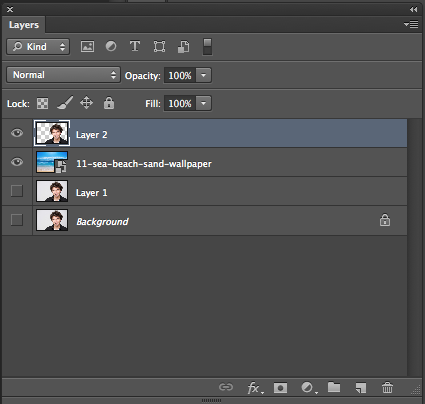
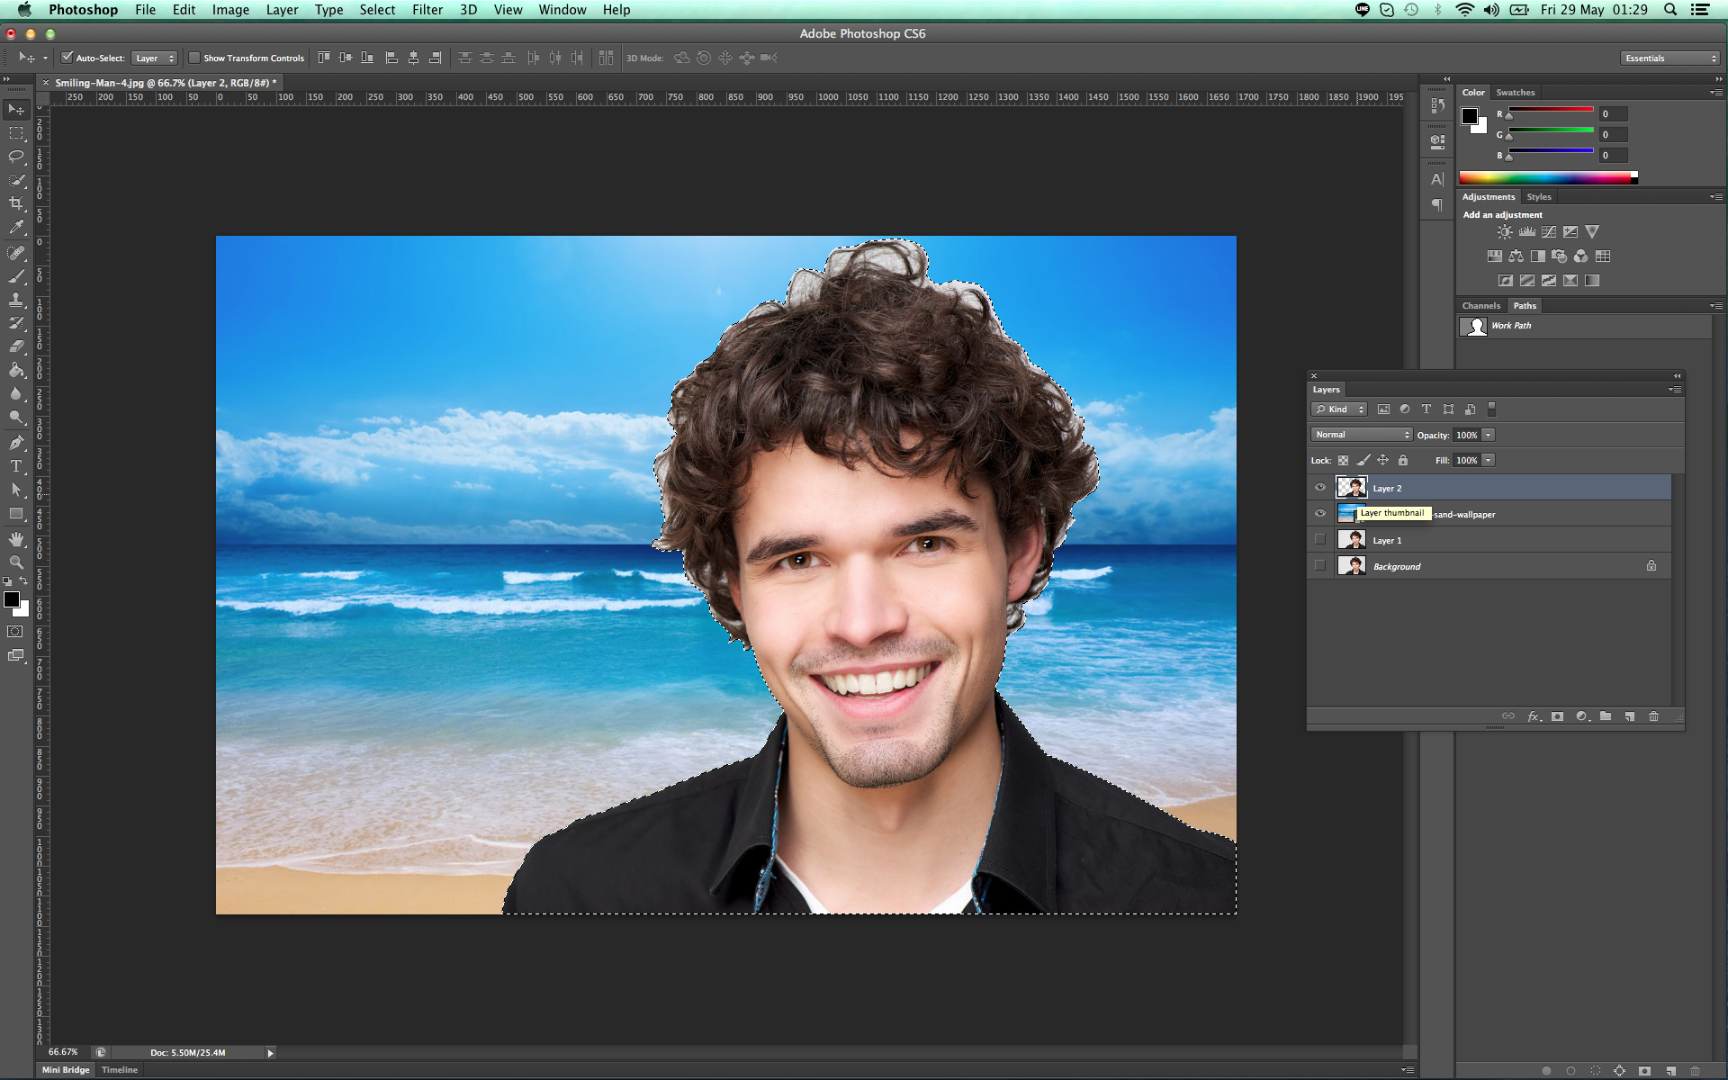


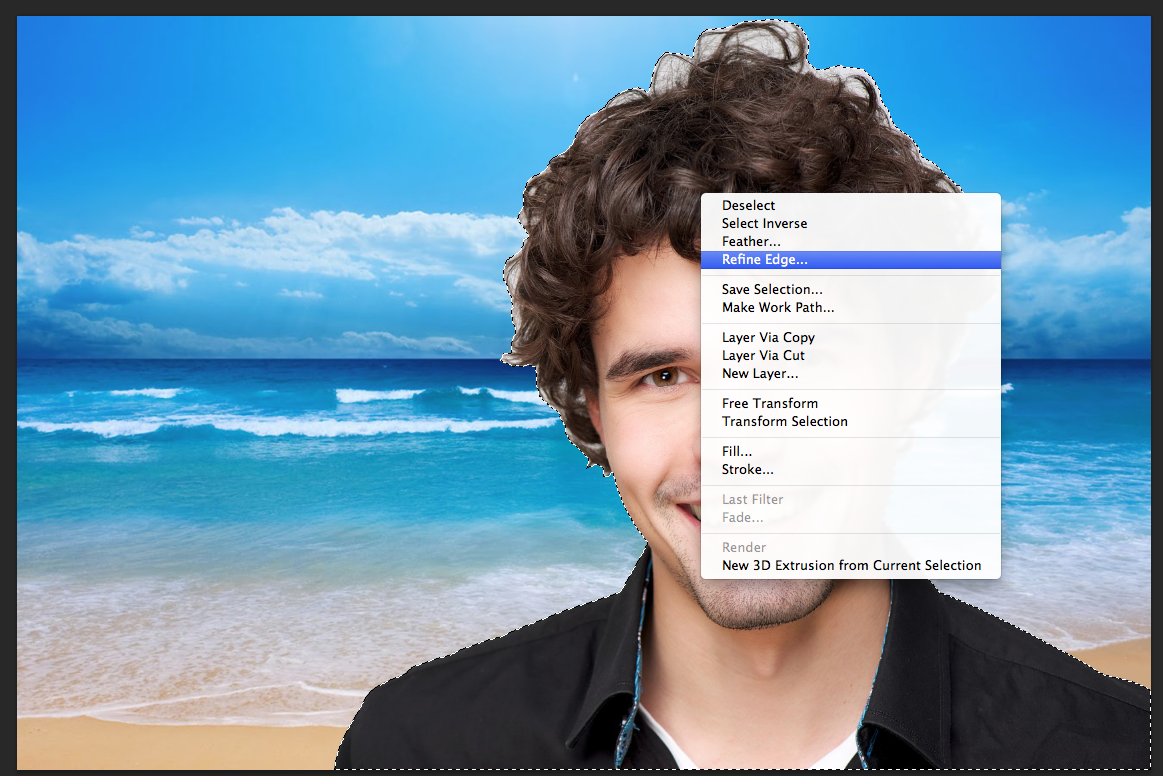
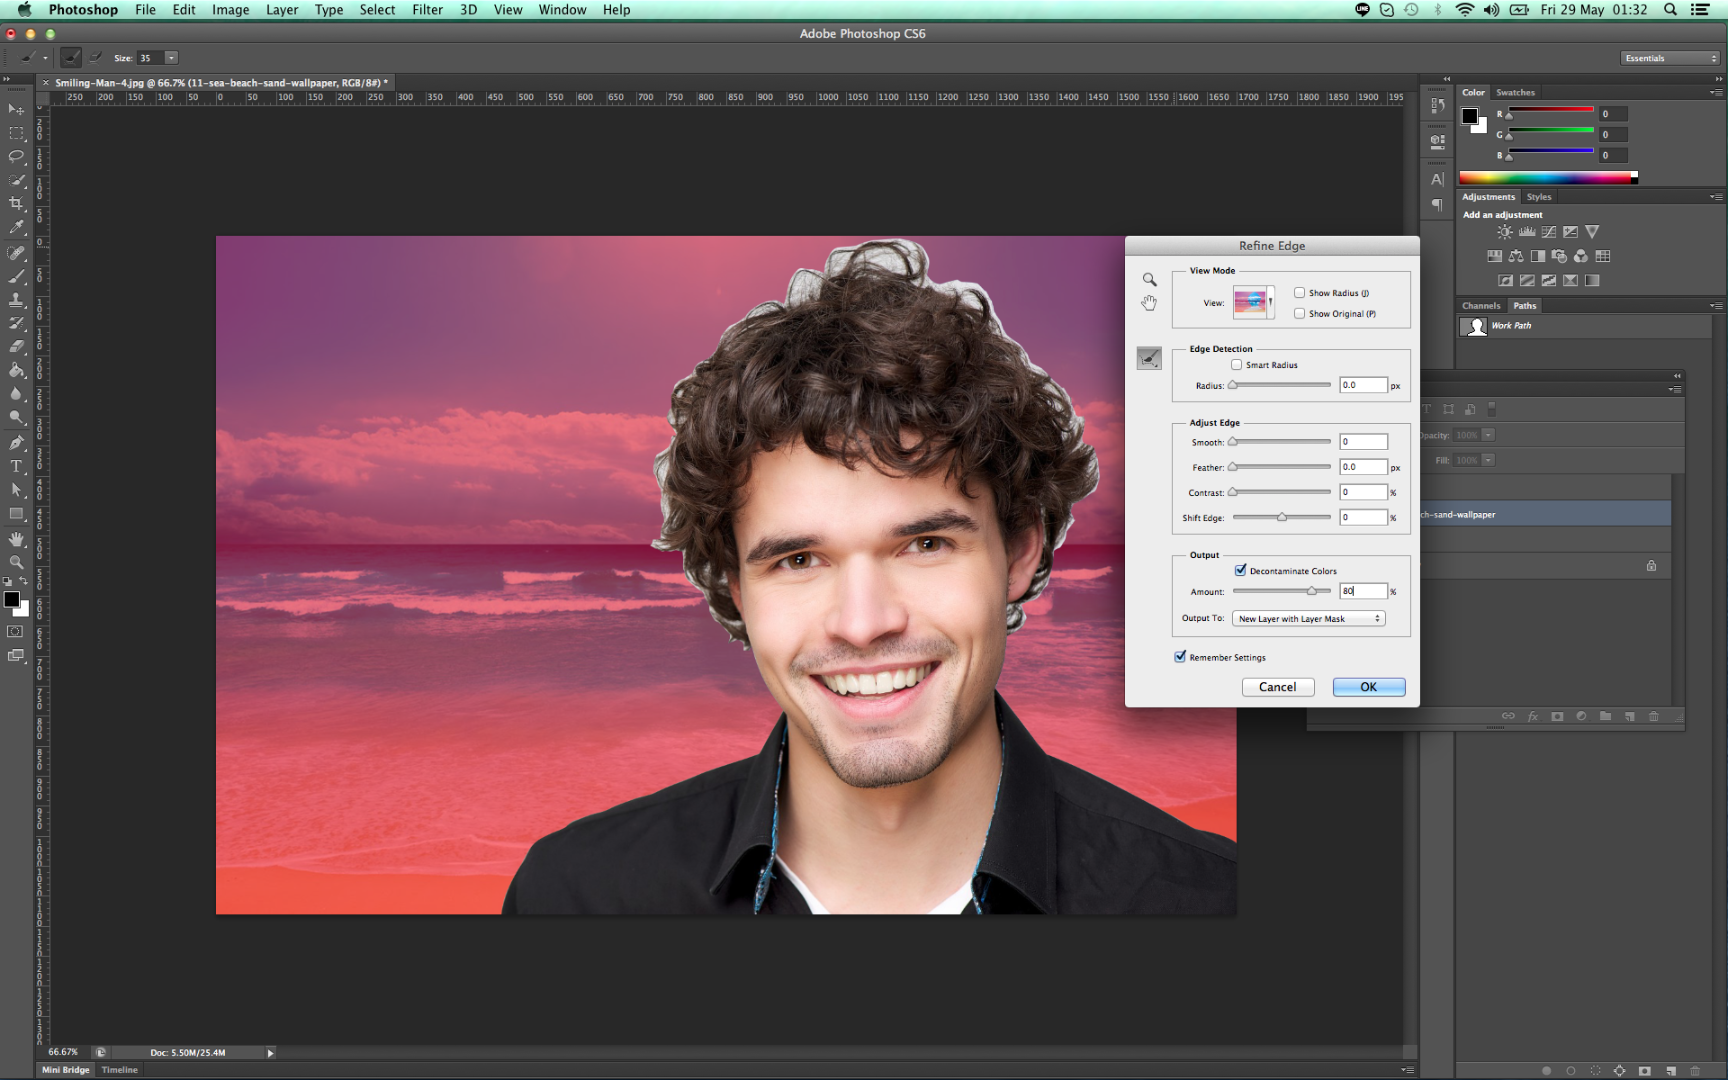
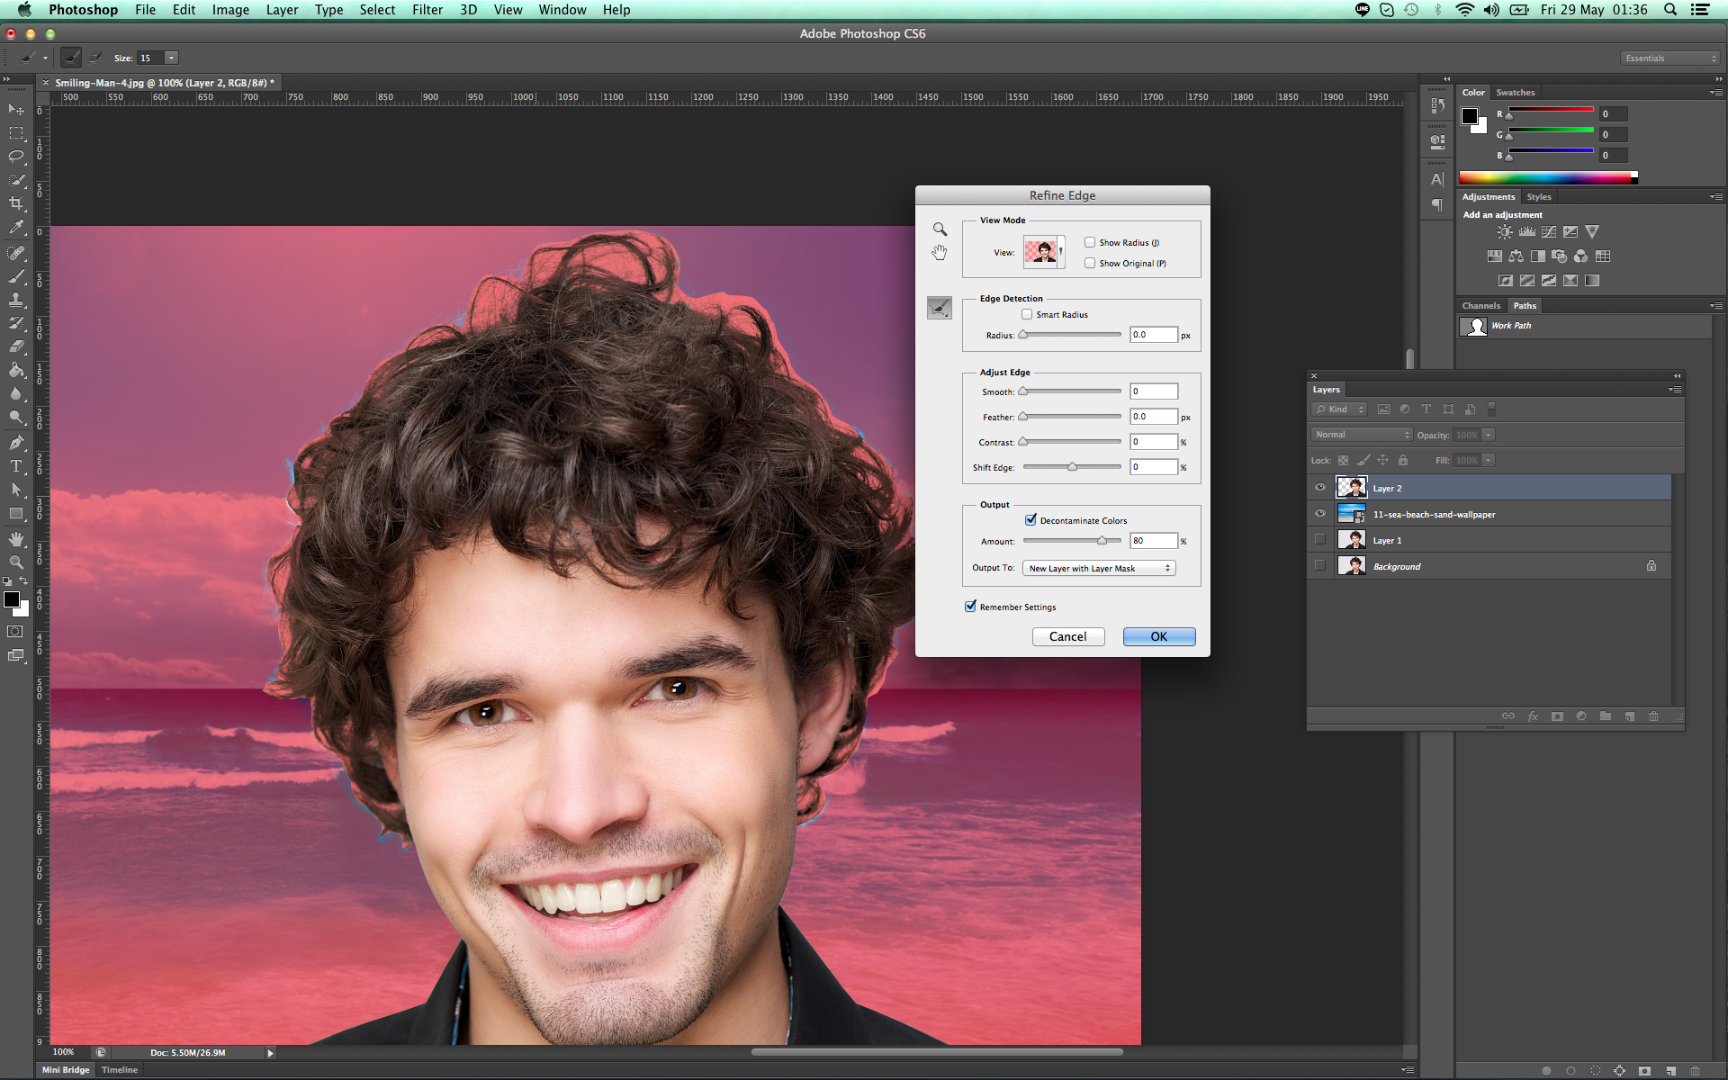
so before furnishing the hair, lets add up our background image. This is a common mistake that I also saw when some designer change the background of a subject, they furnish the hair detail before putting the background. on my perspective, its quite wrong, when you need to replace the background the subject the we are going to decontaminate is looking for a reference color that they will adapt, so when there's no image or a different image on the bottom of your layer, photoshop will just automatically get whatever color they can adapt, in that situation, the image decontaminated does not adapt on the background image that you'll going to put on. so before you contaminate the subject, make sure you have your background ready.
Adding Background image
so first, add the background of your choice. When transforming the background, hold shift and pull the left-top or right-top of the image to retain its original size and it will not look distorted image.
Furnishing the hair
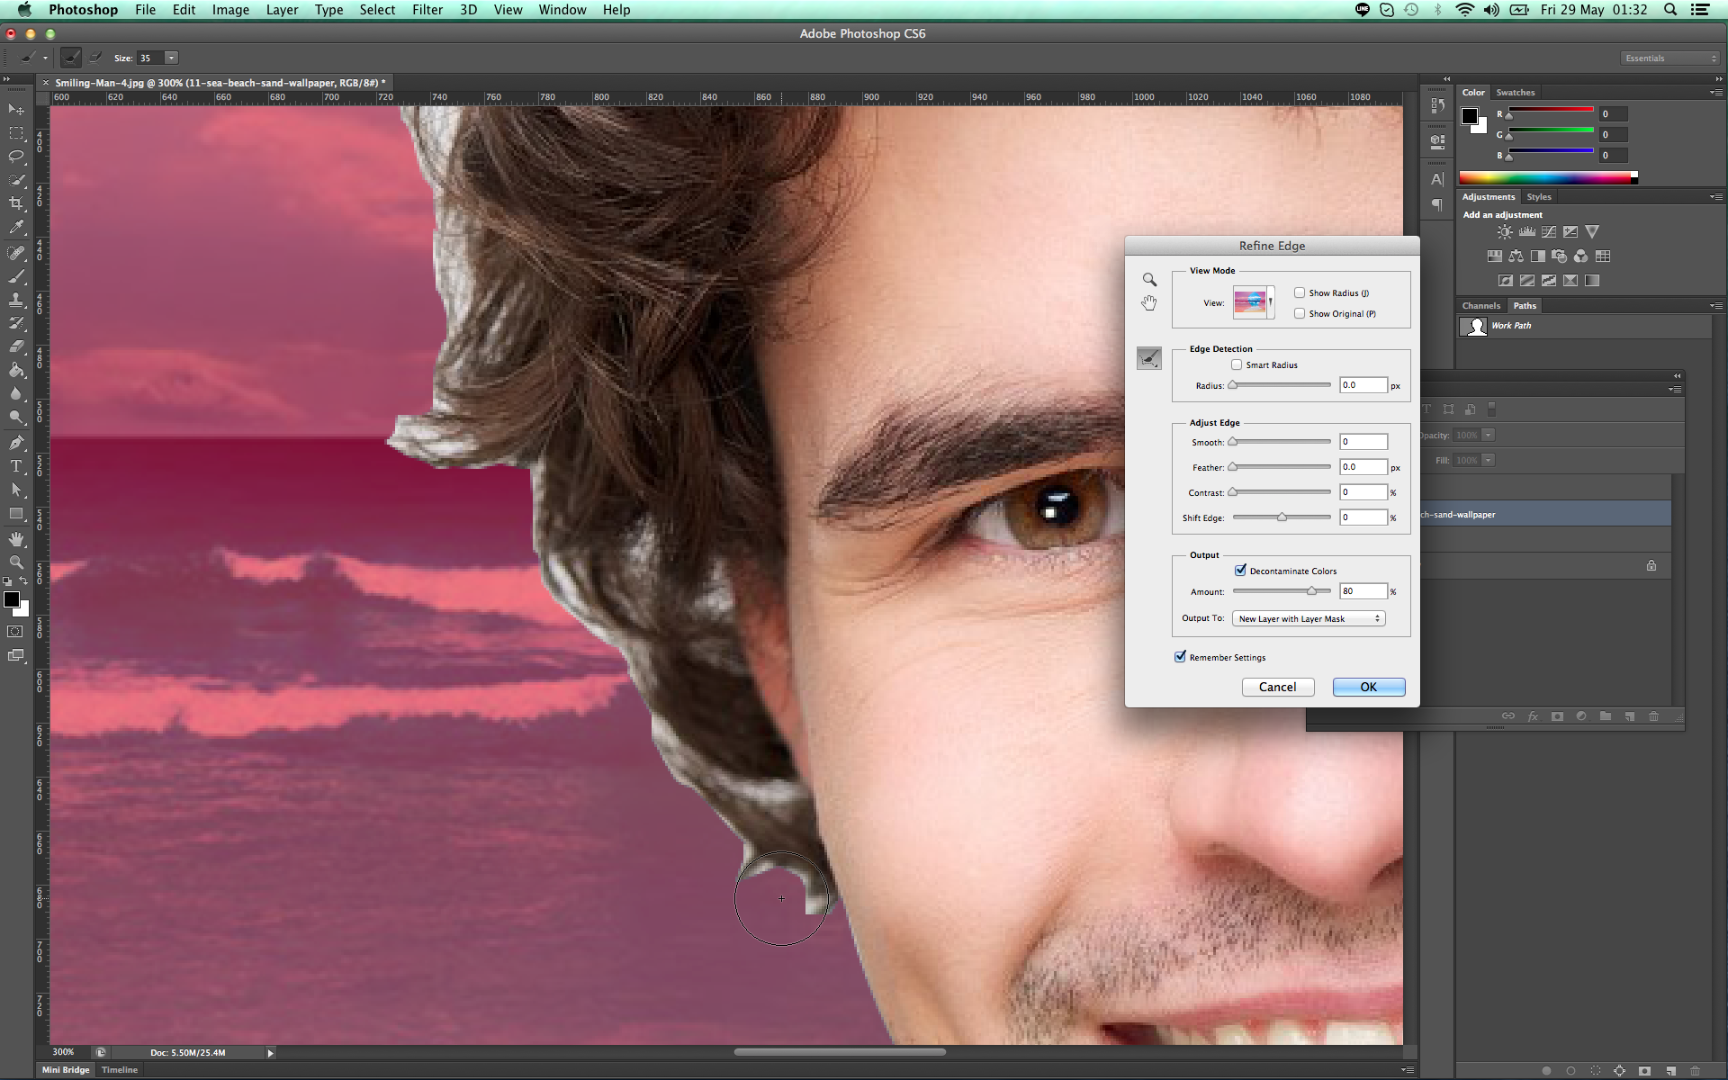
1. zoom in to your subject, specifically in the hair part that we will furnish. choose the subject on the layer panel and hold ALT + Click then you will notice now that the subject is being selected and marching ant is all around it.
2. Press M on the keyboard to use the selection tool, then right click on the canvass and choose refine edge, in this moment, a pop up menu should appear on your canvass.
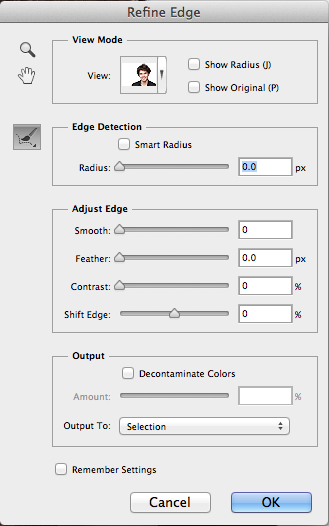
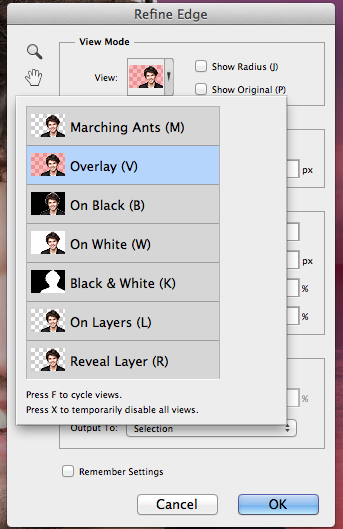
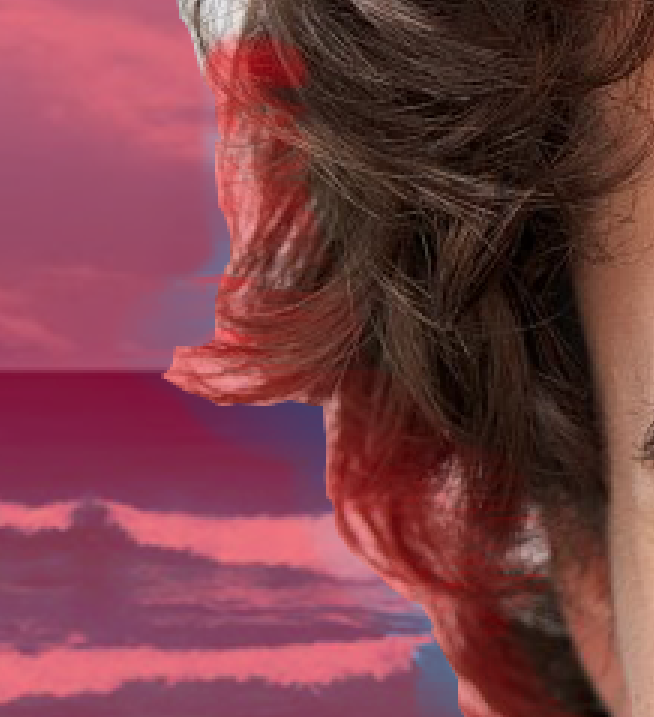
3. on the refine edge menu, select overlay on the view mode, this will give us an opacitated red background on top of our subject. on the output section, thick on decontaminate colors and set it to 80 and output to New layer with Layer mask.
*decontamination may varied on the subject that you are dealing with, in this case I chose 80. and output to new layer with mask to create a new layer so that our original subject won't change.
4. Brush all over the hair that we want to furnish, this is the reason we make use of some additional/excess background of the subject hair so that it will be removed once we refine it.
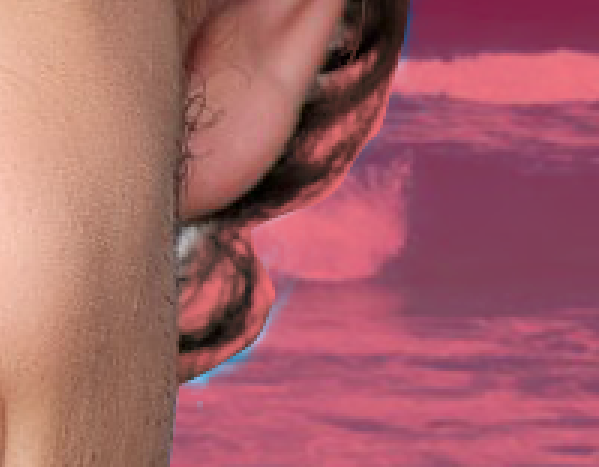
once you are done, and you feel that you have brushed all the excess white background on the subjects hair, just hit OKAY and lets see the magic!
5. Finished

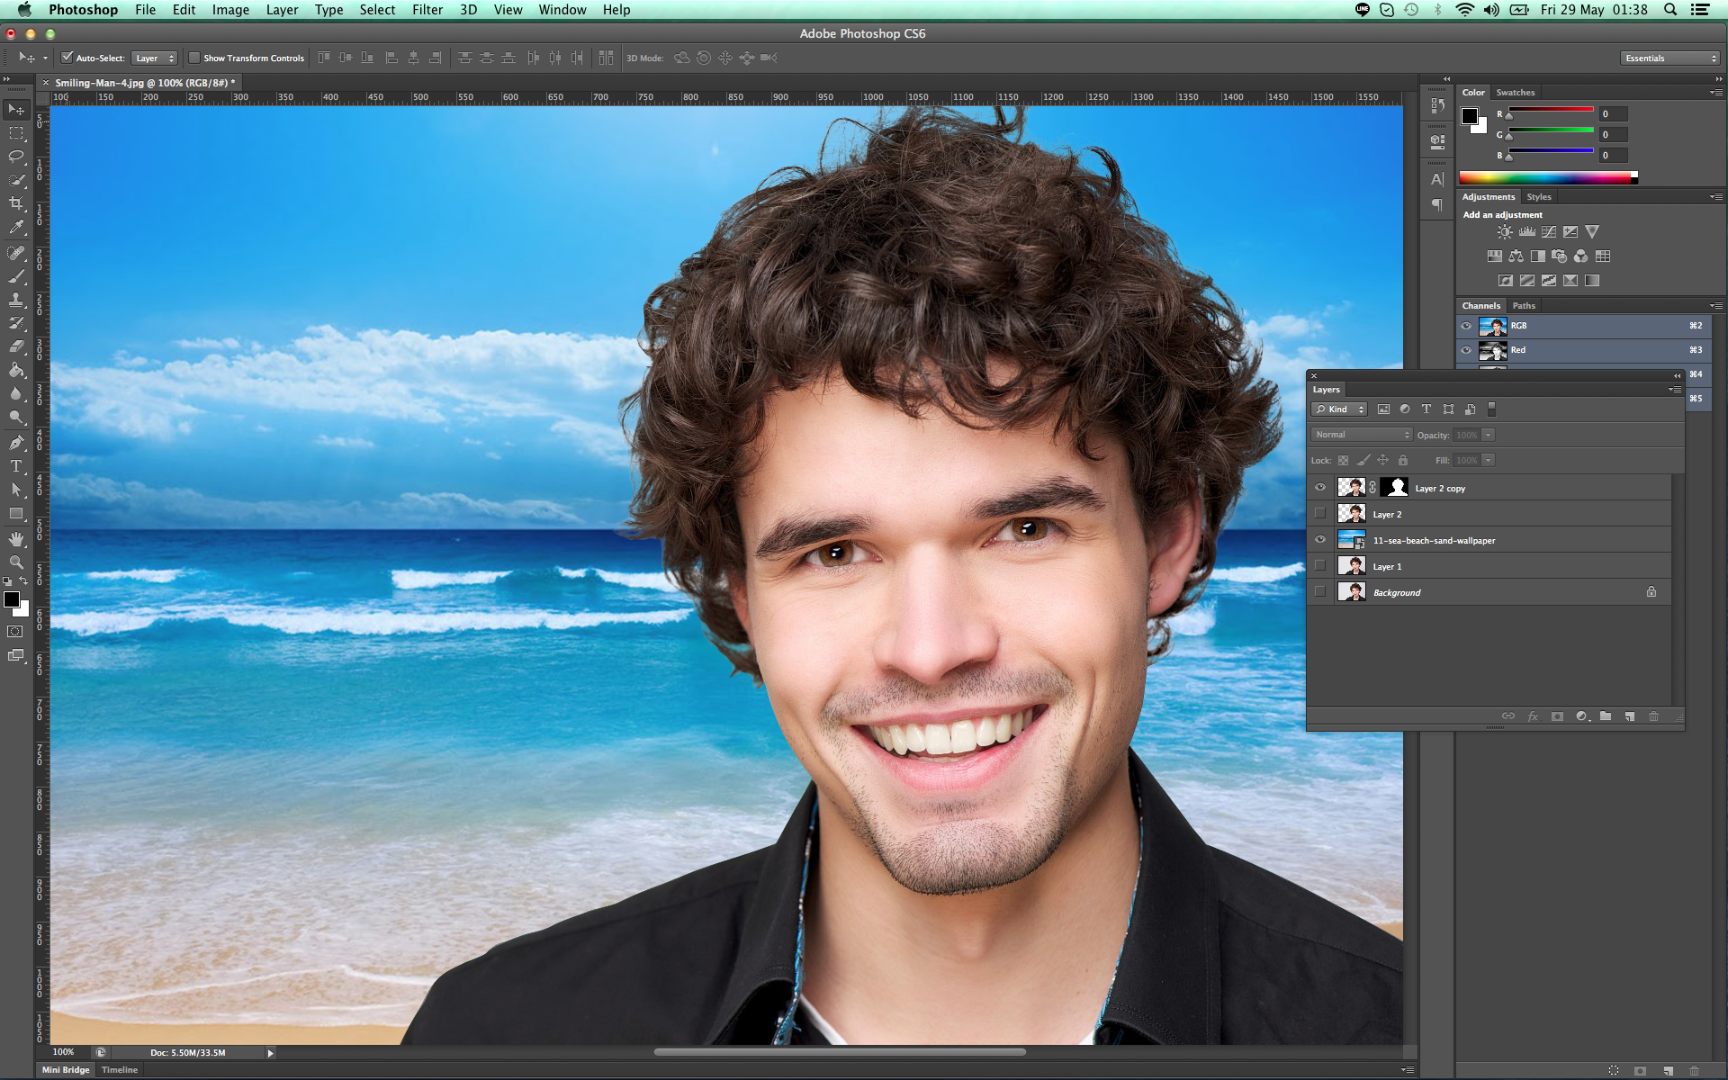
all set!
as you can see, now the hair detail appears quite good now in the design and background. feel free to download the sample PSD too so you can practice it again :)
like my instructables and I will make another tips for you again! Thanks in advance!