Photoshop Plugins in the GIMP
by technosapien in Design > Software
67793 Views, 42 Favorites, 0 Comments
Photoshop Plugins in the GIMP
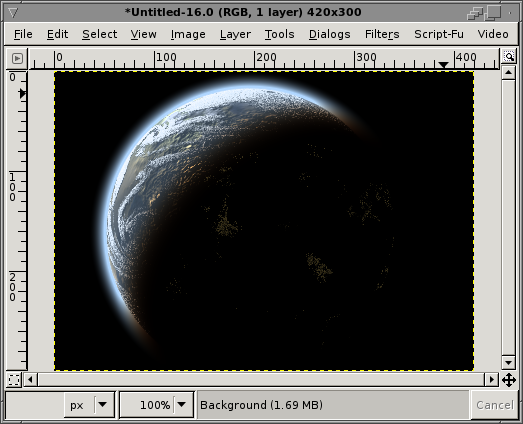
Good day!
Photoshop is often considered to be the best desktop raster graphics imaging editor software on the market, with zillions of features, not to mention a massive array of filters available online and from retail outlets. Many graphics artists come to rely heavily on a set of Photoshop Plugins to do the work they do, and may recommend these plugins to other artists.
The GIMP (GNU Image Manipulation Program) is a free, open-source raster graphics imaging editor that is quickly becoming a strong challenger to Photoshop. GIMP may not yet be able to replace Photoshop for everything Photoshop can still do. But we can take one thing off the list (well, sort of). GIMP can, in fact, use Photoshop Plugins with relatively little effort, with the use of the GIMP PSPI plugin from Tor Lillqvist.
Because Windows and Linux have different issues getting PS plugins to work in GIMP, I have tried to expand the areas where the OS makes a difference. Otherwise, the processes described herein are really much the same, no matter which OS you use. However since I do not own an OSX computer I cannot vouch for this process on that operating system.
Assumptions, Prerequisites and Caveats
This tutorial assumes you have installed The GIMP, and is based on versions 2.2 and 2.4 of the software. Most linux versions are available through your distribution's package management. The Windows version is available at the GIMP's website (see links at the end).
This tutorial assumes you have a fair knowledge of how to copy, move, and paste files in the Windows Explorer, or in Linux, whichever you favor.
This tutorial does not assume you know how to use The GIMP, but it does help if you have experience with it.
Linux users must have wine (WINE Is Not an Emulator) installed for pspi to work. It will be required for any plugin that, under Windows, would need to be installed. It may also be required for any plugin that has a dialog window. This is many of them. It's possibly even required even when the first two conditions aren't met. Remember, these are plugins designed for a Windows application. Just get and install wine, and run winecfg to set it up.
Caveats:
Not all Photoshop Plugins will work 100% with the GIMP PSPI plugin. I have tested a few, some of which work perfectly, and others which don't work at all. So, the standard disclaimer applies: YMMV, TANSTAAFL, and all that jazz. And my standard disclaimer: if anything you do while following these instructions destroys, injures, or emotionally scars anything or anyone, that is not my fault... make backups, save frequently, and use plugins responsibly. Thank you.
Install the GIMP PhotoShop Plug-In (PSPI)
Windows users, and users of some linux distributions (SUSE, Ubuntu, and Fedora Core) can download the GIMP-PSPI packages at Tor Lillqvist's page (see links at the end). Debian users - like me - are out of luck as far as installing from a repository, as the libraries used to build pspi are not free (and therefore violate the DFSG). However, you can try three things: creating a Debian package from a Fedora Core package, installing the binaries for Ubuntu, or building from source.
Linux:
I tried installing from a Fedora Core package using alien to convert the RPM to a DEB but it didn't work for me. You may have more luck. What did work from me was installing the Ubuntu binaries (you may or may not know, but Ubuntu is a Debian-based linux distribution). Download the binary package from Tor's site; as of this writing, the filename is "gimp-pspi-1.0.5.ubuntu.i386.tar.gz".
Save the file to an accessible location, then unpack it with
tar -xzvf gimp-pspi-1.0.5.ubuntu.i386.tar.gz
This will create three files in the current directory: pspi, pspi.exe.so, and README.Linux.
You can read the README.Linux file, but all of the information there is in this instructable sooner or later.
Copy the two files pspi and pspi.exe.so to your personal GIMP plug-ins folder, NOT the system plug-ins folder. Be sure GIMP knows about this folder in the Preferences - Folders dialog. For me, it is ~/.gimp-2.4/plug-ins/
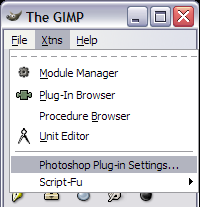
Test if the install worked by launching GIMP. Once it loads, check the Xtns menu for a new entry: Photoshop Plug-In Settings...
If the entry is not there, then you are probably somewhat screwed unless you have, or have access to, a Photoshop 6 CD containing the Photoshop SDK. If you do, then you can download the source package, and follow the instructions in the README.Linux file inside the unpacked source tree to install pspi from source. I did not have to do this, so I can't help you here. But, I do know pspi will not compile without the pssdk6 (so says the README).
Windows:
If you are a Windows user, there is no installer package. But thankfully, installing the plugin isn't difficult.
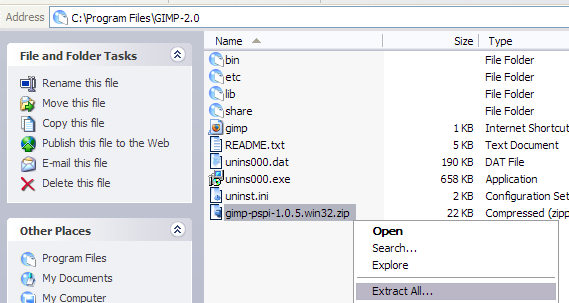
Copy or move the downloaded gimp-pspi package (as of this writing, named "gimp-pspi-1.0.7.win32.zip") into the GIMP program directory, which if you installed GIMP with default options is probably C:\Program Files\GIMP-2.0
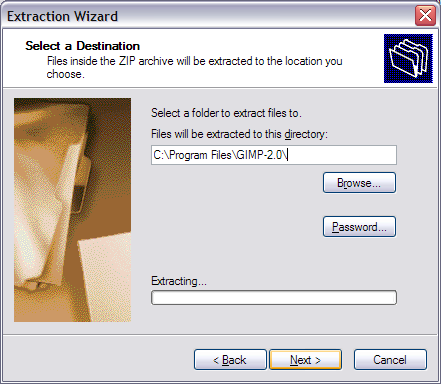
Right-click on the file and select Extract All... and the Windows Extraction Wizard will open. In the field where you can enter a directory to extract files, Windows is kind enough to suggest the location C:\Program Files\GIMP-2.0\gimp-pspi-1.0.5.win32 -- remove the last part of this path and change it to read just C:\Program Files\GIMP-2.0 and then click "Next." (The gist is, extract the contents of the folder into the GIMP directory, not into their own directory).
If you want to, you can navigate into this directory using Windows Explorer to verify the pspi.exe plugin was installed: C:\Program Files\GIMP-2.0\lib\gimp\2.0\plugins
Test if the install worked by launching GIMP. Once it loads, check the Xtns menu for a new entry: Photoshop Plug-In Settings...
Configure the GIMP PhotoShop Plug-In
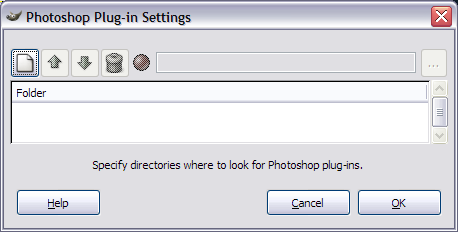

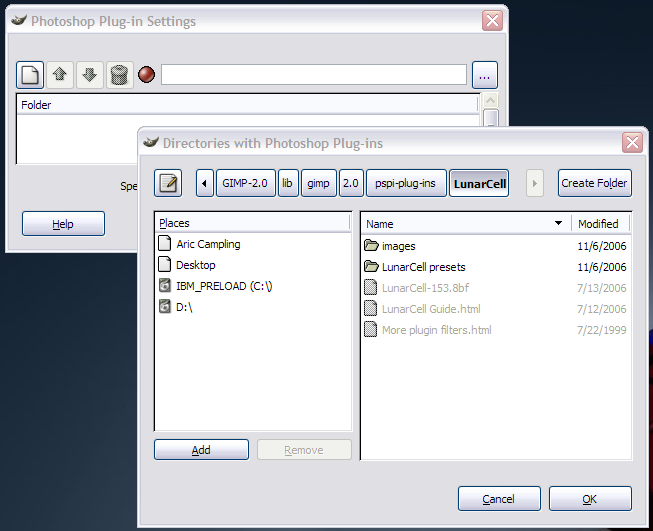
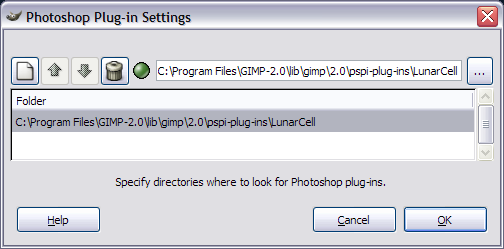
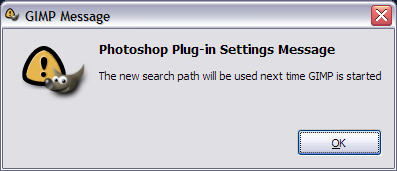
Before installing the Plugins (and especially under Linux) you need to decide where you're installing the plugins. It's easier to keep them all in one place. On my linux box, for example, all of mine are in ~/bin/pspi
The next step is to start GIMP and open the Xtns menu in the main program window.
There is now a new item in the menu: Photoshop Plug-In Settings...
Select that item and a dialog window opens, which you will use to identify the directory or directories where you will install the photoshop plugin files.
The first step is to click the button to the far left, which looks like a blank sheet of paper. Before you add a new path to this dialog, you must always click this icon. Otherwise you will simply change the path that is selected in the dialog. I went a few rounds with this dialog before I found that out.
When you click the paper, if it is not already available, the textbox to the right becomes accessible. You can type in the path to your plugin folder, or click the ellipsis button to the right of it, and a standard file open dialog appears. Navigate to the proper folder and click OK.
The path will be added to the configure dialog. If you need to add more paths, remember: always click the blank paper icon before adding a new path. You may need to do this in Windows if plugin installers litter plugins in various locations.
Note: My screenshots are a bit old, and since making them I have discovered that PSPI will read subdirectories, which originally I had trouble with. In my screenshots, I navigate to the directory containing the actual plugin files - the .8bf files themselves - and use that directory. This would mean for each plugin you install, you would have a directory in the PSPI configuration. There's nothing wrong with this, and it may be necessary in some cases under Windows. However it's not necessary, as I later realized. So the text says one thing, and the images another -- you can pick which you prefer, neither is wrong.
When you are done, click OK. A dialog window will open telling you that "The new search path will be used next time GIMP is started." So... Restart GIMP!
Now that you've read this step, you don't necessarily have to do this first. You COULD do the next step first, then come back to this step. It's up to you.
Obtain and Install PhotoShop Plugins
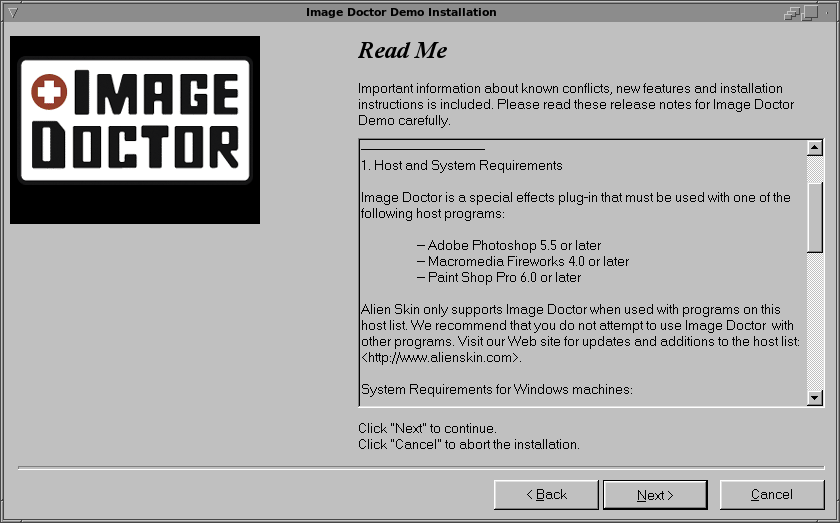
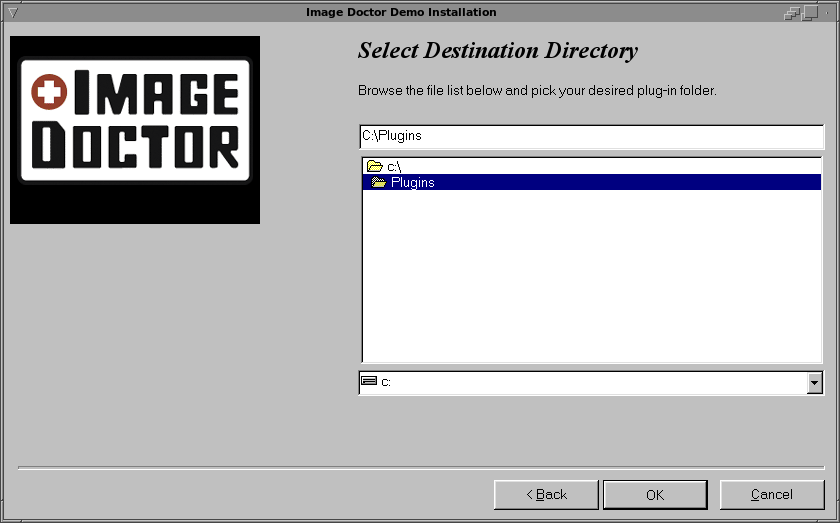
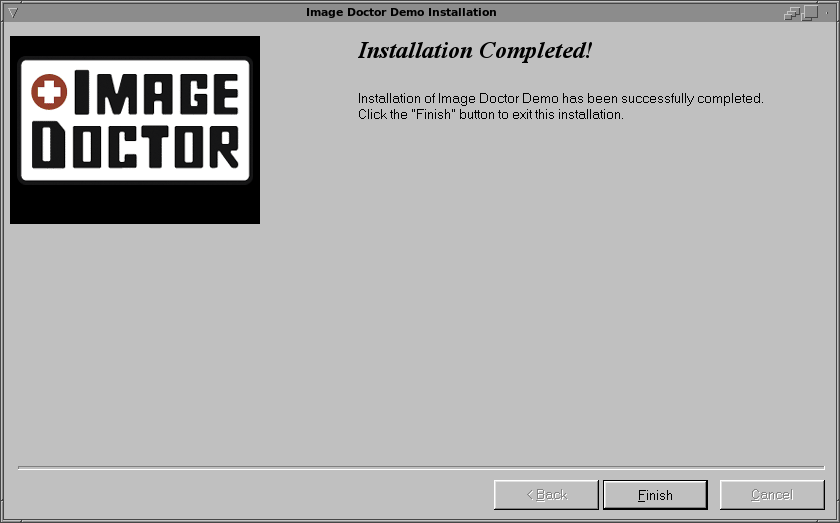
he next step is to obtain some photoshop plugins. Tor comments in the README file that you should install your plugins one at a time, to be sure they work. This is generally good advice. The two plugins I demonstrate later in this tutorial are the Flaming Pear filters, LunarCell and Anaglyph Flip. The one I demonstrate in this step is the Image Doctor from Alien Skin. (see links)
The FlamingPear LunarCell filter, Alien Skin Image Doctor filter, and many other photoshop filters available on the internet are shareware. You may download and try them for free, but if you intend to use the filters regularly you should register them.
The Anaglyph Flip filter is from a filter pack named "Freebies," which are just that-filters you can use without registration, free of charge. Other free filter packs are available all over the internet, some better than others. Google is a good place to start.
Also, Alien Skin will not support Image Doctor installed and used under The GIMP, in any OS. The installer actually says so, and does not recommend you try it. In experimenting with the plugin I found it worked fine, but proceed at your own risk should you also want to try this particular filter.
When you have downloaded the filters, save them to a location you can find later. On my Windows computer, I saved the files to C:\Program Files\GIMP-2.0\lib\gimp\2.0\pspi-plugins
On my Linux box, I saved them to ~/bin/pspi/
I kept each plugin's files in its own directory within the pspi directory in both OSes, to make them easier to manage. However, pspi only needs to be configured with the directory that holds these plugin directories. It will search further in if needs be.
Note: in the directory you specify, and in any subdirectories, do not put any .exe or .dll files that do not belong to a plugin (for example, installer EXE files). They might cause pspi to error while loading the plugins, and some or all of your plugins will not be available. Move those files to another location in case you need them. I placed them in ~/bin/pspi-inst
Some plugins need to be installed in order to work. In Windows, this is a trivial issue: run the installer, answer the questions, and you're ready to go. simply remember where you installed the plugin.
However, linux users must go through the extra step of using wine to "install" the plugin. Because this took me a little extra time to figure out, I will explain here what I did.
For this example I am using the Alien Skin Image Doctor demo (see links).
I have wine installed and configured already, so I simply go to a terminal and at the shell prompt type:
wine ImageDoctorDemo.exe
The Installer should launch. when I am prompted to select an installation location, it does not matter what I choose as long as I can remember it later. I told the installer to install to C:\Plugins and let it run, answering the rest of the questions as though I were a windows user. The installation completes successfully.
Internally, wine maps the "windows C:\" drive to a directory in my home directory, ~/.wine/drive_c/ so all I have to do is copy the directory ~/.wine/drive_c/Plugins/Auto Eye Image Doctor to the same directory with my other PS plugins:
cp -R "~/.wine/drive_c/Plugins/Auto Eye Image Doctor" ~/bin/pspi
That should do it. Shut down GIMP if it's still running, and restart it. This will cause PSPI to register the new photoshop plugins. You can look for them by opening an image (or creating a new one) and checking the "Filters" menu. They should be at the bottom.
Use the Photoshop Plugins
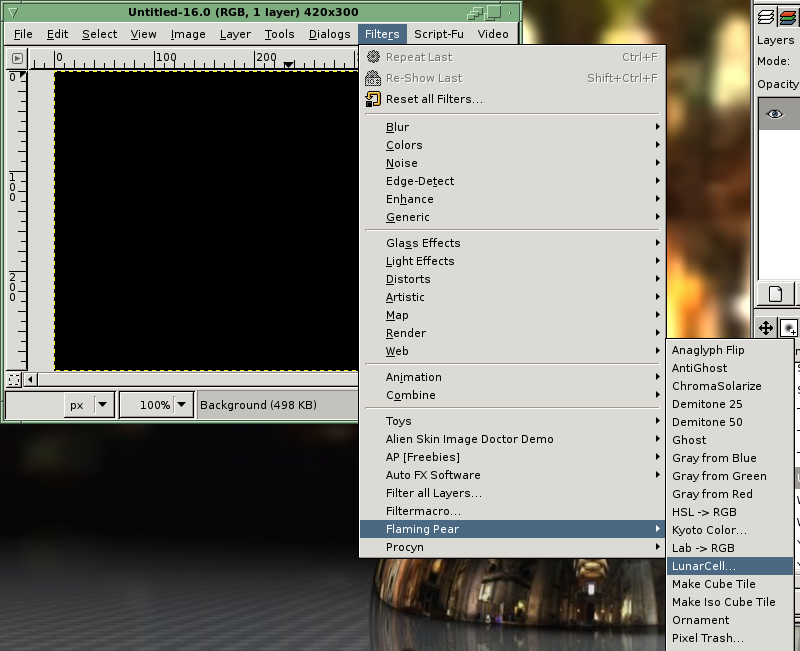
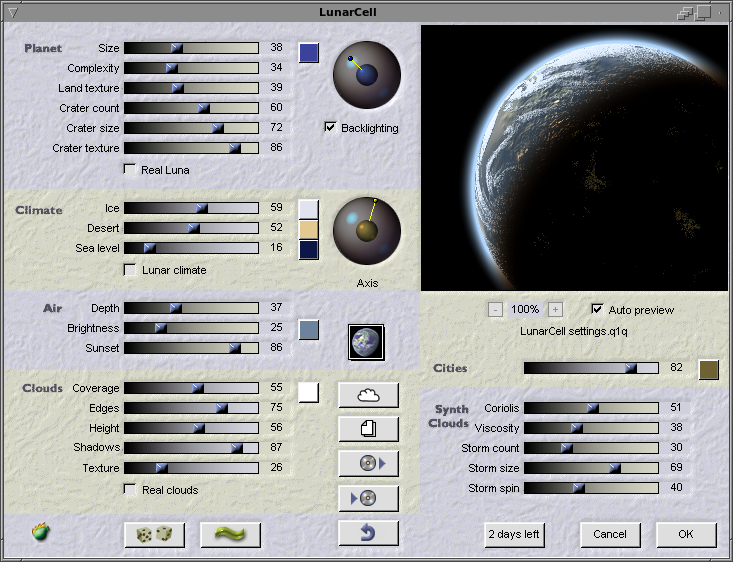

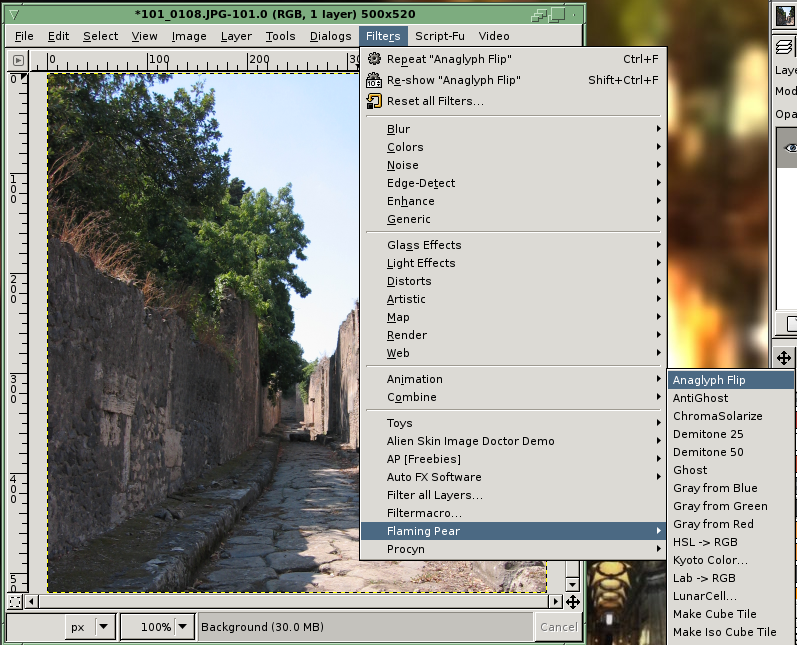
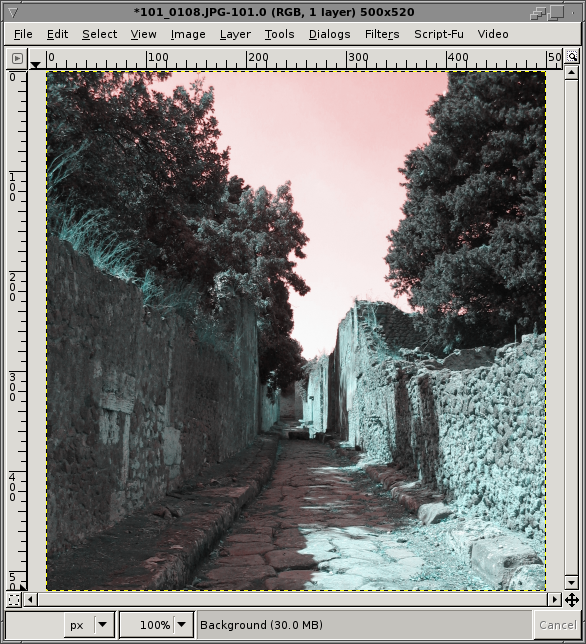
I have selected to demonstrate here two Photoshop filters. One of them launches a window wherein you select settings and options and can preview your changes before applying the filter. The other simply applies the filter directly to the image. This is done to demonstrate the flexibility of the functionality.
Because windows dialogs running in WindowsXP is wholly unremarkable, I have obtained screenshots for this demo from my linux box.
First I create a new image, and then go to the "Filters" menu. All of the Photoshop plugins you have added to the plugin will appear at the bottom of the Filters menu. Here you can see that I have several plugin registries installed, and I have opened the FlamingPear menu to access the LunarCell plugin.
I set up the settings I like in the window that opens, and when I am done, I click "OK" to apply the filter. After a few seconds of thinking, the filter finishes running and I have an image of a pretty-looking planet.
The next few images demonstrate "instant" filters, I'm sure they have some official-sounding name. I mean filters that just do what they do, without a dialog to set up how the filter is run.
Here, I have a pretty picture taken of a deserted street in the excavated city of Pompeii in Italy. I once again open the "Filters" menu and expand FlamingPear, then select the Anaglyph Flip filter. After a few seconds of processing, I have turned Pompeii into an alien landscape.
And that's all there is to it!
Useful Links

(Commenters, feel free to add more!)
Tor Lillqvist's GIMP PSPI plugin
The GIMP
GIMP for Windows
wine: WINE Is Not an Emulator
Flaming Pear - These guys have some REALLY nice, creative plugins....
Alien Skin Image Doctor
Tor Lillqvist's GIMP PSPI plugin
The GIMP
GIMP for Windows
wine: WINE Is Not an Emulator
Flaming Pear - These guys have some REALLY nice, creative plugins....
Alien Skin Image Doctor