Photoshop Editing - Awesome Effect
by joshuamcleanphotography in Circuits > Cameras
3516 Views, 35 Favorites, 0 Comments
Photoshop Editing - Awesome Effect
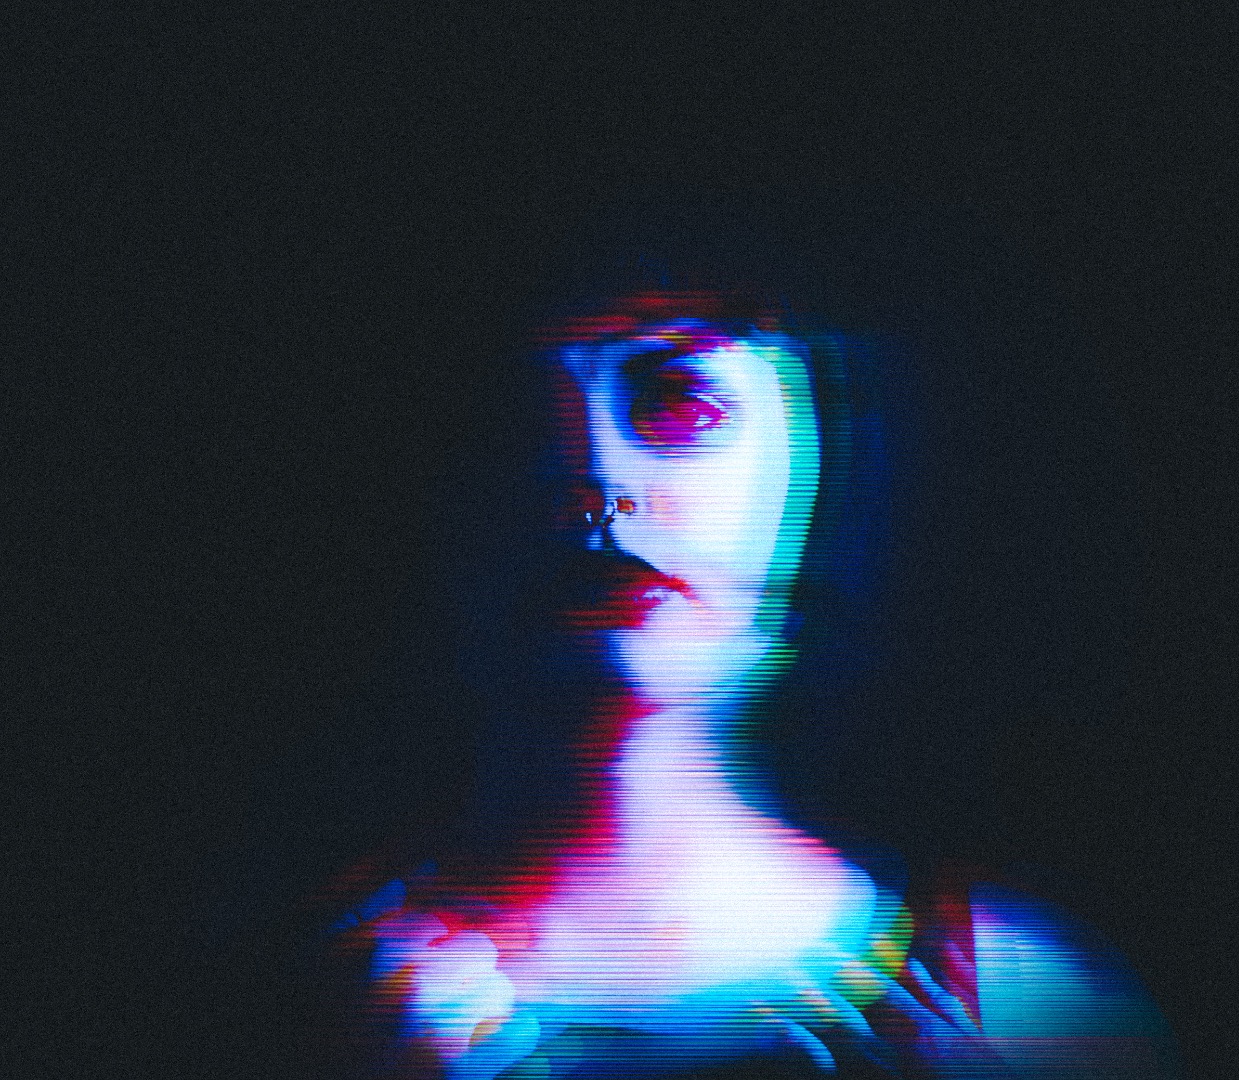
In this tutorial I Am going to show you how to recreate this Effect in the finished picture above.
This piece of work was inspired by Nine Inch Nails, The Matrix, Girl with the dragon tattoo, 3D prints, Linkin Park Video - Waiting for the end to come ETC..
Things You Will Need for This Lesson
- A photograph of your choice that is in RAW format.
- Adobe Photoshop CC
- Level of difficulty - Easy
Open Your Photo in Photoshop

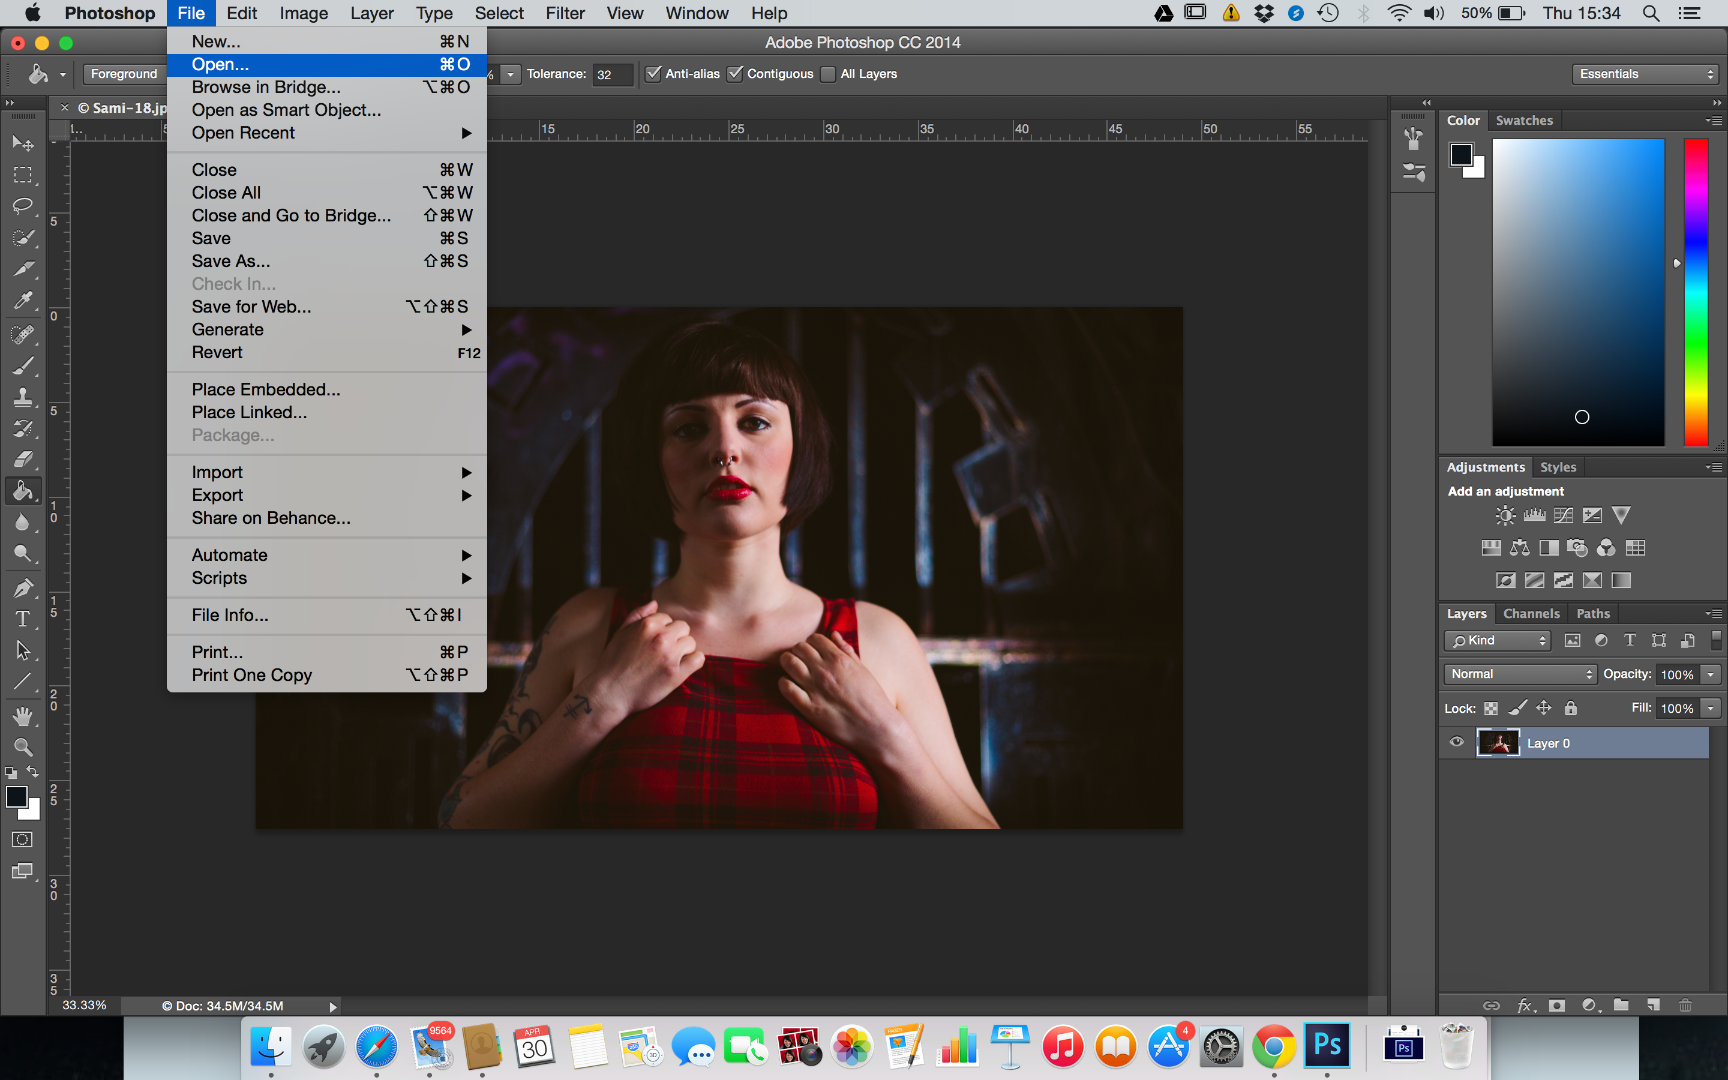
Inside of Adobe Photoshop Goto;
- File
- Open
- Select your RAW format photo
Duplicate Your Image
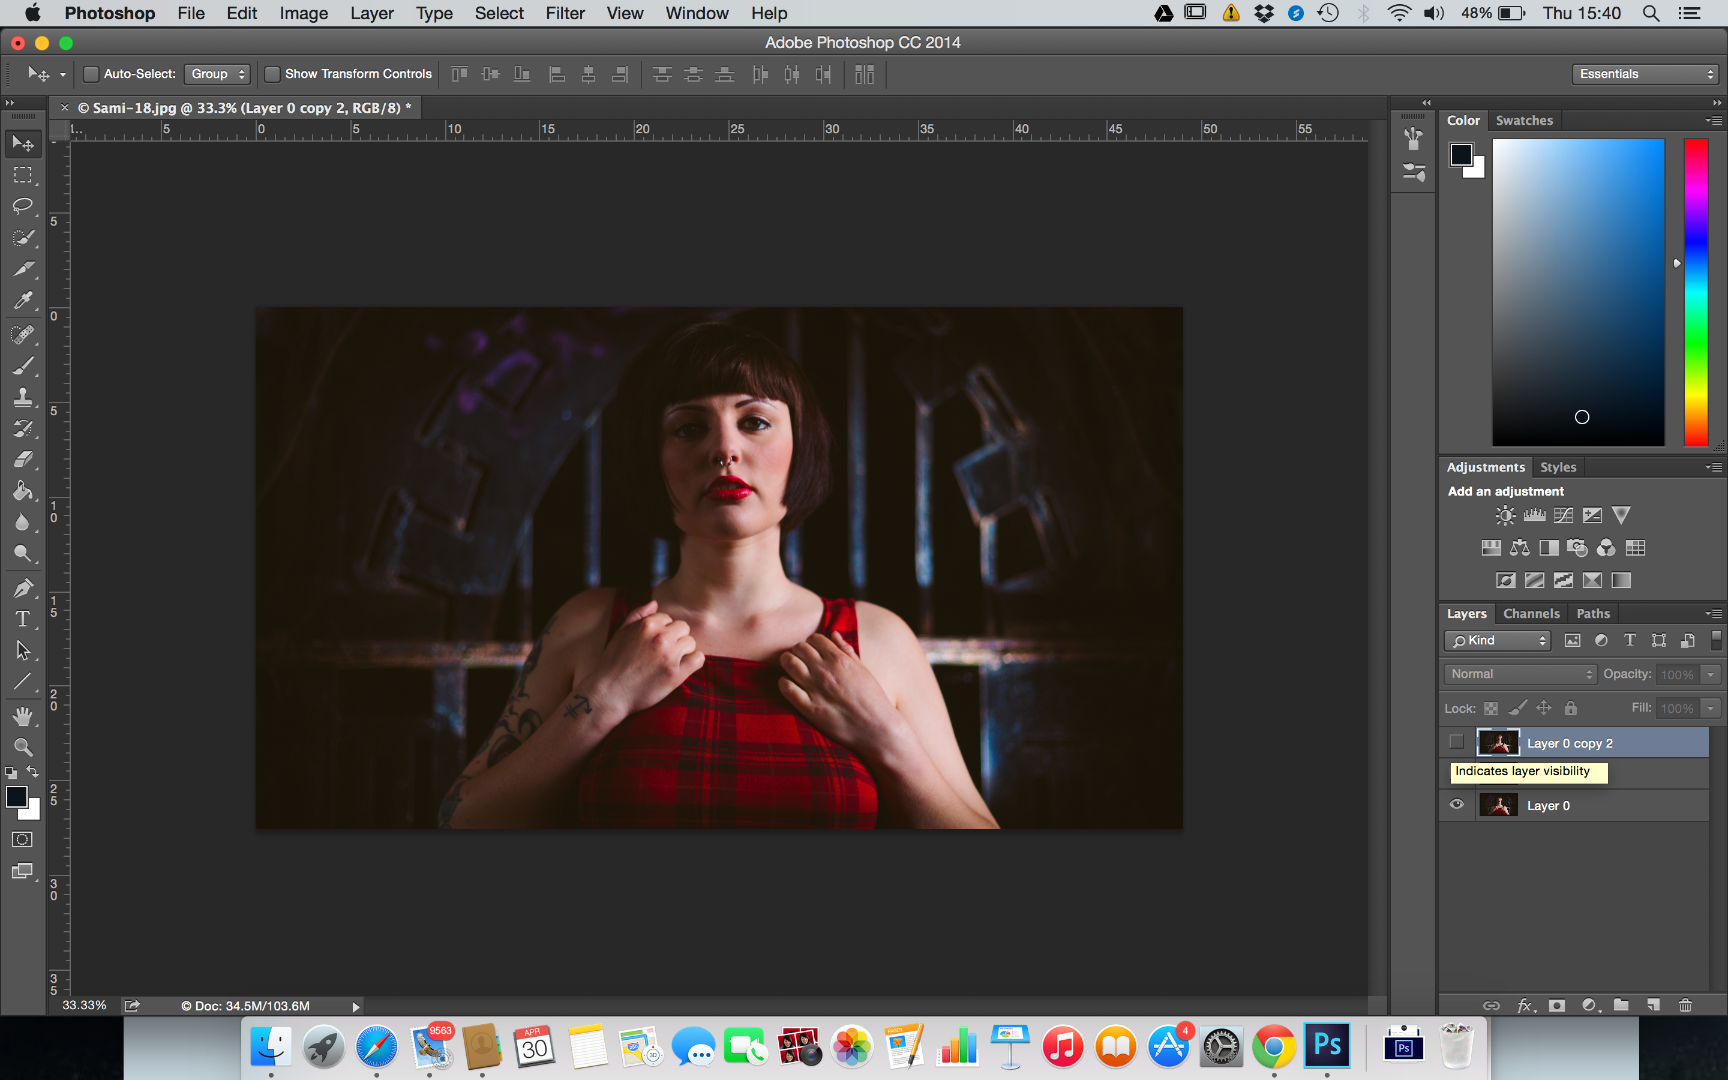
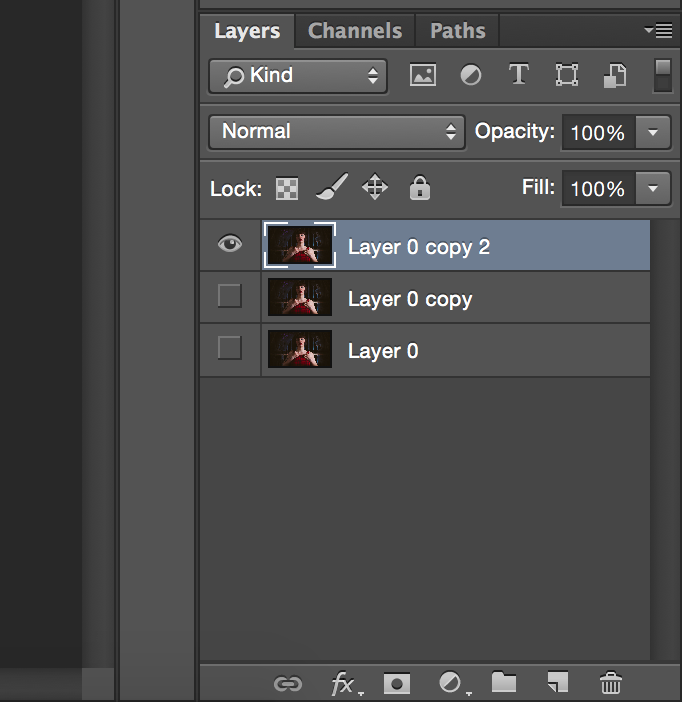
Inside Adobe Photoshop;
- To duplicate a layer on a MAC hold Command & J (PC it is Control & J )
- Duplicate your original photo layer 3 times
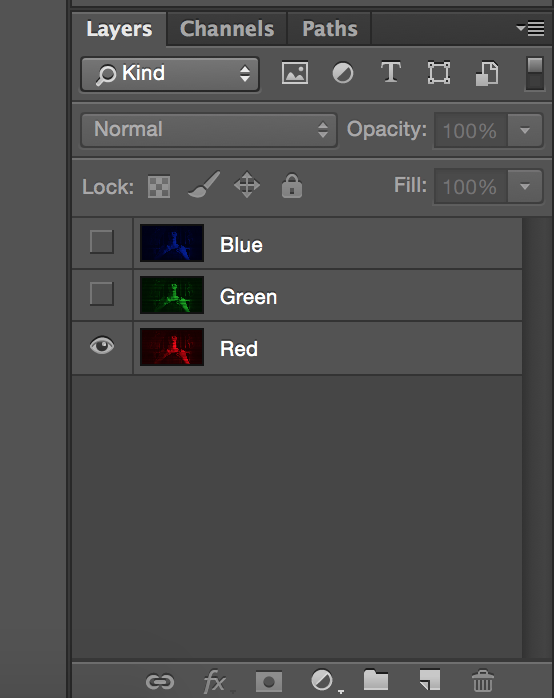
- In the Layers window in the bottom right portion of photoshop click the Eye next to the bottom two layers this will make them invisible, leaving just one layer visible. This layer will be our first working layer.
Rename Your Layers
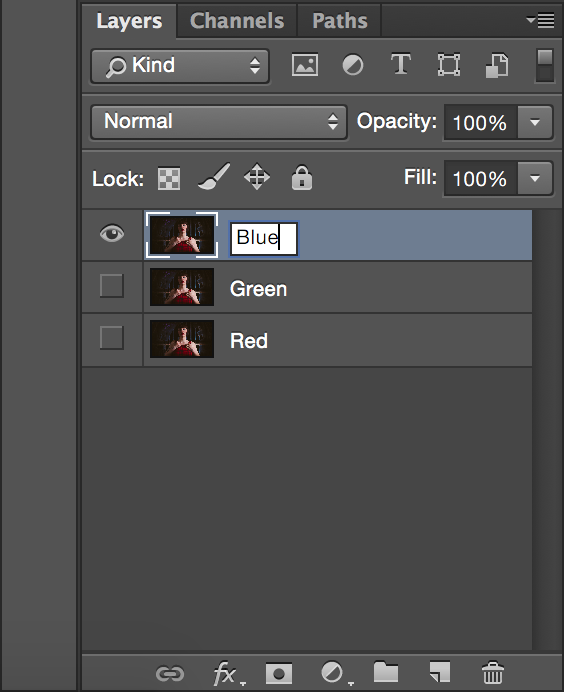
In the layers window in Adobe Photoshop;
- Double click on the layer name
- We are going to name our layers accordingly to the image
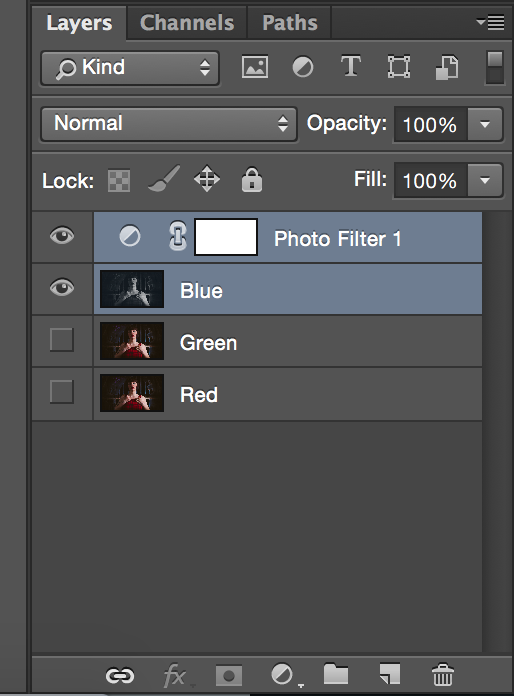
- We have named them RED, GREEN & BLUE as this will correlate to the coming steps
First Effect Step
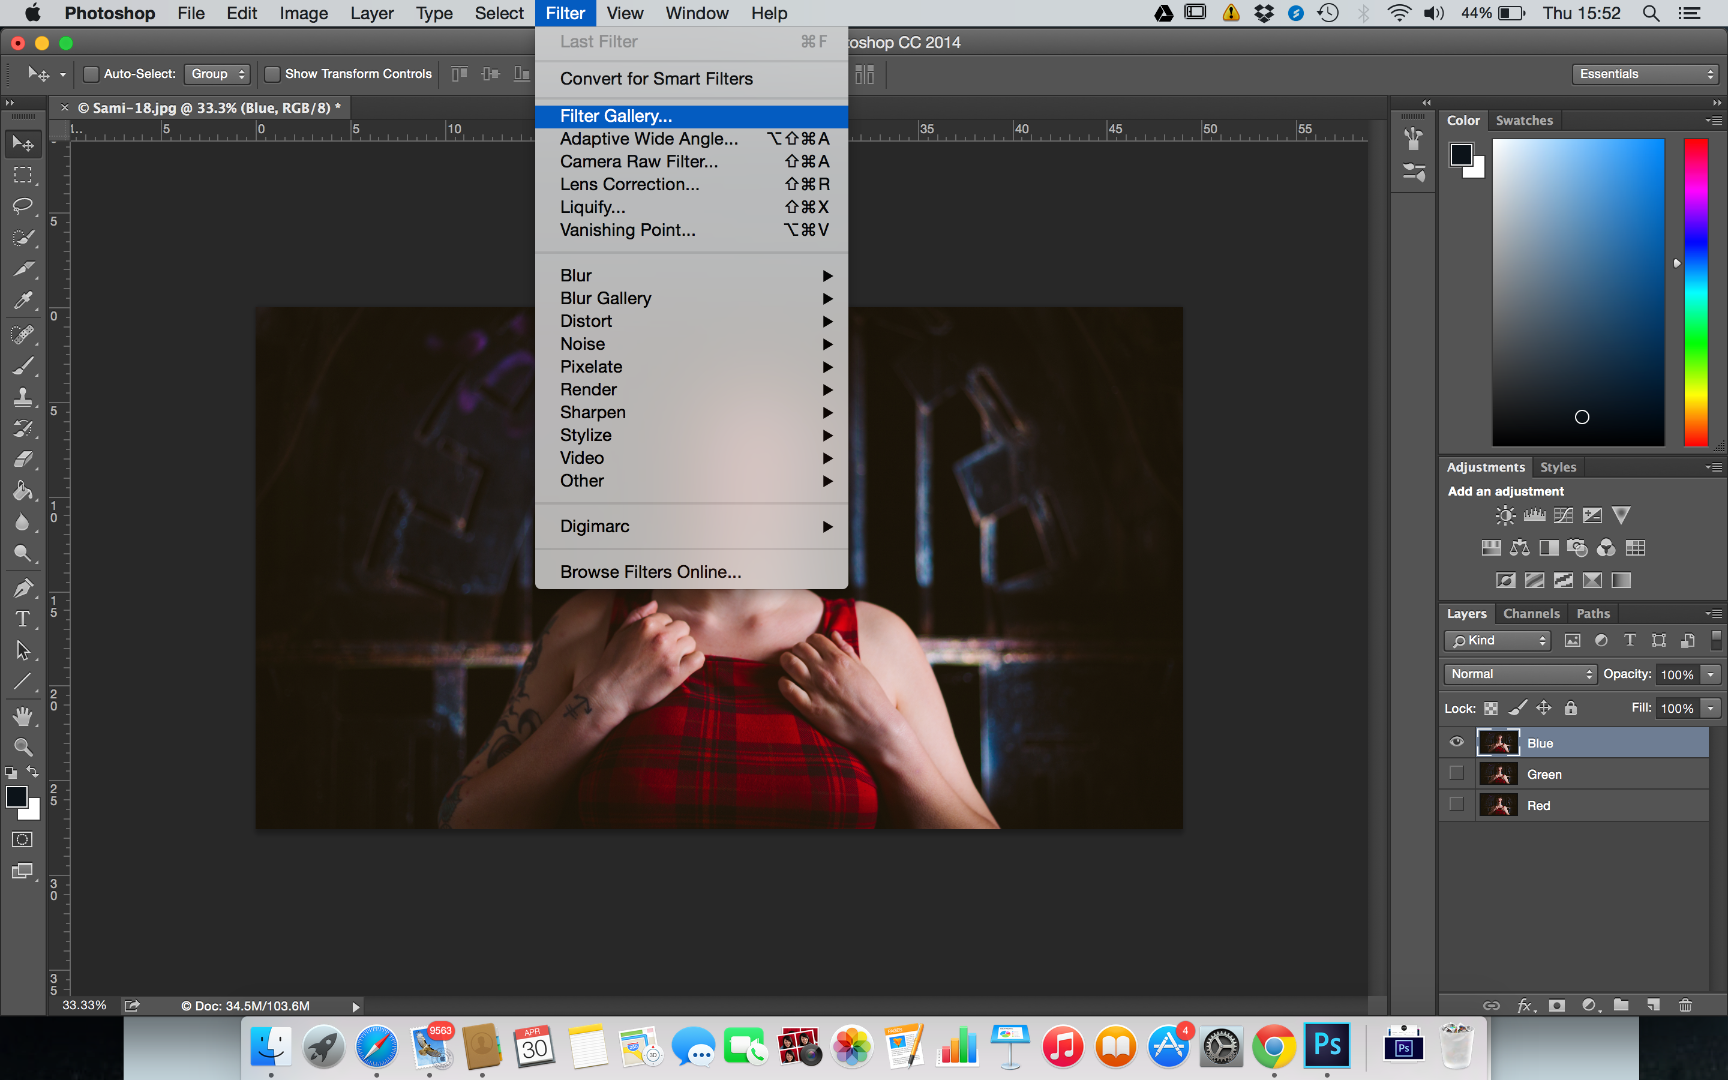
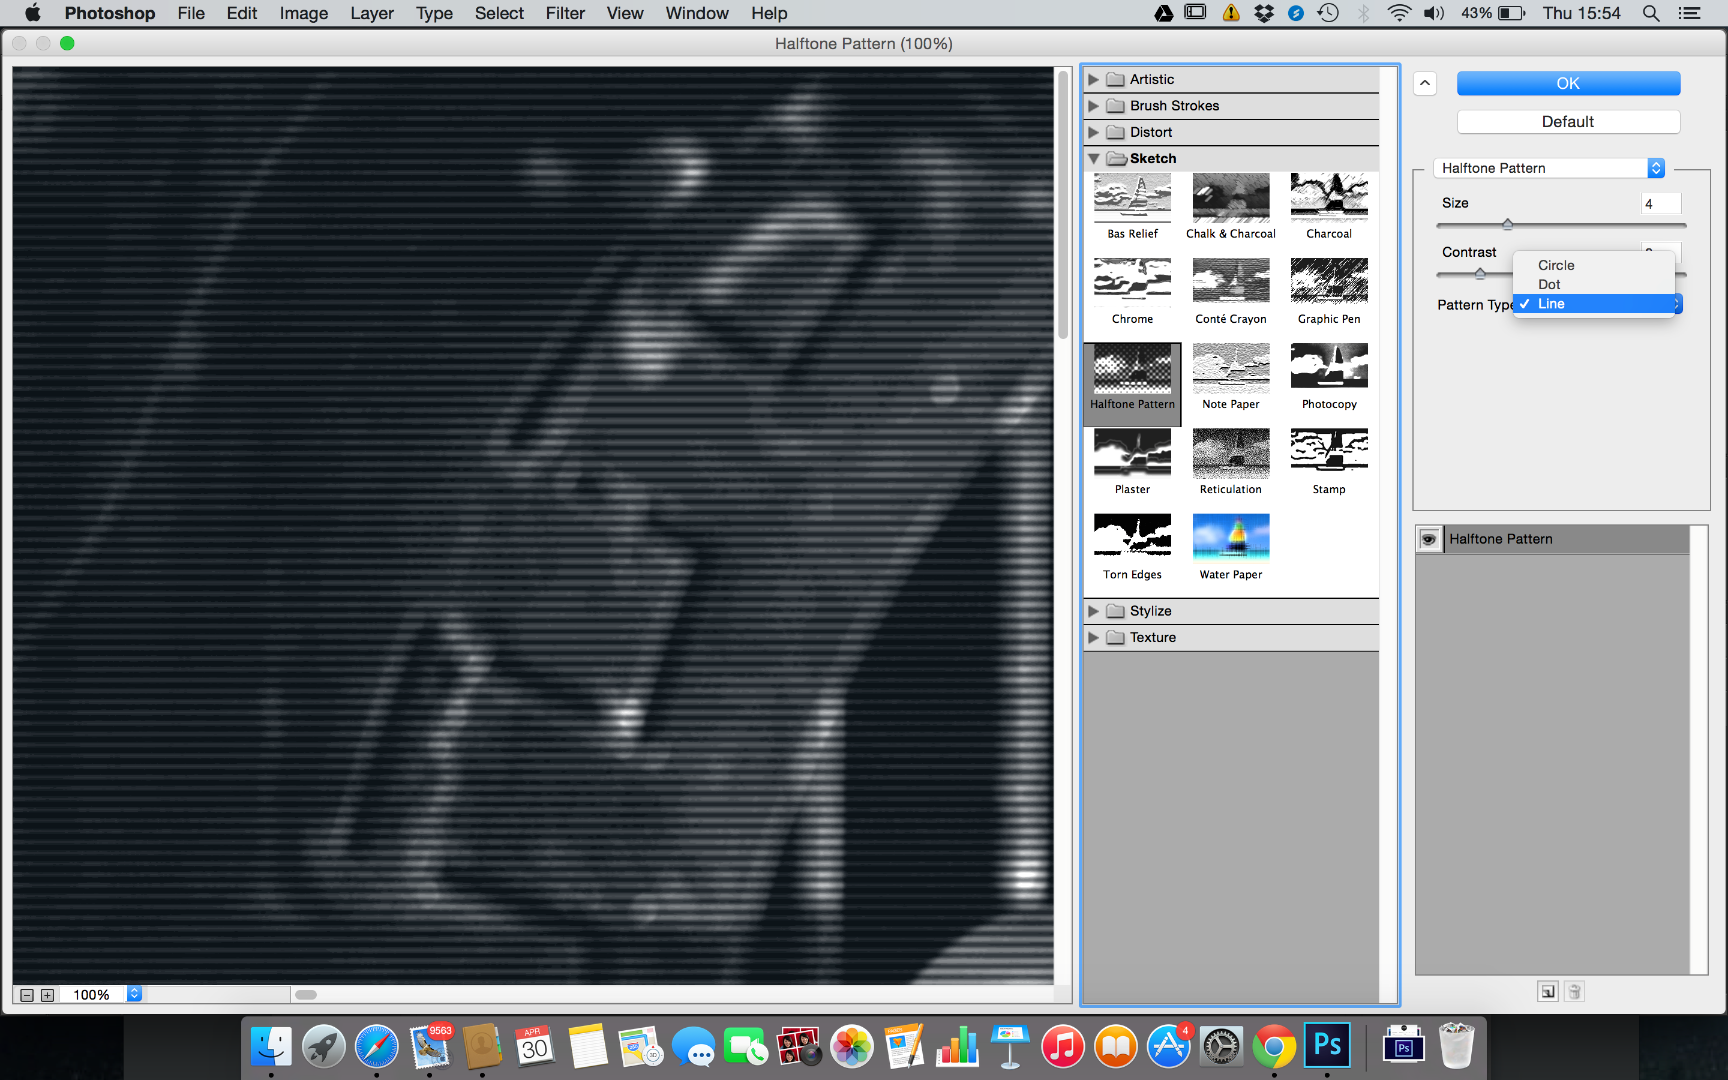
Inside of Photoshop Goto;
- Filters
- Filter Gallery
- Sketch
- Halftone Pattern
Inside of the Halftone Pattern Window Select - Pattern Type - Line
- Size - 2
- Contract - 0
Confirm Settings By Pressing 'OK'
Second Effect Step [ DO THIS STEP FOR EACH LAYER ONLY CHANGING THE COLOUR]
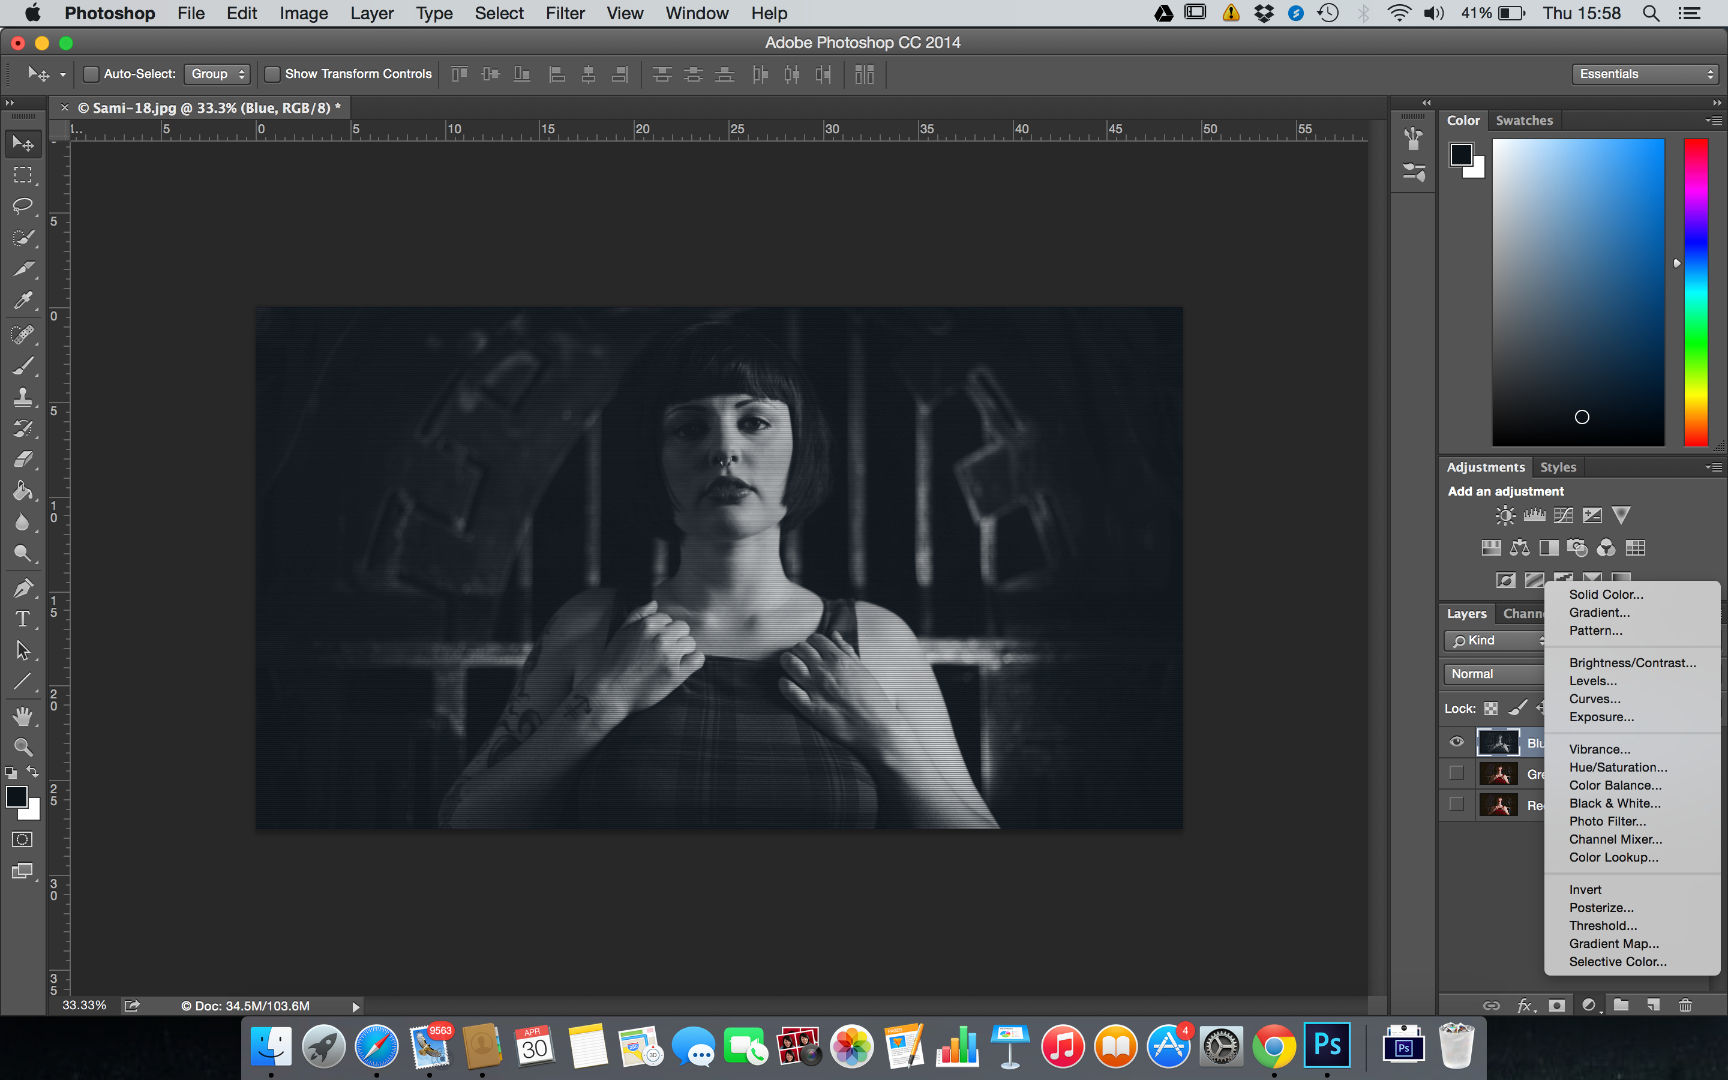
Inside of Photoshop Goto;
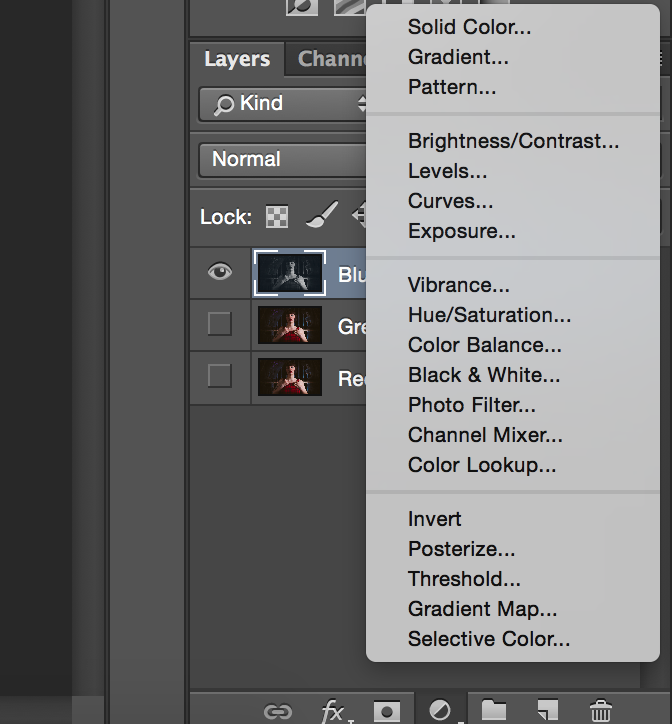
- Layers Panel (Bottom Right)
- Make A New Adjustment Layer
- Select Photo Filter
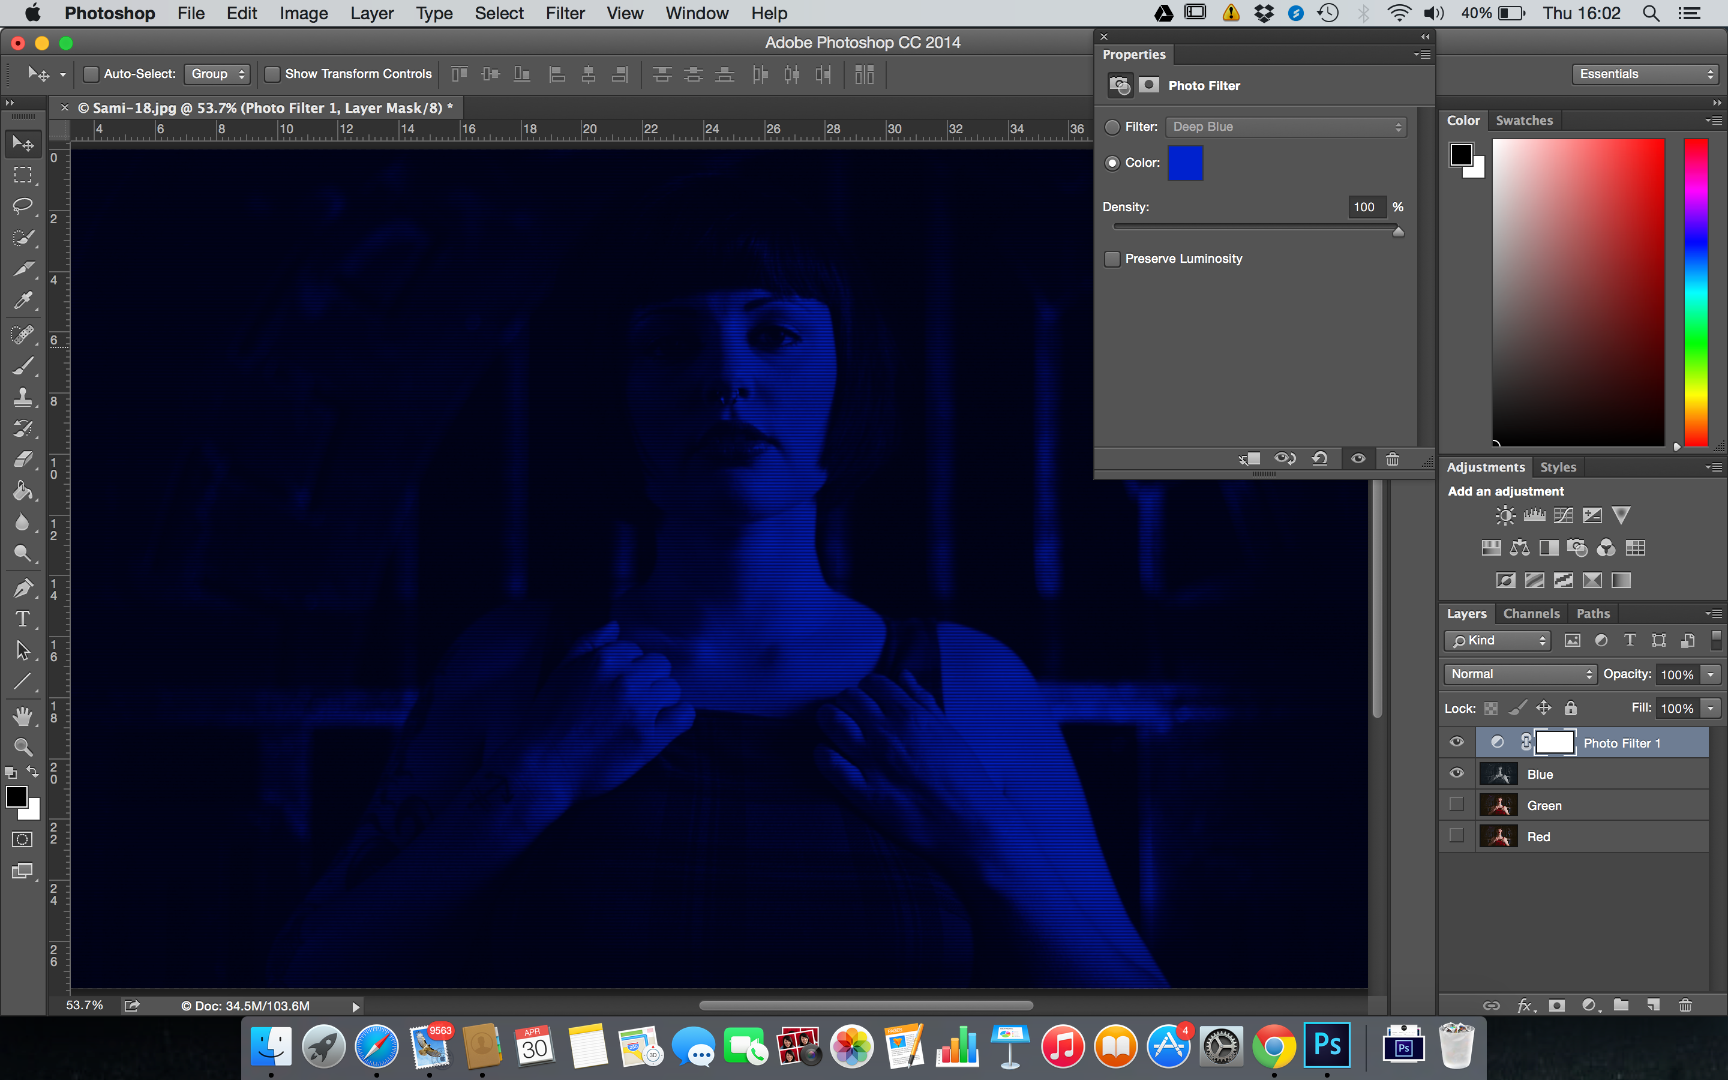
Once inside of the photo filter panel;
[ DO THIS STEP FOR EACH LAYER ONLY CHANGING THE COLOUR]
- Select a Blue Colour (this will be in reference to the layer name) this layer is named 'Blue' so we have chosen the colour 'Blue' for this layer.
- DO THE SAME FOR EACH LAYER BLUE FOR BLUE, RED FOR RED & GREEN FOR GREEN
- Intensity 100%
Un Check The 'Preserve Luminosity' Check Box.
Once the layer is coloured;
- In the layers Panel Hold COMMAND + click the photo filter adjustment layer
- Hold Command + E
- This will merge Selected layers into one layer.
Blurring the Images
Once all of the images have been treated for the appropriate Effects Colouring and Half-toning, We will the treat them for blue effects
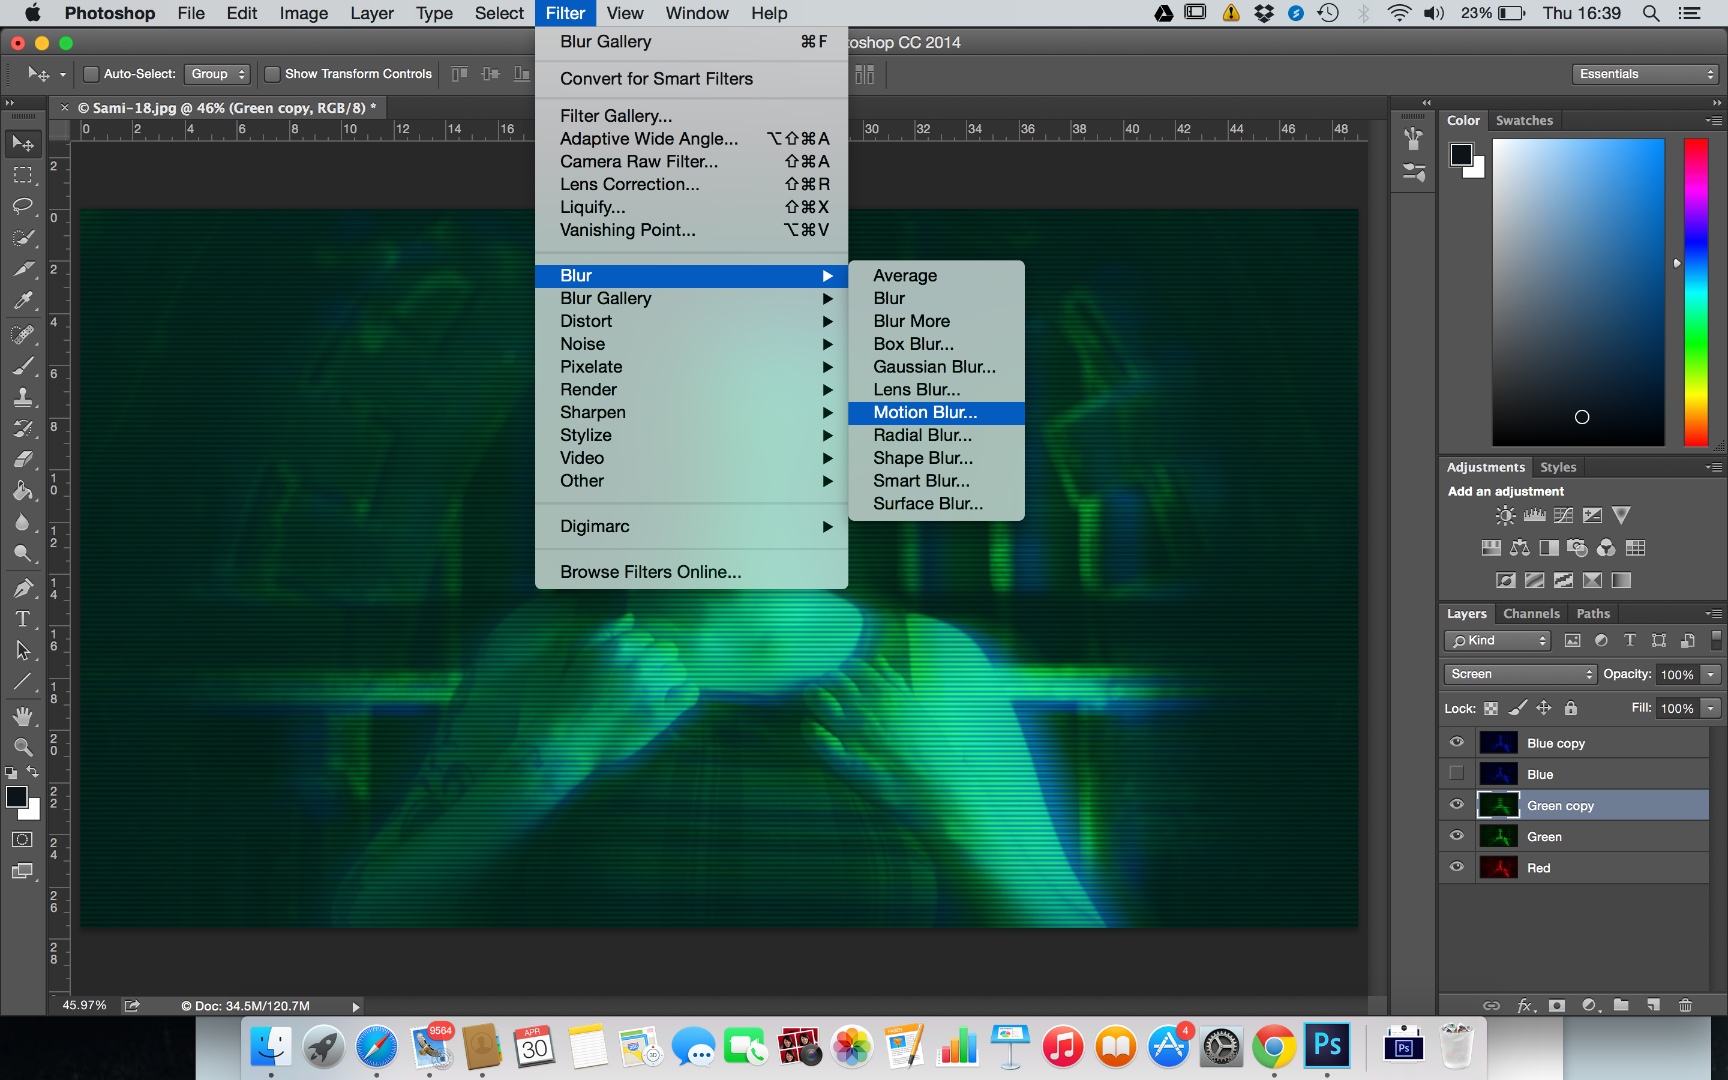
- Make a copy of each layer so you now have a copy red, copy blue & copy green
- These new copies will be the layers treated for blurring effects
To Use the Blur Effects goto - Filters
- Blur
- Motion Blur
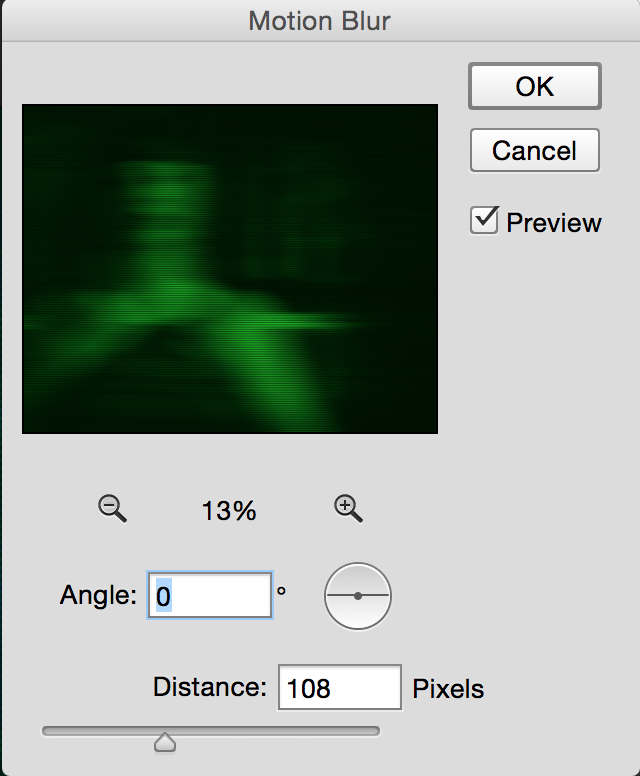
Once in the Motion Blur Panel - Angle 0 degrees or whichever angle that correlates to the lines you have created
- Distance pixel amount to your preferred taste/style
DO THIS FOR ALL COPY COLOUR LAYERS RED BLUE & GREEN BUT EACH TIME INCREASE THE DISTANCE PIXEL VALUE BY 20 TO THE PREVIOUS LAYER, THIS WILL CREATE A SPREADING EFFECT.
Transforming the Images


On each blurred copy of each colour we will now expand/transform the layers in size.
First we need to select a layer, for the purpose of this tutorial we will pick The Red Layer the copy that is blurred.
- Command + T (Control + T for PC) this will create a transform selection
- Doing so for a layer will make the top section appear for size controls
- Click the LOCK to keep parameters equal
- for each layer increase it by 20%
- Red layer 120%
- Blue layer 140%
- Green layer 160%
Once completed on stretching out the layers, Group them together Command + G
Add an adjustment layer (see previous steps for instructions) - add a curves adjustment layer to adjust colour depth to your liking
- change opacity sliders to change more predominant colours
And voila, your new cool retro digital sci fi looking portrait or image!!
Hope you enjoy this photography editing tutorial
Add me over at www.facebook.com/joshuamcleanphotography
For more tutorials drop me a message!