Photographing for 3D Lenticular Printing
by Parallax Printing in Circuits > Cameras
18911 Views, 41 Favorites, 0 Comments
Photographing for 3D Lenticular Printing
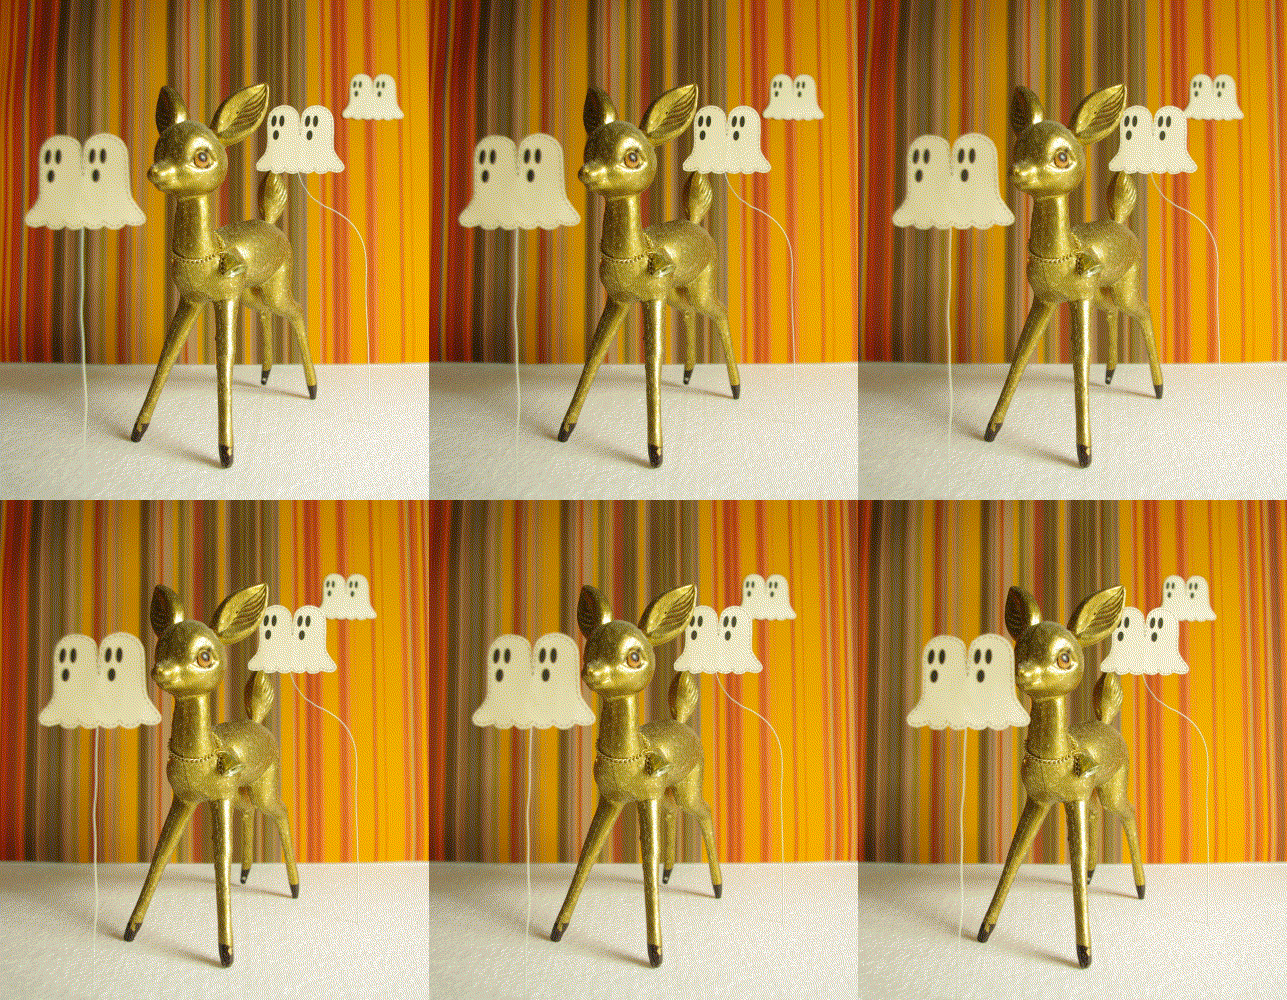
Photographing for 3D Lenticular Printing
There are several ways to create the illusion of three dimensions using the lenticular process but one of the most effective has always been natural 3D photography. This tutorial describes a basic workflow for creating image sequences optimized for lenticular output. Use of Red/Cyan anaglyph 3D glasses is recommended in parts.
The Single Camera Rail System
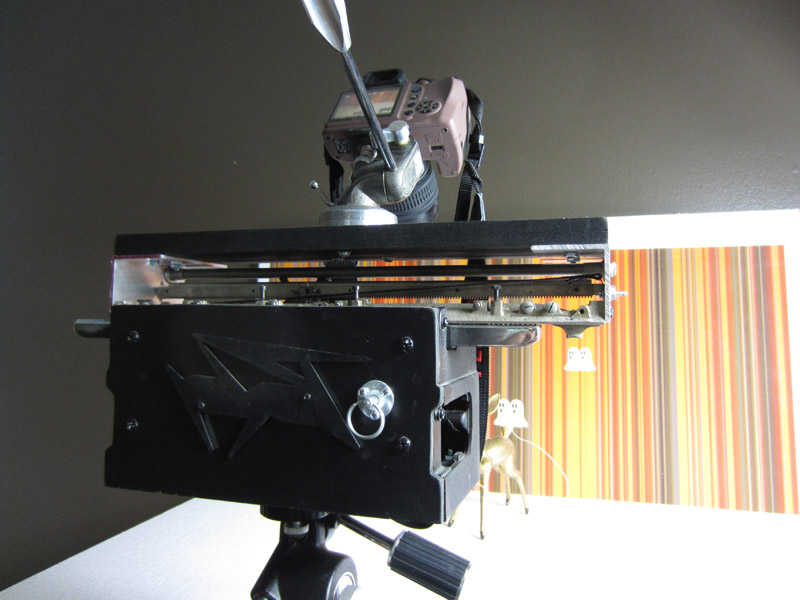
Rail systems are commercially available or can be easily constructed. Most are manually operated. The length of the rail will determine your maximum stereo base (the distance between the far left and far right camera views) and should be related to the kinds of subjects and situations being photographed. A rail with a length of 12” will satisfy a majority of studio situations.
For this tutorial I am using a vintage Underwood wide carriage typewriter that has been modified and fit with a tripod mount. The camera is carried past the subject in 1/12” increments using a lever to trigger the space bar mechanism. With a traditional camera rail you would simply count off marks on a ruler in the increments you desire.
Scene Construction
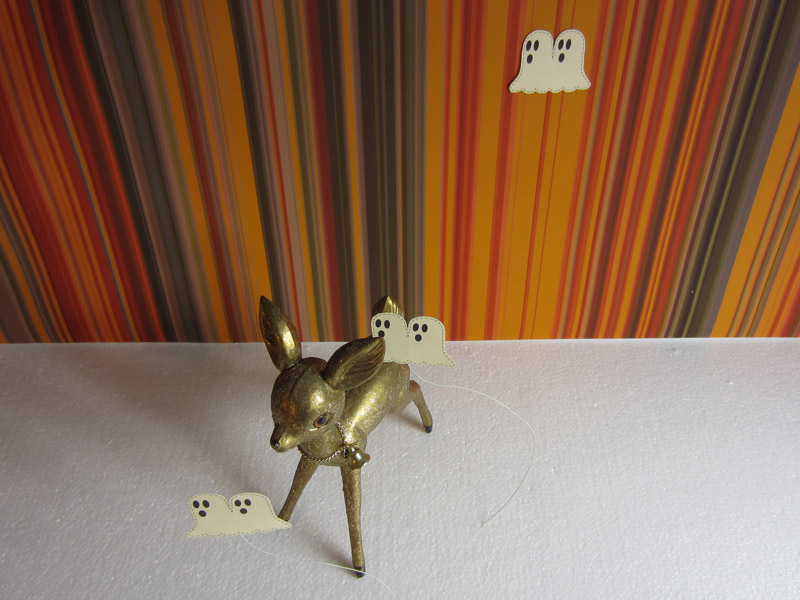
1. Keep your subject close to the background and use as shallow a space as possible. This allows your subject to be the primary recipient of the 3D effect and not the space between it and the background.
2. Do not use a single flat color for the background. A flat color does not register as depth.
3. Use occluding objects. Having objects overlap gives the depth effect more points of reference and makes it stronger.
4. Watch the edges of the compositional frame, especially the sides. If an object close to the camera comes in from the side of the frame, like a tree branch, it may create a stereo window violation and limit your options later on. Foreground objects should not touch or run through either side of the frame. This can also be said for the top and bottom of the compositional frame, but it is less problematic in these areas.
Shooting the Scene
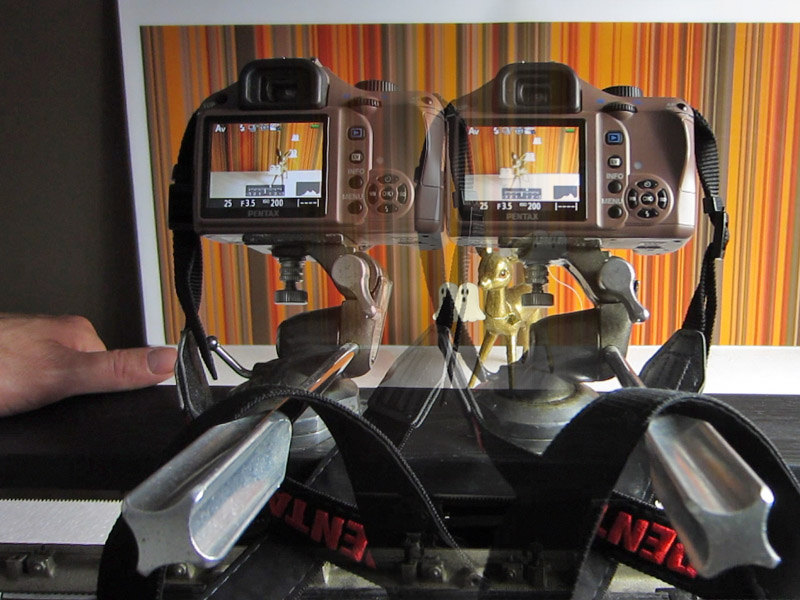
1. Stereobase. The distance your camera travels along the rail is defined as stereobase. The stereobase for a particular shoot can be large or small depending on a number of variables. There are several free stereobase software tools created for lenticular production but we will use a variation of a common guideline to get us started. The 1:10 rule suggests that your stereobase for a lenticular sequence should be 1/10th the distance measured from the camera to the nearest subject in a scene. If your subject is 10 feet away you would use a 1 foot stereobase. This assumes a controlled studio environment where the background is close to the subject as it is in our demonstration scene. This wide stereobase yields deep, rounded 3D objects.
2. Camera Movement. It is common to move the camera from left to right along the rail (unless you are using a converted typewriter, which moves right to left). This creates a sequence of images that will be in an order familiar to most lenticular printers. Try to take 30-40 images within your stereobase at precise increments. Then take an additional 10 images to give yourself some flexibility later on.
3. Depth of Field. If your equipment and aesthetic considerations allow it, use a large aperture for a shallow depth of field. When background and extreme close objects are blurry you can use a bigger stereobase and create a greater 3D effect.
4. Focusing. Move your camera along the rail until it is directly in front of your subject and focus the lens. Then turn the Auto Focus off. Since you will be sliding your camera through the scene it may choose to focus on background details and leave you with a soft subject.
Do not adjust the camera position as it moves along the rail in an effort to keep the subject in the center. Toeing-in, as its called, is used in many professional stereoscopic camera rigs but creates a distortion that is easily avoided if the camera remains parallel to the subject as it moves.
Processing the Images
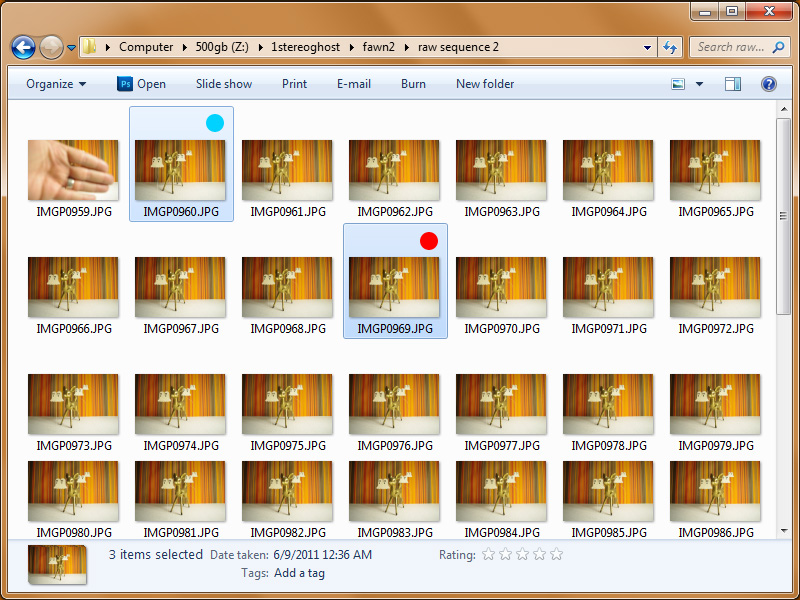
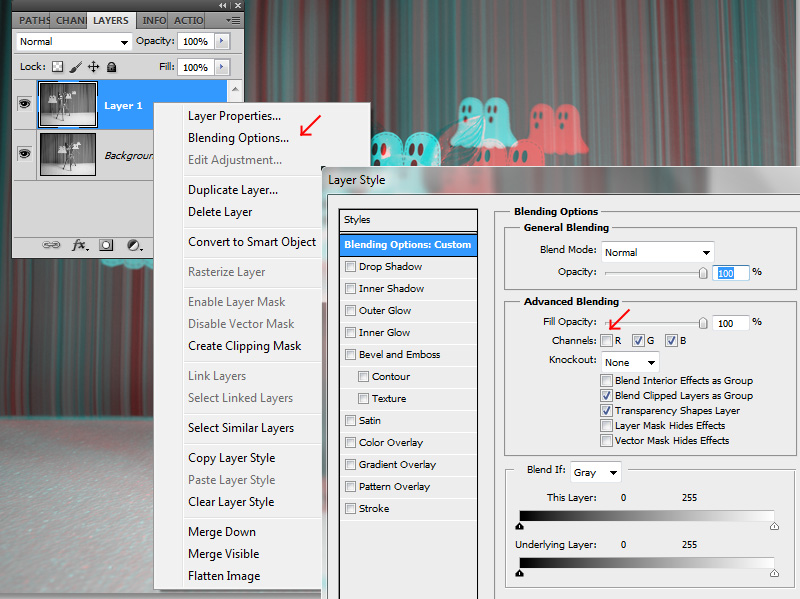
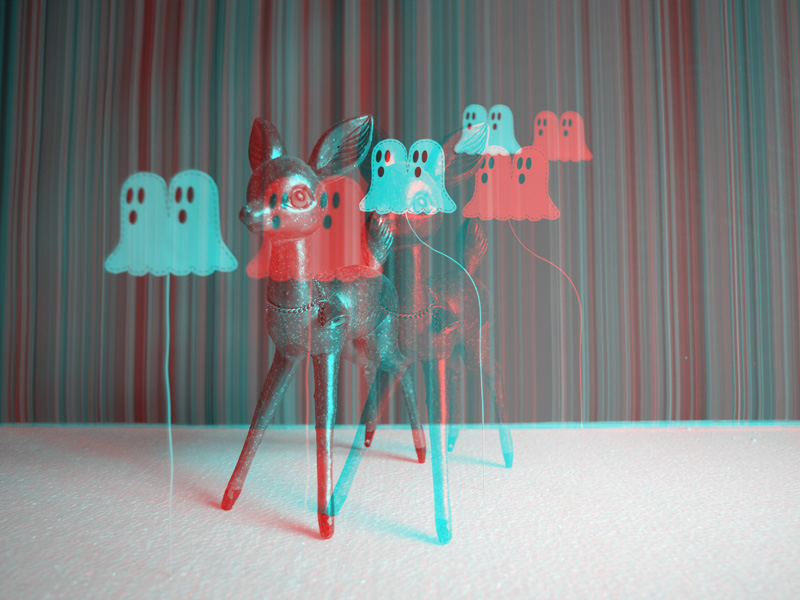
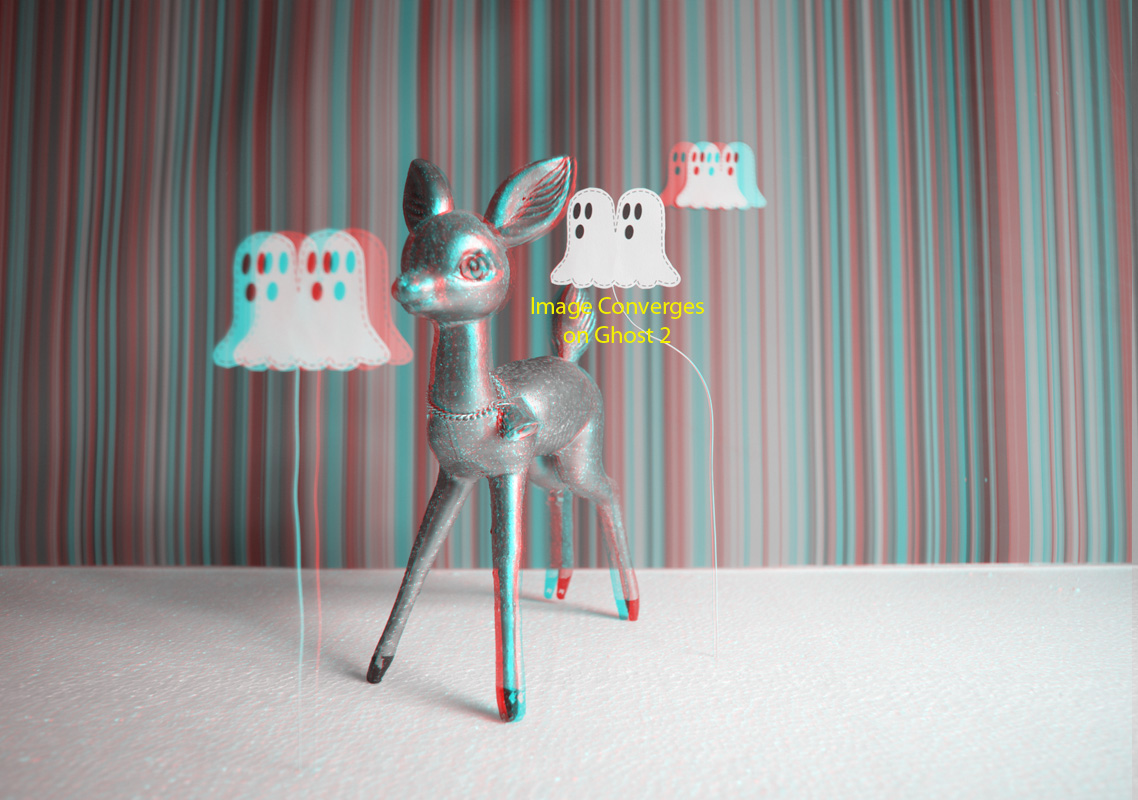
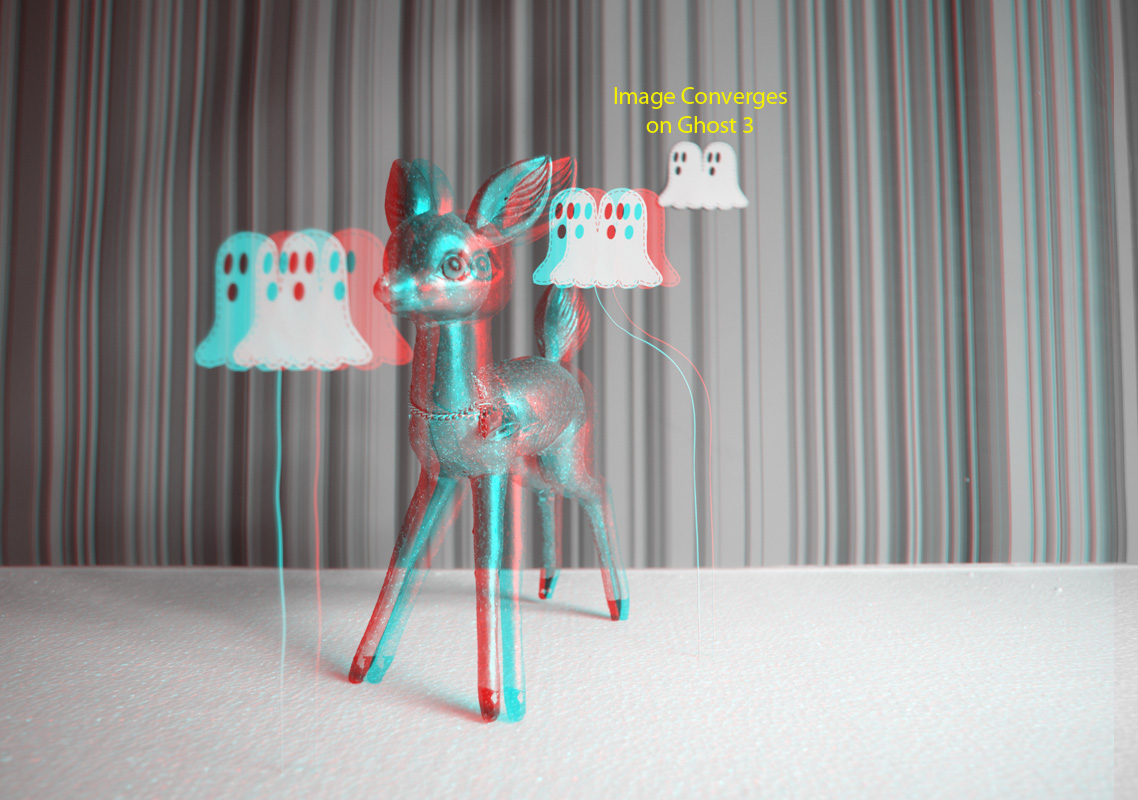
1. Open two images 10 frames apart in your sequence. Copy the Right image and paste it over the Left.
2. Desaturate both layers: Image/Adjustments/Desaturate
3. Right Click the top layer: Blending Options/Advanced Blending/ uncheck the Red channel. The bottom layer is left alone.
The left and right images now need to be aligned:
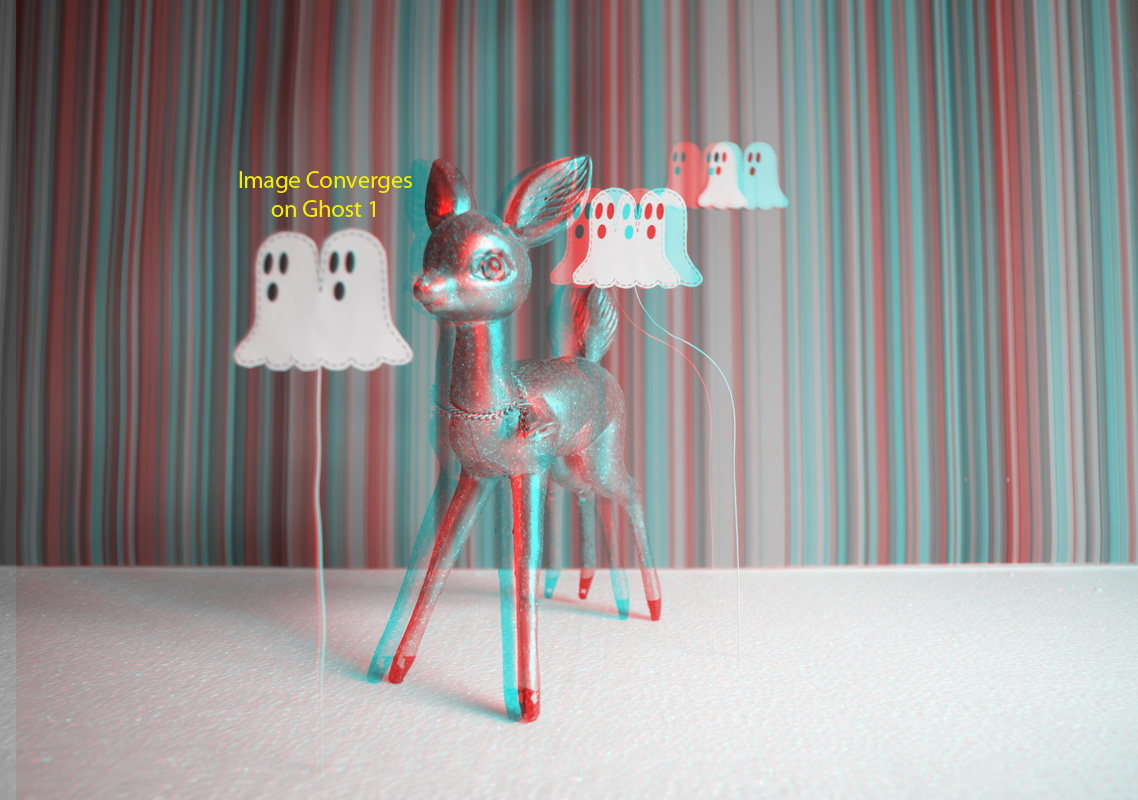
Put on your 3D glasses and move the top layer horizontally until things begin to overlap - this will affect the point of convergence (a.k.a. stereo window). The point of convergence is the area of the image where things do not appear to be coming forward or going back. Your mouse pointer will be at the same level. If at all possible you should have objects that both project toward the viewer and recede into the background to maximize the depth effect. Play with different points of convergence until you find a position that balances the foreground and background depth in a way that is pleasing to you. The point of convergence will be the area of greatest clarity in your lenticular print. Take note of which areas of the scene come closest to the viewer and which recede farthest, you will need this information next.
1. Once you have determined a reasonable point of convergence (the middle ghost makes a good temporary point of convergence in the sample) it is time to select the farthest left and right images that will be the bookends for your lenticular image sequence. Assuming the camera was moved from left to right choose the first photograph from your sequence as the left frame and then photograph 36 as the right frame (36 is a popular number of images for a robust lenticular sequence. In the end you may have a different number and that is fine too). Align these images at the point of convergence you chose earlier. You will not be able to do this wearing the glasses, the images are too far apart, so simply make the top layer 50% opaque so you can see the layer below.
2. Crop the image to its final proportions and make it roughly the size you intend to have it printed at. You can leave Resample unchecked – there is no need to change the actual pixel values, just the values in inches or cm. This must be done before proceeding.
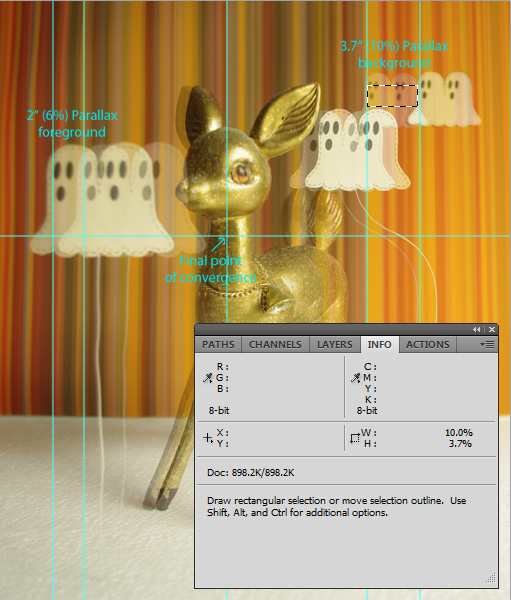
3. Time to take some measurements. In the closest foreground and farthest background area observed previously find an element in each that is prominent, something easily seen in both the right and left layers. In the sample photos the eyes on the front and rear ghost make good objects to measure. To Measure:
A) Change the rulers in Photoshop to display percentages instead of inches or pixels (double click to change)
B) Open the Info window
C) Using the Marquee tool drag a rectangle between the prominent background element as it appears in both the left and right layers. The Info window will give you a number that is a percentage of the total width. This is the rear parallax of your stereoscopic scene. Do the same to find the forward parallax.
D) Change the rulers back and find these values again as inches.
4. Parallax is the result of your stereobase and is the cause of the effect that makes things appear 3D. Parallax can be discussed as a percentage of the total width of an image or as a fixed number like inches.
As a fixed number parallax can be seen to relate to the physical qualities of the lenticular plastics. With contemporary inkjet technology many people find that 4 inches of parallax is about the maximum a 20 LPI lenticular lens can handle before things get too soft or jumpy. With a 40 LPI lens it is roughly 2 inches. To help you decide whether to target 2” or 4” of parallax consider that 20 inches square is good threshold for which lens to choose. If you are working larger than 20 inches then a 20 LPI lens is probably a better choice and under 20” 40 LPI is probably best. Of course there are other lenses used in inkjet printing, from 10 LPI – 60 LPI, so this is only a guideline.
As a percentage parallax relates to the size of image and the viewers distance to the final piece. A lenticular image in the portrait format (taller than wide) might have parallax values close to 10% at the maximum and in the landscape format (wider than tall) might be around 5%. This is why the image needs to be cropped to its final proportions prior to measuring percentage values. Because of the potential variables this method is less precise but is a good cross reference and should have a correlation with the fixed parallax values above.
Parallax is image dependent and can be manipulated. It is possible, for example, to use 2-3 times the maximum parallax typically used if the deep parts of the image are blurry. Or, less can be used if there are fine details that need to be preserved like text or thin lines. These maximum values refer to the background areas. For the foreground, which is just as important, your parallax values should be roughly half that of the background.
5. Back to the measurements. If the parallax values for your image are not close to those we have been discussing try moving the point of convergence by nudging the top layer to the left or right. Or, move the farthest background area to your desired parallax and see if the new point of convergence and new foreground parallax are acceptable. If you cannot get images 1 and 36 to work try using others from the sequence until you find two that do. When you are done take note of a prominent detail at your point of convergence that is common to the left and right images. You will align all the images of your sequence to this point.
6. Once you know your bookend images for your final sequence it is time to align the whole thing. A great workflow exists using the “Multiple Images” feature in StereoPhoto Maker and is recommended. The concept is simple, however, and can be done in Photoshop easily too.
A) Make a single layered PSD from your sequence. File/Scripts/Load Files into Stack
B) Hide all but the bottom layer and pull guidelines from the top and side rulers and place them at your desired point of convergence.
C) One by one align each of your layers to these guidelines
D) Crop the entire image, noting that there are now empty areas in the image canvas on the sides and possible the top and bottom.
E) Create a new folder called Aligned Sequence or something similar.
F) Export layers as files: Files/Scripts/Export Layers to Files
7. Make some tea. You now have a great lenticular image sequence ready to interlace!
Concluding Remarks

The only concern that remains with the sequence is the total number of images. The number of images needed to produce a lenticular image is the product of several factors. I mentioned earlier that 36 images is a number popular for high quality 3D lenticular prints. This is based on the popularity of piezo (Epson) printers in the lenticular industry that have a print head resolution different from that of thermal (HP) printers. The resolution of the printer and the resolution of the lenticular lens have a relationship that determines the best number of images for a sequence. The formula is DPI/LPI where the DPI is the actual print head resolution (not the stepper motor resolution) and the LPI is the fixed value of the lens. If you are printing this yourself determine the print head resolution of your printer and decide what lens you want to use. If the number of images in your sequence is not an exact number consider duplicating the end images if you are short a few, removing the end images if you have too many or using software like After Effects to “retime” the entire sequence to your final image count.
If you are having these printed elsewhere your service provider should be able to take your image sequence, whatever the total number, and adjust it for their workflow.
This tutorial was recently featured in Stereoscopy Magazine Number 103, and can be found in its updated version on the Lenticular Printing section of the Midwest Lenticular website.