Photo Engraving With Vector Lines
by EdwardJ13 in Workshop > Laser Cutting
18157 Views, 221 Favorites, 0 Comments
Photo Engraving With Vector Lines
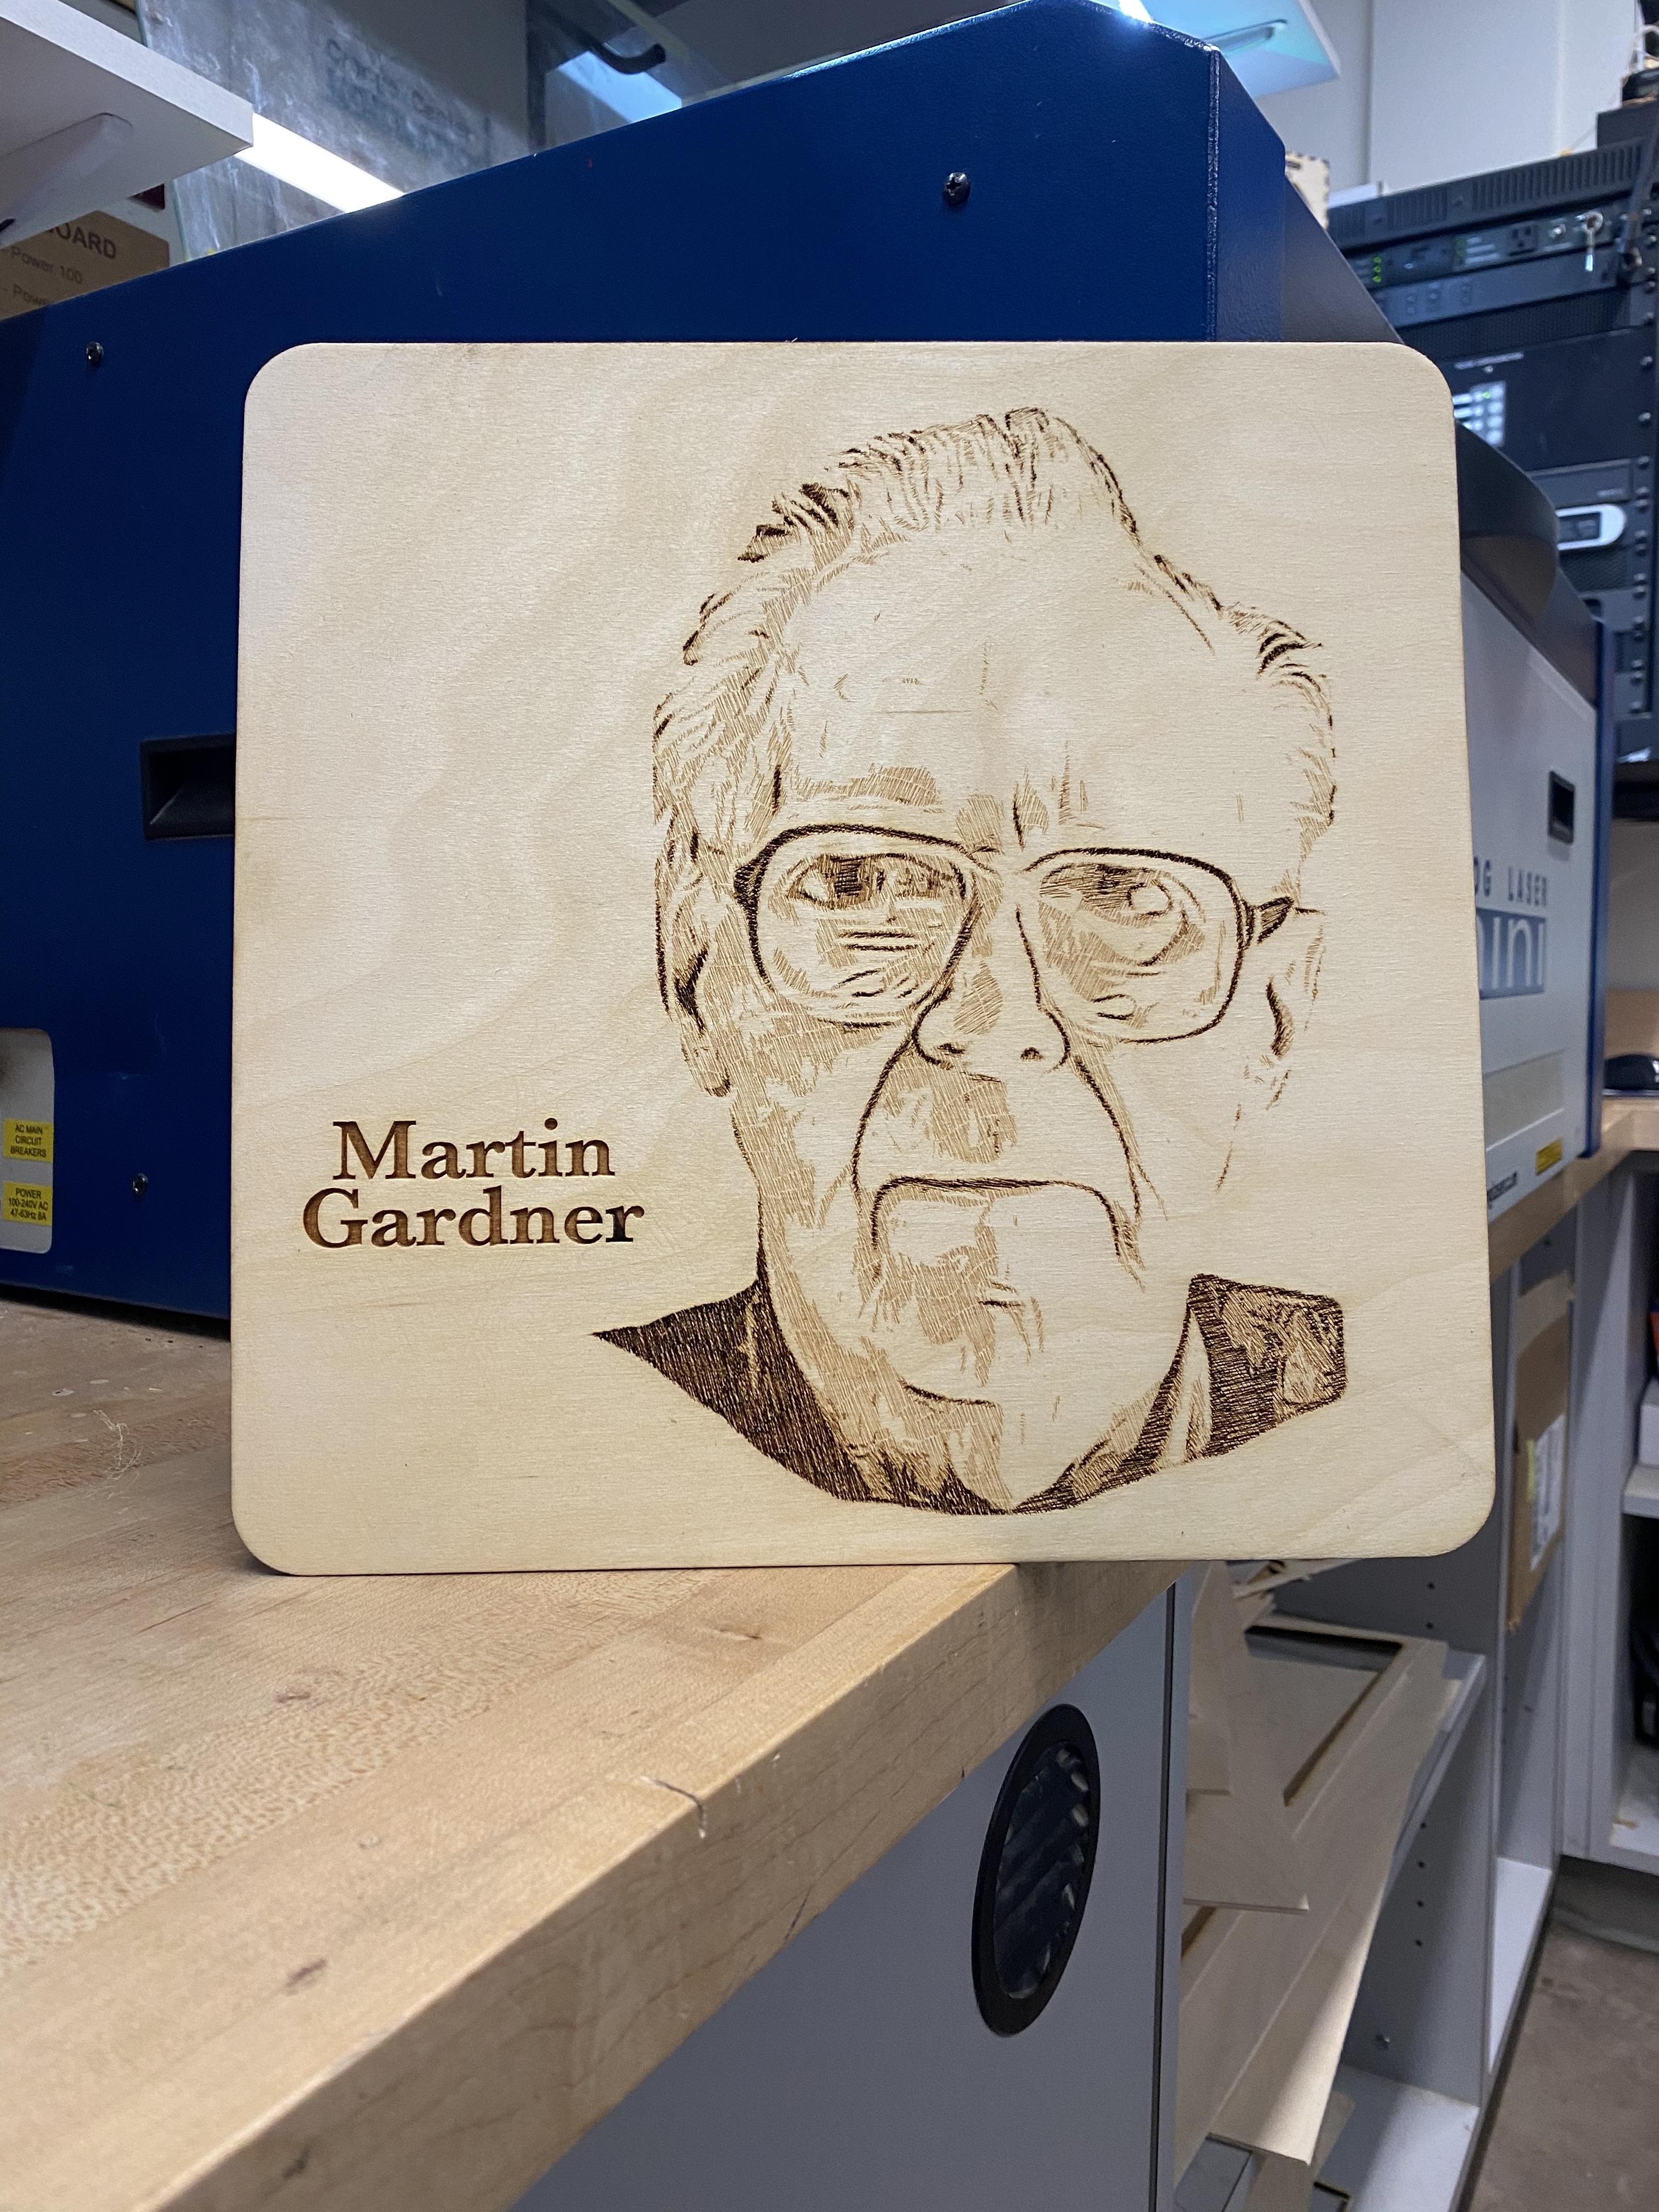
Using a laser cutter to create a portrait from a photo using vector lines (not rastering).
Supplies
1/8" birch plywood (12" x 12")
Laser engraver / cutter
Sandpaper
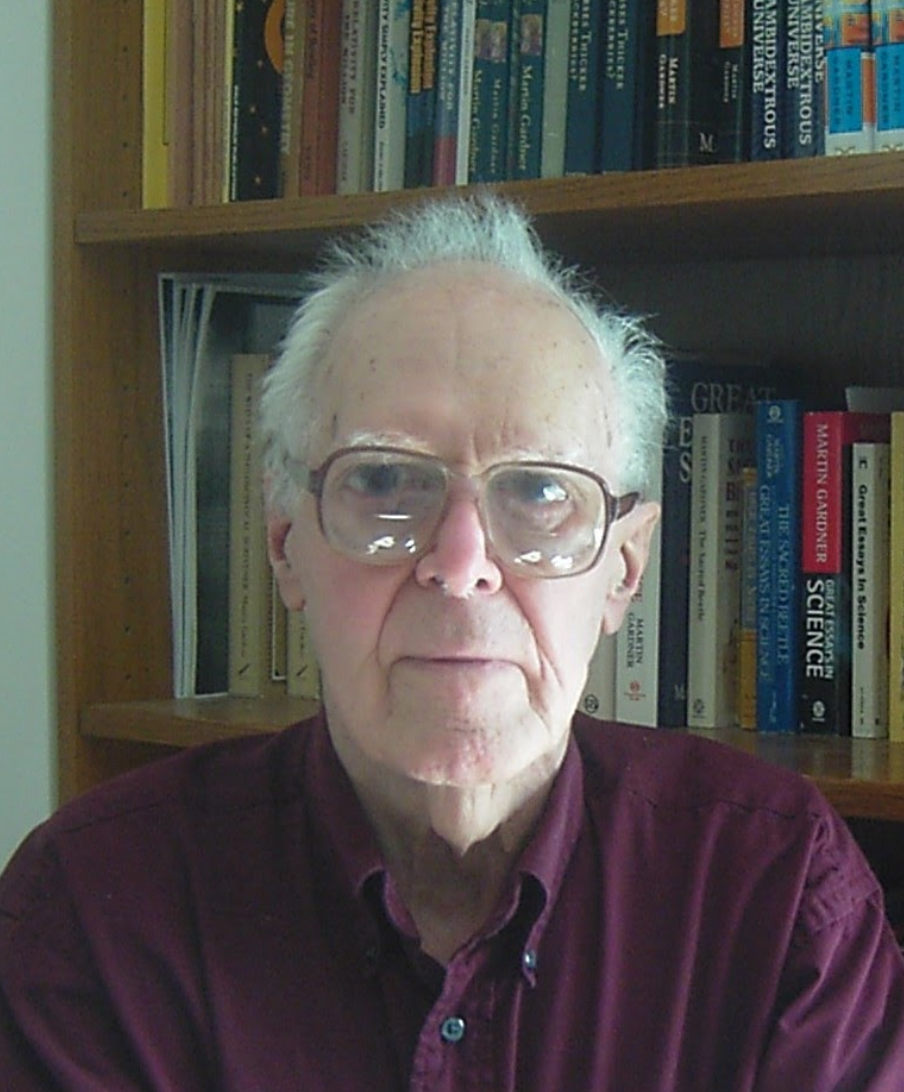
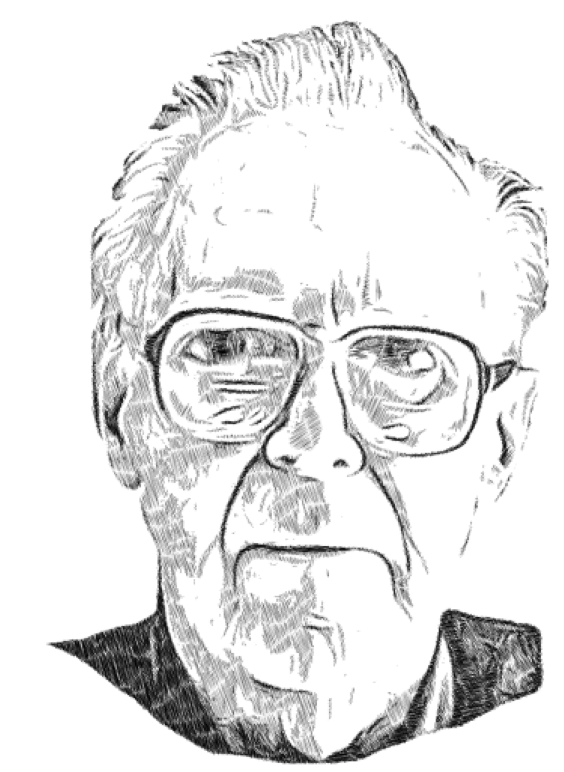
Find a High Quality Photo You Want to Engrave.
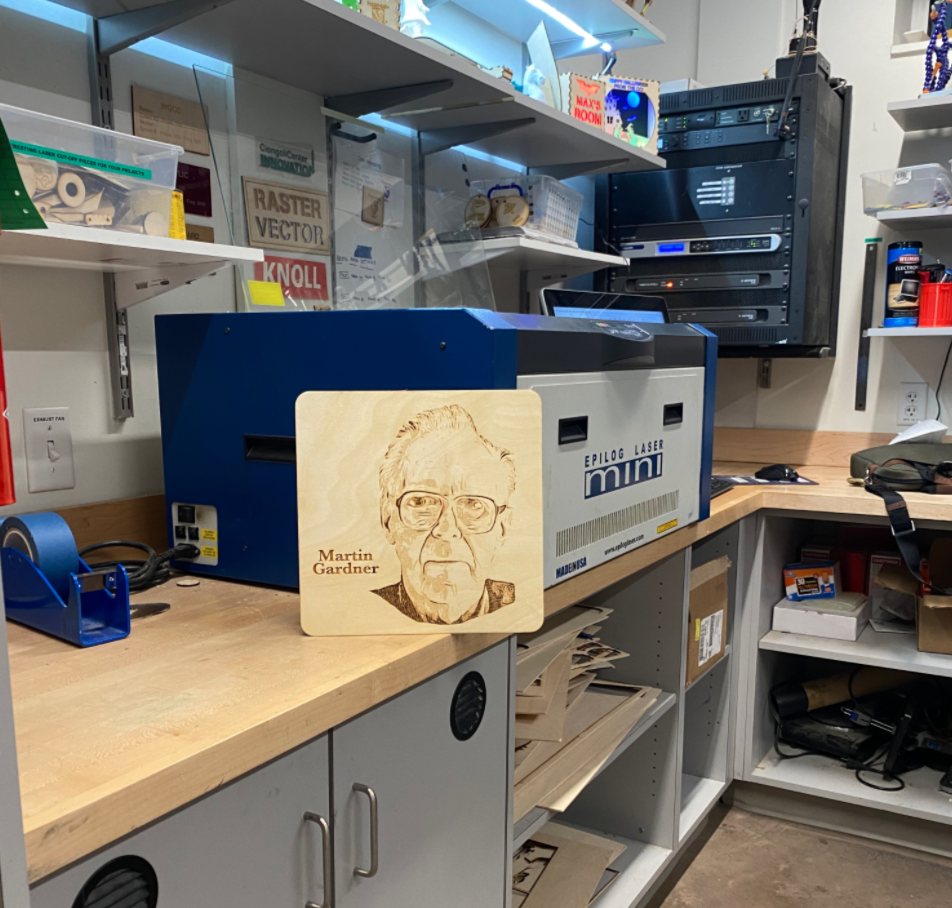
Identify a high quality (> 300 KB) photo (this is a photo of Martin Gardner). I find that portraits with even lighting and good contrast work best.
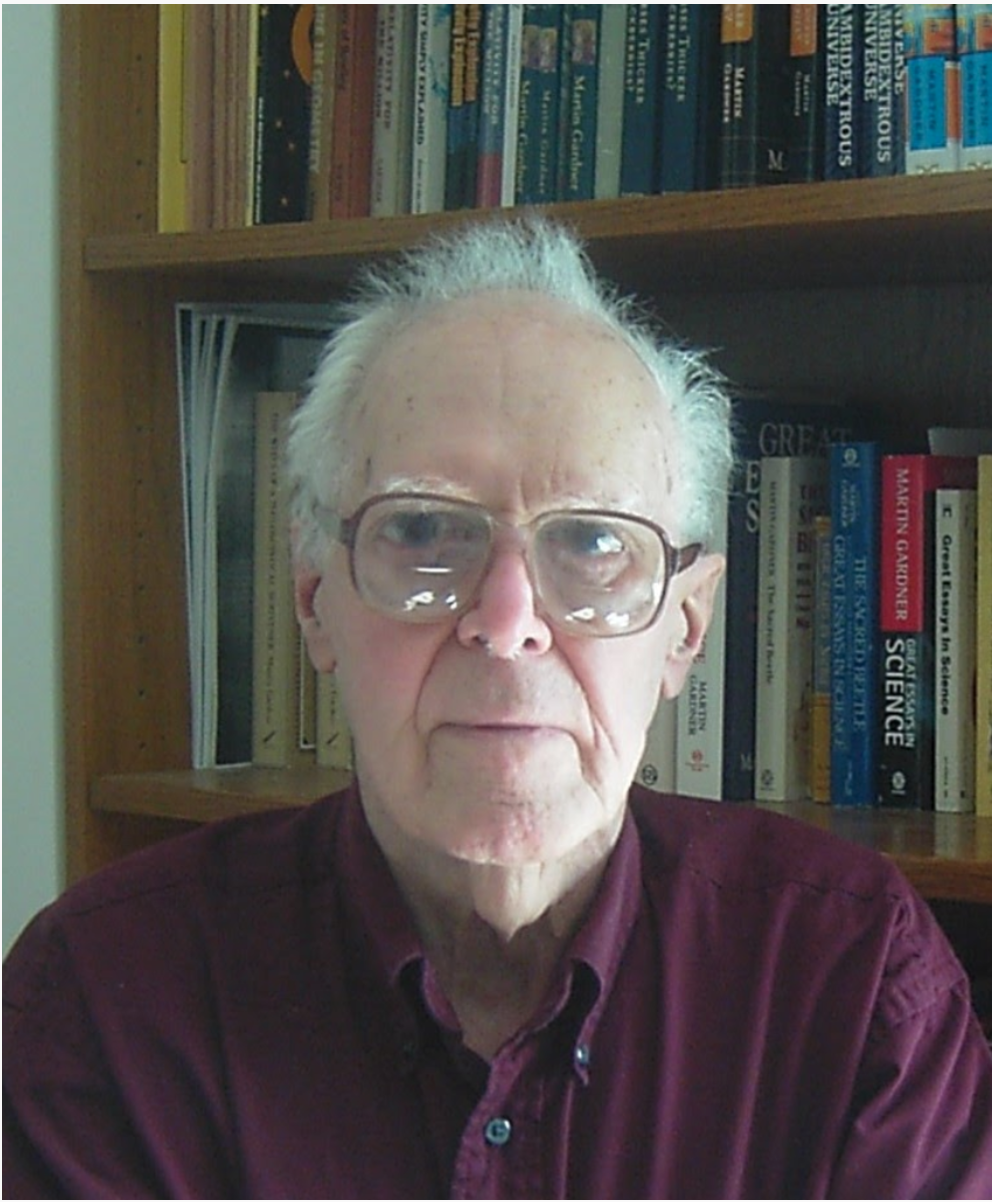
Prep Your Photo With Pixlr
Pixlr - crop, remove background, sharpen, and increase contrast. Brighten until about 1/3 of the picture is “white”. JPG.
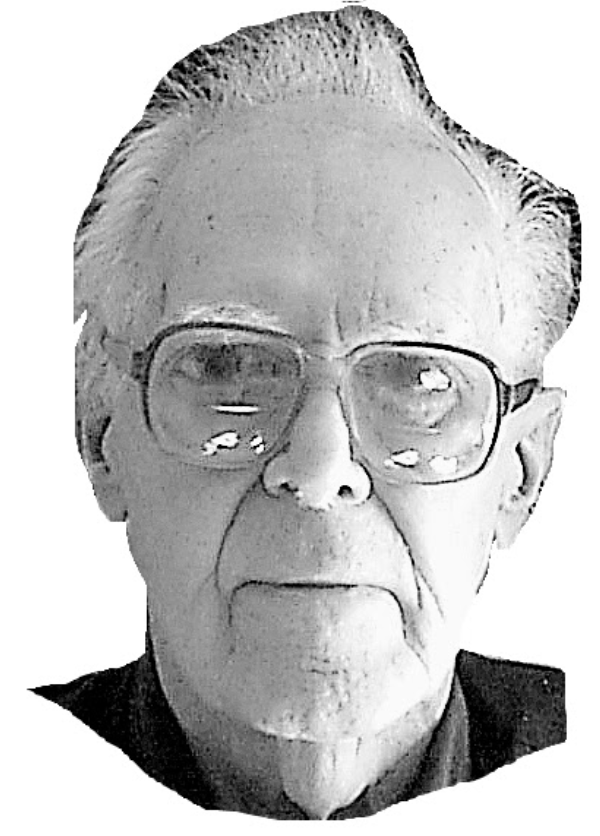
Additonal Prep Using BeFunky

I use BeFunky Digital Art Oil Painting DLX filter to increase contrast and detail. Take screenshot unless you have purchased the software.
Convert to Line Drawing Using Sketchmee
Sketchmee Pro (purchased on MacOS, can also use the iOS iphone app but has less features) - I like using 3 layers with high detail. Save as PDF - transparent. More detail or layers than this will create too many objects for the laser cutter buffer.
Prepare File Using Inkscape
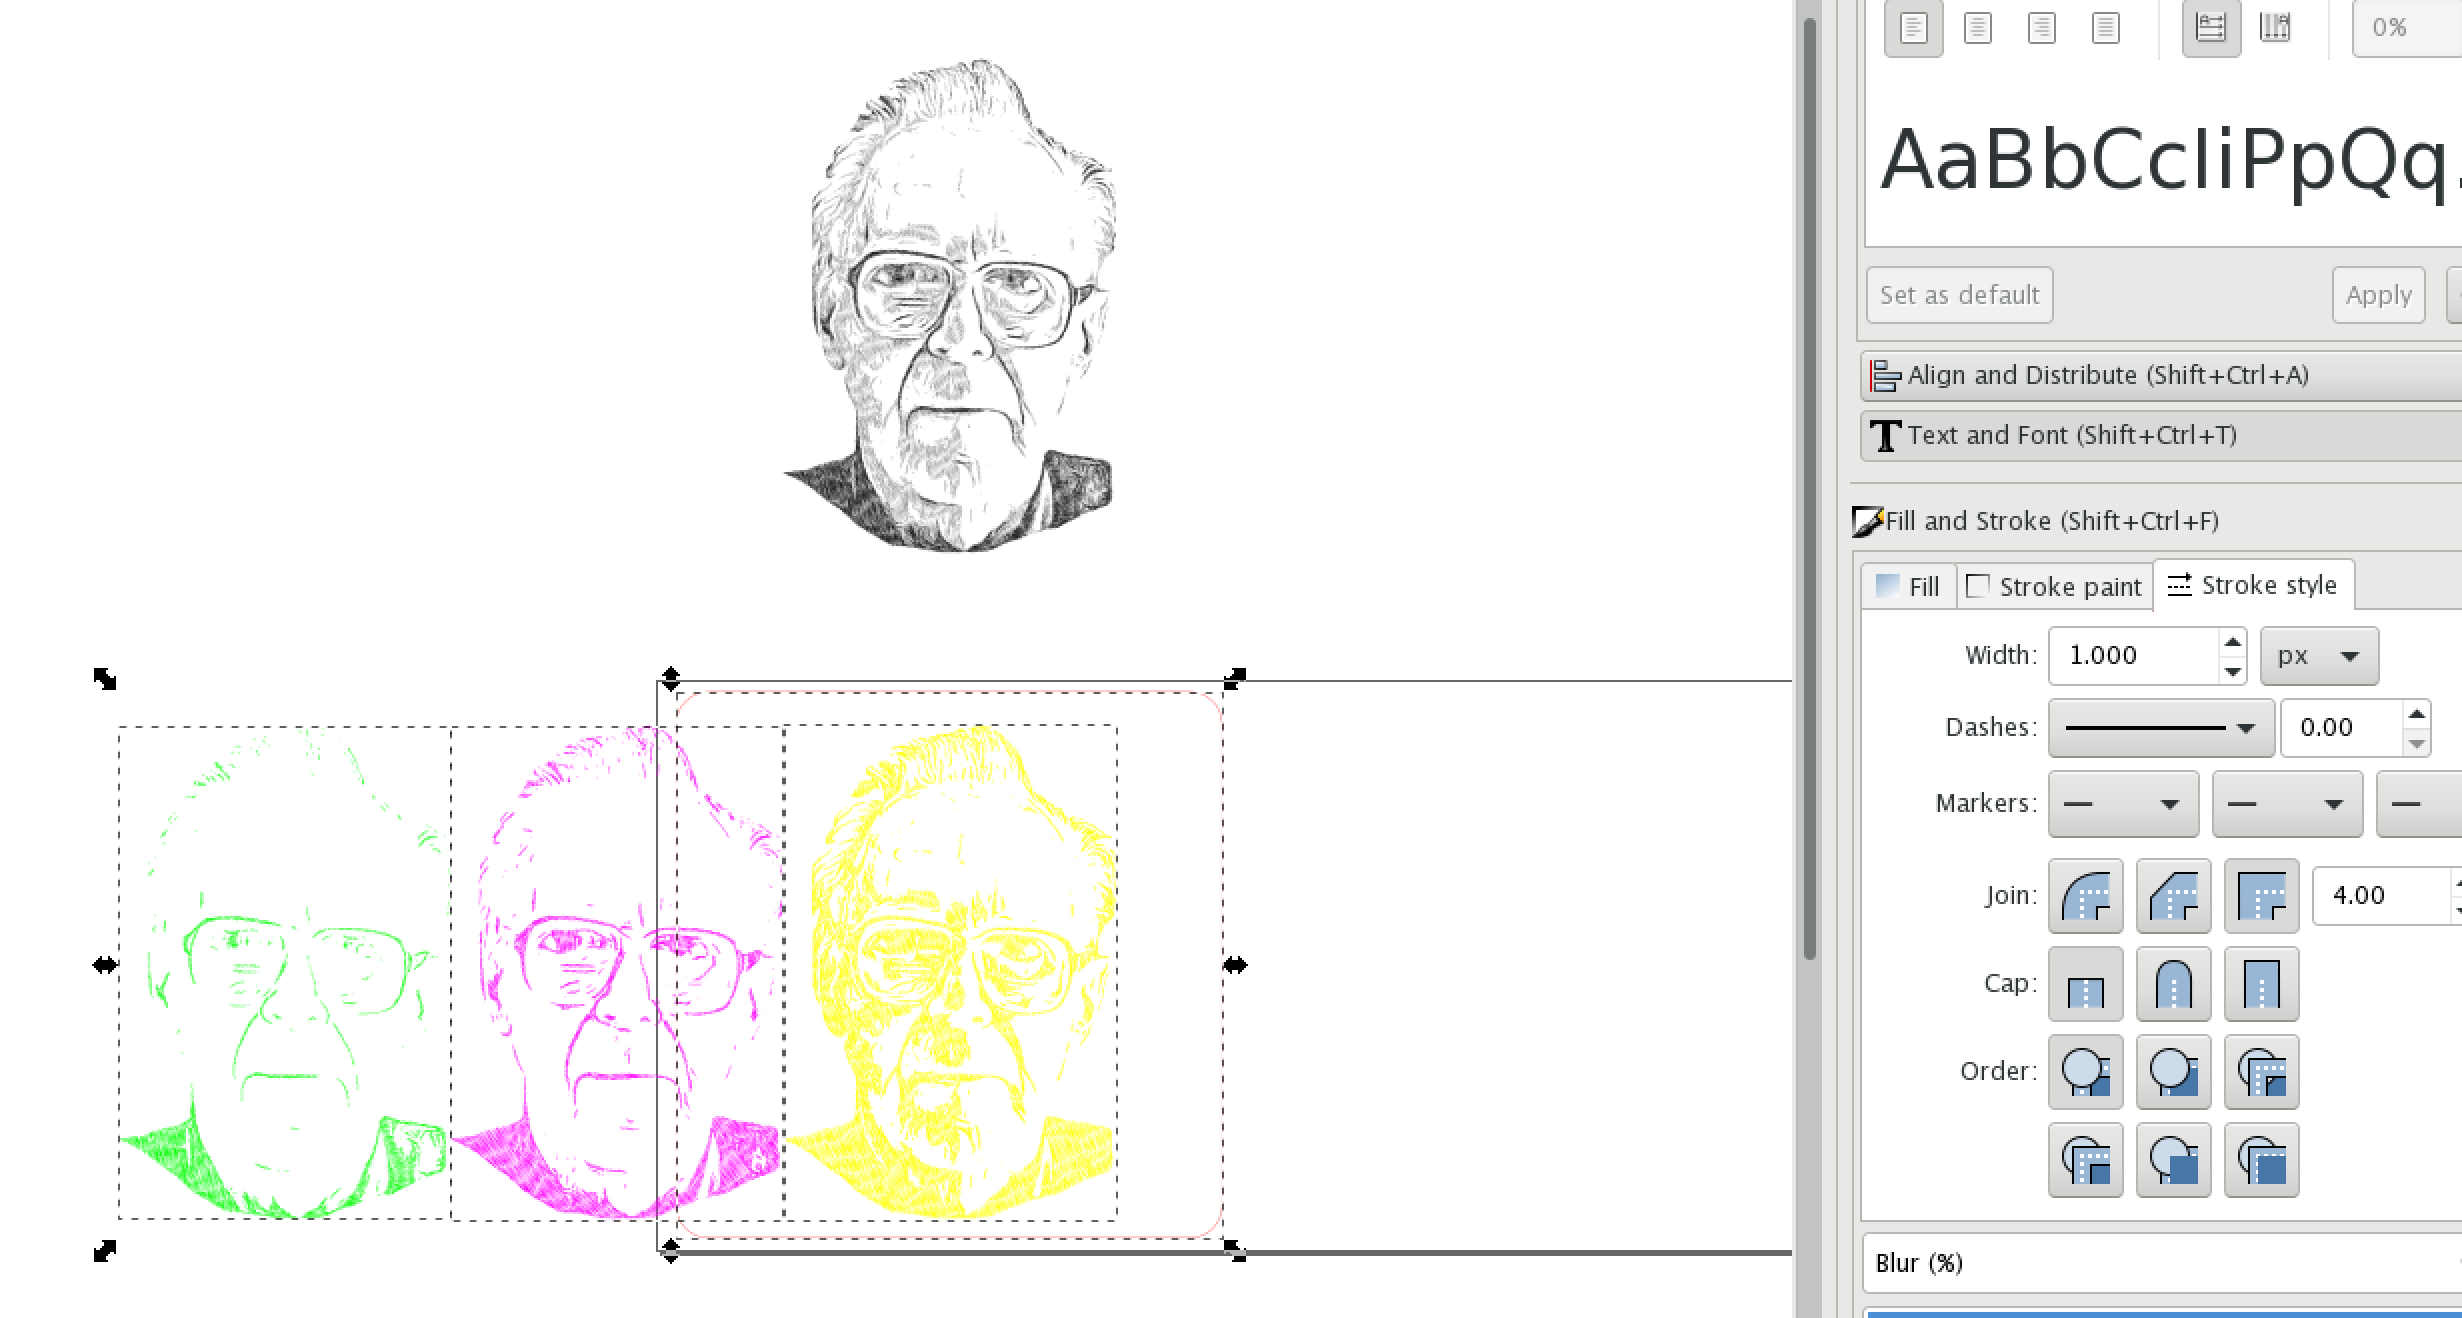
Import PDF to Inkscape. The file from Sketchmee will have layers stacked with the top being most dark. Set Inkscape Edit/Preferences/Behavior/Steps to 8 inches so that “arrow keys” allow easy movement of layers. Color map to 3 colors (I use RGB green/magenta/yellow for dark/medium/light). I also set to uniform line thickness of 1 px.
Print on Laser
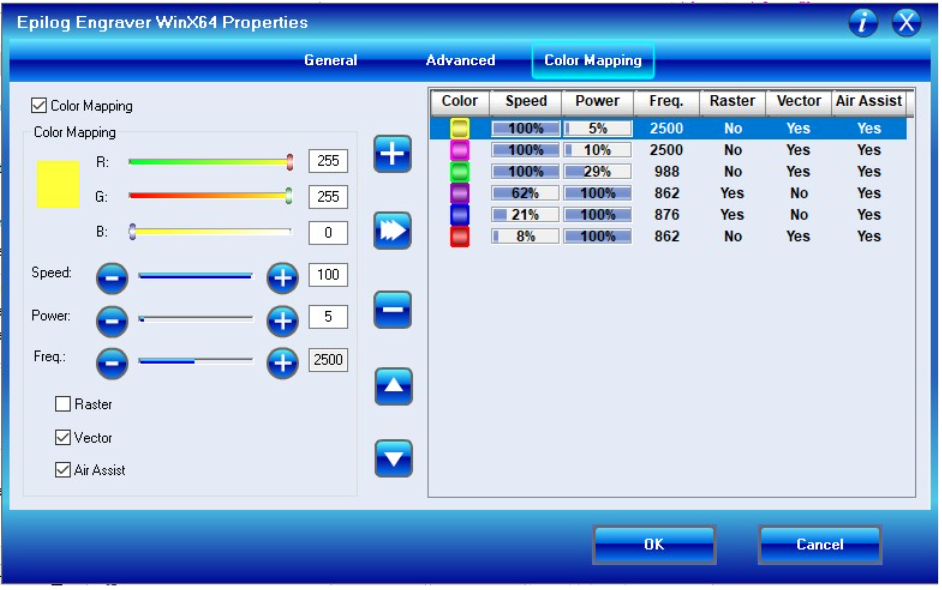

I then save as PDF and import to Corel for laser printing. Convert all lines to “hairline”. Color map settings are below for my laser cutter (Epilog mini 40w). I group objects by color in separate layers and print each layer separately (lower power layers to higher). I recommend this layering step in order to reduce the number of objects sent to the cutter as I have had print jobs error due to memory overload. The total print time for this portrait takes about 70 minutes on this machine.
Sanding to Complete.
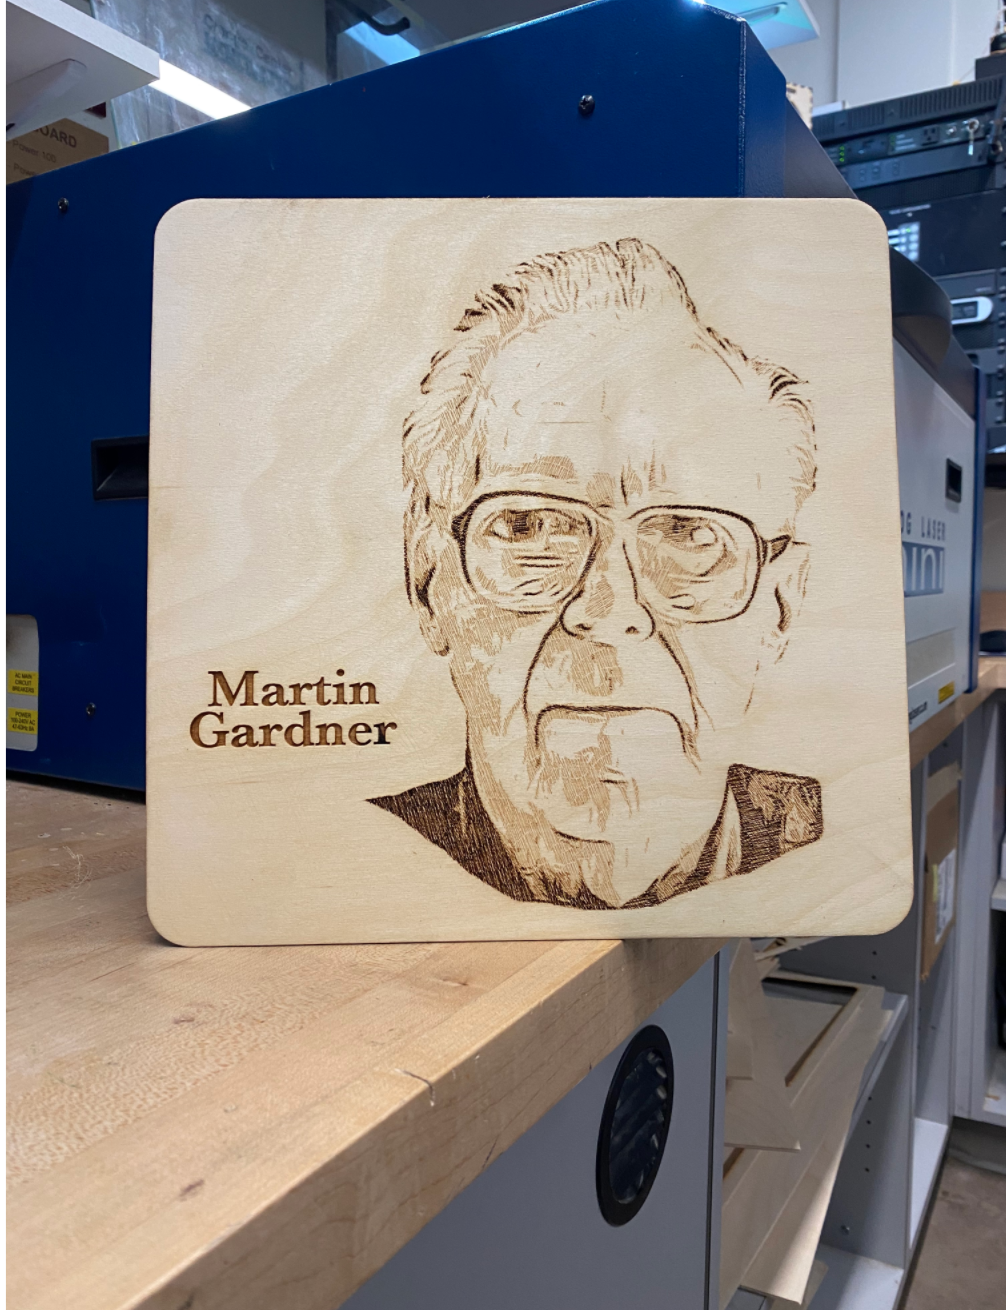
A little bit of sanding to remove burn markings.
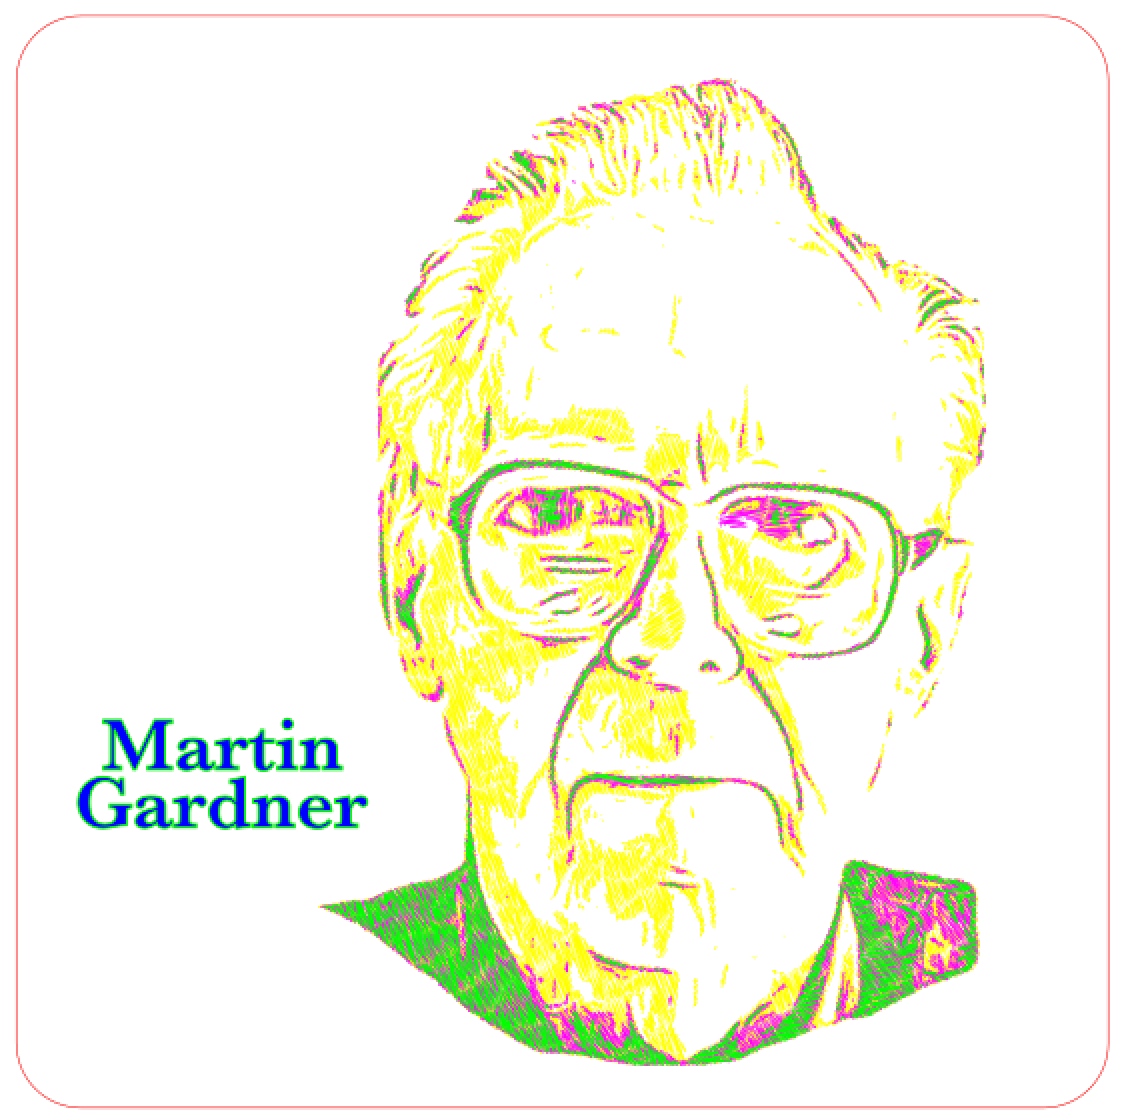
File for Reference
This is svg file after importing from Sketchmee Pro and color mapping.