Person Safety System With Raspberry Pi 2 Model B
by fzyrkowski in Circuits > Raspberry Pi
256 Views, 2 Favorites, 0 Comments
Person Safety System With Raspberry Pi 2 Model B
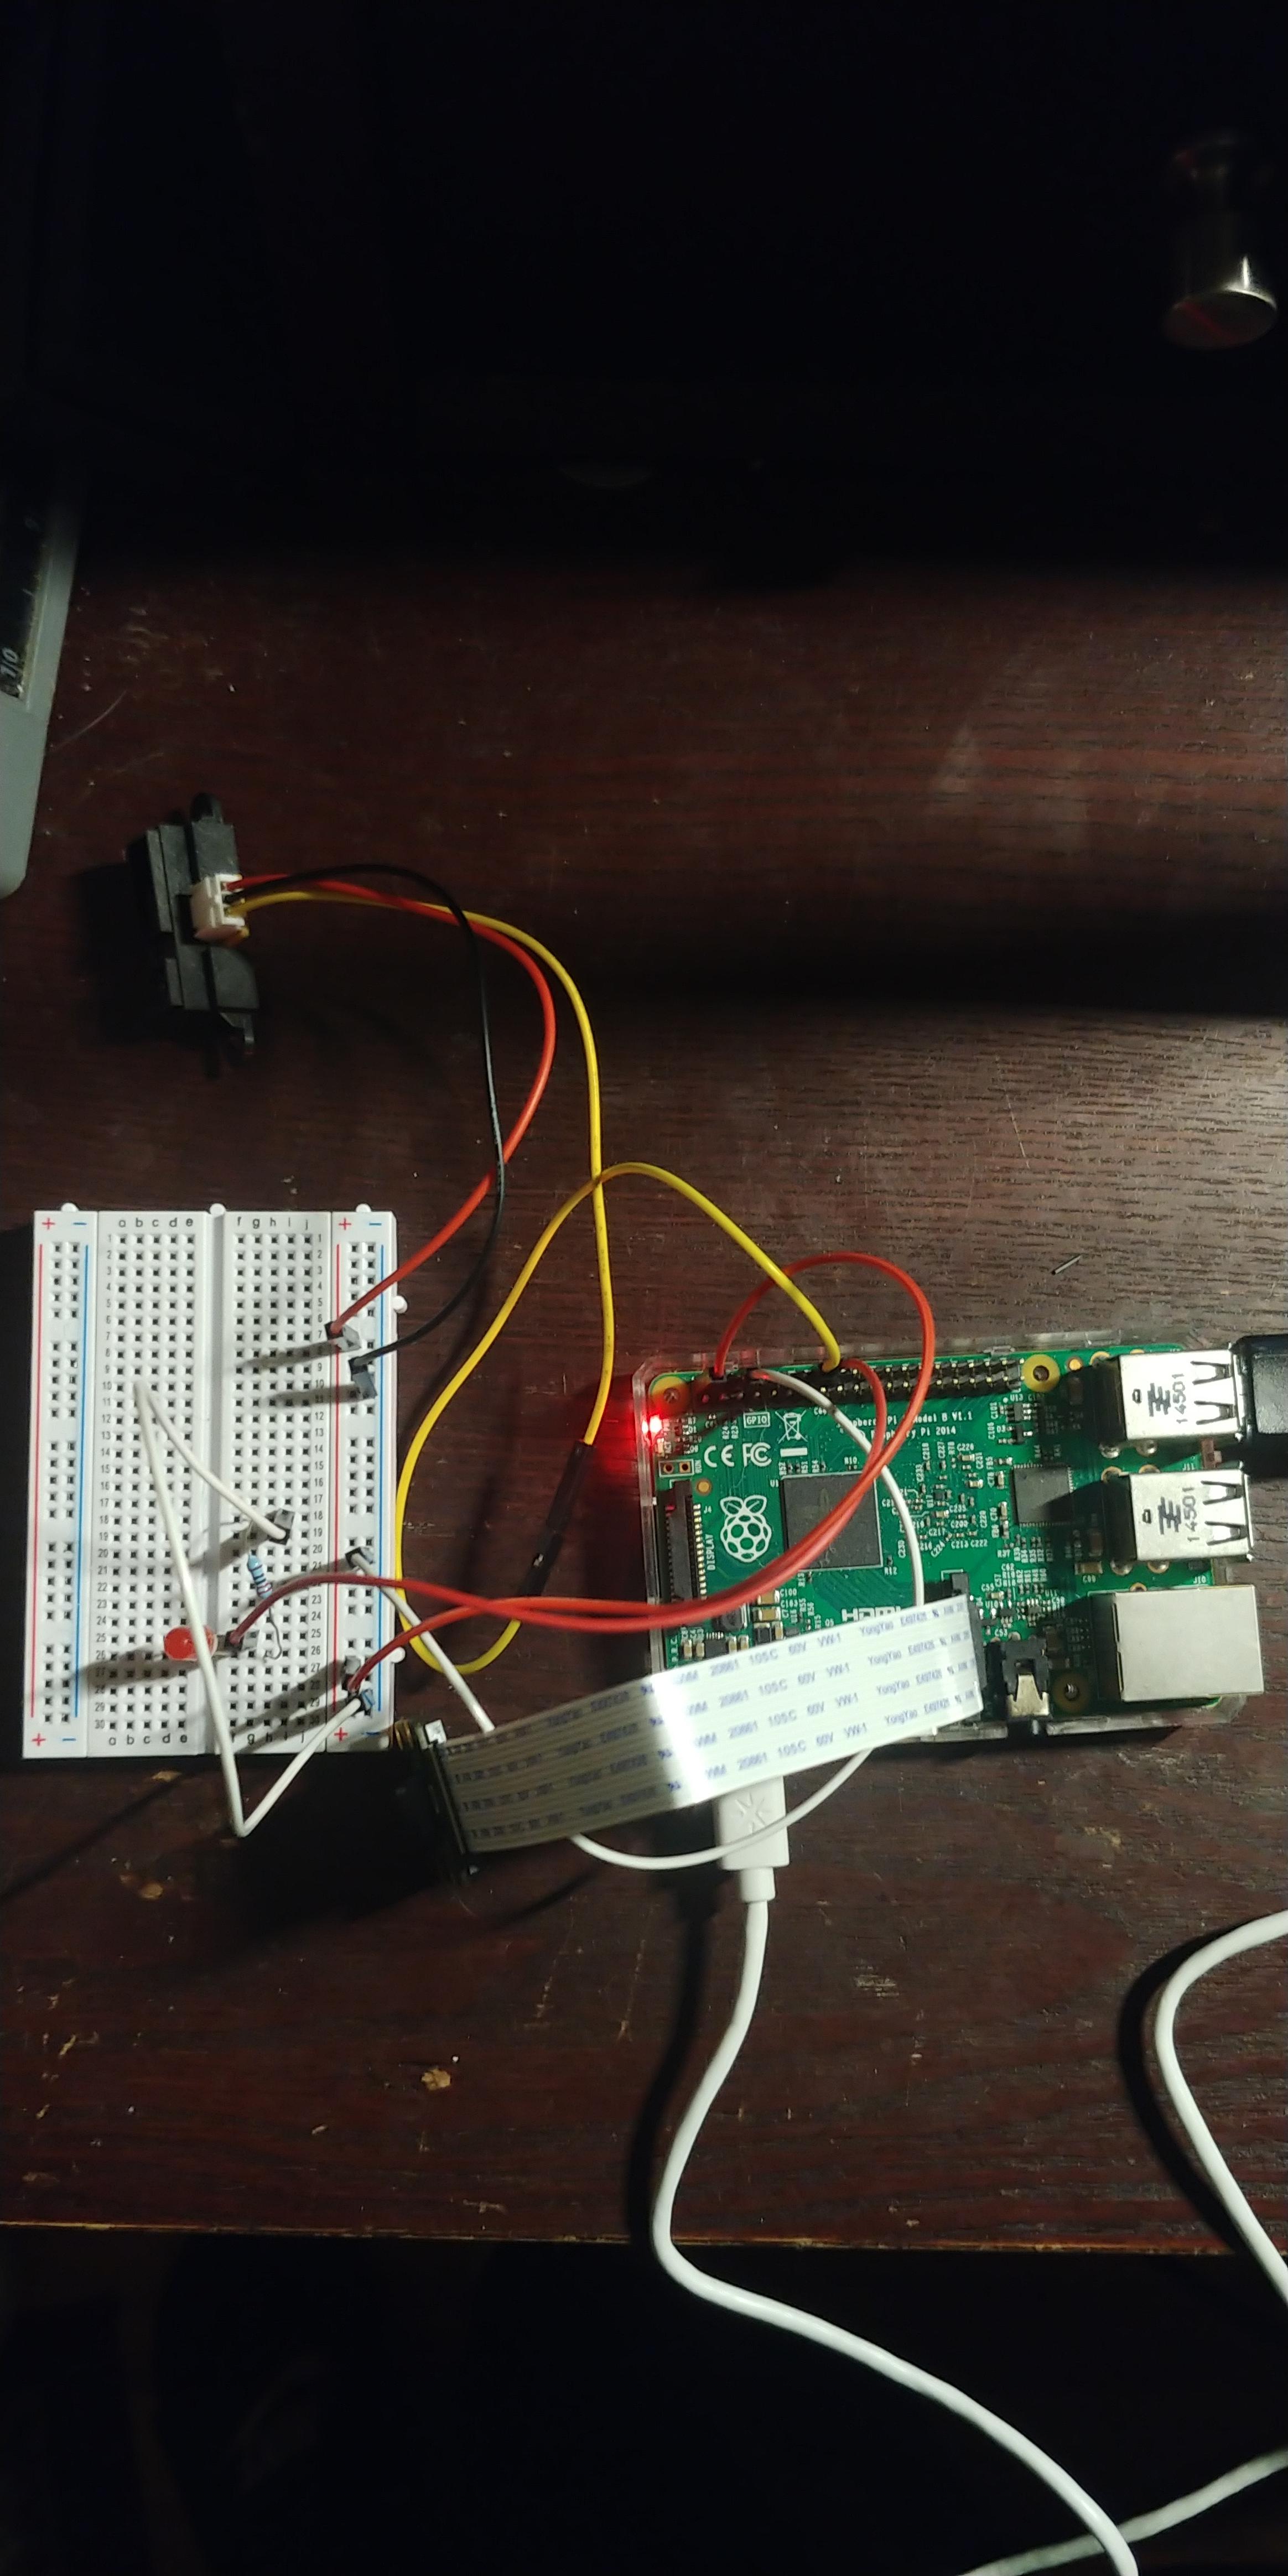

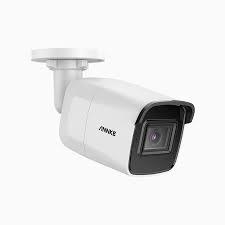
Have you ever worried about the safety of one of your family members? In your workshop, kitchen, or outside?
If you are like me, you worry about your family members engaging in activities that can be dangerous.
My inspiration for creating this detector is my Dad; he frequents the garage with tig-welding or working on one of his machines. About two years ago, he was moving a heavy machine and didn't ask anyone for help; consequently, he ended up misplacing the machine and it fell on his foot, ultimately causing it to be severely broken.
In this Instructable, I am going to show you how you can detect someone's movement and trigger a camera to send an image over your email. This system functions similarly to a security camera but without high expenses and possible hacking.
Supplies
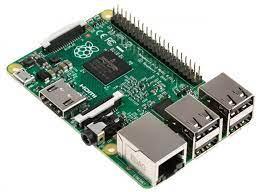


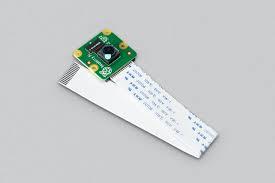


Now, getting the correct supplies is important to ensure that you get the correct results and don't have to deviate from the tutorial. The specific supplies used are provided below, along with links to some sellers:
HDMI Cable(if not running headlessly)
Keyboard and Mouse(if not running headlessly)
Wires
Project Motivation
Setting up your Pi to take an image and send it to your email can be an exciting task; however, there are foreseen technical difficulties. Understanding the behavior of the Pi and mastering the Linux terminal takes time.
To minimize the amount of research that you may need to do if problems arise, get familiar with the Linux terminal-a text-based interface to control your computer's files- and the files that need to be modified. Below is a link to a resource for mastering the Linux terminal.
https://ubuntu.com/tutorials/command-line-for-beginners#1-overview
Besides getting familiar with the terminal, the first step in this development process is identifying your needs.
- Where will I use this setup?
Before beginning to work on your project, it is important that you identify where you will use the project. Since the IR proximity sensor has a judgment distance of 20cm and the wireless adapter is able to retain a connection within 150 feet of your router; furthermore, the IR proximity sensor should be in a location that is non-angled and allows for the beam to not break.
- What or who does the product detect?
Anyone that you are worried about their safety, more specifically people that engage in potentially dangerous hobbies or jobs.
This product will detect anyone that breaks the IR beam, subsequently taking an image and sending it via email to the recipient.
- To which purpose has this product been developed?
Security systems are expensive and are often unable to be modified due to their protection features. Not only is this product cheaper, but it allows you to get experience working with the Raspberry Pi.
Objective Needs
- Performance:
The device should be able to detect when the beam is broken, take a picture, and send it via email.
- Ergonomy:
Start-up and use should be as convenient as possible. The device should be able to be used by simply plugging it into power and already having code deployed. There should be little to no human interaction after setup.
- Safety:
The Raspberry Pi 2 has a maximum rating of 5V at 1 Amp. Be mindful when using it, as proper use can result in injury.
Subjective Needs
- Aesthetic:
You can customize the mounting of the device and the wiring to make it more appealing.
Setting Up the Raspberry Pi 2
.png)



You can install the OS on the Pi even without a display and an extra keyboard and mouse but we are going to use them anyway because it’s easier this way and most of the stuff required is most probably lying around your house. (NOTE: I used Raspbian Jessie lite version released on 2017-07-05 because the Wireless Driver is only compatible with OS's from 2.6 to 4.9)
Besides the Raspberry pi, you'll also need:
Ø A MicroSD Card: The minimum requirement is 4GB class 4 (higher the class higher the speed), the class of the card is written in a small circle on the card. Using a higher class card is recommended. I will be using Sandisk 4GB MicroSDHC Memory Card with SD Adapter. The 'HC' in SDHC means that the data on the card is written in random memory blocks (this makes them last longer). Getting this type of card is a good idea for the Raspberry.
Ø A keyboard and Mouse: Most of the wired and wireless (the ones with the wireless dongle not the Bluetooth ones) keyboard and mouse work fine with the pi. I will be using my laptop and a wired HP mouse.
Ø A Display and Respective Cable: Any Display with HDMI or RCA (the ones with the red, yellow and white cable) input work nicely with the pi. If you wish to use a display with VGA input, then you can use a HDMI to VGA converter cable. This tutorial is catered towards people that control their Pi headlessly. It is easier to access the device IP and debug without an extra display with a HDMI cable; however, if you are using an external display, then you just plug the HDMI cable into your computer and the Raspberry Pi's HDMI port.
Ø A 5V Power Adapter: 600mA is the minimum requirement but using a 1 to 1.5 Ampere power adapter is recommended.
Downloading Raspbian Jessie Lite
- Navigate to Raspbian Jessie Lite
- Take your MicroSD card that is plugged into your MicroSD card reader and insert it into your computer
- Click on the zip and begin the installation process
Interfacing your Pi(Though the Raspberry Pi is called a computer, it itself can’t run. It needs a couple of IO devices.)
1. Insert the MicroSD card (now with Raspbian written on it) into the card slot at the bottom of the Pi.
2. Plug in your USB keyboard and mouse or the wireless receiver for your wireless keyboard and mouse.
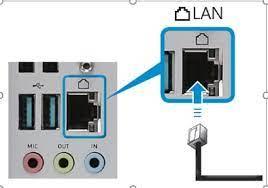
3. Plug in the ethernet cable into the Ethernet port.
4. Plug in your HDMI cable or RCA cable for analog display in the 3.5 mm jack.
5. Plug in the MicroUSB cable from the power adapter. The Pi doesn’t have a power switch, it will turn on as soon as you plug in power.
Once booted up, open up the Linux terminal and type sudo raspi-config
- The configuration tab-Raspberry Pi Software Configuration Tool (raspi-config) should open
- Navigate down to Localisation Options and correct the time, time zone, and date to avoid future complications.
- Next, access Control Panel on your computer and ensure that the Pi is able to access the internet through the ethernet cable by going to Network and Internet and click Network and Sharing Center.
- Right click on Ethernet and choose Properties.
- Select Internet Protocol Version 4 and then click Properties
- Set up the IP to use, then click OK to save your settings.
Operating your Pi Headlessly(Optional)
- Open up the Linux terminal and type sudo raspi-config
- The configuration tab-Raspberry Pi Software Configuration Tool (raspi-config) should open
- Navigate down to Interfacing Options and locate SSH
- Enabling SSH will allow you to use your Pi without a plugged in monitor, keyboard, and mouse
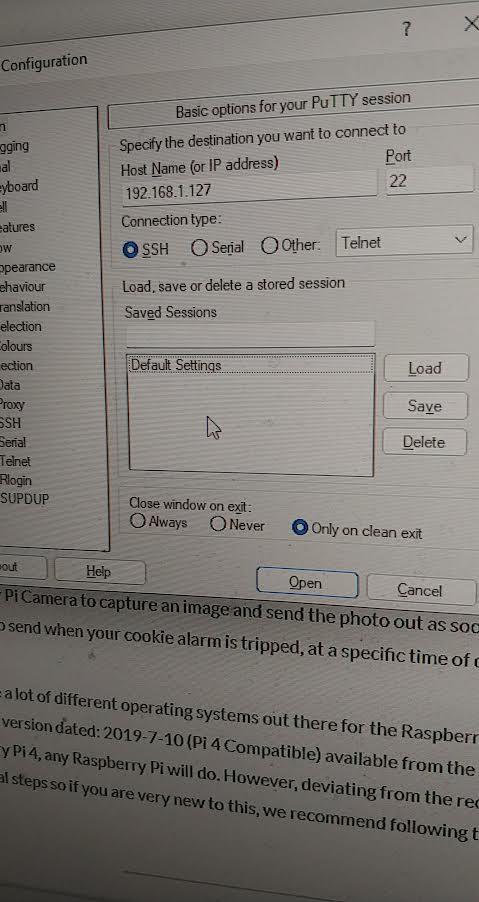
- Download PuTTY- a remote SSH client that allows us to access Raspberry Pi´s command prompt.
- Download Advanced IP Scanner-Scans your home network and lists all connected devices and their local IP addresses
- Locate the IP Address of the Pi and enter it under Host Name (or IP address) in PuTTY(Keep the Connection type as SSH and no not change anything)(Note: Take a picture of all the connections so finding the wireless adapter one won't be difficult)
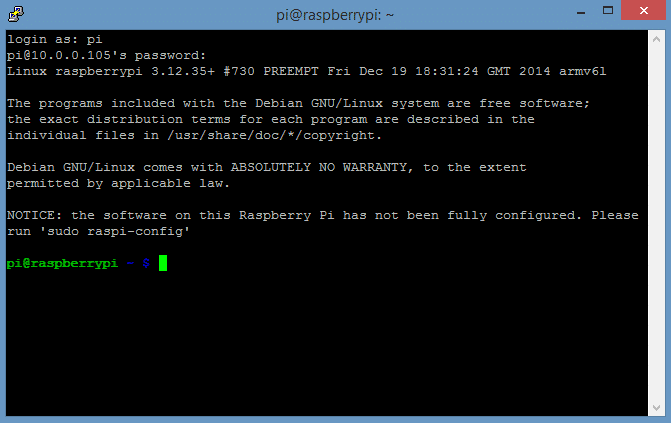
- Once the connection is set, you will be prompted for your username and password. Once entered, you will now be able to access your PI.
Configuring the Wifi Dongle

Installing the Driver
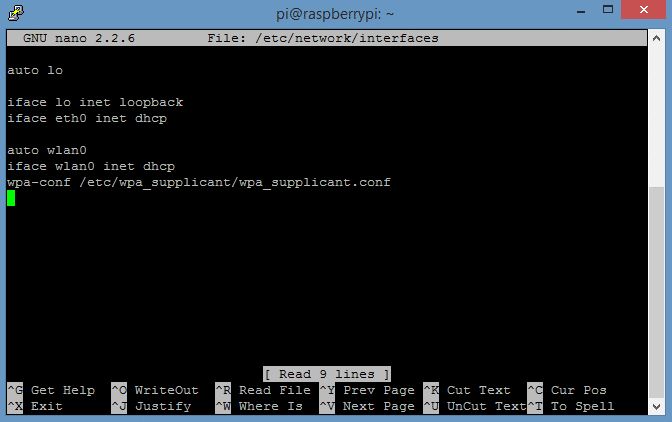
- Once in PuTTY(Previous step), access the command prompt to edit the file sudo nano /etc/network/interfaces.
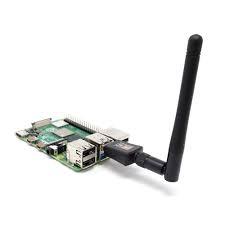
- Plug in your Wireless Adapter(TP Link 823N)
- Type sudo cd mkdir to create a new directory where you can store the driver that you will install.
- Go to the command prompt and type sudo wget http://www.fars-robotics.net/install-wifi -O /usr/bin/install-wifi. This link accesses a page with the different drivers for a wireless adapter. If you are correctly configured to Wifi, it will be able to get the correct link.
- Type sudo chmod +x /usr/bin/install-wifi
- After you enter both commands, type sudo install-wifi -h to show details on using it
- Once the driver is installed, your Pi will know how to use your wireless adapter.
Editing the Network Interfaces Files
- Type sudo nano /etc/network/interfaces in the command prompt. Replace the code with the following:
auto lo
iface lo inet loopback
iface eth0 inet dhcp
auto wlan0
iface wlan0 inet dhcp
Editing the WPA_SUPPLICANT.CONF FILE
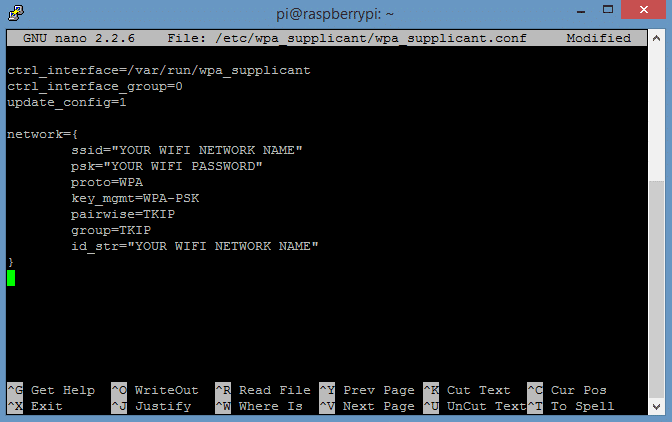
- Edit the WPA_SUPPLICANT.CONF FILE. Type sudo nano /etc/wpa_supplicant/wpa_supplicant.conf in the command prompt. Replace the code with:
ctrl_interface=/var/run/wpa_supplicant
ctrl_interface_group=0
update_config=1
network={
ssid="YOUR WIFI NETWORK NAME"
psk="YOUR WIFI PASSWORD"
proto=WPA
key_mgmt=WPA-PSK
pairwise=TKIP
group=TKIP
id_str="YOUR WIFI NETWORK NAME"
}
Finding the New IP Address
Navigate to the Advanced IP Scanner to find the new IP address of your scanner. Reference the picture you took earlier to make your life less miserable. Once you get this address, SSH with PuTTy.
Test the WIFI Connection
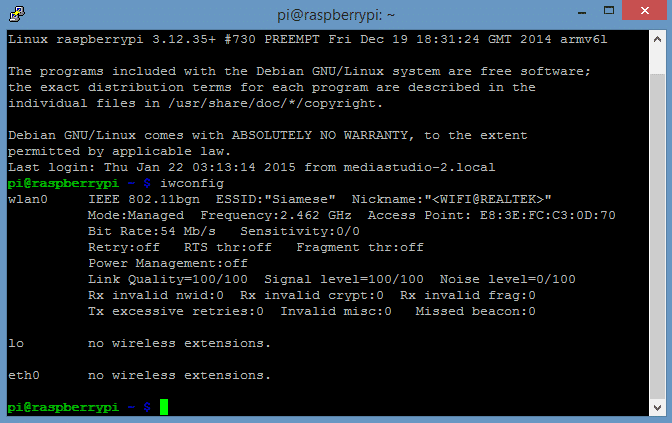
Type iwconfig in the command prompt. Your WIFI Network should appear under ESSID: "YOUR WIFI NETWORK NAME". If you are unsure of your connection, ping google by typing sudo ping www.google.com in the command prompt.
Wiring the Components

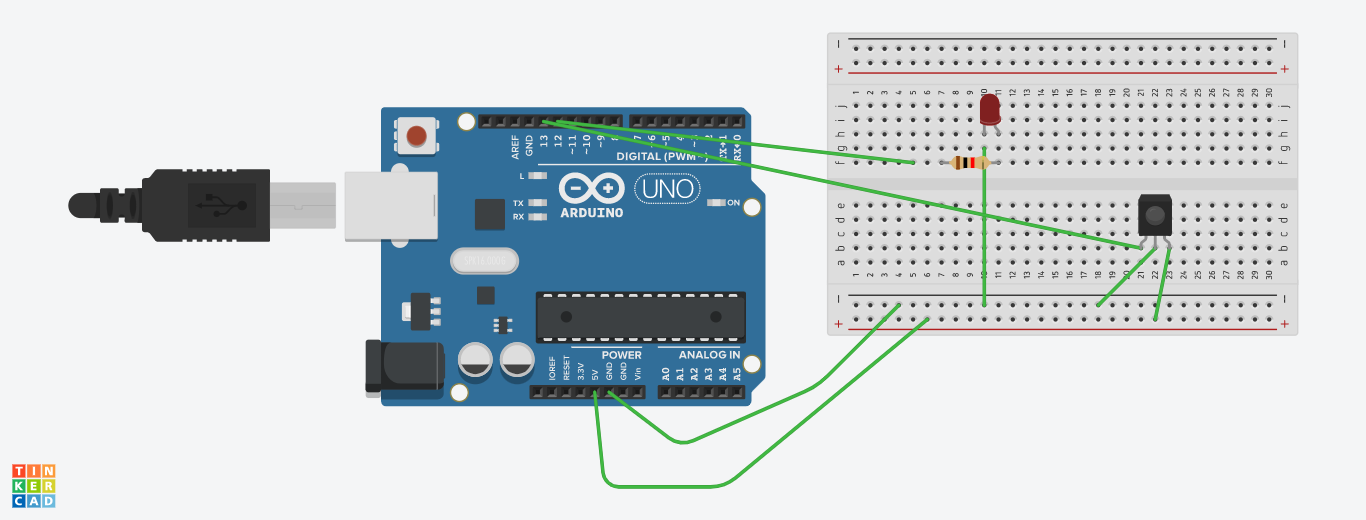
Even though this is Arduino, the concept is the same. Wire the IR sensor to GND, 5V, and Digital. Wire the led to ground and digital. Plug in the camera to the CSI port.
Code for the IR Proximity Sensor, Led, and Camera
Copy and paste the code below in any IDE with Python of your choice:
import smtplib
import RPi.GPIO as GPIO
import time
from time import sleep

from picamera import PiCamera
from email.mime.multipart import MIMEMultipart
from email.mime.text import MIMEText
from email.mime.image import MIMEImage

camera = PiCamera()

#Component Variables
sensor = 23
led = 24

#Email Variables
SMTP_SERVER = 'smtp.gmail.com' #Email Server (don't change!)
SMTP_PORT = 587 #Server Port (don't change!)
GMAIL_USERNAME = 'youremail@email.com' #change this to match your gmail account
GMAIL_PASSWORD = 'yourPassword'  #change this to match your gmail app-password

#Set GPIO pins to use BCM pin numbers
GPIO.setmode(GPIO.BCM)

#Setting up the sensor and led
GPIO.setup(sensor, GPIO.IN)
GPIO.setup(led, GPIO.OUT)
GPIO.output(led, GPIO.LOW)


class Emailer:
    def sendmail(self, recipient, subject, content):

        #Create Headers
        headers = ["From: " + GMAIL_USERNAME, "Subject: " + subject, "To: " + recipient,
                   "MIME-Version: 1.0", "Content-Type: text/html"]
        headers = "\r\n".join(headers)

        #Connect to Gmail Server
        session = smtplib.SMTP(SMTP_SERVER, SMTP_PORT)
        session.ehlo()
        session.starttls()
        session.ehlo()

        #Login to Gmail
        session.login(GMAIL_USERNAME, GMAIL_PASSWORD)

        #Send Email & Exit
        session.sendmail(GMAIL_USERNAME, recipient, headers + "\r\n\r\n" + content)
        session.quit

sender = Emailer()

while True:
    if GPIO.input(sensor)
        print("father detected")
        GPIO.output(led, GPIO.HIGH)
        sleep(3)
        image = '/home/faithzyr/Desktop/father.jpg'
        sendTo = 'anotheremail@email.com'
        emailSubject = "Father Detected in Garage"
        emailContent = "The beam has been broken at: " + time.ctime()
        sender.sendmail(sendTo, emailSubject, emailContent)
        print("Email Sent")

    time.sleep(0.1)
Link to working project: https://youtube.com/shorts/sNp7fu7aeC8?feature=share