Password Vault V2.0
by Northstrix in Circuits > Microcontrollers
2985 Views, 32 Favorites, 0 Comments
Password Vault V2.0
A while ago, I made the first version of the password vault. Its security relied on four RFID cards and my modification of a relatively old encryption algorithm. This time I improved the encryption algorithm even further and also made the device cheaper.
Supplies
- ESP8266 x1
- 1.77 Inch TFT LCD with ST7735 x1
Encryption Algorithm
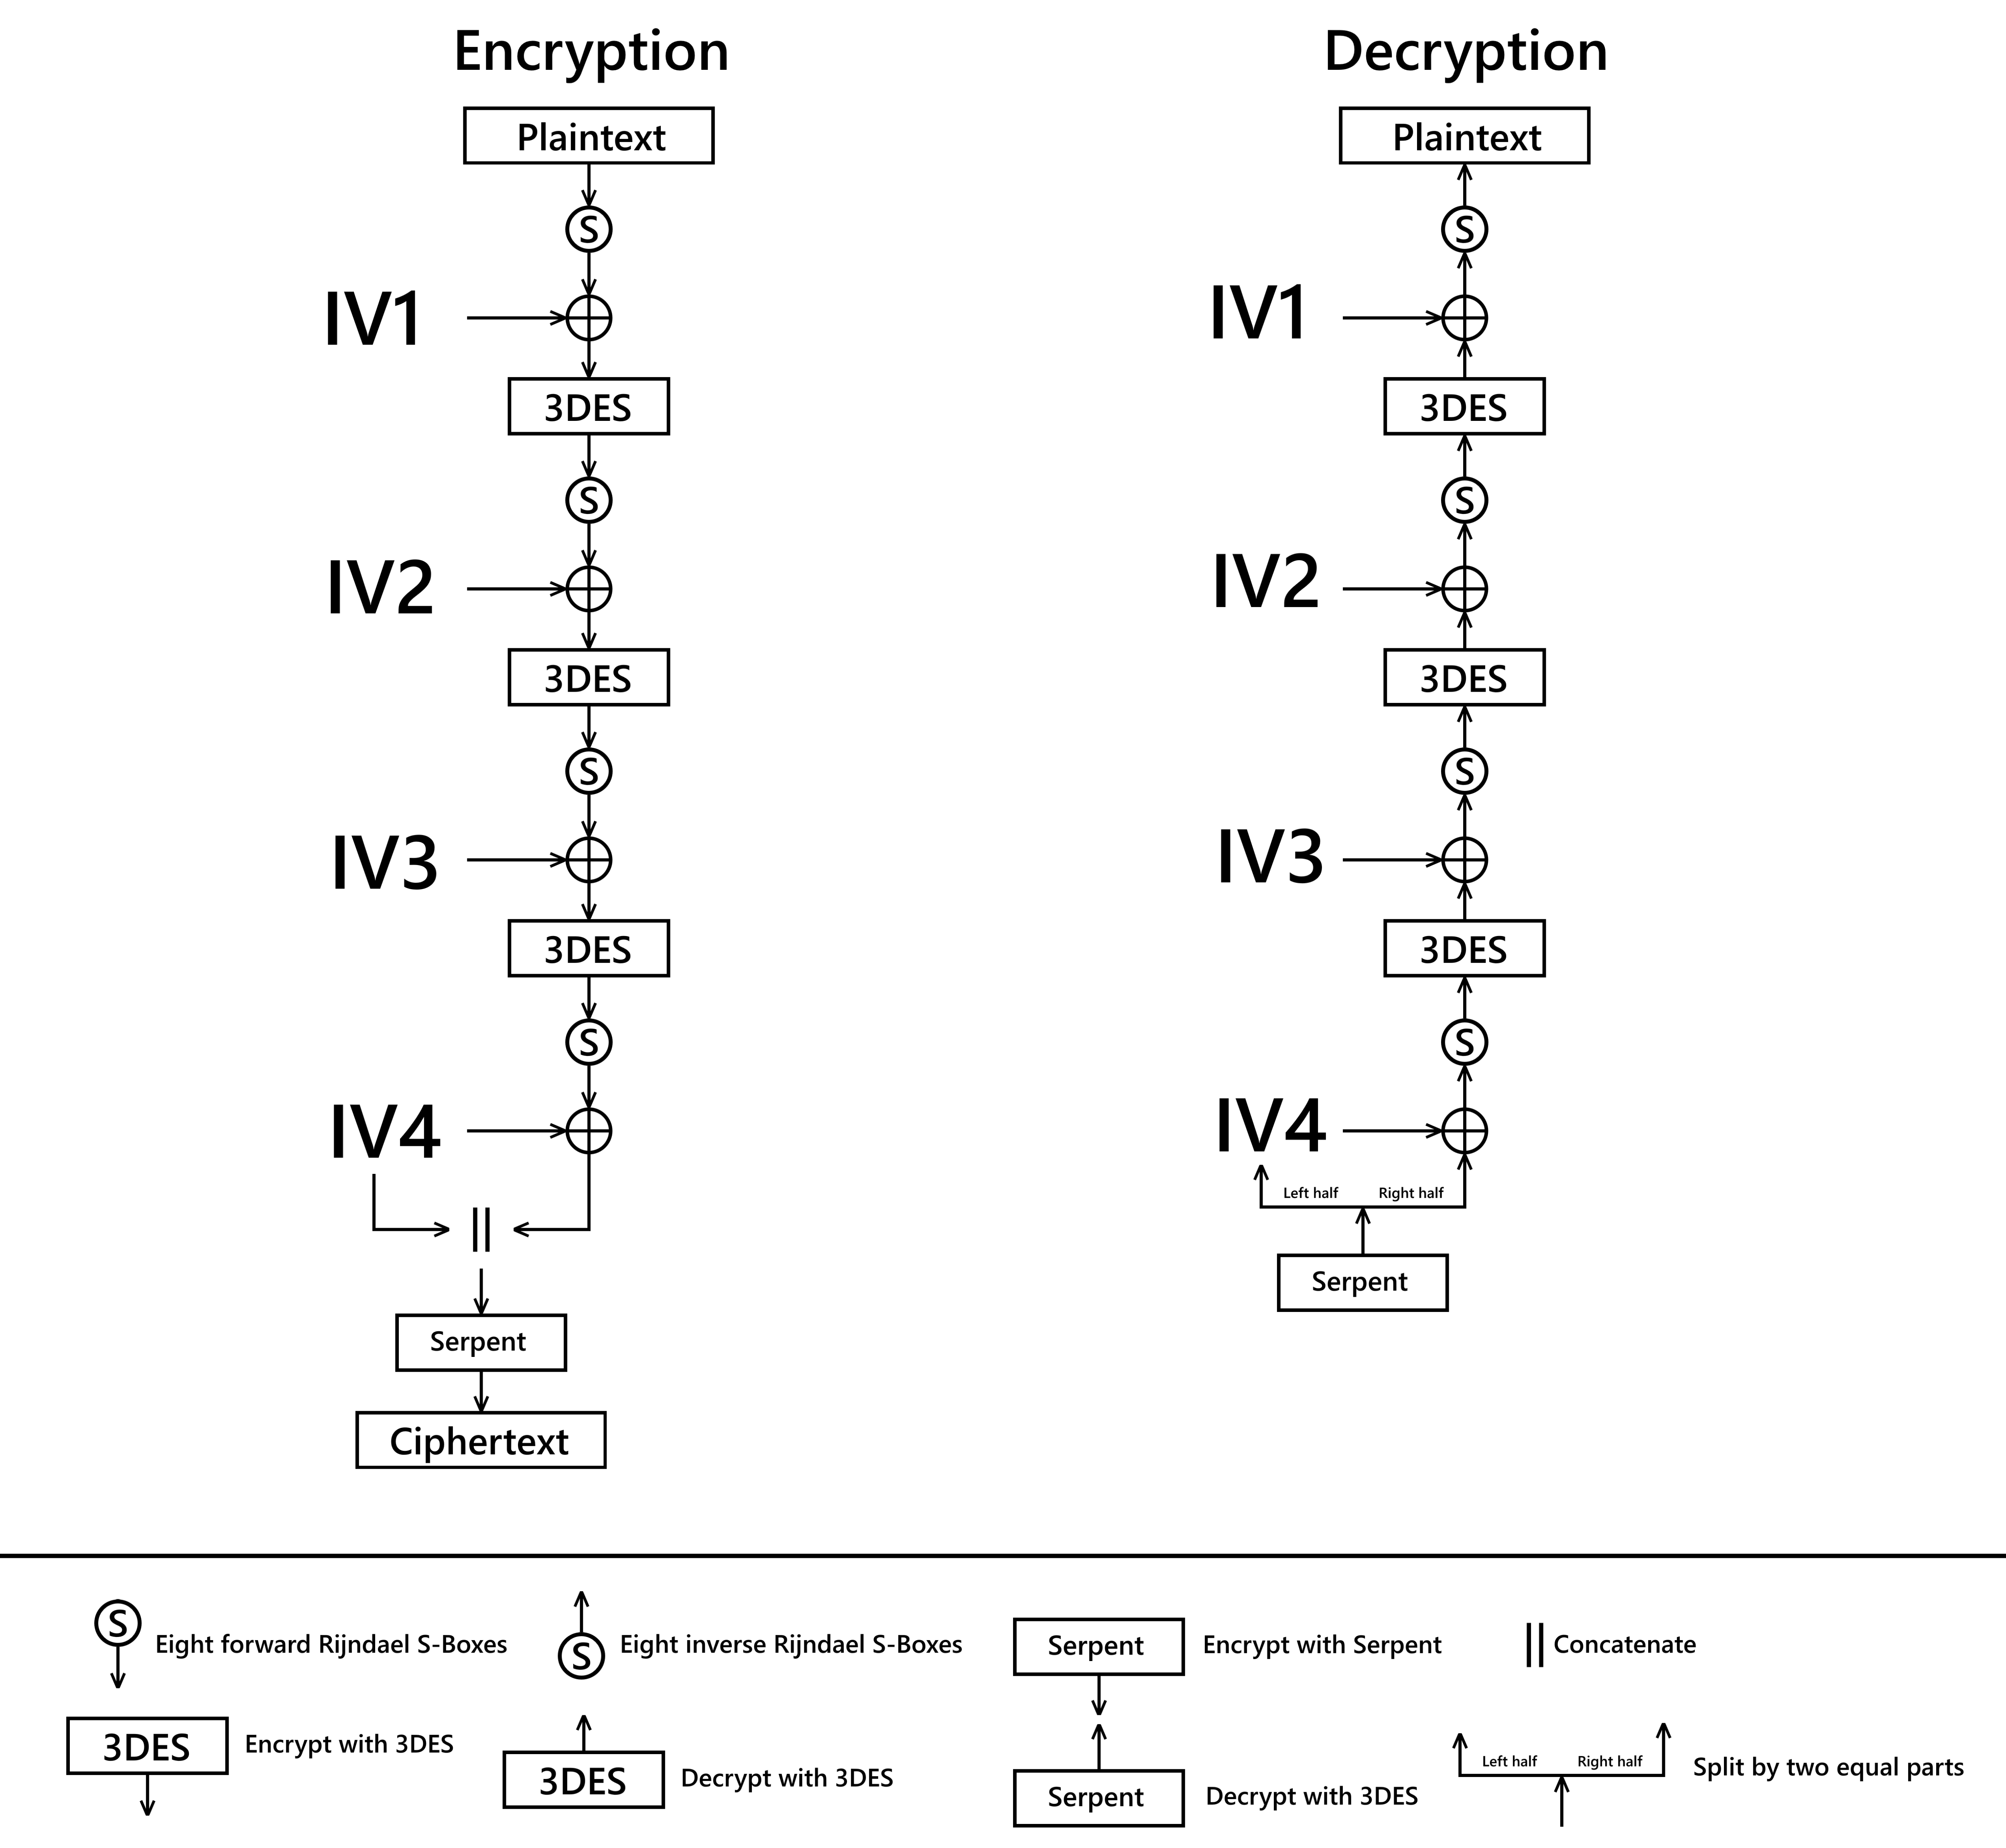
I took 3DES, added IVs and Rijndael S-boxes to this cipher, then cascaded all this "mess", and fed the output to the Serpent cipher. I'm well aware that concatenating IV4 to the ciphertext XORed with the IV4 isn't the best decision I could make, but the device is already "unstable enough" to properly handle another 3DES round. The introduction of the Initialization Vectors prevents the attacker from learning about the content of the captured packets by implementing the chosen-plaintext attack. One of the most useful features of this encryption algorithm is that it produces different ciphertexts for the same plaintext each time it's encrypted. In other words, if you give the algorithm the same input more than once, the output will be different every time.
Structure of the Block

The first forty-eight characters are the encrypted IVs. The last thirty-two characters are encrypted (IV4+plaintext).
Install the Drivers and Configure Arduino IDE *optional
If you've never flashed ESP8266 before, you need to configure Arduino IDE and install drivers to upload the firmware to the boards. You can find drivers here:
CH340 driver: https://sparks.gogo.co.nz/ch340.html
CP210x driver: https://www.silabs.com/developers/usb-to-uart-brid...
In case you don't have Arduino IDE, you can download it here:
https://www.arduino.cc/en/software
Configuring IDE isn't a part of this tutorial, you can read about it here:
Download Firmware From GitHub
You can download firmware here https://github.com/Northstrix/Password_Vault_V2.0
Download and Install the Libraries
DES_Library: https://github.com/fcgdam/DES_Library
Serpent: https://github.com/peterferrie/serpent
ESP8266TrueRandom: https://github.com/marvinroger/ESP8266TrueRandom
Adafruit-ST7735-Library: https://github.com/adafruit/Adafruit-ST7735-Librar...
Adafruit-GFX-Library: https://github.com/adafruit/Adafruit-GFX-Library
Adafruit_BusIO: https://github.com/adafruit/Adafruit_BusIO
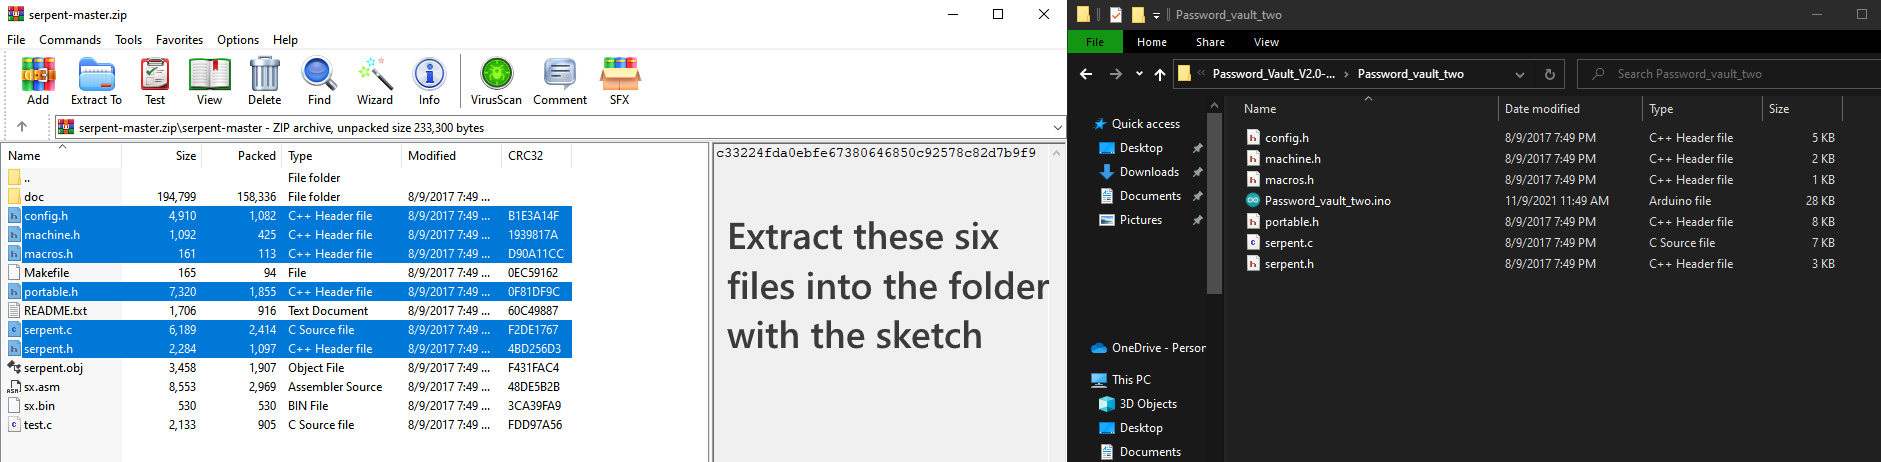
The process of unpacking libraries besides Serpent is typical. You can unpack the content of the archive into the folder: ...\Arduino\libraries. Or open the Arduino IDE, click to the Sketch -> Include Library -> Add .ZIP Library... and select every archive with libraries.
Serpent library has to be extracted into the folder with the sketch.
Generate the Keys
You can do it by any means possible.
The best way to do it is to throw 20-sided dice.
If you get a number from 1 to 9, write it down. If you get a number from 10 to 15, write down a letter corresponding to that number.
10 = A;
11 = B;
12 = C;
13 = D;
14 = E;
15 = F.
If you get 20, write down 0.
If you get something else, don't write anything and throw the dice again.
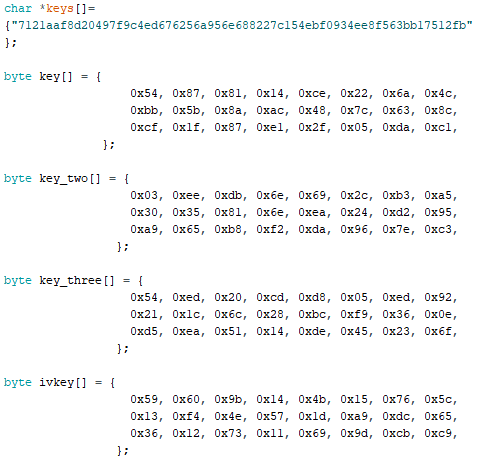
Since I'm going to expose the keys to the whole world, I've used a weak RNG to generate the keys, don't ever do that! That will compromise the security of the device.
Modify the Firmware
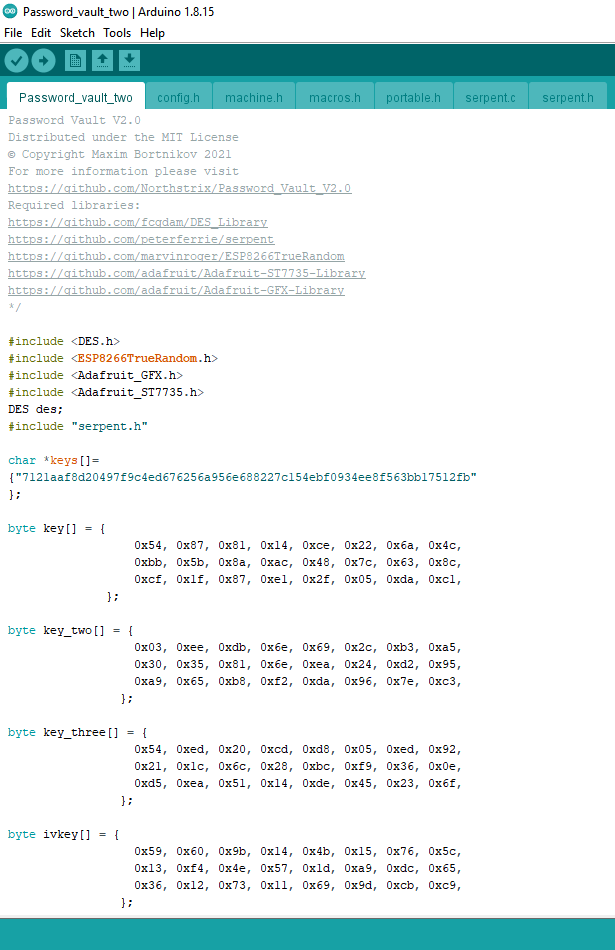
Open the file Password_vault_two.ino and replace the existing keys with those you've generated.
By the way, If you want to create your color scheme you can find the color converter here https://chrishewett.com/blog/true-rgb565-colour-pi...
Flash the ESP8266
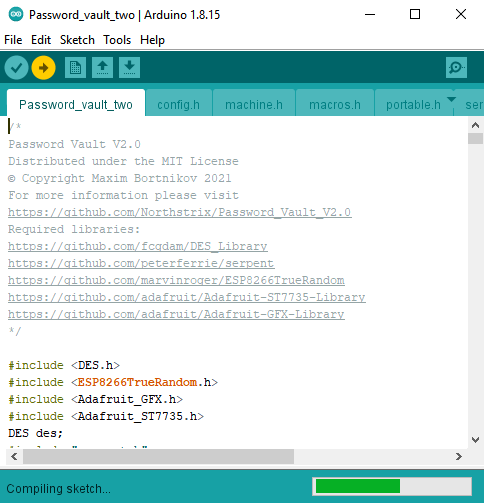
Upload the modified firmware from the folder Password_vault_two into the ESP8266.
Build the Device
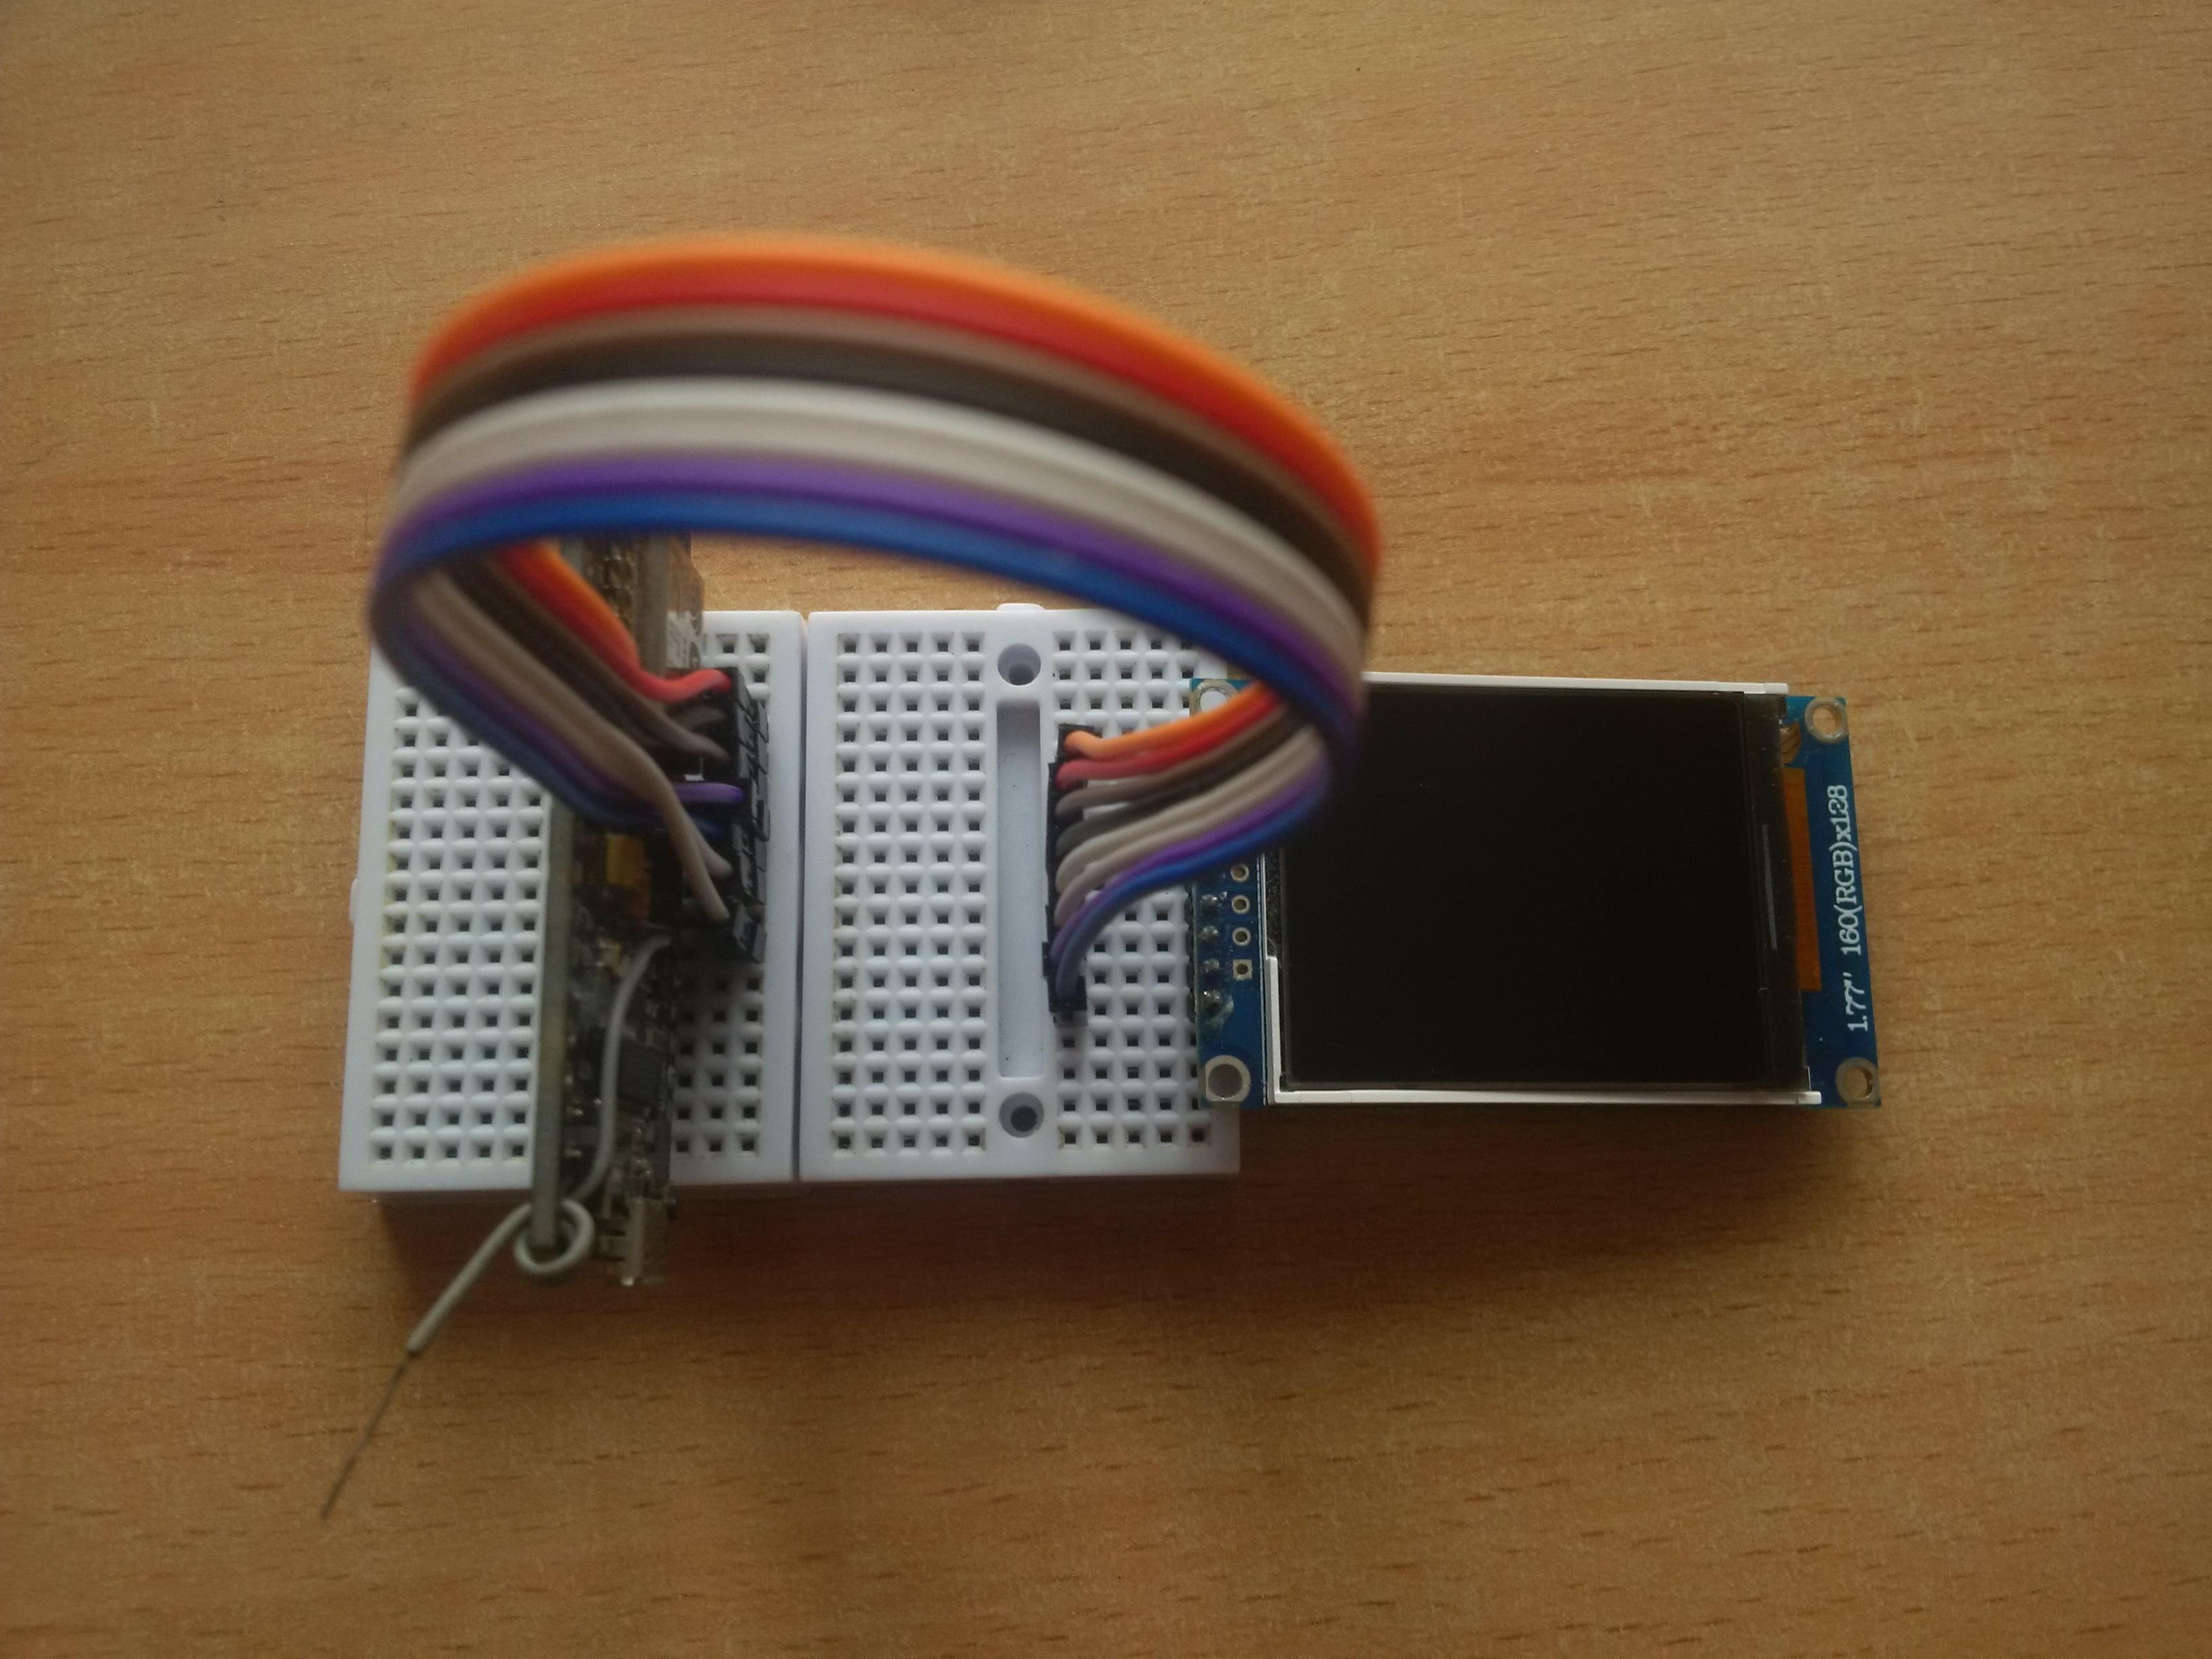
The circuit is so simple that I've decided not to include the schematic diagram.
Ignore the protruding gray wire. It's +5V.
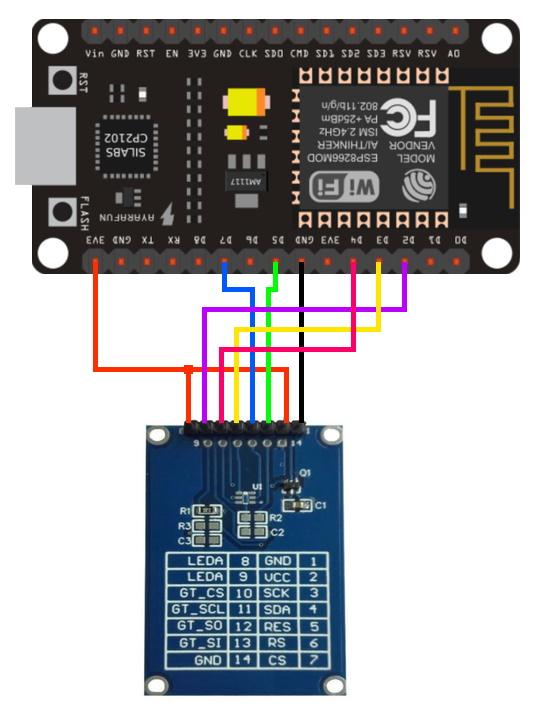
Circuit Diagram
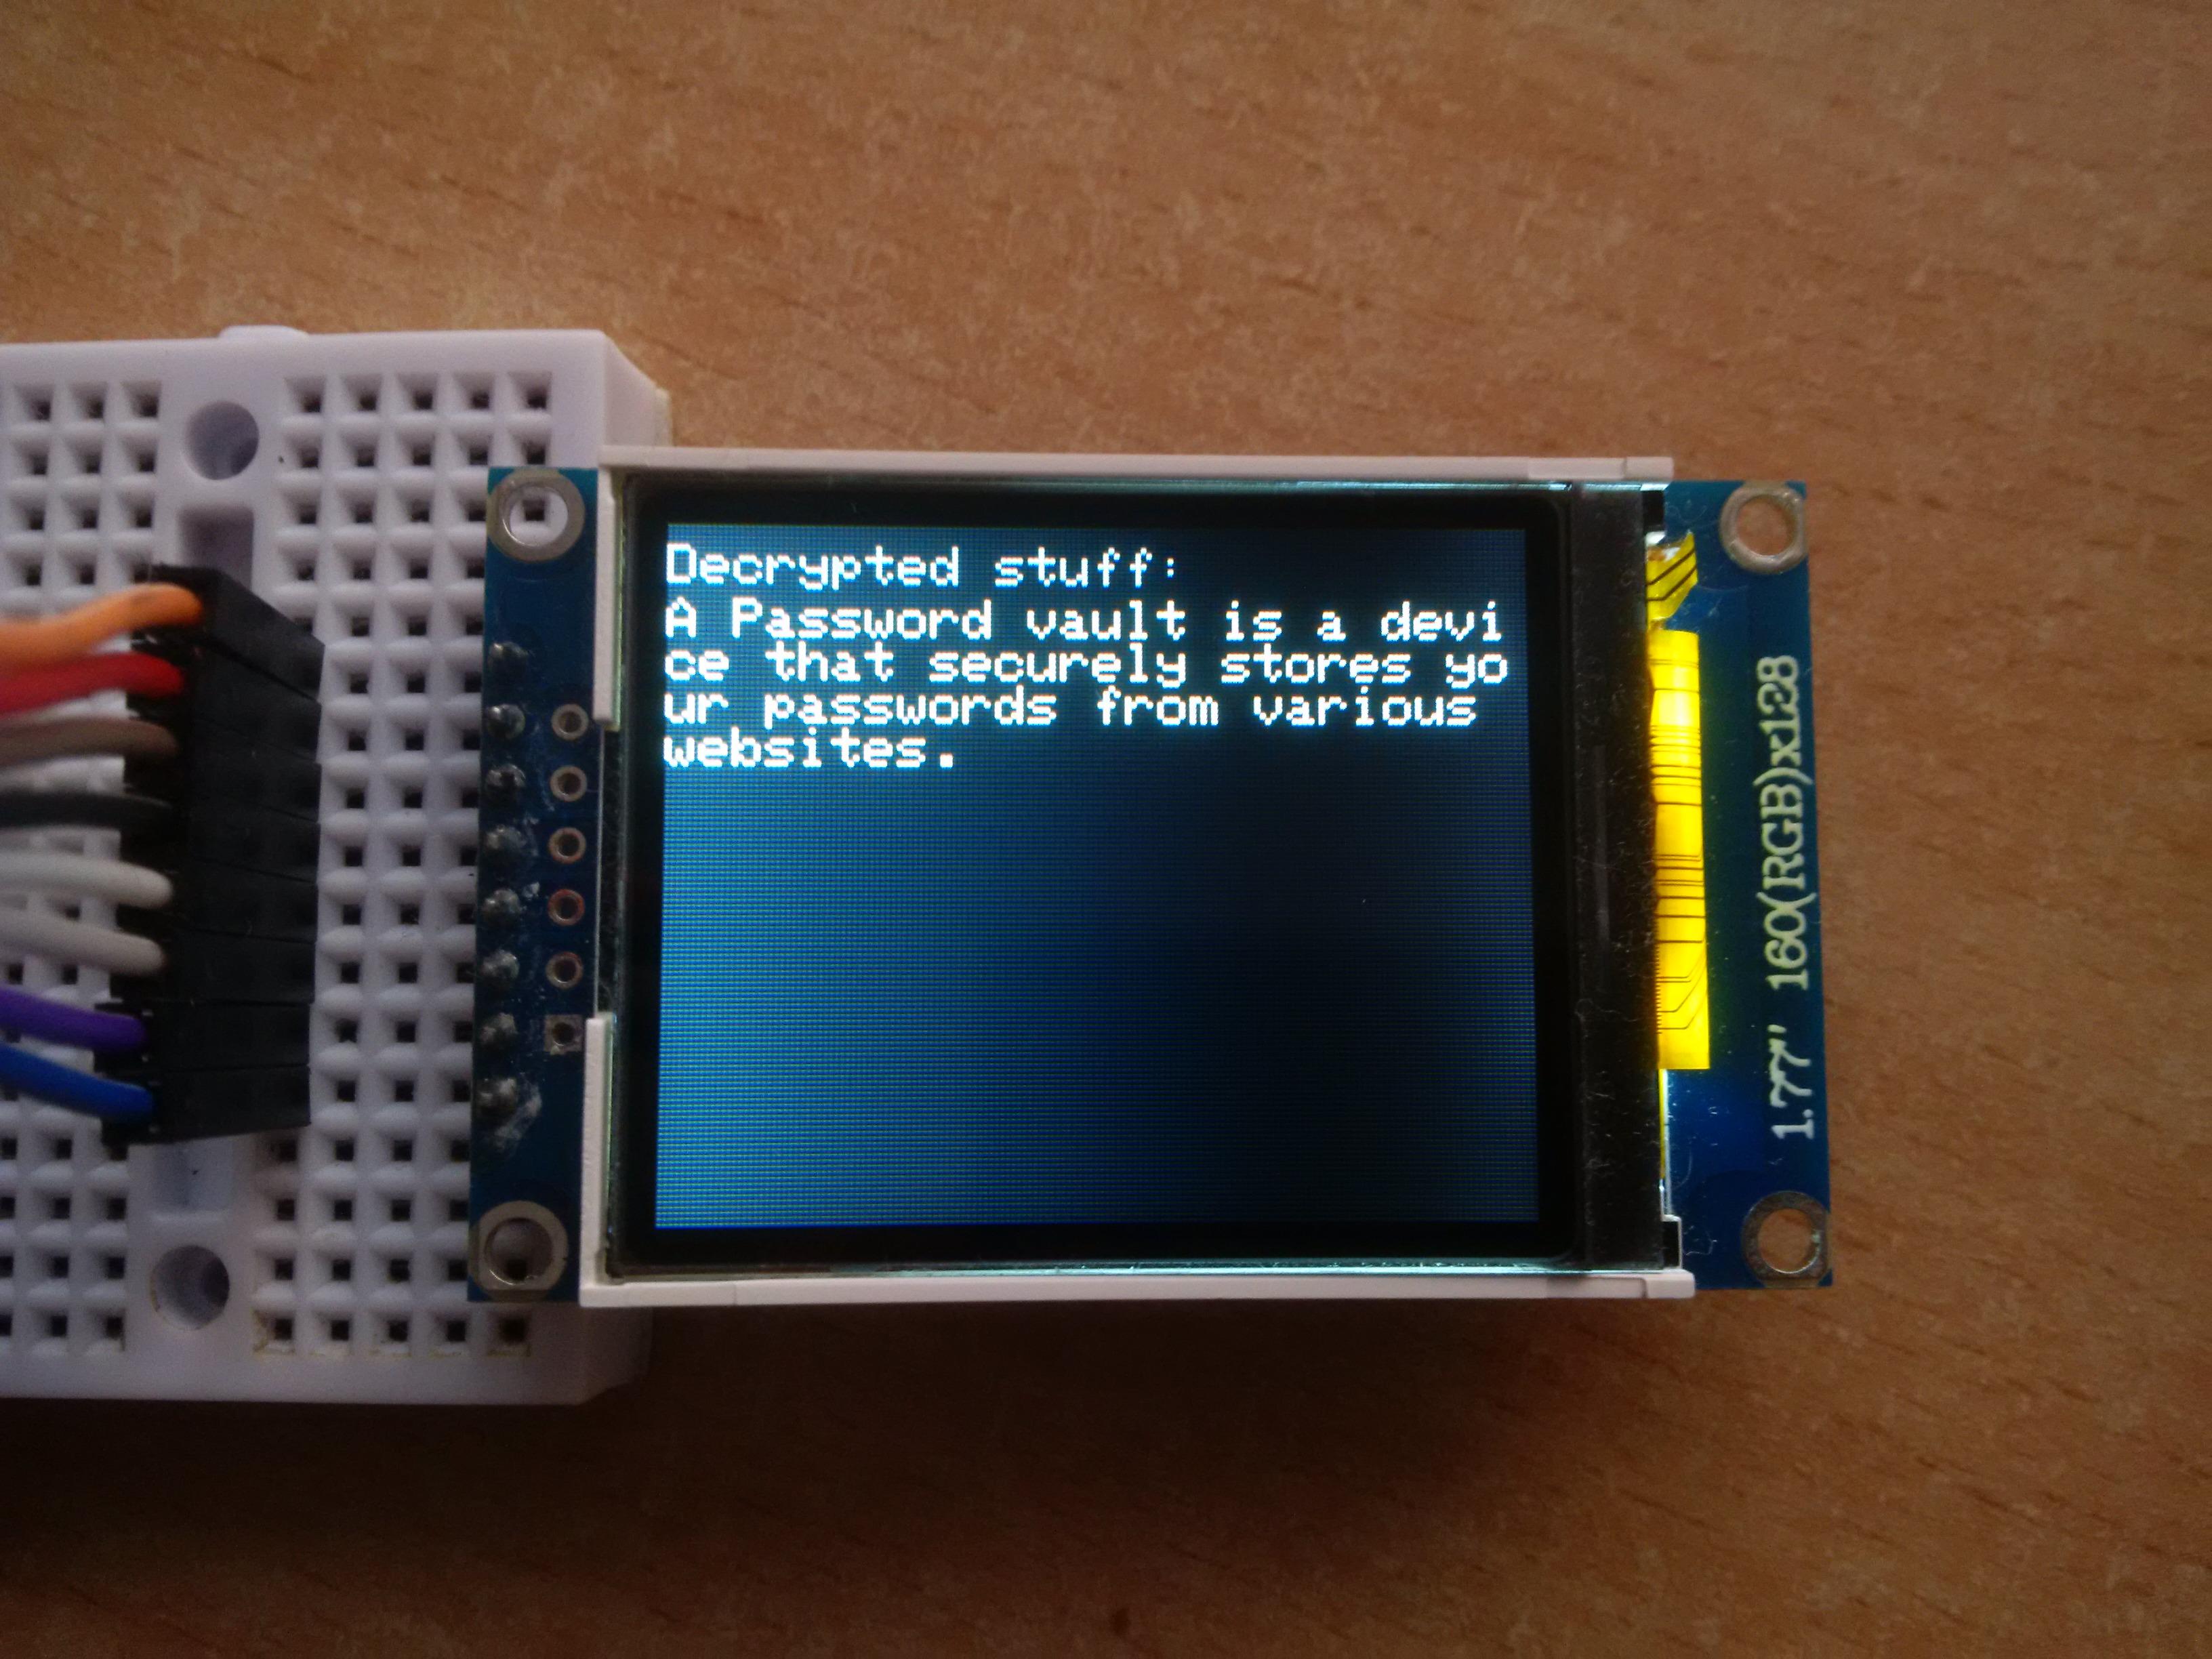
Power Up the Device and Open the Serial Monitor
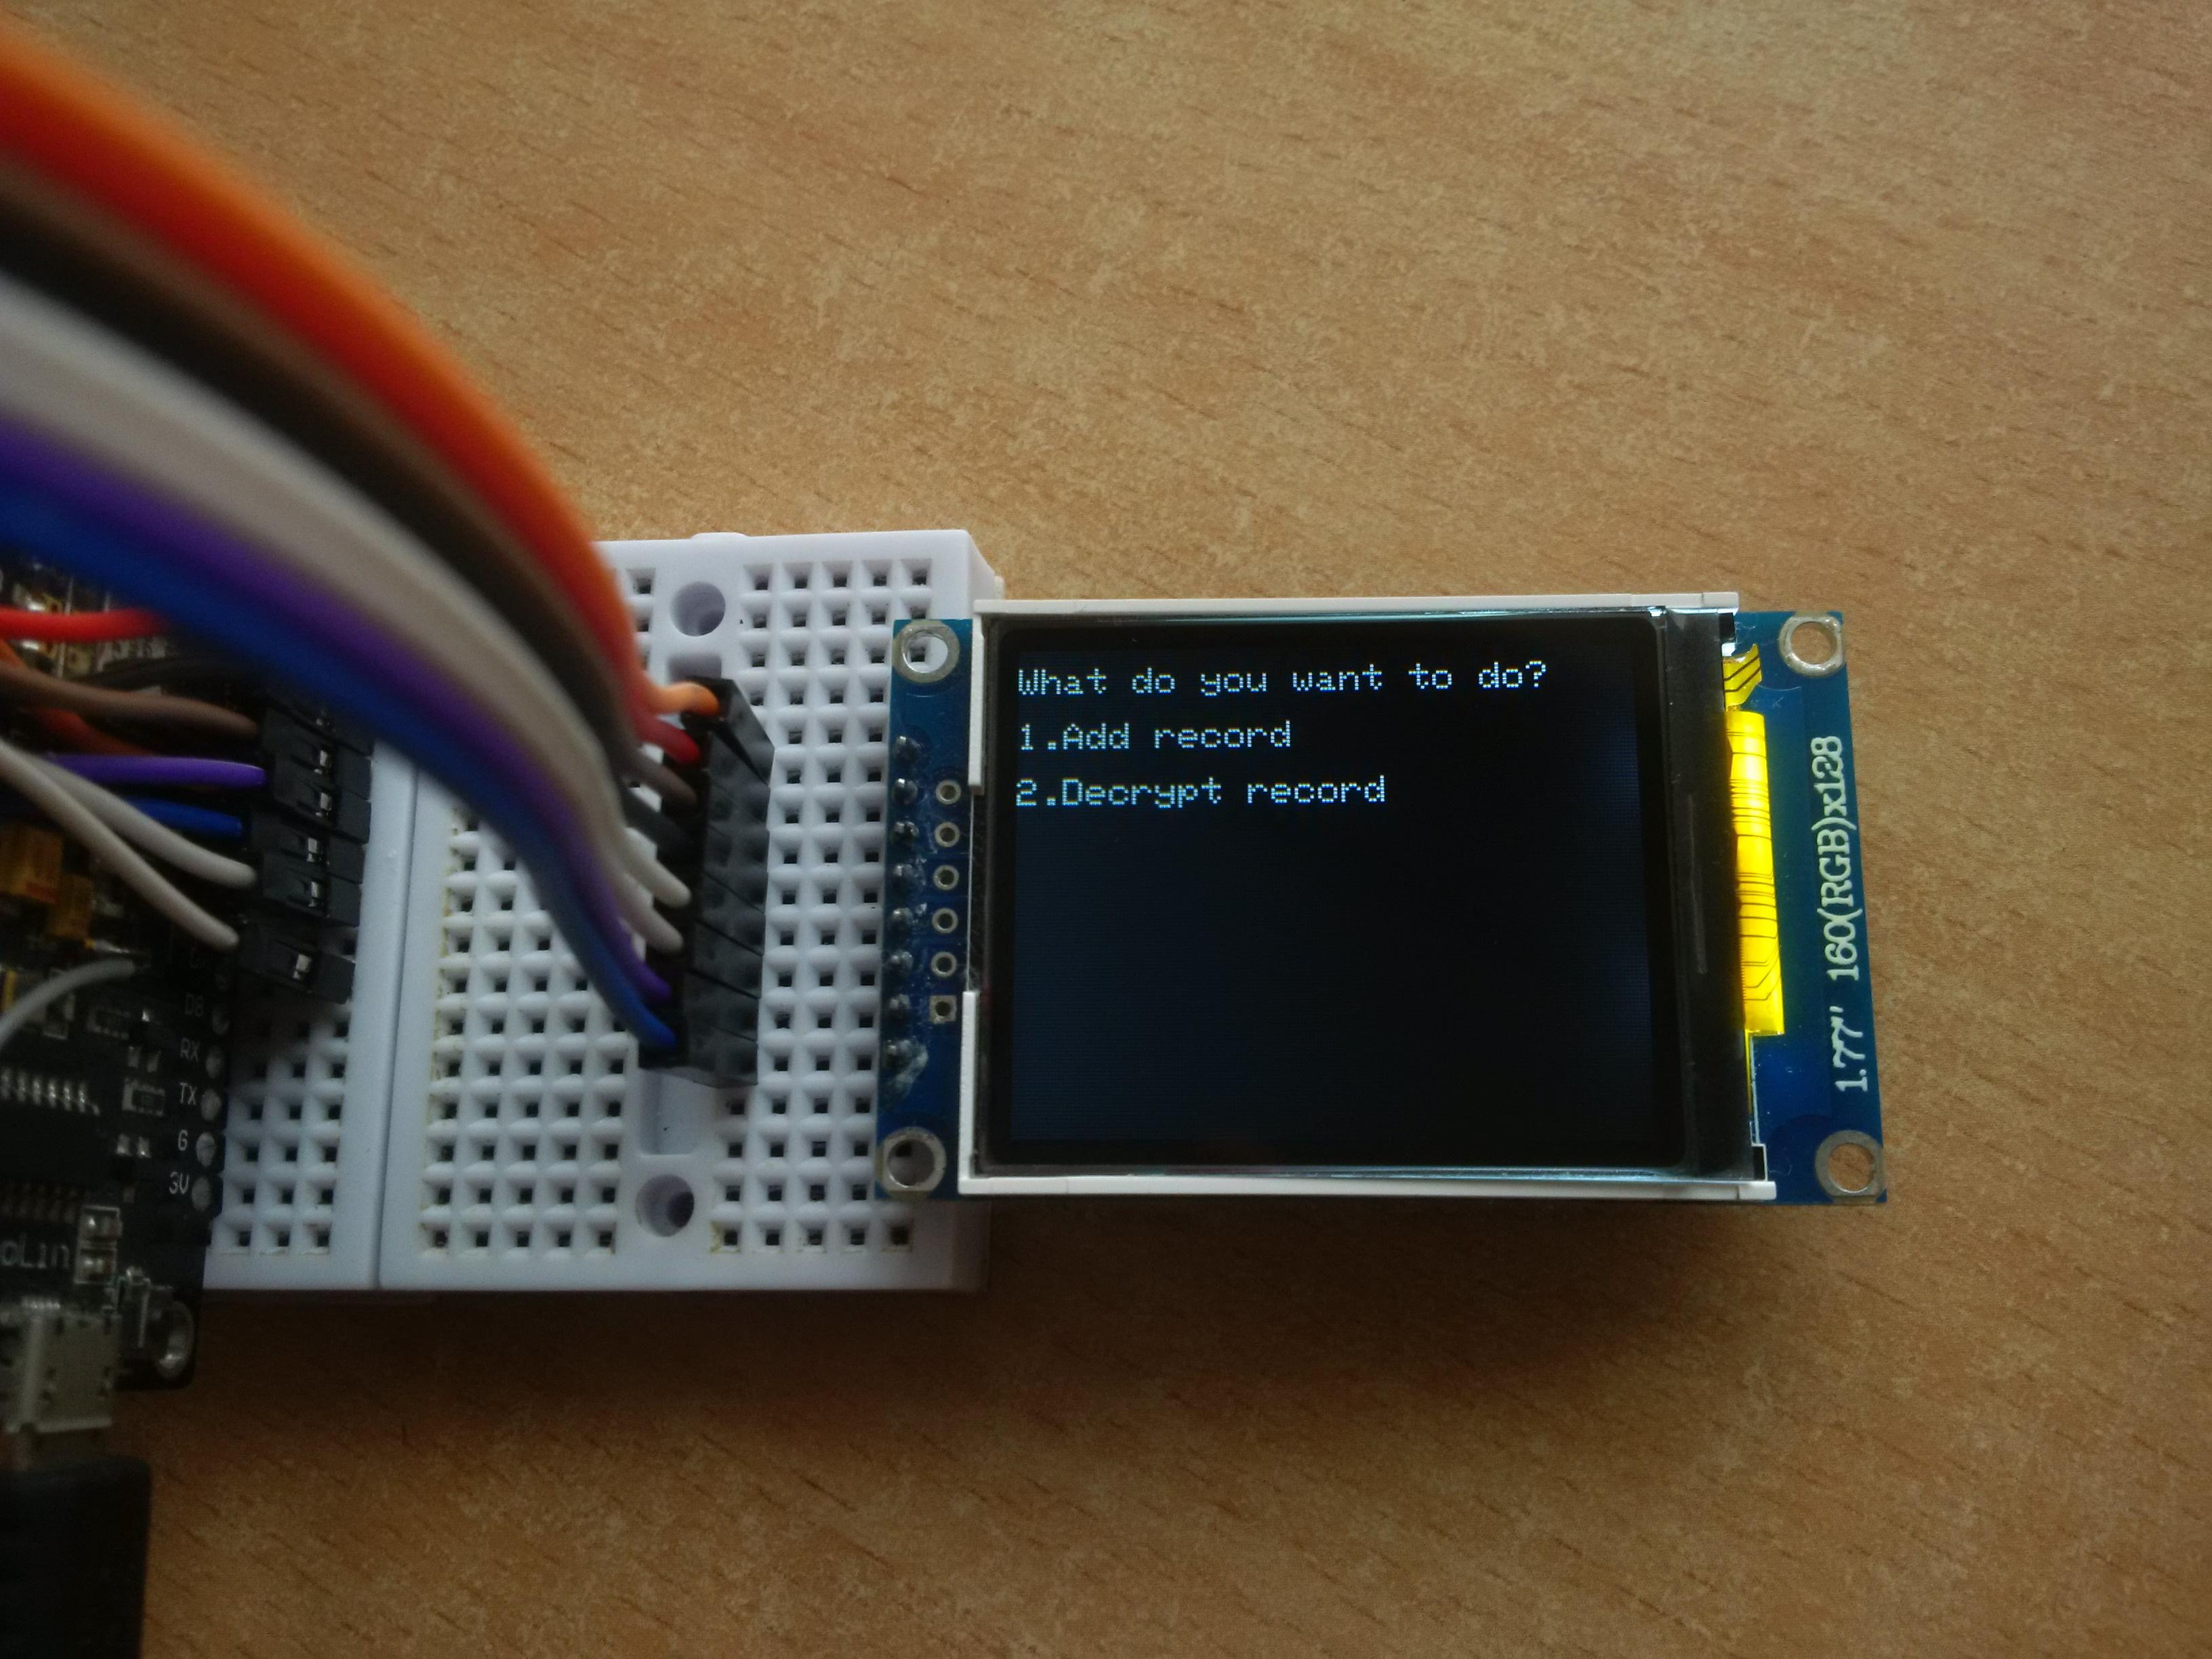
Power up the device, open the Serial Monitor and set the baud rate to 115200.
Enter 1 to the Serial Monitor and press Send to Add new record.
Enter 2 to the Serial Monitor and press Send to Decrypt the existing record.
Add Record
It's time to encrypt something. Enter 1 to the Serial Monitor and press Send.
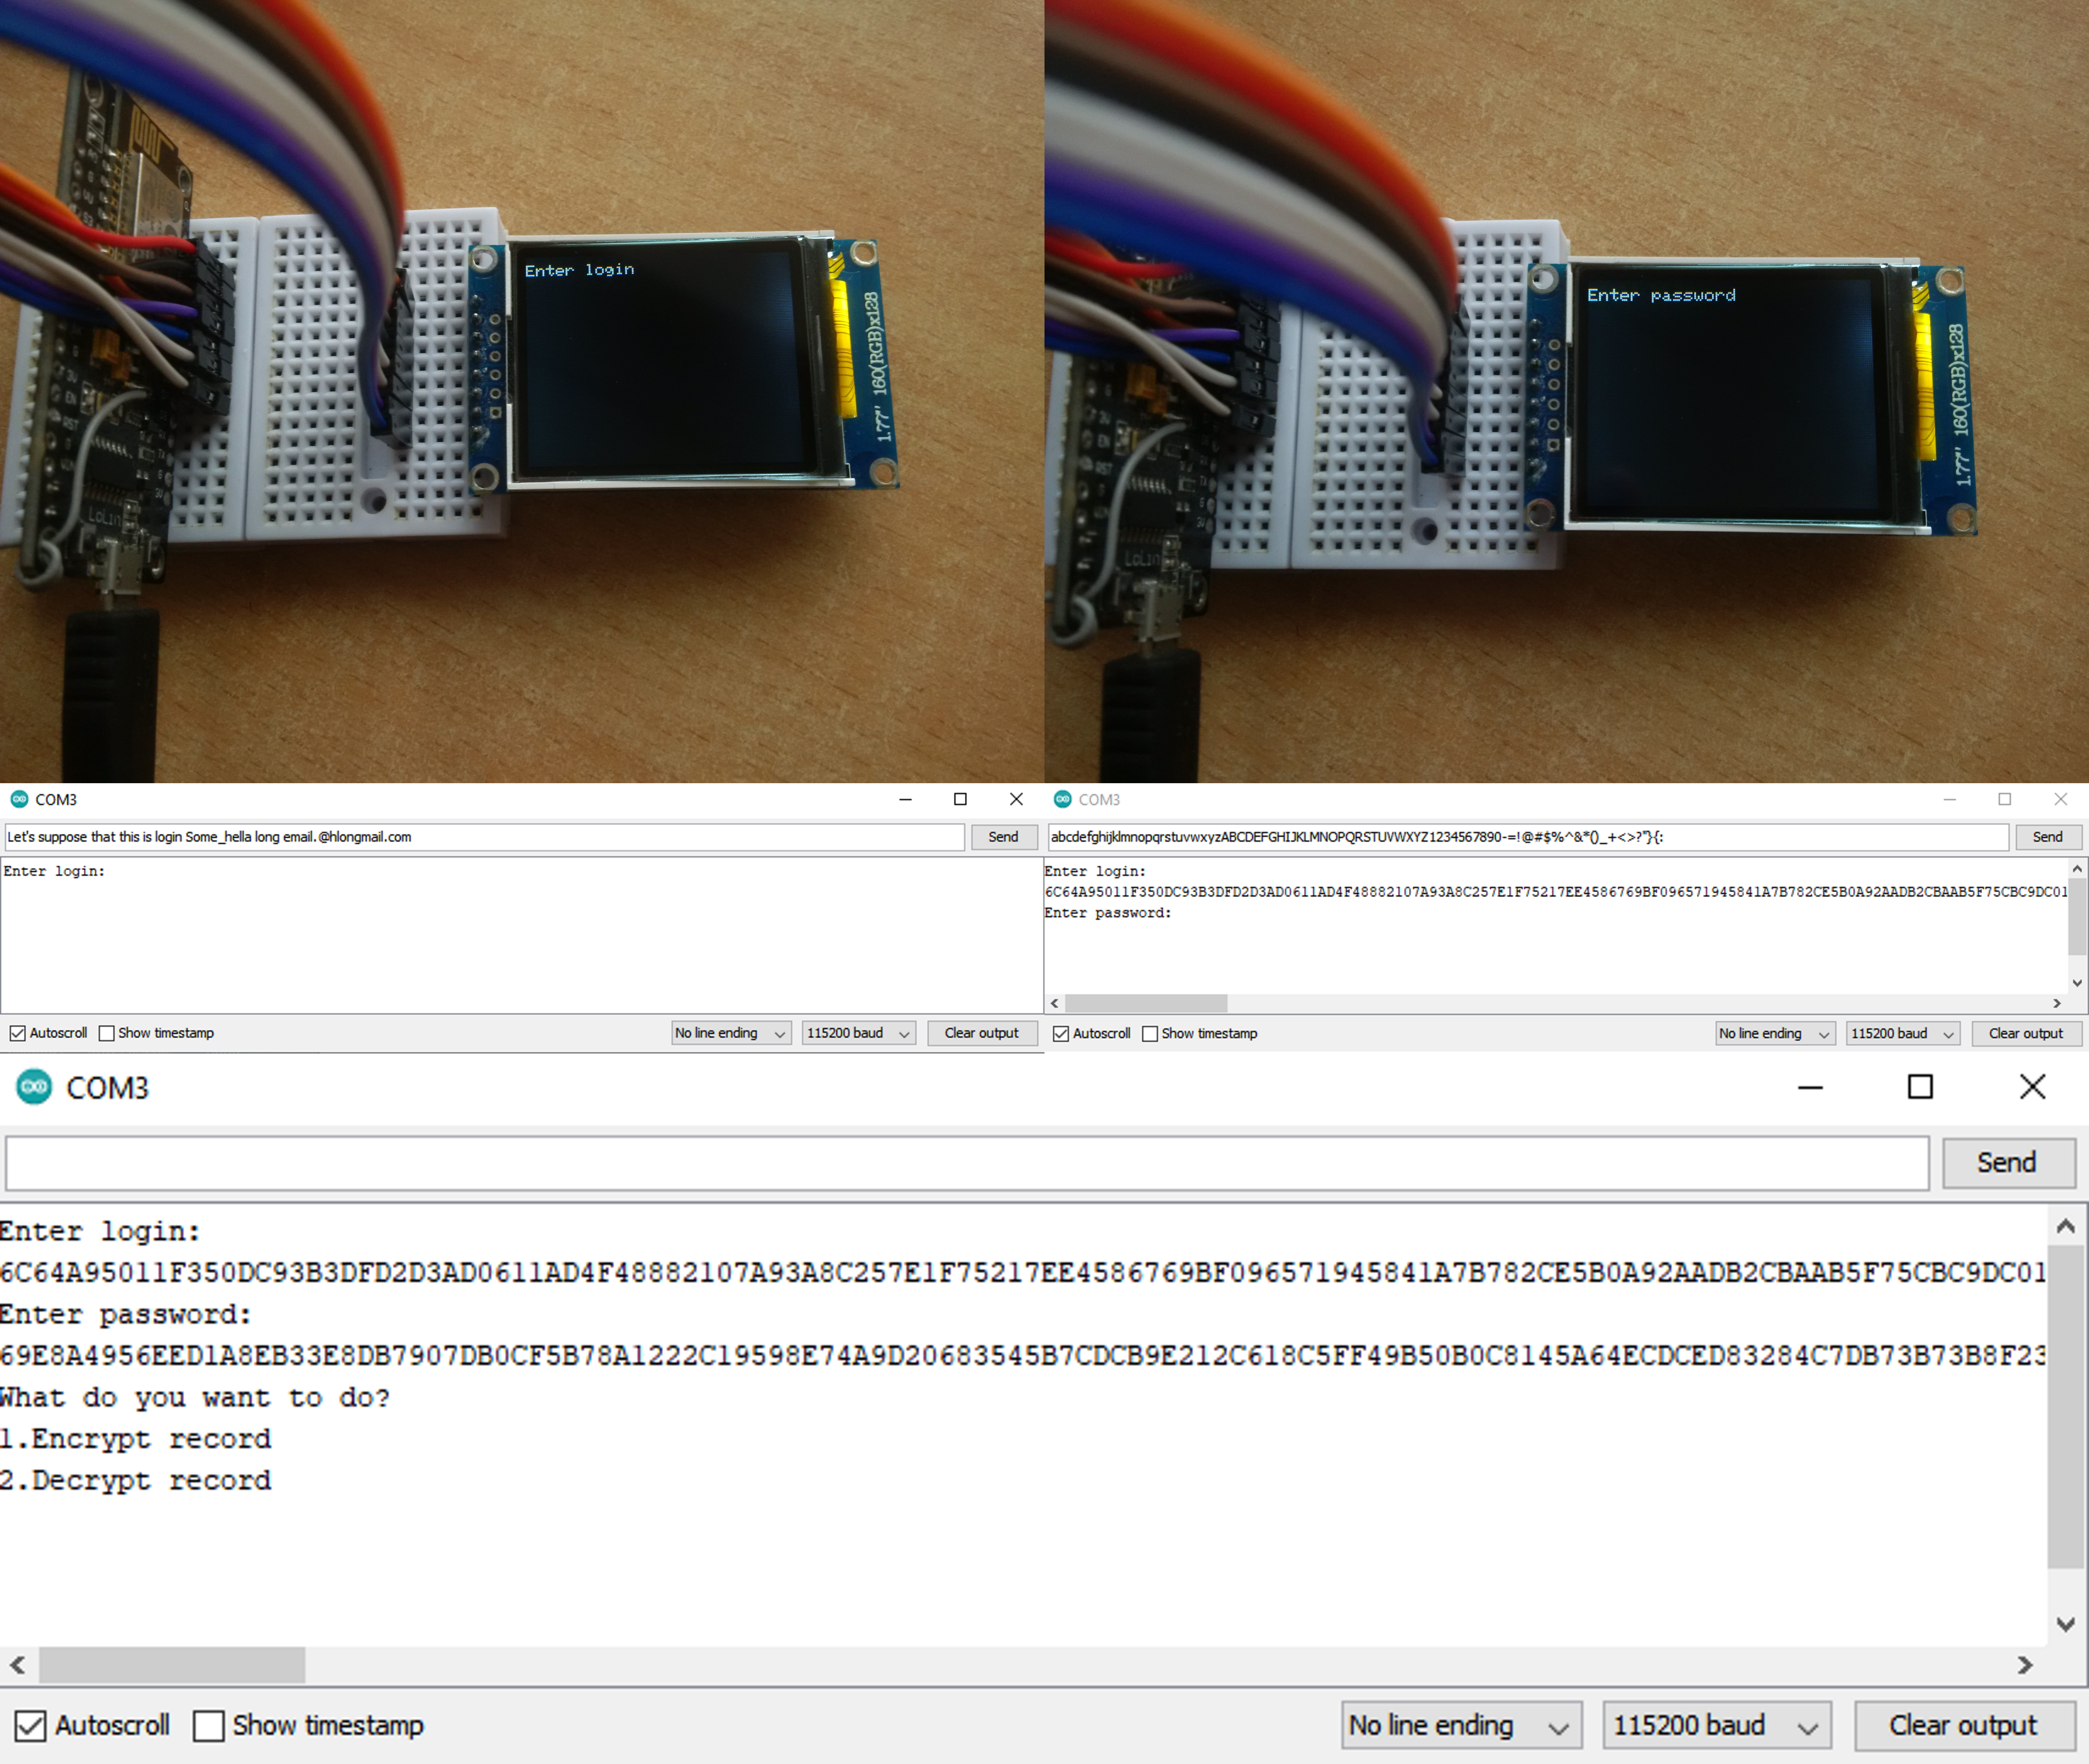
Now, you'll see the instructions in both the Serial Monitor and the display. Start entering the login and password one after another. In new versions of Arduino IDE, make sure that the first combo box is set to No line ending. Press Send after you've finished entering the plaintext. Technically, the length of the plaintext is unlimited. Practically, this device can encrypt 1000-characters long plaintext, but it can only decrypt 152-characters long ciphertext without suddenly rebooting. That's where the crappy implementation of the algorithm is limiting the potential of the MCU. The encryption algorithm is cryptographically strong, but the device can't decrypt long strings, although 152 characters should be enough even for the longest logins and passwords.
I've encrypted these plaintexts and obtained these results.
Login:
Let's suppose that this is login Some_hella long email.@hlongmail.com
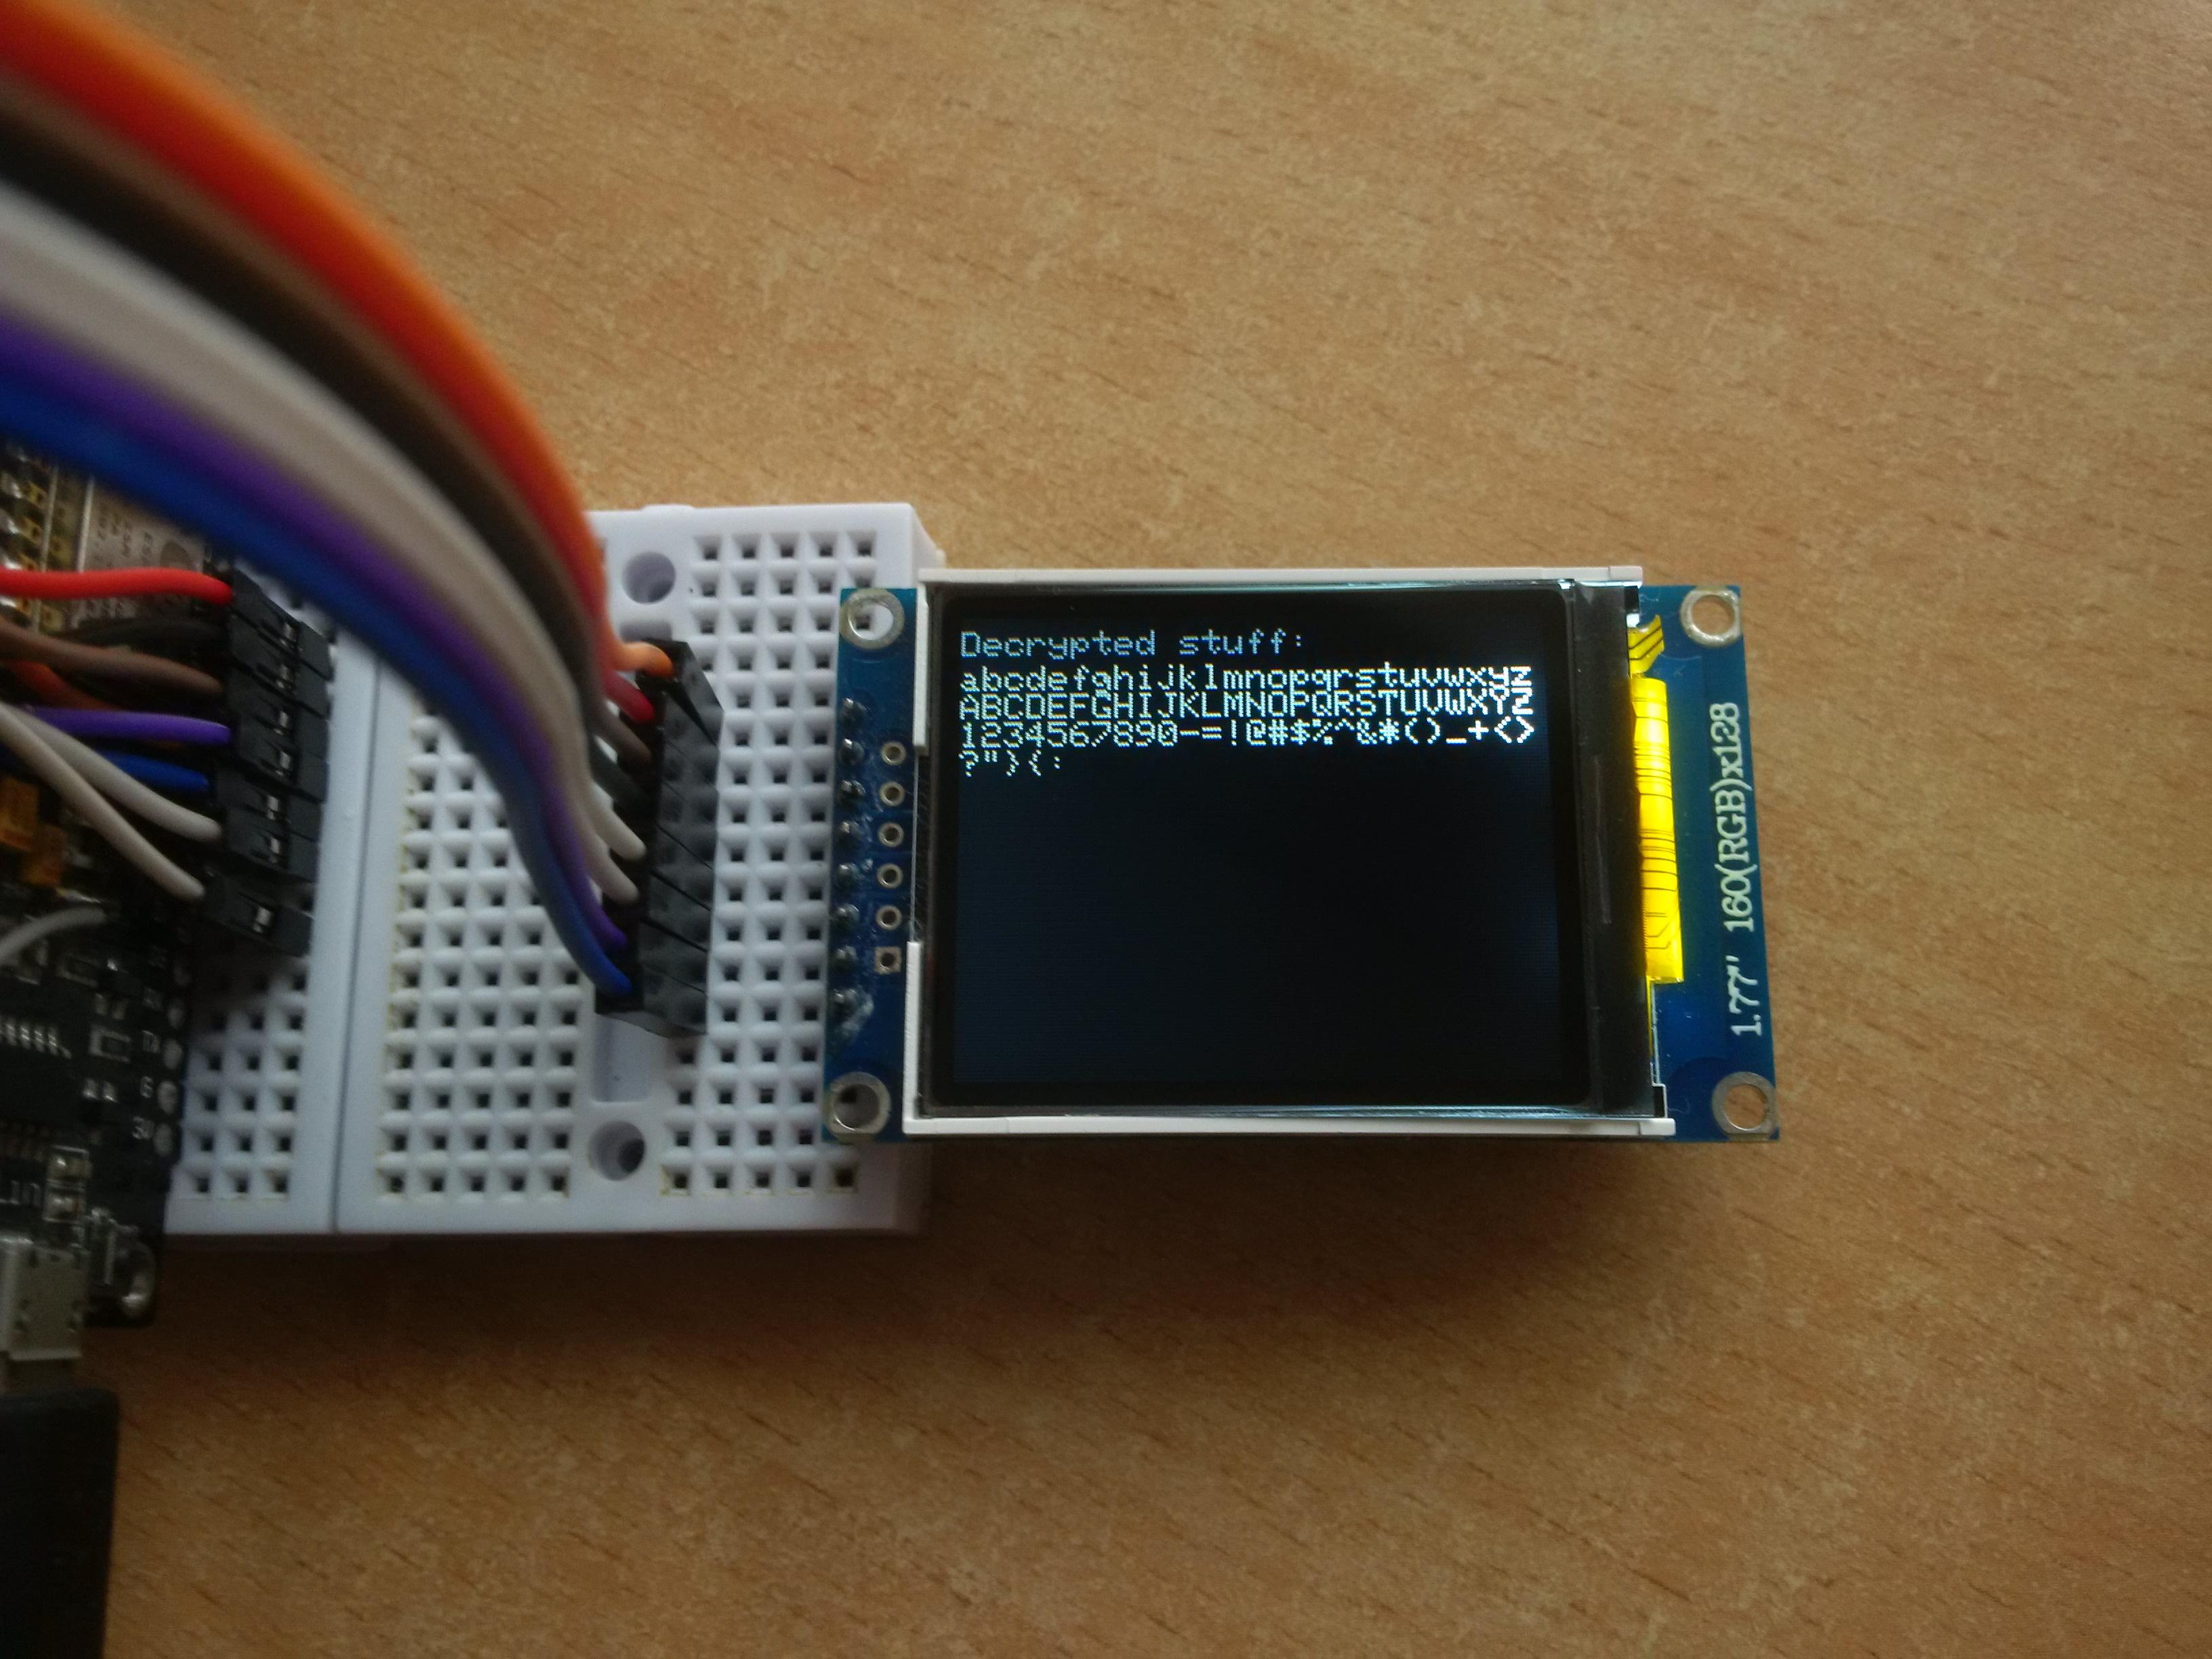
Password:
abcdefghijklmnopqrstuvwxyzABCDEFGHIJKLMNOPQRSTUVWXYZ1234567890-=!@#$%^&*()_+<>?"}{:
Ciphertexts
Login:
6C64A95011F350DC93B3DFD2D3AD0611AD4F48882107A93A8C257E1F75217EE4586769BF096571945841A7B782CE5B0A92AADB2CBAAB5F75CBC9DC01D9E75080455105AC11AE93A4B33DAD082F0EA4B8862F9BEB7508A1DB6BCE7AF51472B8107E11A508691CEF84ED1BD91DBA8B02EB1197603AFD0D729ADB17ED0786D8D3AF6CBC4AC6A7CD662E40F2DBAA249CB01A98A279439B75C601E1AD6F29A22C45D1306A43EB23E0A84457CCD4AC91BB4032A0820E4FDDEC0D11B2A88BFEA603B810BAB32D2DF0A2122AC47D8EE87F7B68D8E00908260C47685065ECC9F6A91DF3D7DFED56C69D57AA630FC4EF4CCB93D3922157DE94298B2A134FF973722743051E15DDDCAC50843706B4406E422A21AC56A69E1DCB21C88FFF27BFB7A284A863240604293142F7D42A3C21502E042A507DF8139092407E076EEE2A5B9B12539B55B3ABD220F633419198CA4CA434C42379C49F7EC55D08226DA51DD0D58C5C906BA4AFE0FE7B73C502
Password:
69E8A4956EED1A8EB33E8DB7907DB0CF5B78A1222C19598E74A9D20683545B7CDCB9E212C618C5FF49B50B0C8145A64ECDCED83284C7DB73B73B8F233B25E315162A95EE5C357B1E7FEE6310937EF166837E06C6CF00EDCBFFEF49D46746CC176D2919BEA04DCF990E0C43A154102E9E8448799FC829EC2E38570951E7AA62EDAD63F807FB818FF8551781C688651D320231DF65D4AEB1A45C5B18D4F27909D5DE4529551297ABC98A0648B0AB5DD9AC2E344FDF2B41290BB17068F6ADFEF72C306F8BA10316E70B41A06A1DB718C2614AA4F7CEF2BBA38906771F471986FBBCF80B412D12EEC2E2495F35C088818887C7F70C8092A6D2DFAFB9A0A0209267119486E51C78631A2A520C2B6B8EAD57EE2A3AFA251EFBD5806258A0F081FAF53512E365F4265EC6D708663E075F7A385E8A3FB036E5C0F0D82155F83C616264C8566A1B7FB563CF8064985ED08E38A67D580FFDAFF4F3361DEFF2C877CB913E0B04761CA76E35DED921E15AEA61BF8B4DFE1A989CCED5D31A60F817F6E0D52036769A731291B94F08516DC7012C1F97429A07FEFD133AEB7BA2B7A585495A51198E2565D09F1A327ACFCCD4C4C29DC43DBC0CF8A03A72EE0C
Login and password are fictional (just in case).
Save the Ciphertexts
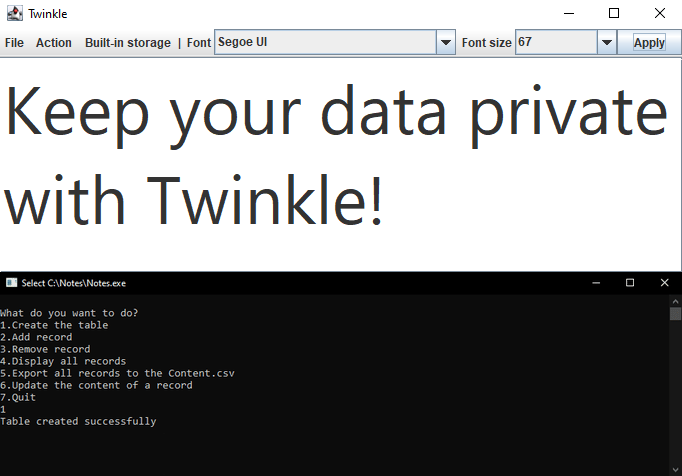
Technically, the word vault implies that the device has some form of storage, and without storage, it's just an encoder and decoder of your precious passwords. But I haven't figured out an efficient way to organize a file system. And for now, the external storage serves as a vault for the already encrypted passwords.
It's up to you where to store the ciphertexts. I can only suggest Twinkle or a database from one of my previous project.
If you have anything better than that, don't hesitate to use it.
Decrypt the Record
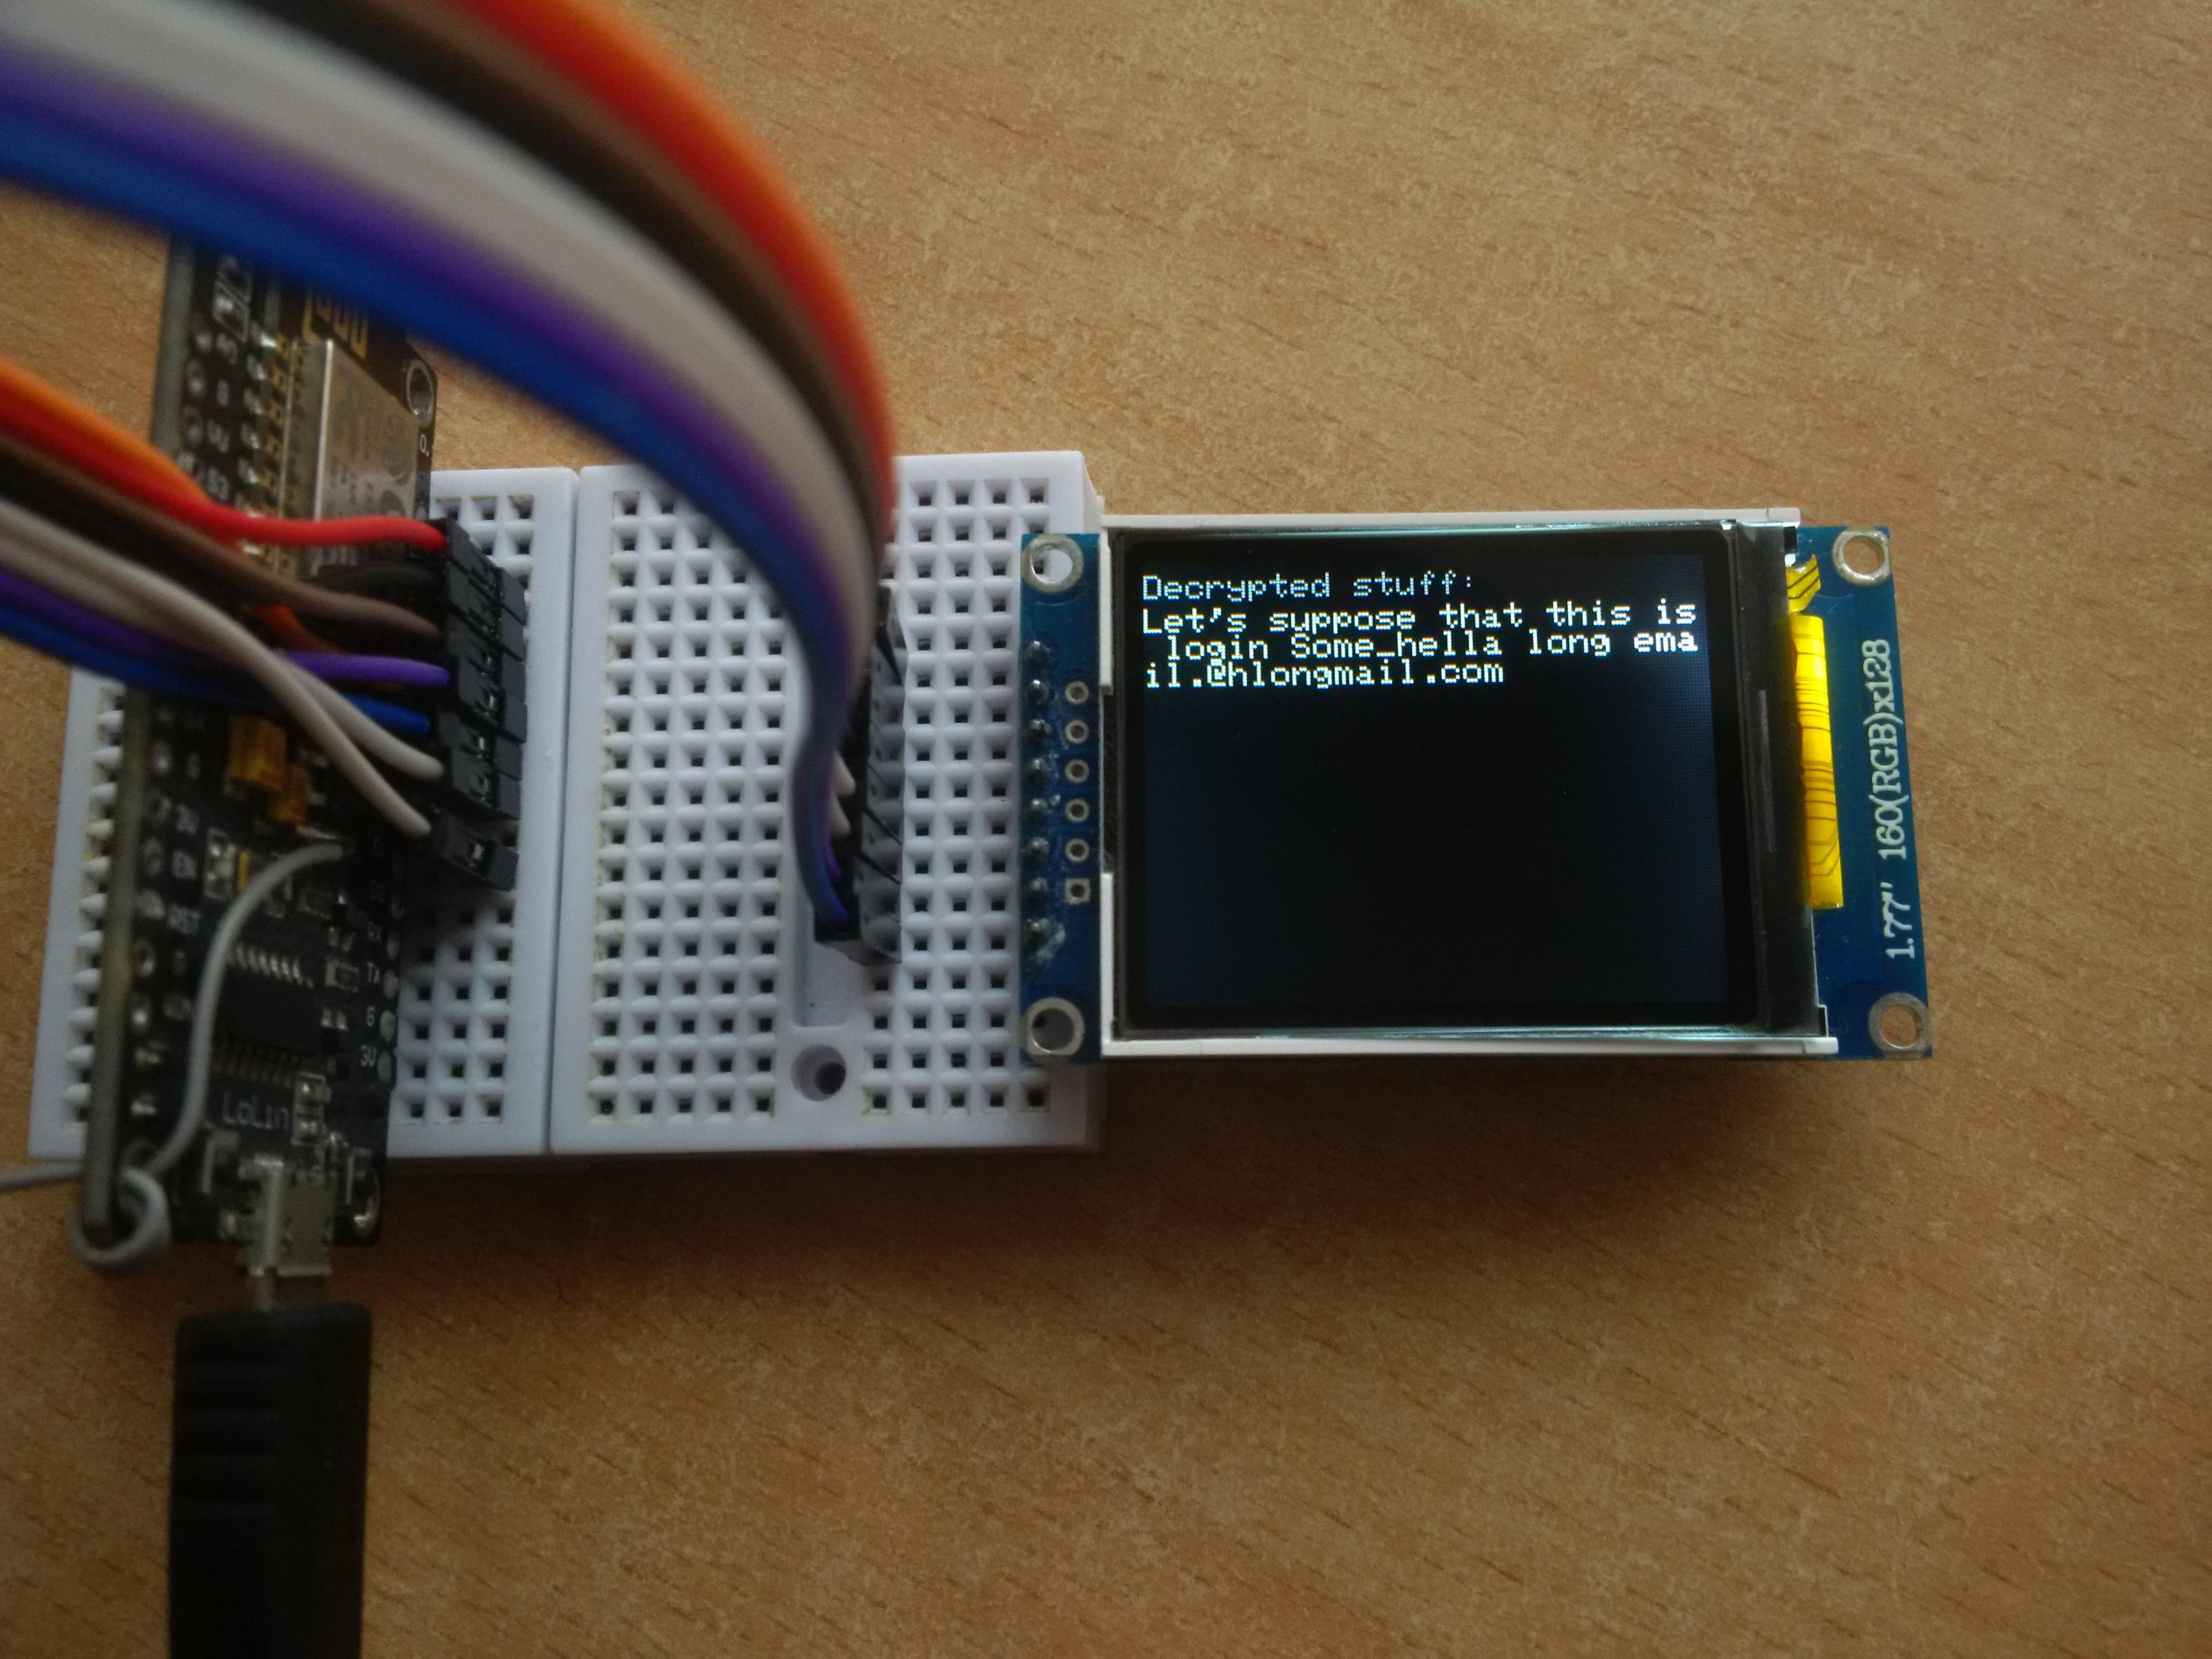
Let's suppose that a couple of days have passed, and now you need to retrieve your data.
1) Power up the device;
2) Enter 2 to the Serial Monitor and press Send;
3) Paste the ciphertext to the Serial Monitor;
4) Press Enter.
Final Thoughts
Even though this version of the password vault is more secure than the previous one (at least from the side of the encryption scheme), it still has some flaws and inconveniences. I did my best to make this device as secure and as user-friendly as possible, but I kinda hit my ceiling here. I admit that this is the best I can do for now.
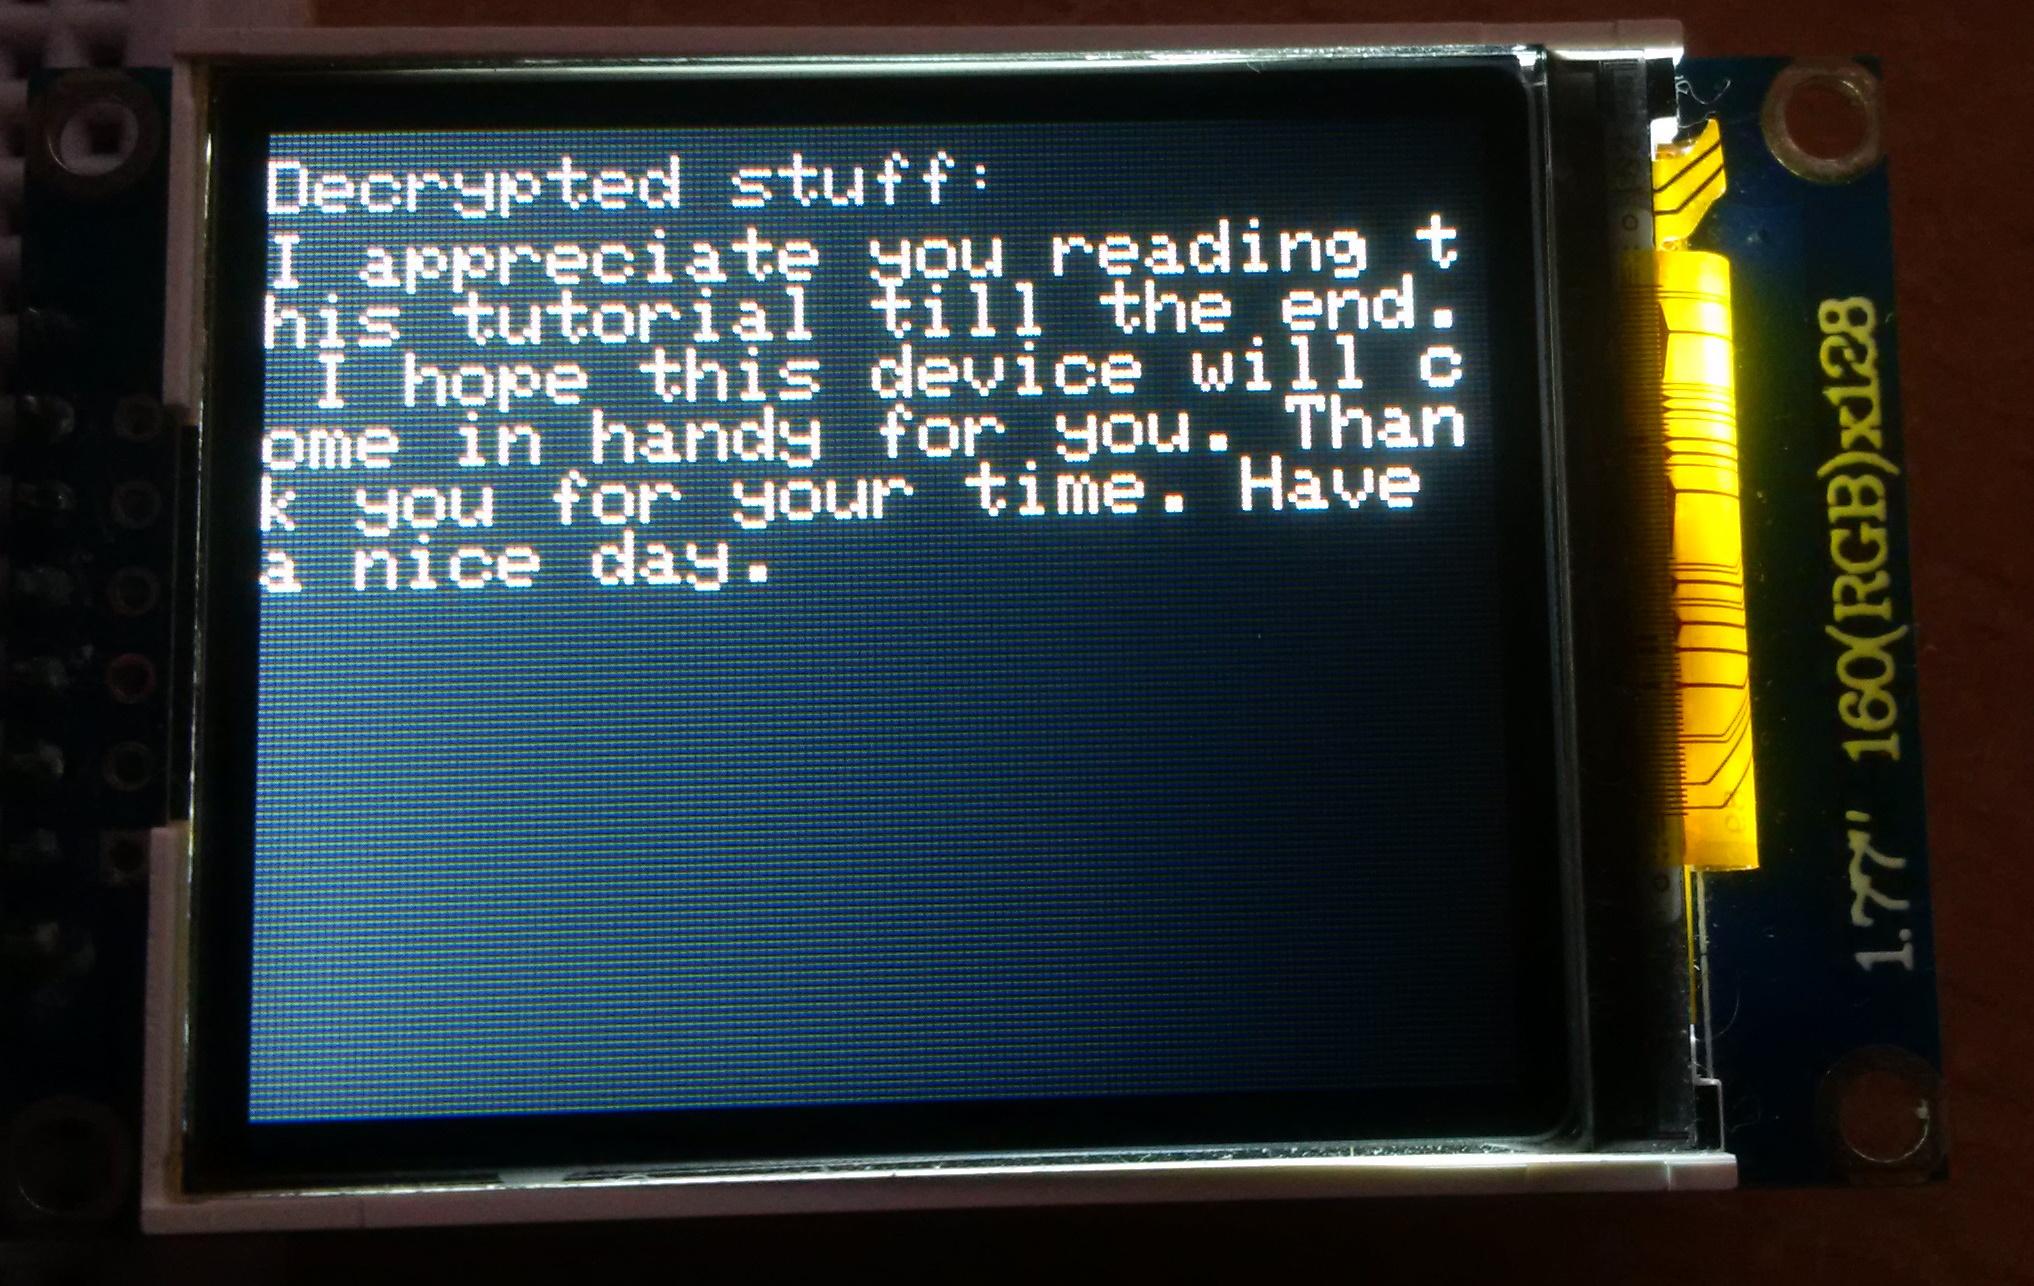
If you like this tutorial, please share it.
Thank you for reading this tutorial.