Parametric Candle Holder in Fusion 360
2698 Views, 51 Favorites, 0 Comments
Parametric Candle Holder in Fusion 360
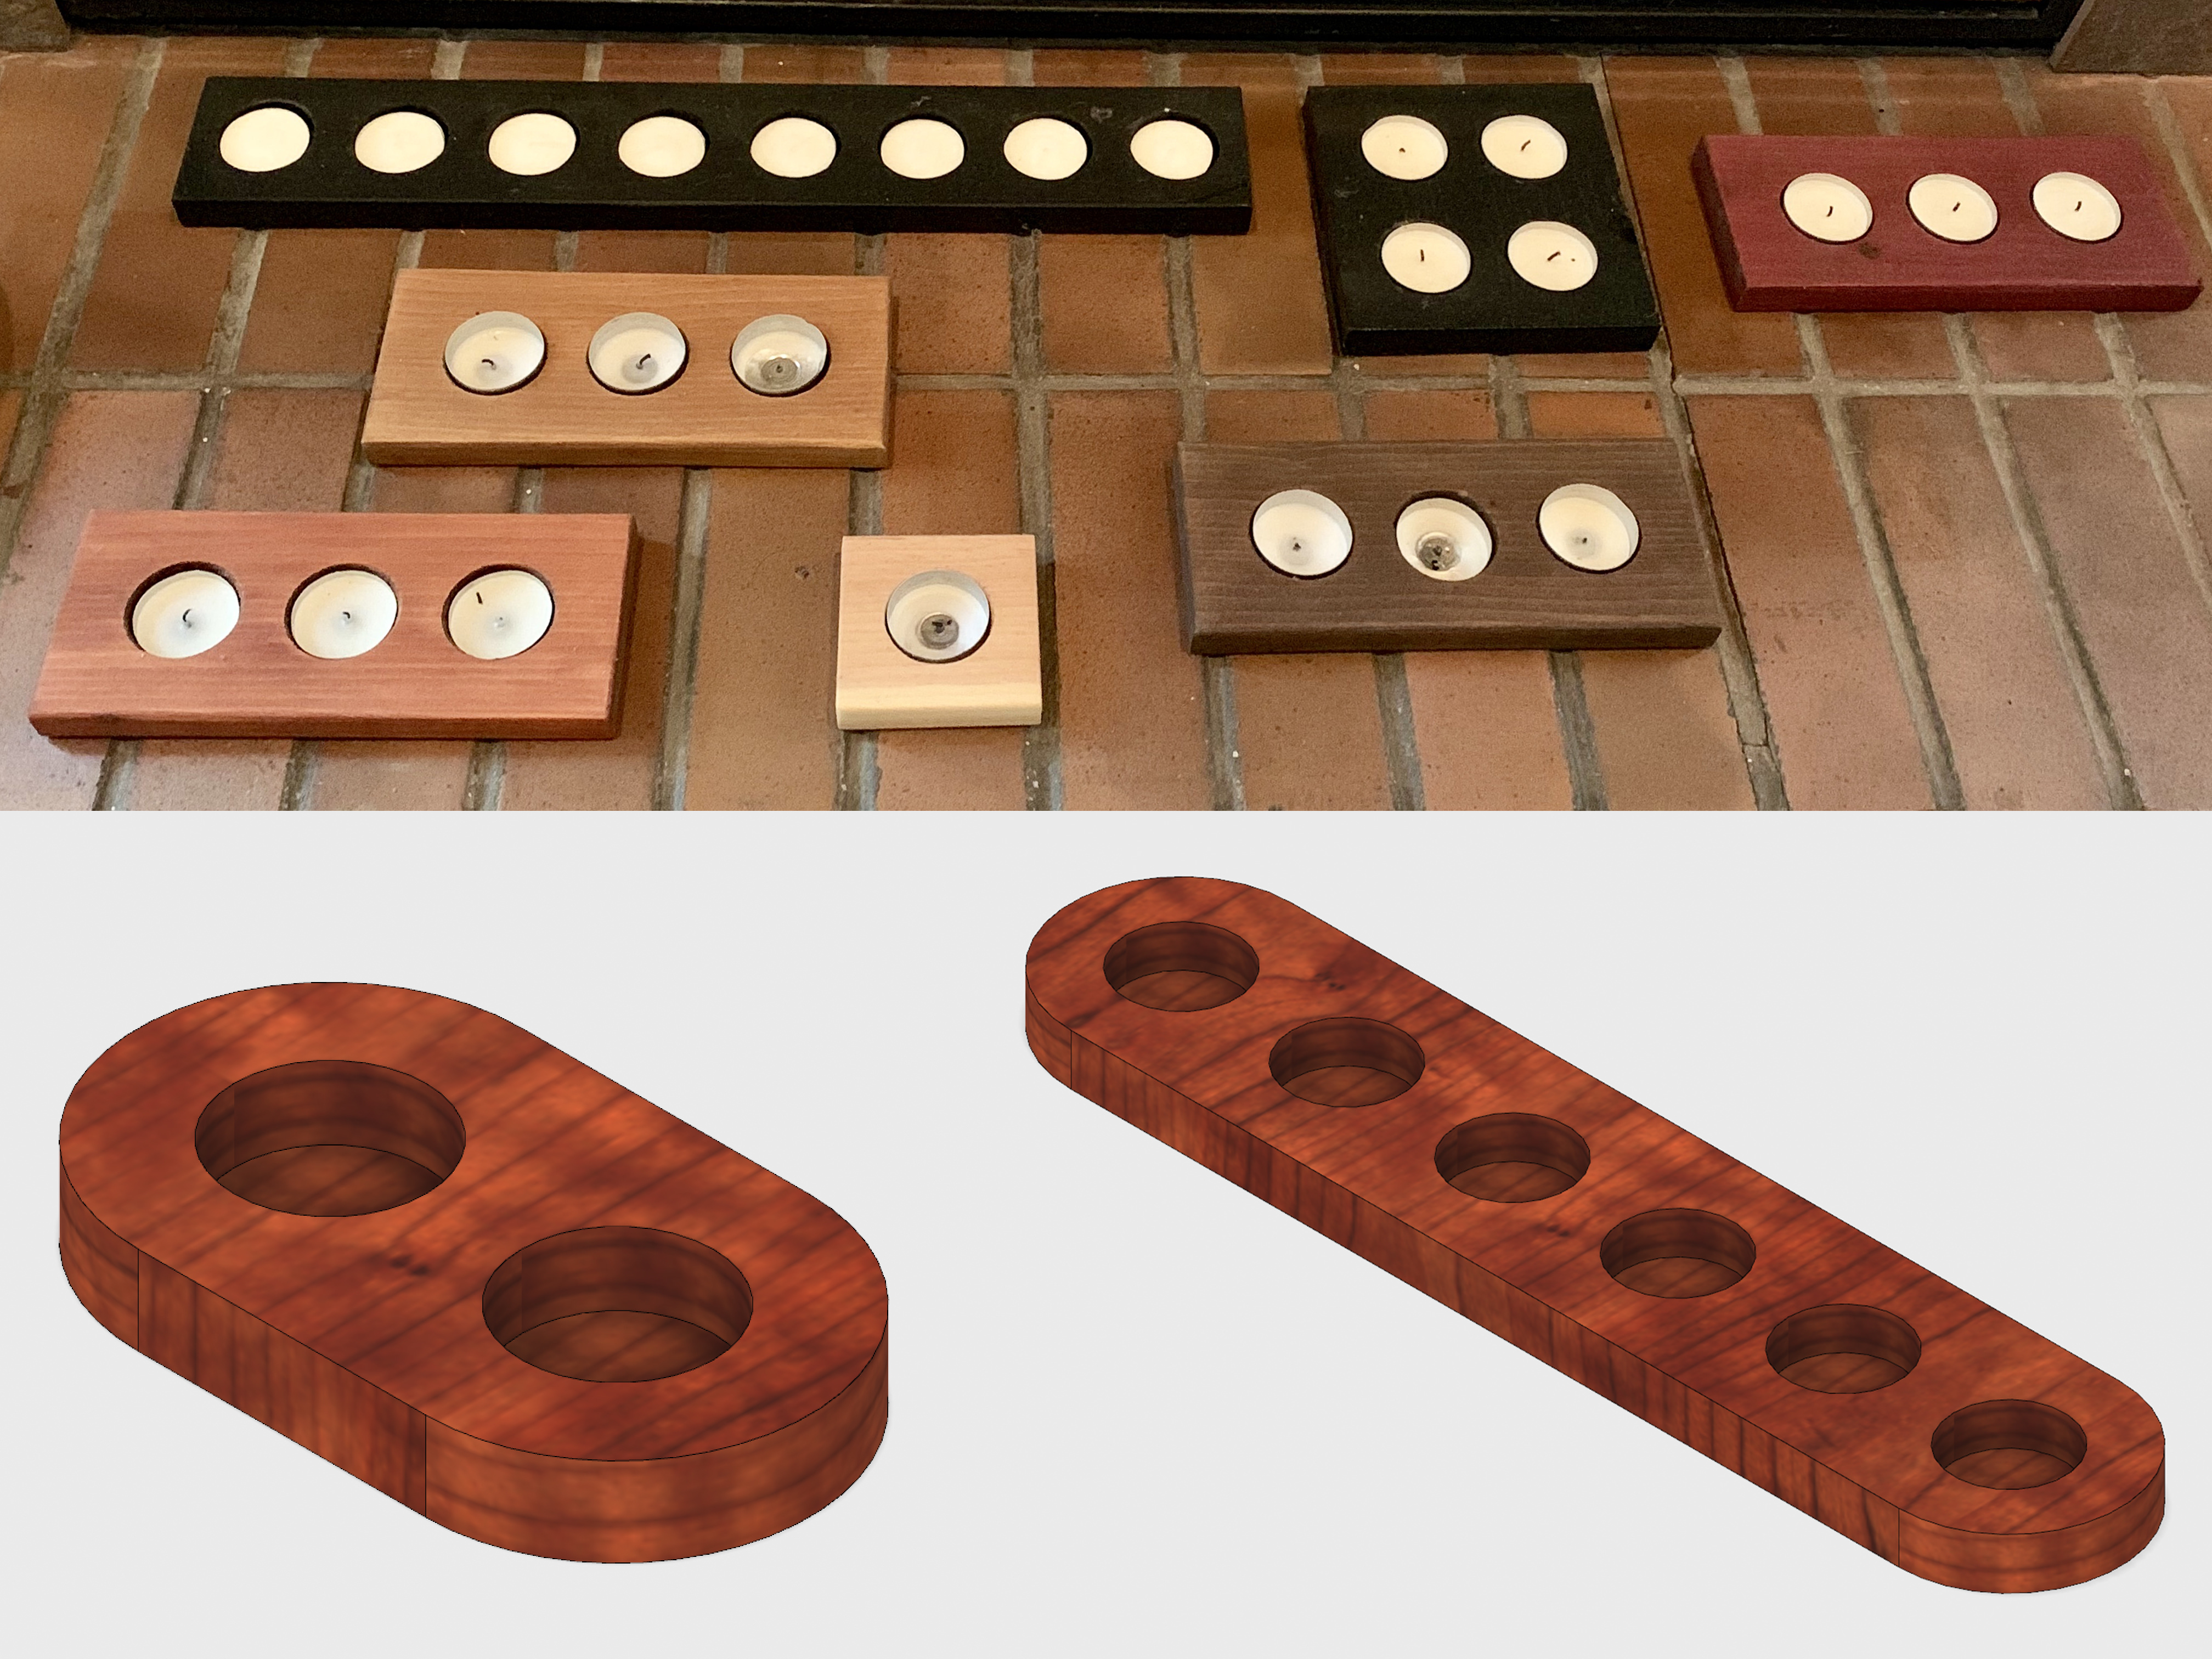
Fusion 360 is a wonderful tool that not only allows you to create very detailed 3D models but it differs with most other 3D modelling software in one very particular way: it is parametric. This means that it allows you to define "parameters" -length, height, number of repeats- within your model that can be changed at any time (even after you've finished your model) and change almost any aspect of it.
Let me demonstrate this by creating a "dynamic" candle holder. I'm using the word "dynamic" to convey that with just one 3D model I can produce many different versions of the object by only changing the parameters and not touching any modelling tools at all.
In the images above you see how this model can create a 2-candle version and a 6-candle version. The only thing I changed was a "parameter" (more on this later). I didn't have to open up a different file or change the model. By just changing the parameter I can update the model in real time to have the amount of candles I want.
This is fantastic for people who sell items like this as it allows them to have a wide selection with minimal cost; only one file to maintain.
Getting to the Parameters Menu
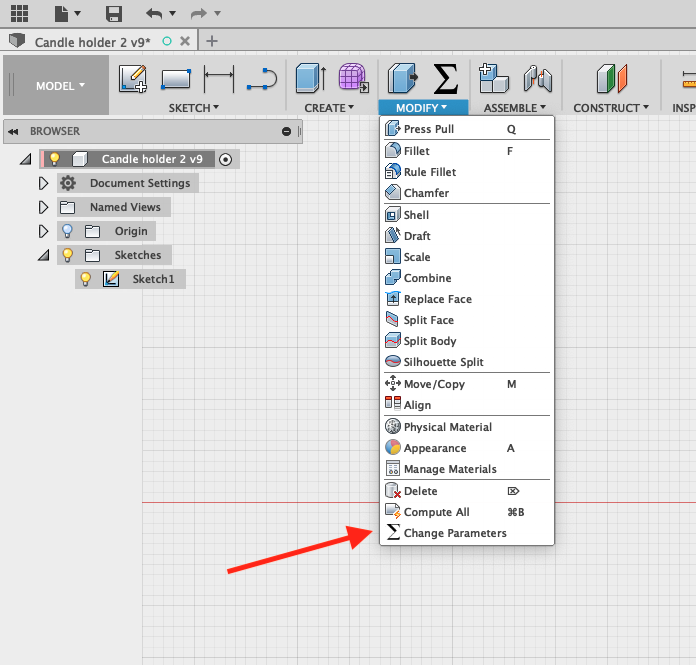
A nice thing about parameters is that you can enter them all before starting your model, enter them one by one as needed during the project, or at the very end. I personally recommend entering as many as you think you will need before starting your project as this will give you a much better mental roadmap of your model.
To get to the parameters page look for the big Epsilon icon in the top bar. Underneath it you'll see a MODIFY submenu. When you open that, at the very bottom you'll find the "Change Parameters" option (again with a small Epsilon icon on its side).
User Parameters
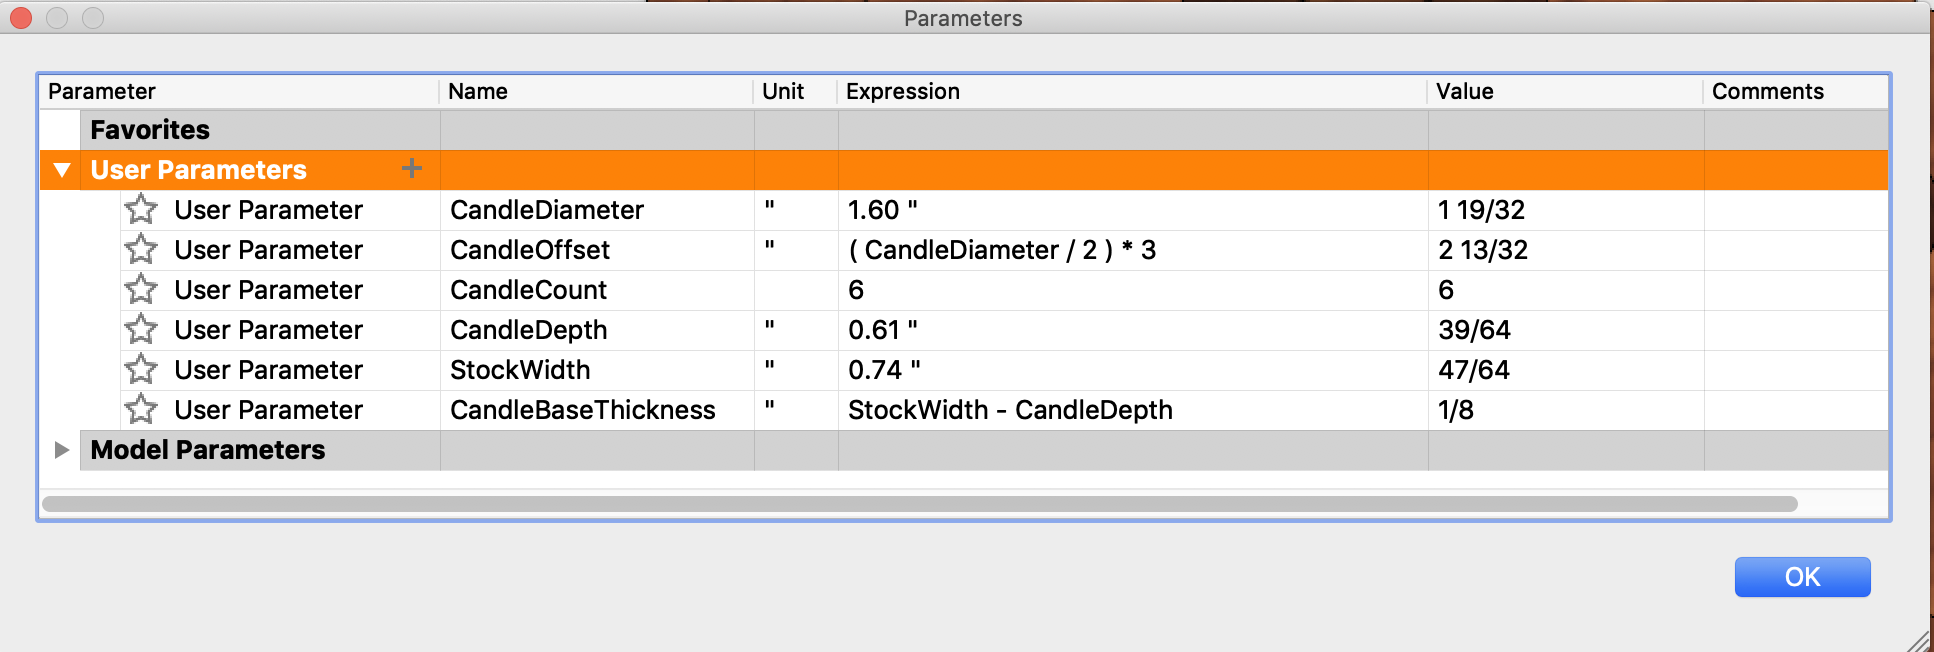
As you can see in the screenshot, I've already entered all my parameters. There are what Fusion 360 calls "User Parameters" as they are the ones I -the user- have manually entered and named. Below this, you will see that there is a collapsed panel called "Model Parameters". These are all the instances within your model that you've used your User Parameters.
Let's look at the ones that I entered:
CandlleDiameter: How wide a single candle is (1.6"). In my case I modelled this so that a standard tealight candle would fit loosely. If I want a tighter fit, I can reduce this number.
CandleOffset: This controls the separation between candles. Take note that the Expression field in a Parameter, that is the place where you enter a value, can also be a formula as you can see in this parameter. In this case I'm telling Fusion that the separation between candles should be a function of the CandleDiameter. This makes it so that if I change the CandleDiameter, then the separation changes proportionally as well!
CandleCount: How many candles I want the object to hold.
CandleDepth: How deep to carve the pocket that holds a candle.
StockWidth: This controls the width of my material (the stock). In my case, I'm thinking I will carve this with a router CNC so having this parameter makes it useful for setting up the machine later.
CandleBaseThickness: This is just so that I know how much material is left under each candle. As you can see, I can't directly control this parameter as it is calculated from other two parameters.
Adding Parameters
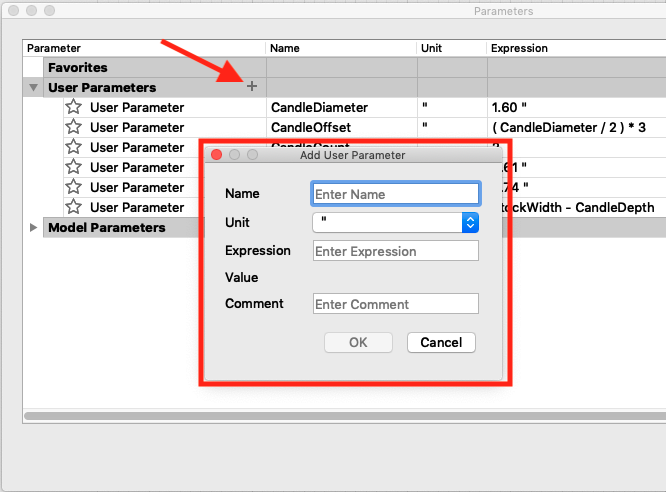
Adding parameters is pretty simple. Click the plus icon next to the User Parameters row and then enter the name, unit, and expression.
Name: Whatever you want to call your parameter. I'm used to software development so I used what is called CamelCase to name my parameters. You can use whatever you want.
Unit: Chose the unit you are going to use. There are dozens to choose from but you are most likely going to use either imperial or metric. In my case, I'm using imperial inches (").
Expression: The value or formula you want the parameter to evaluate.
The Sketch
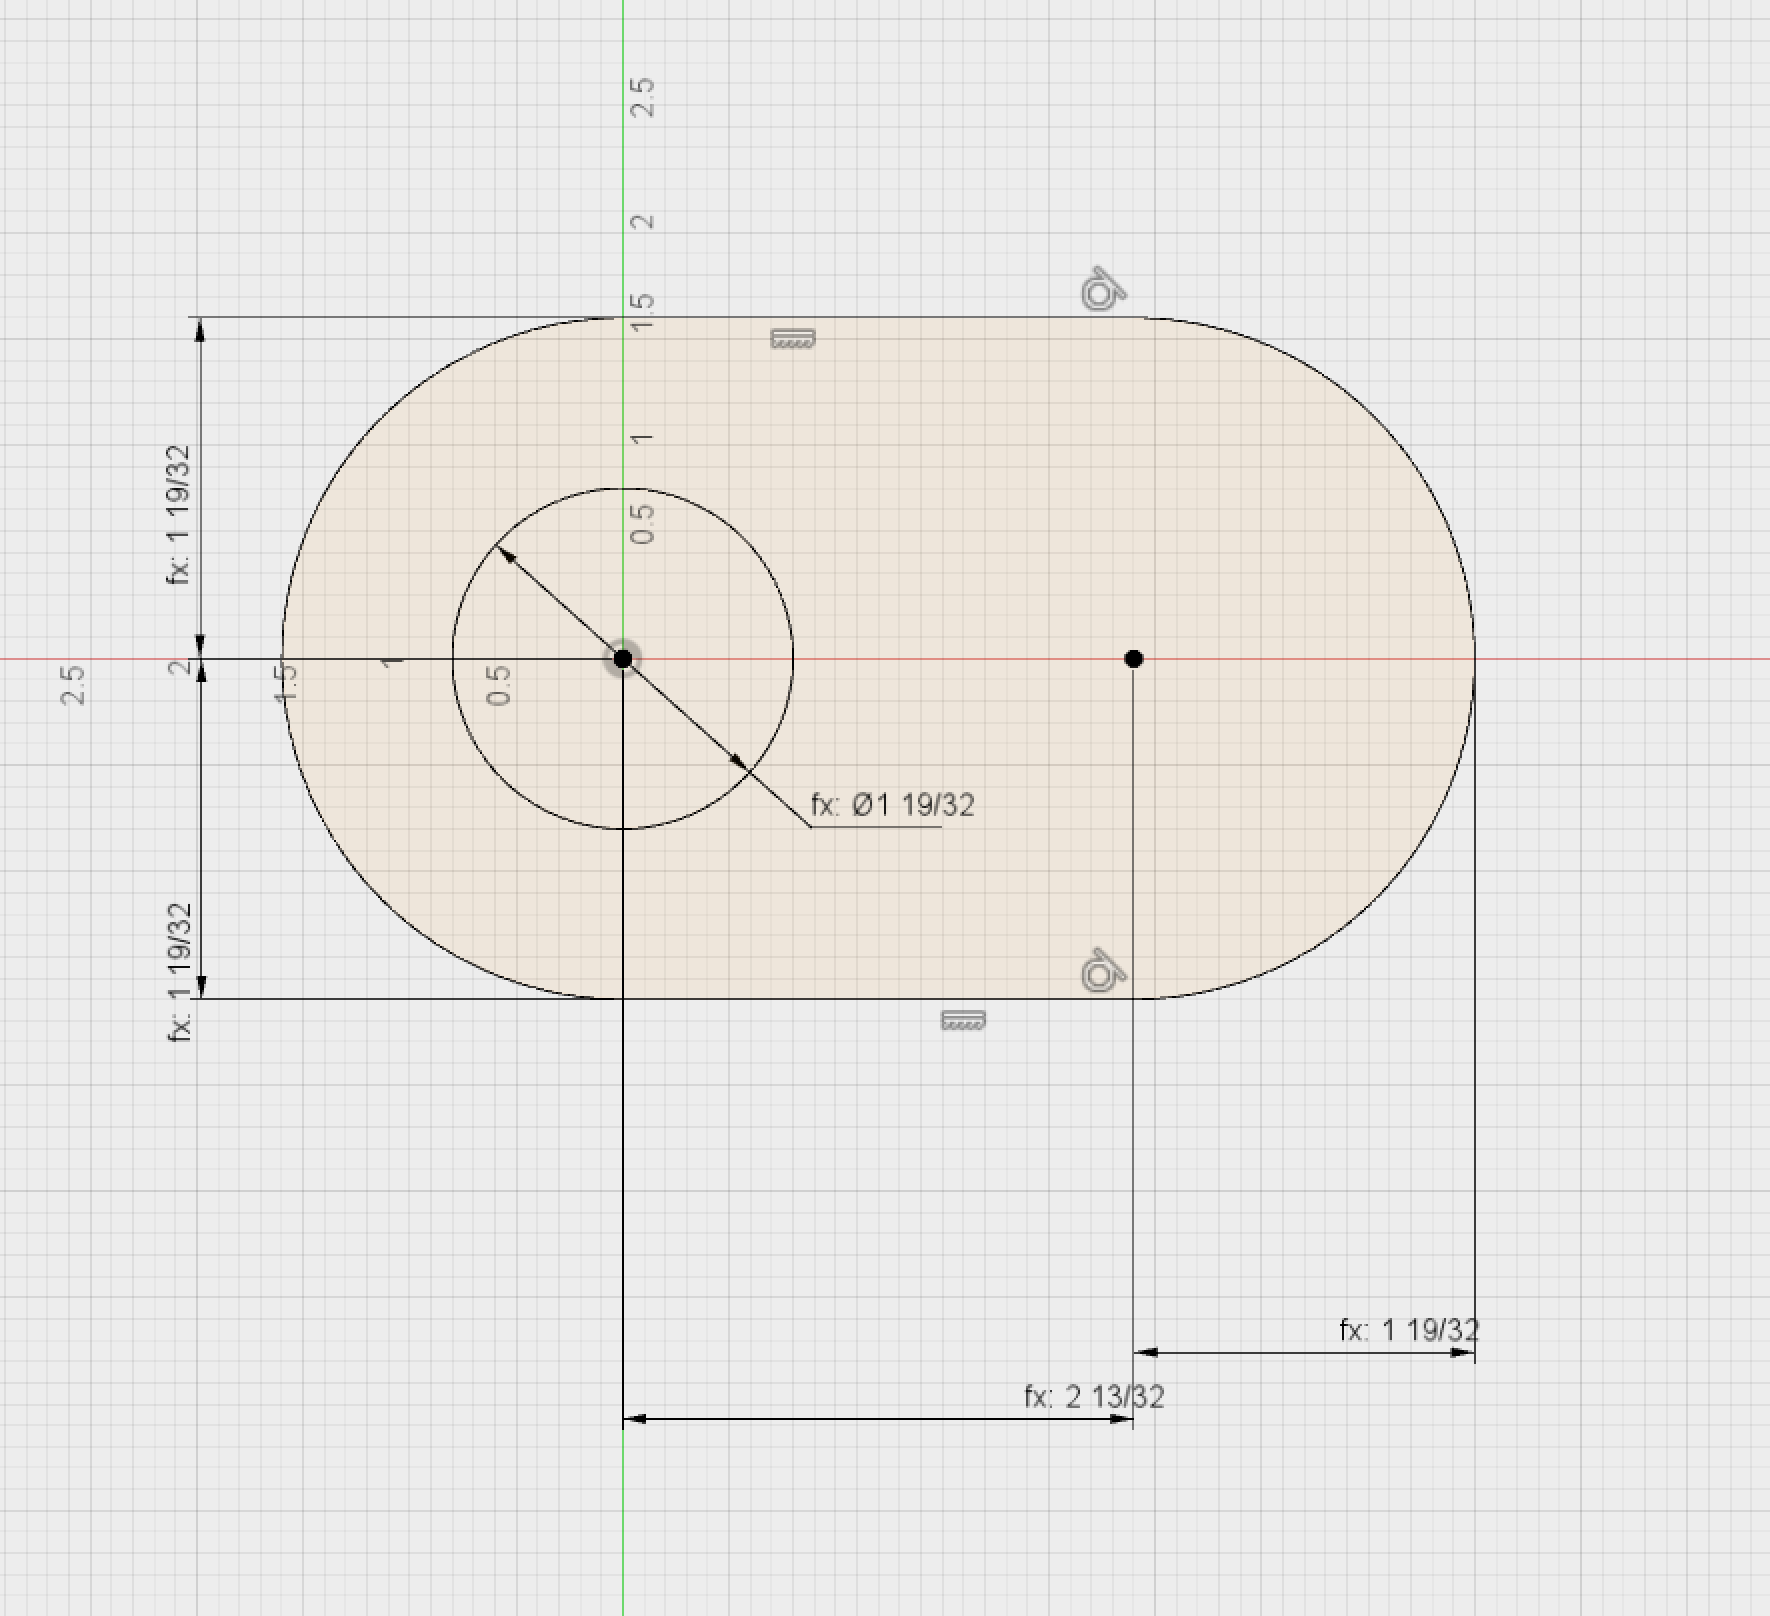
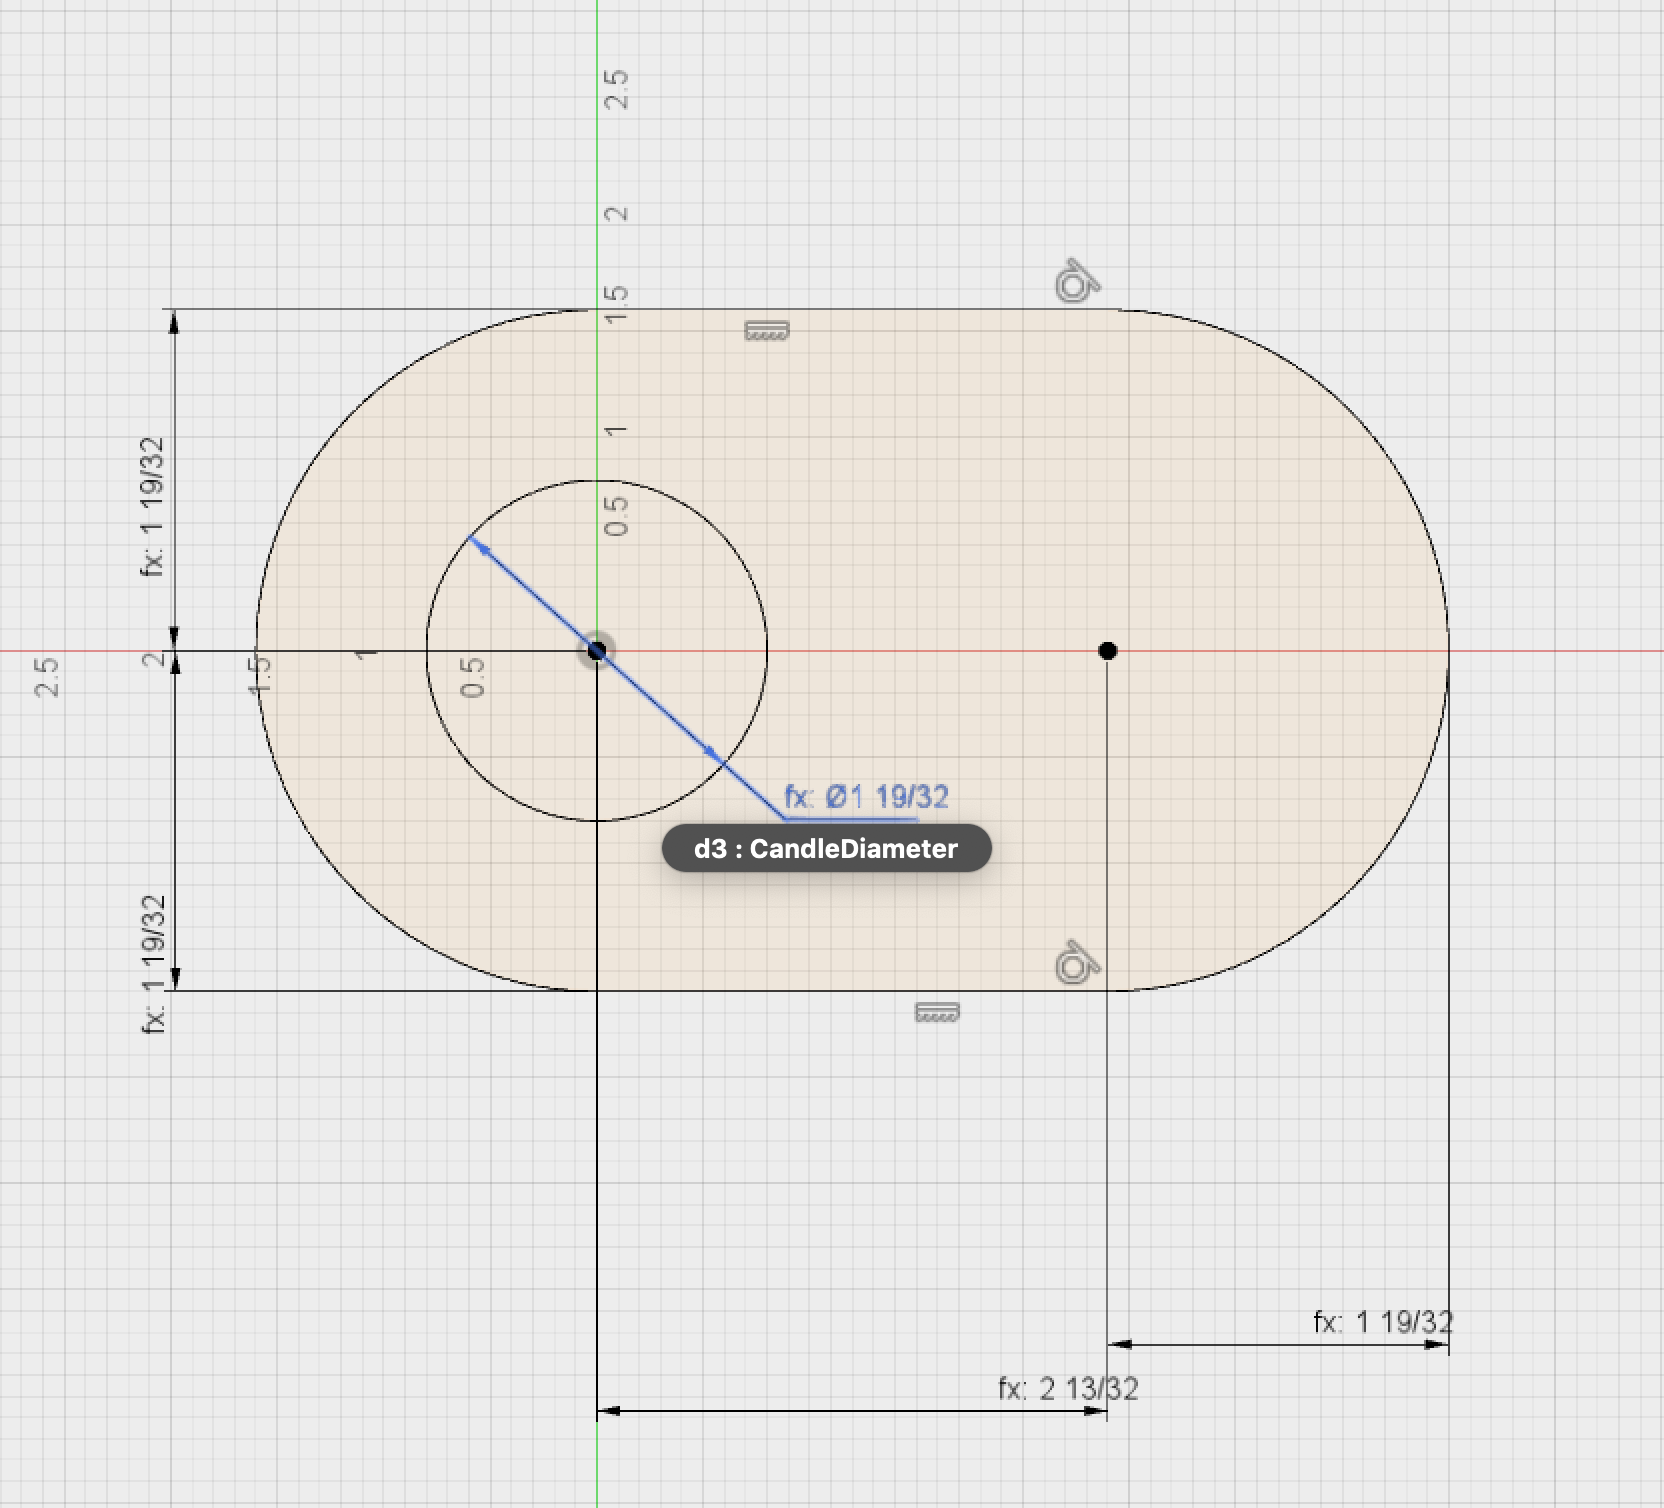
As you can see, the sketch is very simple. I just drew some simple shapes and that was it. The trick here is to assign parameters to the dimensions Fusion assigns to your sketch.
If you look closer at the measurements, you'll see that there is a small "fx:" prefix on them. This means "formula". If you roll over one of these (like in the second screenshot) you'll see that the User Parameter that I used for that particular measurement pops up in white text over gray background. The numbers you see there are what Fusion calculates in real time but what's important is the Parameter you used.
Converting a measurement into a User Parameter is extremely simple: just double click the measurement and type the Parameter name! To test if everything went well, you can go to the Parameter panel and change the parameter to see if your model adapts to the new value.
Rectangular Pattern
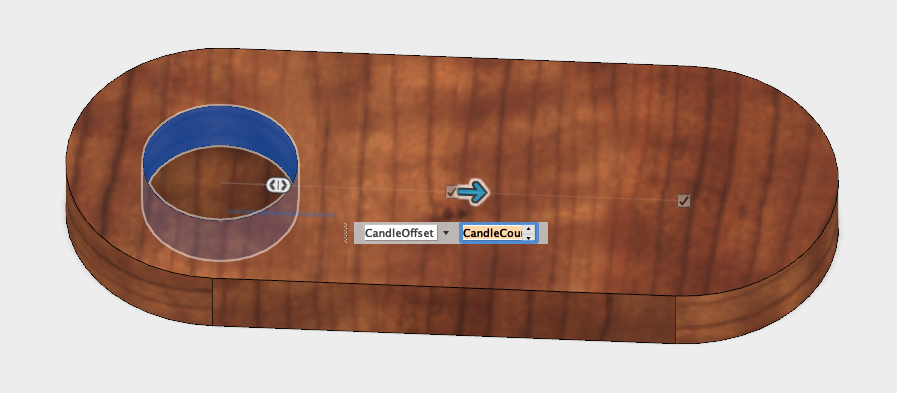
Probably the best feature of this model is that I can select how many candles I want it to hold and it will automatically adapt. This was achieved by using the "Rectangular Pattern" feature in Fusion 360.
While showing you how this tool works is out of the scope of this Instructable, here's the gist of it:
With this feature, you can select an object (in this case the circle representing the candle holder), and have it repeat along an axis. You give it a distance and a quantity and it will repeat that many times. In the screenshot you can see how I selected the left circle and then entered my CandleOffset parameter in the distance field, and CandleCount in the quantity field. This is the very soul of this model! After doing this, I can change my CandleCount parameter and the model will adapt to show as many candles as I want.
CNC Routing
Once your model is done, you can cut it using Fusion 360's Manufacture mode (this was called CAM mode in previous versions).
The Manufacture mode is a very complicated mode to use and what you use within it varies greatly depending on what hardware you have. You can generate the toolpaths to cut with a CNC router, lathe, laser, plasma cutter, or fabricate your model with a 3D printer.
In my case I have a Shapeoko 3 CNC which is not directly compatible with Fusion 360, that is, I need other software to be able to cut my model. I'm not going to get into the fine details because this Instructable is meant to teach you how to use User Parameters. Just for the curious, my workflow is usually this:
- Model with Fusion 360
- Generate GRBL (Gerbel) files with the Manufacture mode.
- Send the GRBL commands to my machine using UGS (Universal Gcode Sender). This is also free to use.
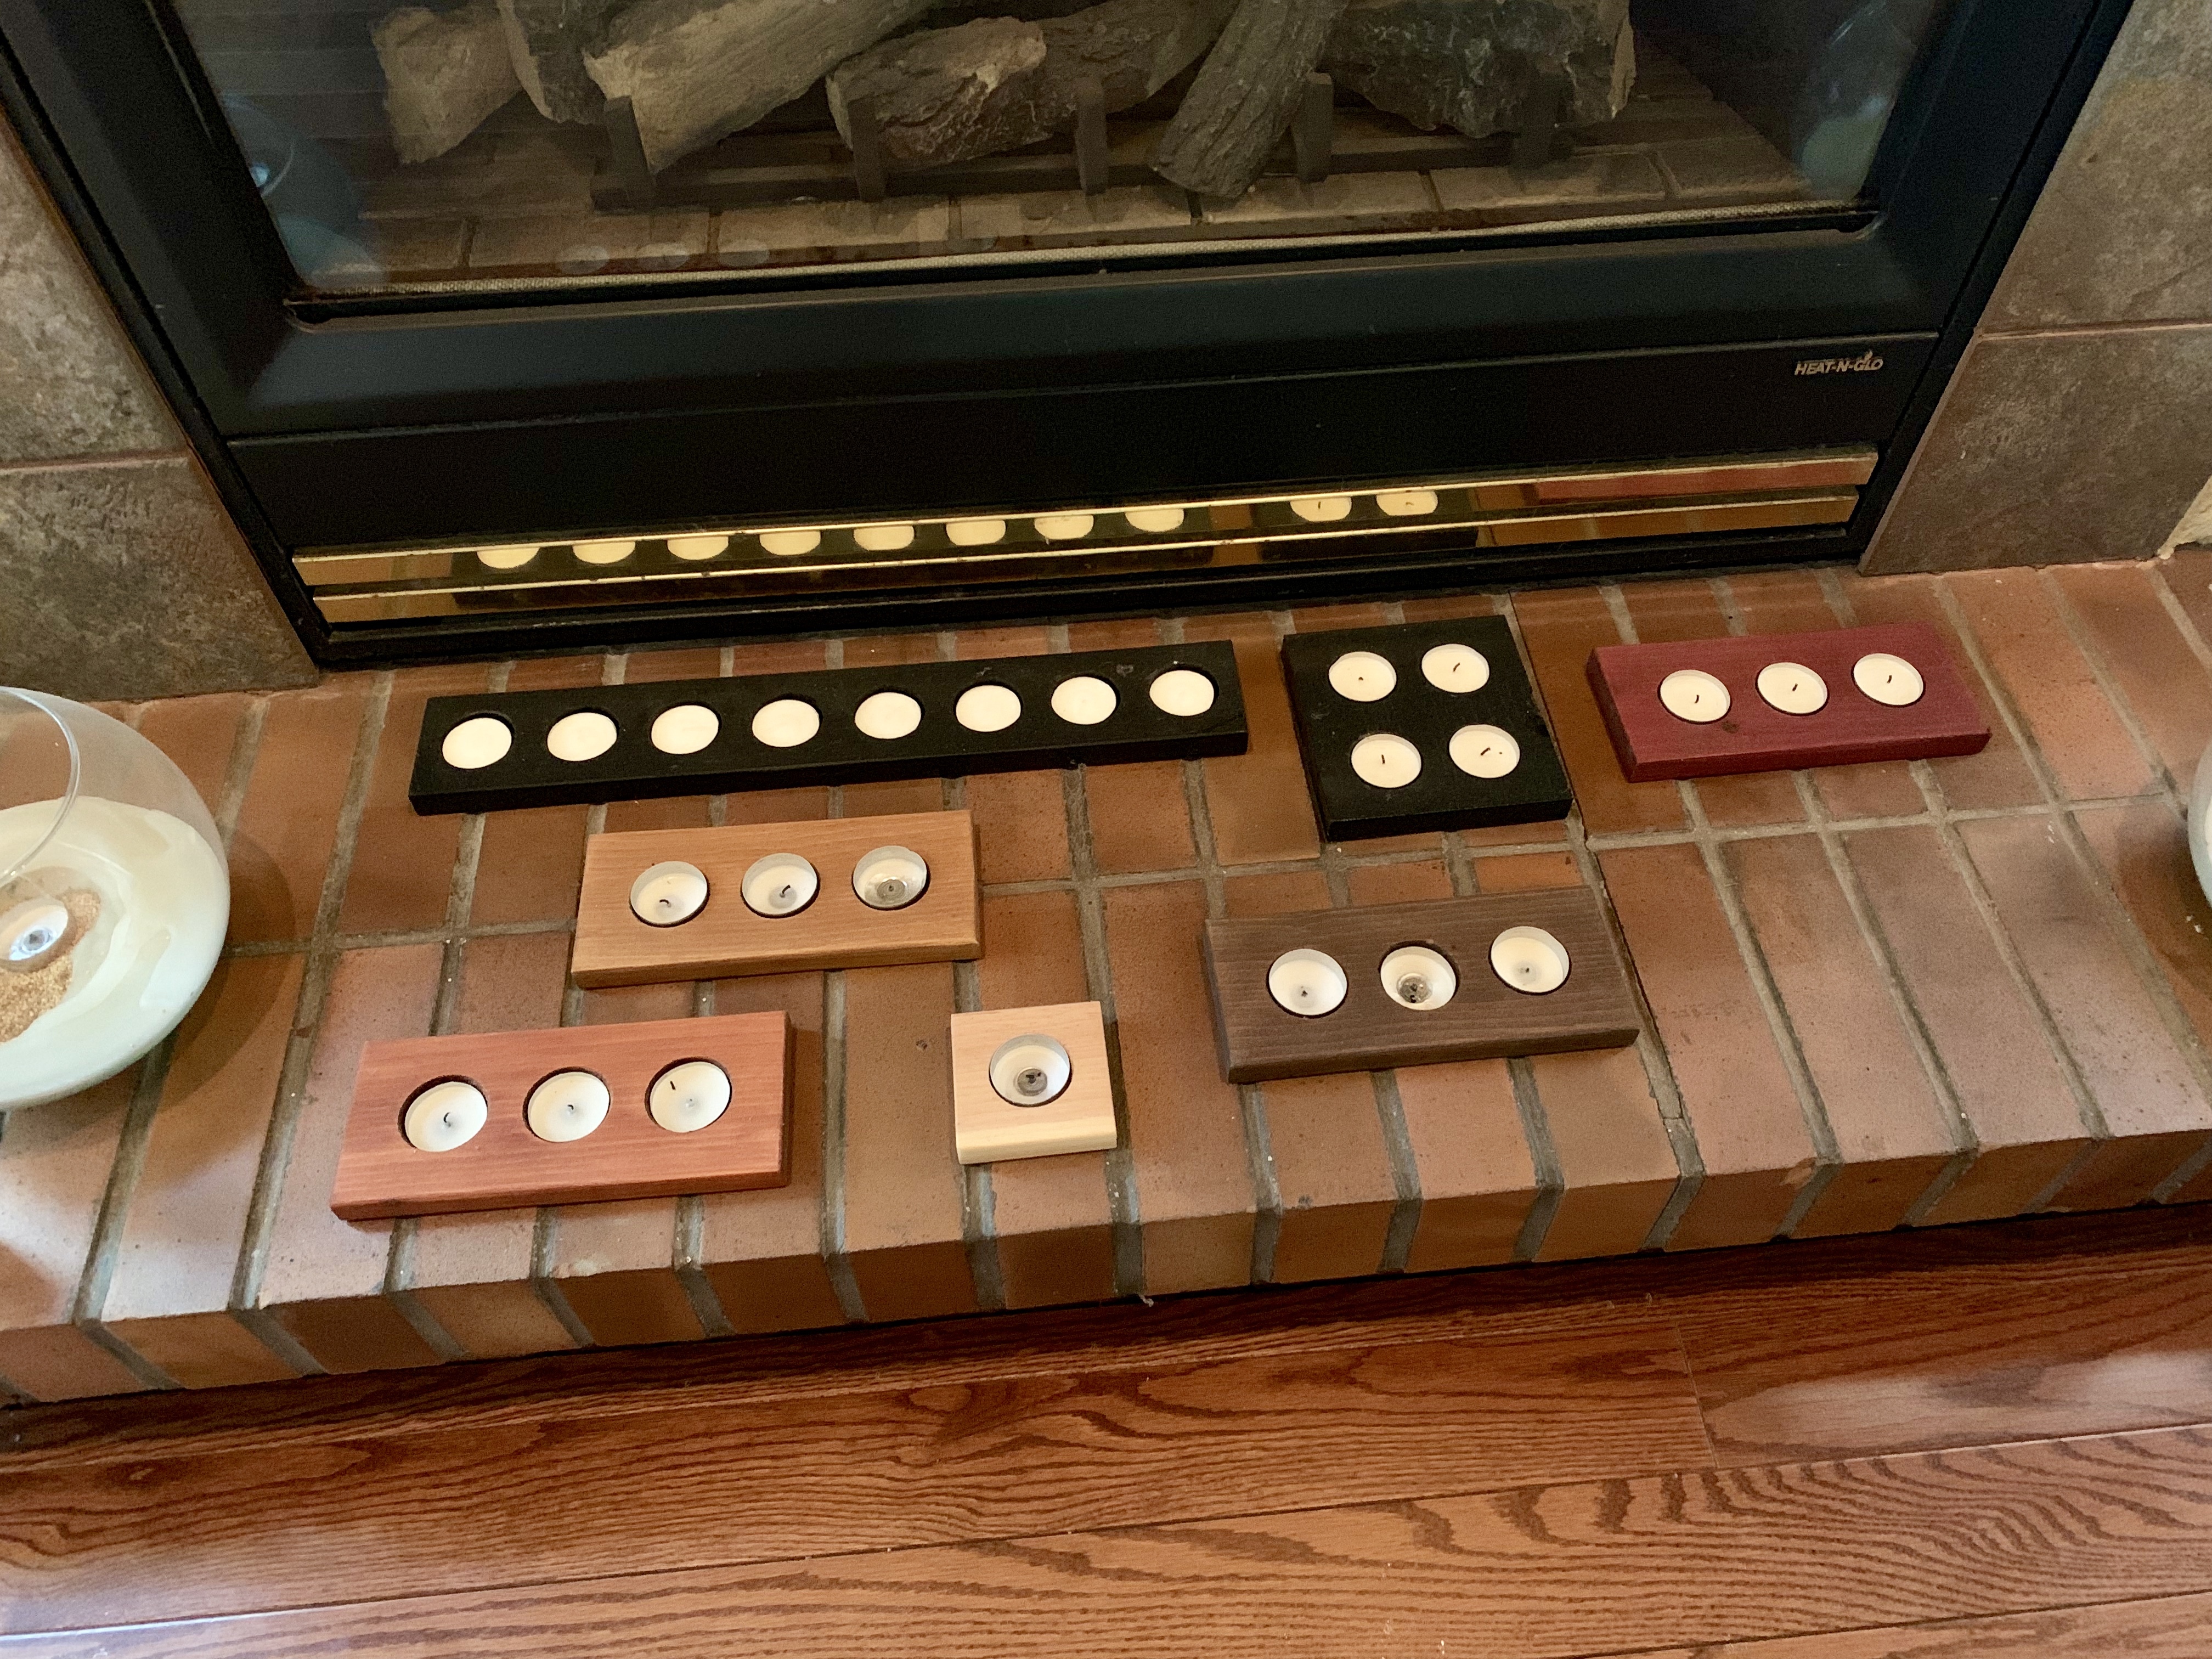
You can see an example of what can be achieved with User Parameters in the included screenshot. All these were cut using a simplified version of the candle holder file (see the next section) and another model which produces a square version.
Challenge
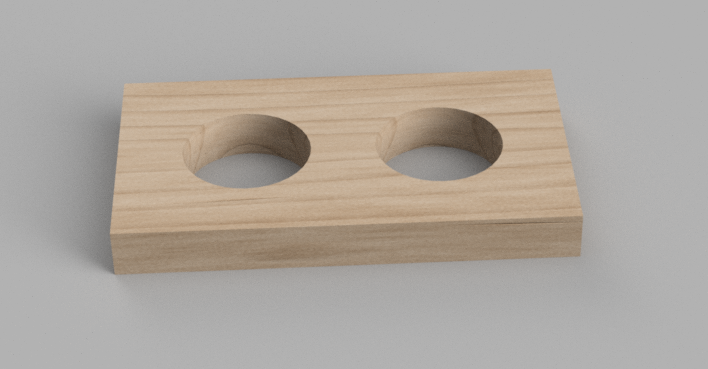
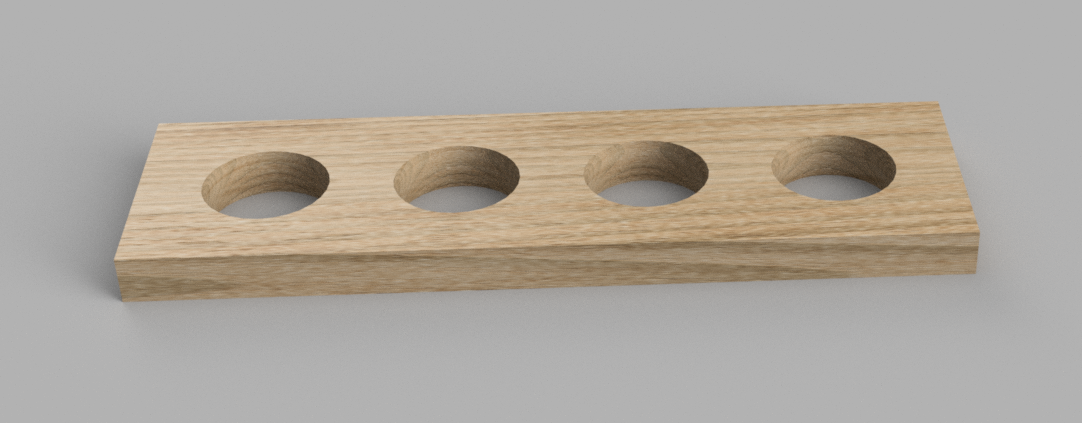
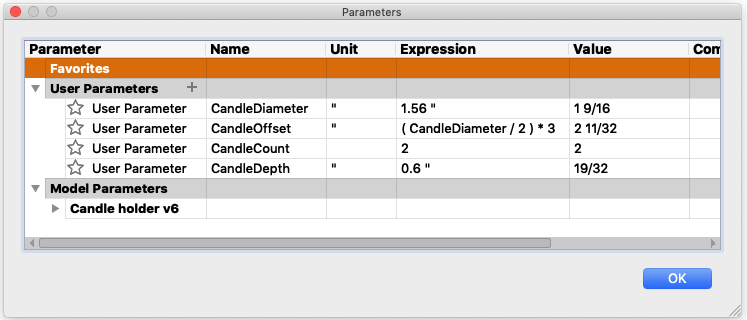
If this is your first time modelling something with Parameters then here's my challenge to you. Try recreating this candle holder but in a simpler way. Get rid of all the complexity like the rounded corners and keep the Parameters to a minimum.
In the included screenshots you will find another simpler version of the candle holder I made using only 4 Parameters and only basic shapes. This should give you an easier goal to achieve. Now, get cracking!