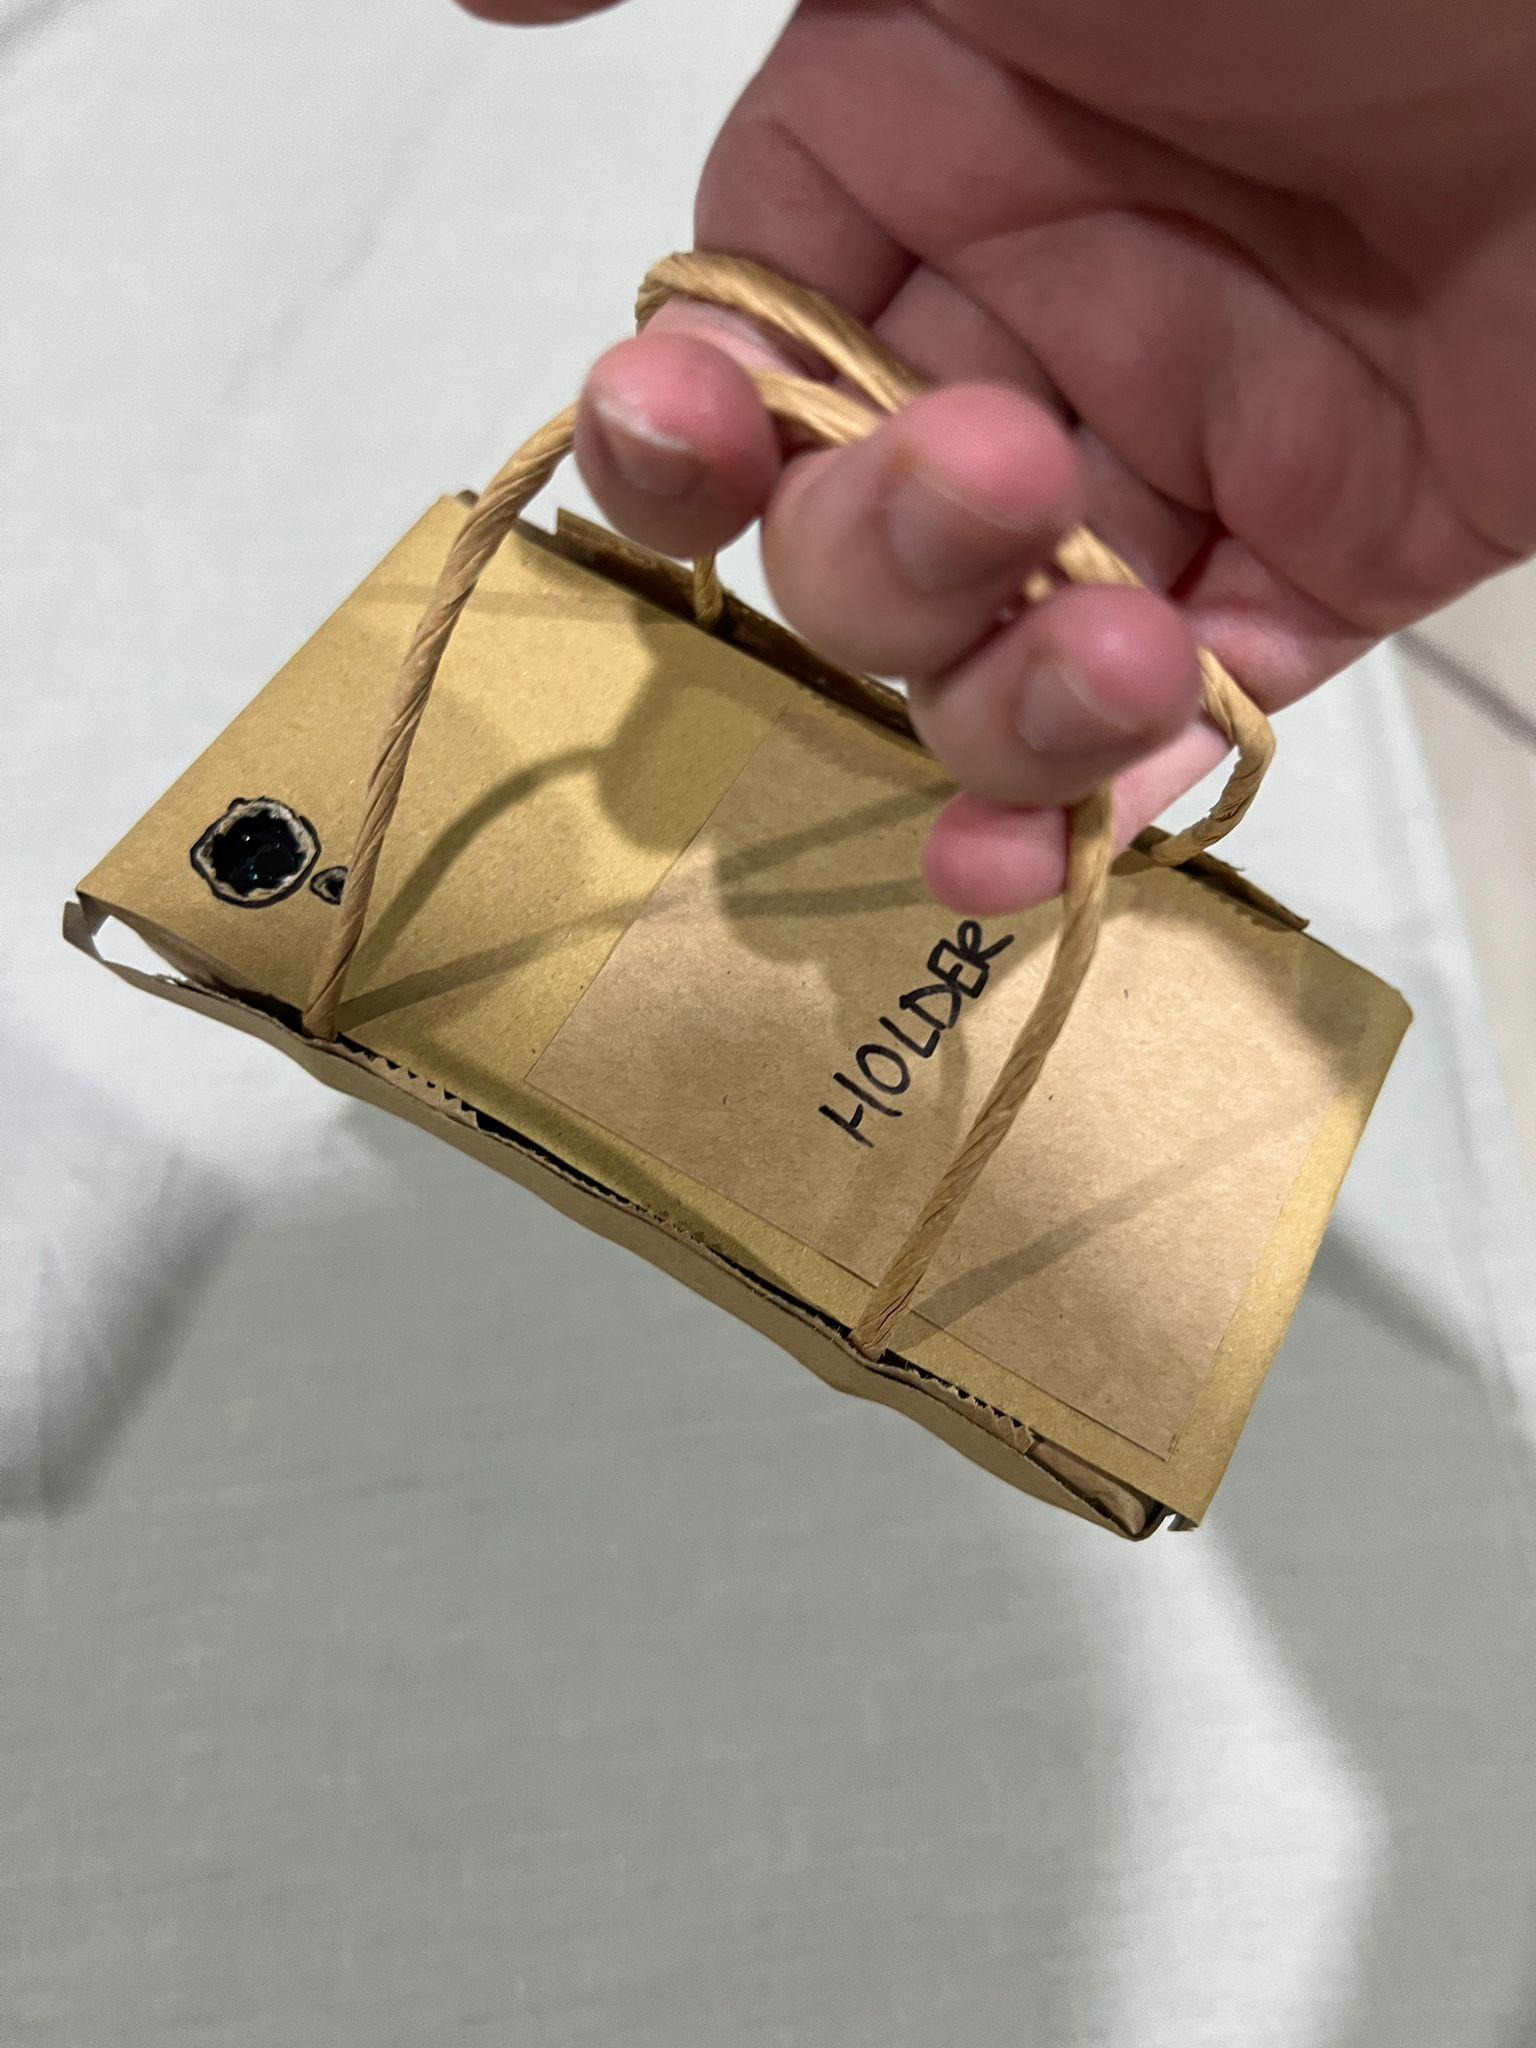
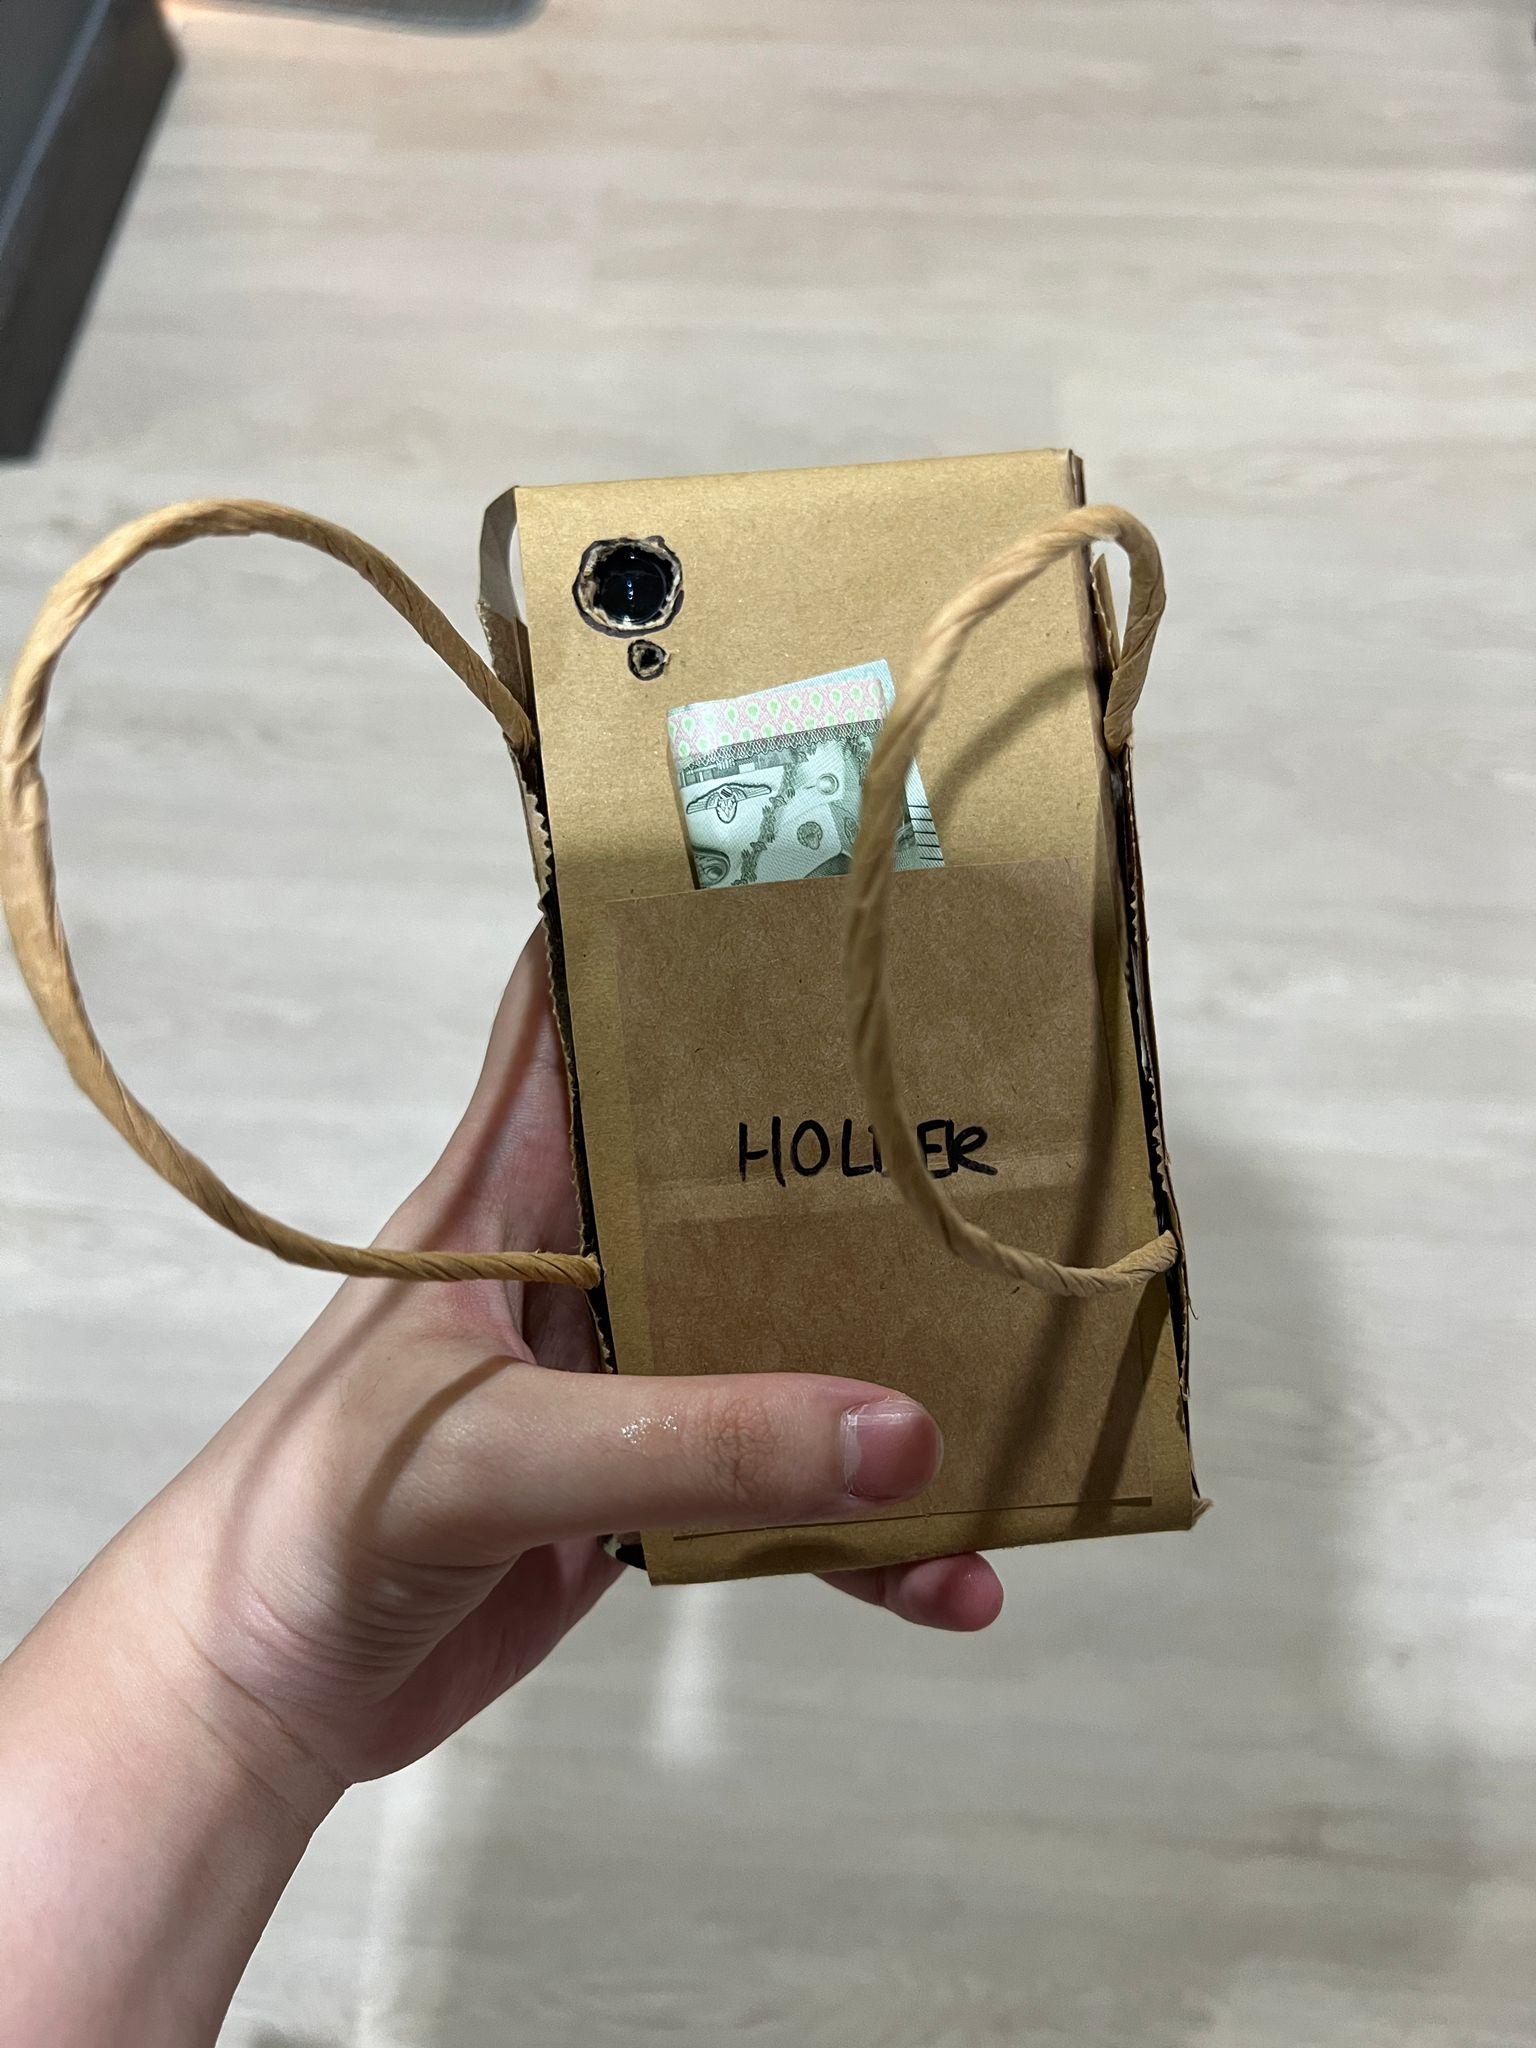
Paper Bag Phone Case Using Recycled Materials
283 Views, 2 Favorites, 0 Comments
Paper Bag Phone Case Using Recycled Materials


Hello! I am a student from Singapore and I enjoy being creative. As I use my phone everyday, I tend to get clumsy with it and drop it very often. That resulted in me having to change my screen protector very often.
My family just finished using a box of tissue and I had a paper bag lying around. Hence I thought to make use of the tools available to resolve the issue I am facing: A paper bag phone case made of recyclable materials.
Supplies
Materials
- Paper Bag
- Cardboard Tissue Box
- Permanent Marker
- Phone
- Glue
- Scissors/Pen Knife
Software:
- Fusion360
Designing on Fusion 360
I started off with designing a draft on Fusion360 to get a preview of my end product.
I do so by creating a cylinder form using the dimension of my phone (Iphone XR dimension) and I deleted the top layers by clicking on the edit form and selecting the rectangles I would like to remove to get the shape of a phone cover
The form is then converted to surface and thickened to a thickness of 3mm (which is the thickness of my current phone case) by selecting create under the solid tab and clicking on thicken
After, I used the sketch tool to sketch the circle on the case where the camera and torchlight on the phone would be at. I measured 5mm by 5mm from the edge of the case to get the intersection point of the lines before sketching the circle with a diameter of 10mm.
Then, I extruded the circle by selecting extrude under the solid -> create tab. I changed the “operation” setting to cut instead of new component to get a hole through the phone case
This is how the extruded circles look like.
Following the extrusion of the camera and torch holes, I extruded a oval shaped hole for the lightning cable using the same method as before.
The paper handles are attached to the case by extruding 2 rectangles on both sides of the case.
I started by sketching a rectangles with the dimensions of the side of the case and extruded the the rectangle by 3.5mm. However, this time the “operation” setting is set to join for the extruded rectangle to join to the overall case.
The handles are designed using the “sweep” tool under solid -> create tab. I started of by sketching 4 circles, 2 on each side with a diameter of 1mm for the handles to be attached to the rectangle.
Then using “conic curve”, I joined both circles together and change the degree to 0.5 so that the handles are not too sharp.
Afterwards, I used “sweep” to form a solid connecting the circles, forming a handle.
Lastly, I extruded a rectangle at the back of the case to represent a card holder/money compartment for me to slot any items needed.
Hands On!
I began making the phone case by cutting a portion of the tissue box and drawing out the dimensions of my phone on the cardboard.
After, I folded the edges of the cardboard to form round edges and glued them to the surface of the cardboard
Following, I used scissors to cut an oval shaped hole at the bottom for charging
As glueing would leave glue marks on the cardboard and paper bag due to the material being too thin, I glued a layer of paper bag paper (brown paper) to the cardboard before attaching the handles and another layer of brown paper using double-sided tape.
After glueing the first layer of brown paper, I cut out the handles from the paper bag and attached them to the sides of the case.
Then to finish the outer layer, I cut out different sizes of brown paper and stuck them onto the case using double-sided tape
Finally, I stuck the money compartment/card holder onto the back of the case. However, as the double-sided tape is wider, I had to cut it into two before pasting it on the sides of the holder to allow the card/money to fit. I ended with some touch-ups to the holes by drawing an outer ring to indicate that it is for the camera and torchlight.
Having a handle to prevent my phone from falling is especially useful when I have a lot of grocery bags to hold.
There are so many new items that can be made using products we have already used. There is a cycle to it! Creating it is all that needs to be done.