Paper Airplane Tutorial
by one-lightbulb in Living > Office Supply Hacks
8358 Views, 3 Favorites, 0 Comments
Paper Airplane Tutorial
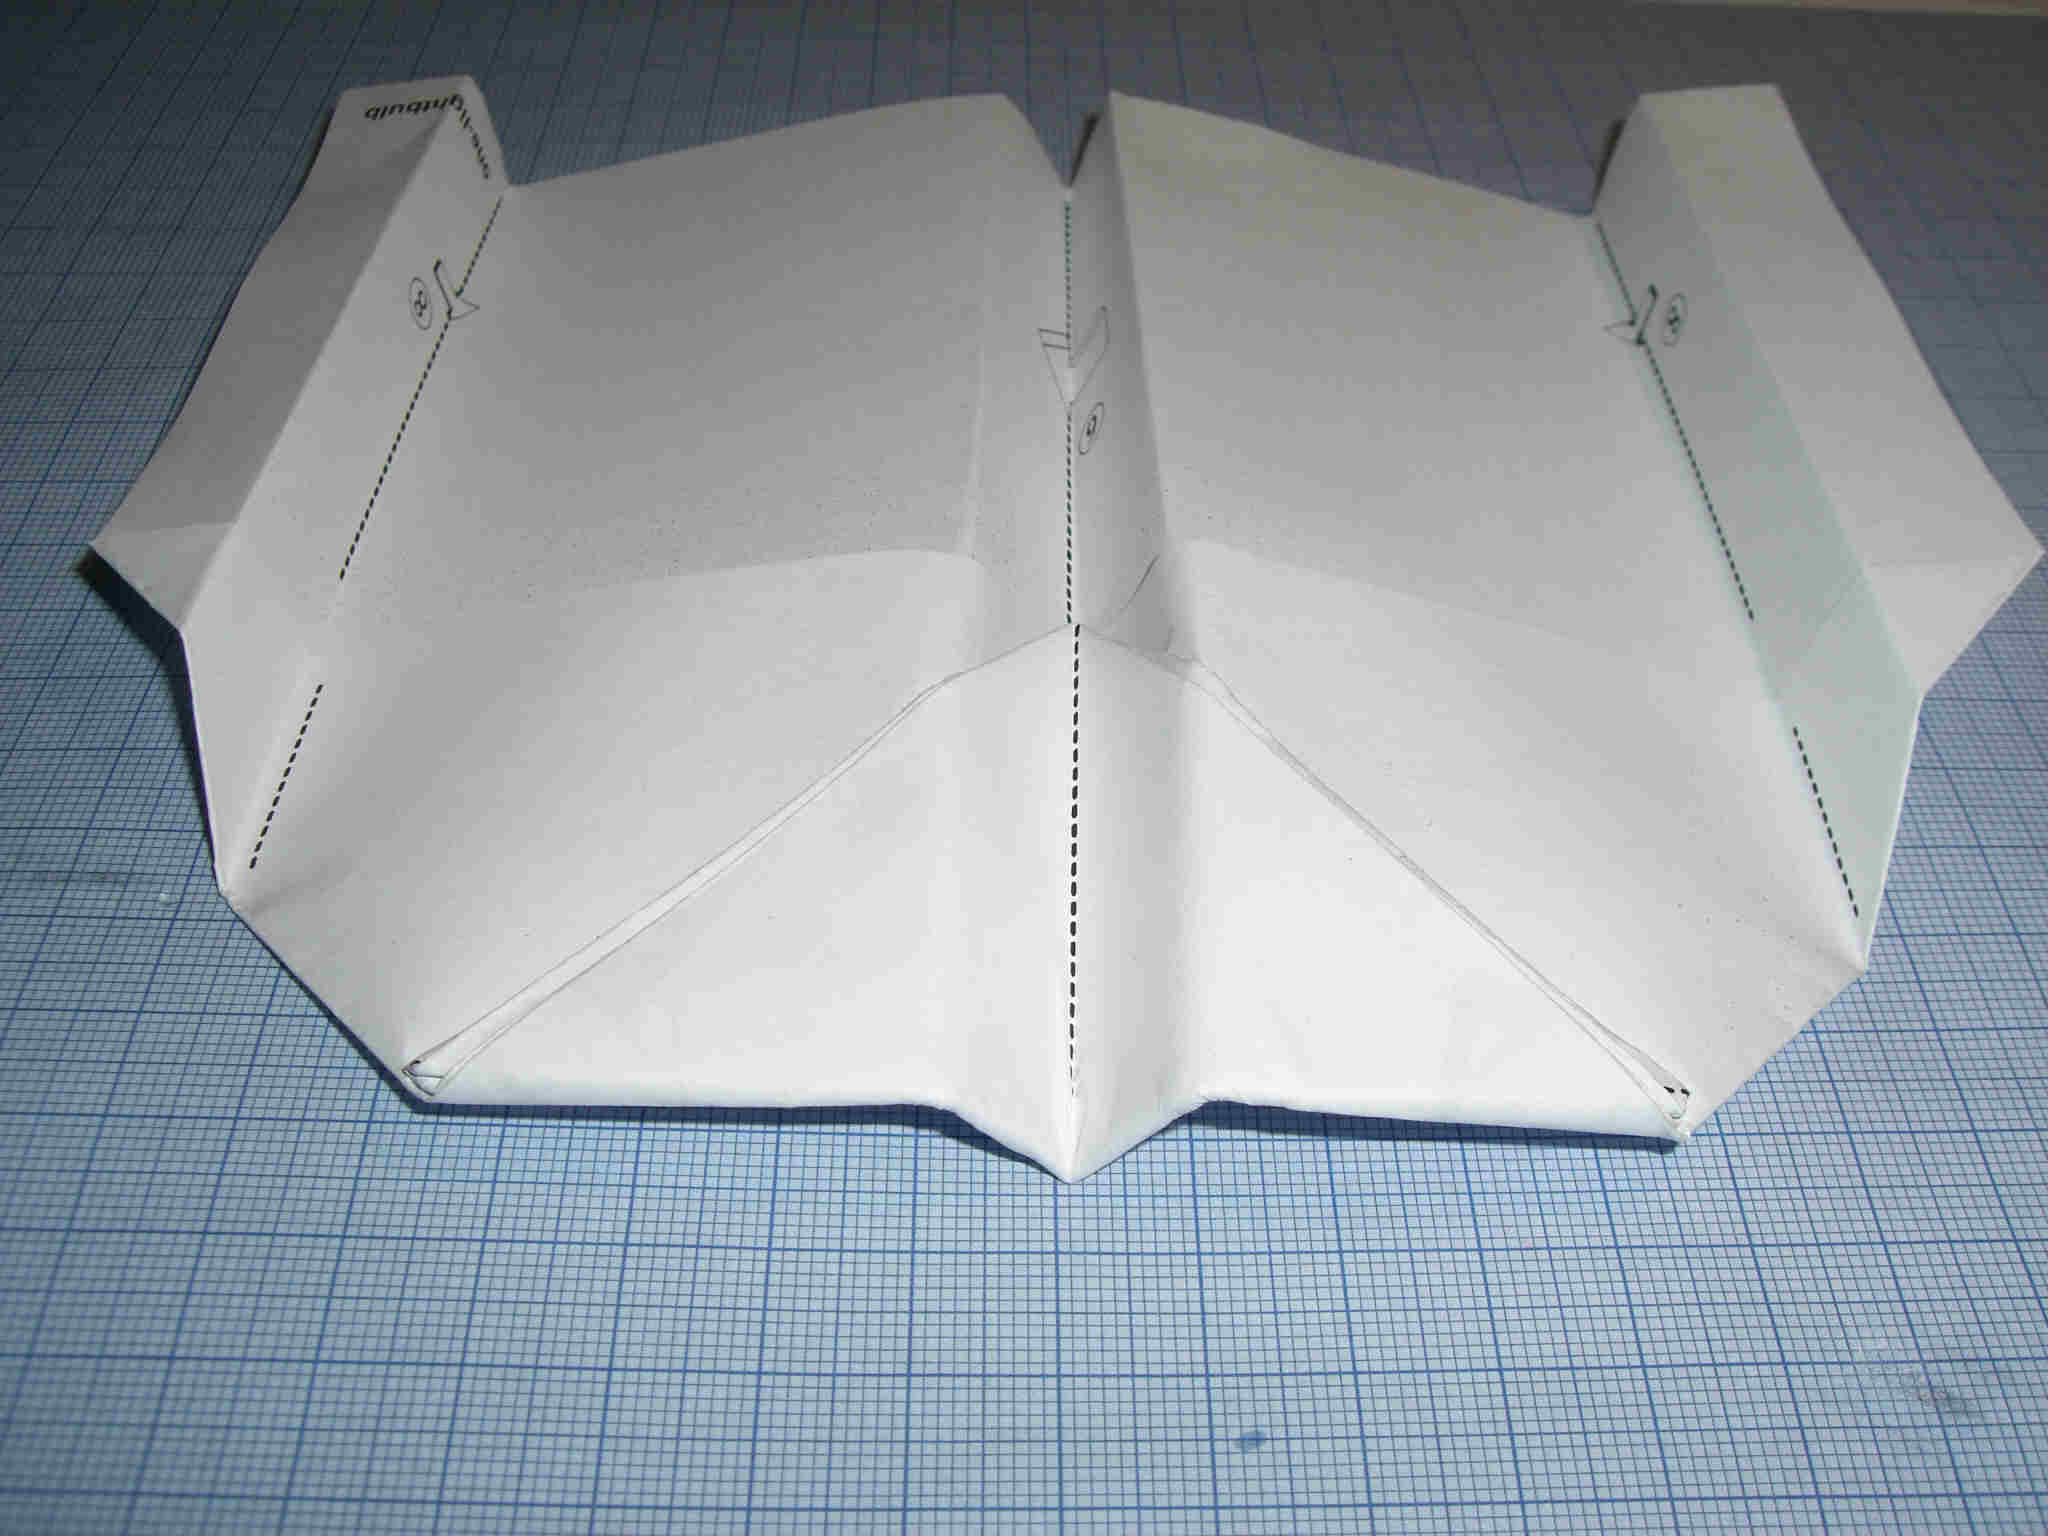
Here I show you how to fold a paper airplane.
Take One Sheet of Paper (A4 or Letter)
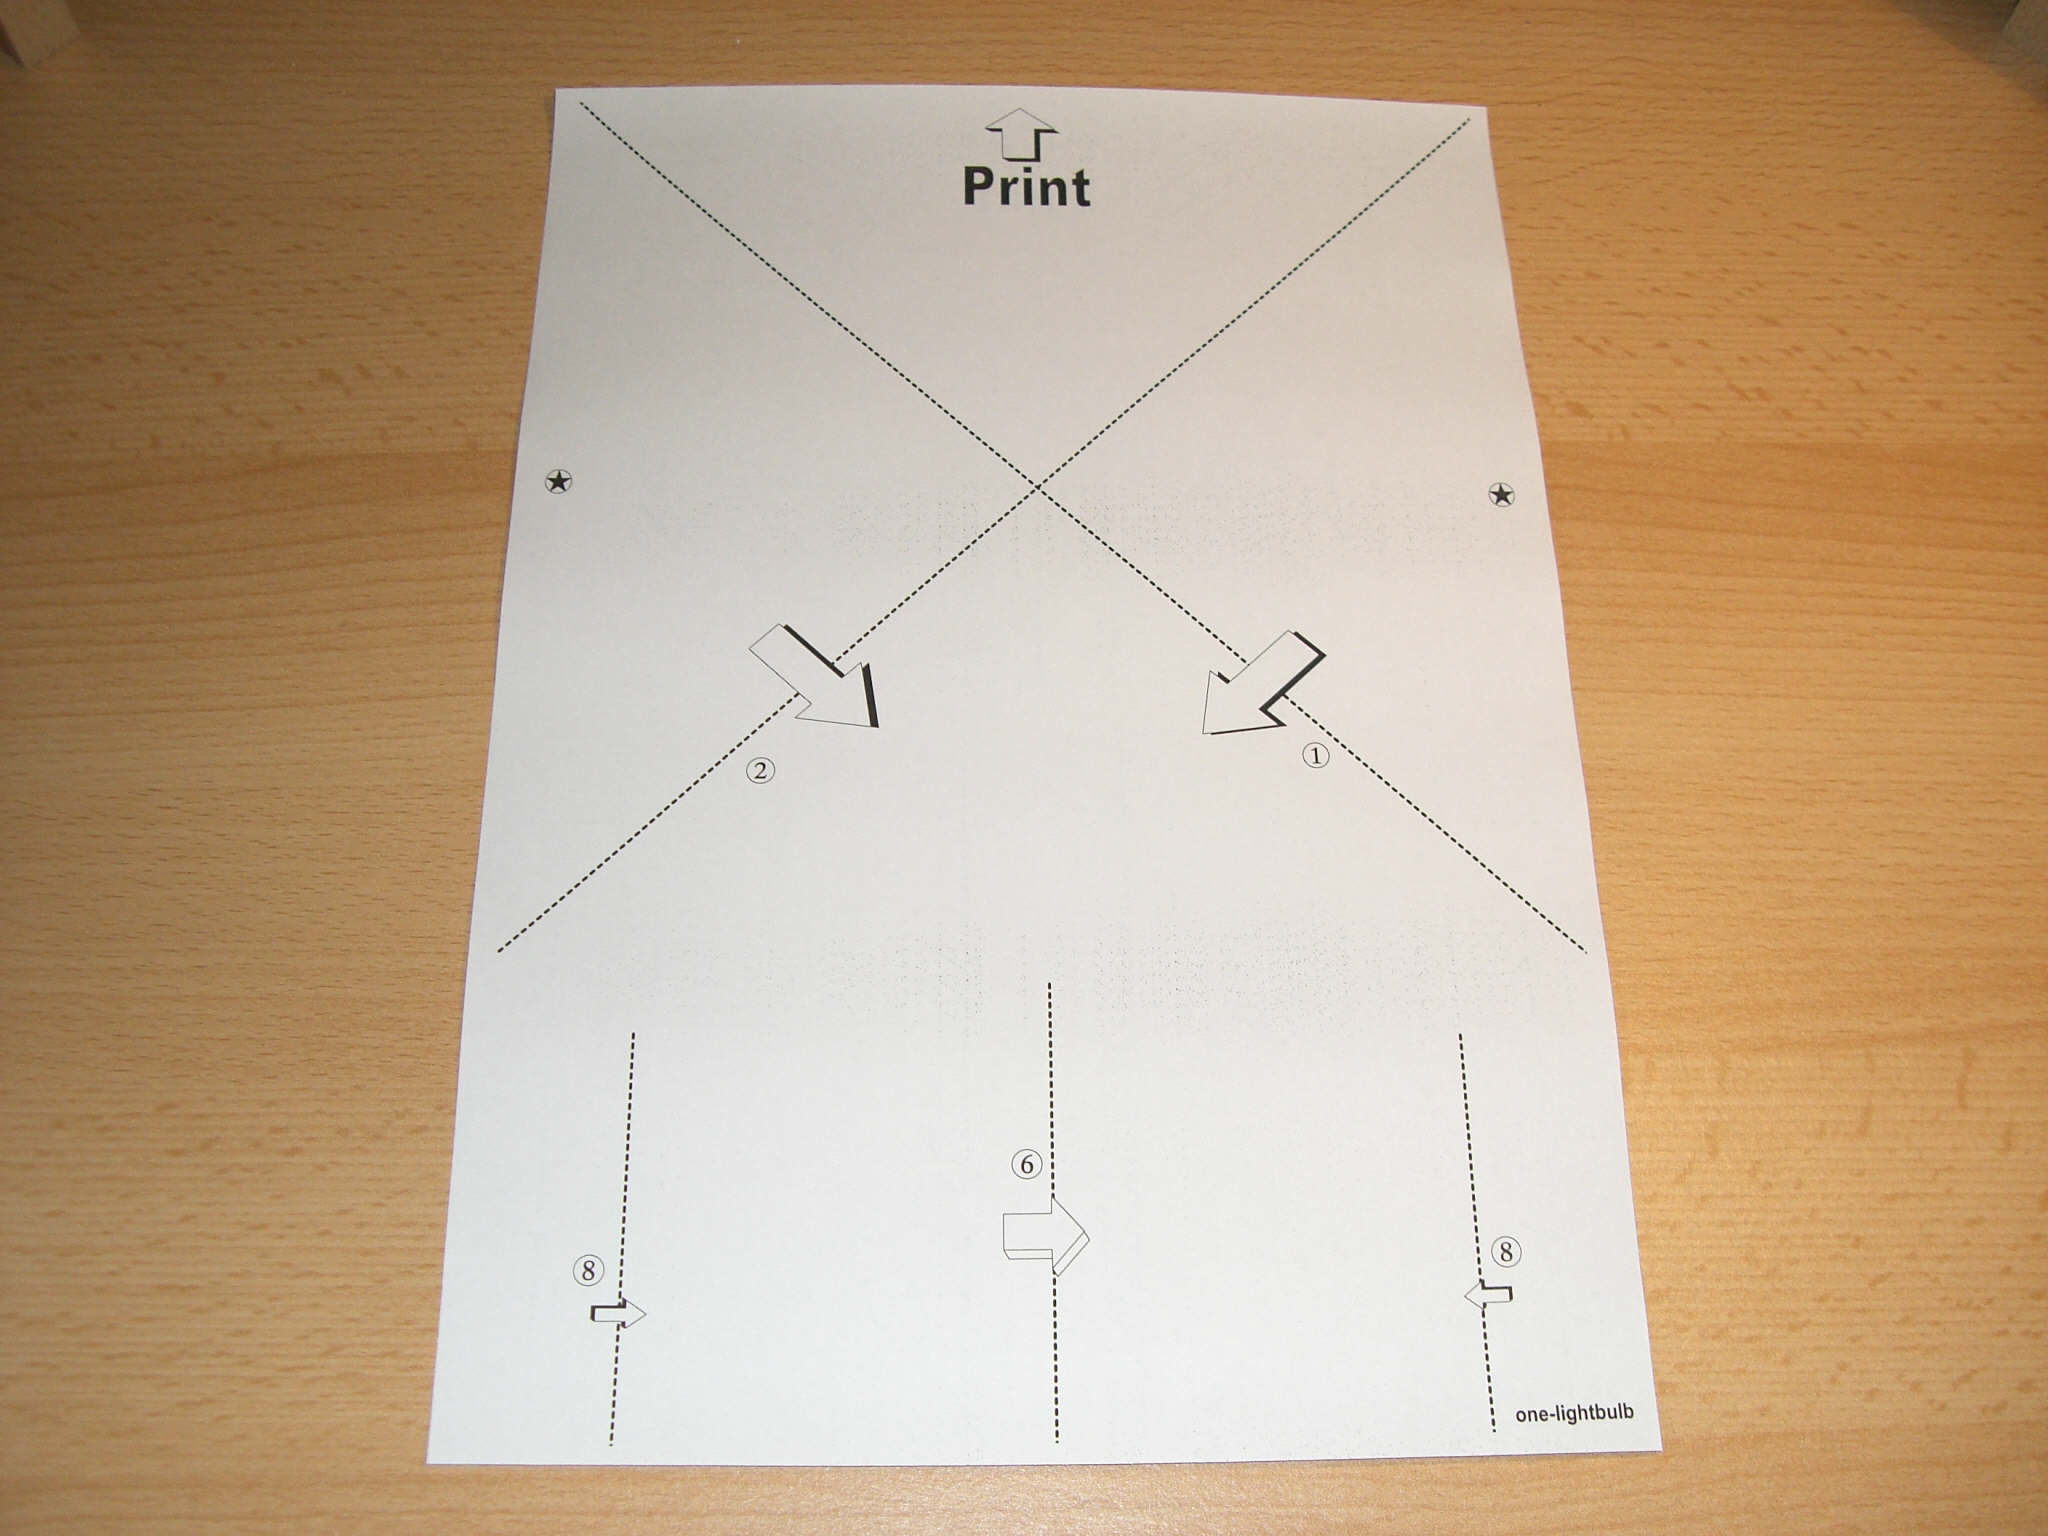
You can either take a blank sheet or print out the pdf files.
Print fly1.pdf on on side and fly2.pdf on the other (of one sheet).
The two "Print arrows" must point in the same direction!
I also make a color version of the airplan with a jet engine (see: fly_color1.pdf and fly_color2.pdf).
Hope you like it.
Print fly1.pdf on on side and fly2.pdf on the other (of one sheet).
The two "Print arrows" must point in the same direction!
I also make a color version of the airplan with a jet engine (see: fly_color1.pdf and fly_color2.pdf).
Hope you like it.
Lets Start Folding
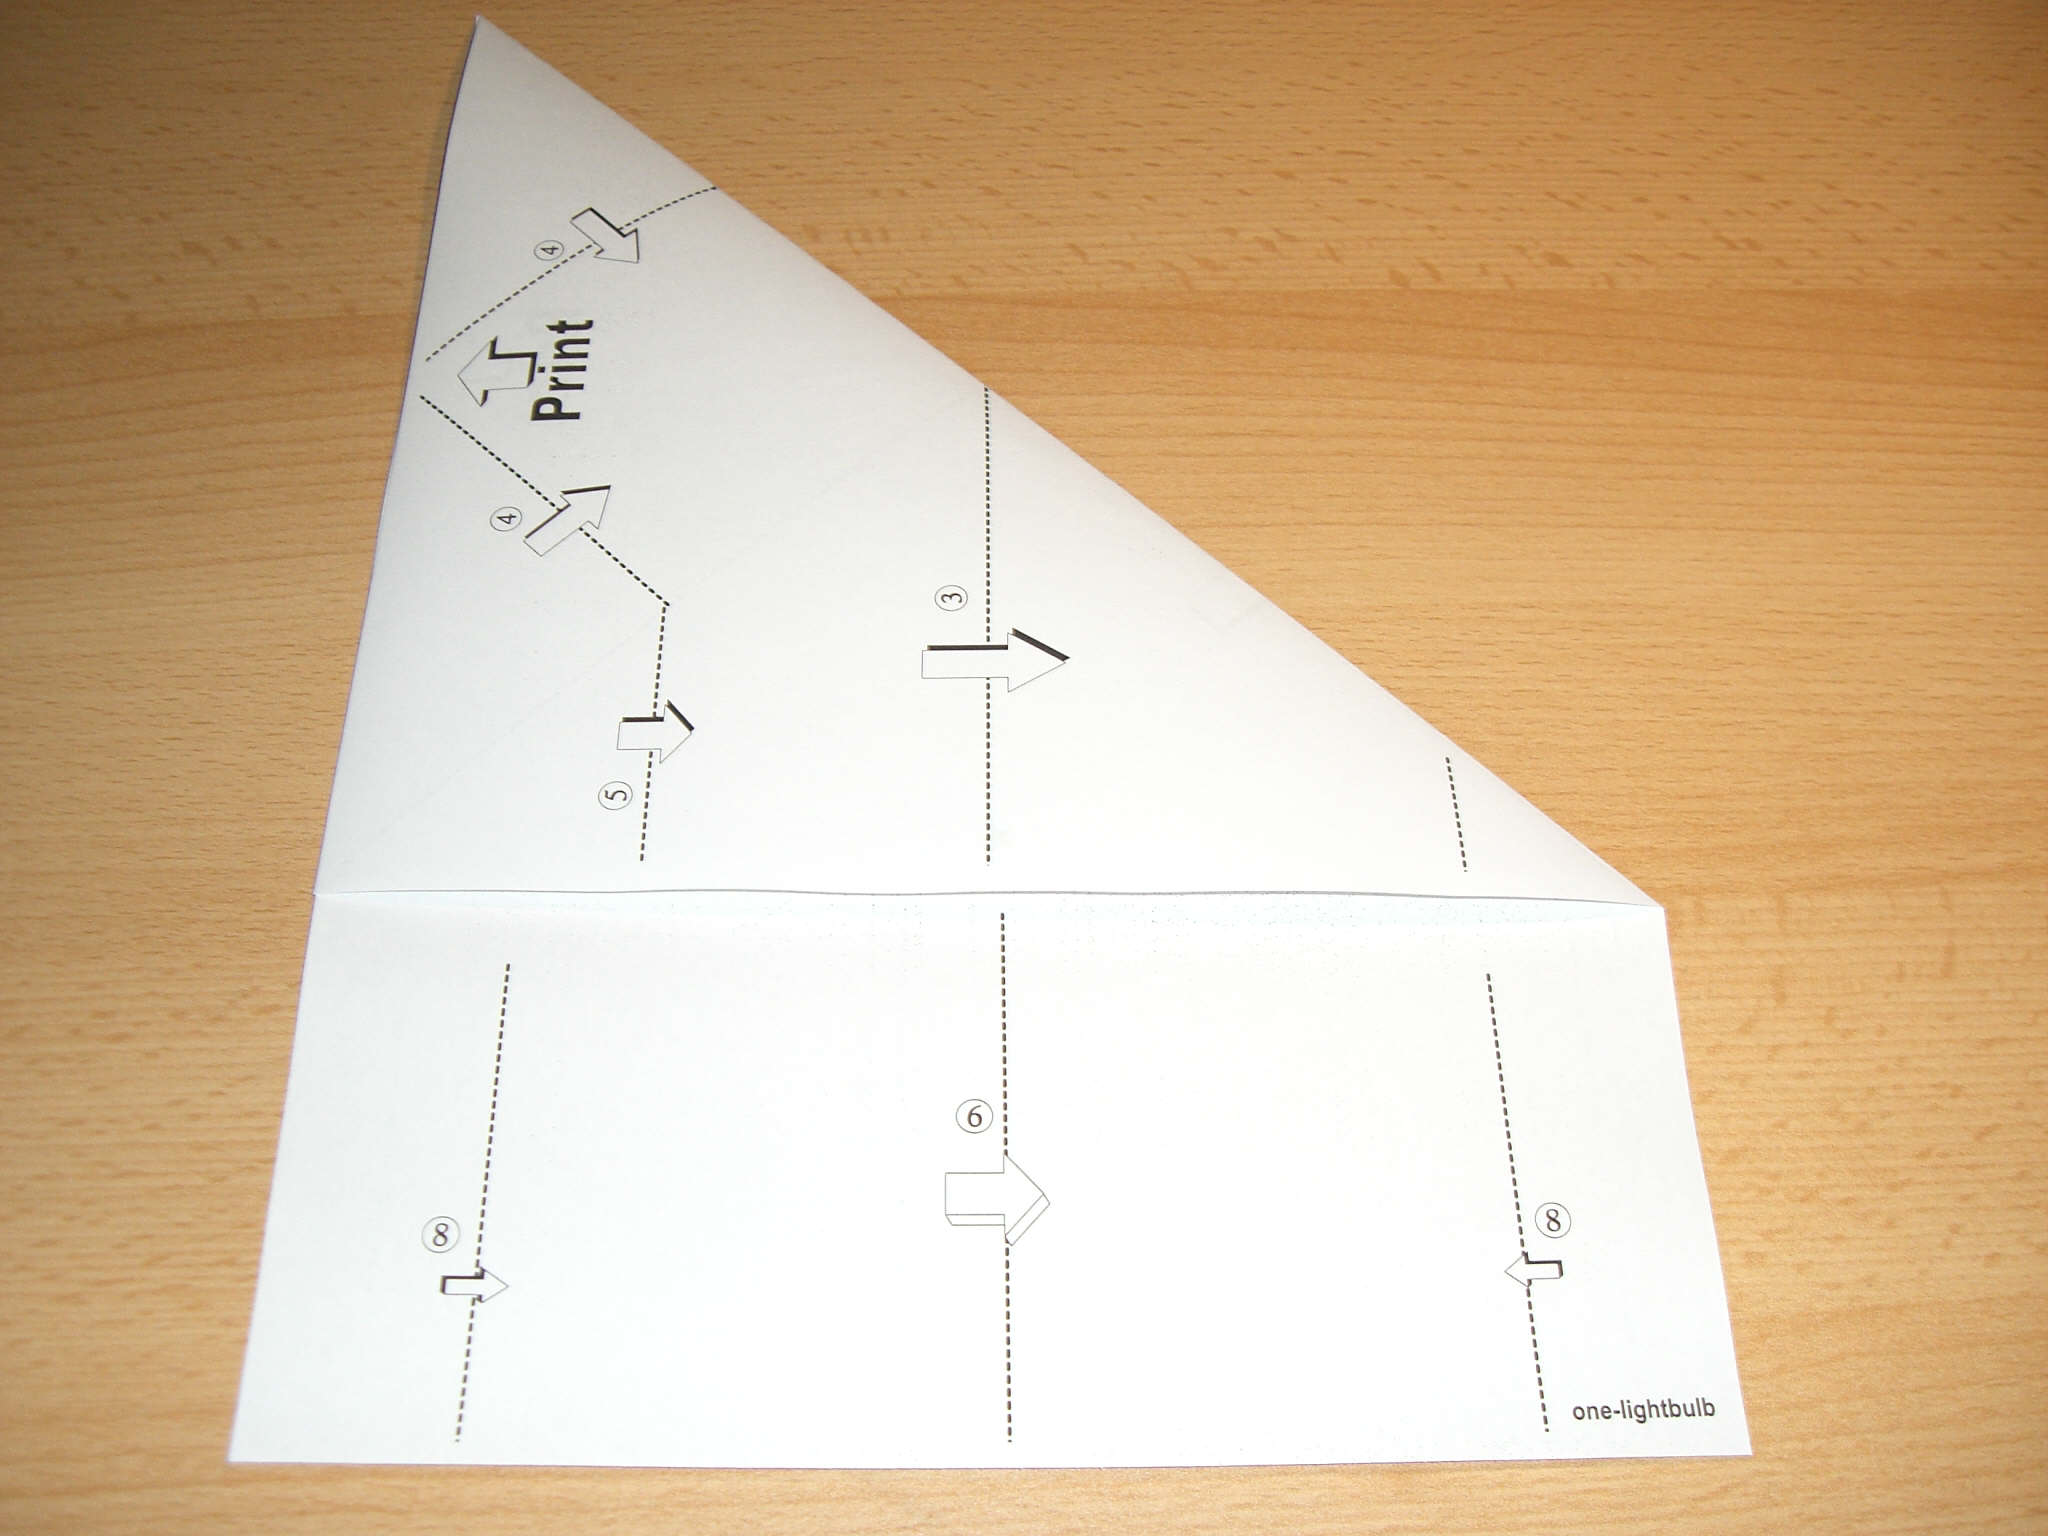
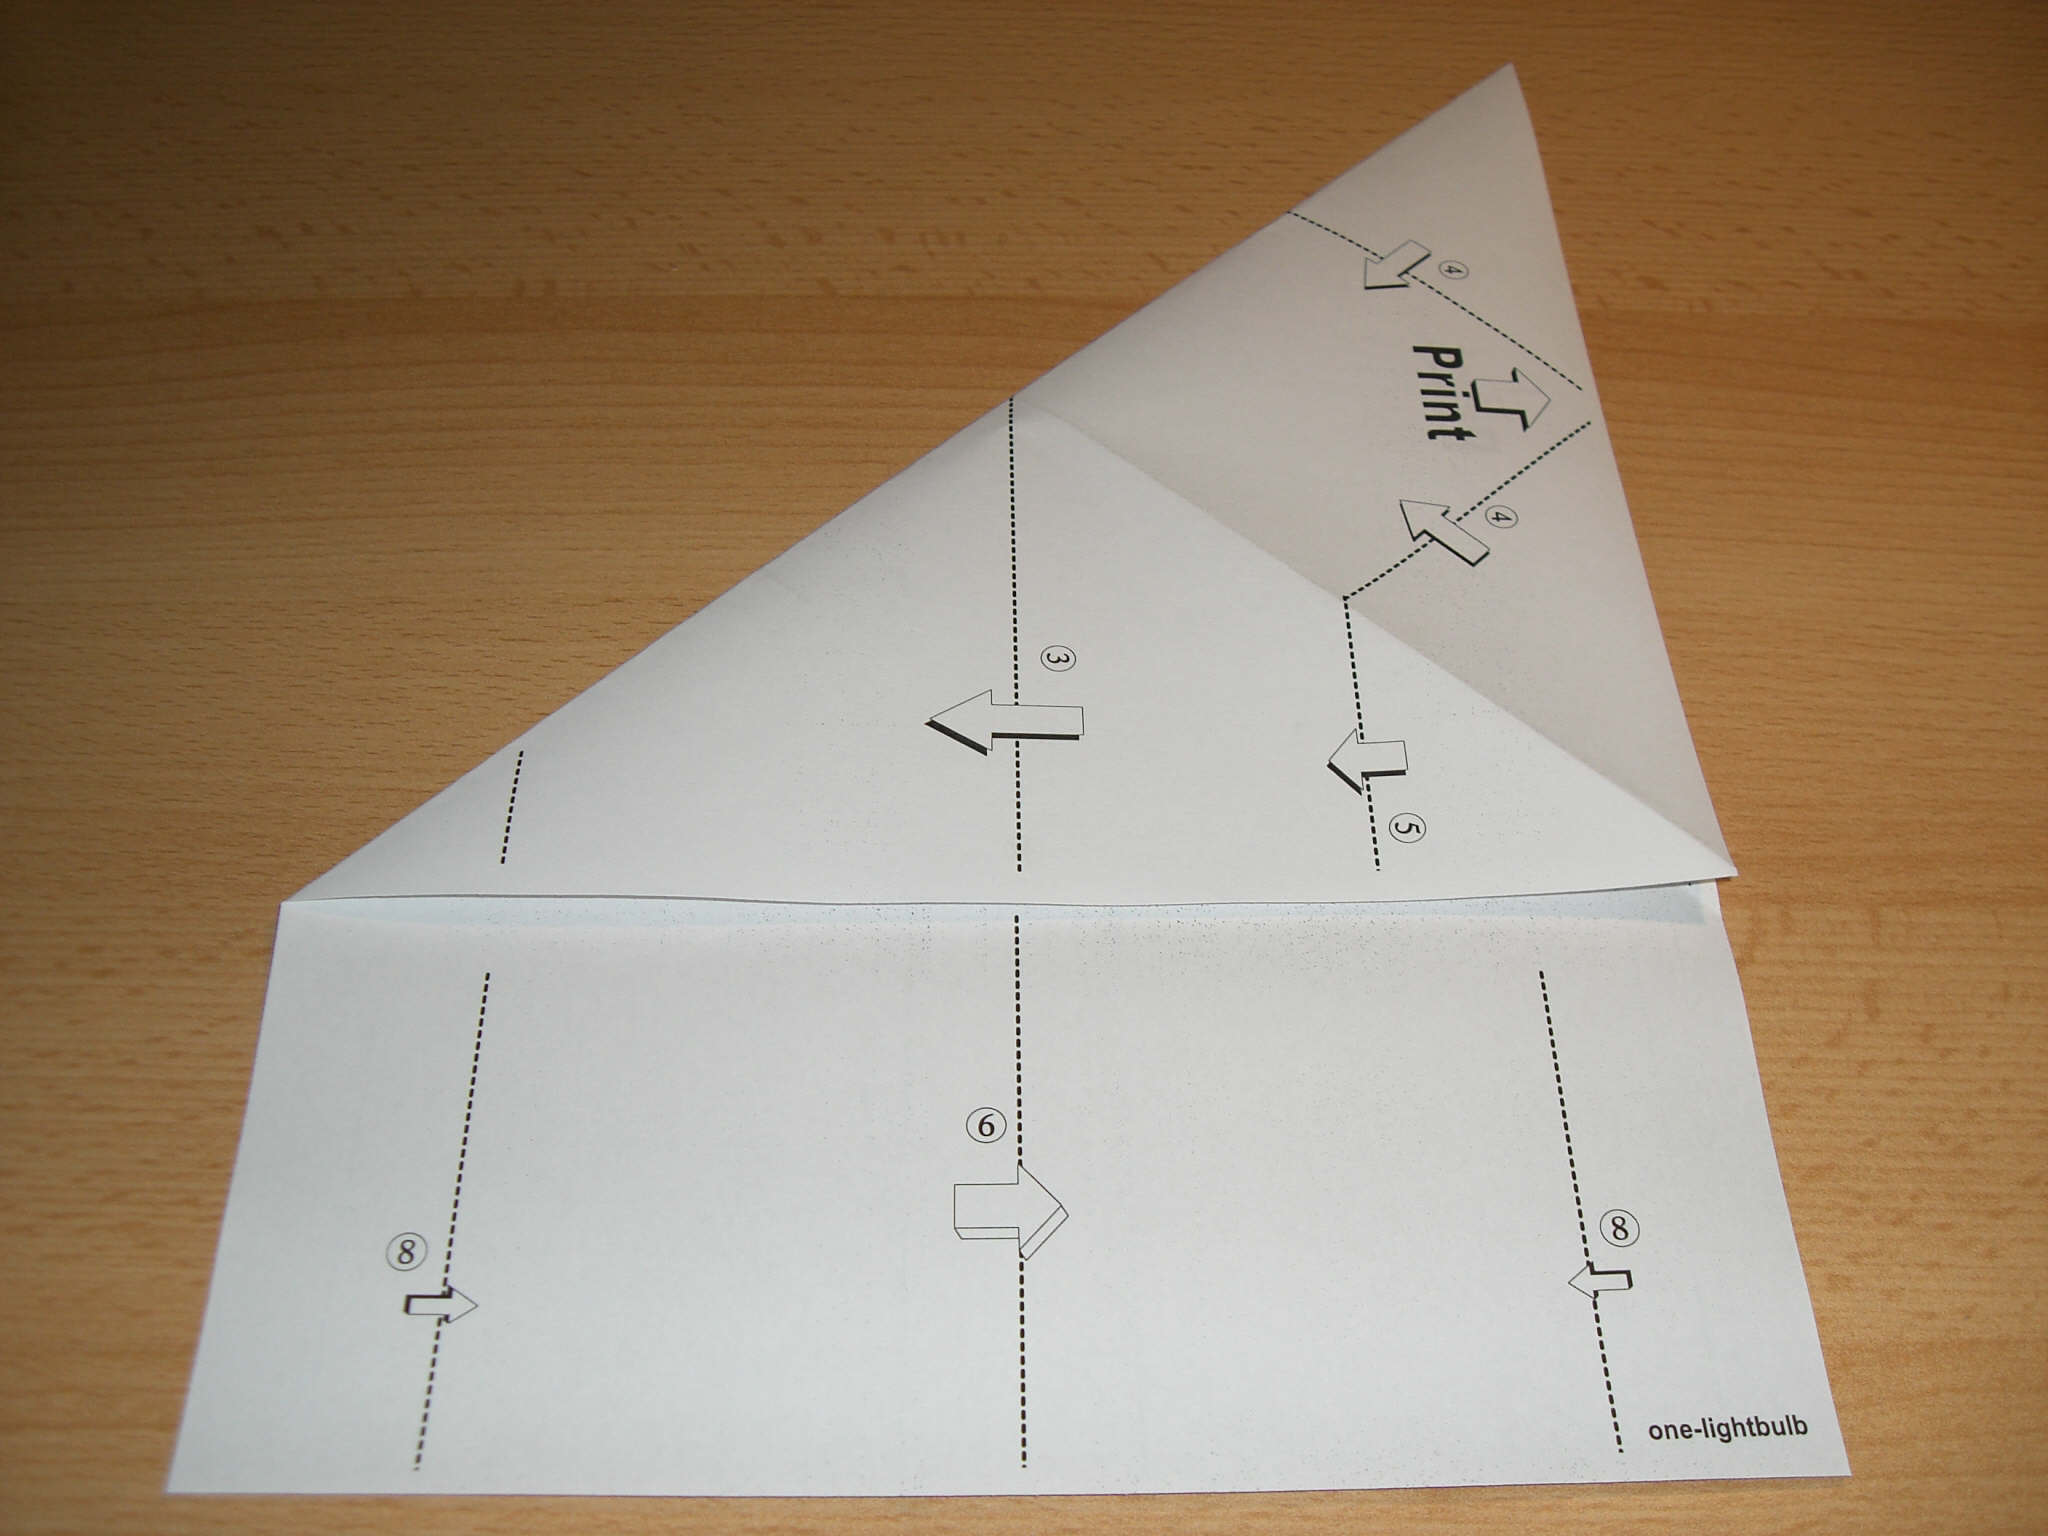
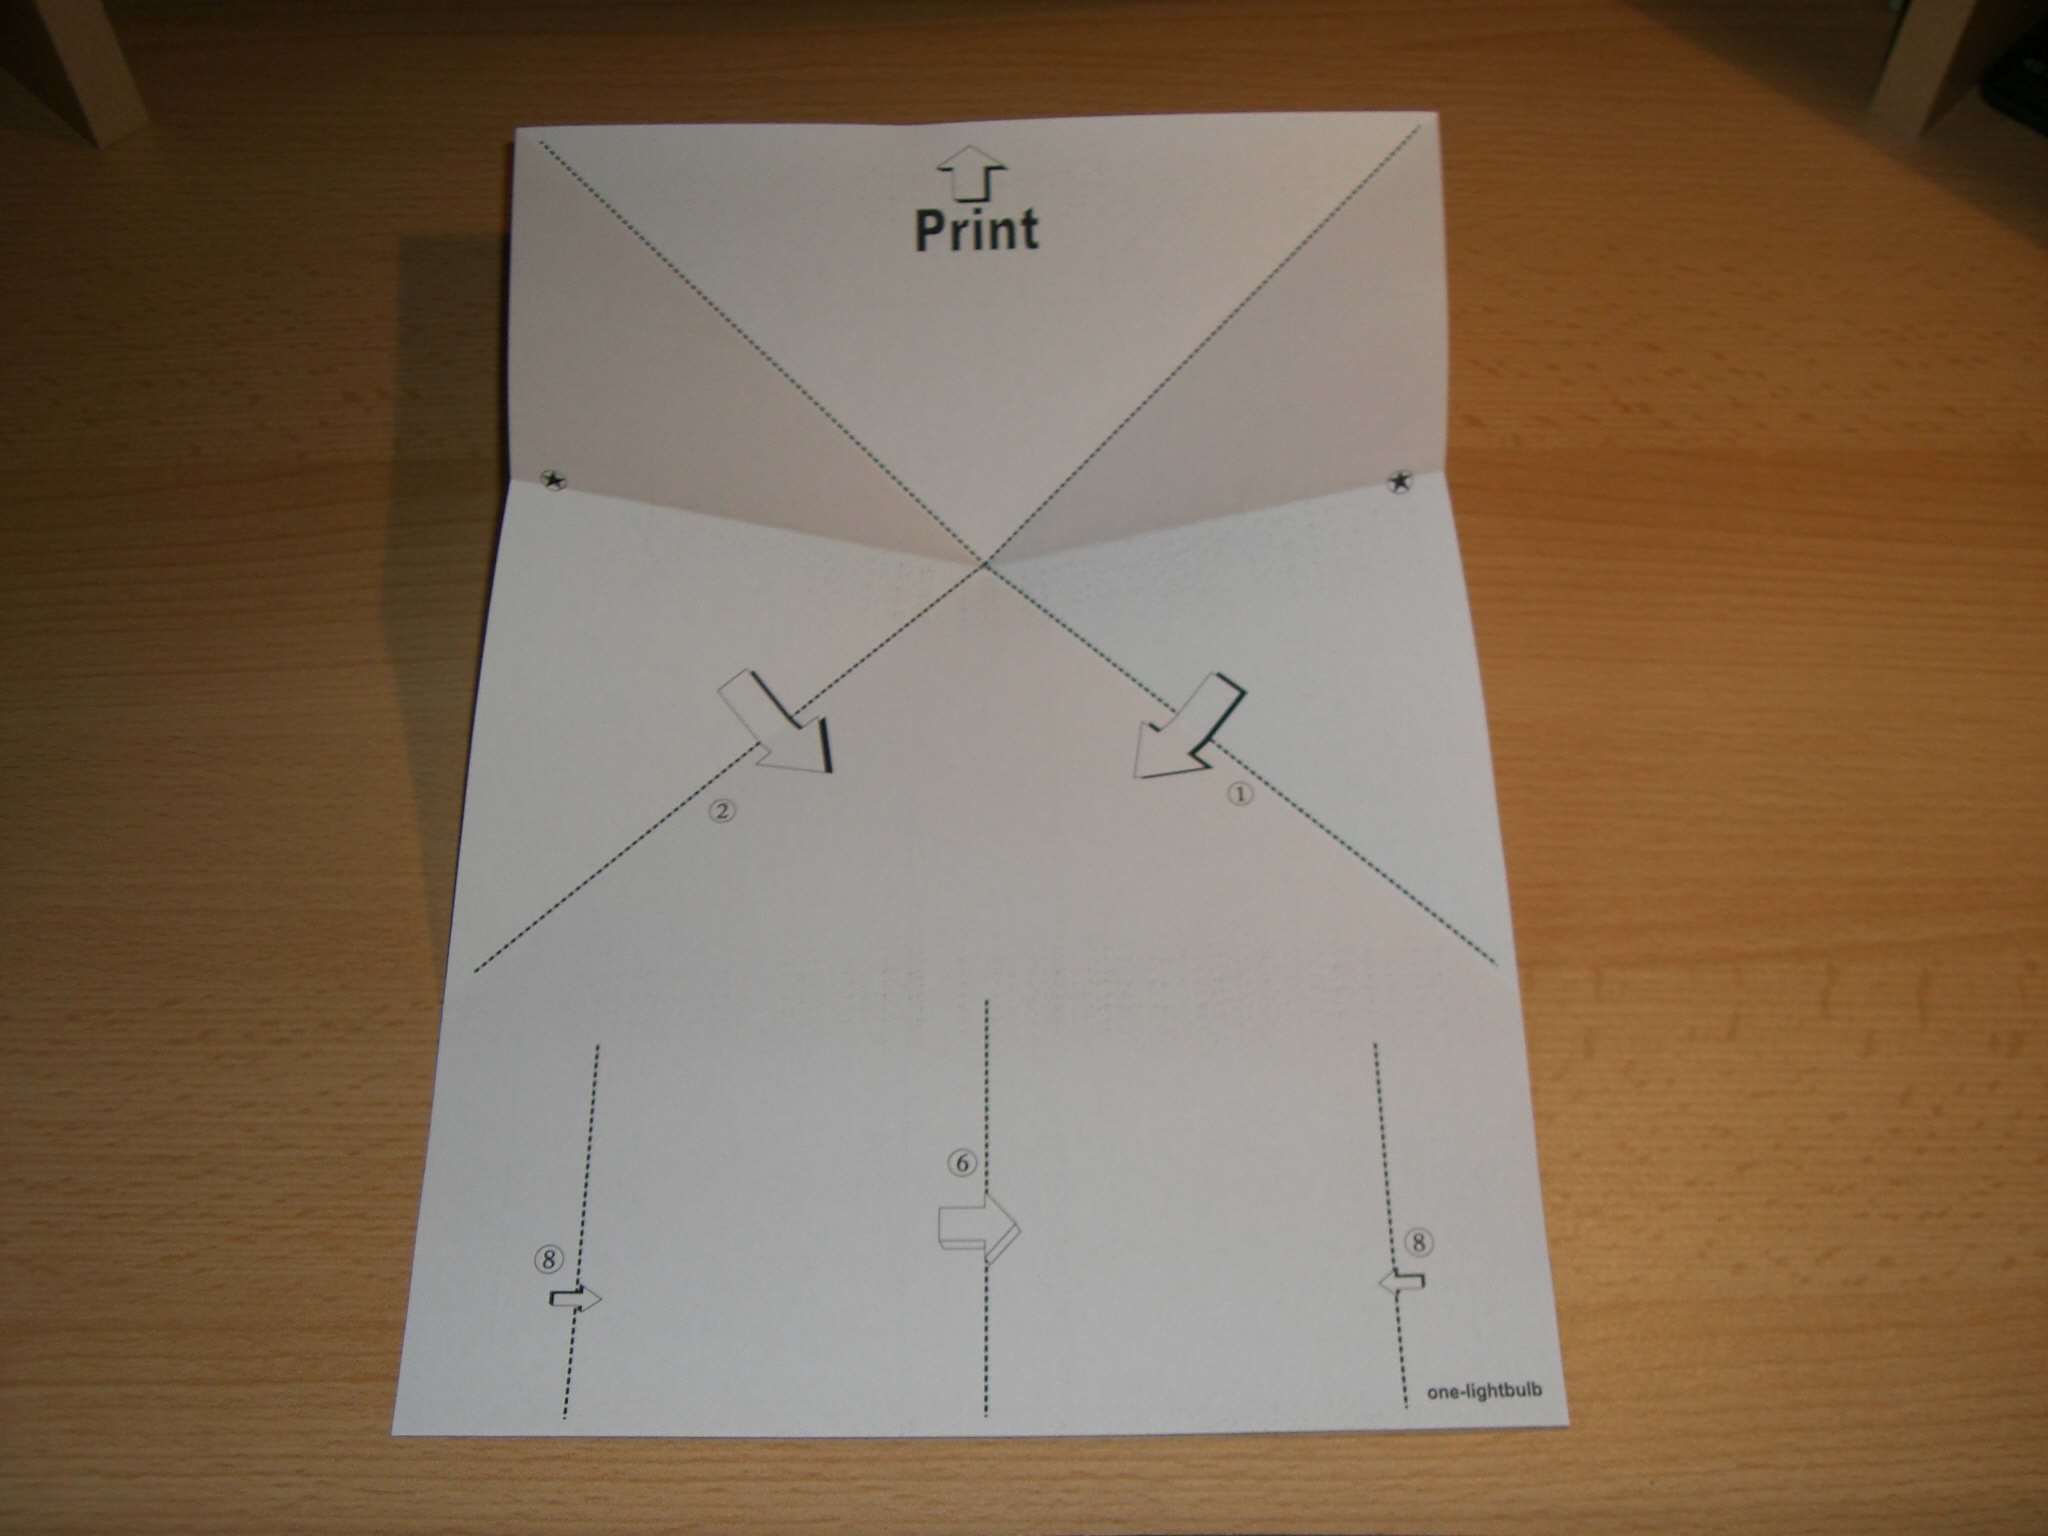
Fold the upper right corner down to the left side of the paper (#1). Open up again and repeat it with the left corner (#2).
Turning Point
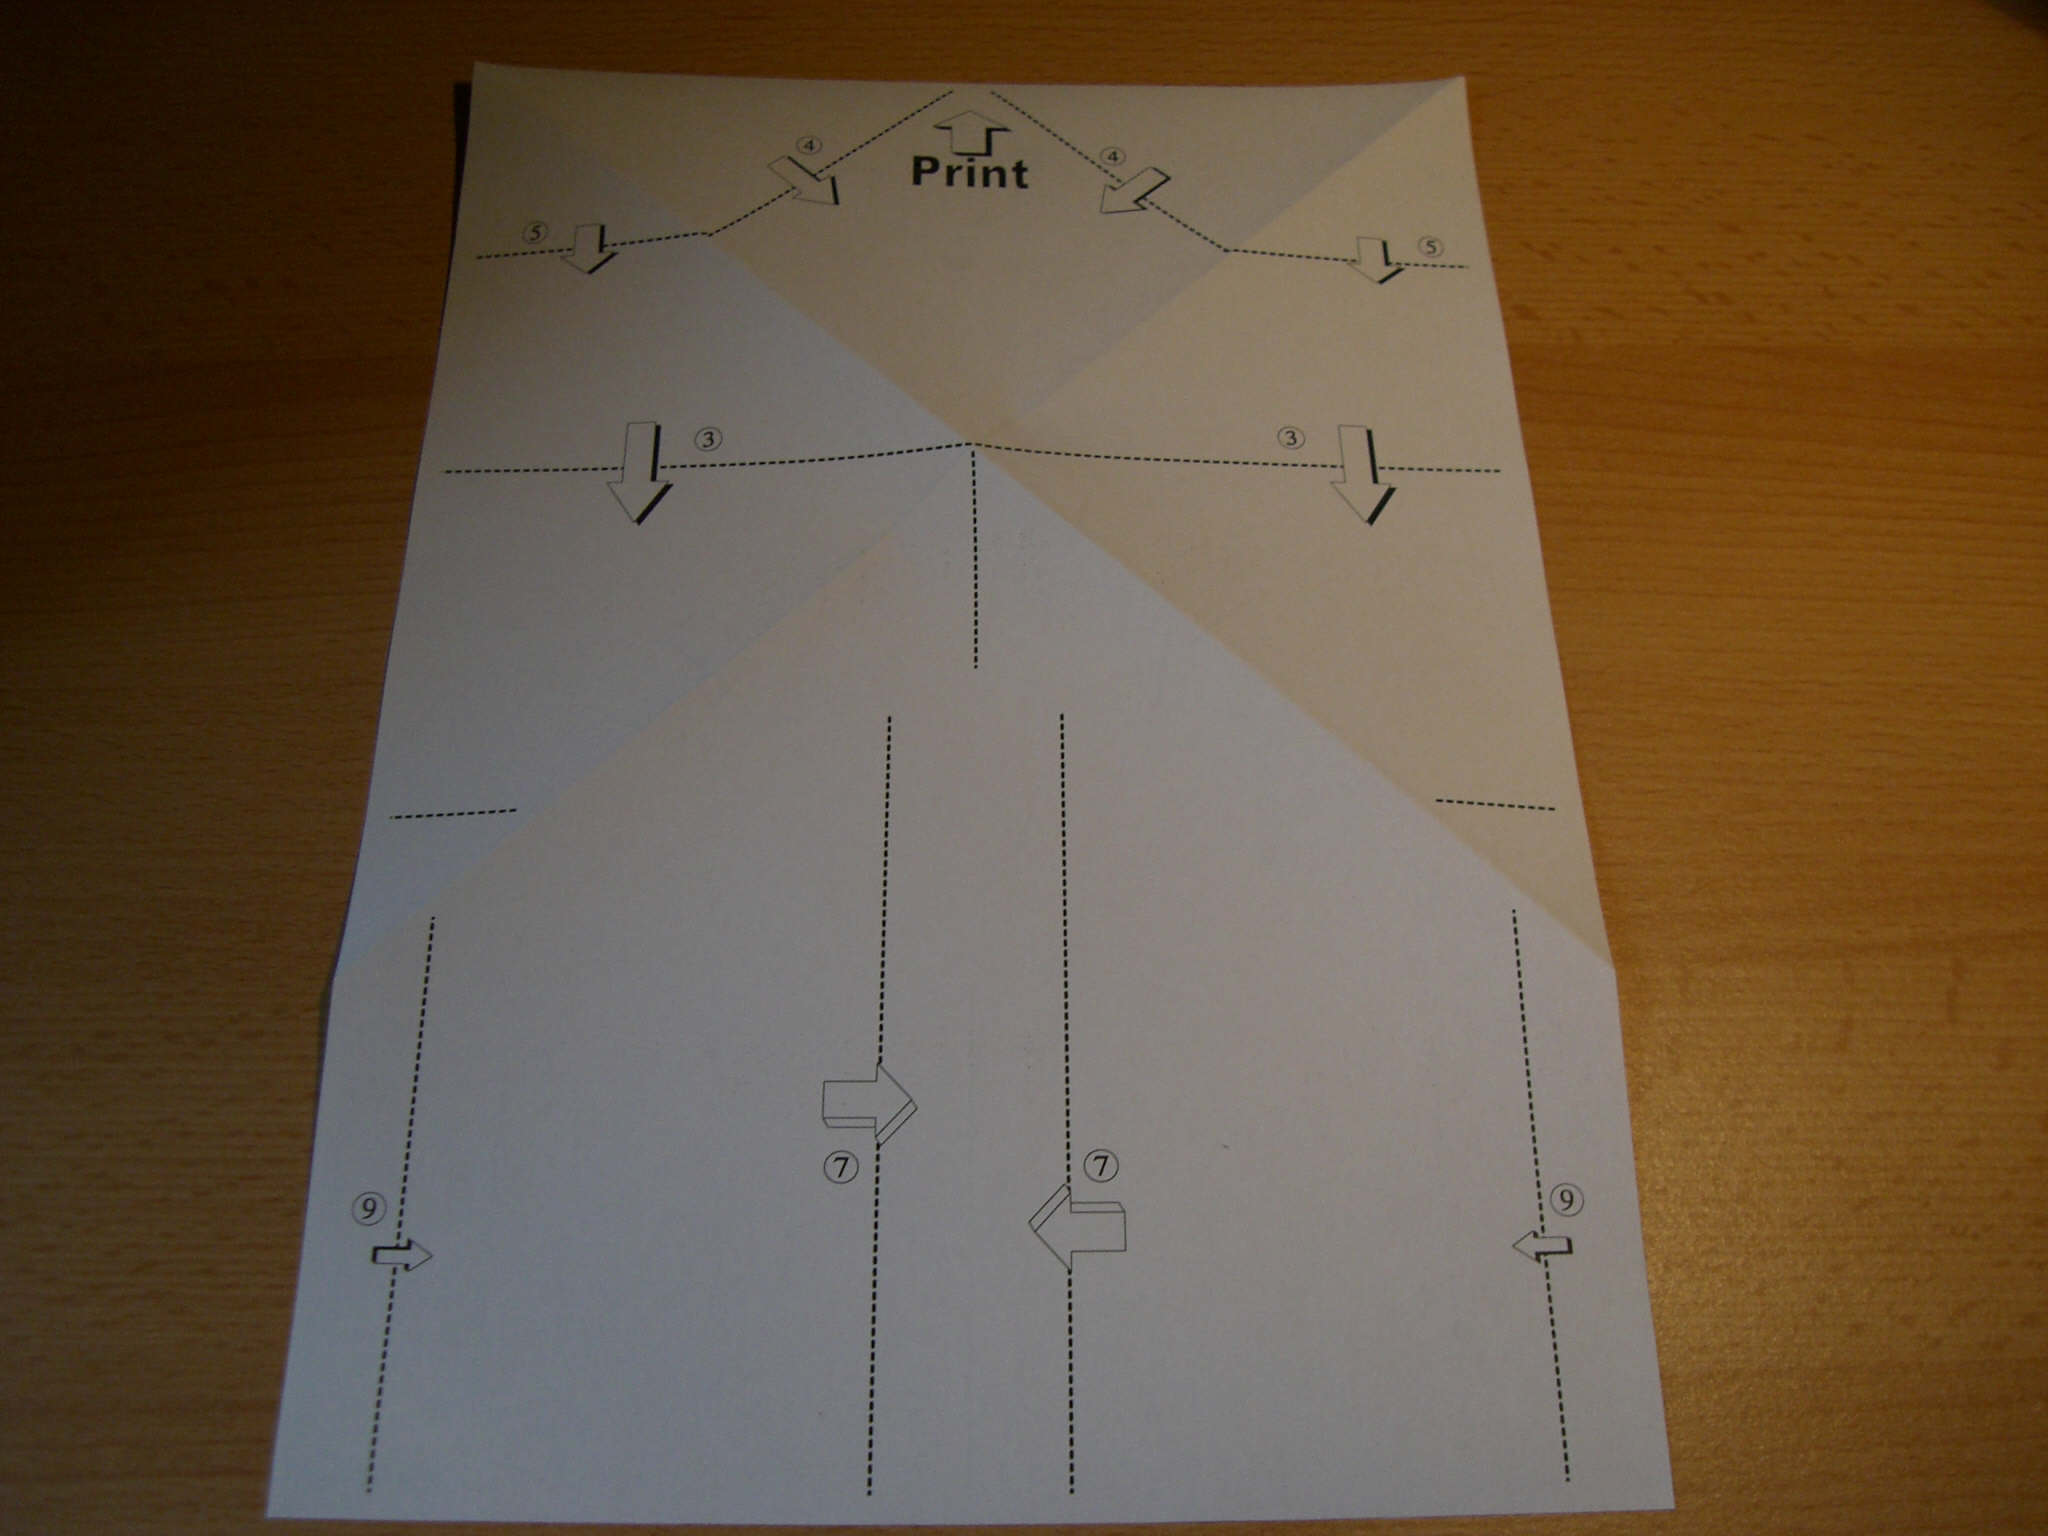
Turn the page. Fold the top third down (#3). The fold should be in the center of the cross!
Two Stars Join
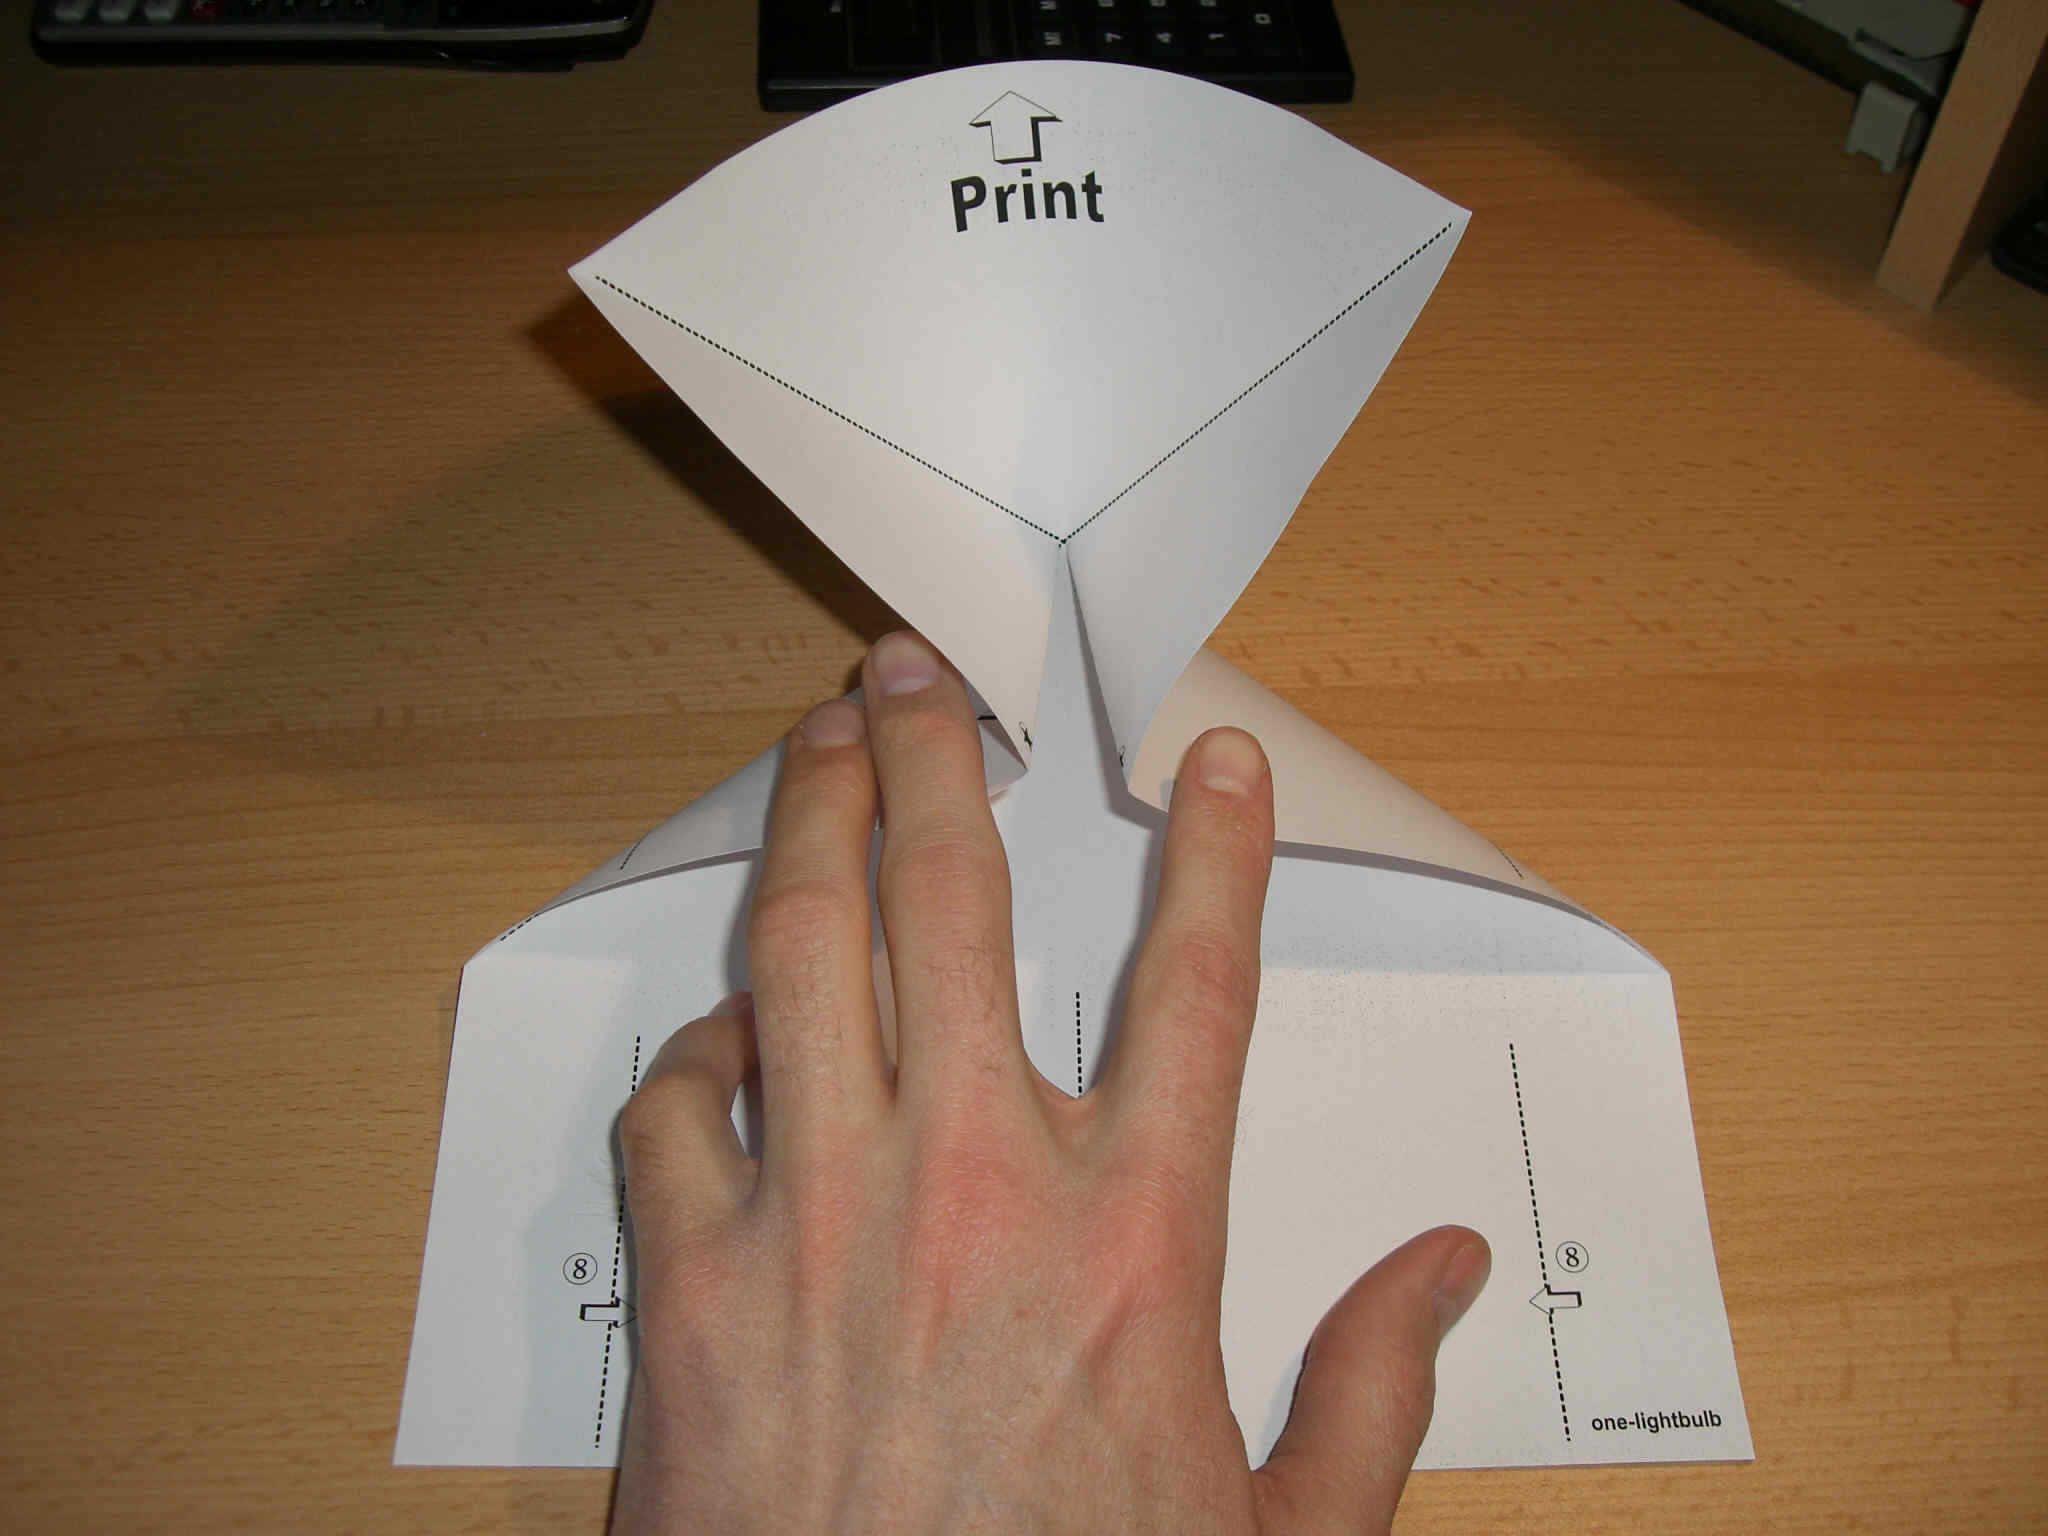
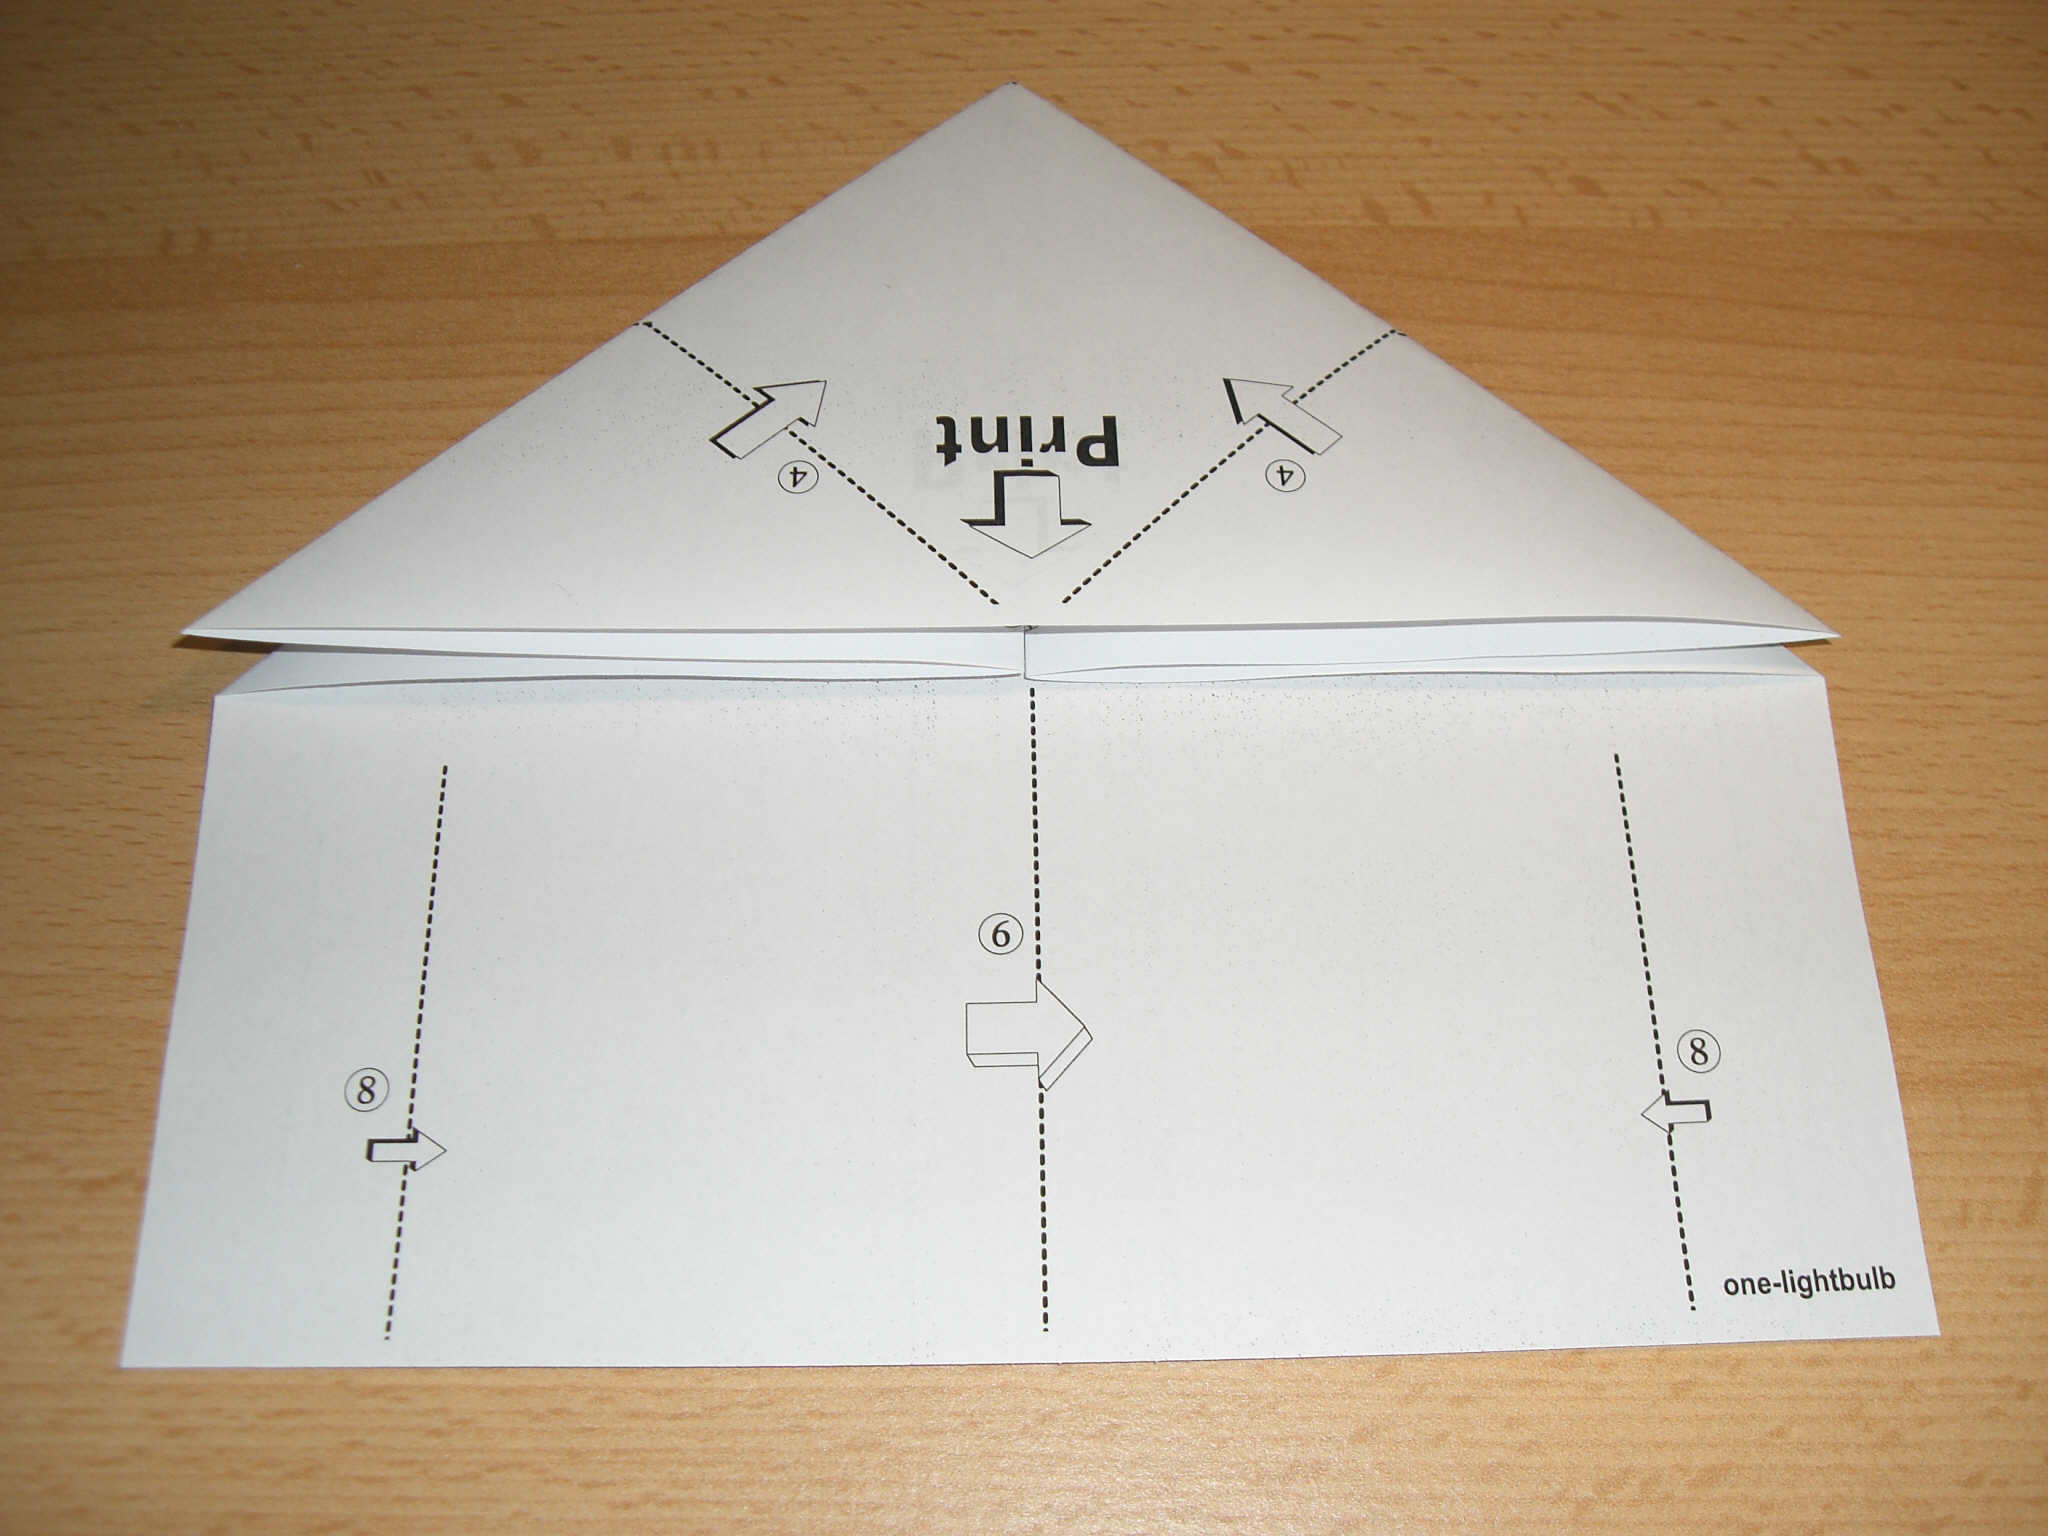
Turn the page again. Now put together the two stars and press down the top part.
Go On
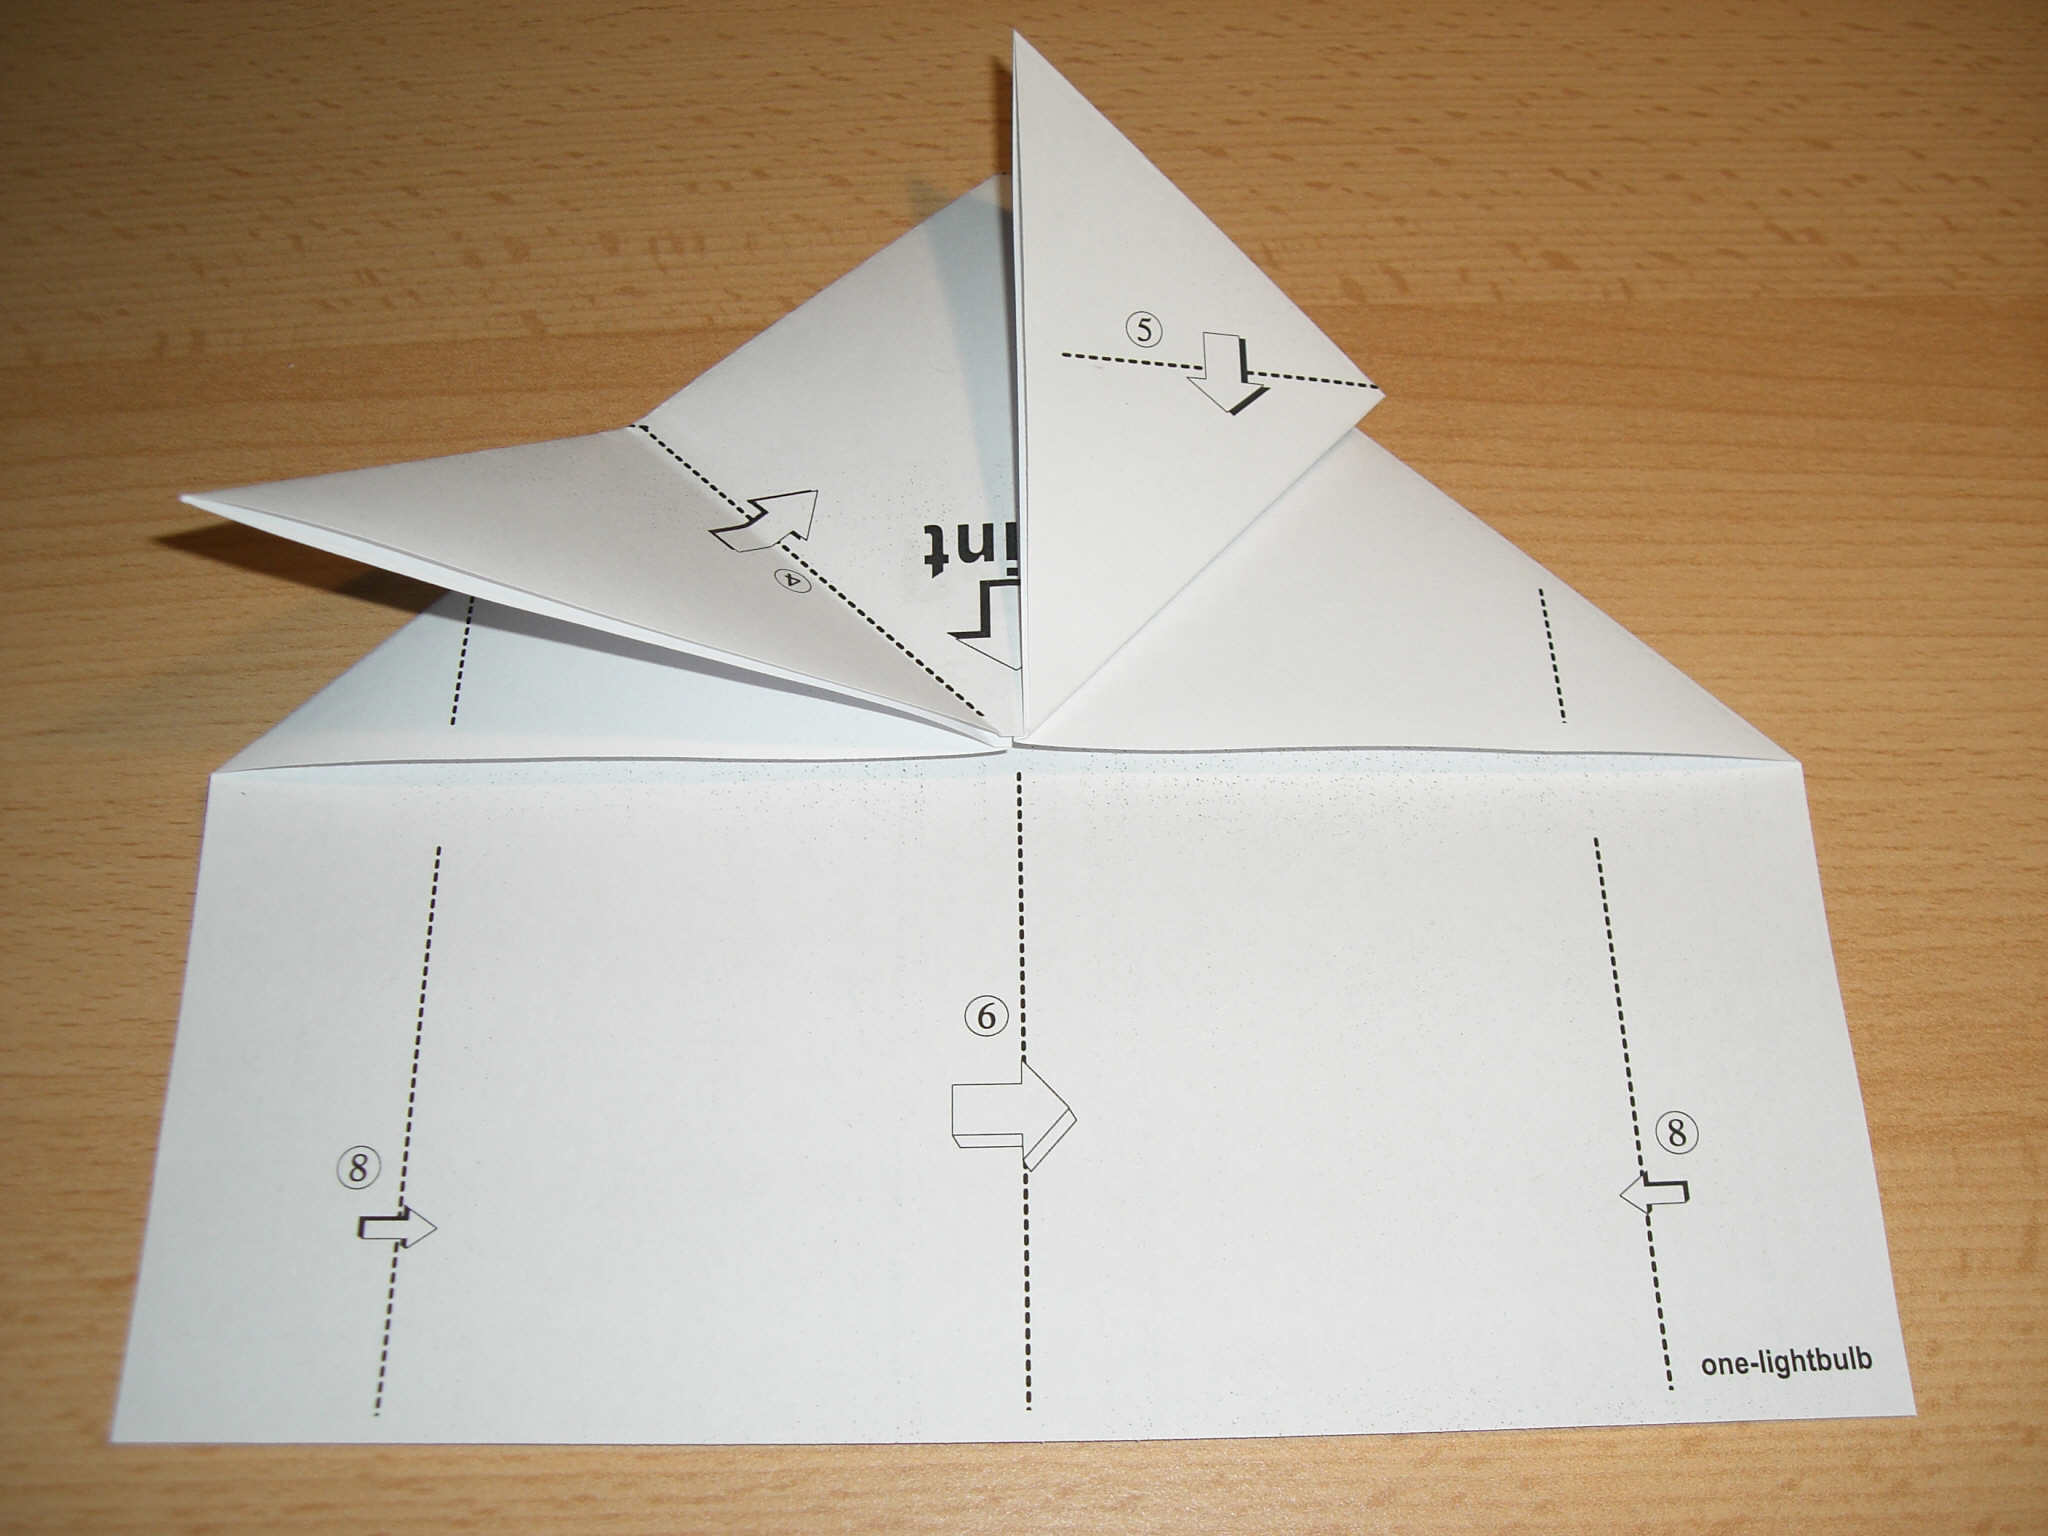
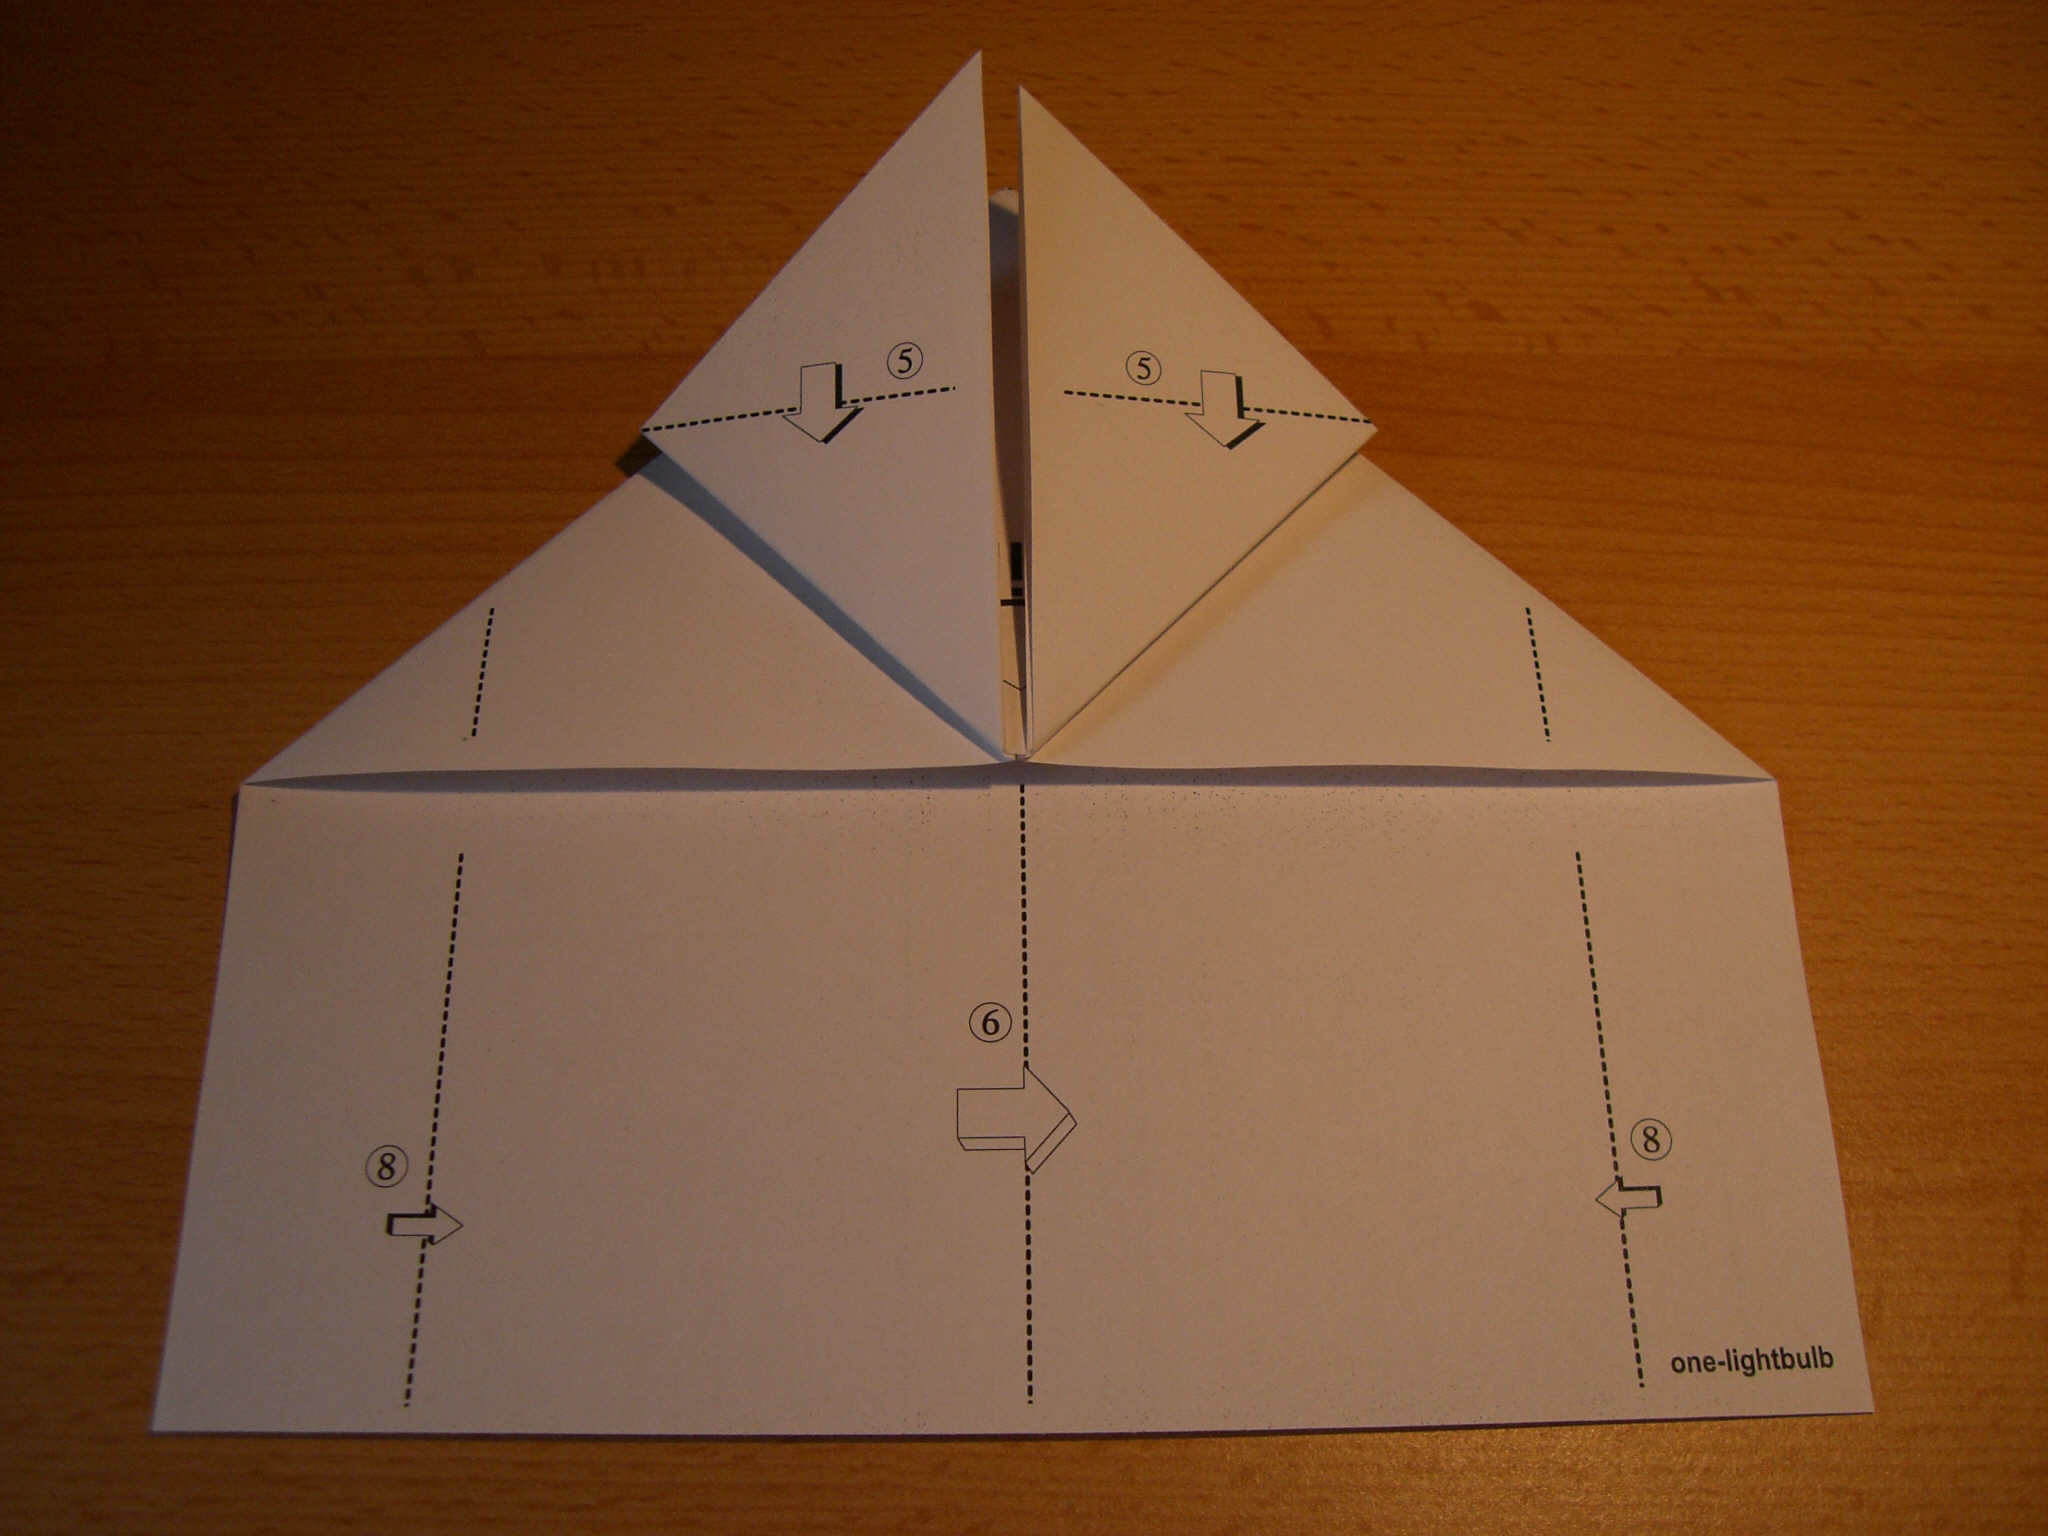
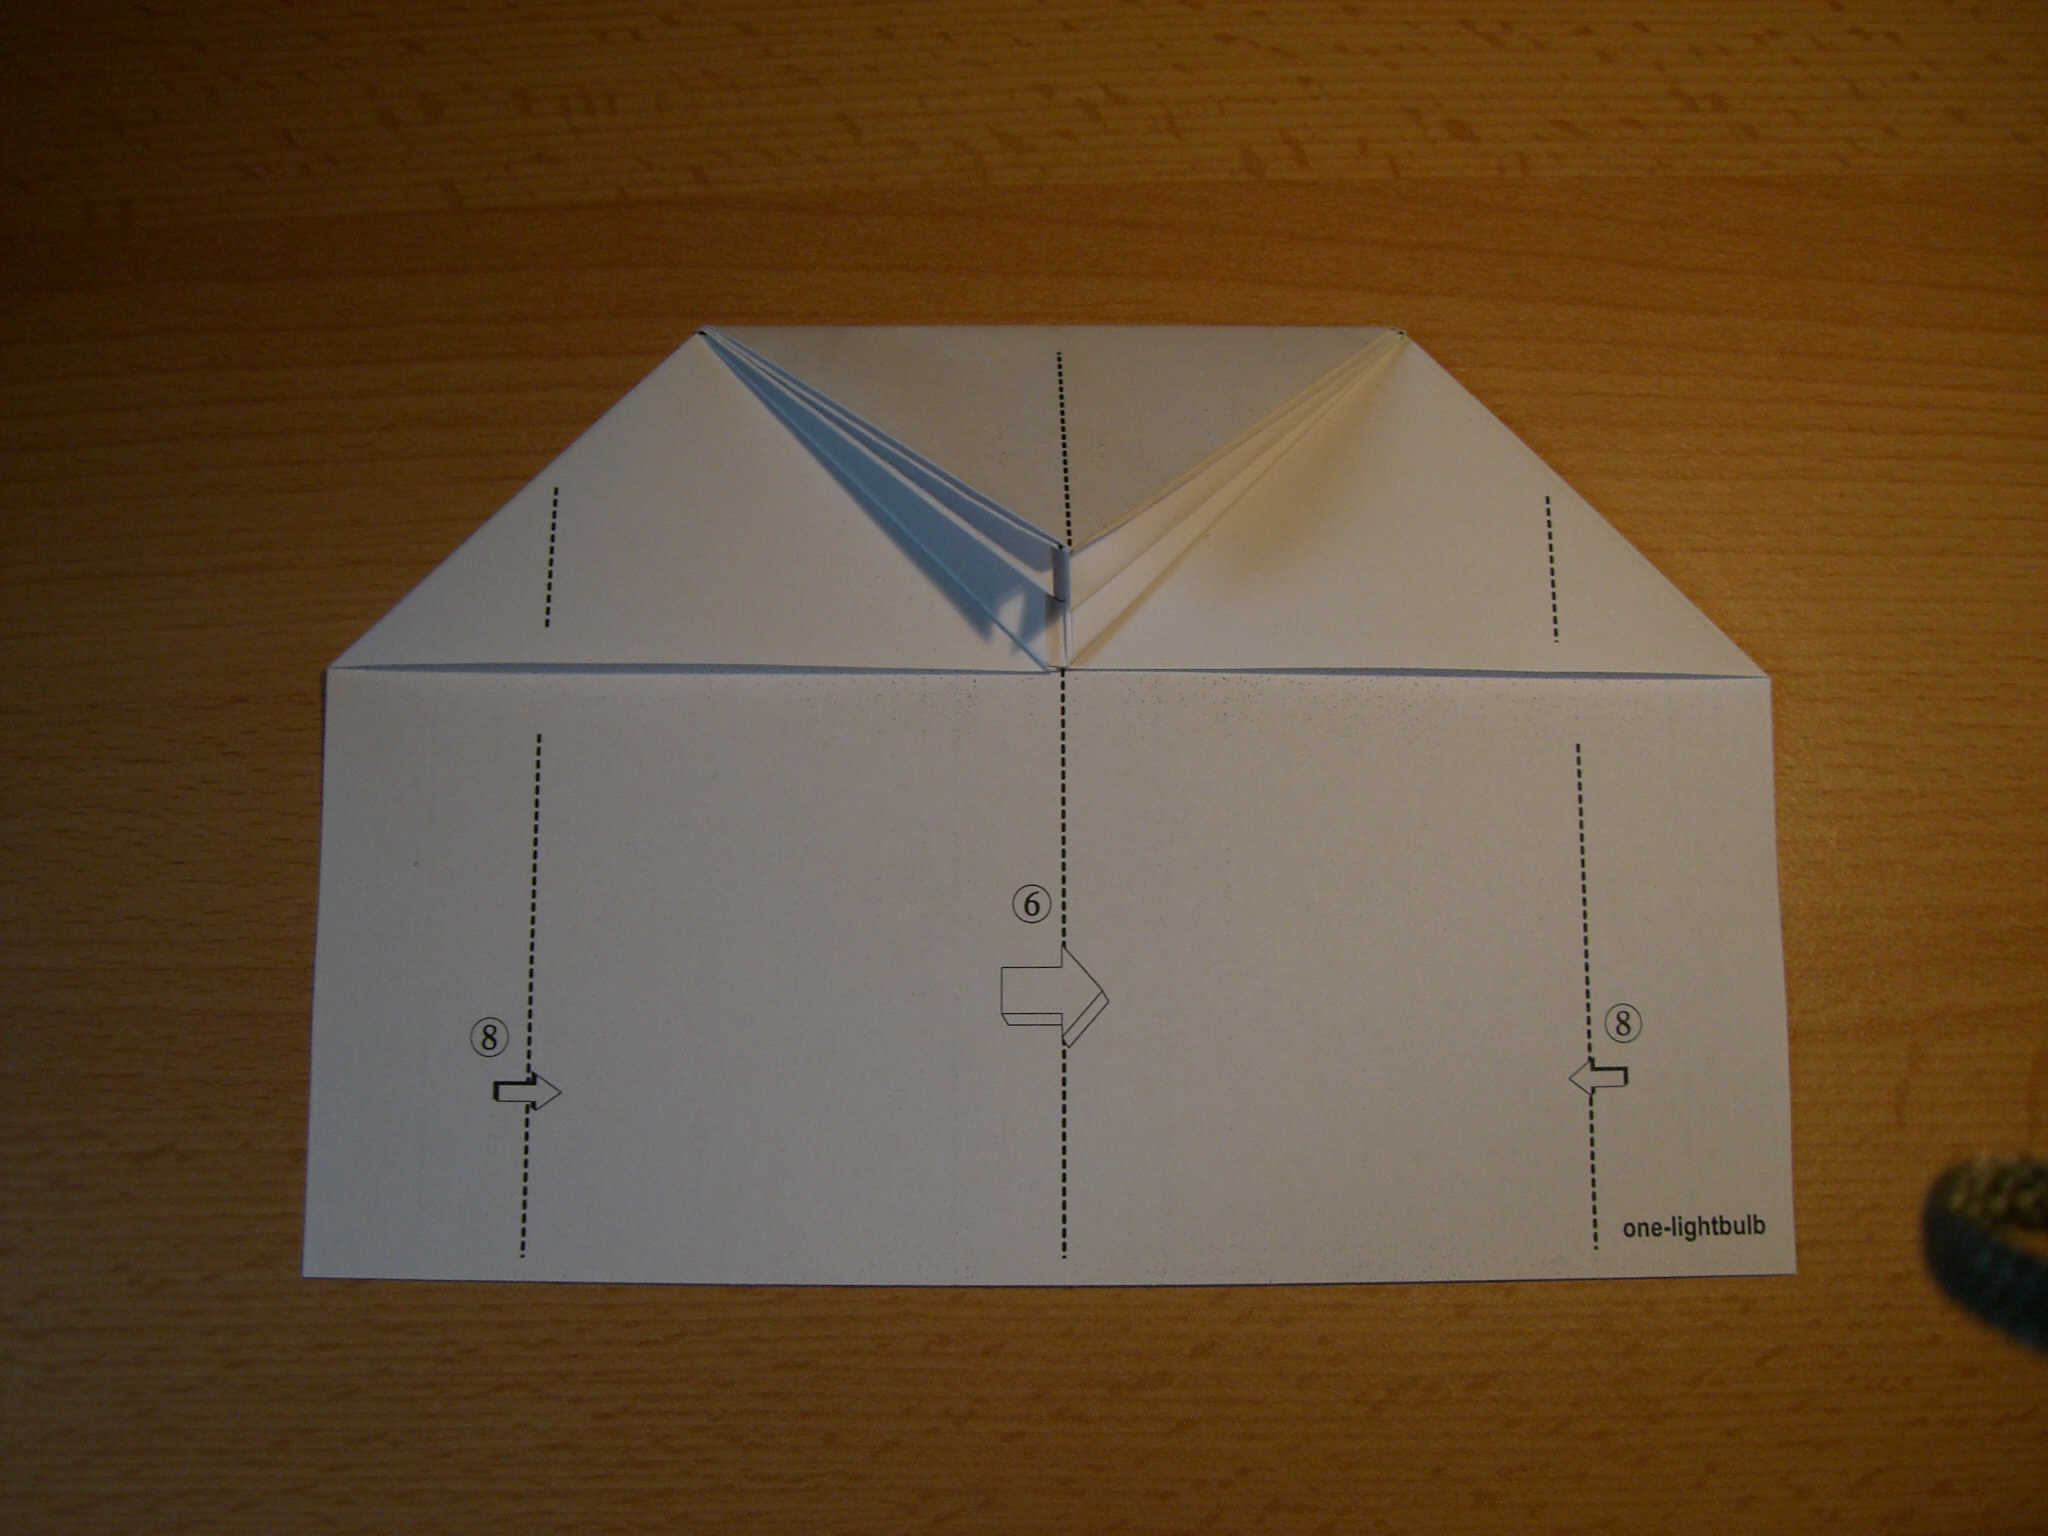
Fold two layers of the triangle to the top corner (#4). After that fold the whole top corner down to the horizontal line (#5).
Fold a Handle
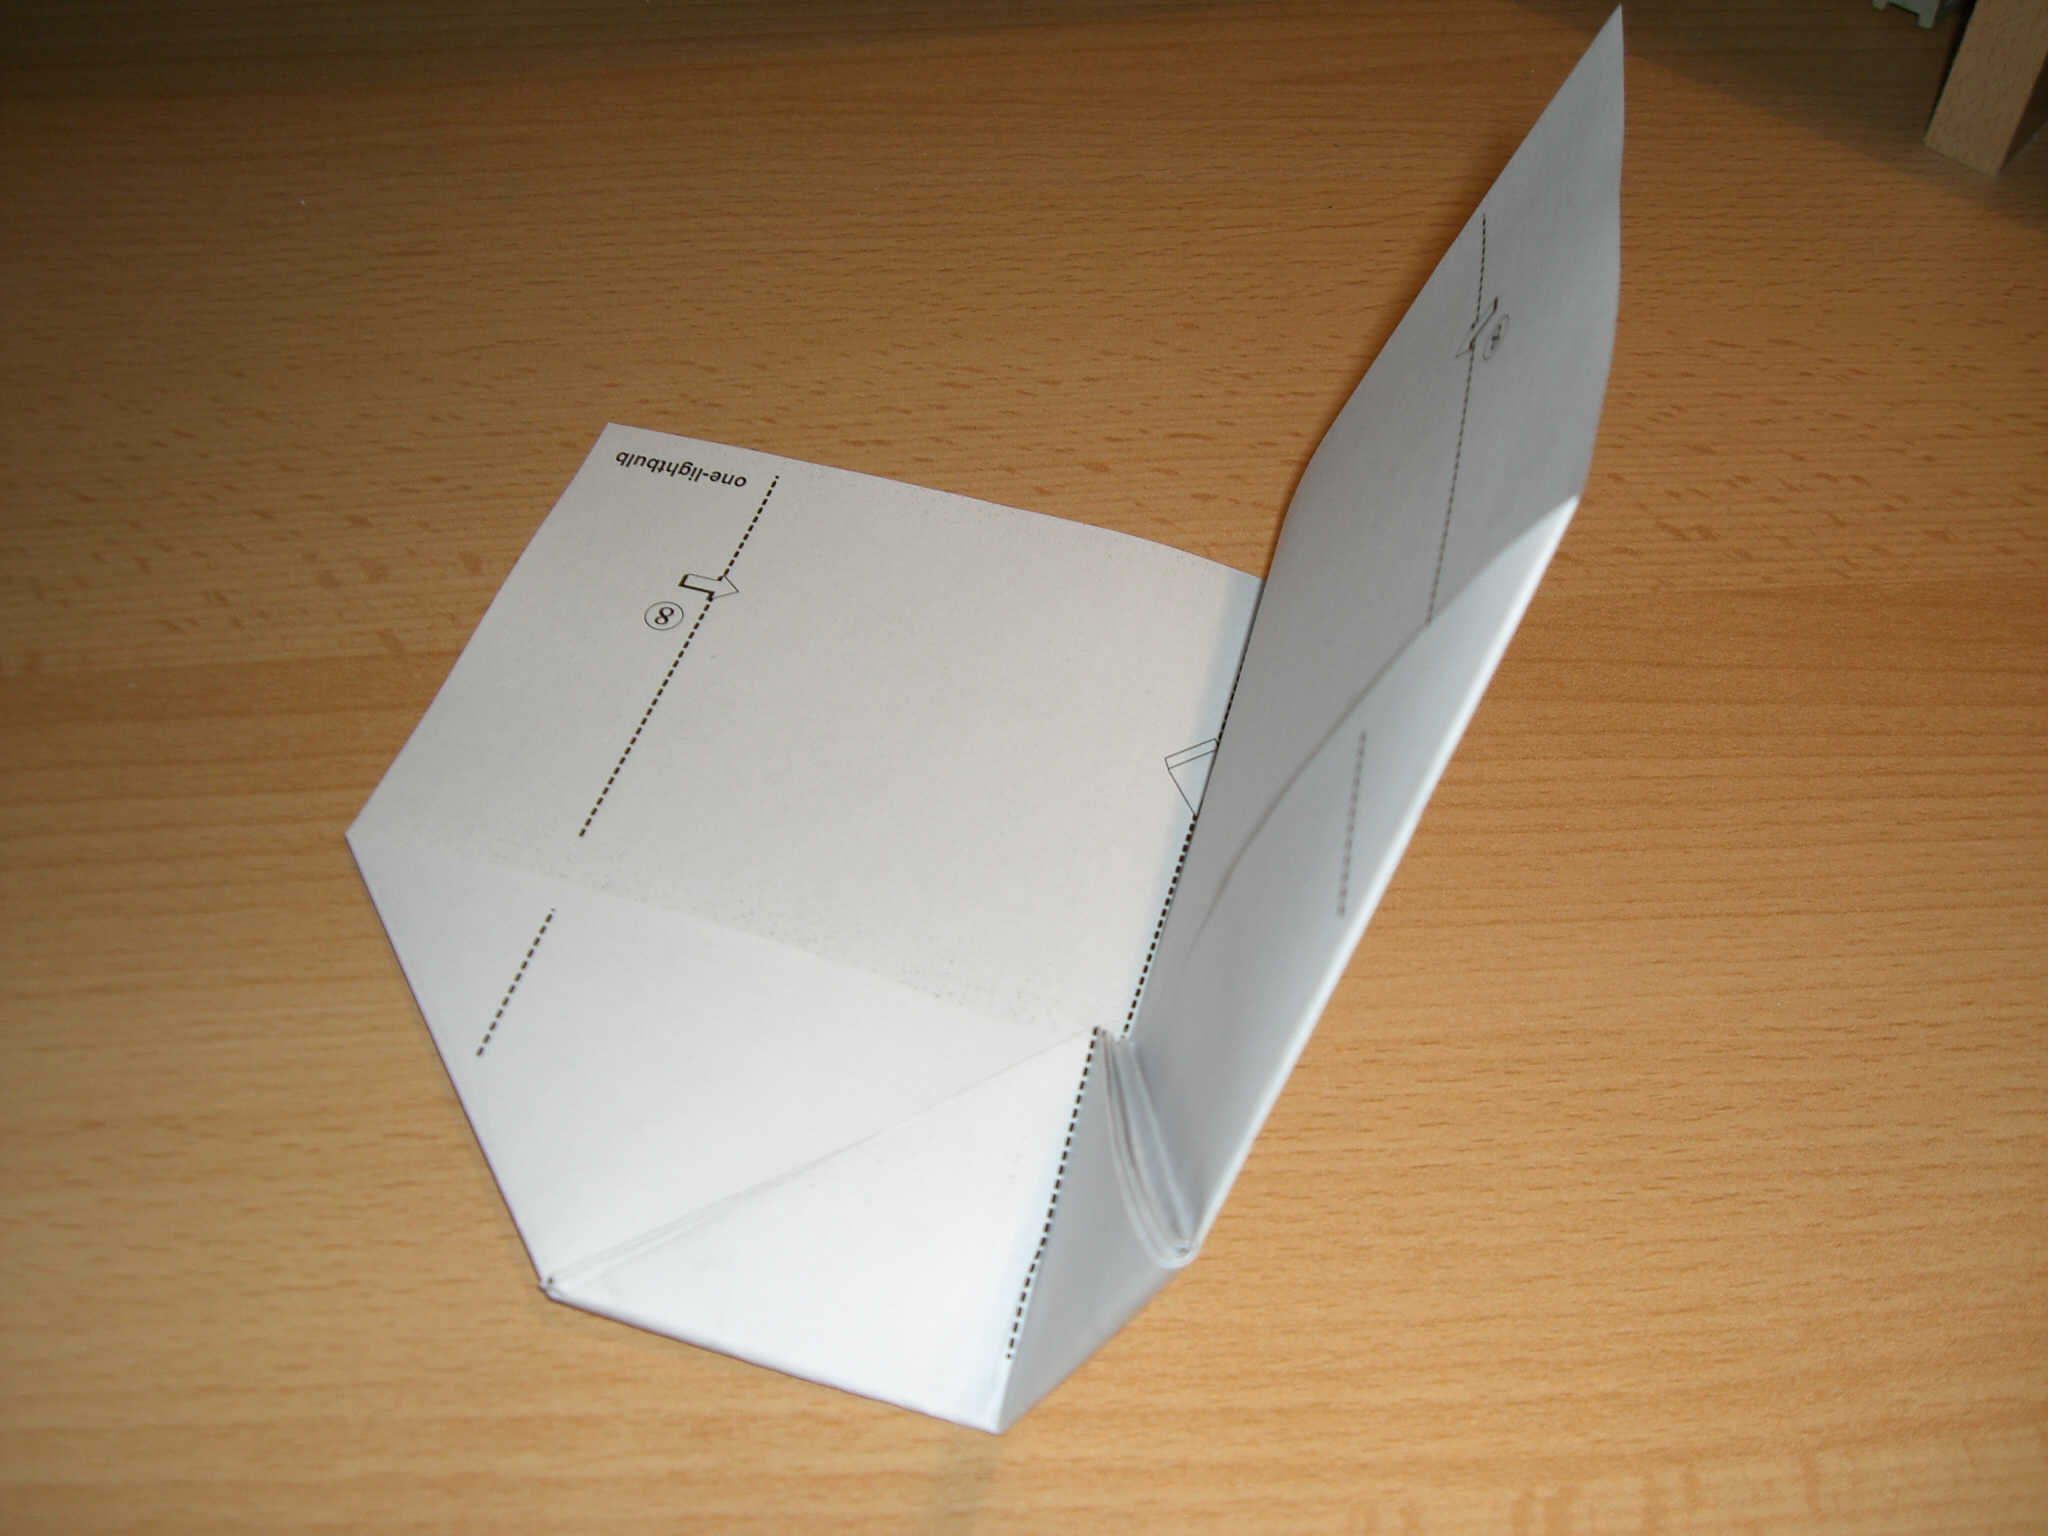
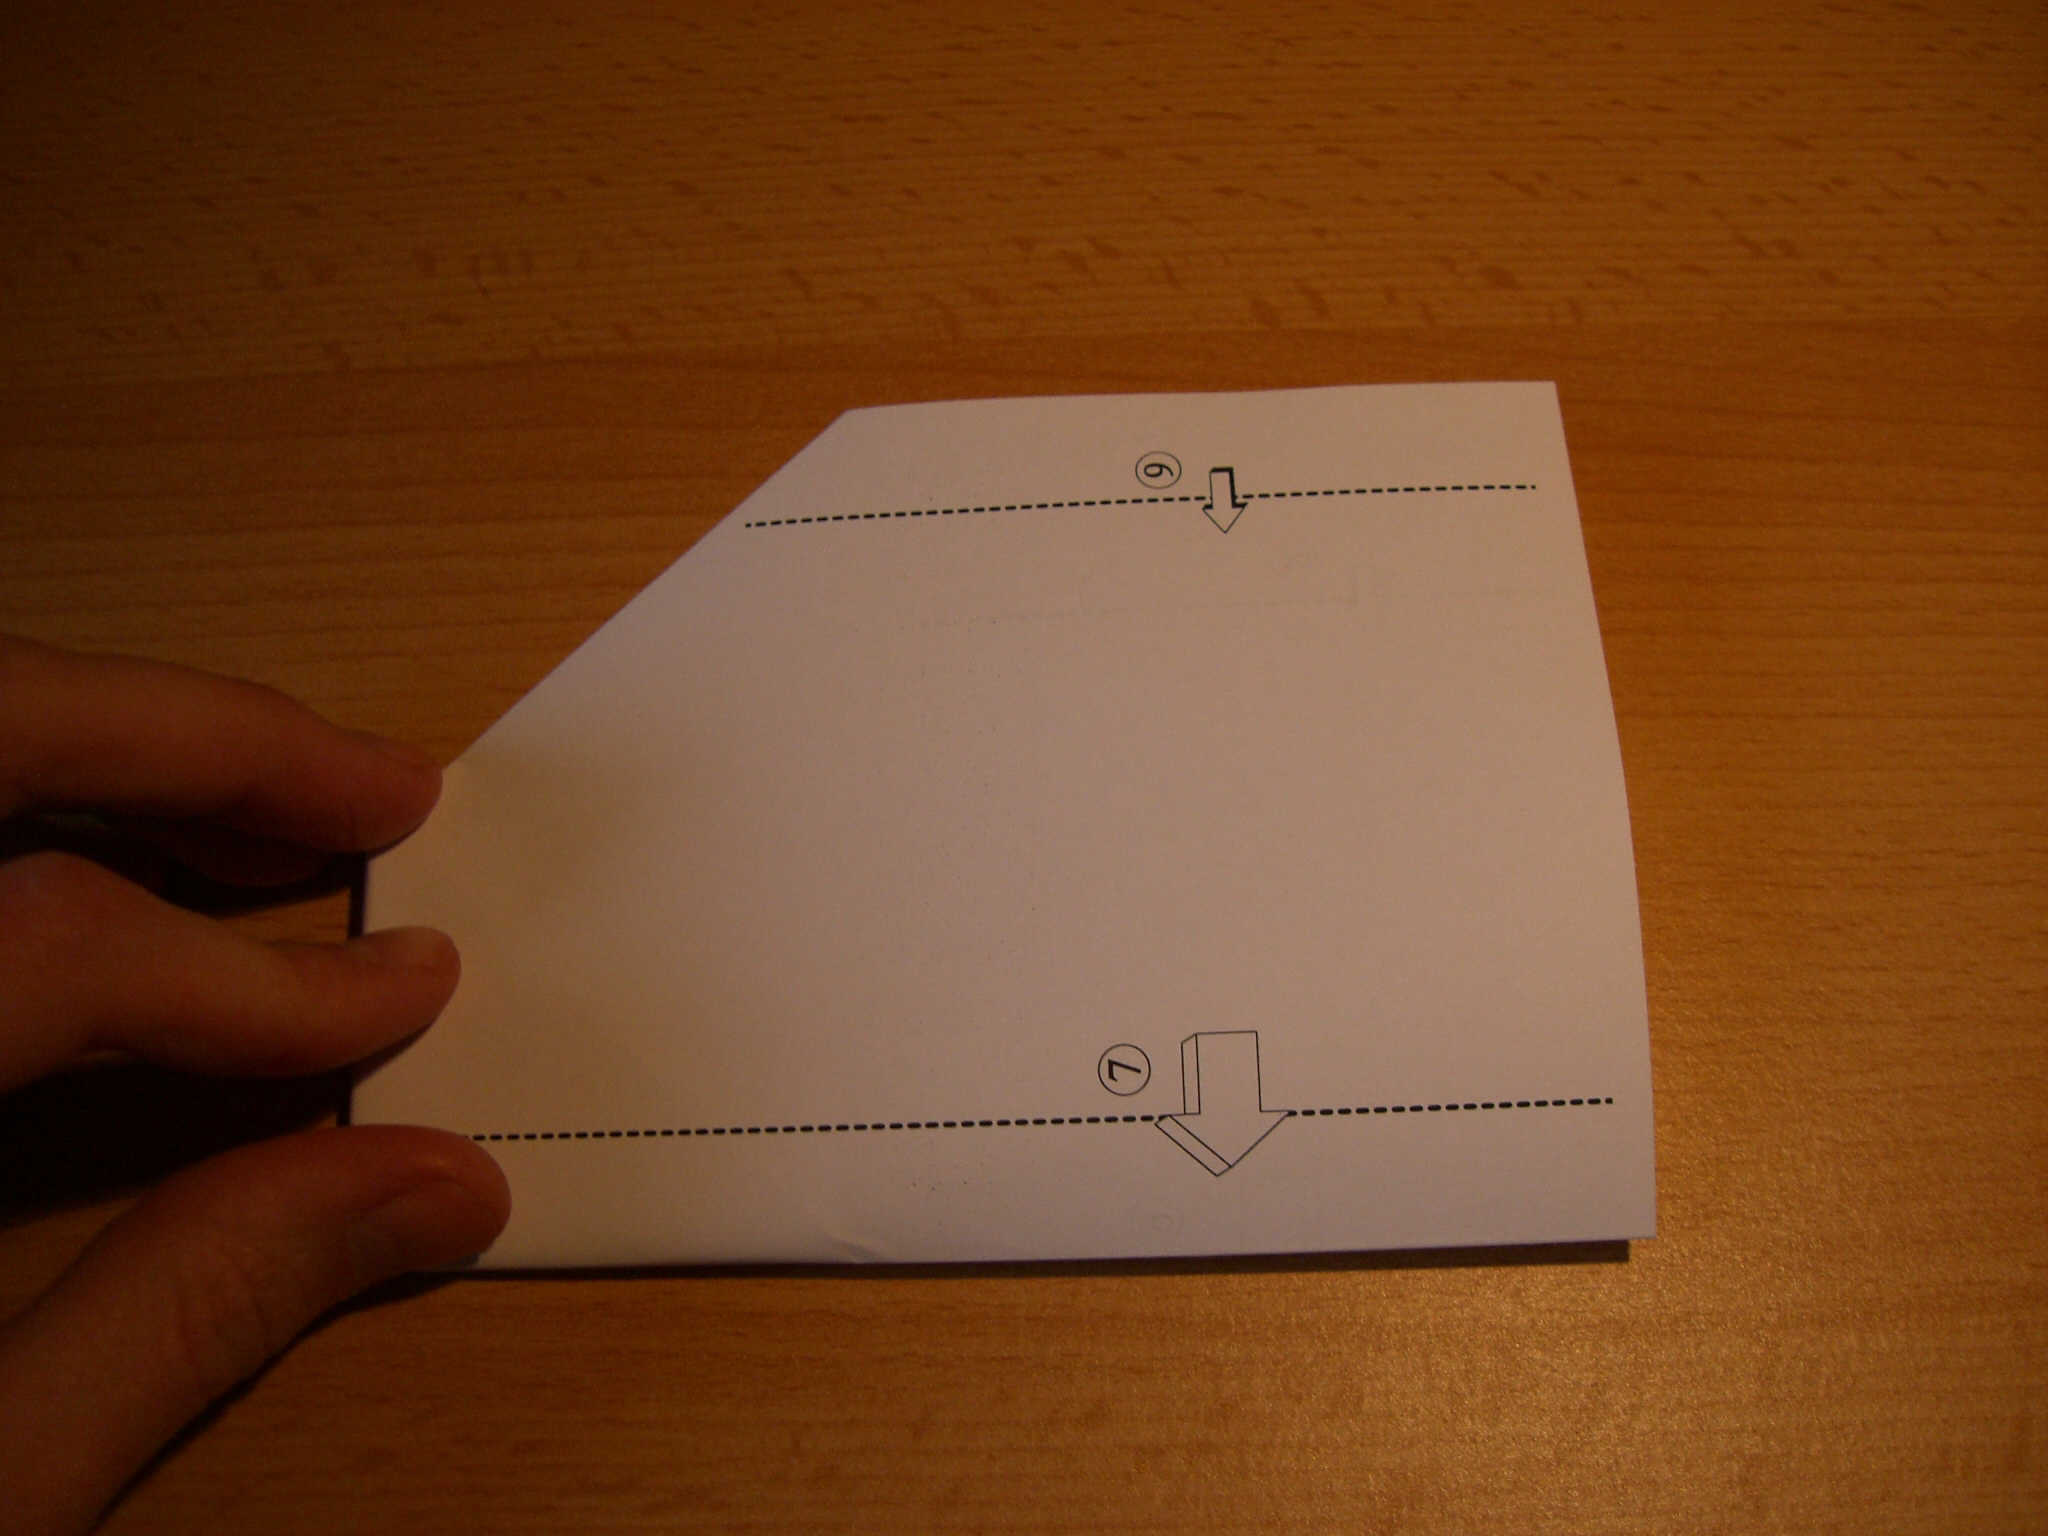
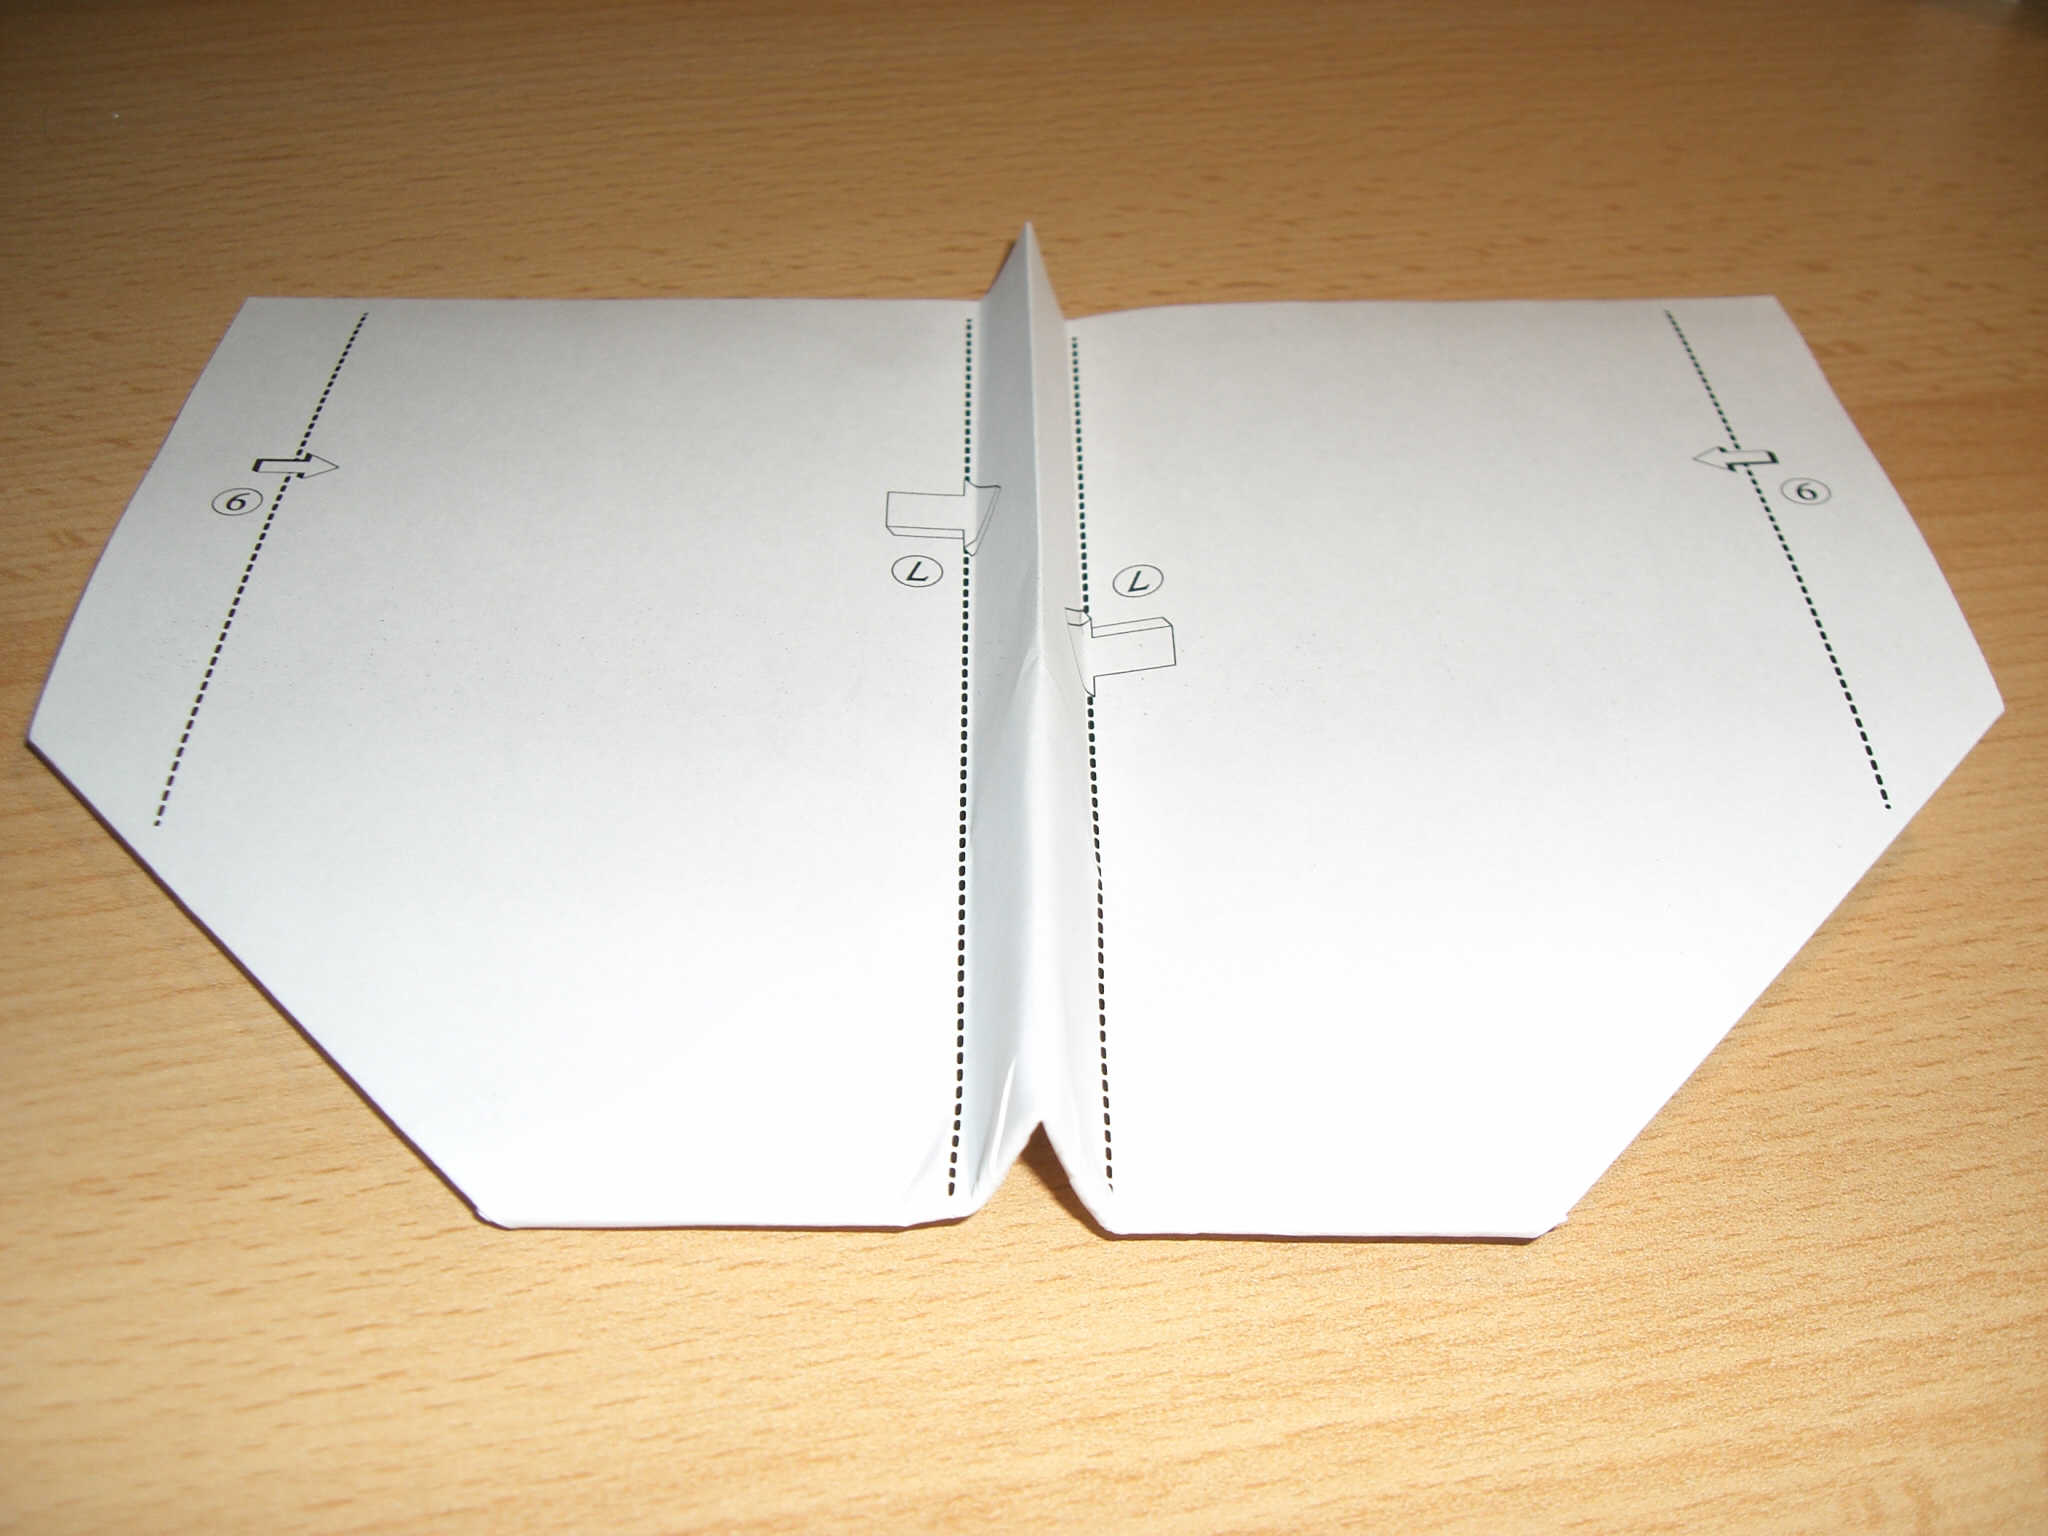
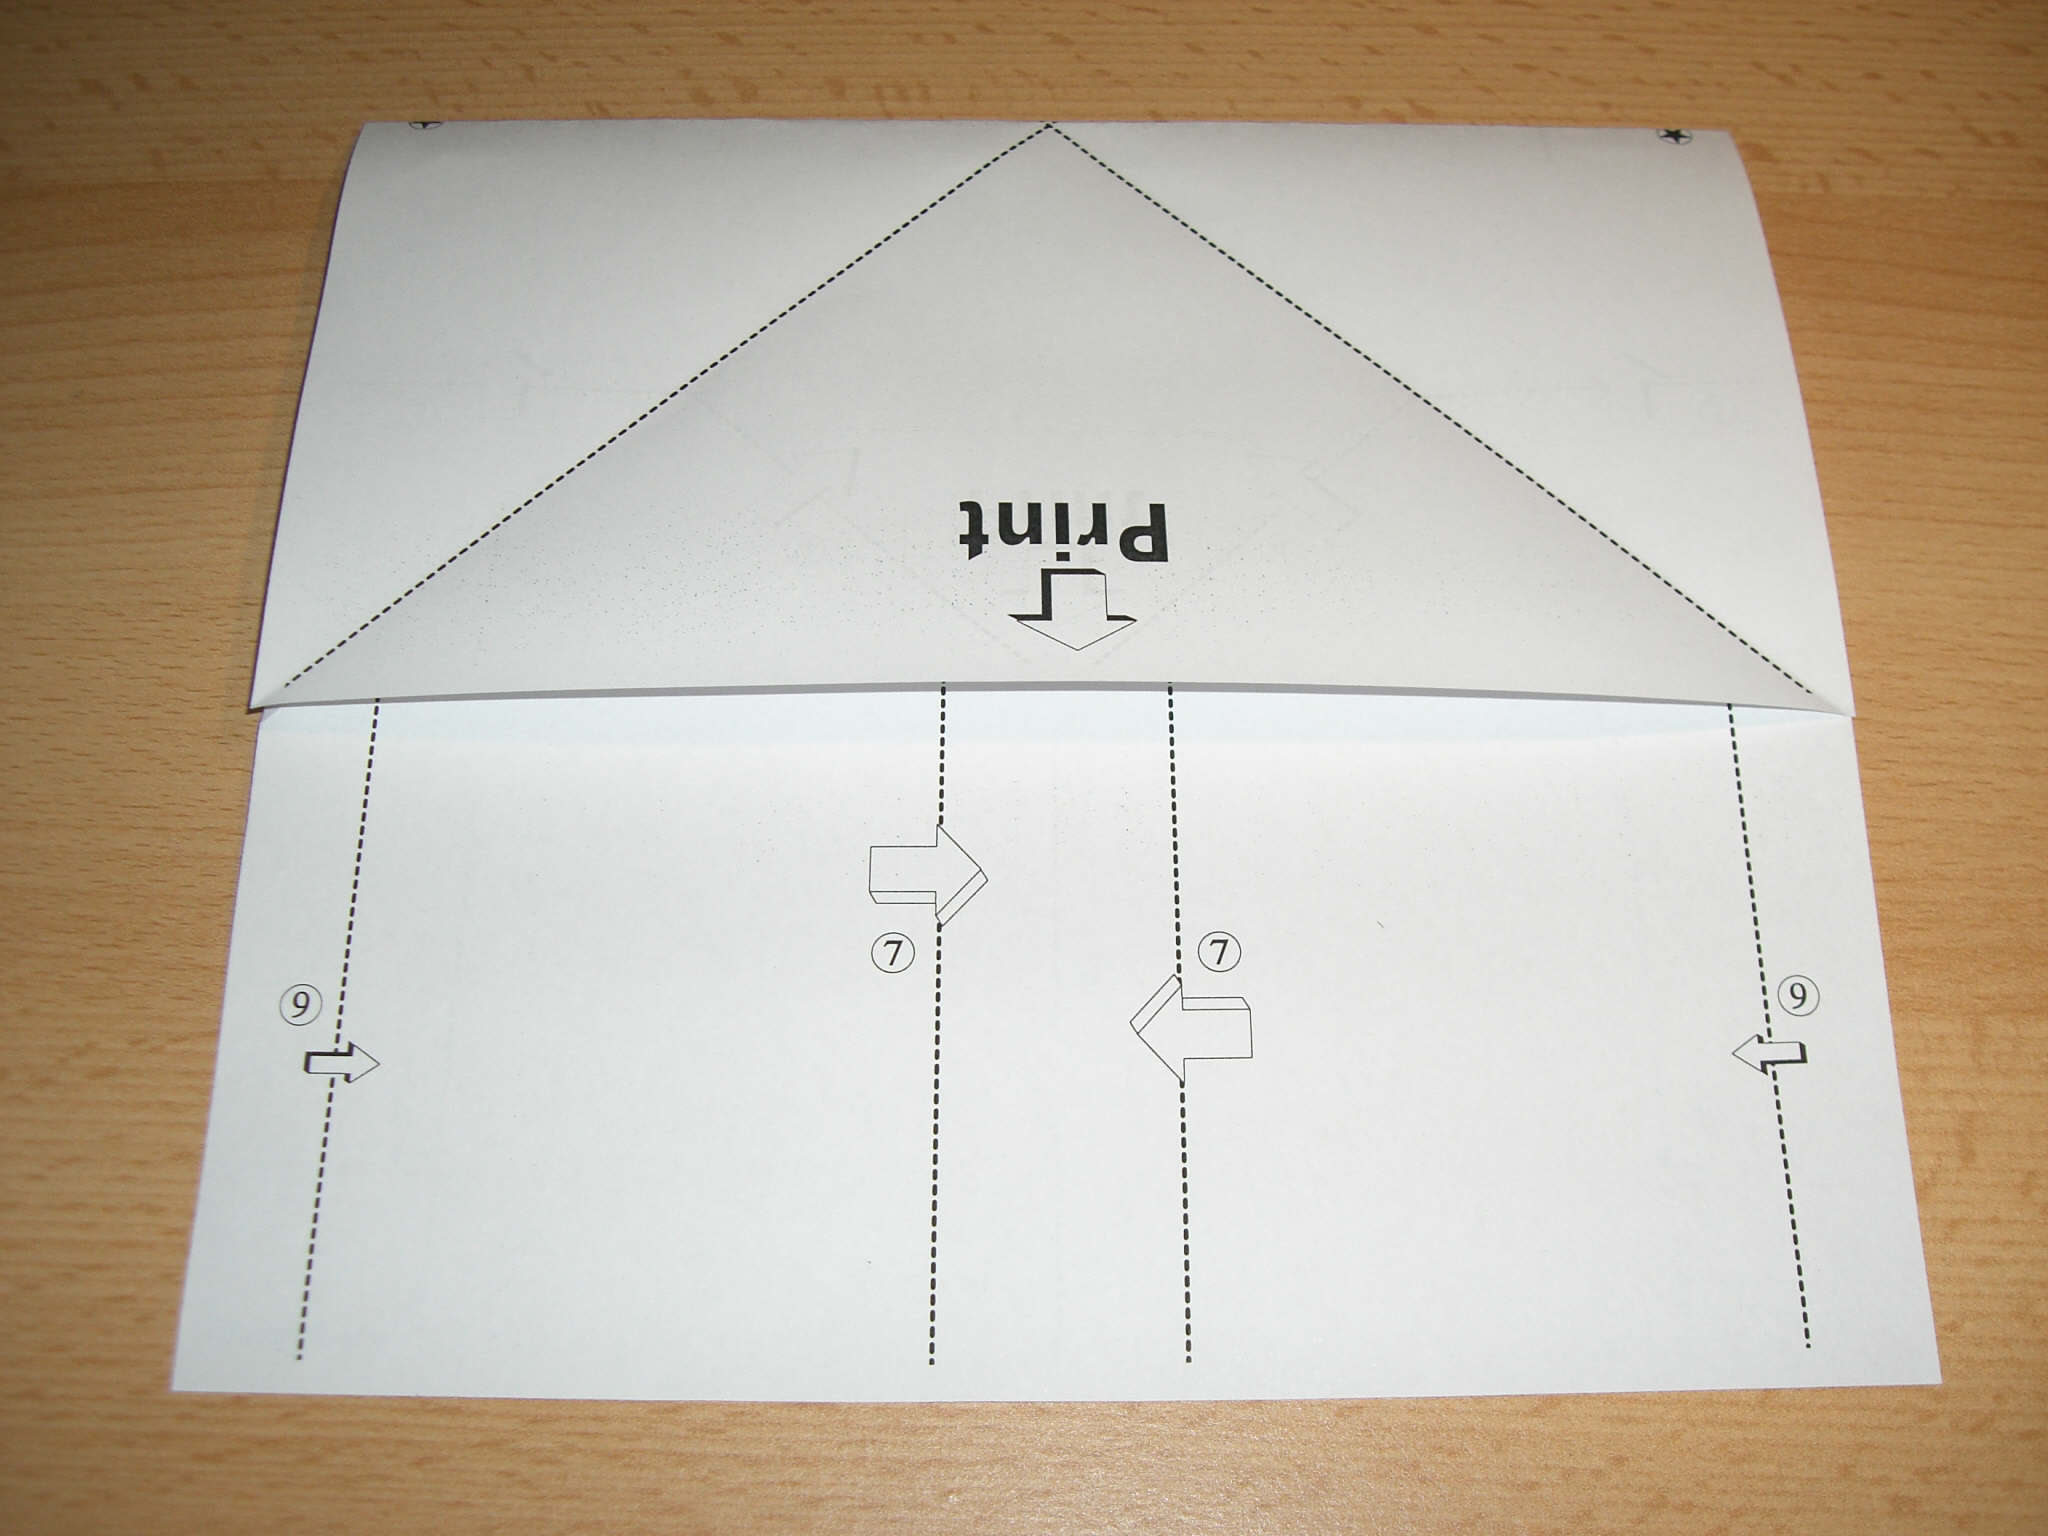
Fold in half (#6). Flip over and fold at line #7.
Now you have a handle.
Now you have a handle.
Winglets
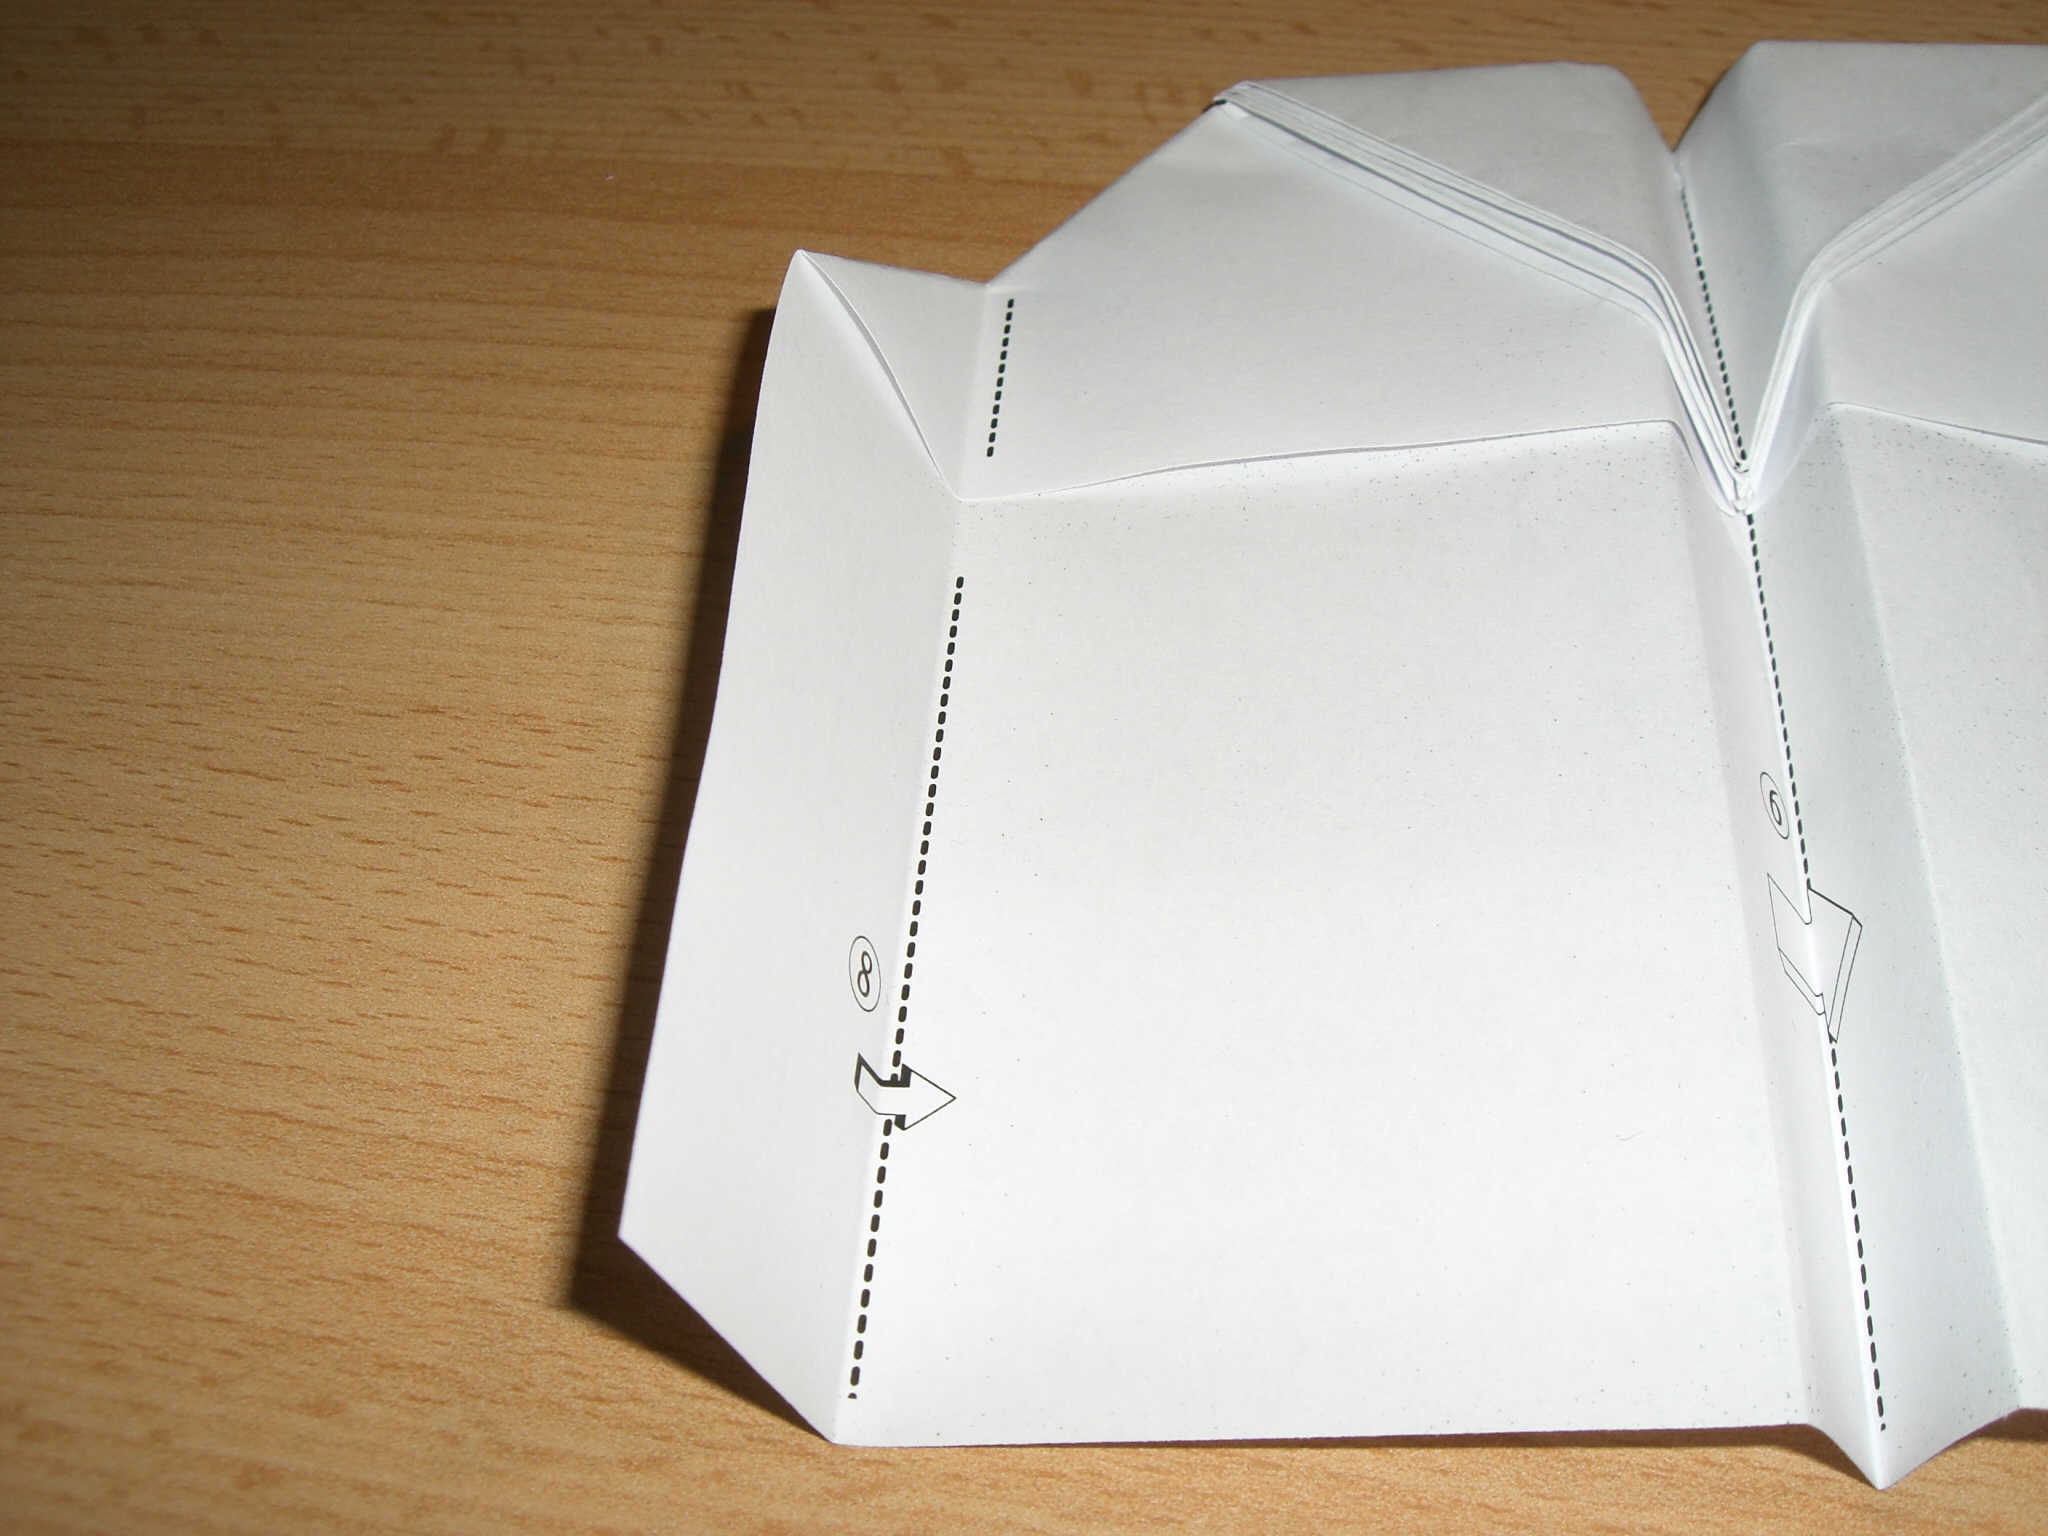
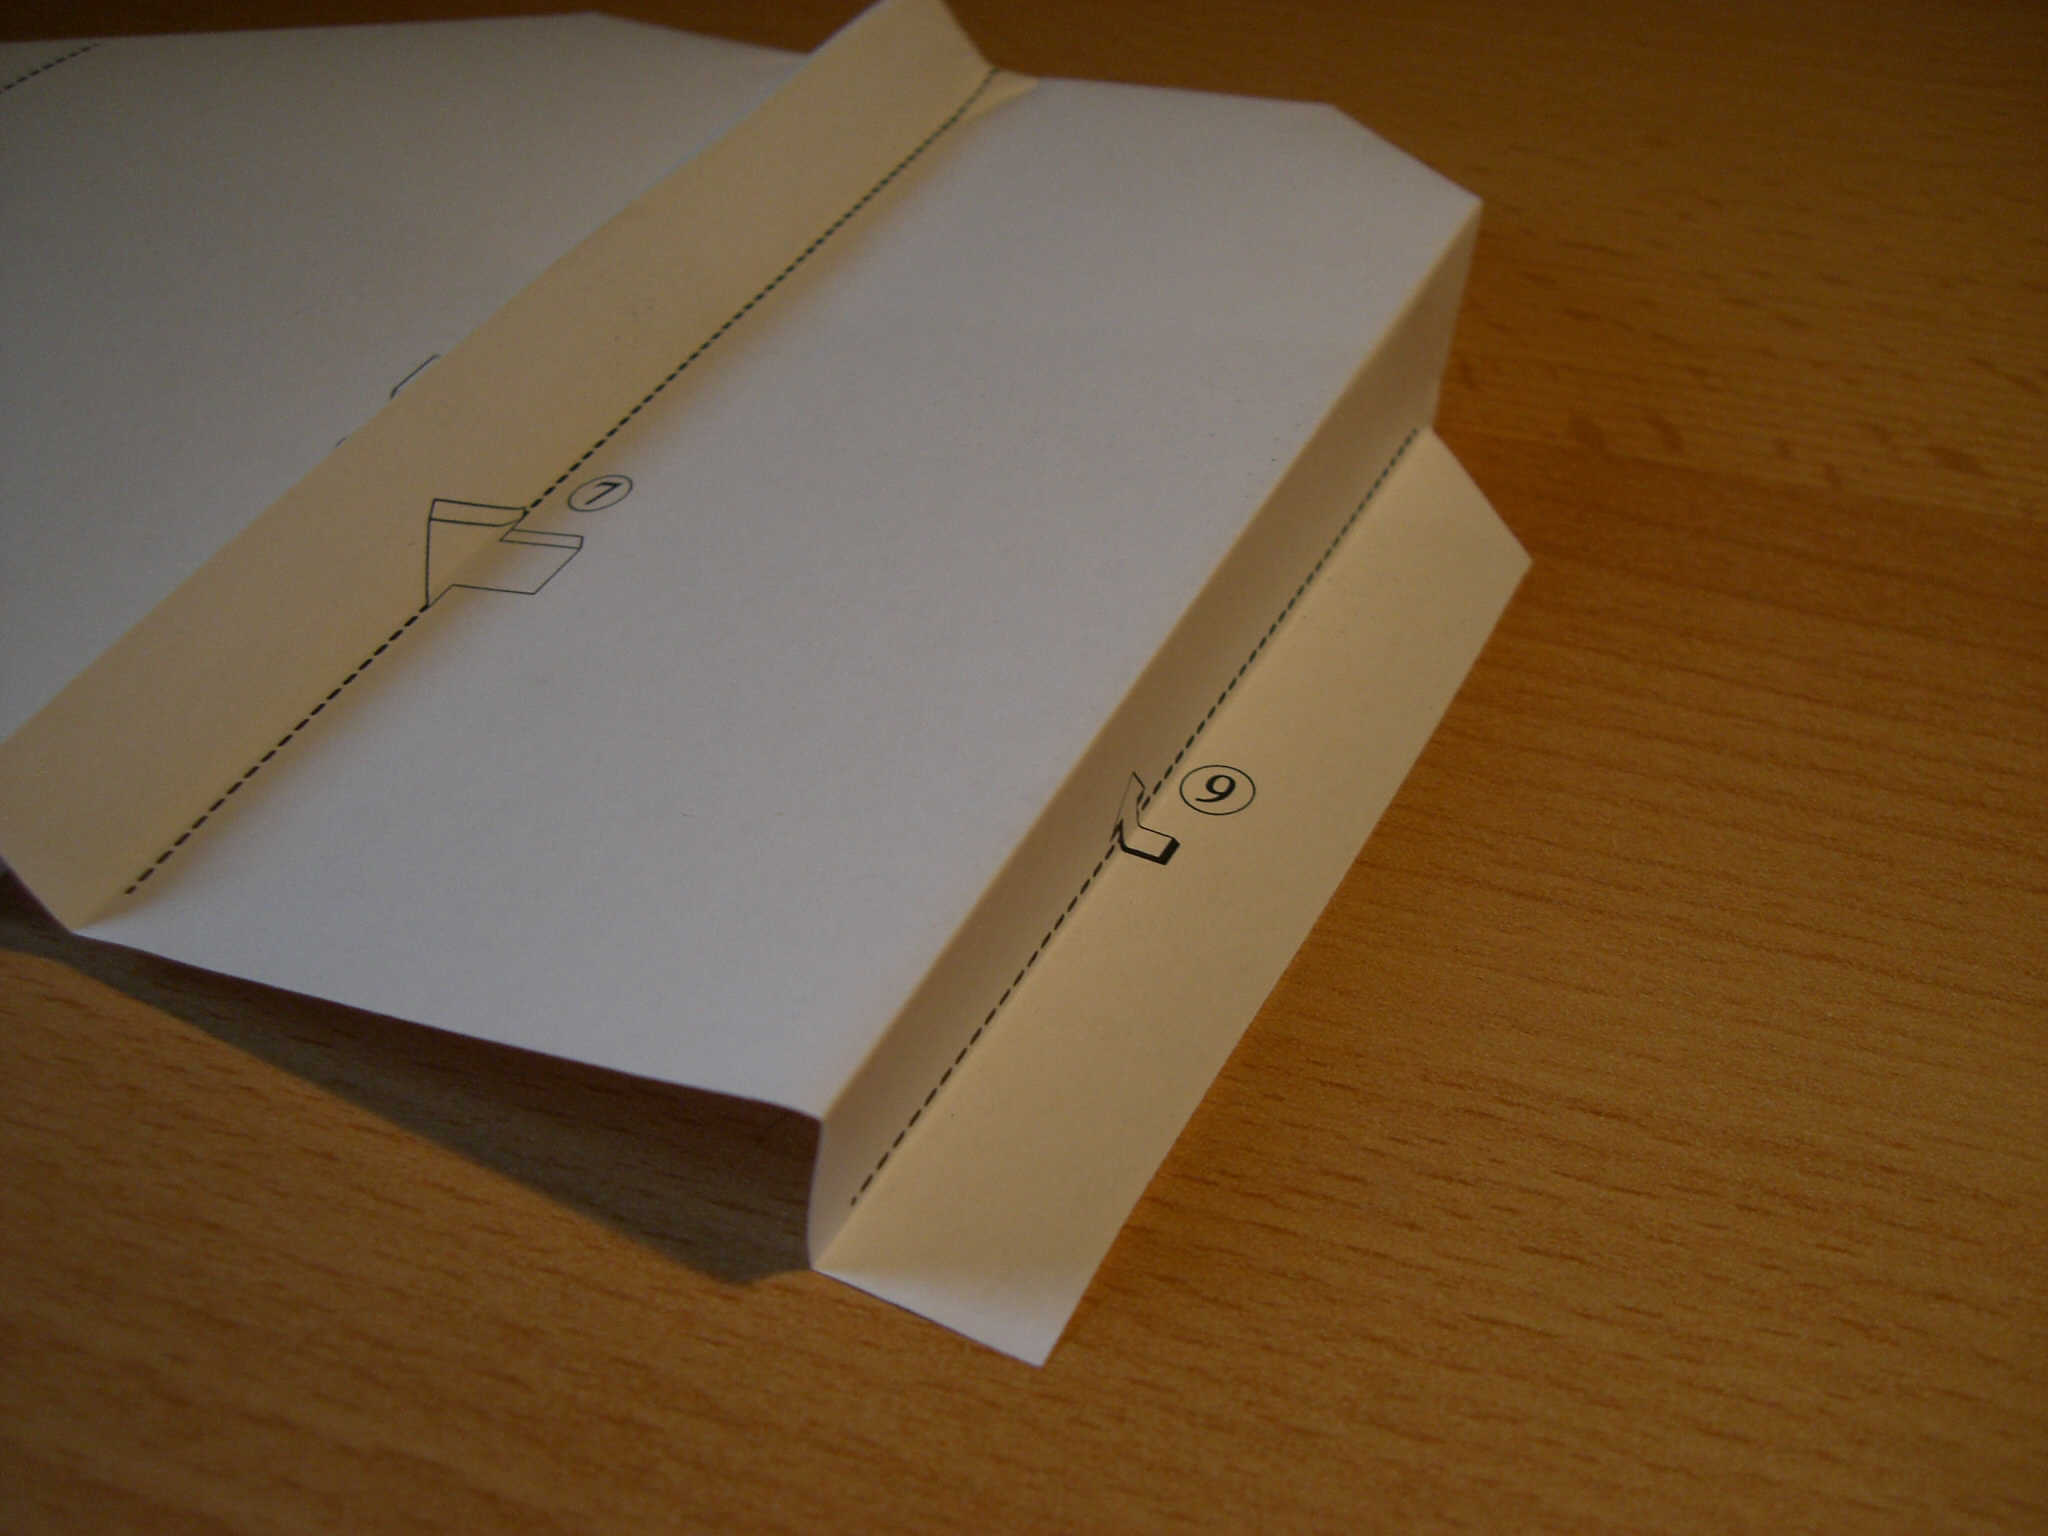
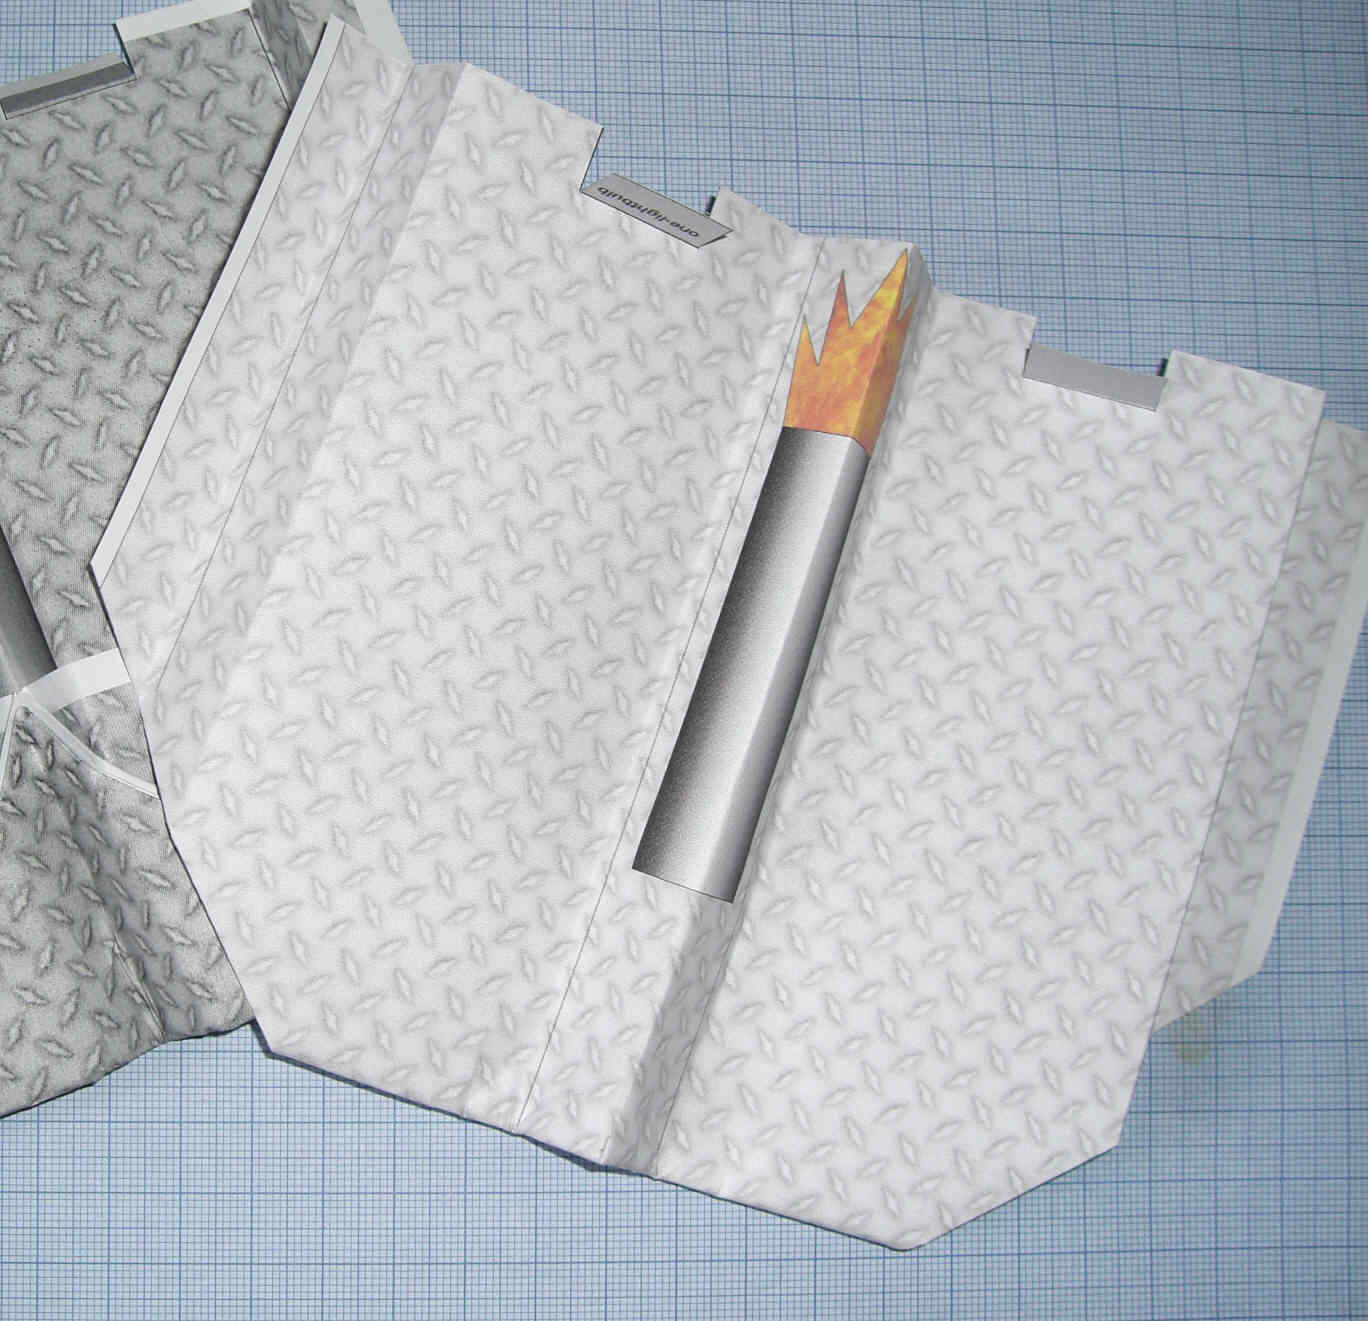
Fold 1/3 of the wing (#8) towards the center. Last time flip over and fold 1/2 of the winglet in opposite direction(#9).
In the color Version I build in "landing flaps". With a scissor you cut the flaps twice and bend them up- or downwards to get better flying characteristics.
Done
In the color Version I build in "landing flaps". With a scissor you cut the flaps twice and bend them up- or downwards to get better flying characteristics.
Done