Padel Tennis Smart Bench
Hi everyone and welcome to my first Instructable !
A few months ago, I had another first time experience since I entered my first Hackathon about "Innovation and Engineering in Sports".
The 60h journey started with a quick presentation of a lot of different projects. And by the end of the welcome breakfast, we had to have joined a project.
The project I chose was initiated by a company which created an app to reserve gym classes in a very smooth way, and this could to be expanded to tennis courts and a lot of other activities.
However, when it comes to practising a new activity, you don't necessarily have all the equipment, and you don't want to buy everything before trying, right ?
So, our idea was to create a box that can be unlocked with your phone when you arrive to your activity that you reserved earlier of the app.
We then thought about a sport where we wouldn't need a huge amount of boxes for different sizes of equipment, and we chose... Padel !
Padel is this new tennis-like sport on a smaller court surrounded by glass walls and with a little bench on the outside to have a break.
We decided to modify this bench in order to give it more functions. Our new bench would allow players to put their things away and sit down. But it would also free up the host, who spends his day handing out rackets, to do other activities.
Supplies
Here is what we used to create our bench :
- Sketch book
- Pencil
- CAD Software
- 3D printer
- Lots of brainstorming sessions
Sketch
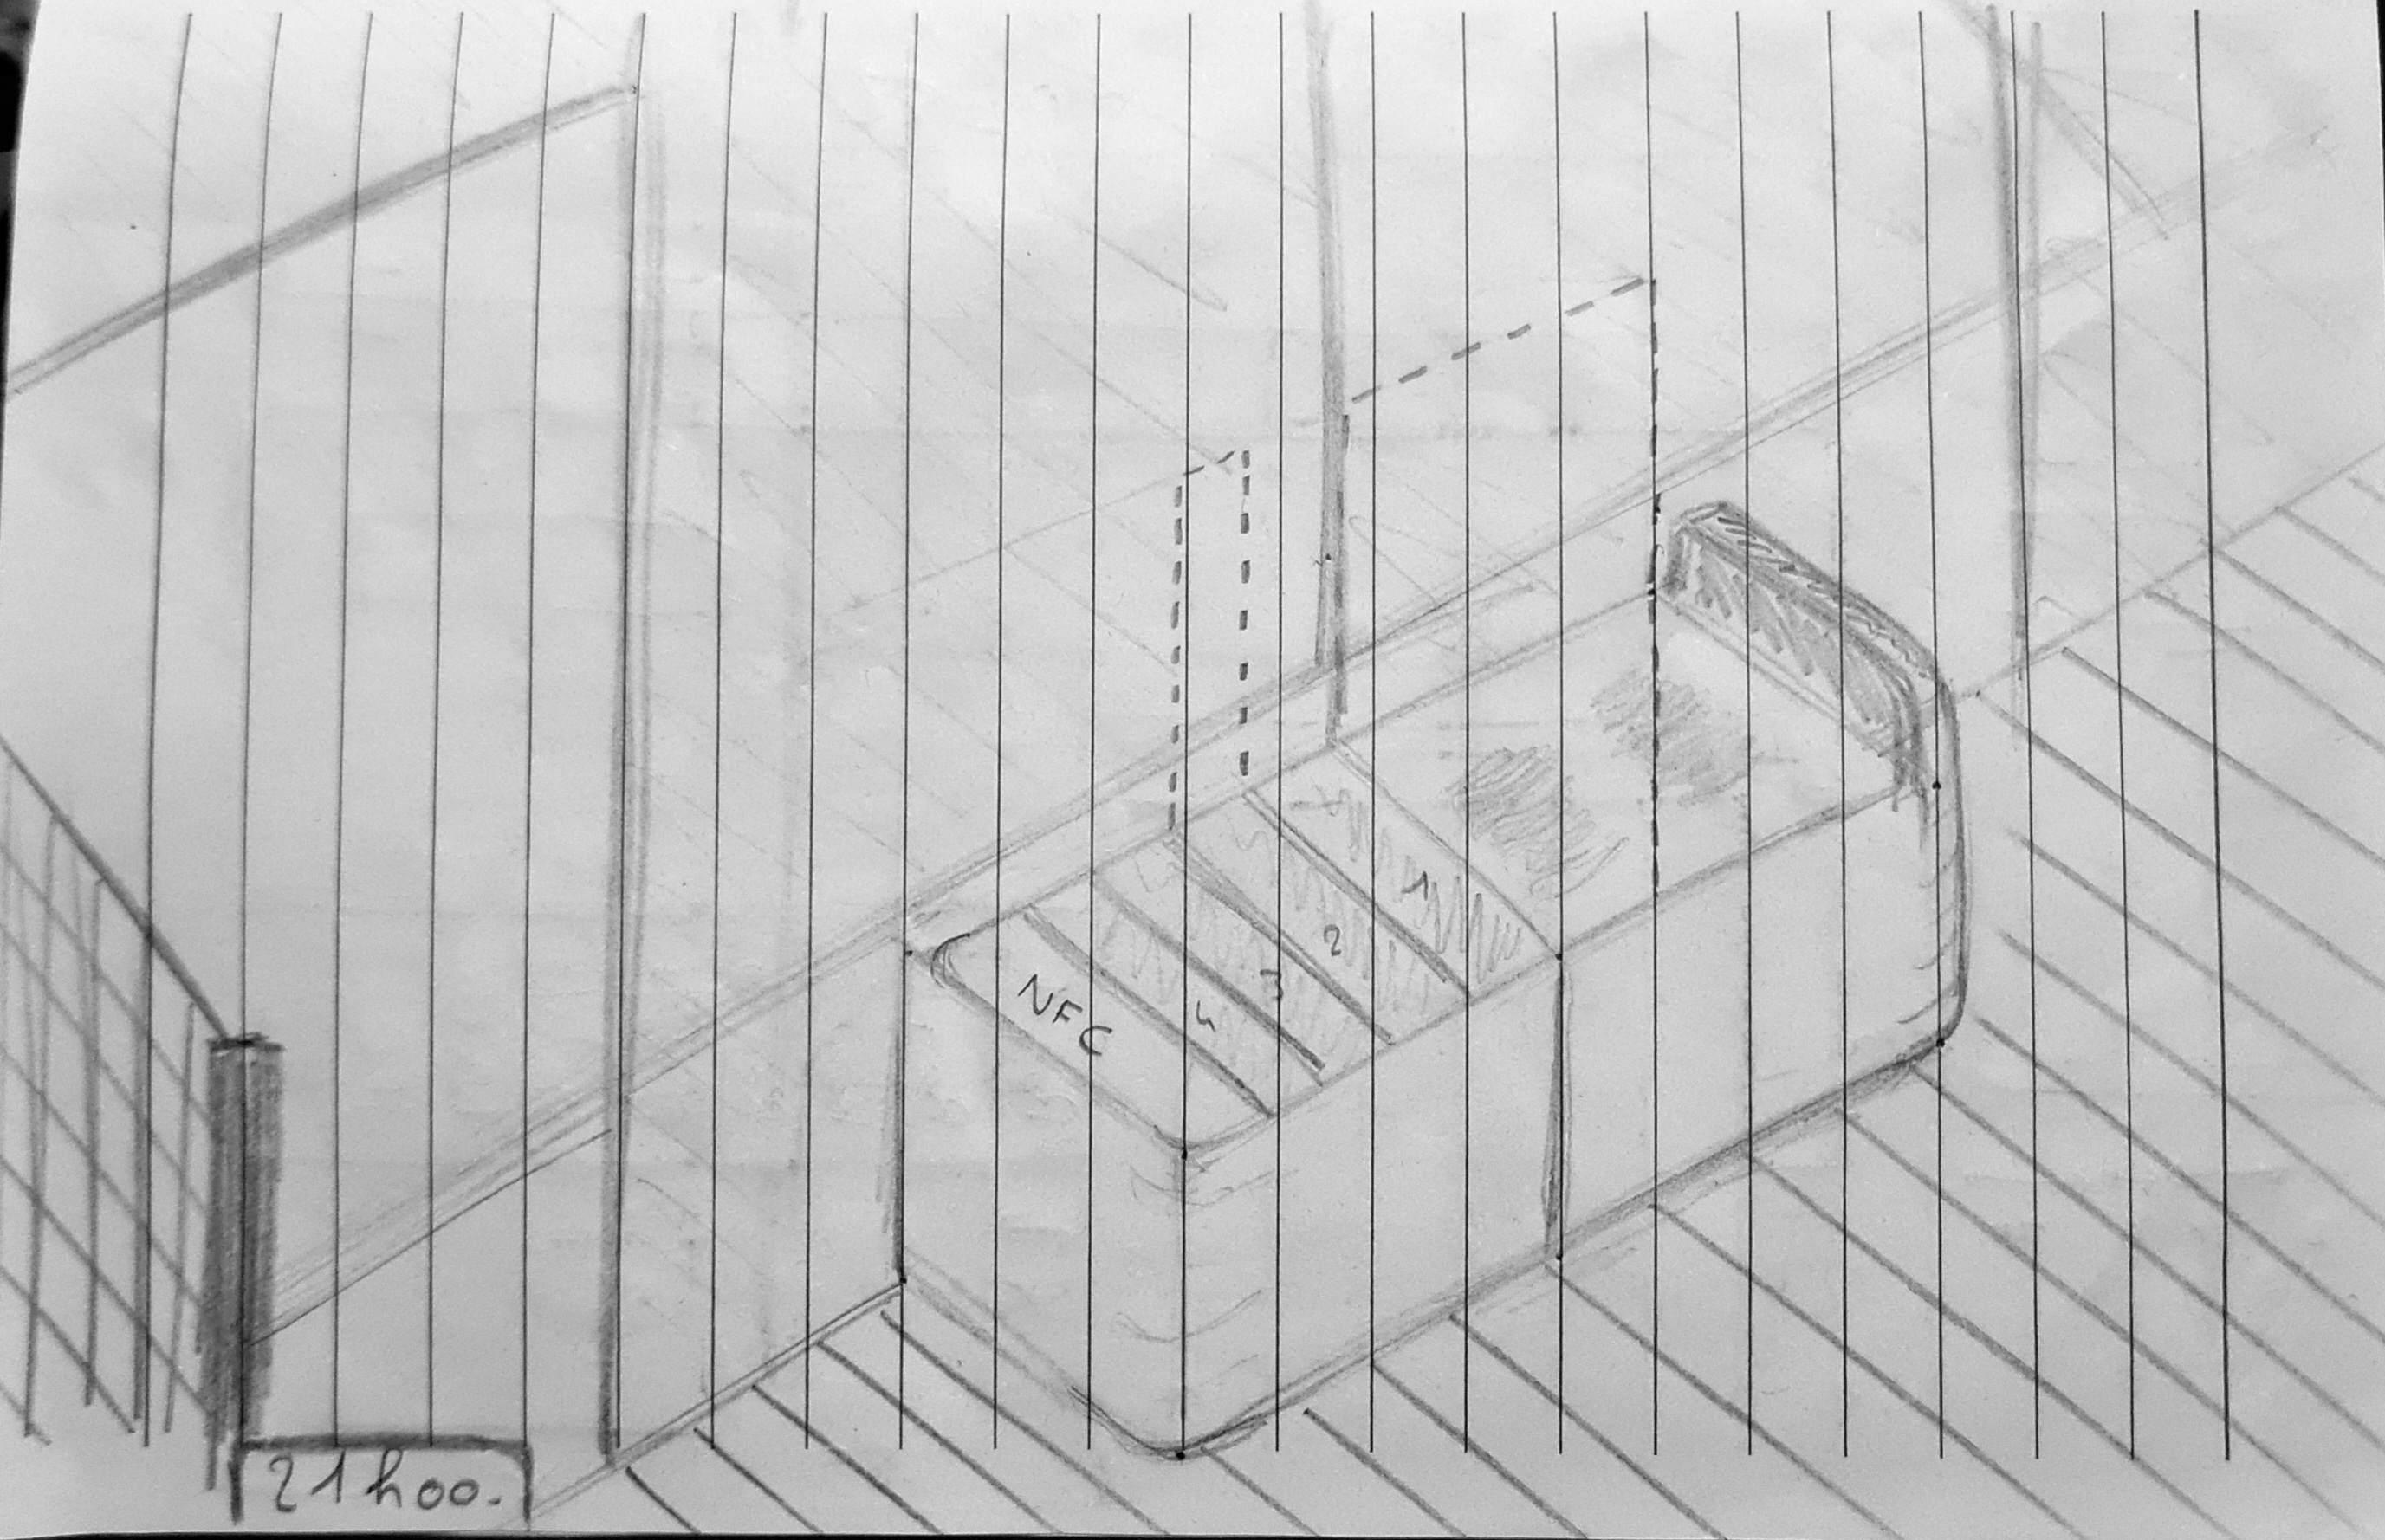
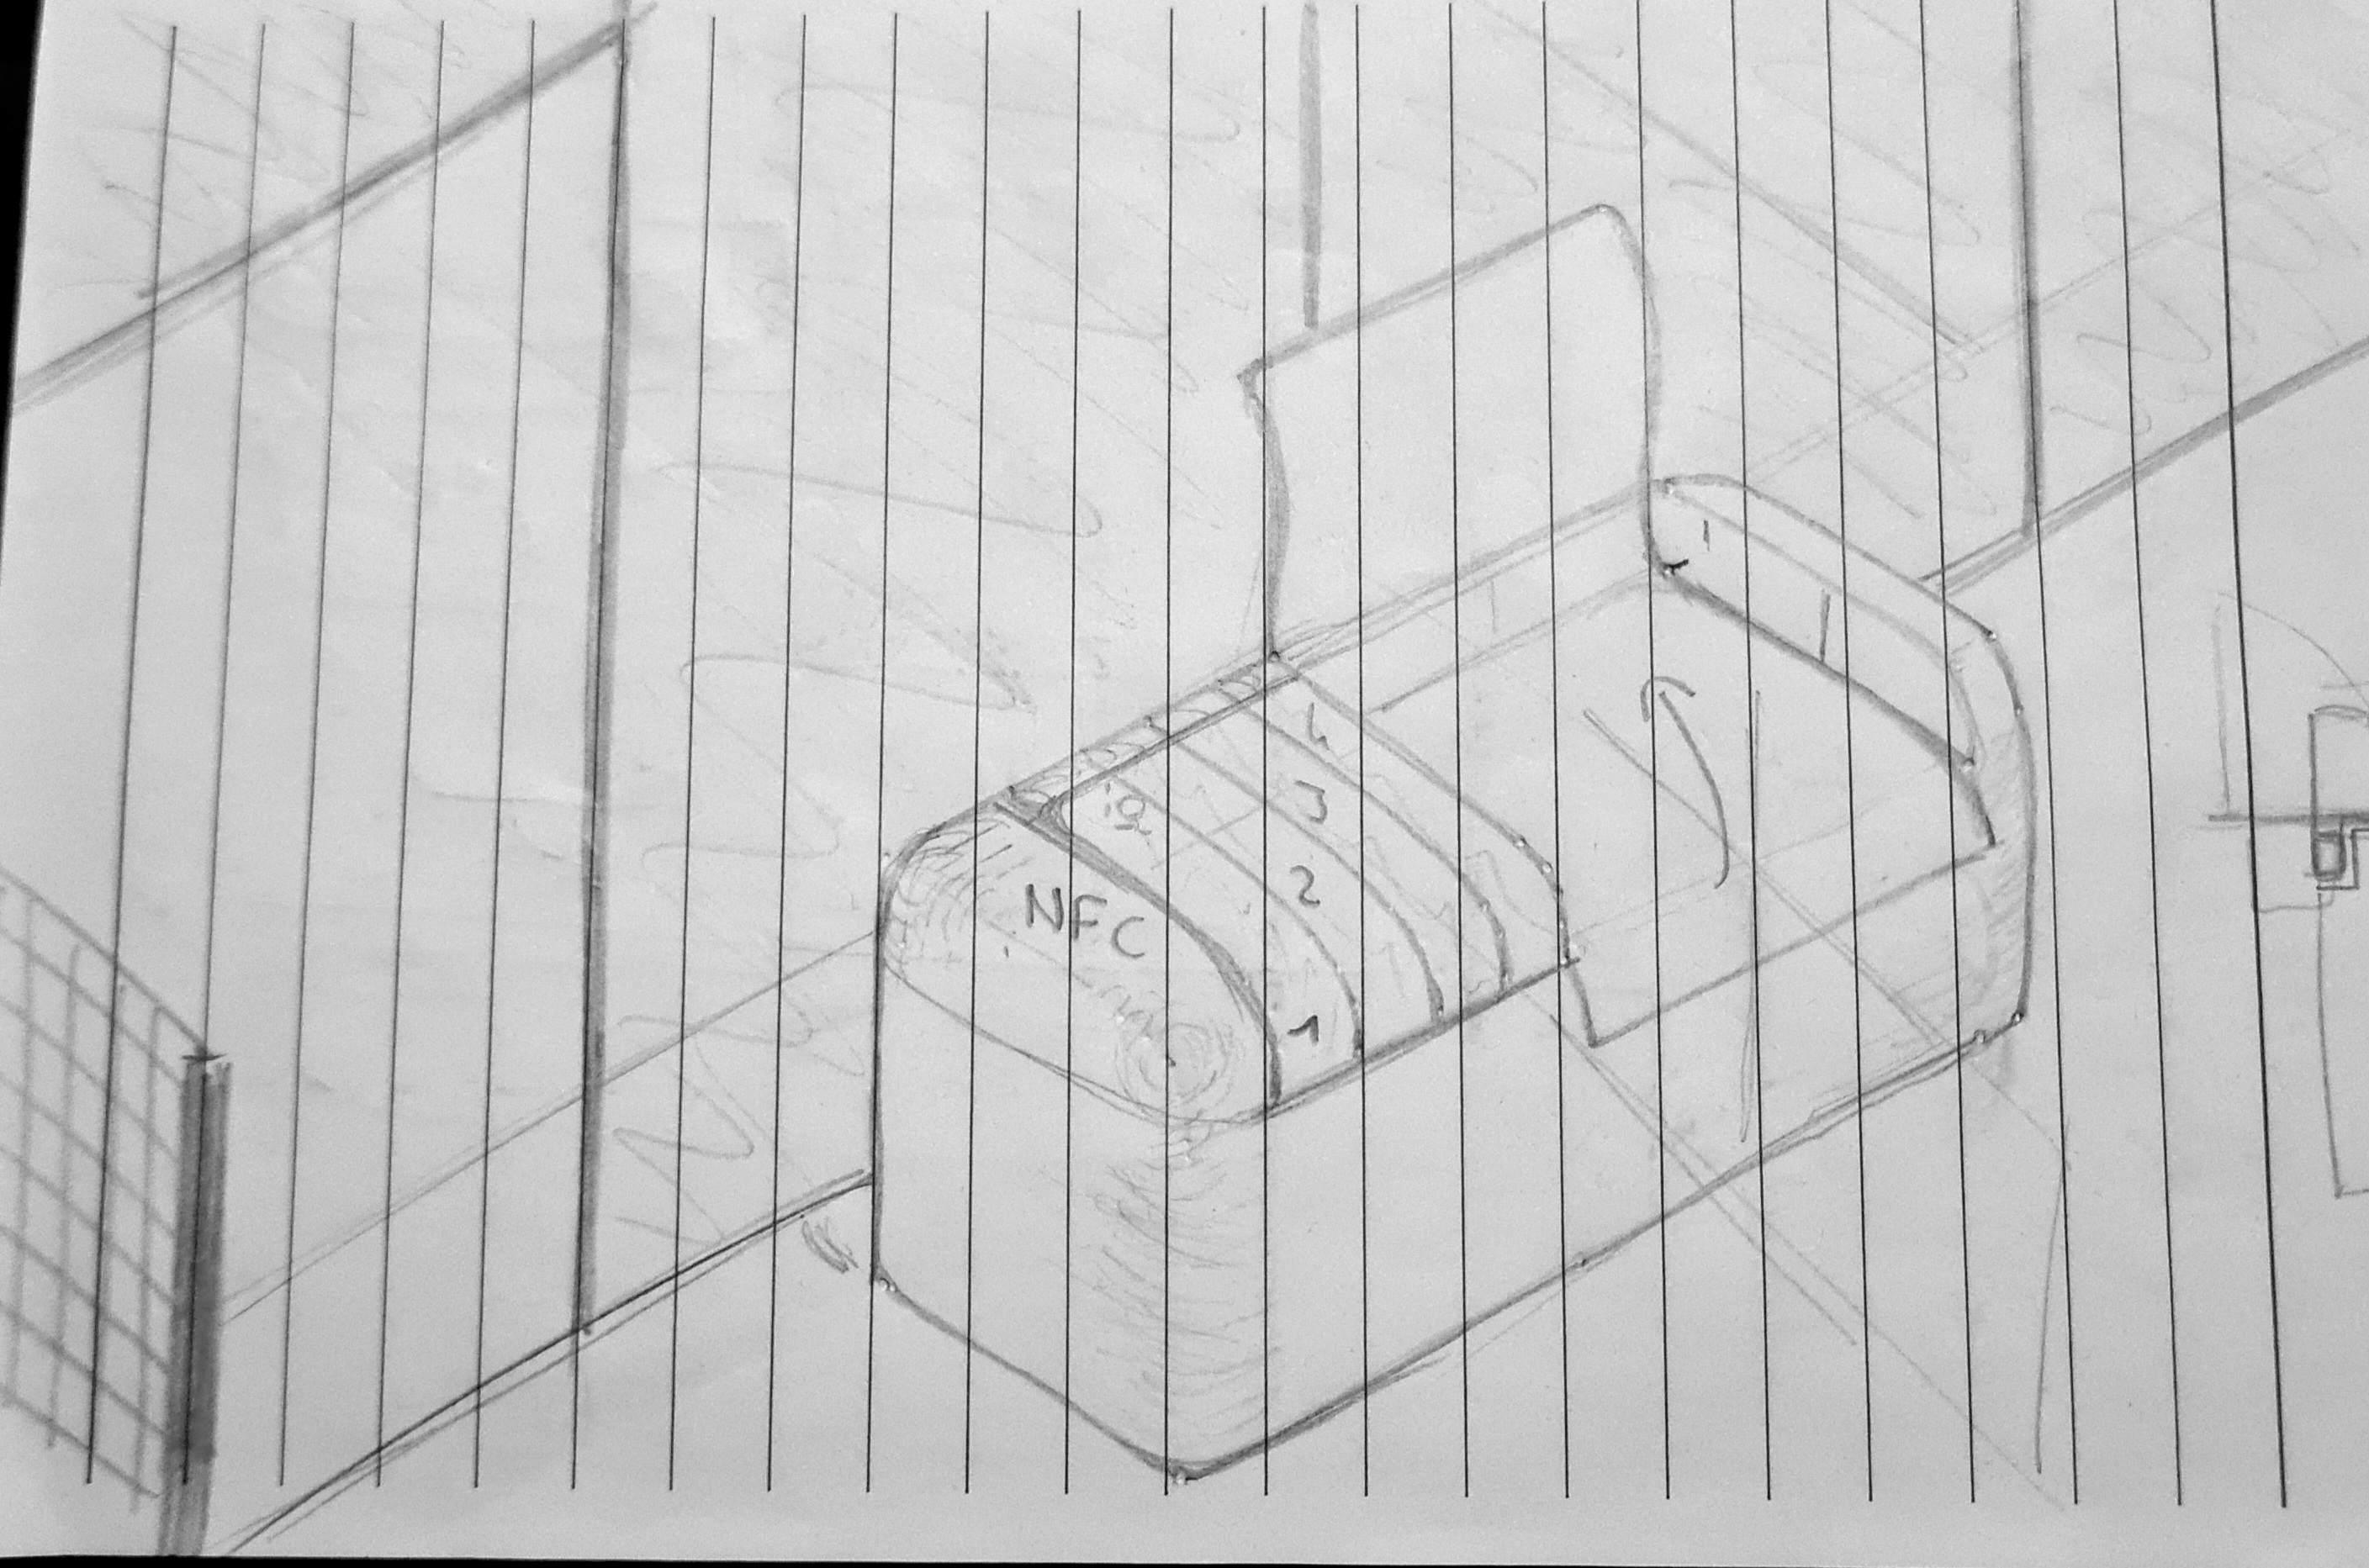
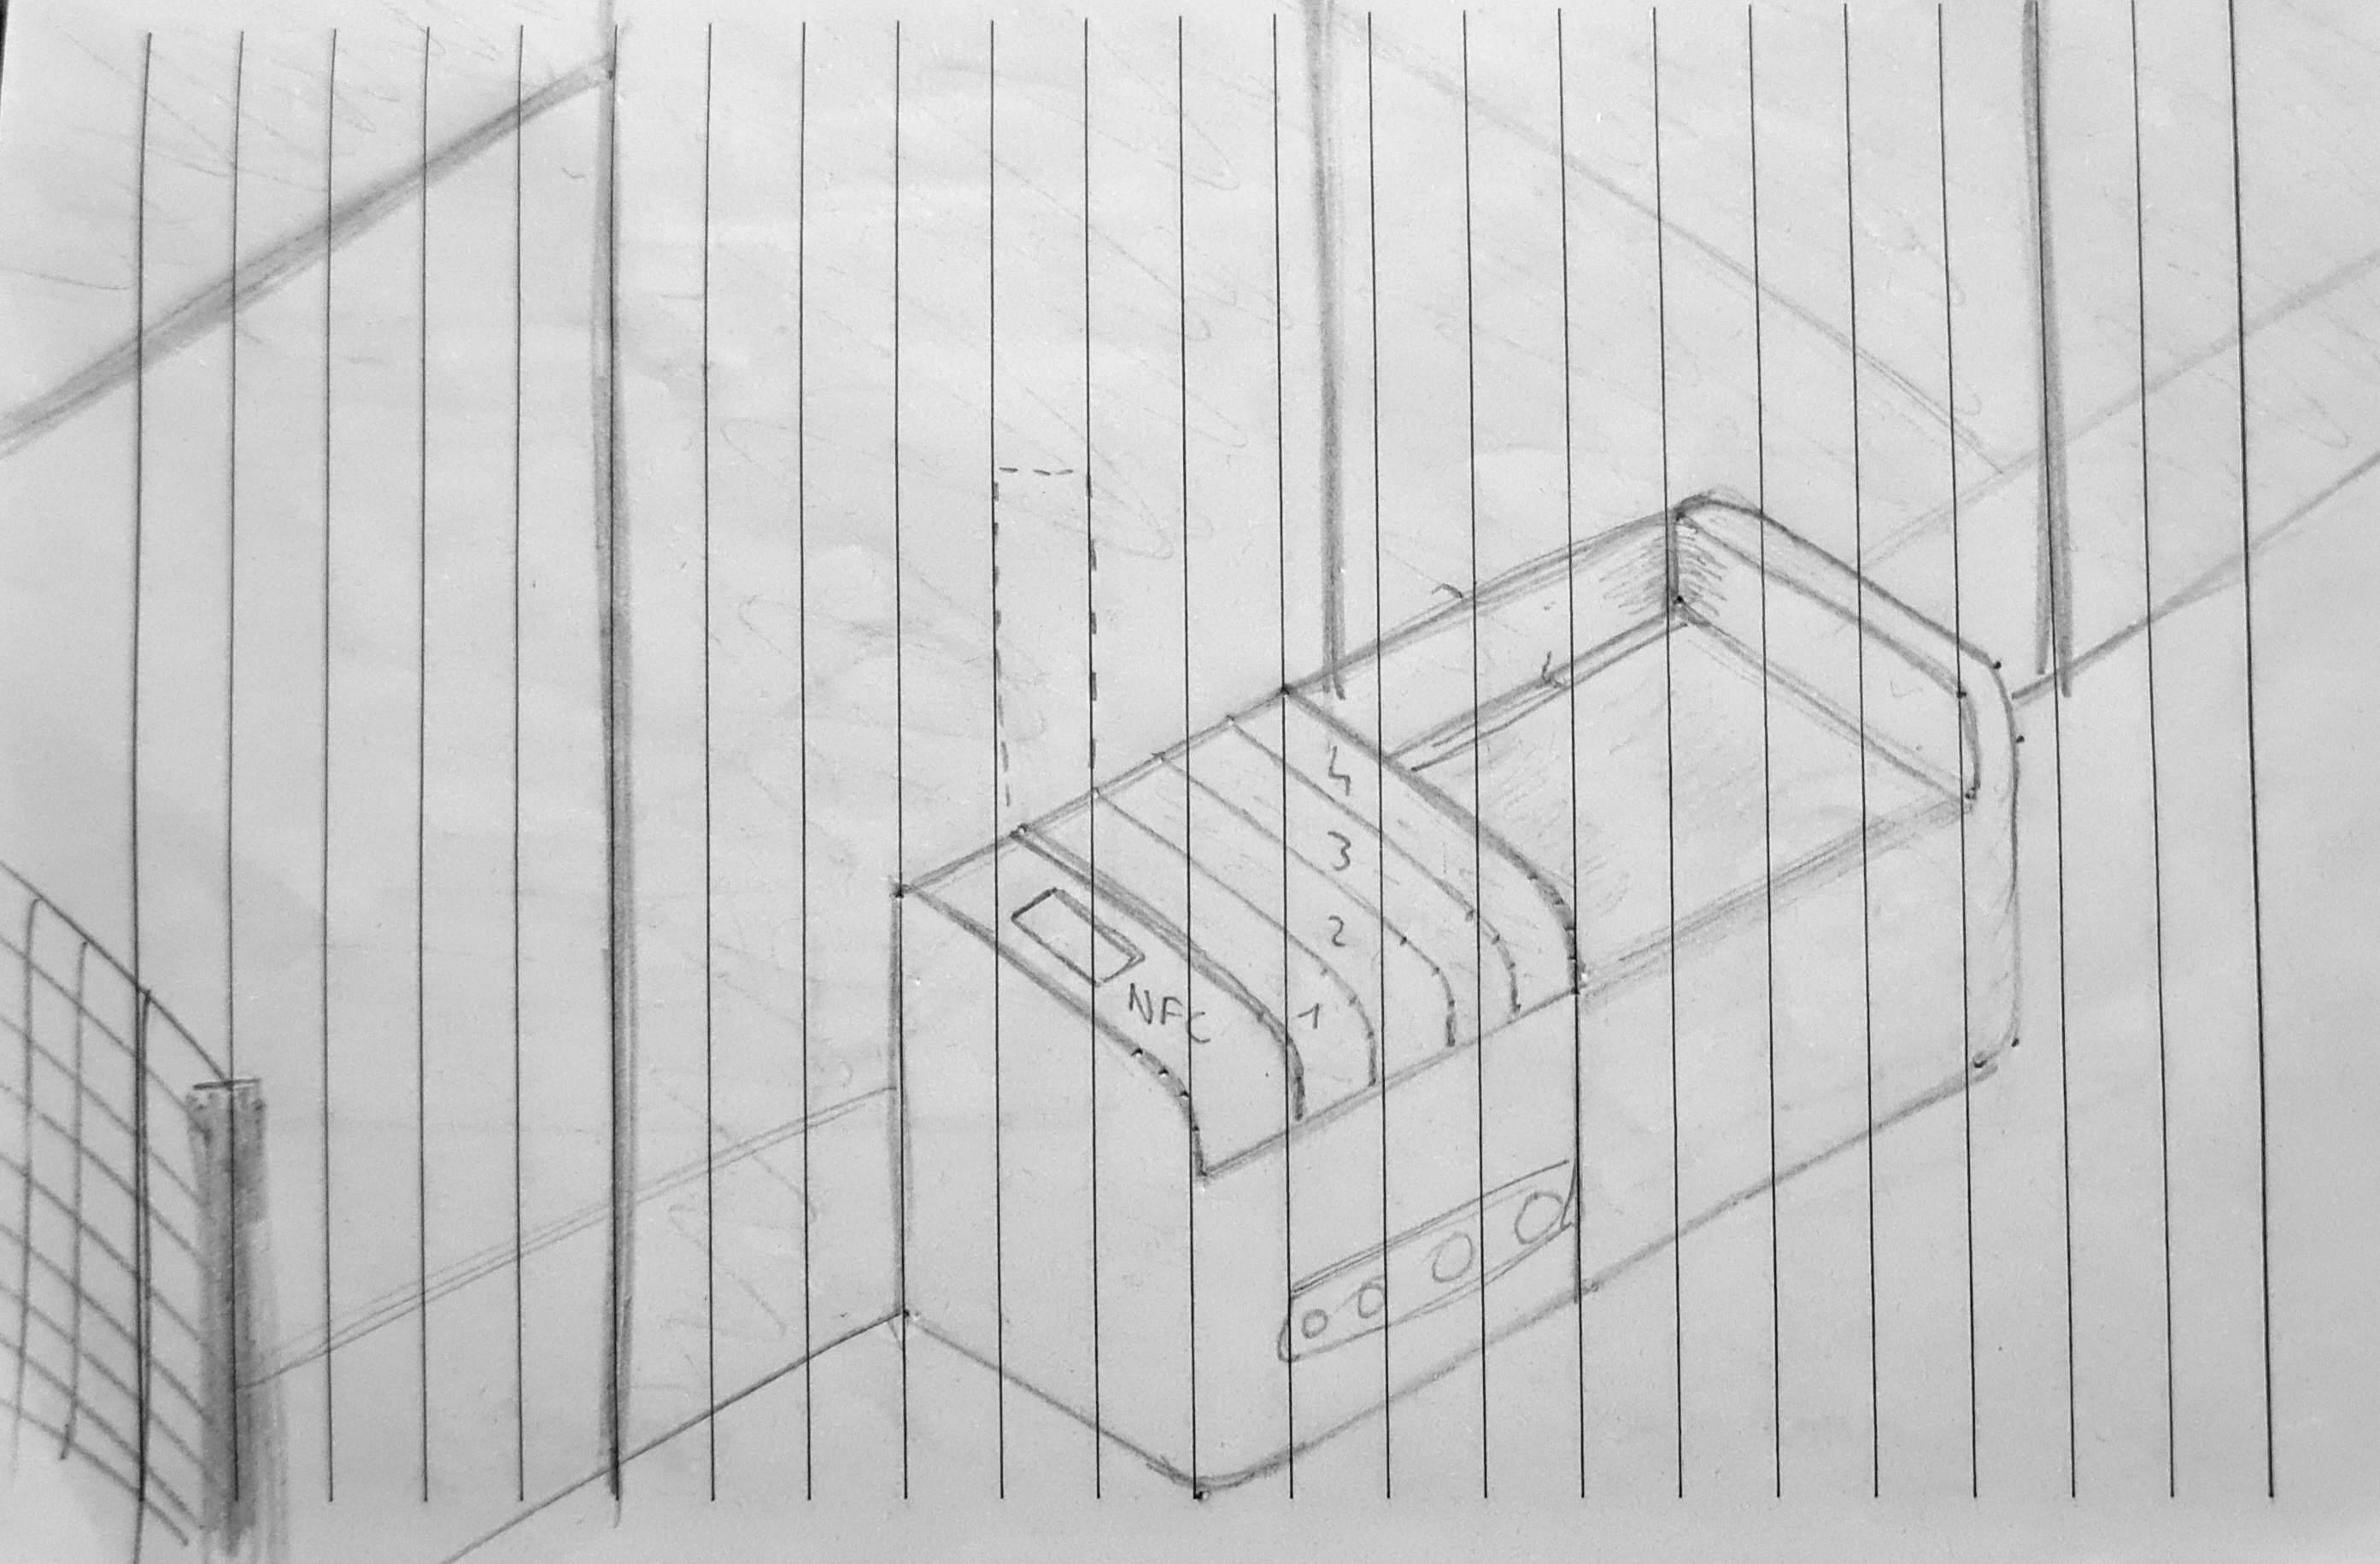
Put all your ideas on paper so that your team can see what you are thinking about.
You don't need to be an artist, it's just a sketch.
This also helps you clear the image of what you have in mind.
You can then talk about the idea with your team, add features together, and draw a V2,V3... and bring your product to life !
Dimensions
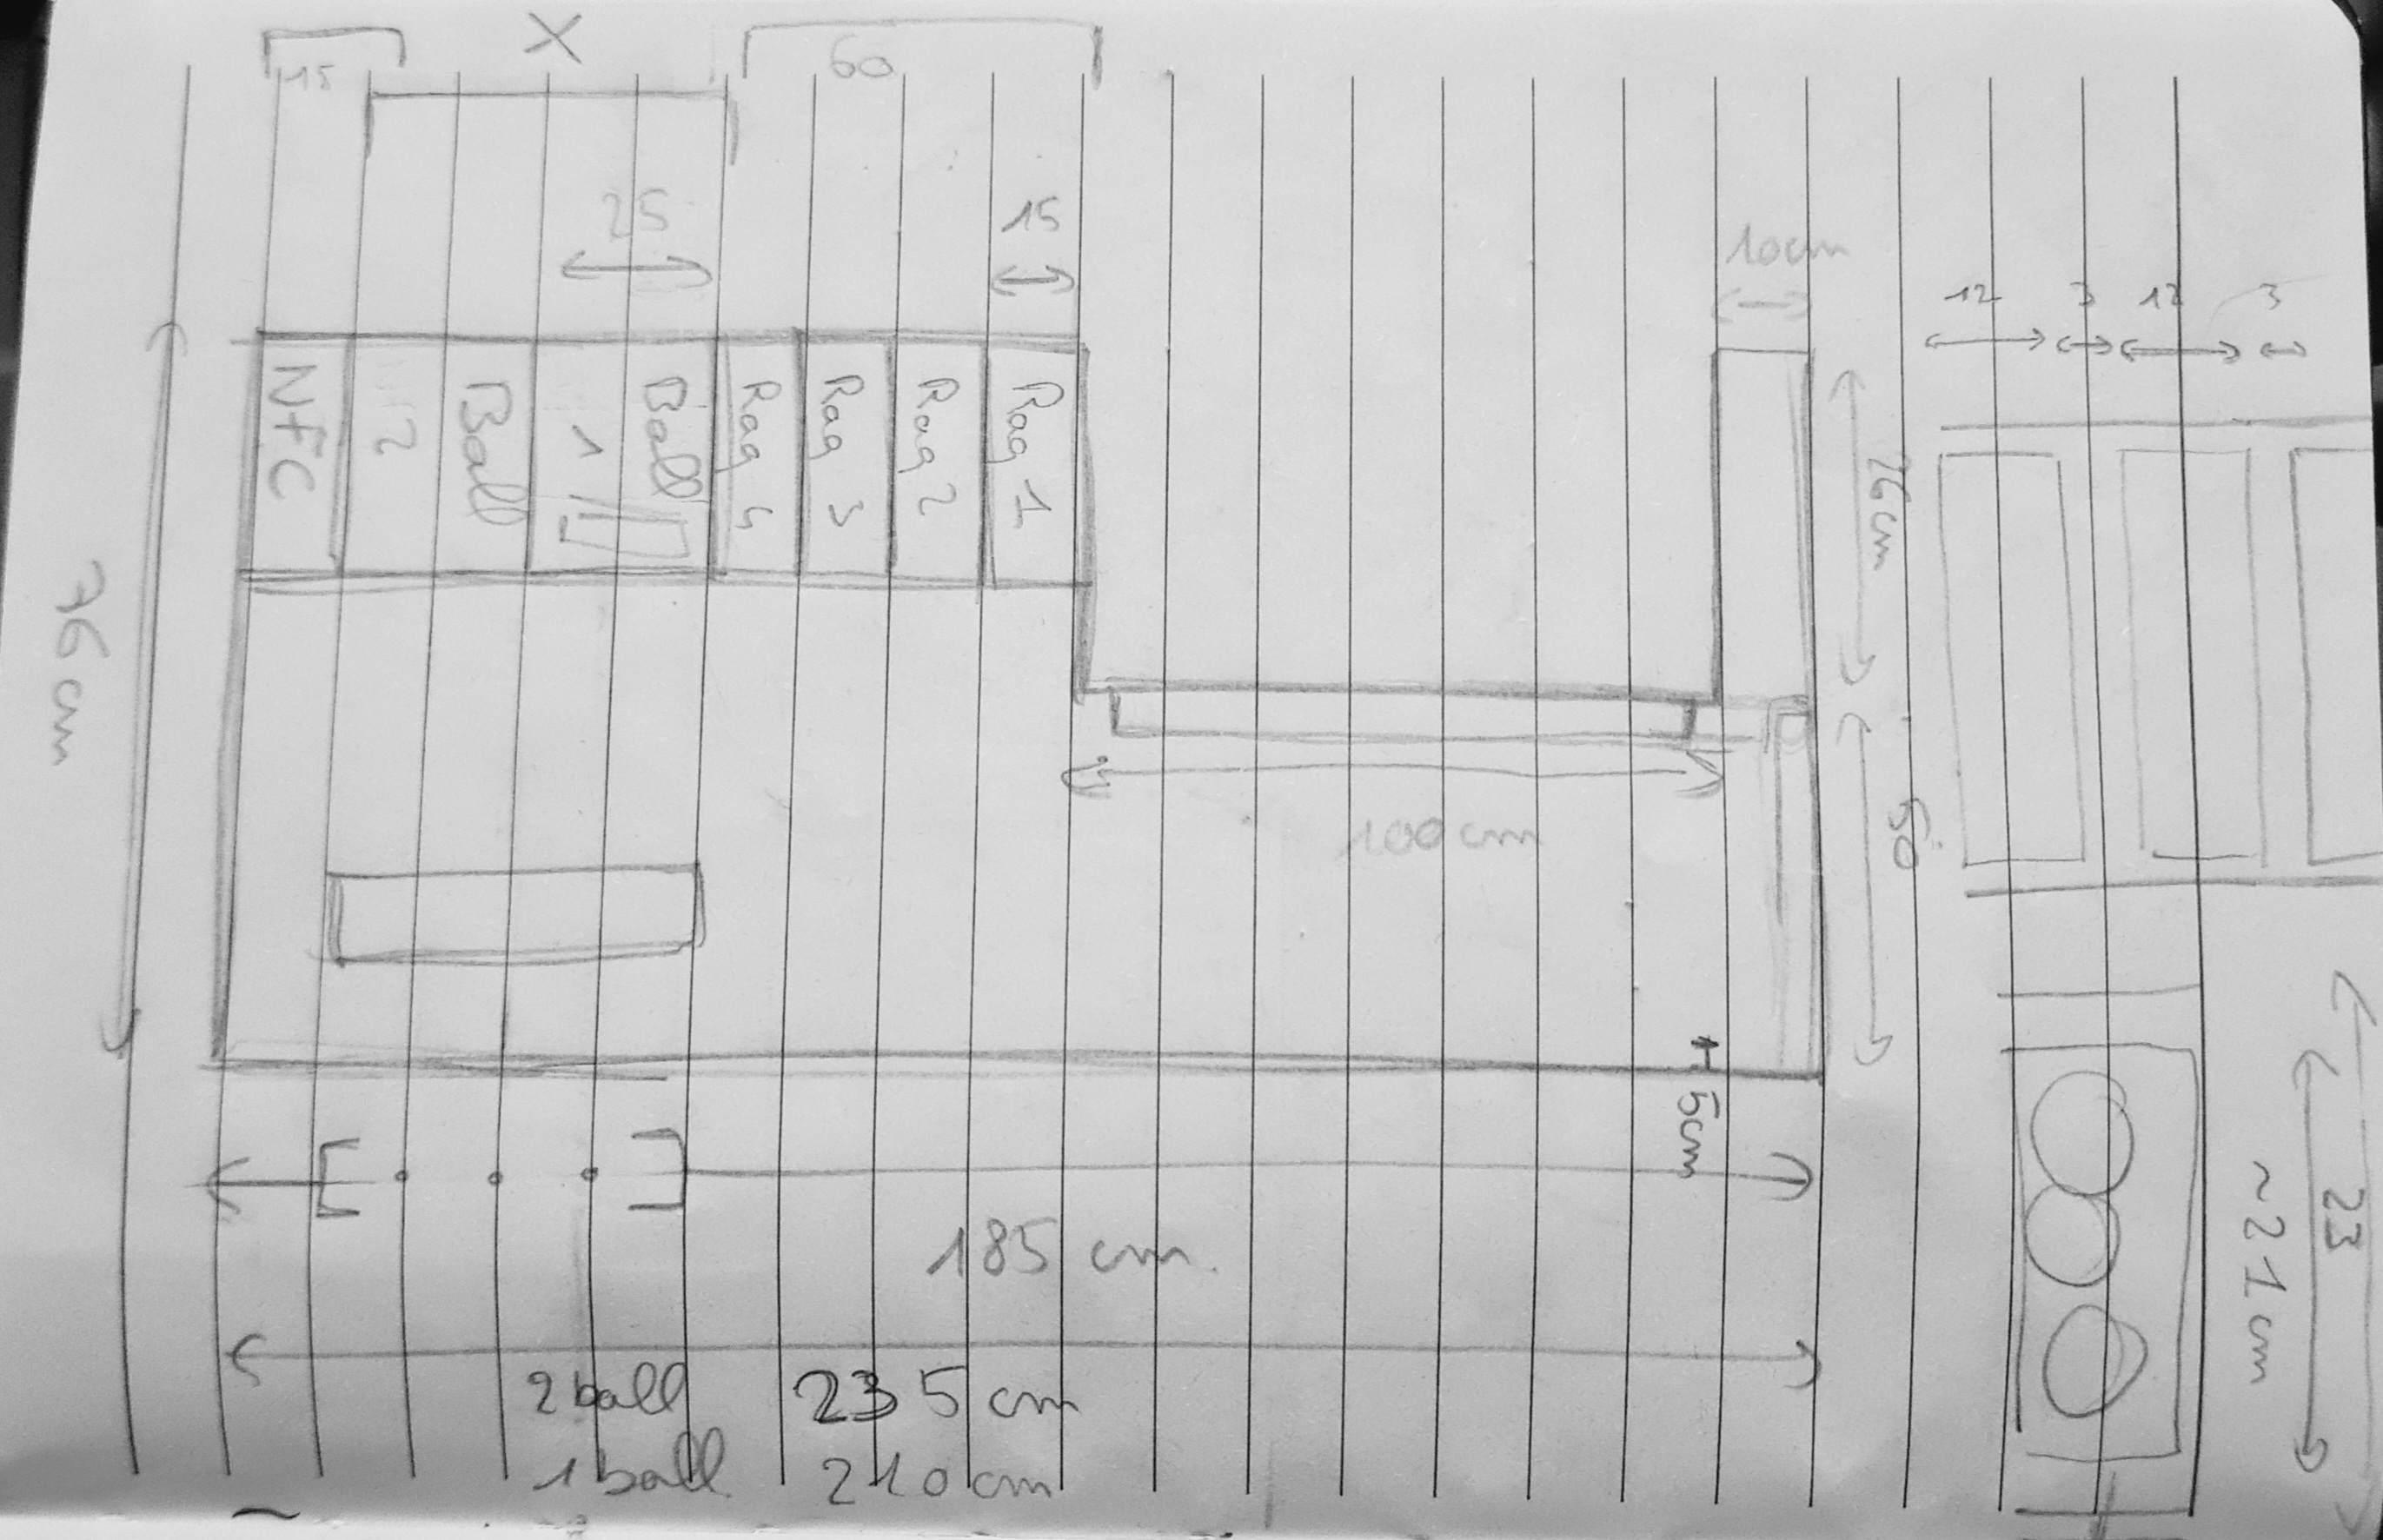
Now you have to think about all the dimensions of your product. Here we had to take a racket from a box.
Thus, the racket obviously had to fit inside, but a hand had to fit inside too to grab the racket without hitting the sides of the box.
We also thought about a bench to let 2 people sit and put your belongings inside it while you're playing.
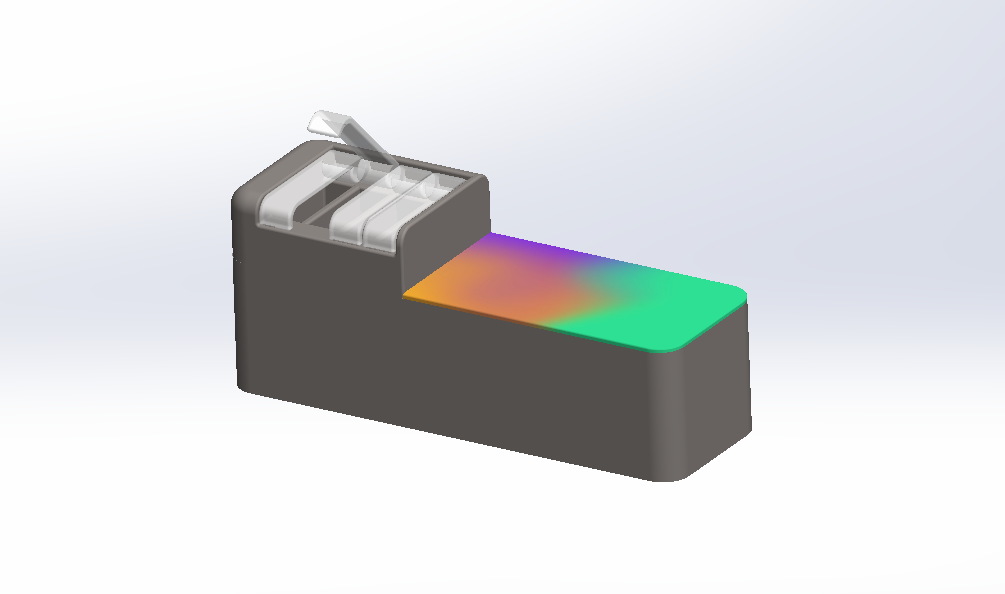
3D Modeling
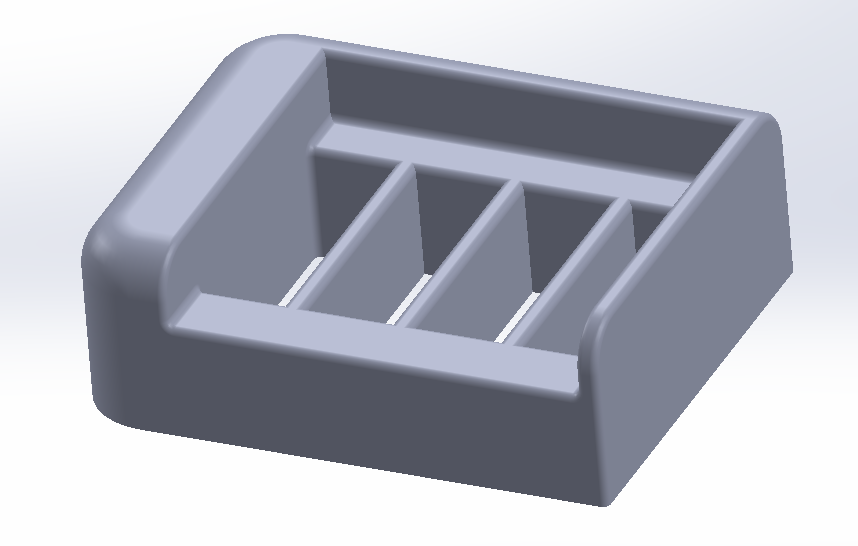
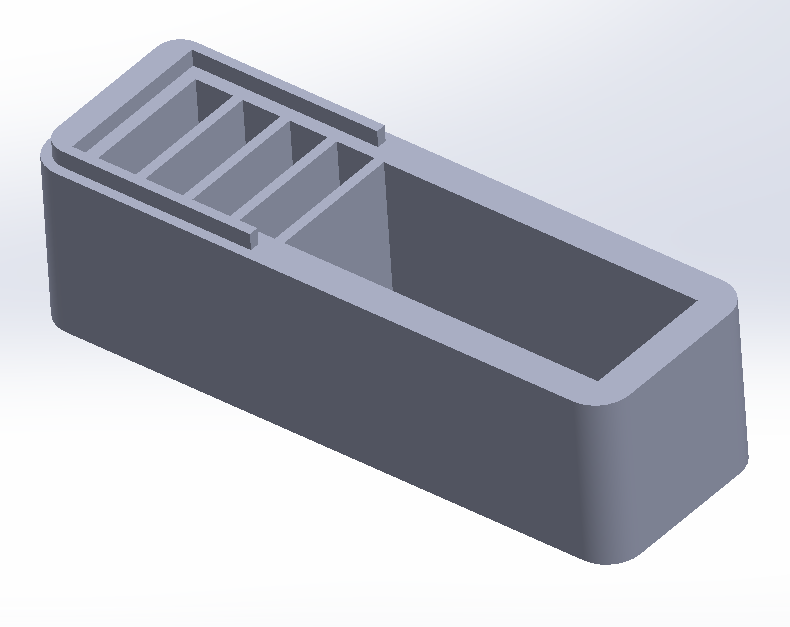
Now create the pieces 1 by one. You have to think about how to make it the easiest way possible. Even more if you want to print it afterwards.
For our bench, we needed :
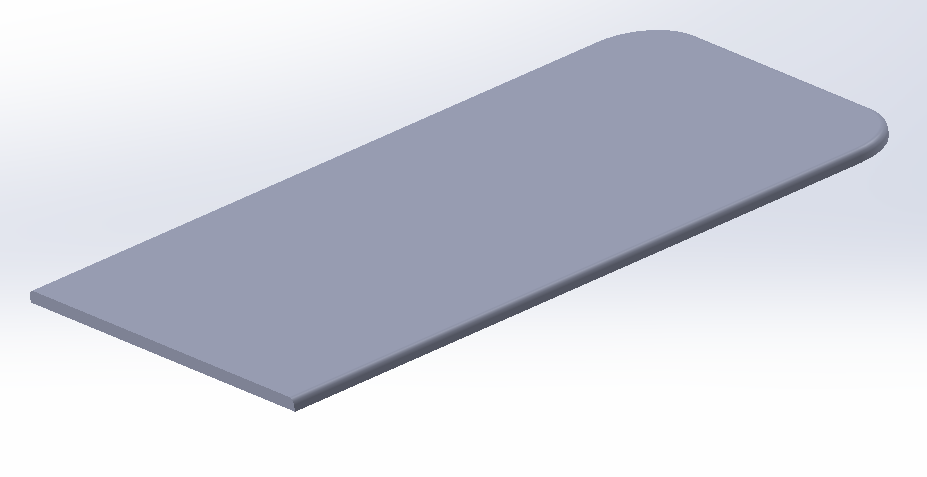
- 4 small doors (1 per racket)
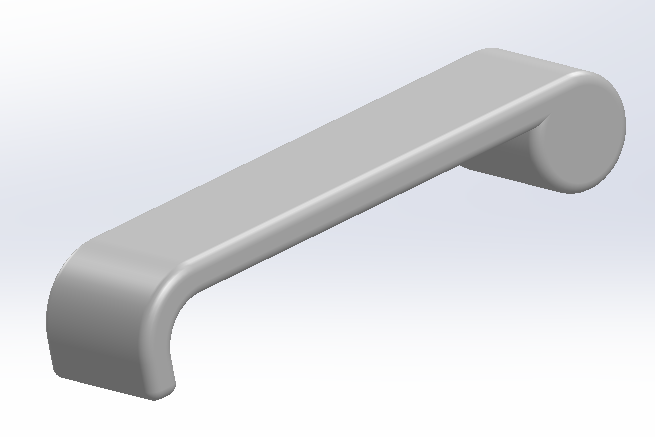
- 1 plane to sit on
- The bench itself
We divided the bench into an upper part and a lower part in order to make it easier to print.
Printing
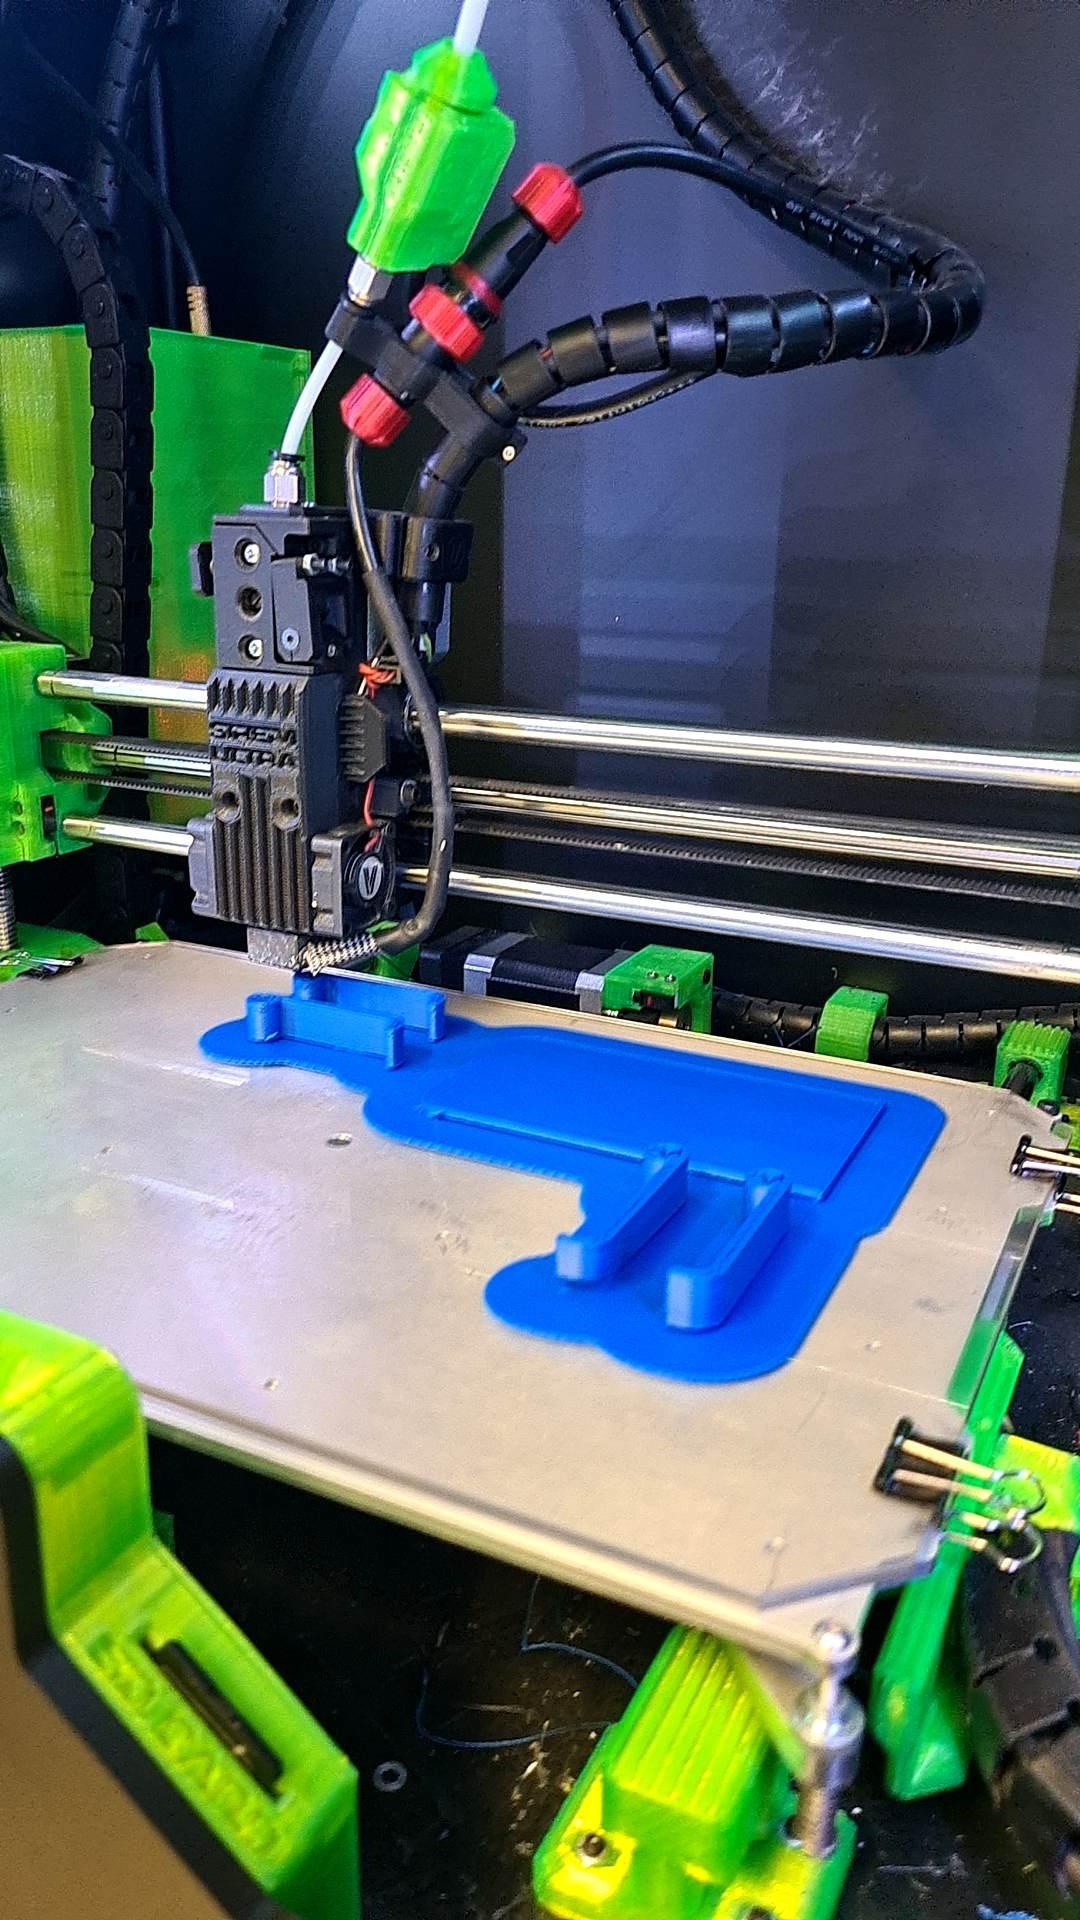
Final step, click printing and wait for a few hours...
Final Product
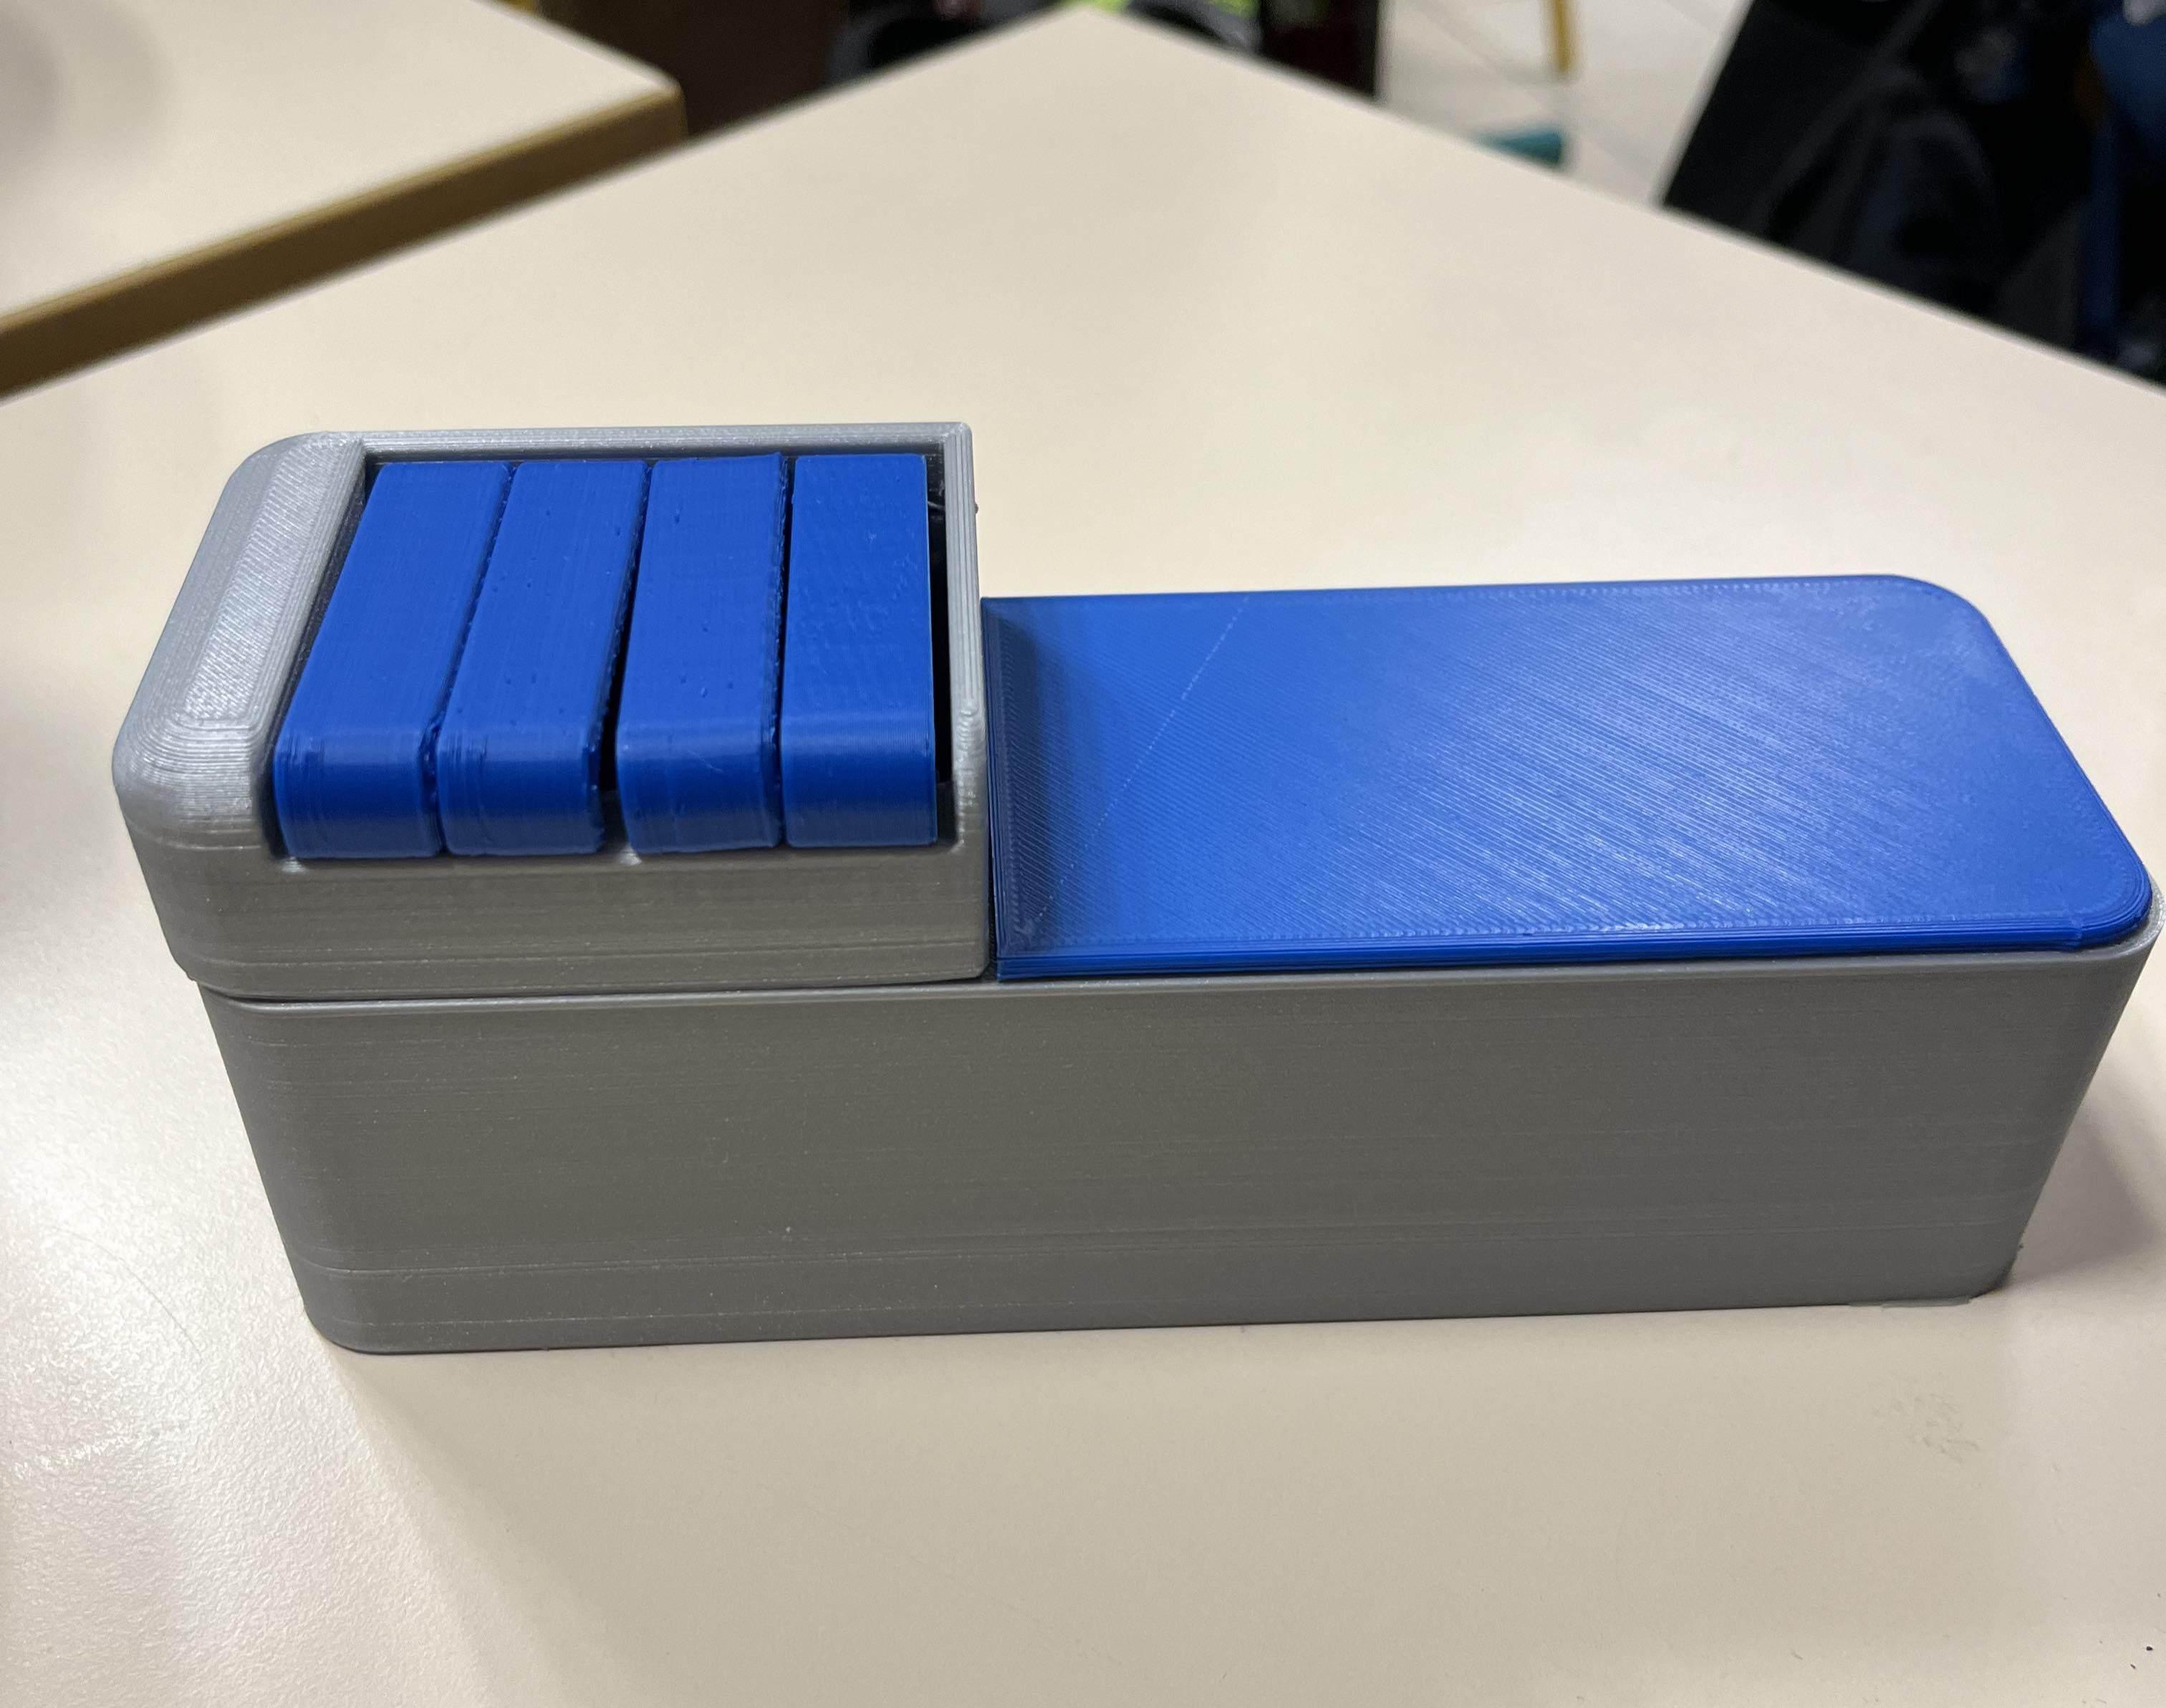

And then you wake up from your second short night of hackathon, you run to the 3D printer hoping everything went well through the night with the 3D printer. And luckily for us, it did !
So this is how you redesign a product of everyday life (a bench) with a purpose (automate the rental of rackets) in less than 60h !
Congratulations
Congratulations, you read it all until the end !
Thanks a lot for reading this, I hope you enjoyed it.
Feel free to leave a comment on this work and provide me with your feedback.
I really appreciate sharing this with you all, and I can't wait to write my second Instructable !