POWER BLOCK Version 2
by Arnov Sharma in Circuits > Electronics
2777 Views, 28 Favorites, 0 Comments
POWER BLOCK Version 2

.gif)
.gif)
.gif)

Hey guys how you doing.
POWER BLOCK is a DIY UPS with emergency lighting that can be utilized to power a variety of 5V-operated devices, like a raspberry pi, or an Arduino project, or even to charge gadgets like a tablet or smartphone. It can also be used outside for lighting.
The objective was to construct a battery system that could be used outside during a brief camping trip to charge cellphones and other 5V gadgets as well as serve as an emergency light.
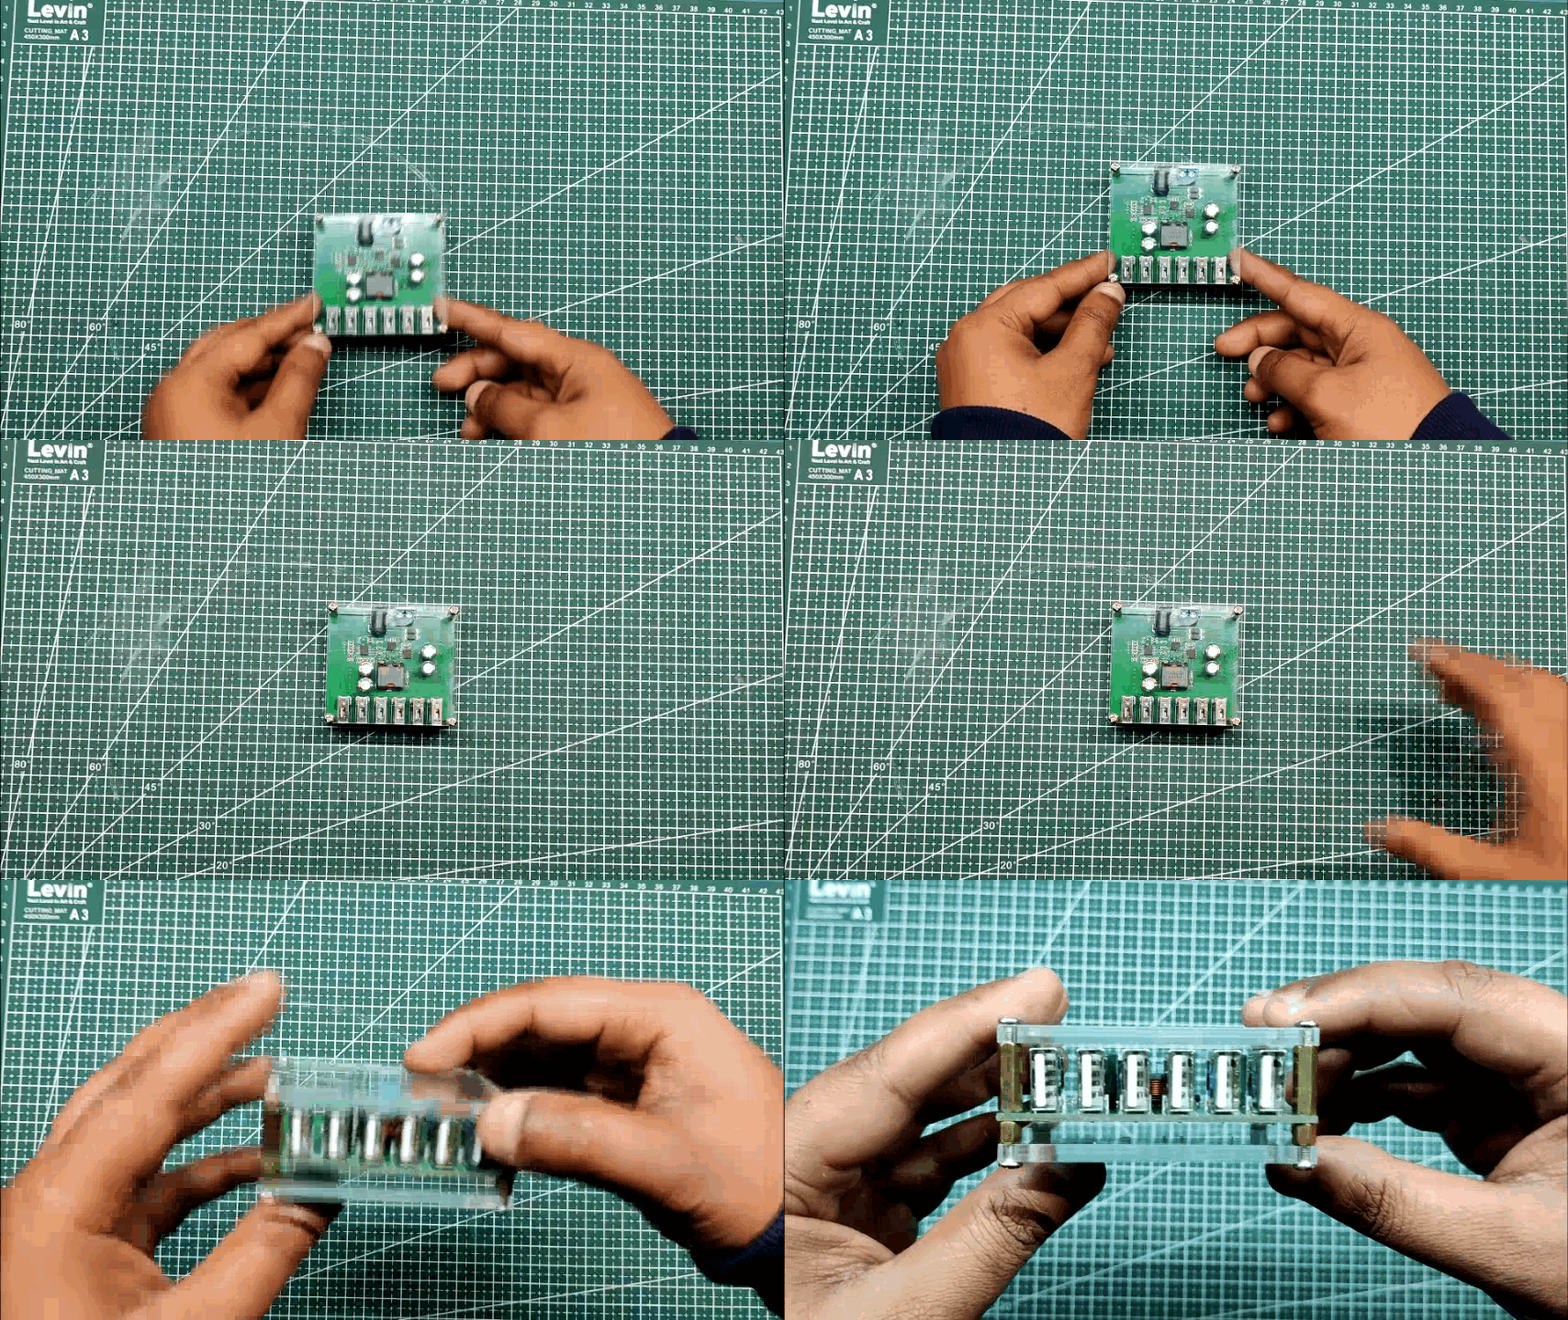
The heart of this project is this Buck Converter Circuit that I got from PCBWAY's Giftshop.
I designed this project because I'm going on a relatively short camping trip, and my power bank is starting to have backup problems and is becoming unreliable. Since camping also requires a small light source, it includes a battery pack with a buck converter circuit that can supply 5V and 6A current to each port and a powerful LED light setup that is powered by CREE XPLAWT LEDs with an onboard LED Driver IC.
This is actually the second version of my previous PowerBlock project, which was essentially a 5V Powerbank with a larger 25Ah Lithium Ion Cell battery. That device is still functional, but one drawback is that it weighs 1.45 kg, which makes it difficult to carry around. Version 2 weighs 800 g.
V2 contains a 13.3V-6Ah battery pack, which is much lower than in the earlier version, but the newer model is still adequate to charge two or three devices and even serve as a lamp for a short period of time. The best part is that it weighs only 800g, making it easy to transport in a bag.
A Buck Converter Circuit, combined with one of my earlier LED driver board projects, and 3D-printed components are used to construct this PowerBank/Emergency Light entirely from scratch.
This Instructables is about the whole build process of this project, so let's get started.
Supplies
The following are the materials used in this project-
- 3D Printed Parts
- Circuit Buck Converter - Got from PCBWAY giftshop
- LED Driver Board- From a previous Project
- 12V 6Ah Battery Pack LiFePO4 Cell with BMS
- Rocker Switch x 2
- Indicator LED RED with 10K Resistor
- DC Barrel jack
- 12V Power Source for charging the battery - through the barrel jack
- Screws M2
- Translucent Plastic sheet for the top diffusion layer
3D Design
.gif)


This project's 3D design is composed mostly of three sections: the bottom or base component, which keeps the battery, the middle part, which has the circuit, switches, and DC jack, and the diffuser layer, which has two parts (LED Holder and Diffuser itself).
The entire design was created in Fusion360 and 3D printed with an ENDER 3 Printer using the settings listed below:
- 20% Infill
- 0.4mm nozzle
- 0.2mm Layer Height
- PLA Plastic, different color
All the files are attached, feel free to download or edit them into anything you want.
Buck Converter Board
.gif)


A Buck converter is a type of DC-DC power converter that is used to convert a higher voltage DC source to a lower voltage DC output. It works by using a switching element, such as a transistor, to control the flow of current through an inductor, which smooths out the voltage and reduces it to the desired level. The Buck converter circuit is composed of an input capacitor, an inductor, a switching element, a diode, and an output capacitor, which is connected in series. The switching element is used to control the flow of current through the inductor, and the diode is used to prevent current from flowing back into the circuit when the switching element is off. The output capacitor is used to smooth out the voltage and provide a steady output.
The key feature of a Buck converter is its ability to maintain a constant output voltage despite variations in input voltage, load current, or switching frequency. This makes it a very versatile and useful circuit, and it is widely used in applications such as power supplies, voltage regulators, and battery chargers.
Got From PCBWAY Giftshop
.gif)
As for sourcing this component, I got this circuit from PCBWAY's Giftshop.
https://www.pcbway.com/project/gifts_detail/6USB_output_DC_step_down_module_12V24v36V_to_5V_8A.html
PCBWAY gift shop is an online marketplace where you can get a variety of electronics modules and boards for their genuine price or you could use the PCBWAY currency which is called beans.
You get beans after ordering something from PCBWAY as reward points or you can also get them by posting any project in the PCBWAY community.
Check PCBWAY out for getting great PCB service from here- https://www.pcbway.com/
Following are a few of its features
- Fix output voltage.
- High-quality terminal block.
- 6-Channel USB output.
- High current output.
- High conversion efficiency.
- Stable output.
- Dual interface free selection input.
- Support multiple devices to use at the same time.
Battery and BMS


One of the main components used in this project is the battery, which is made up of four LiFePO4 cells combined in series to make a 13.3V battery pack with a BMS, or battery management system.
A battery management system (BMS) is a device or group of devices that manage a rechargeable battery, such as by monitoring its state, calculating secondary data, reporting that data, protecting the battery, and controlling its environment.
The BMS is the "brain" of the battery pack and performs several important functions, such as balancing the cell voltage, monitoring the temperature, and protecting the pack from overcharge, over-discharge, and over-current. It also ensures the long-term health and longevity of the battery pack. BMS is used in a variety of applications, including electric vehicles, energy storage systems, and portable electronics.
LED Driver Board


The LED Driver board, also known as the HIGH POWER LED BOARD, is one of my previous project. It consists of four XPLAWT CREE High power LEDs that are driven by a SIC9301A LED drive IC.
To dissipate heat generated during LED Glow, this board has a heatsink attached with thermal glue to the bottom side of the PCB.
The total power of this LED board is 5.4 W, and it requires 13.3 volts to operate at 0.400 A of current.
For the whole built process of this LED Driver Board and details about its use and features, check out this project page-
Basic Setup

.gif)
.gif)
.gif)
- We begin by first connecting all of the components together in accordance with the provided schematic. Battery is connected to the Buck converter circuit with a switch in between them; the switch is used to toggle the entire system ON and OFF.
- Then we connect the VCC and GND of the LED Driver to the battery terminals. A second switch is connected between the VCC of the LED and the VCC of the battery pack, and it is used to turn on and off the LED Light.
- We first press the switch between the battery and circuit to turn on the Buck Converter circuit, then we press the second switch to turn on the LED board to see if everything works.
- We can now plug any 5V device into the USB port.
LED Driver Assembly
.gif)
.gif)
.gif)
The middle LED holder component of the diffuser is where we put the LED driver board and attach it with two M2 screws to begin the assembly process.
Additionally, the aluminum heatsink doesn't become hot enough to cause the plastic holder to melt.
Mid Body Assembly
.gif)
.gif)
.gif)
.gif)
.gif)
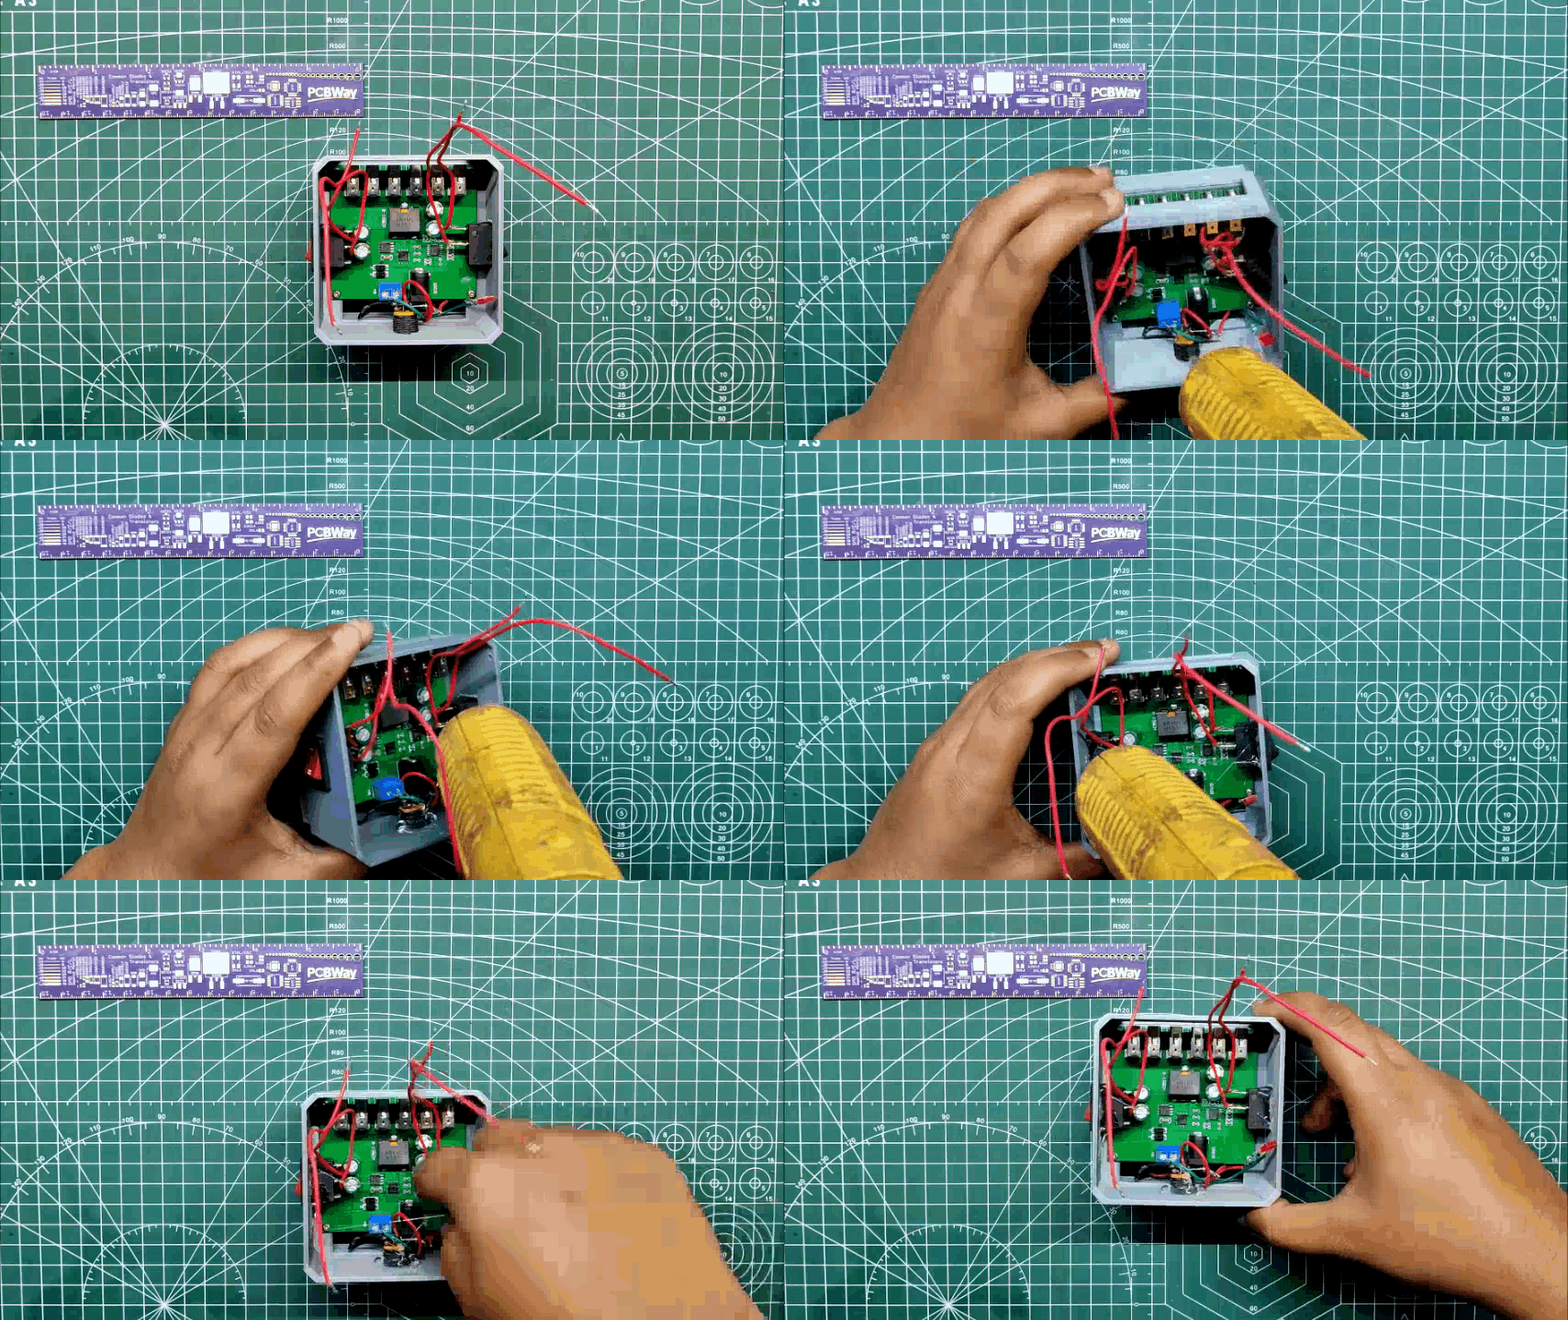
- The mid-body is constructed from grey PLA with a 0.2mm layer height and a 20% infill. The circuit is mounted in the mid-body using four M2 screws.
- Next, we put two switches on either side along with a DC Barrel jack. To give the switches and jacks greater durability, we apply a little amount of hot glue, which will keep everything in place.
Base Assembly
.gif)
.gif)
After 3D printing the base with white PLA 20% infill and 0.2mm layer height, we slide the battery inside by first applying hotglue to the base's bottom side and then securing it in place.
Connecting Base With Mid Body
.gif)
.gif)
.gif)
.gif)
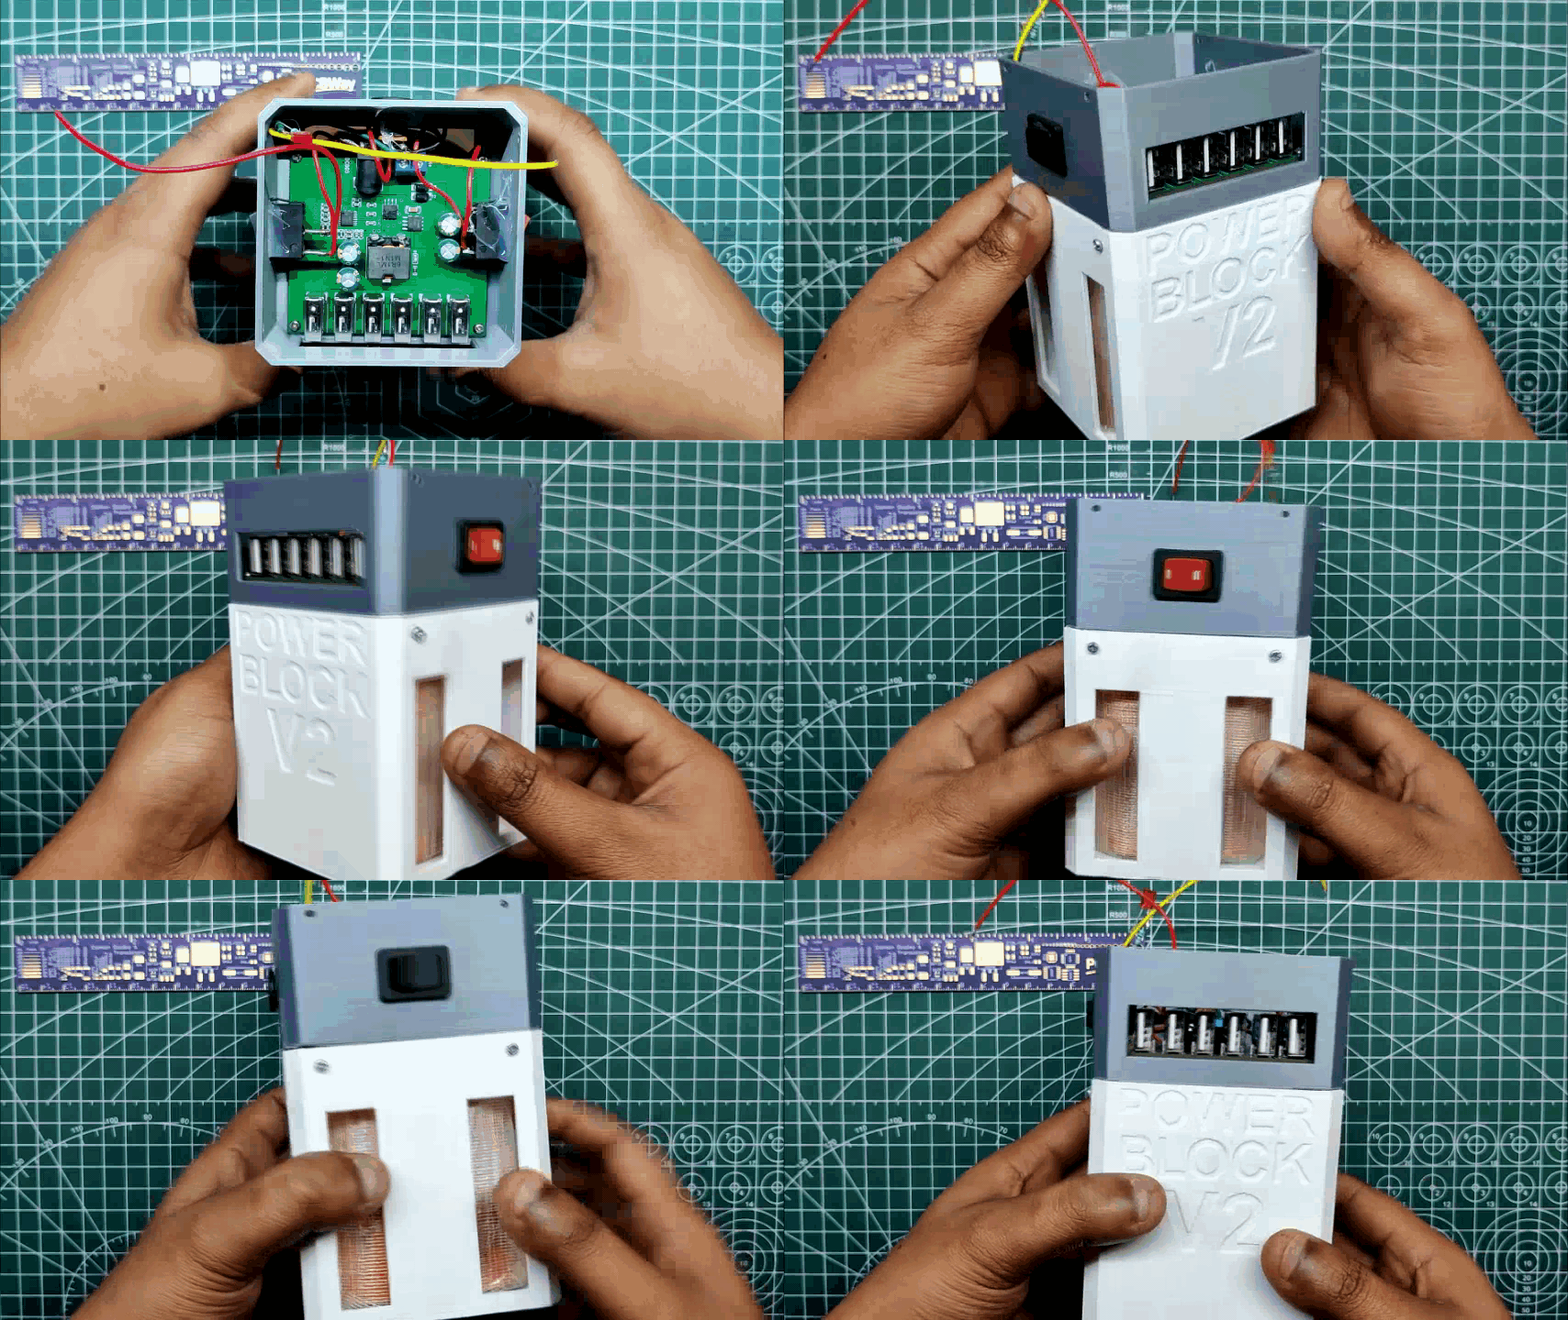
- We begin by first connecting the GND of the battery to the GND of the buck converter circuit. The positive of the battery is then connected to one terminal of the switch, and the other terminal of the switch is linked to the positive of the buck converter circuit.
- Next, we connect GND to GND and the positive end of the DC Jack to the battery.
- We then insert the middle part into the lower part and secure the 2 parts permanently with four M2 Screws after connecting the Circuit to the Battery.
Adding LED Driver Assembly With Lower Body
.gif)
.gif)
.gif)
.gif)
- We now connect the wires to the LED Driver board's VCC and GND.
- Between the VCC of the LED Driver and the positive of the battery, a switch is placed. The GND of the battery is directly connected to the GND of the LED Driver.
- Using hot glue to permanently attach the indication LED on one side, we put it to the LED Driver assembly after attaching wires to the LED Board.
- The purpose of this is to install an LED within the diffuser portion, which will light up red when the charger is plugged in.
Diffuser Assembly
.gif)
.gif)
.gif)
.gif)
- The top layer of the diffuser surface of the diffuser assembly is made from a translucent plastic sheet that was once used in an LCD TV display.
- On the plastic sheet, we trace the outline of the lower diffuser part and then cut it out with scissors.
- Then, using four M2 screws, we attach the diffuser plastic portion to the lower diffuser that was 3D printed.
- Compared to the clear PLA part that I used in this build, the white translucent plastic sheet will diffuse light better, giving it a milky shine.
Merging LED Driver Assembly and Diffuser Assembly
.gif)
.gif)
.gif)
- The LED Driver Assembly part is then inserted into the diffuser, and the entire assembly is then permanently fastened together using four M2 screws.
- Assembly is now completed.
Result

.gif)
.gif)
.gif)
.gif)
.gif)
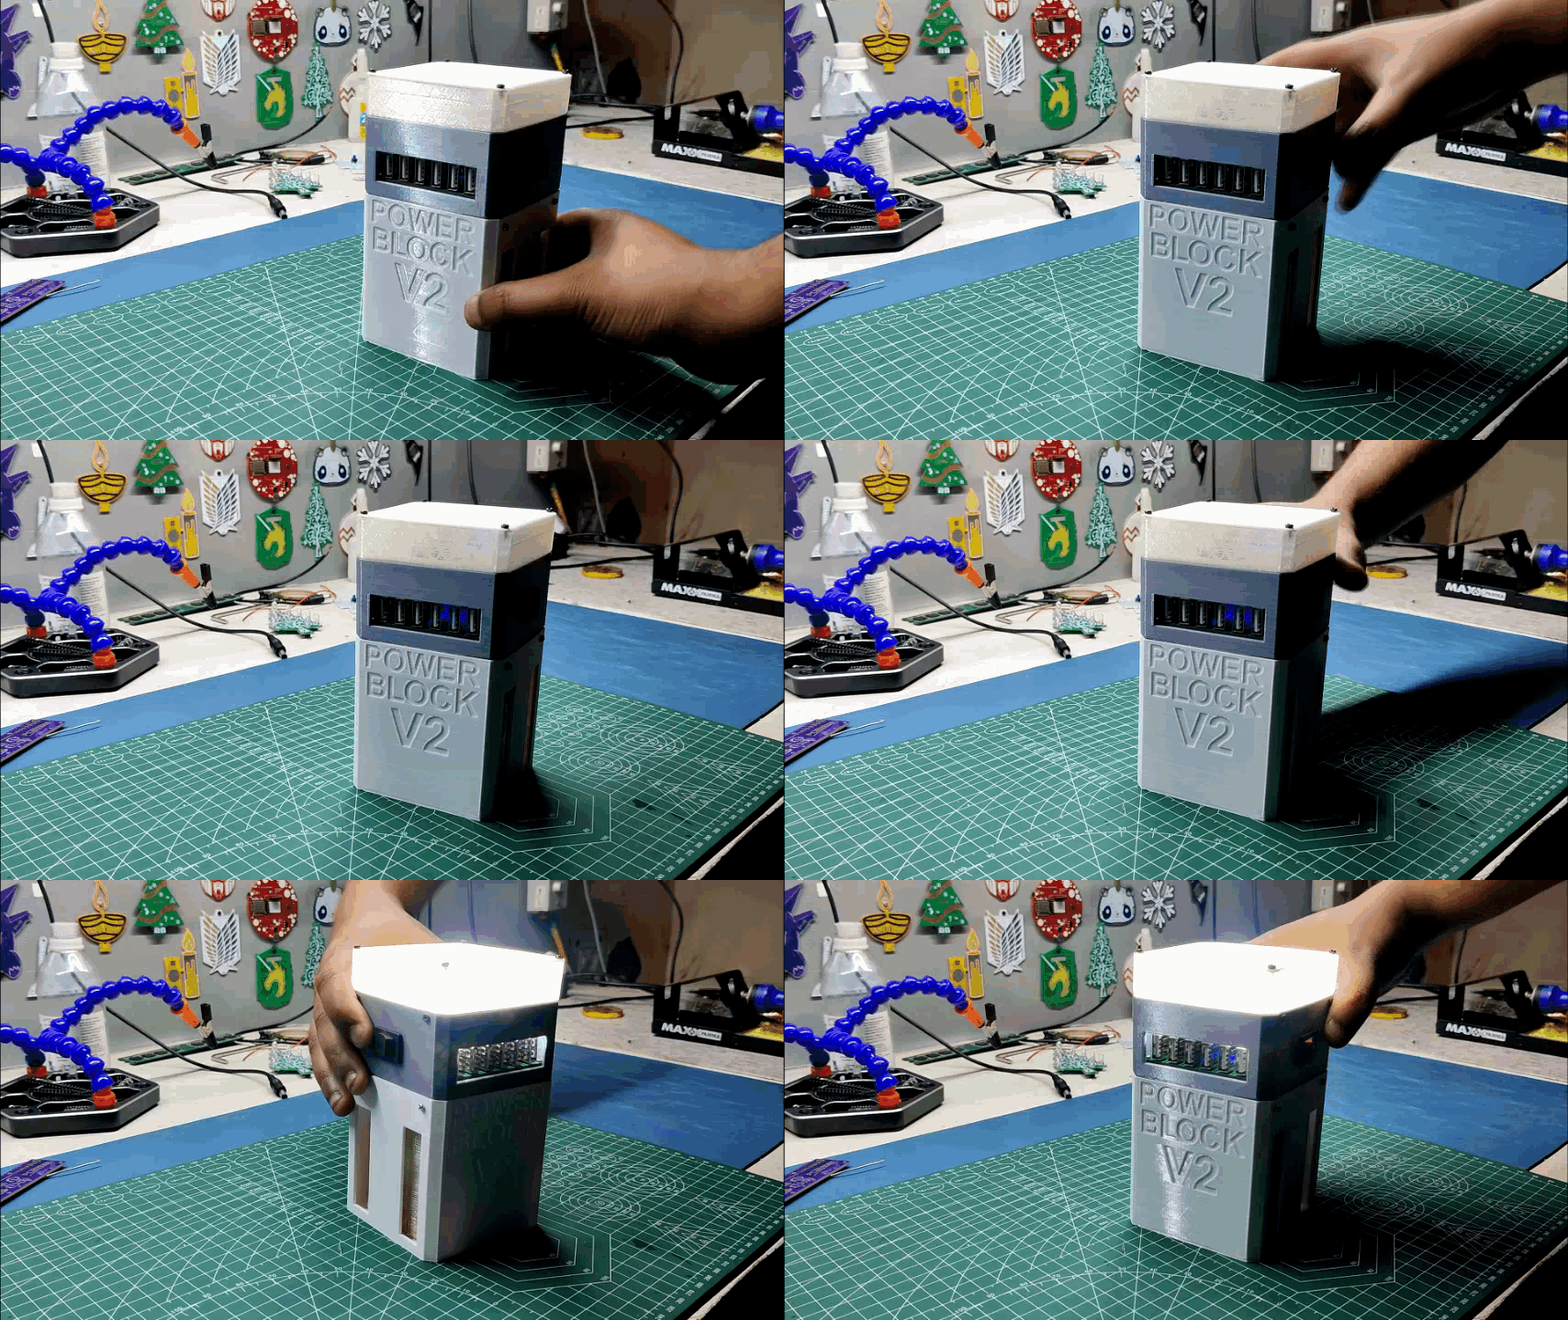
The end result of this build is a portable battery bank setup, also known as a "power block," that can be used to power XYZ 5V devices and even serve as a light source during camping trips or blackouts.
Because the battery has a total power of 79.8 Wh +/- 5% and the LED is consuming 5.4 W, the LED light can be kept running for more than 12 hours, which is remarkable.
We don't have to worry about the battery pack's low and high cut because the BMS is there to ensure that everything is kept in perfect condition. It has two switches—one is the main switch, and the other is for turning the LED ON-OFF. It also has the BMS, which manages the battery pack's overall charging and discharging and keeps it stable.
Testing
.gif)
.gif)
.gif)
.gif)
.gif)

- I first connected a small handheld gaming console (which is also a DIY project) to the 5V USB Port for testing the Power block; the power block is now powering this game console.
- We next attach a Seeed XIAO Board running a basic RGB LED sketch to show that this setup can also be used as a power source for development boards while creating prototypes and performing tests.
- Then, in order to charge the lithium cell in my recently built overengineered pen stand, I connected a USB cable to it. The LED currently blinks, indicating that the cell is charging.
- Finally, I connected an iPad to the power block to see if it was charging or not, and obviously, it was. This proved that the project was successful and that it could be used to operate, power or even charge different 5V Operated items, which is an amazing achievement.
Can't wait to actually test this setup in real life during the camping trip.
This is it for today folks, hope you like this small project.
Special thanks to PCBWAY for supporting this project, do check them out for getting great PCB Service for less cost.
Until then, stay tuned, and peace out!